When you click on links to various merchants on this site and make a purchase, this can result in this site earning a commission. Affiliate programs and affiliations include, but are not limited to, the eBay Partner Network.
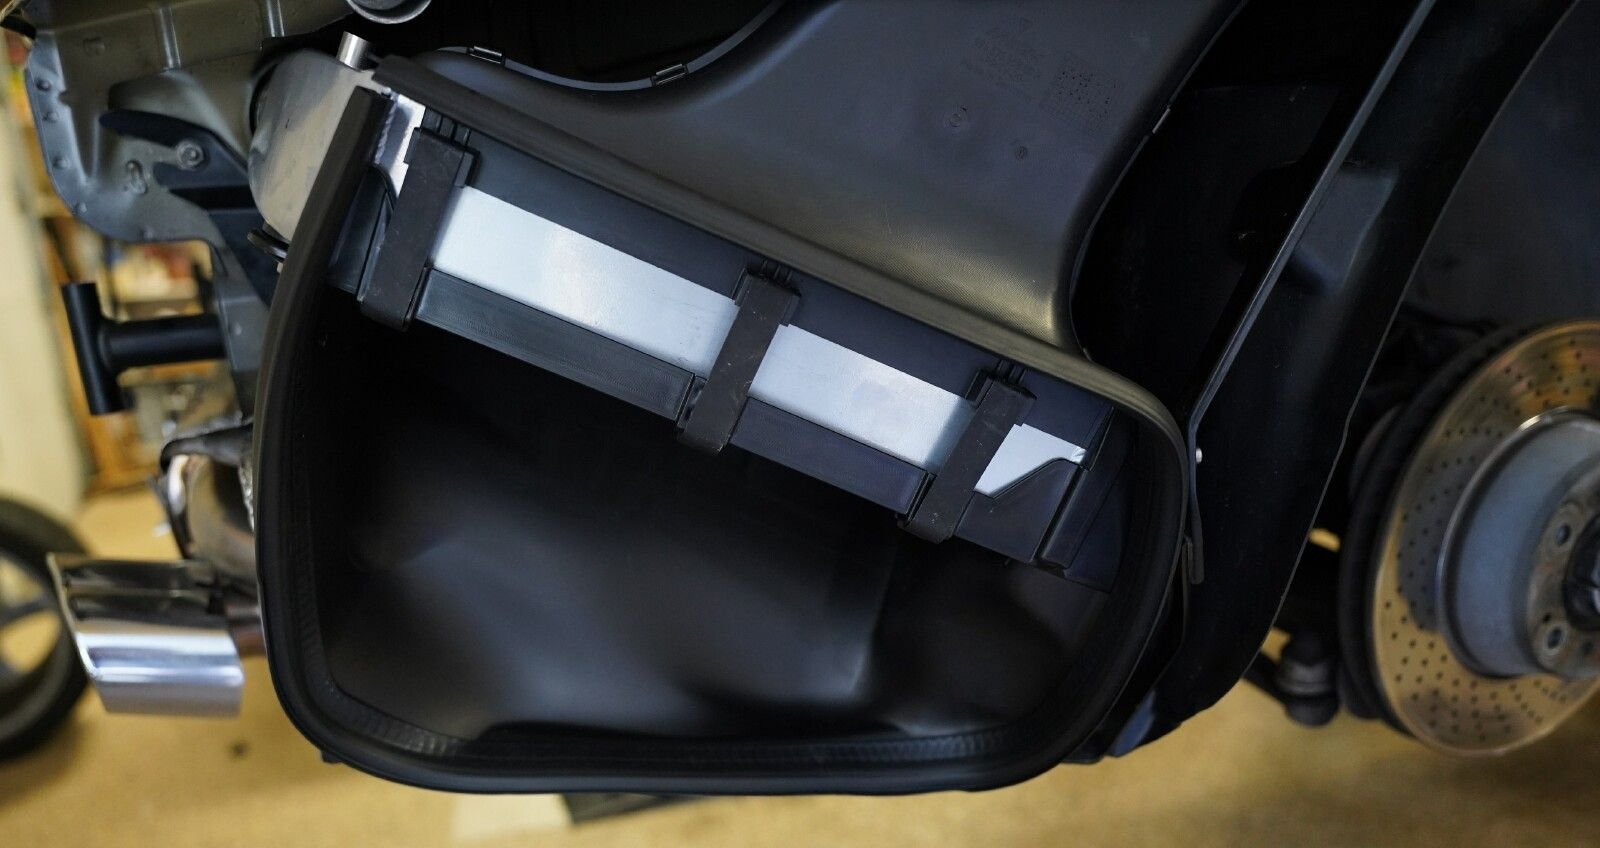
I finally did my intercoolers. When in the market to buy, the Denso equivalent GT2RS ICs were out of stock from the usual suppliers, so I managed to track down a DO88 intercooler kit designed for the 996 Turbo. Per usual, the most tedious and time consuming part of the install was modifying the air ducts to remove the "lips" to allow the larger ICs to sit flush on the ducts. I trimmed mine with a Dremel and then followed with an 80 grit sanding to get nice smooth surfaces. Final step was to install the adhesive-backed foam tape to complete a good seal around the ducts. The DO88 silicone hoses are a bit larger than the stock hoses, and in the two locations where the hoses connect to the Y pipe, I went ahead and replaced the seals with new ones. Took it out for a road test and confirm the boost held to the 1.1 bar I can see with my car's tune.
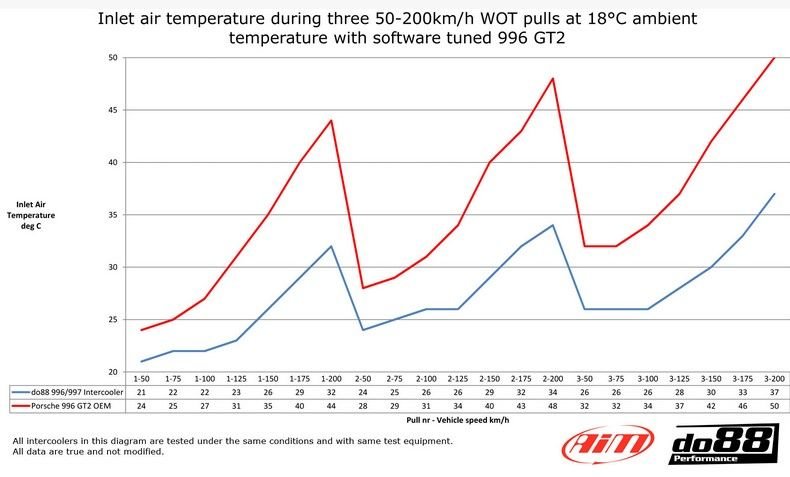
Thanks guys. I liked the fact that the ICs added alot of cooling capacity over the stock X50 / GT2 units installed at the factory on my car, and that it was a complete integrated kit with all hoses, fasteners, clamps and even some thread locking fluid. They even provide some testing data showing cooling improvement to expect:
One minor detail I noticed when removing the factory ICs, was that the factory only used two clamps (one at each end) to hold the ducts together, even though the ducts have provisions for three clamps to be used. I figure it was a small cost save implemented at the factory at some point to cease using the center clamp. I went ahead and added the center clamps on both sides - seems like the additional clamping would provide a firmer air seal. My other suggestion is to check the condition of the rubber that seals the outlet duct to the rear bumper cover. Mine were a bit worse for the wear after 17 years, so I went ahead and replaced them to ensure a tight seal between the IC outlet and the rear bumper cover. The rubber seals are inexpensive, just under $6 each, and are easy to R&R.
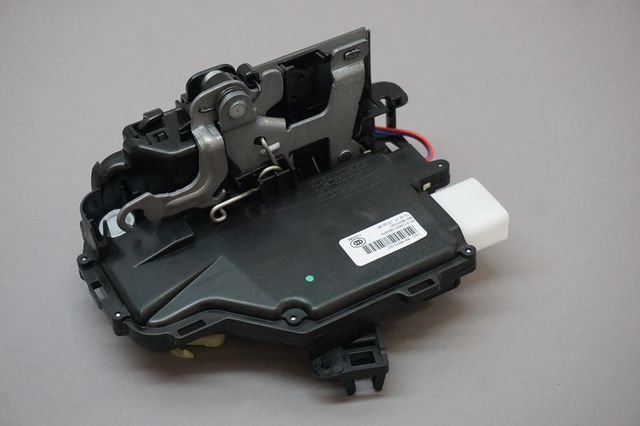
Replaced the driver�s side door latch assembly due to a bad micro switch that tells the ecu if the door is opened or closed. I had an issue when the door was open the window wouldn�t stay down 10 mm so the window could clear the weather strip when closing.
This was an interesting project to complete because of all the components that had to fit together simultaneously inside the door working in the blind with one hand and sense of feel to assemble.
Oh, that sounds like fun.
I thought once the panel was off, all was easily accessible? Or was something else in the way?
I thought once the panel was off, all was easily accessible? Or was something else in the way?
It�s accessible, the problem is that putting all the components together simultaneously. The door handle assembly, with internal cover bracket, and including the lock blade mechanism has to all fit together at once. You can only get one hand and arm inside the door panel and the other holding the door handle on the outside trying to fit/align working pretty much in the blind. Having a helper hold the outside handle could help facilitate the installation.
Once you get all the components fitted, the next challenge is attaching the door handle linkage to the door latch with one hand. I improvised and used a surgical clamp to hold the linkage while I attached the retaining lock.
The photo above shows the door handle linkage and the door lock blade.
I'm pretty sure every VW/Audi/Porsche vehicle from this era used that identical door latch assembly.
The Audi definitely used the same latch, but VW was different. I didn�t want to screw with trying to fix the old one or buy an almost 20 year old used part off of eBay. Instead, I paid the Porsche tax of $305 and purchased the new and improved version. The Audi part was about the same price as the Porsche part.


 08-04-2021, 12:00 PM