When you click on links to various merchants on this site and make a purchase, this can result in this site earning a commission. Affiliate programs and affiliations include, but are not limited to, the eBay Partner Network.
Nice, this is on my wish list, but for me it involves some additional cost.....my center stack is painted body color so I will have to send out the radio bezel to get painted. Any pics of the install?
There are some pretty decent videos on YouTube that show installs of the PCCM+, and I learned what I could from those. I didn't take very many pictures; just some showing the existing positions of all the connections so I wouldn't have to memorize them, and then just a few putting it back into the car.
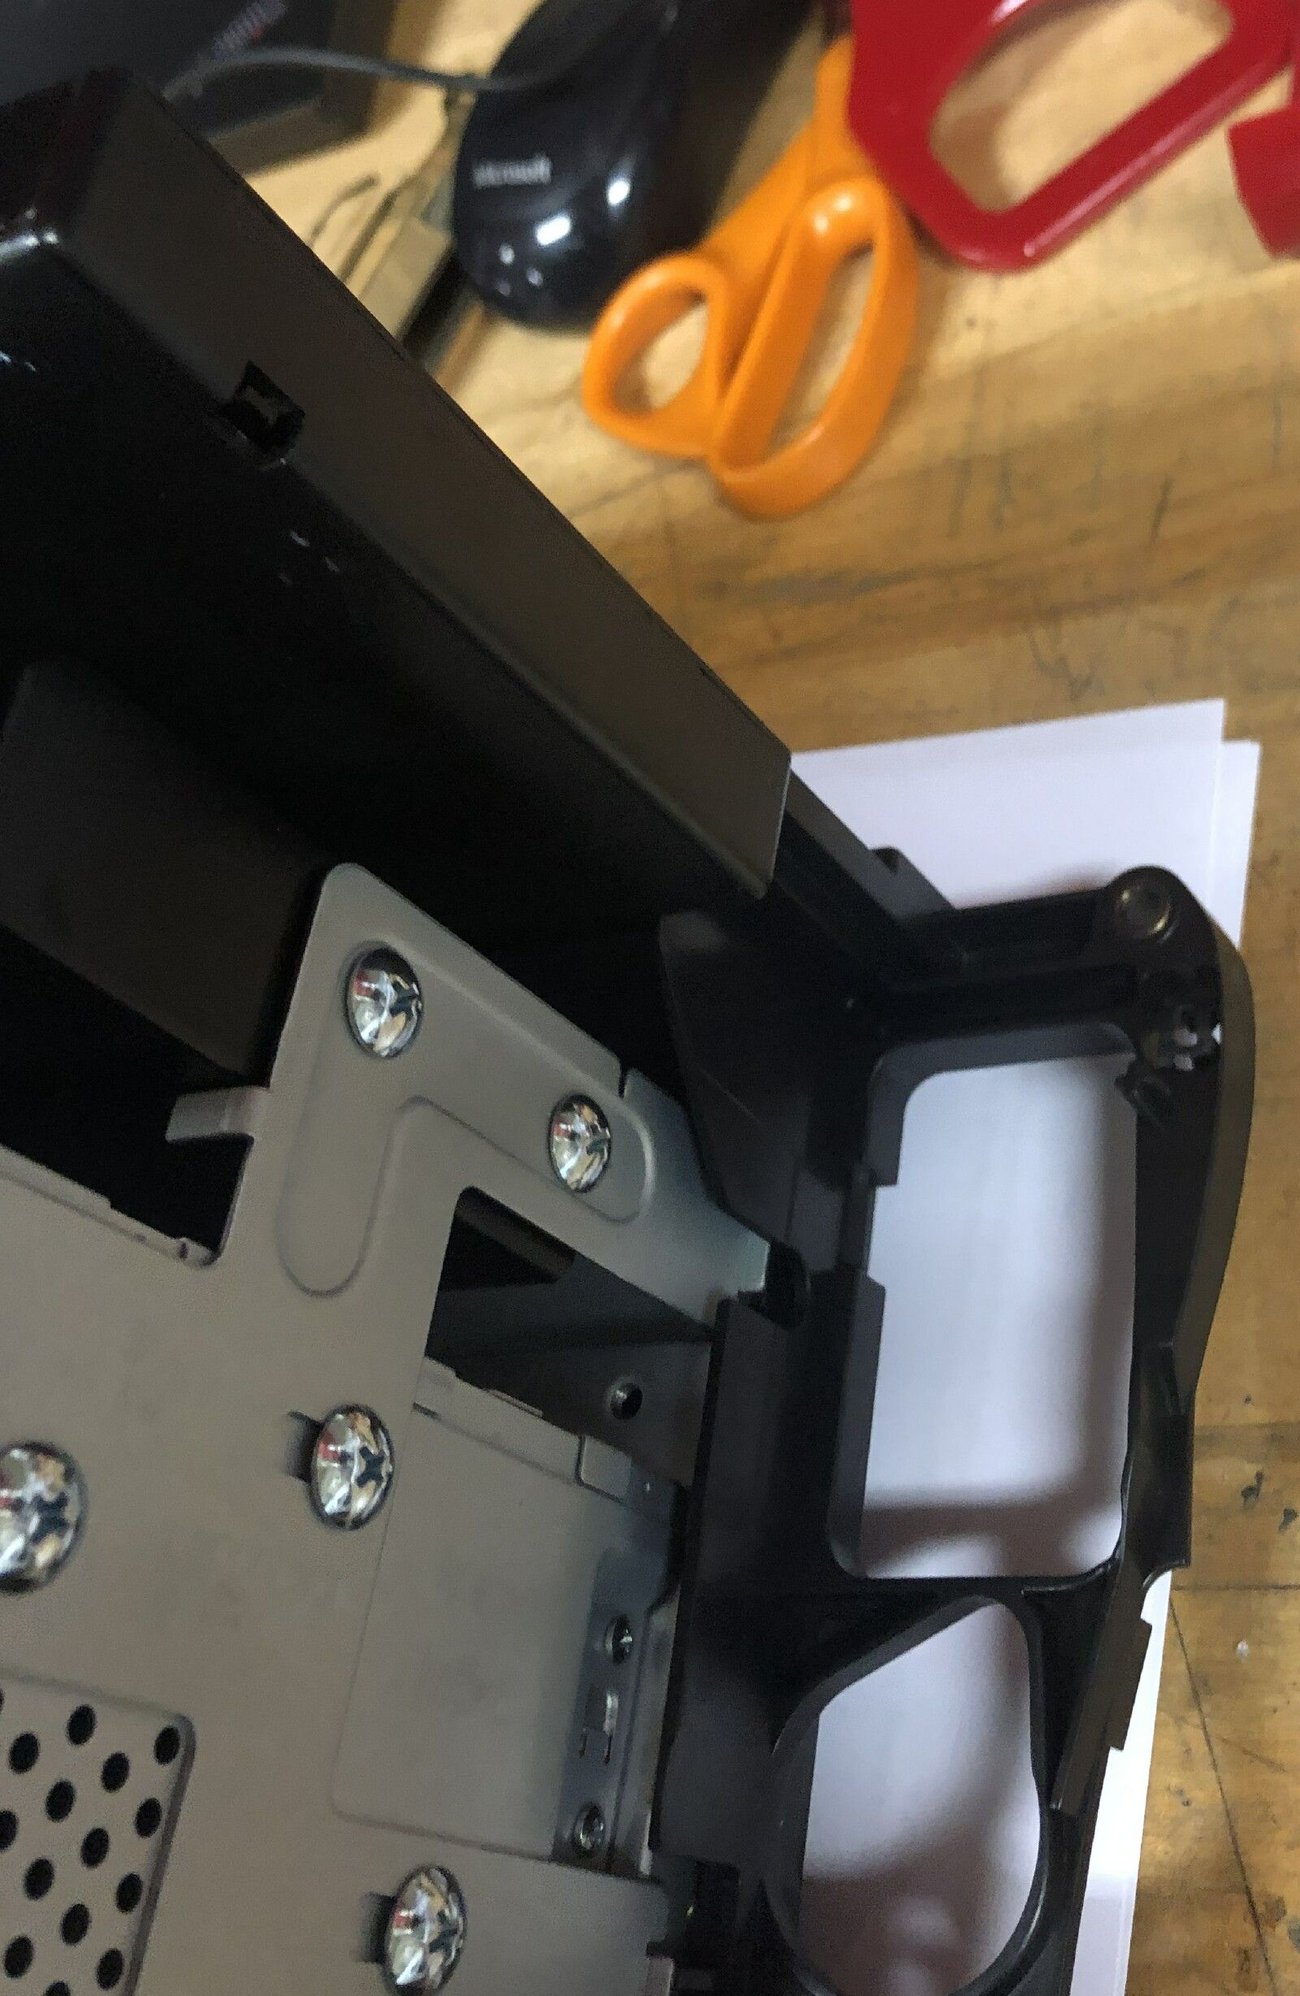
The first one shows one of the installed side mounting brackets. The key on this portion of the install is realizing that the cross-brace between the side brackets is mounted counter-intuitive to how you would expect it to be mounted. In actuality, it serves as a mounting shelf for the MOST module so it goes in upside down to what you might otherwise think. There's a small notch in each bracket, so you're assured that it's assembled correctly when the little tabs in the side brackets are resting in the slots in the center brace.
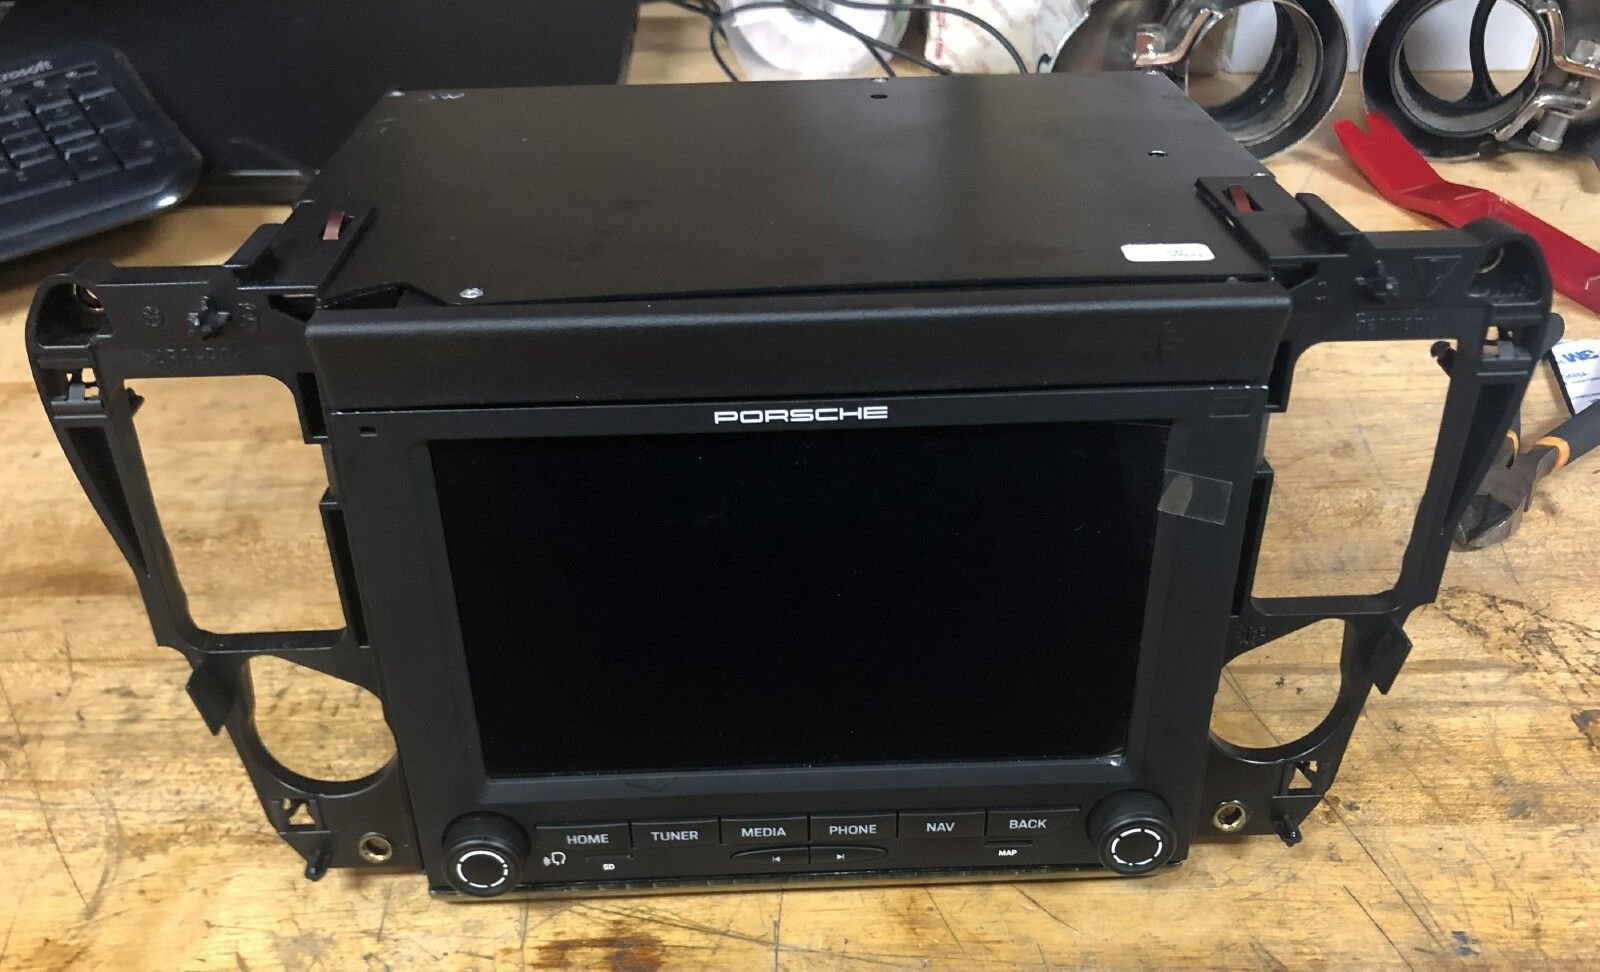
You actually need to position the side brackets and center brace as closely as possible to the plastic radio support from the car. Then you slide the PCCM+ into position in the bracket assembly and secure the bracket assembly to the radio unit. Here's a shot of the complete assembly prior to installation back in the car:
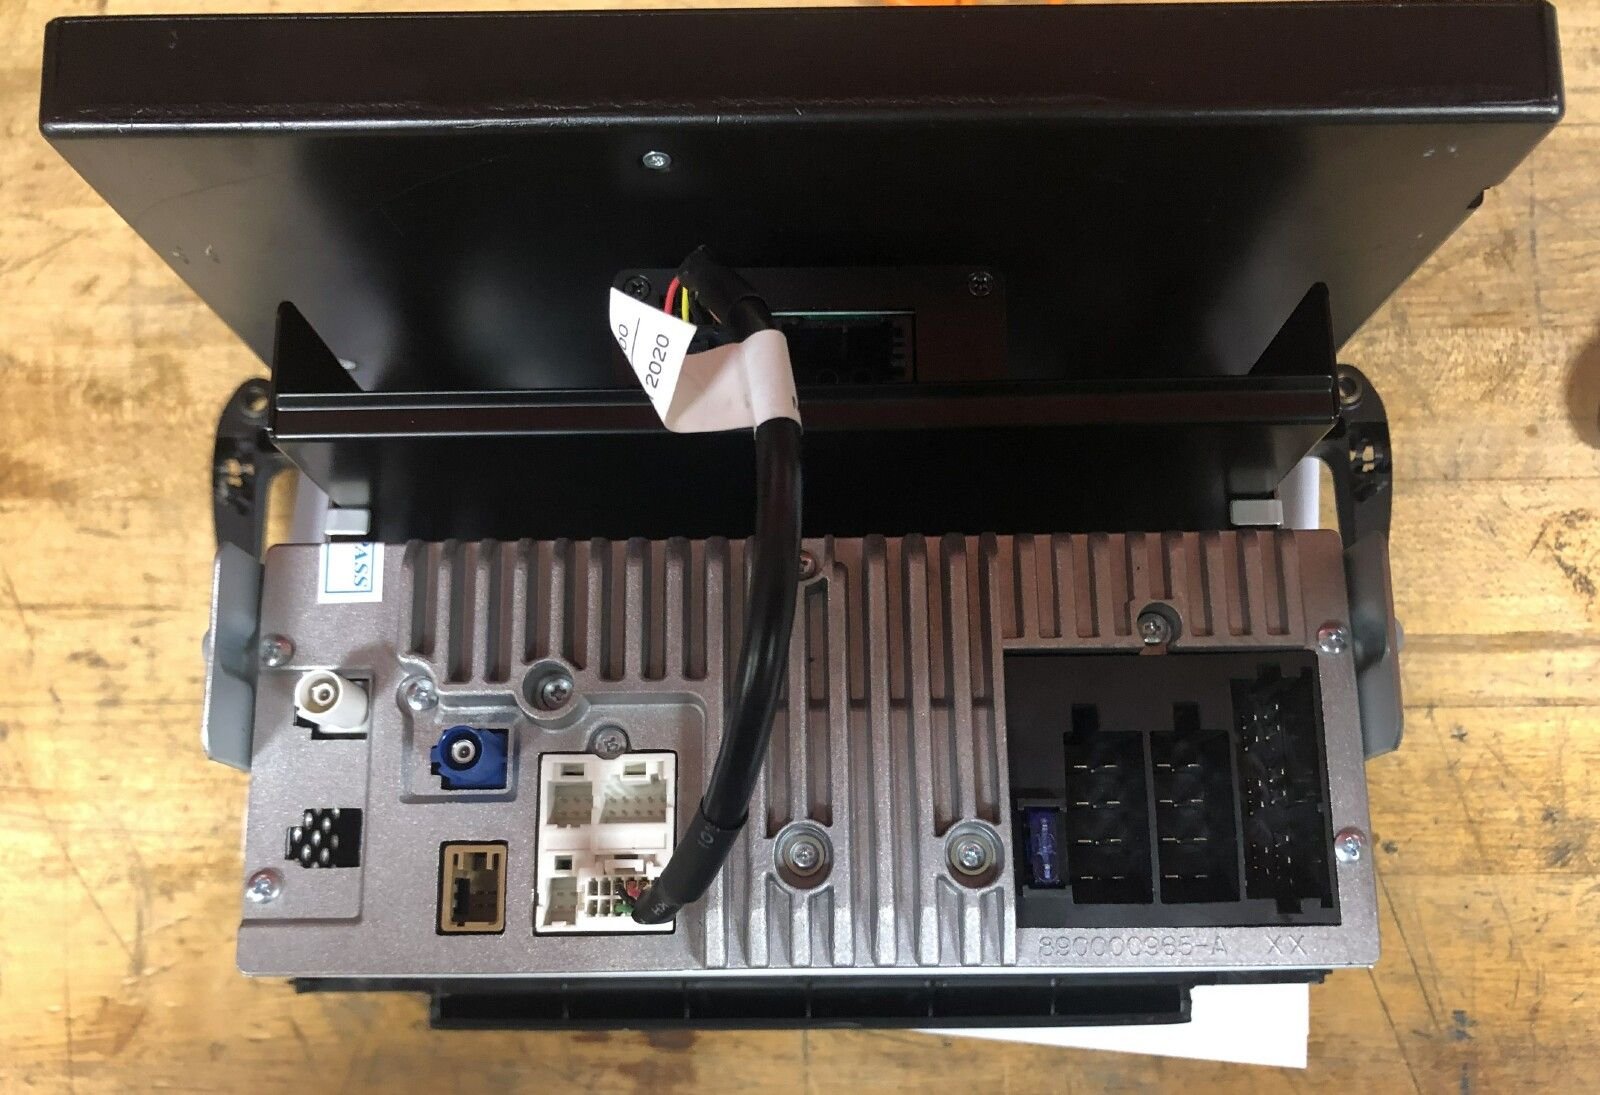
And here's a shot of the rear of the PCCM+. Note that in this picture, the MOST cable is already connected between the MOST control box and the PCCM+ unit. Also, the cup holder has already been reattached to the bracket assembly.
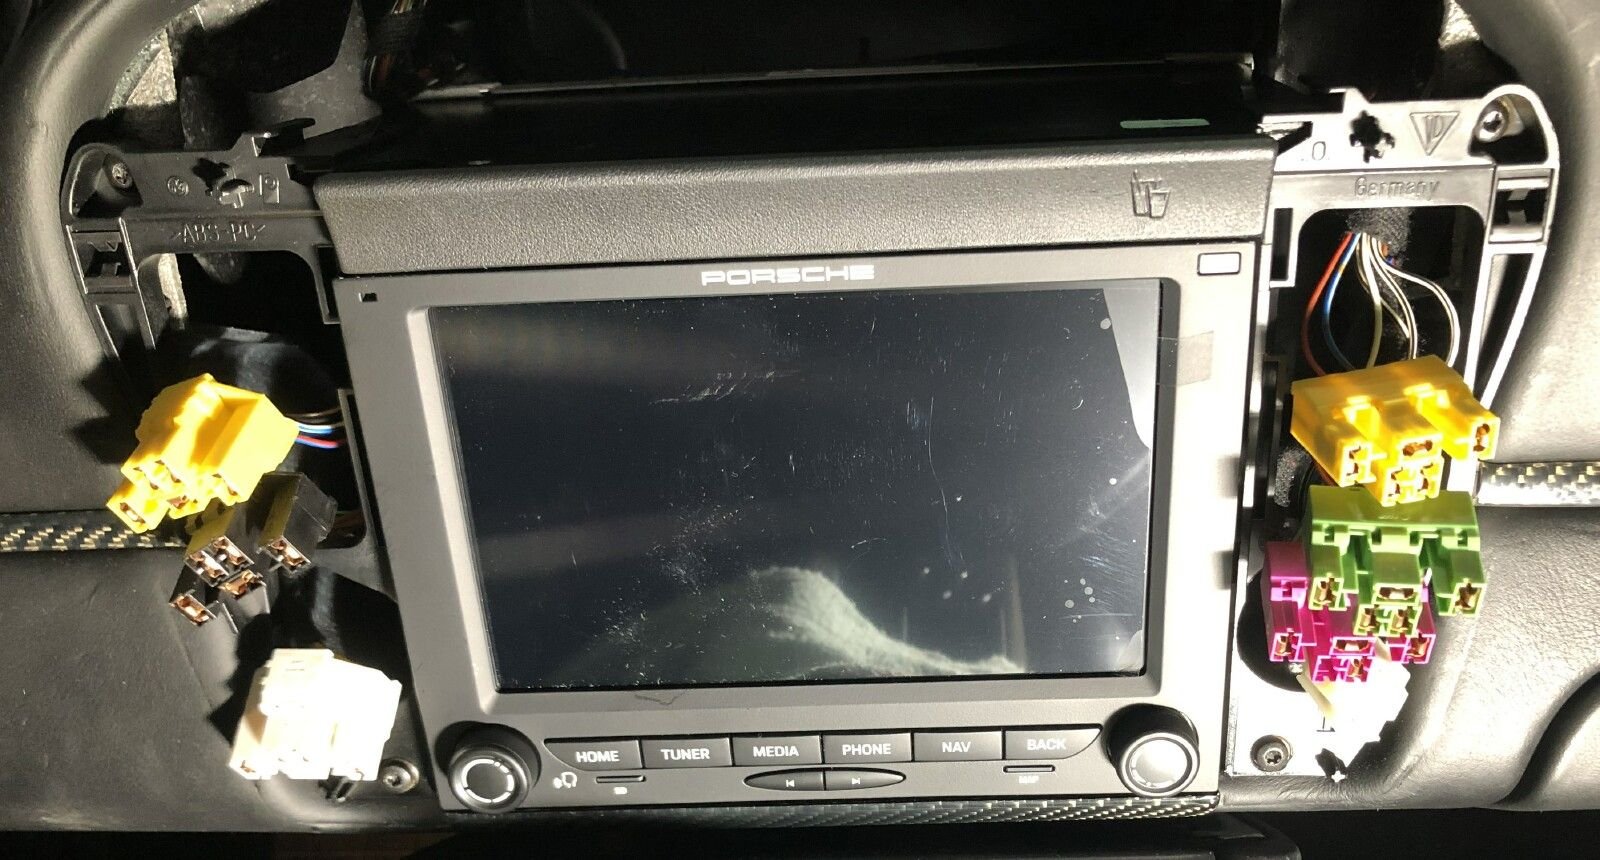
Once the re-configured assembly is complete, it's time to slide it back into position in the dash. This entails attaching all the connectors (GPS antenna, radio antenna, microphone, USB /phone interface module, MOST line, dash display connector, and the power / speaker line). Once these are all reconnected, you pull the connectors for the various switches surround the unit through the support bracket and then slide the unit all of the way in. The support bracket is held in by four T20 torx screws. With everything in position, this is what it looks like:
I had not peeled off the protective film on the screen in this picture. At this stage of the installation, after plugging in all the switches on the trim surround piece, I confirmed that everything was working, including having the navigation acquire the GPS signal, functionality of Apple Car Play, operation of the radio antenna, etc. I should add that with LHD vehicles, it is possible to mount the USB / phone interface in the glove box, which is where I mounted mine. This keeps the cubby contain in the center console unmolested and not having unsightly wires and plugs visible. The microphone is mounted on the steering column shaft using double sided tape (included; everything is included which made it easy). Final thought. I was initially "concerned" about doing this install myself. I called one of the local dealers to get a quote for installation (time estimate is give or take about three hours) and was informed that since I had not purchased the PCCM+ from them, they would not be willing to install it for me. I discovered I'm not a valued customer of theirs, even after having dropped some serious coin there over the years with my former and current Porsche vehicles. Lesson learned and the requisite push needed to decide to just to it myself and save the exorbitant fee they would have charged me to install this. Now having completed it myself, I'm wondering why I even considered having them do it in the first place. Again, I think this is a real value upgrade to the car and highly recommend it.
None other that what's visible in the third picture I posted above. It's about the size of a cigarette package and fastens to the cross brace with included double sided tape. For the EU versions, the DAB module also mounts there. The only connection to it is what's shown in the photo. The part number for the MOST control unit is 996 642 580 00.
Interesting... It was originally speculated that the PCCM+ used an external most adapter, and was similar or identical to the existing Chinese MOST adapters out there that then connected through RCA high impedance to the radio, but not the case...
Now it could functionally be doing the same thing, and that modular connector nothing more than high impedance outputs without the RCA connectors, but nice to see it is actually some sort of custom solution considering the price.
Could you have placed the microphone behind the little round "screen" located next to the amp meter in the gauge pod? Do all years have that phone mic provision? Also, I know it's too late, but did you notice if the radio bezel would be easy to pop off?
Could you have placed the microphone behind the little round "screen" located next to the amp meter in the gauge pod? Do all years have that phone mic provision? Also, I know it's too late, but did you notice if the radio bezel would be easy to pop off?
Thanks
TK
i moved my microphone there when I did the blinker relay mod. It is almost nonfunctional now. I need to take it back out and put it back up by the map lights.
Could you have placed the microphone behind the little round "screen" located next to the amp meter in the gauge pod? Do all years have that phone mic provision? Also, I know it's too late, but did you notice if the radio bezel would be easy to pop off?
Thanks
TK
The microphone supplied with the PCCM+ has a long cable and could be attached in numerous locations; however, the Porsche AfterSales Technical Information bulletin on installing the unit suggests the steering column for mounting, likely because it's directly in front of the you when you're driving and talking on the phone. I didn't look at the ability to remove the radio bezel.
i moved my microphone there when I did the blinker relay mod. It is almost nonfunctional now. I need to take it back out and put it back up by the map lights.
i moved my microphone there when I did the blinker relay mod. It is almost nonfunctional now. I need to take it back out and put it back up by the map lights.
mmmm, I don't think that would work well in a cabrio.......wind noise. Steering column probably works best for us cab drivers. Or how about "don't call me when I'm out driving the Porsche".
Adding a relay to the blinker so that when you gently push it, the binker flashes 3 times. Like on most newer cars. I've been meaning to do that mod for a long time. It's pretty straight forward.
The three-blink system is I believe a European innovation.
The first exposure I had to it was in 1986 (as I recall) as it was on a rental car I had in Germany. I remember thinking "why don't we have this in the U.S.?"
 01-04-2021, 03:04 PM