When you click on links to various merchants on this site and make a purchase, this can result in this site earning a commission. Affiliate programs and affiliations include, but are not limited to, the eBay Partner Network.
I confess I haven�t read every post in this thread but you have been bitten by the bug for sure. The journey is certainly part of the fun and figuring out the next thing to do to your car to make it that little bit faster. When I went down this road about 15 years ago with an air cooled I worked within a PCA class for club racing so there were limits to the improvements. It looks like you are headed in the direction of building your own CUP without the engine, of course.
Love Cup cars - can't drive them on the road and that's the show stopper for me.. Great inspiration though. From taking one apart, it's amazing how simplified they are compared to a street car. The lack of emissions equipment and creature comfort wiring and ancillaries makes for such a cool car to work on. And what you get with that is a very serviceable car, which I do not feel the street cars are.
That is a TON of car for $60K.
I'm walking this line of track car that can be used on the street, it's blurry. For now, to me, that means it still needs to maintain some street car safety - no full cage, door crash bars have to stay, no halo seat, front and rear crash bars still there...and, its got to pass a MA state inspection - maintain OBD2 compliance so standalone ECU is out and visual inspection for catalysts, lights, horn, wipers etc...
I'm not into limits, this car is not built for any class racing and I do not plan to ever change that. I know people will say that a car like this is worth a lot more built to a popular spec class - that may be true but it's not what I want to do with it. Maybe some time trials where the stuff I've done will out class its competitiveness, who cares ! I just build it to have fun. When the 4 tires hit the ground again in the spring - I don't think any Porsche guy would slide into the Recaro, turn the key and not be excited to take it for a rip. I am, every single time I get in it.
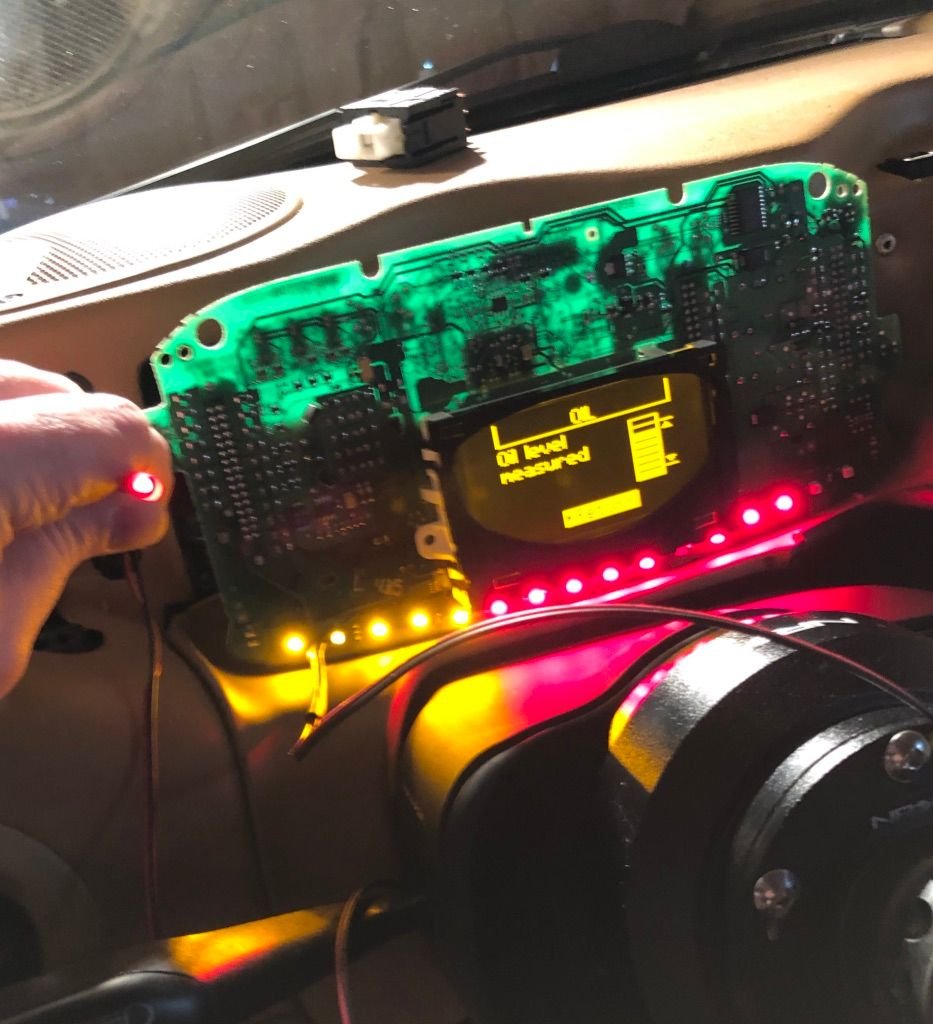
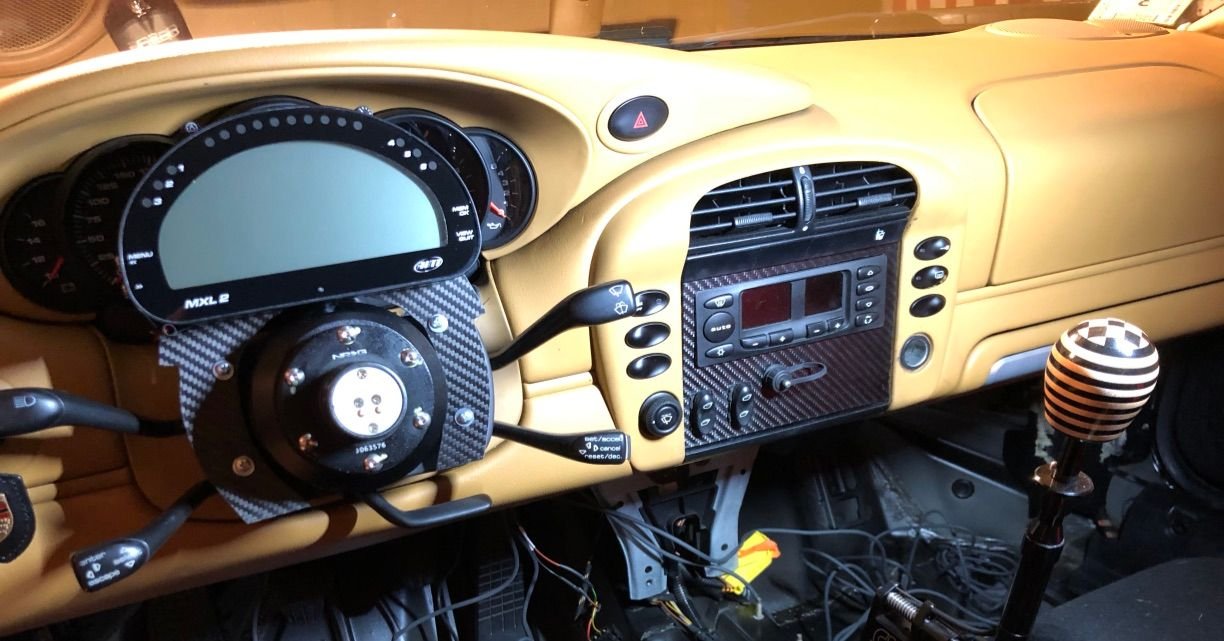
Just finished hooking the AIM up to power CAN and final mounting. Looks like so far so good, picking up coolant temp at least. I'll have some more details on the install shortly, got to run to an engagement... But for now quick teaser. Notice the little red LED on the bottom left, that's wired to the CEL...
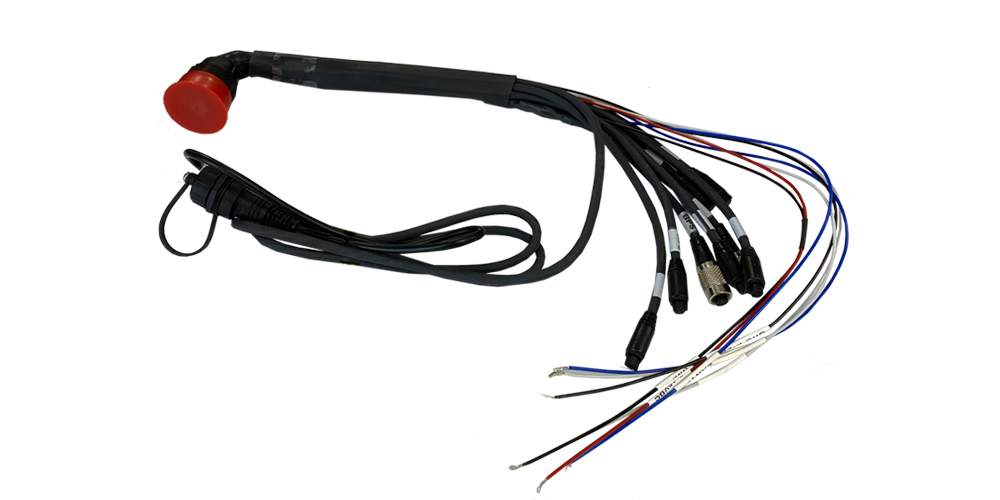
Aim supplies a really nice Motorsports style wire harness to facilitate install of the dash display. Power and ground, 4 0-5V channels, GPS, K line (if using OBD data stream, RPM, CAN + and CAN -. USB port
Not my picture
For my application:
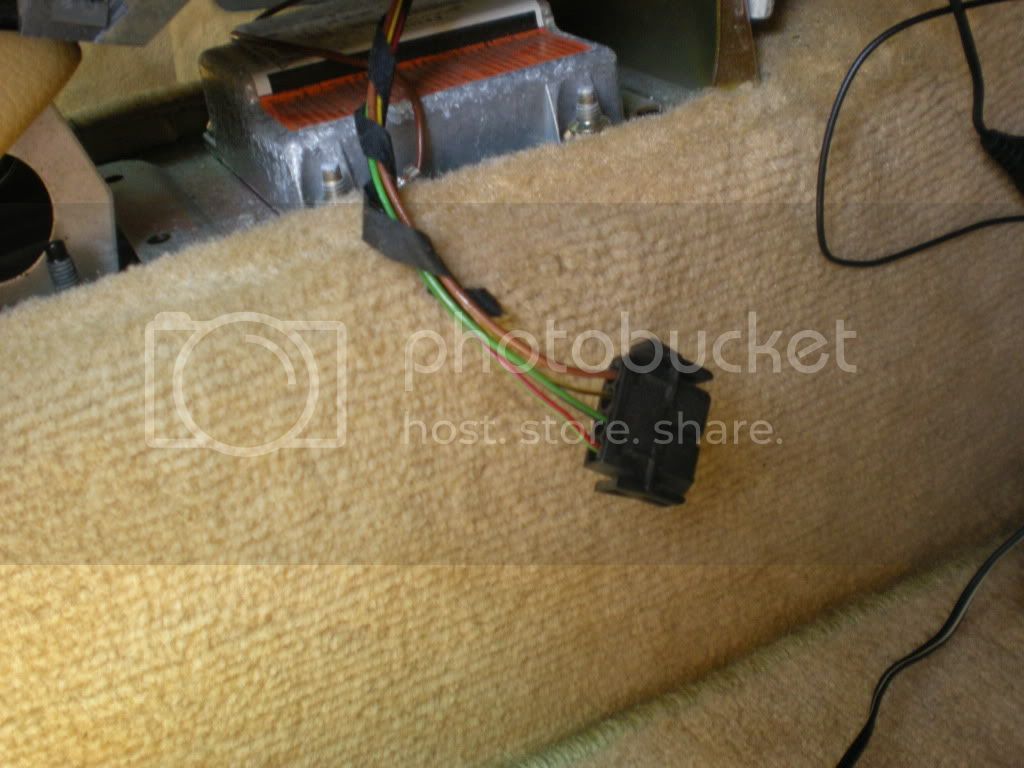
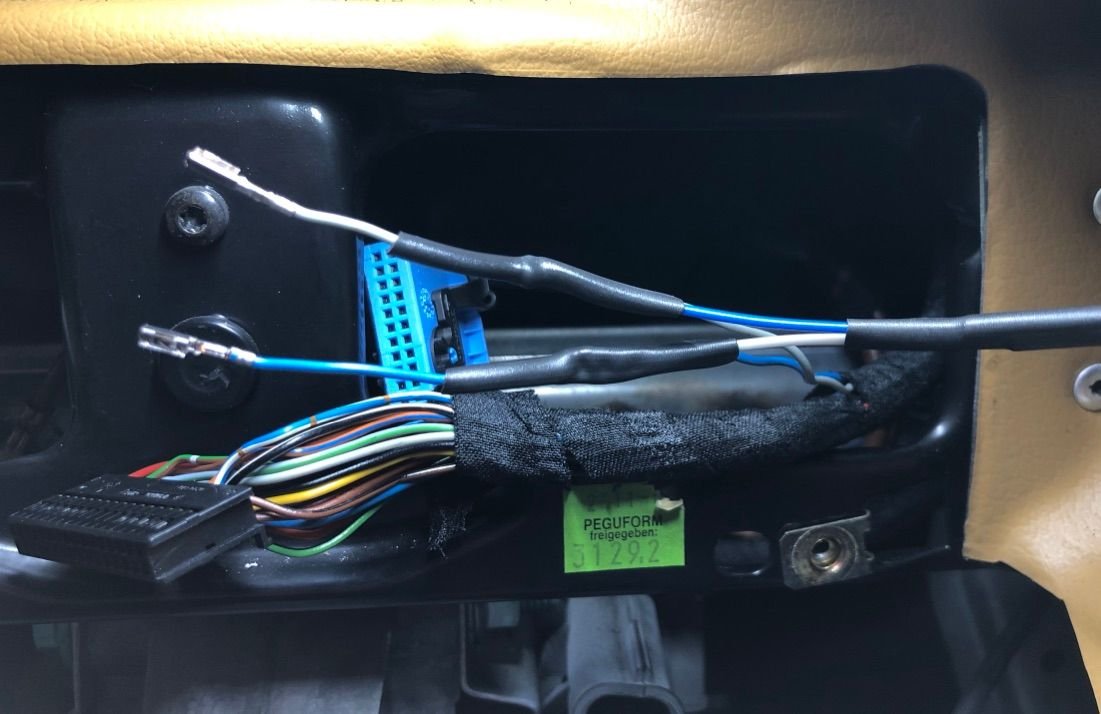
I wired switched power and ground from the unused factory cell phone wiring. Brown is ground and green/black is switched 12V power. This is a really convenient place to pull switched power from BTW.
This is the connector - Not my picture (Thanks Skip for confirming)
I chose to use the CAN data stream for the fast logging rate it allows. Available on the CAN stream are:
RPM
Speed 1
Pedal position sensor
Engine moment
Engine coolant temperature
Intake air temperature
Brake switch
I accessed the CAN + and CAN - lines from harness that plugs into the gauge cluster green connector. The benefit of this location is I already had everything apart and the wiring supplied is plenty long to reach without having to add any additional length - the down side is the combination of cold temps and old connectors meant each one of the 3 main connectors that plug into the cluster broke to some degree installing. The alternative location is directly at the ECU.
I unplugged the 2 wires I needed from the connector, stripped a section of each wire and soldered in the wires from the AIM harness, then I shrink tubed the connections. The CAN wires are a twisted pair, before I plugged the wires back into the connector I re-twisted them.
FROM AIM
The USB access runs behind the dash in to the radio delete plate where it is mounted. It is a mini USB connection on the harness side. AIM supplies a nice USB to mini USB cable to use when connecting to the system from your laptop.
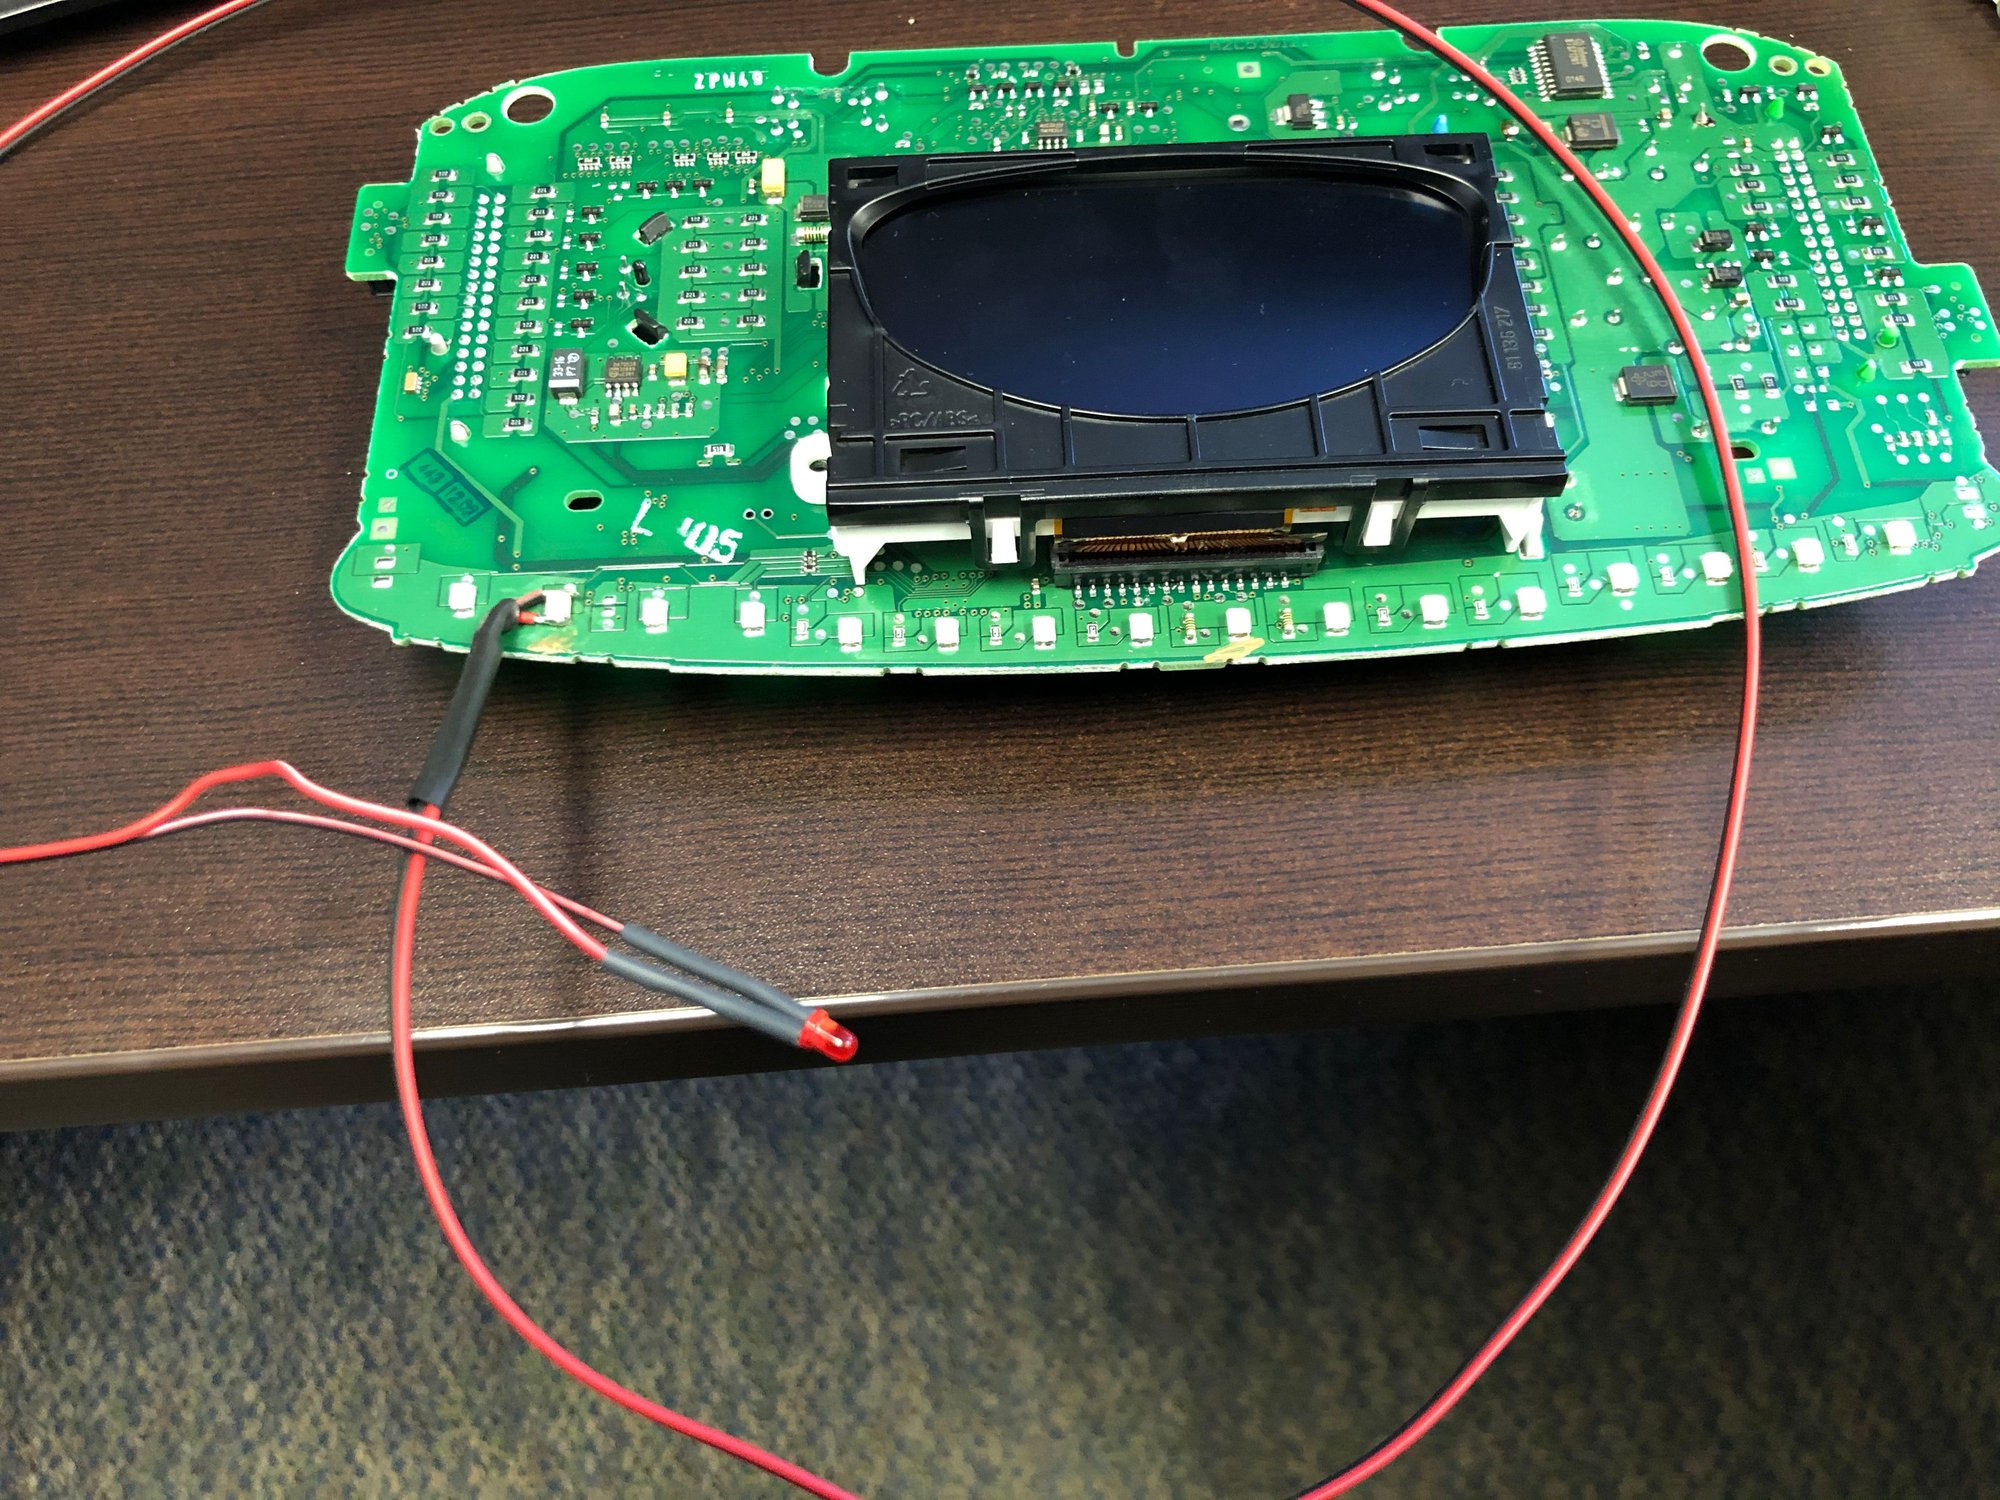
Finally, As I wrote about a couple posts up - I felt it important to make sure if a check engine light were to come on I would be able to see it. This meant a remote light was needed as the new dash blocks visibility to the stock location. I disassembled the stock cluster to get to the main controller circuit card. I soldered flying leads with a through hole LED to the leads of the SMT LED mounted on the circuit board. now, if the LED in the cluster is illuminated so will the LED on the end of my flying leads. For now, I just temporarily mounted the LED to the AIM with a piece of electrical tape until I figure out a better position.
Next up is connecting the sensors and GPS module. There is no wiring involved here, all plug and play. So, its all about the mounting and routing. I'll go over this in my next post on the system.
As you can see, the install up to now is really pretty easy.
That all is looking great. I'm not in such a good position to go with that much track focus now, or perhaps ever. I'm not sure that I would even like to go with that much track focus. I will admit that I can't wait for the snow to go away and track season to reopen. Even with my level of amateurish participation I surely have a ton of fun.
And at the moment I still have this little problem, waiting for one stinking hardened steel ring to arrive from Germany...
Tis the season for cars in pieces.
You got a great thing going, and a lot of knowledge that has really helped me. I really appreciate it and can�t wait to catch up.
Anytime she�s running, open invitation for you to take it for a spin.
Well, Got my sensor lines run and tidy enough for me. Then I got the brake pressure sensor installed, GPS beacon and moved onto the oil pressure and temperature and that is where my long day of jungle jim around the car came to an unsuccessful end...
The oil filter sandwich plate fastener - 13/16-16 which should have bolt right up to my LN Spin on filter bottomed out before seating the sandwich plate against the LN filter adapter...
So... Best solution, I sent LN a ticket asking very nicely for them to sell me one of their IMS Solution filter adapters with QTY 2 1/8 NPT holes... Hopefully they will be able to make it happen. As an aside, I think that would be a great marketable product, getting sensor lines to the oil filter is relatively easy and would allow people to add aftermarket gauges without getting invasive with the motor.
Fingers crossed
If that doesn't work out, I may resort to shortening the fastener that came with my sandwich plate, although I think it would work fine, it would feel a little jerry rigged.
Aaron, don't suppose you have a band saw just in case ?
 02-05-2021, 10:46 PM