When you click on links to various merchants on this site and make a purchase, this can result in this site earning a commission. Affiliate programs and affiliations include, but are not limited to, the eBay Partner Network.
I sure hope you never get rear ended or you may have a porsche logo sized impression on the back of your skull. The forces are intense.
Yep, not the best idea. Also, never install one of these into the airbag to replace a worn our airbag crest. The airbag crest is specially attached to stay with the cover in the event of a deployment and replacing it with the small metal crest (like the lapel pin) will essentially create a bullet in the event of an airbag deploying accident. It may look nice but is a really bad idea.
...I replaced the AOS following instructions from a Rennlist write-up... (2006 S )
Took me about 3.5 hours start to finish (not including tool/shop clean up). For the dreaded hidden A/C compressor bolt, a stubby ratchet w/ short and medium wobble extensions attached to a sharp E12 was the trick. I used electrical tape to secure the socket and extensions together... have a magnet ready incase you drop something under intake. I also removed the two bolts at rear of car first, which allowed me to carefully twist the compressor back and forth a few millimeters to help break the hidden bolt loose.
FINALLY fixed my cabriolet top cycling with help from THIS THREAD and THIS THREAD and THIS GUIDE. Afterwards I did some nice driving in the 55 degree weather last night. 2 hours with the top down is a pretty good day in mid-December in central Ohio.
replaced my crankshaft position sensor. had a slightly rough idle, car started to randomly stall, and also had to crank a second before starting. changing out that sensor pretty much fixed everything (hopefully). part cost a hundred bucks at pelican, and maybe 45 minutes of your time assuming you have all tools.
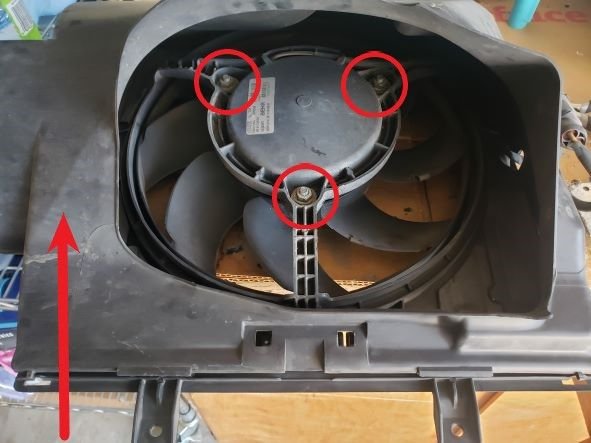
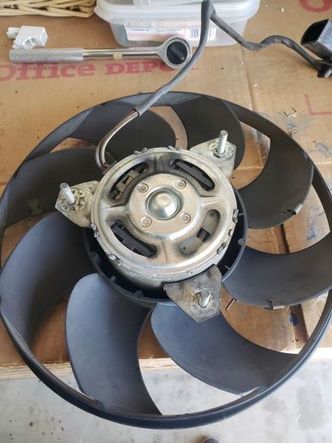
couple weeks ago, also cleaned out my radiators and replaced the radiator fans. pretty confusing but I managed to remove the fans without removing the actual radiator, avoiding the need to drain the coolant. took me an entire day, most of the time just staring at the thing and trying to figure out how to do it. decided to document it so i knew how to put everything back together:
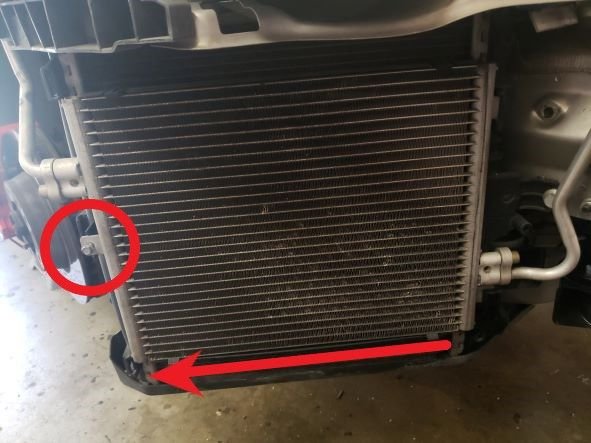
jack up the front, remove wheels and wheel liners from both side. you should see the back of your fan shroud and radiator assembly.
remove the front bumper. i won't rehash the steps here since its well documented elsewhere online and in this forum. only advice here is that the torx screws underneath arent always what the instructions say, i had an odd mix of t25 and t30's.
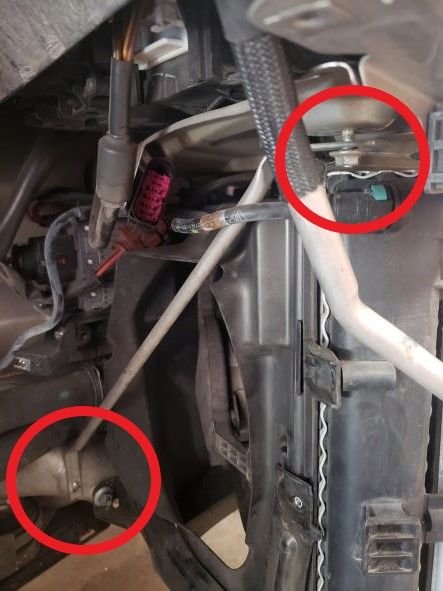
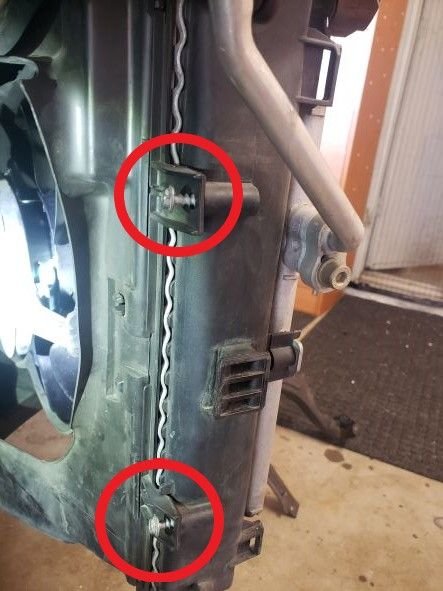
remove bolts (10mm) from a support bar (not sure of the actual name) behind the shroud. the bar won't come off, but you need to remove the bolts to loosen it so other parts can squeeze by it.
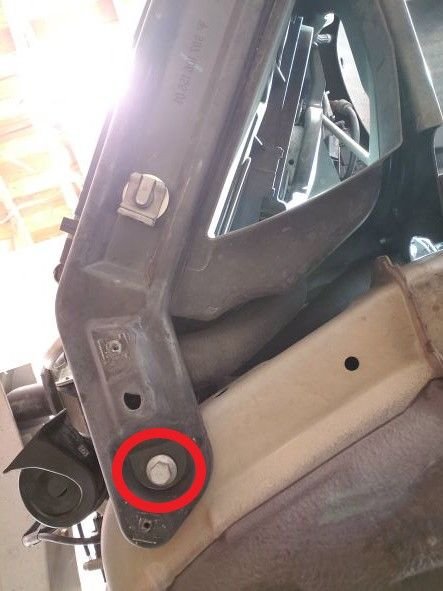
unbolt the ac compressor that sits in front of the radiator (8mm). slide outwards to remove from a bracket.
release the radiator from the support bracket by sliding out two metal clips from underneath.
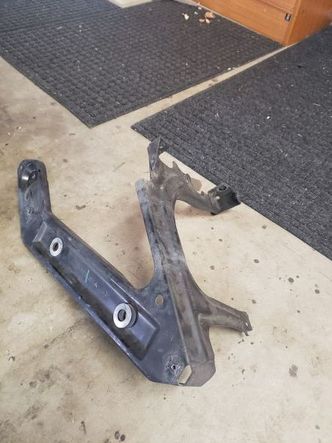
now remove the three 13mm bolts holding the metal bracket that supported the radiator assembly. there are two inside behind the assembly, and one underneath.
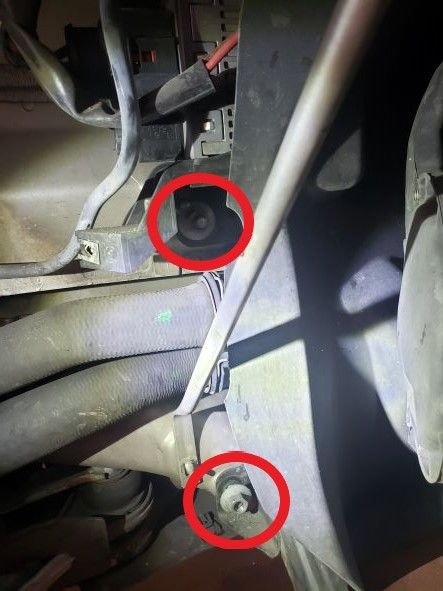
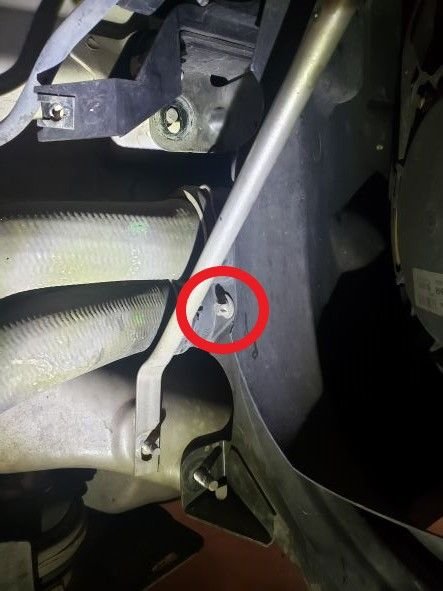
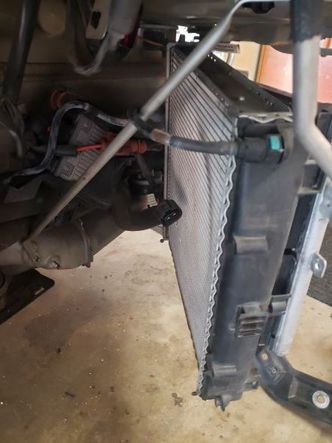
now remove the torx bolt that holds the radiator lines to the metal bracket. i'm not sure what size torx sockets you need (maybe t45?) but i used a normal 8mm socket to remove it. once unbolted, slide the hoses away.
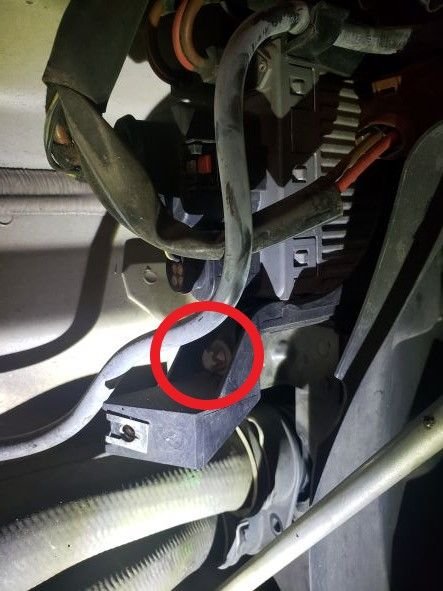
remove another torx bolt, same size as above (possible t45 but i used a regular 8mm), that holds a plastic bracket for the fan control module to the metal bracket. once unbolted, slide the plastic holder away from the radiator to remove.
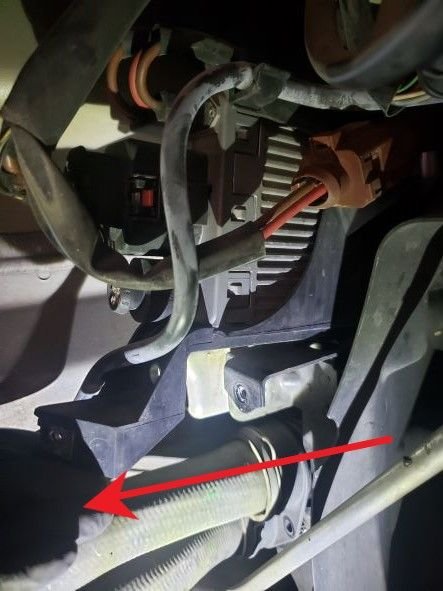
the metal bracket should wiggle out now. i believe there's a cable connecting the fan controller to the actual fan, so that needs to be disconnected. then there are two 8mm bolts holding the fan shroud to the radiator. once the metal bracket is out, along with those two bolts, and the cable is disconnected, you should be able to remove the entire assembly.
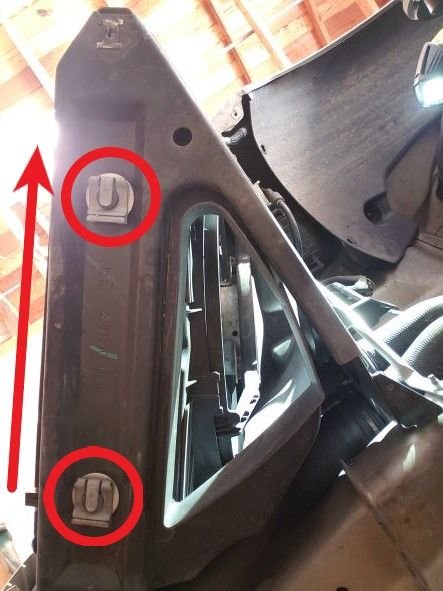
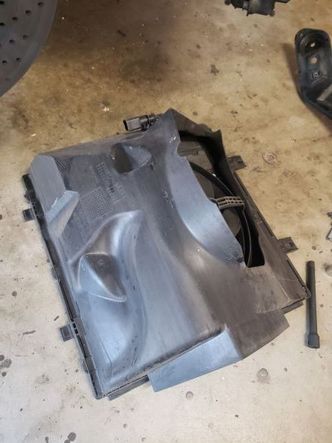
then from the shroud assembly, slide the rear cover up to remove, then unbolt three 10mm nuts, and the fan should come free. be careful with the fan cable.
to reassemble, just do the opposite and it should come together.
Ever since I bought the carbon fiber exhaust tips from Soul Performance I have been lusting after the center muffler delete bypass pipe. I told John Gaydos I was saving up to get one . He told me they are on sale for 10% off ($125) until Dec 20 AND I could pay 50% down now and the balance 6 weeks or so down the road when production/construction is finished ( very helpful with Christmas coming up). So I pulled the trigger and placed my order as it is more financially viable right now.
If you want one look here https://soulpp.com/product/porsche-9...ypass-exhaust/ but you won't find the half down offer on the website. Contact John direct to request that
John Gaydos <johng@soulpp.com> Office: 267-818-3208 Cell: 484-883-6197 Merry Christmas!
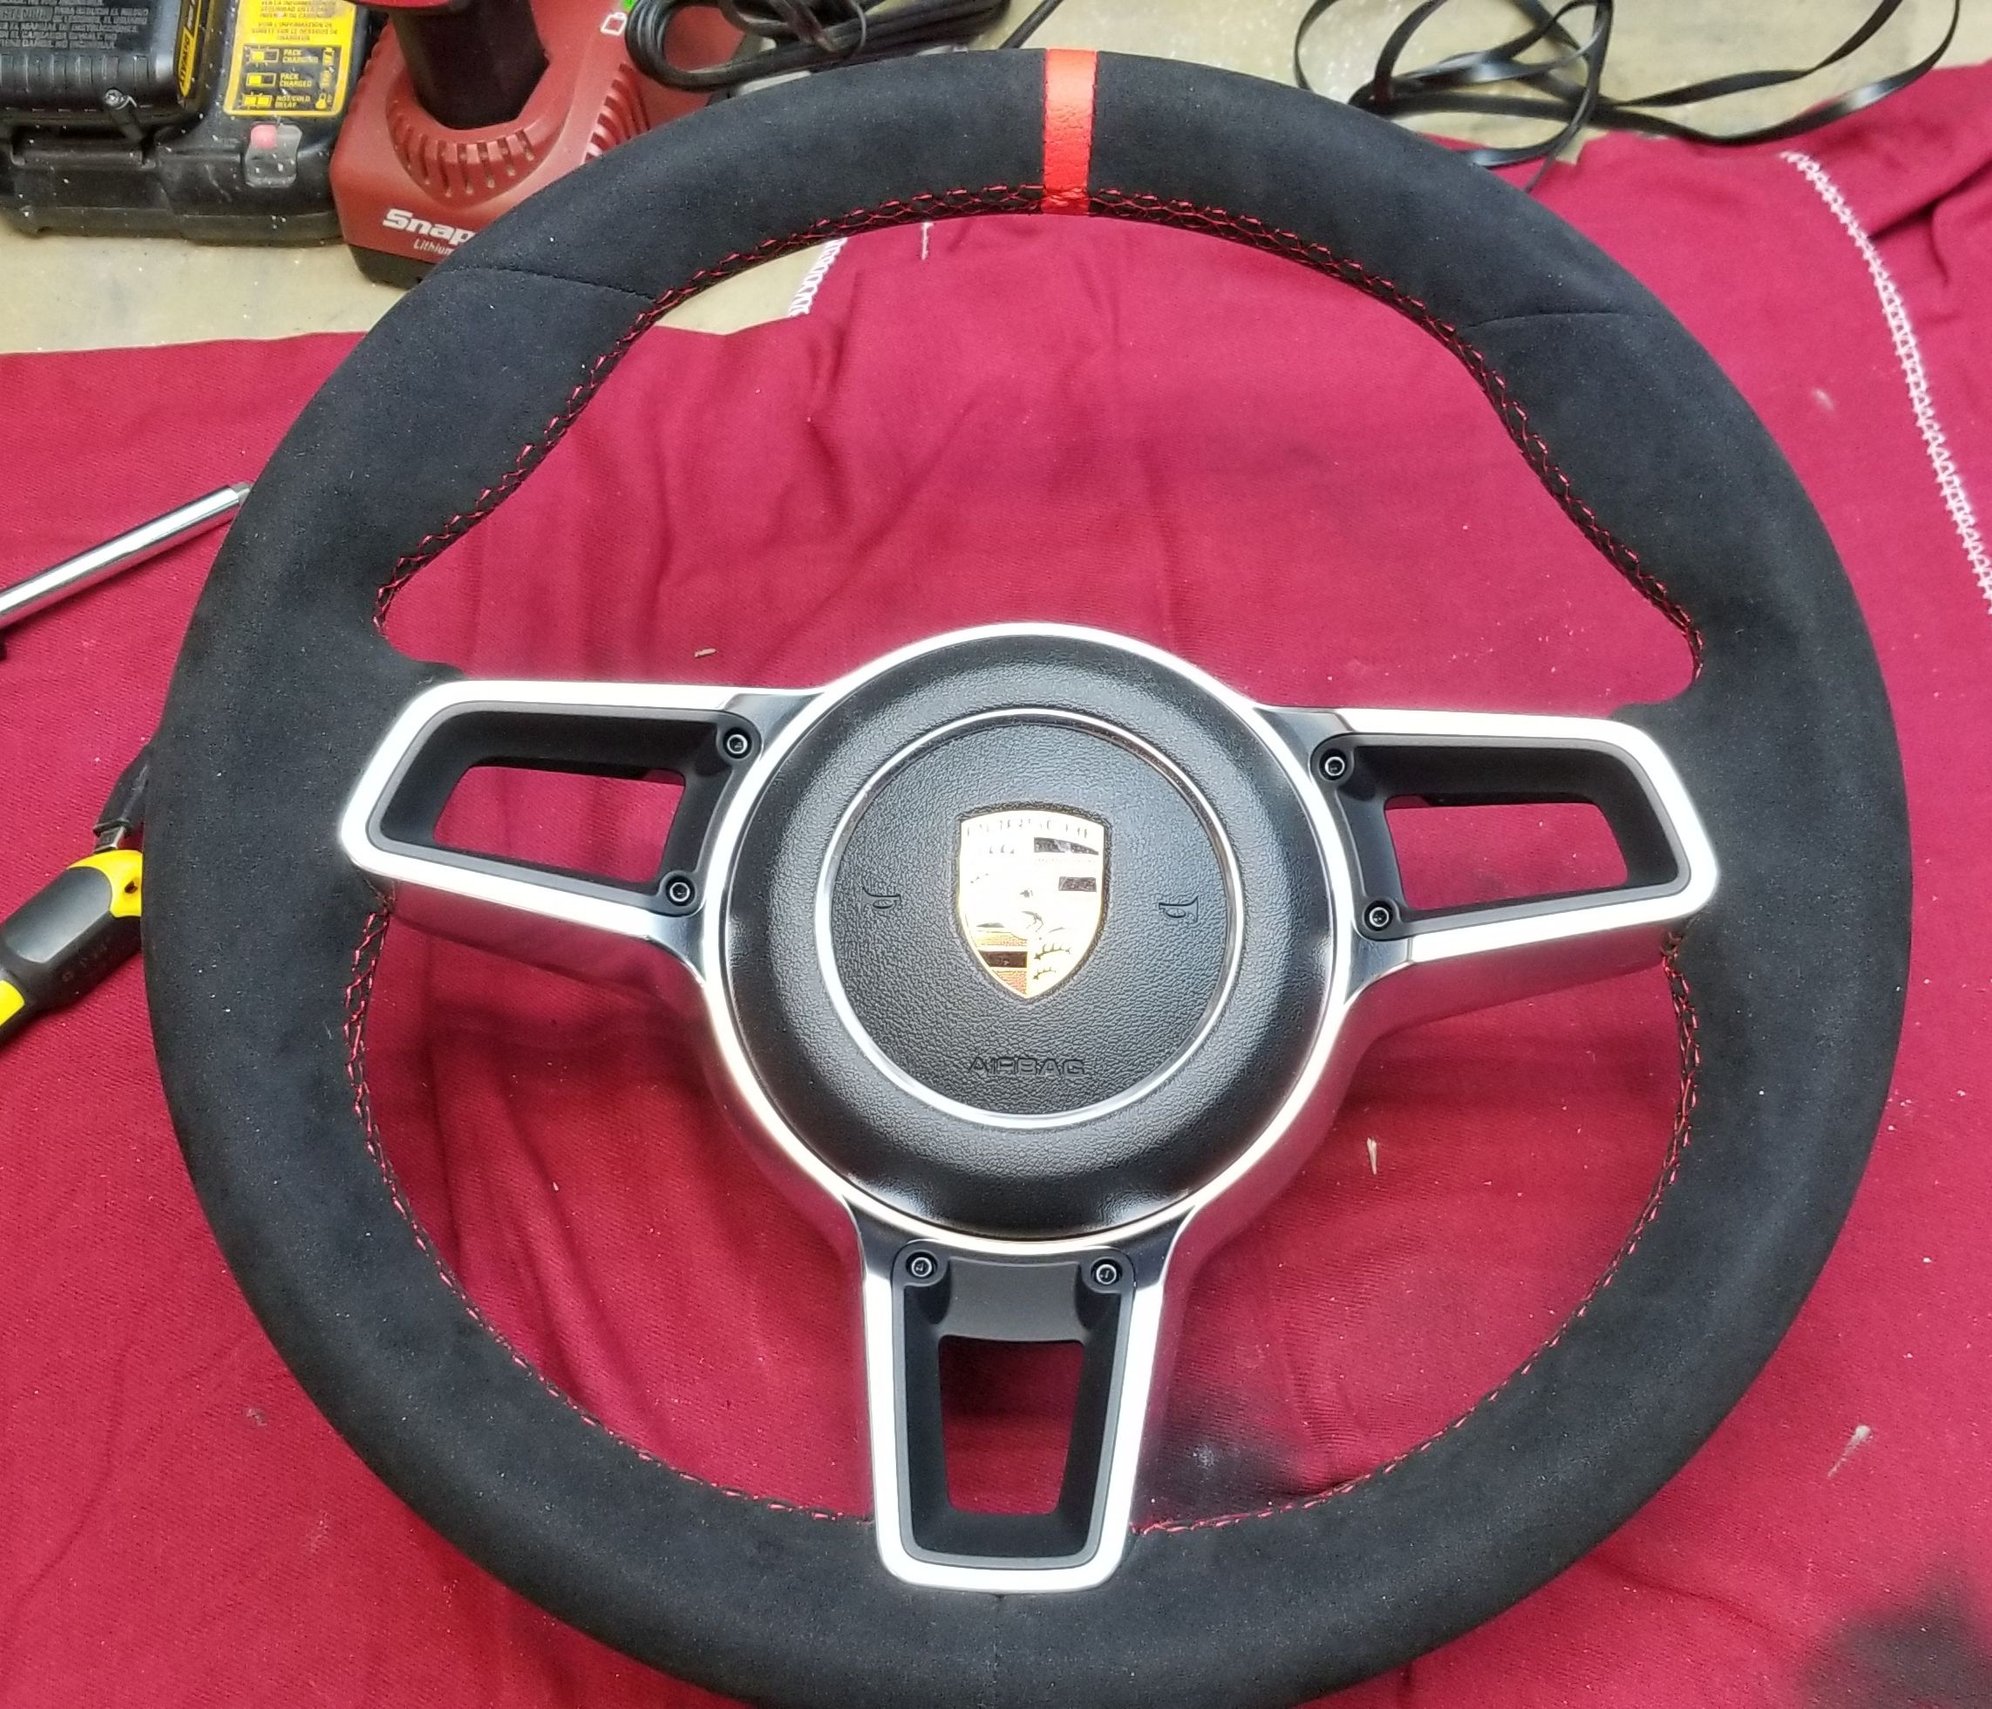
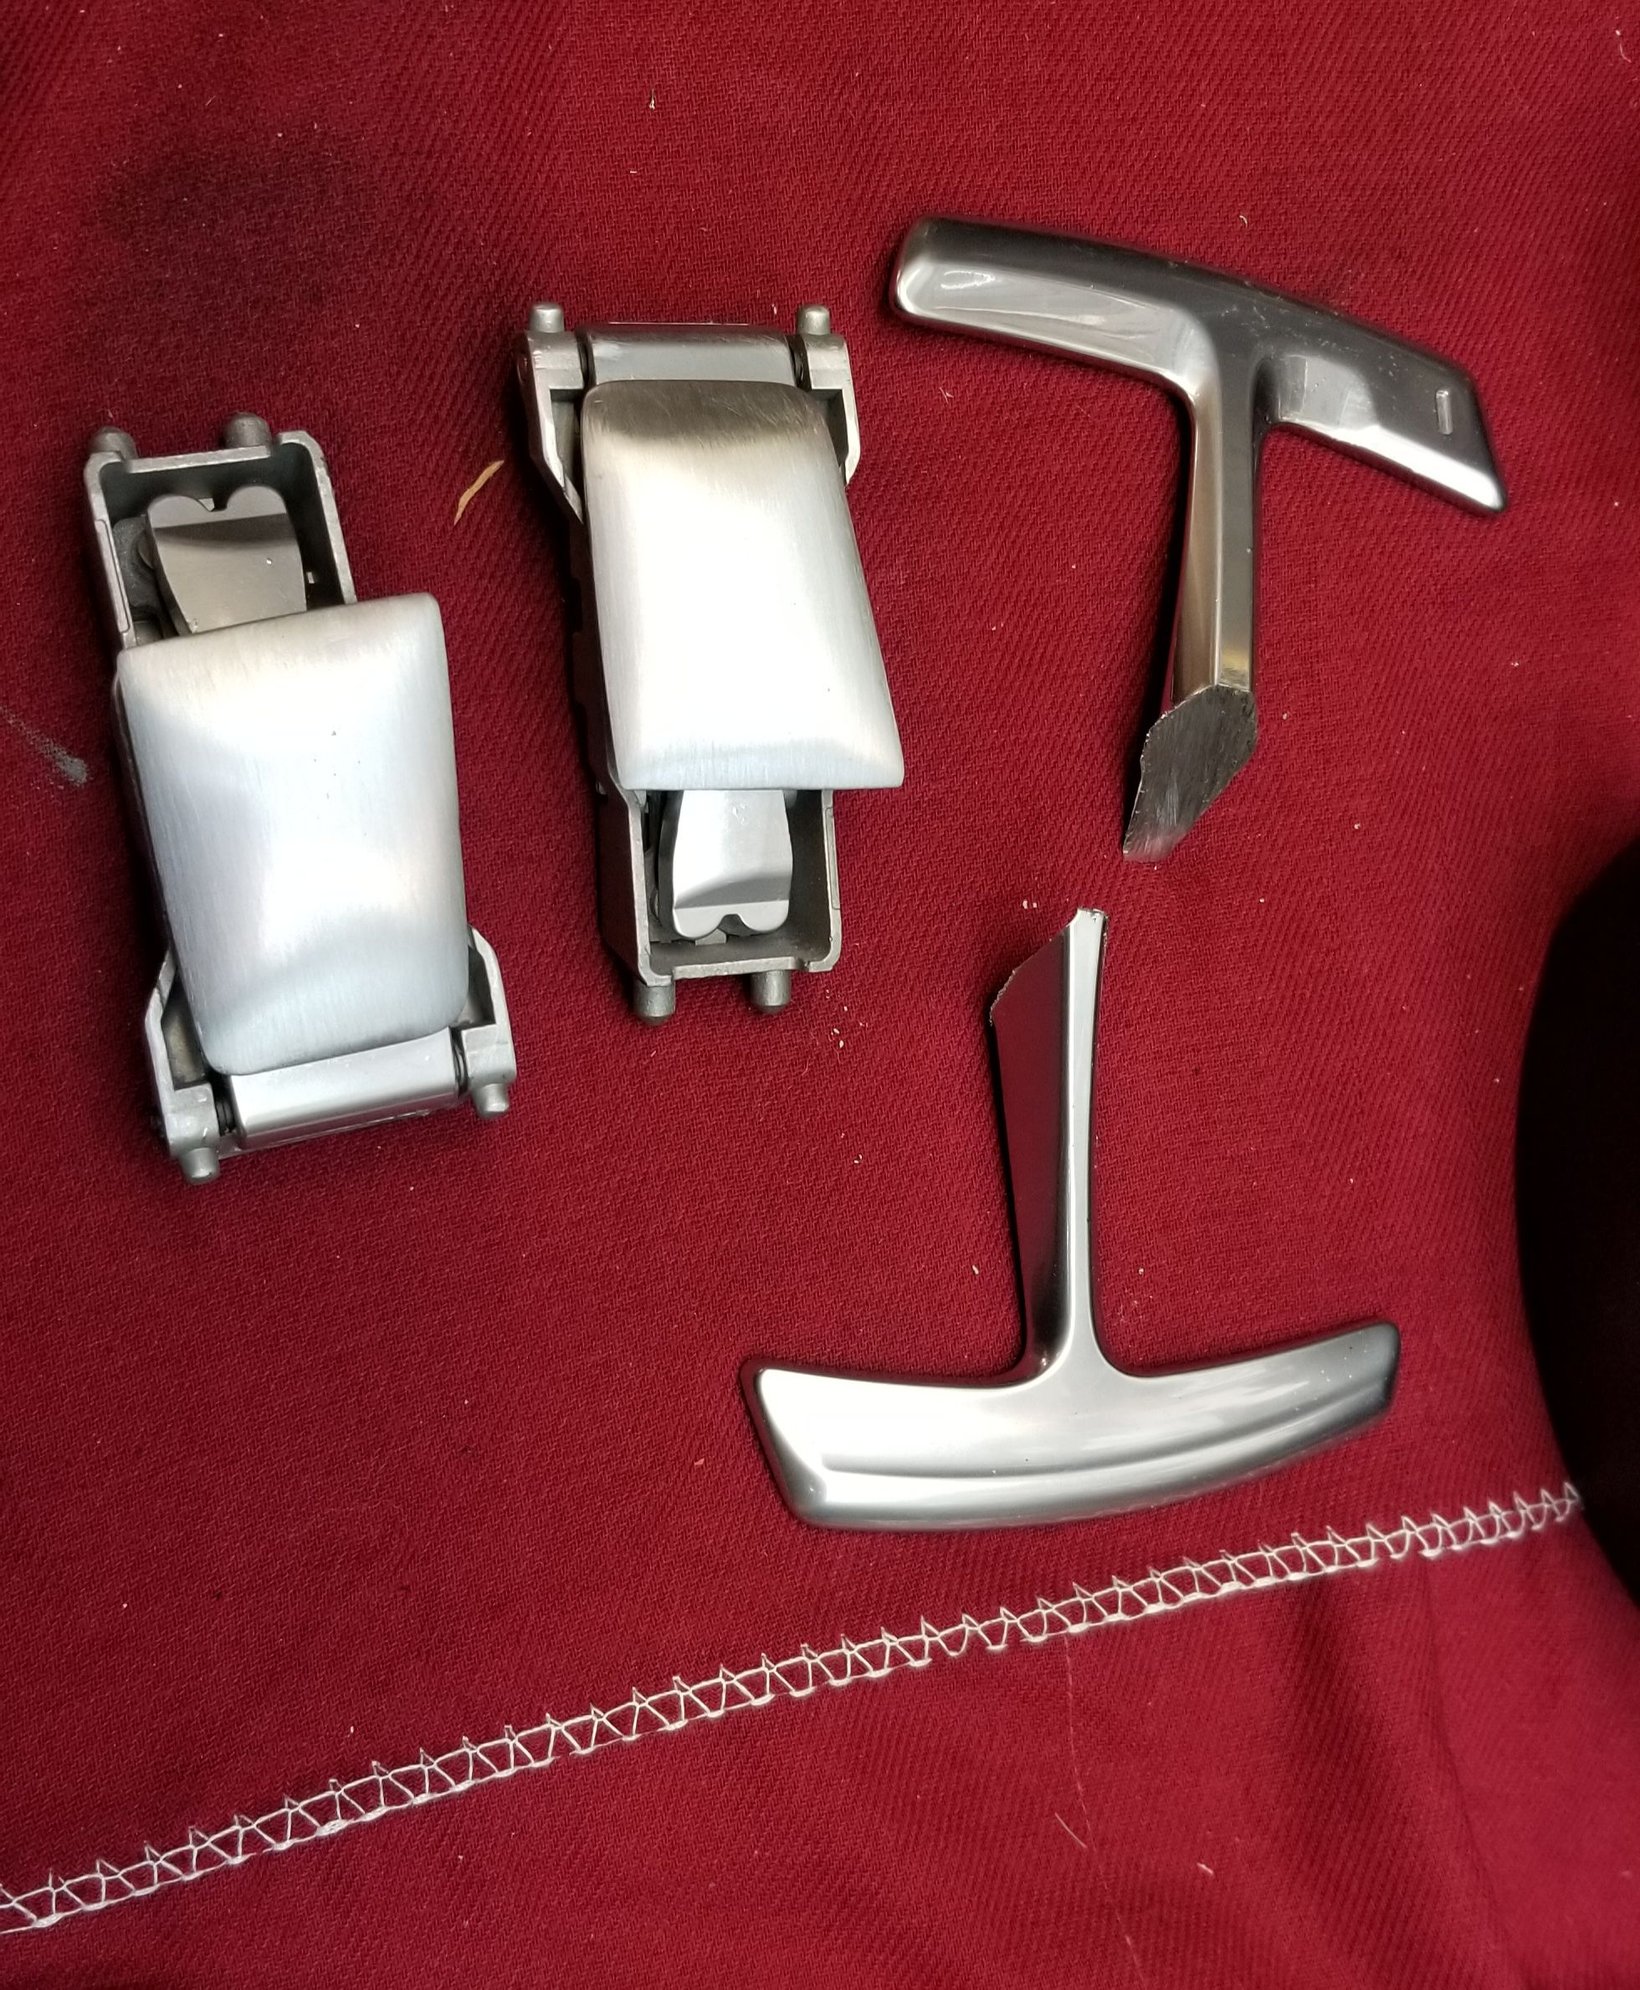
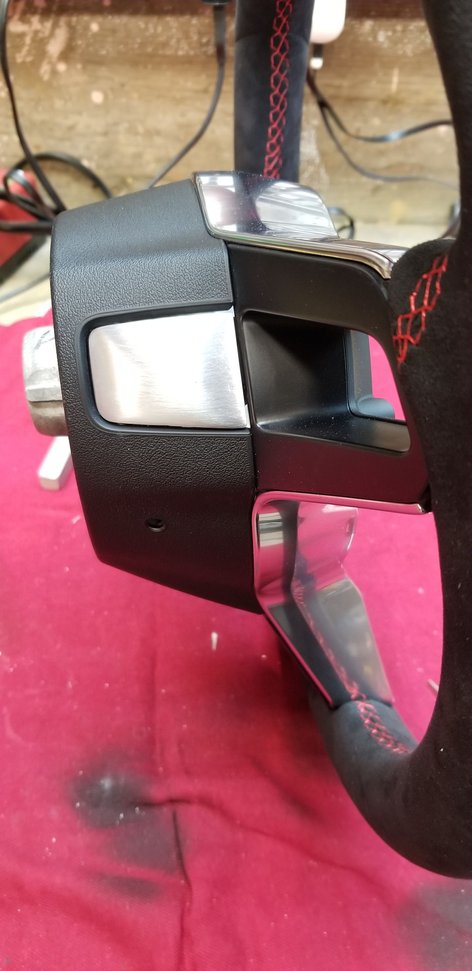
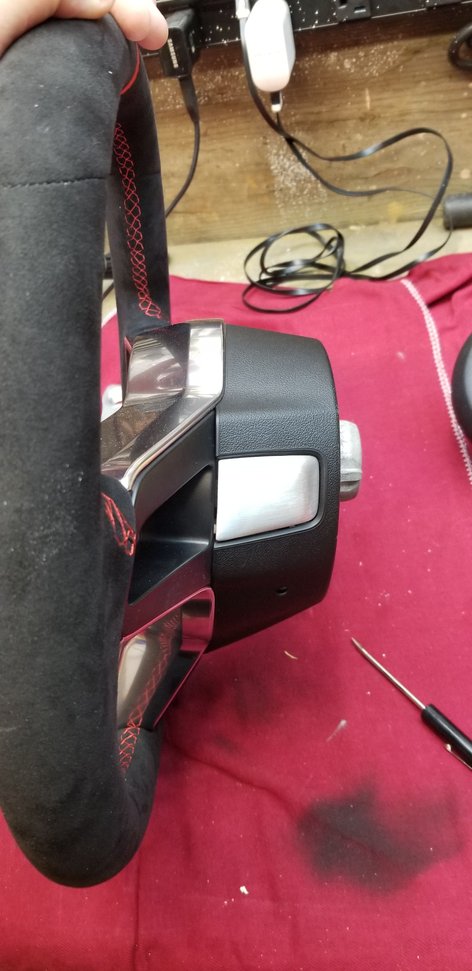
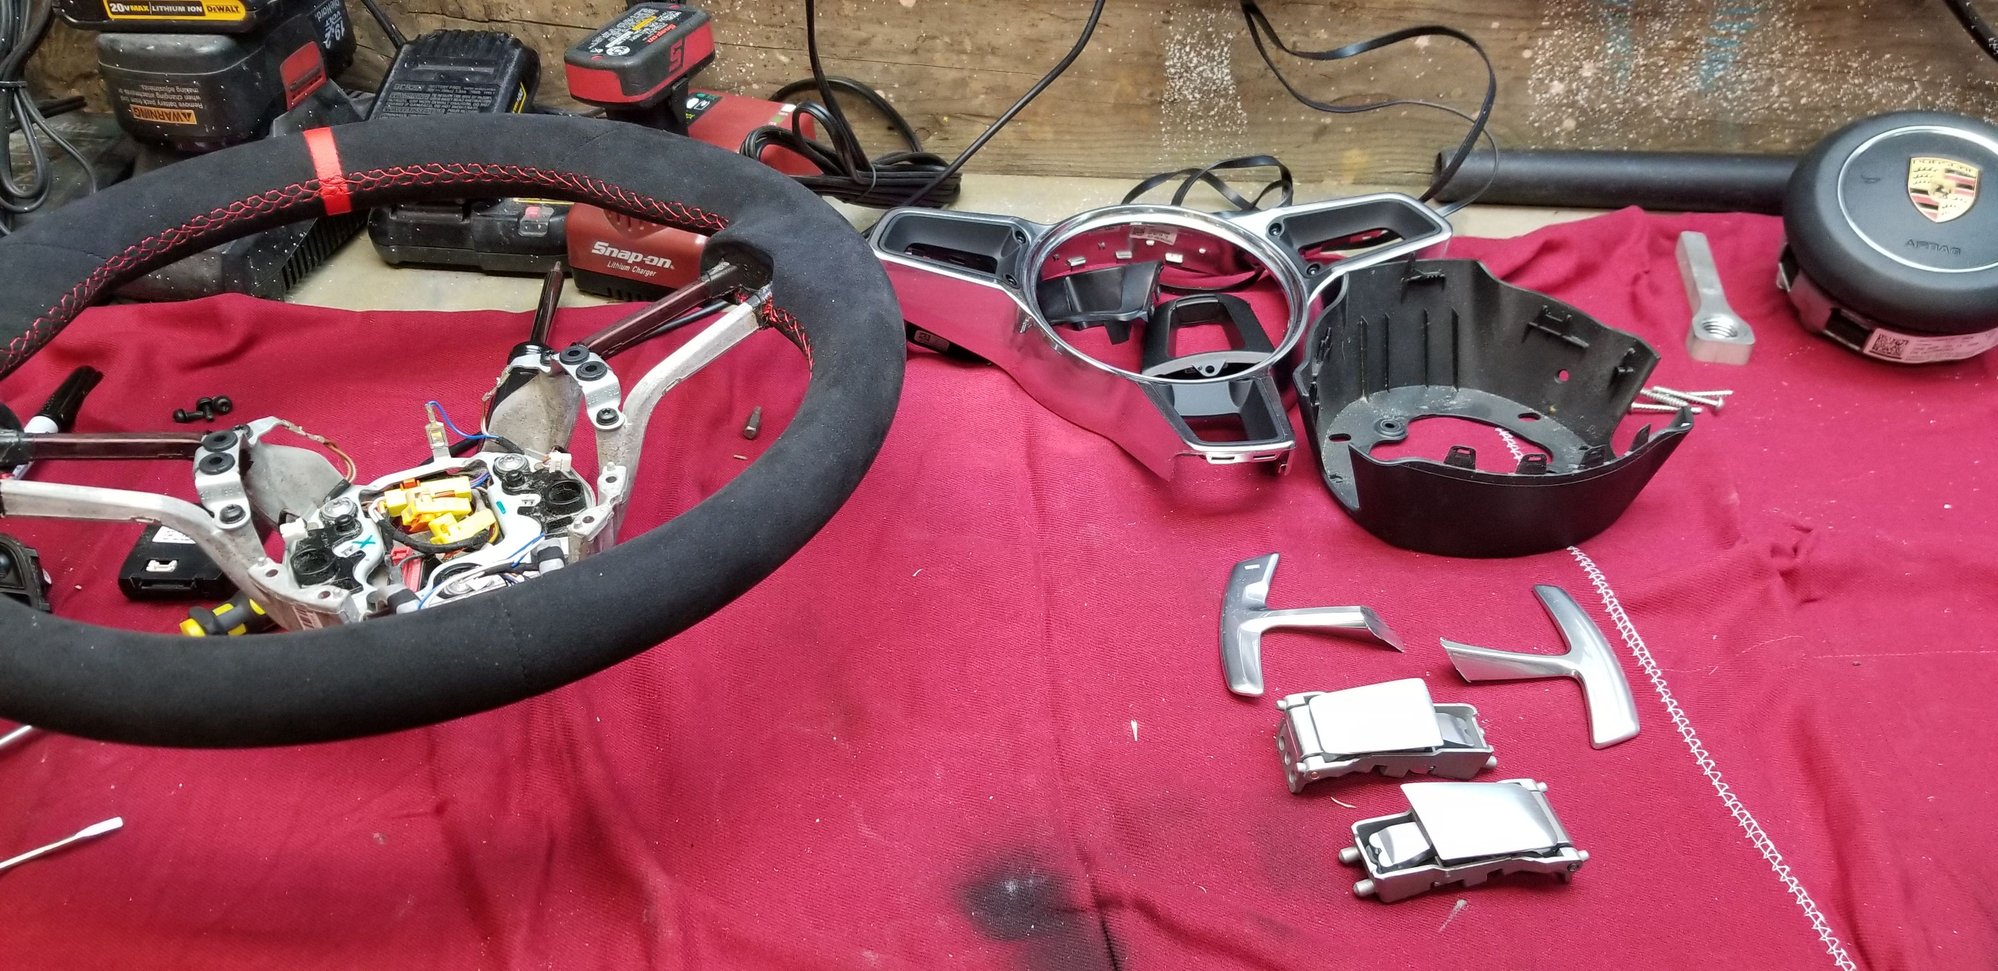
Finished putting together my new steering wheel. Installed the multifunction delete trims and also deleted the paddles. Cut the paddles off of the switches, sanded and finished with a brushed finish as an accent piece.
Looks good but why cut the paddles? I have the same wheel. You just unscrew the paddles and then sell them for $200 on eBay like I did.
I'm completely confused. Maybe I�m missing something. Once you remove the black plastic pieces from the rear of the steering wheel all you have to do is unscrew the paddles and they come out, there�s no cutting involved or necessary.

 12-14-2021, 09:27 PM