

So what did you do to your 928 Today......
 07-11-2012, 01:01 PM
#3091
Addict
Rennlist Member
Rennlist Member
Another interesting tidbit from a few days ago...
I had obtained some SEM 39003 Euro Trim Black and various prep materials in anticipation of painting my rear quarter trim pieces; they had become really chalky in places and generally looked crummy.
So last Wednesday or Thursday, I looked at the trim and was getting ready to mask it for prep and painting. Upon inspection, though, I noticed that it might be easy to remove the trim. Played with the little joiner end pieces and noticed they are easy to remove (I got photos, but I'll have to wait until later to share them). And then the main pieces are easy to remove, too. So... once you know this, rear quarter window trim removal turns out to be very easy, like a "couple of minutes per side" easy; I never knew that before or I would have done this sooner.
So, I figured I'd try to prep the pieces a little. Only realized at this point that the main pieces are plastic (for some reason, I had thought they were alumininum). So, the SEM 38373 SOLVE that I got for prep wasn't going to work. Instead, I just tried wiping them down with denatured alcohol. Kept getting more and more gunk to come off. Kept at it. When I was done and the trim pieces were smooth and gunk free, I took them into a better lit area (it was kind of dark where I was working) and... surprise, surprise! They looked great, as in "holy crap, these are good enough to just reinstall!"
I suspect what was making them look chalky was years of accumulated wax or other material that I never noticed before. I had used the WD-40 trick to try to restore them before, but that never lasted. I think the problem all along was that there was an accumulation of crud that just needed to be stripped off. And, IMHO, it's best to remove the pieces to do this, as it's much easier to wipe them down when they're off the car, and you can get to all the nasty crud that accumulated by the end joiner pieces (which, I believe, are aluminum).
Anyway, they'll go back on tonight; you'll be able to judge the success for yourself if you're at the OCIC in Wichita.
 07-11-2012, 01:04 PM
#3092
Archive Gatekeeper
Rennlist Member
Rennlist Member
Ed- will be very interested to see the pics and outcome. I have never been afraid of removing window trims, it's the reinstallation that I'm intimidated by!
Have a great time in Wichita!
Have a great time in Wichita!
07-11-2012, 01:18 PM
#3093
Addict
Rennlist Member
Rennlist Member
 (I'm hoping it's that easy.)
I know you don't have time to drive, but you really should consider flying out and joining us.
For those who can't make it: I'm sure I'll have a ton of photos to share after this event, just like last time.
07-11-2012, 03:08 PM
#3095
Three Wheelin'
 07-12-2012, 03:01 AM
#3099
Archive Gatekeeper
Rennlist Member
Rennlist Member
Passed a beautiful granite green 87-89 S4 on 5S in Santa Ana, coming back from the hospital. Haven't passed one 'out in the wild' in a long time.
07-12-2012, 01:04 PM
#3100
Addict
Rennlist Member
Rennlist Member
07-13-2012, 07:38 PM
#3101
Rennlist Member
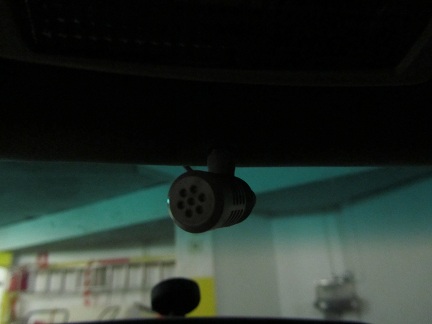
Installed external microphone for hands-free calling via head unit (already had put the wiring in place some days ago):
Will drive a lot during tomorrow
Will drive a lot during tomorrow
07-13-2012, 08:22 PM
#3102
Addict
Lifetime Rennlist
Member
Lifetime Rennlist
Member
Complained to myself (nobody else there) about the fracking tightness of the engine bay. Not a single part or there's another part one millimeter next to it.
07-14-2012, 06:14 PM
#3103
Pro
Join Date: Dec 2010
Location: Palgrave, Ontario, Canada
Posts: 700
Likes: 0
Received 2 Likes
on
2 Posts
...in anticipation of painting my rear quarter trim pieces; they had become really chalky in places and generally looked crummy.
So last Wednesday or Thursday, I looked at the trim and was getting ready to mask it for prep and painting. Upon inspection, though, I noticed that it might be easy to remove the trim. Played with the little joiner end pieces and noticed they are easy to remove (I got photos, but I'll have to wait until later to share them). And then the main pieces are easy to remove, too. So... once you know this, rear quarter window trim removal turns out to be very easy, like a "couple of minutes per side" easy; I never knew that before or I would have done this sooner.
So, I figured I'd try to prep the pieces a little. Only realized at this point that the main pieces are plastic (for some reason, I had thought they were alumininum)...
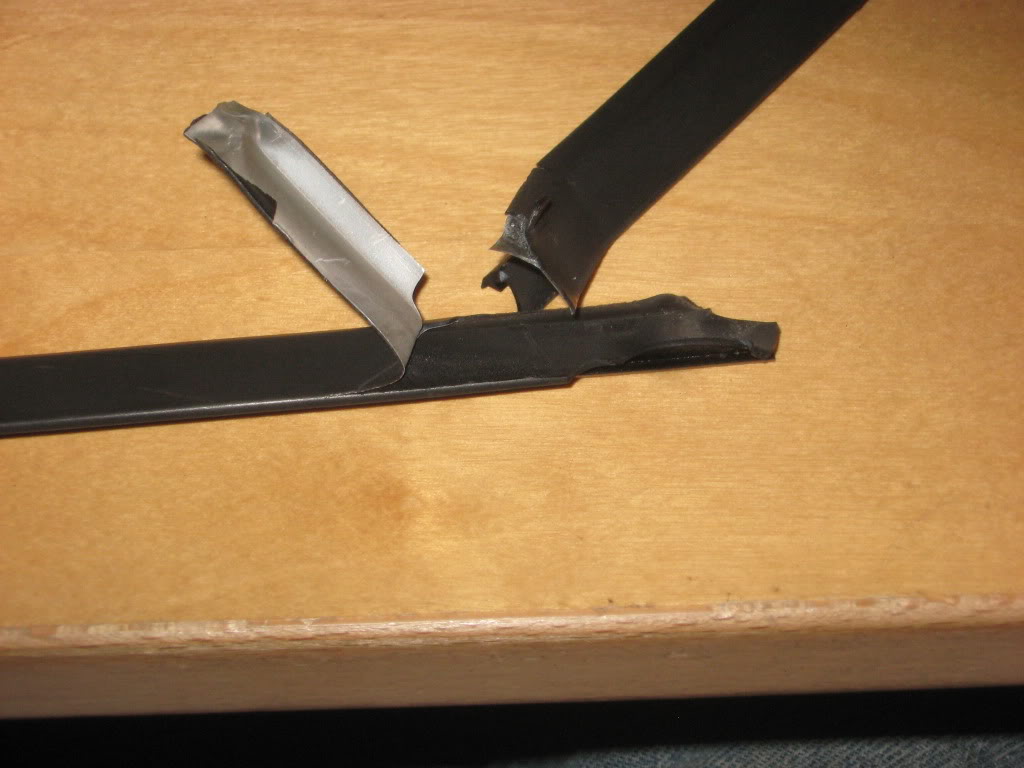
As for replacing them - it is easy provided you lubricate the spline.
07-14-2012, 06:49 PM
#3104
Rennlist Member
Join Date: Dec 2011
Location: Sunny South Florida
Posts: 374
Likes: 0
Received 0 Likes
on
0 Posts
Finally had the time to replace my catalytic converter with the bypass pipe I acquired (thanks G Man  ).
).
Found the O2 sensor wasn't connected at the cat..wire pulled up easily (can explain the idle issue I had?). Replaced it with a new Bosch unit. Fired her up, sounds better, adjusted the idle and smooth as silk now!!
Found she is a bit more responsive now
).Found the O2 sensor wasn't connected at the cat..wire pulled up easily (can explain the idle issue I had?). Replaced it with a new Bosch unit. Fired her up, sounds better, adjusted the idle and smooth as silk now!!
Found she is a bit more responsive now
07-15-2012, 06:32 AM
#3105
Rennlist Member
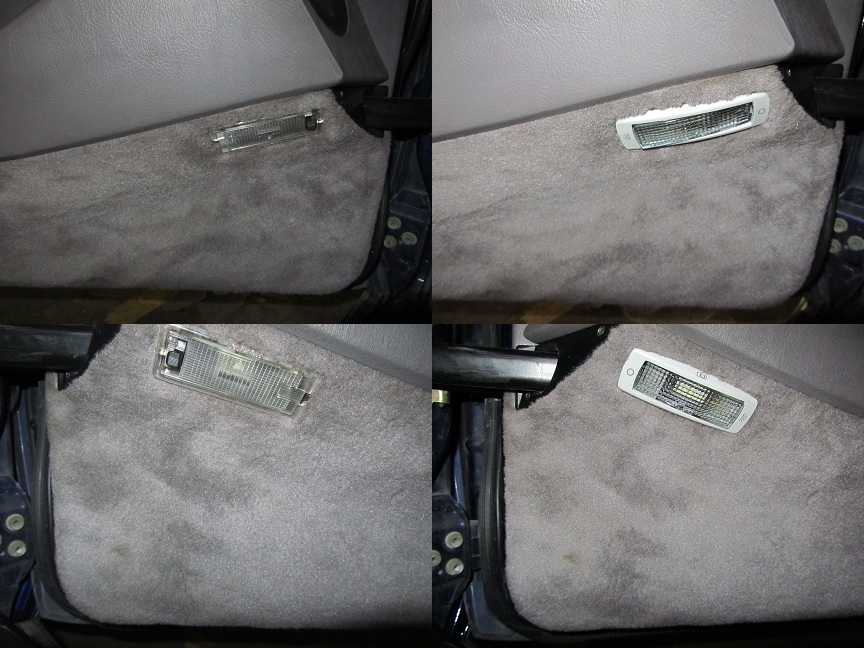
Yesterday actually...Completing what is one of my last interior cosmetic modifications, so to concentrate on interesting "go faster" engine stuff in the weeks to come (for which I will do pre- and post-dyno checks, and then post results here).
So to match the already long time ago changed three (3) interior roof lights, finally did the door's too. Changed these too so to take a larger 42mm (LED) bulb, as well as soldering my own pig-tail onto it (as I do not like connectors that connect to connectors that...):
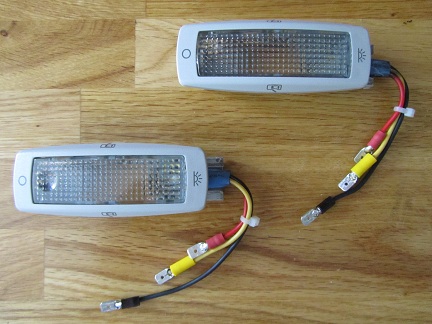
(for which I will do pre- and post-dyno checks, and then post results here).So to match the already long time ago changed three (3) interior roof lights, finally did the door's too. Changed these too so to take a larger 42mm (LED) bulb, as well as soldering my own pig-tail onto it (as I do not like connectors that connect to connectors that...):