
So what did you do to your 928 Today......
 01-29-2012, 07:35 AM
#2191
Instructor
Join Date: Aug 2010
Location: Tasmania
Posts: 246
Likes: 0
Received 0 Likes
on
0 Posts
Drove it 200km on a very hot day and avoided multiple head on`s with crazy motor bike riders overtaking on double white lines.. had a swim, got back in, drove it back, again avoiding multiple head on`s with motorcyclists only to be stopped just of north of Copping where 2 Ambulances we`re attending to a ... motorcyclist that hit a car that was towing a boat... Ive never seen it as bad as that in over 30 years of going down to the Tasman Peninsula. There are some seriosuly over confident Motorcyclists out there, stay away from my beautiful 928...
 01-29-2012, 11:36 AM
#2192
Rennlist Member
..... nothing more than a gentle touch on the fender (ditto for the Carrera) to comfort them in hibernation as I walked by to finish up the TB/WP R&R on the 1.8T Passat: perfect as they sit ...
01-29-2012, 05:33 PM
#2194
Rennlist Member
Going back to factory springs with my Bilstein shocks (currently paired with Eibachs). Step one is to disassemble the old Boge factory coilovers. Got the rears cleaned up and taken apart today, noticed the springs are blue color coded (three stripes).
EDIT: Finished up with all four coilovers completely disassembled. Front springs were brown color coded (three stripes). The old Boges will be tossed in the trash. Removed previous picture of the rear springs, replaced with the full set.
EDIT: Finished up with all four coilovers completely disassembled. Front springs were brown color coded (three stripes). The old Boges will be tossed in the trash. Removed previous picture of the rear springs, replaced with the full set.
Last edited by JWise; 01-29-2012 at 11:03 PM.
01-29-2012, 07:39 PM
#2195
Three Wheelin'
Join Date: Feb 2004
Location: Jacksonville and sometimes St. Aug Beach, FL
Posts: 1,727
Received 341 Likes
on
171 Posts
Drained the gas tank in hopes of replacing internal fuel pump with Strainer and replacing Fuel Filter...
The strongest mechanic in the world tightened down the fuel filter inlet line from the fuel pump to the point it cannot be removed.
More parts (including hardline) being ordered tomorrow
The strongest mechanic in the world tightened down the fuel filter inlet line from the fuel pump to the point it cannot be removed.
More parts (including hardline) being ordered tomorrow
01-29-2012, 07:48 PM
#2196
Drifting
First I started cleaning but then
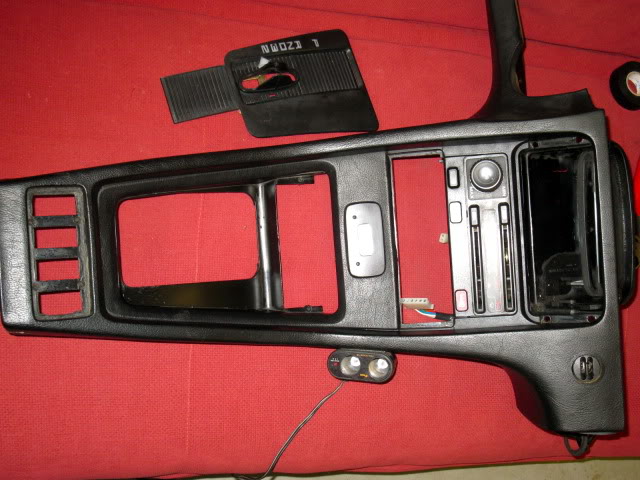
I decided to do something about the chipped up temp sensor
so I pulled it out and ground the chipped edges off with the grinder
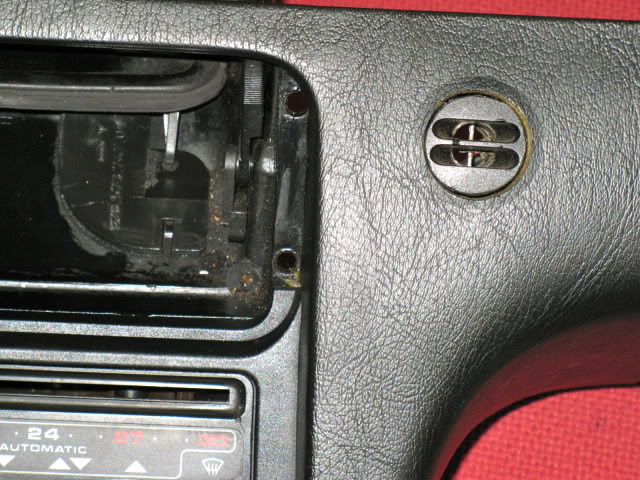
using black tape stops it from sliding to deep in the hole but now I can glue what ever I want to it to trim it out.
I might buy one of the expensive $50 trim peaces down the road.
Next I noticed that the vent seems to not close right as it seems to be oblong or warped.
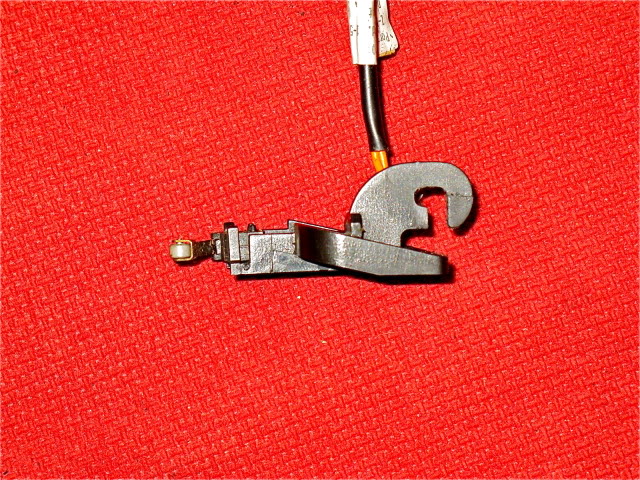
I removed the micro switch as it seemed to be stopping the vent from closing properly.
As you can see there is no adjustment
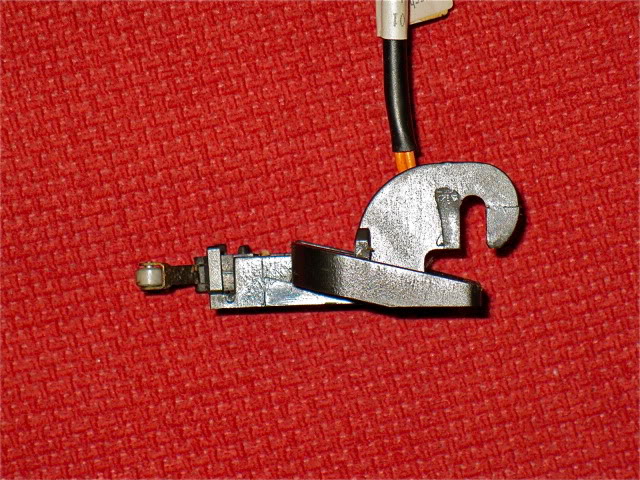
so I decided to notch it and make an adjustment.
That helped a bit and the switch still activates.
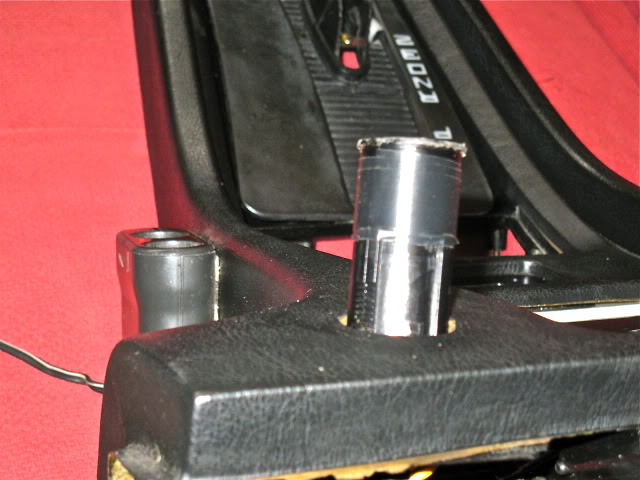
But I believe the vent opening part of the console was to badly twisted and the flap could not seal.
So I took it apart and saw that the bushings on each side could be cut down to allow the flap to center
normal bushing shape
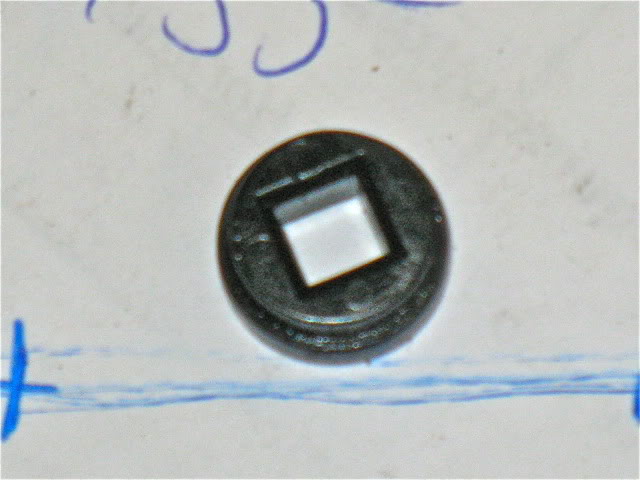
cut down bushings. 1 on each side.
This allows the bushing to shift and the flap to center and seal.
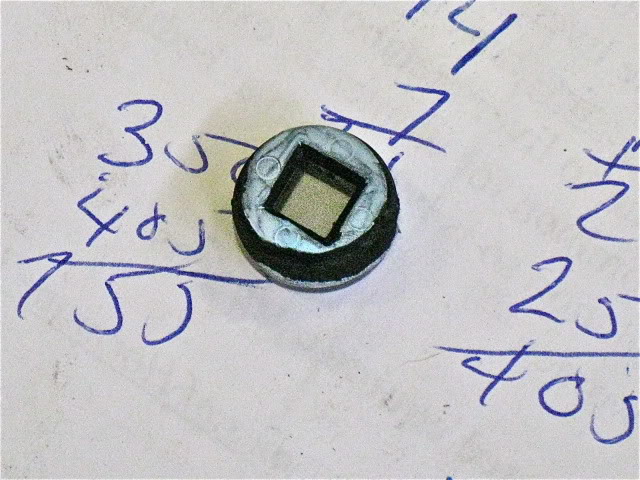
These are temp fixes that will work so that you do not need to buy new all the time.
Brad
I decided to do something about the chipped up temp sensor
so I pulled it out and ground the chipped edges off with the grinder
using black tape stops it from sliding to deep in the hole but now I can glue what ever I want to it to trim it out.
I might buy one of the expensive $50 trim peaces down the road.
Next I noticed that the vent seems to not close right as it seems to be oblong or warped.
I removed the micro switch as it seemed to be stopping the vent from closing properly.
As you can see there is no adjustment
so I decided to notch it and make an adjustment.
That helped a bit and the switch still activates.
But I believe the vent opening part of the console was to badly twisted and the flap could not seal.
So I took it apart and saw that the bushings on each side could be cut down to allow the flap to center
normal bushing shape
cut down bushings. 1 on each side.
This allows the bushing to shift and the flap to center and seal.
These are temp fixes that will work so that you do not need to buy new all the time.
Brad
01-29-2012, 07:56 PM
#2198
Rennlist Member
Before and after? i don't get the brace bar.
I for one decided to go to get some beer in the 928. Detoured by home depot for some house lights. burned lots of fuel. ford contour fan 30amp fuse blew. So had to speed to keep the airflow up so no overheating.
Okay, something for the to do list.
I for one decided to go to get some beer in the 928. Detoured by home depot for some house lights. burned lots of fuel. ford contour fan 30amp fuse blew. So had to speed to keep the airflow up so no overheating.
Okay, something for the to do list.
01-30-2012, 09:45 AM
#2199
Pro
Join Date: May 2003
Location: Hamilton, Ontario, Canada
Posts: 700
Received 0 Likes
on
0 Posts
Removed right bank of heads to check the head gasket while the engine is on the stand. Good thing, gasket was corroding and quite a bit of carbon build up. I am thinking that I will do one bank at a time so that I don't get the two banks mixed up. Lots of little baggies for the top hat valves. Not sure if I will remove the valves at this point. I will check for leakage, then determine next steps.
01-30-2012, 10:36 AM
#2200
Rest in Peace
Rennlist Member
Rennlist Member
Join Date: May 2006
Location: Bird lover in Sharpsburg
Posts: 9,903
Likes: 0
Received 2 Likes
on
2 Posts
Removed right bank of heads to check the head gasket while the engine is on the stand. Good thing, gasket was corroding and quite a bit of carbon build up. I am thinking that I will do one bank at a time so that I don't get the two banks mixed up. Lots of little baggies for the top hat valves. Not sure if I will remove the valves at this point. I will check for leakage, then determine next steps.
01-30-2012, 04:06 PM
#2201
Pro
Jim, Looks great! What did you use? I've been meaning to do the same but worried about it backfiring on me.
01-30-2012, 04:23 PM
#2202
Rennlist Member
01-30-2012, 04:34 PM
#2203
Pro
The water part scares me. Or rather, it scares my electrical connections. I guess I'll have to either be real careful or live with the dirt.
01-30-2012, 04:56 PM
#2205
Rennlist Member
And then after your done, you have a great excuse to clean your elect. connections!