What did you do to your 924/944 today

 03-05-2014, 03:19 PM
#5597
Three Wheelin'
 03-05-2014, 06:49 PM
#5598
Freedom Enthusiast
Rennlist Member
Rennlist Member

Mine is a Frankenstein setup now.
I had a 3" Lindsey Racing exhaust with a cat and Magnaflow muffler on my 86 turbo.
I decided to adapt that to the original exhaust. I used the cat and everything after it.
The front part of the S2 exhaust after the headers is one piece with the cat welded on.
I cut off the cat right in front of the weld. That left about 1" of original pipe after the front hanger. It is 2 1/4" outer diameter(OD).
I found an adapter that went from 2 1/4" inner diameter(ID) to 2 1/2" OD and a second adapter that went from 2 1/2 ID to 3" ID. I then cut a length of 3" pipe to the right length to fill the gap from my adapters to the cat.
I used band clamps like this to fit everything together.
03-05-2014, 08:11 PM
#5599
Addict
Rennlist Member
Rennlist Member
Ultrasonic #8 turbine housing cleaning today, before - after.
03-06-2014, 12:24 AM
#5601
Rainman
Rennlist Member
Rennlist Member
picked up my Kokeln-built race engine from TonyG after many shenanigans.
my van wasn't the best and his driveway is like a ramp into space, its so steep.
but its home now, awaiting a rebuild.
some hot parts from this will be available for sale soon.
my van wasn't the best and his driveway is like a ramp into space, its so steep.
but its home now, awaiting a rebuild.
some hot parts from this will be available for sale soon.
03-06-2014, 03:01 PM
#5602
Three Wheelin'
Mine is a Frankenstein setup now.
I had a 3" Lindsey Racing exhaust with a cat and Magnaflow muffler on my 86 turbo.
I decided to adapt that to the original exhaust. I used the cat and everything after it.
The front part of the S2 exhaust after the headers is one piece with the cat welded on.
I cut off the cat right in front of the weld. That left about 1" of original pipe after the front hanger. It is 2 1/4" outer diameter(OD).
I found an adapter that went from 2 1/4" inner diameter(ID) to 2 1/2" OD and a second adapter that went from 2 1/2 ID to 3" ID. I then cut a length of 3" pipe to the right length to fill the gap from my adapters to the cat.
I used band clamps like this to fit everything together. http://www.amazon.com/SmartParts-120...ust+Band+Clamp
03-07-2014, 02:11 AM
#5603
Intermediate
Started it from sitting all winter and realized I need a new battery!
Tomorrow it gets:
1. New battery.
2. Weltmeister springs.
3. Koni struts.
4. New adapters for the Kenisis wheels
5. New Toyo proxies.
Hopefully it all goes on that easy....fingers crossed...wallet open! Hahaha I'll shoot for sunday so I'm not disappointed.
Tomorrow it gets:
1. New battery.
2. Weltmeister springs.
3. Koni struts.
4. New adapters for the Kenisis wheels
5. New Toyo proxies.
Hopefully it all goes on that easy....fingers crossed...wallet open! Hahaha I'll shoot for sunday so I'm not disappointed.
03-07-2014, 11:20 PM
#5605
Rennlist Member
Join Date: Sep 2013
Location: Mooresville, NC & Parkville, MD
Posts: 74
Likes: 0
Received 2 Likes
on
2 Posts
Crappy weather kept me out from under the hood, so I spent some time in the nice heated garage and powder coated a few more things before they go back on.
Rebuilt with the Arnworx kit and newly powdercoated throttle body
[IMG] [/IMG]
Hard pipes after a nice bath in lye, had to strip one twice becasue I forgot to take off the sticker
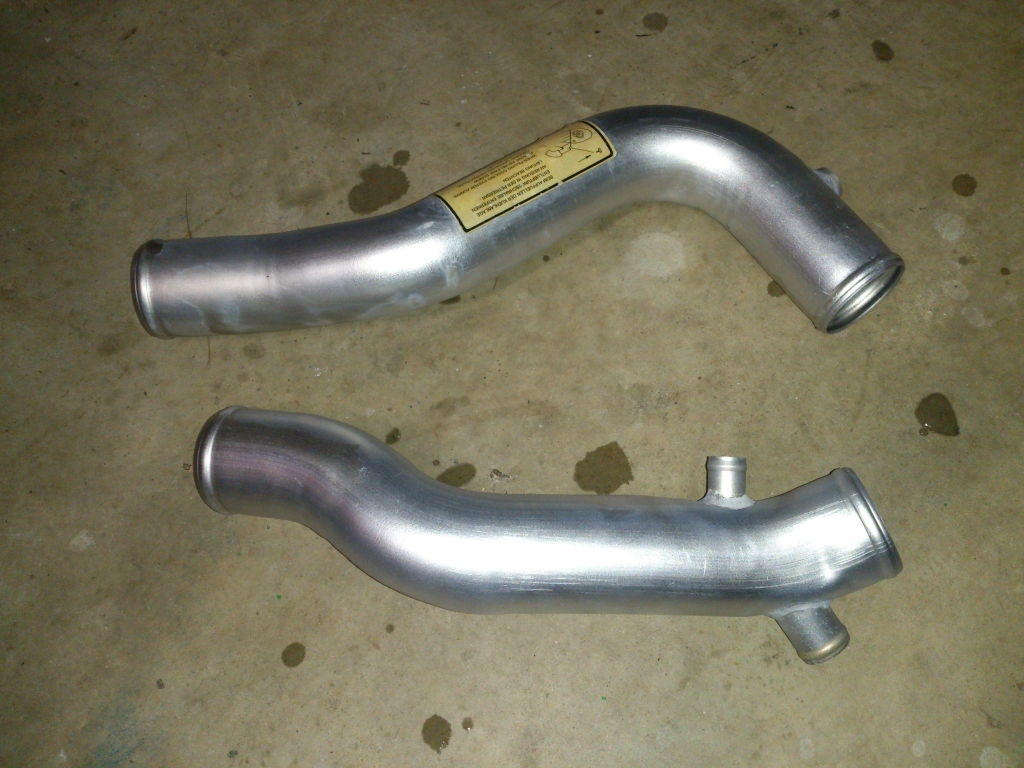
Hard pipes and water pipe after powder coat
[IMG]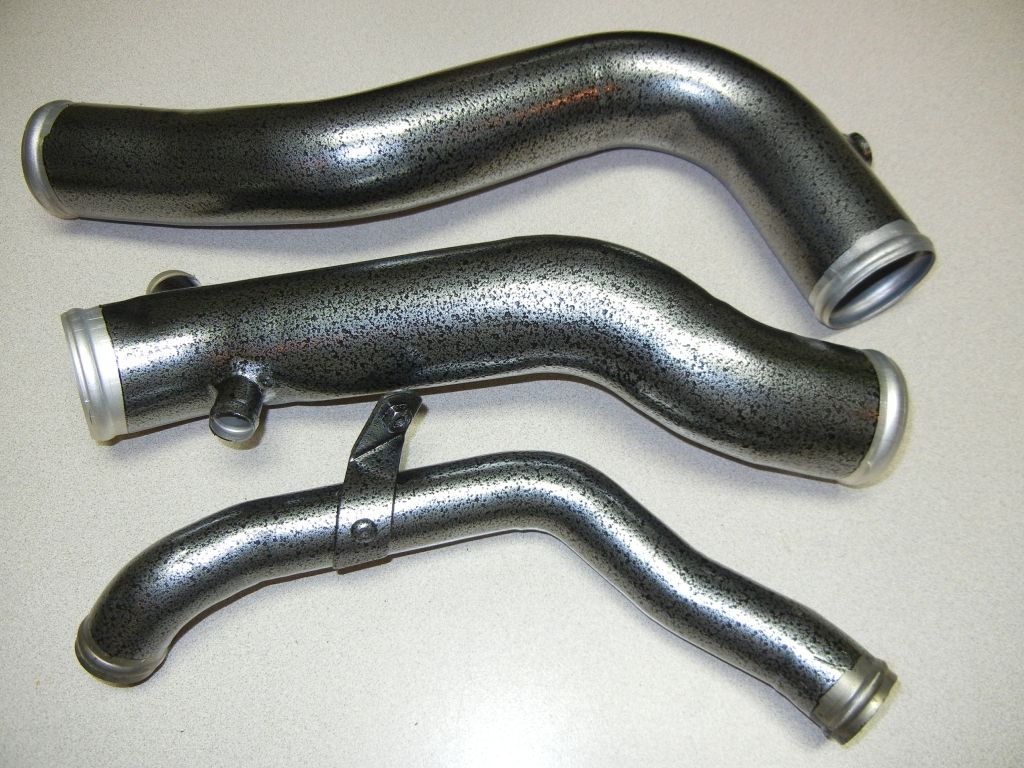 [/IMG]
Now I need to drill out the stripped cheesehead bolt, mount the new Lindsey oil cooler and the rest of the reassembly can begin.
Maybe I'll actually get to drive it again soon.
Rebuilt with the Arnworx kit and newly powdercoated throttle body
[IMG]
 [/IMG]
Hard pipes after a nice bath in lye, had to strip one twice becasue I forgot to take off the sticker

Hard pipes and water pipe after powder coat
[IMG]
 [/IMG]
Now I need to drill out the stripped cheesehead bolt, mount the new Lindsey oil cooler and the rest of the reassembly can begin.
Maybe I'll actually get to drive it again soon.
03-08-2014, 02:40 AM
#5606
Advanced

Join Date: Jun 2010
Location: a mile high in the sky
Posts: 98
Likes: 0
Received 0 Likes
on
0 Posts
Replaced the thermostat. Started on taking apart the oil cooler/oil pressure regulator/ oil pressure switch combination housing to replace gaskets. Need to take off crankshaft pulley to replace front main gasket. Need to take apart lower balancing shaft to reveal and check bearings. Also need to do this to the upper balancing shaft. Then replace all the timing pulleys. Way too much noise going on. Stethoscope revealed it not to be around the crankshaft thank god. But I am going to install a cranks reaper before I put the oil pan back on.
03-08-2014, 06:47 AM
#5607
Rennlist Member
Reinstalled the front tie rods and sway bar including replacing the inner and outer sway bar bushings.
Installed a rennbay sway bar brace.
Quite a lot of "power words" were had removing one of the inner bushings.
The bushing in question:

The inside of the bracket, after removing the old bushing:

The inside of the bracket after 20 mins with a dremel using a grinding bit:

How I remove the bushing out of an outer sway bracket:
Note: THERE IS ALWAYS TIME FOR LUBRICANT!

Installed a rennbay sway bar brace.
Quite a lot of "power words" were had removing one of the inner bushings.
The bushing in question:
The inside of the bracket, after removing the old bushing:
The inside of the bracket after 20 mins with a dremel using a grinding bit:
How I remove the bushing out of an outer sway bracket:
Note: THERE IS ALWAYS TIME FOR LUBRICANT!
03-08-2014, 07:05 AM
#5608
Addict
Rennlist Member
Rennlist Member
These are always fun to work with 
03-08-2014, 12:40 PM
#5610
Three Wheelin'
Rolled up and stored the hatch cover, installed the new front spacers, checked brake disk assembly runout and then took it for a short drive.
Cant wait to drive it more.


Cant wait to drive it more.