What did you do to your 924/944 today


 05-05-2014, 07:46 PM
#5750
Over the past week when starting my car the tach bounce has been nuts like all the way to 4k rpm, but still always started o.k. Finally my car didn't start today but it was really weird. First, it just clicked like a dead battery so I got a jump, that didn't help. Then it would crank over fine but not fire. So I changed DME relay. Then getting crazy tack bounce again and no start, then jiggled speed and reference sensors just behind manifold and bingo.
05-06-2014, 01:00 AM
#5751
Rennlist Member
Join Date: Sep 2013
Location: Mooresville, NC & Parkville, MD
Posts: 74
Likes: 0
Received 2 Likes
on
2 Posts
(yesterday) After working through timing belt, balance belt, oil cooler console, seals, rollers, hoses etc over the last month or so, finally had time to modify and install the Lindsey 3X+ cooler, put the belts, hoses, hard pipes and AFM back on, and it fired right back up with no leaks and in perfect time! Just need to flush the cooling system (oil in there), install the new thermostat, refill and drive it!
Next on the list get rid of that ugly but temporarily necessary air filter arrangement with a proper mass airflow setup and pull the manifold and cam box to replace gaskets, hoses and refinish both. for now though (barring any breakdowns) just going to drive and enjoy it for awhile.
[IMG]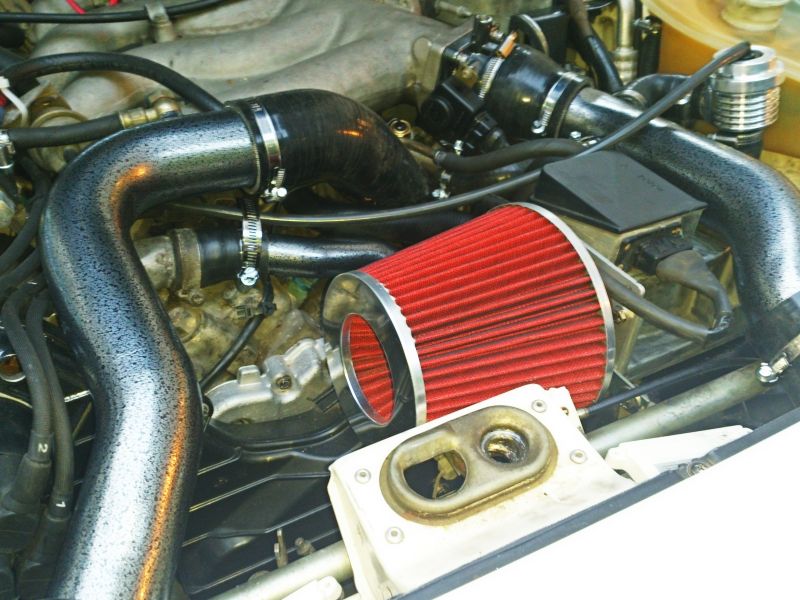 [/IMG]
Next on the list get rid of that ugly but temporarily necessary air filter arrangement with a proper mass airflow setup and pull the manifold and cam box to replace gaskets, hoses and refinish both. for now though (barring any breakdowns) just going to drive and enjoy it for awhile.
[IMG]
 [/IMG]
05-06-2014, 01:20 AM
[/IMG]
05-06-2014, 01:20 AM
#5752
Today I gaped my speed/reference sensors and notched my bellhousing to make life easier. The cut could have been cleaner, but whatever.

After that was done, I installed it along with a brand new plug for the inspection port.


Then I got down and dirty and removed my steering rack, crossmember, and engine mounts. In order to remove the rack from the crossmember I needed to remove this bolt on the rack (see pics). Of course it was stuck and I bent the **** out of my allen wrench trying to get it out. I said **** it and cut the rubber section of the hardline that went to that coiled up section under the passenger side headlight. I'm sure I can find something to replace that section with.


As expected, the passenger side engine mount was collapsed.

Hopefully I'll find a job soon so I can start buying parts. Until then I'm stuck with cleaning and painting stuff
05-10-2014, 12:24 PM
#5753
Three Wheelin'
After more than 6 years of not having windshield cleaning(intercooler pipes go where the bottle used to be), today i finally completed the conversion to a smaller bottle that fits next to the battery.
Wires needed lengthening so i made a black jacket protected pair of wires that shoe into the factory wiring. I routed the wires seamlessly so nothing is visible.
I still have to change the gasket on the bottle motor as its leaking a bit since it wasnt used for a long while, the nozzles were filled with calcar so i had to needle clean them and then blow compressed air trough them to make them work properly.
I also applied some thermal protection on the strut tower and on the rail where the exhaust manifold and turbo are.
Will take it for a drive in about half an hour.


 05-12-2014, 02:25 AM
#5758
Rennlist Member
Join Date: Jan 2014
Posts: 20
Likes: 0
Received 0 Likes
on
0 Posts
So went home for a week, which meant that I could steal my father and work on my car in his garage rather than my apartment's parking lot!
So we got the following done:
And to finish it all off we put a new exhaust system on. Straight pipe, 2.5" to a Borla muffler. It's quiet at idle and smooth when going around town, but hit the gas and she wakes up.
I grabbed a GoPro and attached it to the bumper. Watch the whole thing, it's worth it. Around 1:20 I go hard.
So we got the following done:
- Changed the transmission fluid
- Changed the oil
- Fixed the centeral locking
- Fixed the left turn indicator
- Resealed tail lights
- Fixed a broken CV joint
- New front brakes
- New front calipers
- New power steering hose
And to finish it all off we put a new exhaust system on. Straight pipe, 2.5" to a Borla muffler. It's quiet at idle and smooth when going around town, but hit the gas and she wakes up.
I grabbed a GoPro and attached it to the bumper. Watch the whole thing, it's worth it. Around 1:20 I go hard.
05-13-2014, 04:02 PM
#5759
Former Vendor
Anyone need rear pads? Have 2 sets to fit:
Porsche 928 S 1980-85 Rear
944/944 S (non-turbo) 1983-89 Rear
924 S (16V) 1985-89 Rear
924 Turbo 1978-82 Rear
RS44 street/track pads, bought for 196 - I will sell em BRAND NEW 115 - have 2 sets.
This post would get lost in the for sale section, great deal.
Porsche 928 S 1980-85 Rear
944/944 S (non-turbo) 1983-89 Rear
924 S (16V) 1985-89 Rear
924 Turbo 1978-82 Rear
RS44 street/track pads, bought for 196 - I will sell em BRAND NEW 115 - have 2 sets.
This post would get lost in the for sale section, great deal.