When you click on links to various merchants on this site and make a purchase, this can result in this site earning a commission. Affiliate programs and affiliations include, but are not limited to, the eBay Partner Network.
I want to rig something up short term to see how much oil is actually getting caught and when. Thinking I'll run a hose from accumulator to a small coolant overflow so it's visible.
I want to rig something up short term to see how much oil is actually getting caught and when. Thinking I'll run a hose from accumulator to a small coolant overflow so it's visible.
No, the drain plug on the UAOS Accumulator is a 1/2-13 thread, commonly used on Mercury Marine engines on exhaust coolant and block coolant drains.
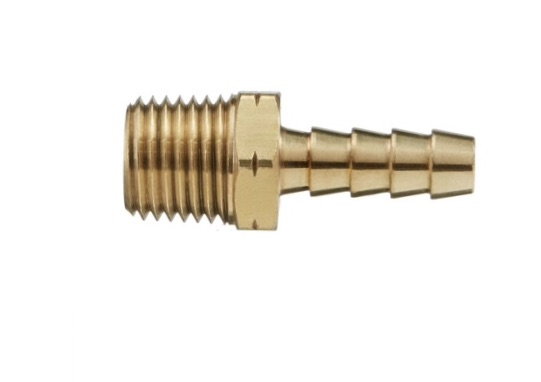
Currently I'm using the Nylon brain plug and drilling and threading the center with 1/8npt threads and installing a similar fitting, but with 1/8npt to 1/4 barbed sizes.
If your going to use a temporary clear catch can mounted lower off to the side, remember that it must be sealed !!
No, the drain plug on the UAOS Accumulator is a 1/2-13 thread, commonly used on Mercury Marine engines on exhaust coolant and block coolant drains.
Currently I'm using the Nylon brain plug and drilling and threading the center with 1/8npt threads and installing a similar fitting, but with 1/8npt to 1/4 barbed sizes.
If your going to use a temporary clear catch can mounted lower off to the side, remember that it must be sealed !!
K... I was going to use a coolant expansion tank - so should be sealed up.
My nylon drain plug is a wing nut... didn't think to modify it to accept a fitting but I don't see why I can't.
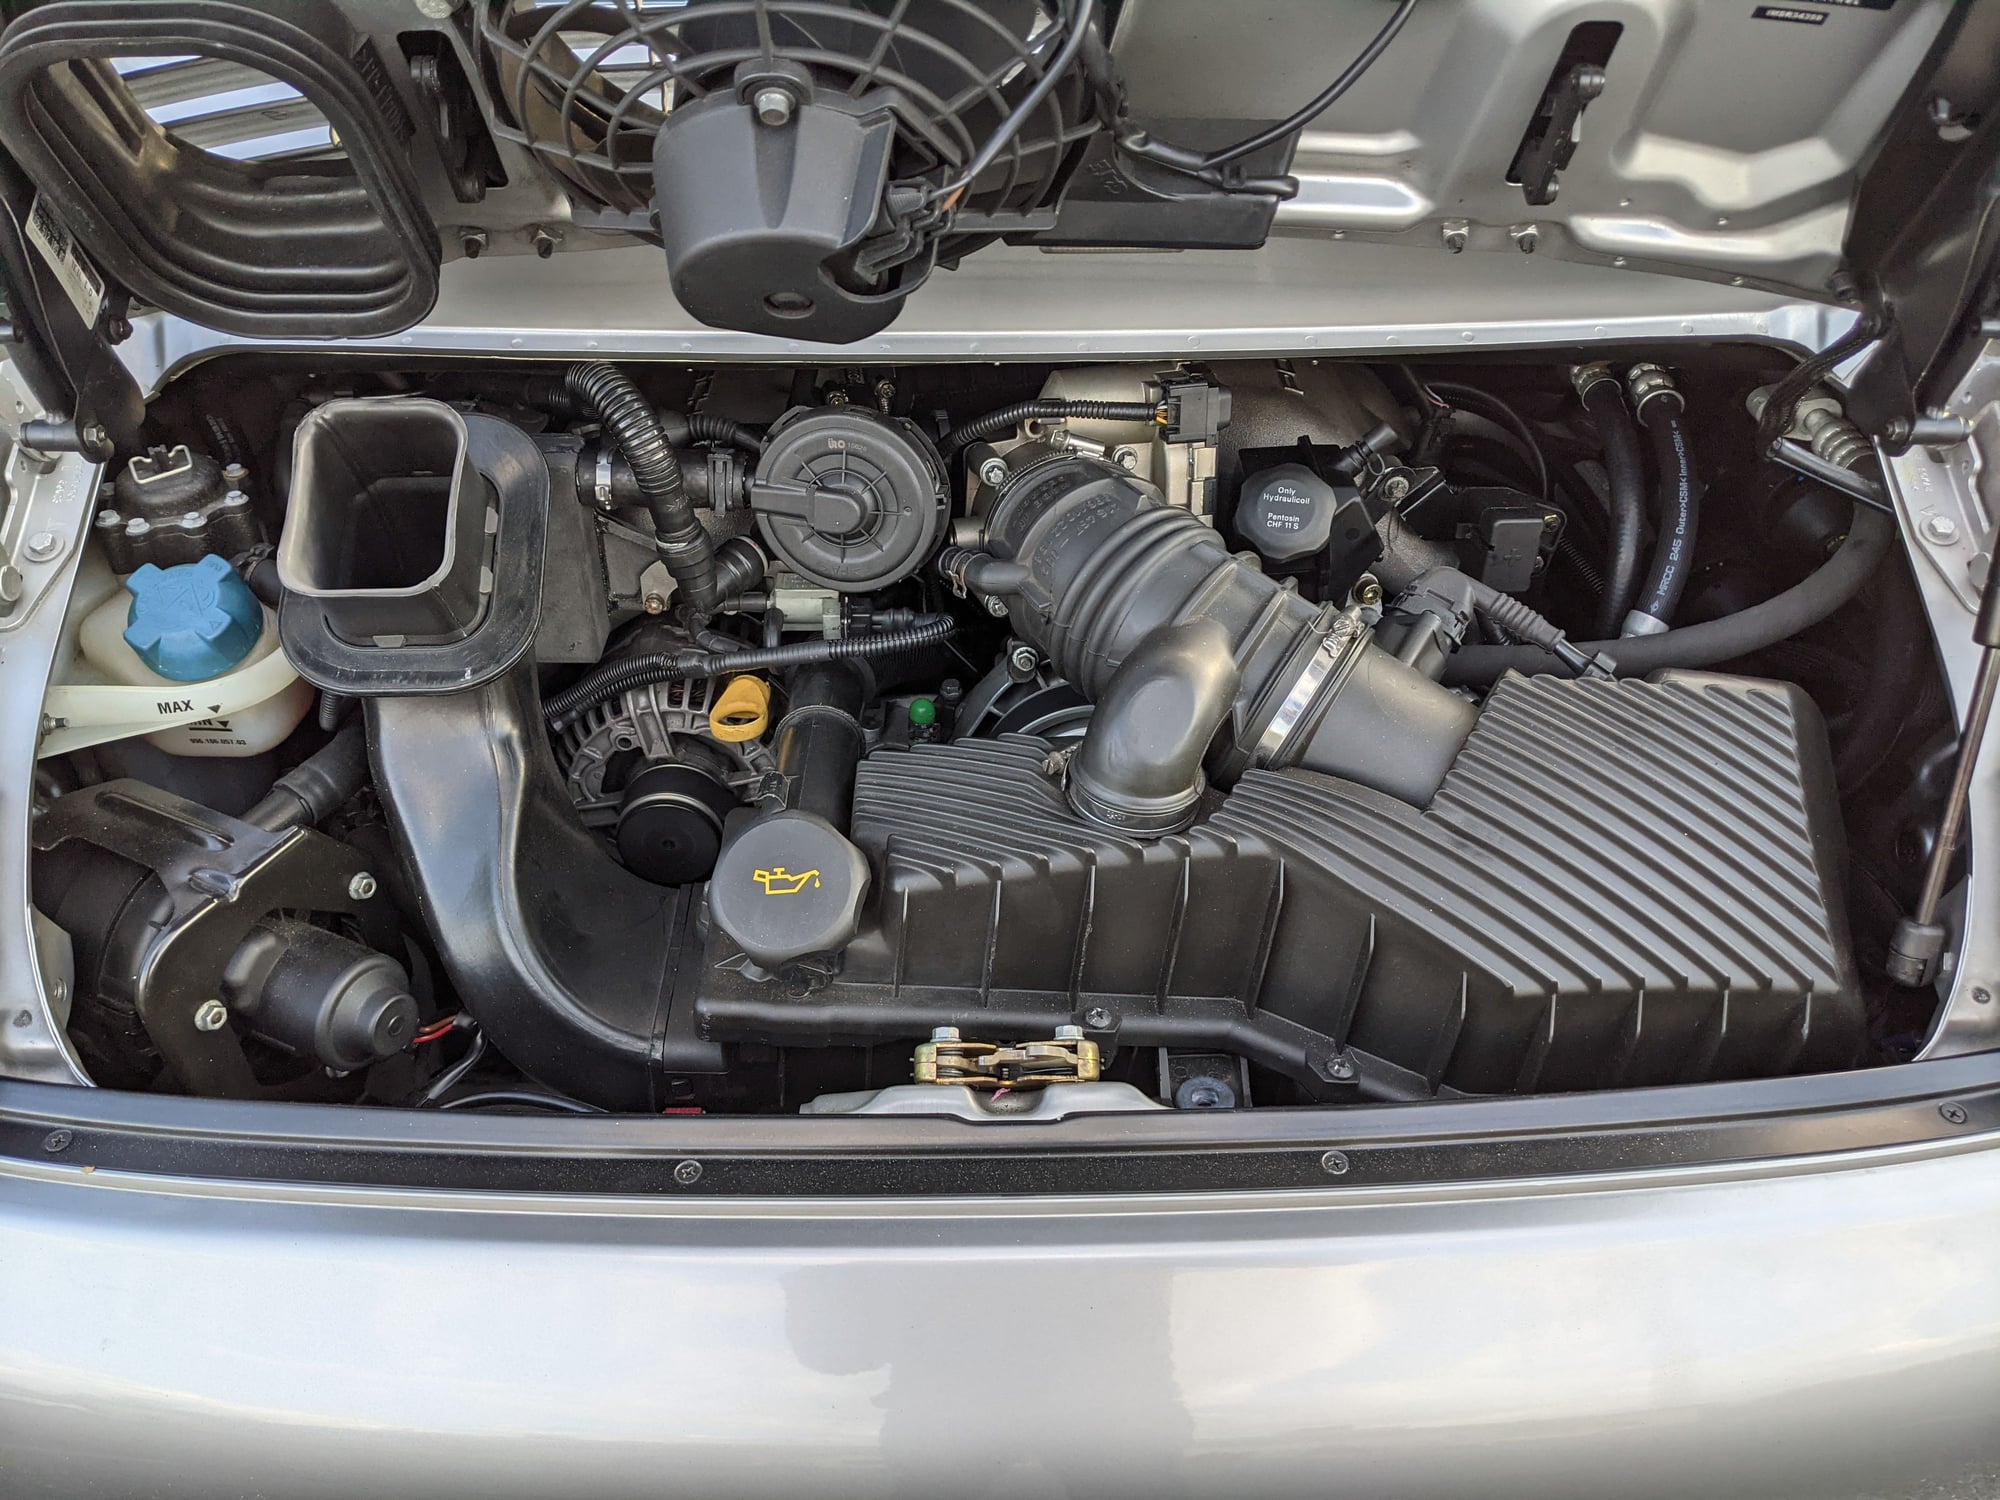
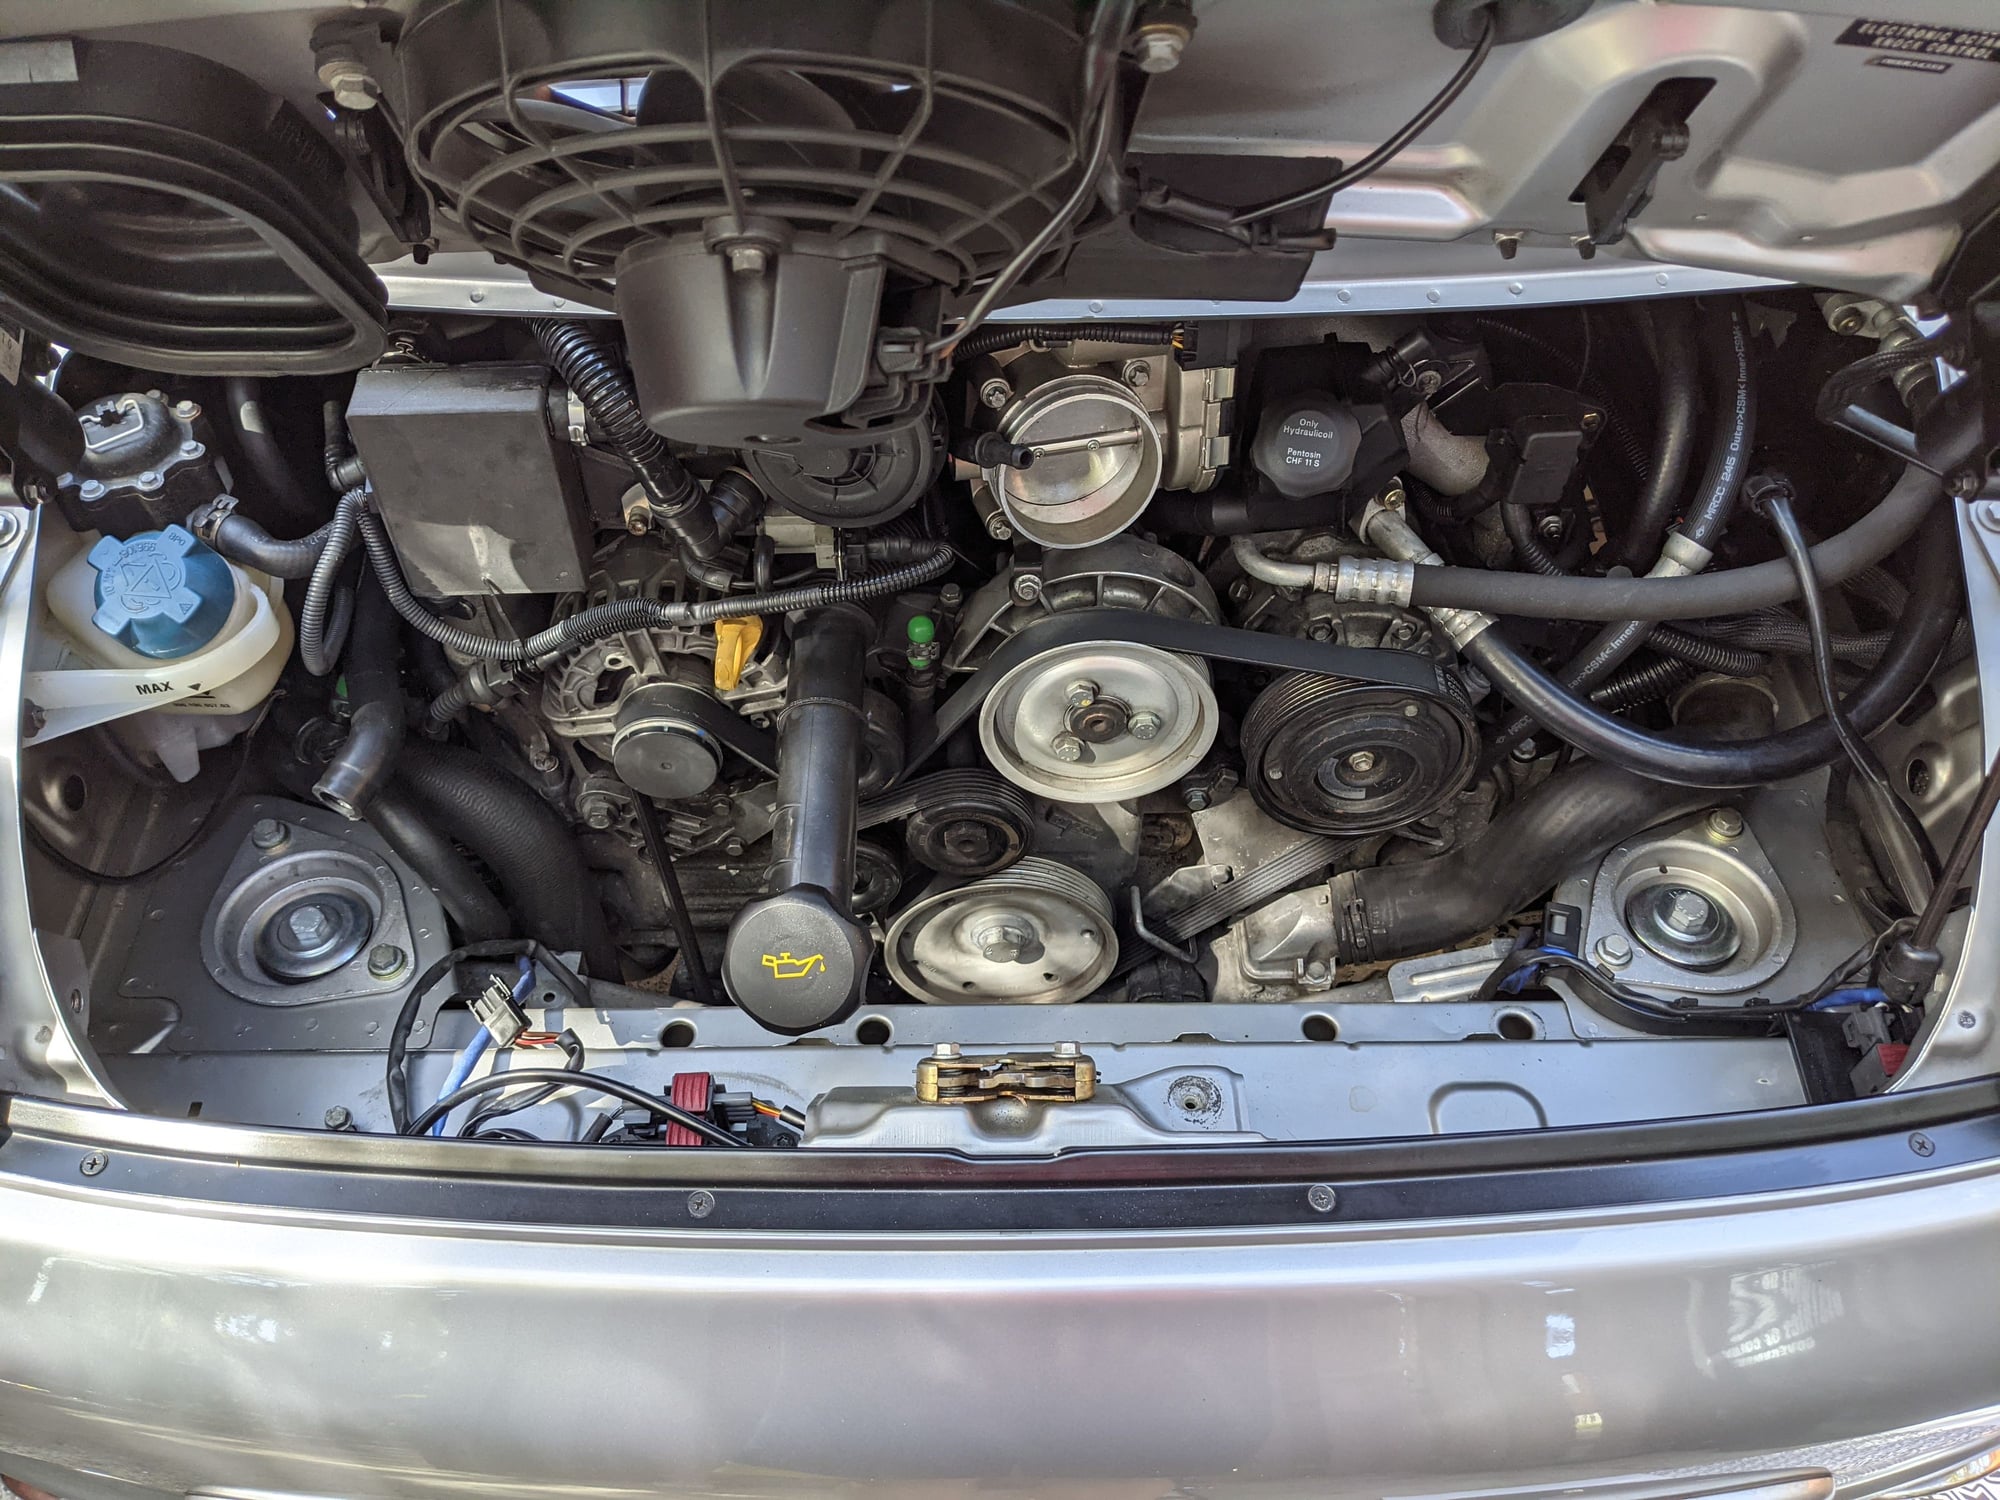
This thread was super useful in getting my UAOS installed, although I'll say it's a bit light on good photos. I think the job is very doable as a DIY but having some visual cues may help those that want to tackle this. Below is how my install went. This is specific to an X51 engine found in my 40th anniversary car but most of it will apply to regular M96 too. For .1 cars your AOS may look a bit different and the throttle body may be cable actuated.
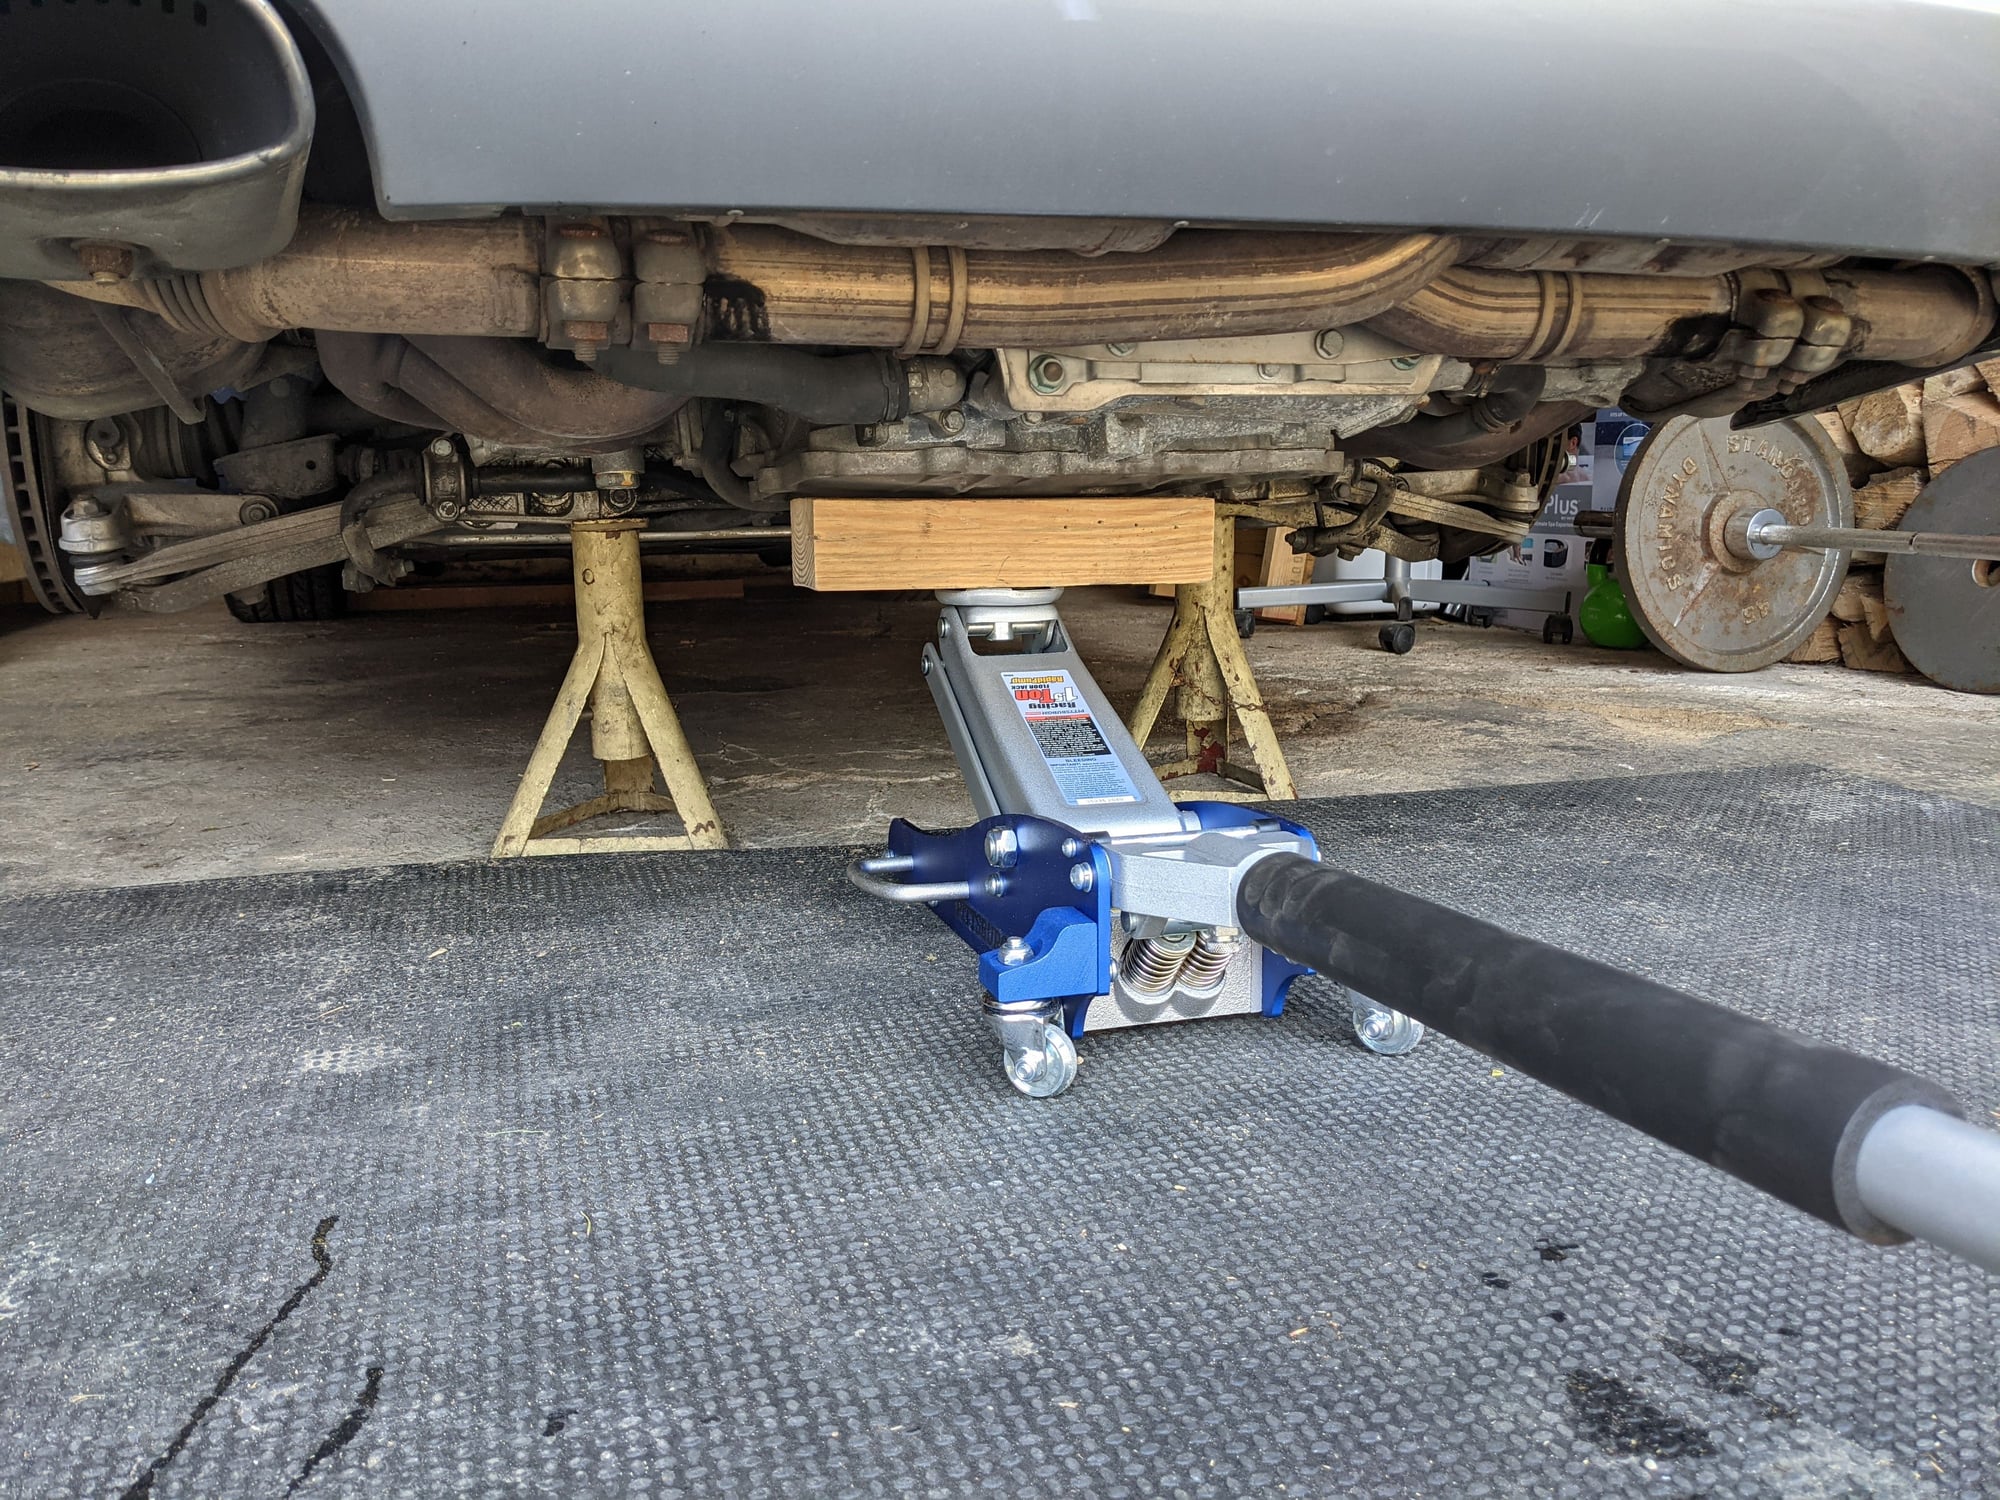
1. Get the rear of the car raised on jack stands and remove the rear wheels. I placed the jack stands at both end of the rear crossmember. Once you have the car raised and secured go ahead and remove the air box. Don't forget to unplug the MAF sensor! Also, disconnect the battery.
2. Next we will want to slightly lower the engine but first you'll need to disconnect the O2 sensors. There is a total of 4 connectors, 2 on each side. They pull up from the bracket and unclip. With that said, keep in mind that all connectors and plastic is old and easy to snap so be gentle.
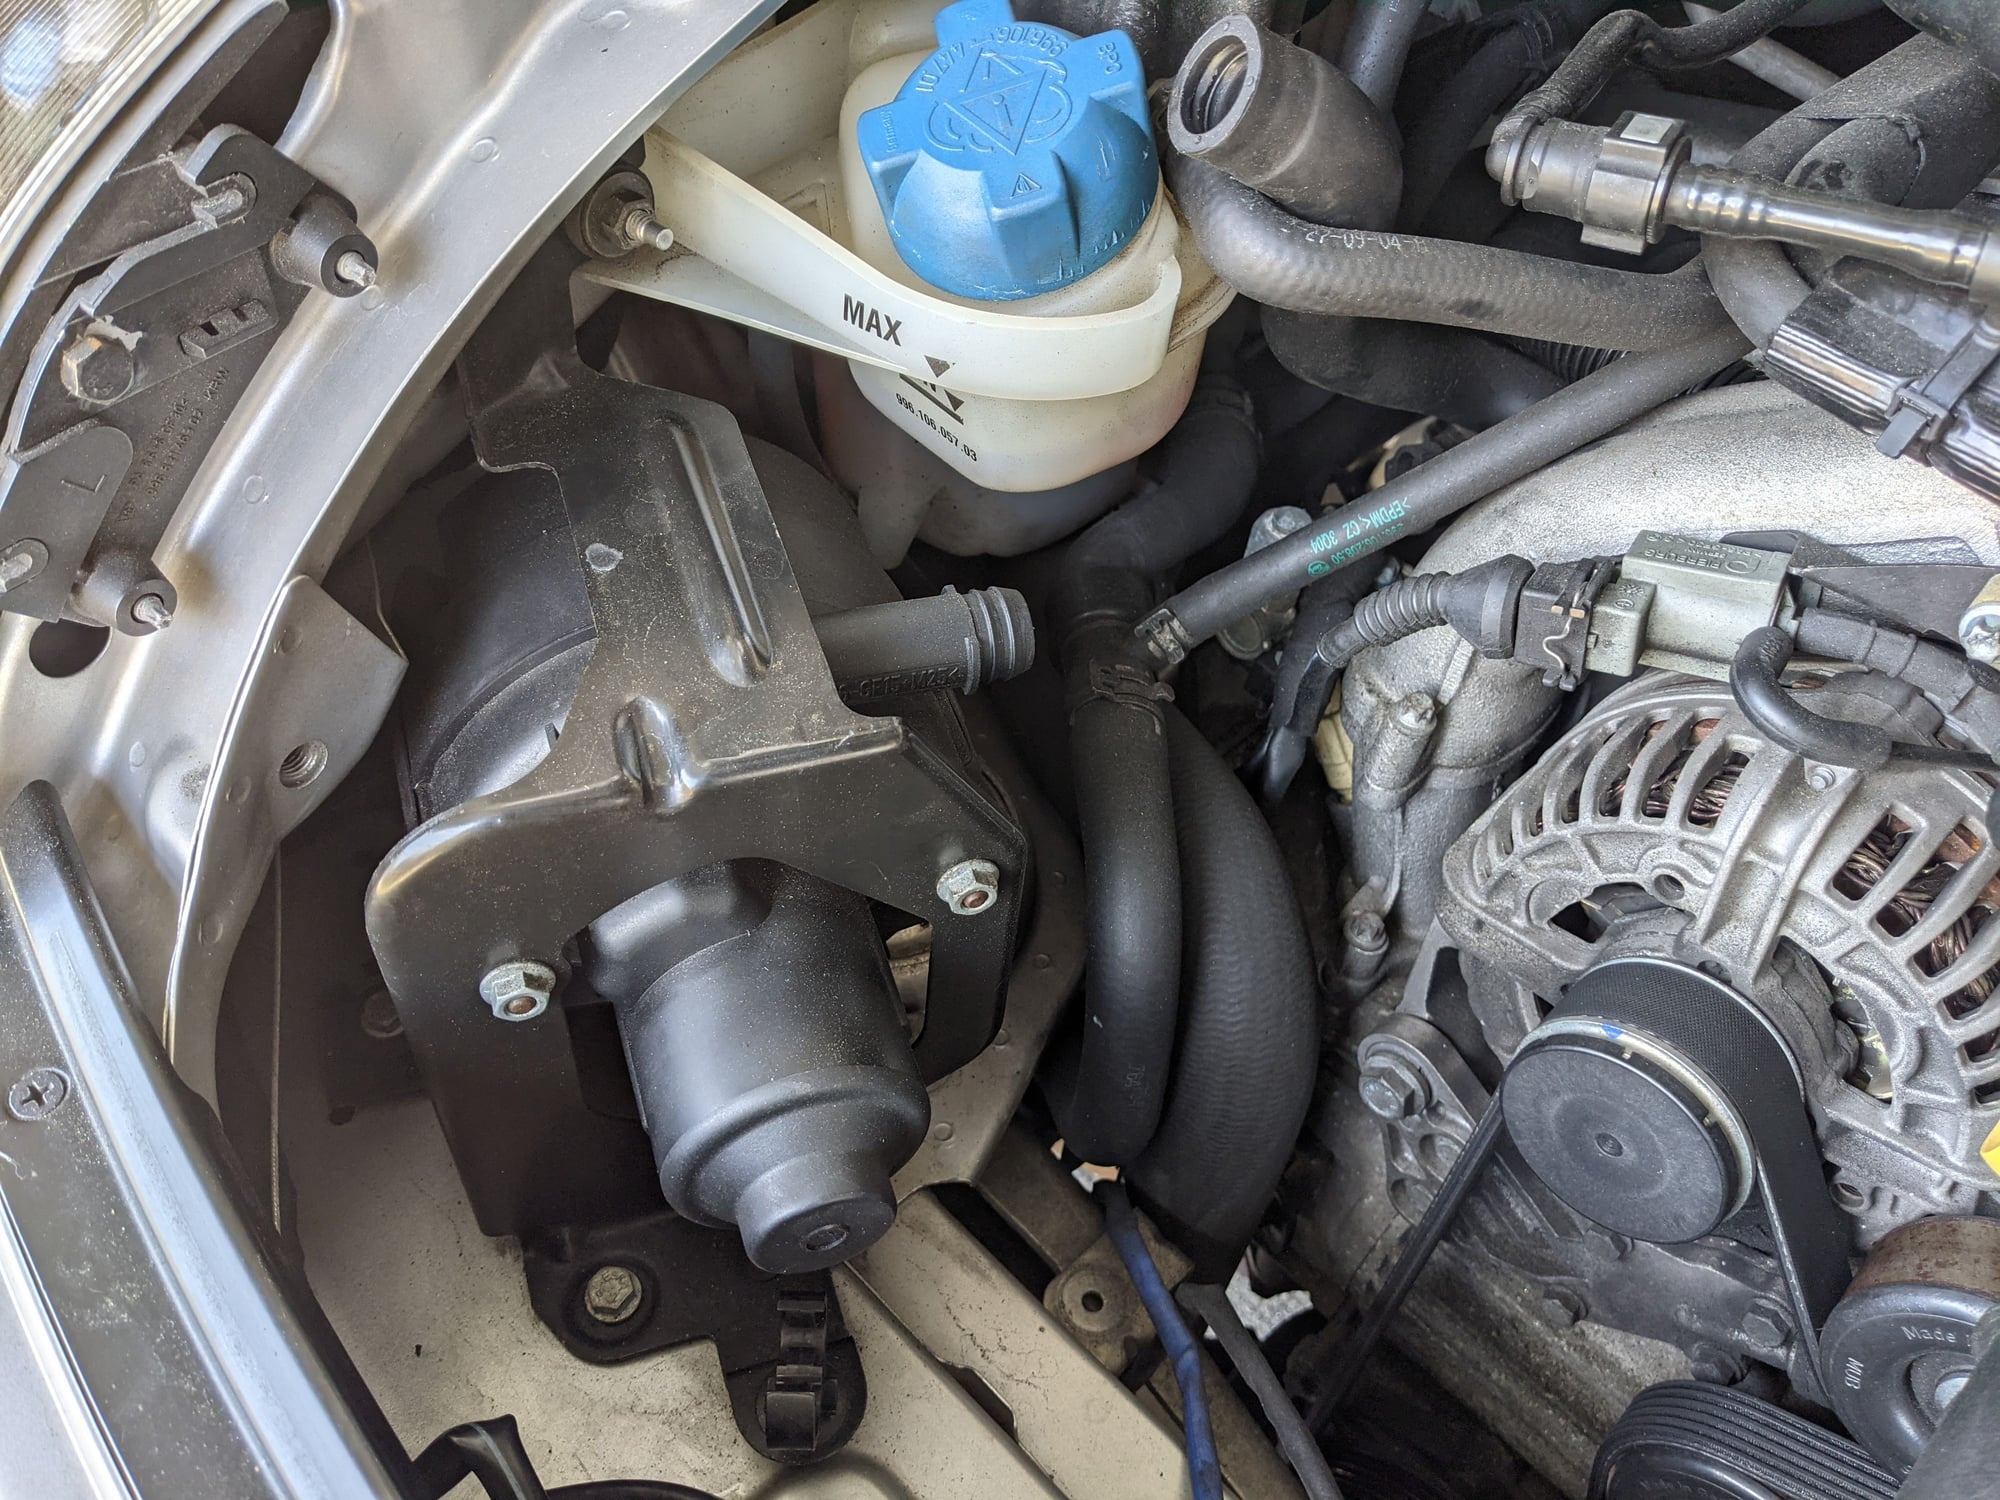
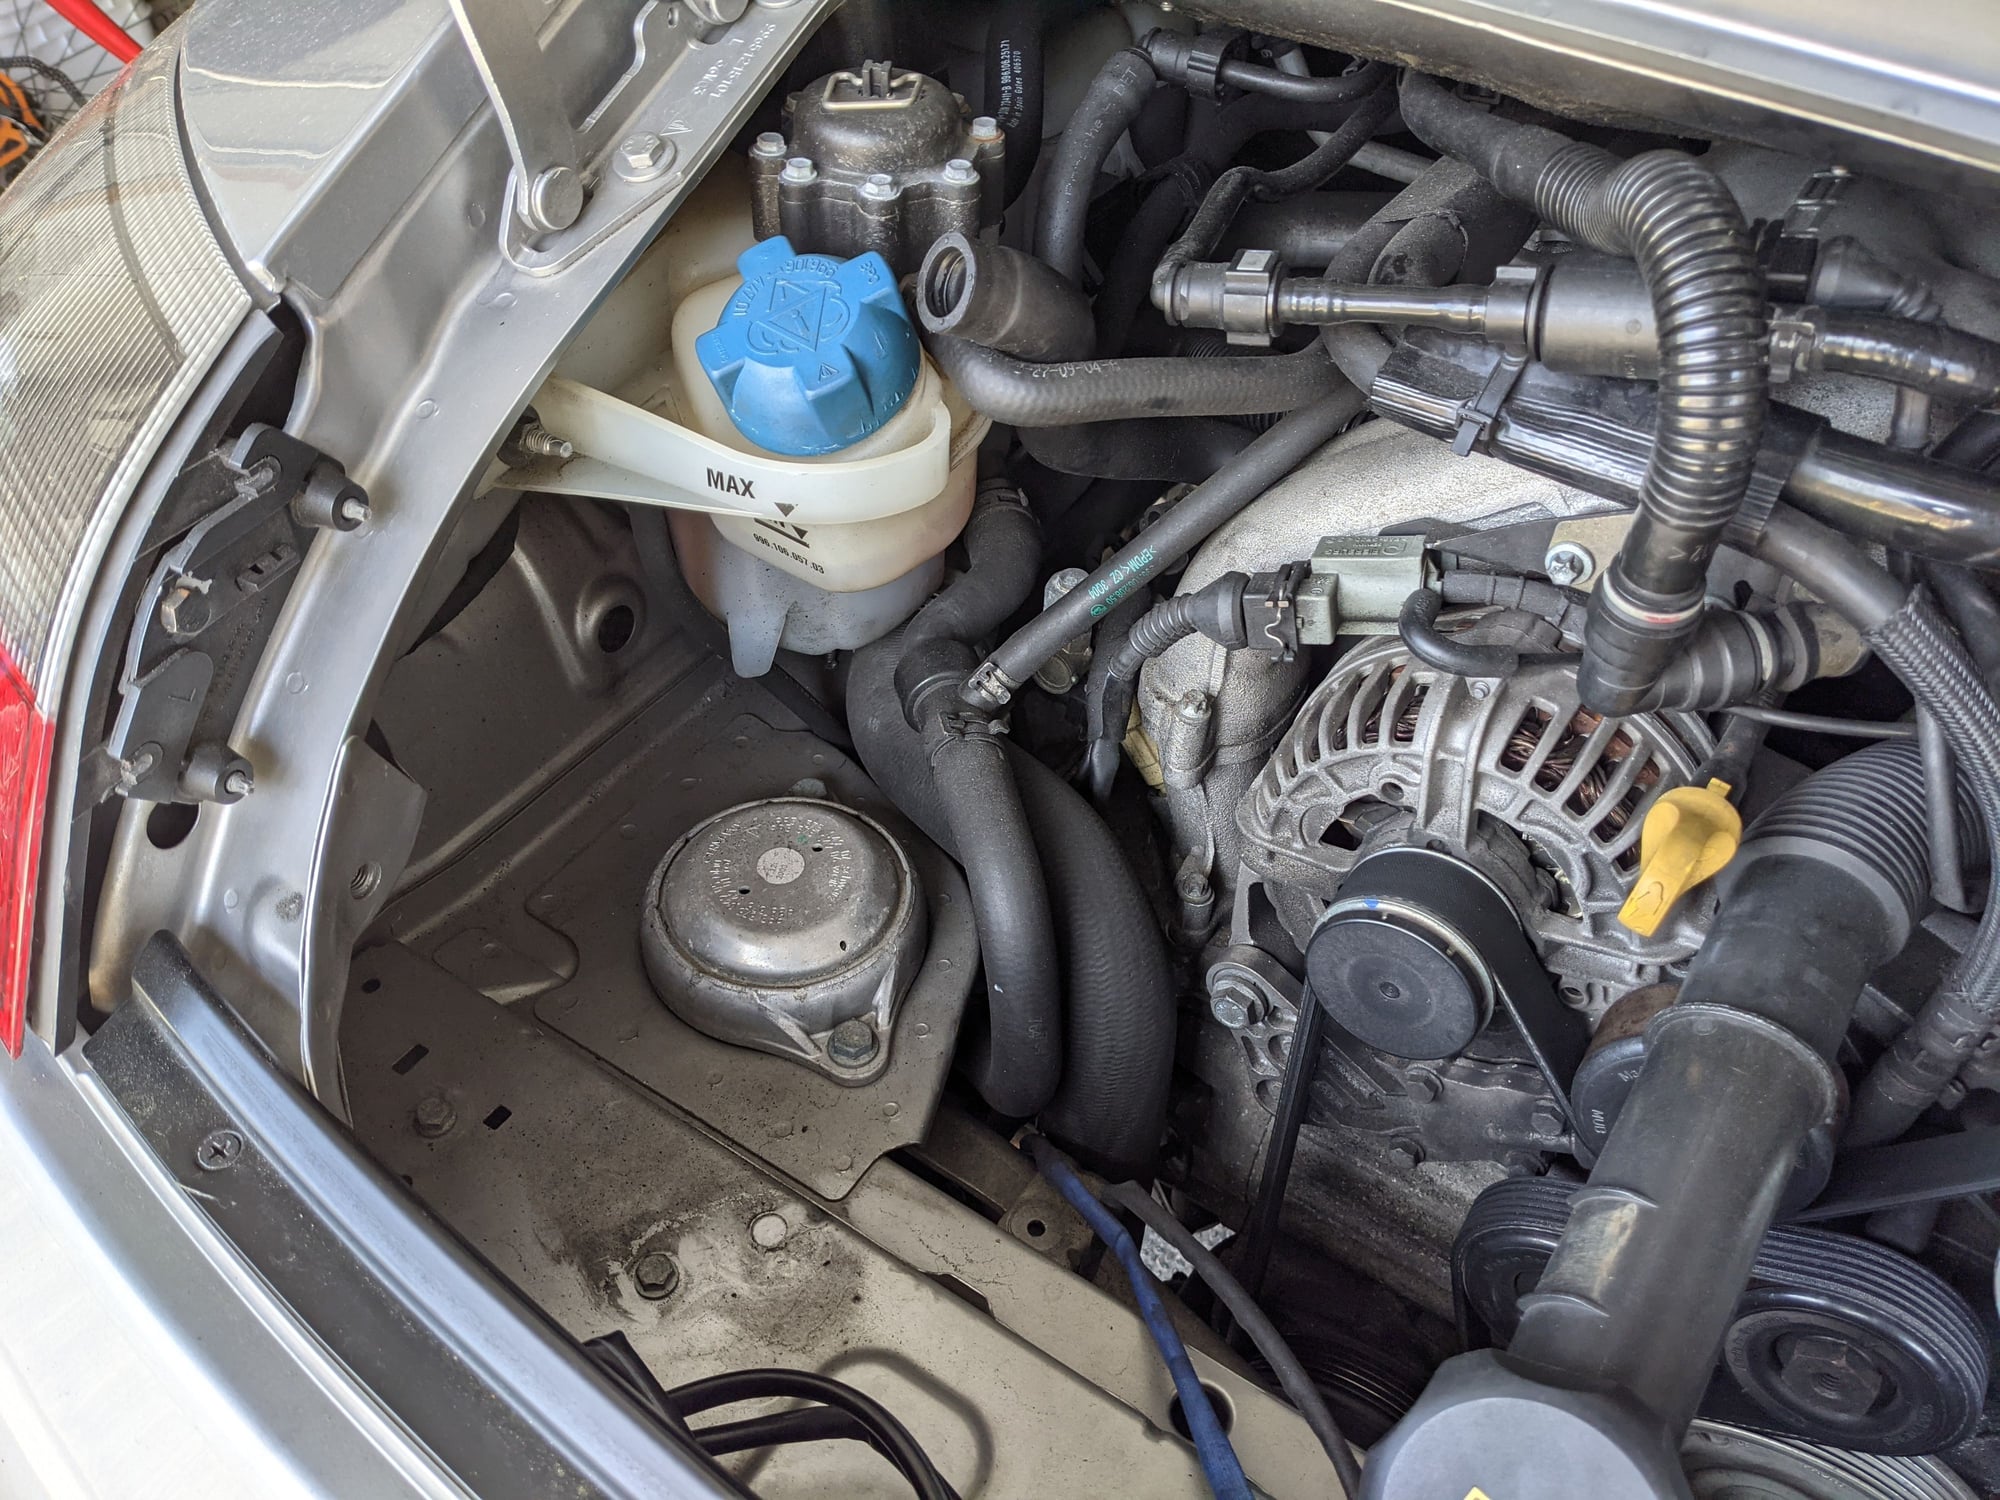
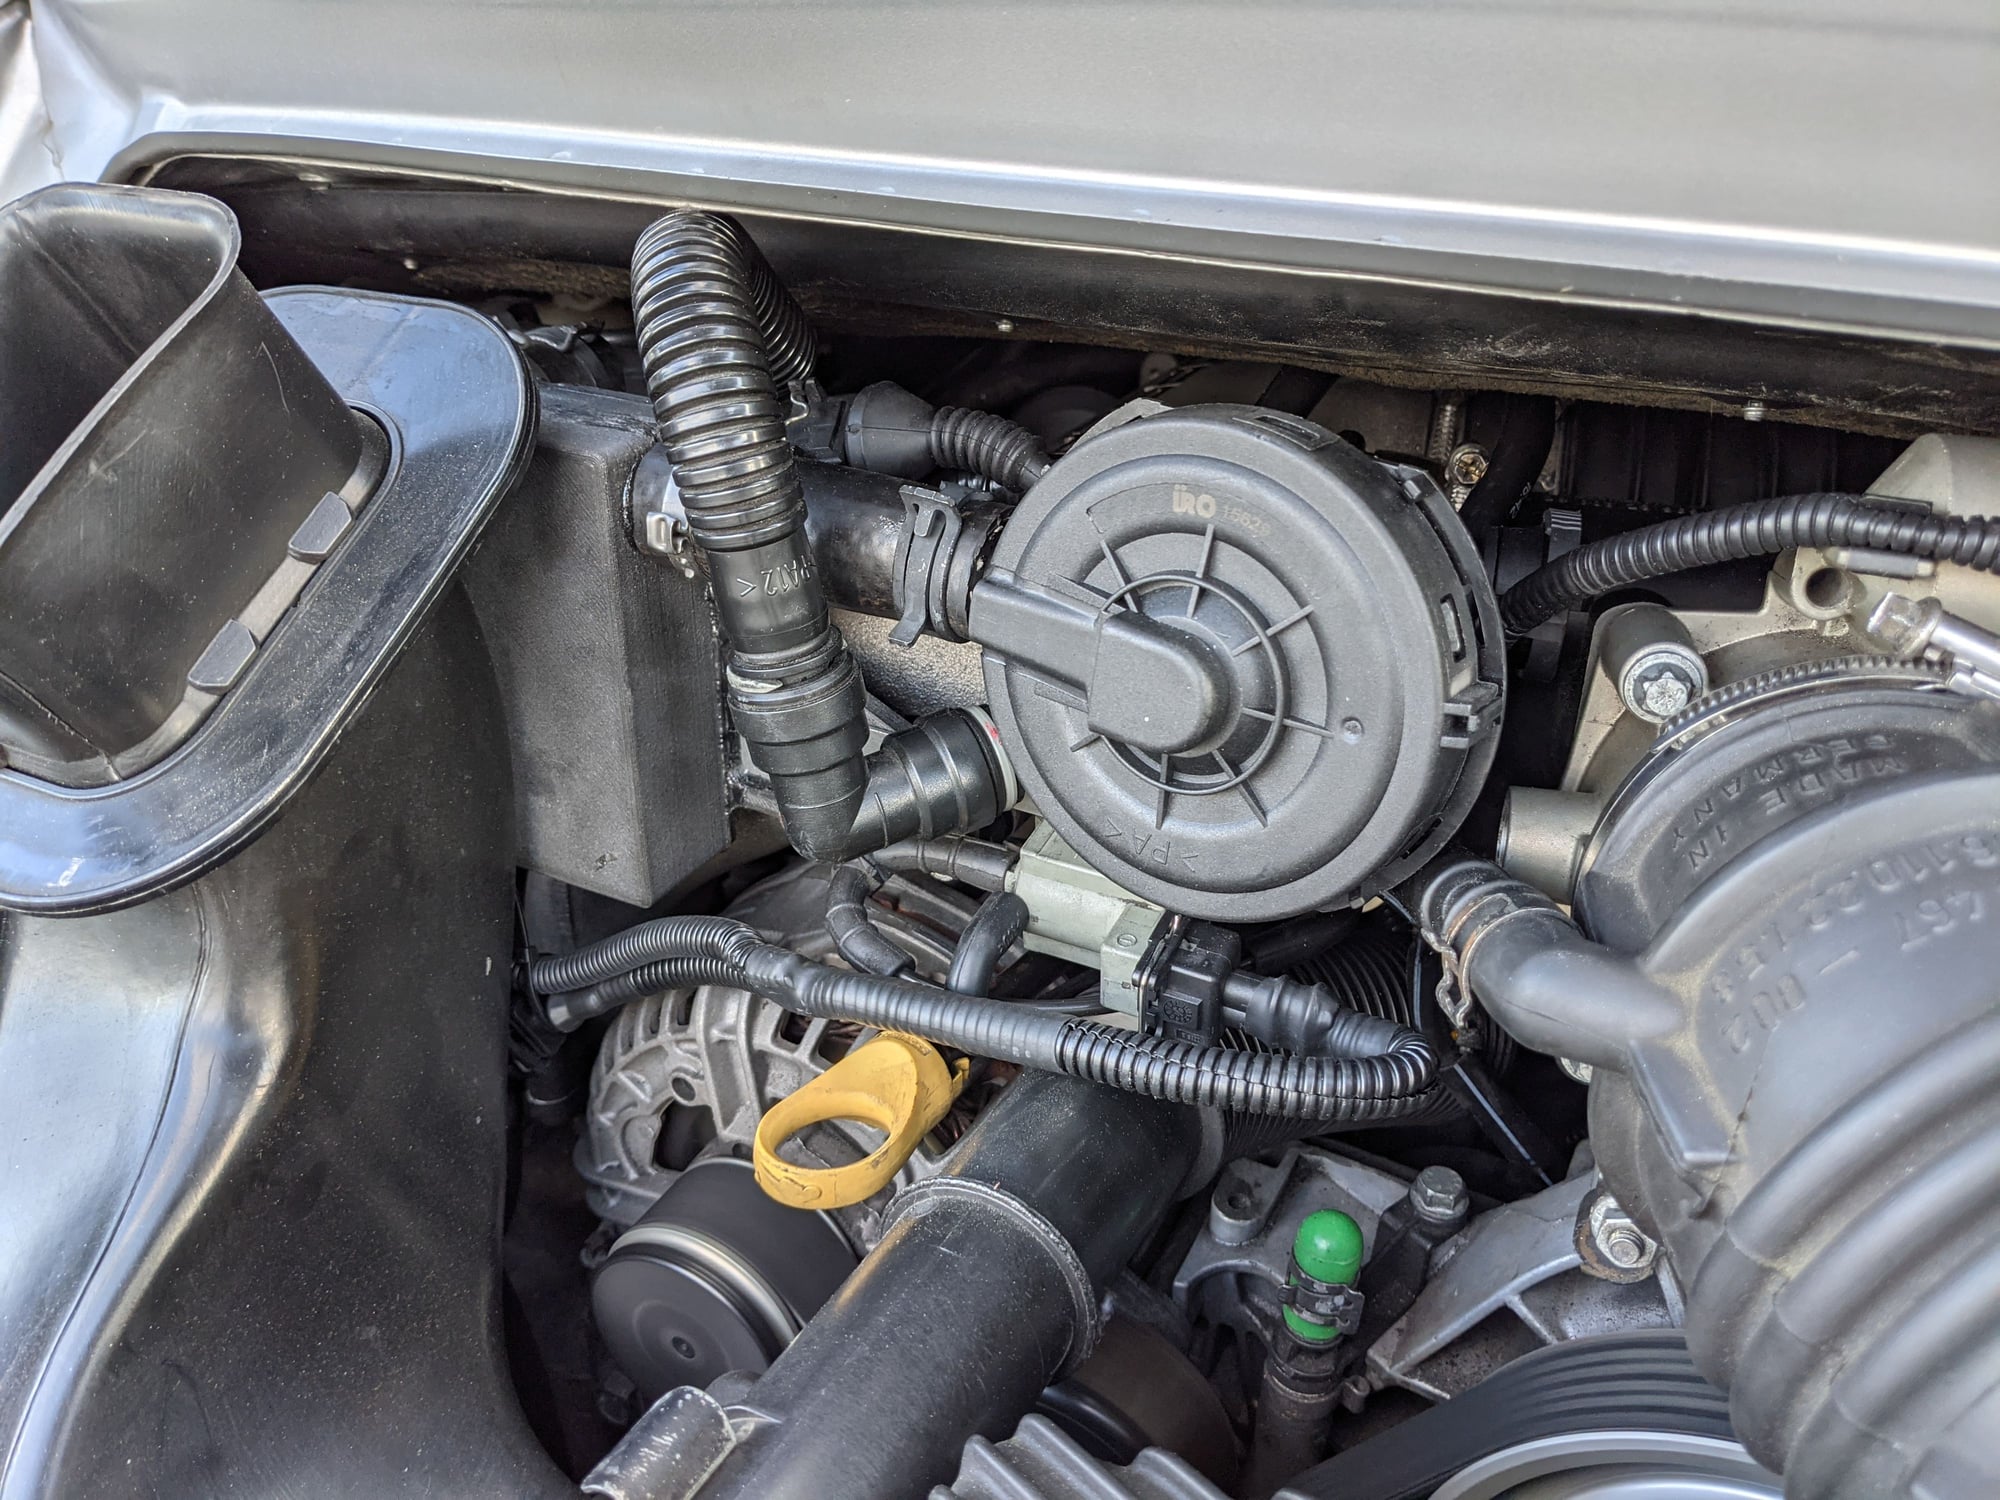
3. Next I removed the SAI pump. The goal is to always give yourself as much room to move around as possible. Just pull off the hose, 2 x 10mm bolts at the bottom and one 10mm nut at the top that also helps holding the expansion tank. There is one connector to be unplugged.
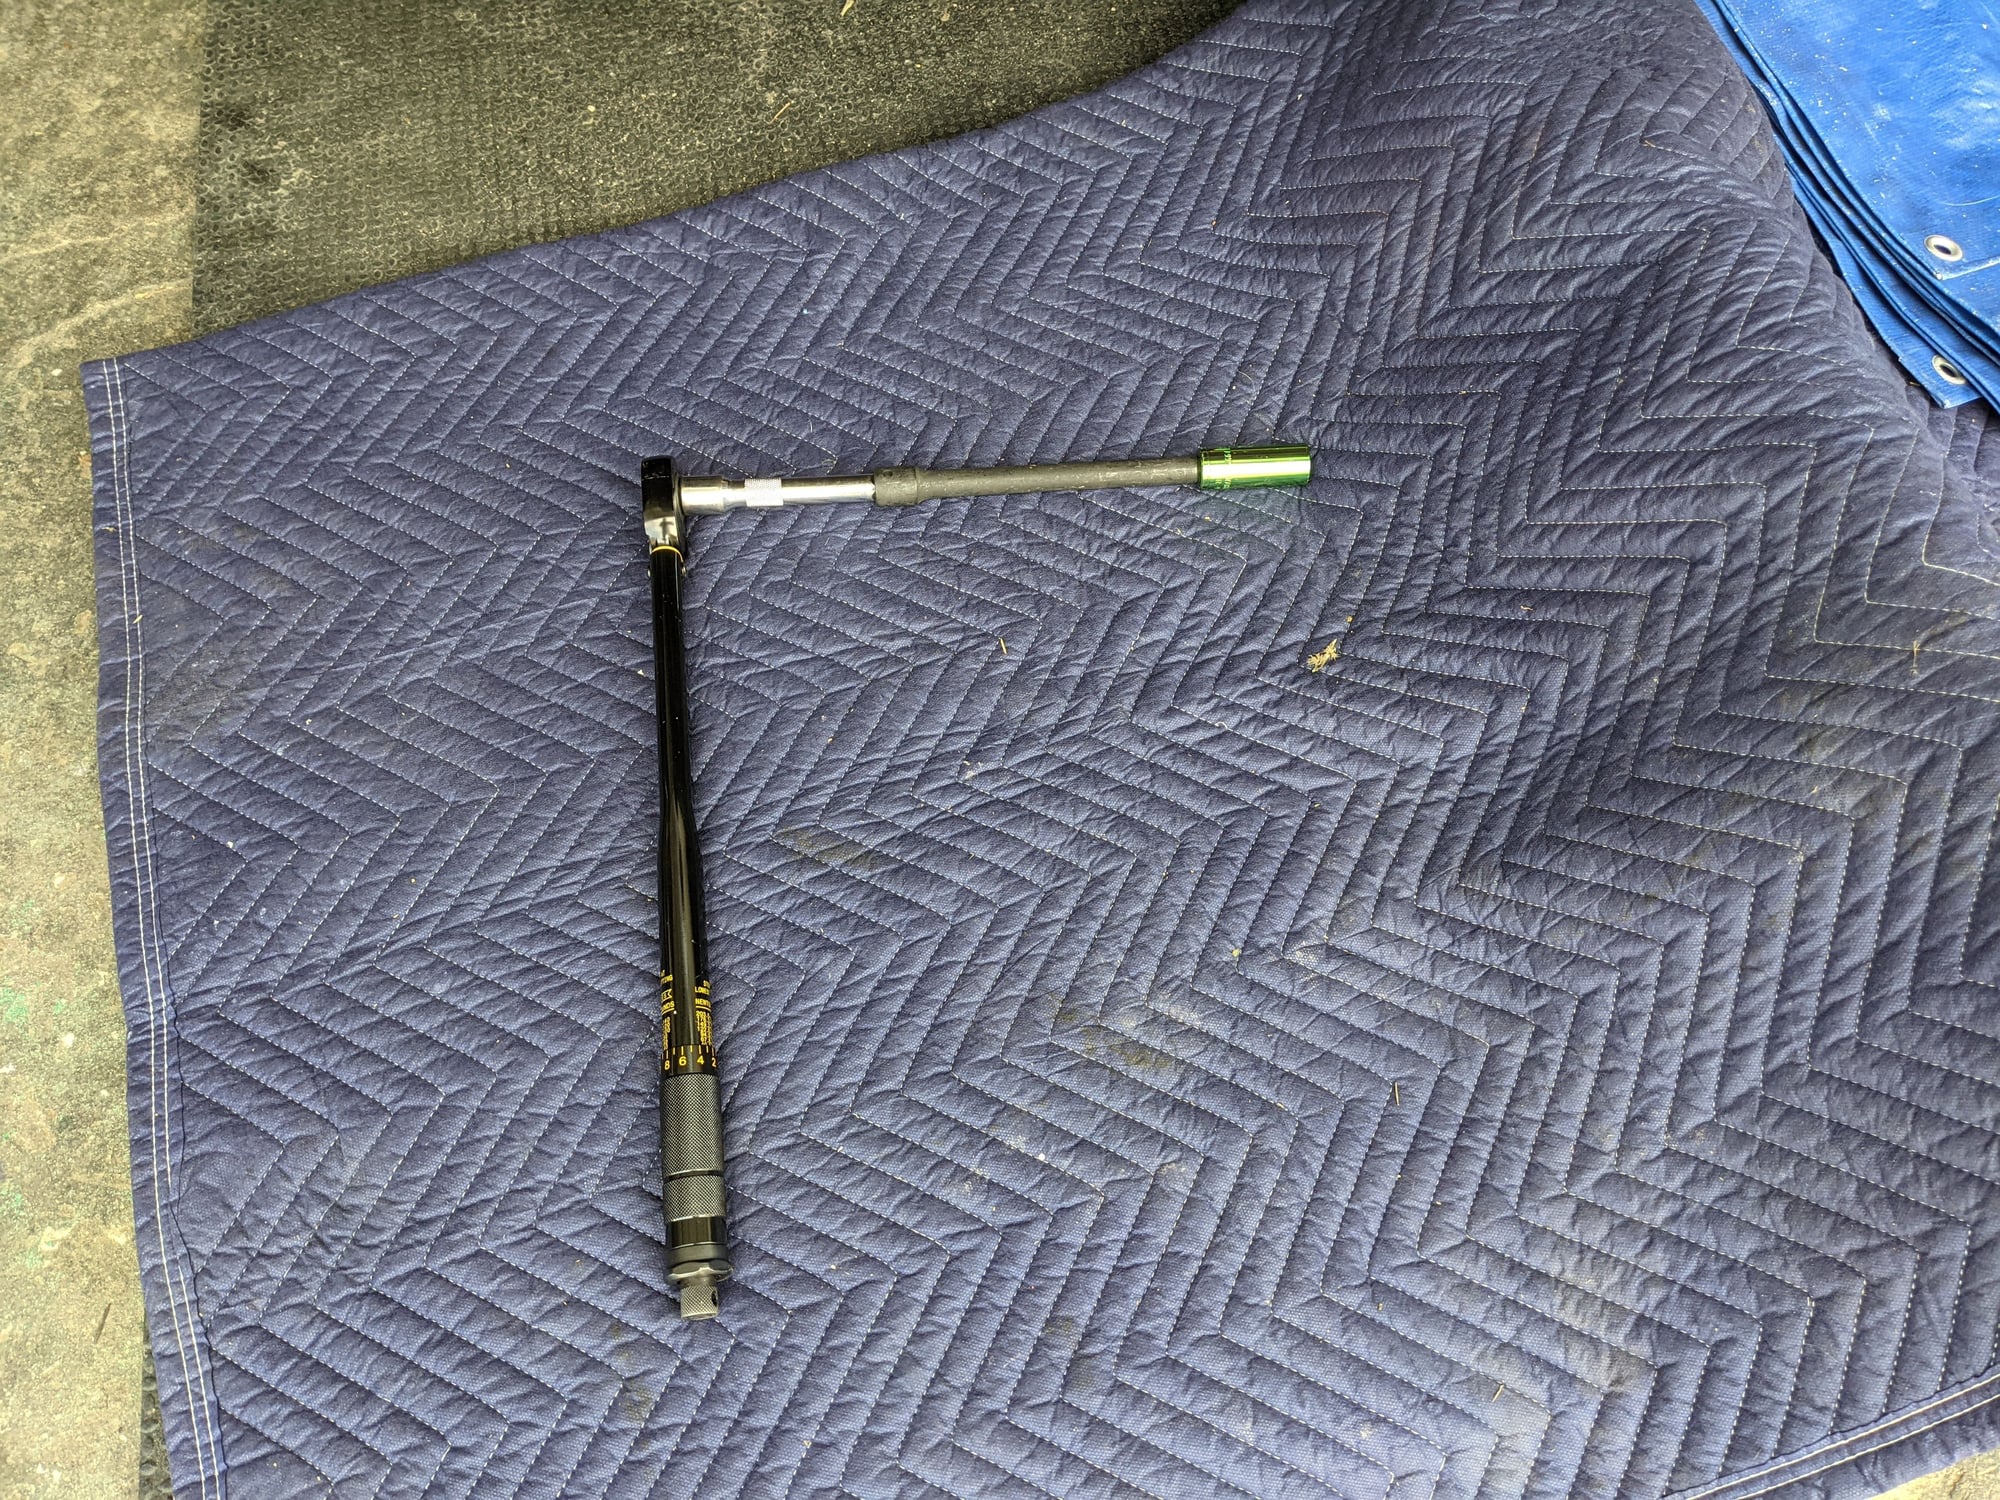
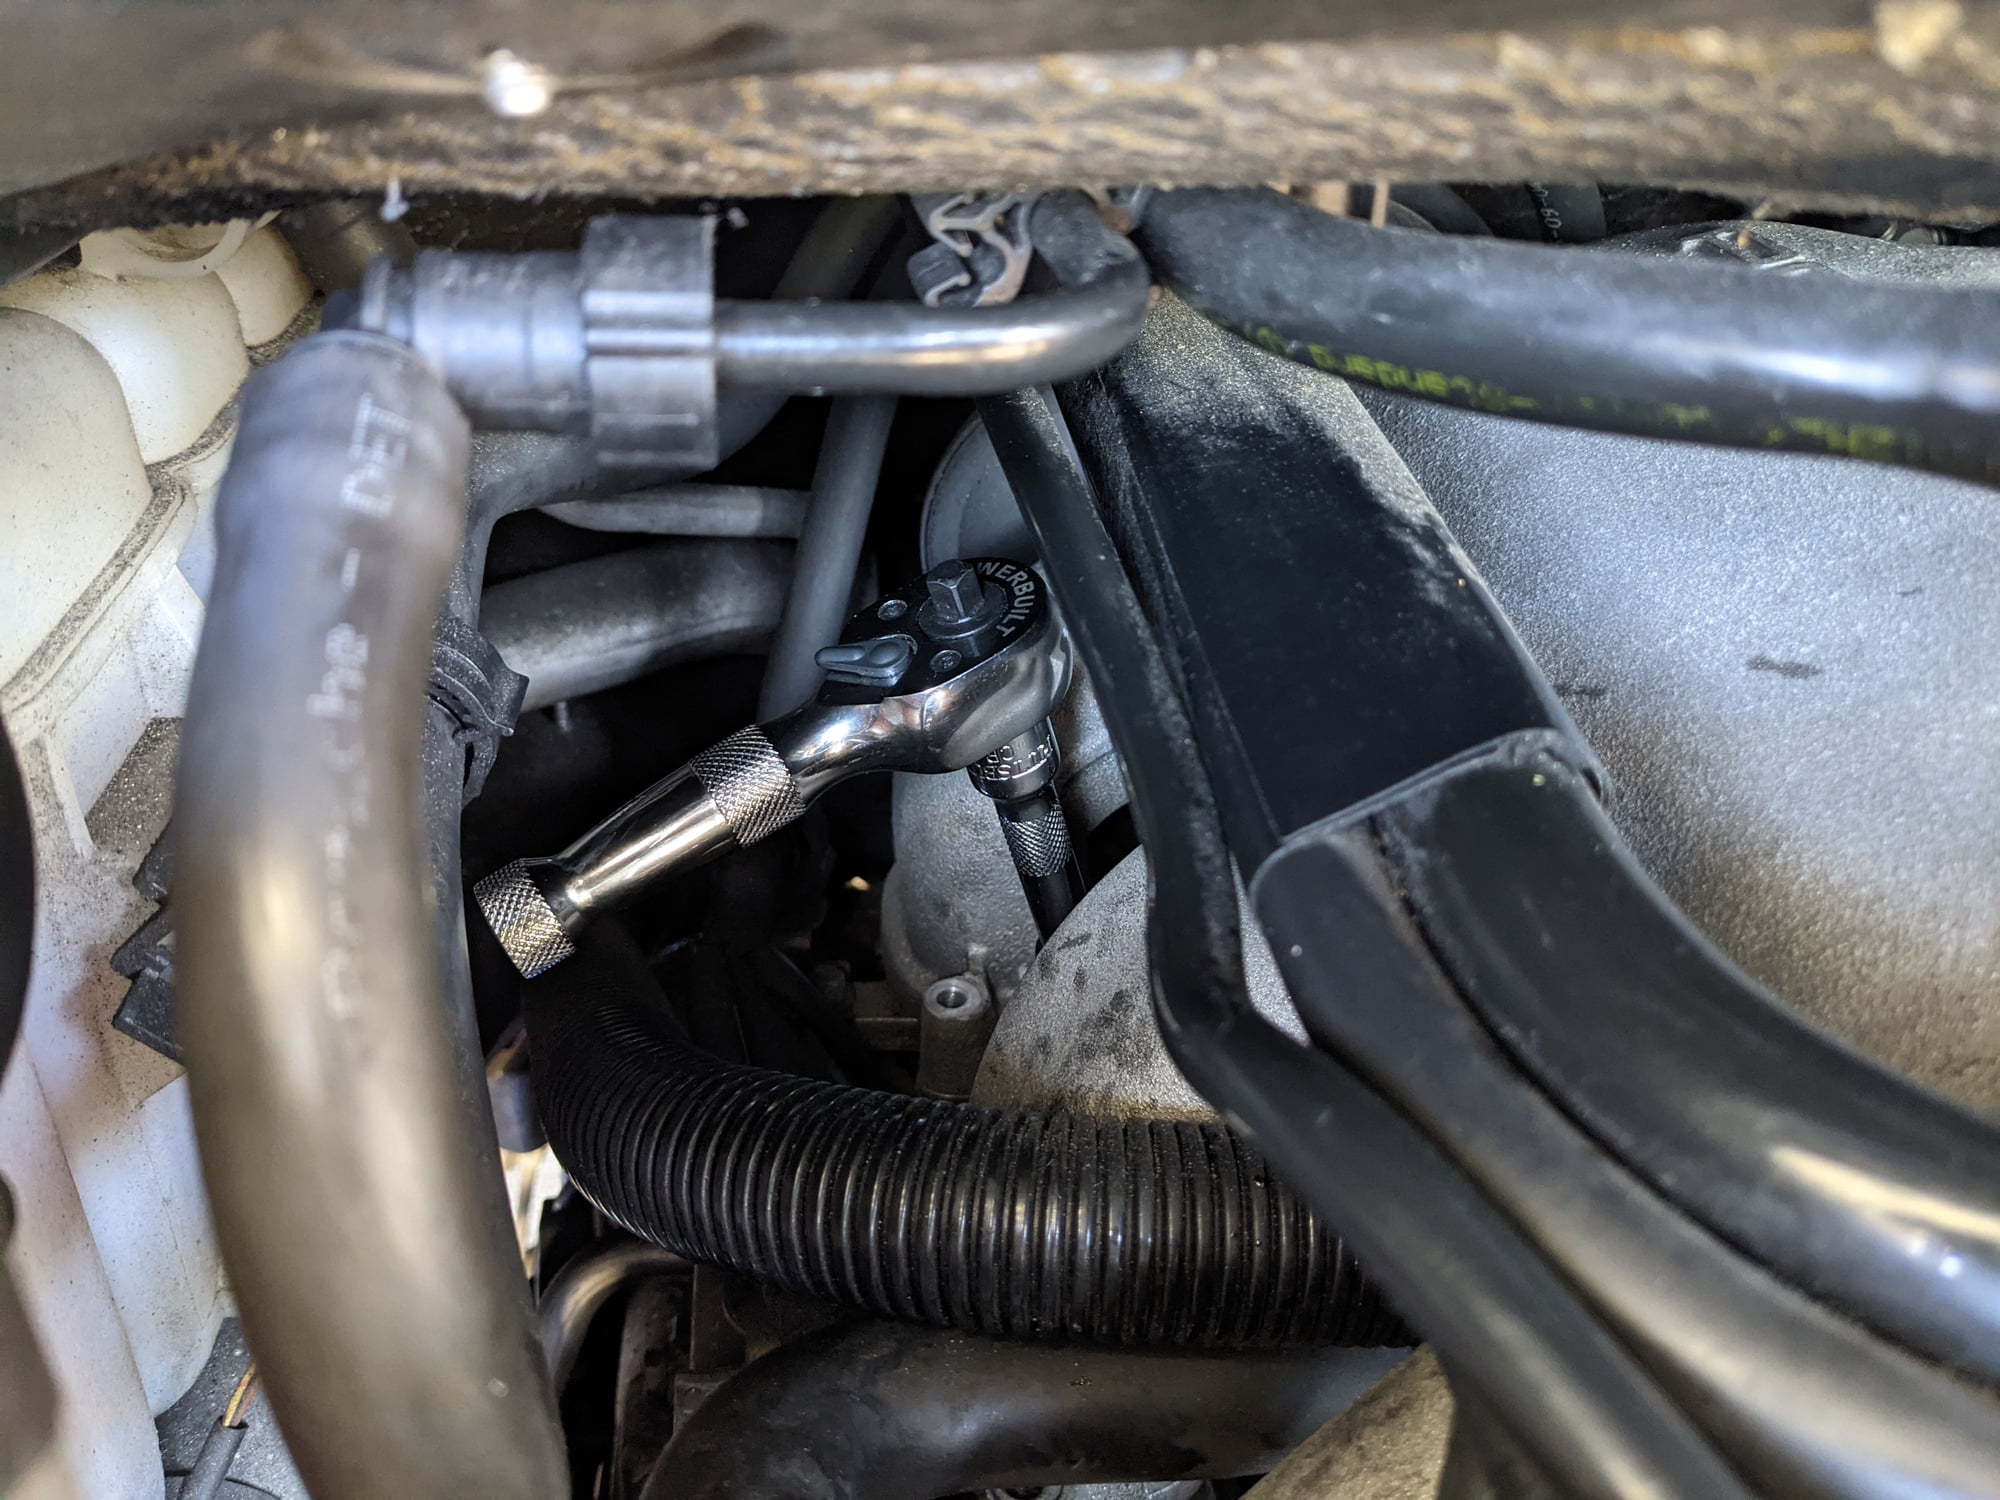
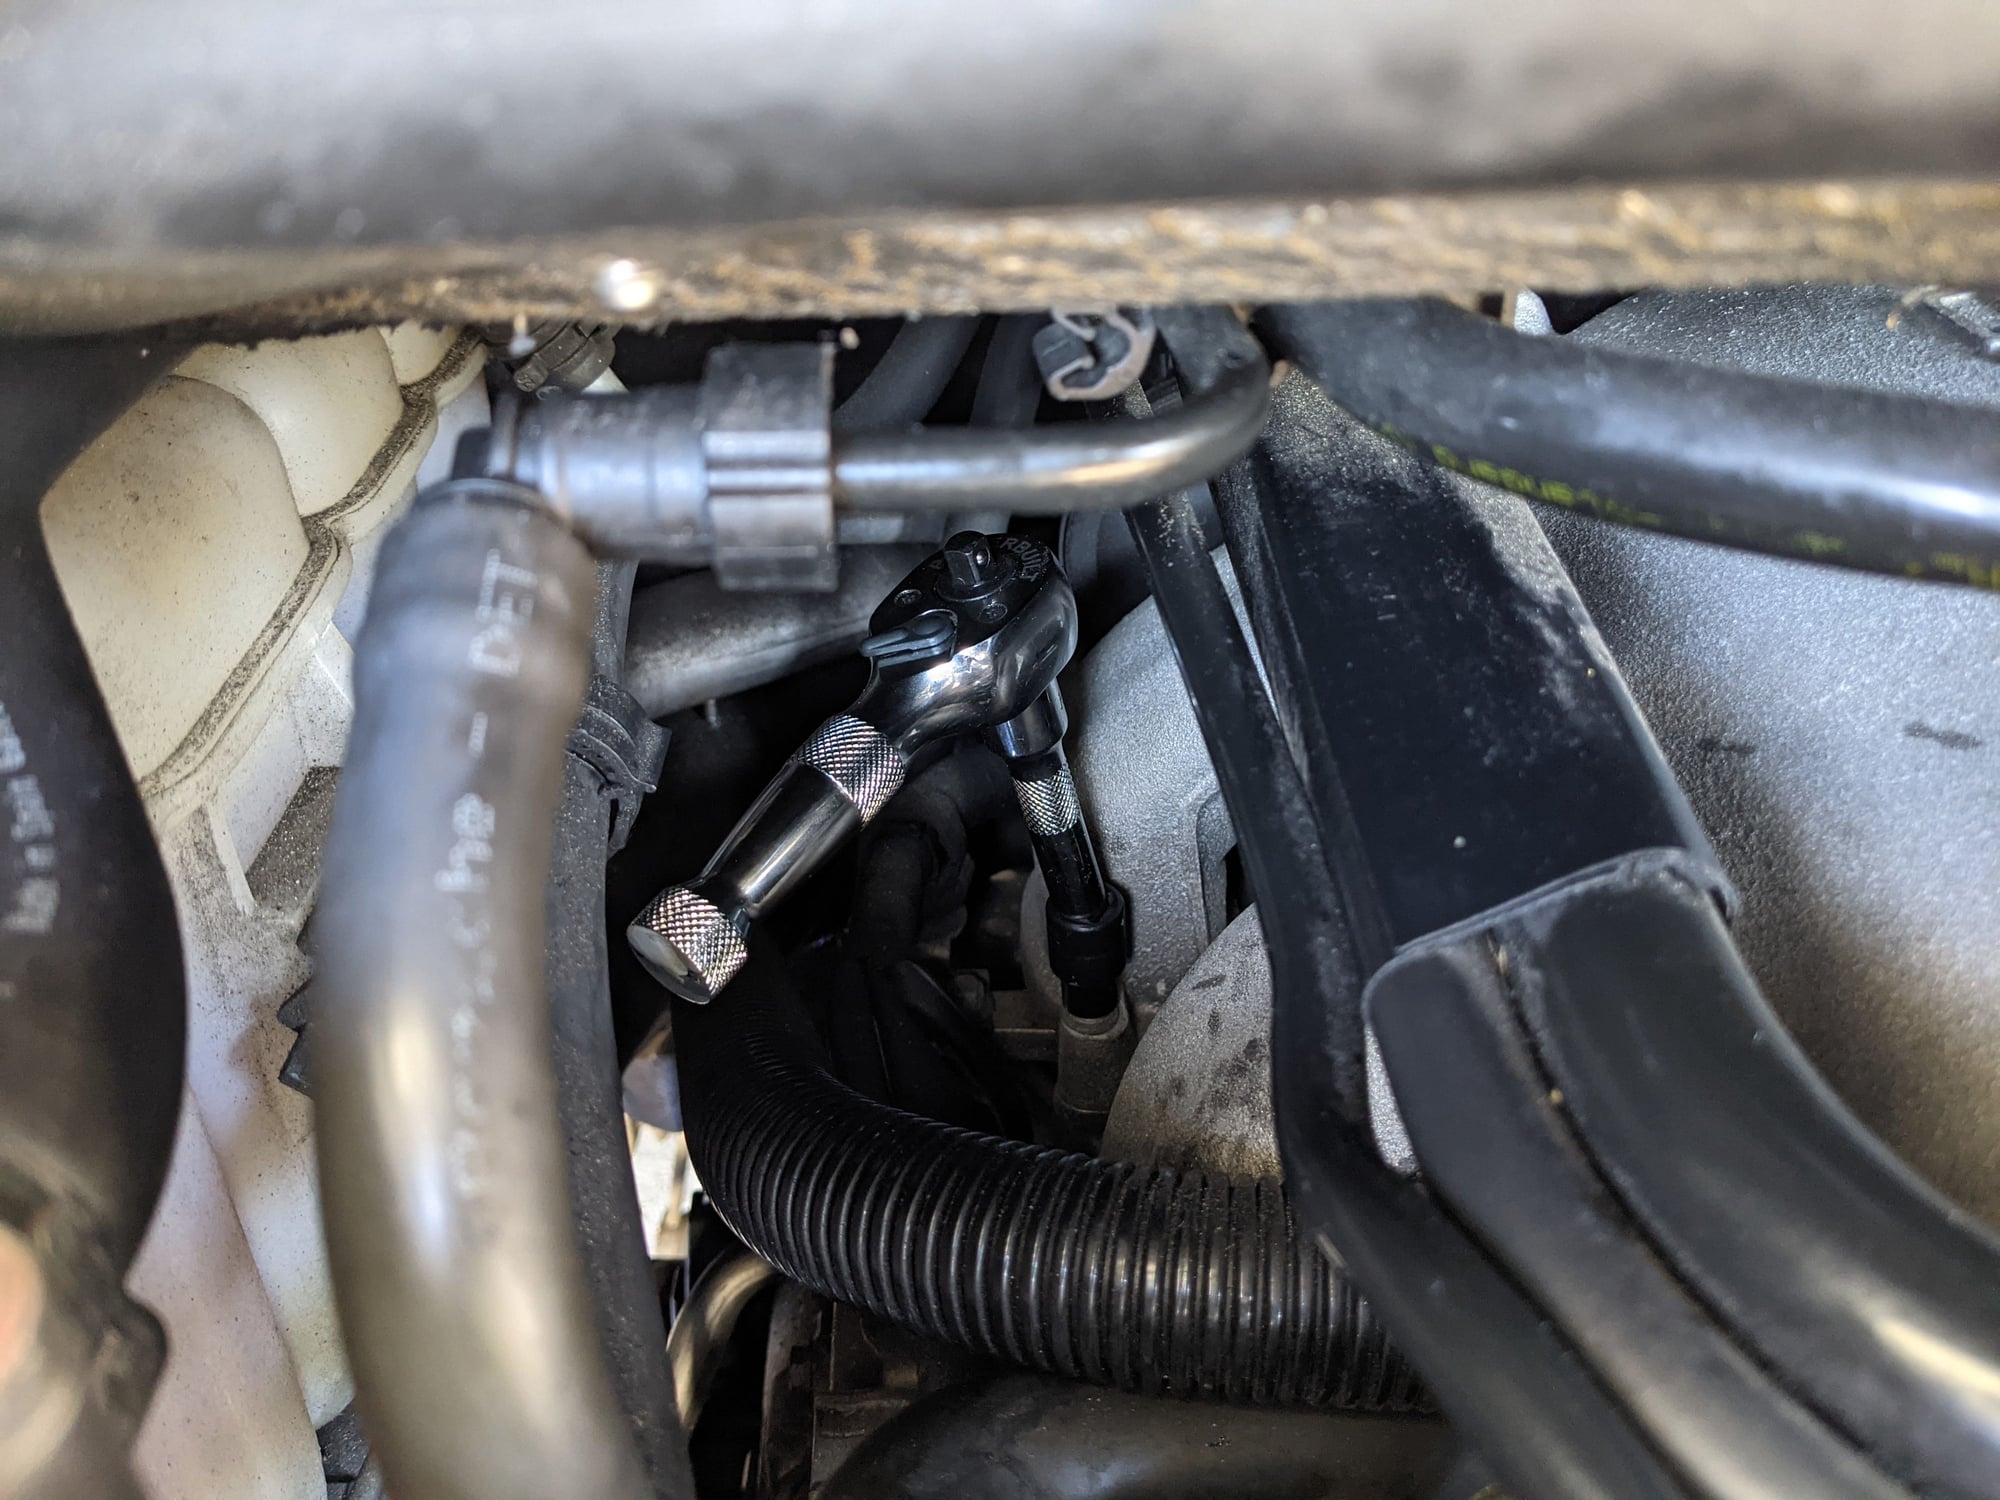
4. Now you want to lower the engine slightly to get some more room up top where most of the work will happen. Start by supporting the engine with a jack and a decent piece of lumber. Once you've taken the weight of the engine of the mounts we will undo the 2 x 18mm nuts that are accessed from the bottom. You'll be able to slip in the socket between the exhaust pipes. I'd suggest using a deep 18mm socket and a longer ratchet or breaker bar for leverage. Give it some liquid persuasion in form of PB Blaster or WD40 if these were never touched.
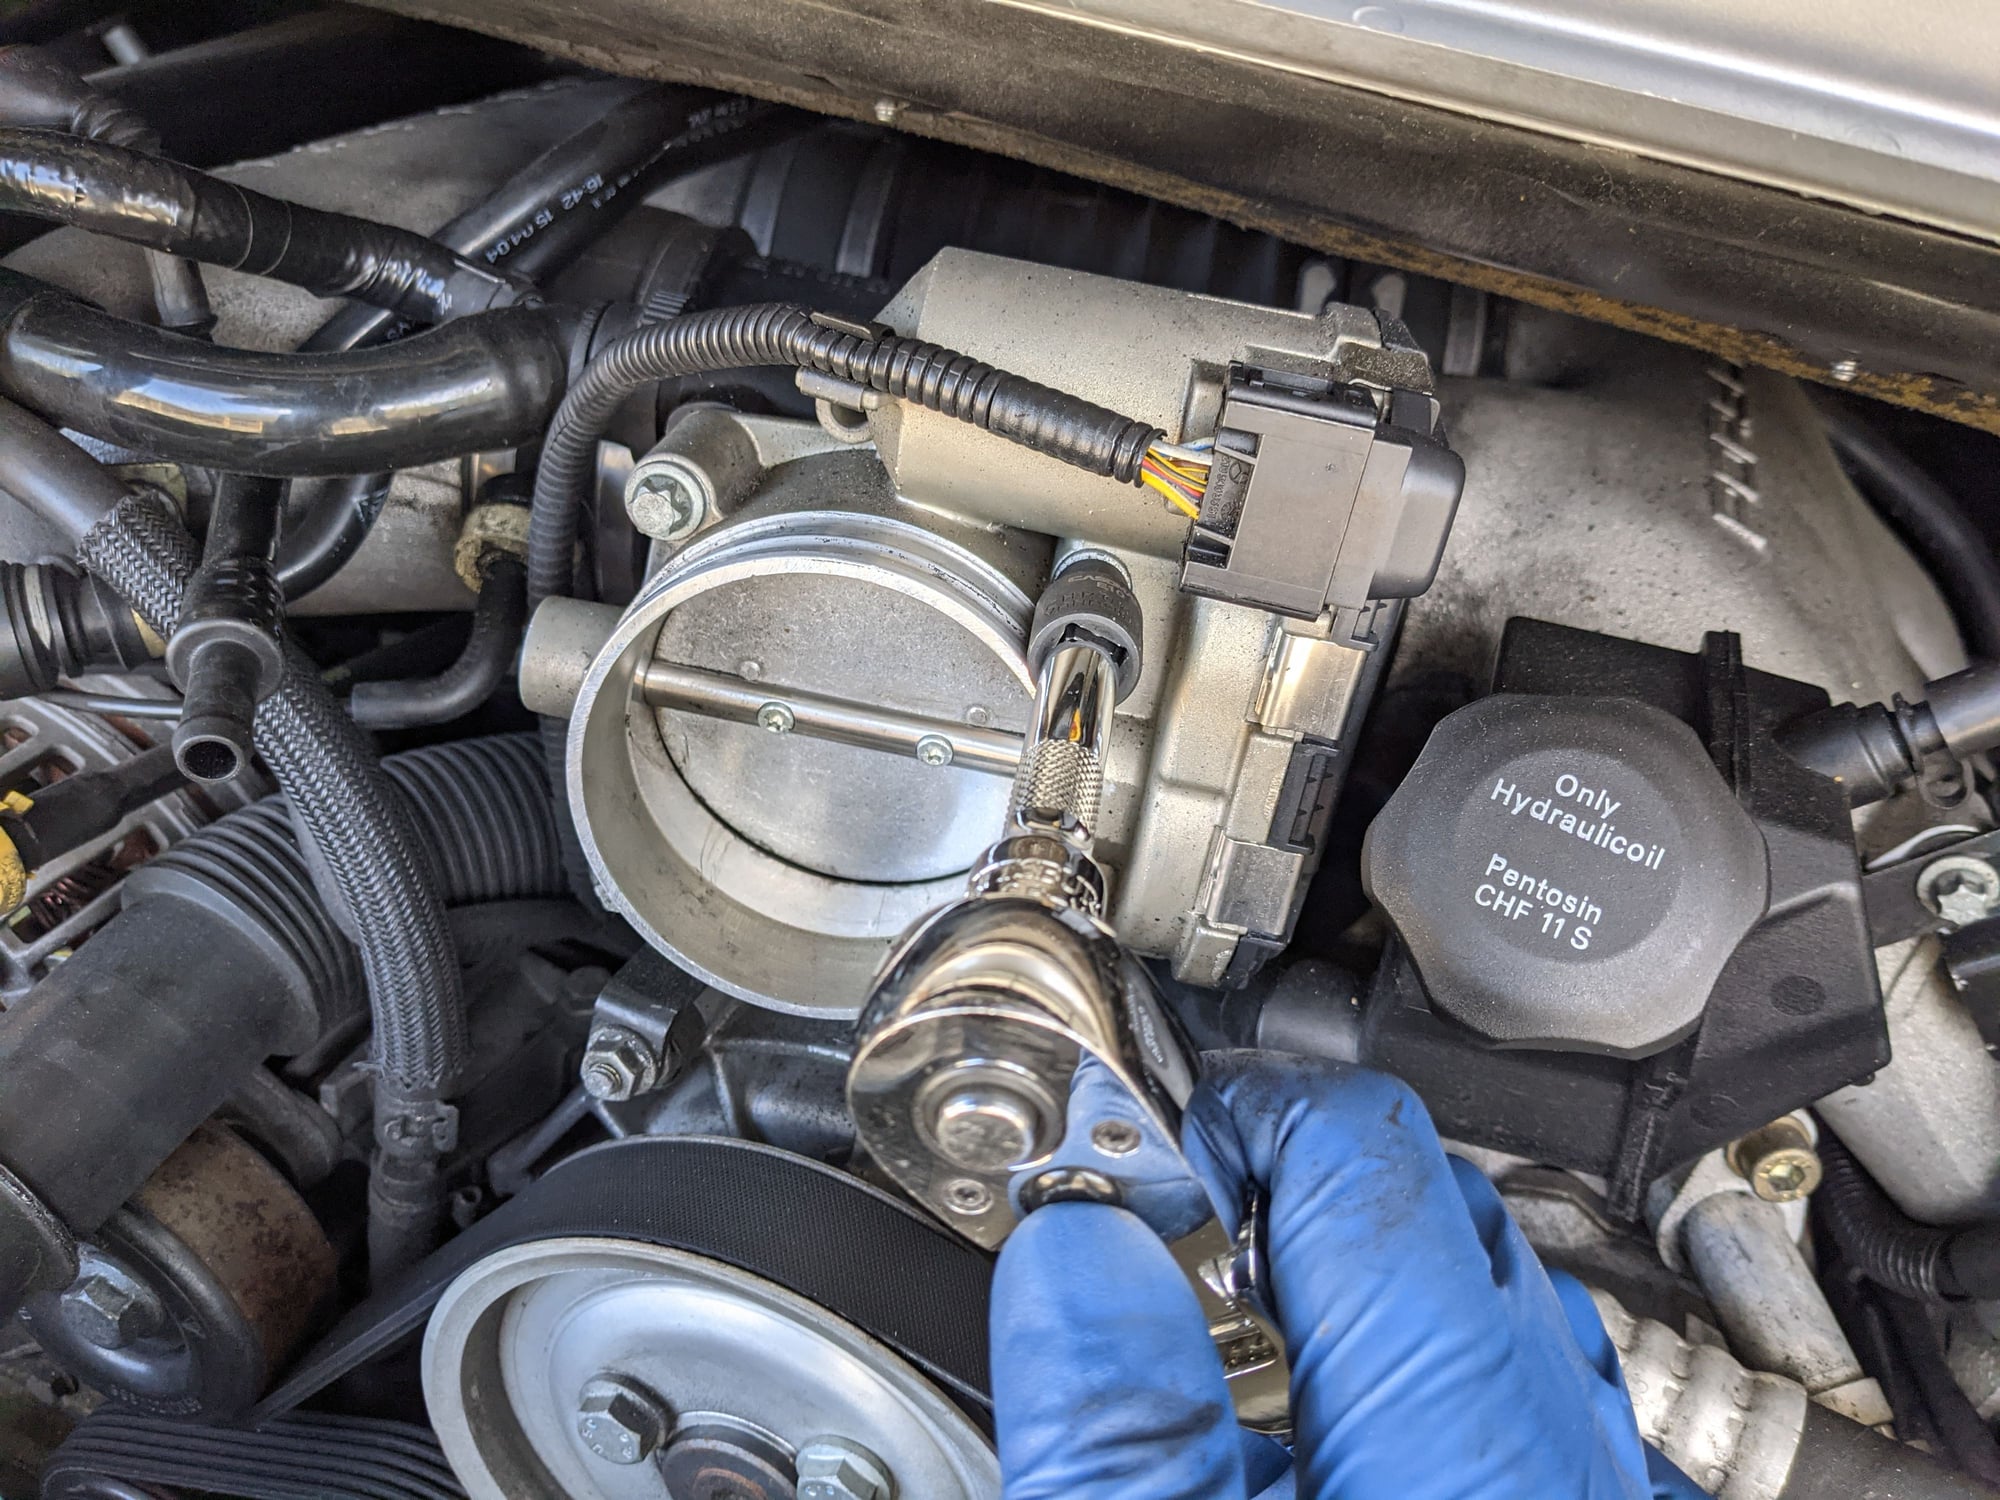
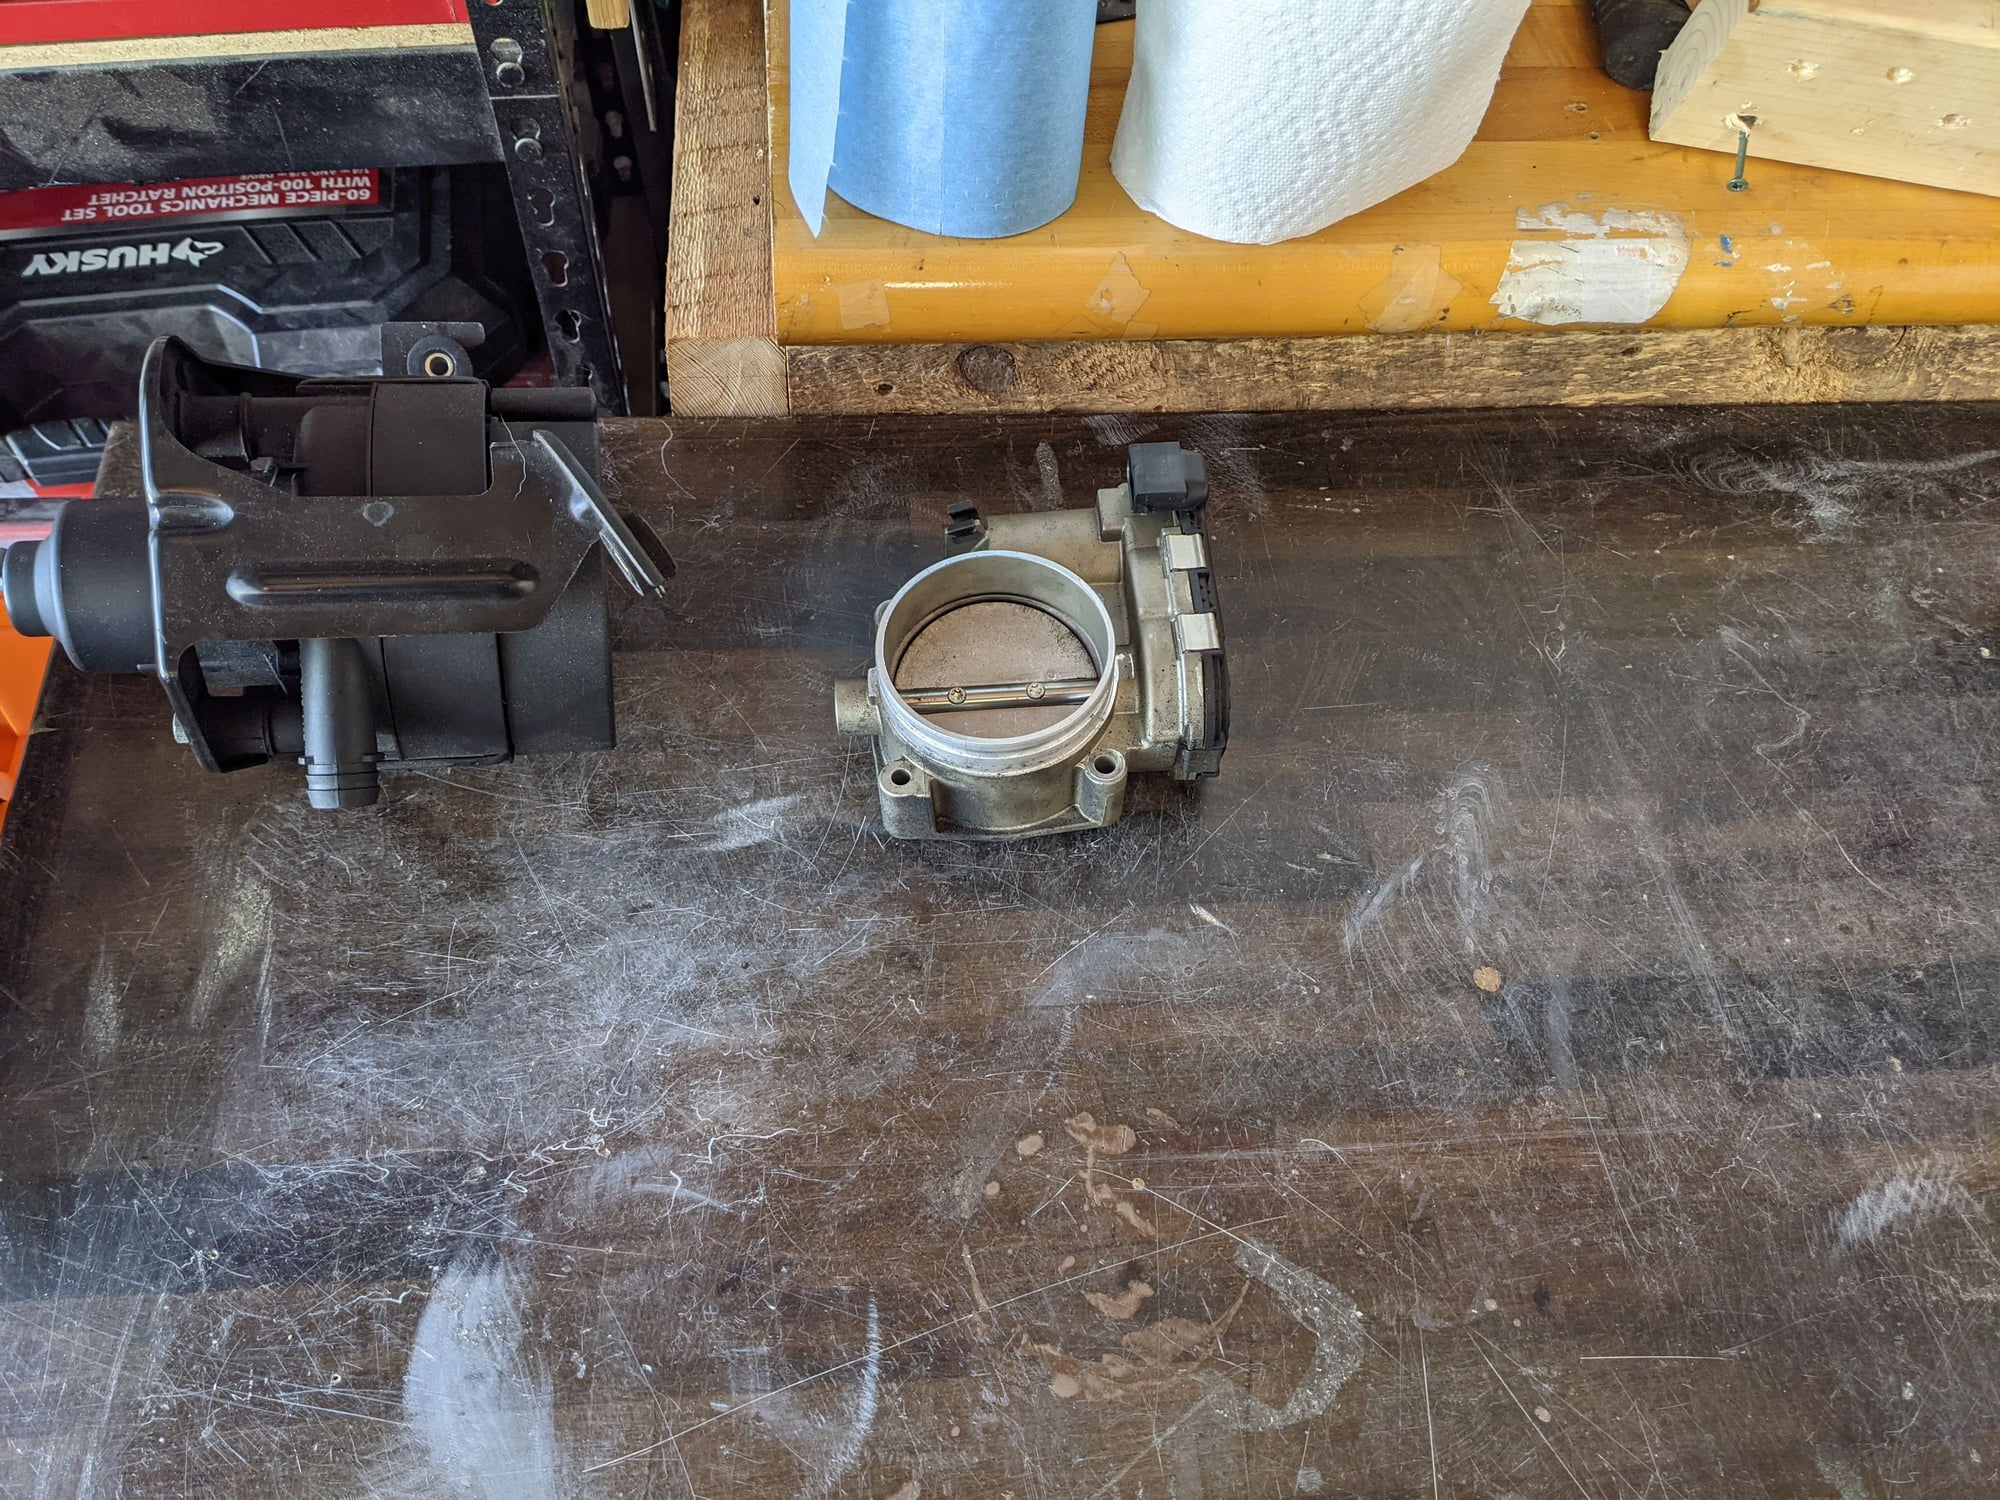
5. Now remove the throttle body and set it aside. Just about all bolts on my car were e-torx. I was quite grateful for that later on. I'll explain when we get there.
I found it helpful to place all the parts that came off in an order that they did. It made reassembly easier and kept things organized. I'd also suggest to get some degreaser and clean everything. It's much more enjoyable reassembling clean parts than dirty ones. It adds time to the job but you don't want to rush here.
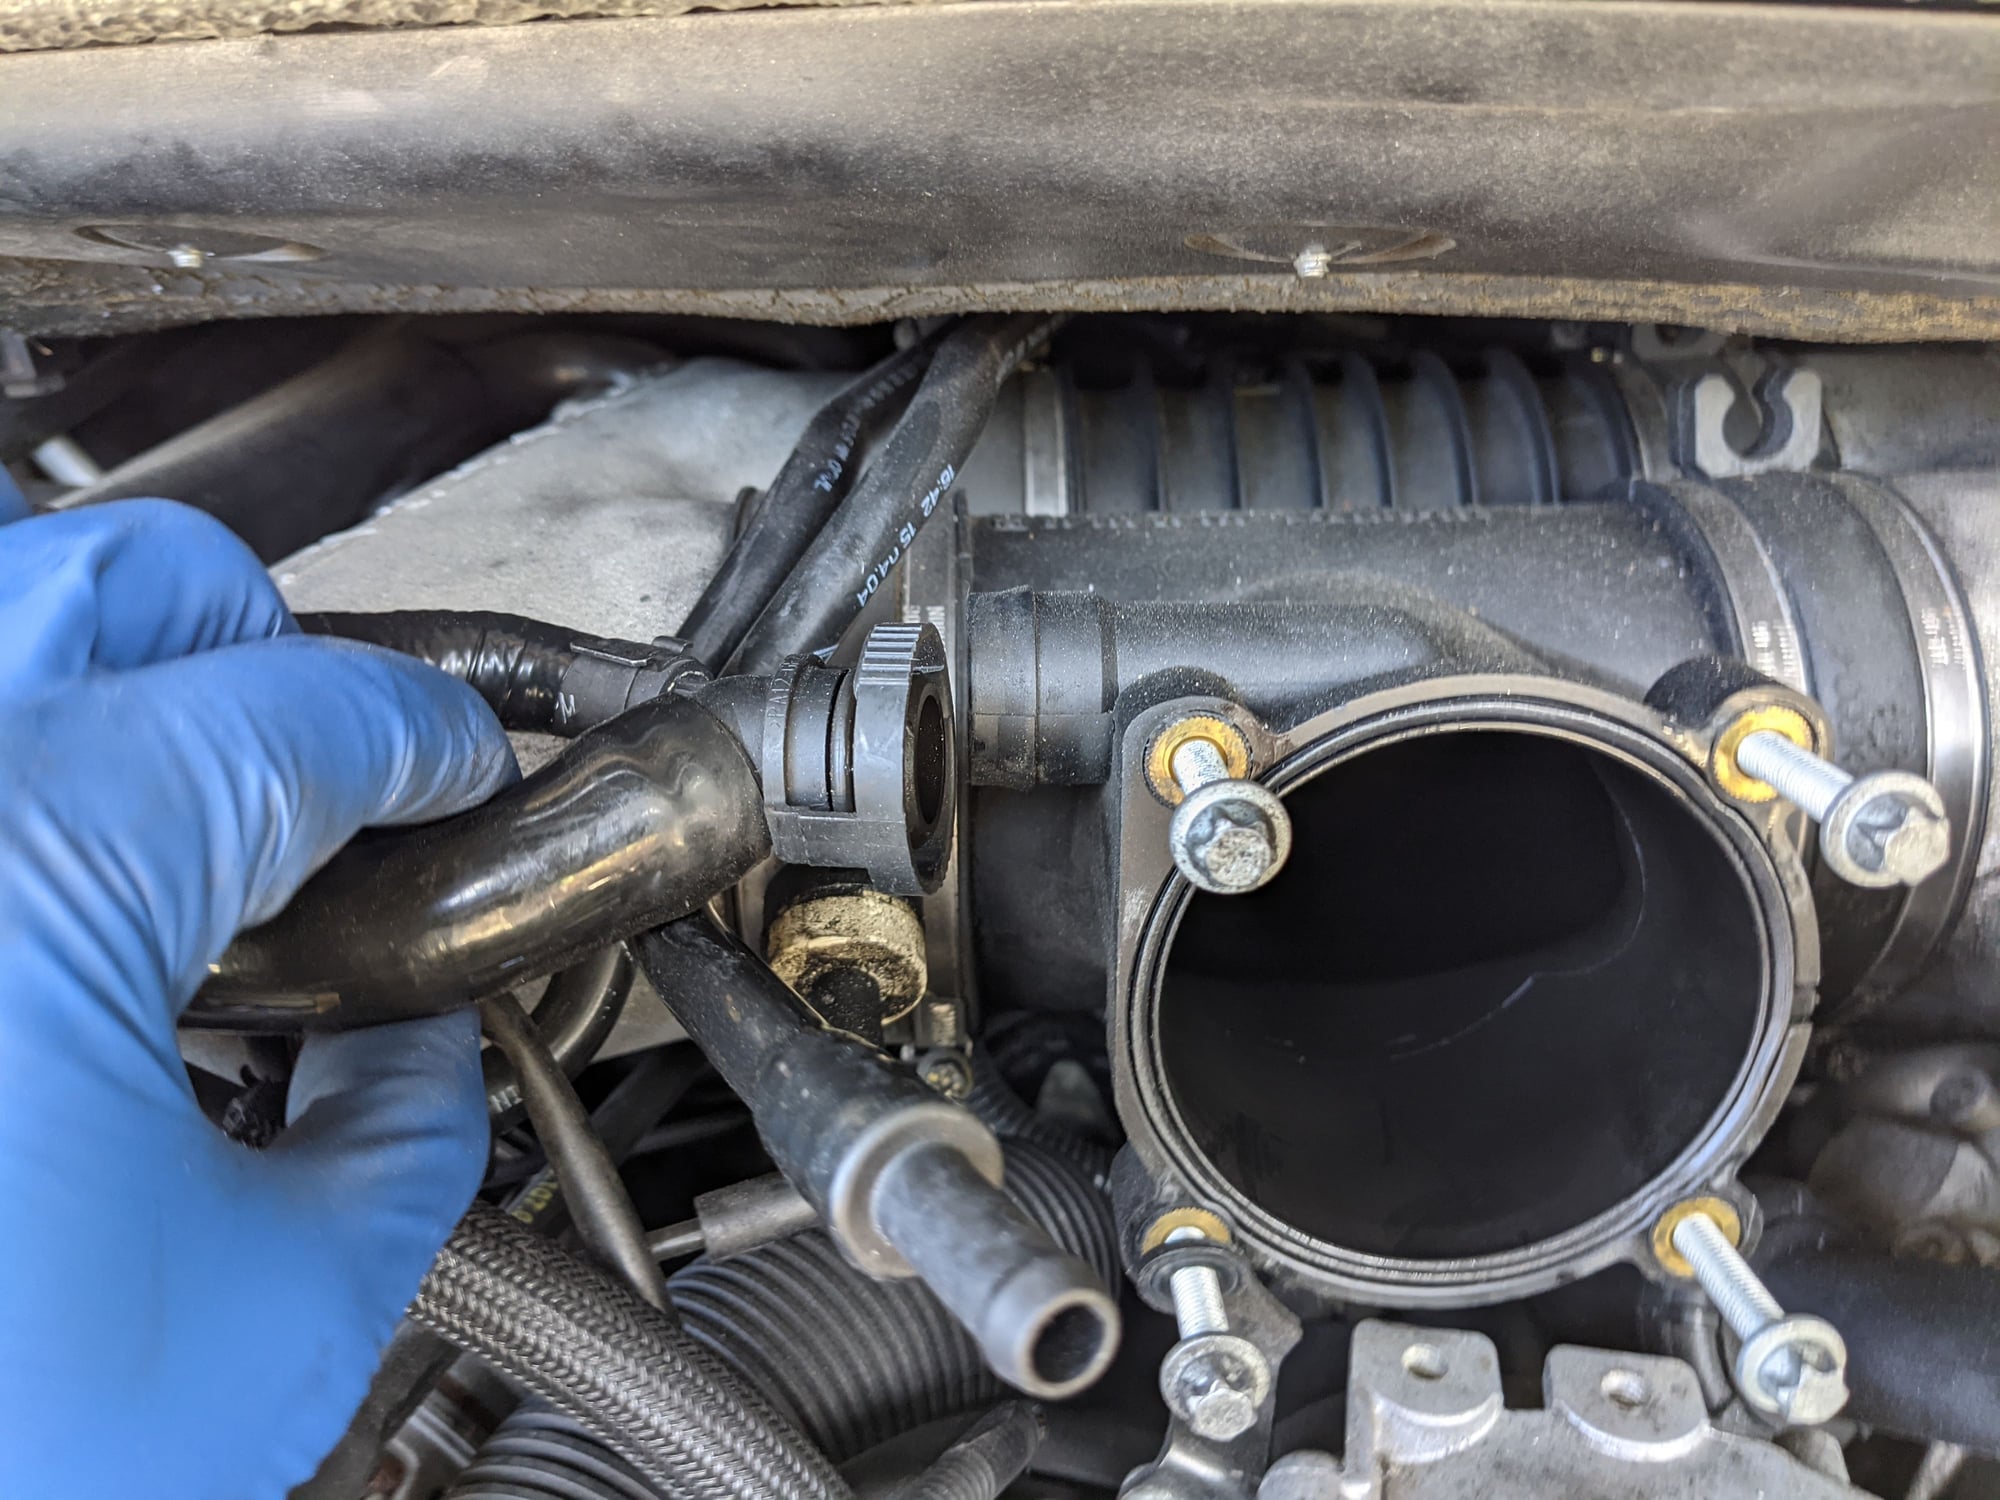
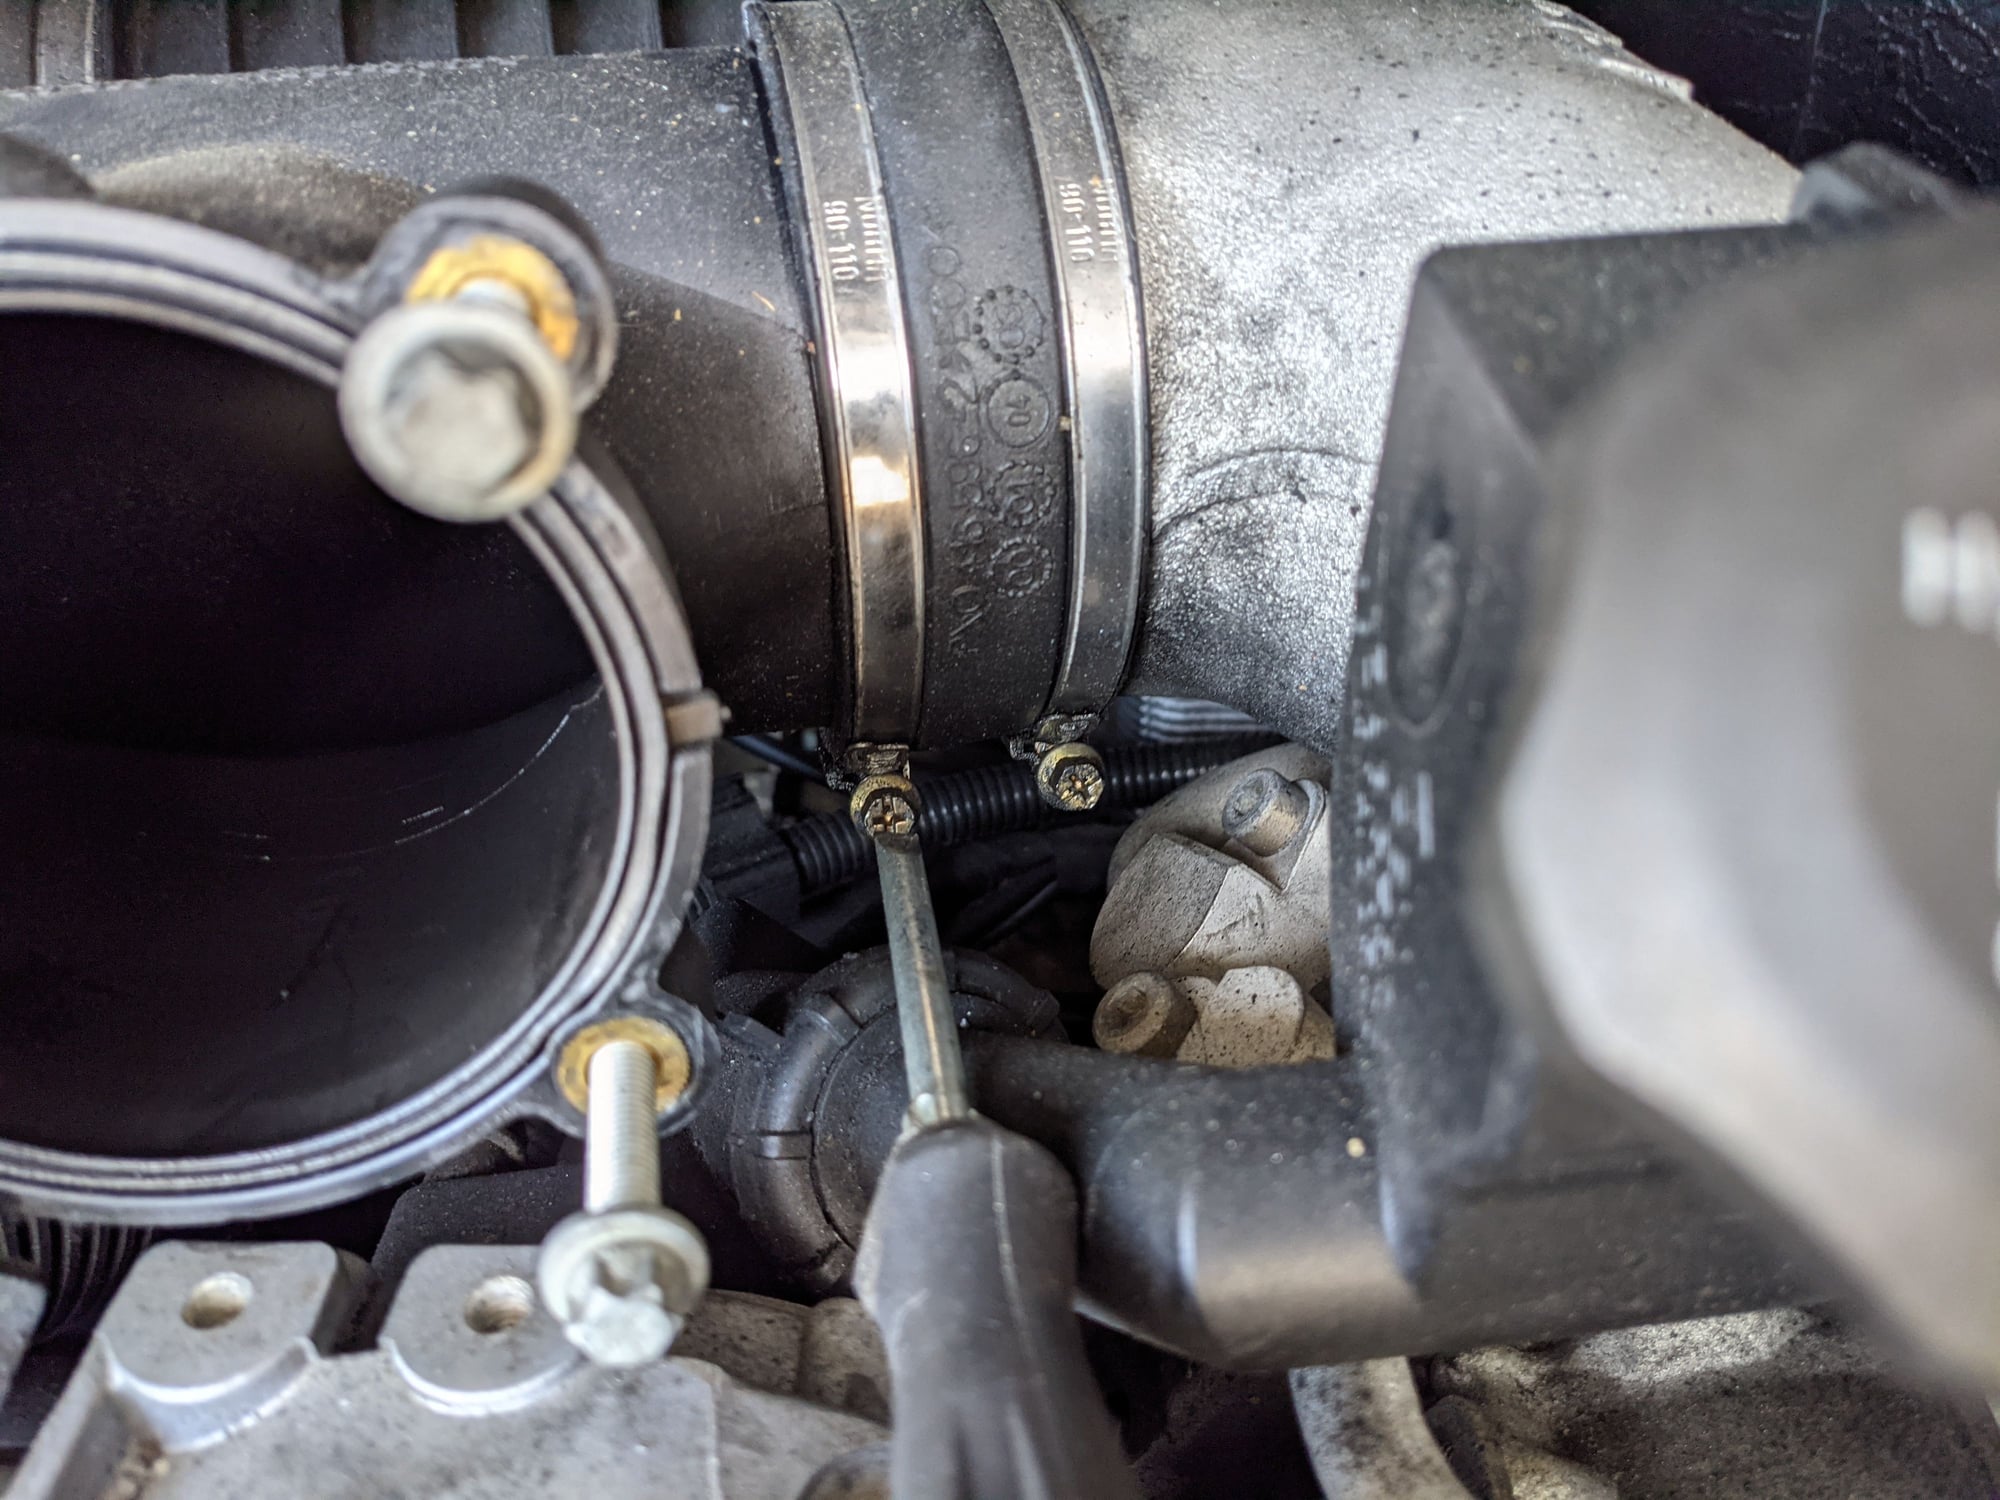
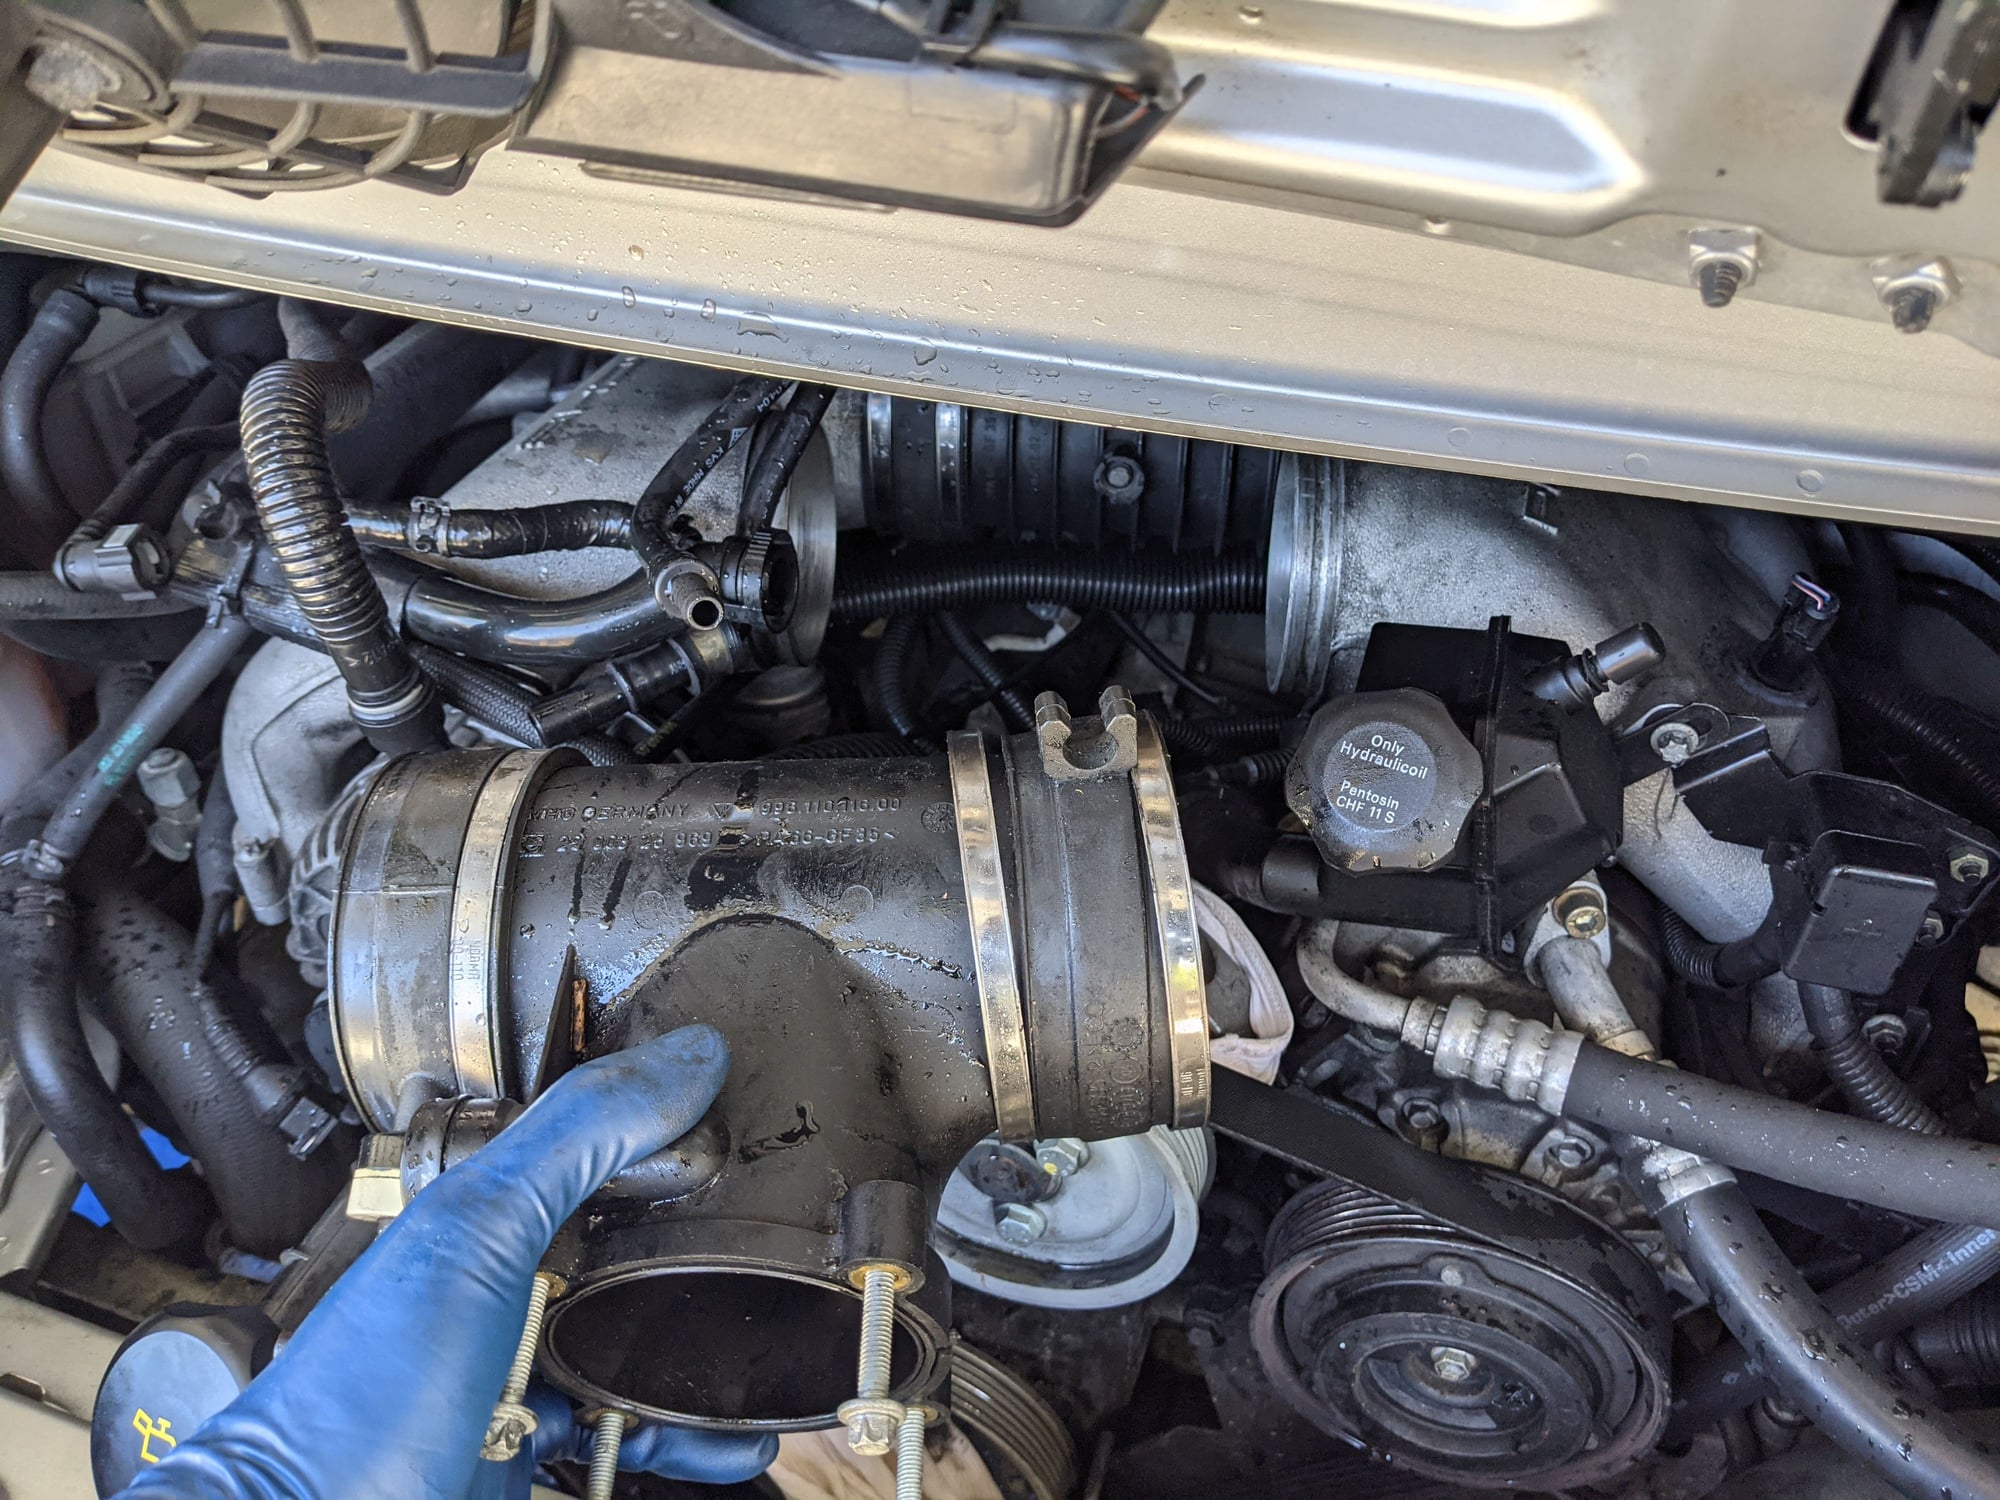
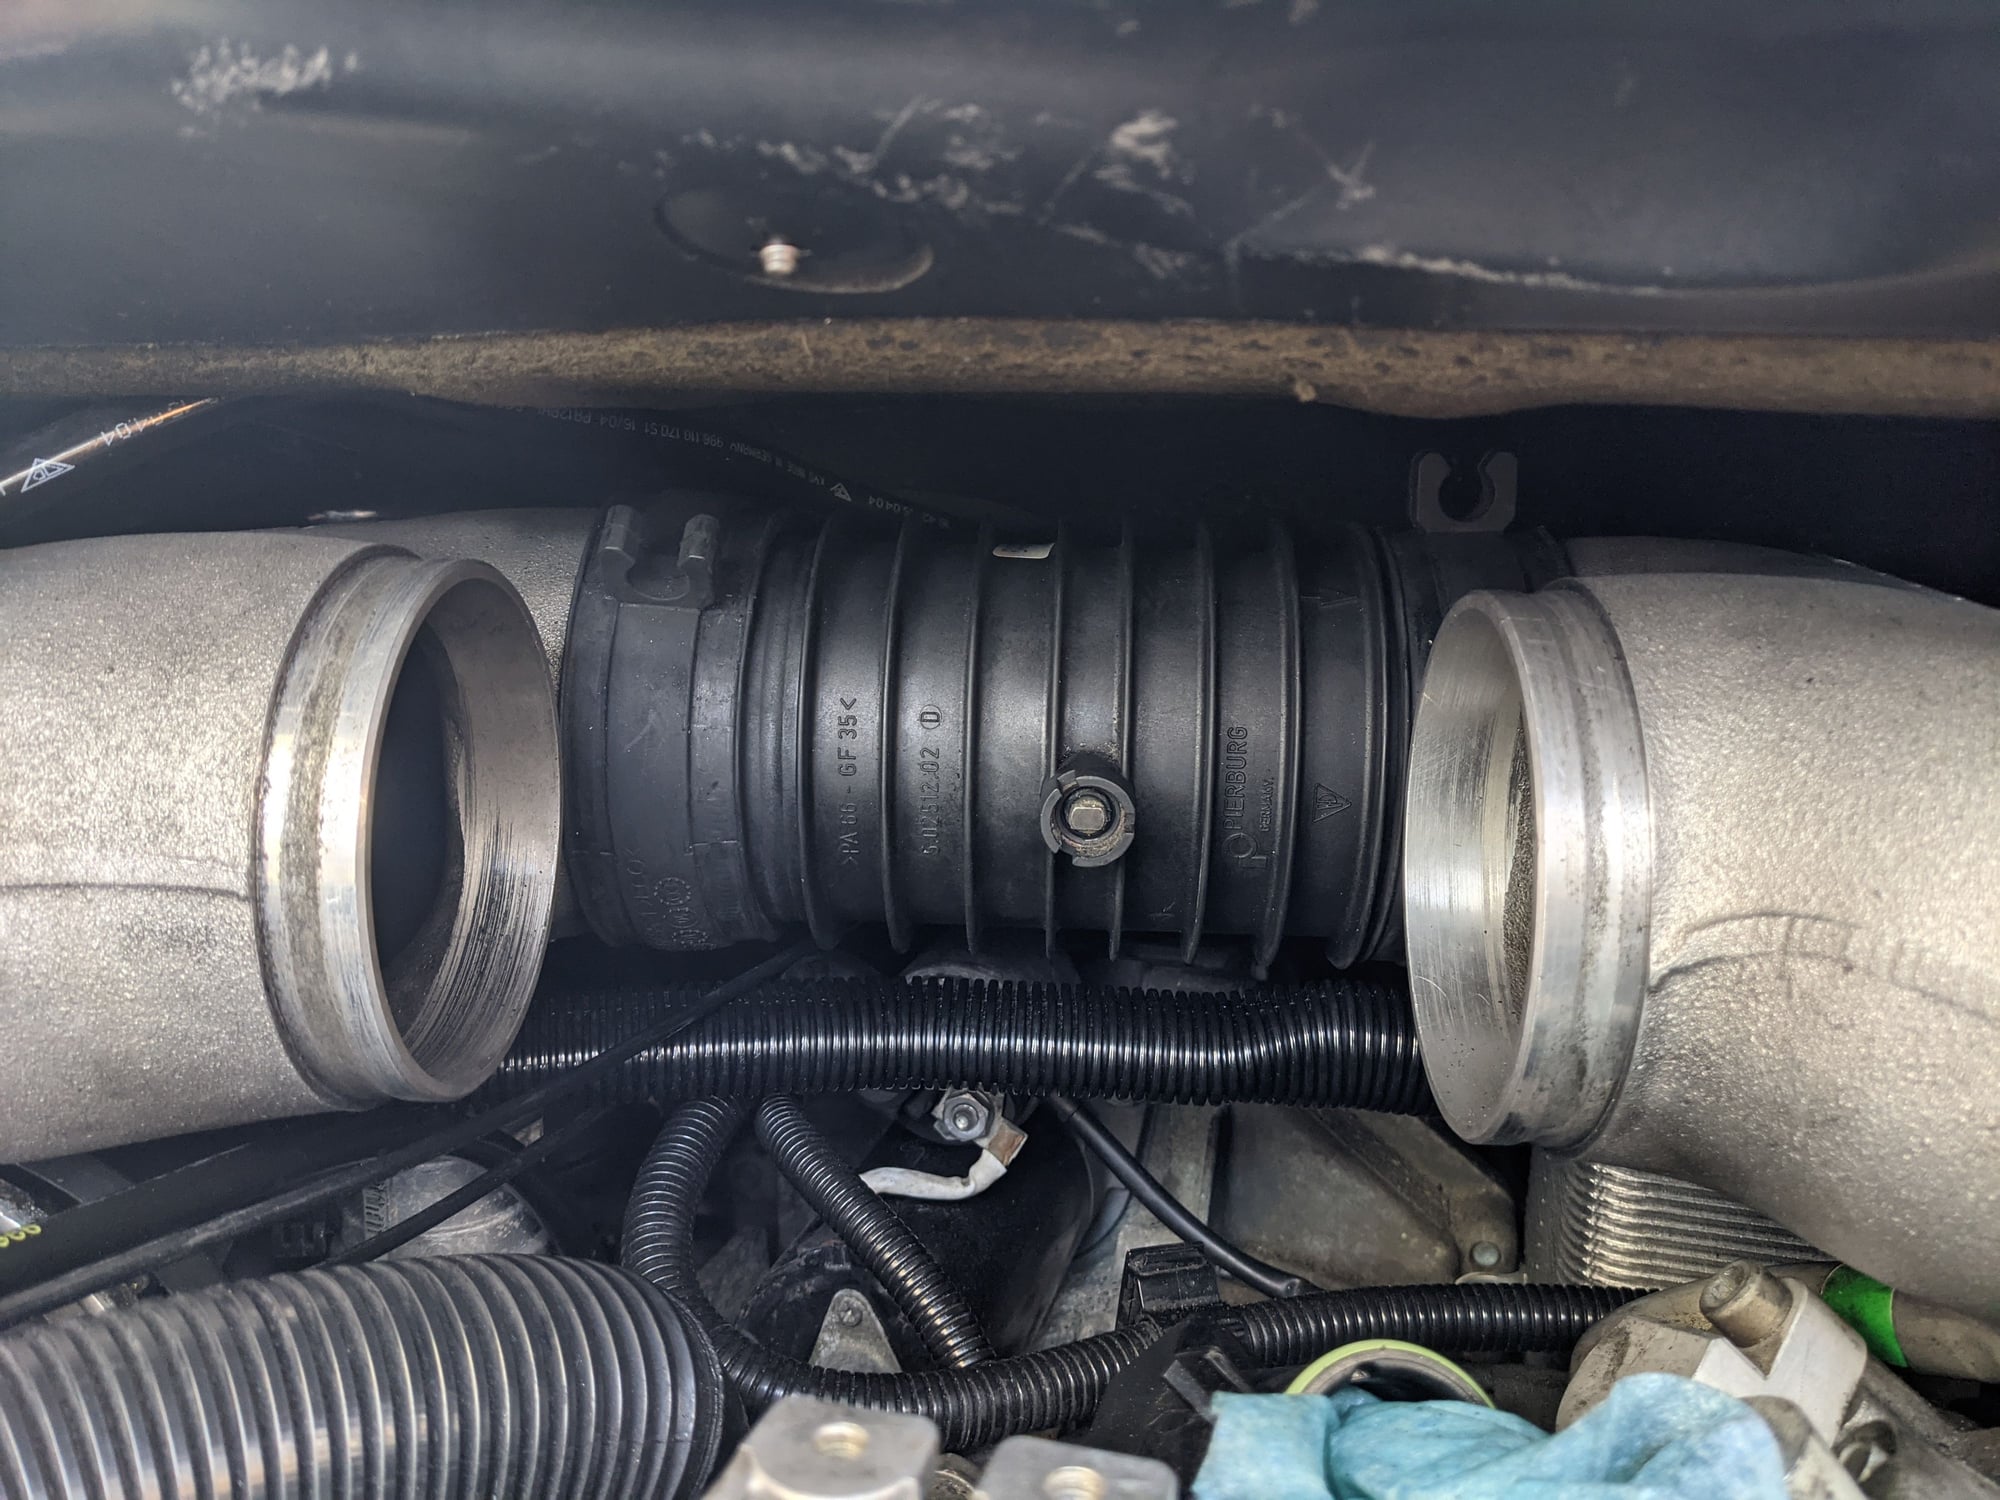
6. Next I unplugged the hard pipe leading from AOS to the first plenum. Then loosen the 4 worm clamps that will allow you to remove the plenum.
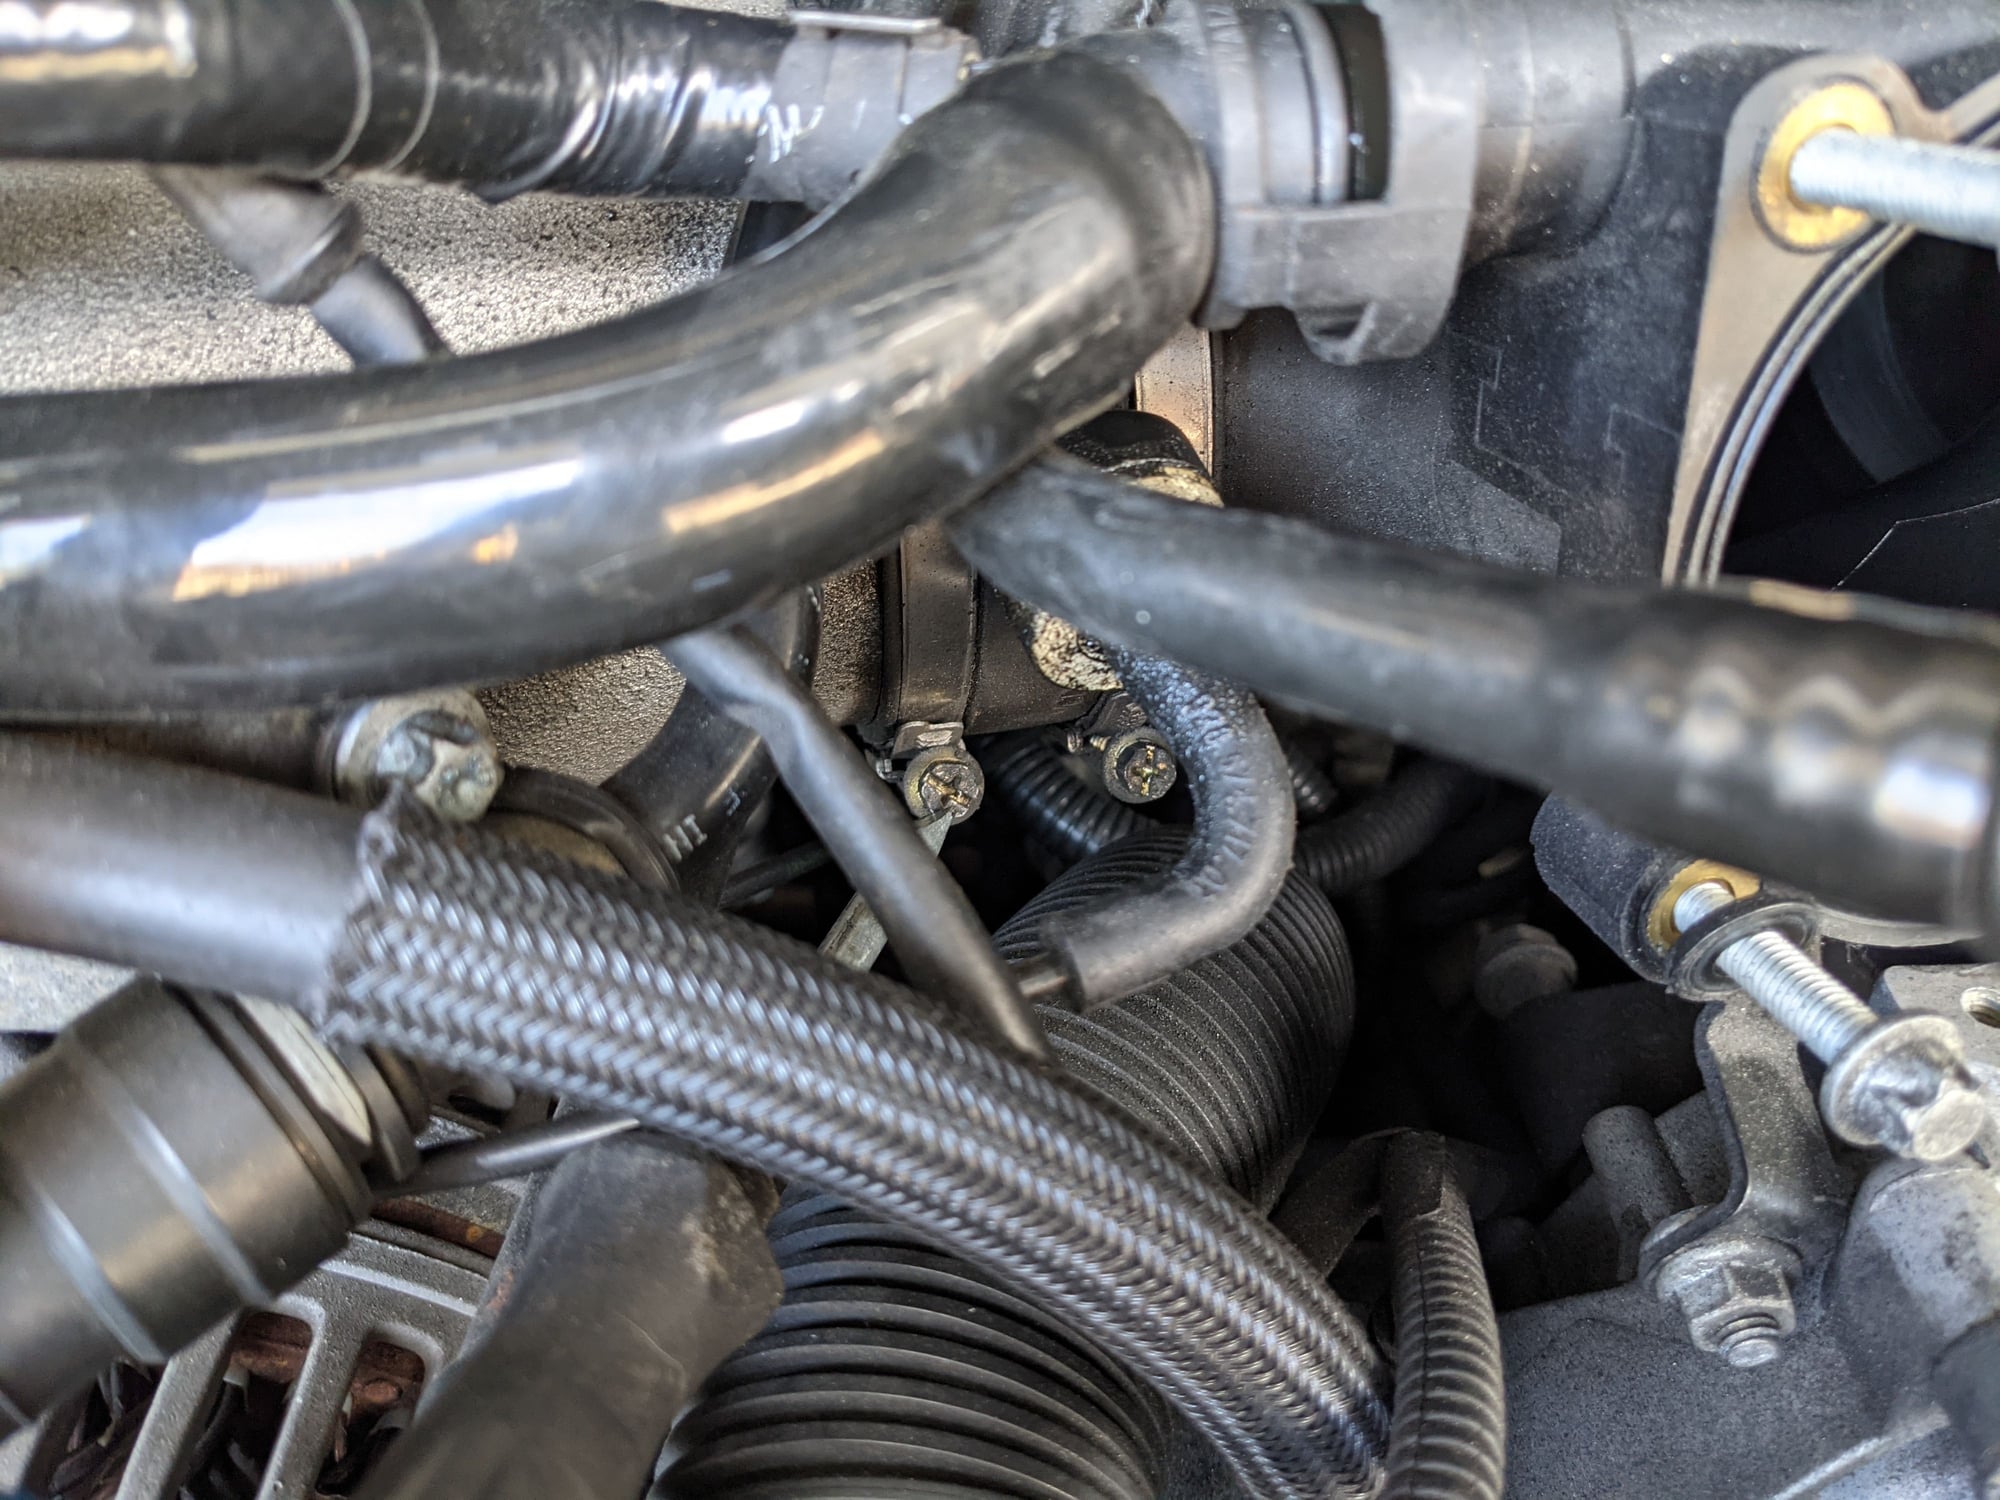
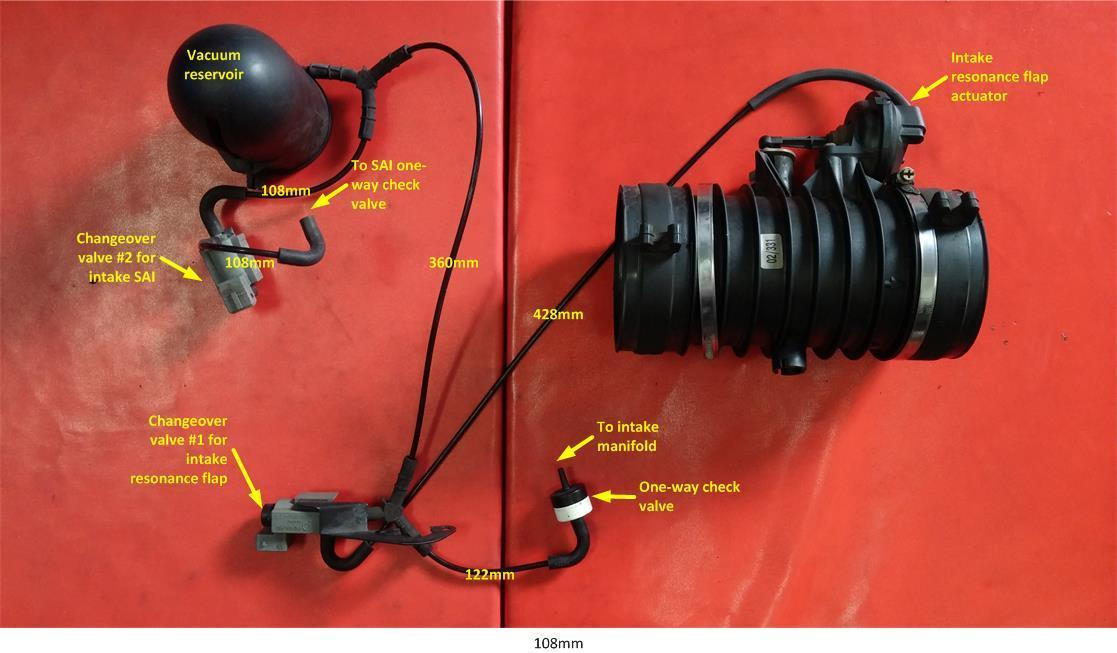
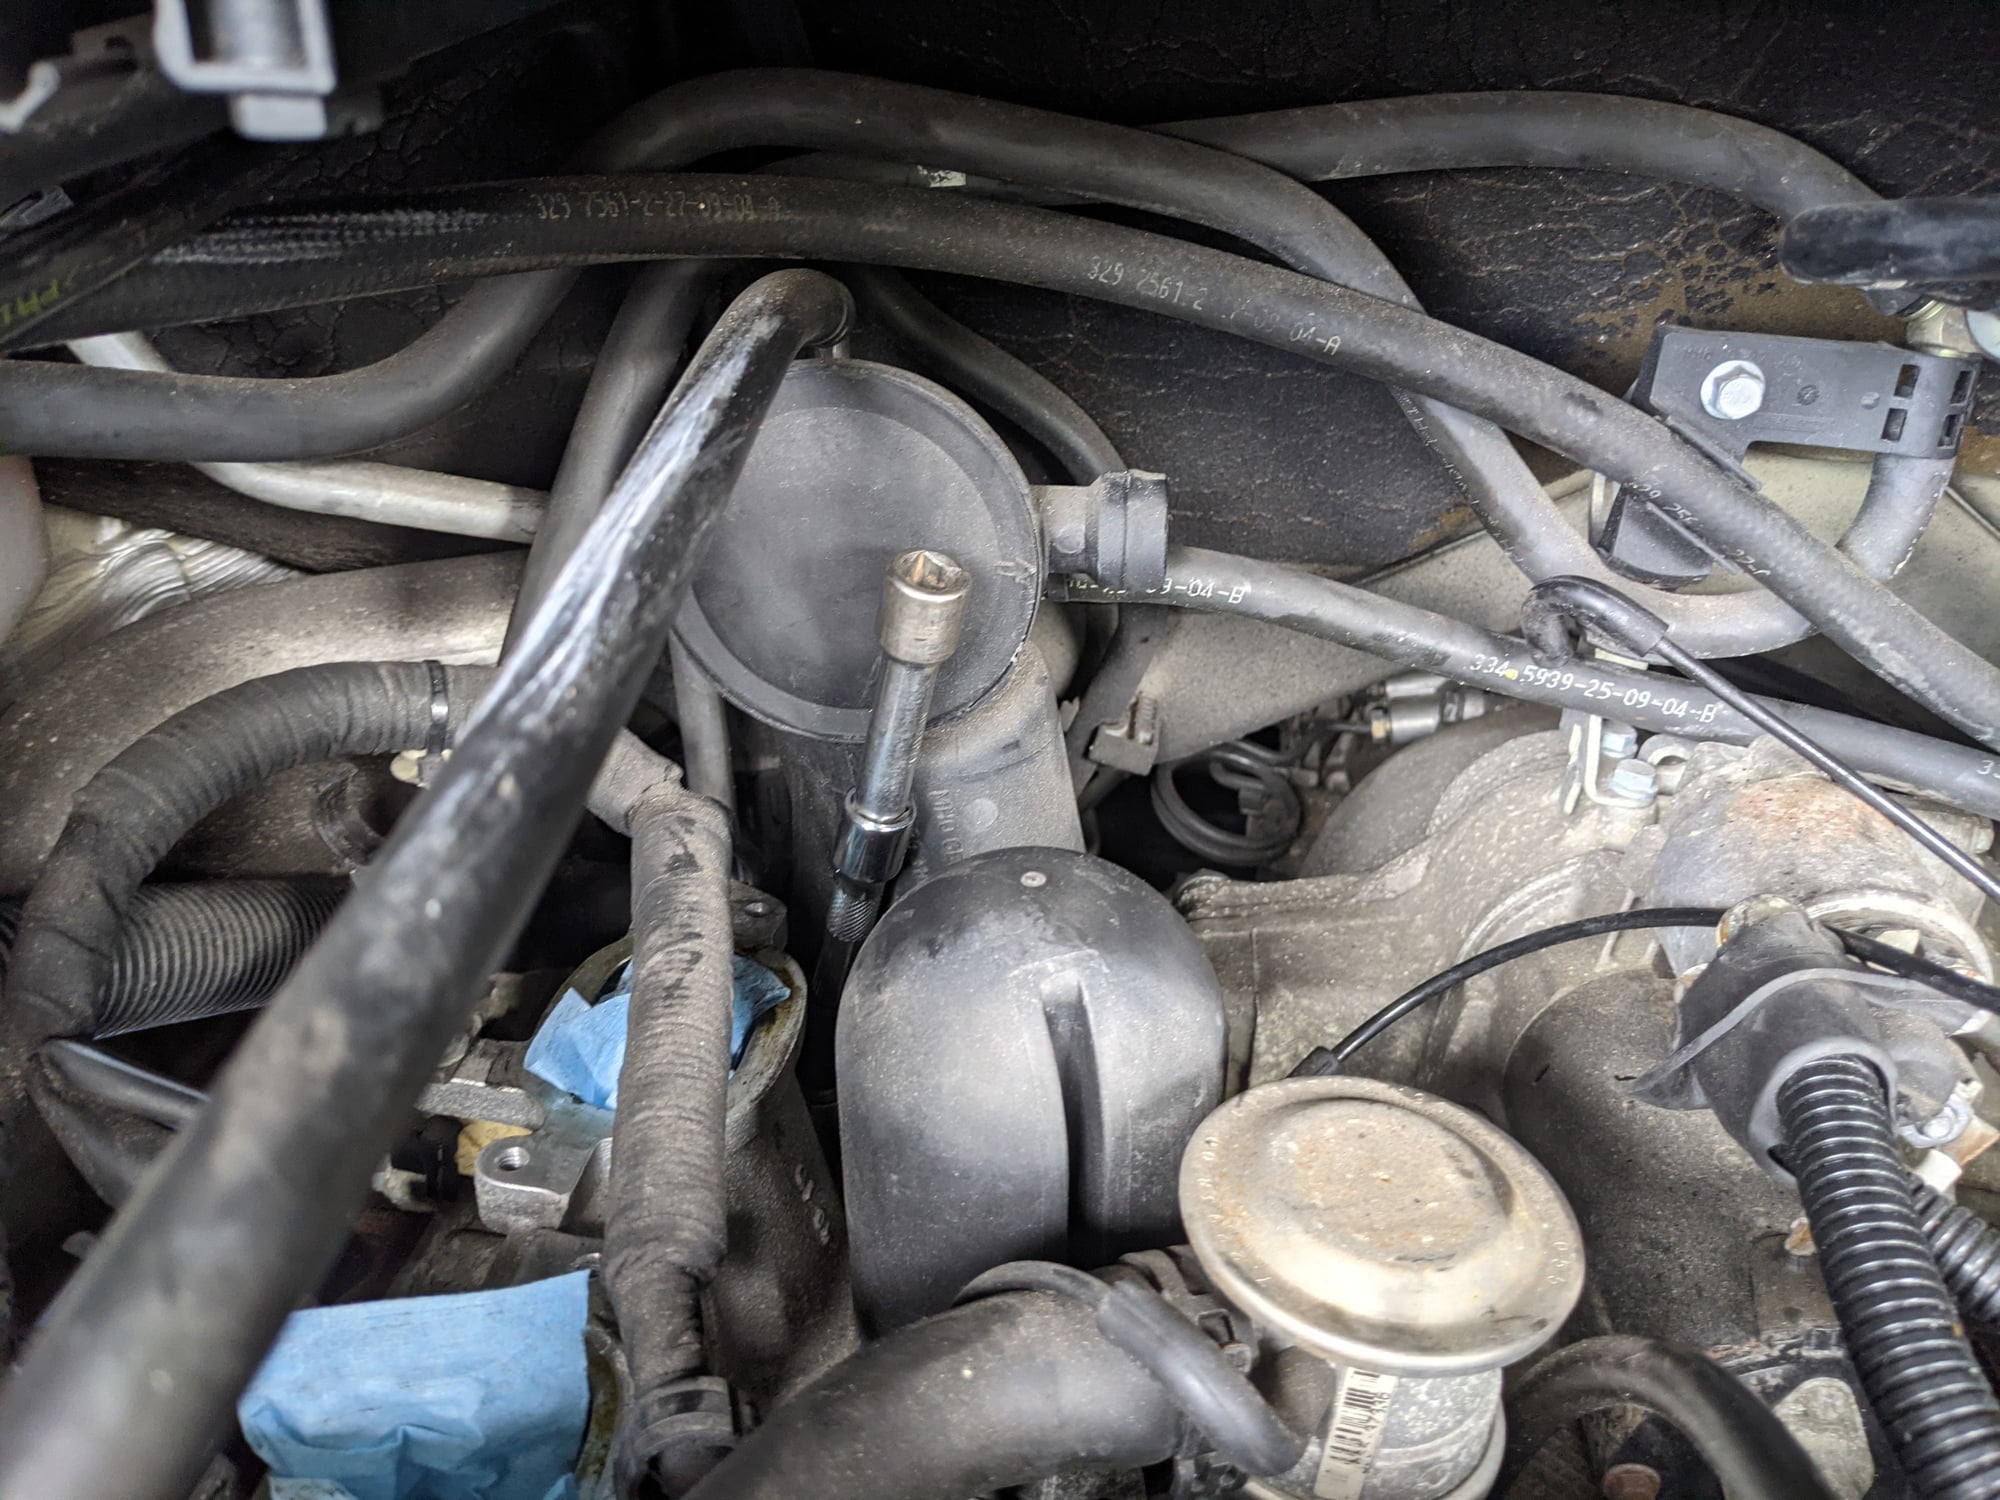
7. Now take note of some of the vacuum lines that run to and around the changeover valve. This will help ensure you get it all back together correctly. Again, pictures speak a 1000 words.
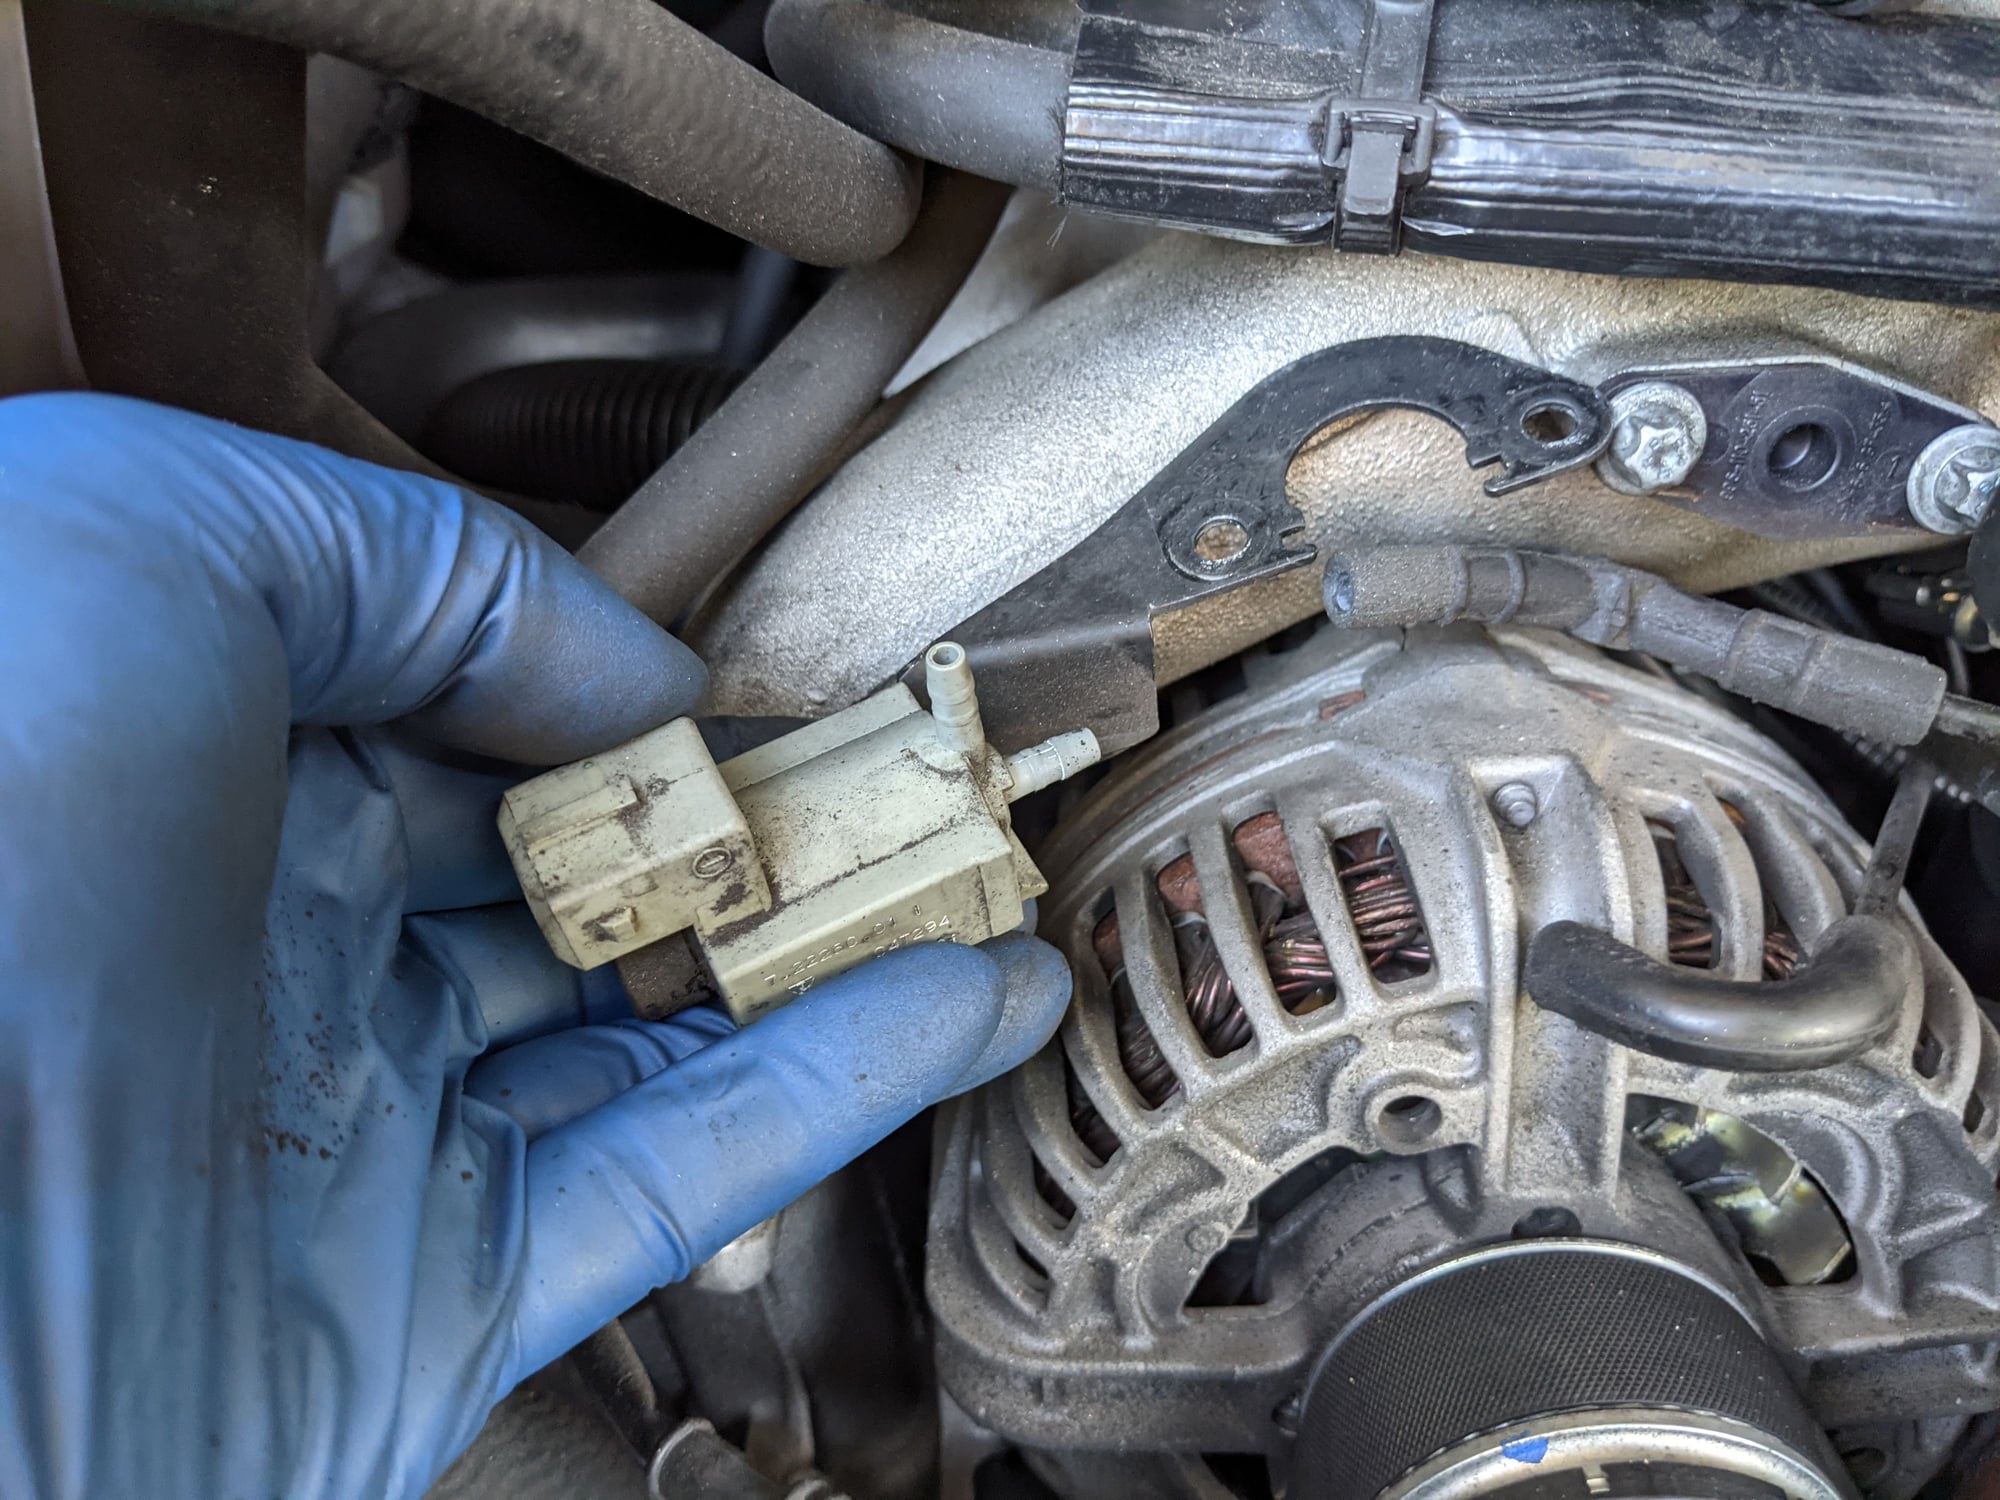
8. Now unplug and remove the tank vapor vent valve. I think mine is done as I keep on getting a code for a minor leak.
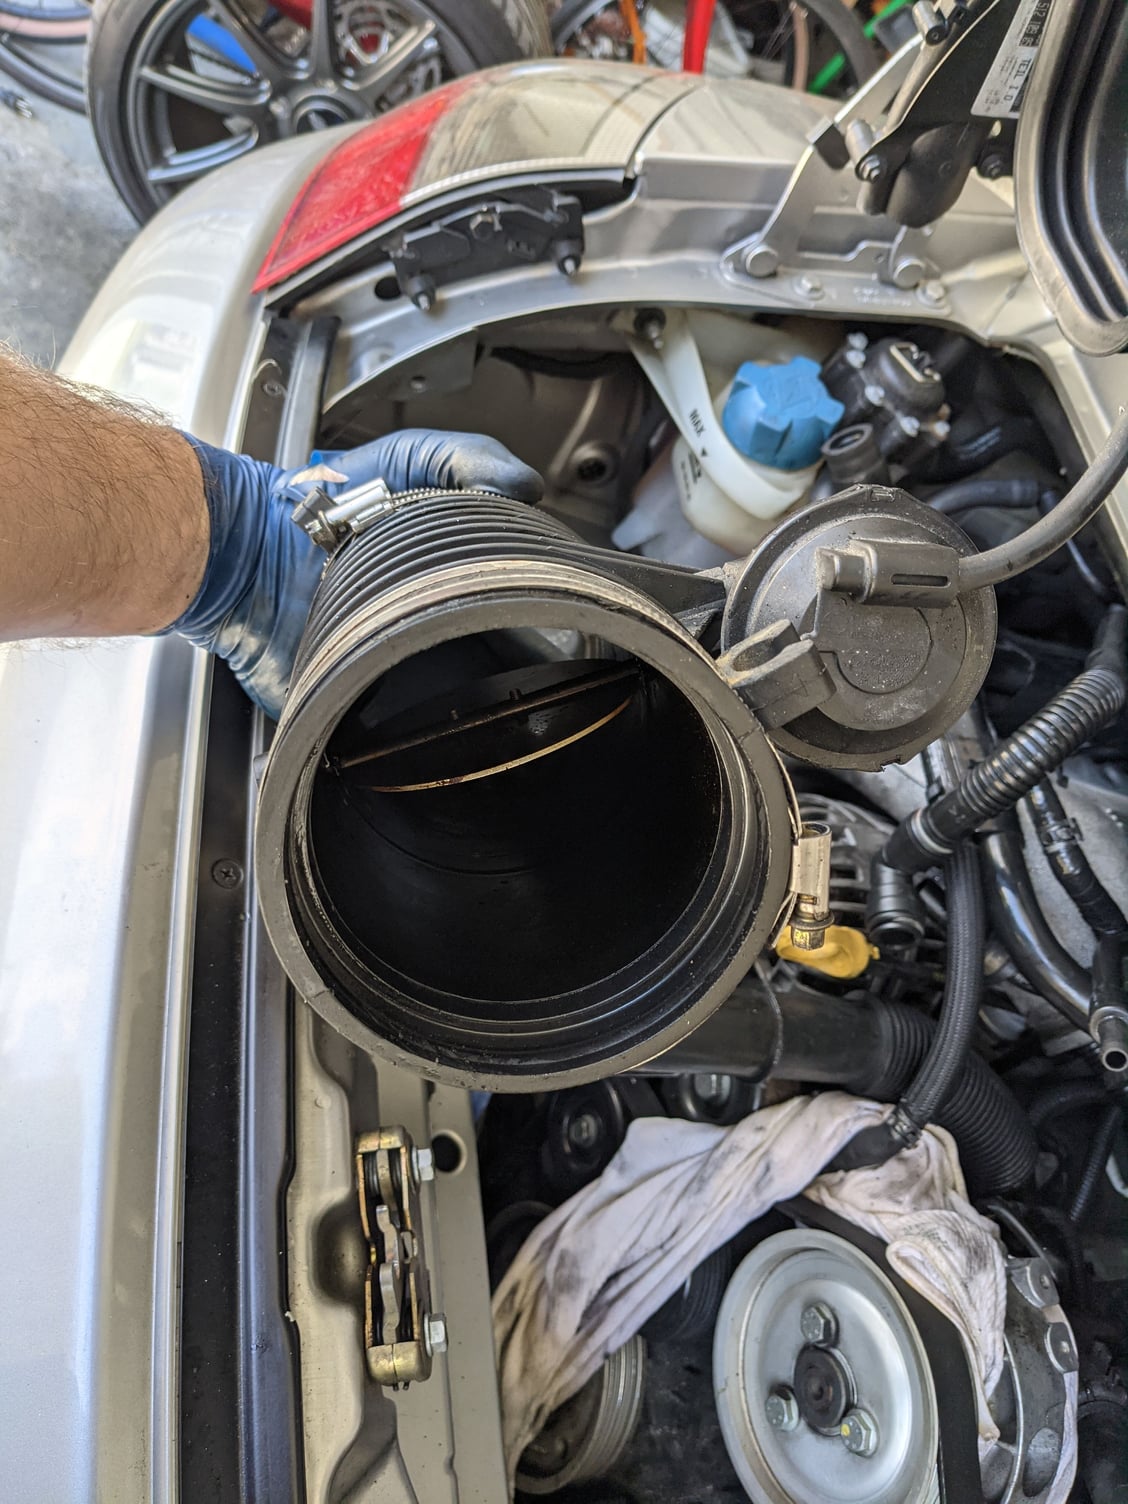
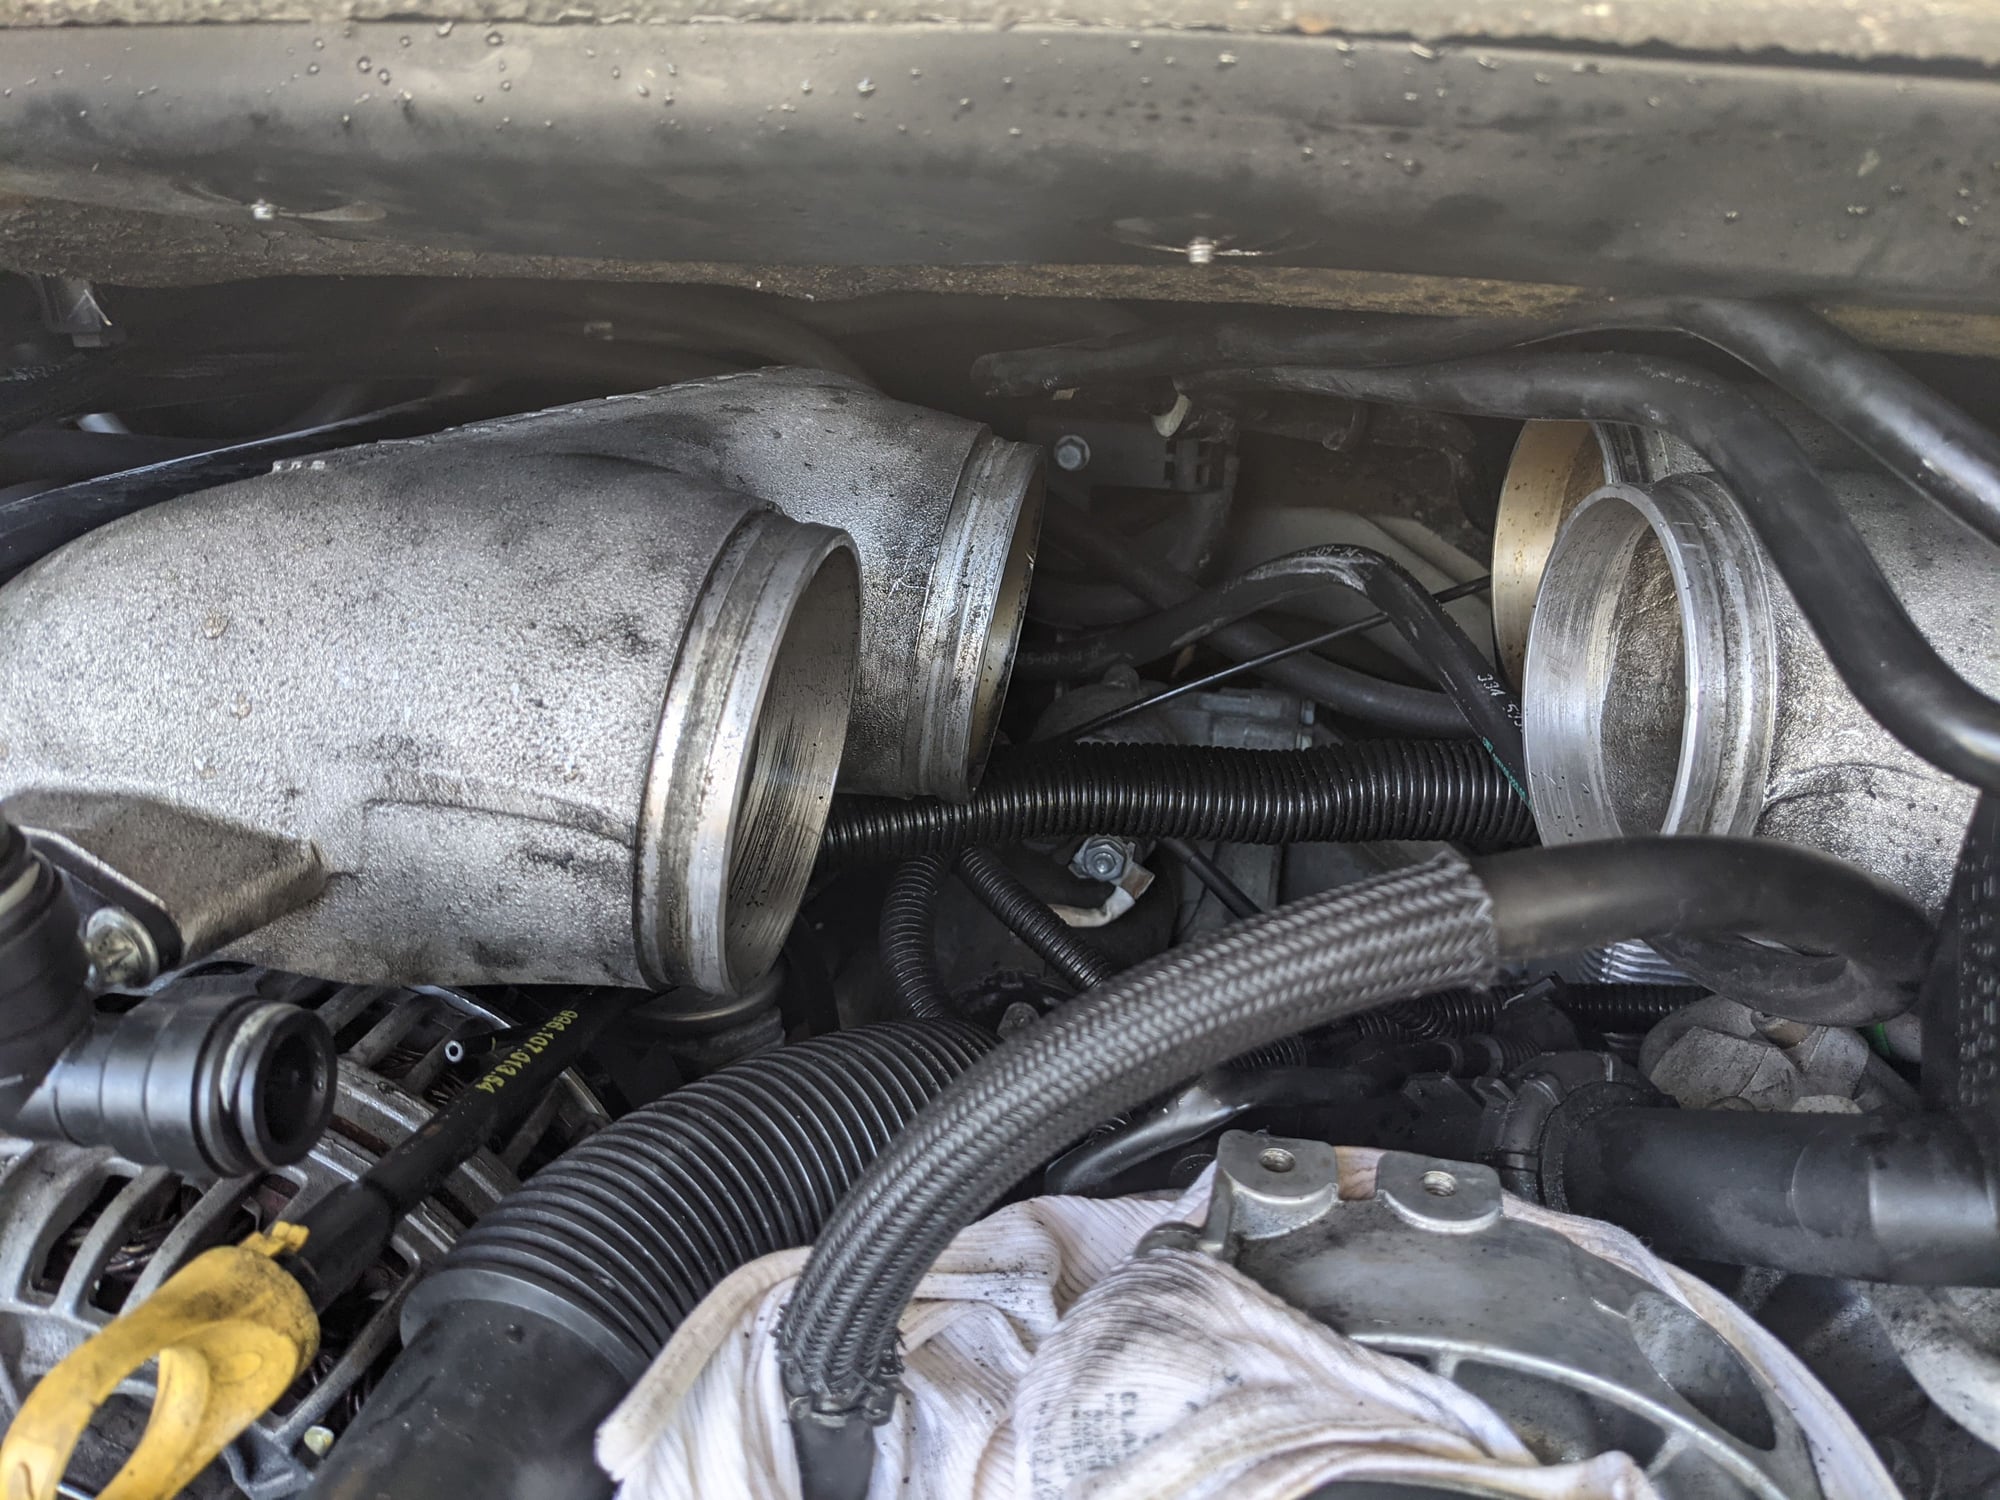
9. Now remove the retention clip from the U shaped hose and separate it. Now you will be able to remove the first plenum. The rubber sleeves can be slightly pushed towards the plenum to give you some extra room. A bit of wiggling and it should come out easy.
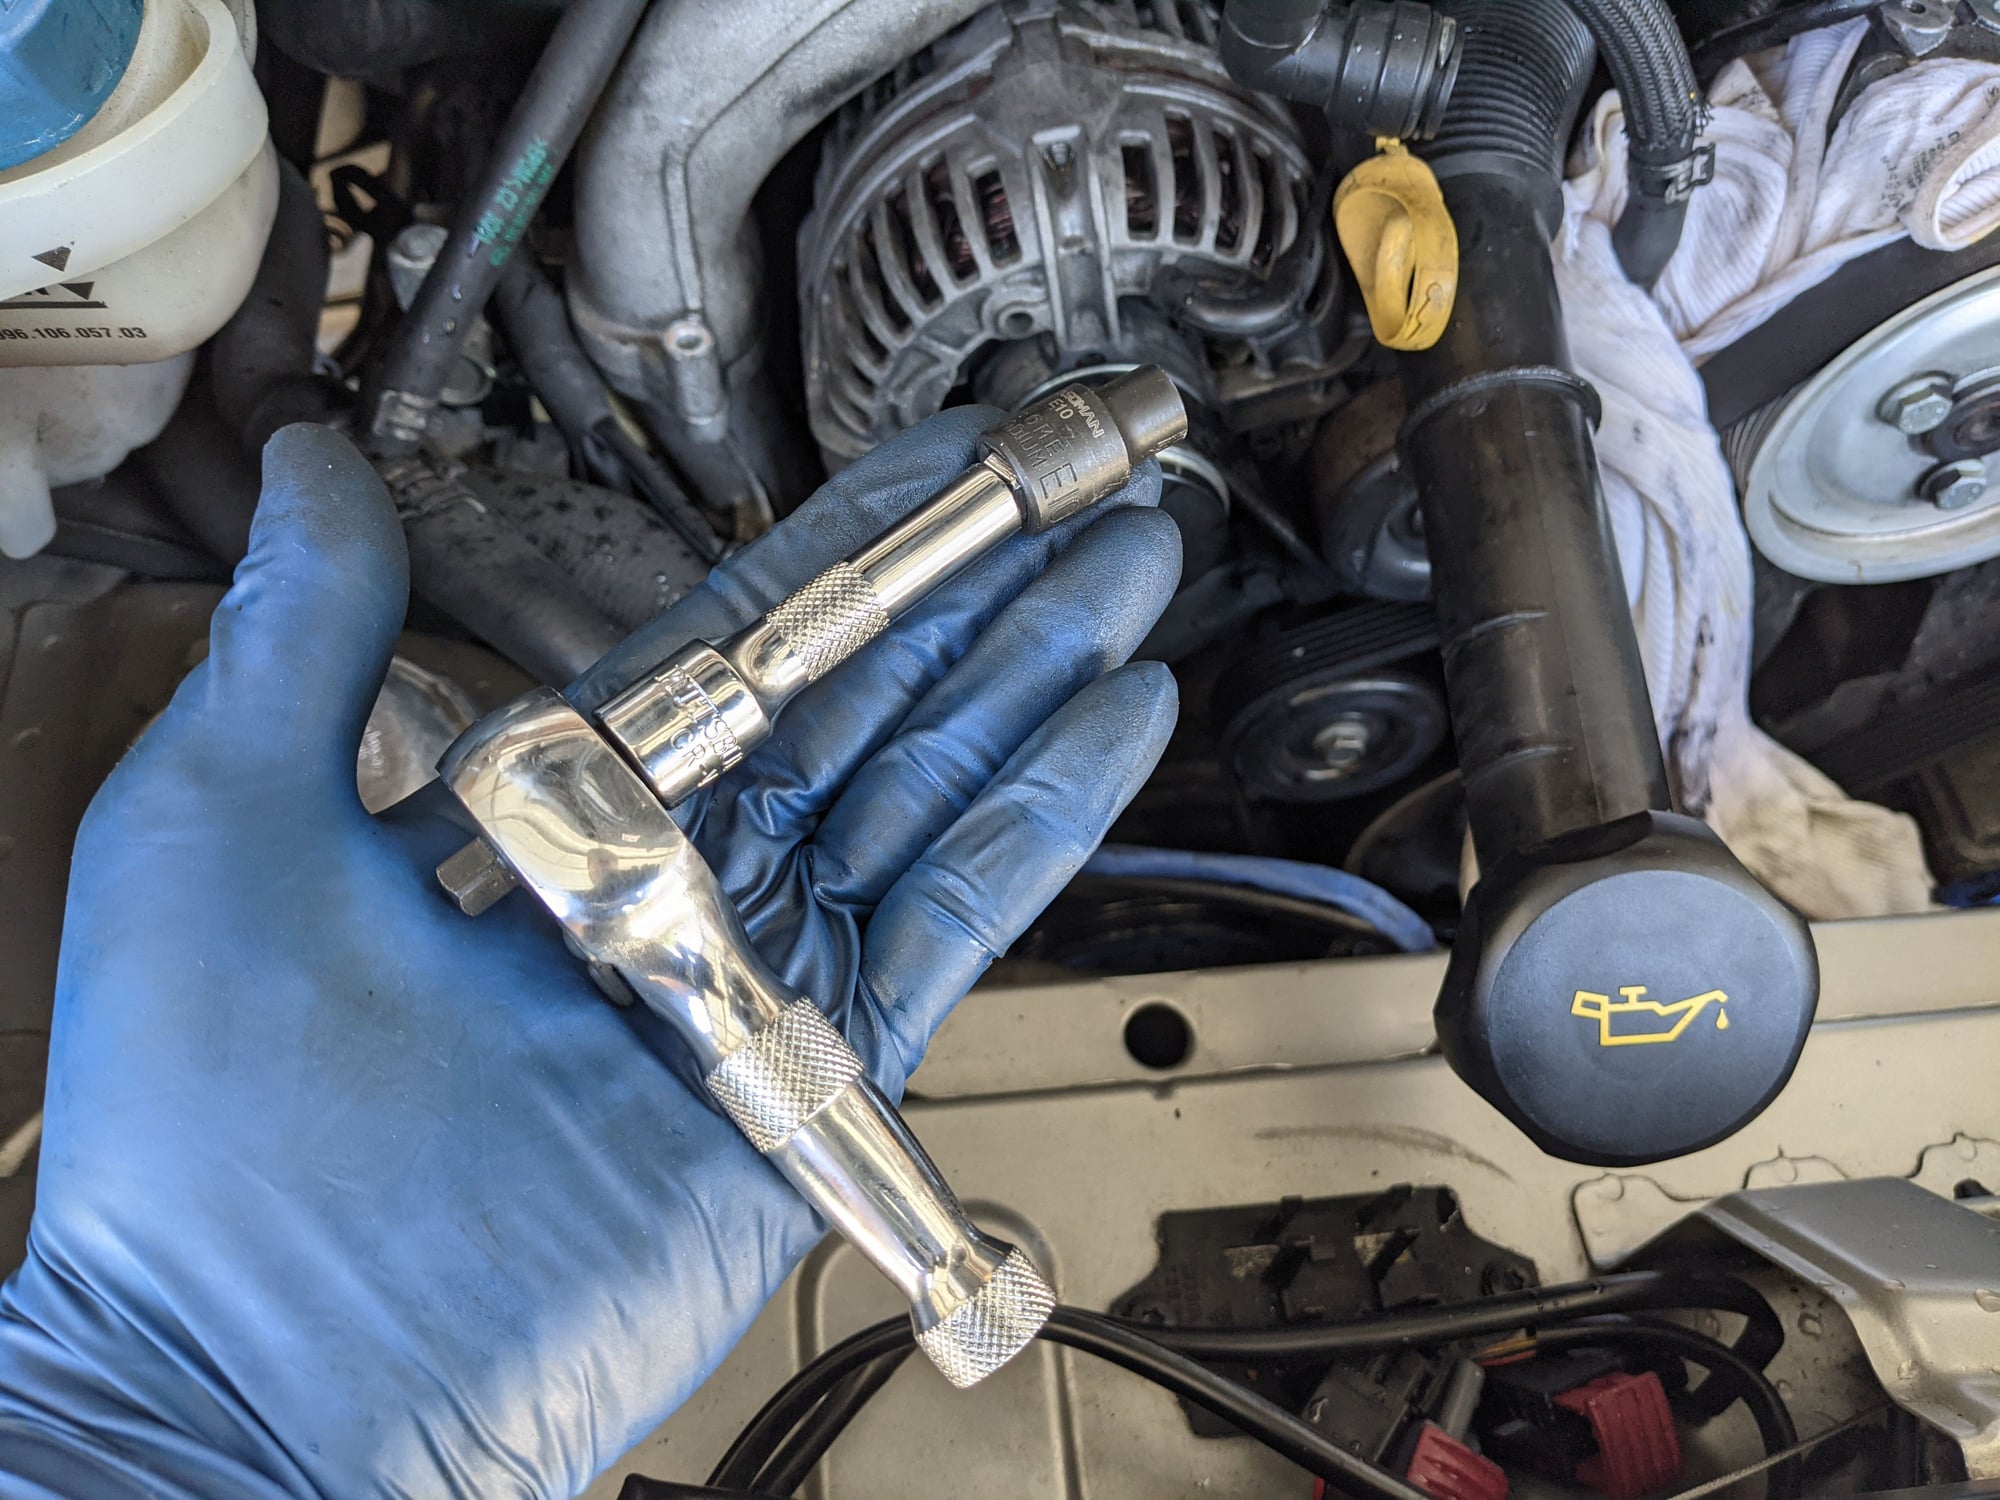
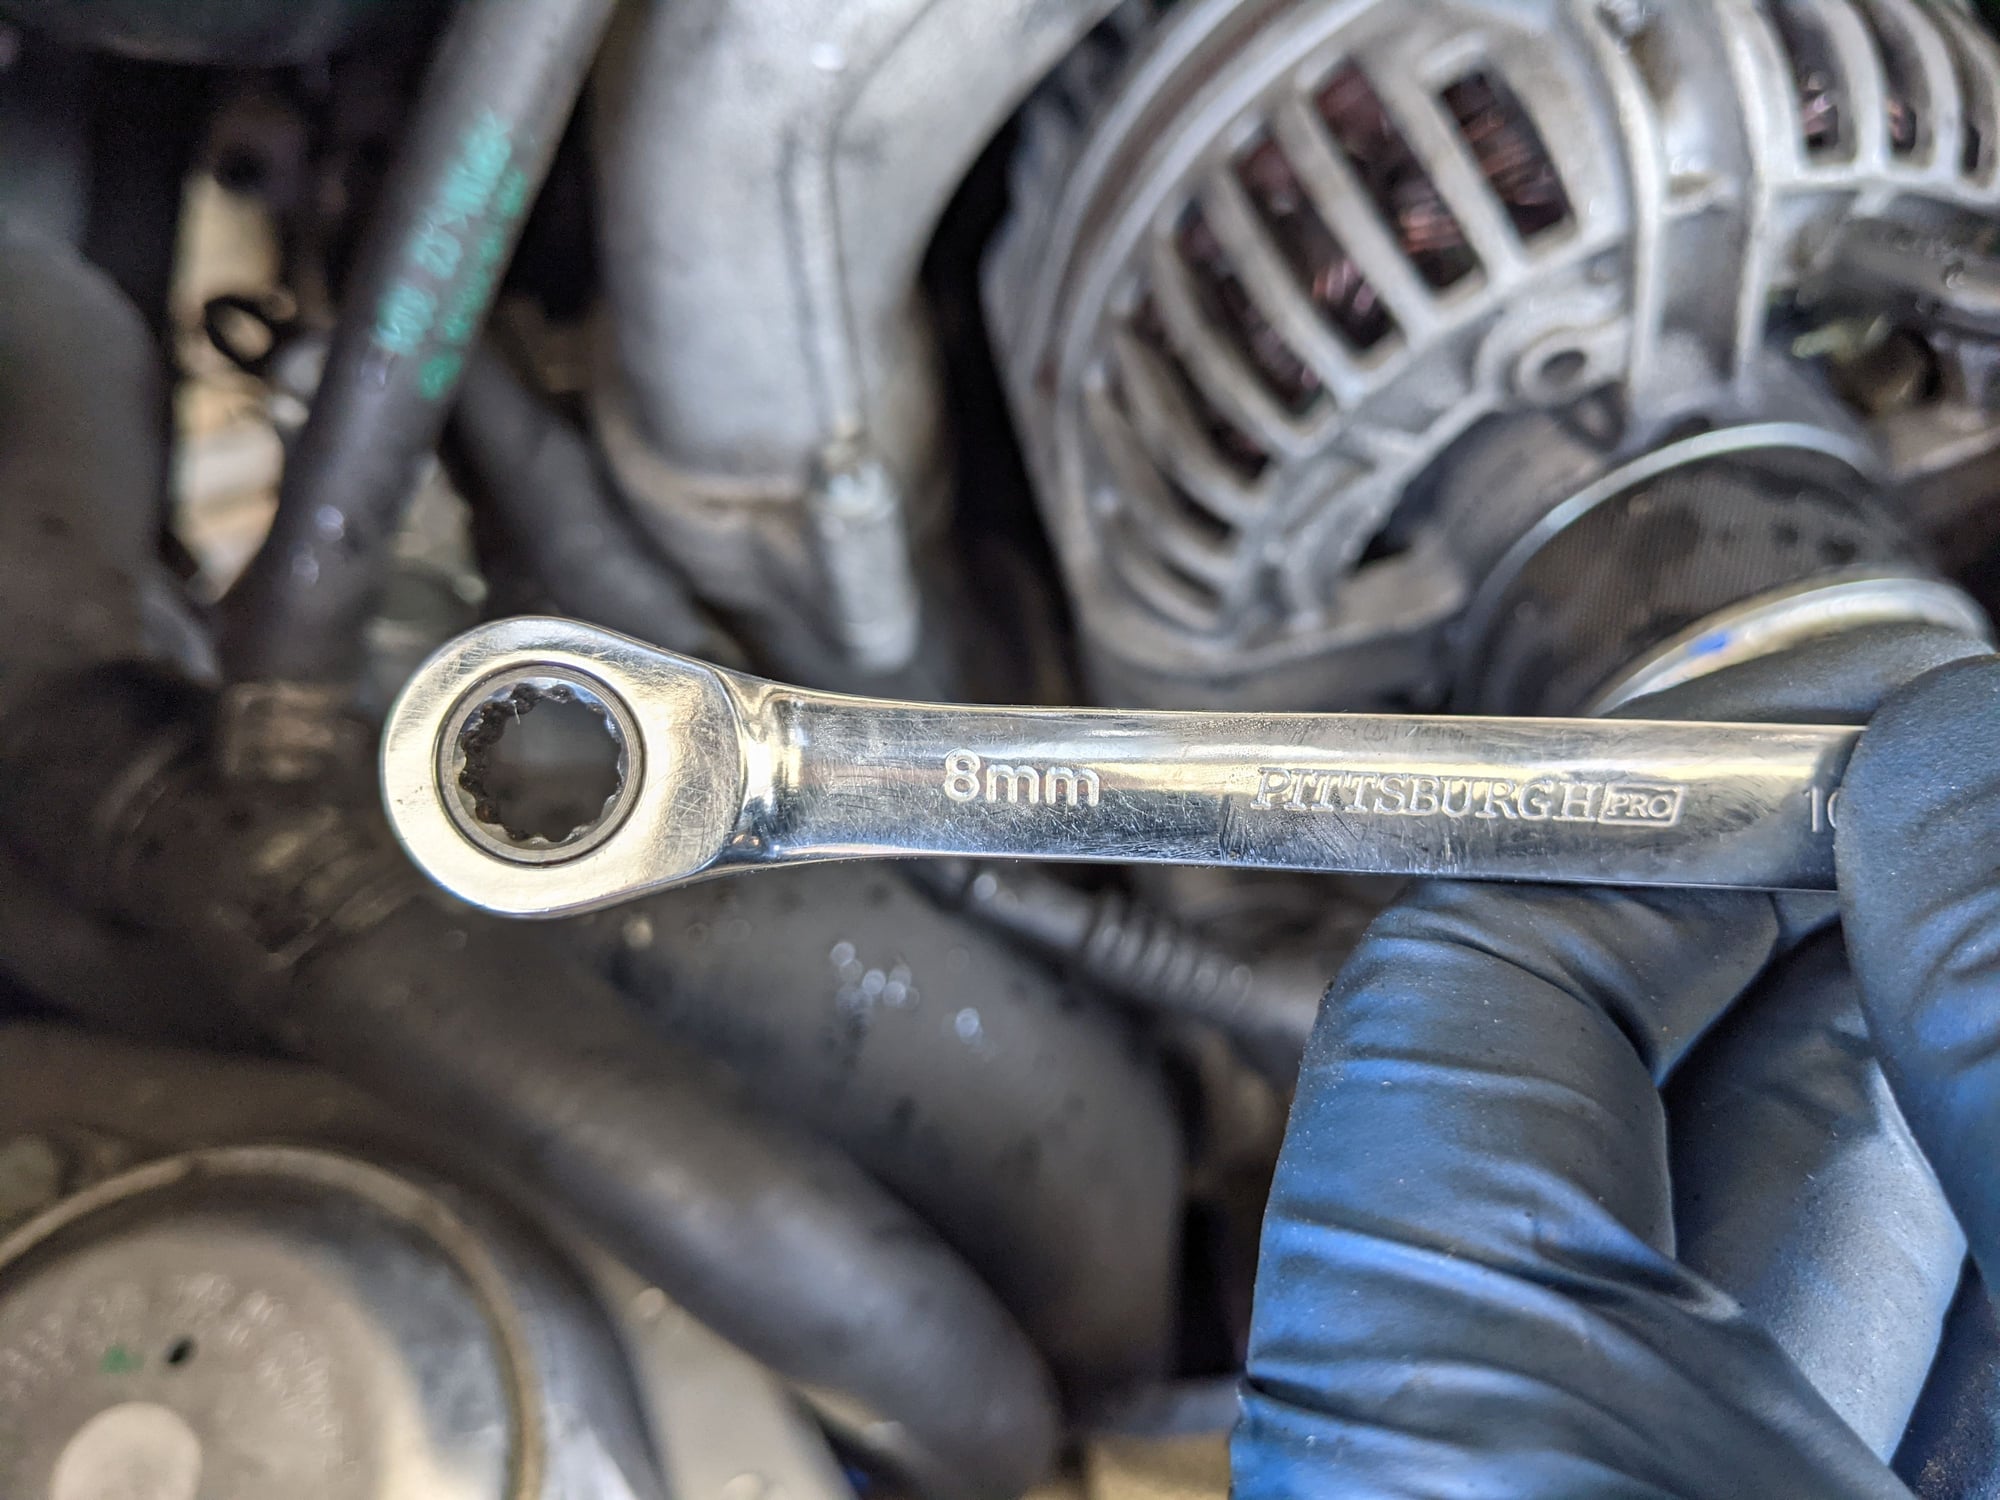
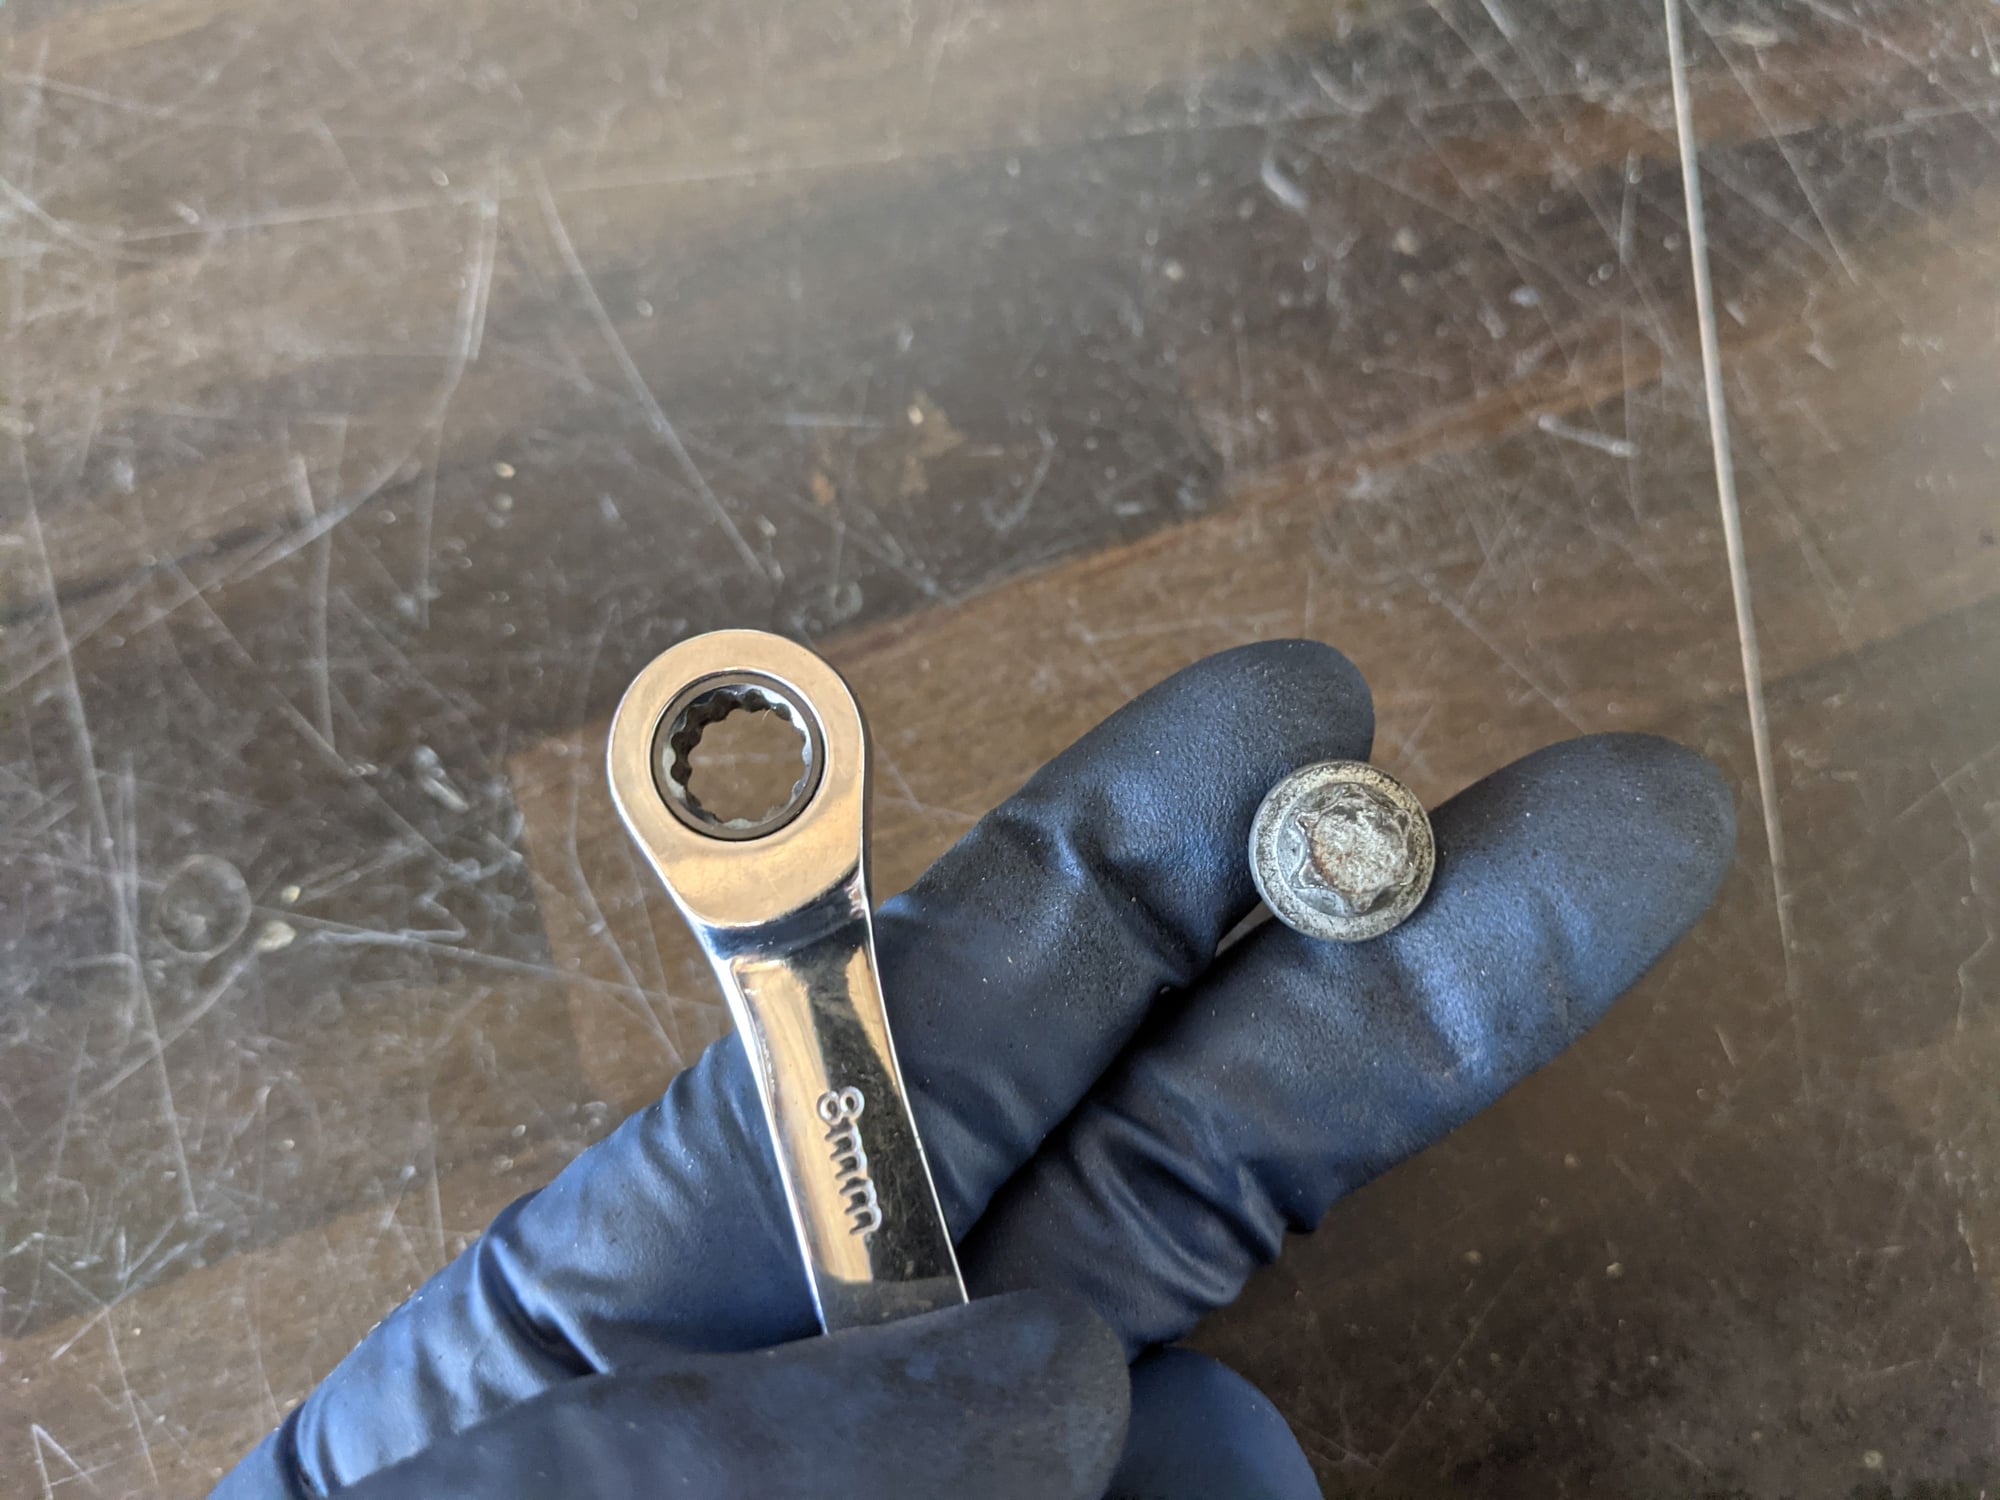
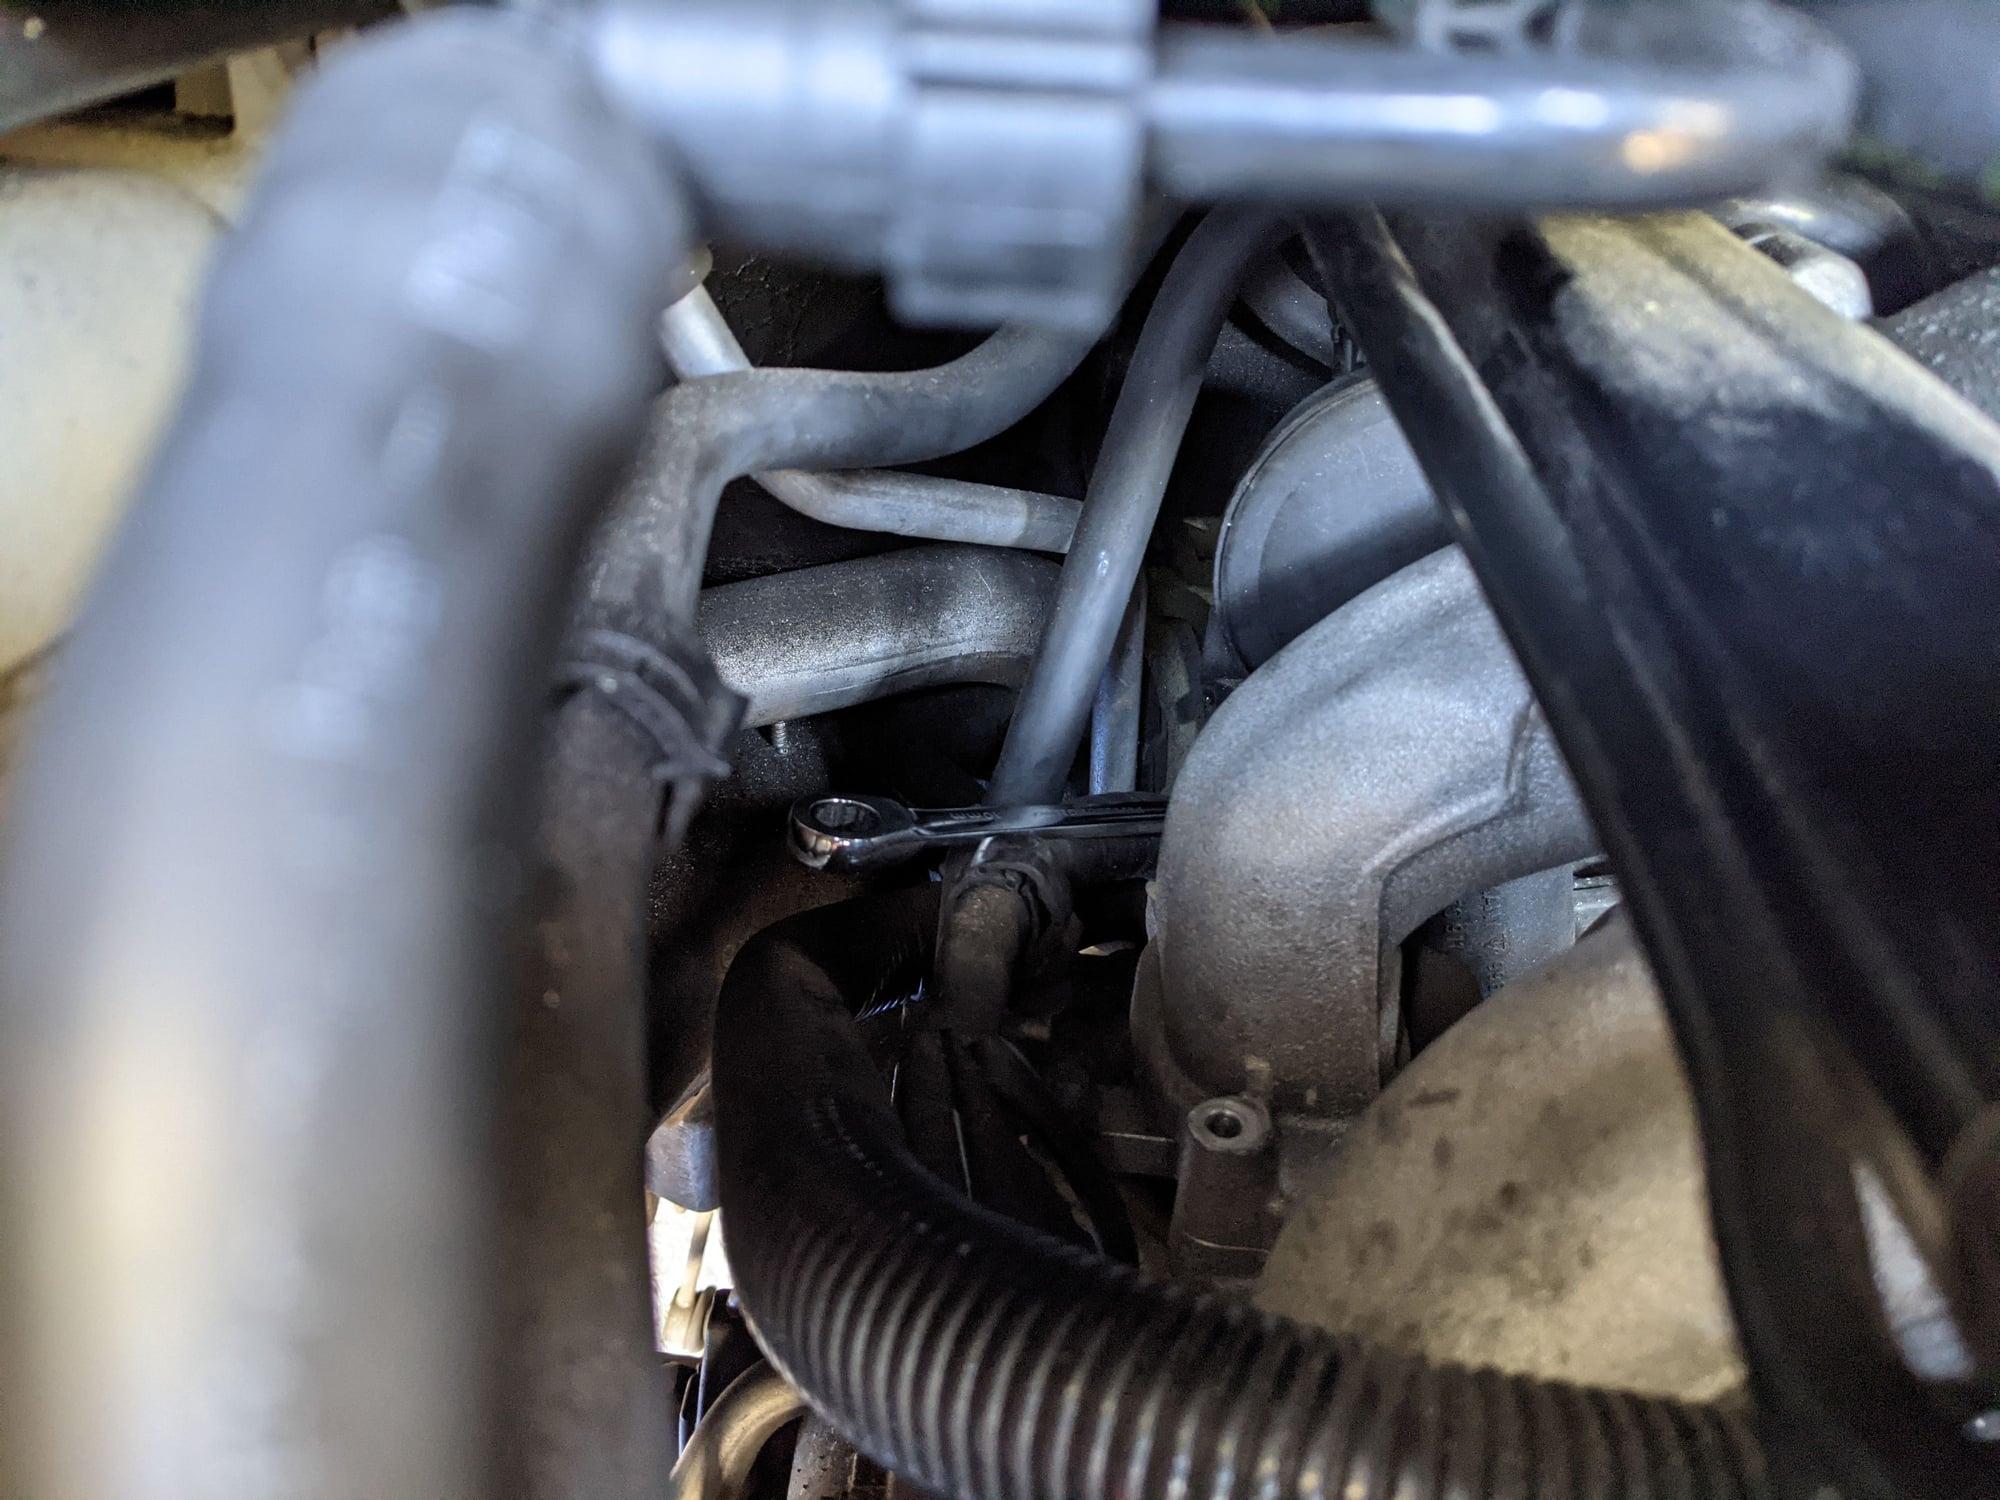
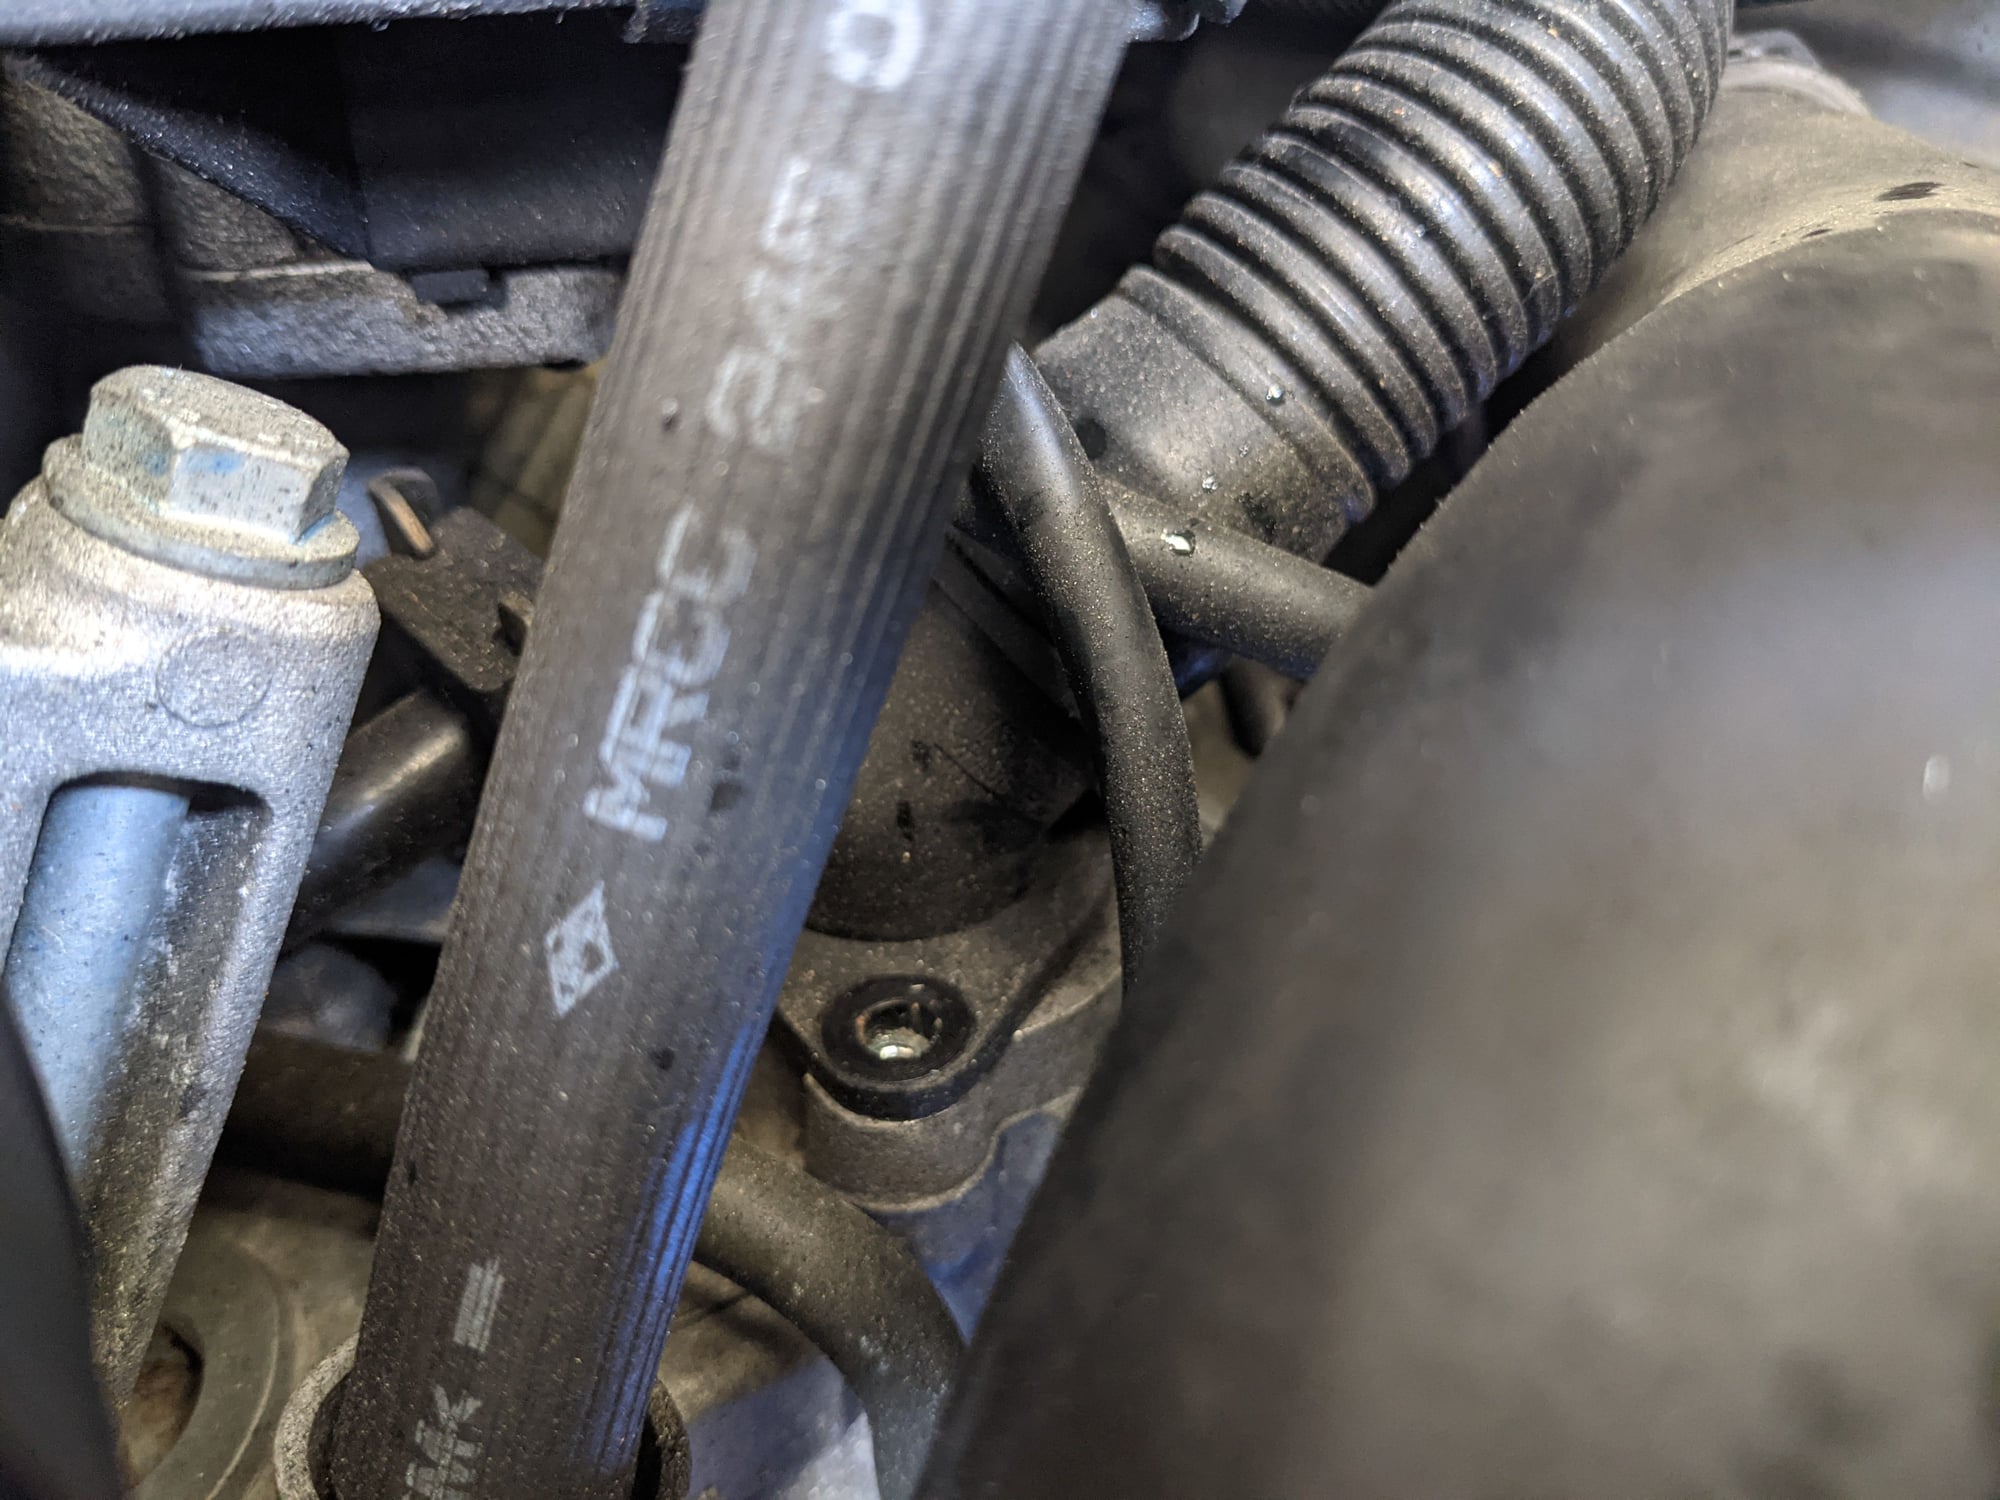
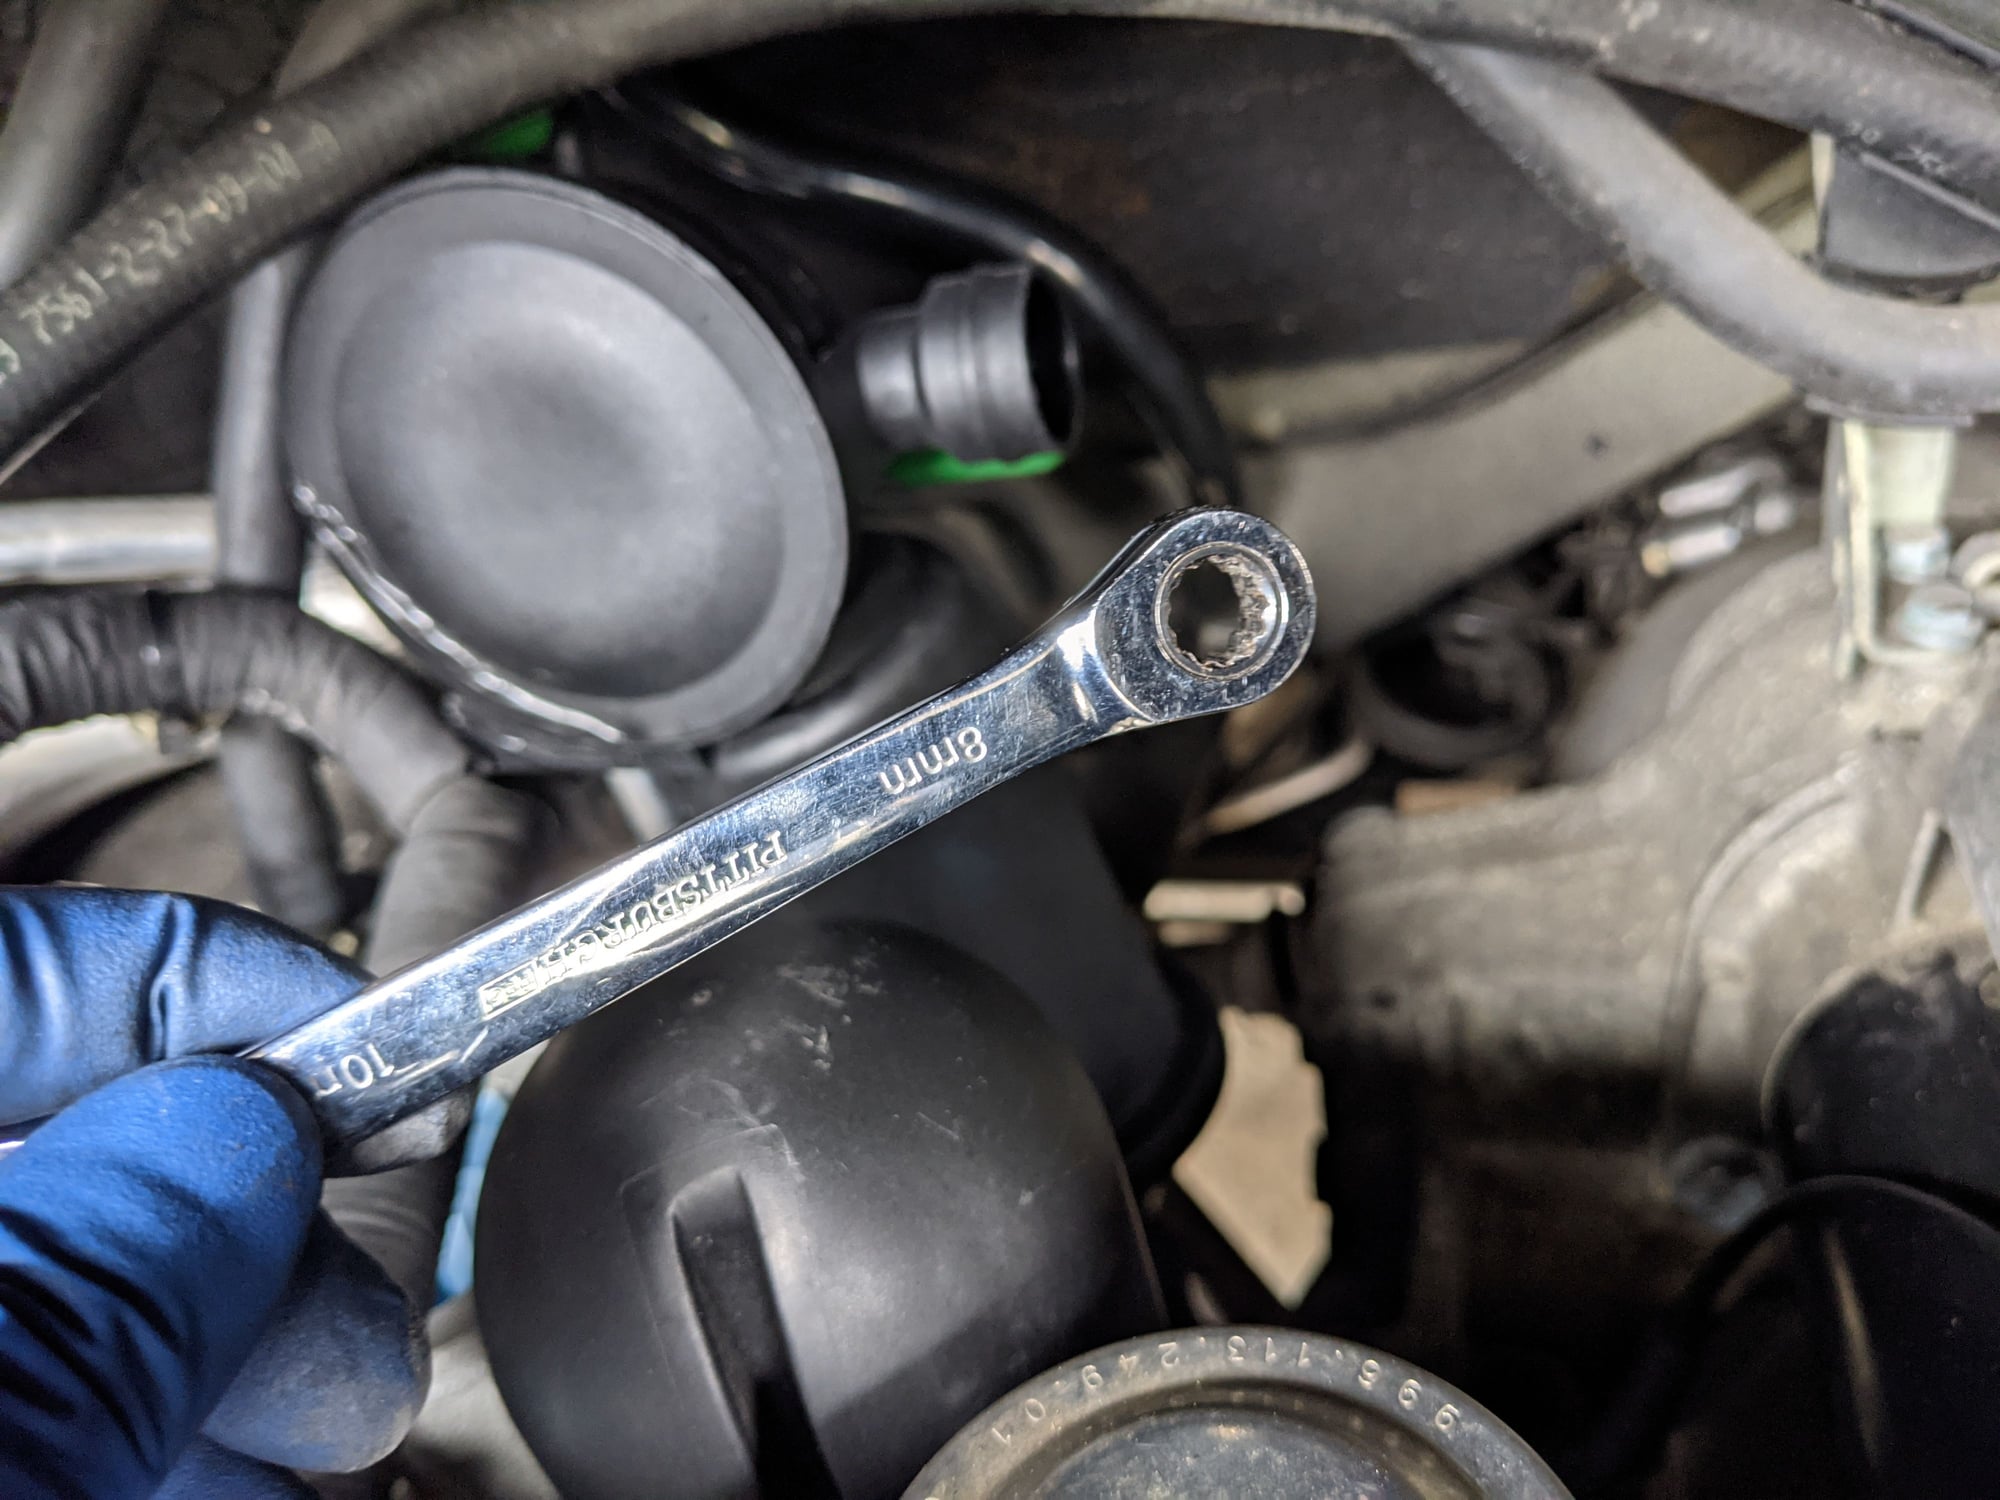
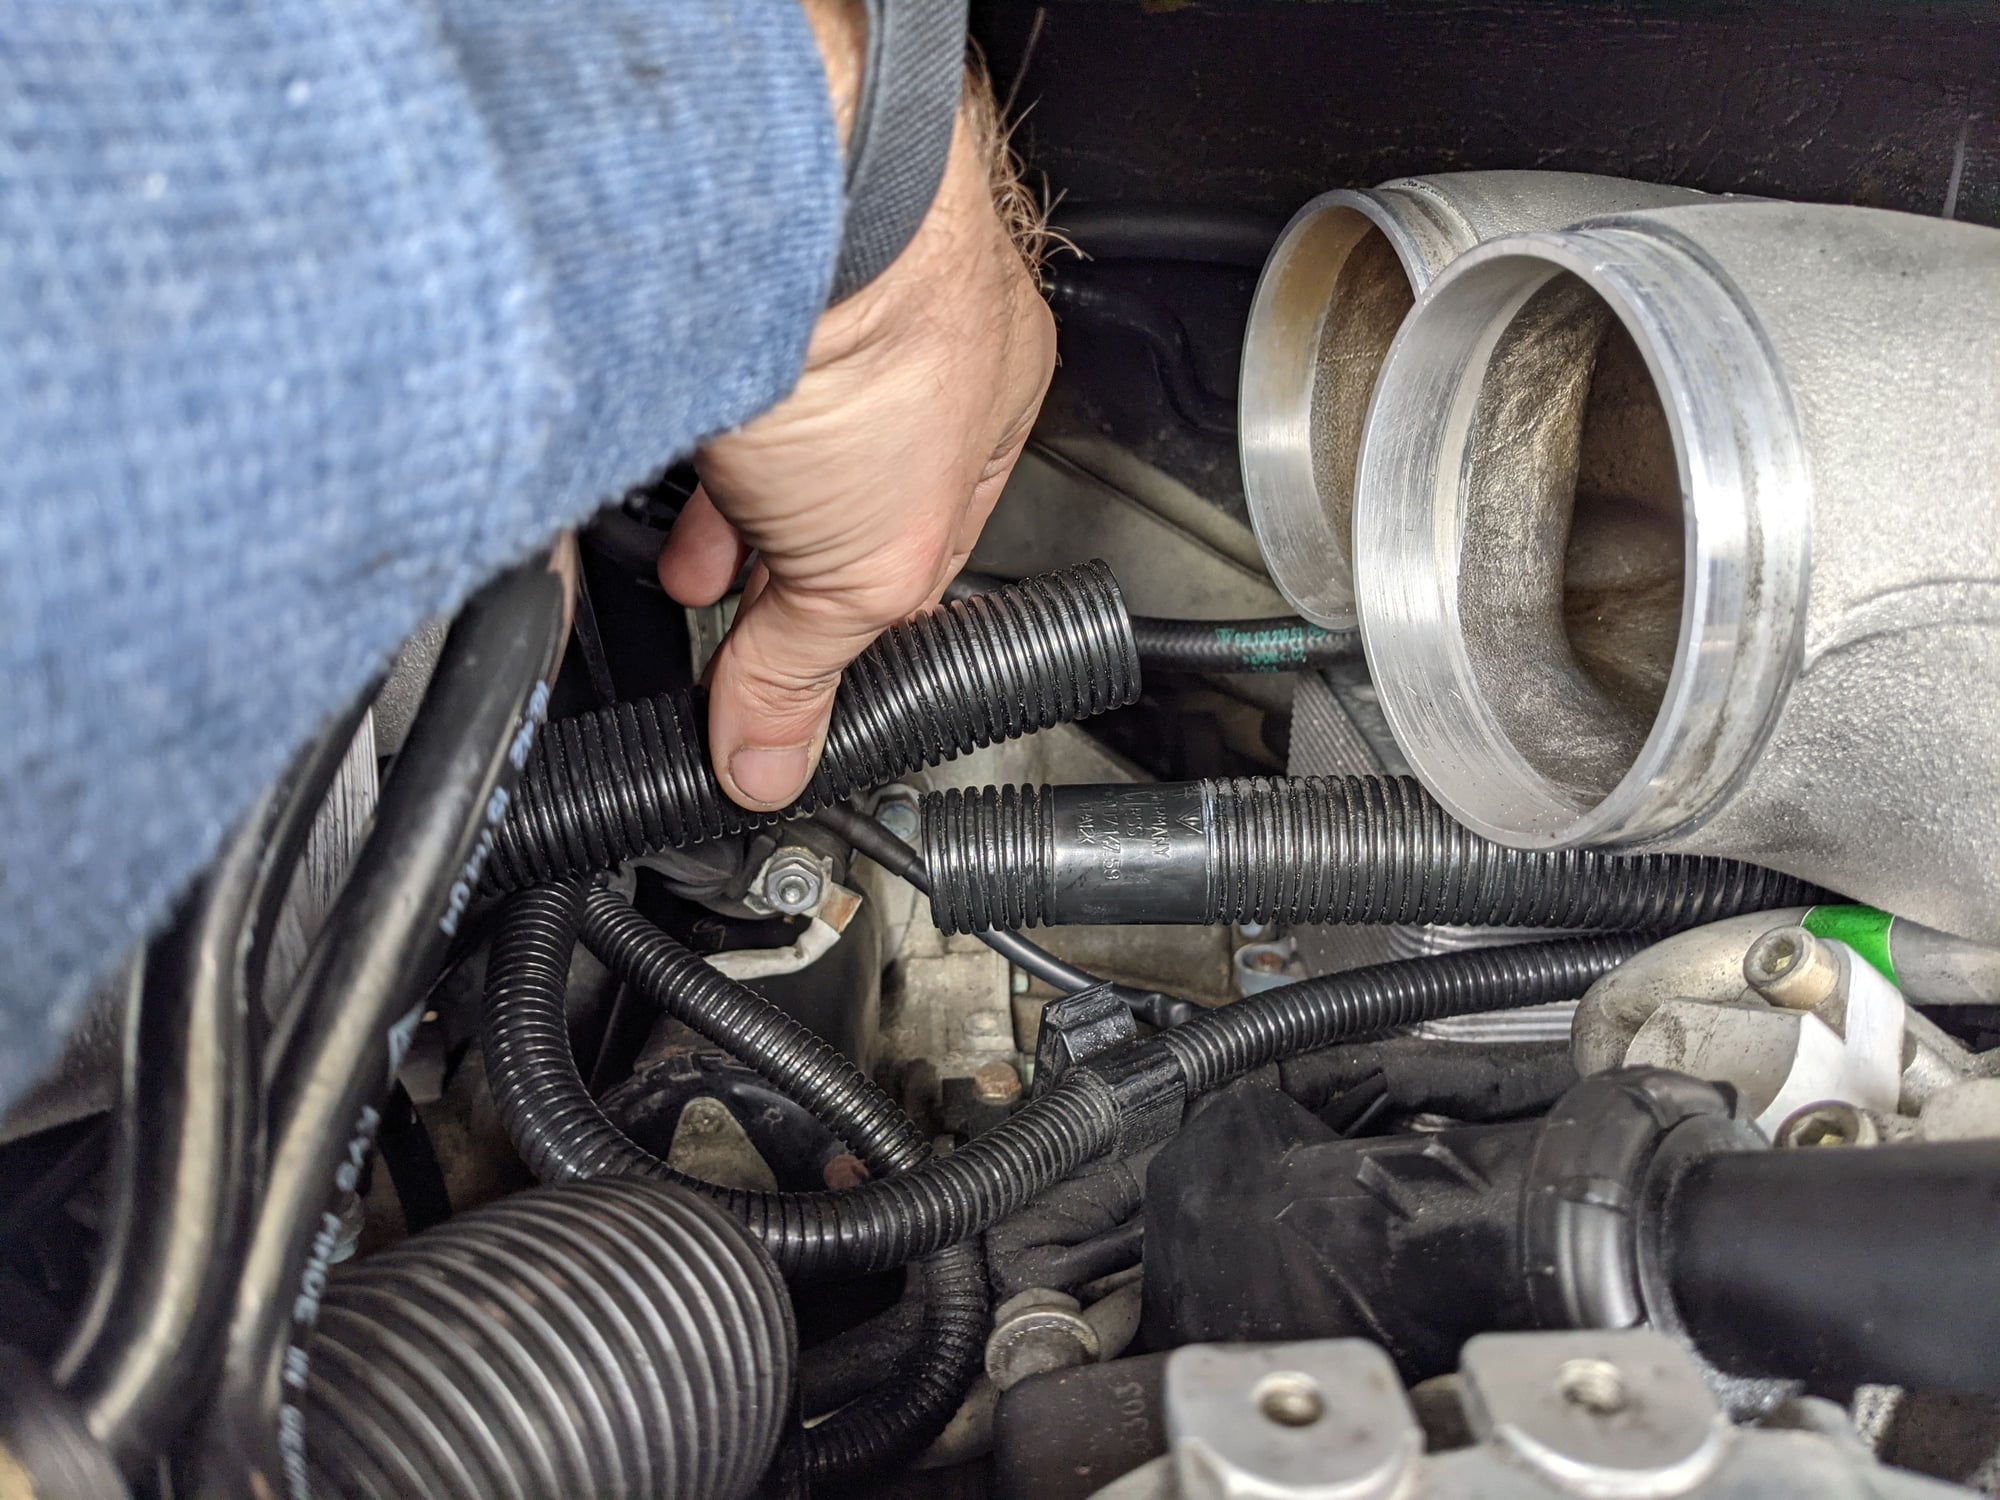
10. Now the fun part. Removal of the intake manifold, featuring the notorious "bitch bolt". As I mentioned before, I was glad to have the e-torx bolts. I used a combination of the following tools: a small stubby ratchet with a wobble extension. These types of extensions were SUPER helpful as you can access things at an angle. Additionally, the last "bitch bolt" was easily accessible by a ratcheting 8mm wrench. This means that if you don't have an e-torx socket, a multi-point 8mm socket will work. Just be cautious with the amount of torque you apply.
This is how I accessed the final bolt. I was able to get the wrench on and few clicks at a time it came out.
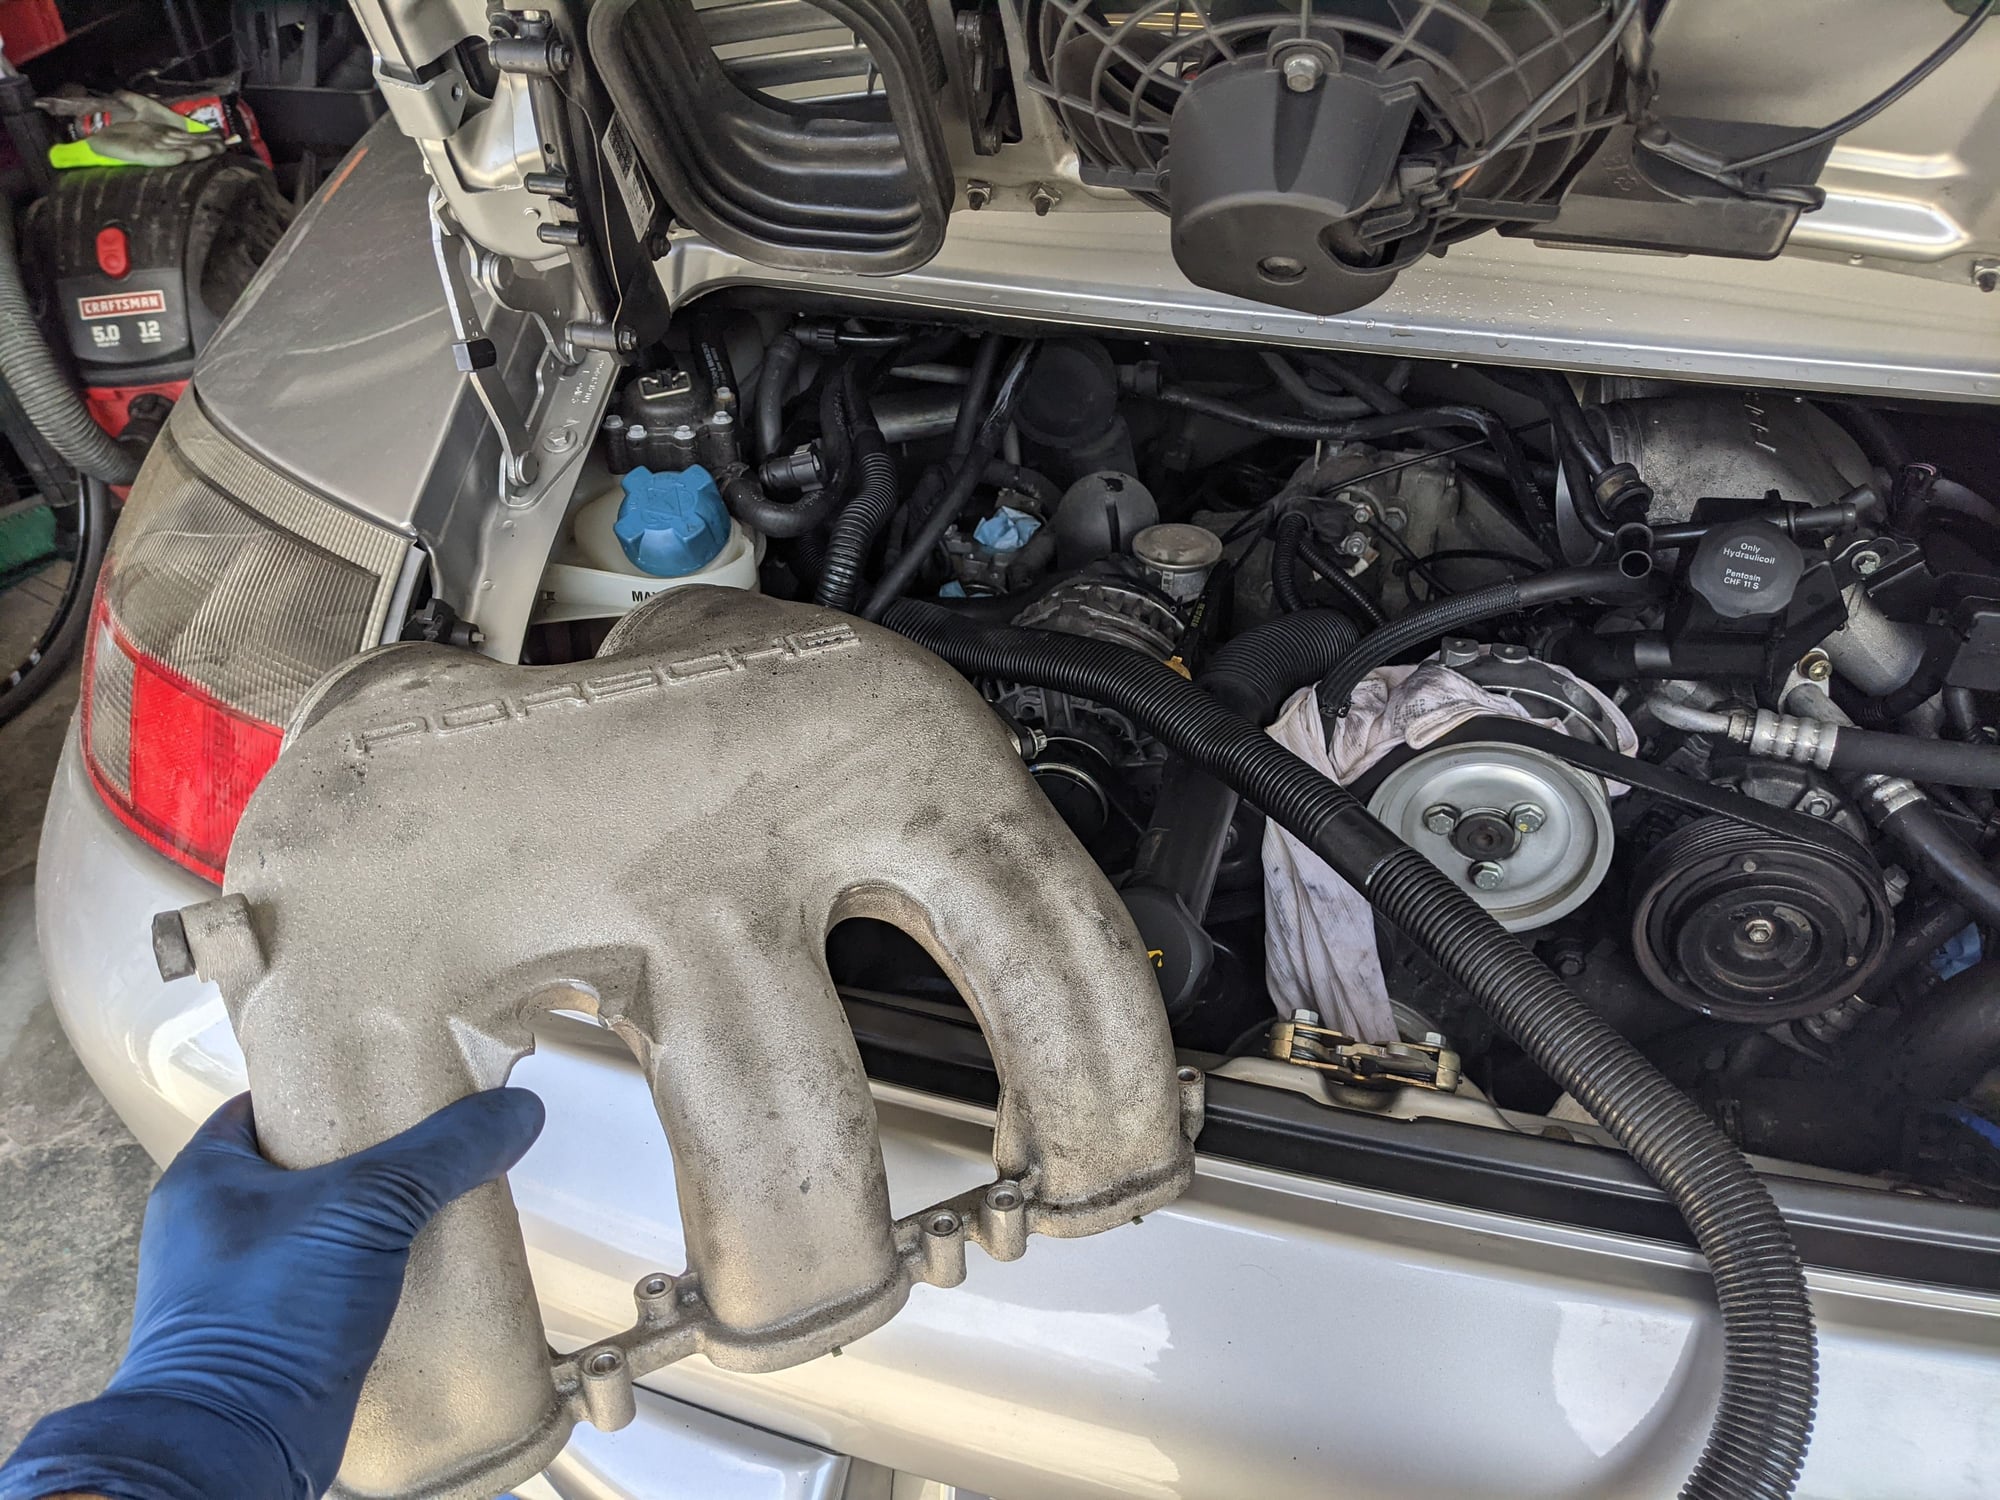
11. Now with the intake manifold loose you'll be able to easily remove the second plenum.
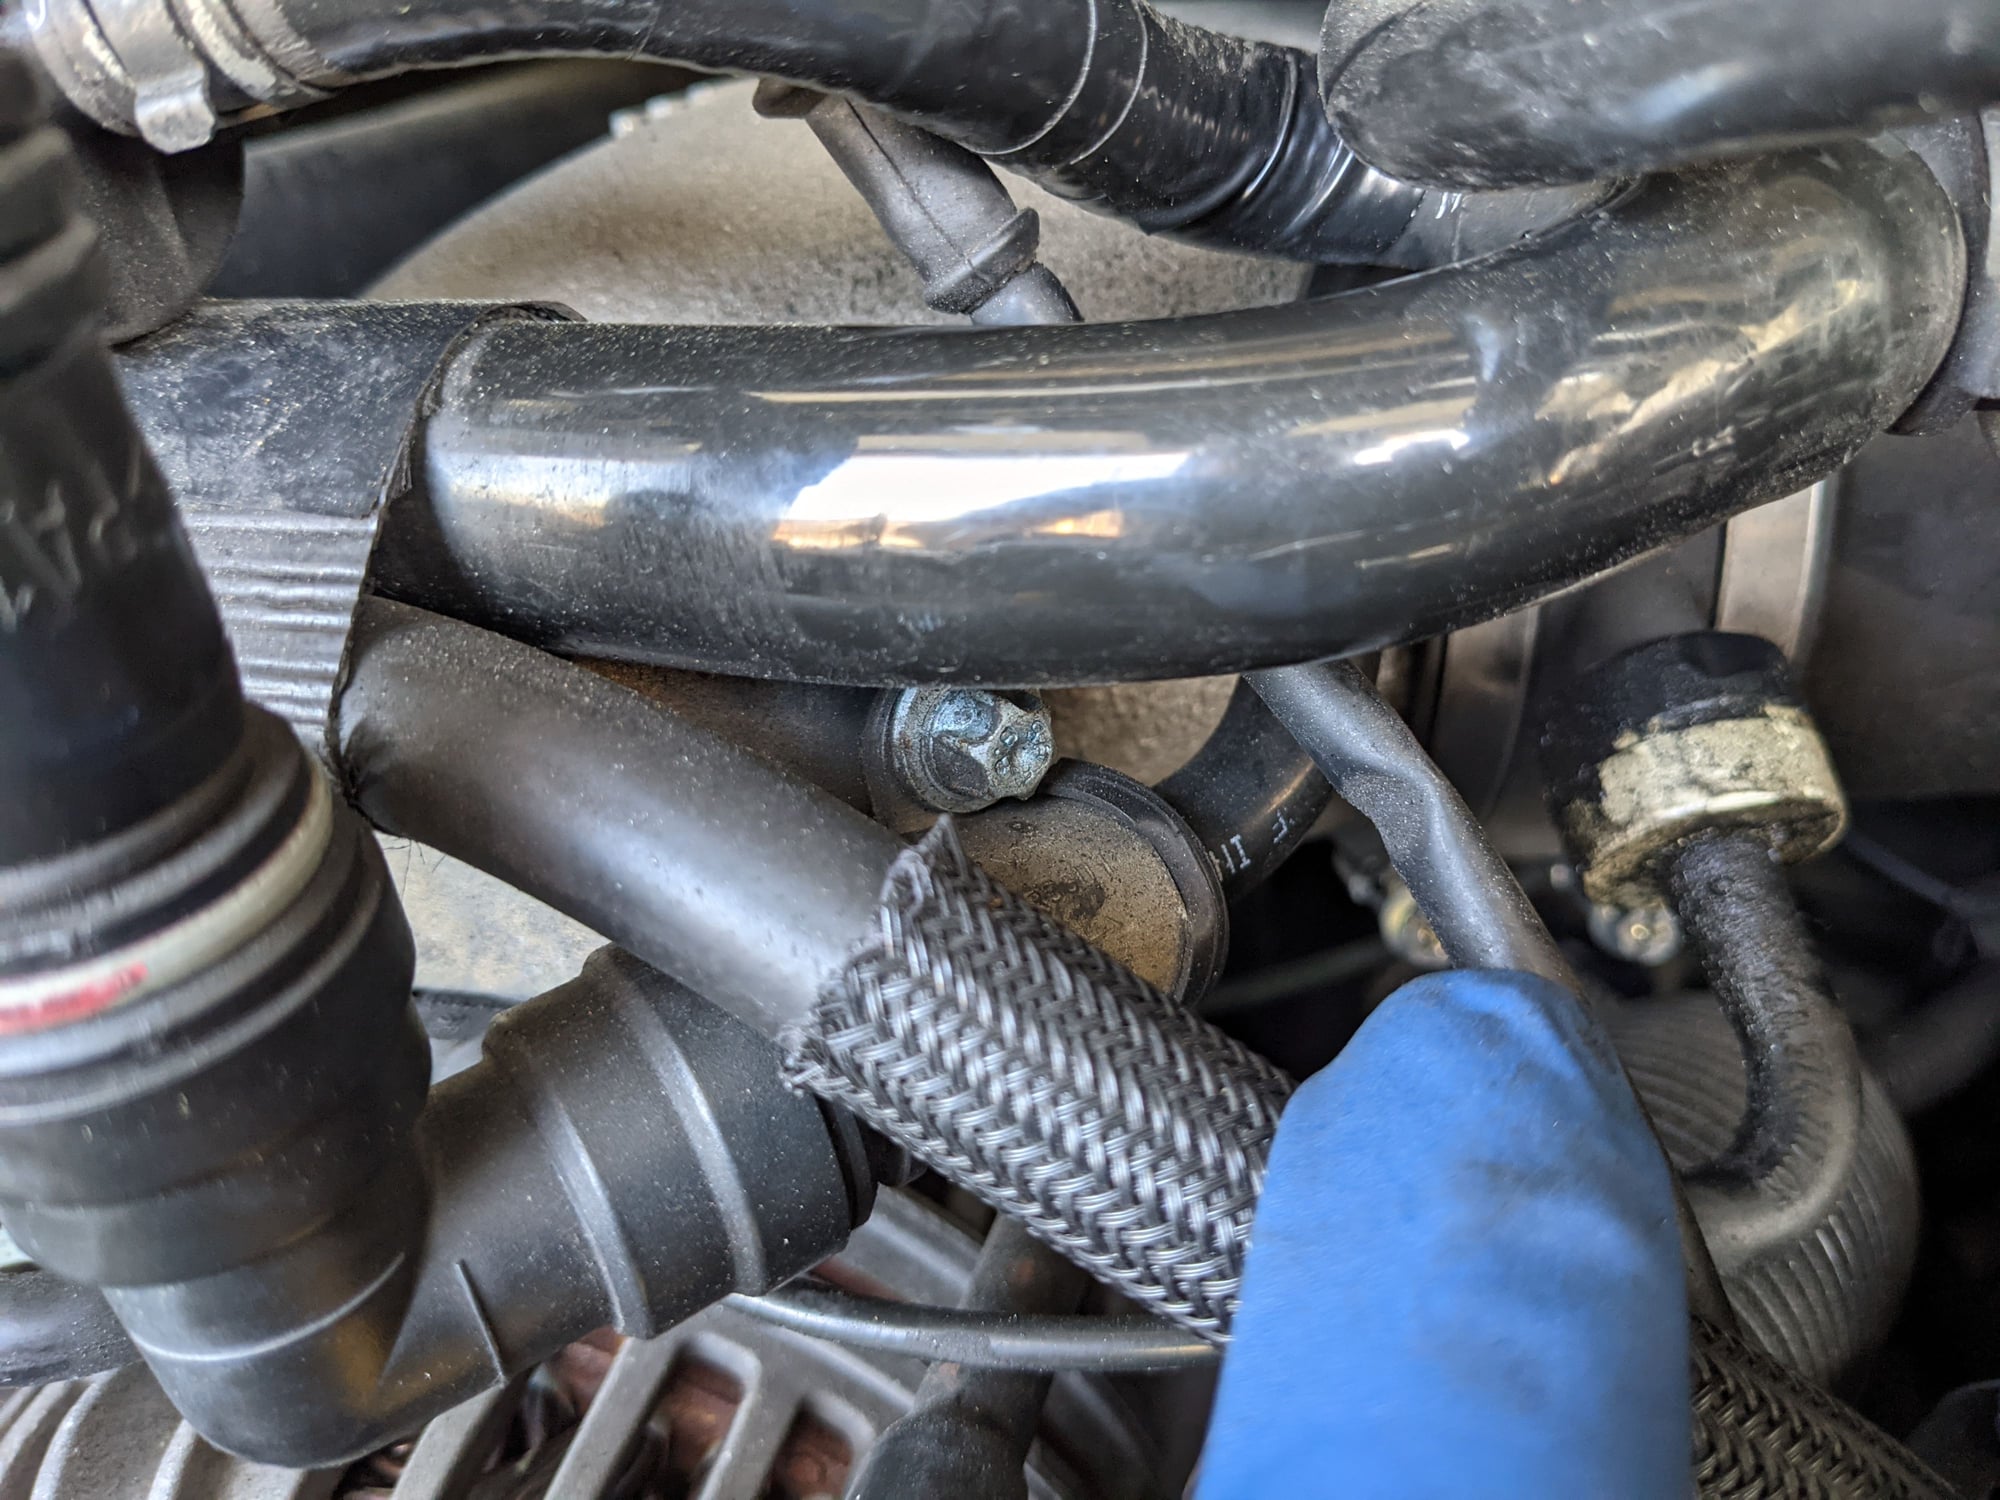
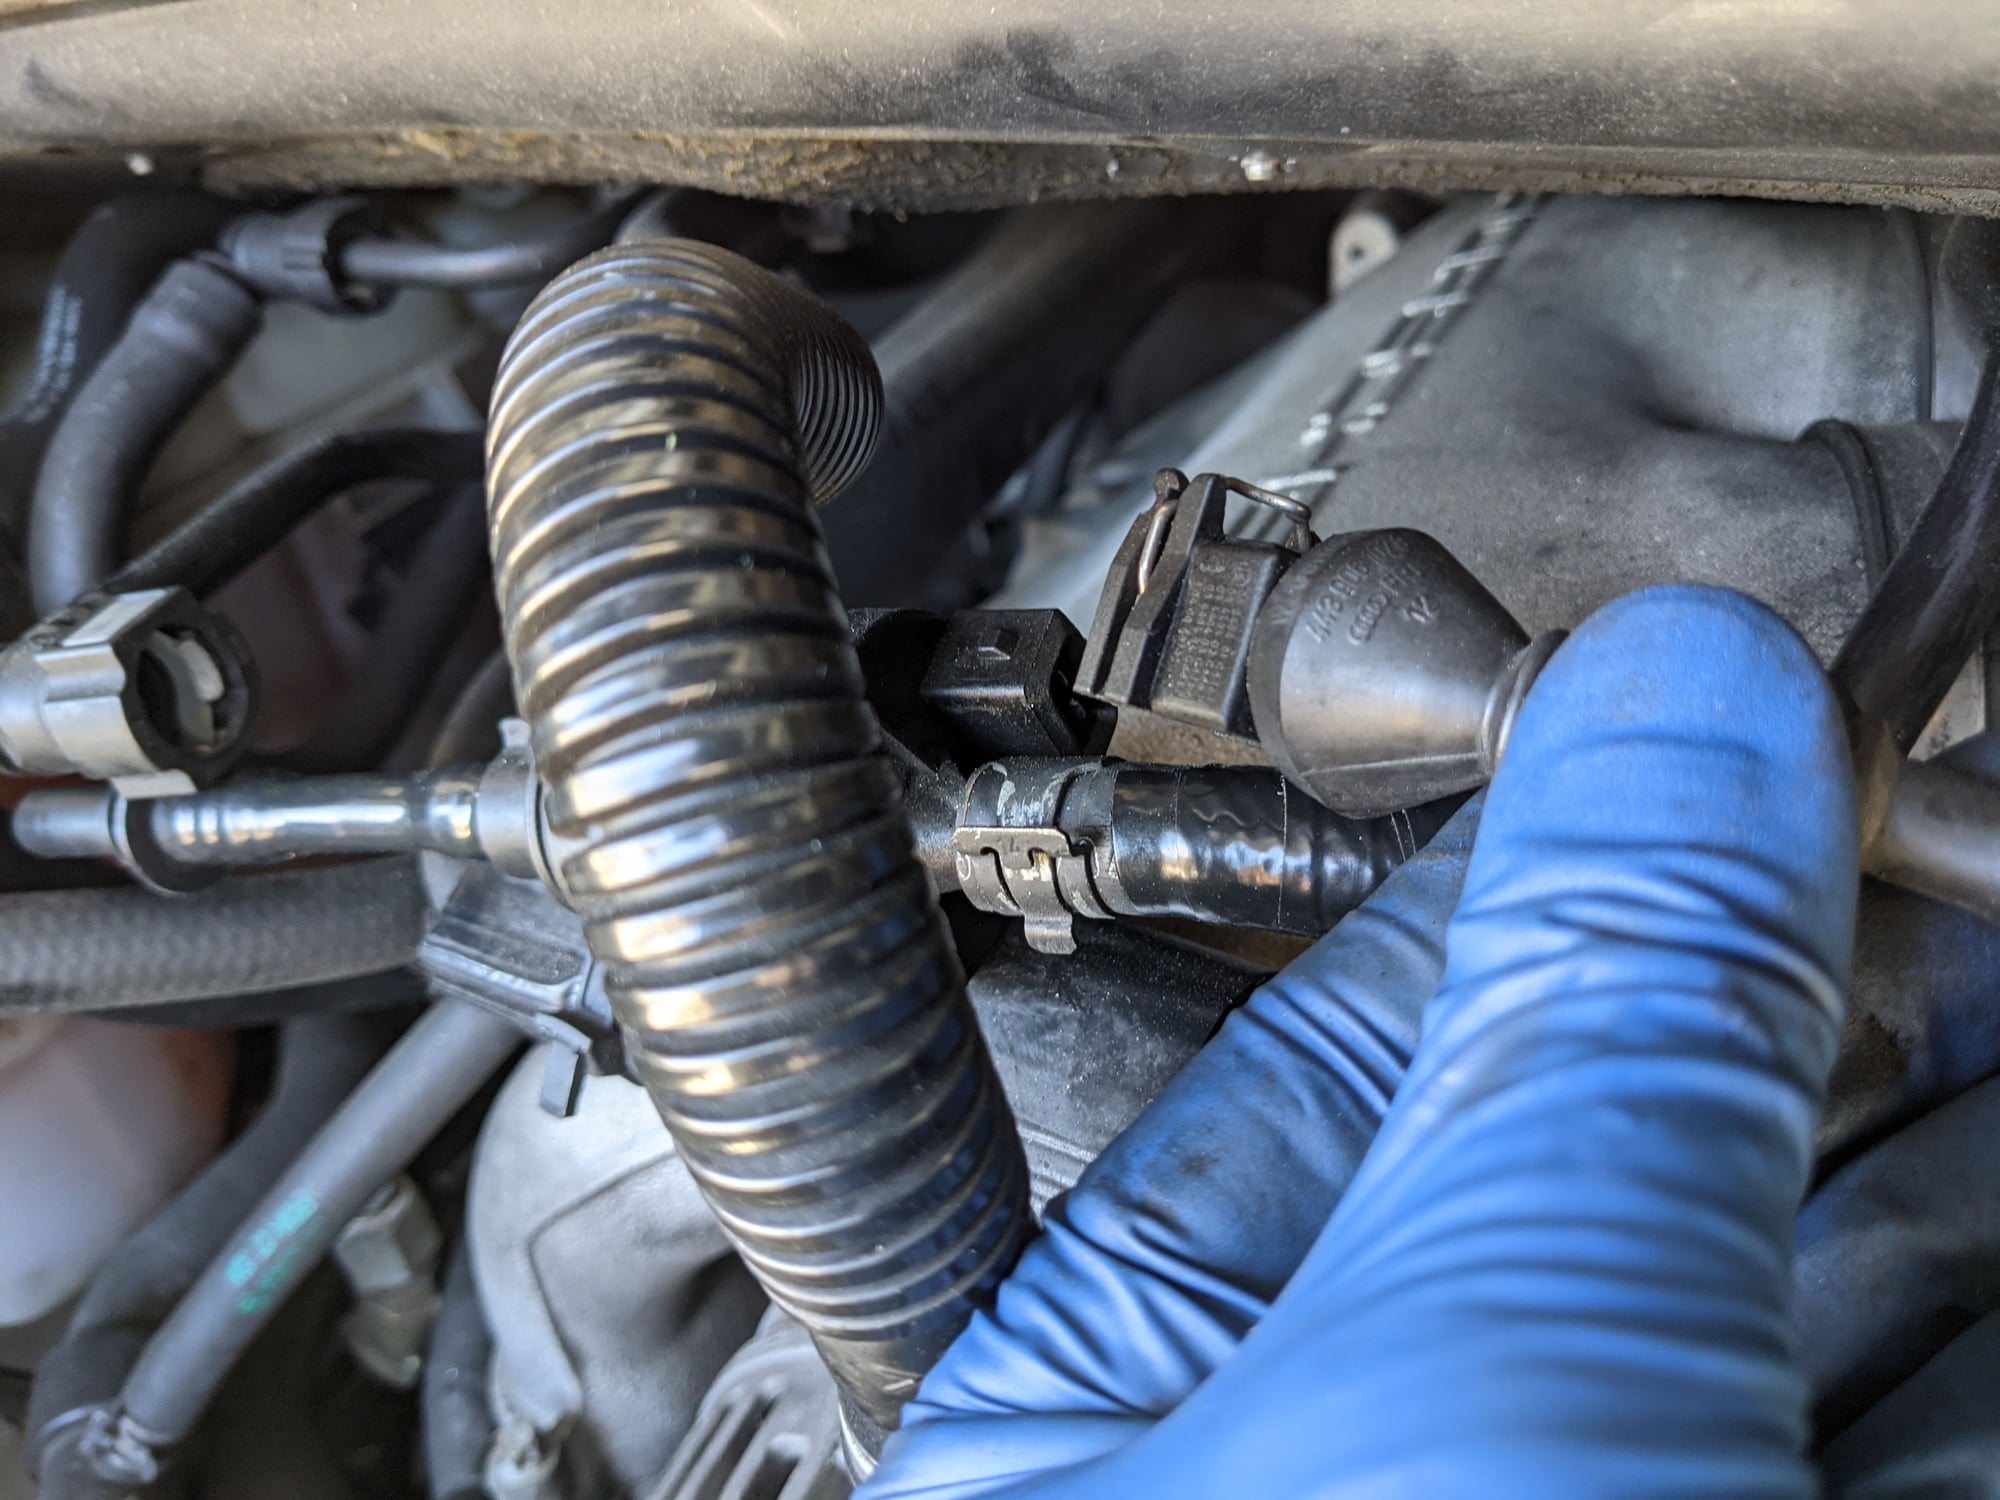
12. Now cut the material that is holding the hard line leading from the AOS + coolant line together and set it aside.
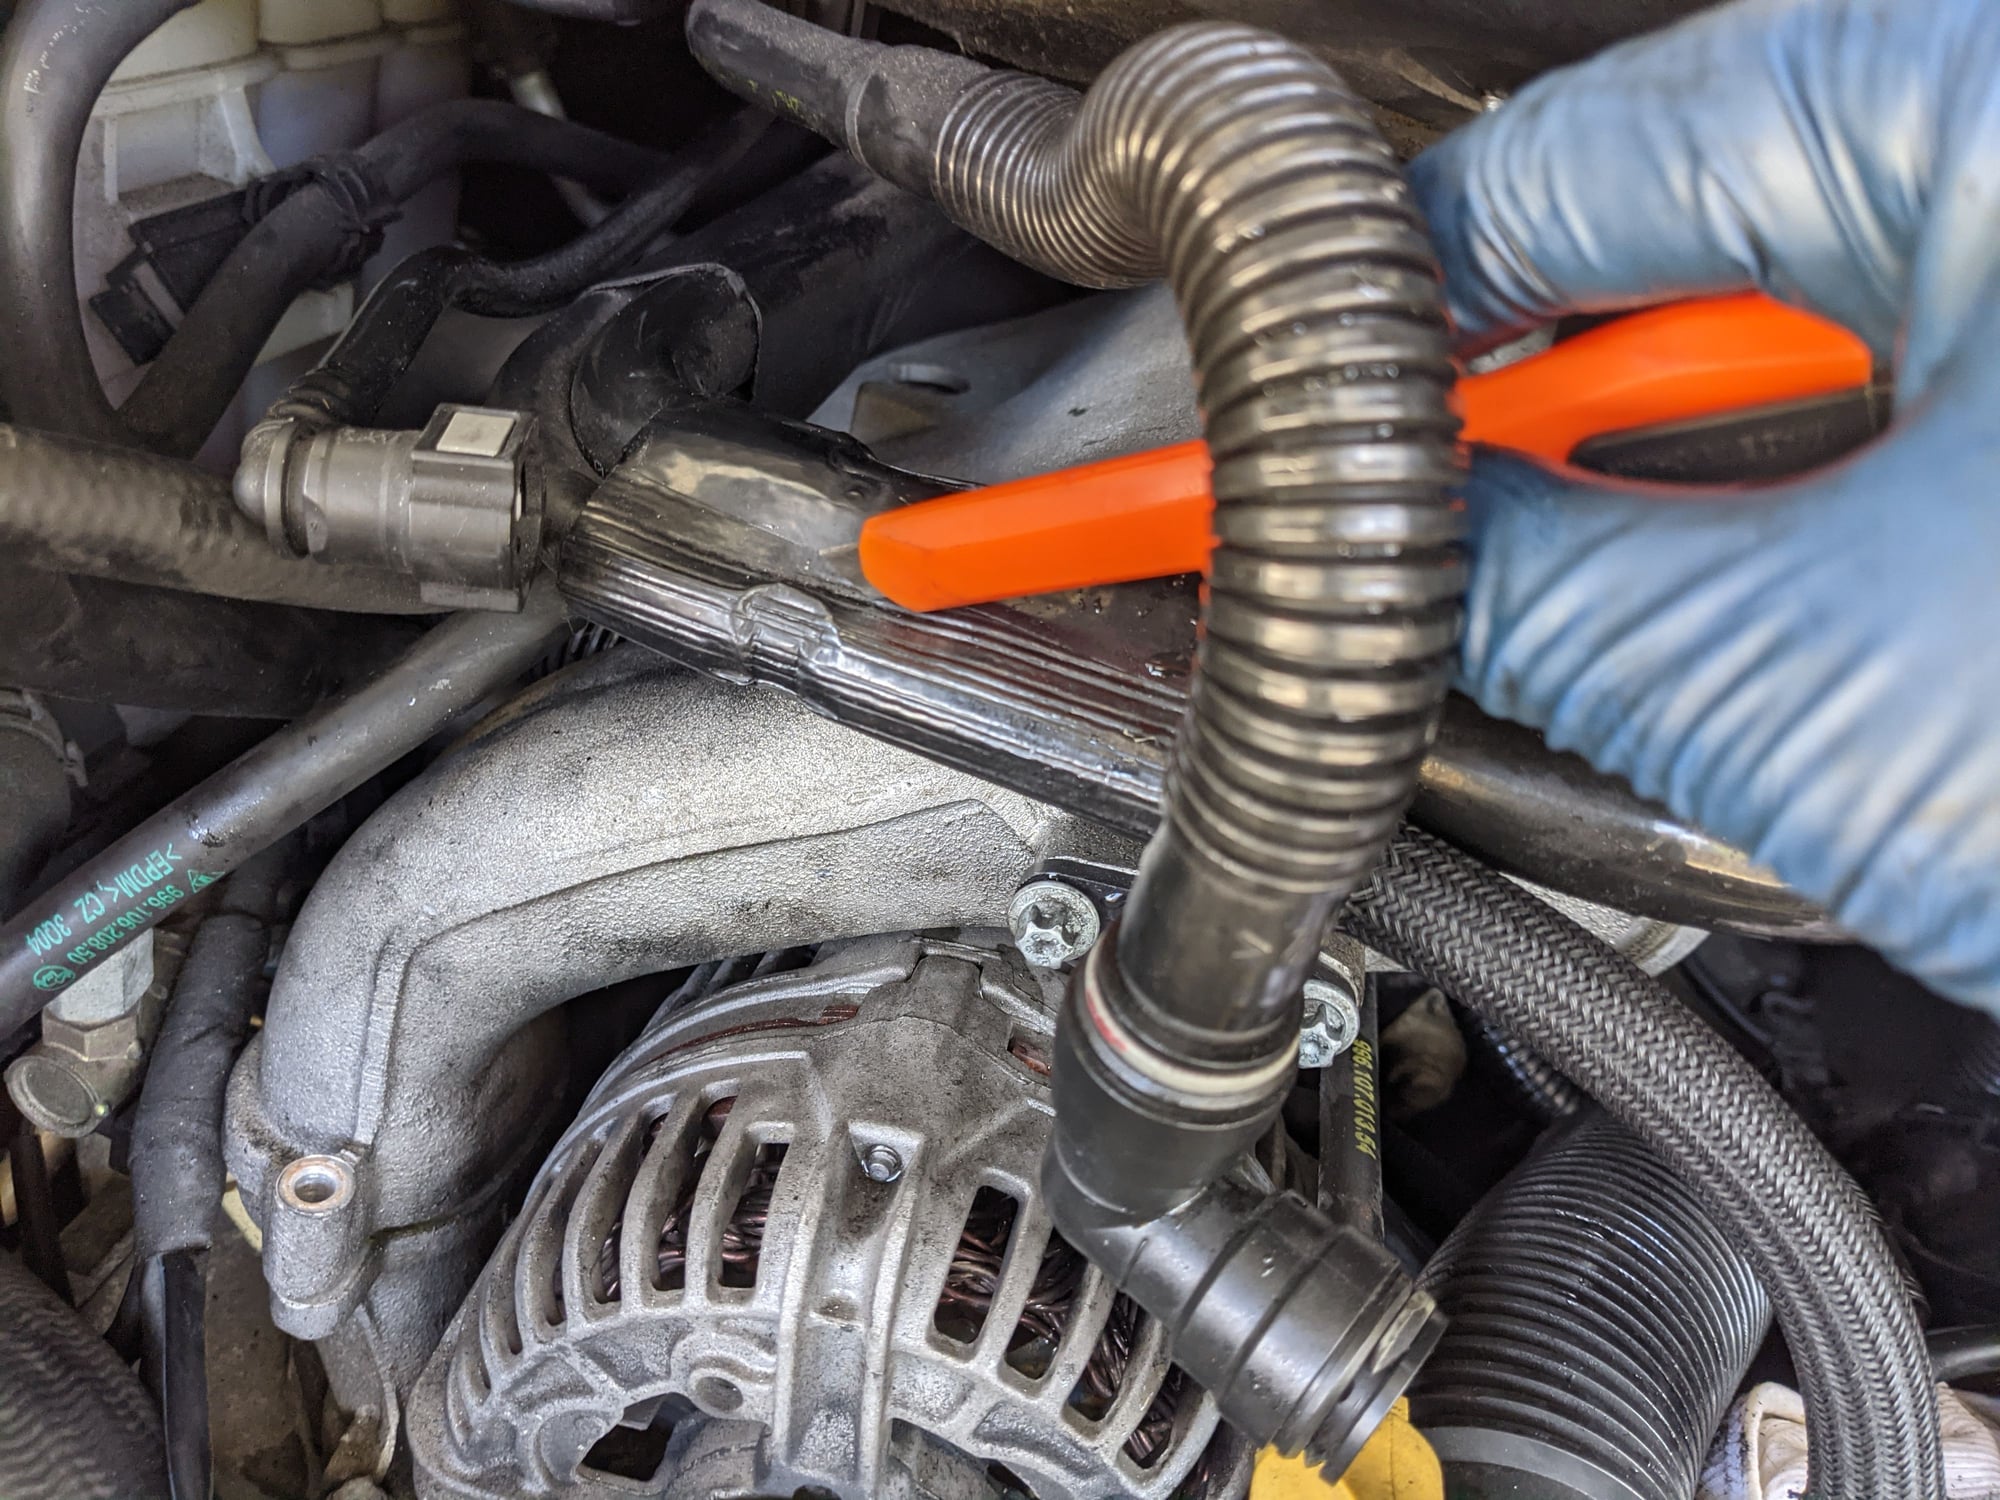
13. Now unclip the top hard AOS line and remove it. There is also a long plastic cross over hose the goes from the bottom of the AOS attachment point to the other side of the engine, right near the AC compressor. This is what gave me some headaches as it was super brittle due to age and ended up snapping in half during the reassembly. I'd suggest getting a new OEM one for $50. Difference in amount of flex in new vs old was huge! 2 x 10mm will get that loose and again, the wobble extension was helpful.
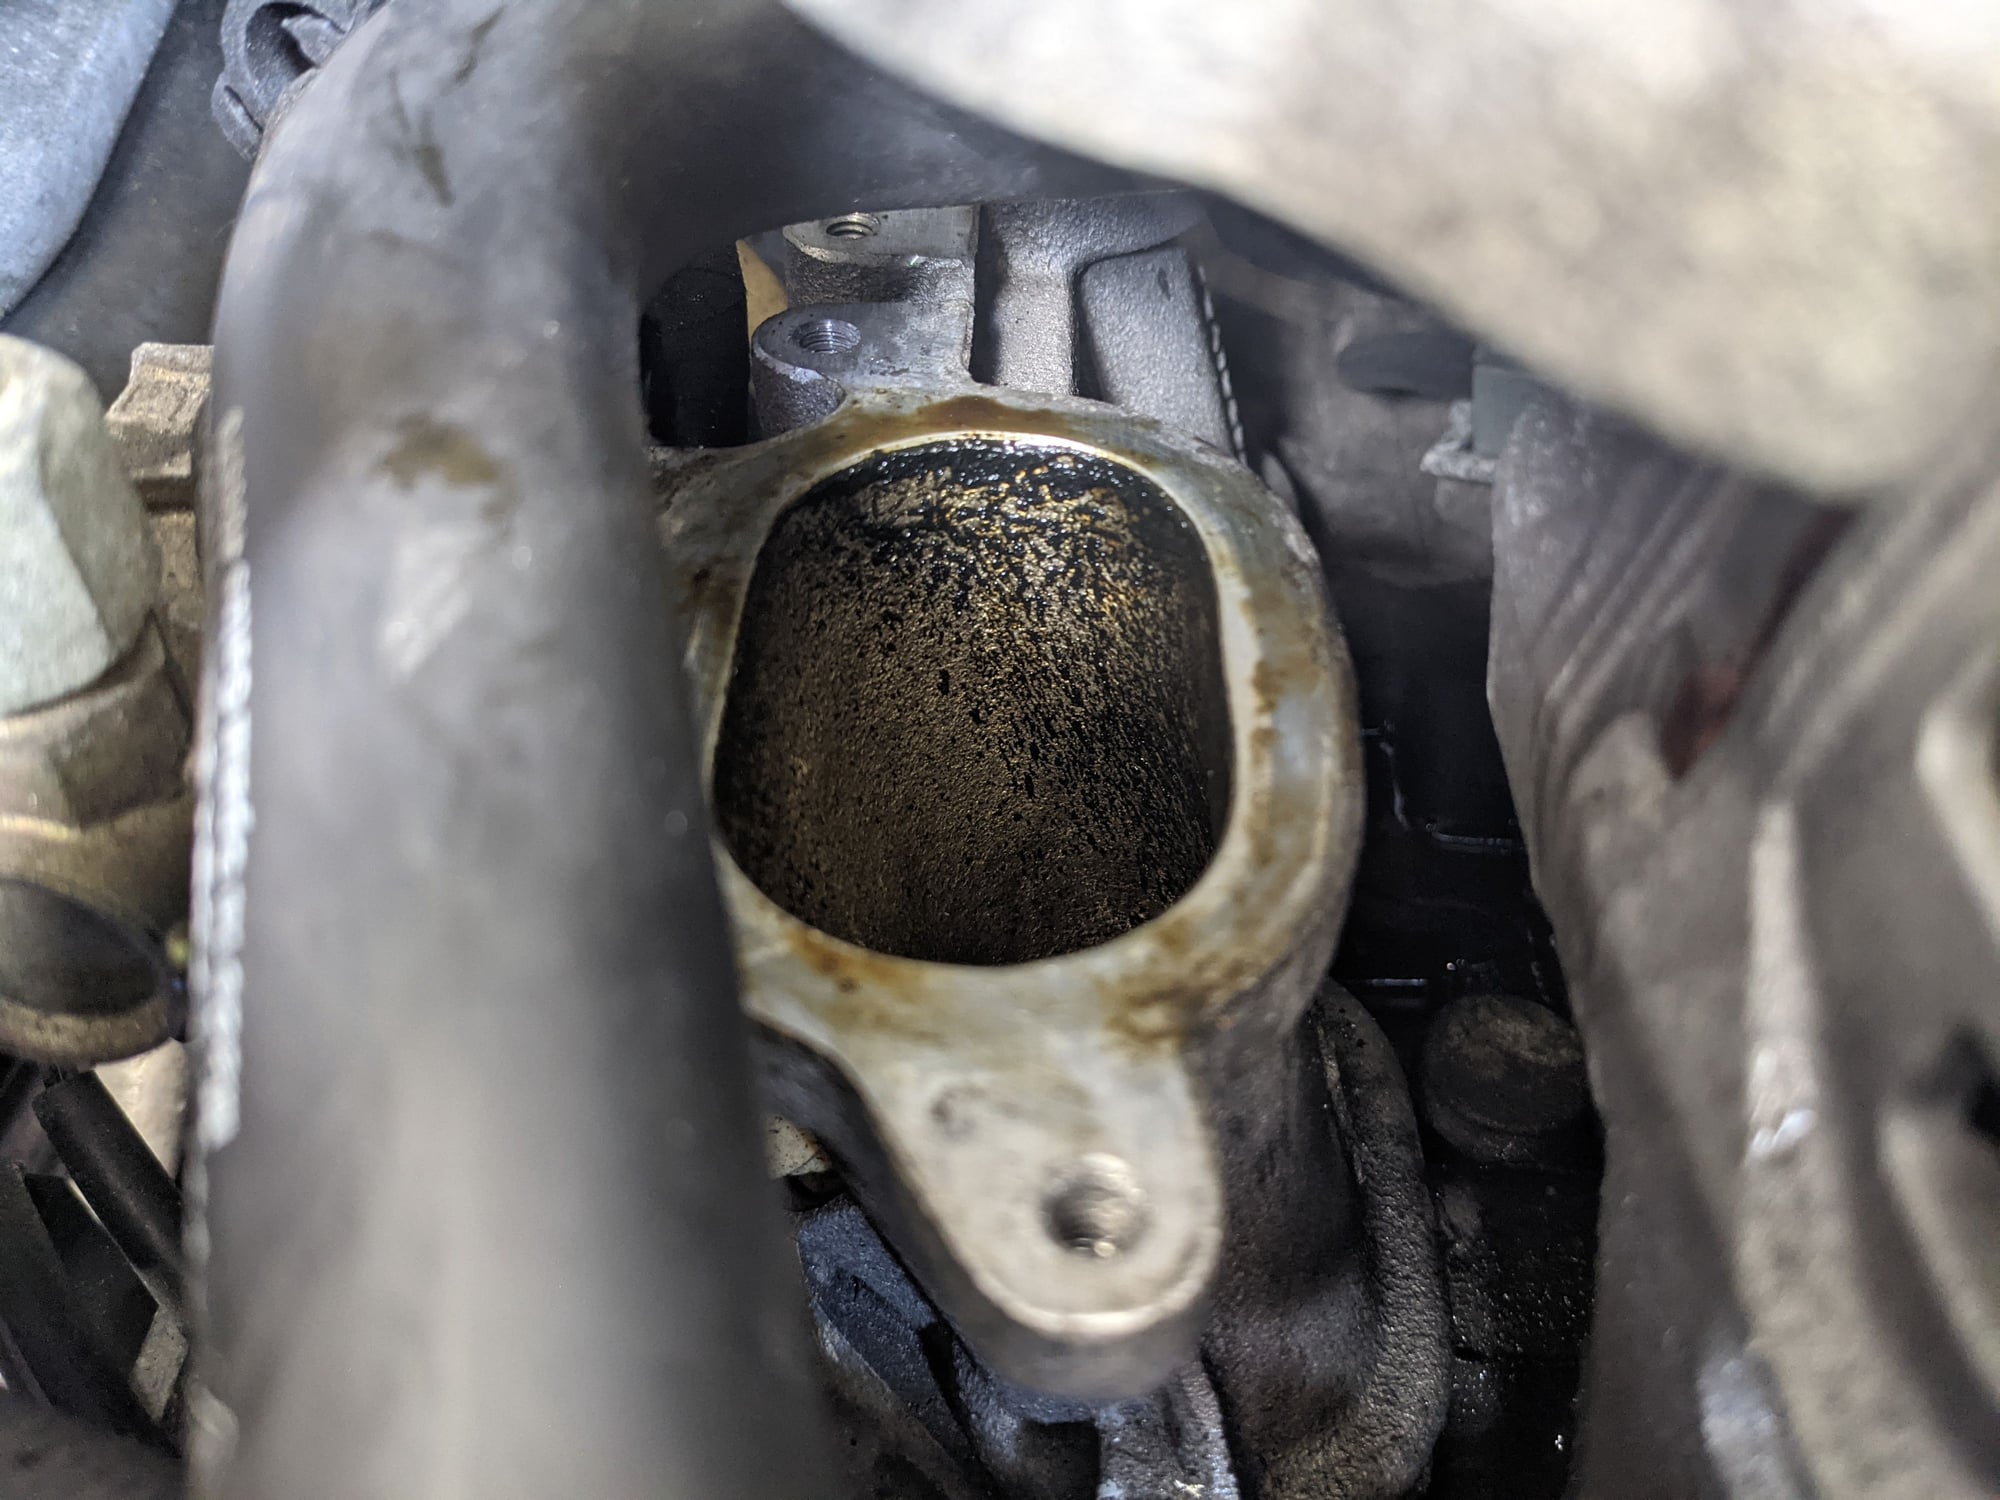
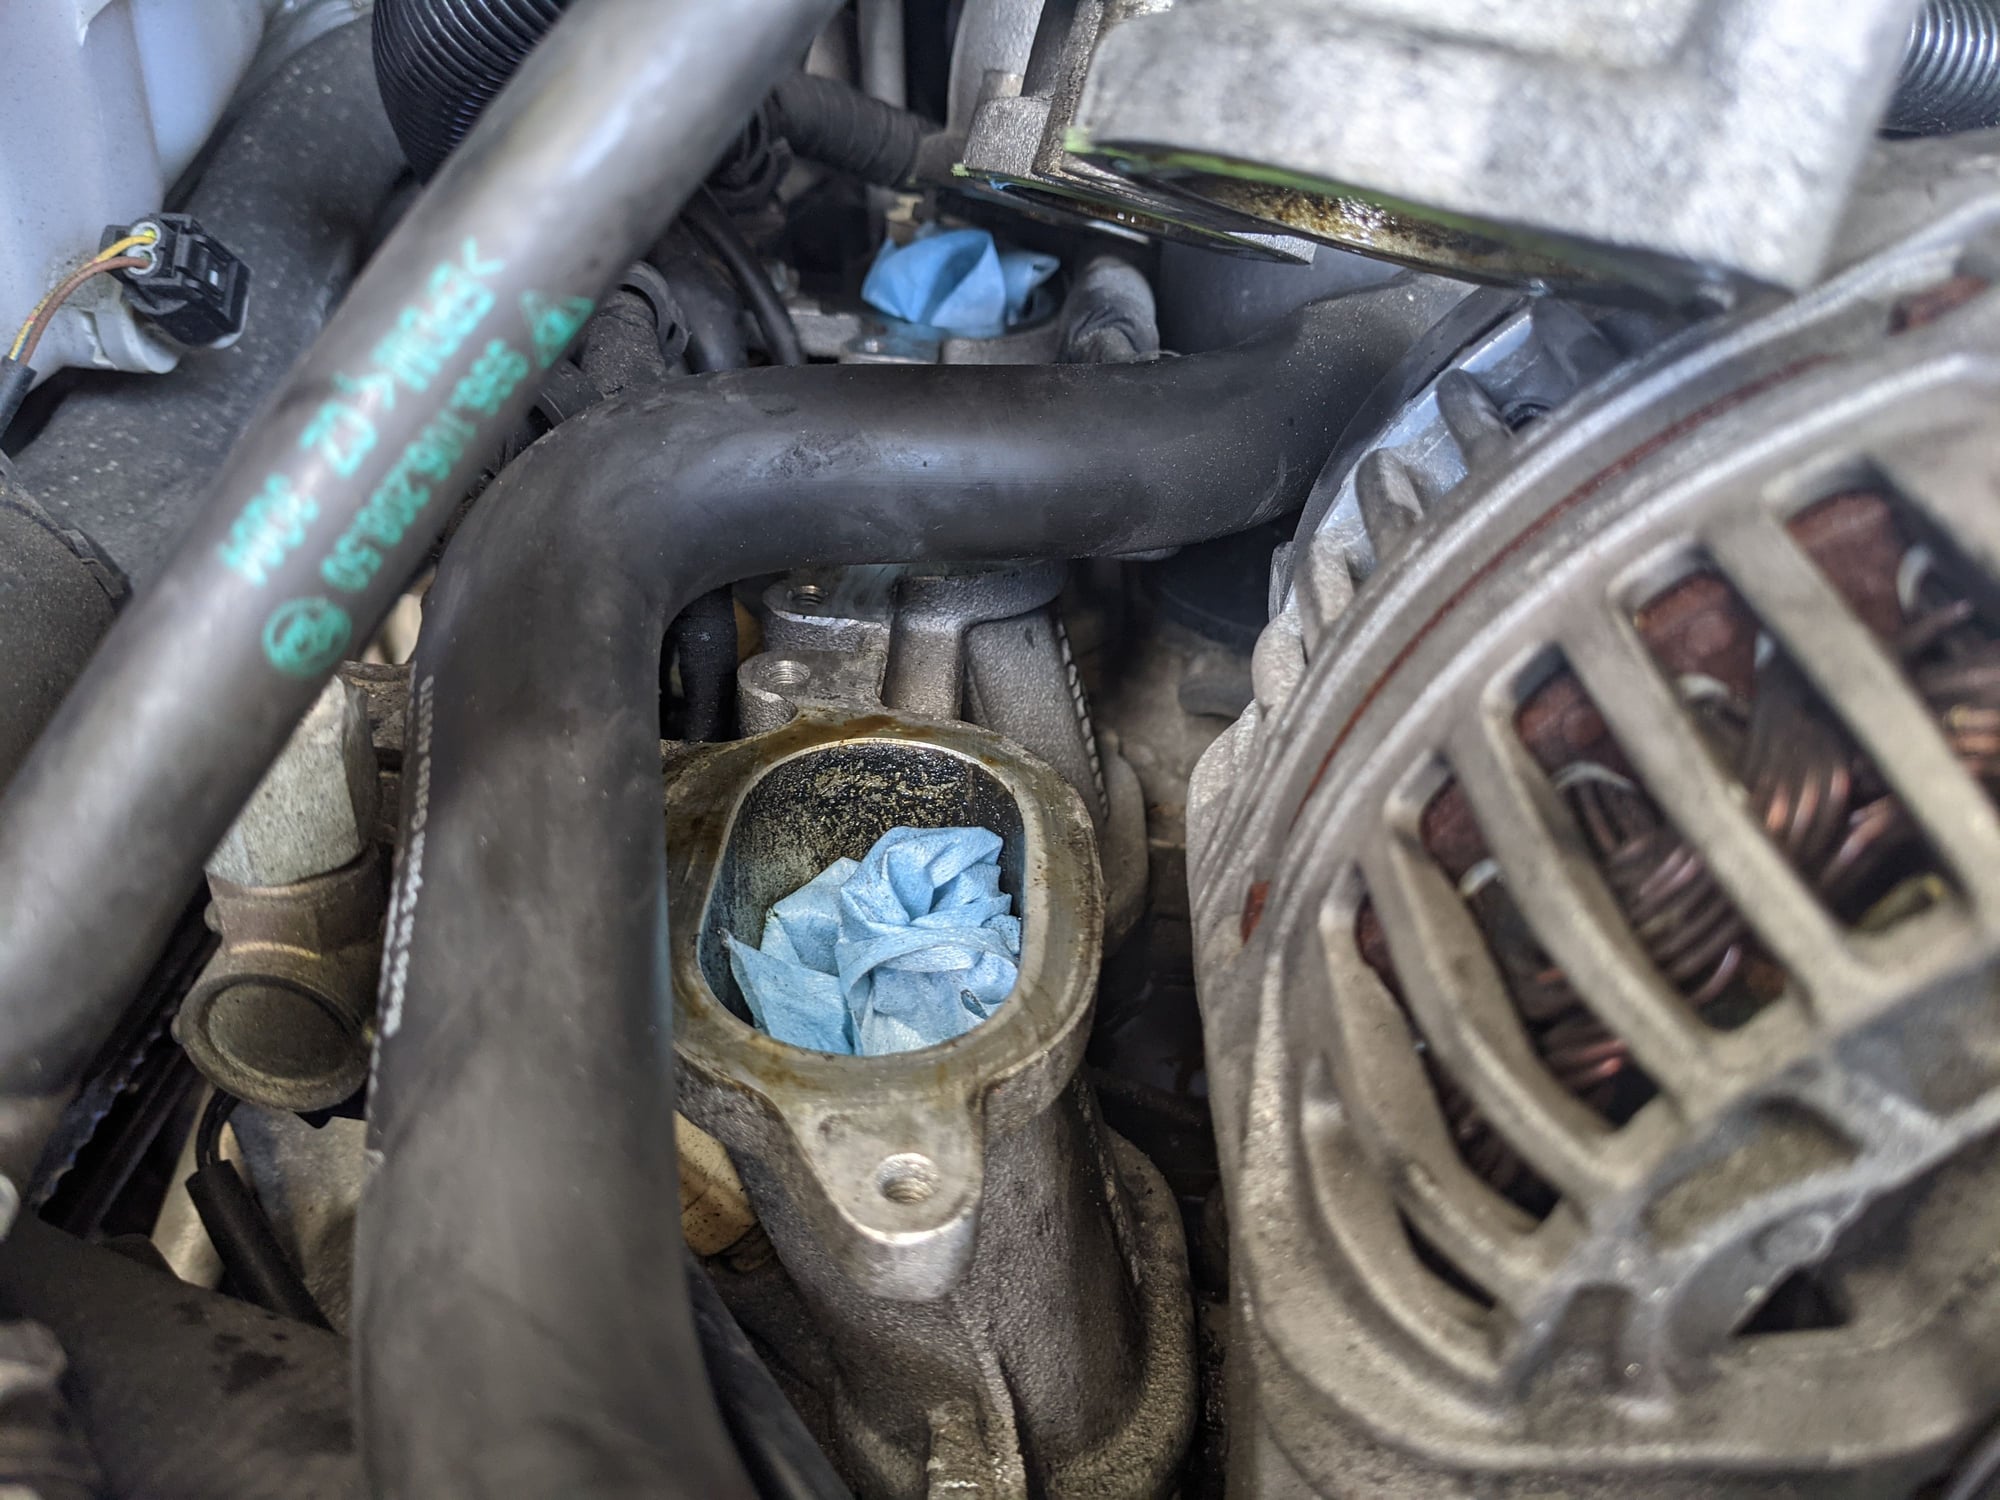
14. At this point you should have all the intake manifold bolts out and the part should come out easily. You can see the oily grime I had at the lower intake runners. I'm assuming this was due to the failed AOS and part of the oil consumption. Be sure to plug all the runners so nothing falls in. With the crossover hose out you will be able to slide out the actual manifold. Again, be careful as lots of wiggling is needed to not damage that crossover pipe. If you plan to replace it I'd just snap it in half to make it easier.
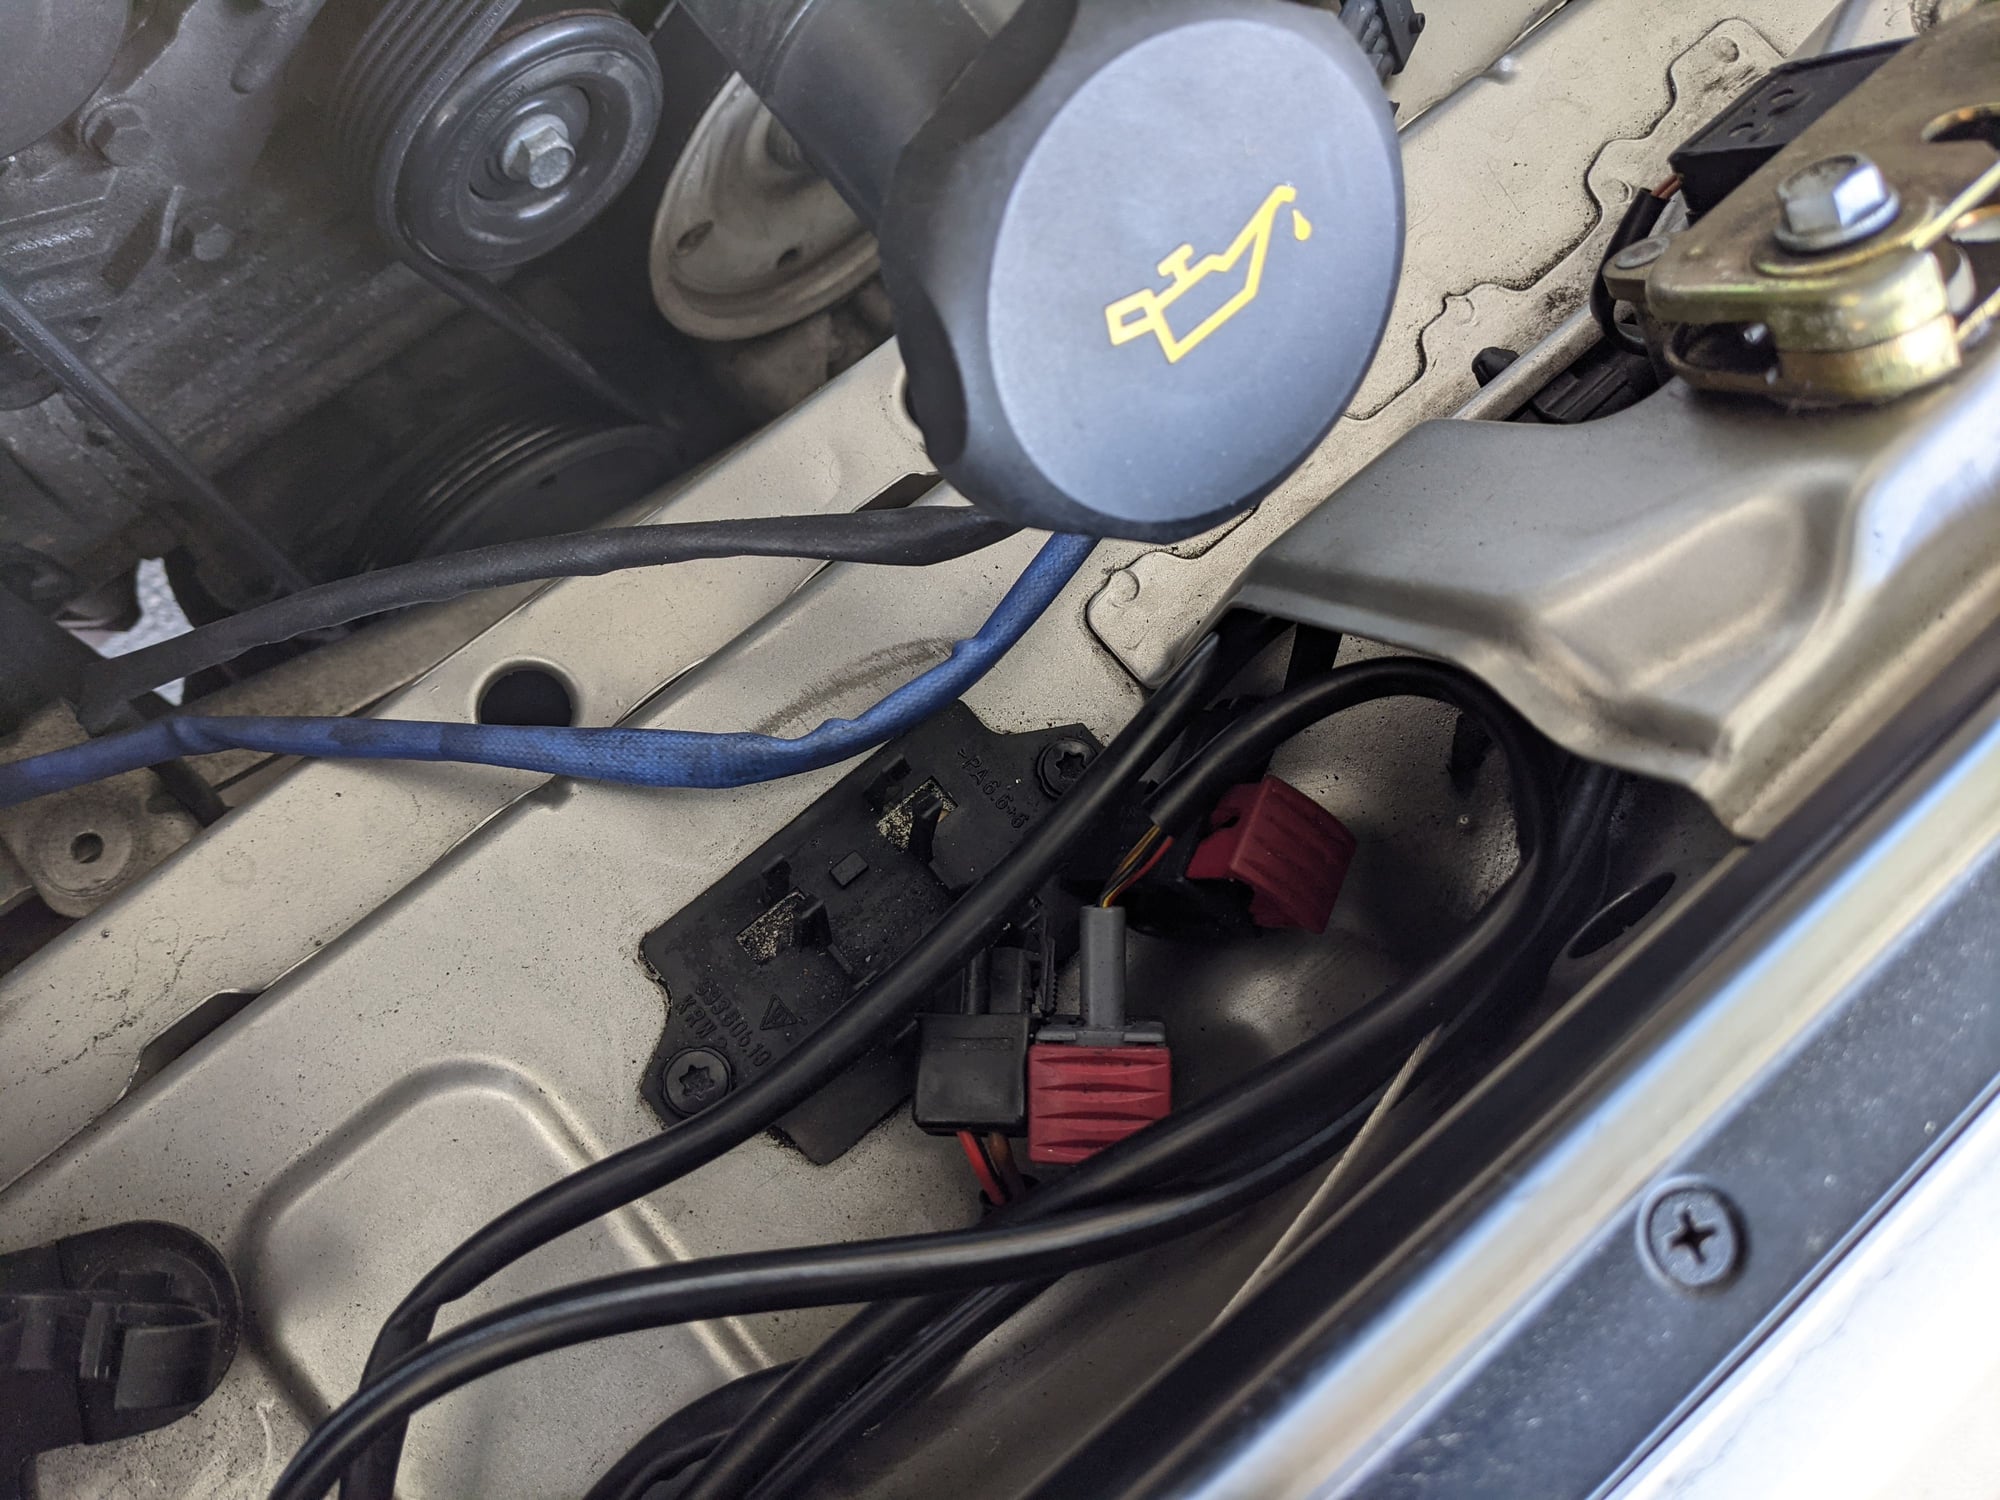
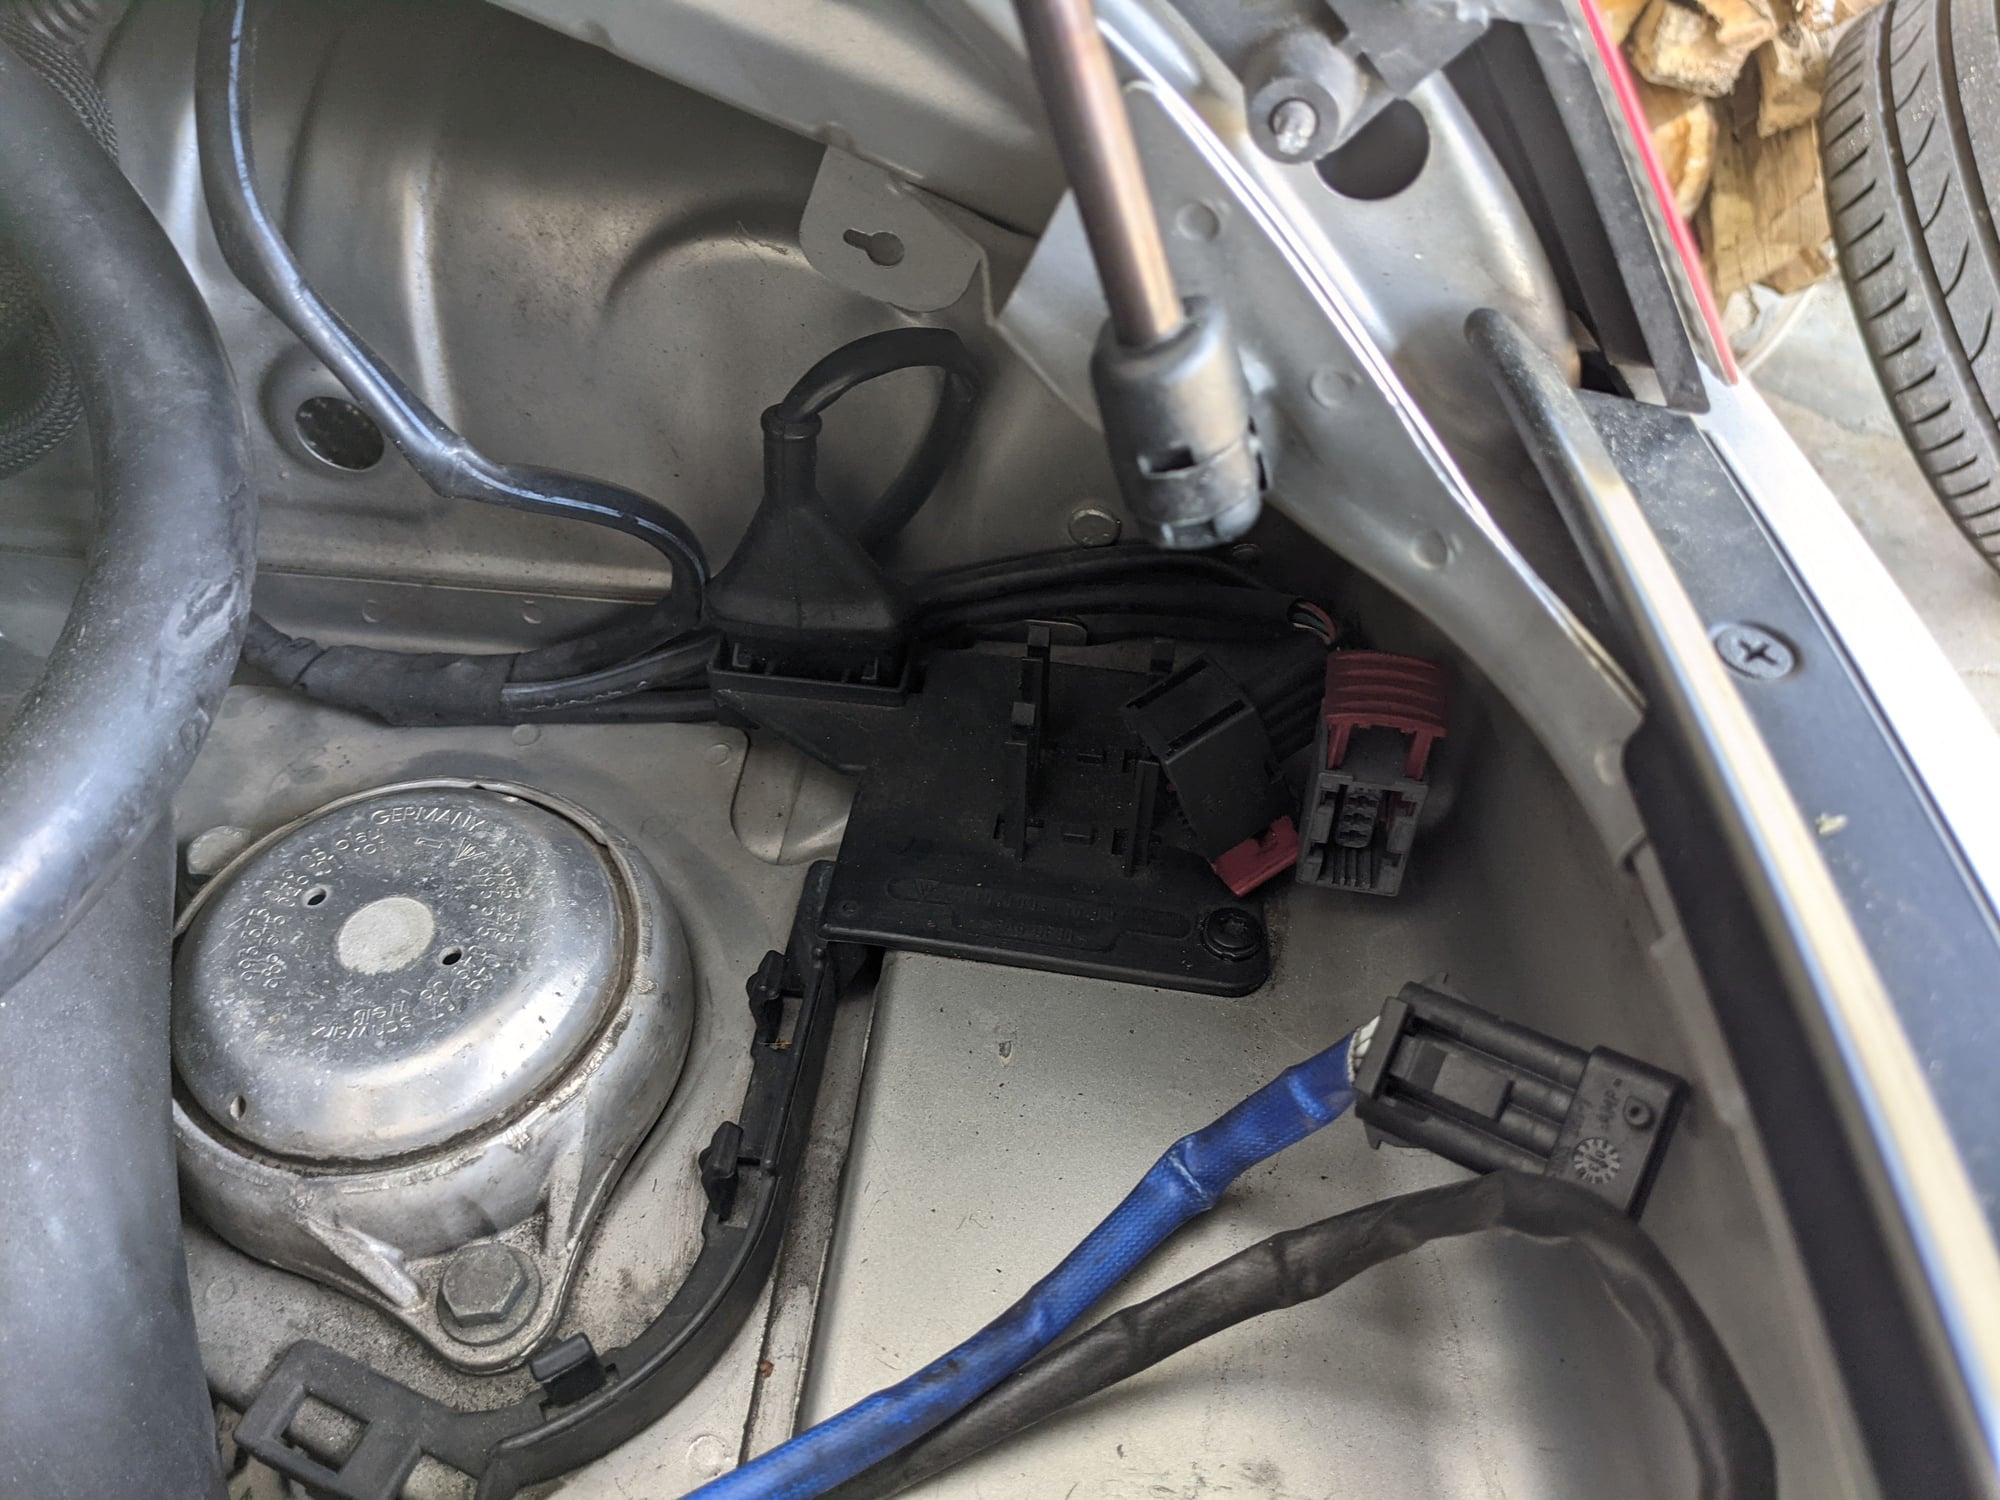
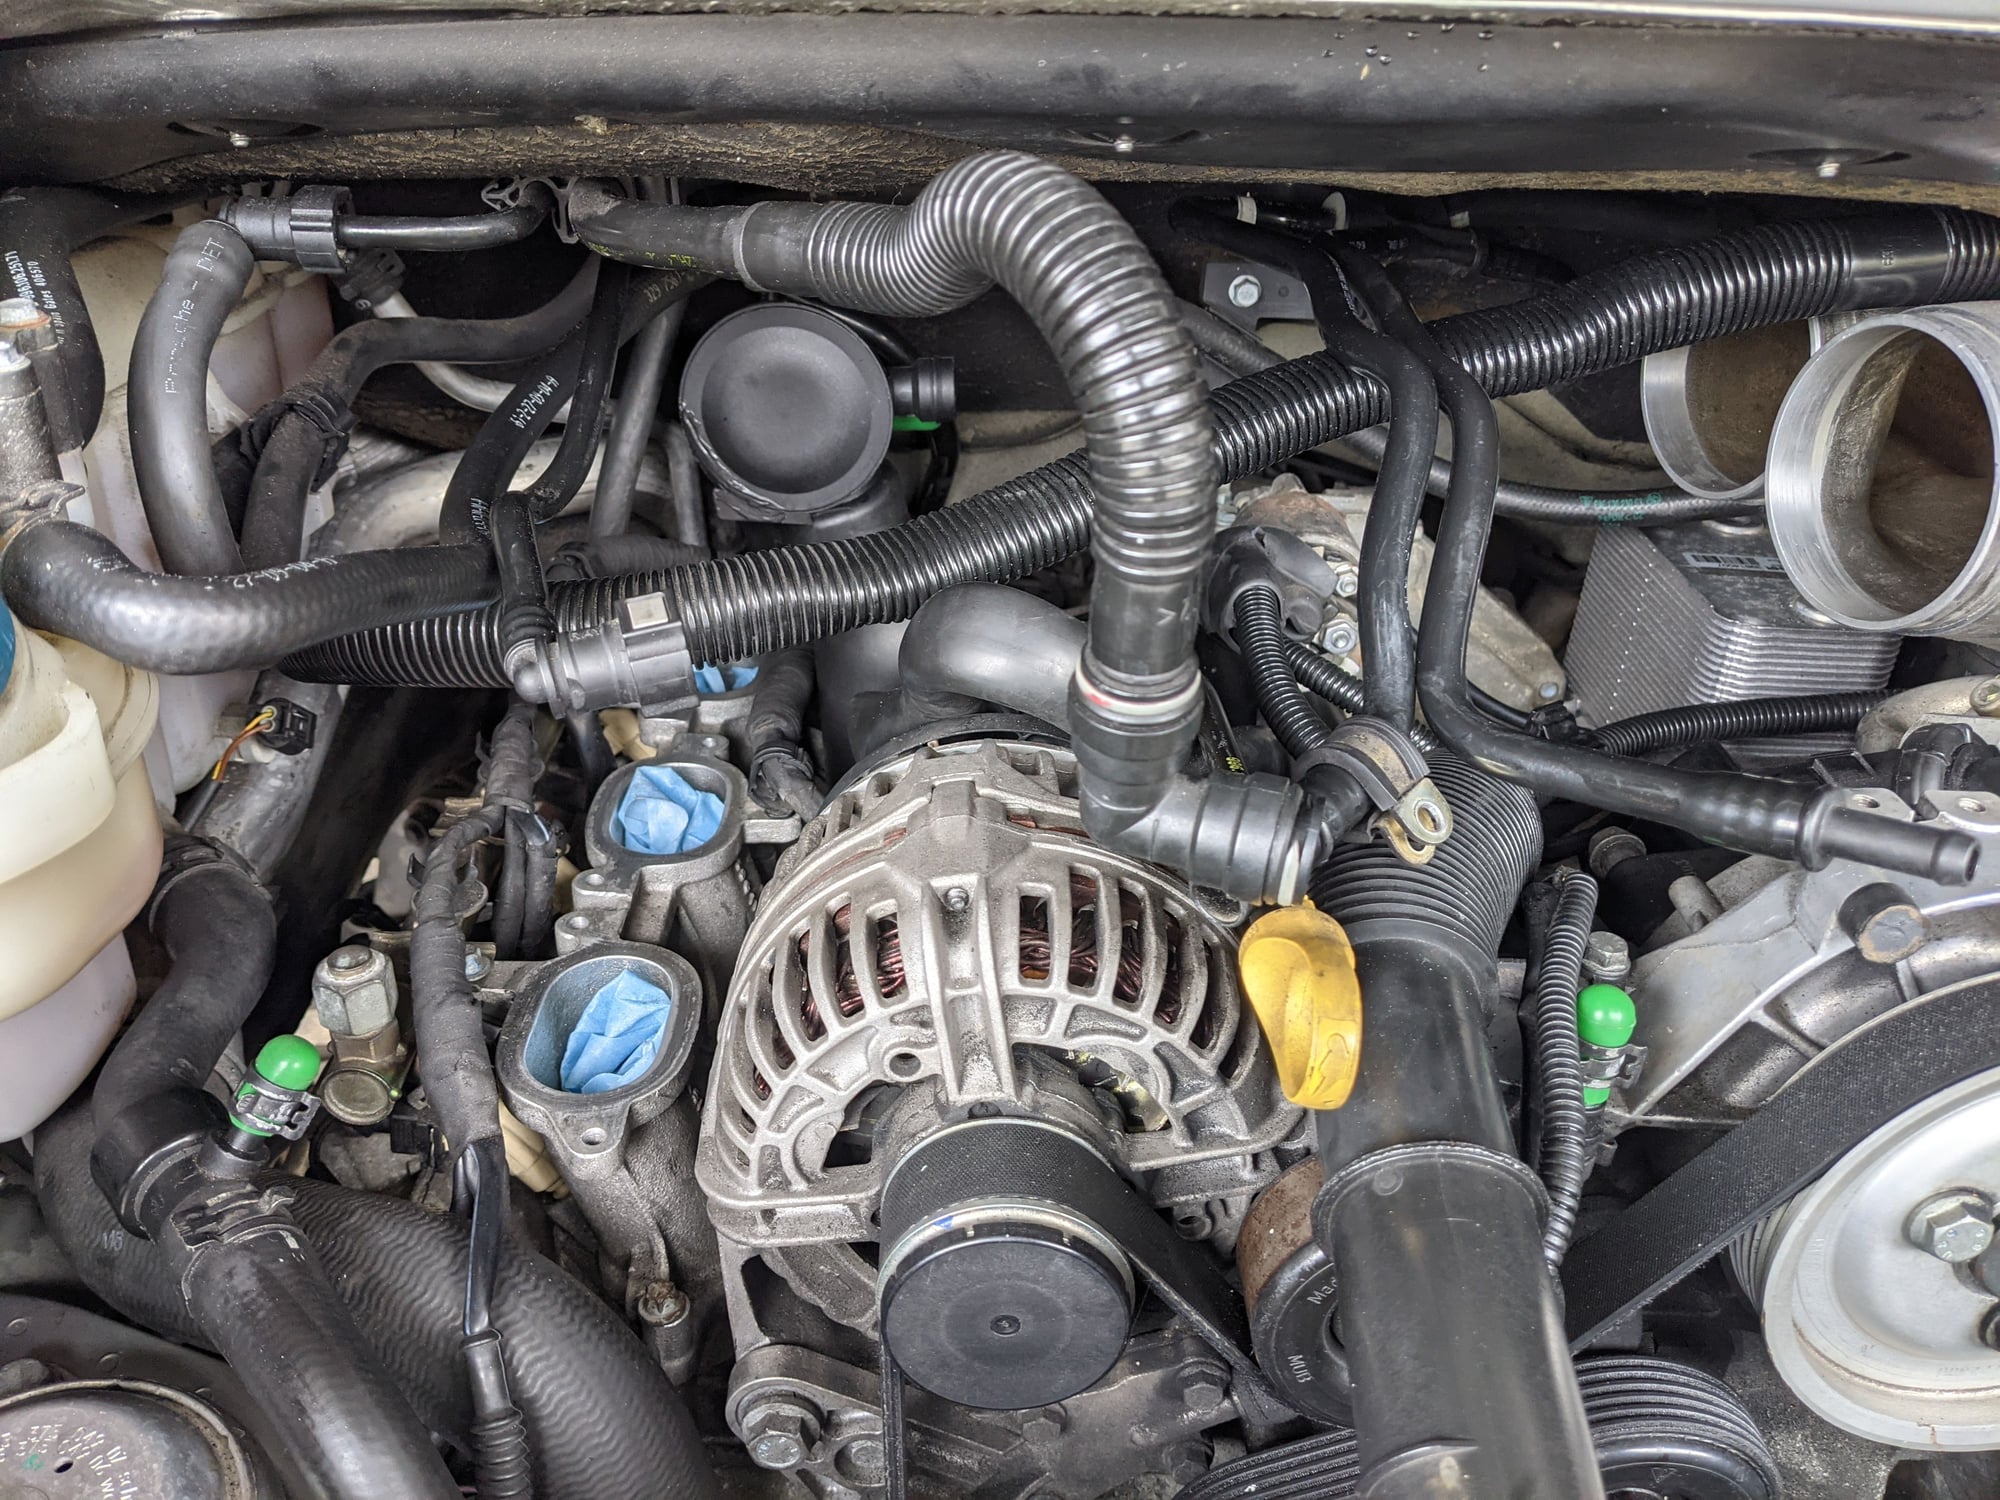
15. With the intake manifold out there will be more space to access the AOS and removing that is the next step. It's secured with two bolts accessed from the top. I believe on .1 cars the AOS is mounted differently, from the side. In this case, I found it easier to first remove the two bolts, then raise the AOS to get better access to the lower snap in hose fitting as well as the clamp at the bottom of the AOS. Getting the clamp off is a bit of a PITA but I was able to get decent grip from the top after 37 tries. If you think you're going to loose it during assembly, it can be secured with a small worm clamp.
You can also see here that I removed one of the starter cables. It was getting in the way and blocking my range of motion so better to remove than break anything.
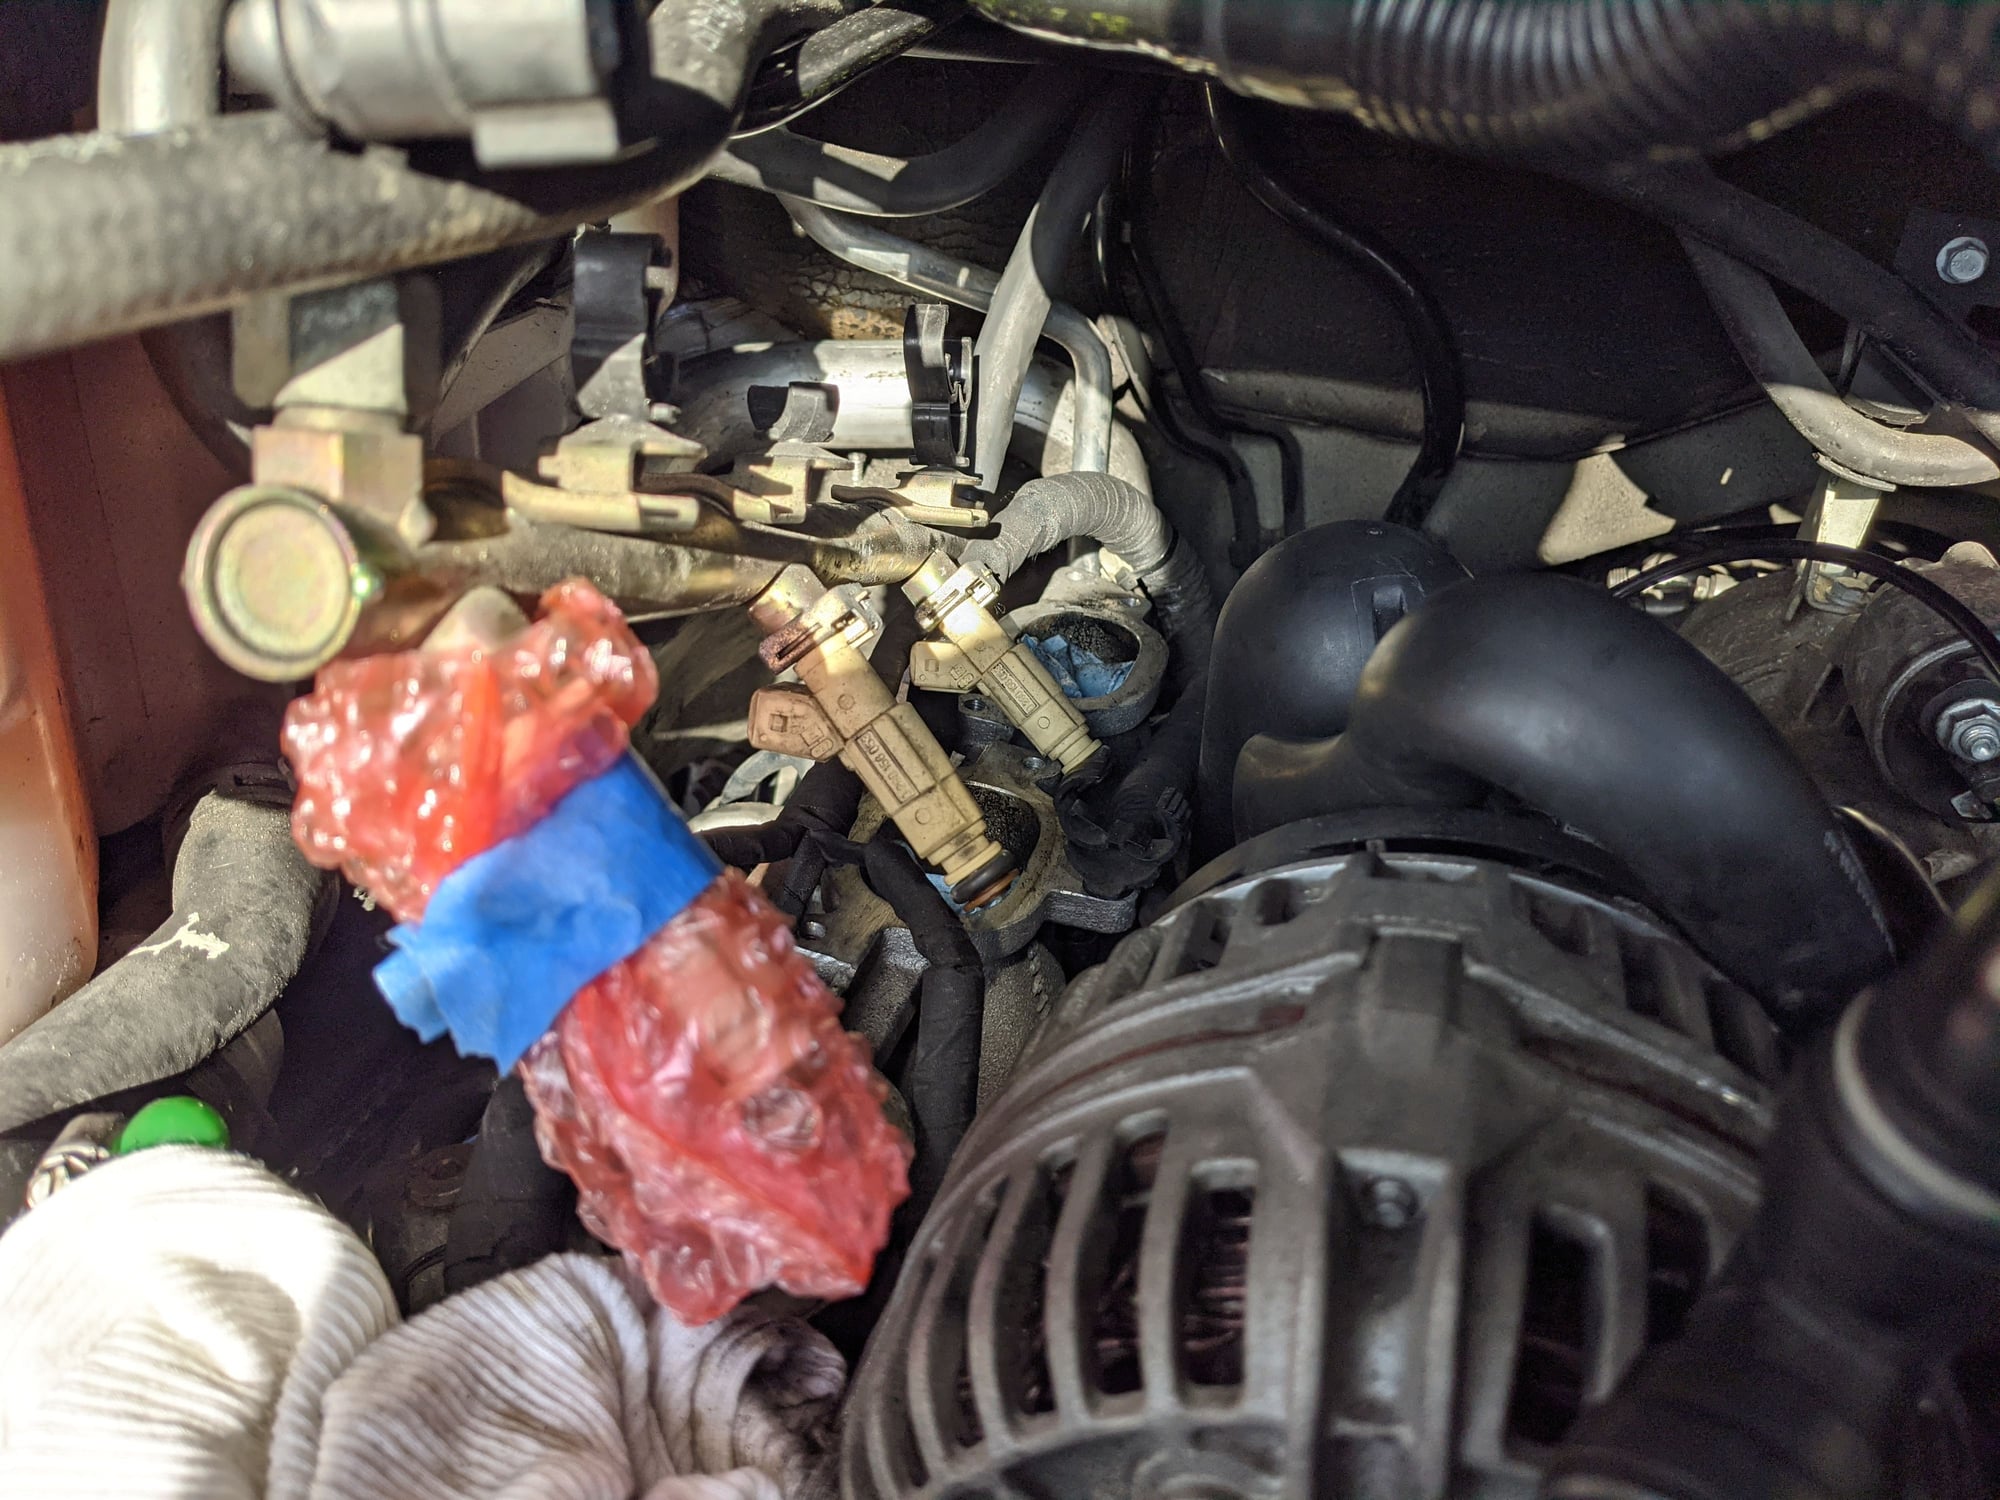
16. (Optional) At this time it was a perfect opportunity to replace the injectors with plenty of room to work with. It's easy and Pelican parts has a decent write up on this. With the X51 things looked a bit different but it was a smooth process. I covered the new injectors before reinstalling.
17. Next I removed the other manifold. It was pretty easy and all 6 bolts were easily accessible. You'll need to remove the positive battery terminal cable that is attached to the manifold. Once that was out I replaced the bank 2 injectors.
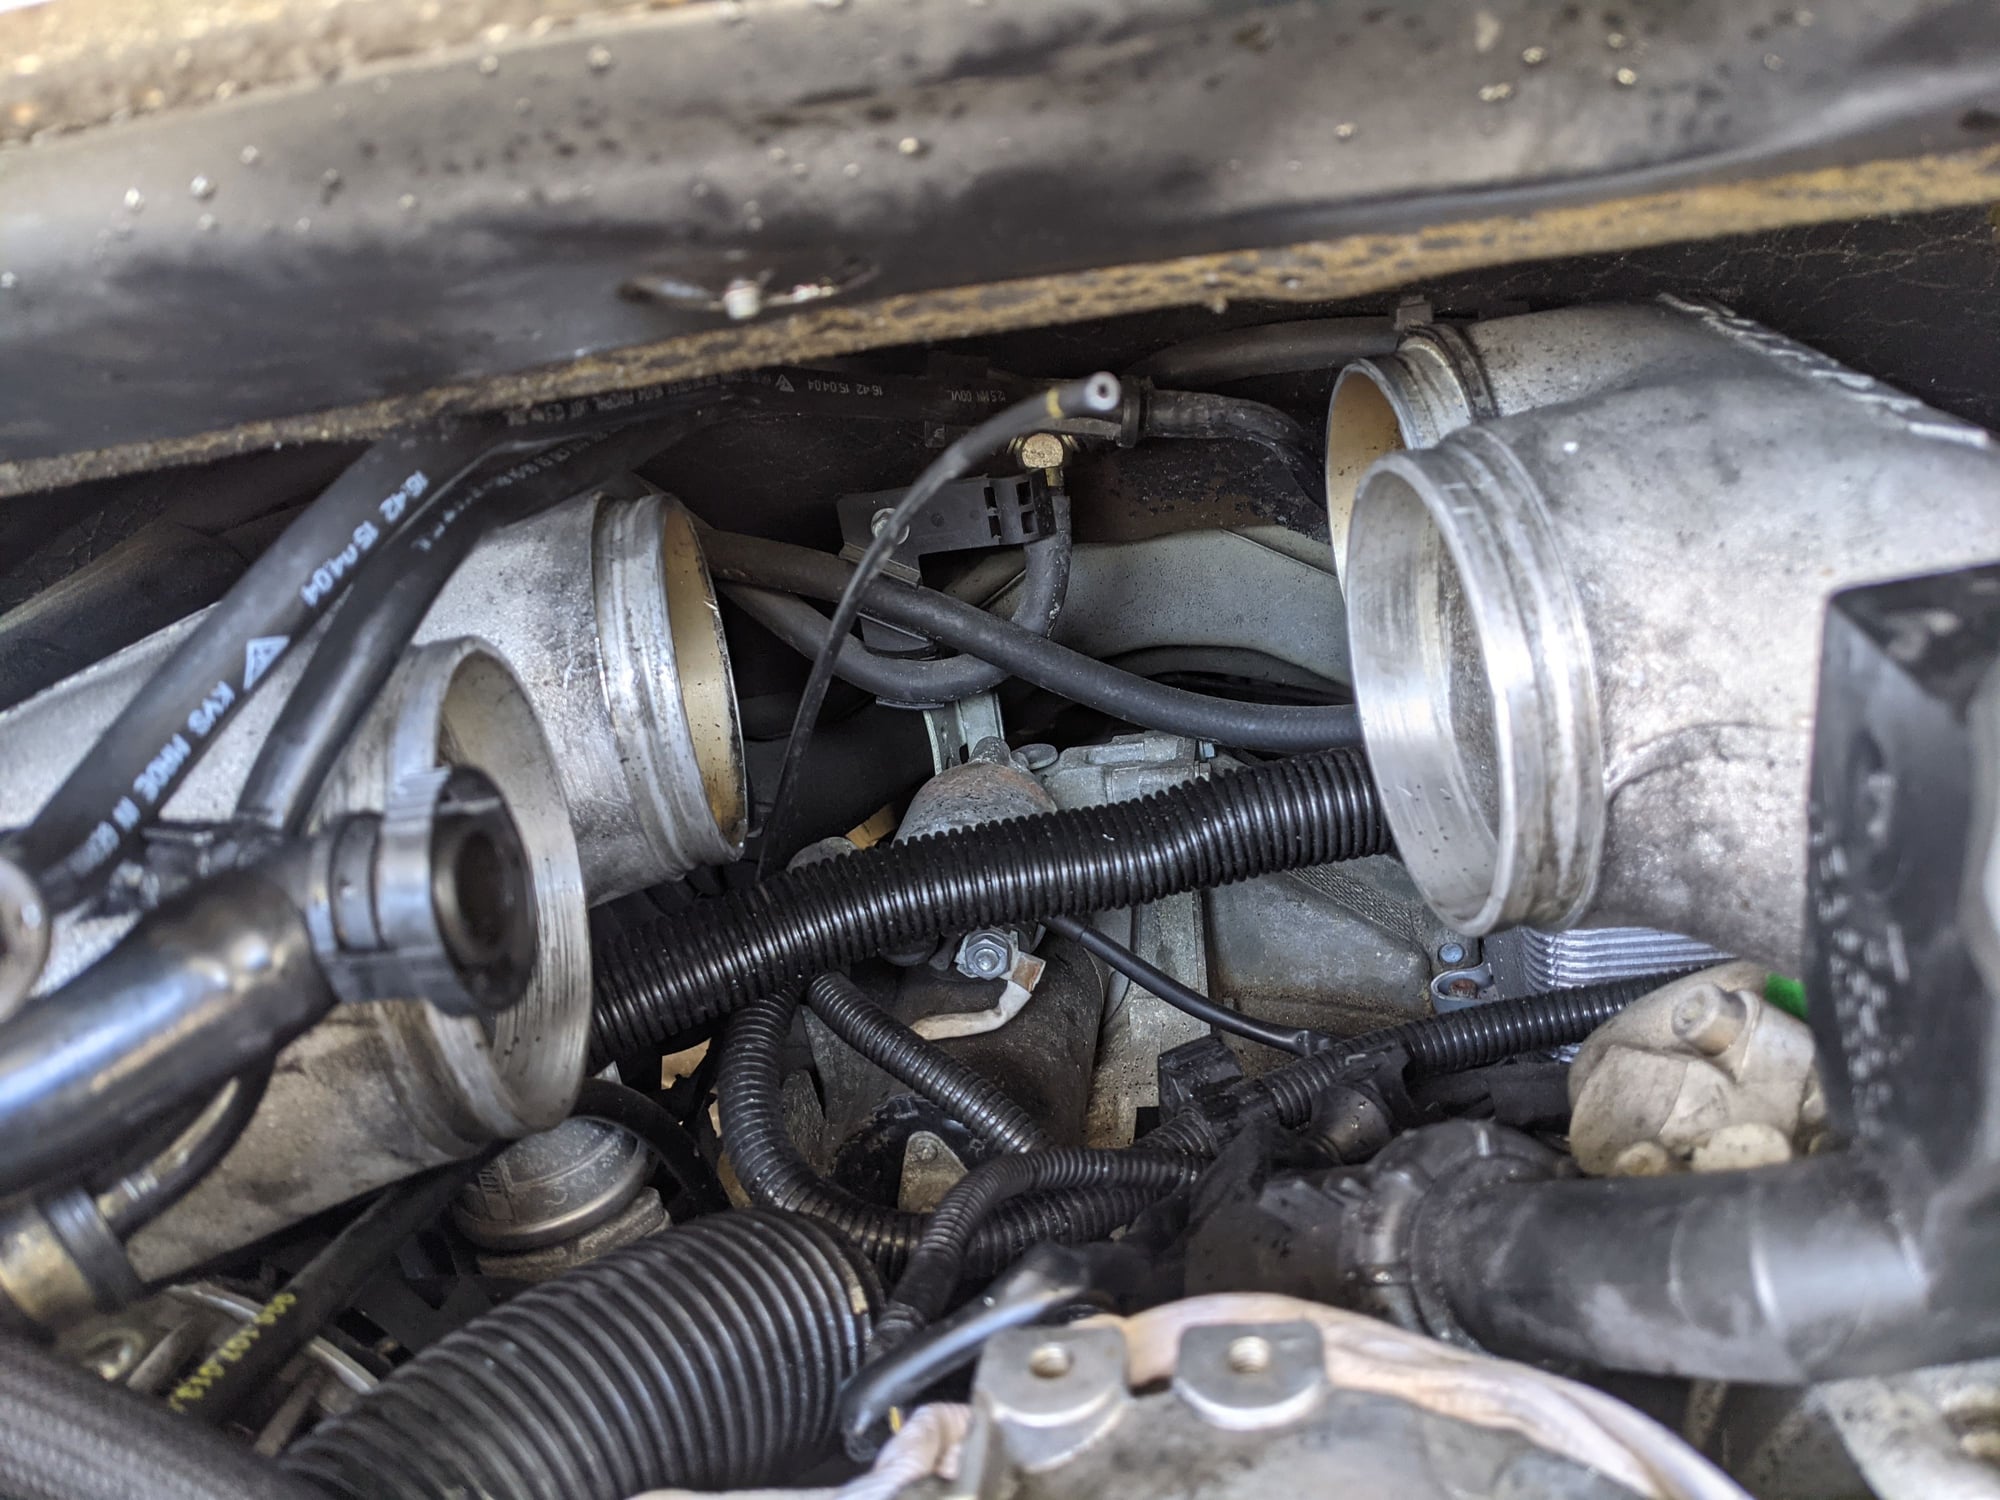
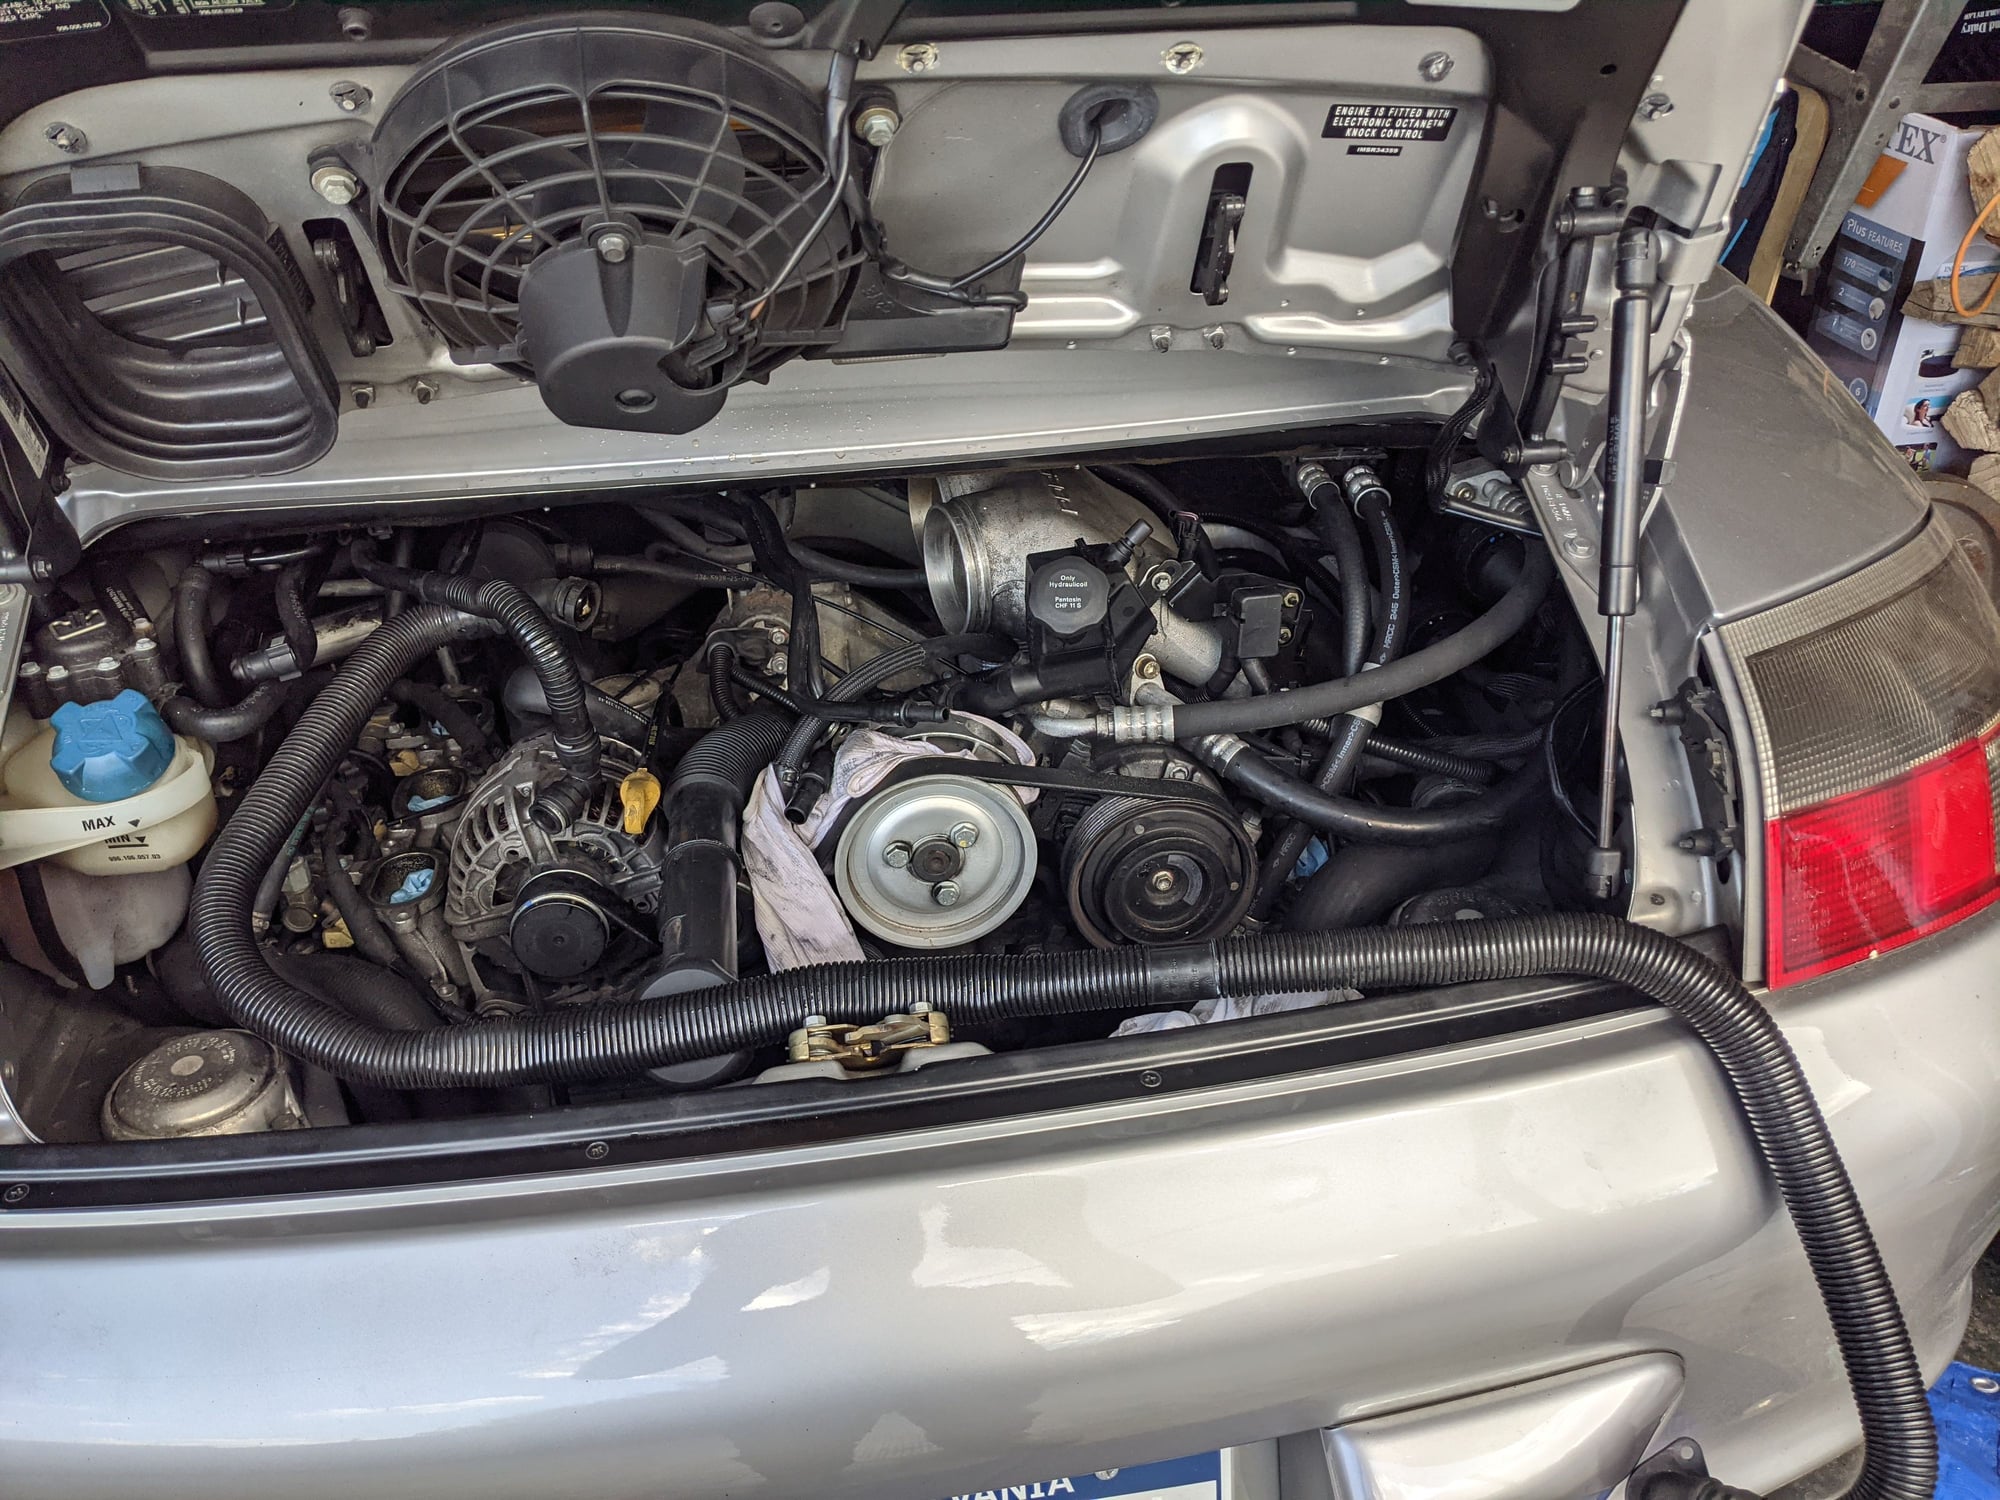
Once the intakes are out there was a decent amount of room in there!
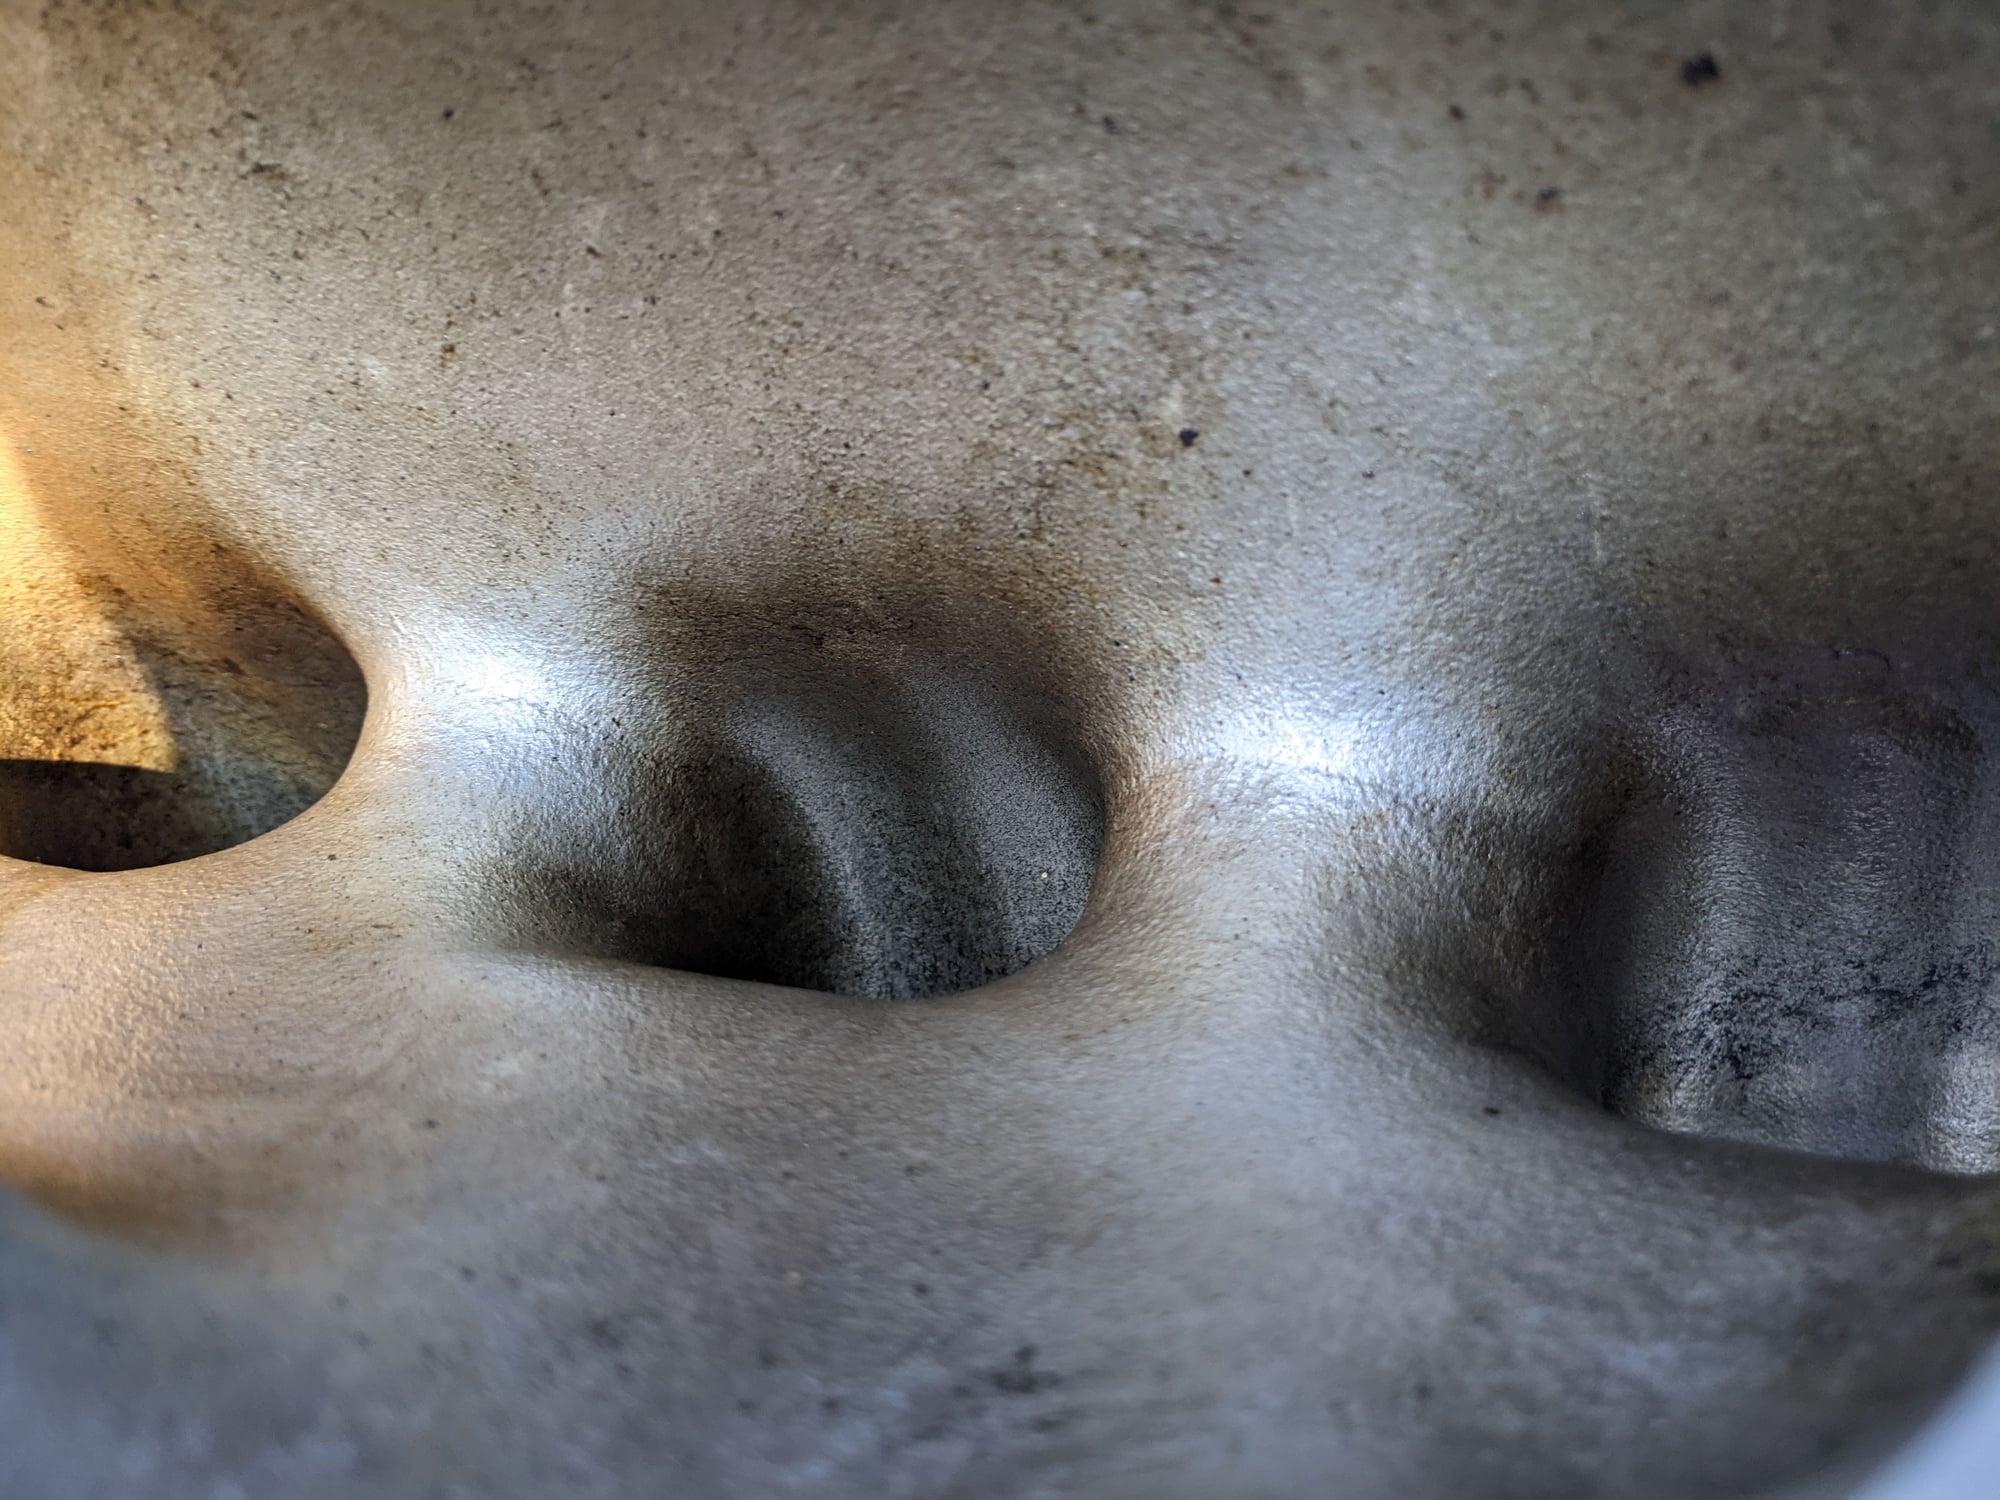
I cleaned both intakes and took some sand paper to the Porsche logo Nobody will see it but I'll know!
Inside of the X51 intake
I just cleaned up some of the oily grime at the top of the runners but the valves looked very clean. Thanks port injection!
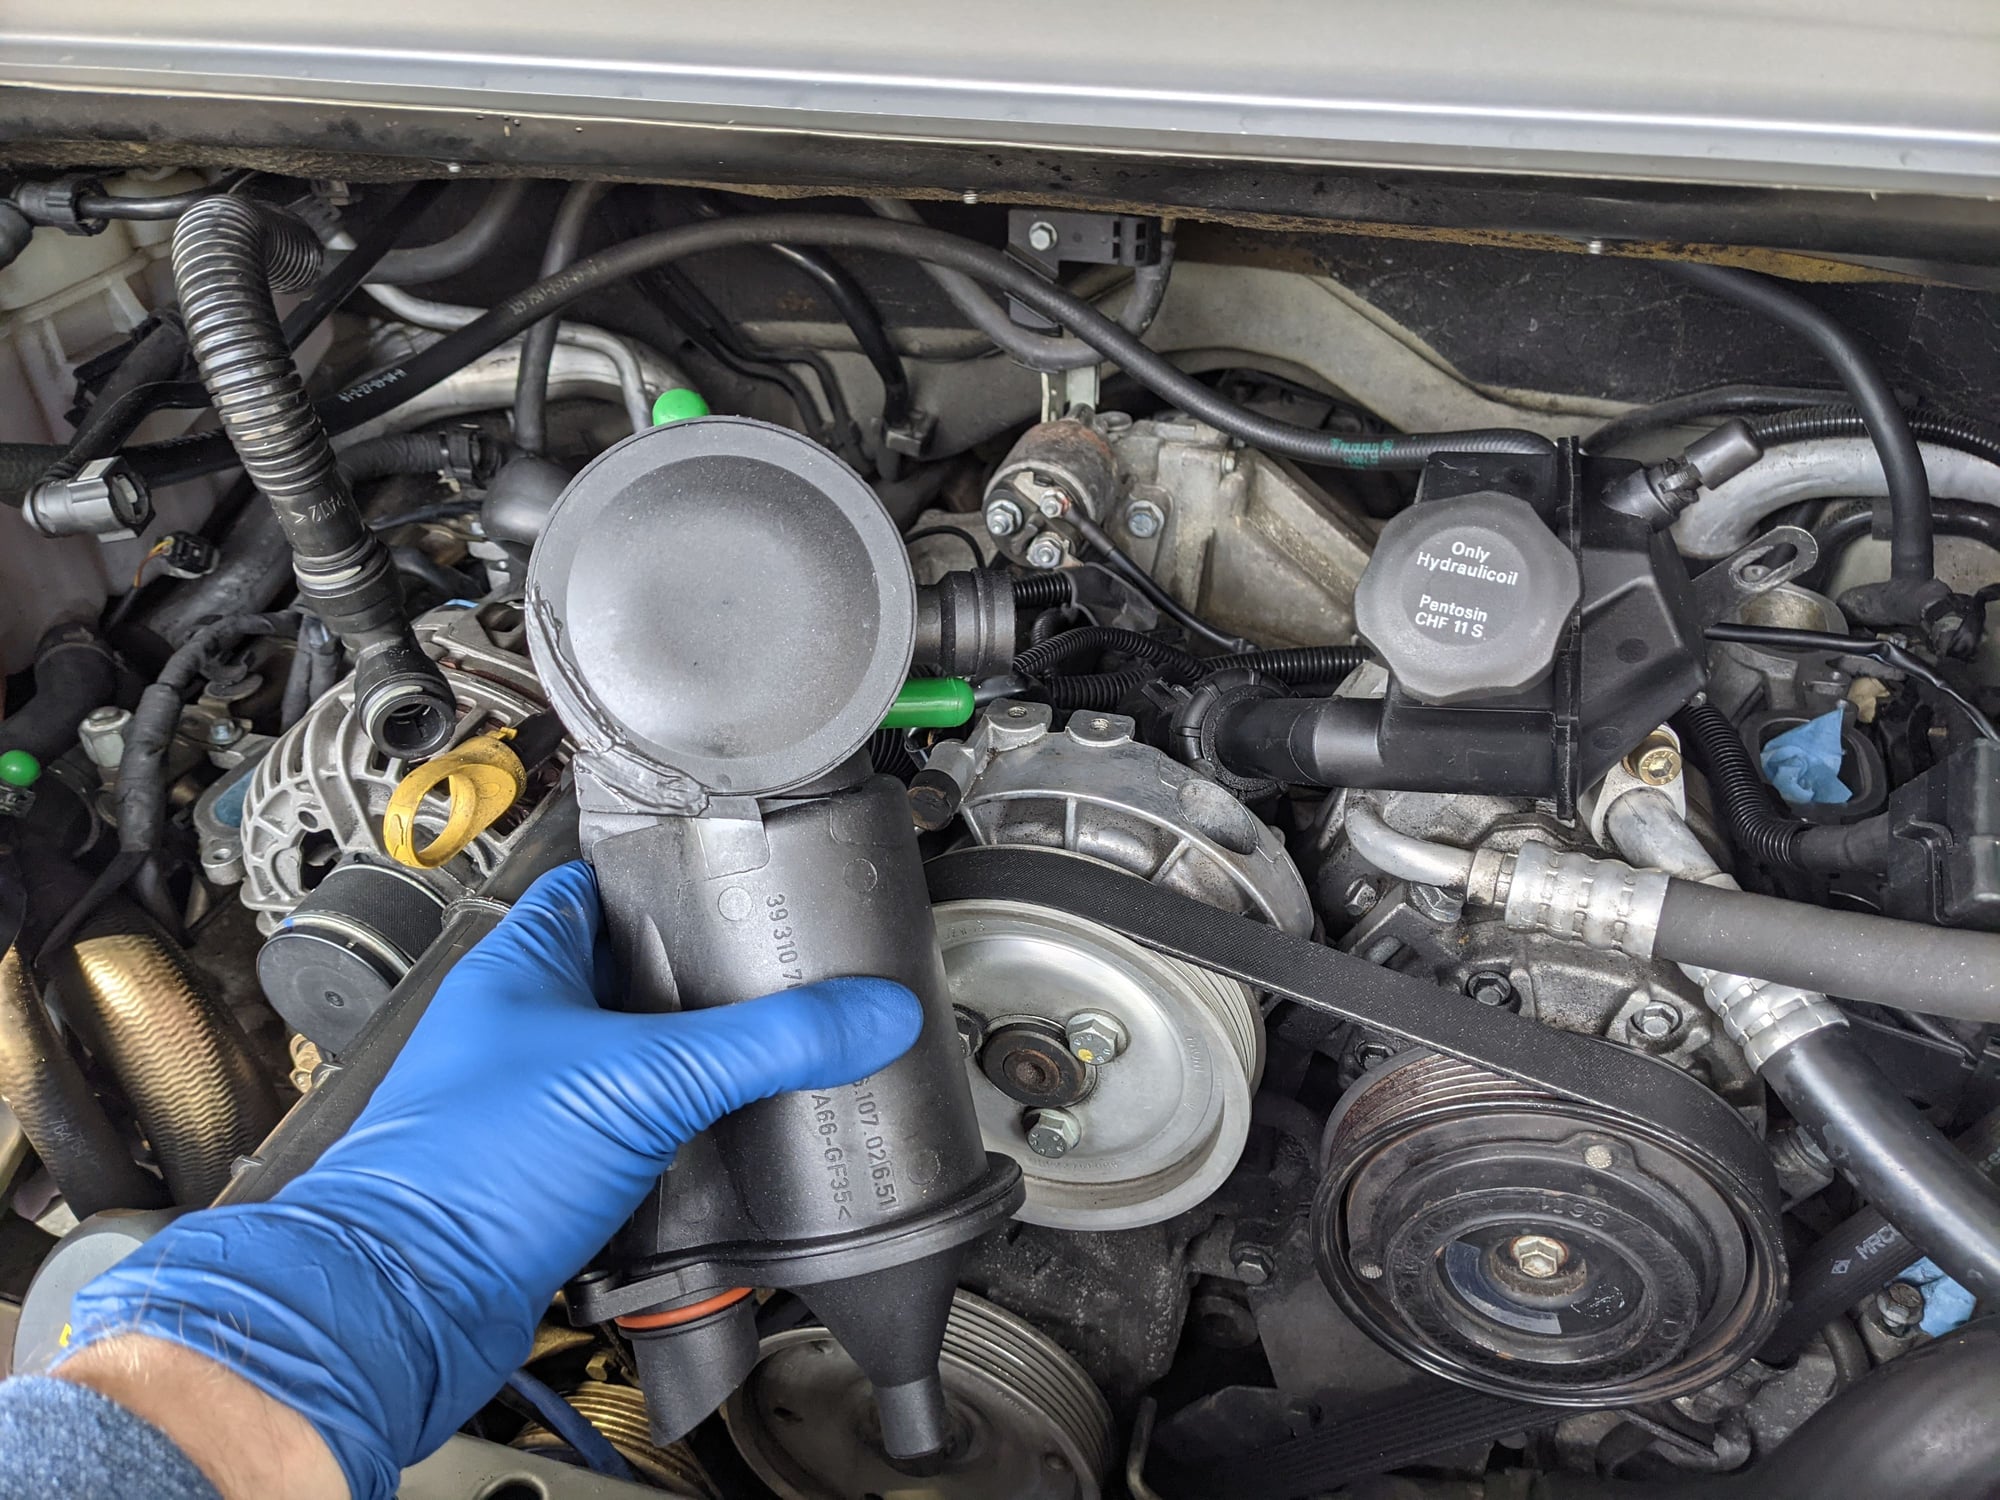
18. As part of my install I did the coolant line delete. You can see the two ports on the sealed AOS plugged. I started installing it by first sliding on the lower L shaped hose and beginning the struggle of getting the clamp back on. You want to do this BEFORE screwing in the AOS. Once the lower hose is on you can reattach the plastic hose to the bottom port. Once that is on you can tighten the AOS with the two bolts.
The 8mm multipoint ratcheting wrench was super useful here.
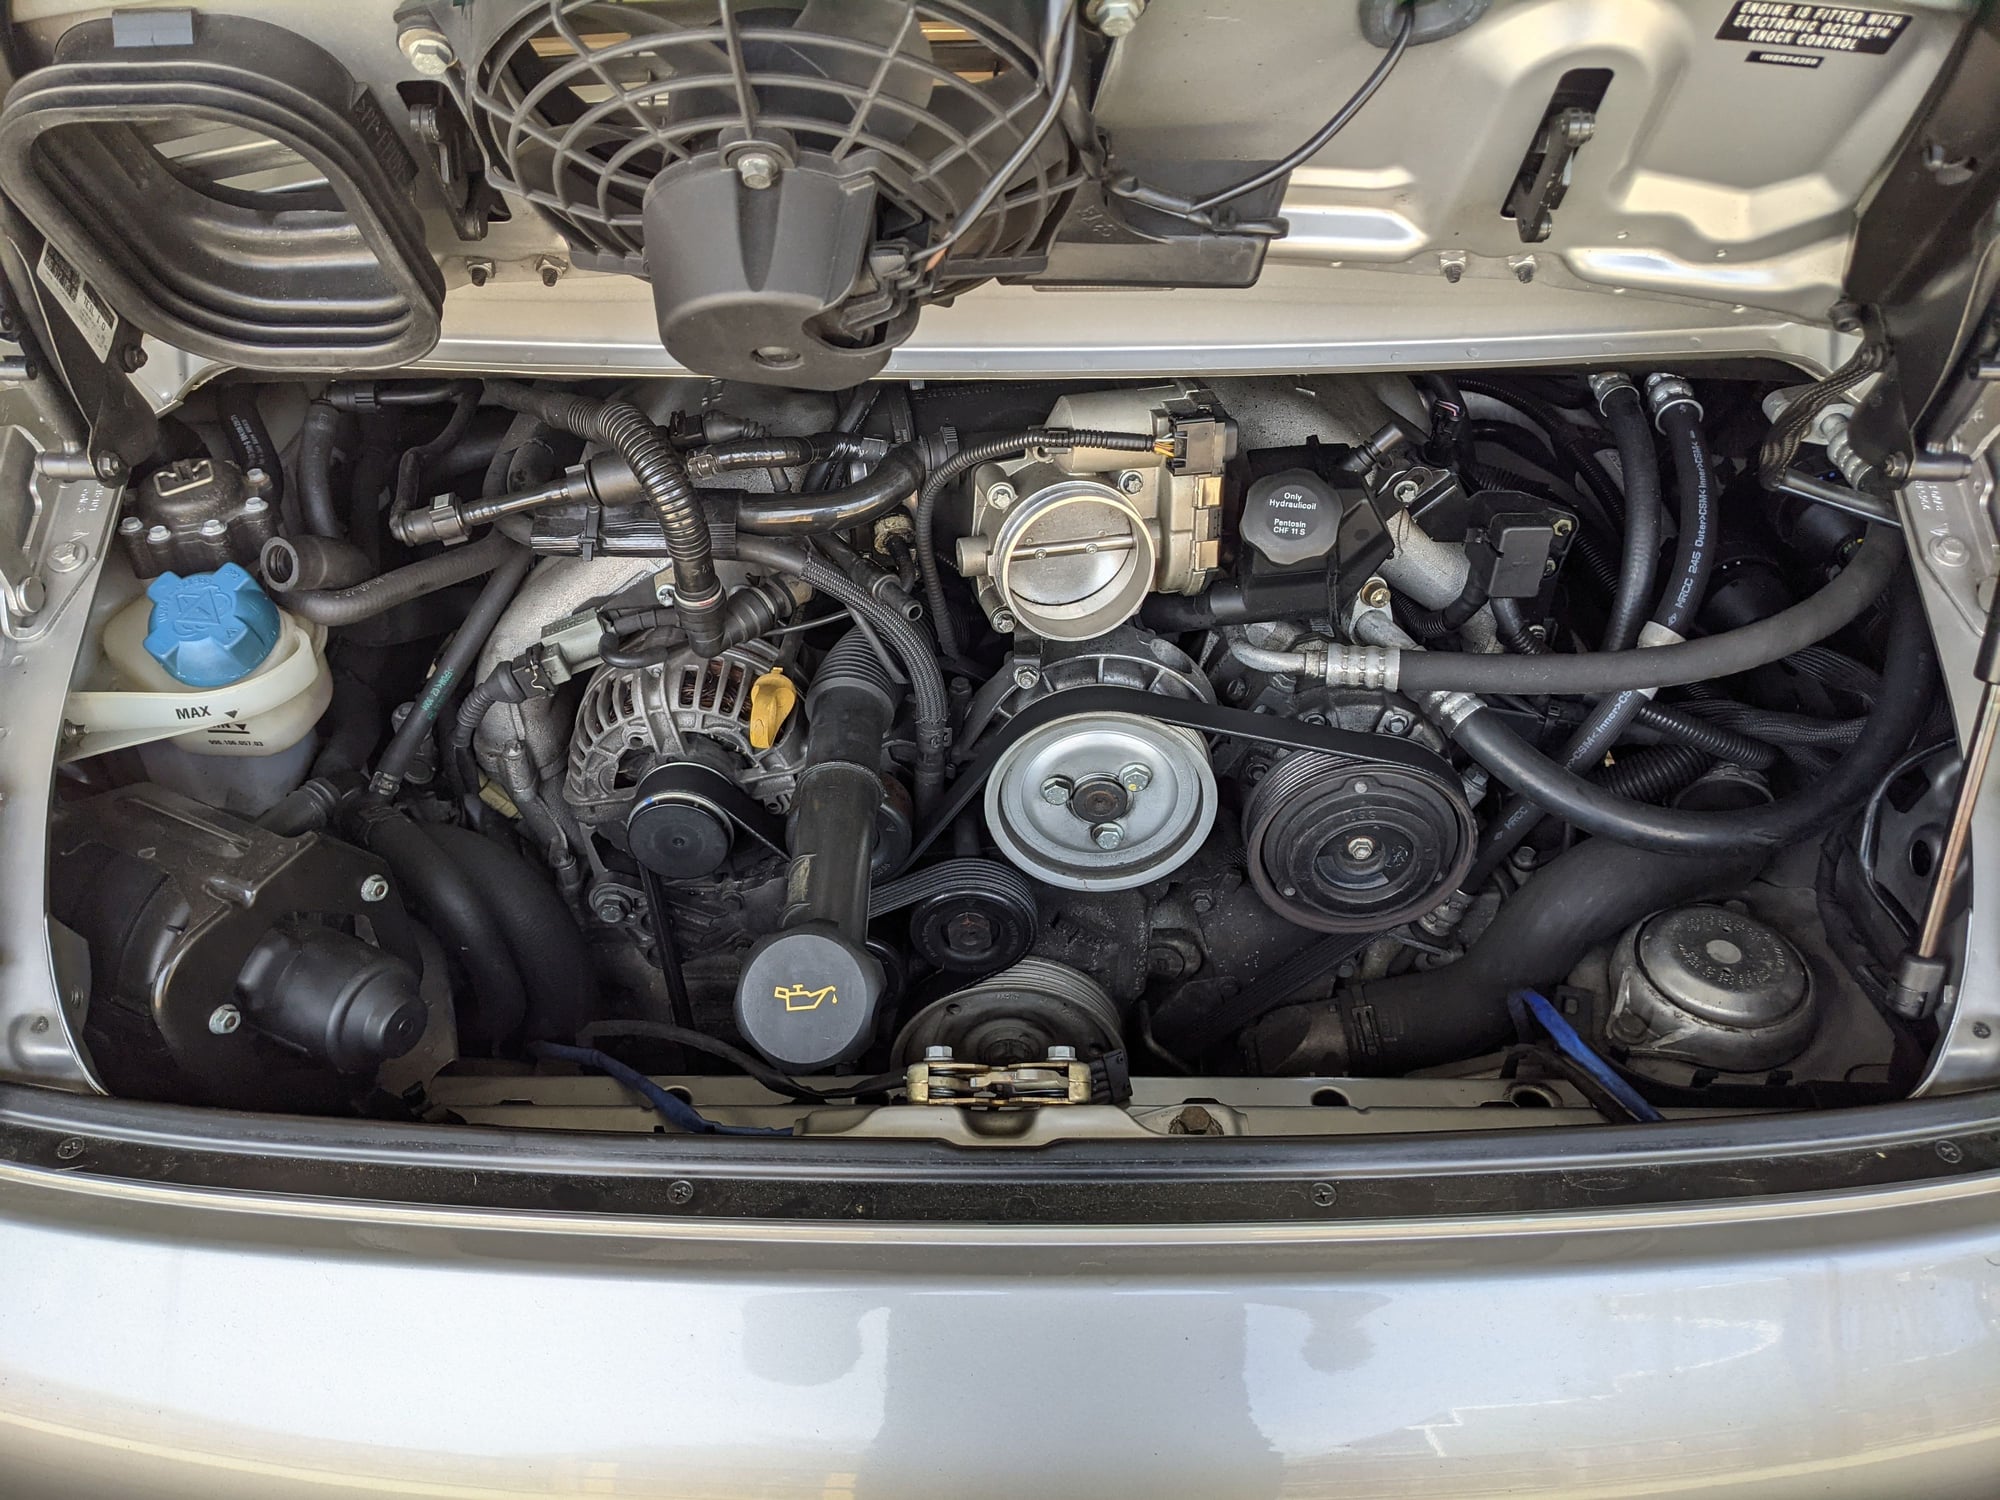
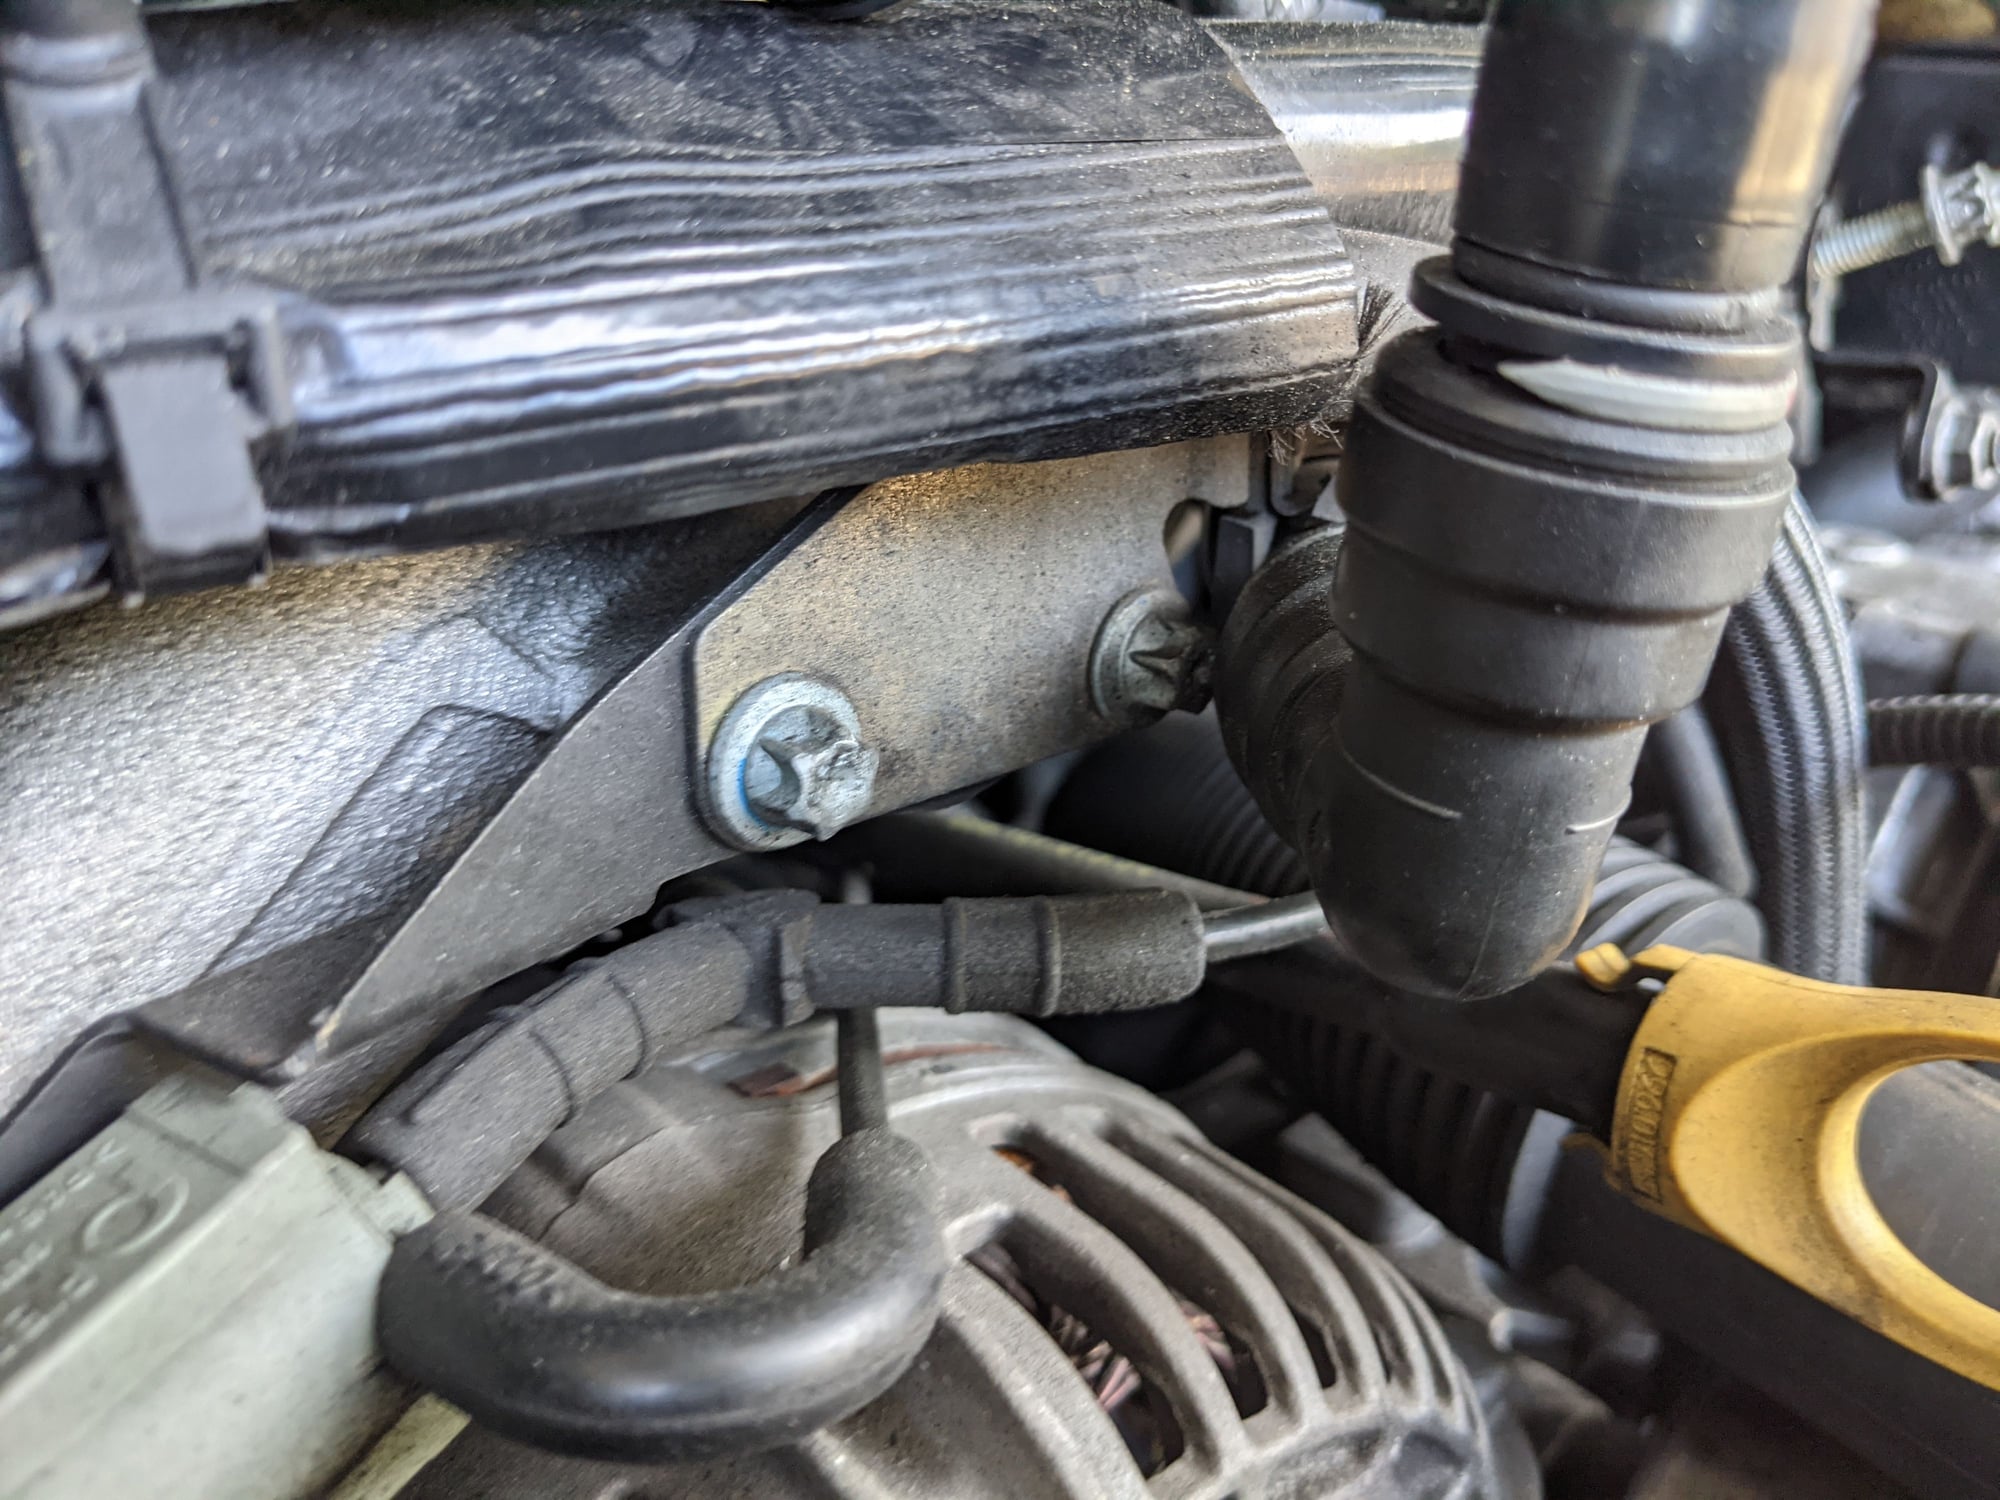
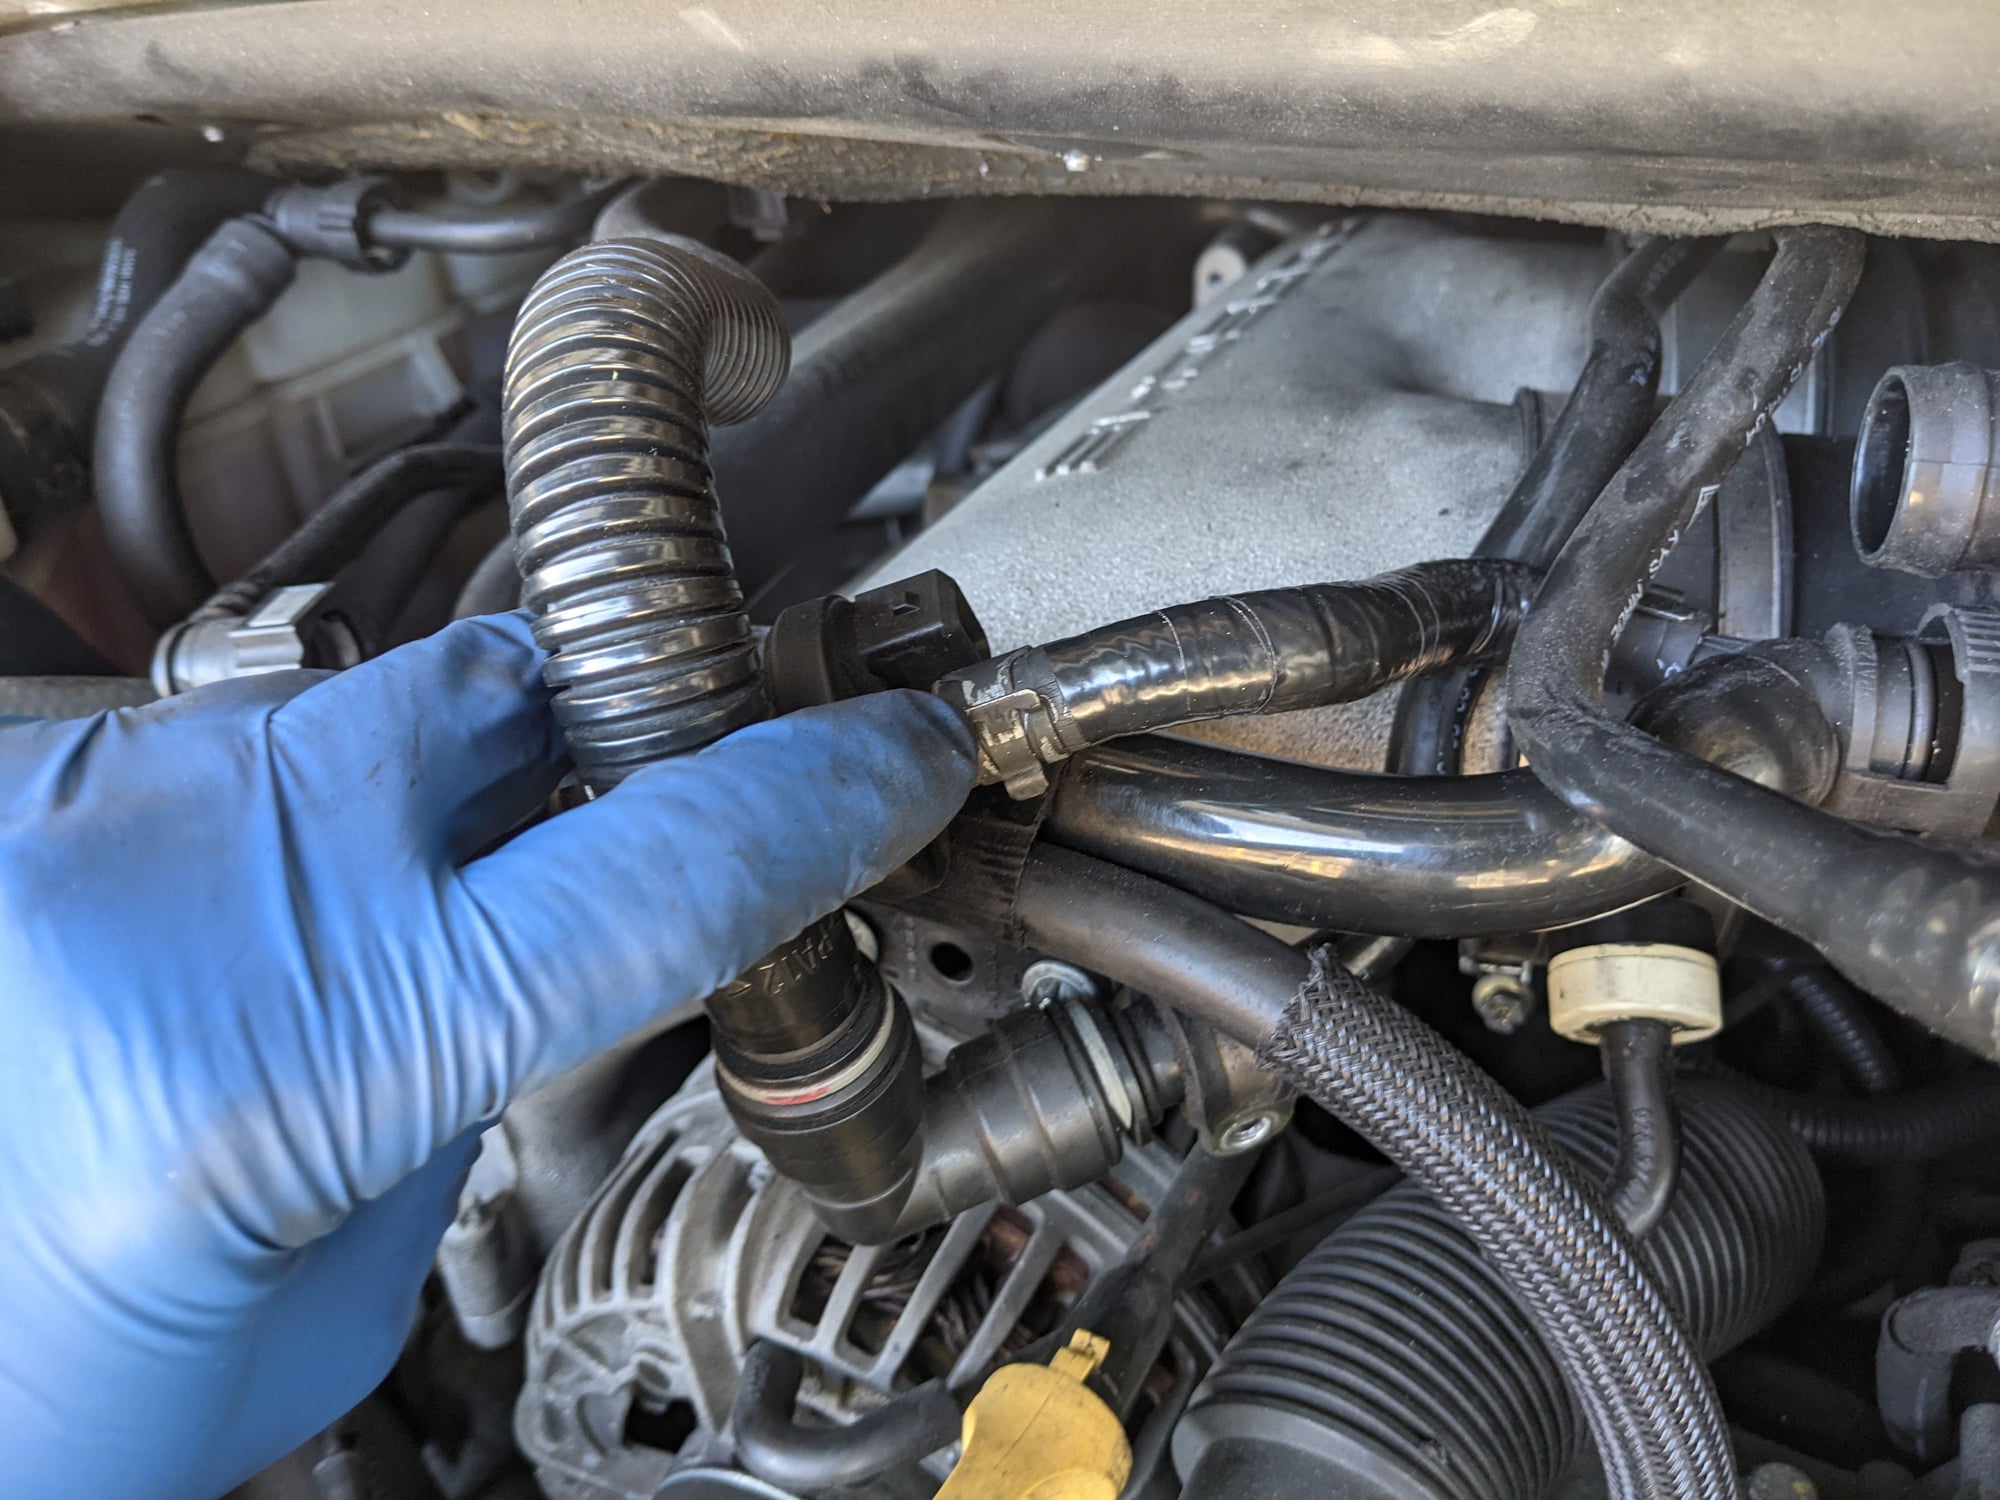
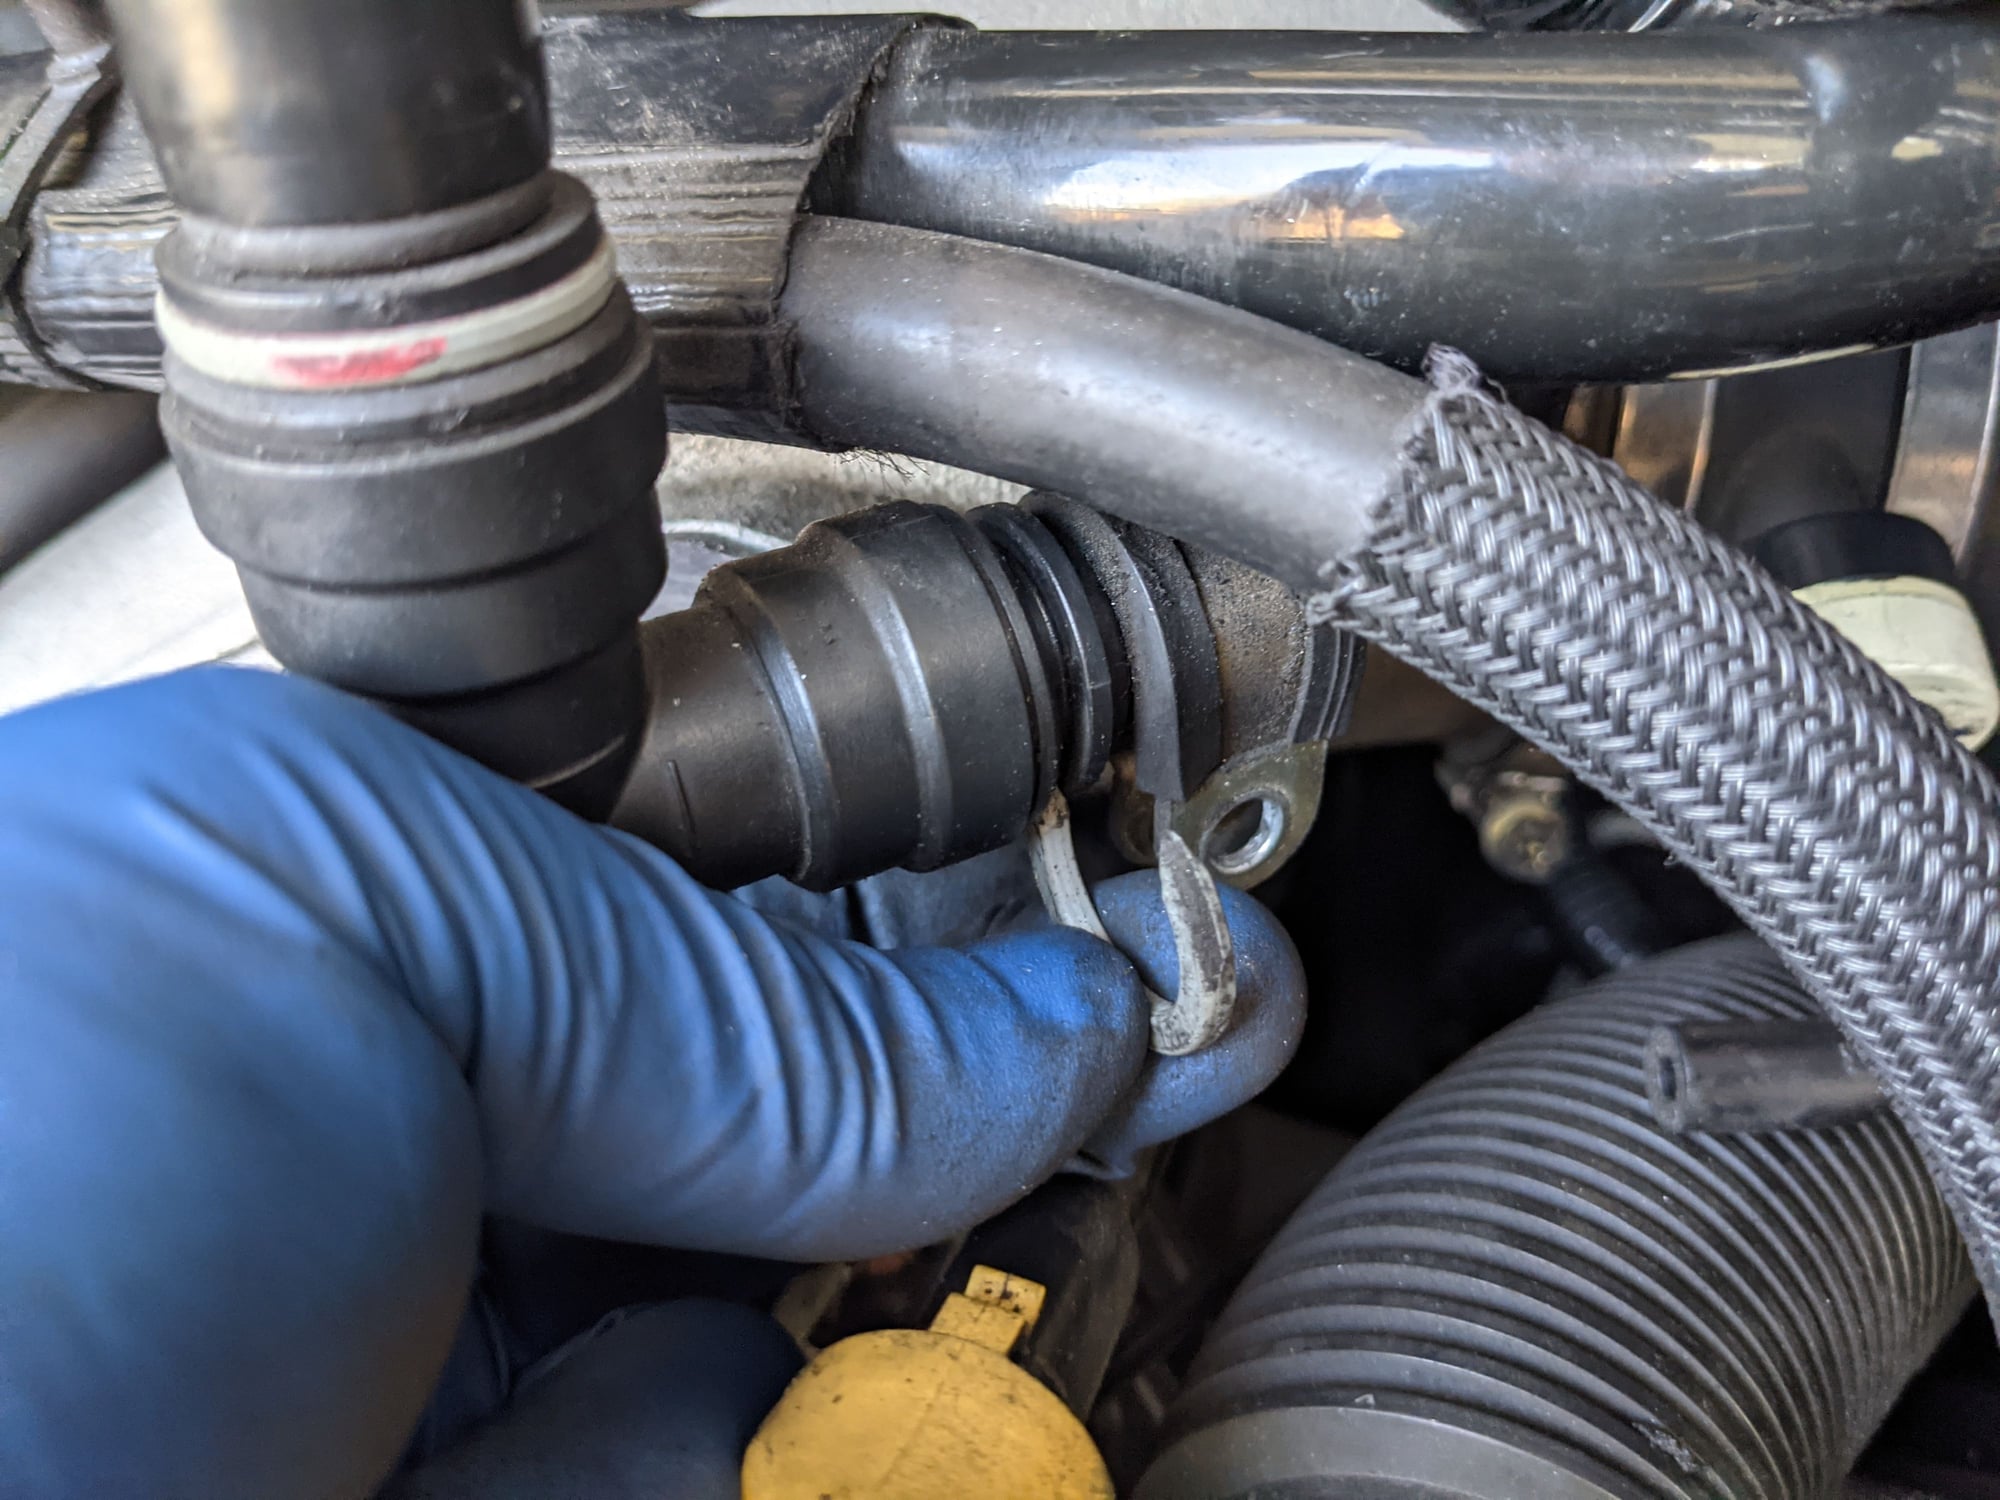
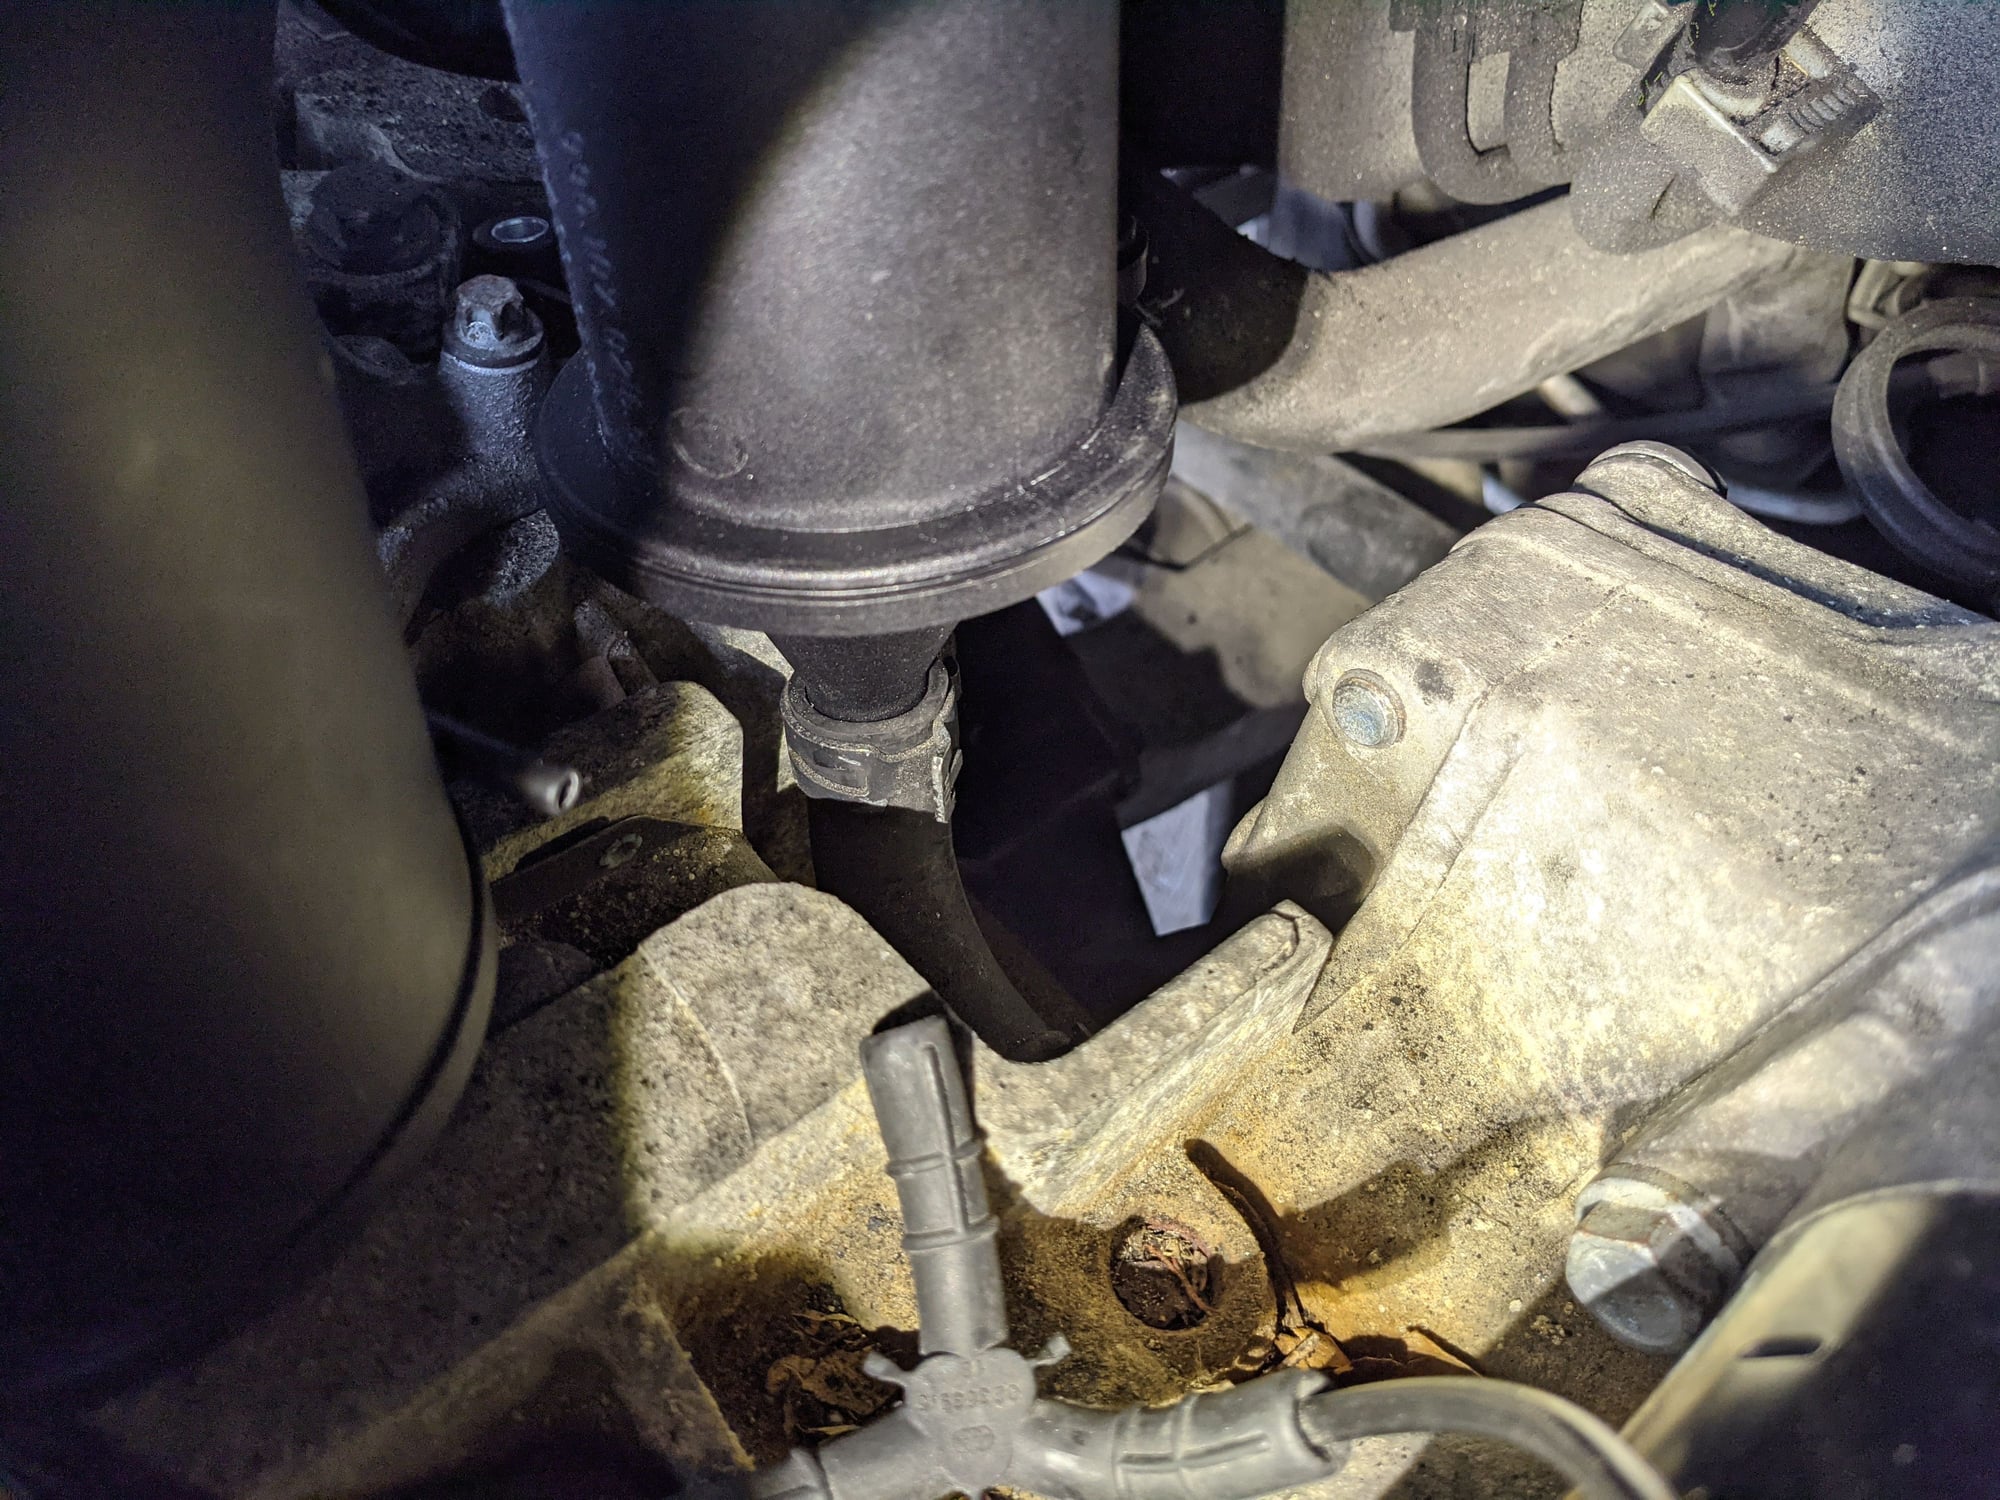
19. Here you can see where I plugged the coolant ports on the engine. I plugged the port at the bracket that tends to snap. 2 reasons I went this way. One, the hose unplugged easily and the bracket was in excellent condition. Two, I felt better about having the silicone cover further away from the moving belt. I'm sure it can be done at both spots but that's what I did and I've had zero issues - no leaks. When removing the coolant hoses you will spill a bit of coolant but not much. It was helpful top clamp the hose running from the coolant reservoir to minimize spillage.
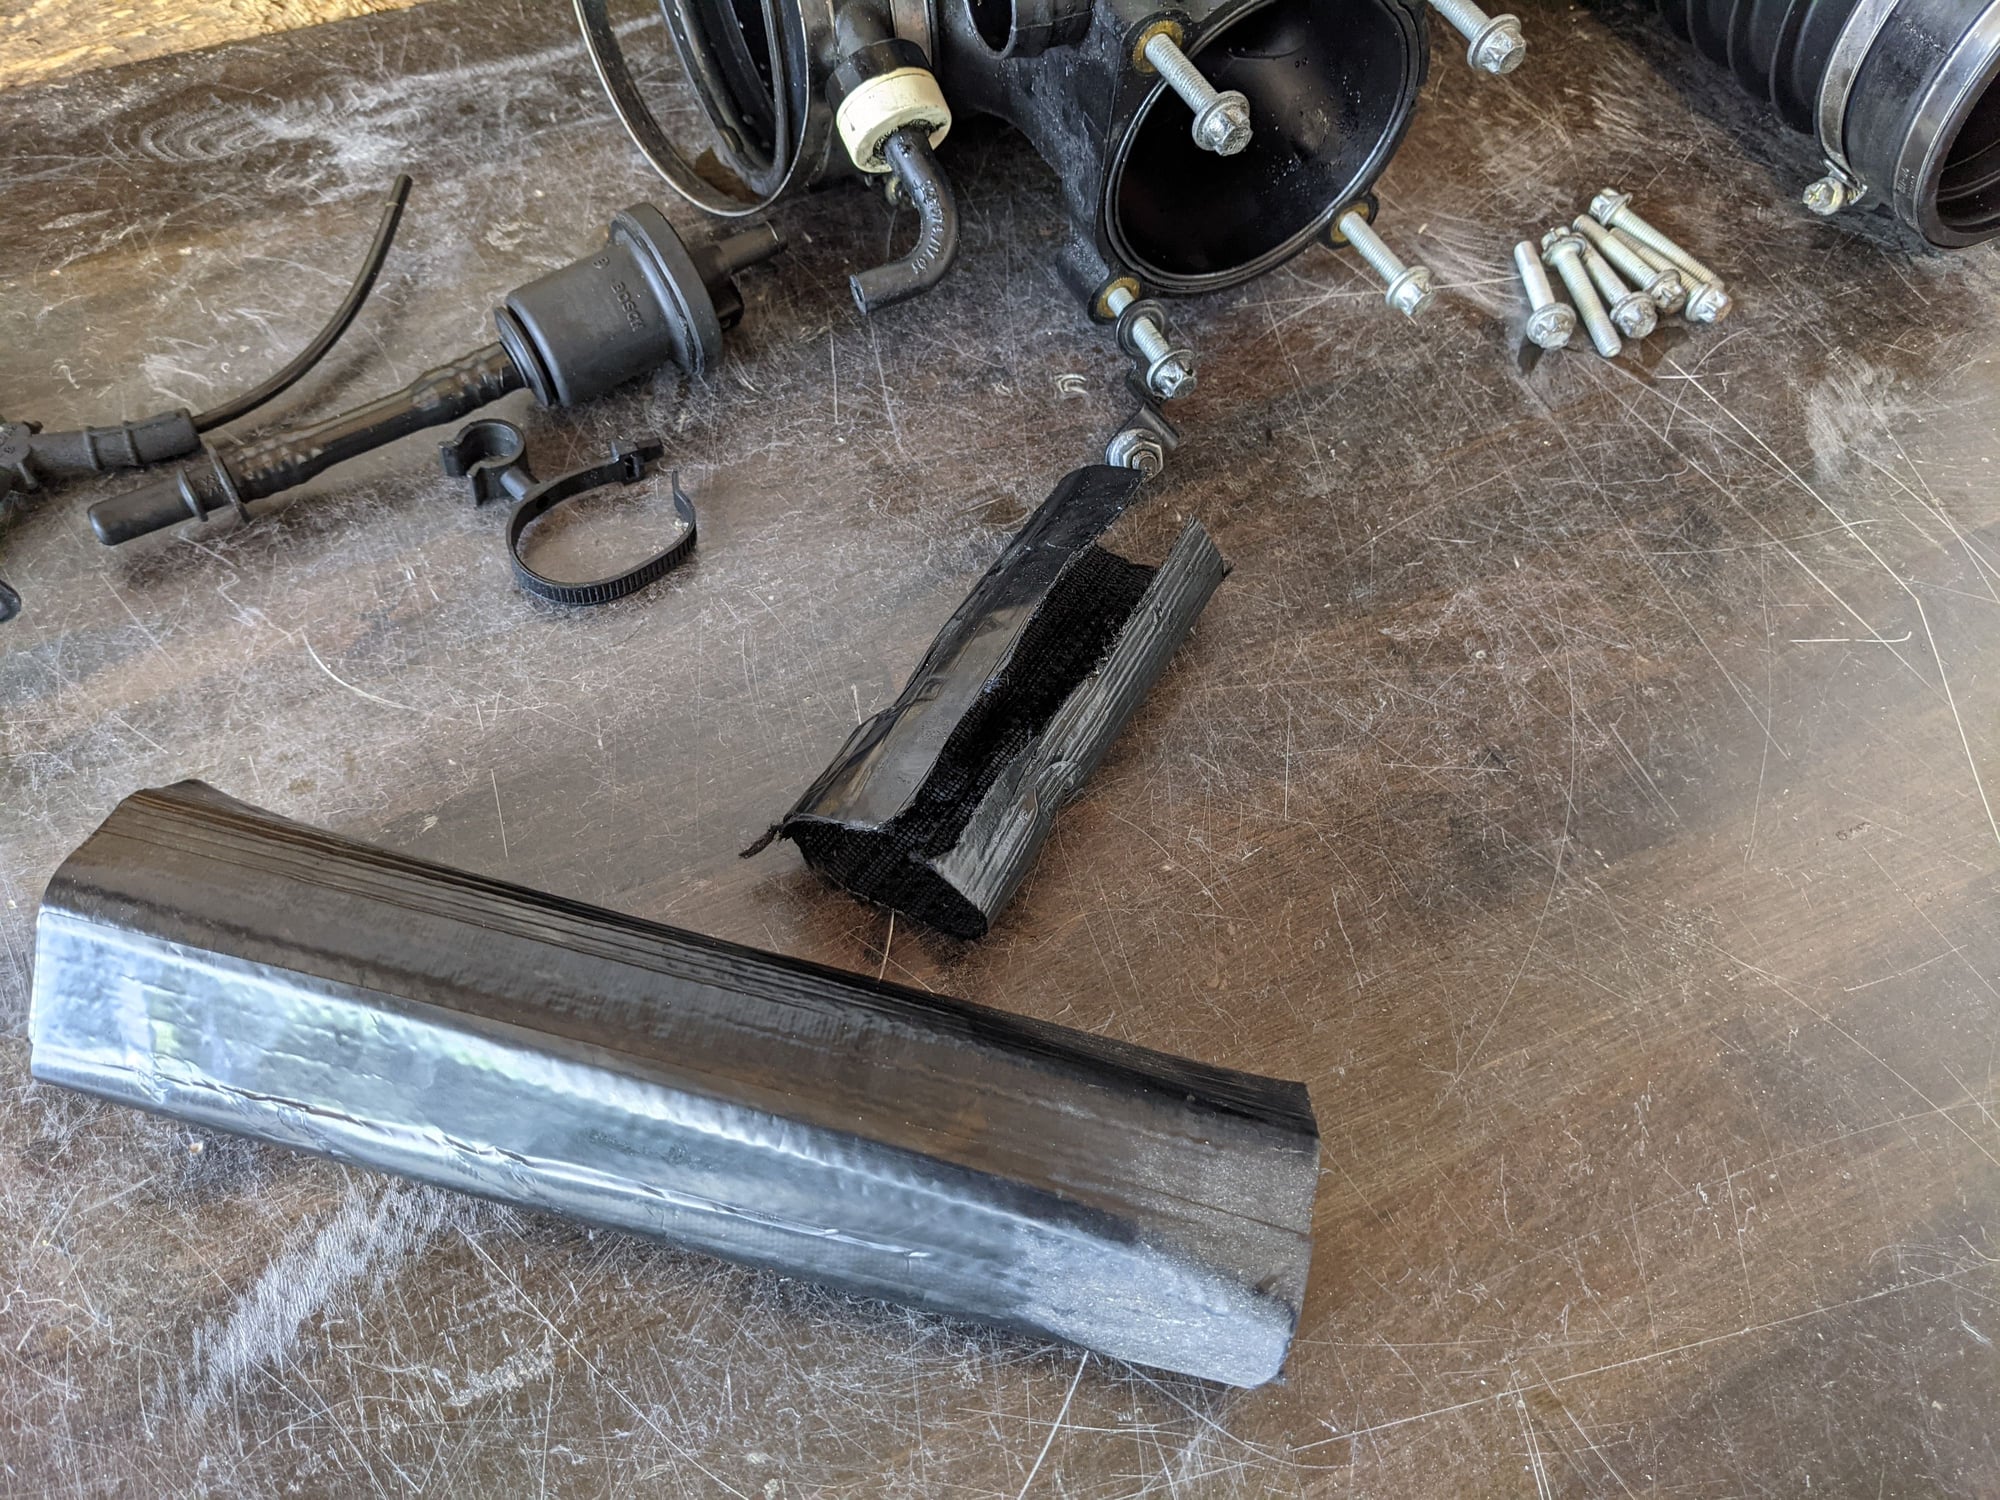
At this point you can begin reassembly. This is the time where I ran into the main issue - broken crossover hose. I was able to tape it together but this only ended up causing vacuum leaks and a rough idle and was nothing more than a temporary fix. As such I suggest getting that hose ahead of time.
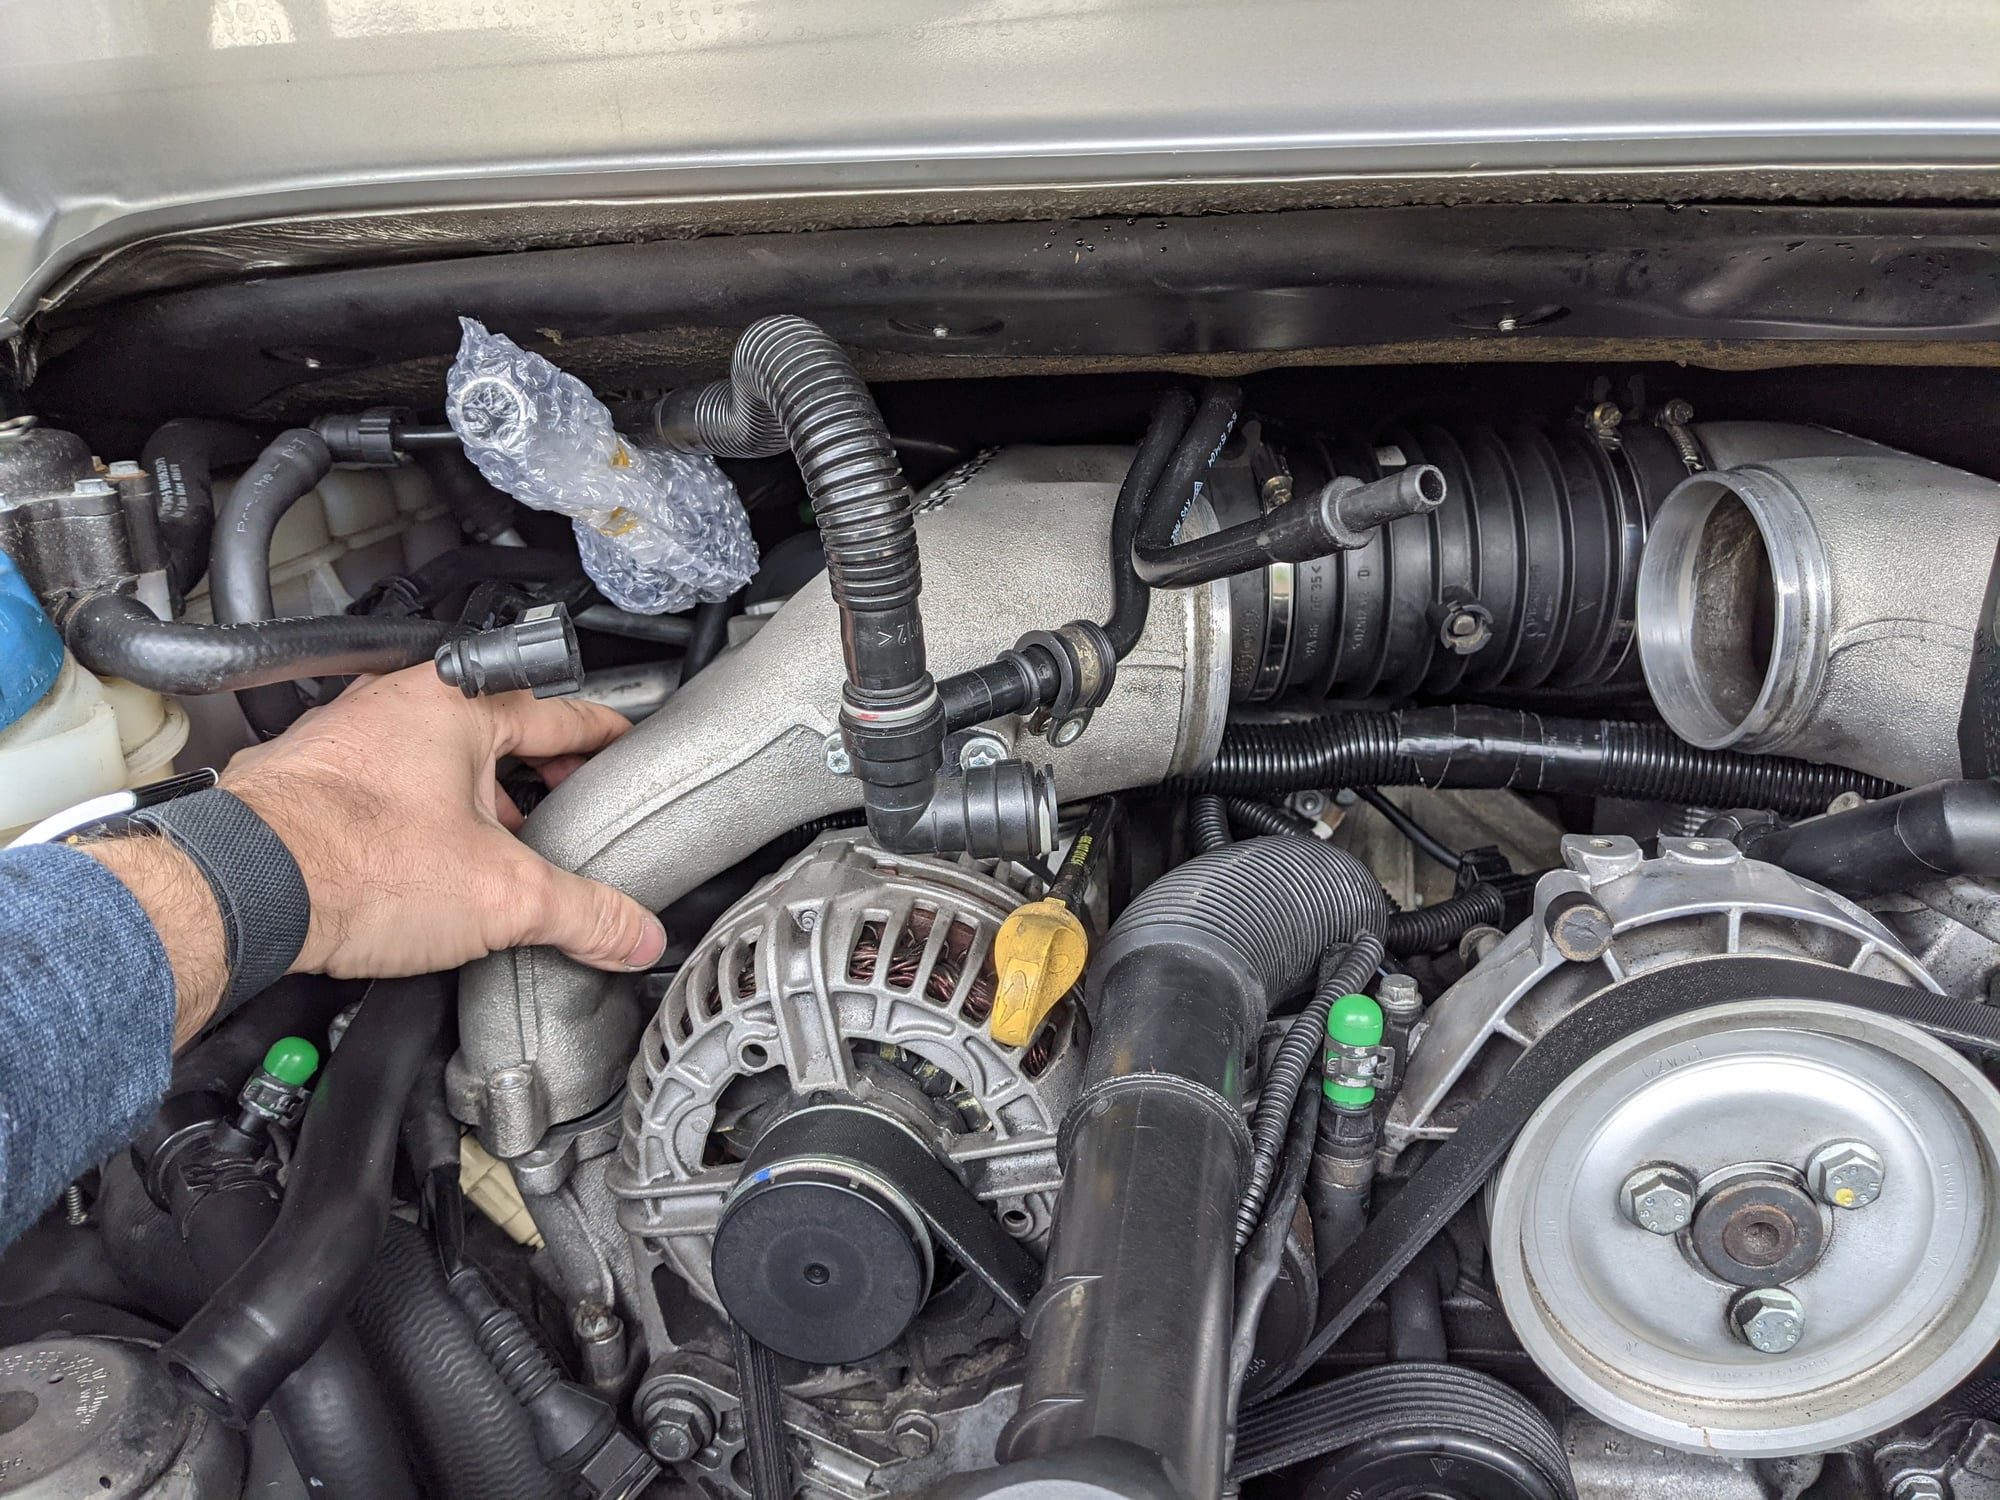
20. At this point, once the crossover hose is attached on the passenger side and threaded through that manifold you can start to reinstall the driver side one. Once you get that loosely into place it's time to connect the new supplied hardline that connects to the top of the sealed AOS. What I've done for the manifold was start with the bolts from the back first. That allowed some movement to get the rear plenum in. You can actually slide in one of the rubber sleeves further onto the intake to help installing it back easier. Then straighten out the manifold and reinstall the rest of the bolts. Before you tighten everything double check that all the this vacuum lines are connected and routed correctly. Refer to the earlier image to confirm routing.
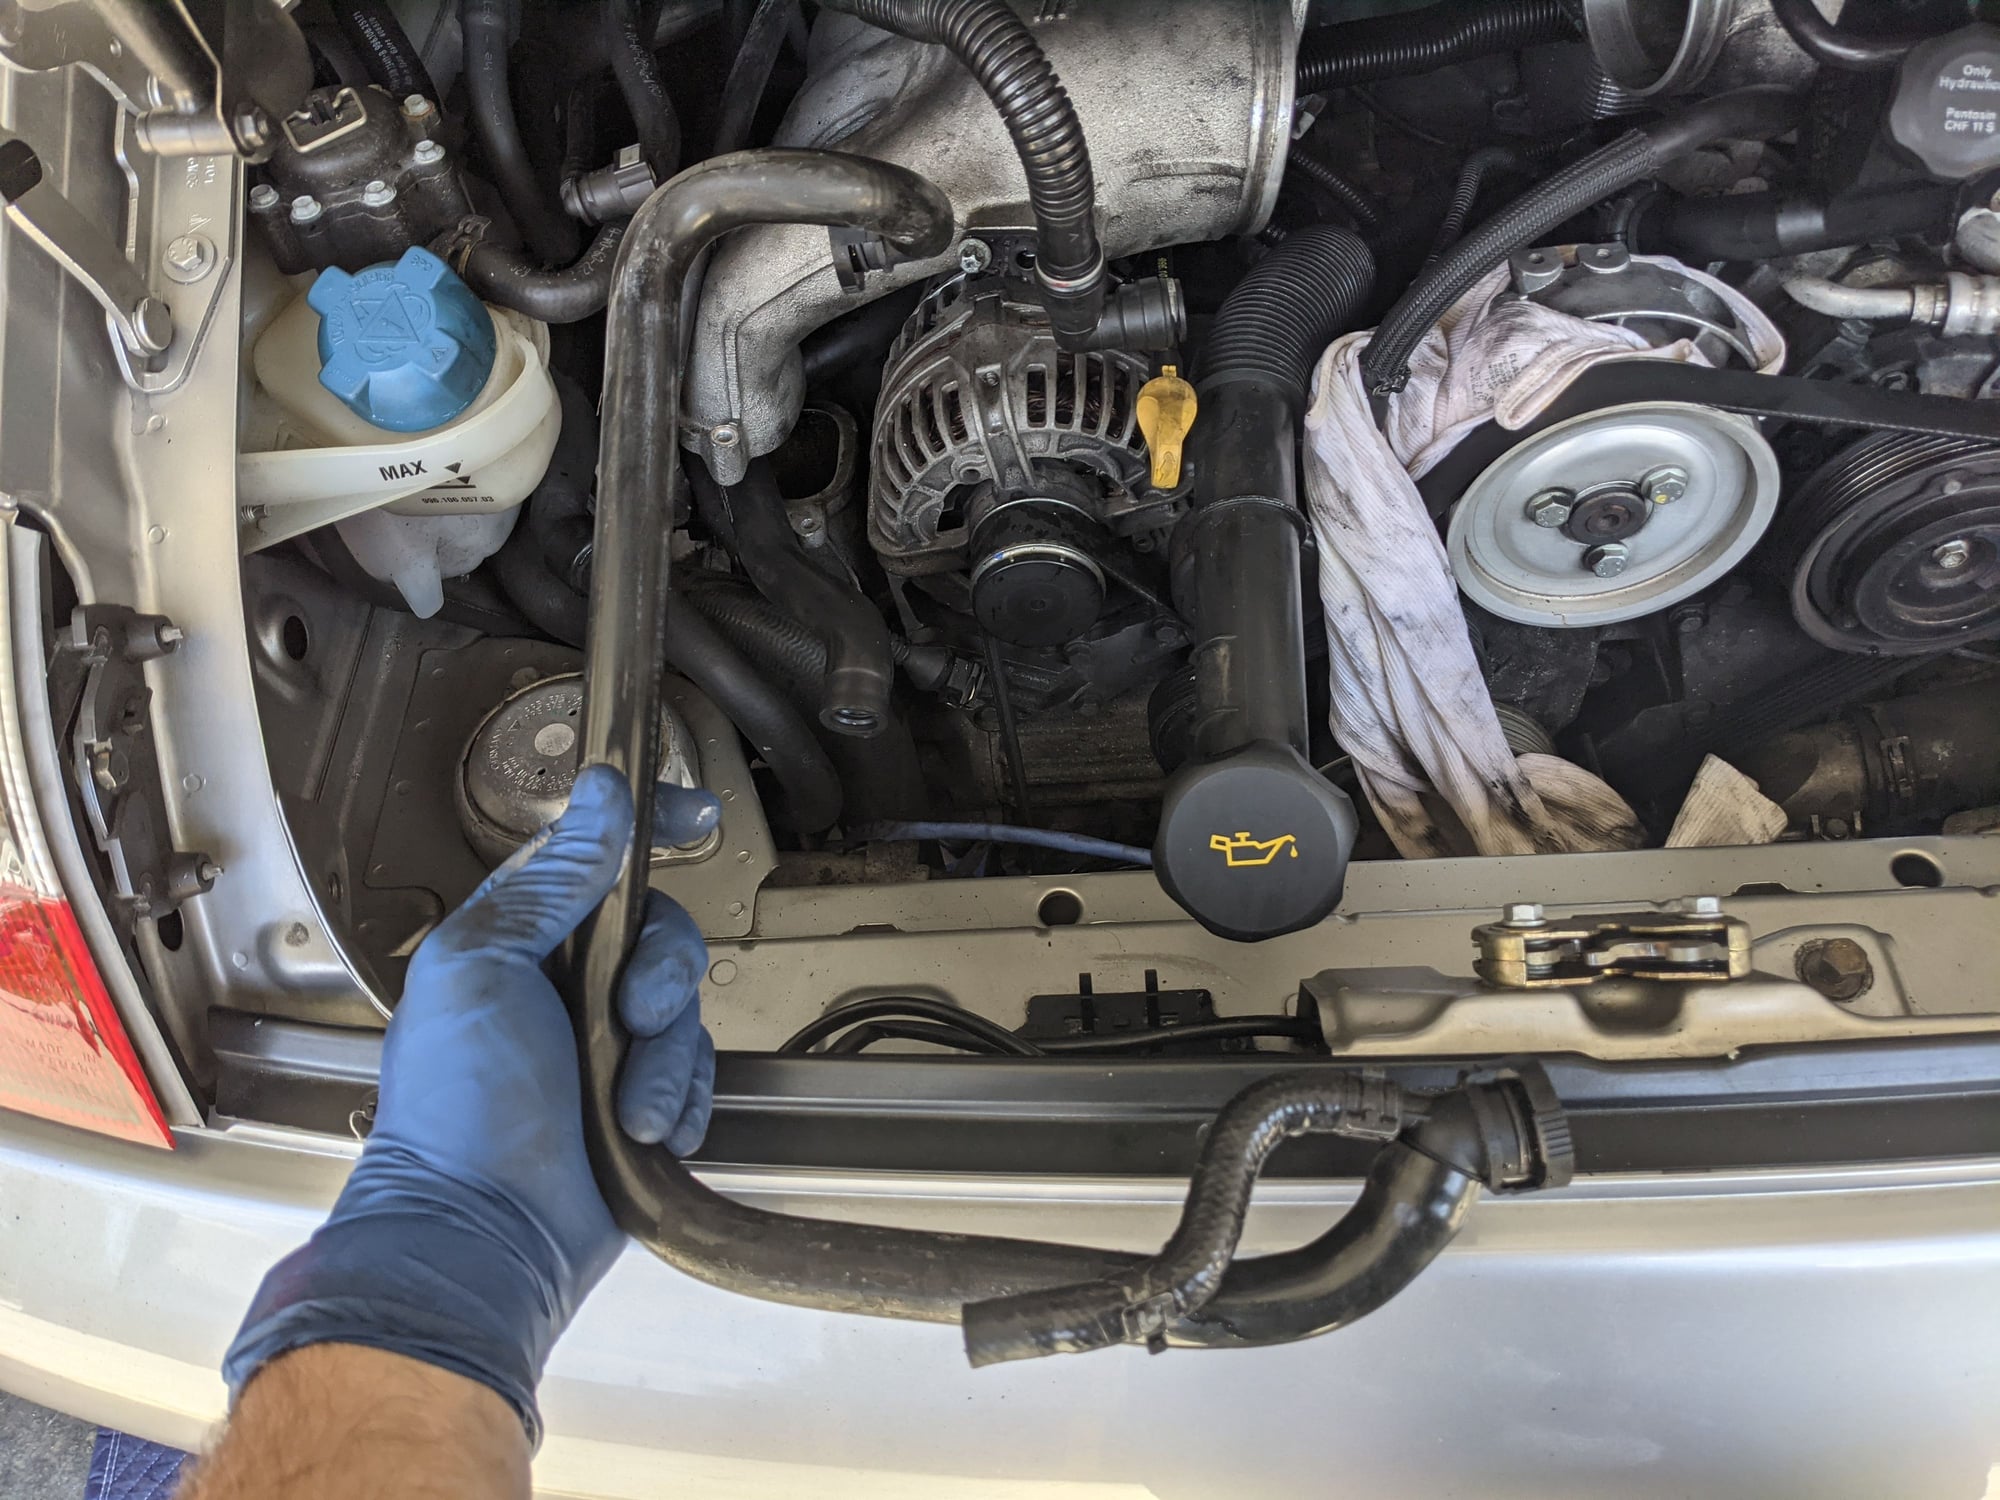
This image was taken 3 days later once my new hose came in (see missing tape). What I did here to make routing it easier was remove the power steering fluid reservoir. It was either that or the AC compressor to gain more room to maneuver the passenger side intake manifold while threading the pipe through it. This was one of those cases where it's just easier to remove an extra part or two than risk breaking something. I had extra fluid and the little that spilled was caught by a rag that was inserted around the tube.
From here it's home stretch. Reinstall the front plenum and throttle body along with all connectors and vacuum hoses. The bracket Skip provides works great and all the connectors are plug and play which is awesome if you hate wiring like I do. Be mindful when routing everything to ensure nothing is binding and that there isn't any excessive tension. There will be some due to the stiff hoses but all within reason. With the aluminum intake I ended up using 2 hex bolts I had left over after doing coil packs as new ones came with longer e-torx ones. I used two nuts that served as spacers to line up the collector and ease up any tension. I think the aluminum intake might have slightly different dimensions but all worked out pretty well. Once that is buttoned up reinstall the U hose secured with the plastic C clip. Make sure that's snapped into place and mine came slightly loose causing hissing and a vacuum leak. From there just reinstall the SAI pump and intake box and you're done!
Overall the job is not super difficult. The hardest part is working within tight spaces and often using your fingers to see. There were times where I had both hands stuck into the back of the motor feeling for a bolt or feeling out available space so being comfortable with that kind of stuff is a plus. The tools that came in most useful were a small stubby ratchet that fit well into tight spaces (the thinner the better) and wobble extensions. Being able to get to a bolt at an angle was fantastic. Also the ratcheting 8mm wrench made getting the last bolt a breeze. Seemed like having the e-torx allow for more engagement points which was also nice when things were tight. Other then that I'll say to just not rush, stay organized and clean and budget time accordingly so in case something goes south you're not sh** out of luck. I took some PTO and did this over 2 days with the first day being mostly disassembly and half of second putting it all back together. It can definitely done faster but I stopped a bunch to take photos and cleaned all parts that came out, adding to the time. When the new crossover pipe came in, I had both intake manifolds out in less than 2 hours.
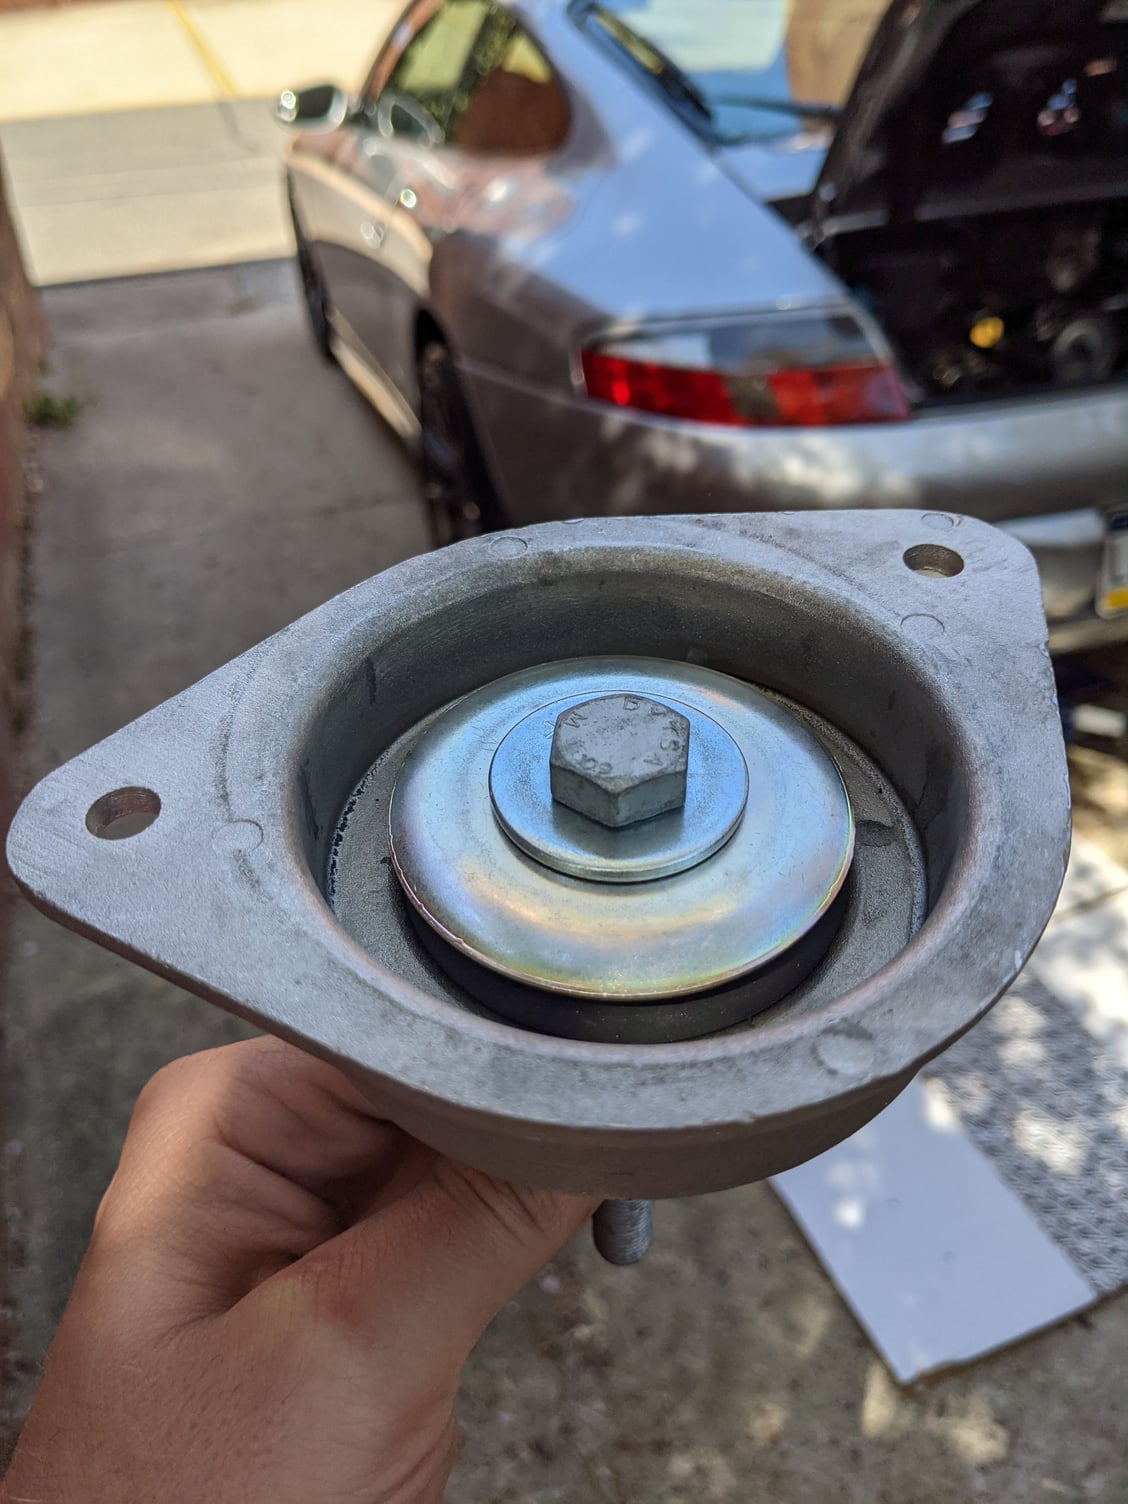
One other thing to note is around the engine mounts. Mine were not bad although did provide some additional vibration for the engine. When raising the engine back up to tighten the 18mm nuts, the driver side mount puked the hydraulic fluid all over. I ended up ordering the RS mounts and installed those on both sides.
Prior to the install I was seeing, significant to me, oil consumption to the tune of a quart per 800 - 1000 miles. Jury is still out if this fixes it. Hope so! My manometer readings were all over the place but definitely not good. I've seen as high as -60inH2O and around -20inH2O. After the install I've been getting -2.70inH2O and the oil cap comes off without much effort. Additionally, I've noticed that the mayo like goo in the oil fill pipe in now gone after 2 weeks. I've driven the car a lot and it never seemed to burn off but today I noticed it was all gone! Next is to get the prober drill bit and do a blow-by engine health test in hopes of getting some additional data.
Thanks to Skip for putting this upgrade together and getting me the UAOS and answering my questions. Holler if you have any questions regarding this DIY. I'm sure I might have missed something...
Thanks to you for taking the time to document this in photos.
Originally Posted by zbomb
Great job documenting the process - That will be a great resource, one of the best I've seen of the process.
Originally Posted by plpete84
Thanks gents - hoping this will encourage others to upgrade too!
Originally Posted by JC68
Great install post and pics. Plpete84�s install post should be moved up to the the first page.
I agree !! There are some nice pics and very good tips/tricks and recaps of the install in here, but plpete84's post is the most detailed and picture heavy and the candid description of the process is hands down the best one yet !!!!!
Skip - a bunch of orders should be rolling in any day now! Feel free to use this as a reference point to sent to your customers that may be doing this as a DIY. I've always been a visual person and learn best by seeing and doing so having something like this is extremely valuable to me.
 04-24-2021, 01:49 PM


 Nobody will see it but I'll know!
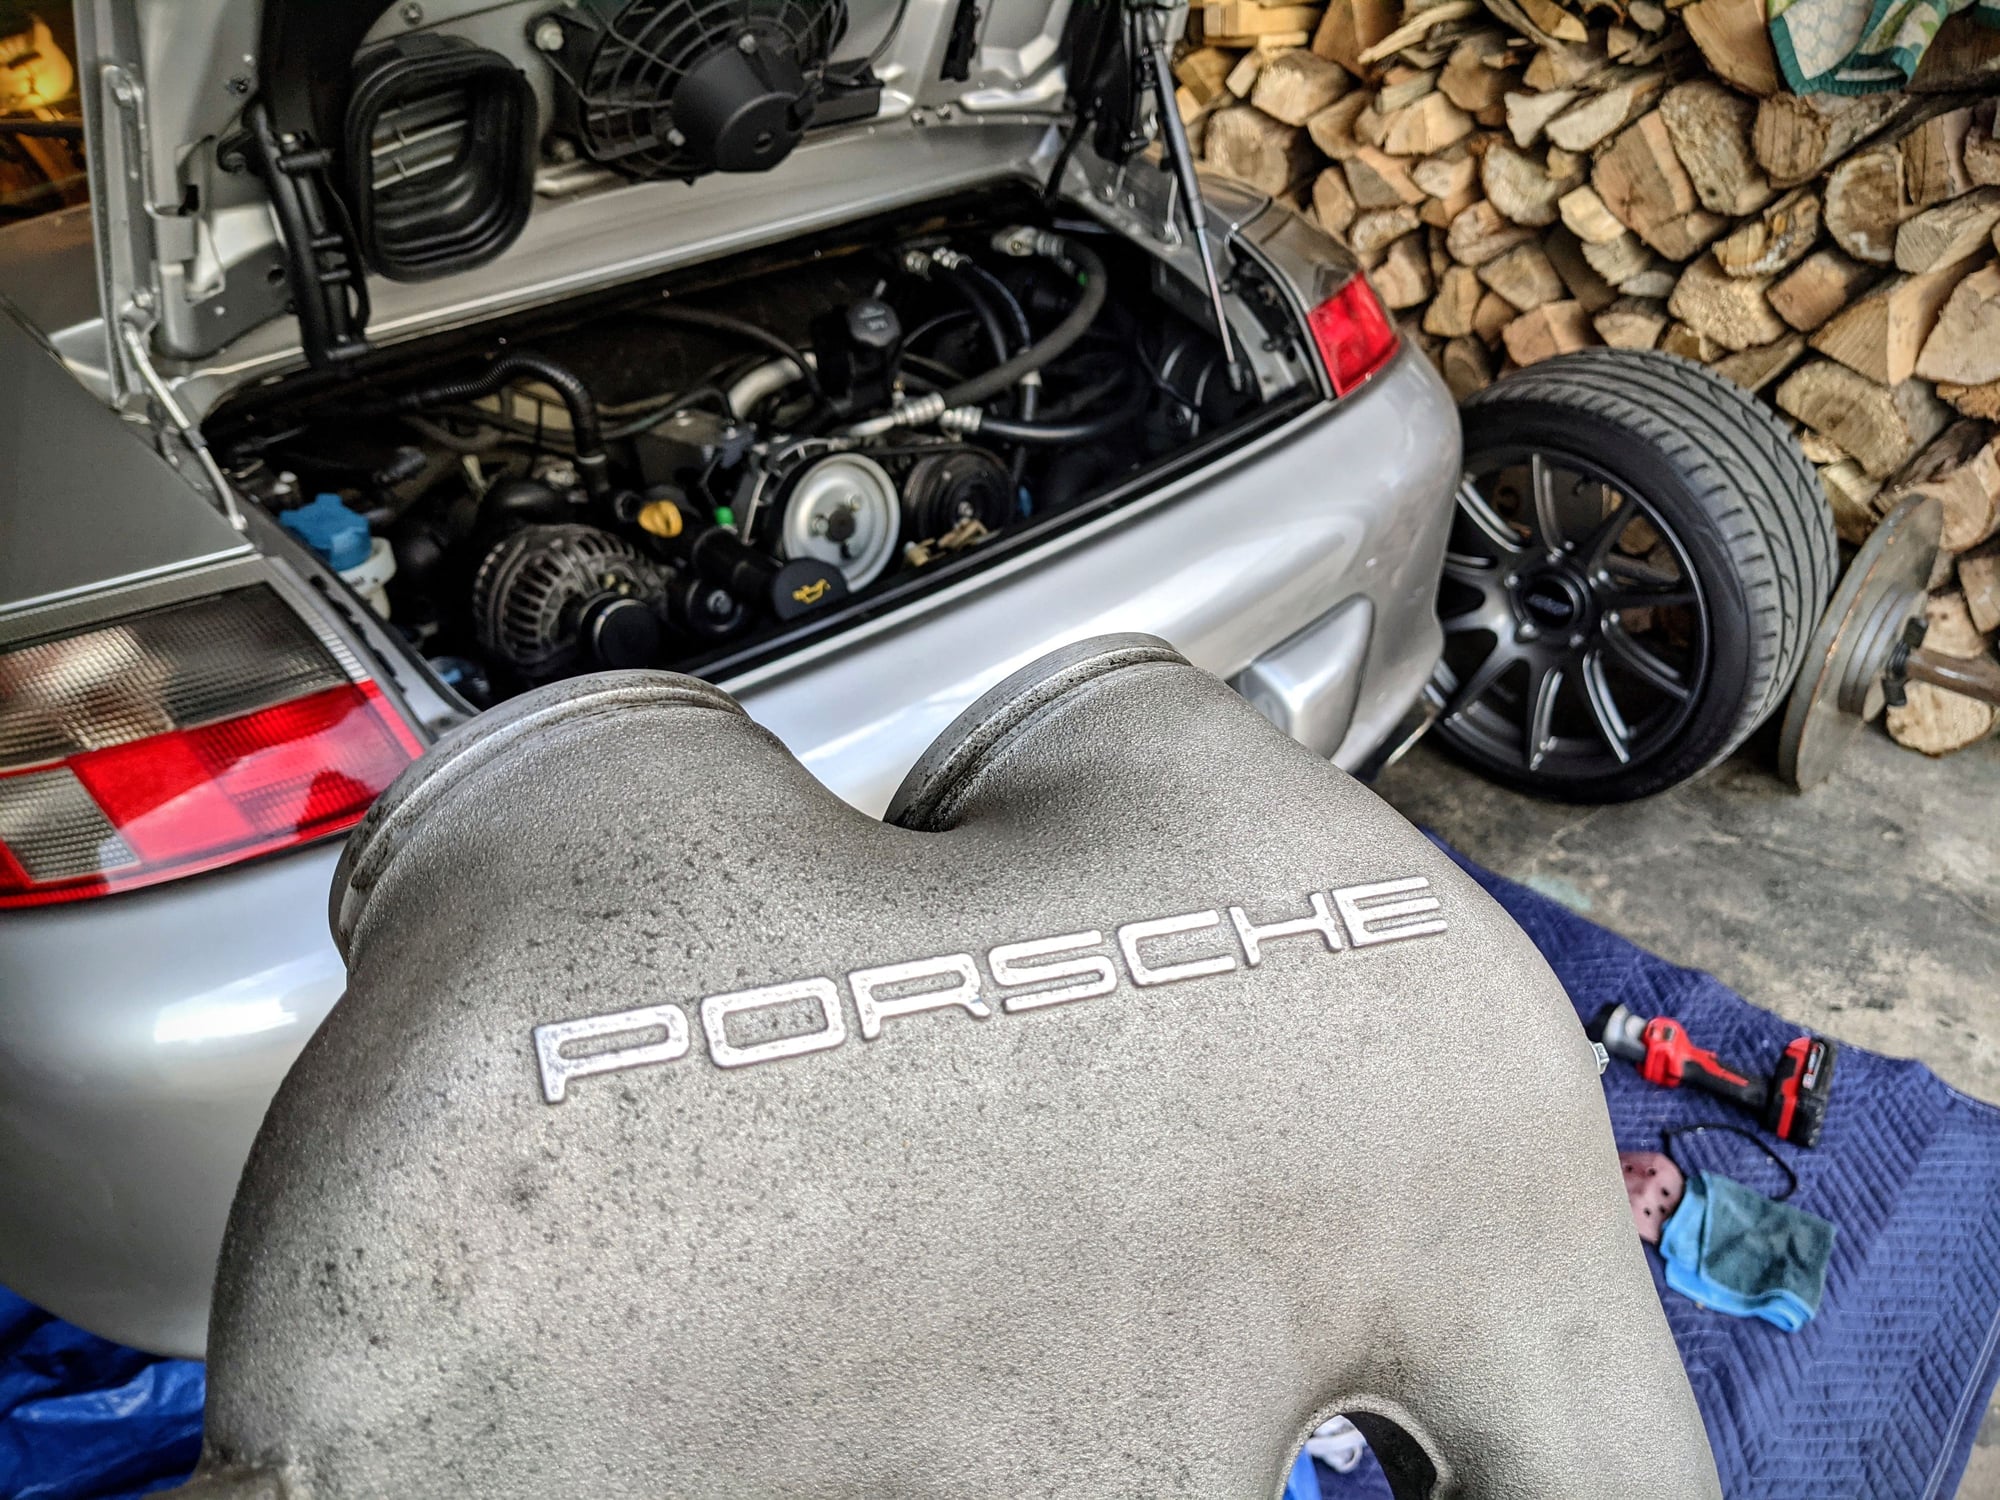


 Feel free to use this as a reference point to sent to your customers that may be doing this as a DIY. I've always been a visual person and learn best by seeing and doing so having something like this is extremely valuable to me.