When you click on links to various merchants on this site and make a purchase, this can result in this site earning a commission. Affiliate programs and affiliations include, but are not limited to, the eBay Partner Network.
This thread will be for instillation instructions/tips/tricks for the UAOS to help make the process go smoother. The instructions should probably be in three skill levels Novice, Competent, and Expert. The Novice level should include safety precautions and basic instructions like counterclockwise to loosen ect and will be the most lengthy . Expert level is just an overview of the procedure with key instructions for out of the ordinary tasks and nuances.
Remove air cleaner
Loosen the retainers for the 02 sensors
Support the engine
Remove the 2 nuts on the motor mounts
Lower the engine onto the crossmember
Remove the grey c-clip on the Brake Booster hose
Press down on the inner sleeve while pulling up on the Brake Booster hose
Remove the 2 screws for the Brake Booster fitting from the intake
Remove the AOS hose by squeezing the retainer ring and pulling
Cut the insulation bundling from the AOS hose and other hoses
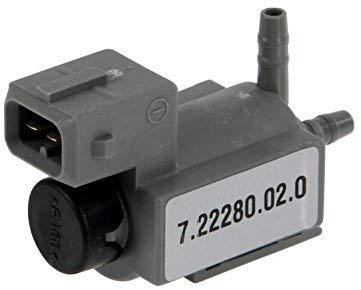
Unplug the changeover valve and lay aside ( it and the bracket will be installed in opposite direction)
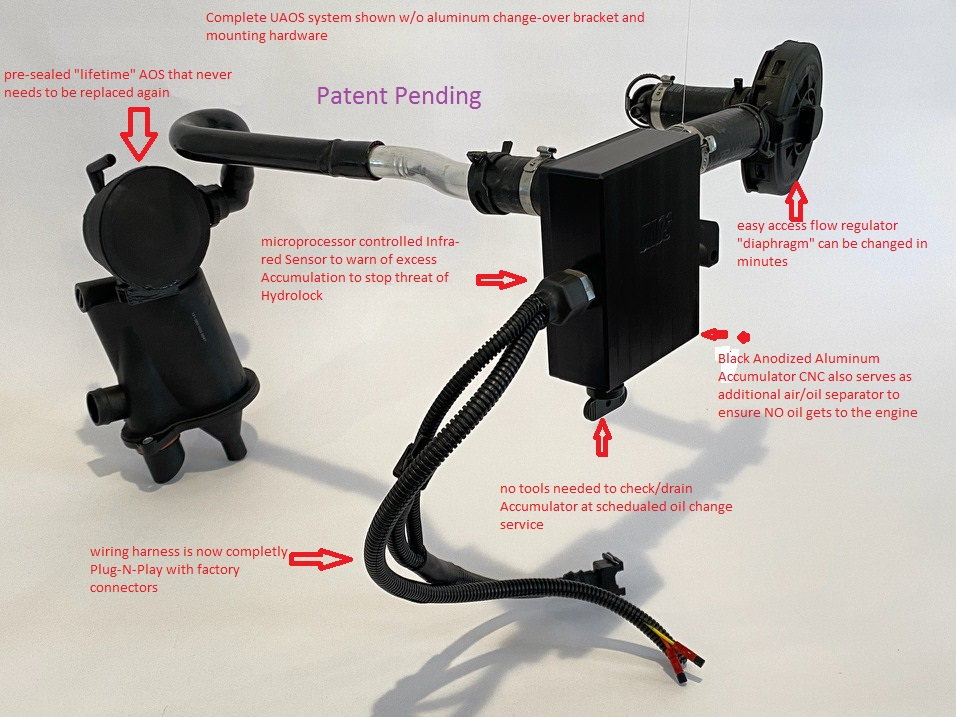
Install UAOS in place and connect both ends
Install the Brake Booster fitting between the UAOS bracket in the intake
Install the changeover valve and bracket facing the Throttle Body
Secure the changeover valve bracket,UAOS bracket, and Power Brake Booster fitting with the longer 6mmx24mm Tamper Proof T27 screws provided
Plug UAOS wiring harness into the EV1 engine harness
Route the UAOS harness extension behind Accumulator and plug into the changeover valve
Disconnect low coolant sensor and Plug UAOS harness into low coolant sensor and wiring harness
Jack engine up and install 2 motor mount nuts.
Secure wiring and hoses as necessary with zip ties, check routing
Reinstall air cleaner
Last edited by Porschetech3; 10-05-2021 at 02:54 PM.
Reason: Remove instructions for Posi-taps due to full Plug-N-Play harness now available
Skip, a couple of questions on testing an AOS for health.
Besides the obvious which is smoking, what other signs/tests are viable when determining if your AOS is failing?
1. Manometer readings above -5?
2. Engine begins to stall when removing the oil cap while the engine is running?
3. When engine is running its very difficult to remove the oil cap due to suction?
4. If you hear a muted but high pitched squeal coming from the engine compartment?
Are these viable tests and am I missing anything? Would anything be different for the Motorsports AOS versus the stock AOS?
Thanks man! Looks like I will be replacing my MS AOS with the UAOS w/ drainback shortly.
Originally Posted by plpete84
I think increased oil consumption is also a signed of failed AOS.
All the things mentioned can be caused by failing AOS, plus fuel trim issues of lean running and CEL fault codes for fuel trim, and Hydro-locked engines in worse case scenario's..
The manometer test IS the definitive test for AOS function. But be sure not to just test the static vacuum, but test from engine off to engine run, rev engine to watch for fluctuations. Engine off should be zero inh20 and the crank and it should not over-shoot the spec , but instantly come straight to spec without over-shooting. Ideally the inH2o should stay right at the spec under any engine running situation.
I have seen some failing that would go to 50 inh20 when first started but slowly come down to spec (5 inH20) in 10-15 seconds. It should NEVER go above spec.
The spec for factory AOS and MS AOS is about 5 inH20 depending on altitude above sea-level. The spec for UAOS is about 1 inH2o lower ..
BTW : just got a call from my Patent Attorney today to tell me the UAOS Patent has been approved !! After it was first denied by the USPTO sighting a Ford Global Patent and a Walker Industries Patent ( they were not even close, the Ford Global Patent was only for Turbocharged or Supercharged engines ect..lol) we put up an argument sighting the differences and the USPTO Examiner caved and allowed it .. Yes I'm thrilled, first time I have ever applied for a Patent !!
Good stuff. My kit should be here soon but not sure if i will have time to get it installed before my track day. Unfortunately i may have to risk it.
I know u have a bunch of pics showing the port u need to block on the aos but a write up on how to access it would be great. Btw mine is a y2k, 6sp.
Quite honestly, on a 6MT, when I was in good health, I could have installed the UAOS Plug-and-Play kit in 30 min.
The pre-sealed "lifetime" AOs comes with the UAOS kit.
It's like telling someone how to thread a needle, just hold the needle in your left hand, thread on the right hand, insert the thread through the eye of the needle. ( A lot of people especially Millennials, have never threaded a needle)
Last edited by Porschetech3; 04-15-2021 at 11:21 PM.
Reason: recommendations changed
Great info. I'll be able to start my install late next week. .2 tip with failed AOS so I don't think your 30 min job will apply to me
But these instructions are giving me more confidence.
Have lift bars so should be able to work under the car fairly easily.
Are there any "while you are in there" parts that should be replaced?
Yep, replacing the AOS on a .2 is harder than a .1 , and a Tip is harder than a 6MT, so you get a double whammy !! The .1 6MT being the easiest .
The key to an efficient and non-intrusive procedure is to disturb as little as possible, That said I started to include the URO aluminum aos heater hose connector to the UAOS kit due to it being a good "while your in there" thing to due and because someone can break that off if they still have the original oem plastic one. But I decided not to include it or have as an option to complicate things, drive up the price, and a lot of people already have this addressed.
So if you have the OEM plastic connector, then get the URO aluminum one and install "while doing the UAOS". It can be done quickly without draining the cooling system if you use two clamps above and below the connector.
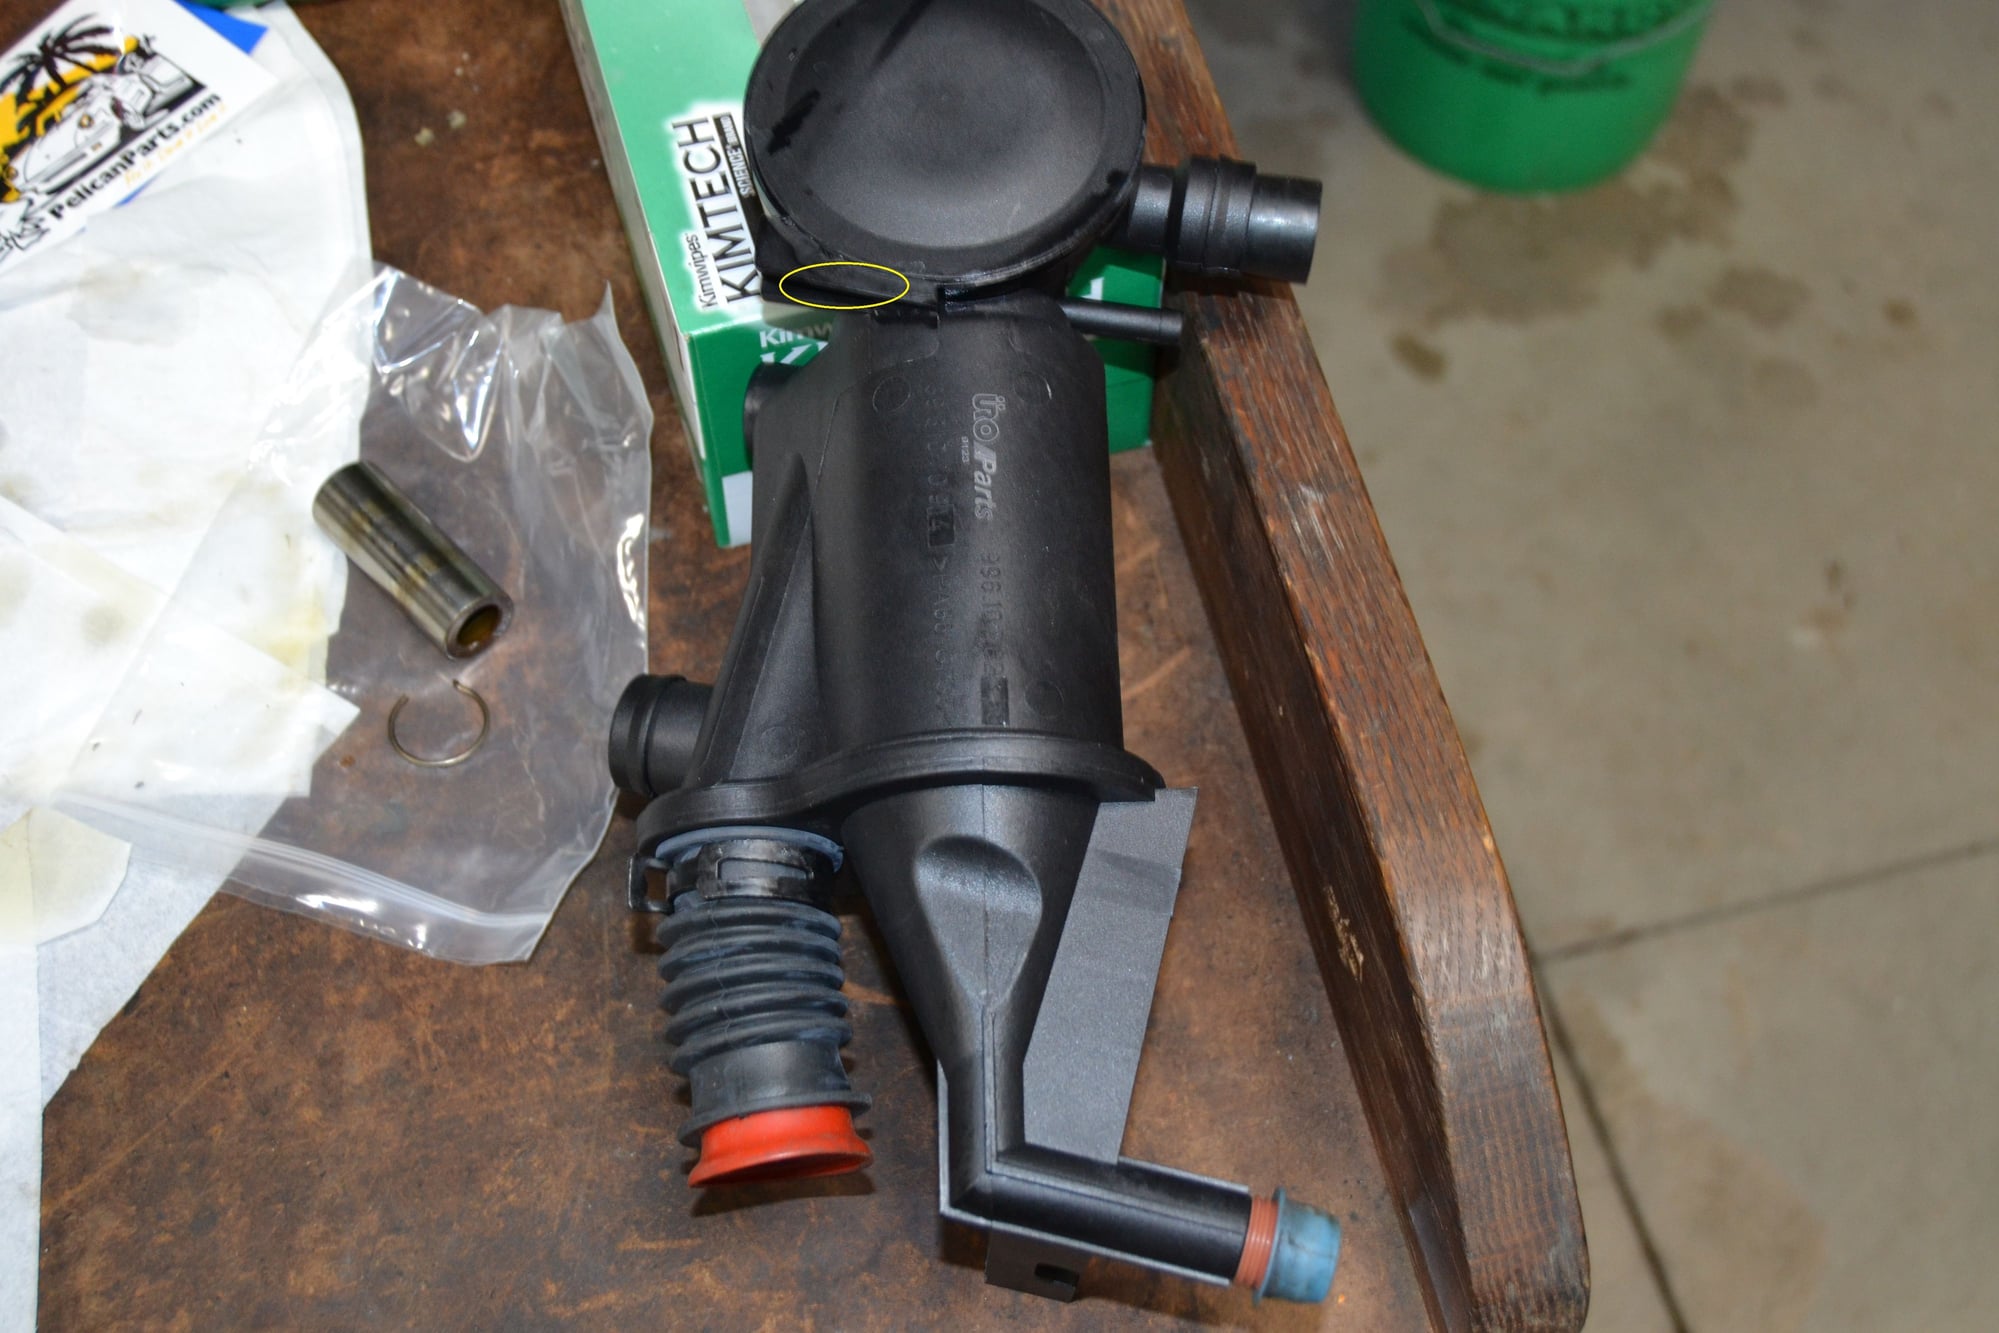
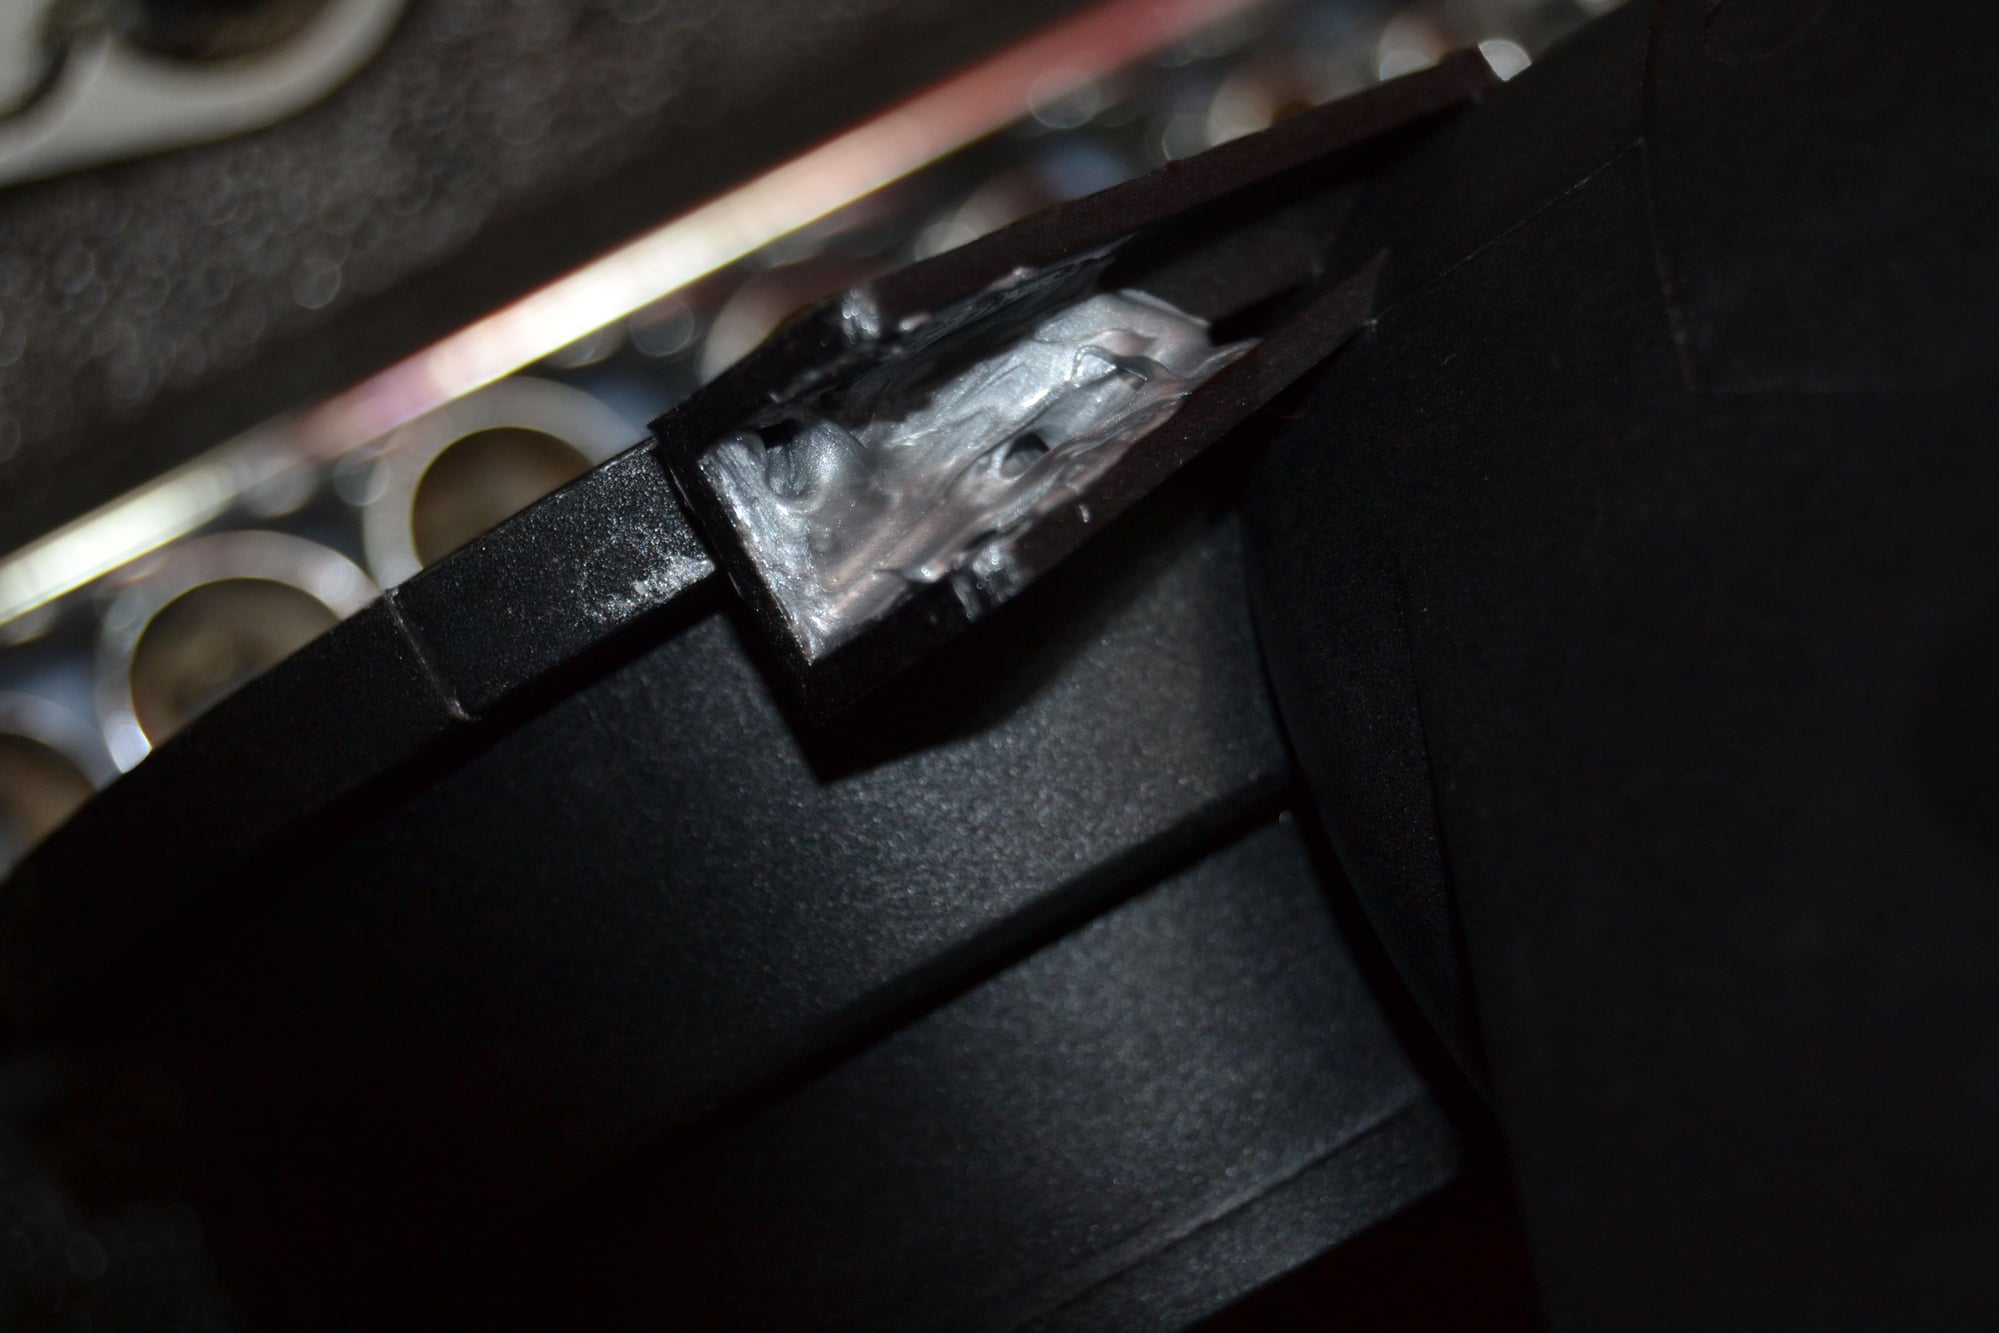
Not to clutter up my first post, but I spent time looking at my new (URO brand) AOS. I was able to spot the tiny port inside the channel. It's very difficult to see, even when the part is in your hands. I capped off all large ports but one. The circled area is where you want to focus your attention.
After putting some soapy water in that channel and applying light air pressure, I was able to spot bubbles from a specific area. You have to do some gymnastics to get a glimpse of the mini-port.
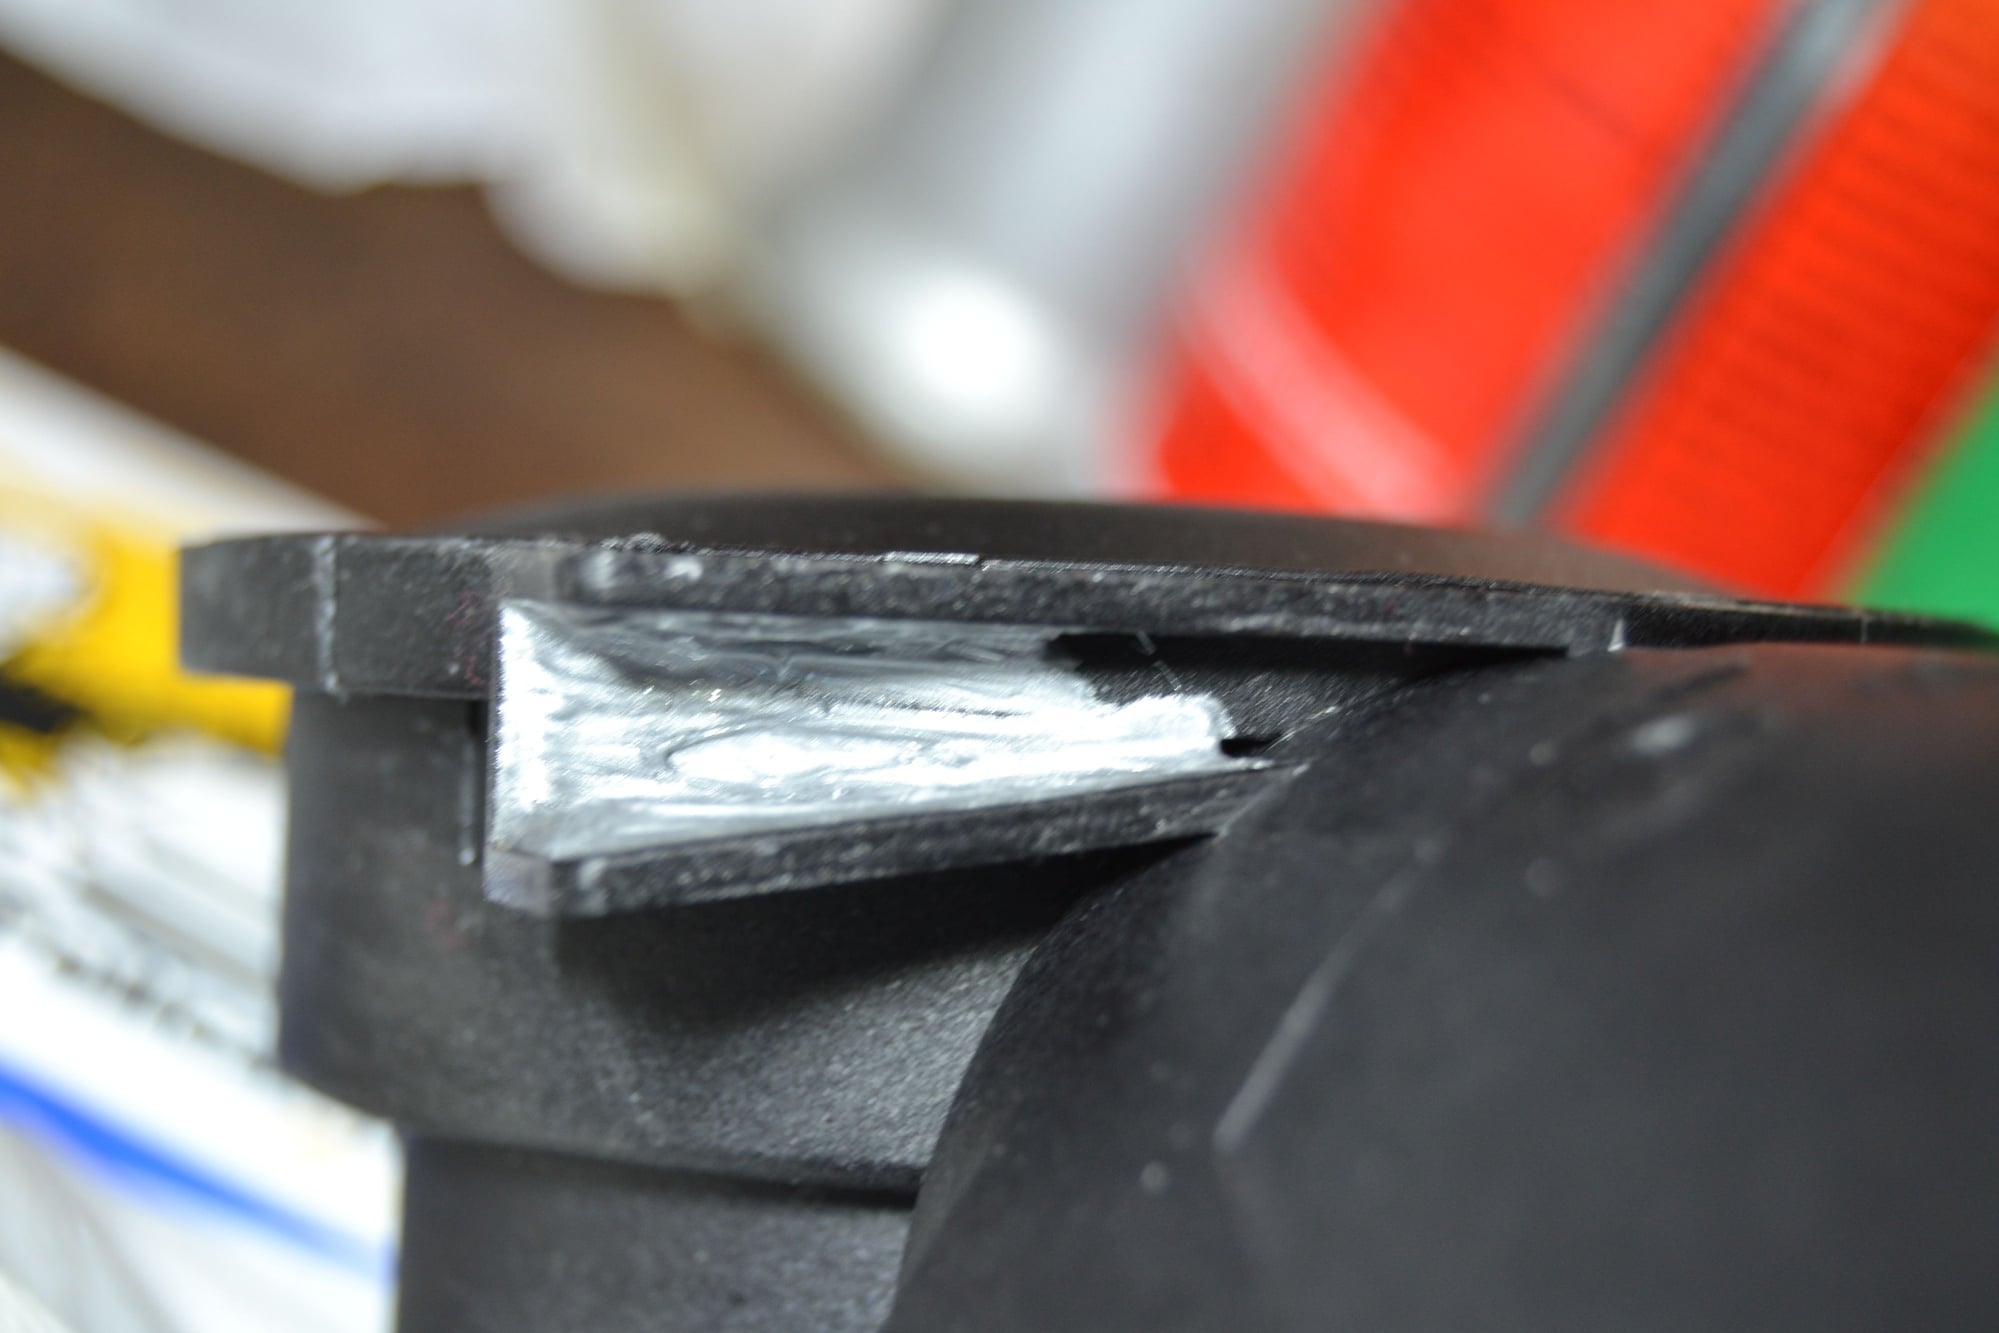
I filled that little channel with some silicone sealer and again applied a little air pressure to make it obvious where you need to seal. Note the little crater where air pushed through (middle of the silicone).
I closed it off with more sealer and will give it a full day to cure. I'll test again tomorrow to confirm the external mini-port is also open to the same chamber. For what it's worth, there must be a diaphragm inside the circular cover with one side open to the large ports and the opposite side open to the atmosphere. The atmospheric side of that diaphragm must have very little volume. I suspect sealing off the two mini-ports is effectively eliminating the functionality of that diaphragm. The secondary (downstream?) diaphragm must be taking up that task with this redesign. The inventor can correct me, if this is an incorrect assumption.
So it should be fairly simple to seal off these two mini-ports, as Skip has pointed out. Knowing exactly where they are located is just good peace of mind.
Last edited by Scott at Team Harco; 03-04-2020 at 07:32 PM.
Ok i understand. I was able to get the car on the 4 post today and get a good look at the aos. I will need to test it before i install your kit. UPS says it will be here tomor.
Is there a way to test the old aol in the car to verify that i sealed it correctly? If not no big deal ill just use a bunch of silicon.
Edit
So i looked at your 1st post in the other thread again. I get the knotch with the yellow arrow but the seem that the red arrow is pointing to, do u just seal about an inch where the arrow is or all the way around.
Im sure its gonna be pretty easy for me to do, but i dont have one in my hand and i dont plan on removing the one in the car. So its hard for me ro verify what i am suppose to do.
Quite honestly, on a 6MT, when I was in good health, I could have sealed the Atmosphere port and installed the UAOS Plug-and-Play kit in 30 min.
To plug the Atmosphere port on a 6MT, just put on a nylon glove on your right hand, raise the car on a lift, put some RTV silicone on your index finger like your were putting toothpast on a toothbrush, reach up and fill the channell on the AOS, then get a little more silicone and seal the seam/notch area on the regulator.
It's like telling someone how to thread a needle, just hold the needle in your left hand, thread on the right hand, insert the thread through the eye of the needle. ( A lot of people especially Millennials, have never threaded a needle)
Ok i understand. I was able to get the car on the 4 post today and get a good look at the aos. I will need to test it before i install your kit. UPS says it will be here tomor.
Is there a way to test the old aol in the car to verify that i sealed it correctly? If not no big deal ill just use a bunch of silicon.
Edit
So i looked at your 1st post in the other thread again. I get the knotch with the yellow arrow but the seem that the red arrow is pointing to, do u just seal about an inch where the arrow is or all the way around.
Im sure its gonna be pretty easy for me to do, but i dont have one in my hand and i dont plan on removing the one in the car. So its hard for me ro verify what i am suppose to do.
It is possible to test to see if the Atmosphere port is properly sealed before installing the UAOS by testing with a manometer, it will show BAD, with very high crankcase vacuum, indicating the regulator is disabled .
Originally Posted by Scott at Team Harco
What's a needle?
That's a tool us old timers use to use to put a button back on our favorite shirt (before the throw away society)
Last edited by Porschetech3; 04-15-2021 at 11:24 PM.
Yep, replacing the AOS on a .2 is harder than a .1 , and a Tip is harder than a 6MT, so you get a double whammy !! The .1 6MT being the easiest .
The key to an efficient and non-intrusive procedure is to disturb as little as possible, That said I started to include the URO aluminum aos heater hose connector to the UAOS kit due to it being a good "while your in there" thing to due and because someone can break that off if they still have the original oem plastic one. But I decided not to include it or have as an option to complicate things, drive up the price, and a lot of people already have this addressed.
So if you have the OEM plastic connector, then get the URO aluminum one and install "while doing the UAOS". It can be done quickly without draining the cooling system if you use two clamps above and below the connector.
Is that a connector I can see before disassembly? If not I'll order one just in case.
 03-04-2020, 04:10 AM


 )
)