When you click on links to various merchants on this site and make a purchase, this can result in this site earning a commission. Affiliate programs and affiliations include, but are not limited to, the eBay Partner Network.
Did my very first 996 oil change (and my first DIY oil change in ~15 years) Friday after work. I didn't know the torque for the LN magnetic plug was lower than the OEM. Tried to torque to 37 ft-lb and stripped the inside a bit. The next change might be "interesting".
Yesterday I changed the spark plugs, coils and 4 of the 6 tubes. The rears were just too difficult to reach and there was no oil on anything so I left the tubes in. I hope to have a detailed write up soon.
Uh oh! The LN magnetic plug is hardened anodozed metal, so if you felt it stripped, it was probably the softer threads on the aluminum oil pan. If I were you, I would plan on replacing the oil pan very soon. Get an upgraded deep sump oil pan.
Uh oh! The LN magnetic plug is hardened anodozed metal, so if you felt it stripped, it was probably the softer threads on the aluminum oil pan. If I were you, I would plan on replacing the oil pan very soon. Get an upgraded deep sump oil pan.
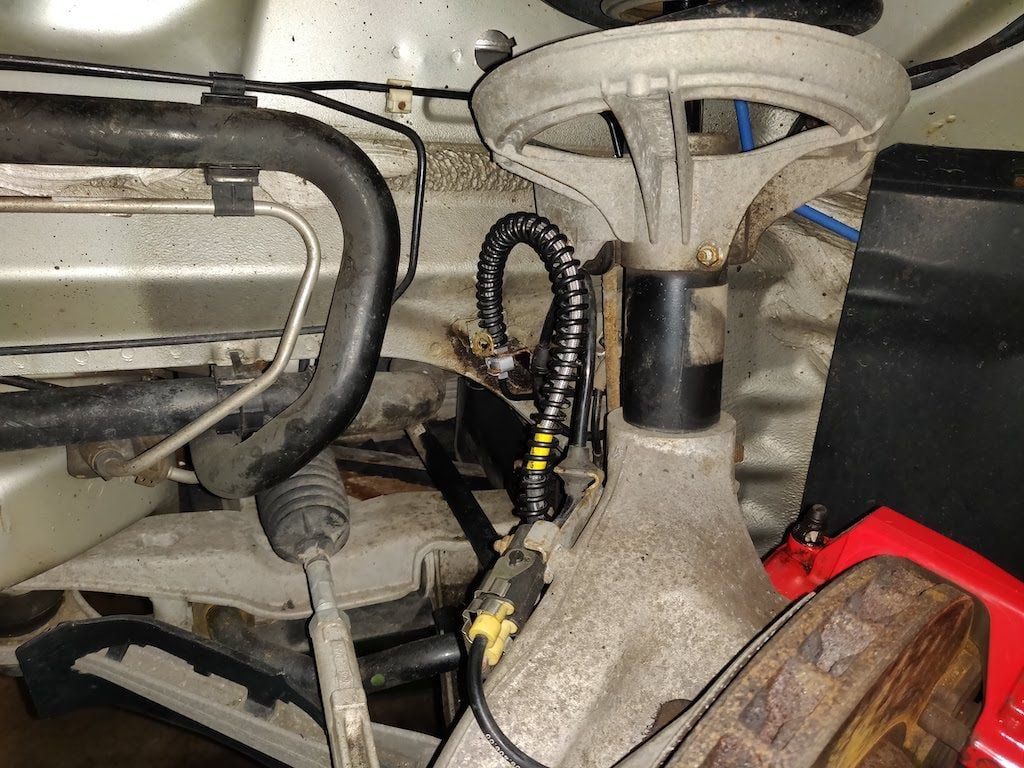
Replaced the engine mounts and got tubing and adapters to fix the fluid tube to the headlight washers. Here in Scottsdale, I can't imagine ever needing the headlight washers but I can't stand them not working.
Uh oh! The LN magnetic plug is hardened anodozed metal, so if you felt it stripped, it was probably the softer threads on the aluminum oil pan. If I were you, I would plan on replacing the oil pan very soon. Get an upgraded deep sump oil pan.
It was definitely the female part where the 8mm hex head goes in. I know the oil pan is fine. At worst I'll need to get inventive to get it back out.
I wonder why the torque specs are lower for the LN part if it's hardened? It's supposed to be 19 ft-lb but I was using 37 because that's what the OEM is. Another possibility is the PO took the LN plug for his 997 and left me with the OEM aluminum one.
Replaced the dusty Textar Pads with less dusty Akebonos. I used my homemade lift bar for the first time.
Before installing Zimmerman rotors we painted the hub and fins with high temp silver looks sharp. Didn't think to dab paint in the drilled holes those now have slightly noticeable rust. Our Akebonos seem to require more pressure on brake pedal when making fast stops, and make essentially zero dust so worth it for us non-racers.
Your liftbar is interesting maybe weld a round hood that captures the jack saddle so it can never slip off and car fall down. Your design advantage over liftbars.com don't have to jack up sides rocking car, possible big disadvantage don't have clear access across middle of vehicle for working on engine, tranny, coolant hoses etc. If you remove jack while up on the stands I would add at least one more jackstand under liftbar so if one fails you still have at least two points of support each end of vehicle.
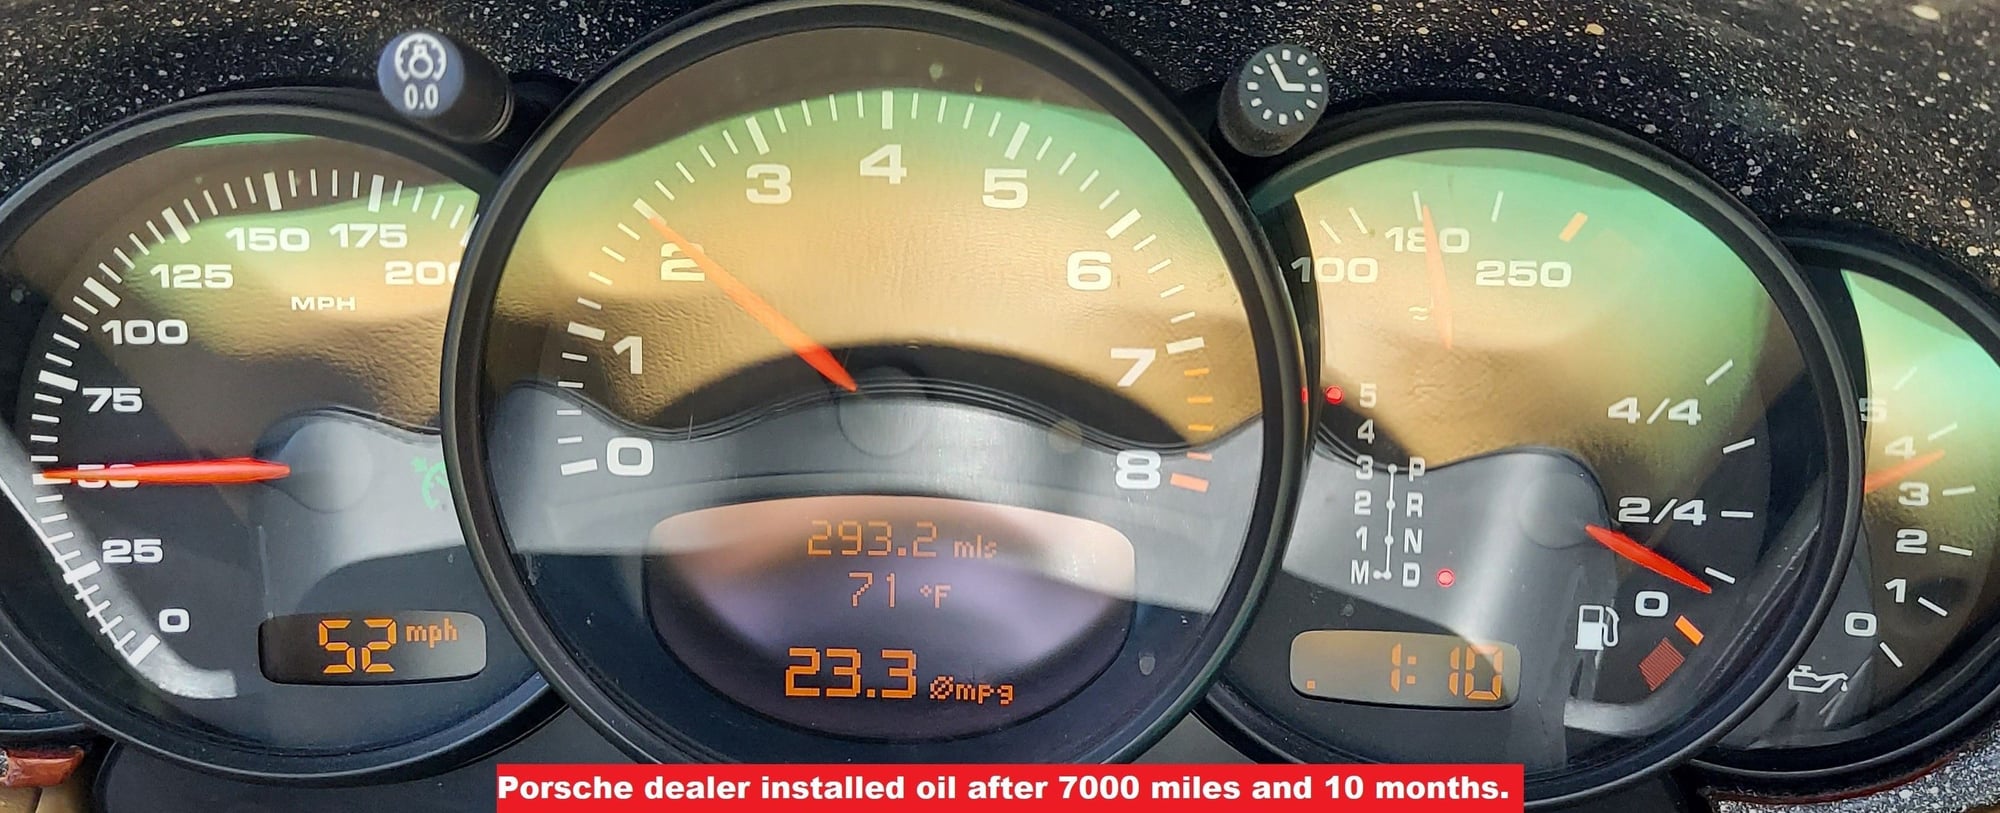
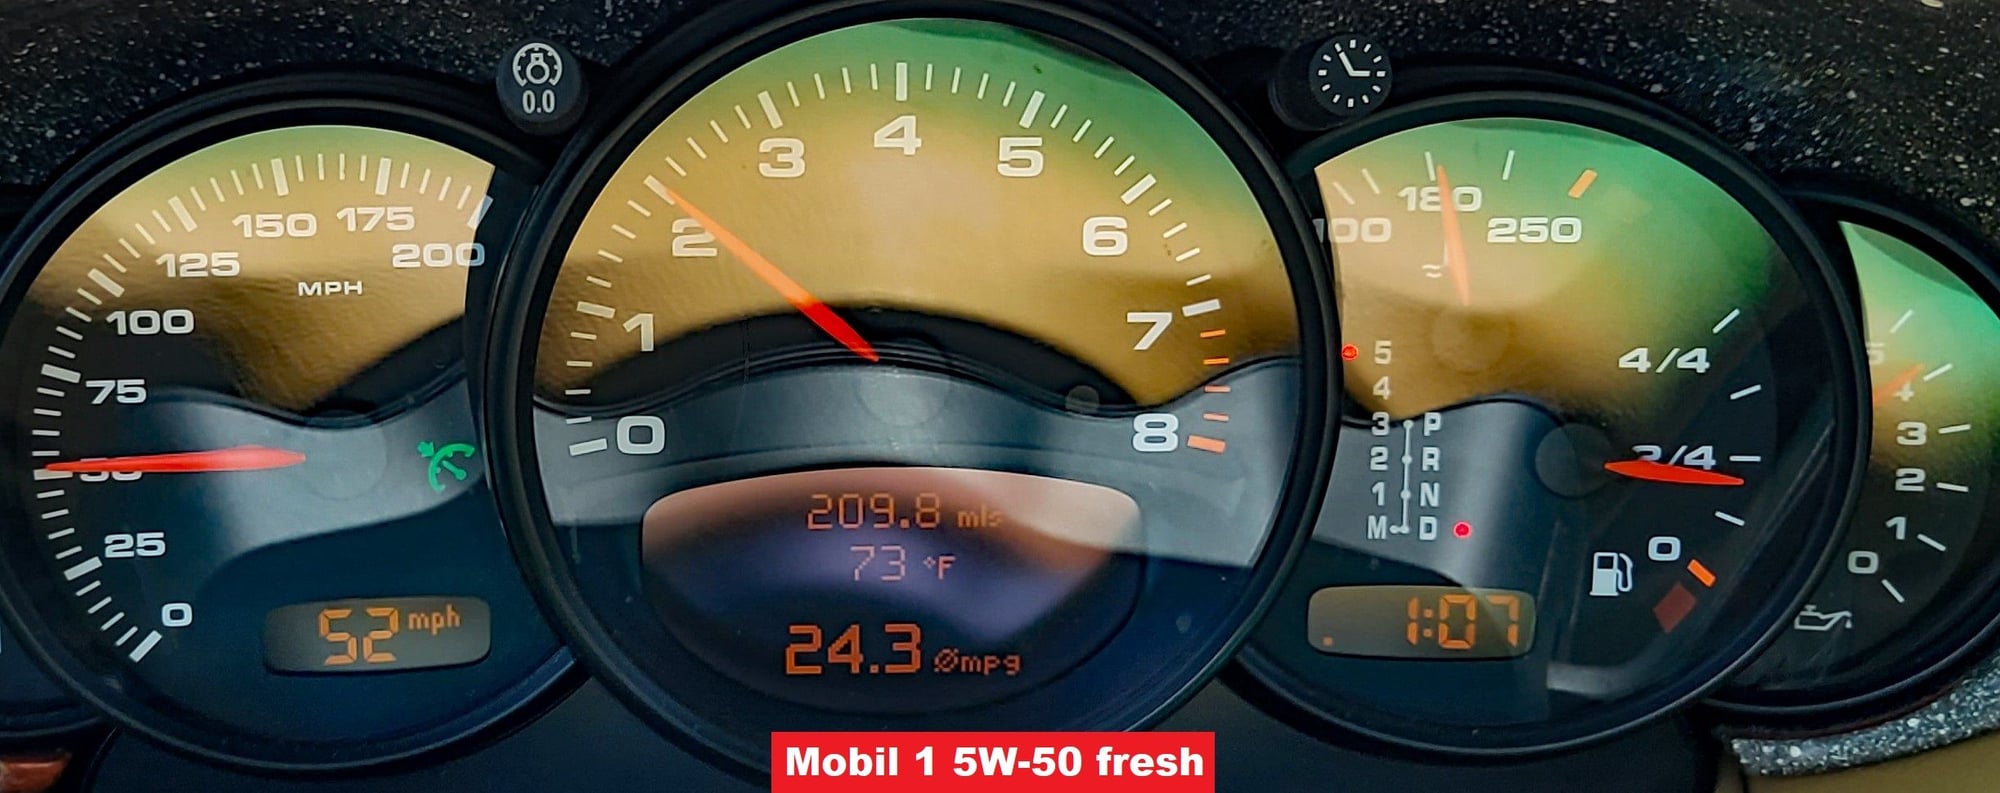
Before changing Porsche dealer installed oil took pictures of instruments at different operating temperatures and RPMs, then did the same after putting in Mobil 1. Driving route back and forth to work same traffic and ambient temperature. Pictures show oil pressure 1/4 to 1/2 bar higher with fresh Mobil 1 5W-50, and fuel economy 1 MPG higher. Will higher oil pressure result in less bore scoring?
If fuel economy stays higher that will give about 16 miles greater range per tank, lower operating costs, and gets our 911 closer to being economy car hehehe.
Did my very first 996 oil change (and my first DIY oil change in ~15 years) Friday after work. I didn't know the torque for the LN magnetic plug was lower than the OEM. Tried to torque to 37 ft-lb and stripped the inside a bit. The next change might be "interesting".
Yesterday I changed the spark plugs, coils and 4 of the 6 tubes. The rears were just too difficult to reach and there was no oil on anything so I left the tubes in. I hope to have a detailed write up soon.
Oh. And today after everything was buttoned up, I had the feeling that:
I put at least one of the heat shields on backwards.
The heat shields were touching the new, larger coils which might be a bad thing.
I wished I had carb cleaner to clean them because they're dirty!
So I looked up how the heat shield was supposed to go on, put the car back on jack stands, took the wheels off and took a look. I went out and got some 1/4" spacers, longer bolts and some engine cleaner. Came back home, cleaned up the heat shields (not sure if the cleaner worked any better than soap and water to be honest) and put them back on with the new bolts and spacers. It took me forever to get the right side heat shield back on with the spacers! I finally used some dielectric grease to keep the spacers from falling off & found out I needed to reverse the shield. Otherwise the top would hit something and the rear hole wouldn't line up. GAAAHHHHH!
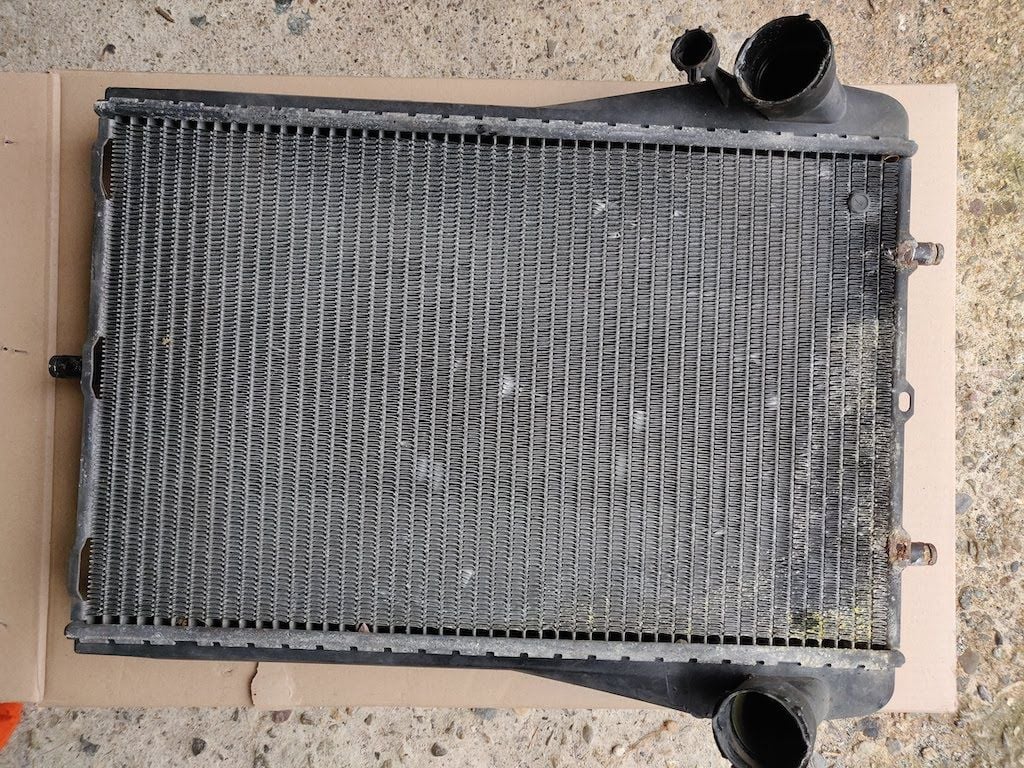
A few weeks ago, I took the car for a ride and came back with a puddle of antifreeze under the front right radiator. I took the inner fender off and sure enough the radiator was leaking from the bottom seam at the tank. Like everything, I took this opportunity to due a few items.
Here is the old radiator.
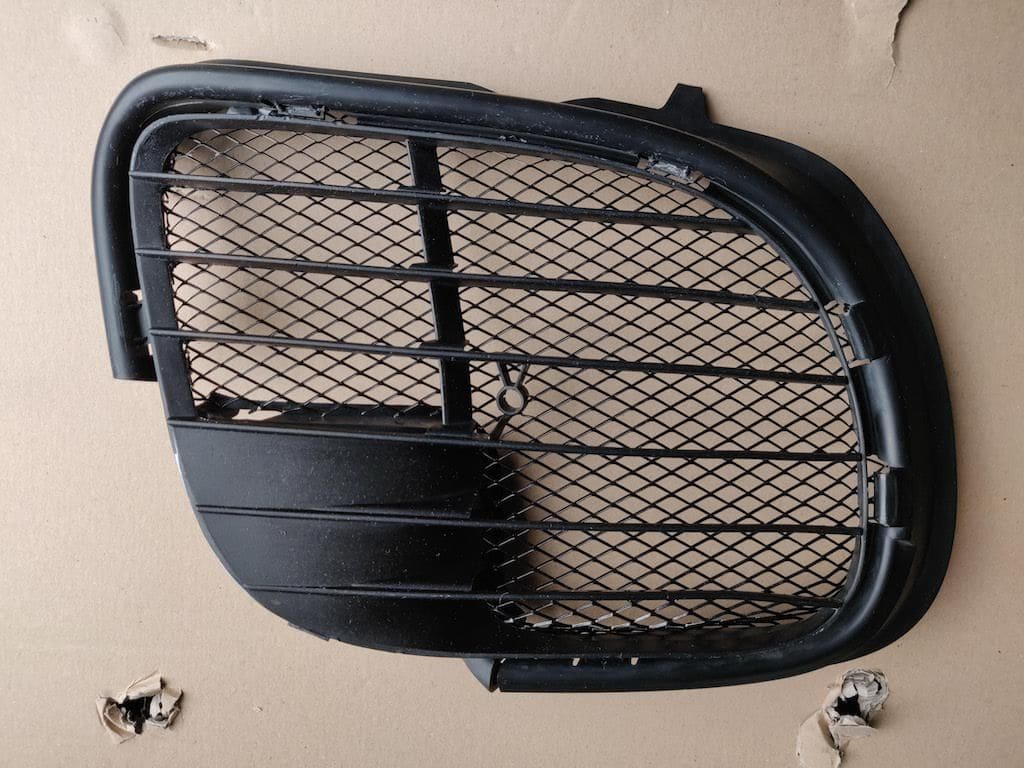
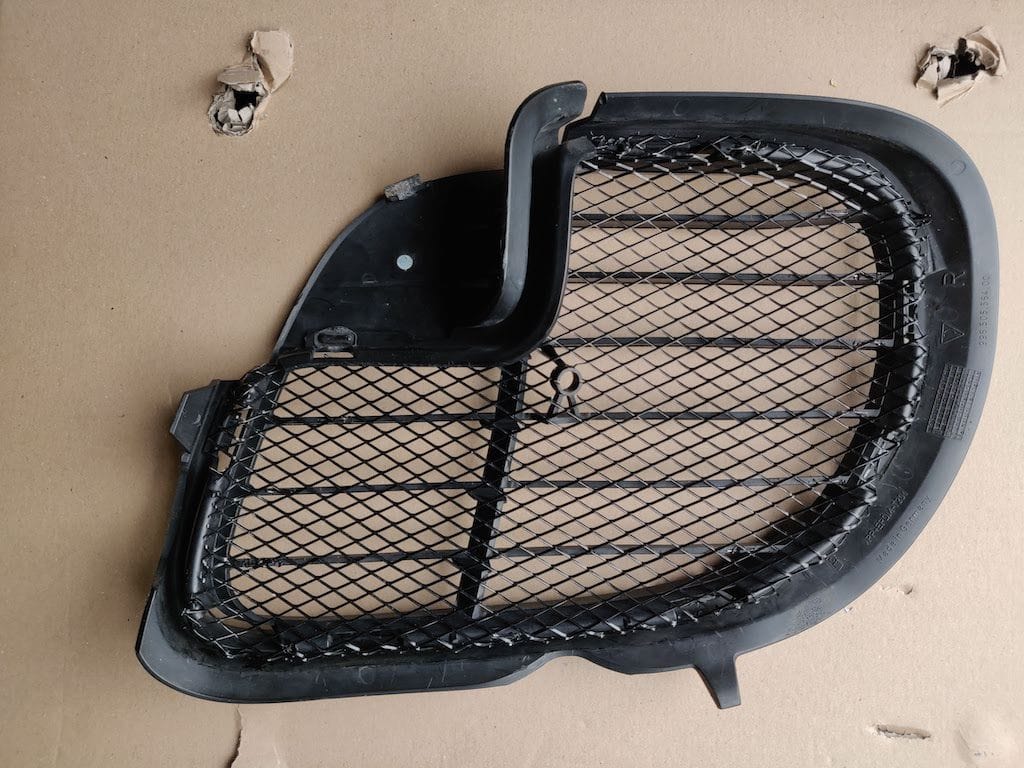
Took off the front bumper and decided to add grill material to the vents, since I believe debris is what caused the tank to go bad. I attached the grilles using staples and a soldering iron. They came out pretty good.
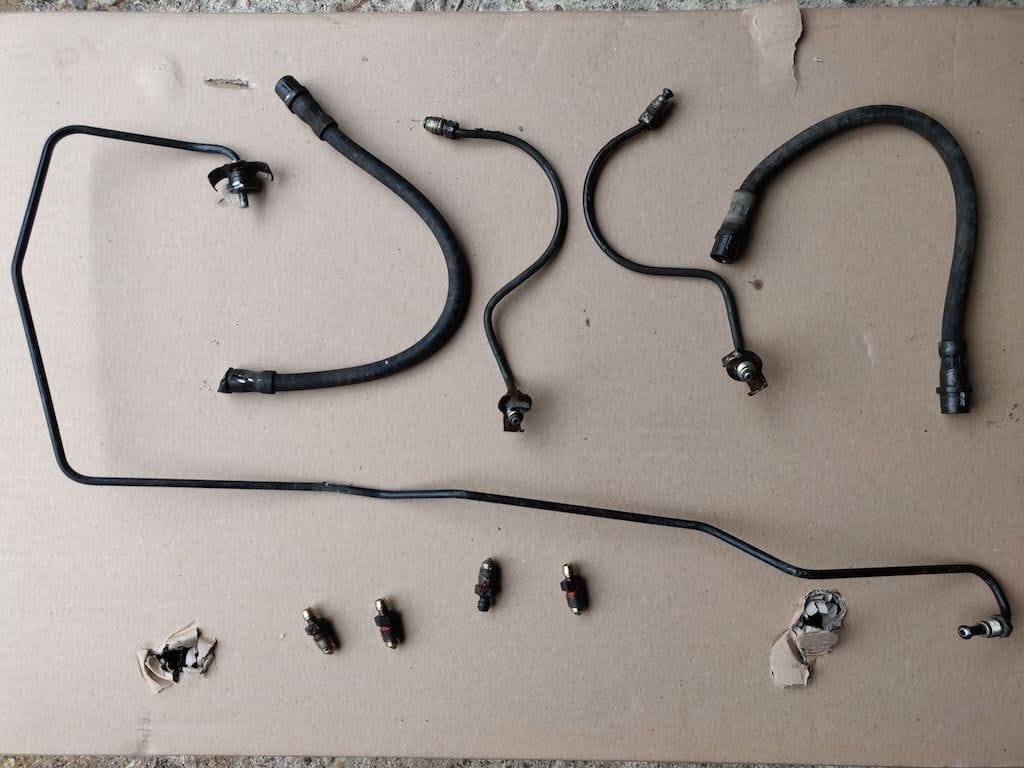
Lastly, I had replaced my rear rubber flex brake lines with stainless steel ones last year. All the fittings in the rear were frozen and was lucky to get the hard line at the body separated from the flex lines. I knew the front would be no picnic. In the front I was able to get the passenger side flex line off after a week of soaking in penetrating oil and heat. Unfortunately, the driver side stripped so I had to replace the line all the way to the distribution block behind the headlight. Also, non of the hard lines from the caliper to the flex lines would come off without stripping. So I replaced all of them as well. Also, added speed bleeders while I was in there. Here are the old lines for the front and completed job on the driver's side.

 05-09-2020, 09:35 PM