
So what did you do to your 928 Today......


 05-17-2011, 12:36 PM
#992
Addict
Rennlist Member
Rennlist Member
Follow-up to a post in this thread from last Thursday; I've been busy with other stuff, but finally got back to the instrument cluster LED relamping last night. Pretty much done, but need to test and probably reorient up to four LEDs for which I couldn't identify polarity based on inspection of the board (most of the grounds are obvious, but four are not and don't have a common ground on that particular board).
Probably won't be able to get back to this until tomorrow night at the earliest.
I do not recommend that anybody selects LEDs based on what you see in these photos yet; give me a few more days to get this stuff tested out first, as there are still a few things I'm not 100% sure about (like whether or not the information display backlighting LEDs will provide a uniform-enough beam spread). I still plan on doing a comprehensive write-up on this when I'm done, but my time is very limited right now, so it'll have to wait a few days. You need to do a little work (quite easy) to get the B8.4D twist-lock bulbs to insert and work reliably; I'll explain that in detail later in the write-up.
(Click photos to get substantially higher-resolution versions.)
These photos are pretty similar to the ones I posted last Thursday, but the backlighting PCB now has been populated with LED lamps rather than original incandescent lamps.


I was also experimenting with dimming on Saturday; I won't be satisfied with this until I've got dimming working (requirement is that dimming works uniformly across all dimmable lamps and that it's controlled with the stock dimmer rheostat). I had a prototype working reasonably well on Saturday: a combination of a common off-the-shelf PWM module with an amp on the front end to adapt the miniscule voltage drop across the ~0 Ω to ~8 Ω rheostat along with a polarity converter on the PWM output (because the PWM module — as most of the most readily-available ones ones do — used a low side driver instead of the high side needed to work with a common ground system). The whole thing was getting a bit too klugy, so I'm going to go one more round on the dimmer until I get it just the way I want it.


I probably won't button this up until I deal with the button backlighting in the pod, too, so I started messing with that a little, too. Seems like it'll be pretty easy.


Last edited by Ed Scherer; 05-17-2011 at 01:07 PM.
05-17-2011, 12:57 PM
#993
today i washed the shark! 3 weeks of dust, and a bird dumped on it this morning... gurrr.
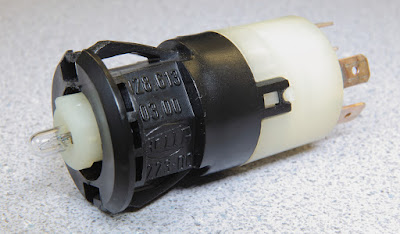
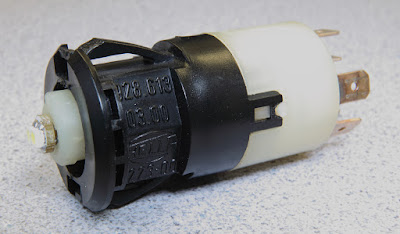
Ed, what and where did you get the little 2 led lights to replace the switch bulbs? i have a single little LED and i have to use a little silicone to keep the bulb in, or it jumps out when i push the switches.....
Ed, what and where did you get the little 2 led lights to replace the switch bulbs? i have a single little LED and i have to use a little silicone to keep the bulb in, or it jumps out when i push the switches.....
05-17-2011, 01:17 PM
#994
Addict
Rennlist Member
Rennlist Member
I've acquired a large selection of LEDs to test and choose from; these seemed to be the easiest to use for this particular application. Note, though, that they're only available in white.
If using the more common #74-style LEDs (which come in plenty of other variations), you may find (as you apparently did) that the base isn't long enough before the bulb becomes cylindrical; see Keith Widom's suggestions for filing or sanding those bulbs to get them to seat better.
05-17-2011, 01:25 PM
#995
Rennlist Member
Really looking forward to the finished results Ed. Installed the 84 rear hatch glass on the GTS. No more 3rd brake light in my rearview mirror. Plan on mounting a thin 6" wide LED 3rd brake light strip in it's place when Paul C finishes up the rear headliner. (rear sunvisors deleted). T
05-17-2011, 01:27 PM
#996
Three Wheelin'
Ed, do the button LED's light up in the two different states with no other modifications? i.e. some of the buttons are dim then brighten when depressed/turned..
Got pics?
Got pics?
05-17-2011, 01:33 PM
#997
Addict
Rennlist Member
Rennlist Member
I haven't yet addressed this yet myself, but will within the next few days.
I'll be providing photos (you can count on that
 ) of what things look like when I'm done; I assume that it'll look pretty much like the result of Keith's efforts.
05-17-2011, 07:56 PM
) of what things look like when I'm done; I assume that it'll look pretty much like the result of Keith's efforts.
05-17-2011, 07:56 PM
#999
Rennlist Member
Join Date: May 2007
Location: Placerville, CA
Posts: 272
Likes: 0
Received 0 Likes
on
0 Posts
RMB. Ooh, loud. But nice, and since no longer my daily driver I will run like this for awhile. If ending up too annoying I'll have a high flow muffler welded in place of the mid-pipe resonator. But I think it'll be OK, just need to keep the R's up and maybe turn the stereo up a bit when I want music, although the sound was so intriguing I didn't listen to the stereo at all on the way home. Had polished steel tips put on, to eventually match the stock wheels which I will be polishing. The gold anodizing on the wheels has declined so badly there is no hope other than to cut it off and polish to a mirror aluminum finish.
 05-17-2011, 11:01 PM
#1003
Rennlist Member
15mm spacers in the back..
No rubbing.
Look much better with wheel arch full....
No rubbing.
Look much better with wheel arch full....
Last edited by dimi5928; 06-06-2011 at 08:36 PM.
05-18-2011, 11:13 AM
#1004
Rennlist Member
Well, this may seem OT, but it is something I am GOING to do. This weekend I'm going to drive, I estimate 10 -15 miles out of my way, (around NYC to avoid 5+ miles of crap highway) to keep from tearing up my shark. I made the trip to Hershey in April and through NYC and Holland Tunnel twice and I'm not doing that to my car ever again. Unknown to me, a 5x4x3/4" MB Quartz junction box was tucked up above the dead peddle. During the extreme vibration test the car was undergoing on the approach to the Tunnel, something fell and continued to dangle on my left foot. No time to reach down there and figure it out. (Snakes on the plane?) Thanks Hollywood Sound for the otherwise excellent installation. I still don't have any rattles, but I don't need that again.
05-18-2011, 11:19 AM
#1005
Addict
Rennlist Member
Rennlist Member
Took a bunch of old fasteners, brackets, washers, etc to the platers.
Getting them done in "yellow Zinc". Looking forward to getting them back to see the before/after.
Getting them done in "yellow Zinc". Looking forward to getting them back to see the before/after.