When you click on links to various merchants on this site and make a purchase, this can result in this site earning a commission. Affiliate programs and affiliations include, but are not limited to, the eBay Partner Network.
This 996TT is on stock suspension at stock height.
I put some 4x4's under the trailer parking jack and jacked it up as high as possible, tilting the front up and the back down.
I used some 3/4" plywood about 12" wide and 3 feet long to make short bridge ramps from the ground to the trailer's ramps.
I needed to put a square of 3/4" plywood under each front wheel or the lip/undertray would have dragged on the trailer's front rails.
To unload the car my buddy has a set of Race Ramps that we used which worked spectacularly well.
I checked if my other 996TT would have fit. That car is 100mm high in the front/125mm high in the back. The ramps could be made to work with the Race Ramps. The problem is the trailer has guard rails on the inside of the wheel tracks that are too high for that car. I would need to lay 3/4" plywood the full length of both wheel tracks.
Many thanks theprf for the speedy reply and detailed info provided, truly appreciated and will make my loading/unloading experience go that much more smoothly!!
I trailered my stock '01 996TT on that UHaul trailer. Similar tricks as theprf. I recall the fenders being a problem re door height. I vaguely recall a NASCAR-style climb out the window, as doors wouldn't clear fenders.
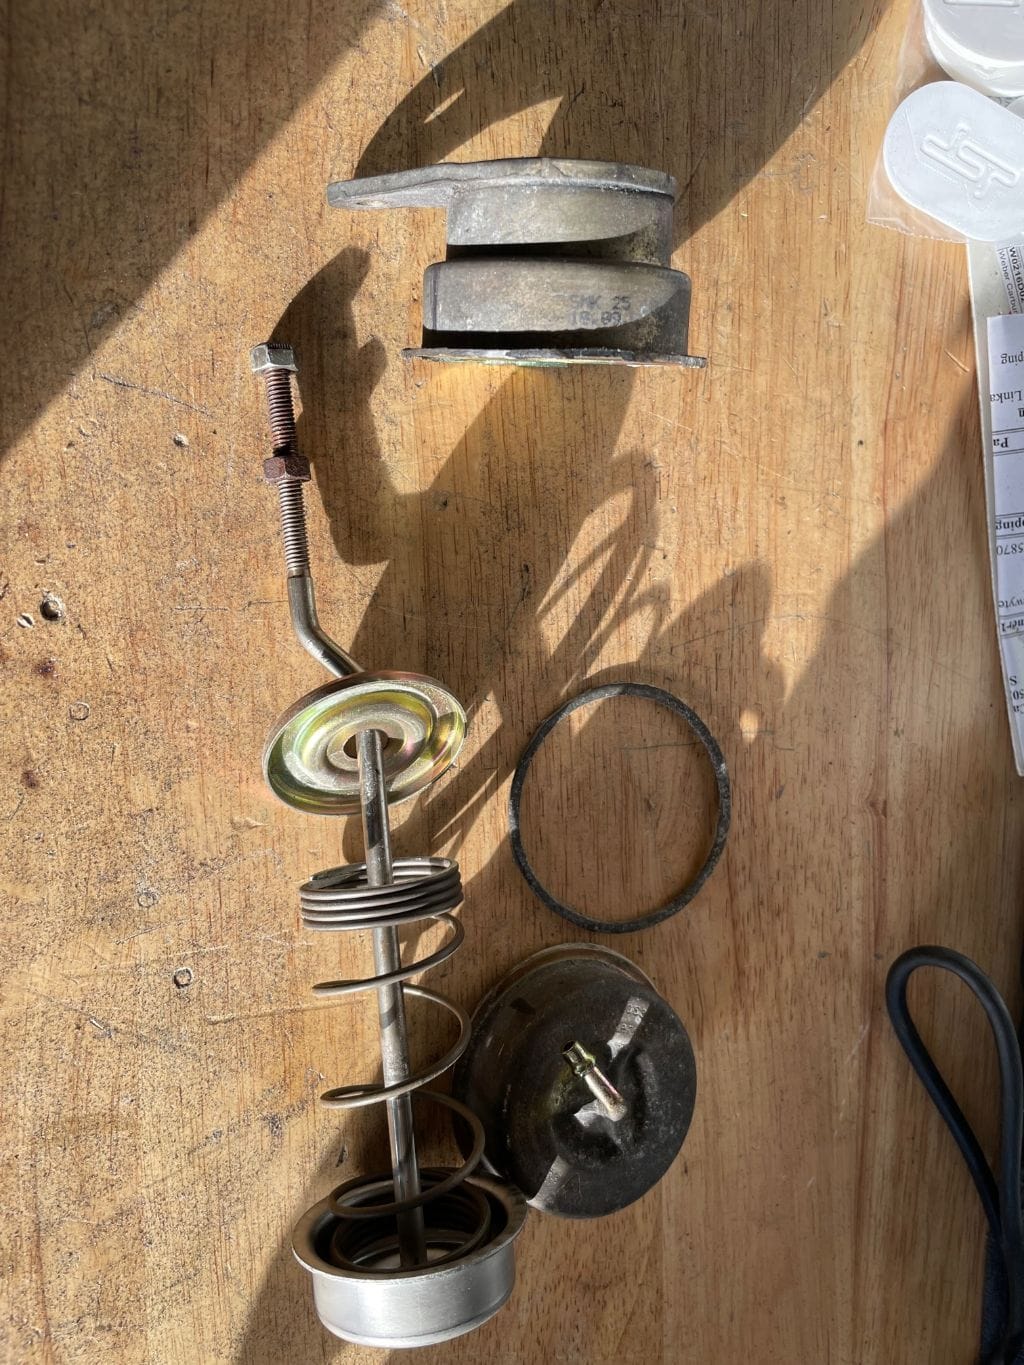
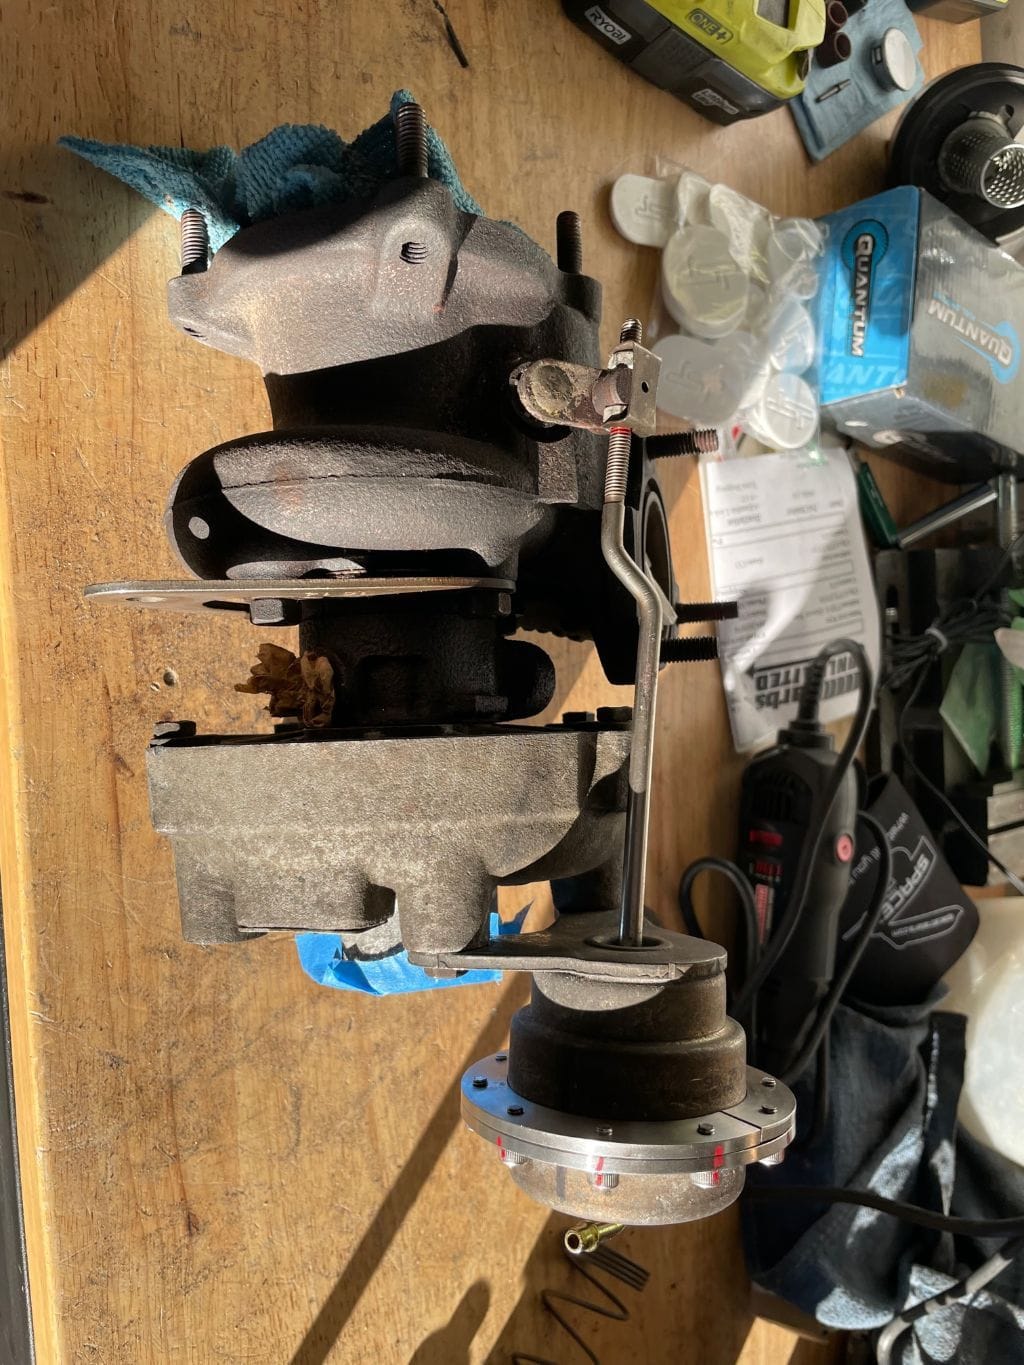
Finally got around to installing the UMW 1 bar wastegate kit. Well, half of it, I'm doing the other one today. Pretty straightforward to do.
Did the other wastegate just now. Installed it on the turbo, then pressure checked both of them. The one I did yesterday wouldn't hold pressure at all! WTF?! Man, I must've taken that thing apart and put it back together at least 4 more times before I got it sealed up. I'd deburred it when I first split it open, but the last time I very carefully went over both sides with a file and chamfered the edges. Then I made sure the diaphragm was properly in place. Then put it together and was giddy when it finally held pressure.
Then I started to sync the wastegates. UMW says to you should be able to just start to rotate the wastegate disc at 8.5-8.75psi. Since my gauge doesn't have that kind of resolution, I set them to do that at 9psi. Took a little bit of work on the right turbo to get it there, initially I was spinning the rod the wrong way. Got it all set though. As much of a pita it was to keep redoing the work, I'm really happy I checked them. It would've truly sucked to have installed everything and then had a wastegate that wasn't opening at all...
what's the symptoms for needing to replace the wastegate? overboosting?
I didn't replace the wastegate, technically I swapped out the spring inside it. Let's the turbos hold more boost and spool up more quickly. From what I understand you can also squeeze a bit more power out of K24's too.
Just for clarity:
The Wastegate is a Flap inside the turbo
The Wastegate Actuator is a pressure driven can, where the pressure inside the intake manifold presses against a spring, moving a rod opening the wastegate
The N75 solenoid valve regulates the pressure driving the actuator....
In most cases either the N75 valve is broken or the hoses between have a leak
Just for clarity:
The Wastegate is a Flap inside the turbo
The Wastegate Actuator is a pressure driven can, where the pressure inside the intake manifold presses against a spring, moving a rod opening the wastegate
The N75 solenoid valve regulates the pressure driving the actuator....
great explanation/clarification. One question, does the solenoid regulate or is it simply on/off (open/close)?
great explanation/clarification. One question, does the solenoid regulate or is it simply on/off (open/close)?
It regulates the amount of boost air which flows from the Y-pipe to the waste gate actuator. The ECU does this by varying the duty cycle of the N75 solenoid.
How far did you Extend the Door track on the Wall w Door? 8' or 16'x8/10' ? What type/style opener?
I have a AS10 BendPak's now in 13' main bay, It's fits under vaulted ceiling and I'd like to extend my Garage door track another 12-18" before hitting the Angle turn trak to follow the ceiling instead of a 90 deg turn..
Today my door is 18" away from ceiling when raised, 911's ok when lifted, but Taco, I have to let door down before lifting, so winter project is to customize the Door install for tighter clearance on the ceiling. My ceiling is white metal finished w slim 8' LED strips - 4" clearance. Today I use Wifi controlled Chain drive but could change to side mount if warranted.
Do you cover those beasts until spring ?
What is the MB CL ?
Your shop size is very nice size for those contemplating building a Shop/Garage. Is it attached to a house ?
I was limited to 24x30 by location but wanted to go to 32 or more if it was possible. No
Space Heated/Cooled ?
U Happy w floor covering in winters? i love solid materials
I'm finalizing install of Sink, Work Counters and Storage Cabinets now and the door is next maybe, if I don't get some busy work in.
Thx, Mike
Hello Mike,
I apologize for the delay, I have family in town from all over, so I�m a little distracted.
I ran the track all the way up to the ceiling so I had max clearance if I wanted to add 2 more lifts at the front. They are wall mount LiftMaster, I can find you the model number.
I don�t like car covers because you can�t see what�s going on. I have it temperature controlled and shades drawn so no UV hits the paint/tires. I have a comfort air 25,000 BTU mini split mounted, you can see it above the Mercedes. It�s a 2008 SL600 with only 20,000 miles. Got it from Miami last year, all original, beautiful car.
It is not attached to my house, but sits about 18 feet from my back porch. The flooring is Racedeck, I love it. Wanted a black and white checkered floor since I was a little kid (42 now).
Thanks for the interest. Happy to send more pics if you have other questions.
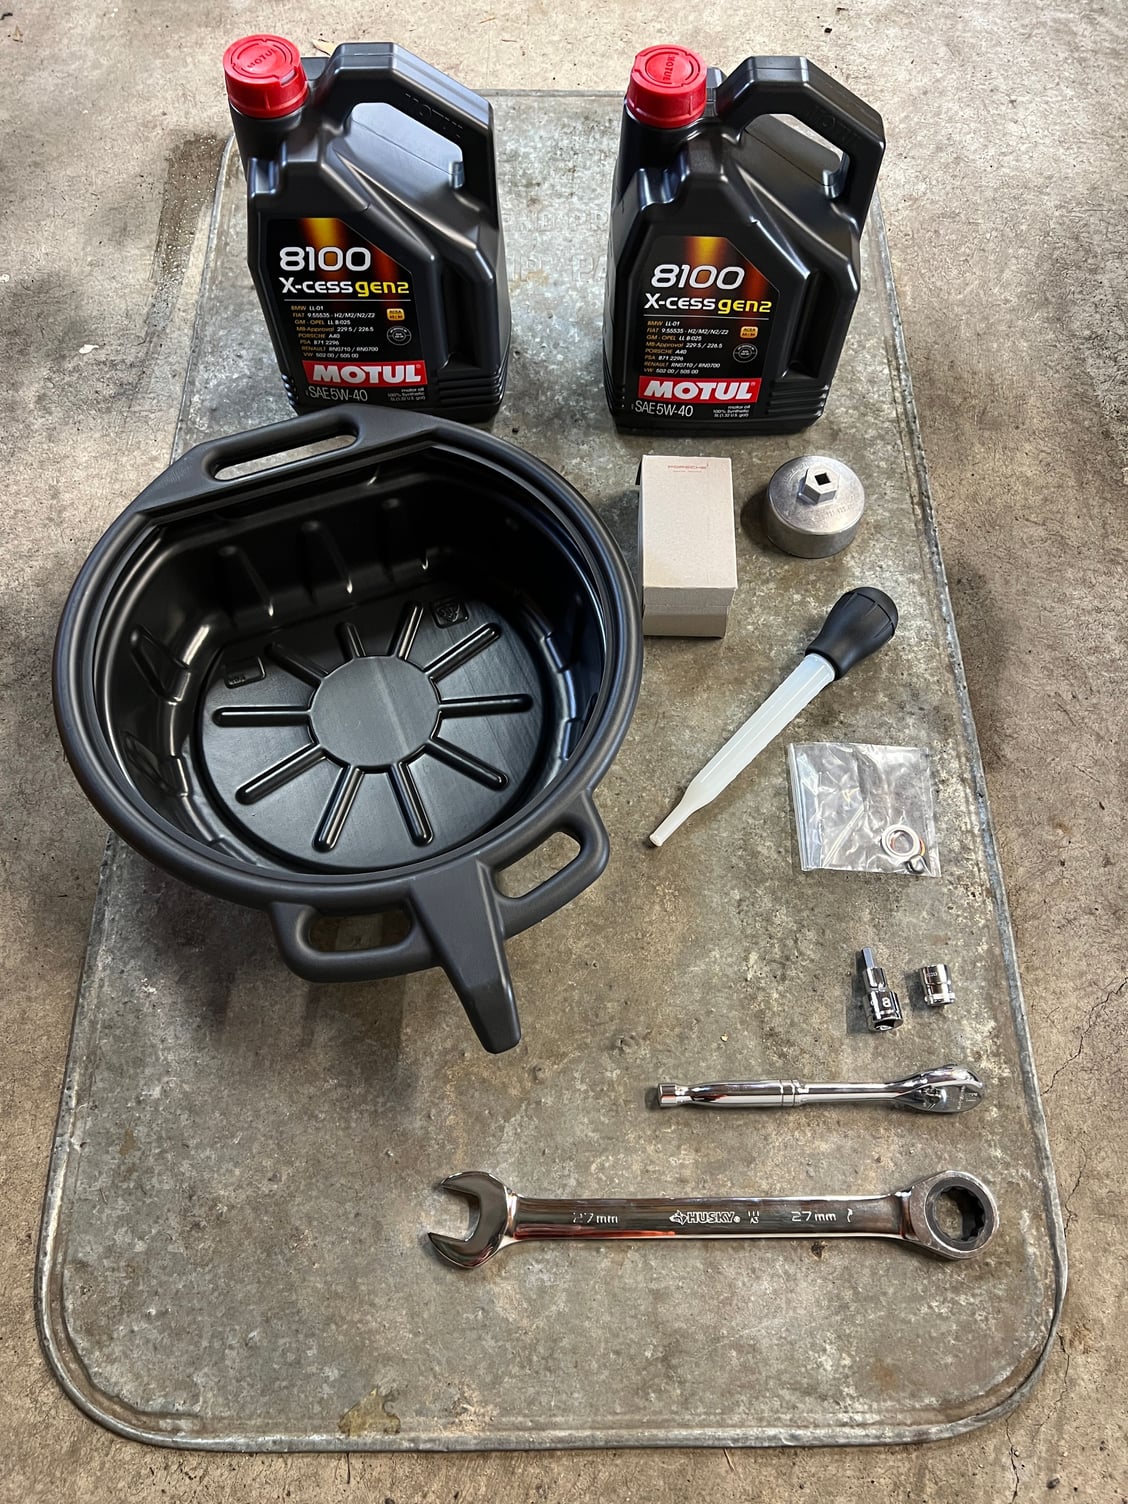
Decided to change the oil myself for the first time instead of handing it over to my local specialty shop. So easy with the right tools. I'll be doing these on my own from now on!
[ 2x torque wrenches, gloves and lots of shop cloths not imaged ]
Began the process of removing 3M film on my head lights. Unfortunately the adhesive did not come free during the peel (soaked in hot water/towels, heated with heat gun, heat gun during peel...). Goo Gone removed most to the adhesive over ~ 30 mins per light. However, the edges of PPF all have what I think is an adhesive ridge. I'm not sure how to remove that yet, and save my thumbs. Any advice be greatly appreciated.
I might do a headlight polish before putting on the Invisible Mask Armor Wrap Ultra.
Here in Germany we have a shop called MrWash.... in principle a giant washing station with an attached service center for Oil change.
Procedure: You drive in and keep sitting inside the car. On the Monitor in front you can follow the tecnician how he drains the oil (Porsche Spec), replaces the Filter and tops up with new Oil. Whole procedure takes about 15mins and cost about 100-120€ Oil and Filter inclusive.
 12-19-2022, 03:33 PM