When you click on links to various merchants on this site and make a purchase, this can result in this site earning a commission. Affiliate programs and affiliations include, but are not limited to, the eBay Partner Network.
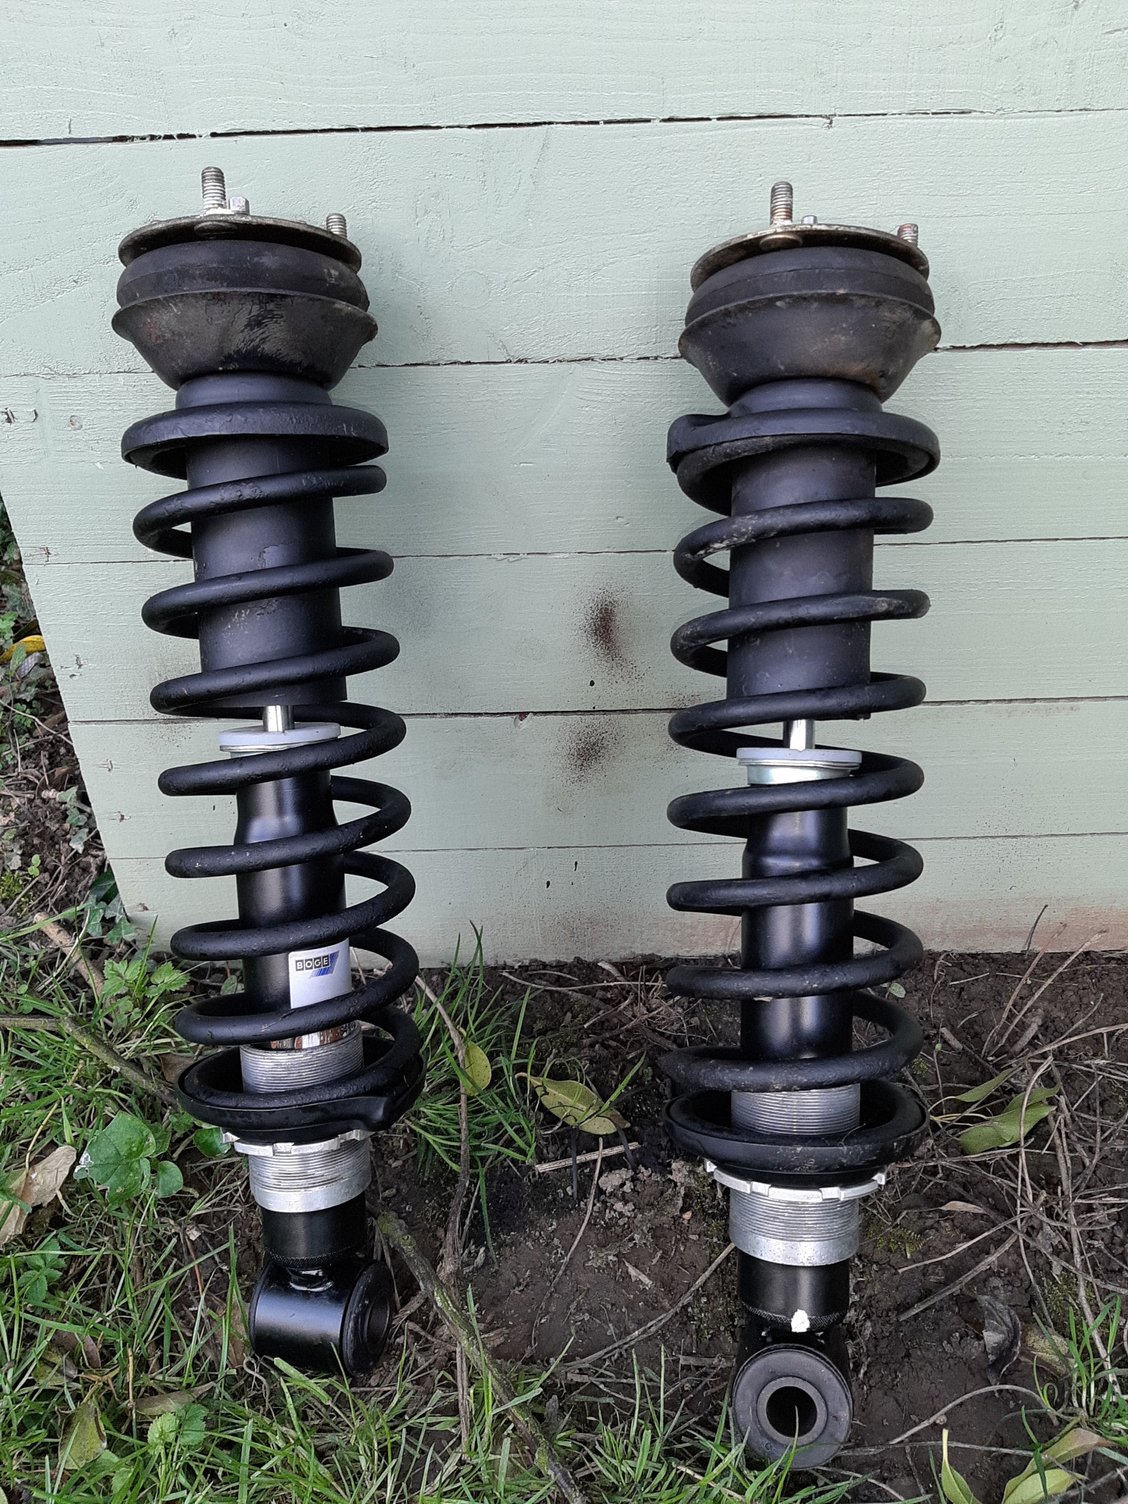
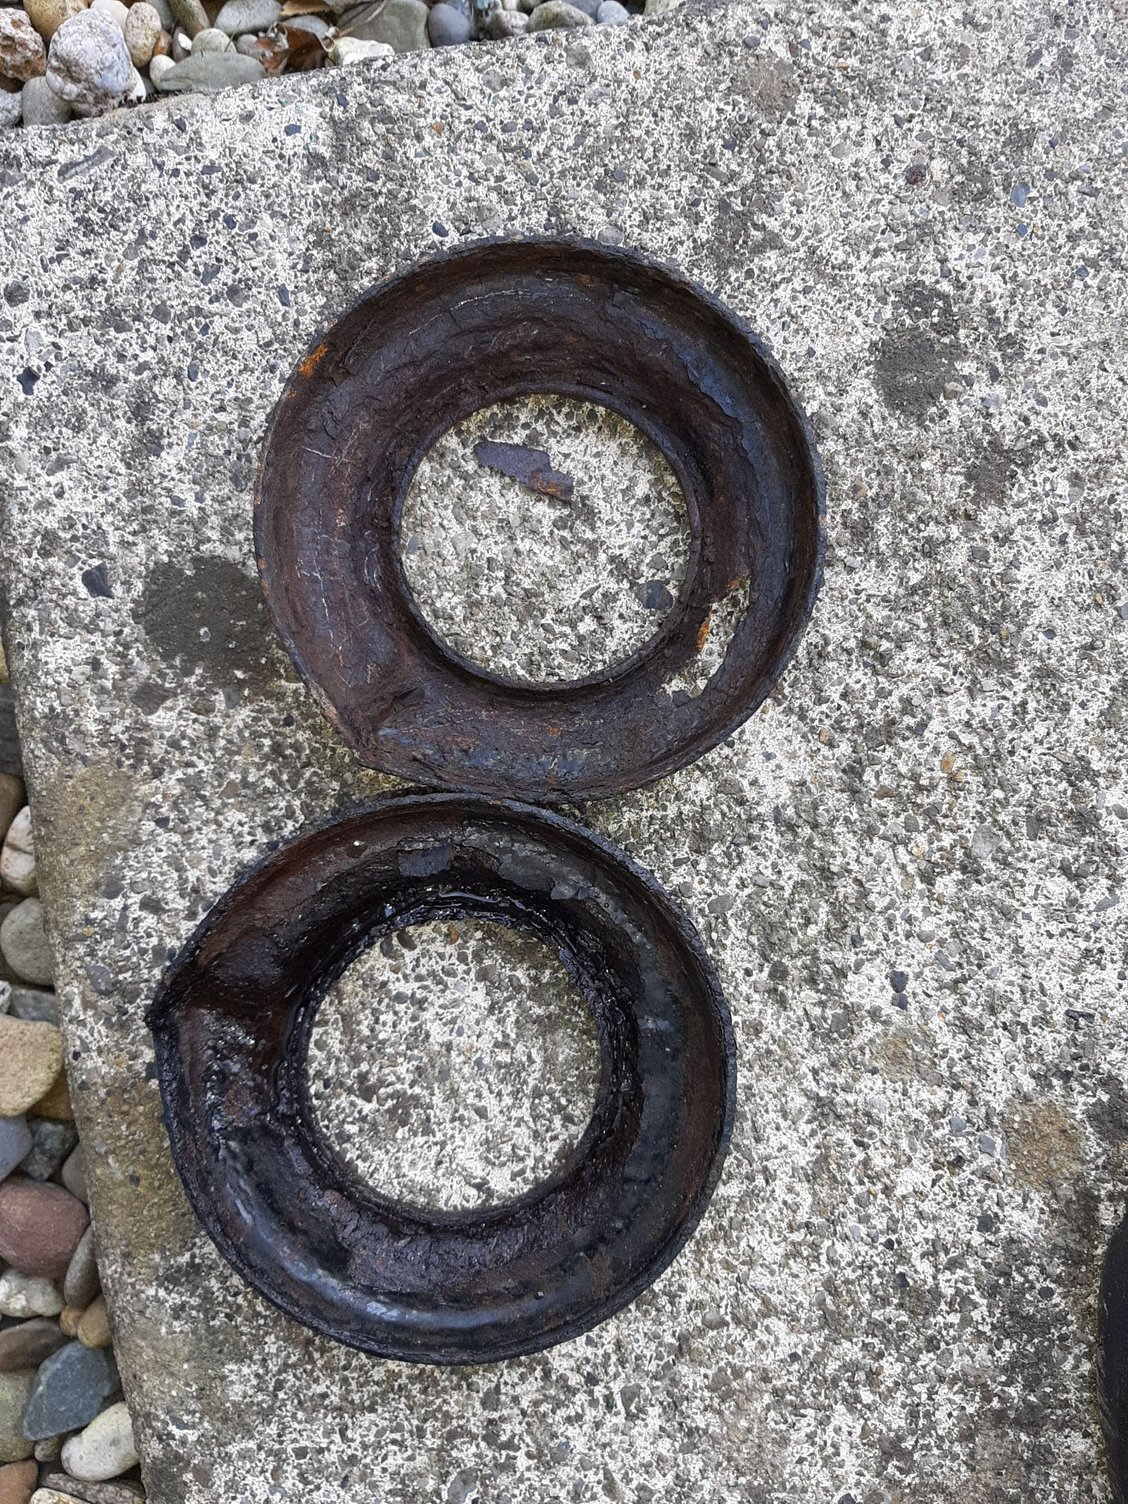
Finished off the install of rebuild rear struts, not a moment too soon from the state of the old lower spring washers. went for short drive and immediately noticeable improvement which is always nice at the end of a long job.
Thanks for the descriptive info and spacer plate offer. I'll get to work on the hatch adjustment while I have the hatch open as I can't drive the car with the hatch unlocked. I'll let you know if there will be a need for additional spacers.
Now that I have my stuck rear hatch question resolved, I have to get the hatch vs left & right body gap matched. I need advise on how to access the bolts/nuts on the upper hinges without ruining the panel/upholstery? Do I have to remove the panel holding the back sun visors? What is holding that panel to the hatch (how many screws/clips)? Do I have to remove some of the headliner forward of the hatch opening?
Now that I have my stuck rear hatch question resolved, I have to get the hatch vs left & right body gap matched. I need advise on how to access the bolts/nuts on the upper hinges without ruining the panel/upholstery? Do I have to remove the panel holding the back sun visors? What is holding that panel to the hatch (how many screws/clips)? Do I have to remove some of the headliner forward of the hatch opening?
You might consider starting your own thread as all of these questions seem to all relate to various parts of the rear hatch, multiple aspects. Just so that people will see it, both now to try to help you and then later when someone else is searching here for the same help.
What in the world is going on with your rear hatch? IIRC it started with the release motor, but its gone all over the place. Can you post some pics and some information as to what is going on? Without background I would simply look at each of your questions and apply them to a car that had no issue(s) before, but it almost seems like you are working on a New To You project and you are uncovering issues as you go.
Computer deficient at 85, I am lucky to be able to post in the proper category of this website forum. I am not sure how to establish your recommendation of a "thread". I am open to direction. Thanks for the comment.
Computer deficient at 85, I am lucky to be able to post in the proper category of this website forum. I am not sure how to establish your recommendation of a "thread". I am open to direction. Thanks for the comment.
I will start a thread for you. Check back to the main Rennlist 928 Forum menu in 5 minutes, it should be near to top. Do post some pictures there and more information about your car�s hatch issues so that people can give you good information.
Hi guys,
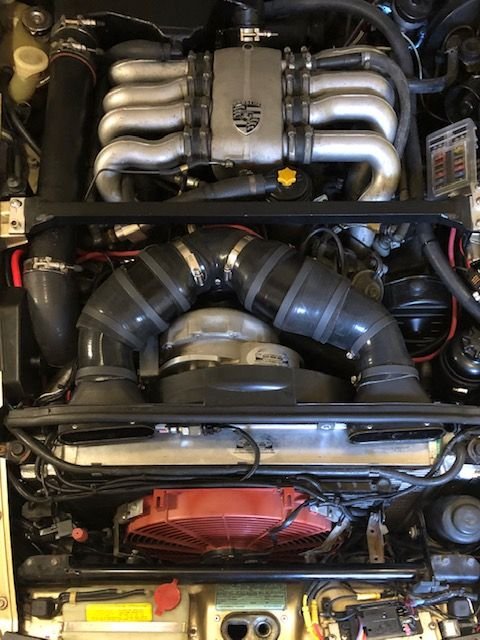
After chasing a no spark condition, I got my 84 car back together again. Since the car is supercharged, there is a lot of congestion over by the jump post in the engine compartment. The SC install involves additional circuits to run electric cooling fans, intercooler fan and pump and a couple of other items. I had a small fuse block over by the jump post. During my no start problem, I changed my ignition control unit that is located of course below the jump post. I decided to move my secondary fuse block over to the driver's side fender, since there is no intake tube in that location. In the picture you will see a 4 ga. main cable from alternator to jump post and a 6 ga. cable back to my new fuse block.
Needless to say the under hood geography is slightly modified, but I try to keep it looking neat.
Good luck,
Dave
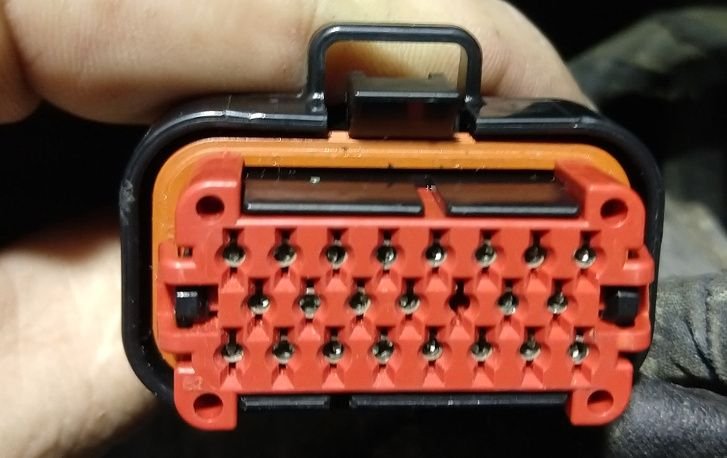
I finally installed the new gauge cluster wiring, replacing the two flaky connectors with one 23 pin AMPSeal connector.
1-10 for left connector, 23-12 for right connector. Eliminated duplicated warning lamp wires and updated turn signal wiring to 79 wiring which reduced wire count by two from the left plug.
Assembled with backshell installed and friction taped to the harness.
Installed CSF radiator, new oil cooler lines, and PS hoses (rebuilt locally). Managed to do the PS hoses by removing the oil filter and not the alternator, 78 5-spd.
Computer deficient at 85, I am lucky to be able to post in the proper category of this website forum. I am not sure how to establish your recommendation of a "thread". I am open to direction. Thanks for the comment.
Check the "Visitor Messages" on your profile page.
Personally, I've finished the bumper cover/rear fog light/LED brake lights winter project.
Mark got a Euro with the 'no rubber baby buggy bumpers' and a rear fog light in a while back.
After some issues with the painter (he had a spider bite get infected really bad and ended up in the hospital), I finally got it back in the fall. I used the winter storage time to replace the bumper cover, add LED brake lights and resistors, re-wire the 'federalization hack job' that was the rear corner markers and add the rear fog light.
Of course, once I had everything done, the fog lights now won't come on (rear fog only works when the fronts are on).
I suspect the headlight relay, but am not sure.
But I got the car out and it runs fine. Happy as all get out to be able to drive it again.
Of course, more snow is predicted this weekend.
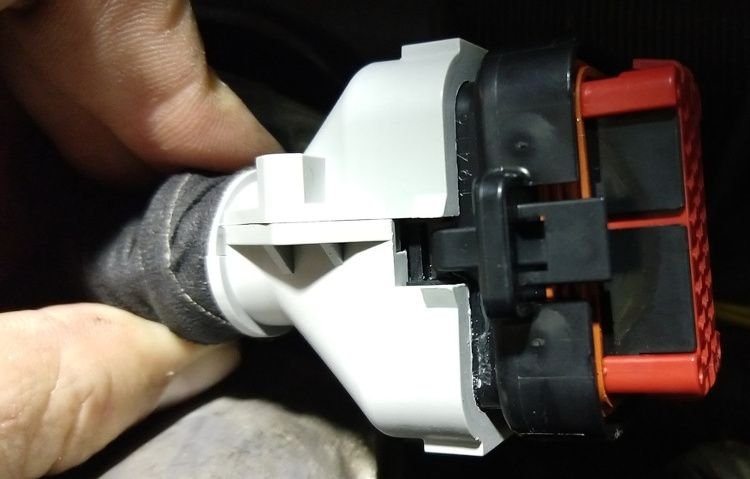
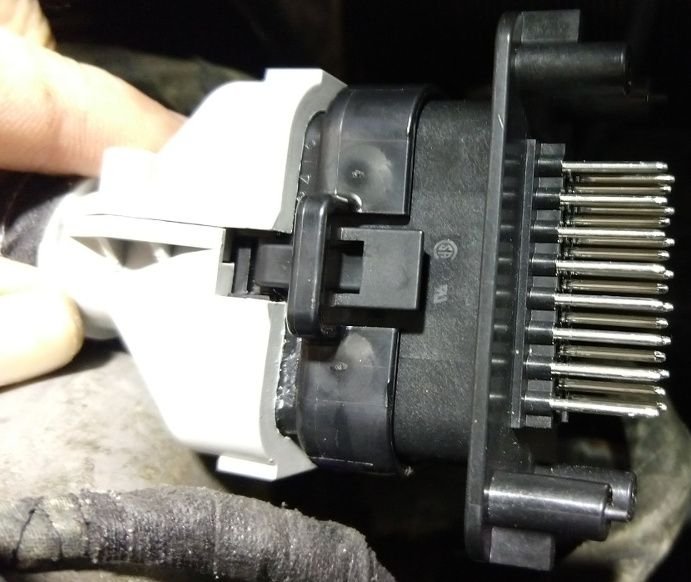
Repaired the passenger side power window motor.
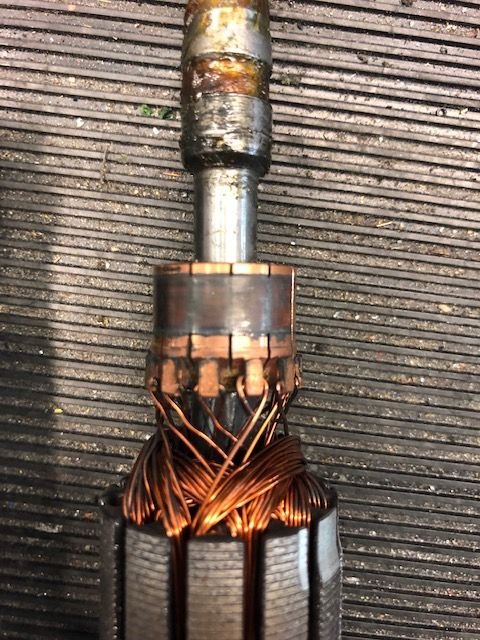
I was so sure the switch was broken that i ordered a new one. That wasn't it. Had power all the way to the connector by the door post, above the LH/EZK units, so motor had to be removed for further investigation. Once out, I took the motor apart and measured continuity from the connector pins to the brushes. So not the fuse/overload device or failed solders. However when measuring continuity all the way to the rotor, there was no connection. Cleaned the rotor of residue from the brushes with a grey scotch brite pad so the copper was all shiny again. On the picture below you can see a dark band of sticky and isolating residue. When that was removed the motor was running perfectly again. Re-greased the worm gear, and putting it all back together. Happy face!
Sorry, no after pic.
Adjusted the heater compartment doors by removing the glove box. They weren't near fully closed when they were supposed to be. Now for some reason the screws to hold the glovebox door latch in place are too short by just enough that they won't grab the speed nuts (if that's what they're called).....so off to the hardware store where we got screws 1/4 and 1/2" longer...cause getting only one or the other will automatically mean its either still too short or I got the too long bolt.....cause it makes no sense in the first place.

 04-04-2020, 04:39 PM