When you click on links to various merchants on this site and make a purchase, this can result in this site earning a commission. Affiliate programs and affiliations include, but are not limited to, the eBay Partner Network.
So here is my saga! I have an �06 C2S with PASM and about 115k miles. I�ve owned the car for ten years. A few years back there was an Eibach sale somewhere so I jumped at it-been sitting in my basement since then so decided that it was time.
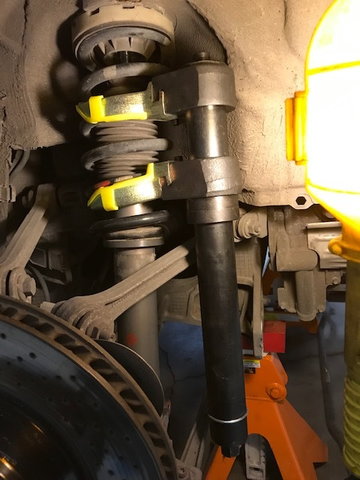
Front Suspension
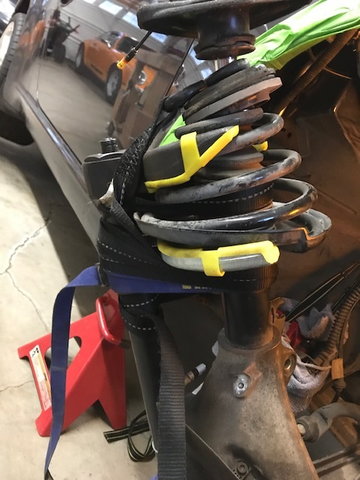
I followed the Bruce�s instructions but could not get the springs compressed enough to get past the fender lip with the two cheap borrowed spring compressors. Had success with the good spring compressor but had to put the lower arm UNDER the strut saddle and for insurance strapped it in to prevent any possible slipping. Finding the right position for clearing the lower suspension took some doing.
I set the jack stands at 18� and used a crowbar secured to the lower suspension and stepped on it to lower the strut enough to get by the outer fender lip. Really easy given the very delicate PASM wires sticking out of the top of the strut.
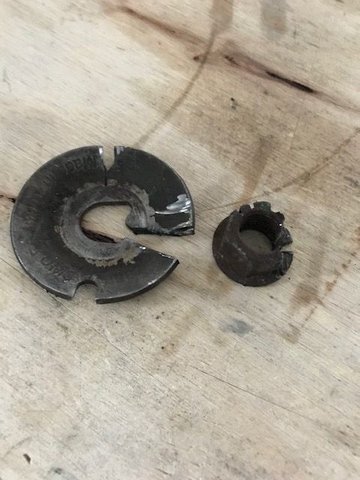
The top nut would not come off on either sides so had to cut them off with my Dremmel. The slot running down the threaded portion of the shaft made this task a bit easier as I could grind right through the nut without damaging the threads. A bit of a pain.....
Given the age and mileage, I changed all the top end bits and pieces.
Rear suspension
The good spring compressor made the task easy. By the way, I only loosened the upper arms at the wheel carrier end as I did not want to change any alignment settings.
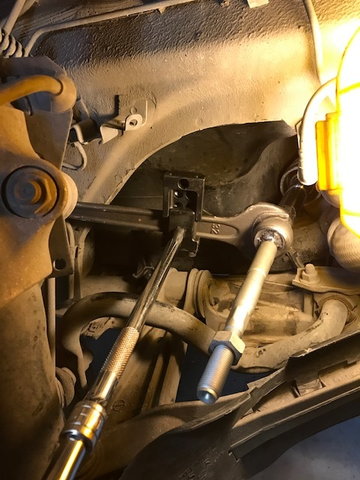
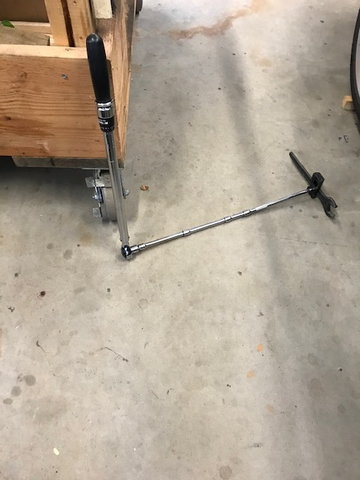
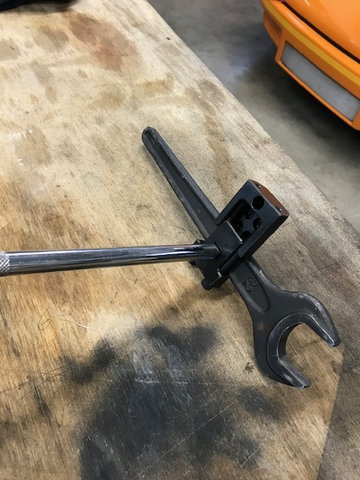
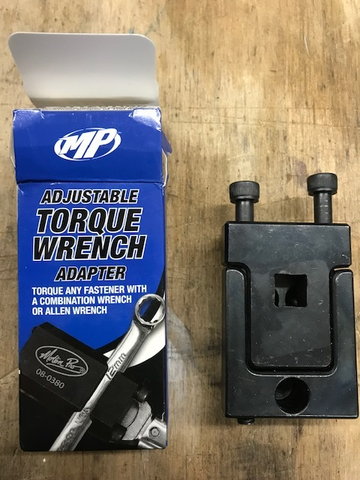
Tie Rods
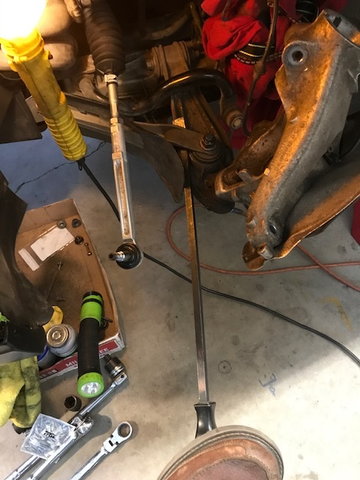
Decided to change both inner and outer tie rods as the inner knuckle on the driver�s side appeared to be a bit loose. Unscrewing the inner tie rods from the steering box was pretty easy using a pipe wrench. I used a 32mm open spanner with this nifty tool that enables you to use a torque wrench in tight places.
Alignment
As my tire wear has always been pretty even, I took my alignment measurements prior to this project. Post project the readings are the same. Mind you, it�s only been about a week and the suspension has not shown any inclination to settle any further despite driving the car up and down the driveway ( middle of winter around here).
Cheers,
Amazing job, and the documentation is amazing. It gives me the courage to tackle this.
There is no doubt that changing the springs give the car the right look without being a lowrider
What about handling and ride? Have any of you tracked your car with the new springs?
I am getting ready to start the job next month, but some things are unclear.
I have a 2010 Turbo, and reading the service manual states to disconnect the front axles at the wheel. Then you basically remove the whole wheel carrier assembly.
How difficult is this? I noticed a few people commented above about their C4, but I am still not 100% sure on the procedure.
BTW, I will be replacing the struts with B8 Damptronic, and springs with Eibach.
What process are you looking at that says to disconnect it at the wheel? The big challenge there is that its 340ft/lb to torque the wheel bearing vs 29 on the front drive shafts (on the C4 at least).
In my copy of the Service Manual, I don't see a separate process for the C4 v Turbo, but the process in mine wouldn't work for a C4 or Turbo anyways. I toyed with the idea of removing at the wheel, but it was a lot quicker for me to do at the front final drive once I removed the front tray.
This attached manual. It is actually step 1 for AWD vehicles.
Seems very straight forward after that step.
Wondering if it can be done without removing the drive shaft? Can it be left attached?
Interesting! Confirms my copy of the Service Manual is older/out of date as I suspected.
Honestly, I bet it is six of one, half dozen of the other. I read something about needing a special press, which I can't find, but looks like they were referencing the wheel bearing, not the axle.
I'd say if you already have a torque wrench capable of accurately torquing the hub nut, then it would be a bit more straightforward since there are less bolts to R&R but removing it from the final drive side isn't too difficult.
This procedure is identical for 4 and 2 wheels drive models. Remove the entire wheel assembly. (Difference being the shafts)
From the thread I see most guys are not doing this. So is it possible with the 4 wheel models?
The hangup is that you cannot rotate the whole assembly down as far on a 4WD as a 2WD.
On the 2WD models, its possible to loosen the lower control arm on the frame side and carefully rotate the assembly out to change the springs or assembly without fully removing it from the car. With the 4WD model, when you try to rotate down, the driveshaft makes contact (ewith either the subfarme or control arm, I cant remember which) before you can rotate out and there is no way to get the extra inch of clearance to clear the fenderwell needed without removing the driveshaft. Even unbolted from the front final drive, it can't rotate out of the way enough to rotate the assembly out of the fenderwell. You _might_ could mess around with it enough to get it to work (a bunch of string compressors, removing the top hats in the fenderwell, etc.) but it'll be more work than just removing the entire assembly. You wont be able to remove the shaft from the hub without unbolting the balljoint anyways, so you might as well just remove the whole assembly.
Even on the 2WD cars, I bet it would be easier to remove the whole assembly, you just have to separate the ball joint.
Last edited by codywms; 02-12-2020 at 05:22 PM.
Reason: added a detail
I have a 2010 Targa 4 and unbolted the axles at the transaxle, not at the wheel. It will give you enough clearance to remove the strut assembly.
Excellent. So you are saying you did not remove the entire carrier, but just unbolted at the transaxle and rotated out? Without spring compressors?
Originally Posted by codywms
The hangup is that you cannot rotate the whole assembly down as far on a 4WD as a 2WD.
On the 2WD models, its possible to loosen the lower control arm on the frame side and carefully rotate the assembly out to change the springs or assembly without fully removing it from the car. With the 4WD model, when you try to rotate down, the driveshaft makes contact (ewith either the subfarme or control arm, I cant remember which) before you can rotate out and there is no way to get the extra inch of clearance to clear the fenderwell needed without removing the driveshaft. Even unbolted from the front final drive, it can't rotate out of the way enough to rotate the assembly out of the fenderwell. You _might_ could mess around with it enough to get it to work (a bunch of string compressors, removing the top hats in the fenderwell, etc.) but it'll be more work than just removing the entire assembly. You wont be able to remove the shaft from the hub without unbolting the balljoint anyways, so you might as well just remove the whole assembly.
Even on the 2WD cars, I bet it would be easier to remove the whole assembly, you just have to separate the ball joint.
It is all clear now.
And yes, I think it must be easier as the procedure from what I posted seems straight forward.
Yeah, you remove more in the Service Manual procedure, but I think it is quicker overall.
The springs are under very little tension so you don't need them when you remove the assembly (with the tophats attached). I removed it without tensioning.
If you decide to remove at the front final drive, I'd just go ahead and order 12x new bolts since they are cheap and its easier to strip them if you're using a bunch of extensions. Check the torque value too, I think it is ~29 for the front and ~60 for the rear.


 01-31-2020, 05:35 PM