When you click on links to various merchants on this site and make a purchase, this can result in this site earning a commission. Affiliate programs and affiliations include, but are not limited to, the eBay Partner Network.
An Updated Guide To Installing Lowering Springs or Coilovers For Your 997.1
I recently installed Eibach lowering springs on my 2006 997.1 C2 and found the existing How-To posts to be lacking critical points, missing images, or just plain wrong. I am by no means an expert but I wanted to share the steps I took and lessons learned.
If you are installing new coilovers or have PASM there should be ~90% overlap in the steps. The key difference for PASM owners is the requirement of a special strut nut to accommodate the PASM cable.
Time Requirement
This is a tough job. Unless you have a lift, impact wrench, previous experience with suspension mods and spring compressors, and an extra set of experienced hands�budget a full weekend for this project plus a couple hours of prep beforehand to ensure you have all the right parts and tools. Your local indy mechanic will quote 6hrs on the job and they will earn every penny of it. I was learning by doing so it likely took me 18-20hrs if I include a couple trips to Harbor Freight and my local dealer for additional tools and parts. If I had to do it again I think I could do it in 8hrs, faster if I had a lift.
Net Result
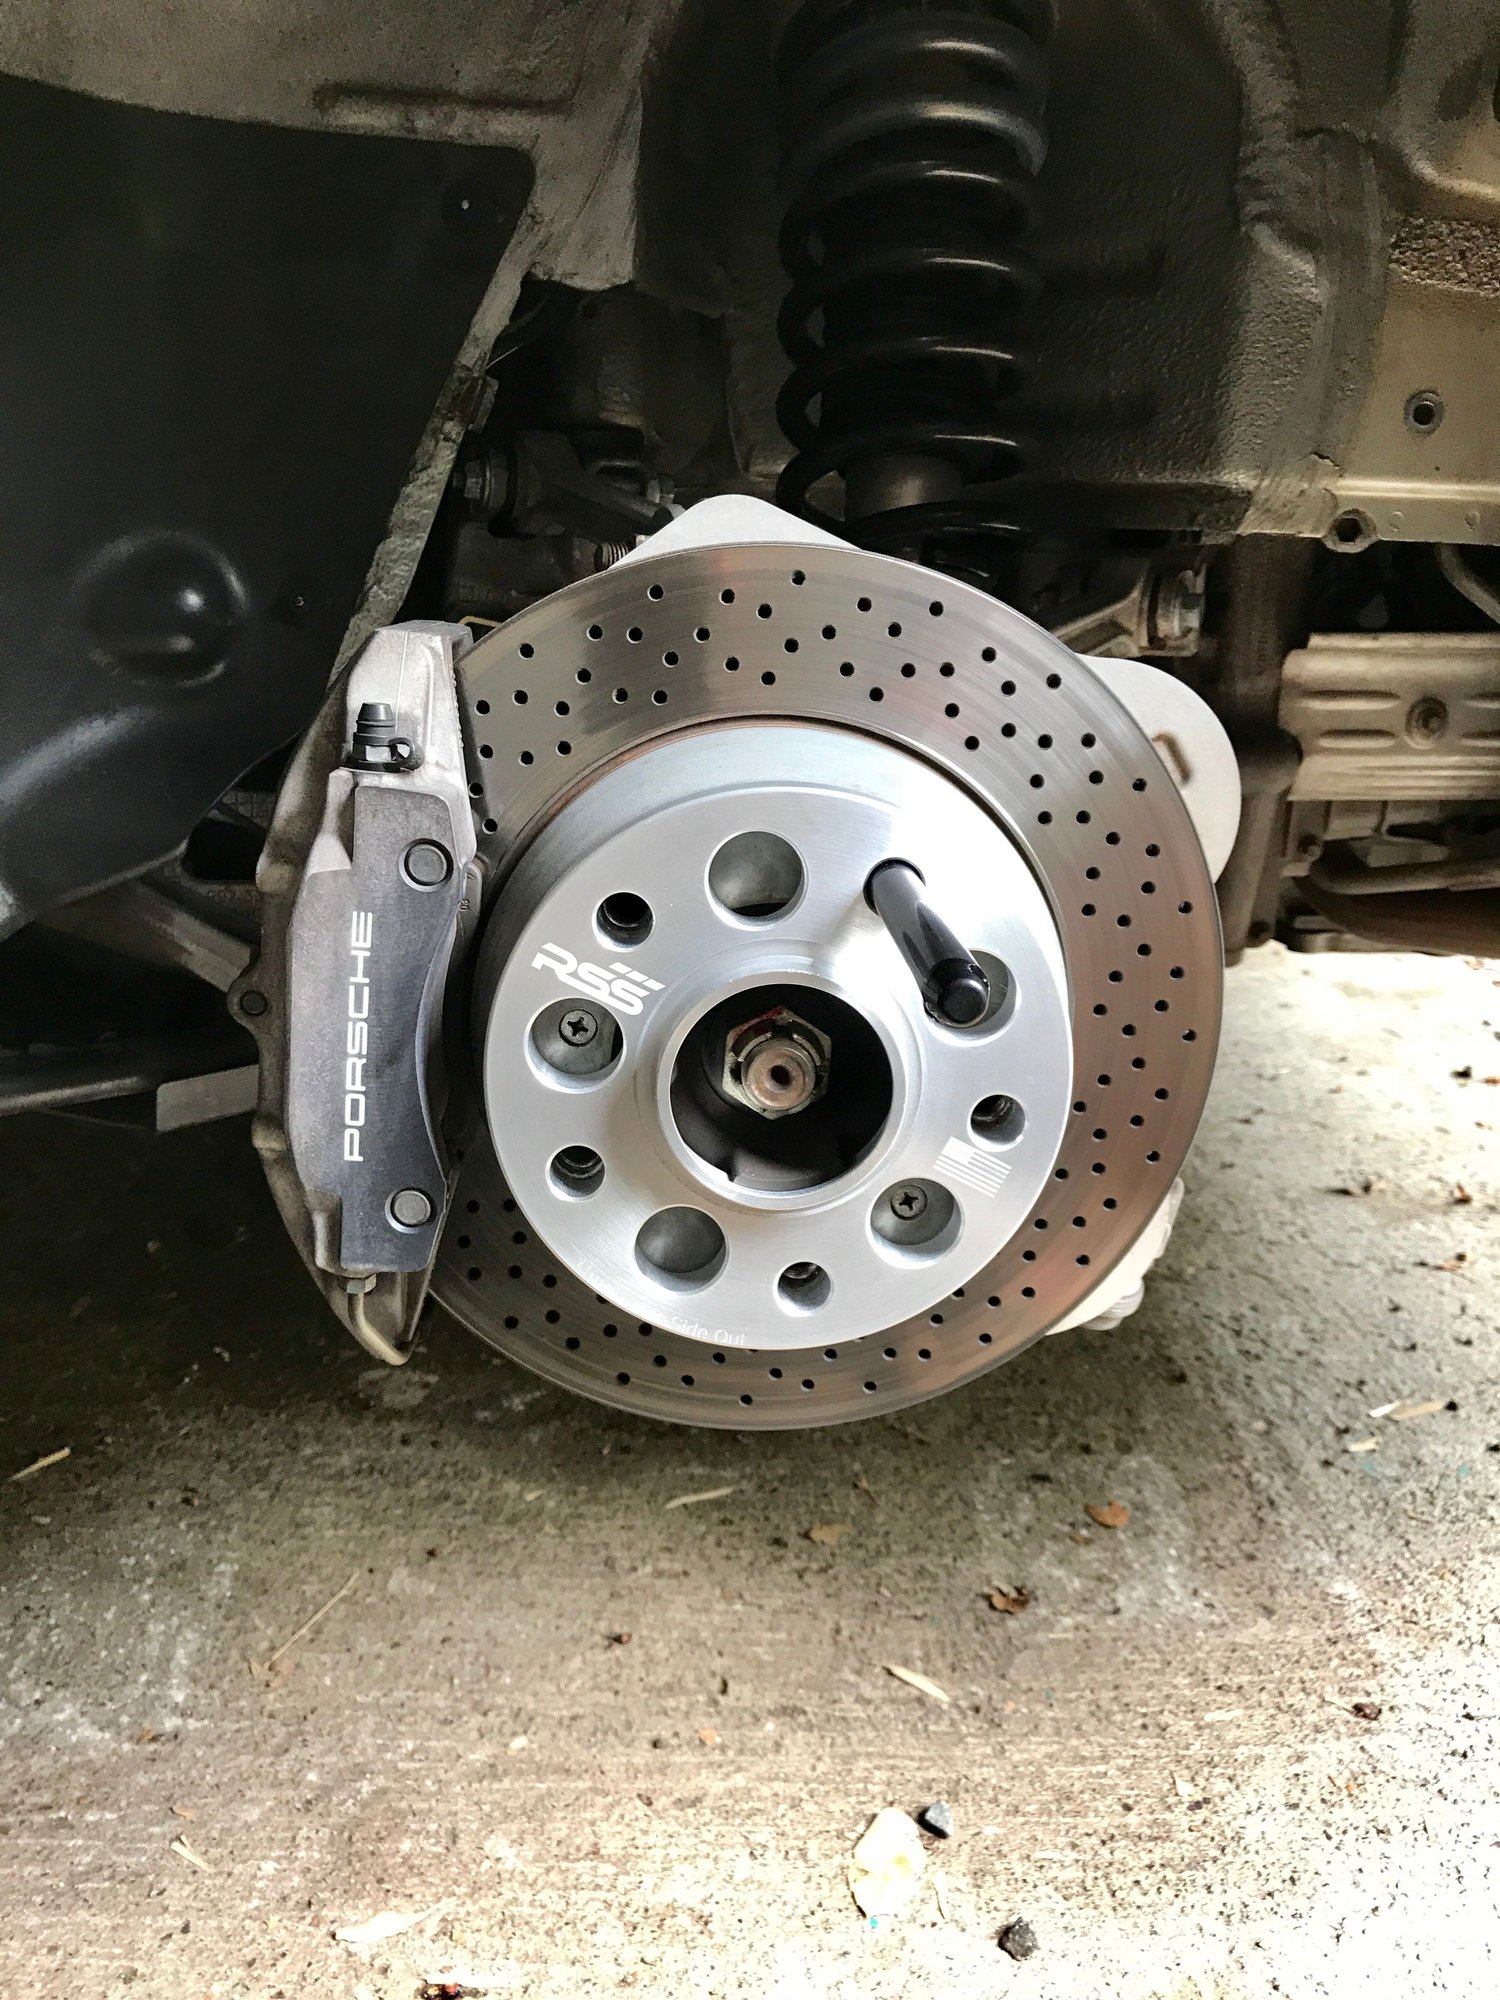
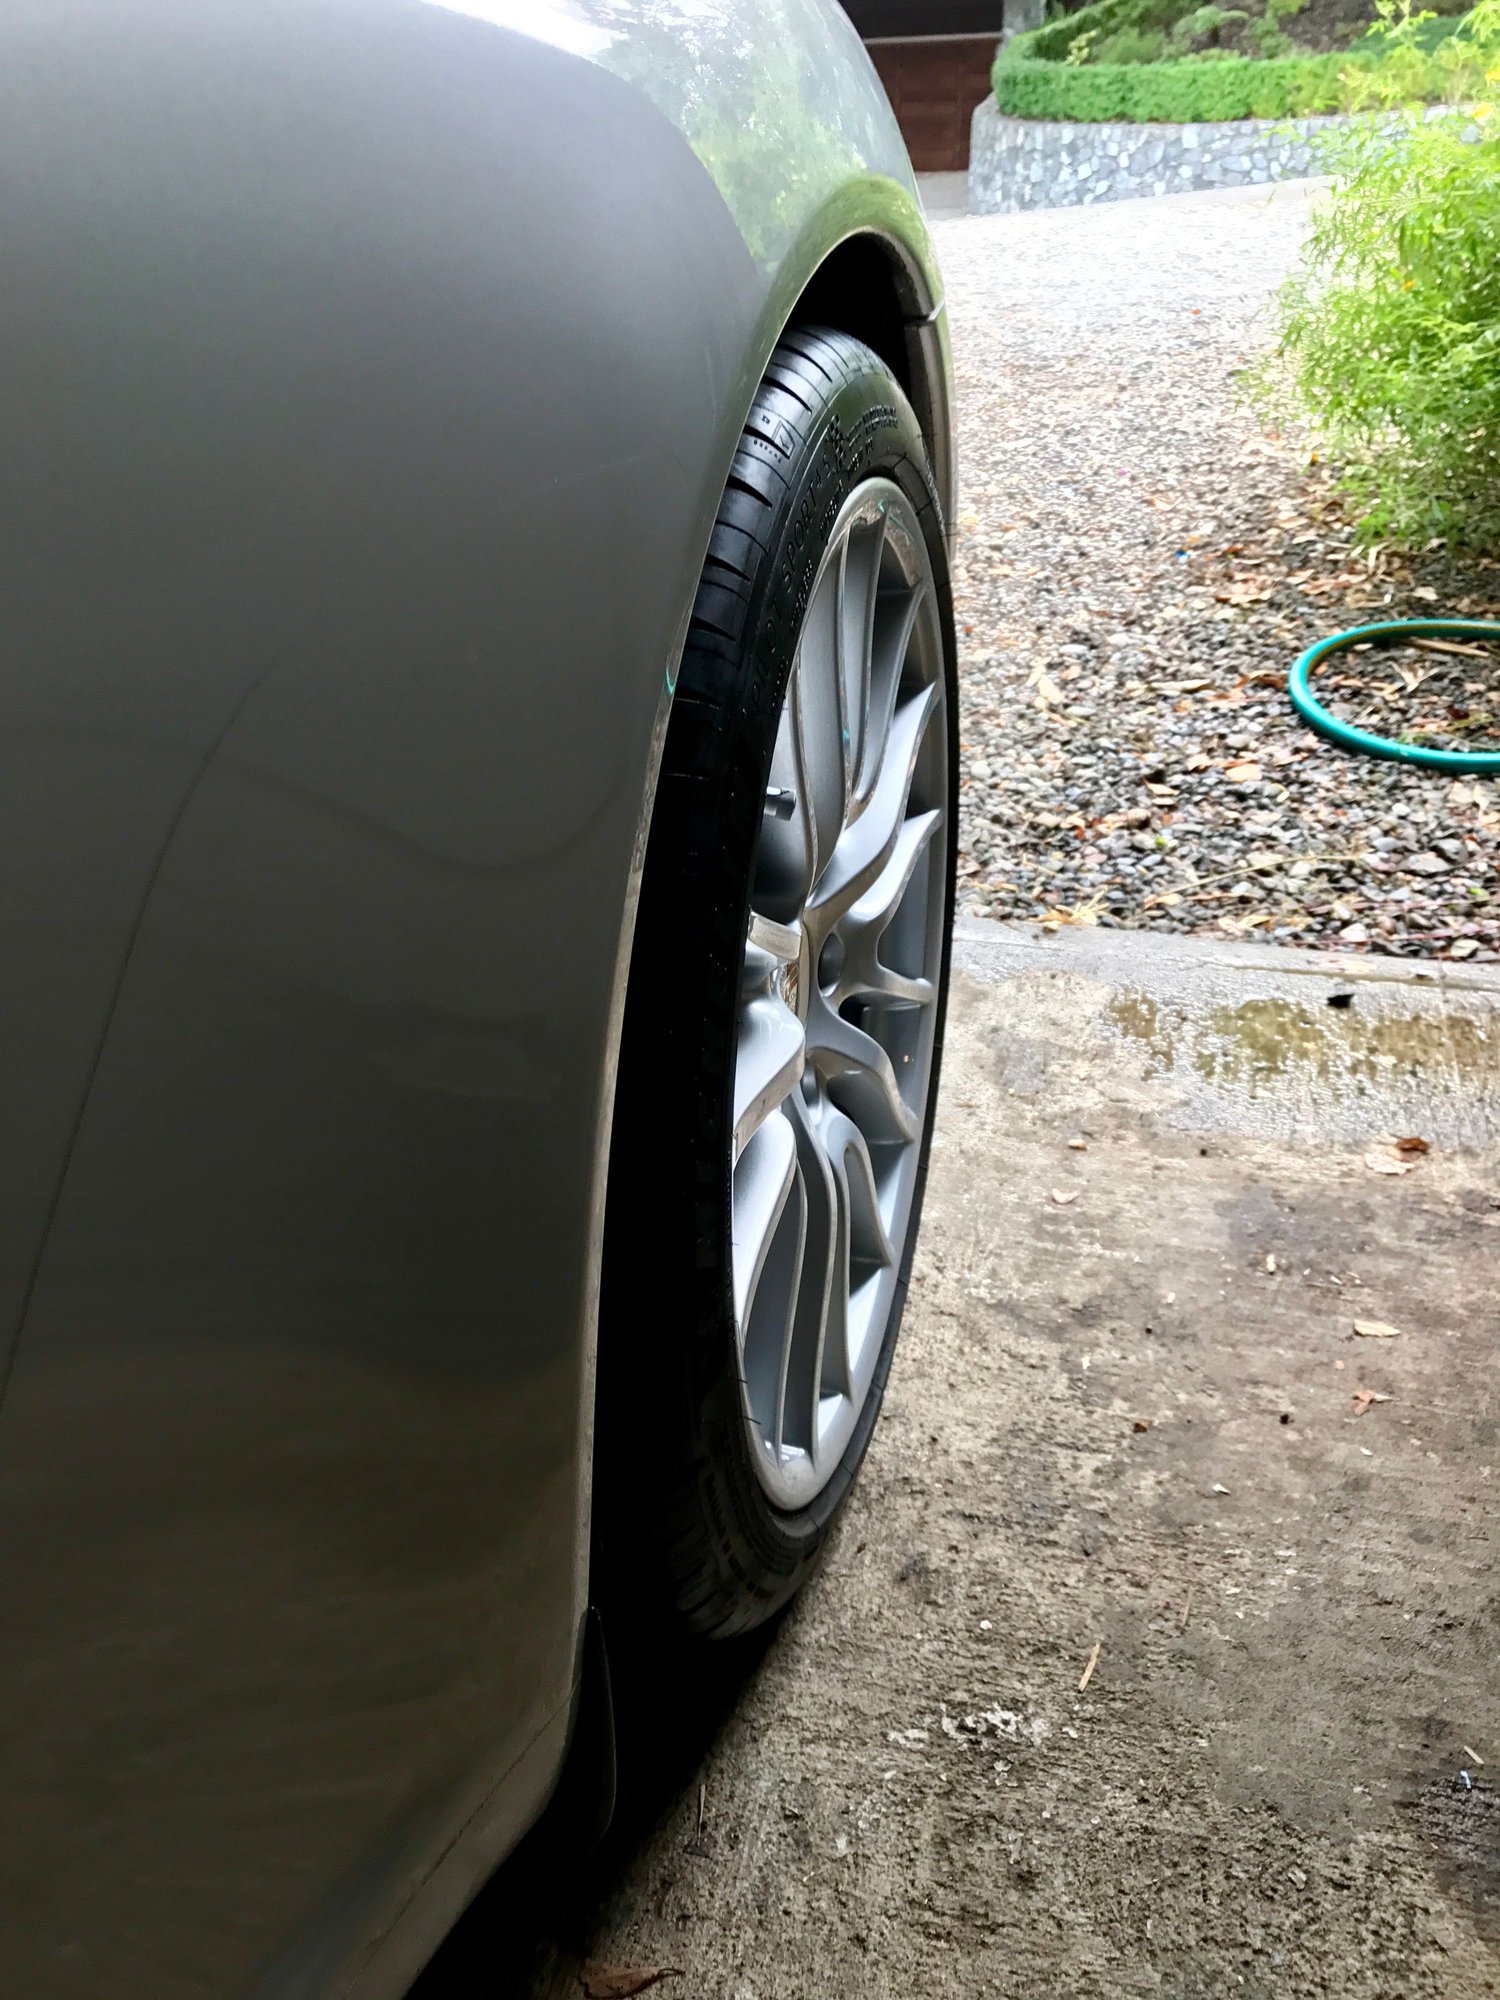
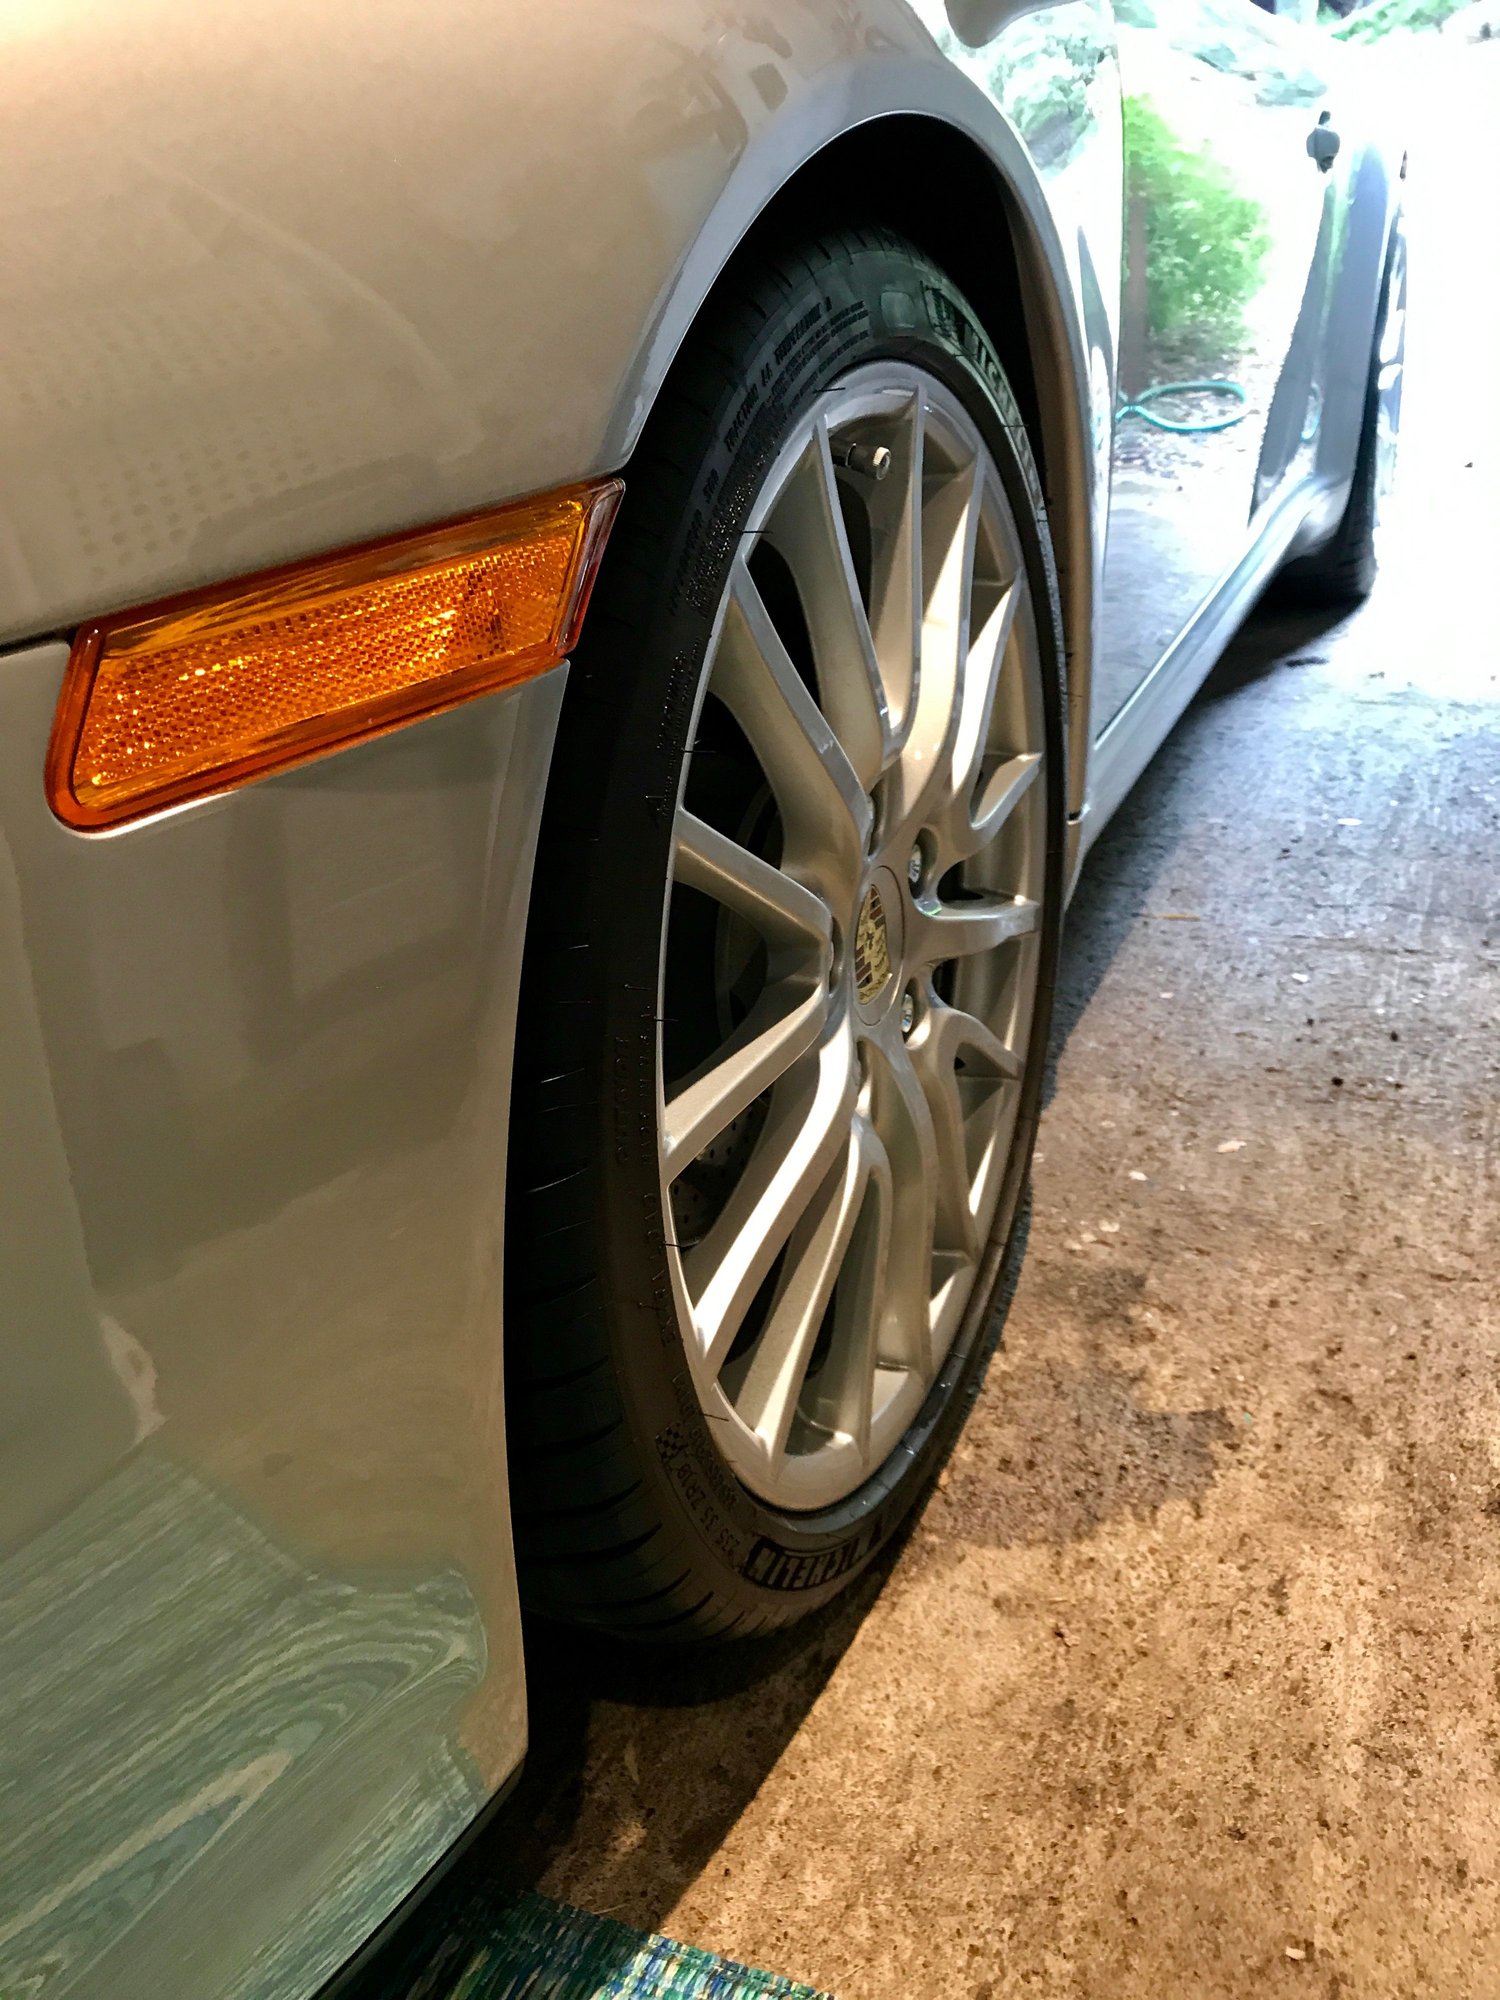
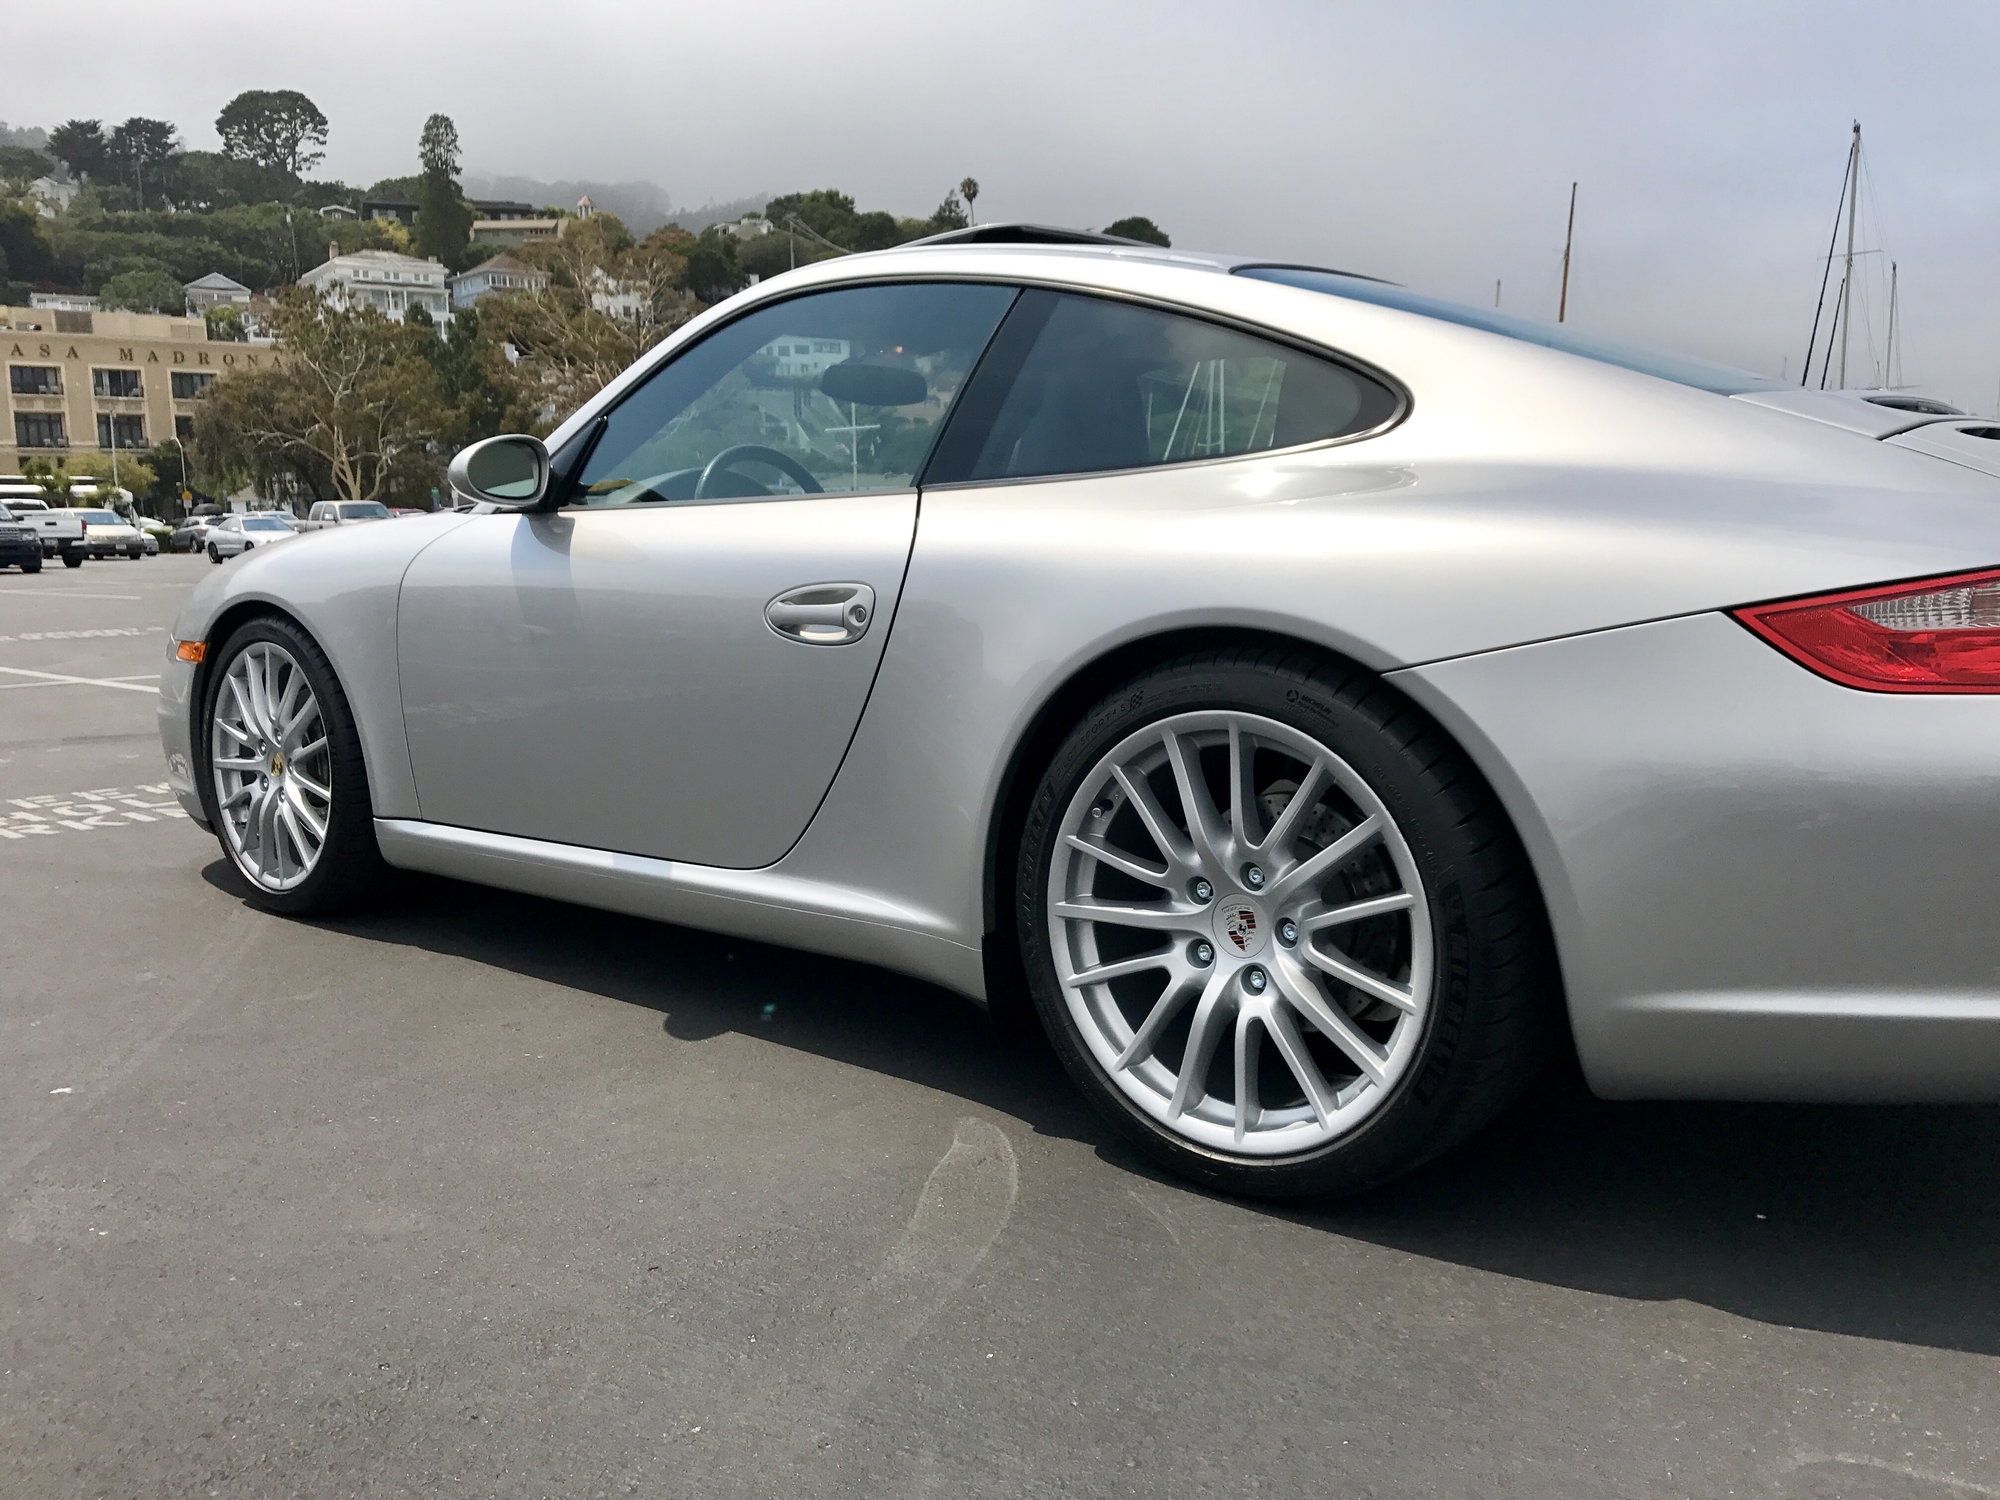
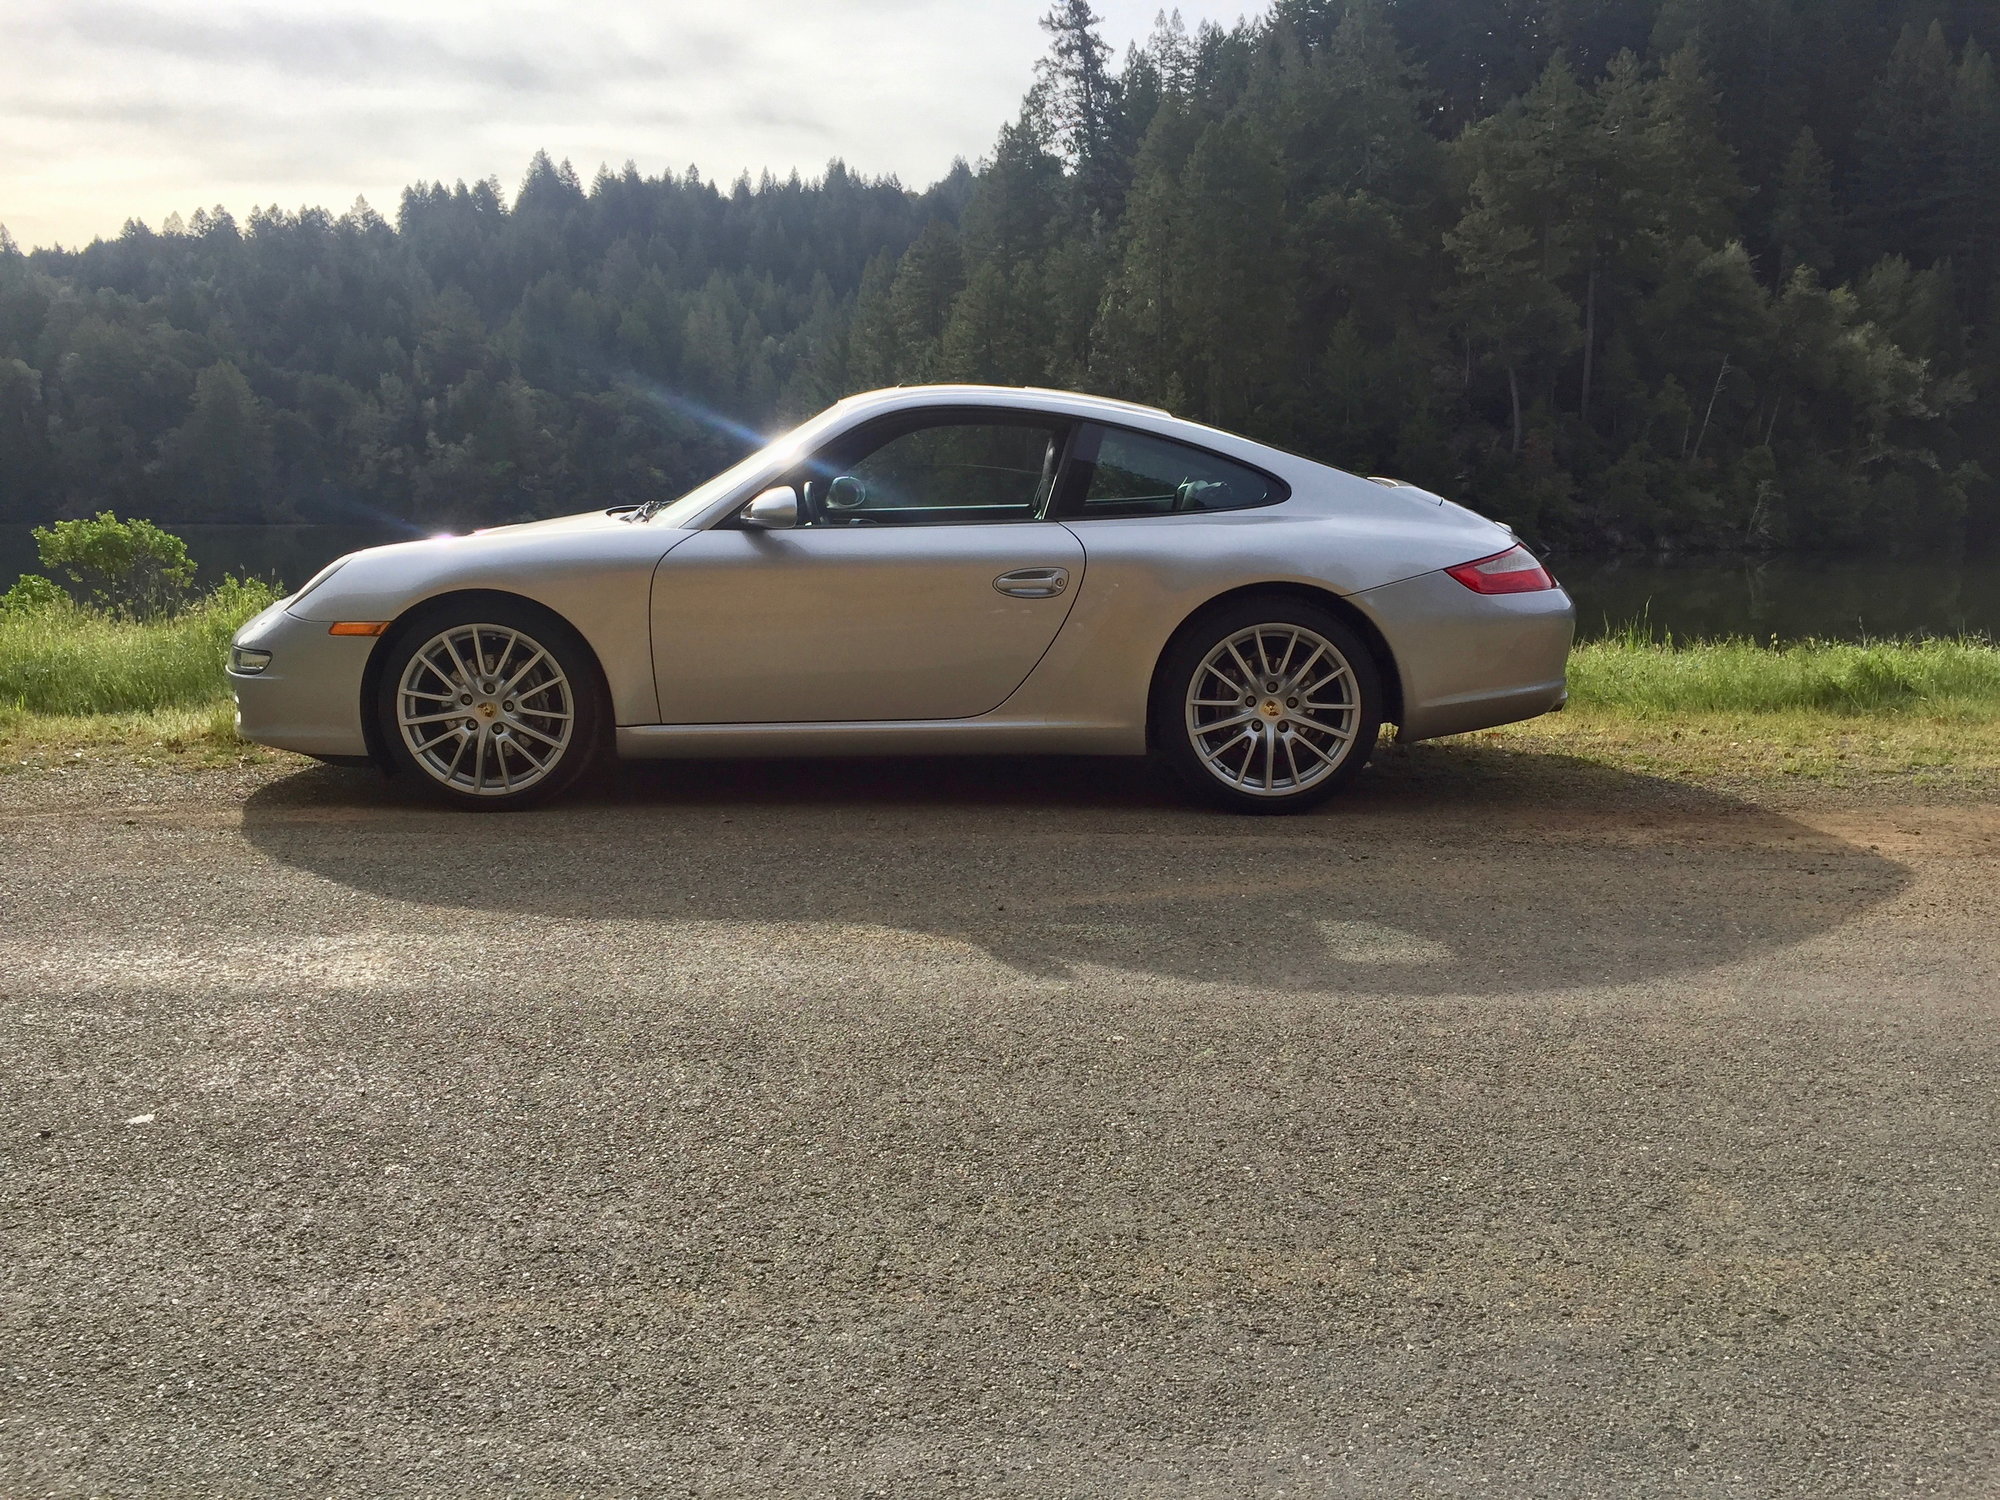
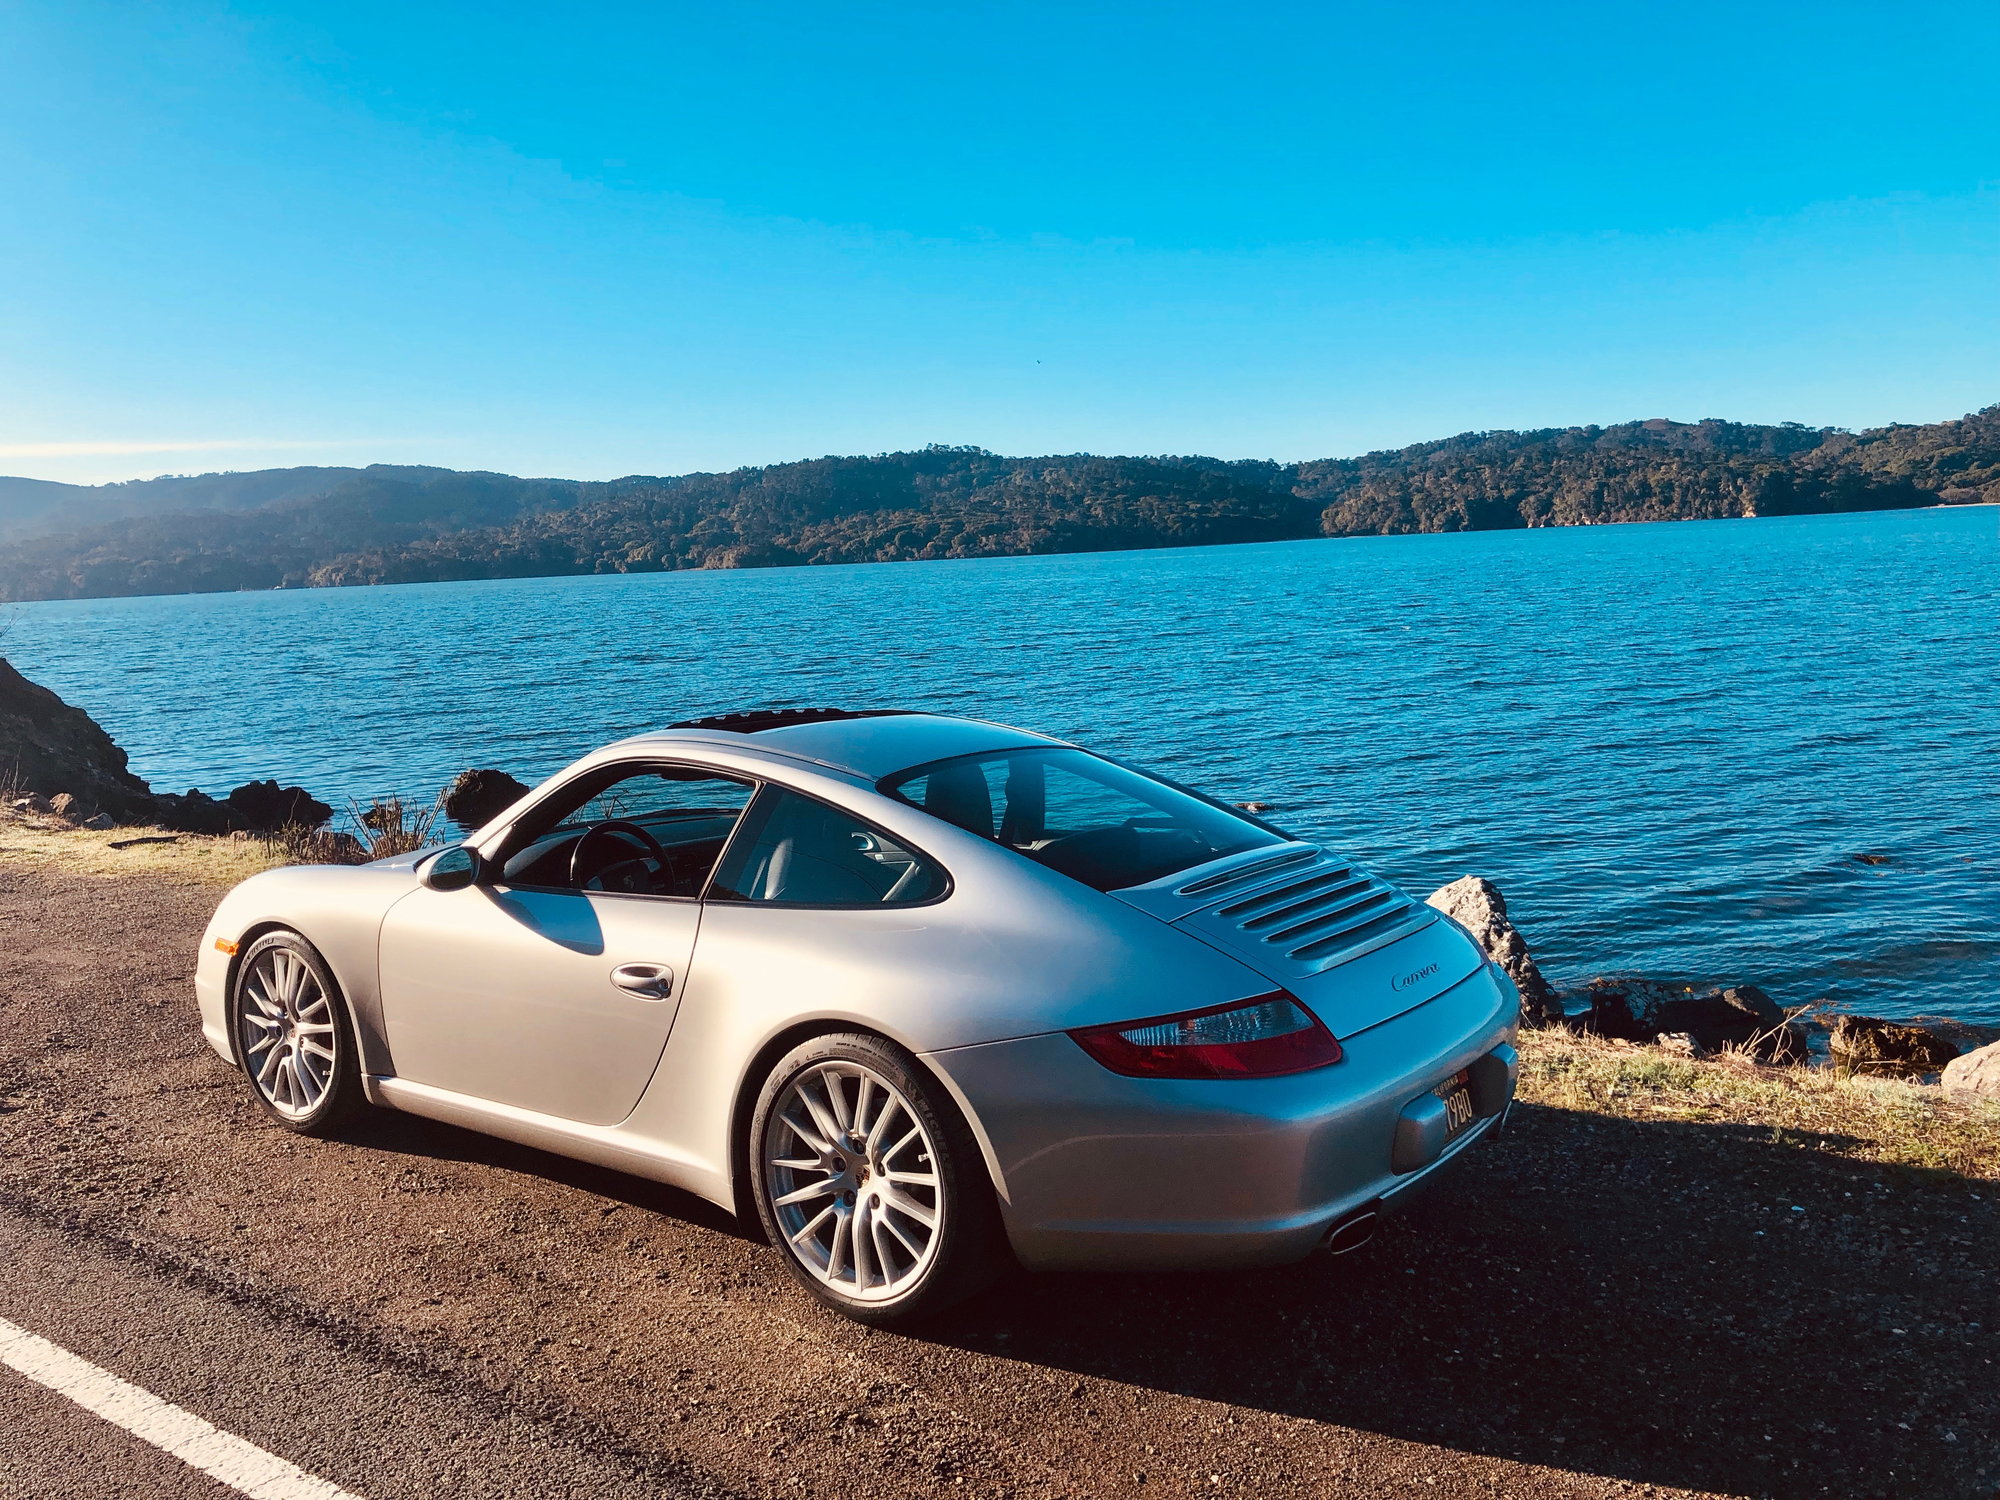
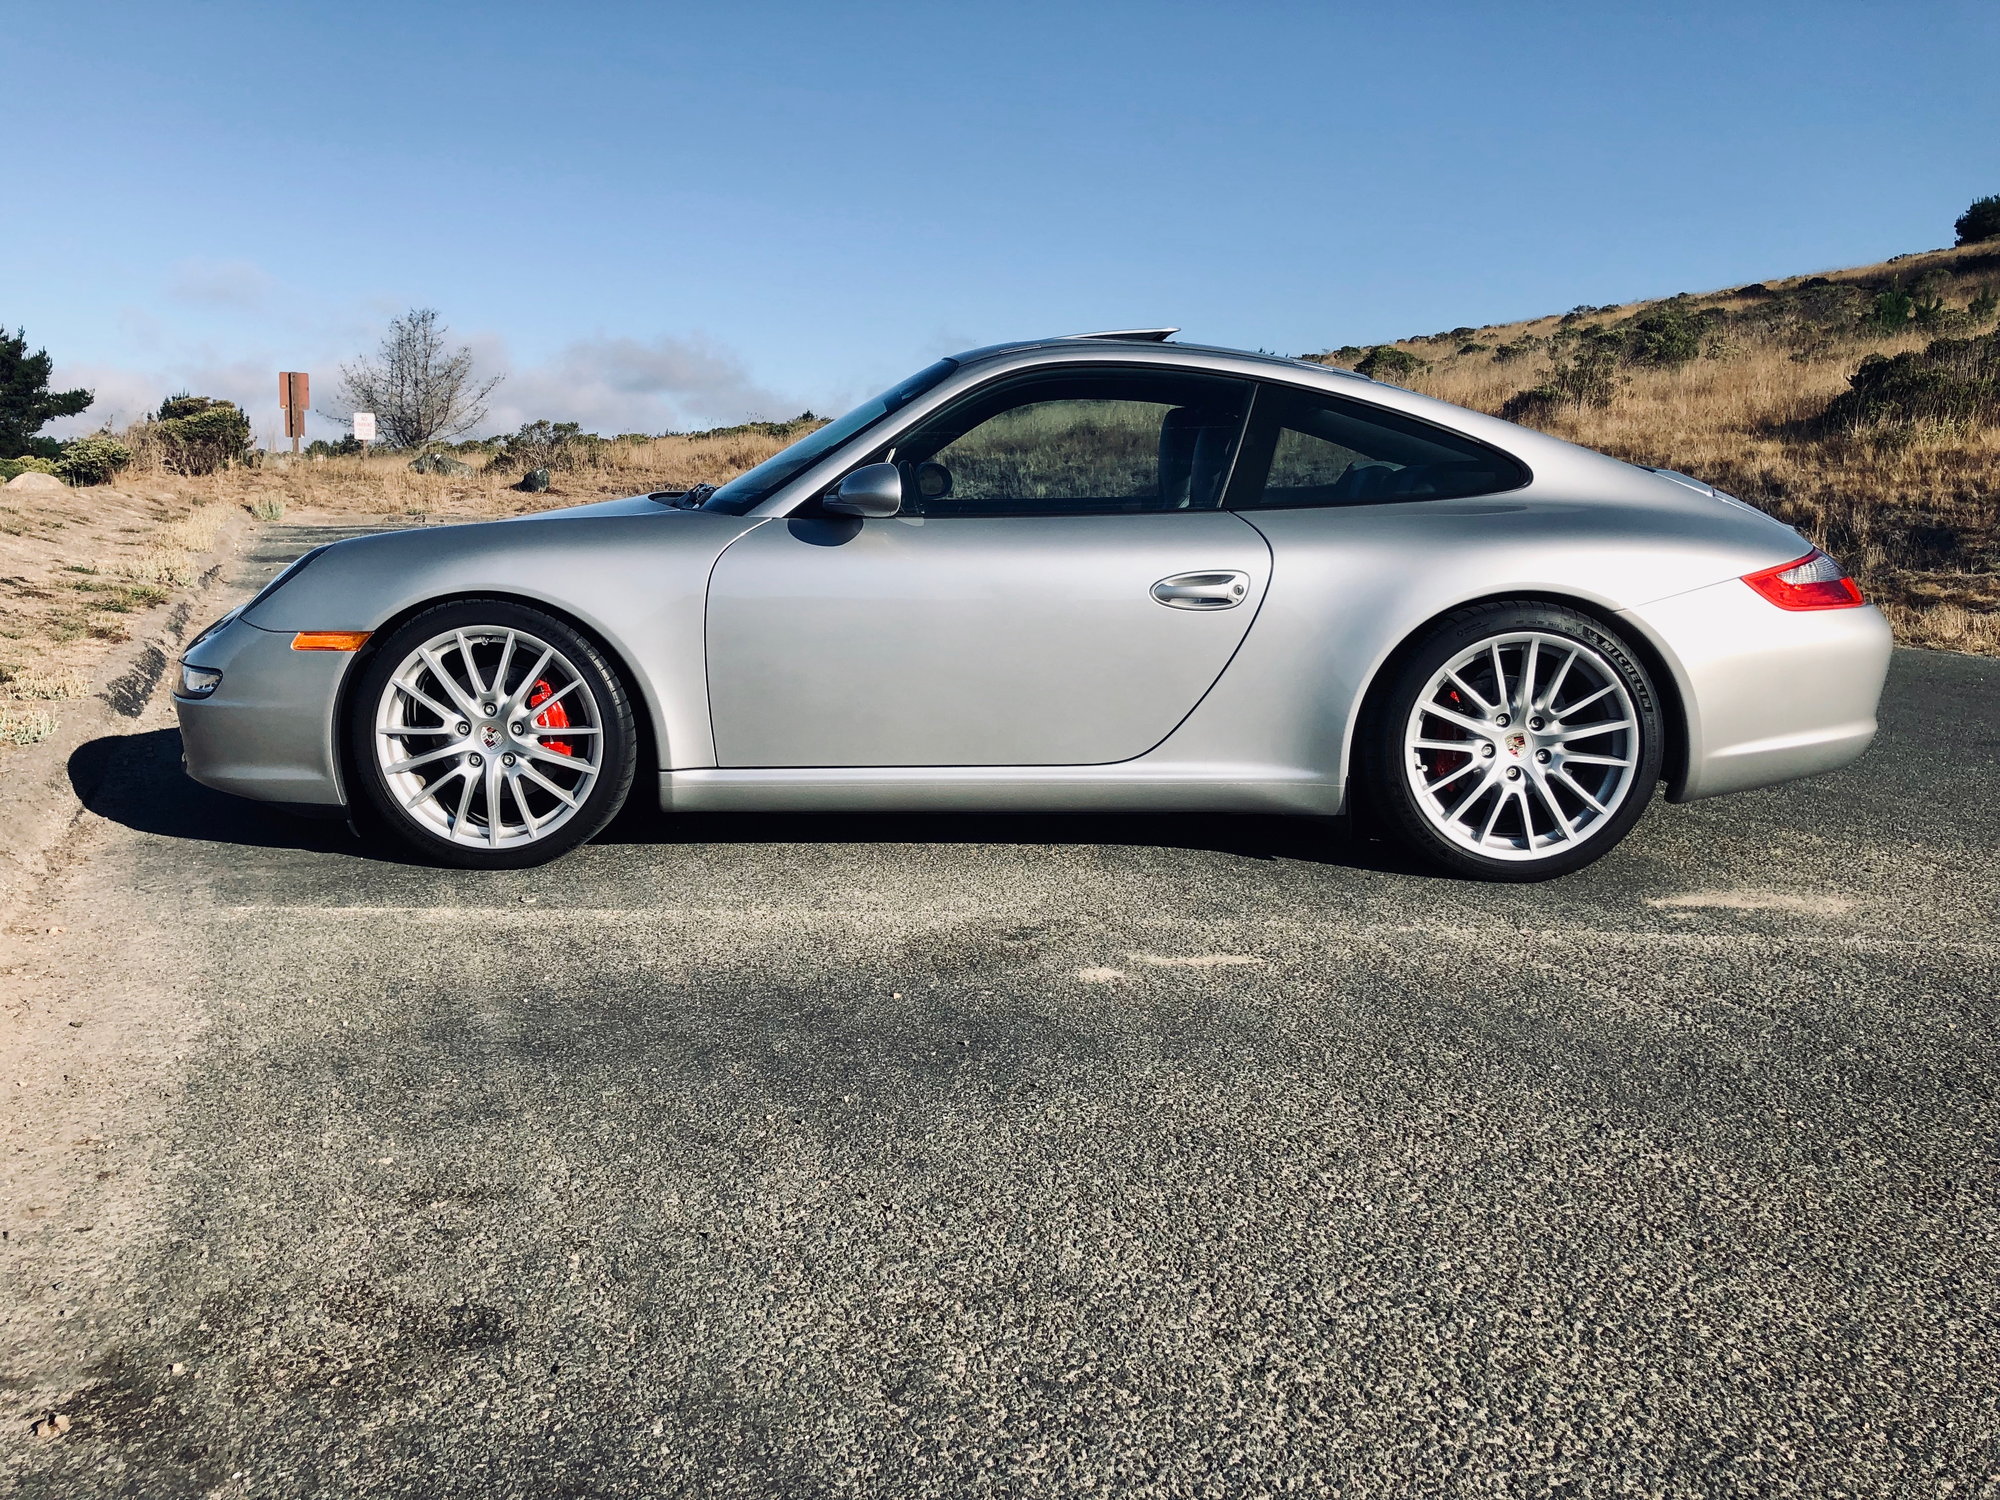
Aesthetics - I have a base Carrera so the much discussed �4x4 wheel gap� was even more pronounced in my car. I installed Eibach springs and RSS spacers (7mm front, 15mm rear) and the net result is perfect. Well worth the effort.
Front Wheel Gap: Before 4 1/4� (3 fingers), After 3 5/8� (2 fingers)
Rear Wheel Gap: Before 5� (3.5 fingers), After 4� (2.5 fingers)
Before
After
Ride Quality - It feels slightly firmer than stock springs but its not harsh. I will report back when I have more miles on them.
An Excellent Backgrounder on Spring Rates by @Tj40
�OK so this is probably more information than you want but I'm going to geek out on spring rates here..........
Base 997.1 sits on 154 front/245 Rear, (lbs/inch) rears are 159% stiffer than the front.
The 'Sports chassis' suspension from Porsche for the 997.2 sits on fixed rate springs at the front and progressive rears,
205 front/371 rear (initial) rears are 180% stiffer than the rear
205 front/542 Rear (final) rears are 265% stiffer than the rear. On the .1 the rears are slightly softer at the final rate.
If you just change out the rears the best numbers I have for Eibach springs will put you on these numbers. (Eibach are progressive).
154 front (stock)/293 Rear, (initial) so a 190% increase in stiffness at the rear
154 front (stock)/514 Rear, (final) so a 333% increase in stiffness at the rear
So you are a bit more aggressive than the sports chassis due to the softer front springs. This will give less understeer. FYI if you look at coilovers KW have a 322% increase in stiffness Front to rear, Ohlins have 200% and the PSS9 have 198% - all with overall stiffer spring rates than you have. So you are not dramatically out of line with what some people have on their cars with relation to F/R stiffness (KW V3). V3's are typically considered a more 'track' orientated setup, hence stiffer overall springs with stiffer rears to dial out understeer.
What I can't tell you is how much travel you have at the initial rate vs final on the eibachs - depends on how much is taken up with static sag and how much initial rate they 'wound' into the spring
FYI the best data I have is that Eibach rates are similar to the sports suspension from the factory (- but this is unverified data from the web) but with progressive rates front and rear. Most people with Eibachs report better handling of bumps - which might imply that they have a little of the softer initial spring rate with improved handling overall.�
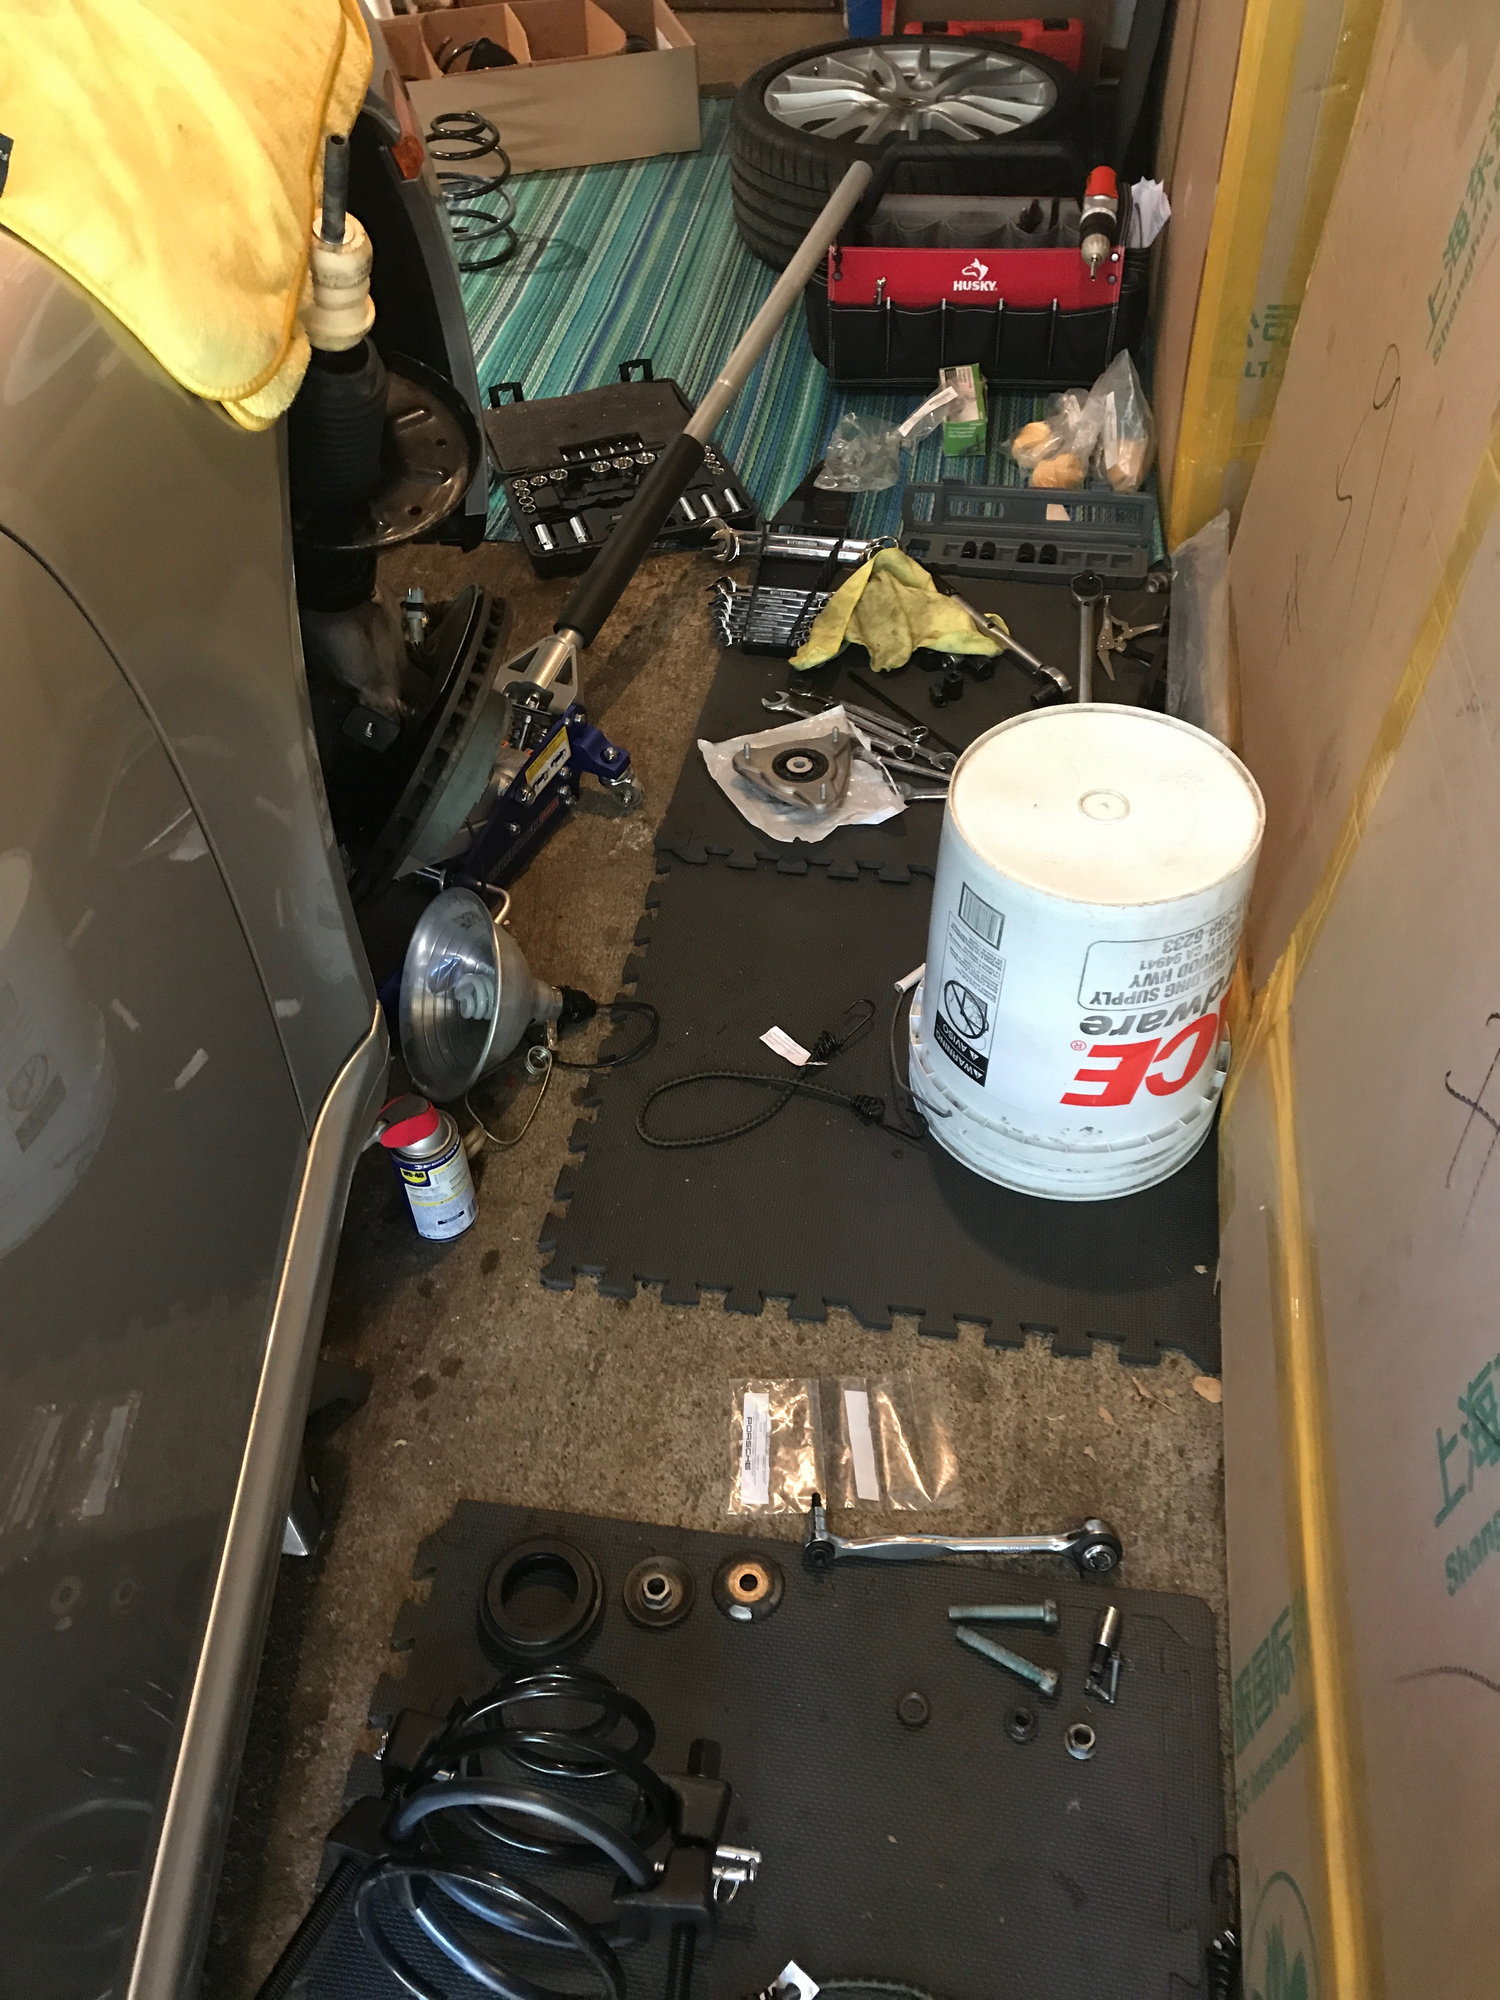
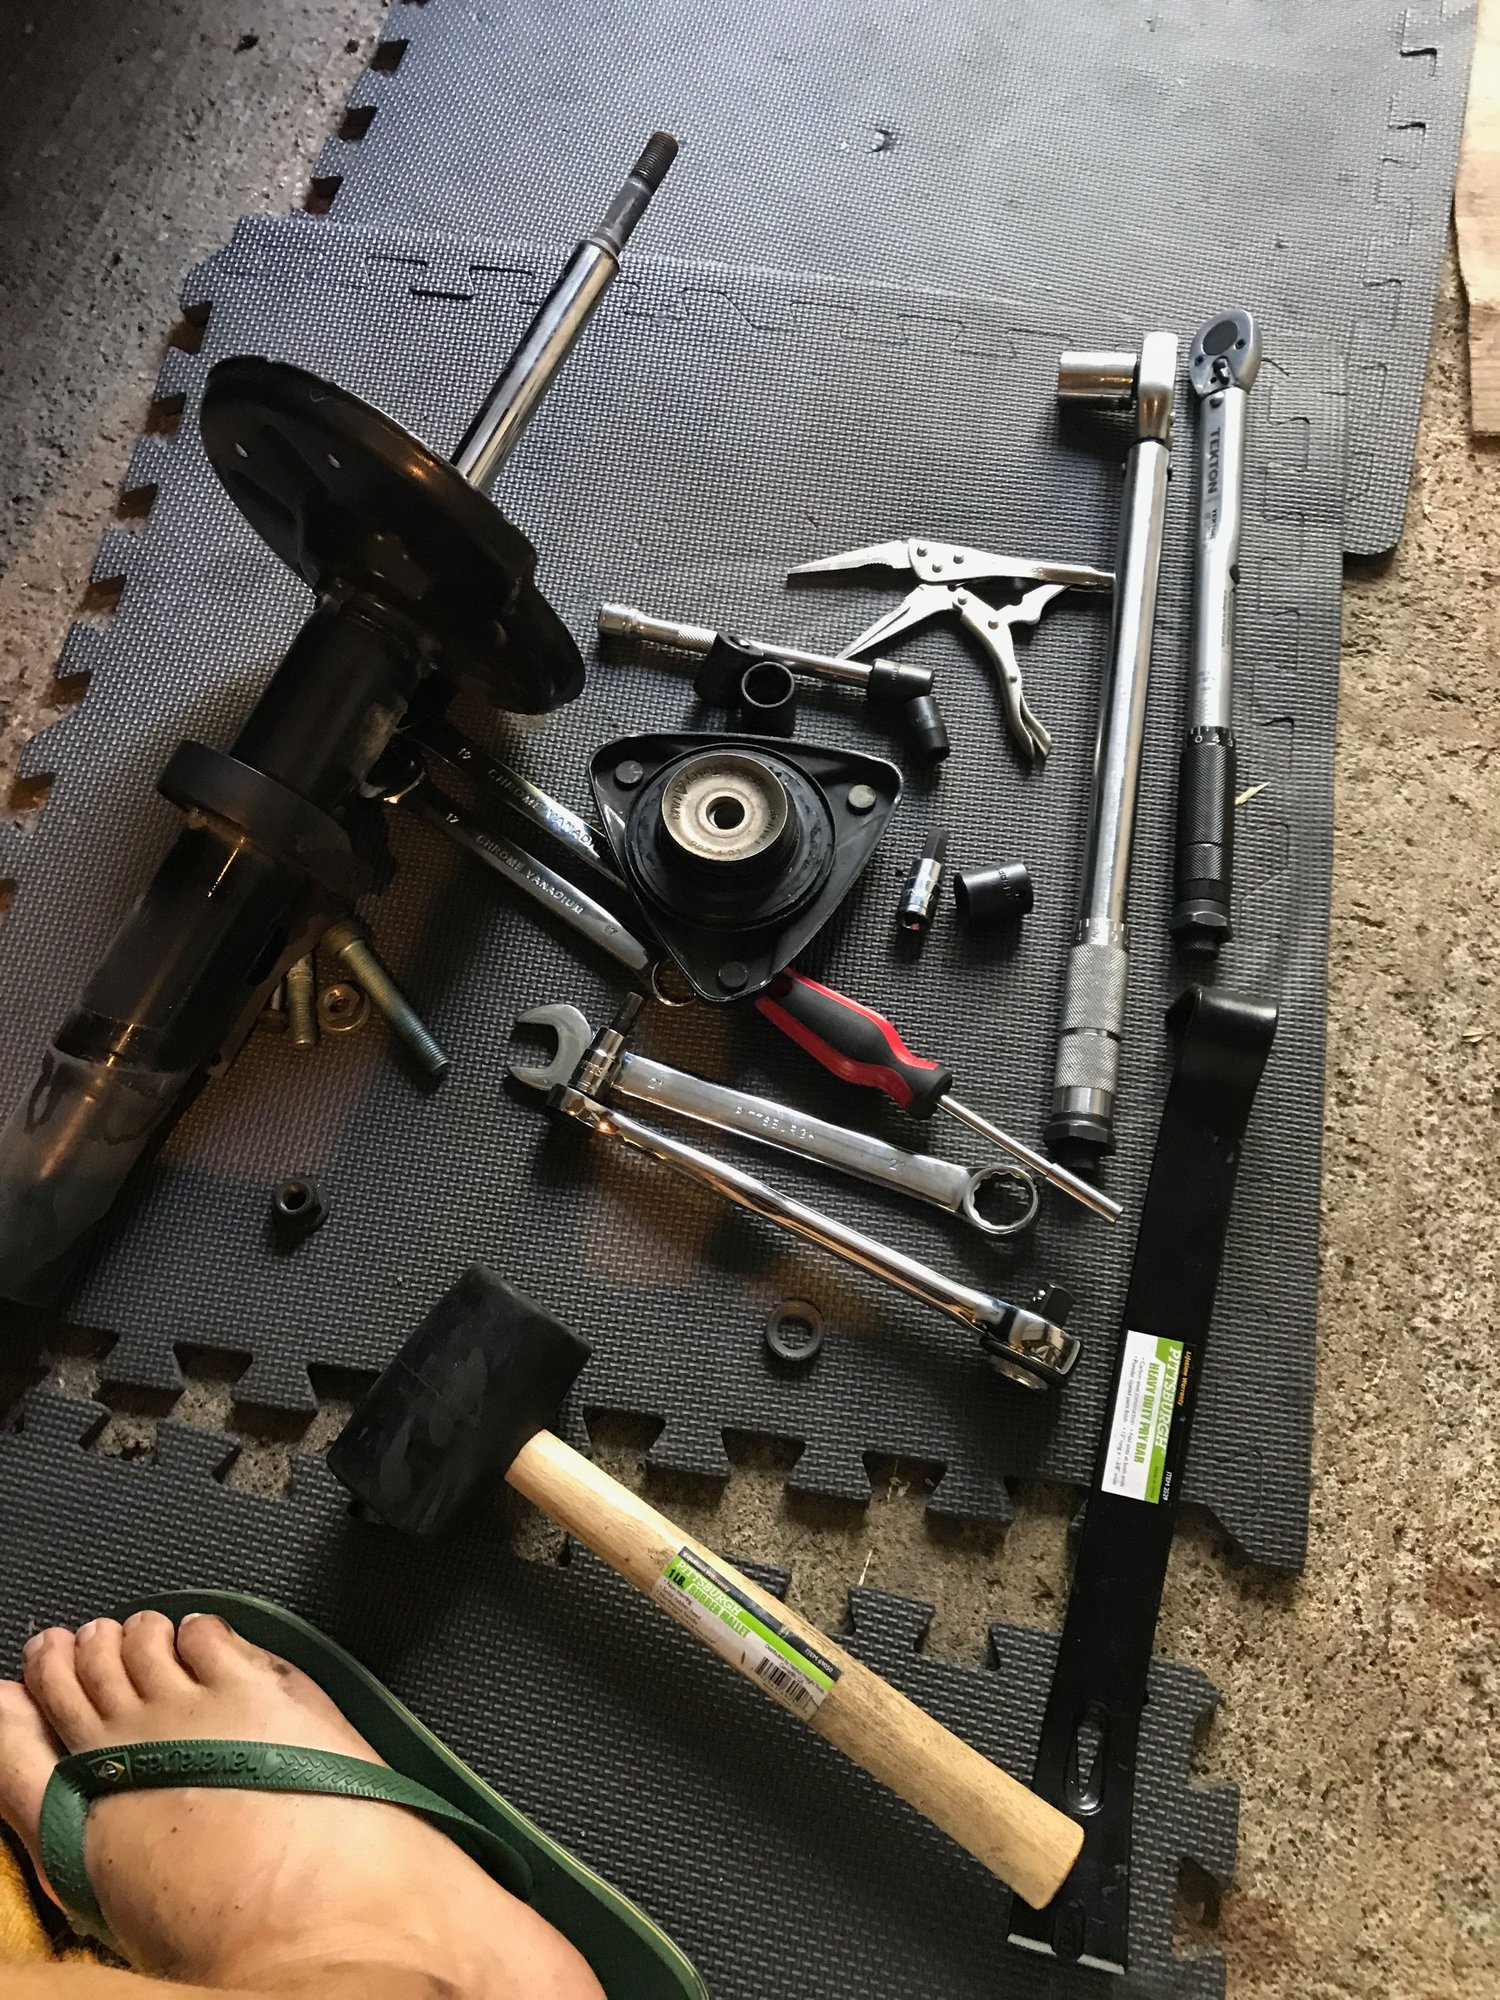
Tools Required
16-21mm box wrenches (don�t miss 18mm)
10-21mm standard socket set (don�t miss 18mm)
6� socket extension
T25 torx bit for removing Bose rear deck
T30 and T40 for countering the f/r lower control arm ball joint and f/r drop links
15-19mm pass-thru socket wrenches for the f/r lower control arm ball joint and f/r drop links
10mm hex bit for removing front brake caliper
6mm hex bit to remove the rear seat receivers
19, 21mm deep sockets for the f/r strut nuts and 15mm for the long studs in the rear strut mounting plate
3/8� torque wrench (17-81 lbs)
Rubber mallet and crowbar for when you get frustrated
3/8� breaker bar for loosening the f/r strut nut
Ball joint separator for the f/r lower control arms. Do NOT use a pickle fork.
Spring compressors. These are a PITA. Don�t use the generic $30 compressors you find at Harbor Freight. https://www.harborfreight.com/automo...set-63262.html They are too big and clumsy and will add at least 2hrs of pain and suffering trying to manipulate them. Further the 21mm nut is at the top of the spring so you can fit a socket wrench on it. The best I can find (after the fact) is a compressor like this
. Its got smaller jaws so you can get a hold of more springs and the adjustment nut is at the bottom.
Do NOT USE ZIP TIES in place of spring compressor - ever. The Rennlist How-To post suggesting 75lb zip ties will work is wrong and highly unsafe. I used 175lb zip ties to help manipulate the fronts springs - plus spring compressors - and 2 of the 5 zip tie locks broke as soon as I started loosening the spring compressor.
Bungie cord or zip ties to hang your brake calipers
Towels to put on the fenders and put around strut studs so you don�t scratch the paint when taking the strut out
Floor jack to help manipulate the strut and wheel carrier up and down
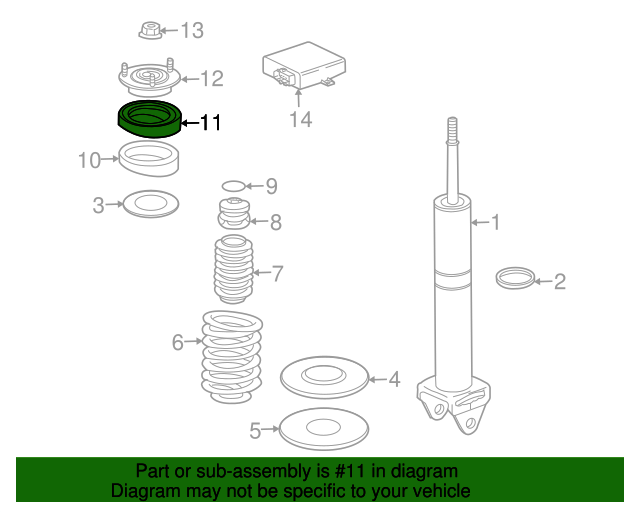
You might want to use the opportunity to install new f/r yellow bump stops if yours have dry rotted. They will cost you $100 from Suncoast or your local dealer.
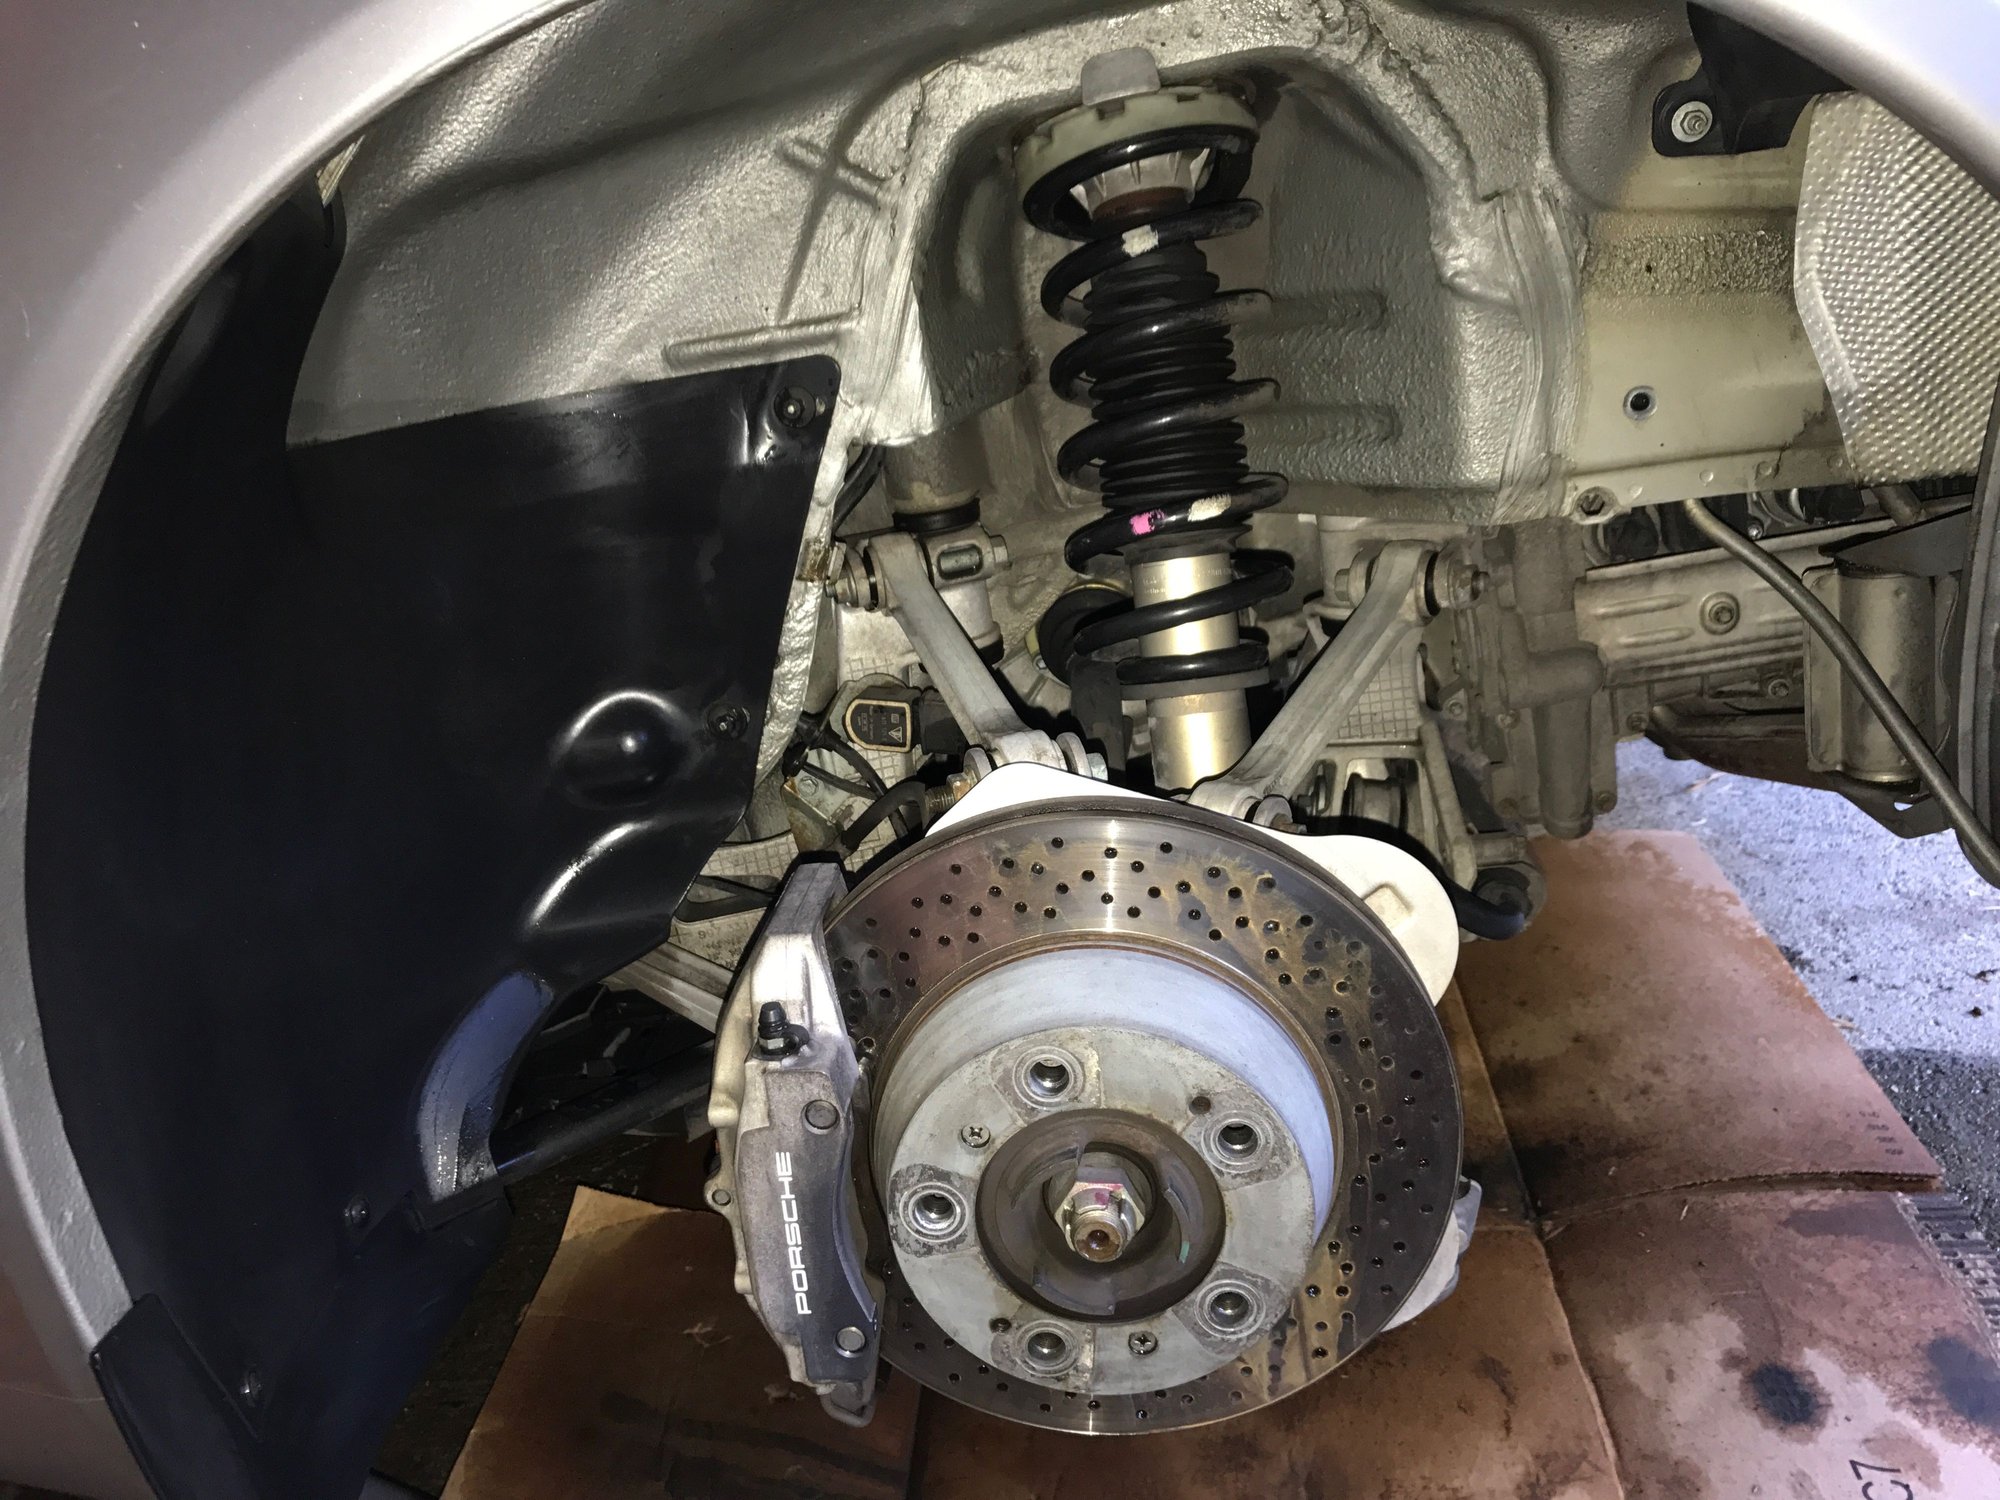
Front Strut Removal
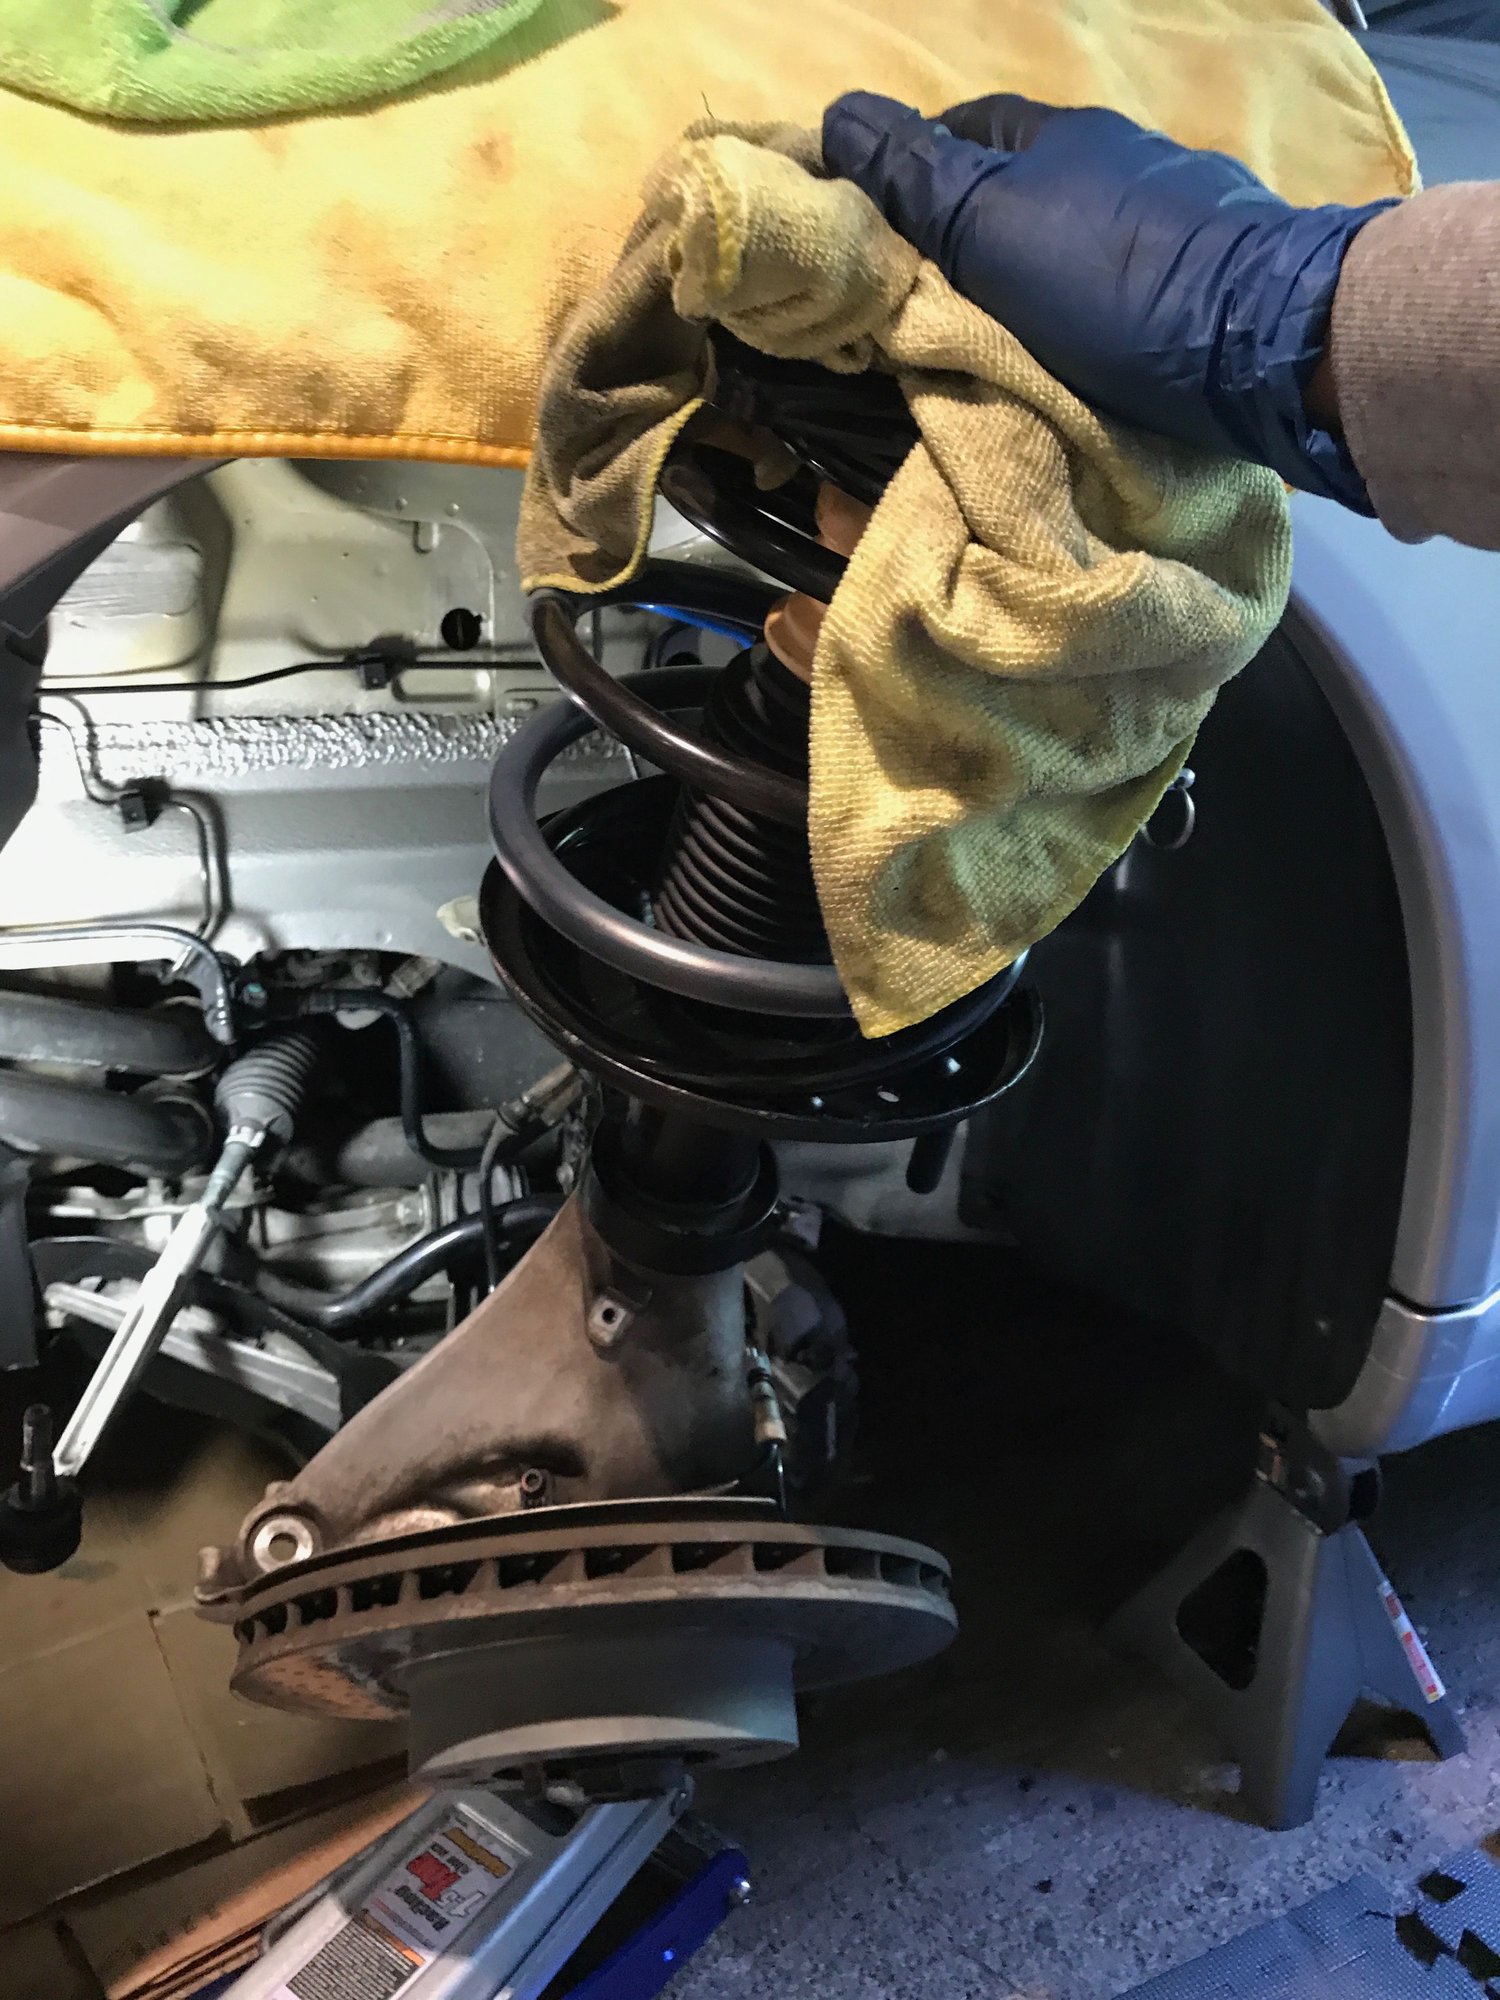
The front struts are harder to remove than the rears because you have less clearance to get the strut out. It requires far more fiddling trying to get the spring compressors in the right position. You will need to sacrifice your hands and forearms to get enough leverage on the top of the strut mount to get it out of the wheel well. Take your time here and don�t force it. If you don�t think you can get clearance, backup and reevaluate. There is a very real risk of scratching the fender and wheel well with the strut studs if you get it jammed so make sure to wrap a towel around the top of the strut studs.
Step 1: Jack the car, remove the wheels. Optional: If you want to ease yourself into the project I suggest cleaning your wheel wells, brake calipers and wheels the night before. It will give you a lay of the land to document all the bolts you need to remove and makes the project far less dirty.
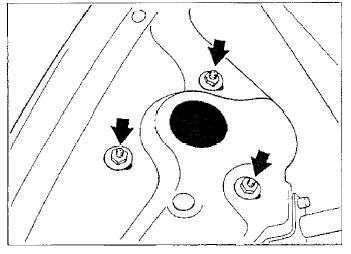
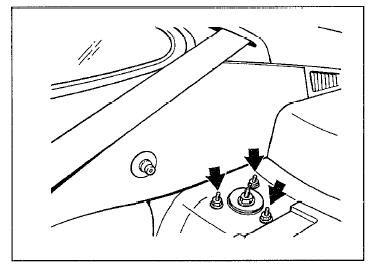
Step 2: Open the trunk and remove the plastic trim shroud around the battery and fenders to expose the left and right strut mounts. Place a heavy towel over the fender to protect it.
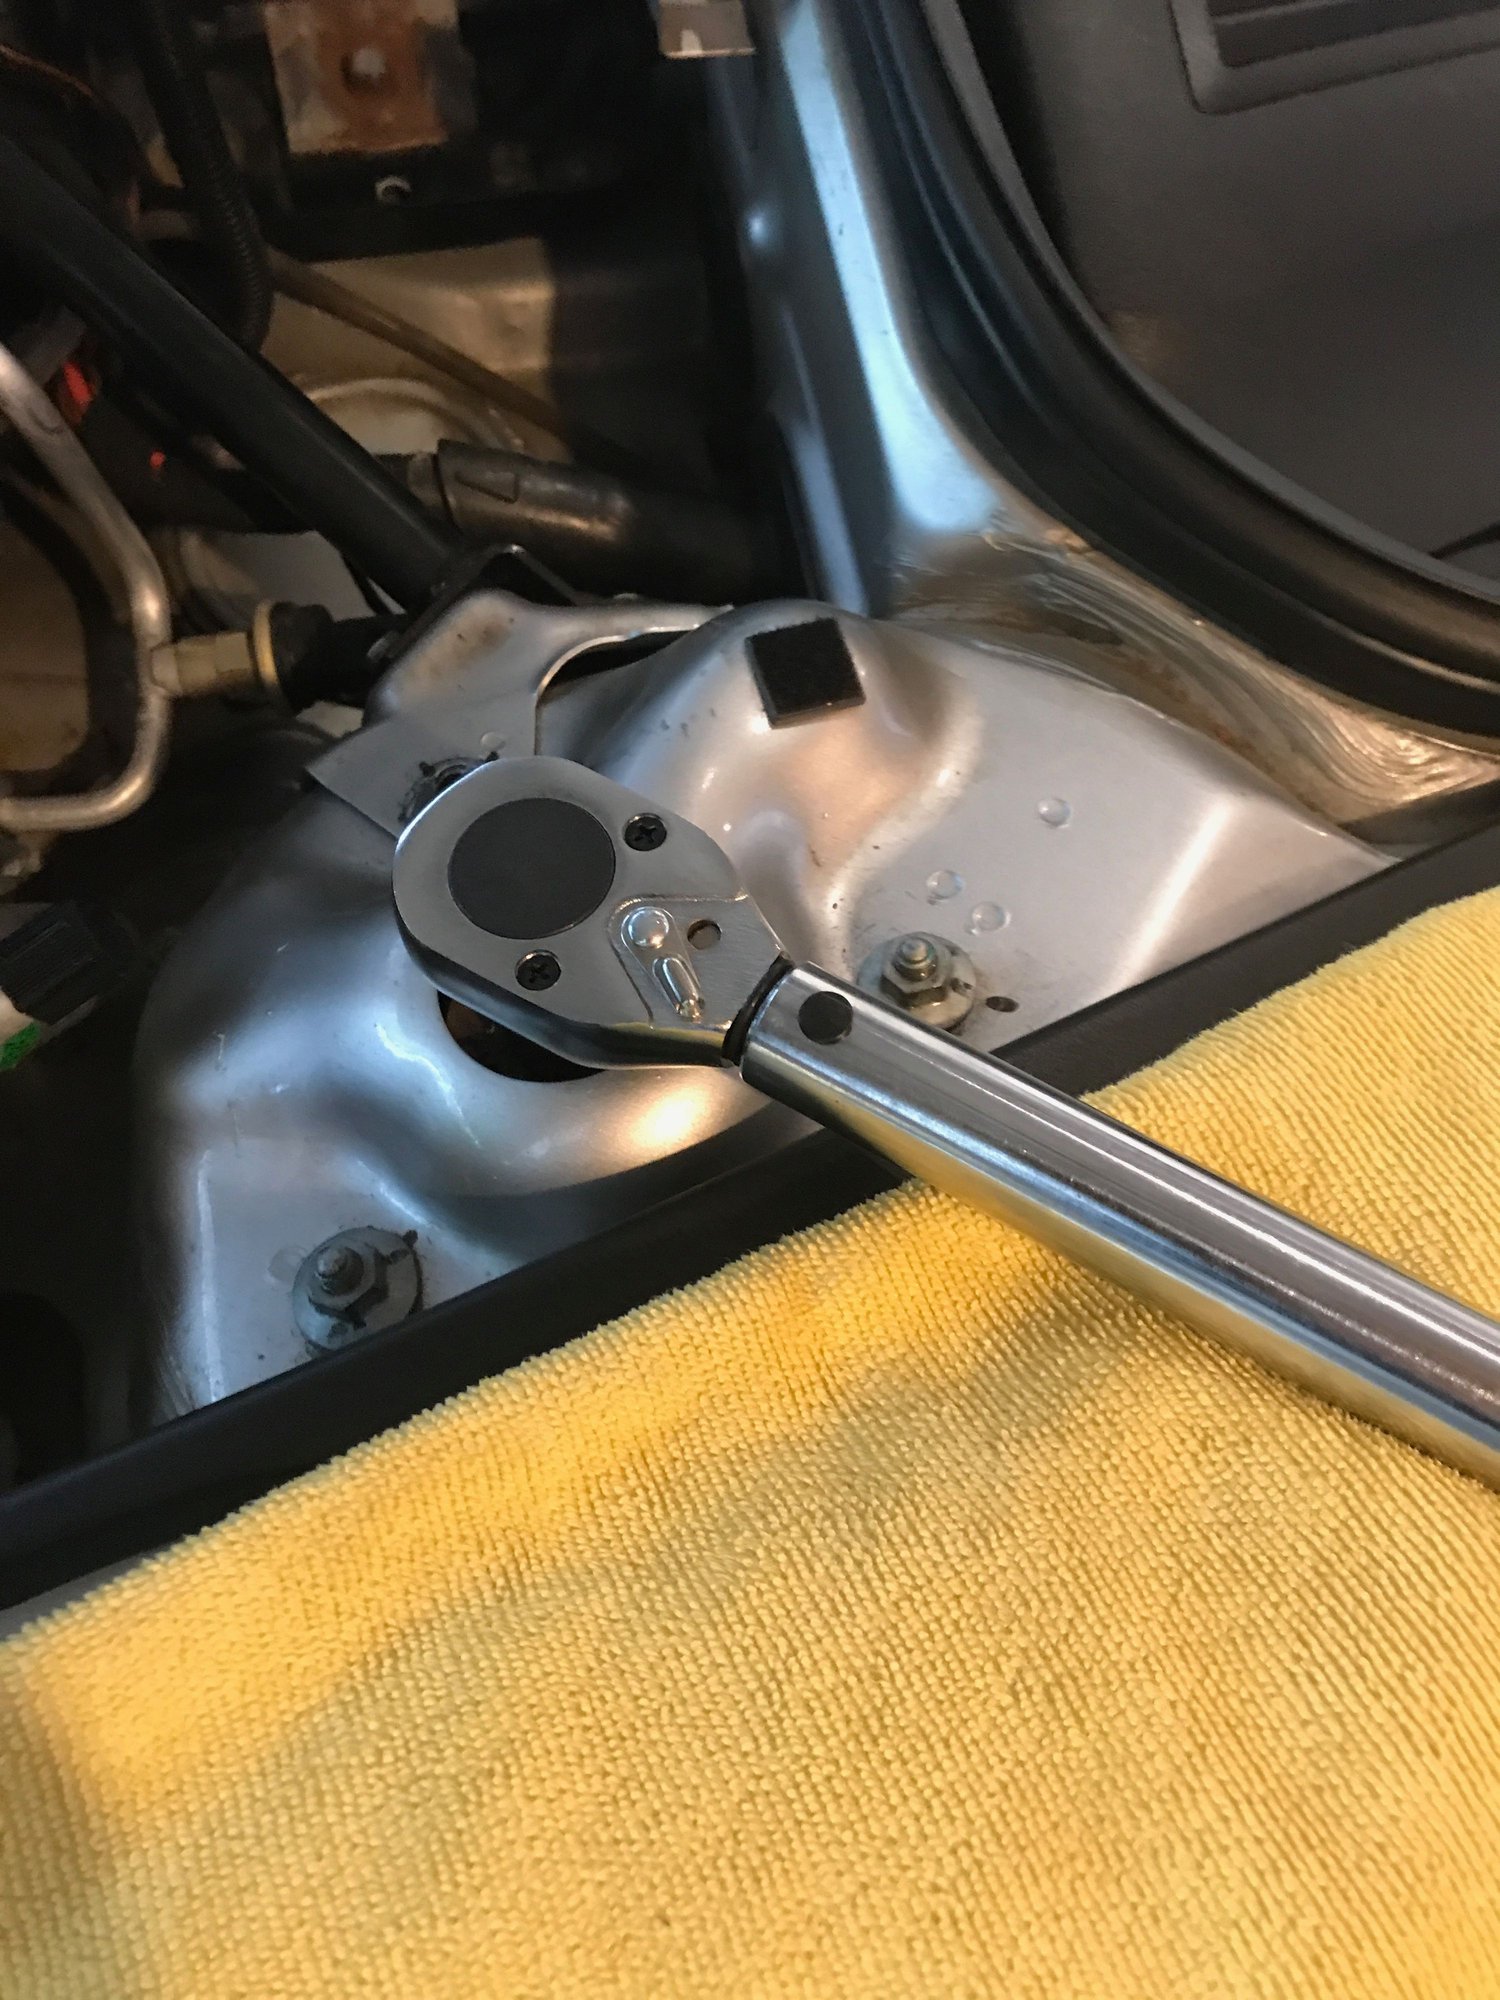
Step 3: Use a felt pen to outline the location of the 3 strut mount bolts and place a mark on each bolt to note the angle so you can torque it back correctly. You will still need to get the car aligned but this should get it close. The strut studs have about a half inch of play and impact wheel camber. Also, make sure the pen doesn�t smear off with sweaty hands.
Step 4: Use a breaker bar and 21mm deep socket to break the center strut nut free a half turn or so. This is particularly important for PASM cars but not critical for non-PASM cars.
Step 5: Break the 3x 15mm strut mount bolts loose but leave them threaded. BE VERY CAREFUL loosening and torquing these nuts. They are very soft and can be sheered easily. I had 2 strut studs sheer in the process of doing this project which requires replacing the top strut mount (an $85 part).
Step 6: Get a comfortable seat in the wheel well as you will be here for a while.
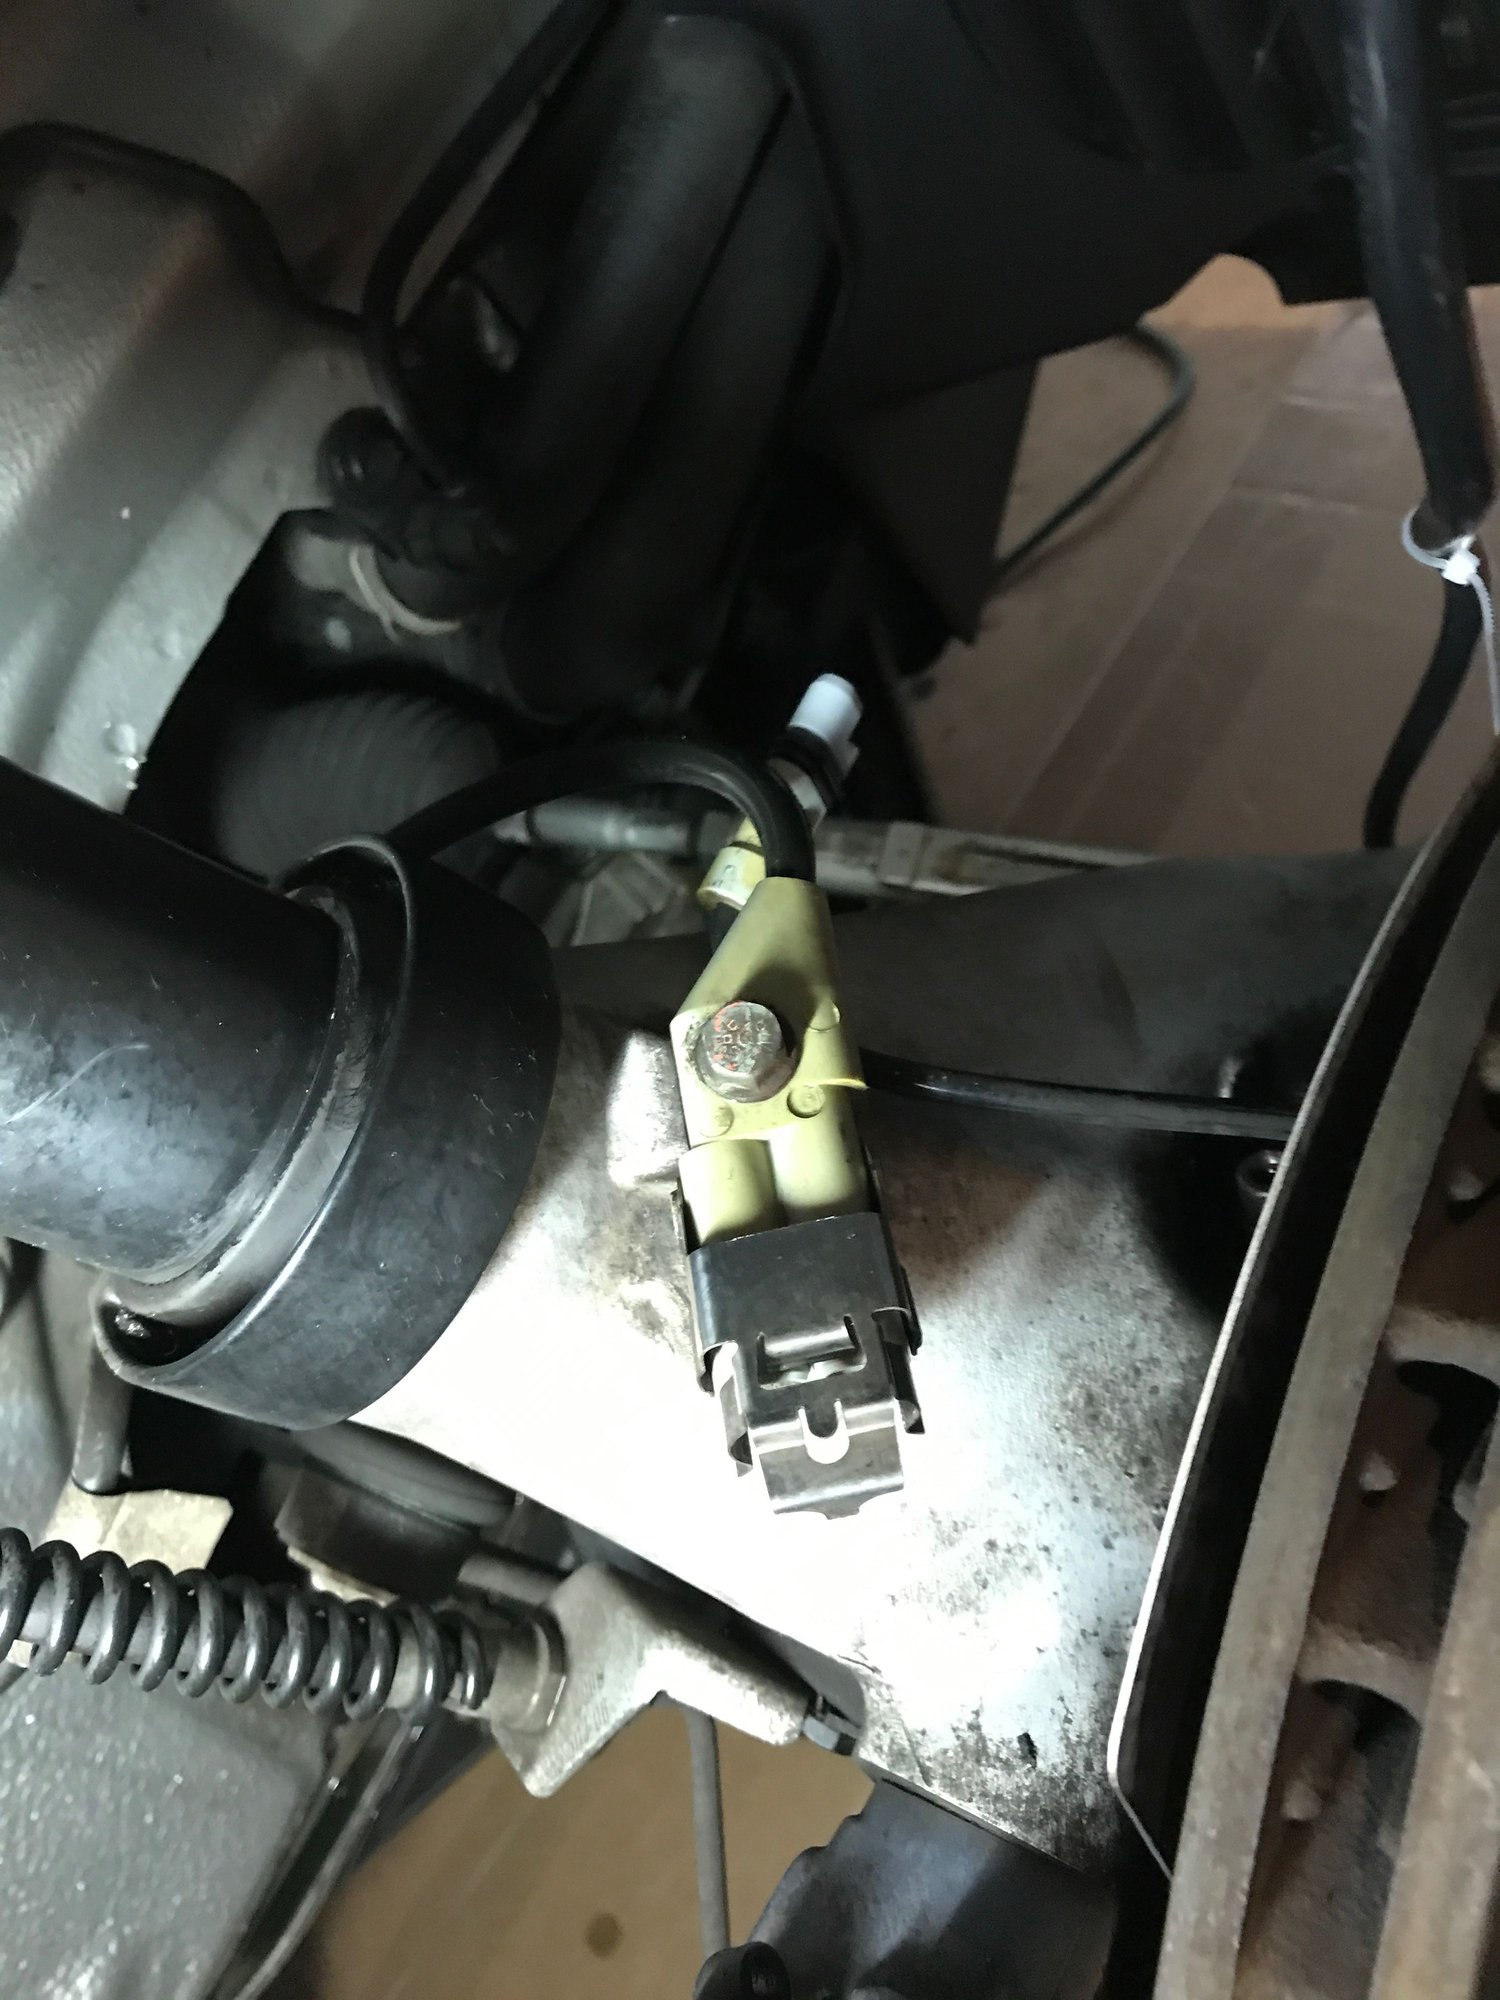
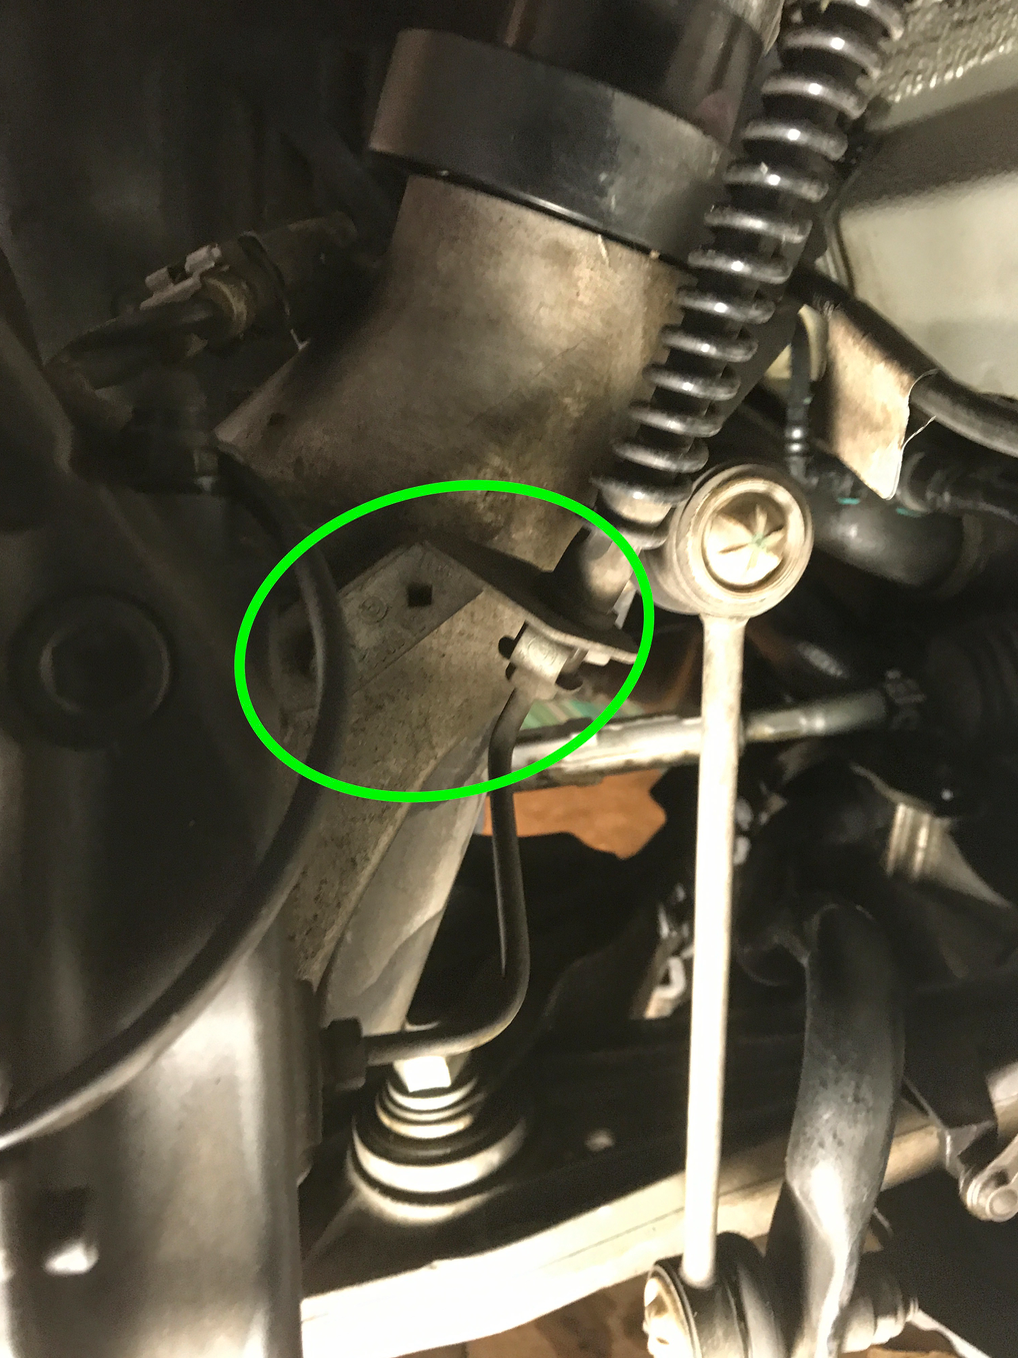
Step 7: Unplug the brake sensor and ABS sensor on the top of the wheel carrier and then remove the clip with a 10mm socket. Hang the cables out of the way. Also remove the little rubber grummet holding the brake sensors to the back of the strut spindle.
Note: The ABS and brake sensors are different sizes to ensure you plug them in correctly but you still can get confused so snap a photo before you remove.
Step 8: Remove the 10mm bolt on the brake line hanger (left side of the strut spindle ) so the brake line has some play.
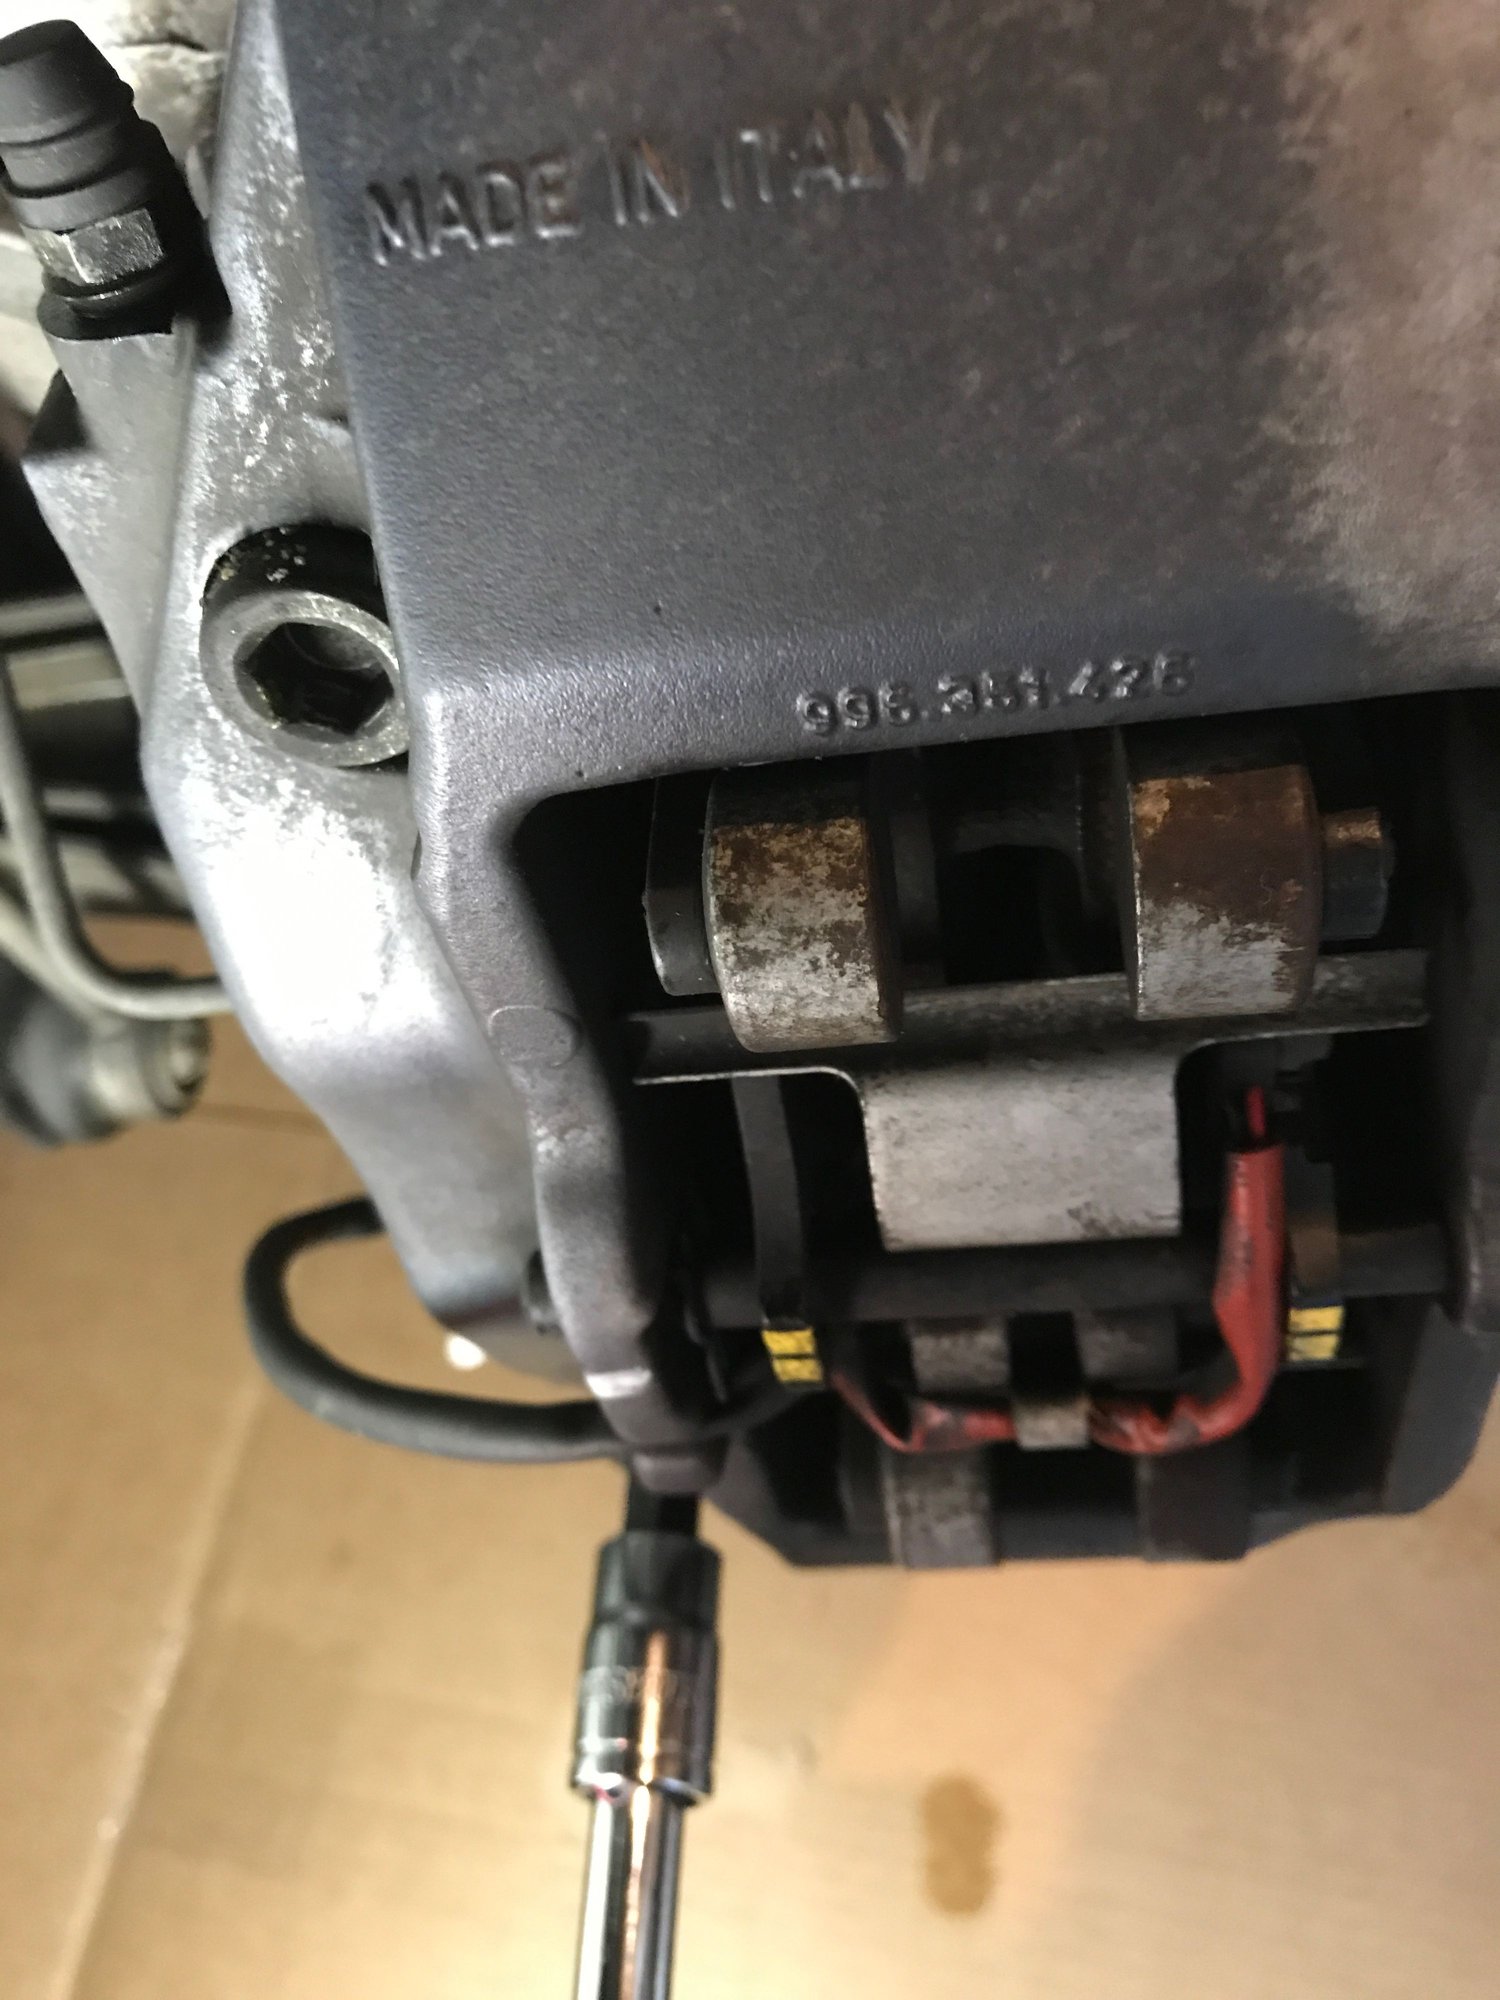
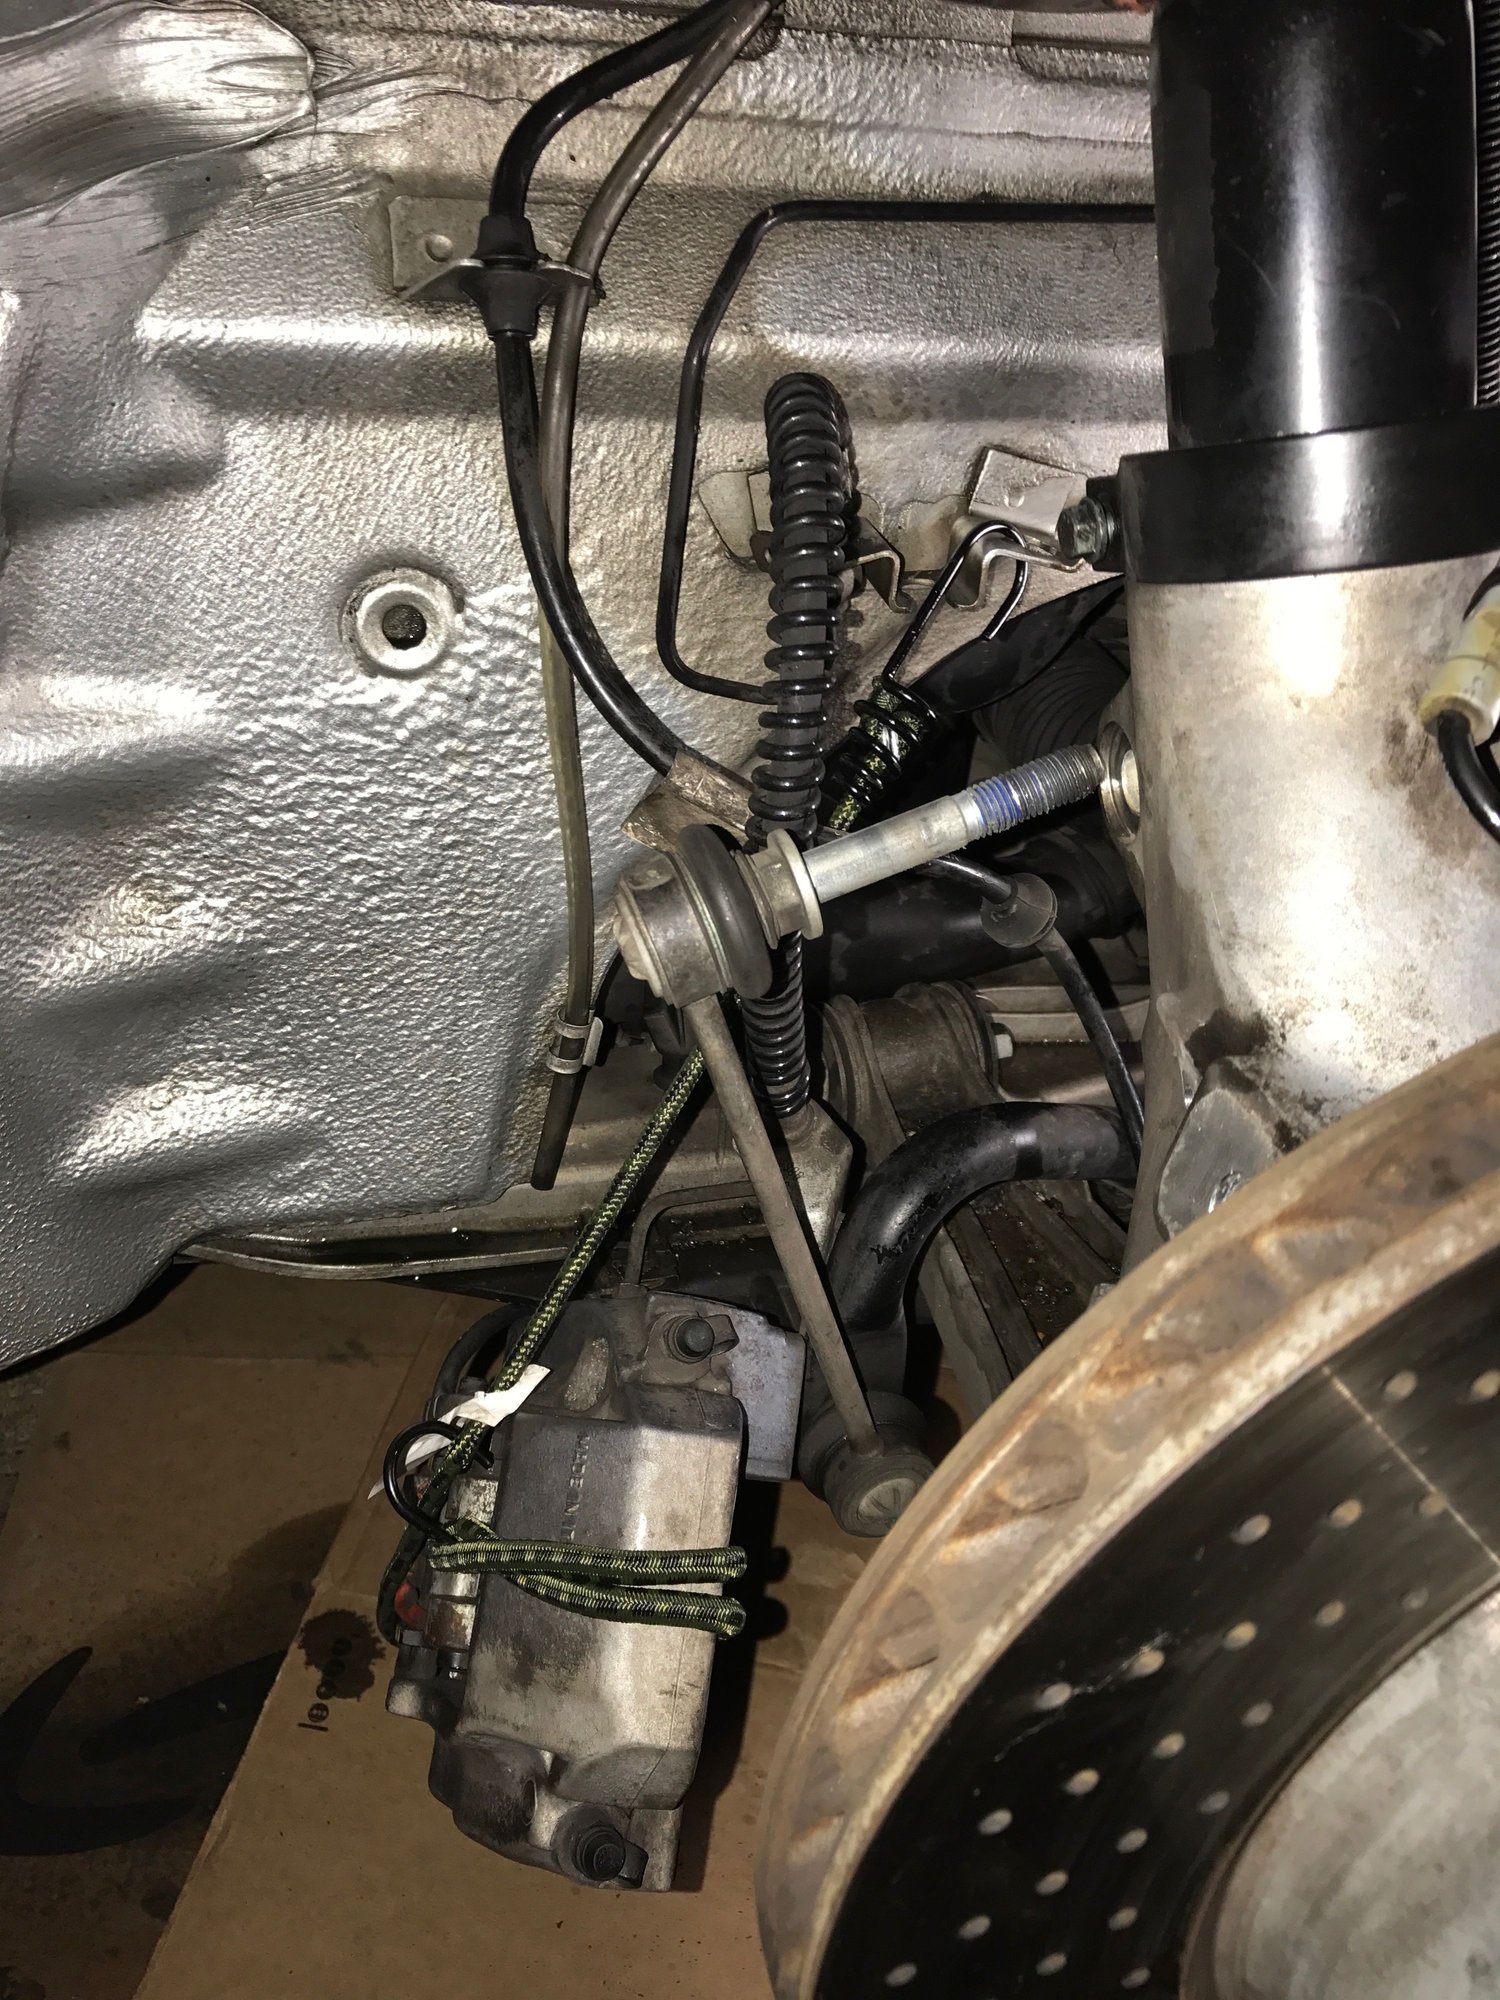
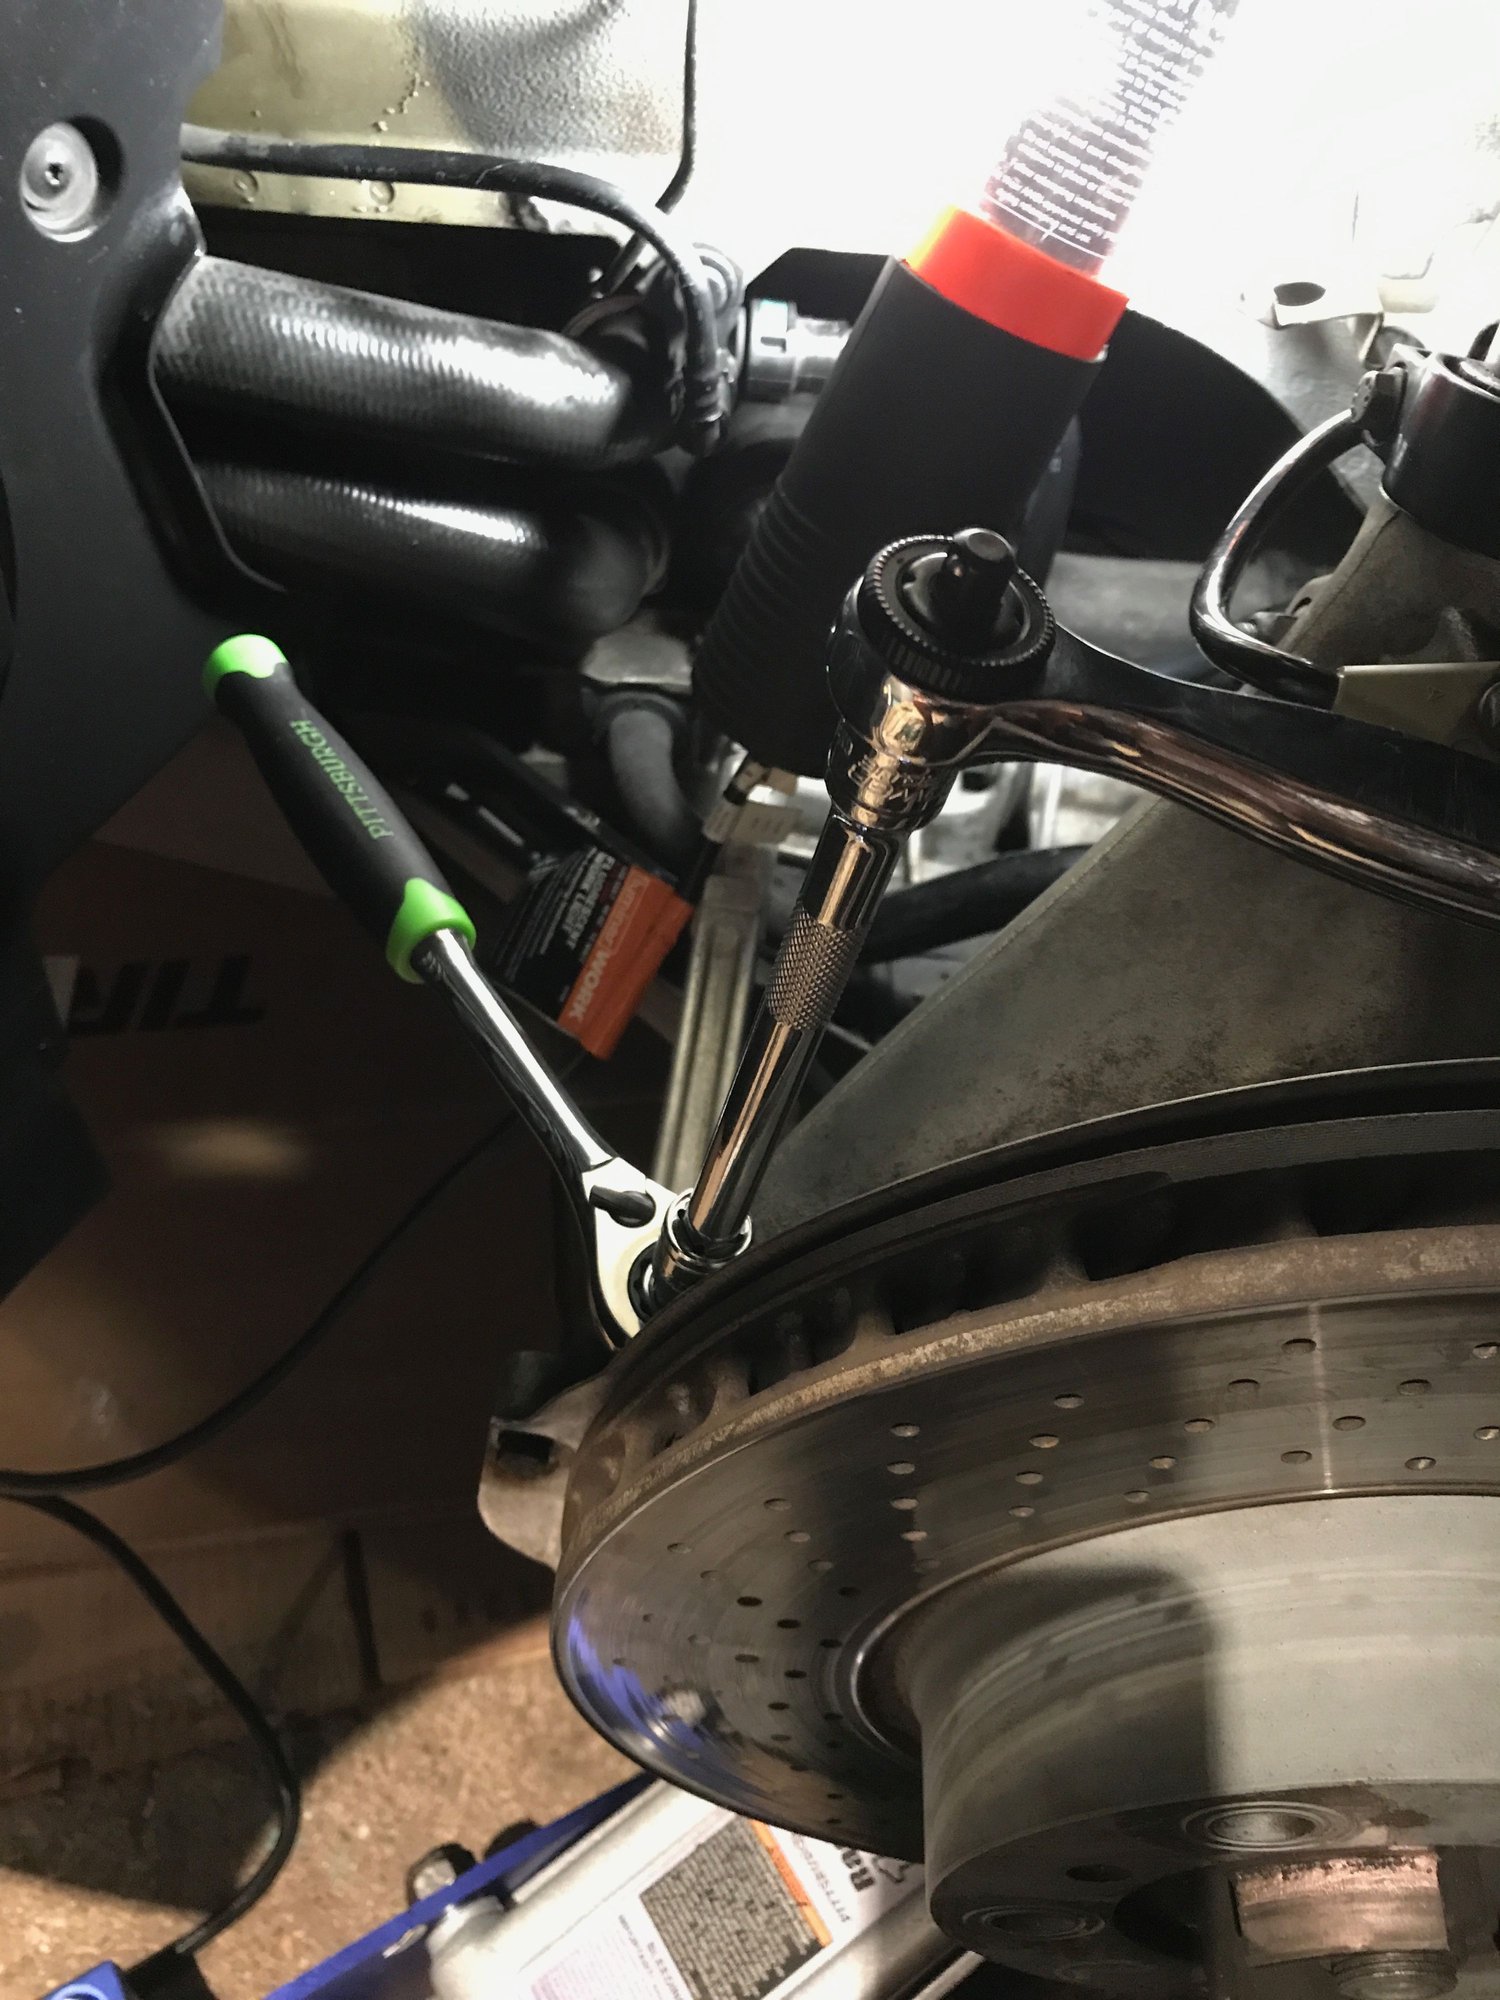
Step 9: Use a 10mm hex bit to remove the 2 bolts holding the brake caliper. Be careful here not to stress the brake line and carefully hang the brake caliper by a zip tie or bungie inside the wheel well. There are a couple brackets and holes in the wheel well you can use for this. Do NOT let the caliper hang by the brake line.
Step 10: Congratulate yourself for now knowing the basic steps to replace your 997 front brake pads and calipers - a far easier project than what you are about to embark on.
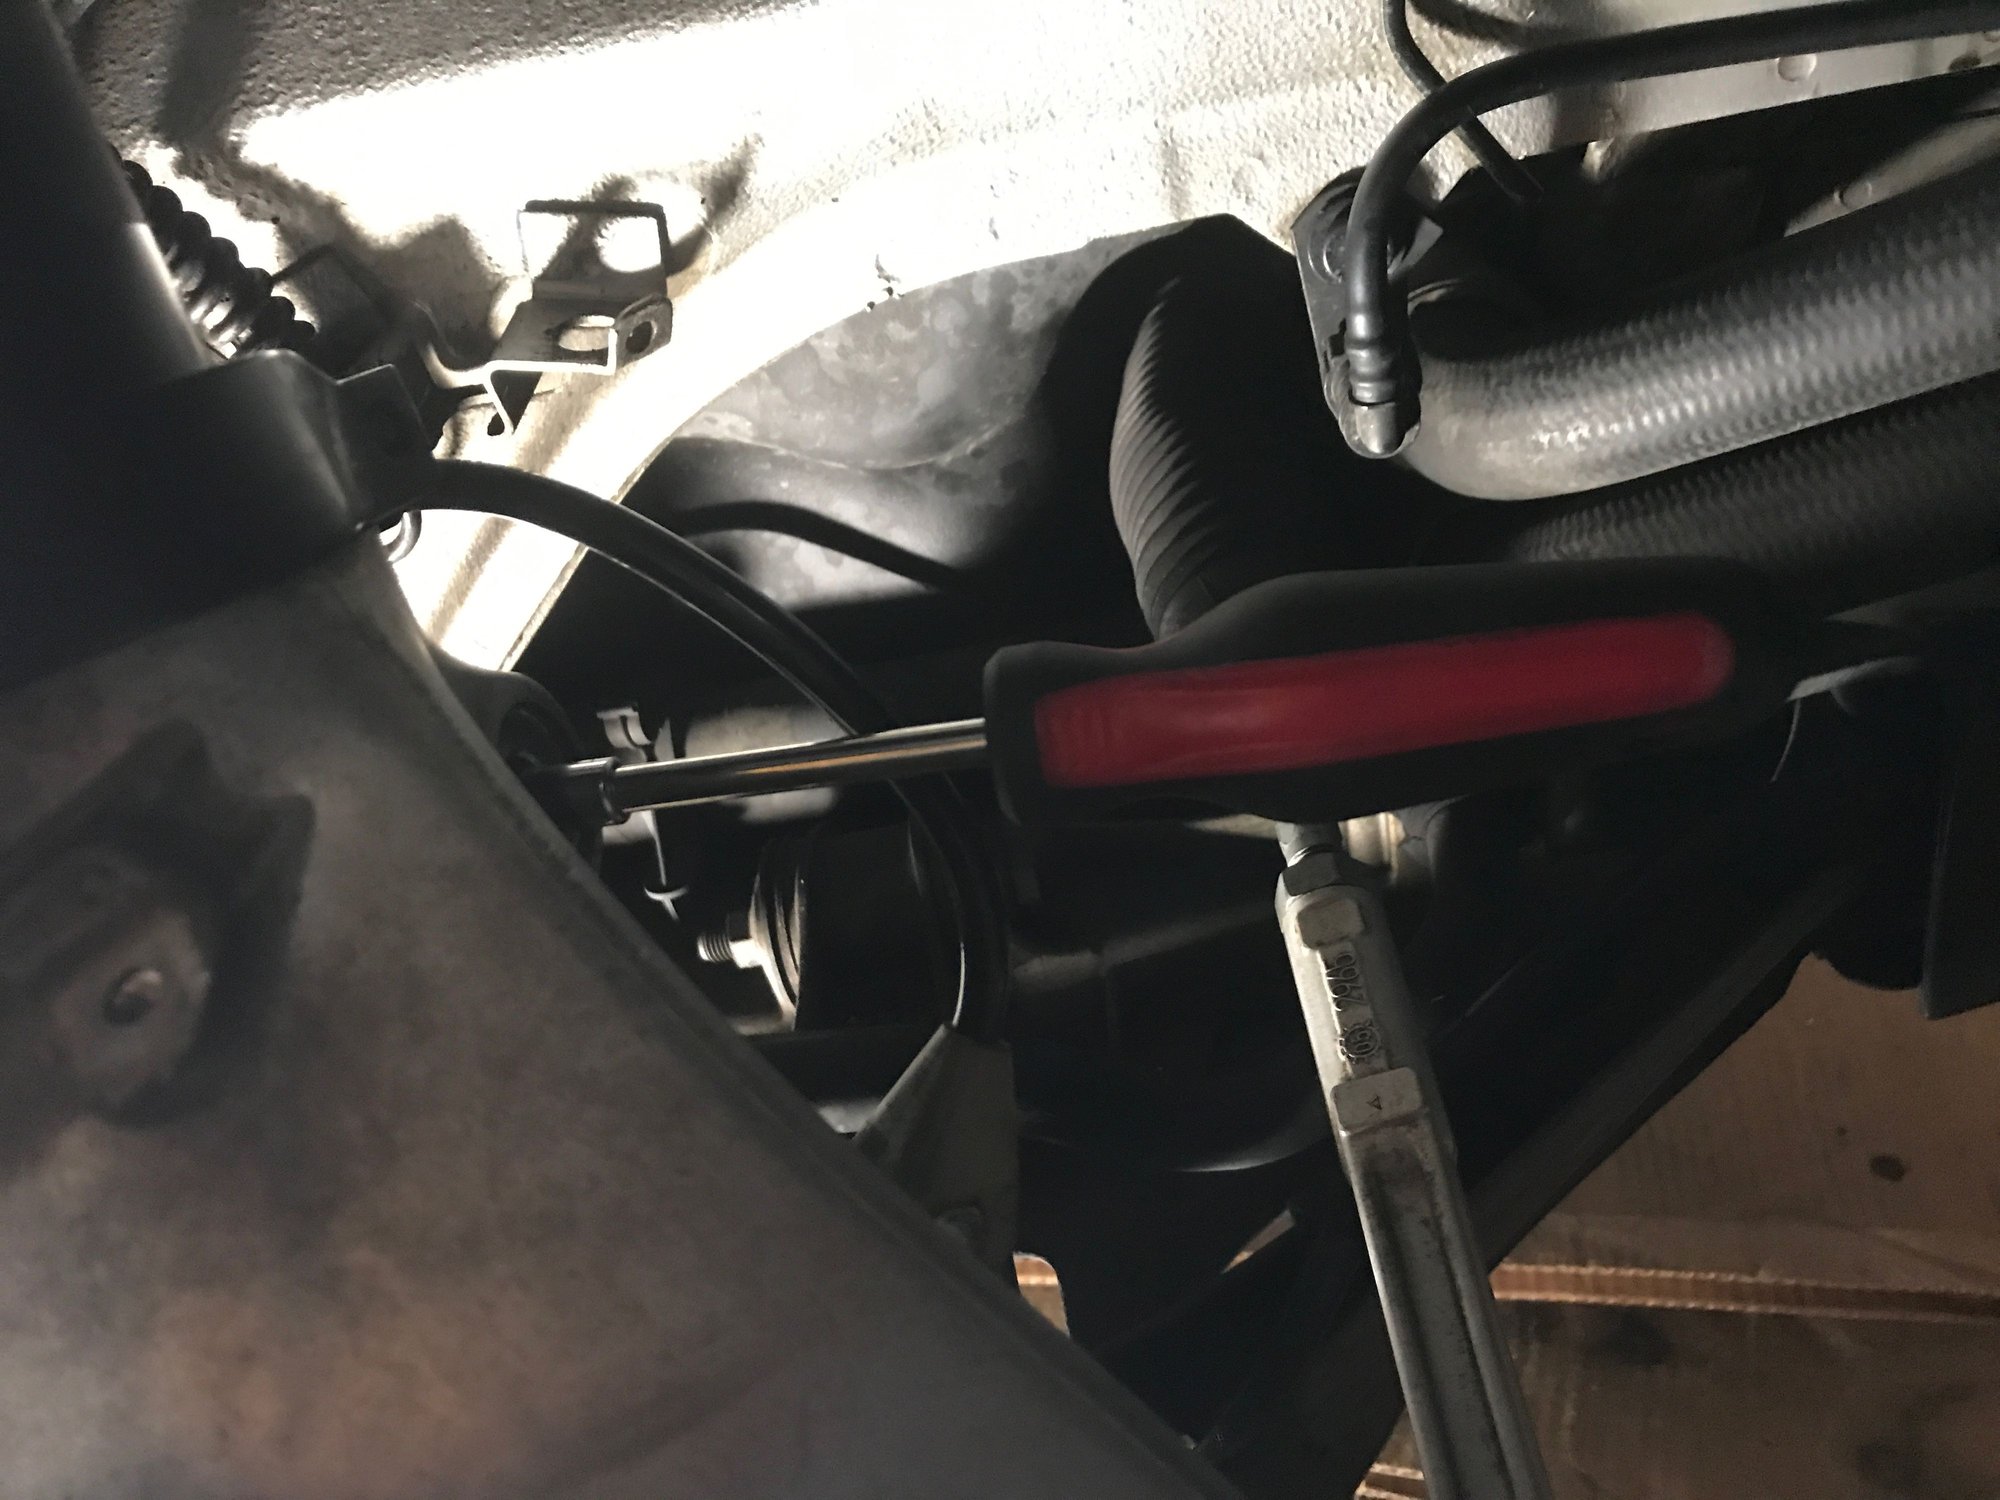
Step 11: Loosen the 18mm drop link with a pass-thru socket wrench. Counter with a Torx T30. You might need to push out the bolt with a screw driver. You may need to push up the wheel carrier a bit with the floor jack to remove enough tension on the drop link to slide the bolt out.
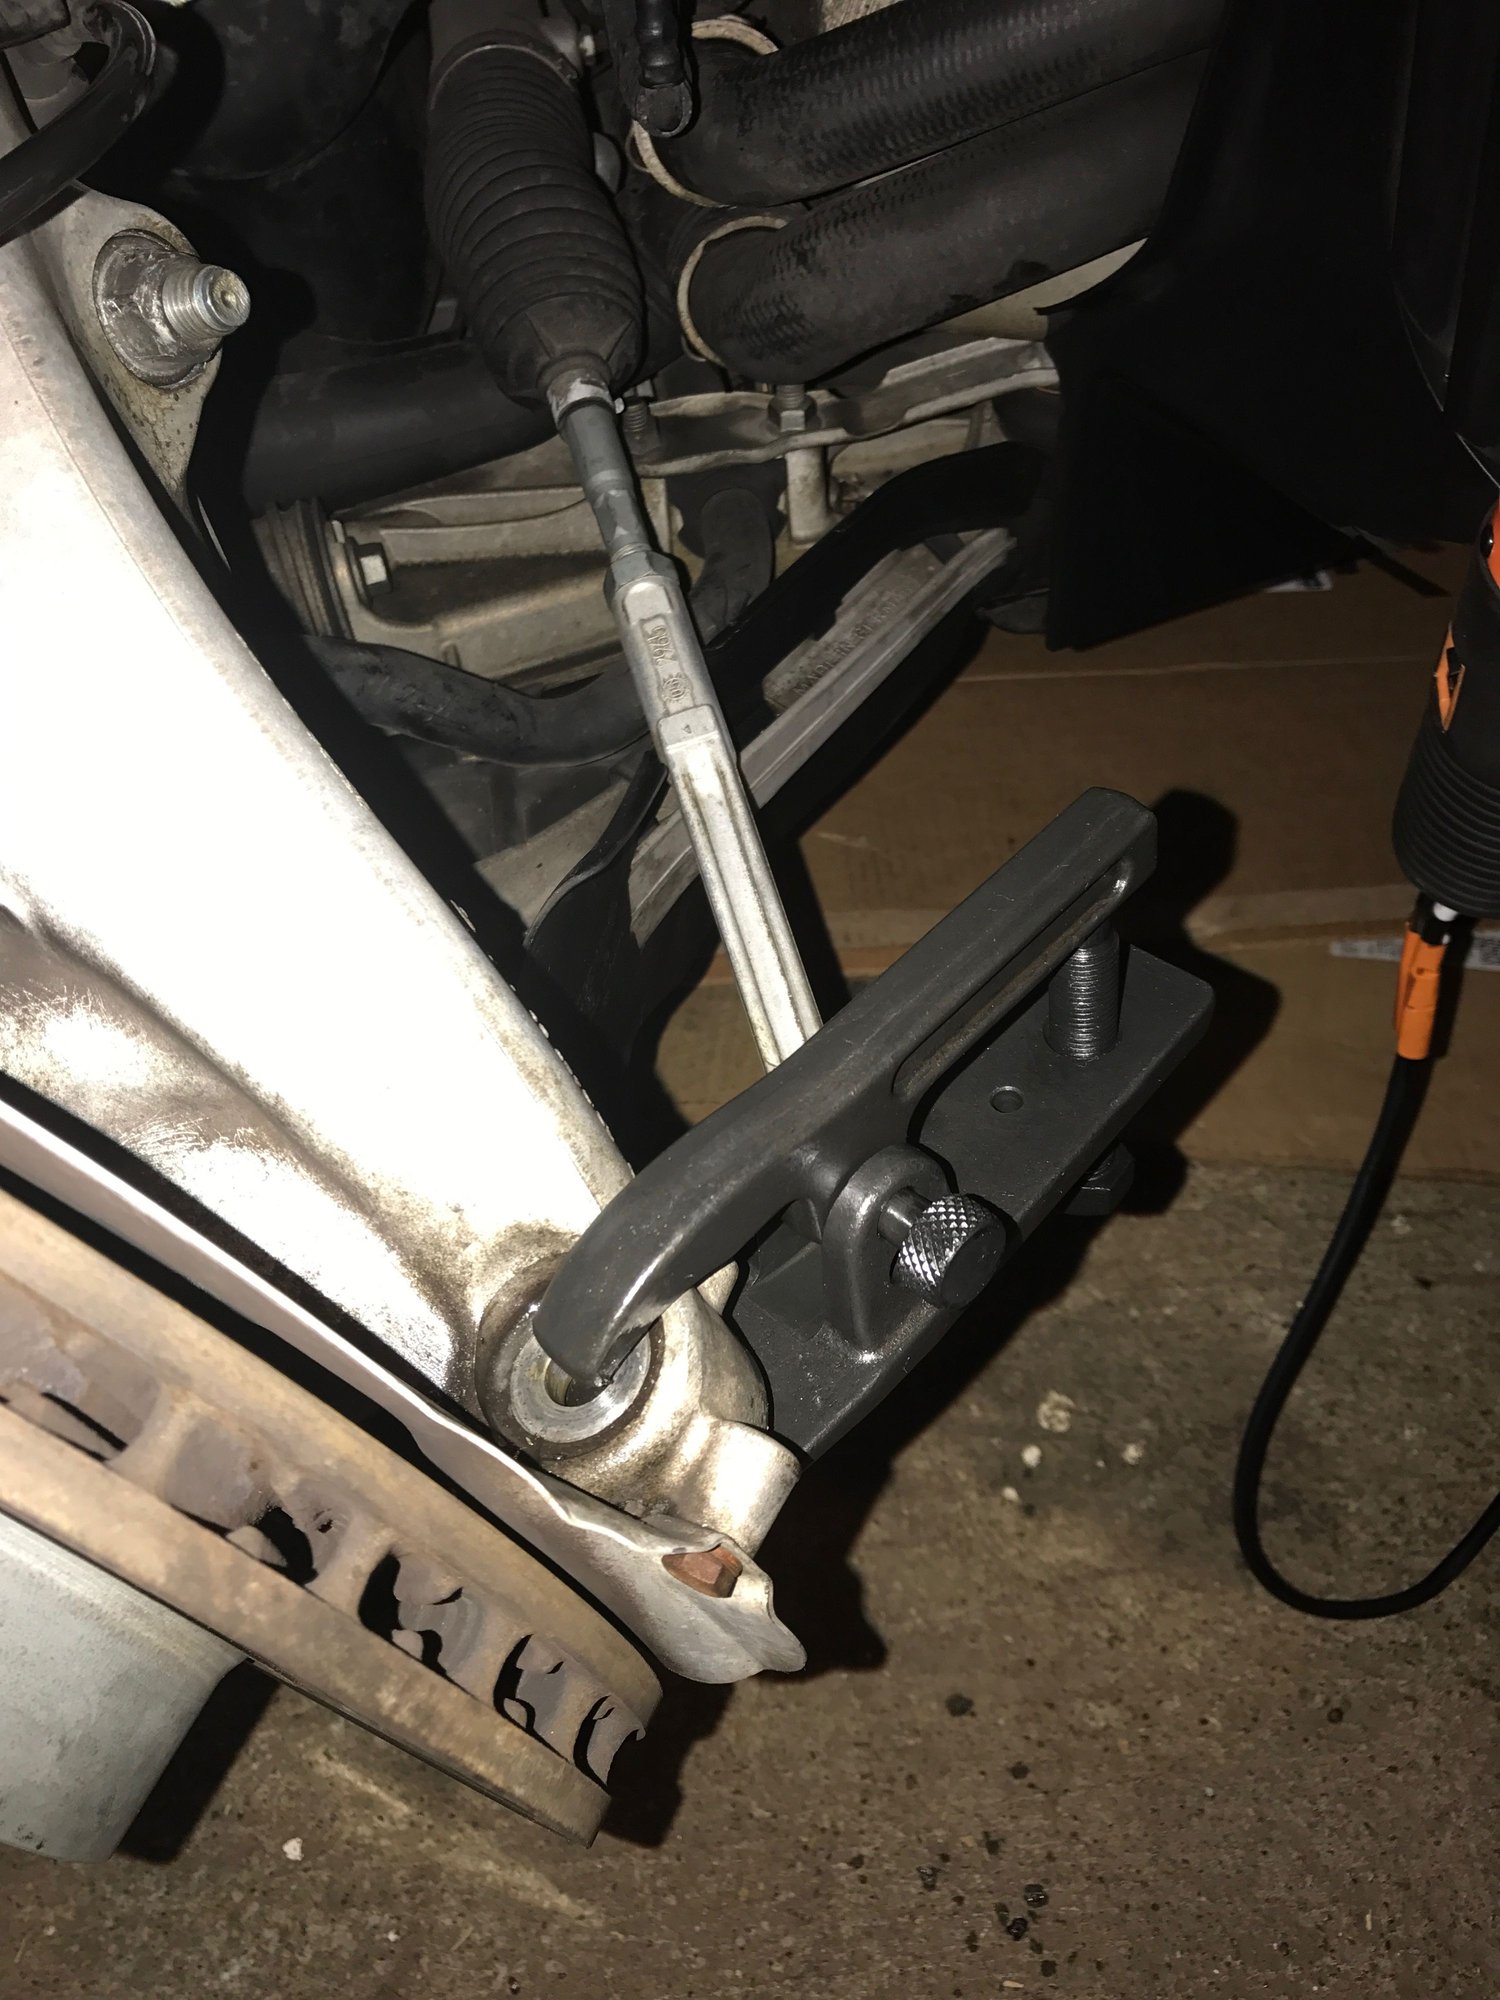
Step 12: Remove the nut on the tie rod at the ball joint with 18mm socket and T40 to counter. Then use a ball joint separator to pop it out. Do NOT bang on the stud. The ball joint separator makes easy work of it and you will need it 4 times so its worth the $25 investment. Manipulate the tie rod above the wheel carrier so its out of the way.
Step 13 - I didn�t do this but in hindsight it would have likely made the project MUCH easier.
@Derek Zoolander has suggested what could be a far better approach to remove the front strut that eliminates the need to use spring compressors.
�Guys, guys, guys... removing the tie rod is NOT necessary. It's also not necessary to put spring compressors on the spring while the strut is still on the car. Just loosen the inner control arm bolt (control arm to frame) and the whole hub will be able to drop low enough for you to remove the strut from the knuckle.�
I couldn�t find info on this in other posts but after re-reading the Workshop manual I found they also recommend this approach (pg 1167). However, instead of removing at the chassis they recommend removing at the wheel carrier. The control arm is where the primary resistance is when trying to push the wheel carrier down so this would have likely saved a lot of hassle.
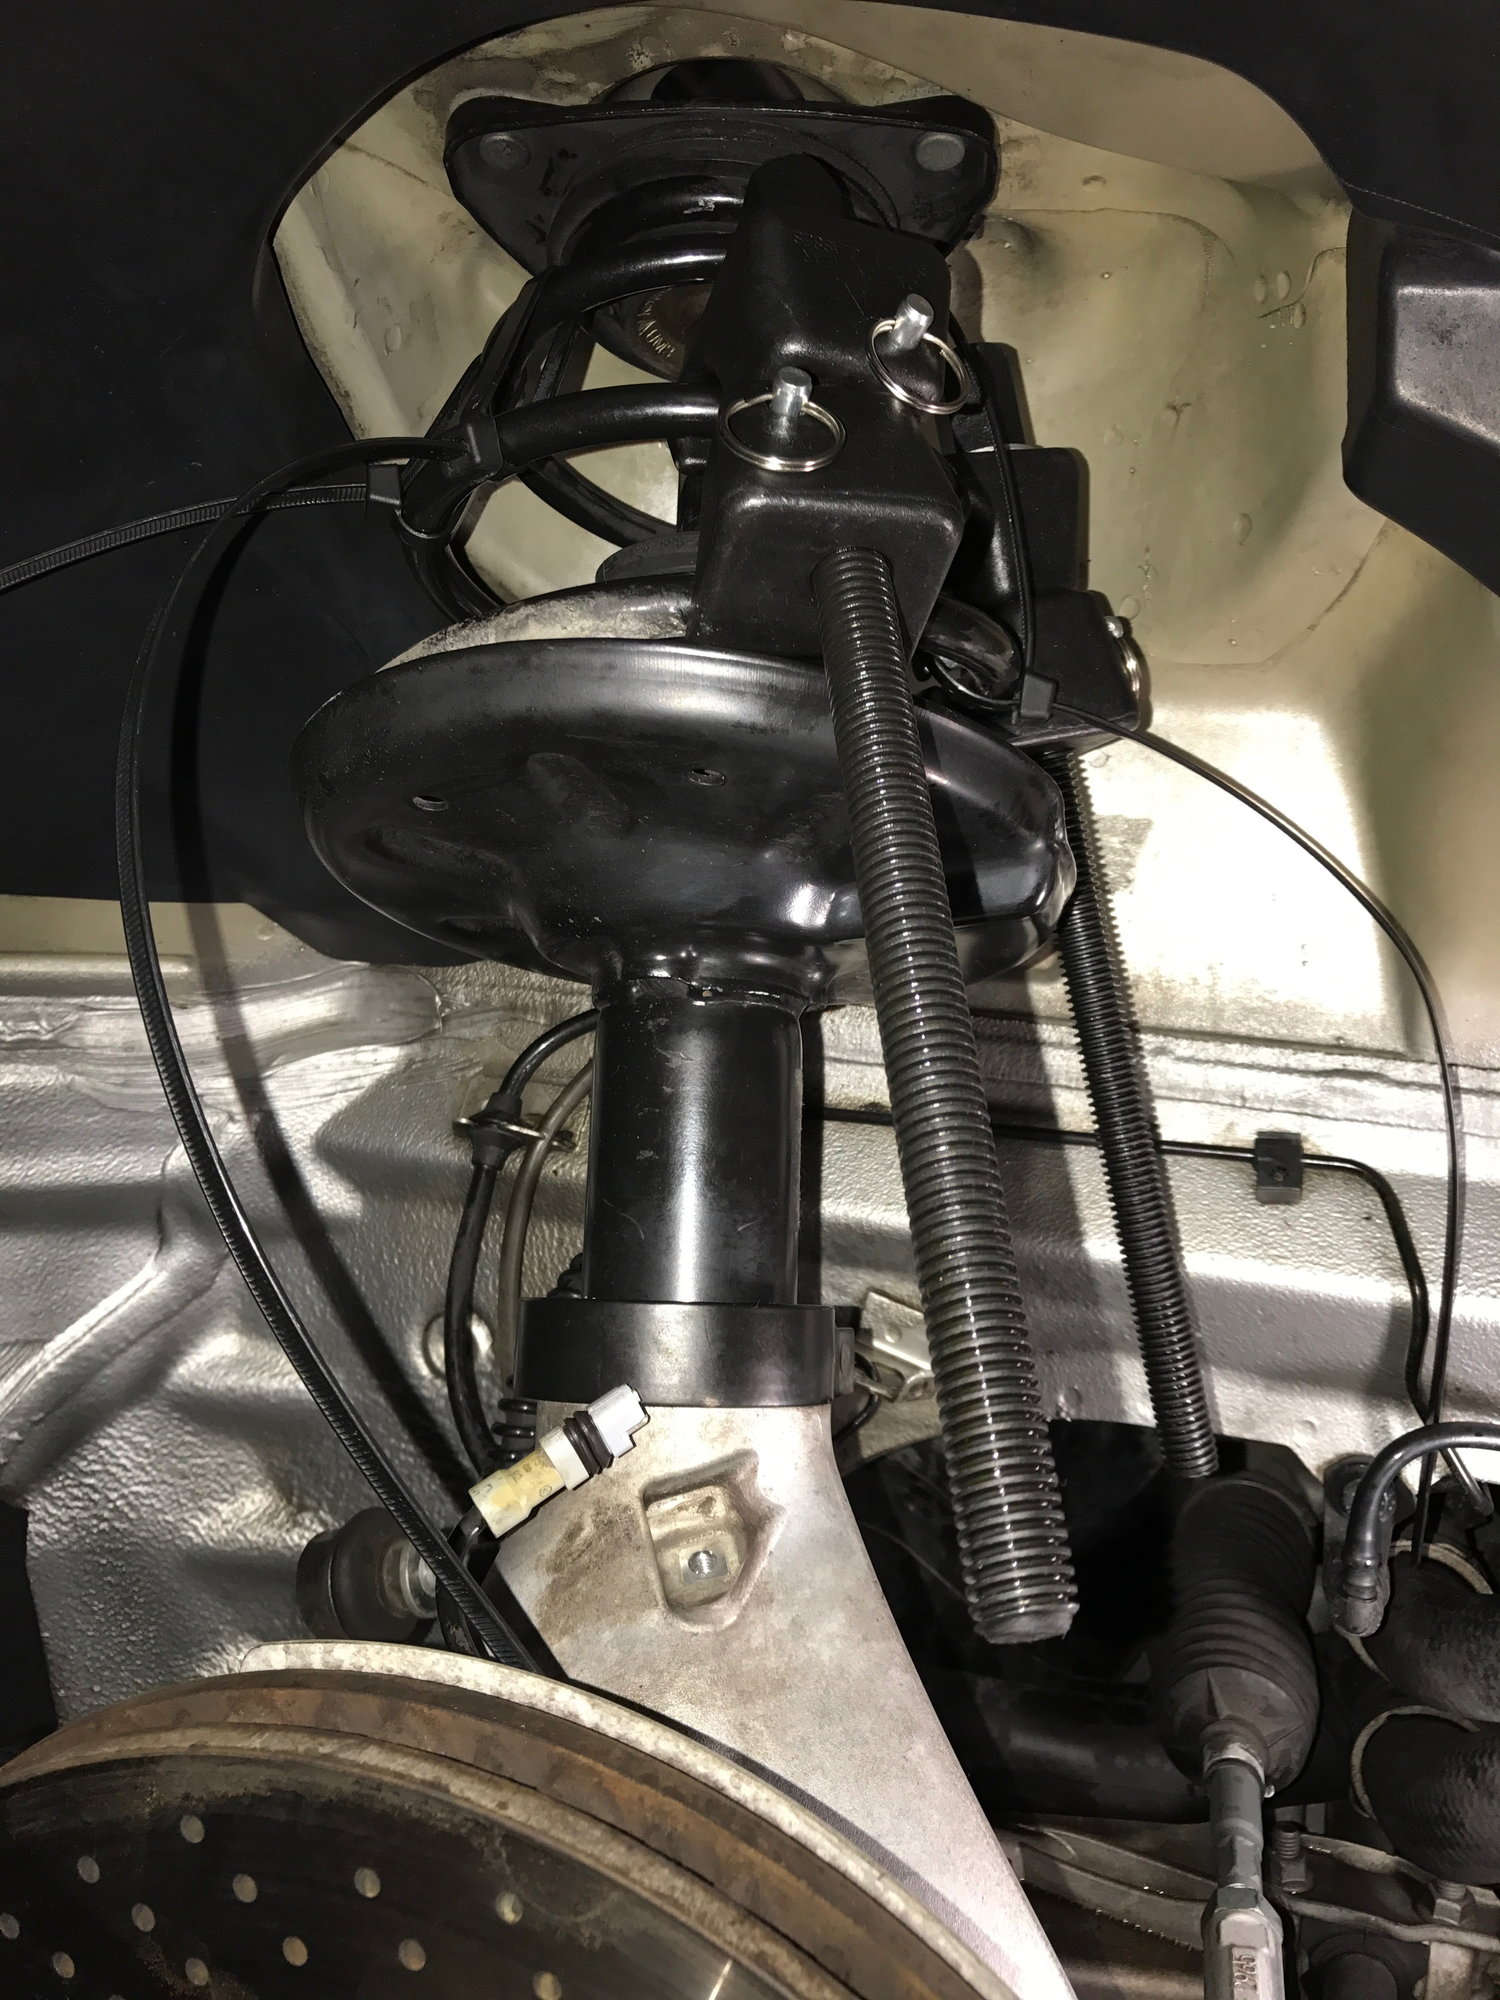
Step 14 - Put your spring compressors on and manipulate as best you can on the left and right side of the spring to get the spring as compressed as much as you can. More compression = more clearance. Using the floor jack under the strut to pre-compress the springs will save you about 30 turns with a 21mm box wrench.
Step 15 - Go back into the trunk to remove the 3 strut nuts. At this point the strut will be completely free.
Step 16 - Reach into the wheel well and grab the top of the strut mount to gently slide the strut studs out. Then slide a towel over the strut mount so the strut studs don�t scrape the plastic wheel well and fender on the way out.
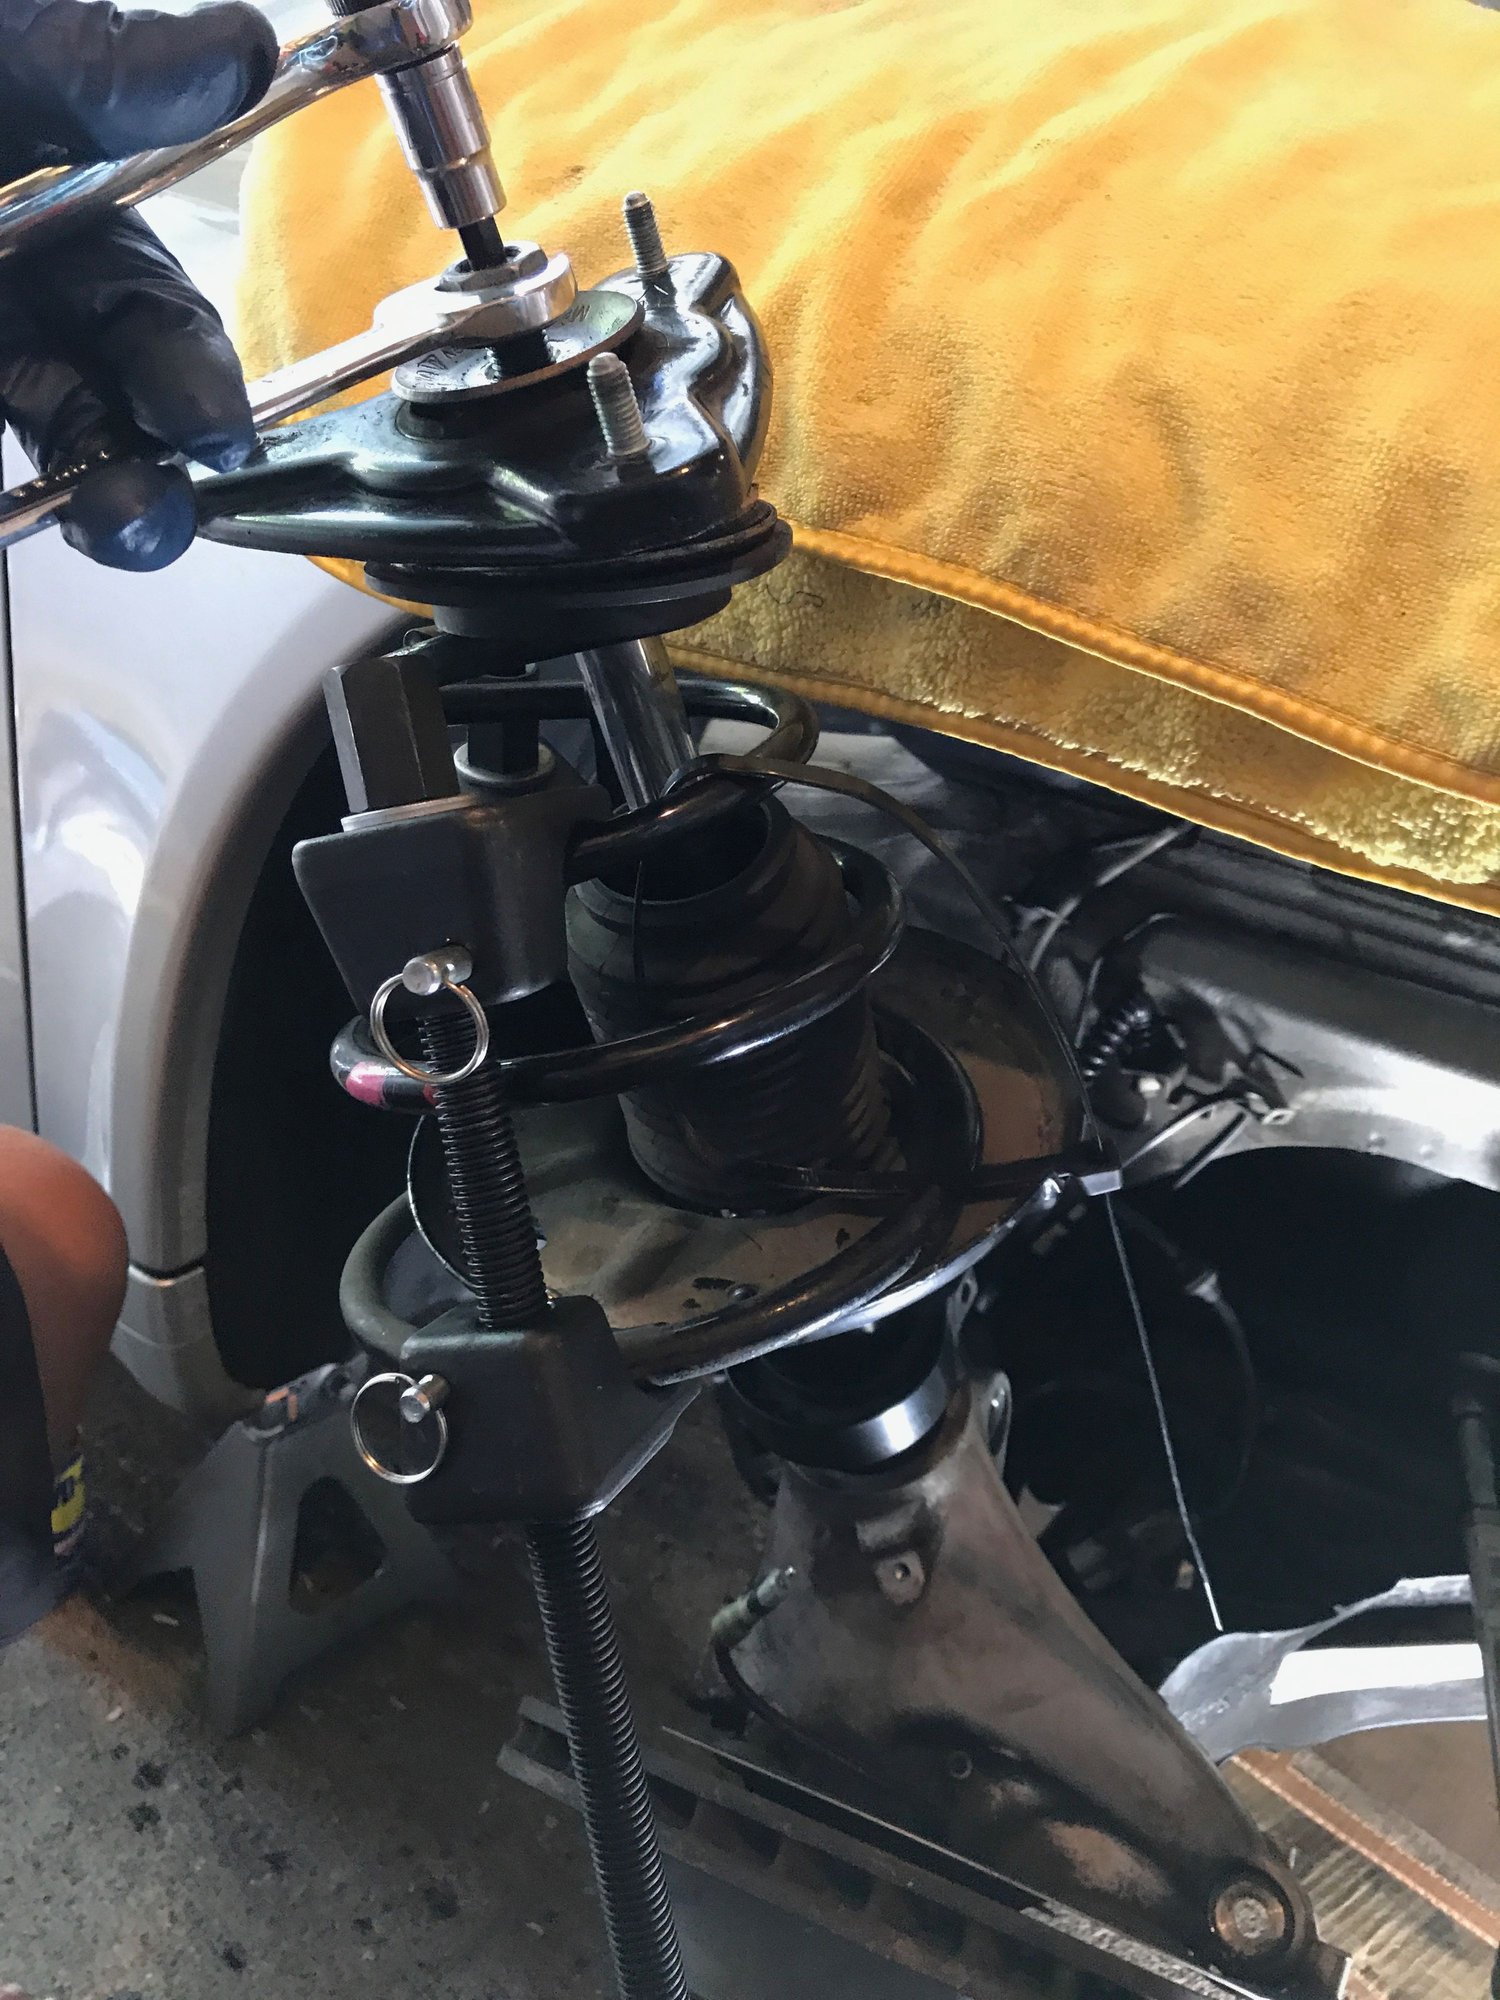
Step 17 - This is the really hard part (if you haven�t done step 13). It took me 3 tries to finally get the strut out. Try to get as much leverage as you can on the top of the strut mount to compress the spring and manipulate the top of the strut out of the wheel well. I sacrificed my hand by putting it on top of the strut mount to protect the fender on the way out. The downside is your hand is jammed between the strut and wheel well.
Congratulate yourself on a small victory when the strut comes out of the wheel well. You only have 3 more to go�
Step 18 - Once you get the strut out of the wheel well you need to lift it up and out of the wheel carrier. Make sure you have lots of towels protecting the fender as you only have about 6� of room to lift it up.
My left strut came out of the carrier with no problem but my right strut was hard to remove. I was concerned about pulling too hard and hitting the fender so I just left it in place and swapped the spring with the strut in place. That works too.
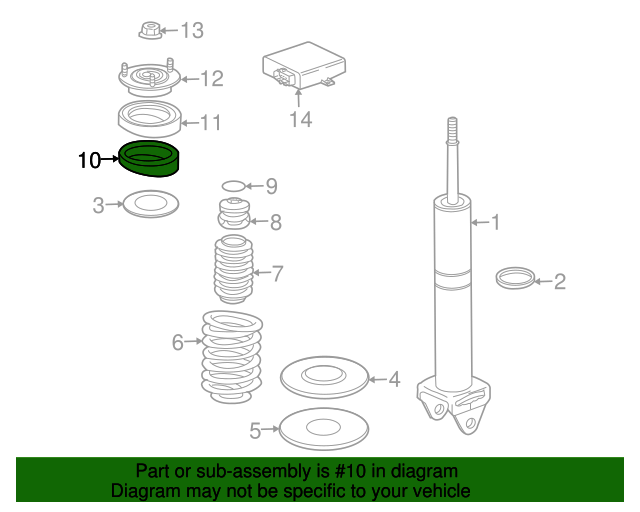
Step 19 - Remove the strut nut and take photos of how the strut, compensators and washers are assembled. Also take this opportunity to clean the strut and compensator plates. They have some greased ball bearings between the plates which collect dirt and grime.
Front Strut Installation
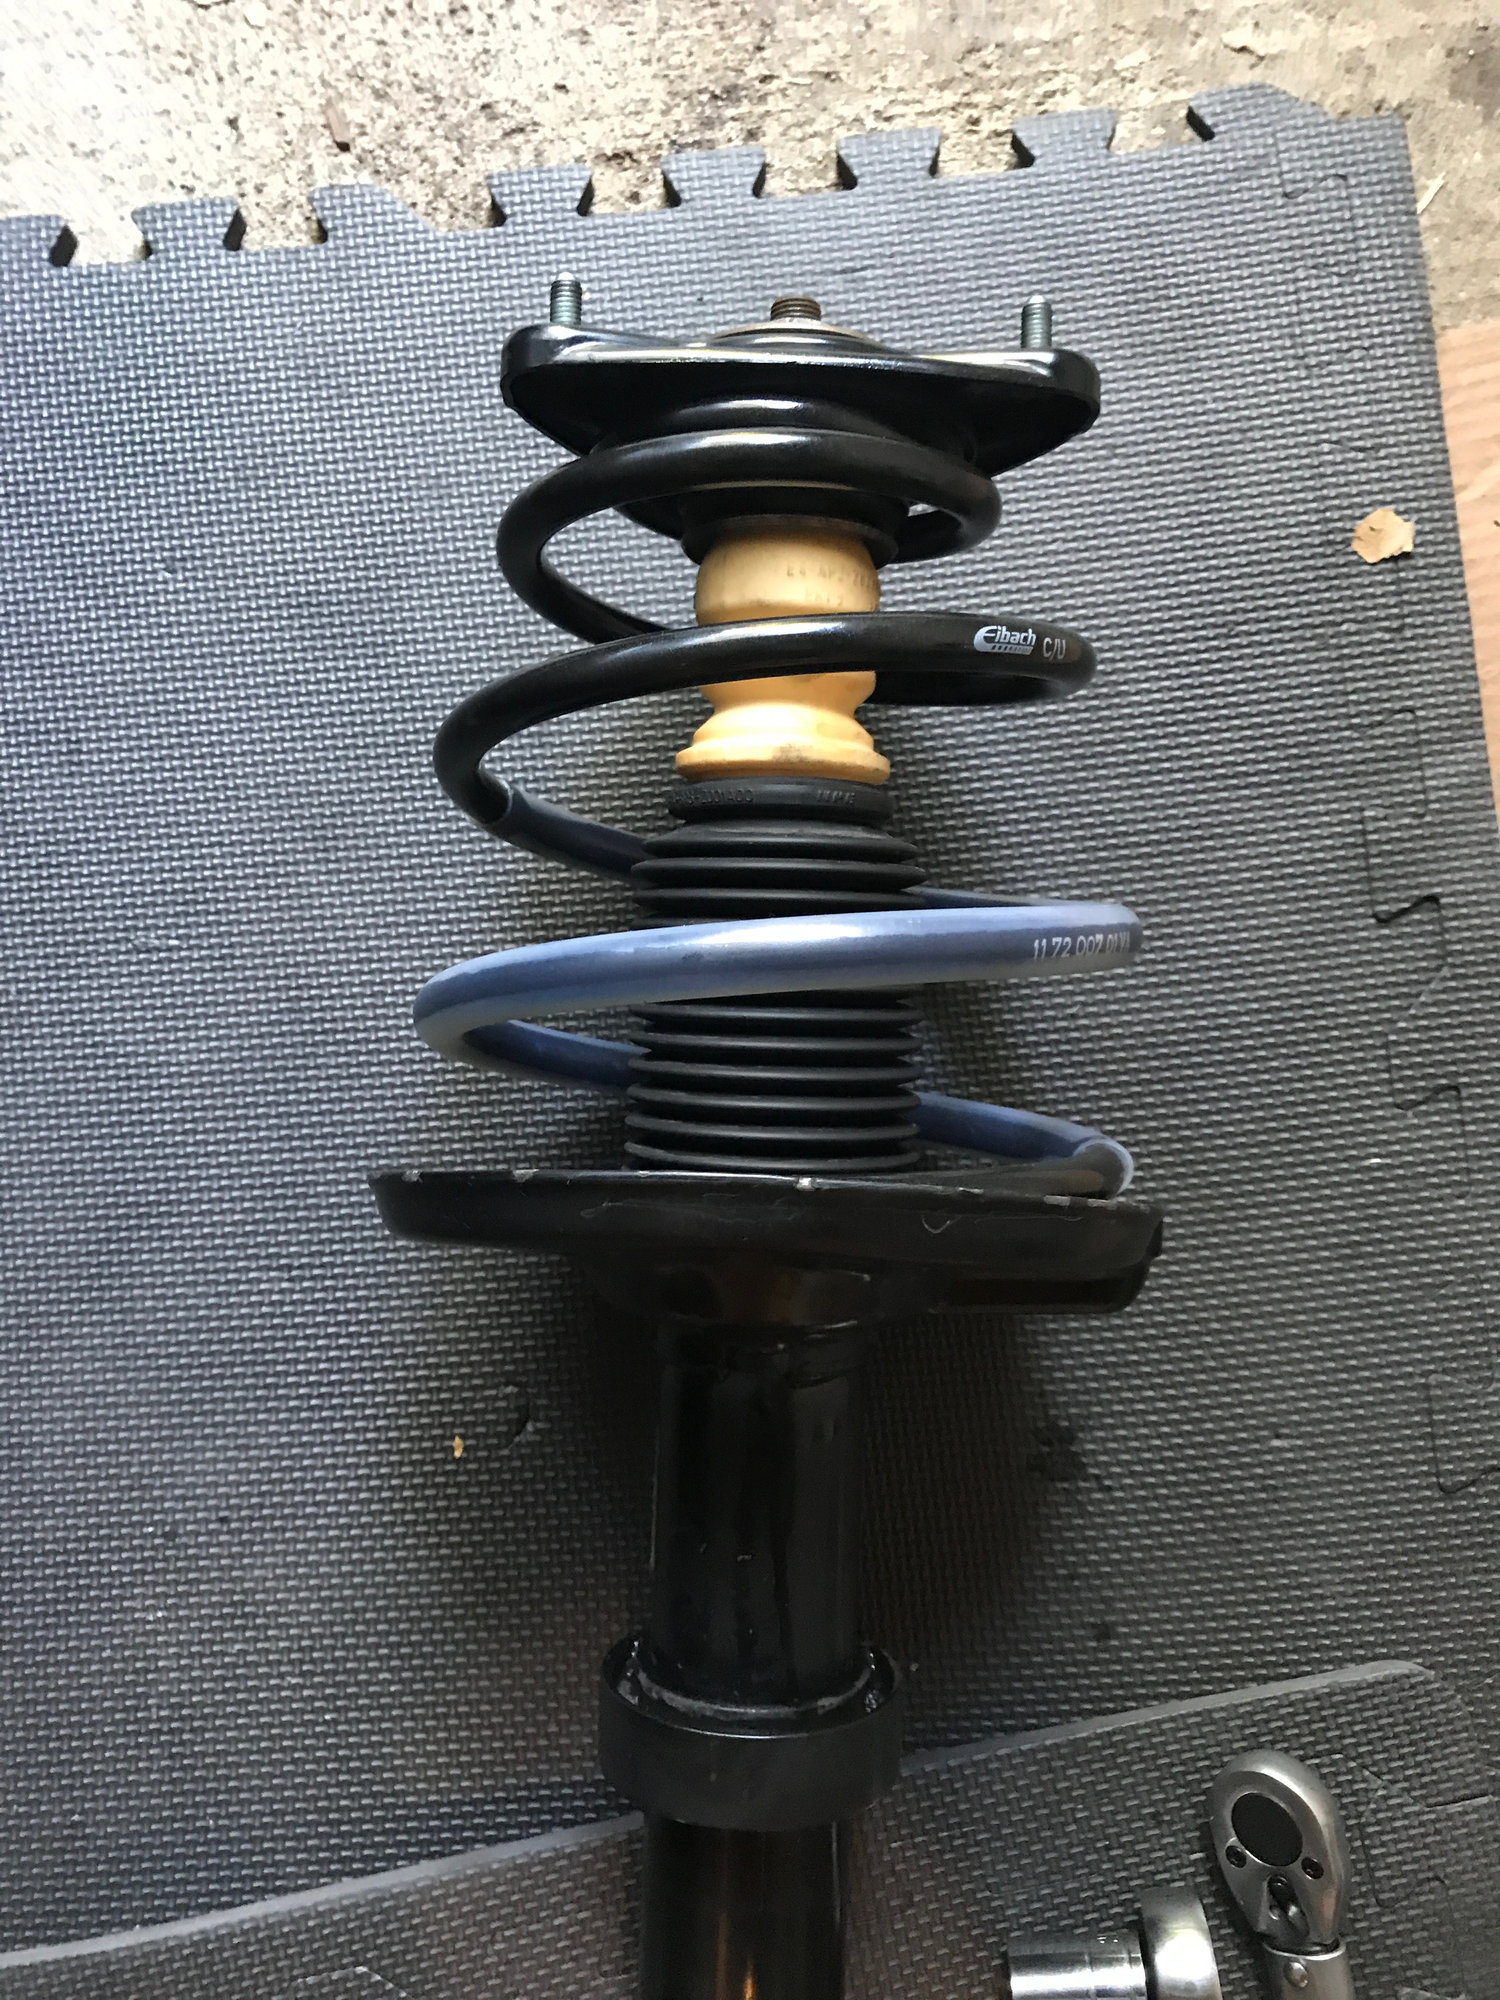
Step 1 - Reassemble the strut with the new spring and new new bump stop if you swapped those out too. The bump stop slides into the rubber shock bellows. Tighten down the strut nut till it bottoms out.
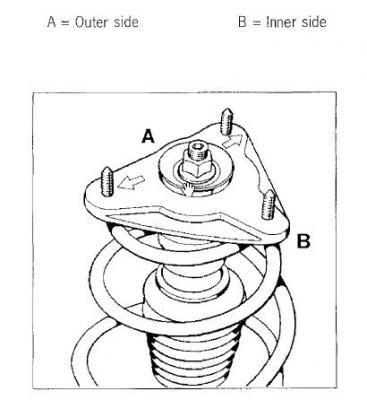
Step 2 - Make sure your strut mount and strut are positioned correctly before you put in back in the wheel well. The strut mount has two arrows on the top of it pointing to the studs that that should be on the outside of the fender (nearest the wheel). The strut also has a dot and sticker on it showing the side facing outward (nearest the wheel).
Step 3 - Put your spring compressors back on and tighten down. You won�t need as much compression as you did with the stock springs but it still helps.
Step 4 - Put a towel back around the strut mount and slide it into the wheel carrier. Slide it back up under the fender and get the studs back into proper position with the arrows on the outside. Get the strut bolts back into the position you marked with pen and tighten them down gently, but don�t torque them yet.
Step 5 - Remove the spring compressors
Step 6 - Reattach the drop link and hand tighten
Step 7 - Reattach the tire rod and hand tighten the nut
Step 8 - Reattach the brake caliper and hand tighten the nuts. Reattach the brake sensor and insert the ABS and brake sensors in their proper holes (they should slide all the way in to the rubber gasket. If they not you installed them backwards), reattach the brake line hanger and don�t forget to the push the brake sensor cable with rubber grommet back into the hanger on the back of the strut.
Step 9 - Torque everything down to spec.
3x 13mm strut bolts: 27lbs. Be very, very careful with these so you don�t over torque. I would torque them down to 20lbs and see how close they are to the marks you made with your pen. Then torque them to the final value.
Drop link (use a T30 to counter): 63lbs
Tie rod ball joint to wheel carrier (use a T40 to counter): 56lbs
Brake calipers: 63lbs
Step 10 - put the plastic cap back over the strut nut and reinstall the plastic trunk trim.
Congratulations your are 1/4 of the way home. The opposite wheel will likely take you half the time as the first.
Removing the Rear Seat Deck Carpet and Bose Speaker
These are easier to remove but take longer because you need to remove carpet on the the rear seat deck, Bose speaker (if you have), and some insulation to get to the rear strut mounts. If you are 6�2� its a tight fit.
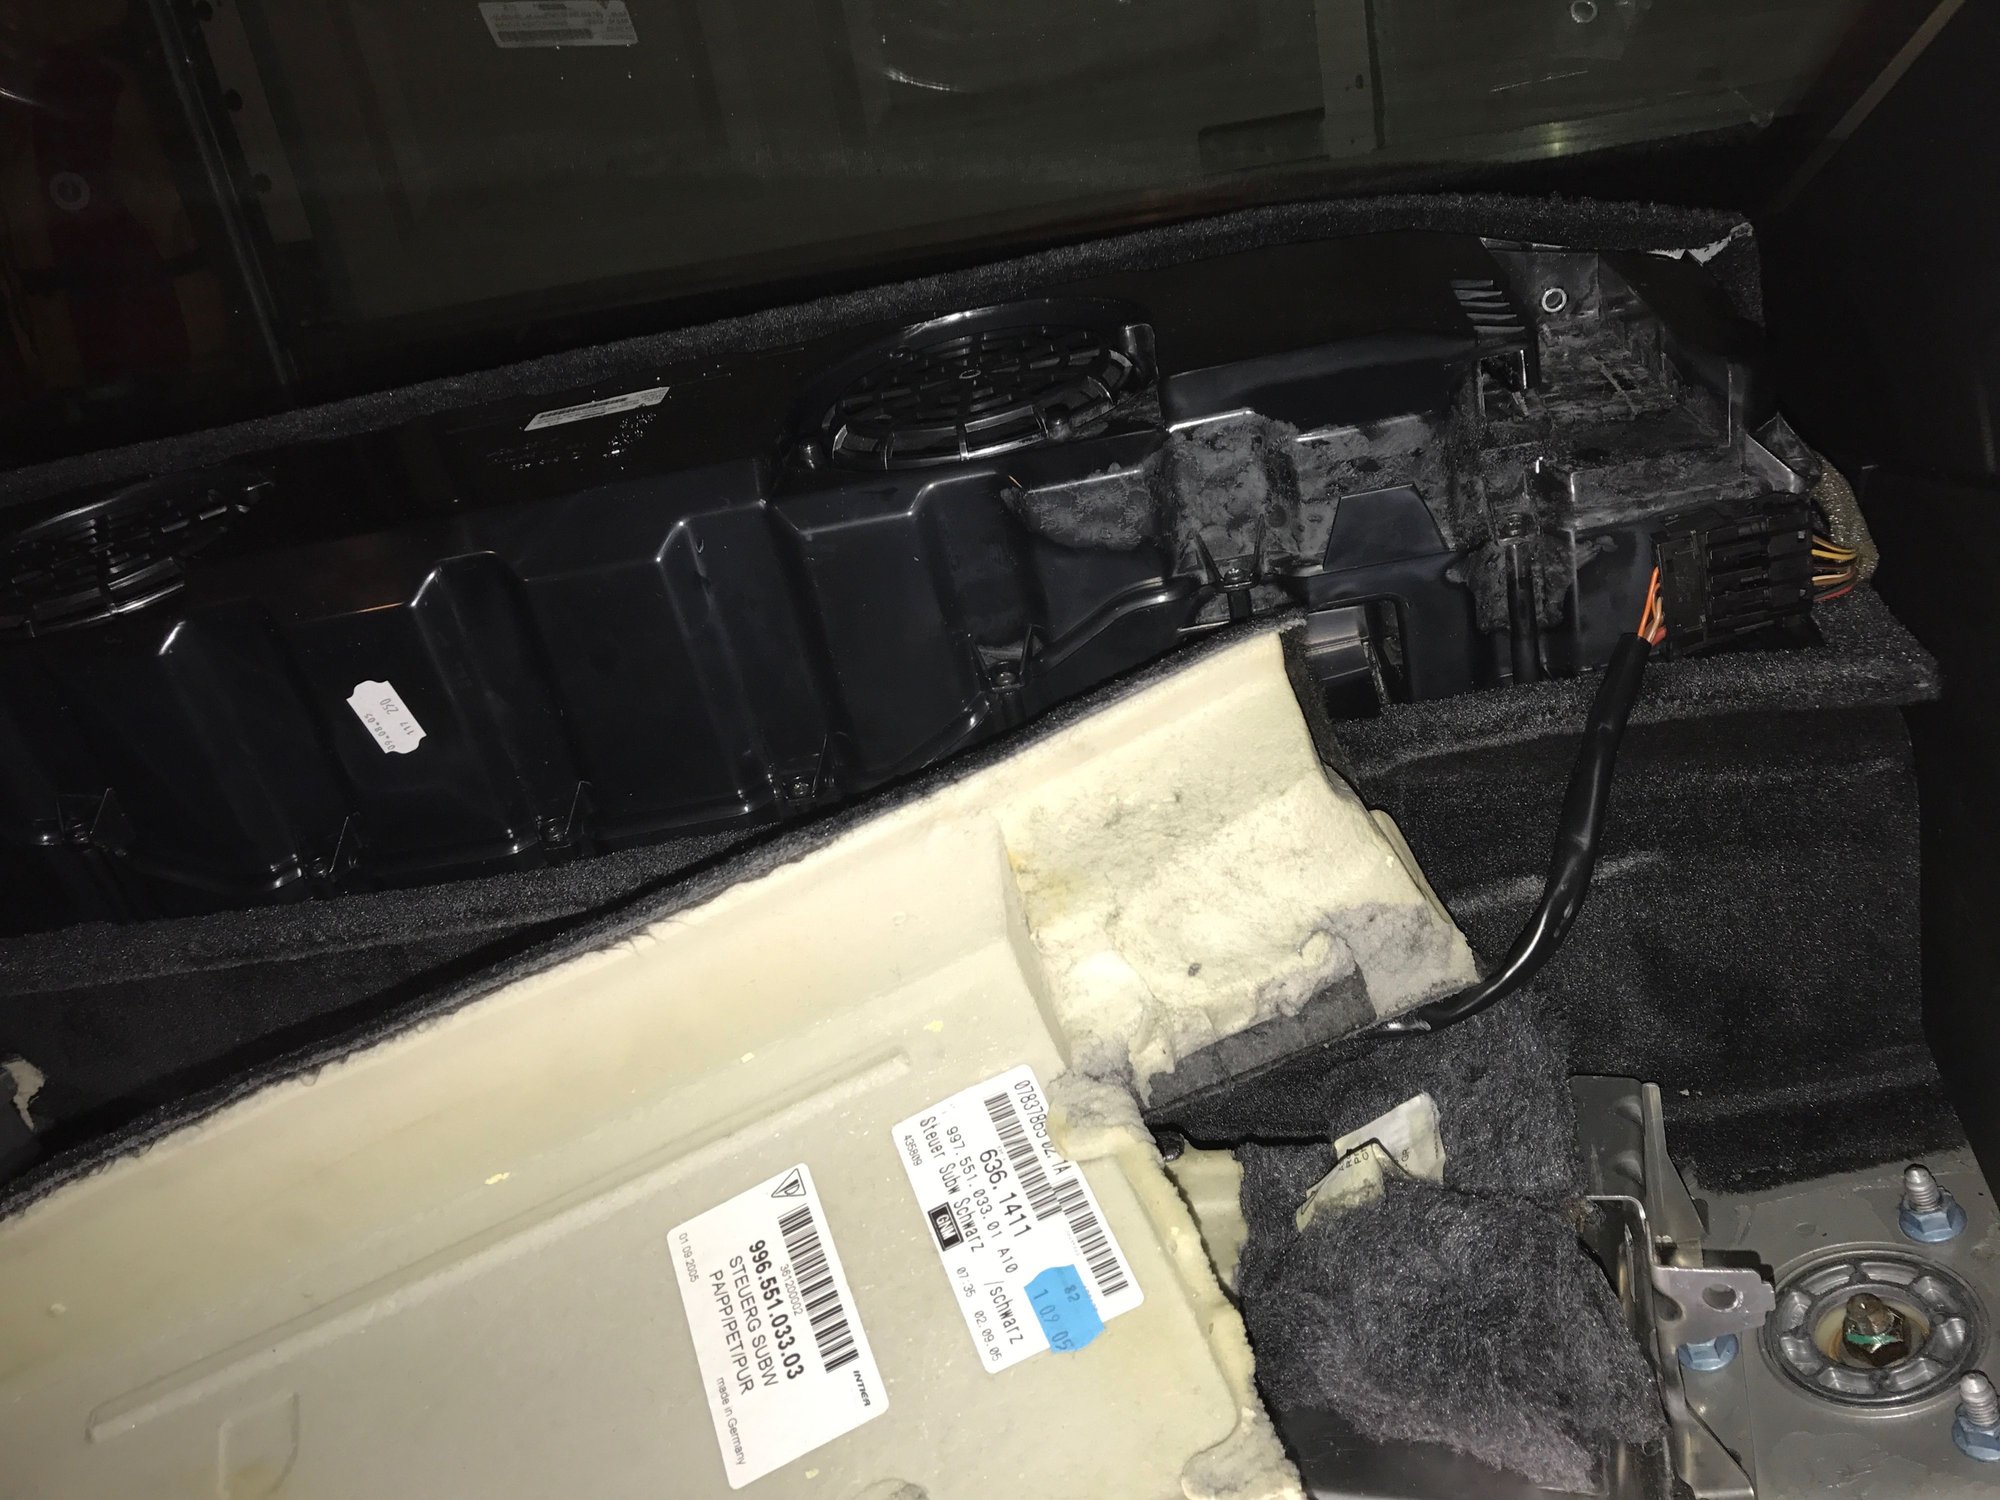
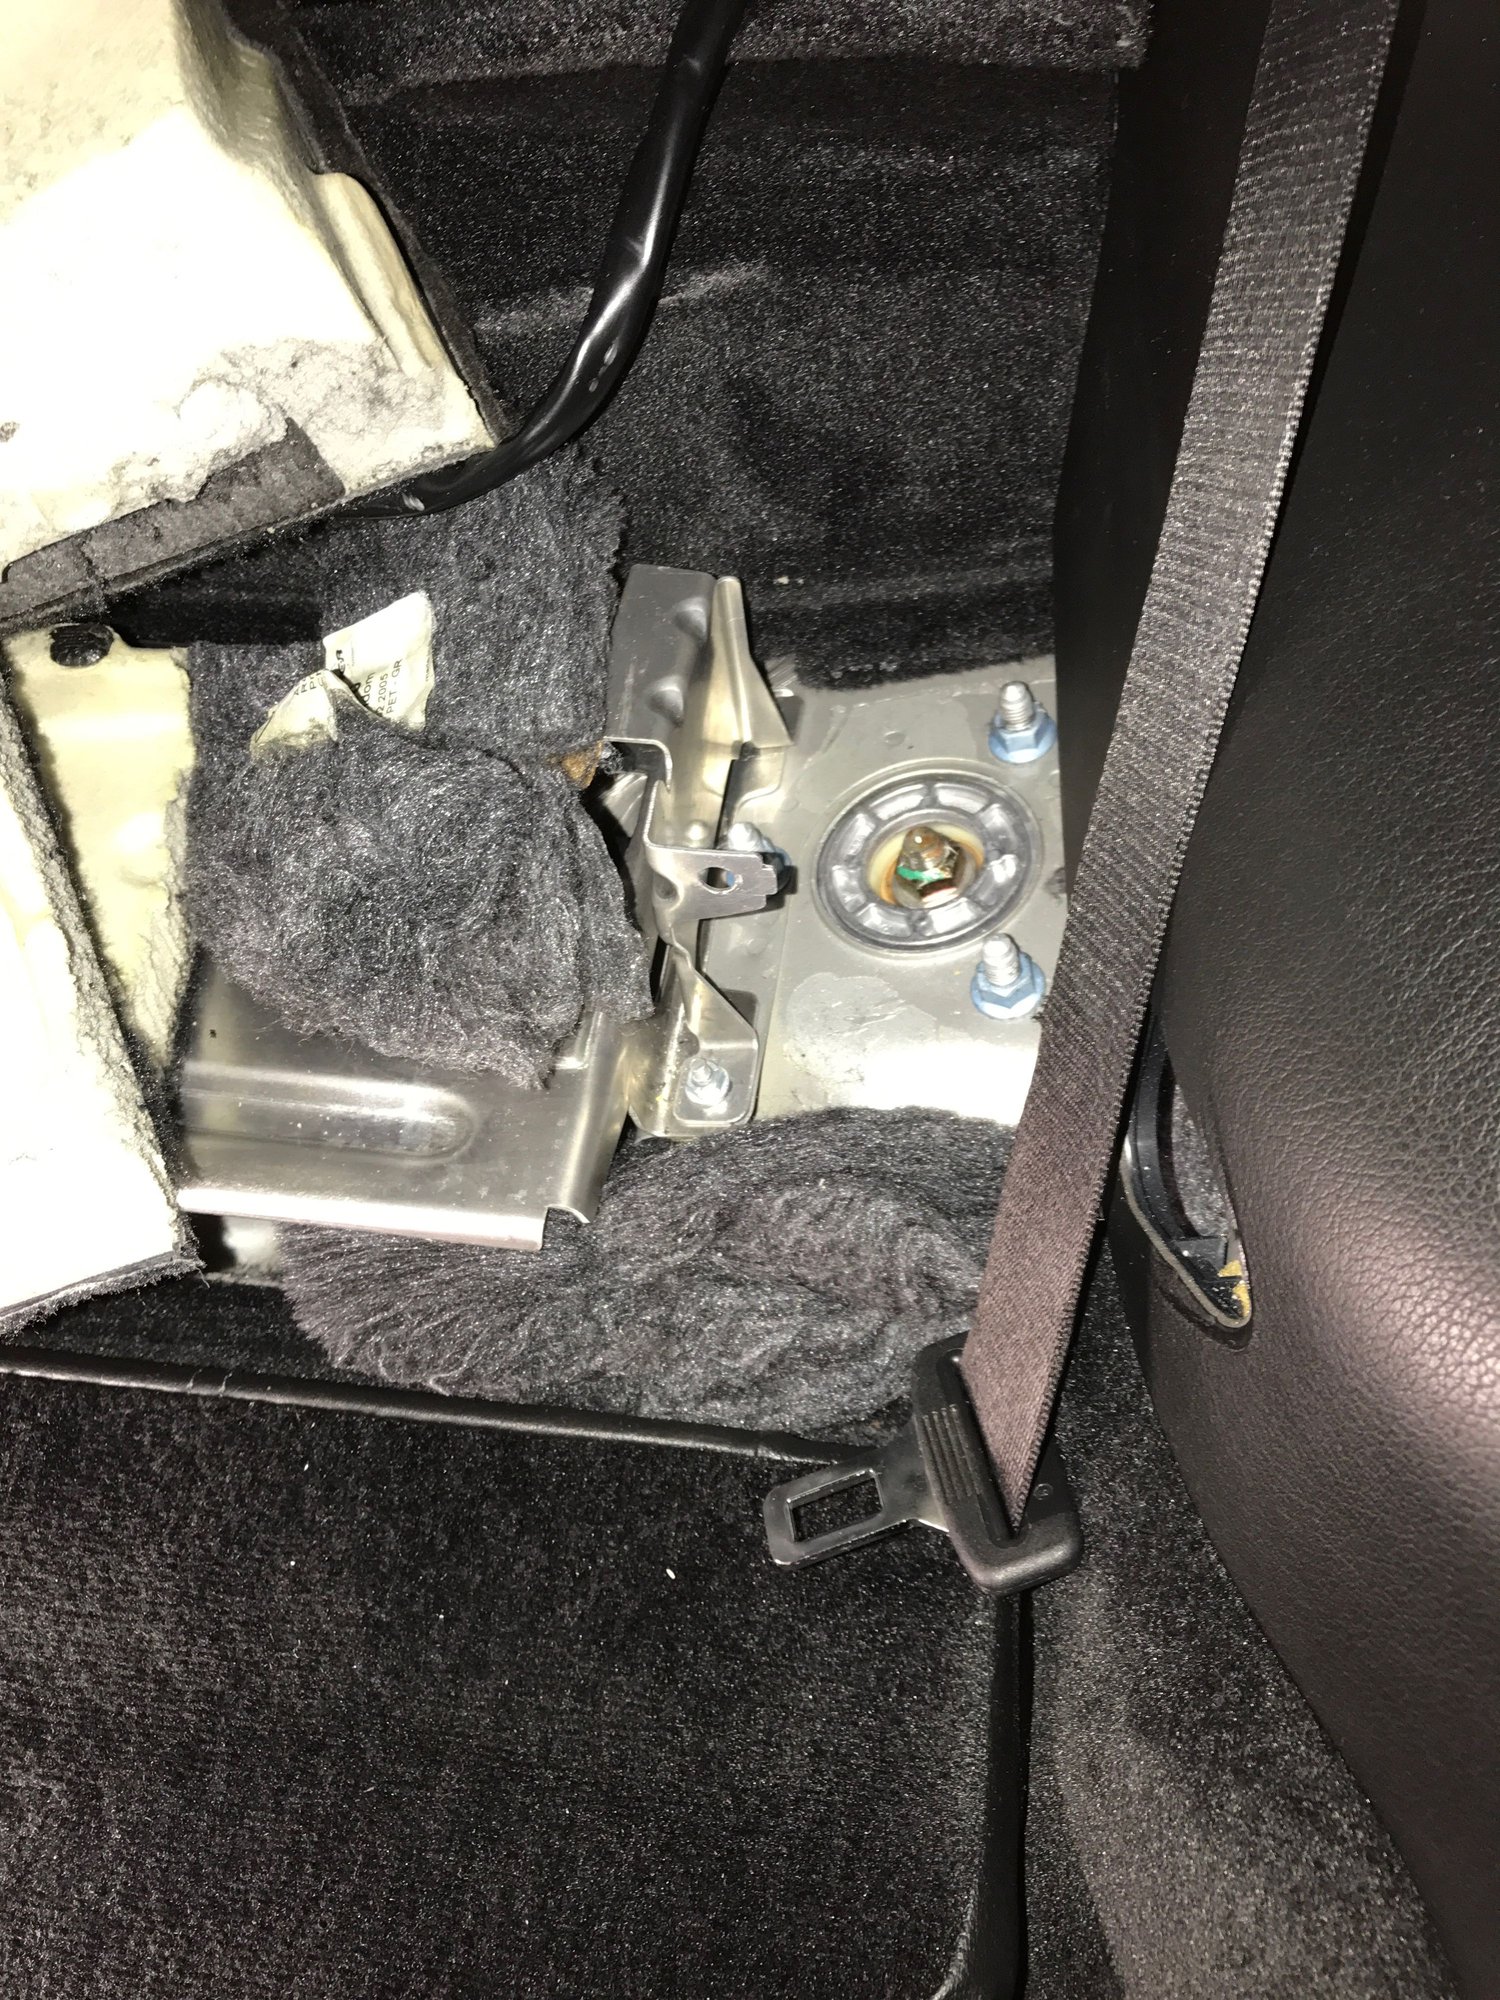
Step 1 - Remove the Bose speaker if you have it. Put the rear seats down and slide the front seats all the way forward to give yourself some room. Use a 6mm hex bit to remove the rear seat locks so you can slide out the Bose speaker. Then pop the plastic trim off the sub woofers with your finger nail or plastic trim remover. Located the screws under the middle of each speaker and use a T25 bit to remove it. The speaker can now slide straight out of its tracks. You can just put it on the rear deck so its out of the way. You don�t need to unplug it. You then need to remove the metal frame the speaker slides into with 2x 10mm bolts. Be careful not to lose the little clip the T25 screws into on that frame.
Step 2 - Remove the insulation over the strut mounts and break the 19mm strut nut free. Then you need a 15mm socket to loosen the 3 strut bolts. They have particularly long studs so you will need a deep socket here.
Removing the Rear Struts
Note: you don�t need to remove the brake calipers for this.
Step 1 - Put a single spring compressor on the front of the spring (facing you). Compress it down a little but not as much is required as the fronts. You don�t technically even need them but it helps.
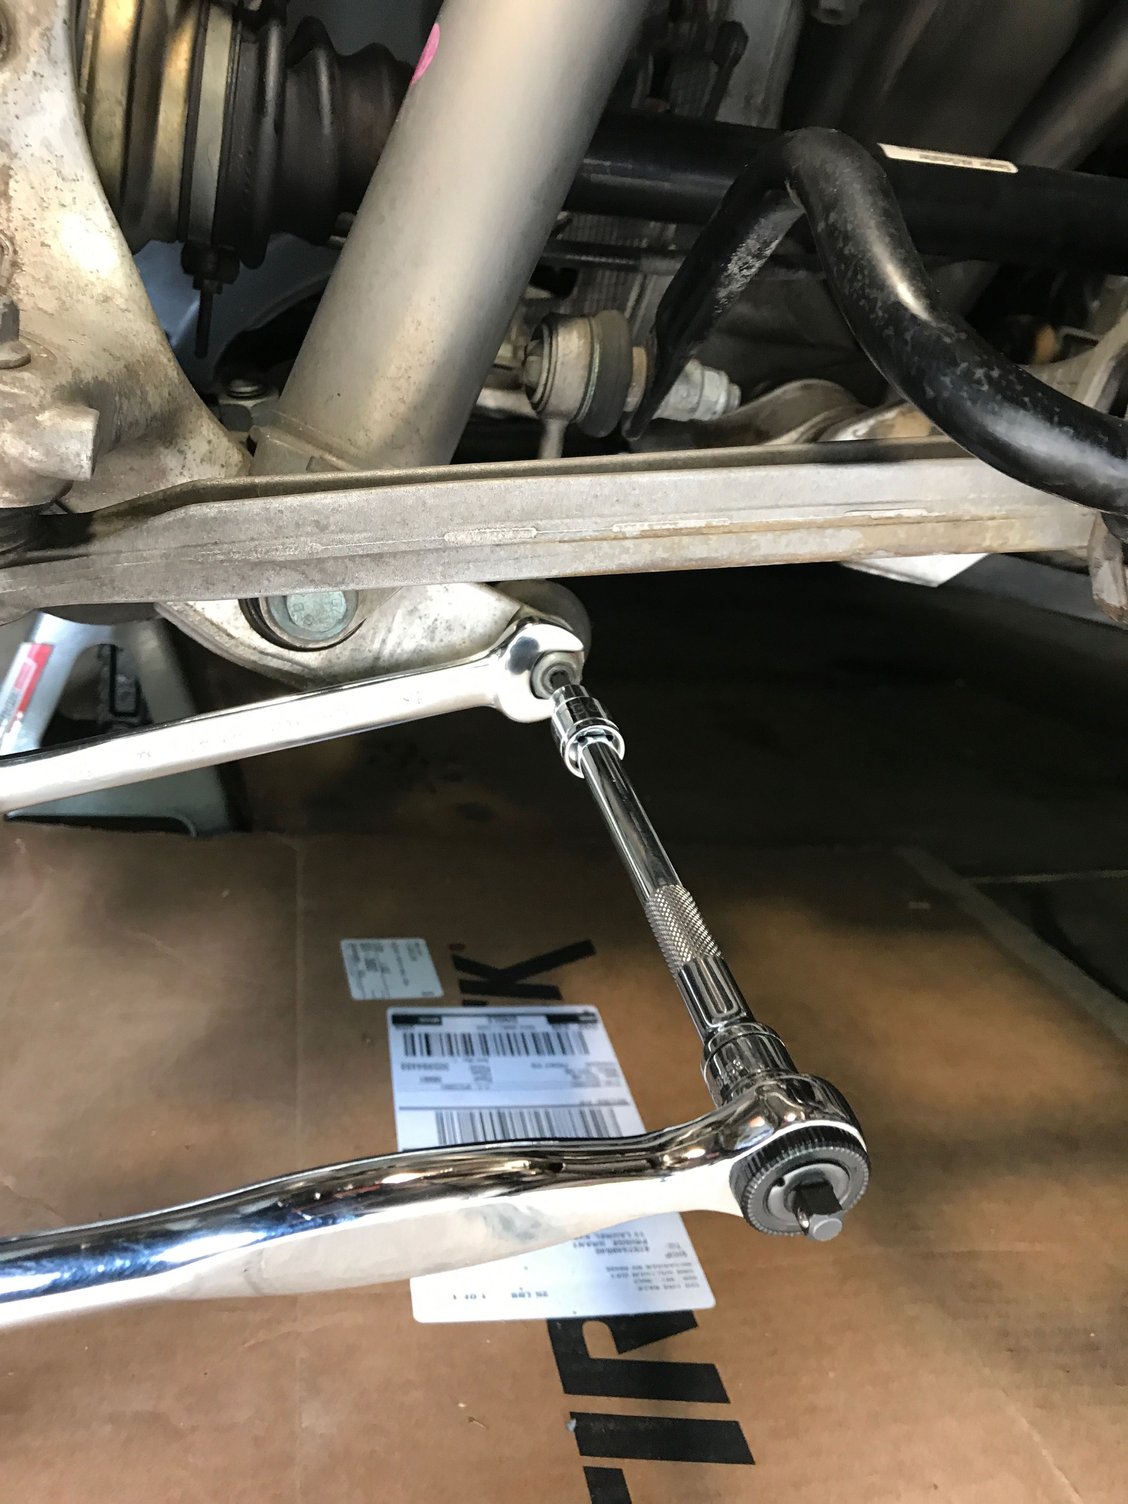
Step 2 - Loosen the 2x 13mm nuts to the anti roll bar mounting bracket on the chassis.
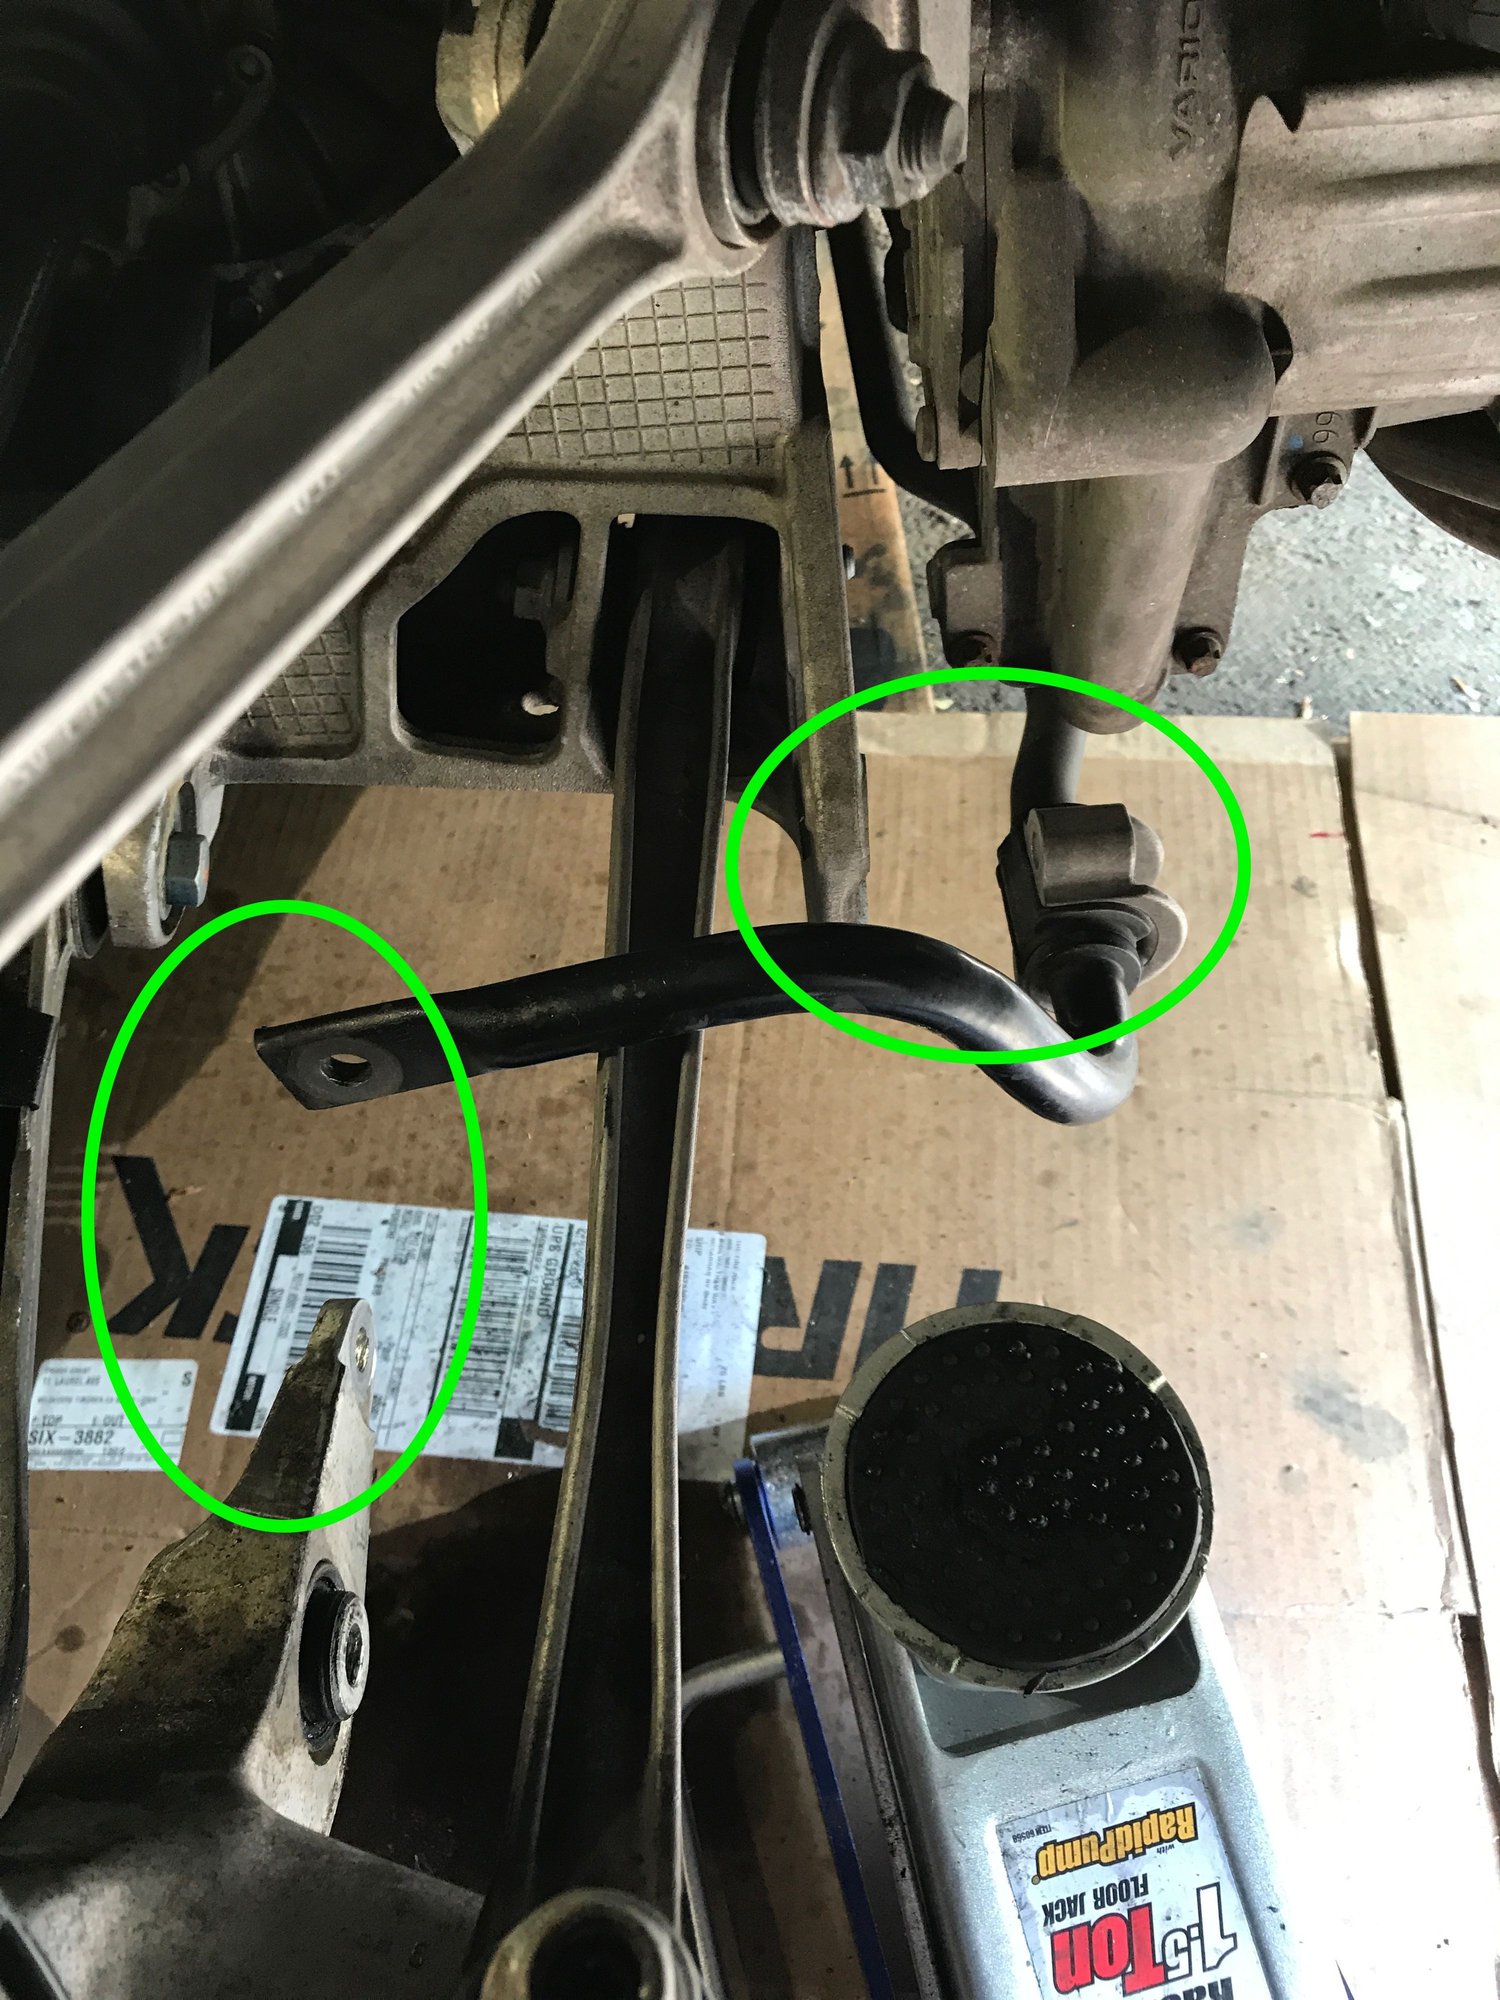
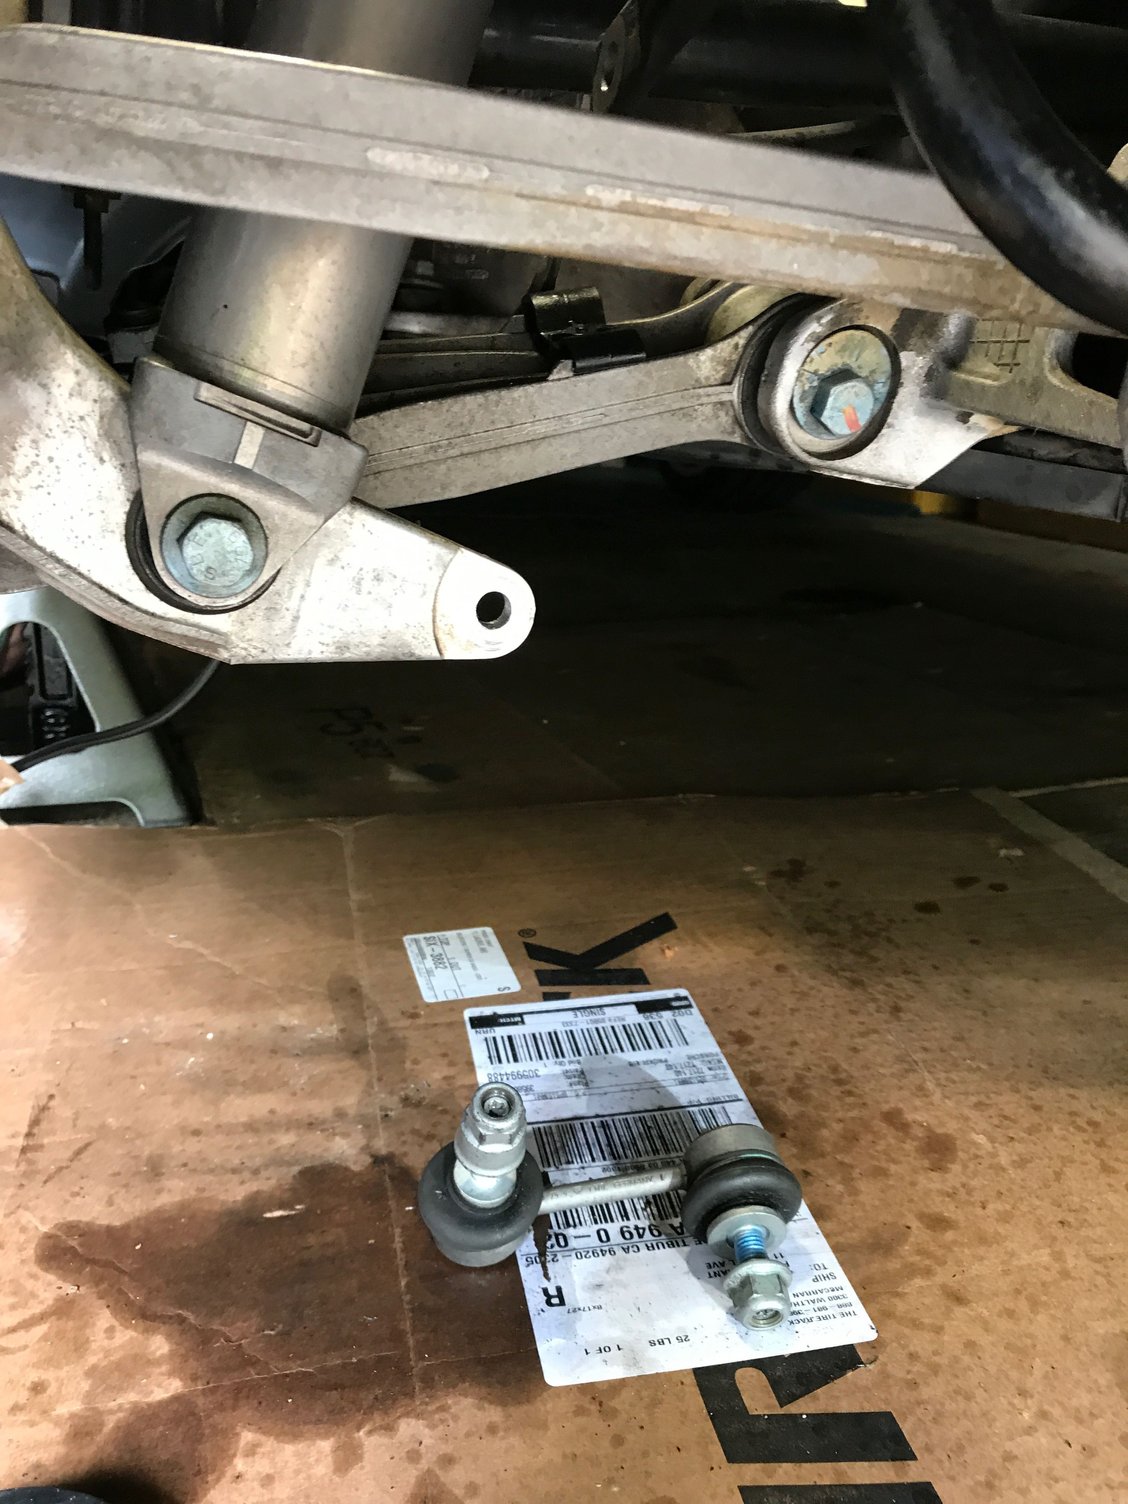
Step 3 - Remove the drop link with a 16mm socket. You might need a T30 to counter. I removed both top and bottom but you likely only need to remove one or the other. It was a real PITA to try to get the bolts out until I figured out you need to jack up the wheel carrier a bit to get the bolts line up. Then its easy.
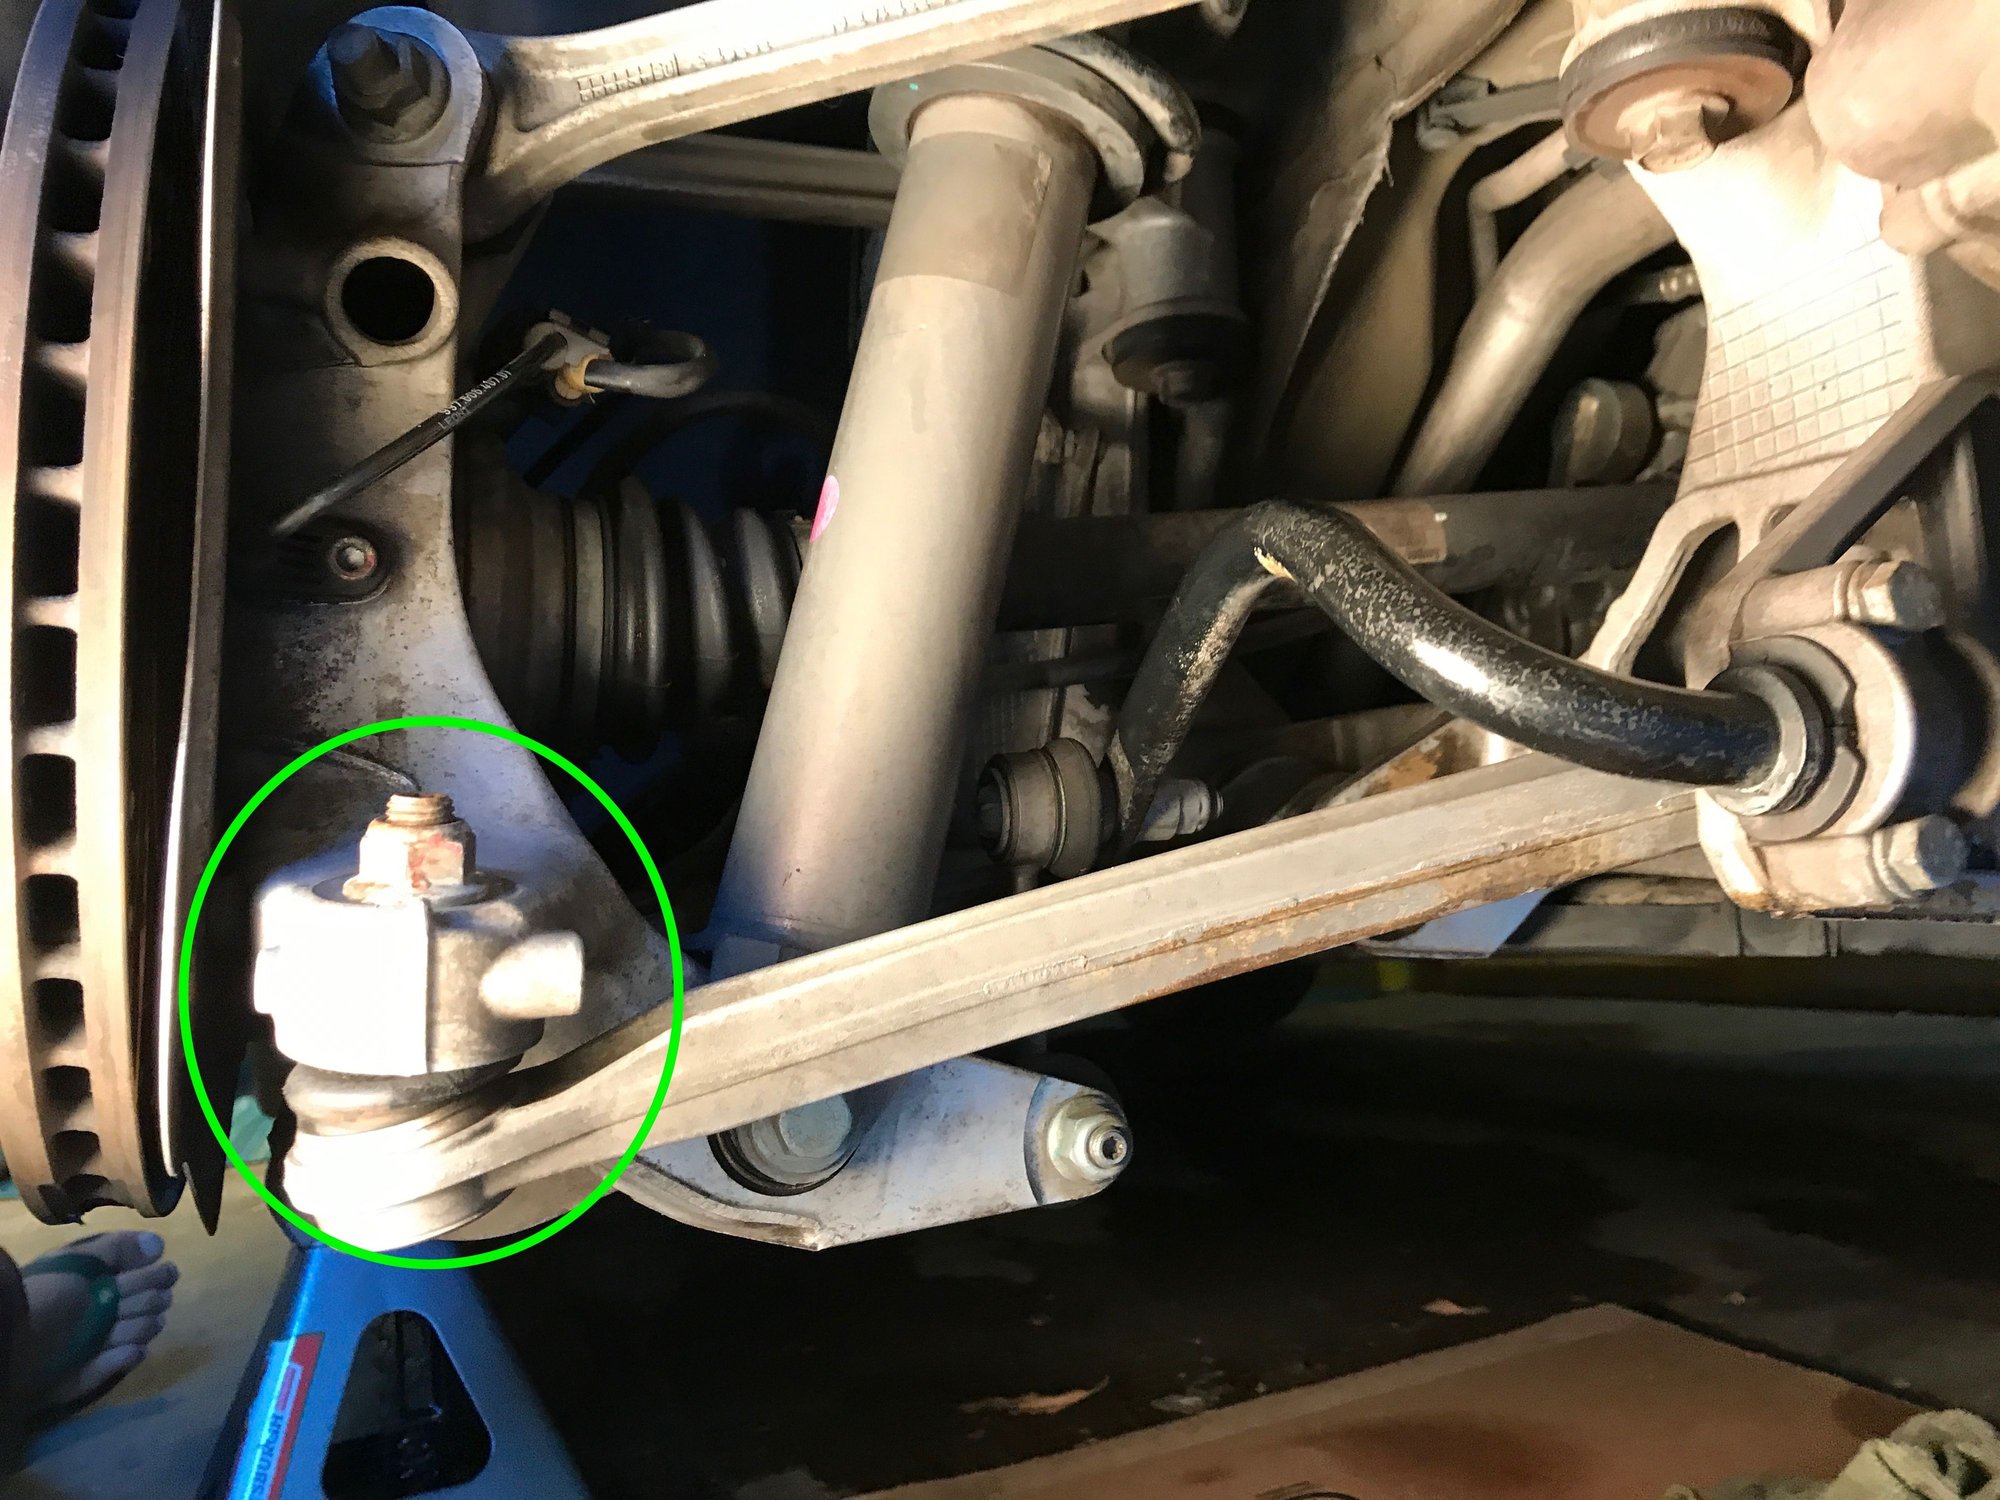
Step 4 - Remove the rear toe control arm with a 18mm socket. You might need a T30 to counter. Then use the ball joint separator to pop it off. Manipulate it above the wheel carrier so its out of the way.
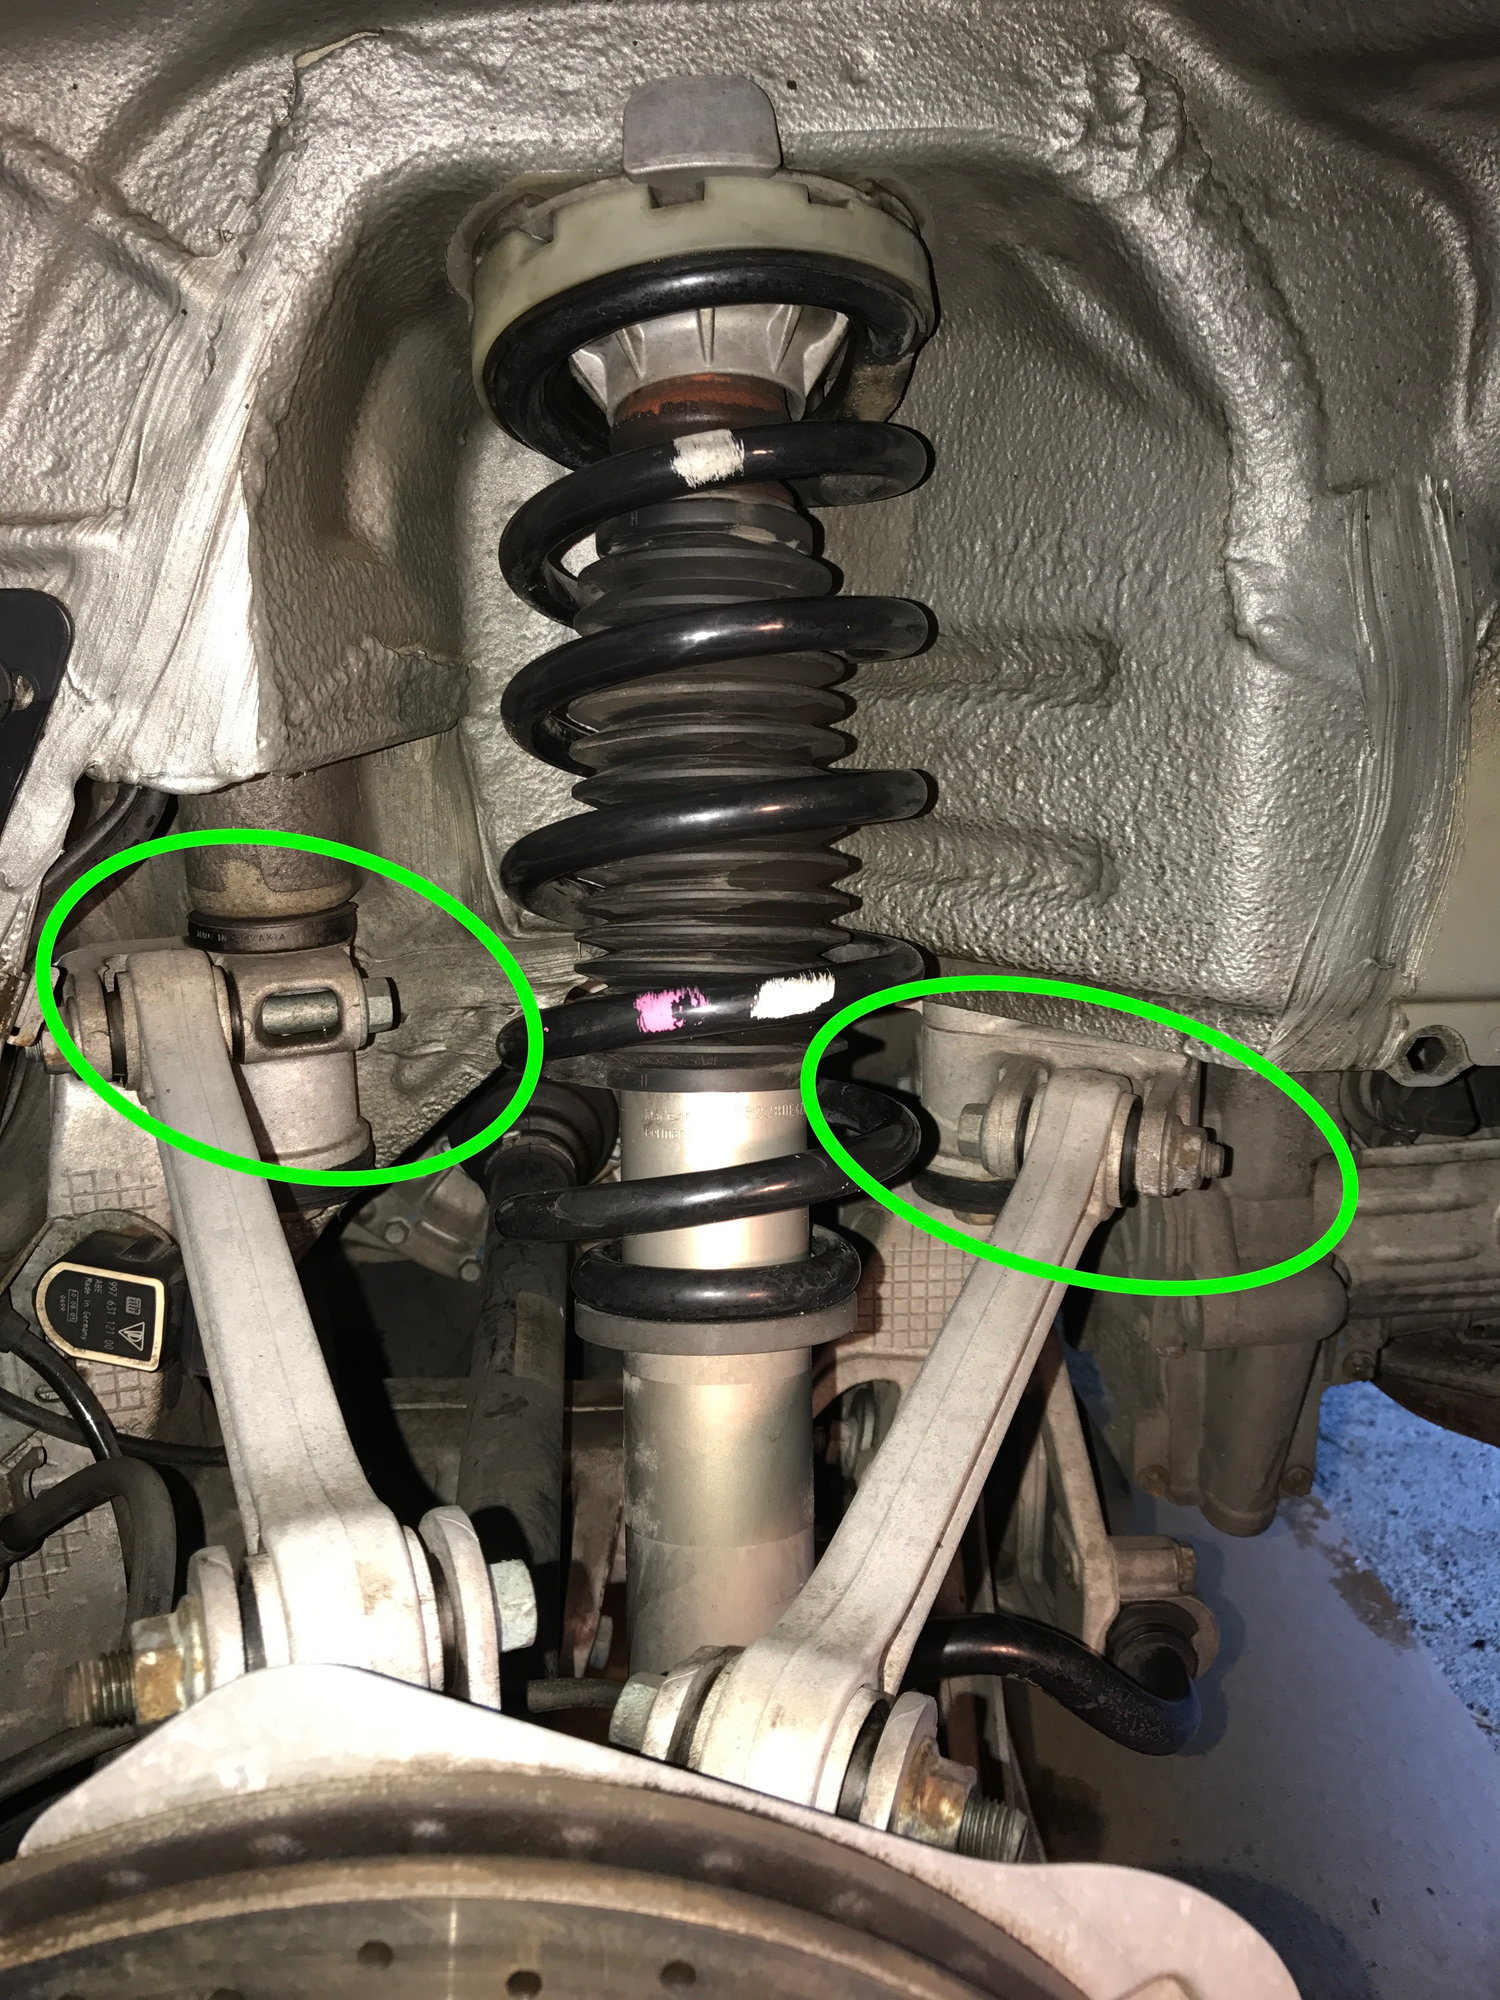
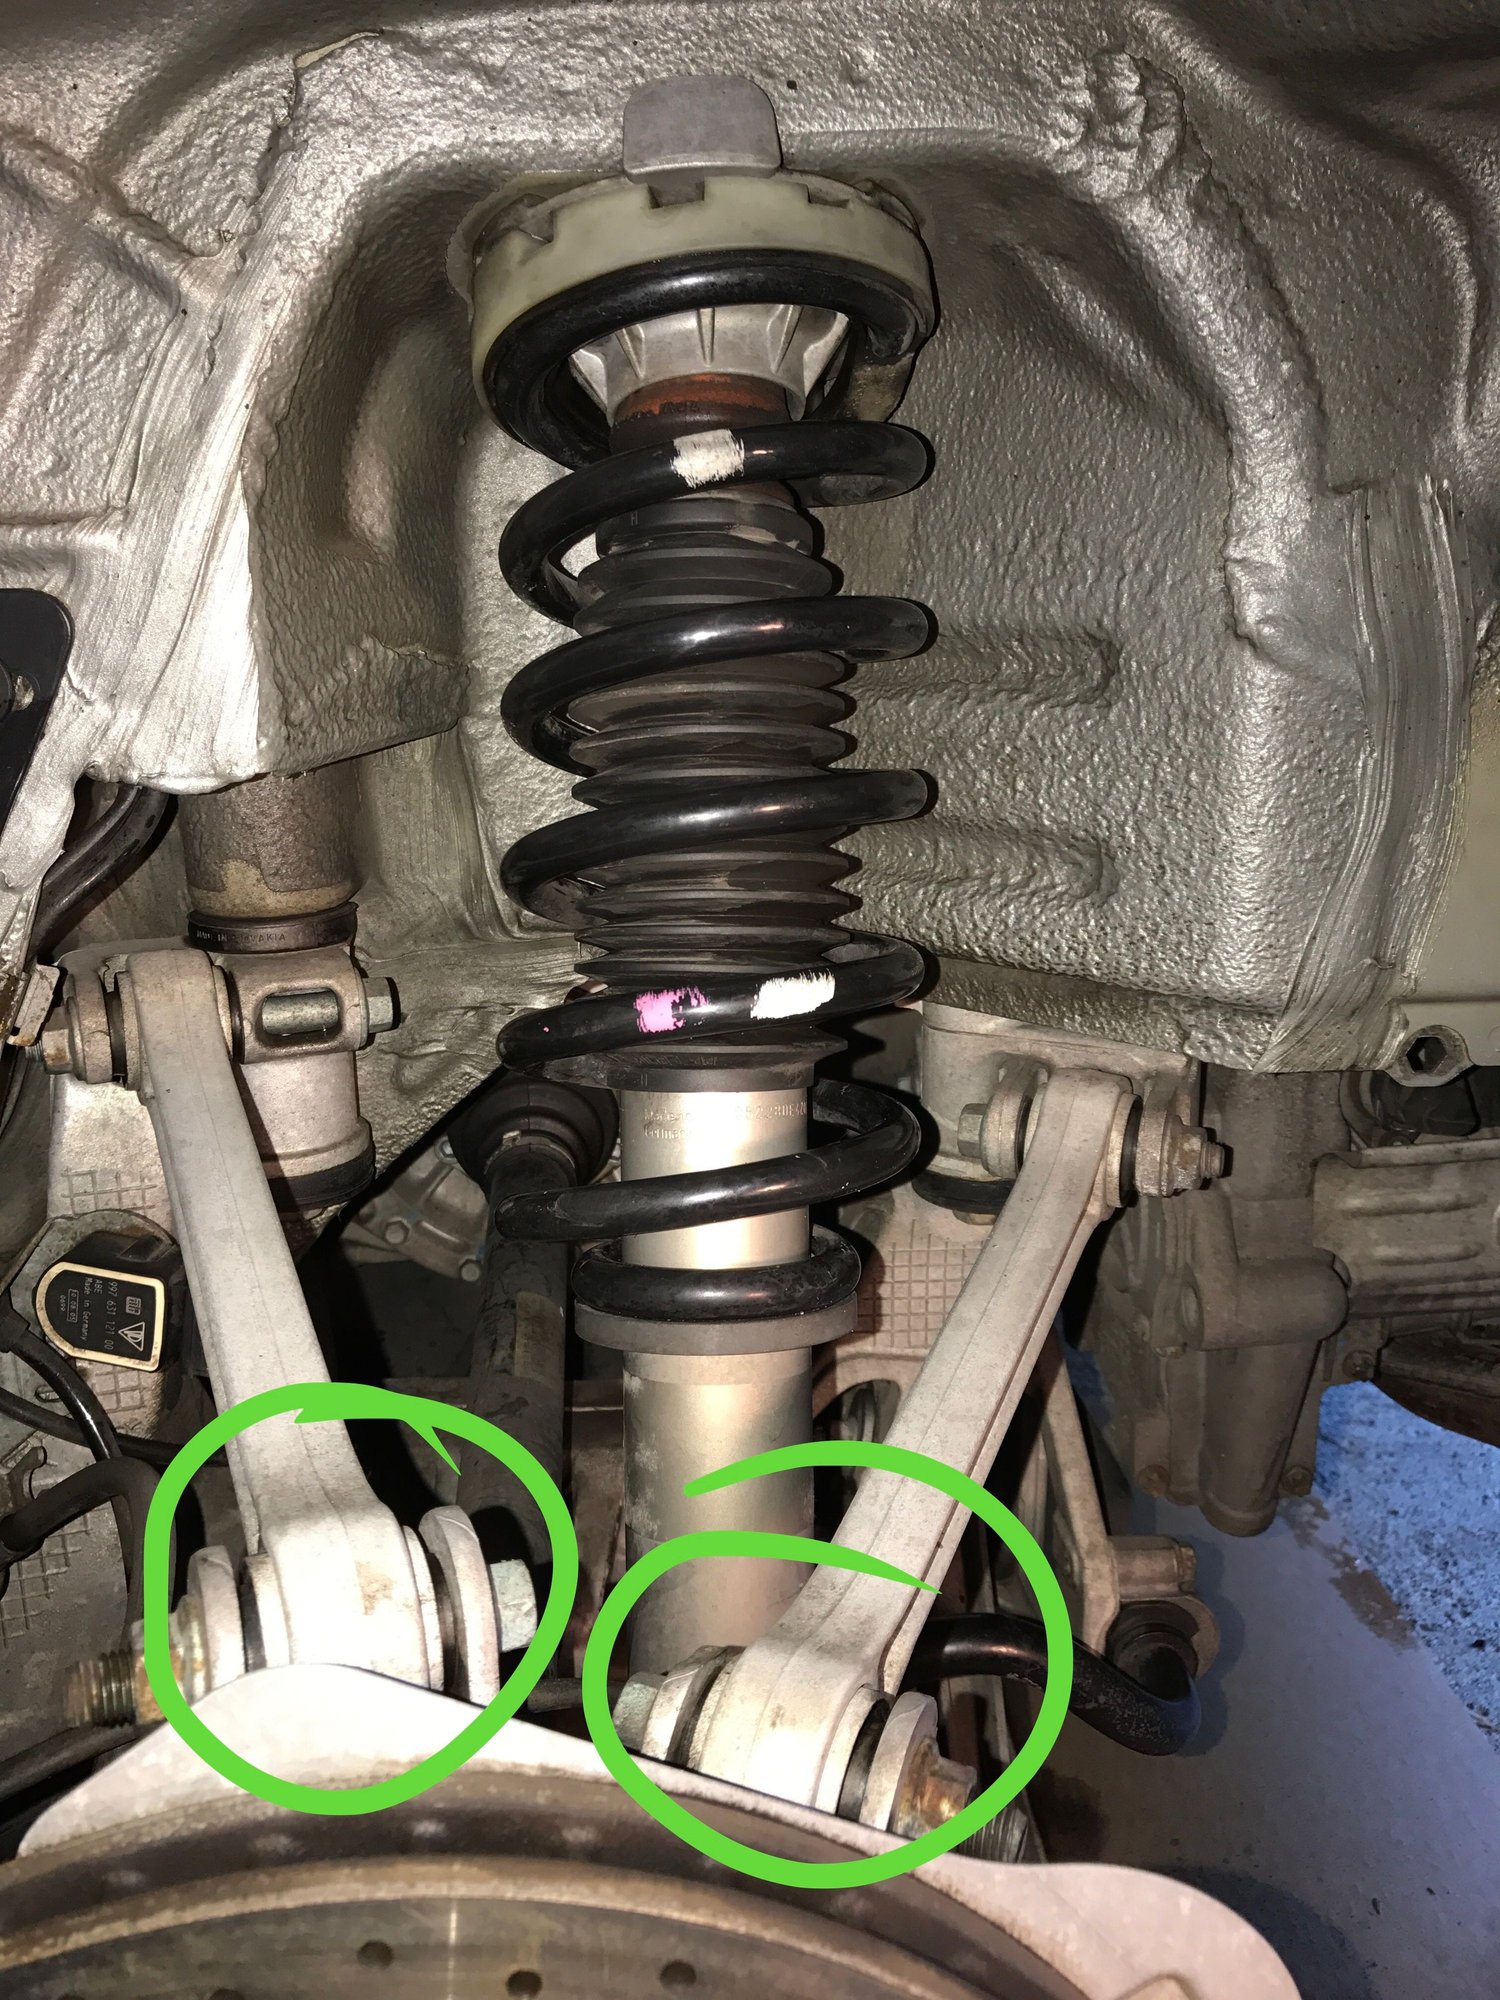
Step 5 - Remove both upper control arms at the chassis with a 16mm socket and 18mm box wrench on the nut. If you manipulate the wheel carrier a bit with the back the bolts should slide out most of the way. Unscrew them the rest of the way out. Make sure to remember the orientation of the bolts.
Keep the floor jack under the wheel carrier to steady it. Once you remove the control arms it will flop around a bit and I tried to keep it aligned to the drive shaft.
Note: I got a recommendation to remove the control arms at the chassis but I think it could be easier to reinstall and torque if you remove from the wheel carrier side. The bolt on the upper front control arm is really long and a PITA to get back in and torque because the strut is in the way.
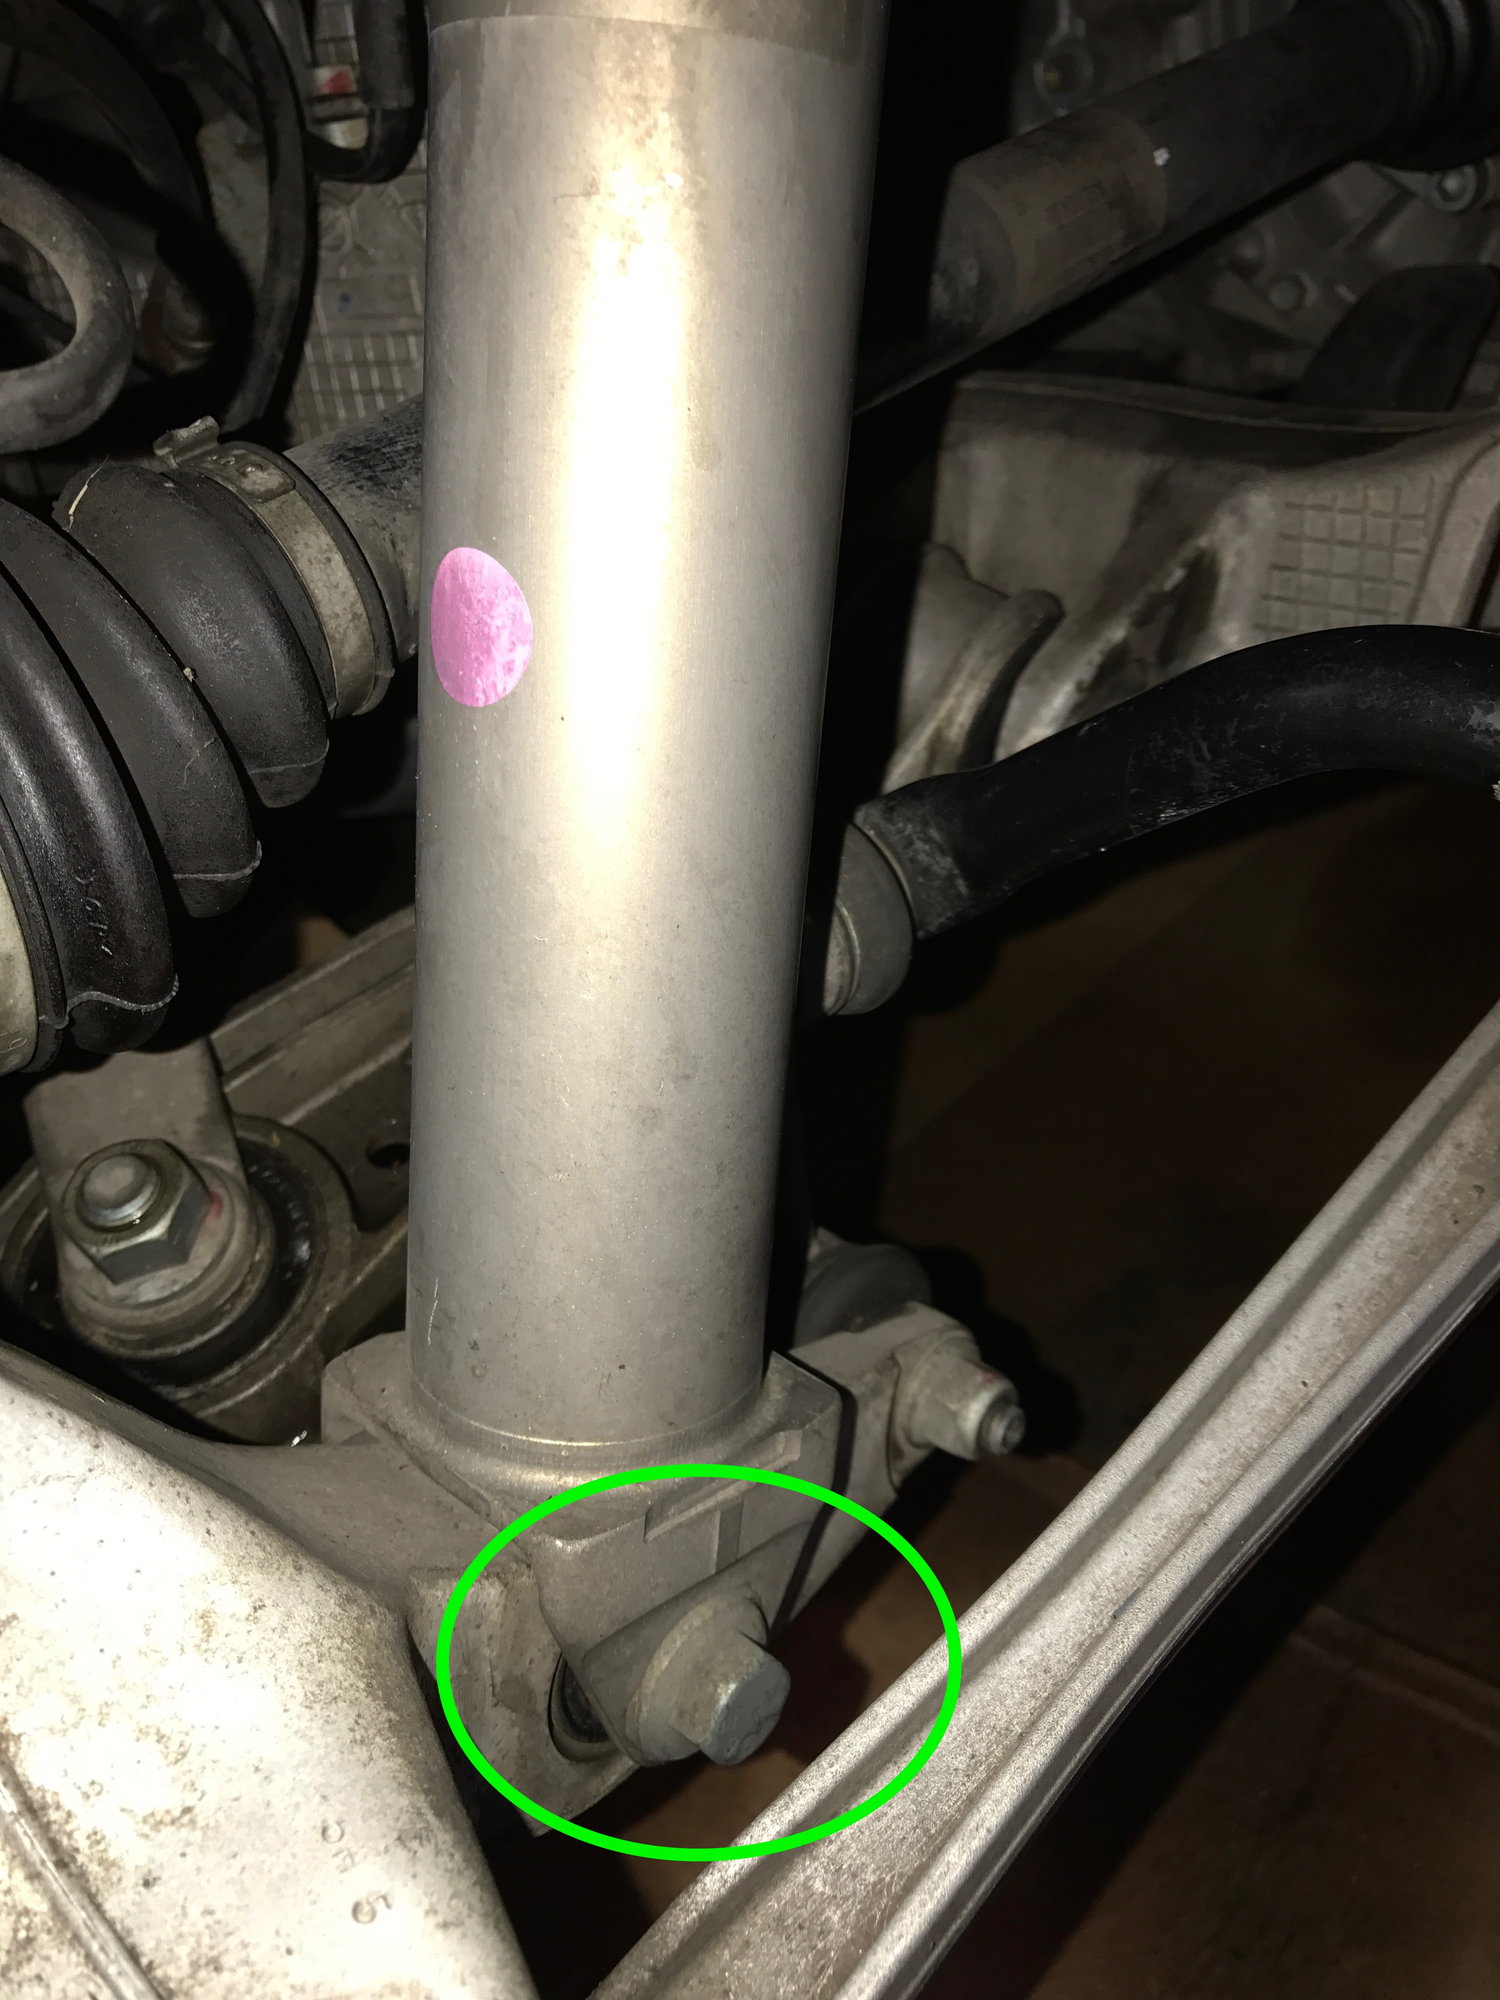
Step 6 - Remove the lower strut bolt with 16mm socket and 18mm box wrench. Make sure you note which bolt came from where. The strut bolt and upper control arm bolts are very similar.
Step 7 - Put the jack under the wheel carrier to keep the strut from falling out. Then get back in the car and remove the 3 15mm strut bolts. At this point the strut will be free.
Step 8 - You will need to tap on the bottom of the strut with rubber mallet to push it off the arm. Make sure you pull the sway bar out of the way or the strut will get hung up on it (this is why you remove the sway bar bracket from the chassis). Now pull the strut down and out of the wheel well. You will have plenty of clearance but still don�t forget to put towels around it.
Step 9 - Remove the 19mm strut nut and note the location of the compensator plates. Clean the strut and parts before putting the new spring on.
Congratulate yourself you are on the home stretch of the project.
Reinstall the Rear Struts
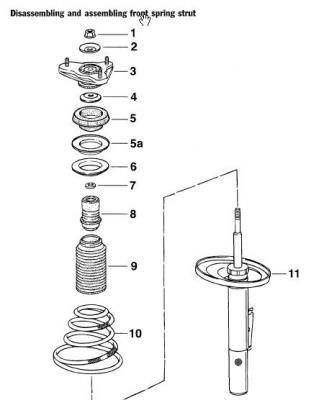
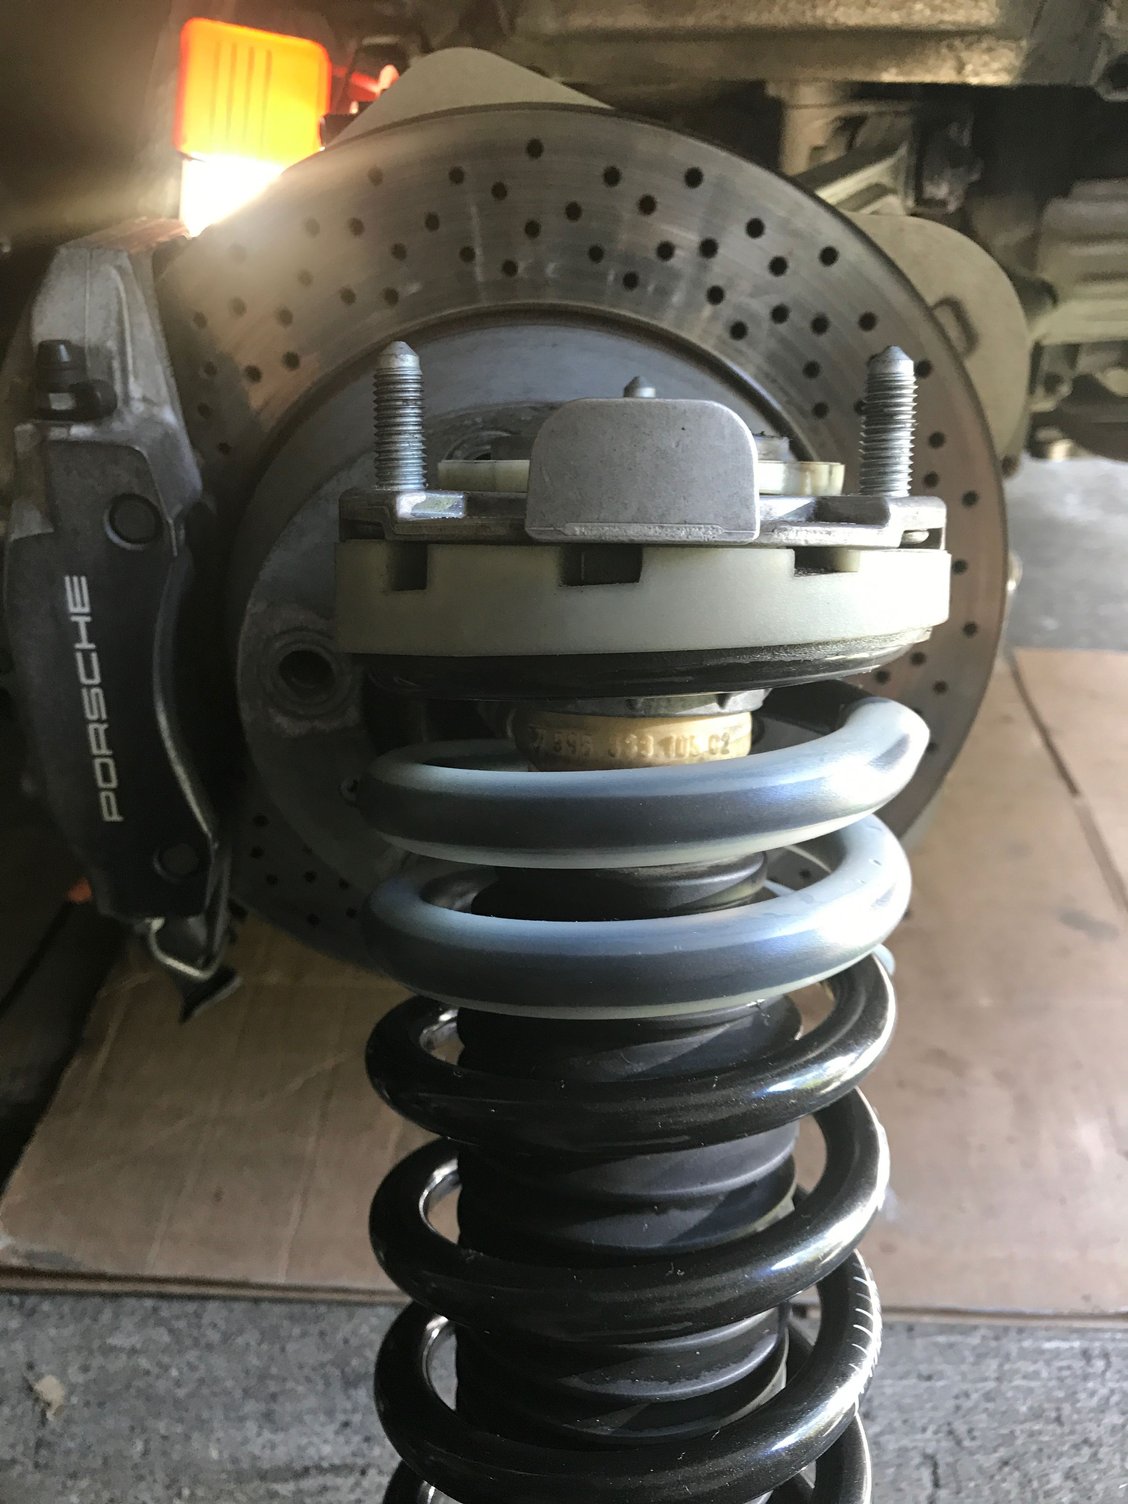
Step 1 - Resemble the strut with new spring. Its important to note the of the strut, strut mount and the white plastic �spring insulator� and rubber spring �upper mount base� (a wedge shaped plate and rubber gasket between the top of the spring and strut mount) are aligned correctly.
The strut has a dot and sticker facing outward.
The strut mounting plate has the same arrows as the fronts. It also has a metal tab that faces outward around and curls around the body (making it impossible to misalign).
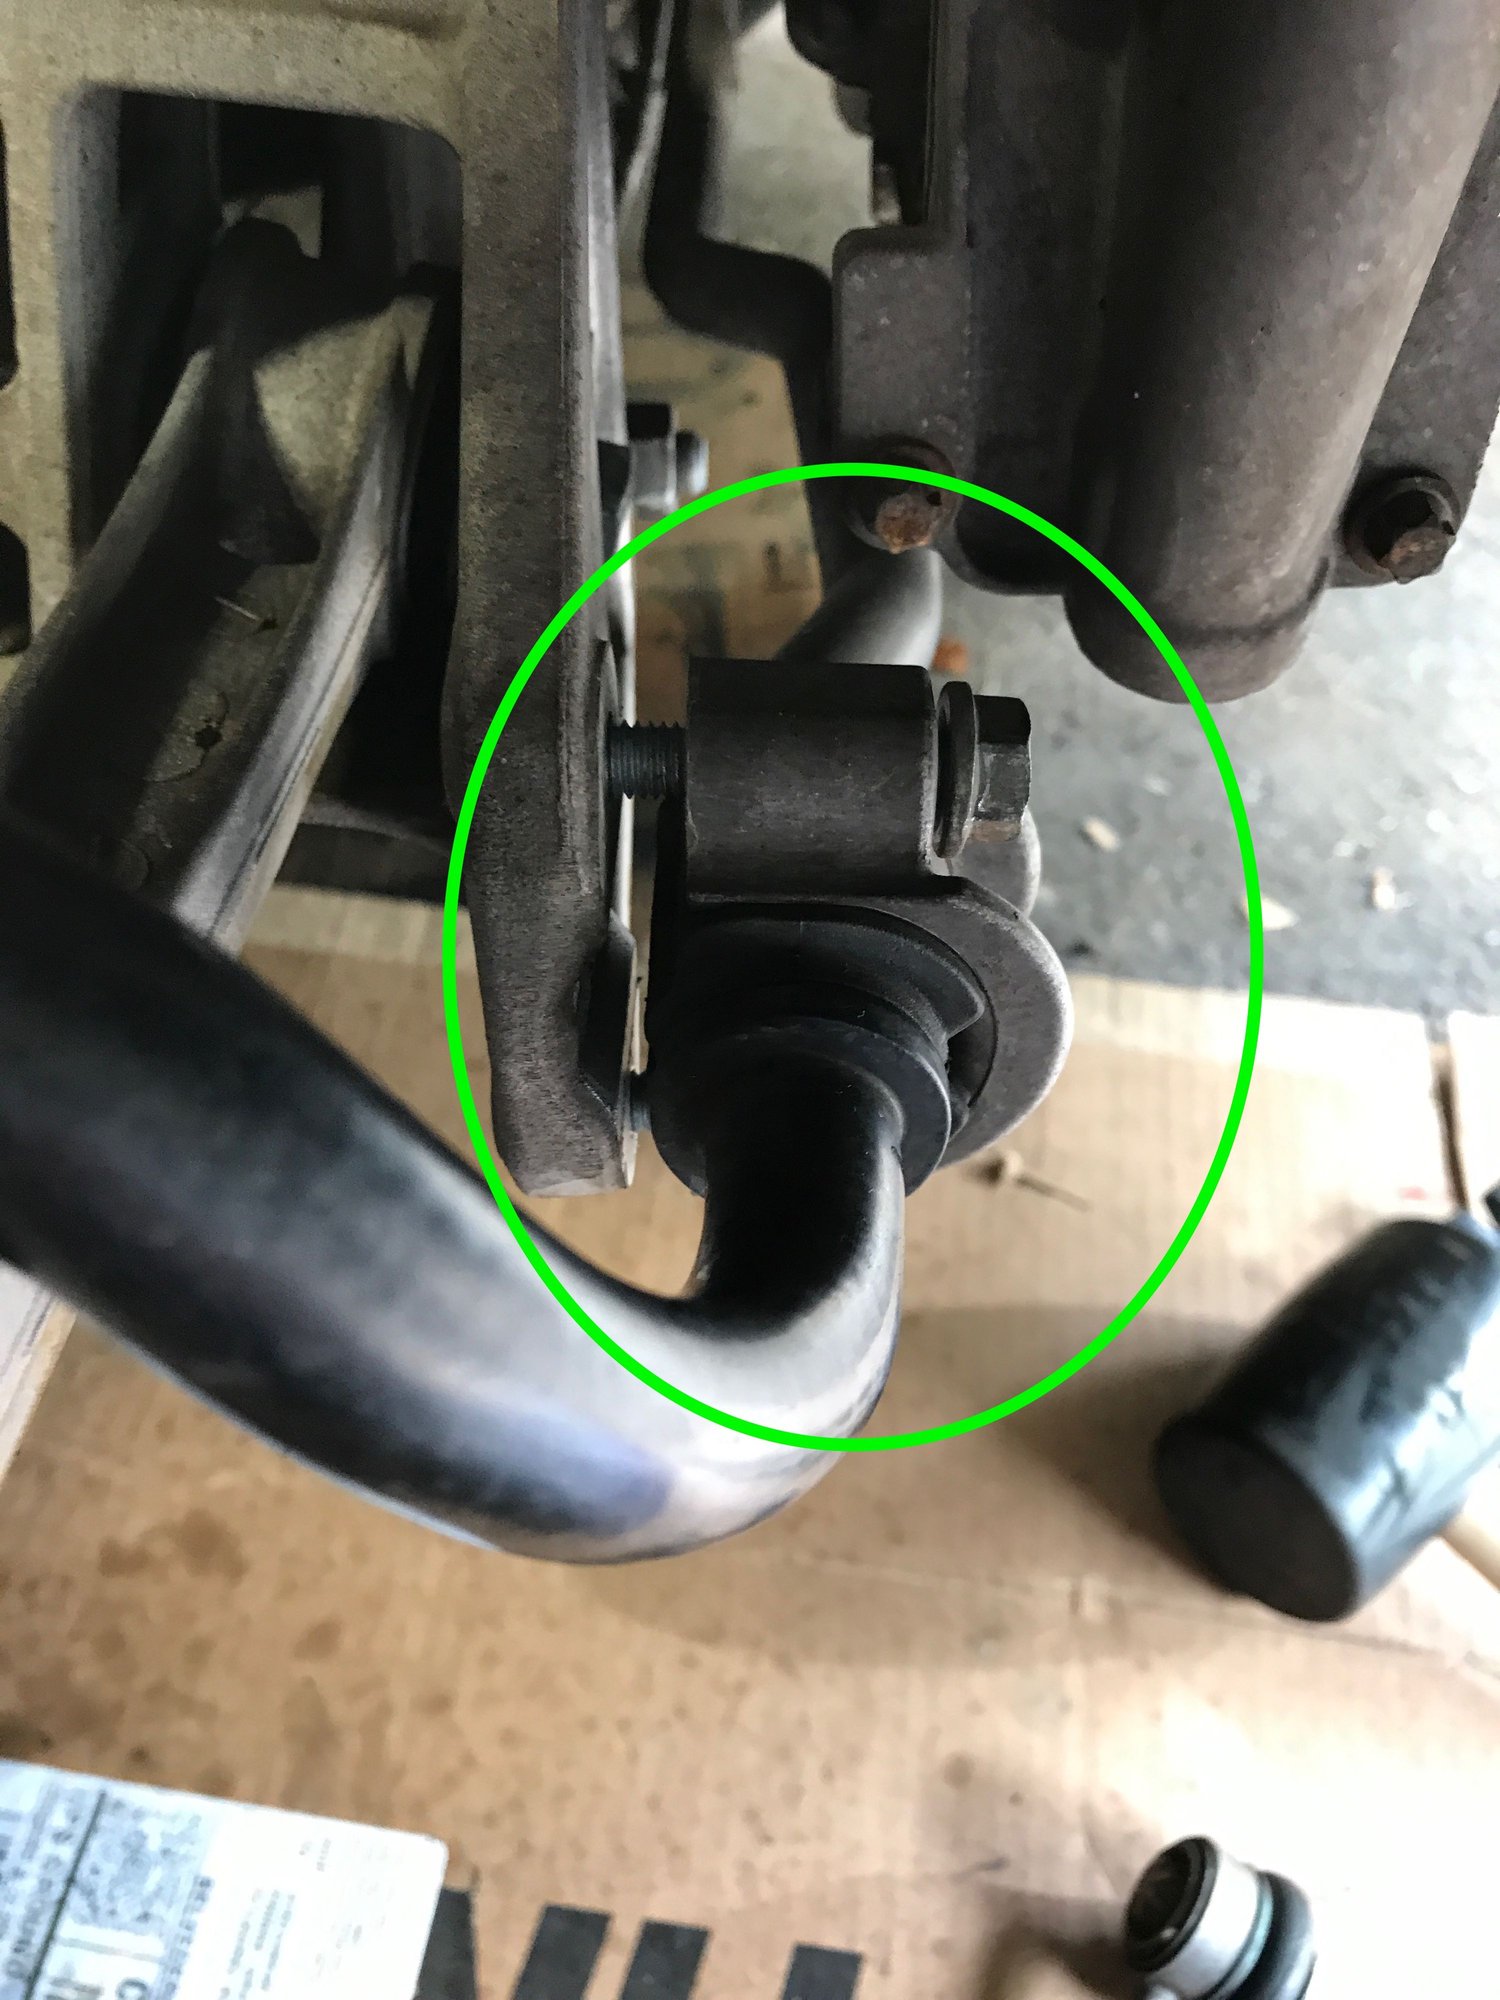
I think you also need to align the white plastic spring insulator the same way on both sides but can't confirm this. I just copied the way it was before I removed it, which is to place the taller side of the wedge on the inside of the wheel well and the shorter side facing outward. I aligned them both the same by lining up the 2nd slot in the white spring insulator plate with the outside metal tab on the strut mount. Its hard to explain but you will get it when you see it.
Seat the top of the spring properly in the rubber �upper mount base�.
Note of caution: I found the top of the spring upper mount base had become slightly cockeyed in the white spring insulator after I had the strut installed. I had to put the spring compressor back on to get it seated properly. Keep and eye on this.
Step 2 - Put the spring compressors back on in the front of the strut (facing you). You only need one and dont worry about tightening too much. It will just give you a little extra wiggle room.
Step 3 - Slide the strut over the wheel carrier then back up into the wheel well and align the strut mounting studs in the proper holes. Make sure the strut base is in front of the sway bar and resting on top of the wheel carrier strut mounting arm. Don�t worry about lining up the strut mounting bolt just yet, just make sure its resting on top of that arm or its a PITA to manipulate later.
Step 4 - Go back inside and tighten up the 3x 15mm strut mount nuts. Don�t tighten them all the way down just yet. Just enough to get the mounting plate seated flush in the wheel well.
Step 5 - Now slide the 16mm lower strut bolt back through the mounting arm on the wheel carrier and hand tighten the 18mm nut. Note the position with the nut facing forward.
You will need to use the floor jack and rubber mallet to manipulate the wheel carrier and strut in the right position to get the bolt through. Some posts said this was a major PITA but in my case it wasn�t too hard. You will likely have your knee steadying the wheel carrier from twisting, one hand pulling on the strut toward you and another working the floor jack all in concert. I also sprayed a little WD40 on the mounting arm and strut base to help slide it along.
Step 6 - Align rear control arm and put the 16mm bolt back through. Note the shorter bolt is used for the rear arm and longer bolt for the front arm.
Its a little tricky align the control arms so you will need the floor jack to help push up the wheel carrier up to make it easier. Once you have the rear arm in then align the front arm. This is a little trickier since the bolt is longer and you need to get your hands behind the strut to get a socket on it. Just hand tighten the bolts once the bolts are through.
(As I mentioned previously, it is likely easier to remove the control arms from the wheel carrier side unless someone has a good reason not to).
Step 7 - Reattach the rear toe control arm. Its a little tricky to get the stud back through the hole because the ball joint is slightly angled when uncompressed. Use the floor jack to push up on the wheel carrier a bit to help guide it in. Once in hand tighten the 18mm nut.
Step 8 - Reattach the anti-roll bar mounting braket on the chassis with the 2x 13mm bolts.
Step 9 - Reattach the drop link. You will need to use the floor jack on the wheel carrier to compress the spring about half way to get this back on. Then its easy. Hand tighten the 16mm nuts.
Step 9 - Torque everything to spec.
15mm strut bolts: 34lbs
16mm strut bolt to wheel carrier (18mm box to counter): 81lbs
16mm strut bolt upper control arm to chassis (18mm box to counter): 81lbs
18mm toe control arm to wheel carrier (T30 to counter): 56lbs
13mm anti roll bar mounting bracket: 17lbs
16mm rear drop link (T30 to counter): 48lbs. Note the Workshop Manual says you should torque these to 35lbs, then back the nut off 90 degrees, then torque down to 48lbs.
Step 10 - Get back in the car and put the insulation, Bose speaker and mounting brackets, carpet and rear seat locks and speaker trim back in the same way you removed.
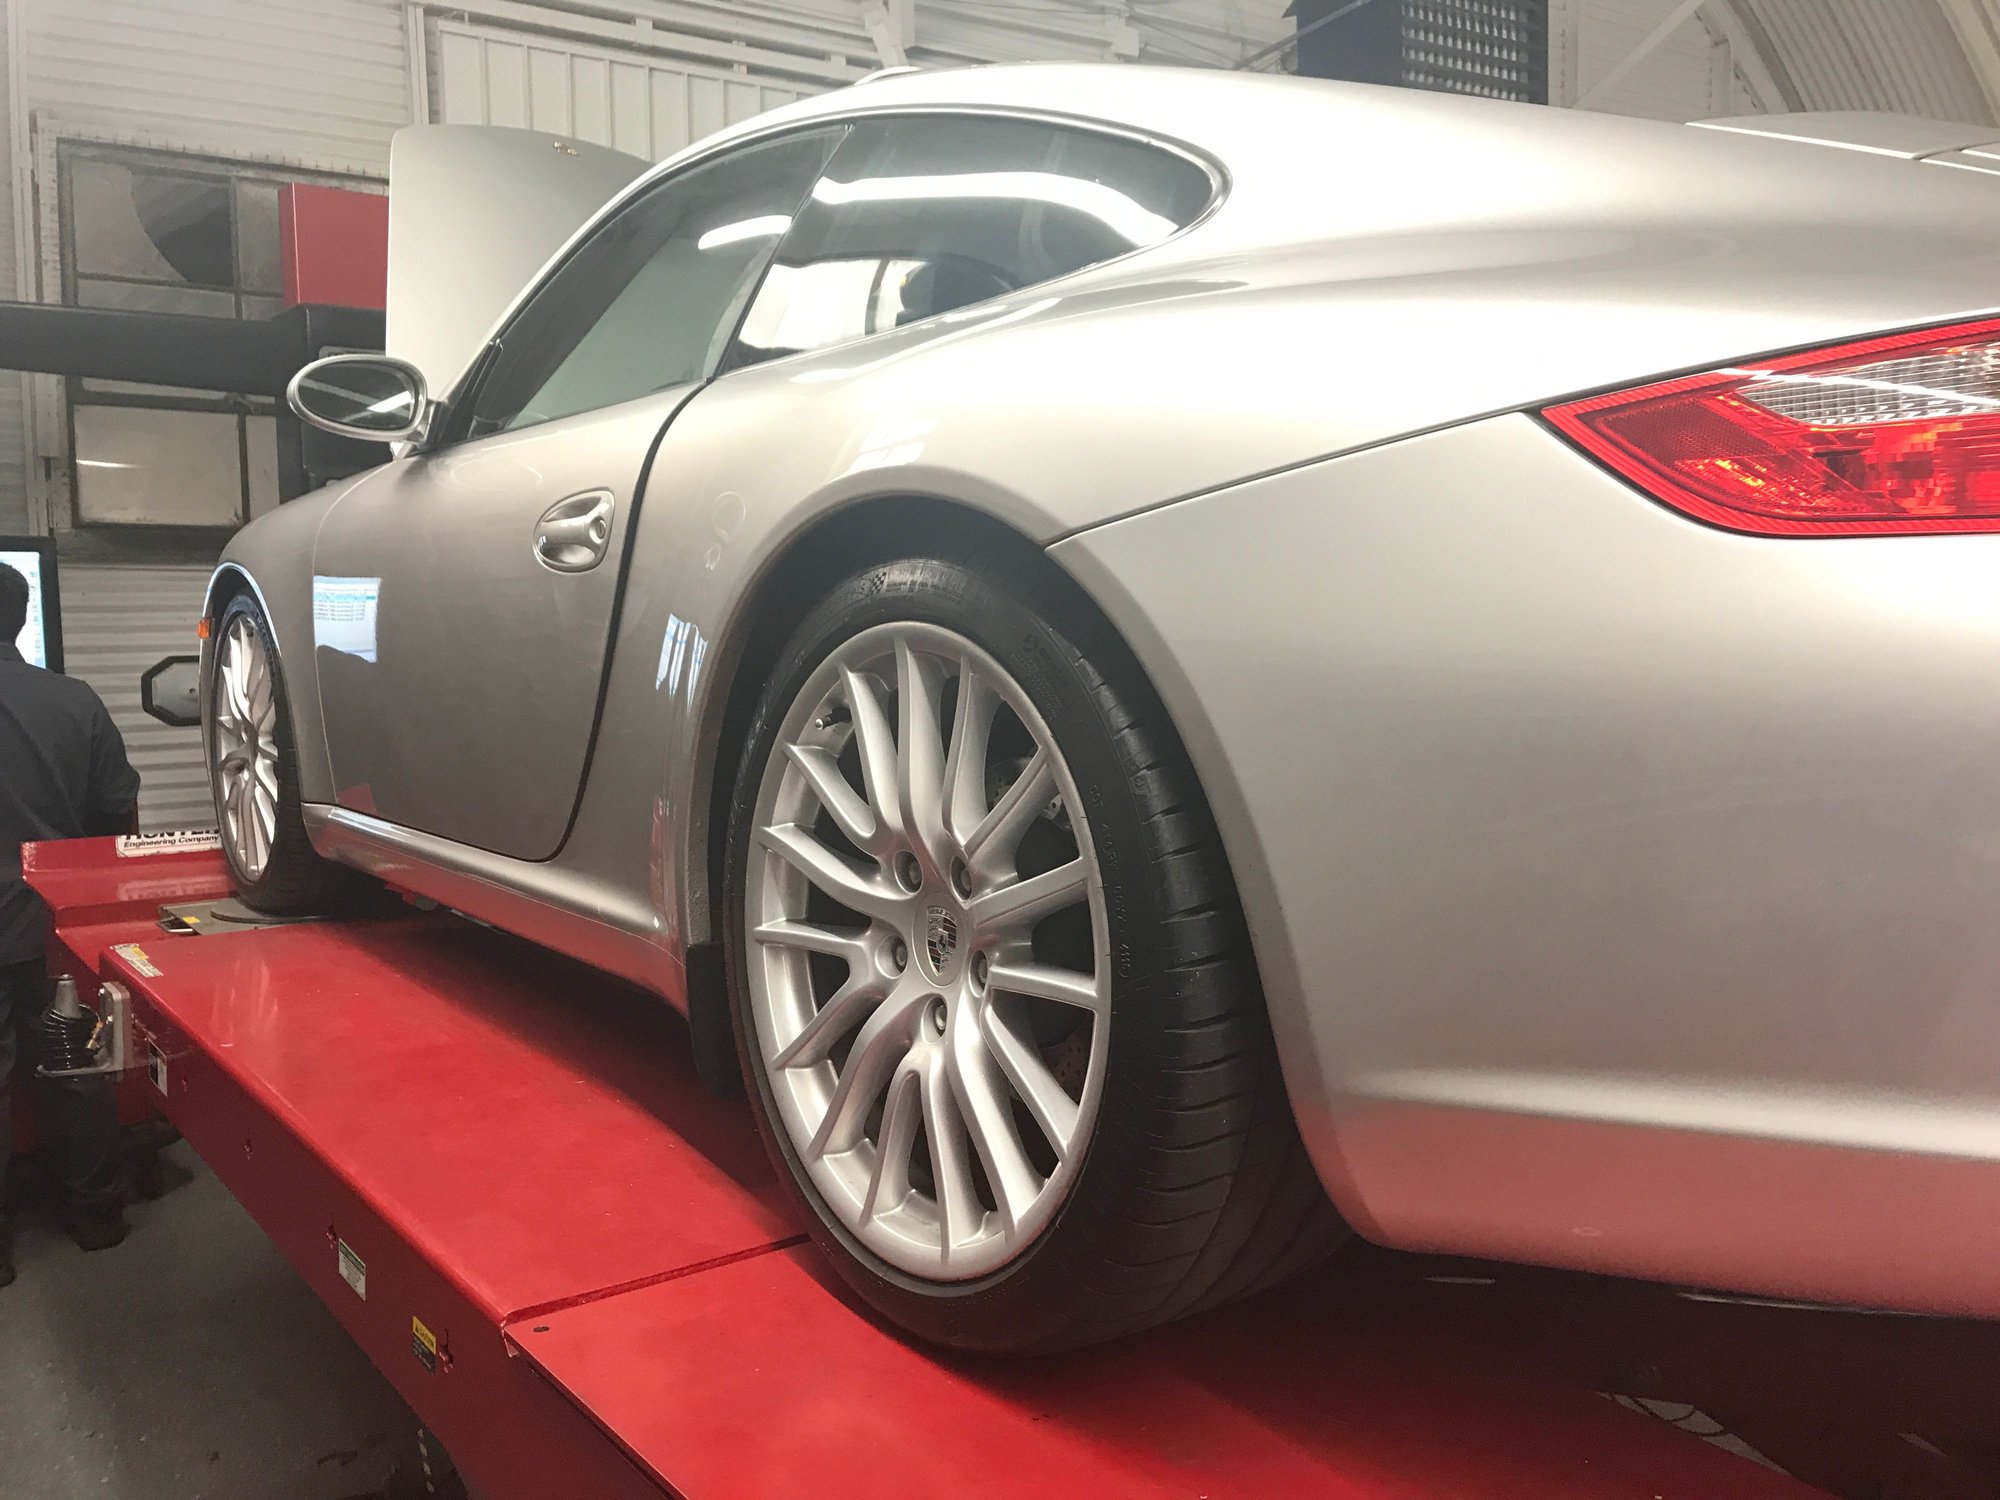
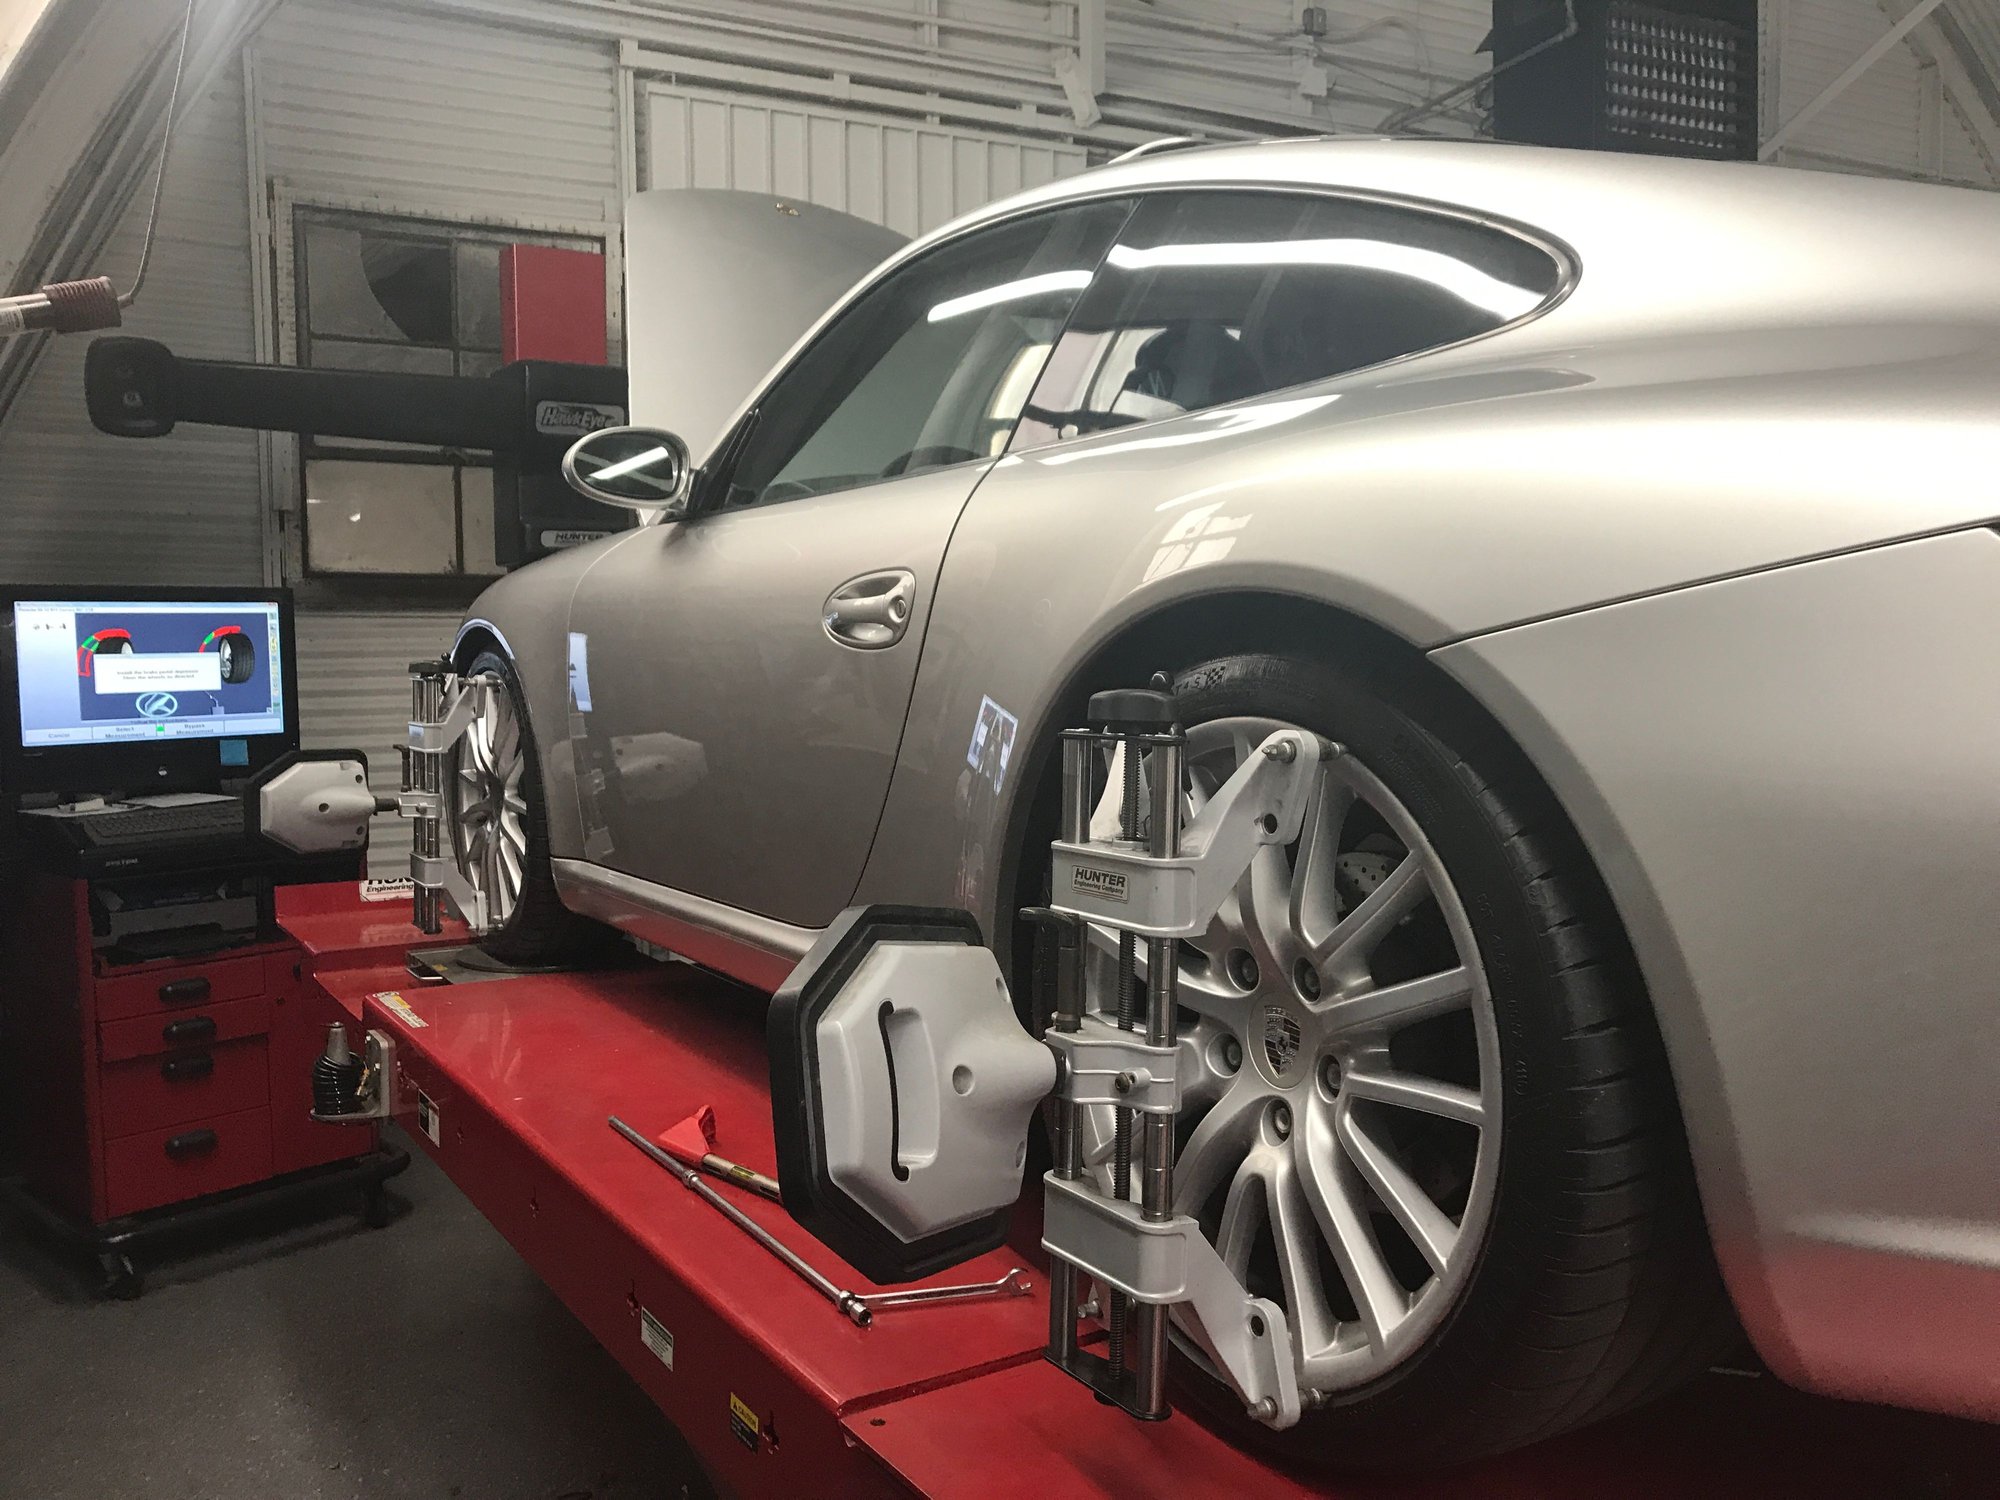
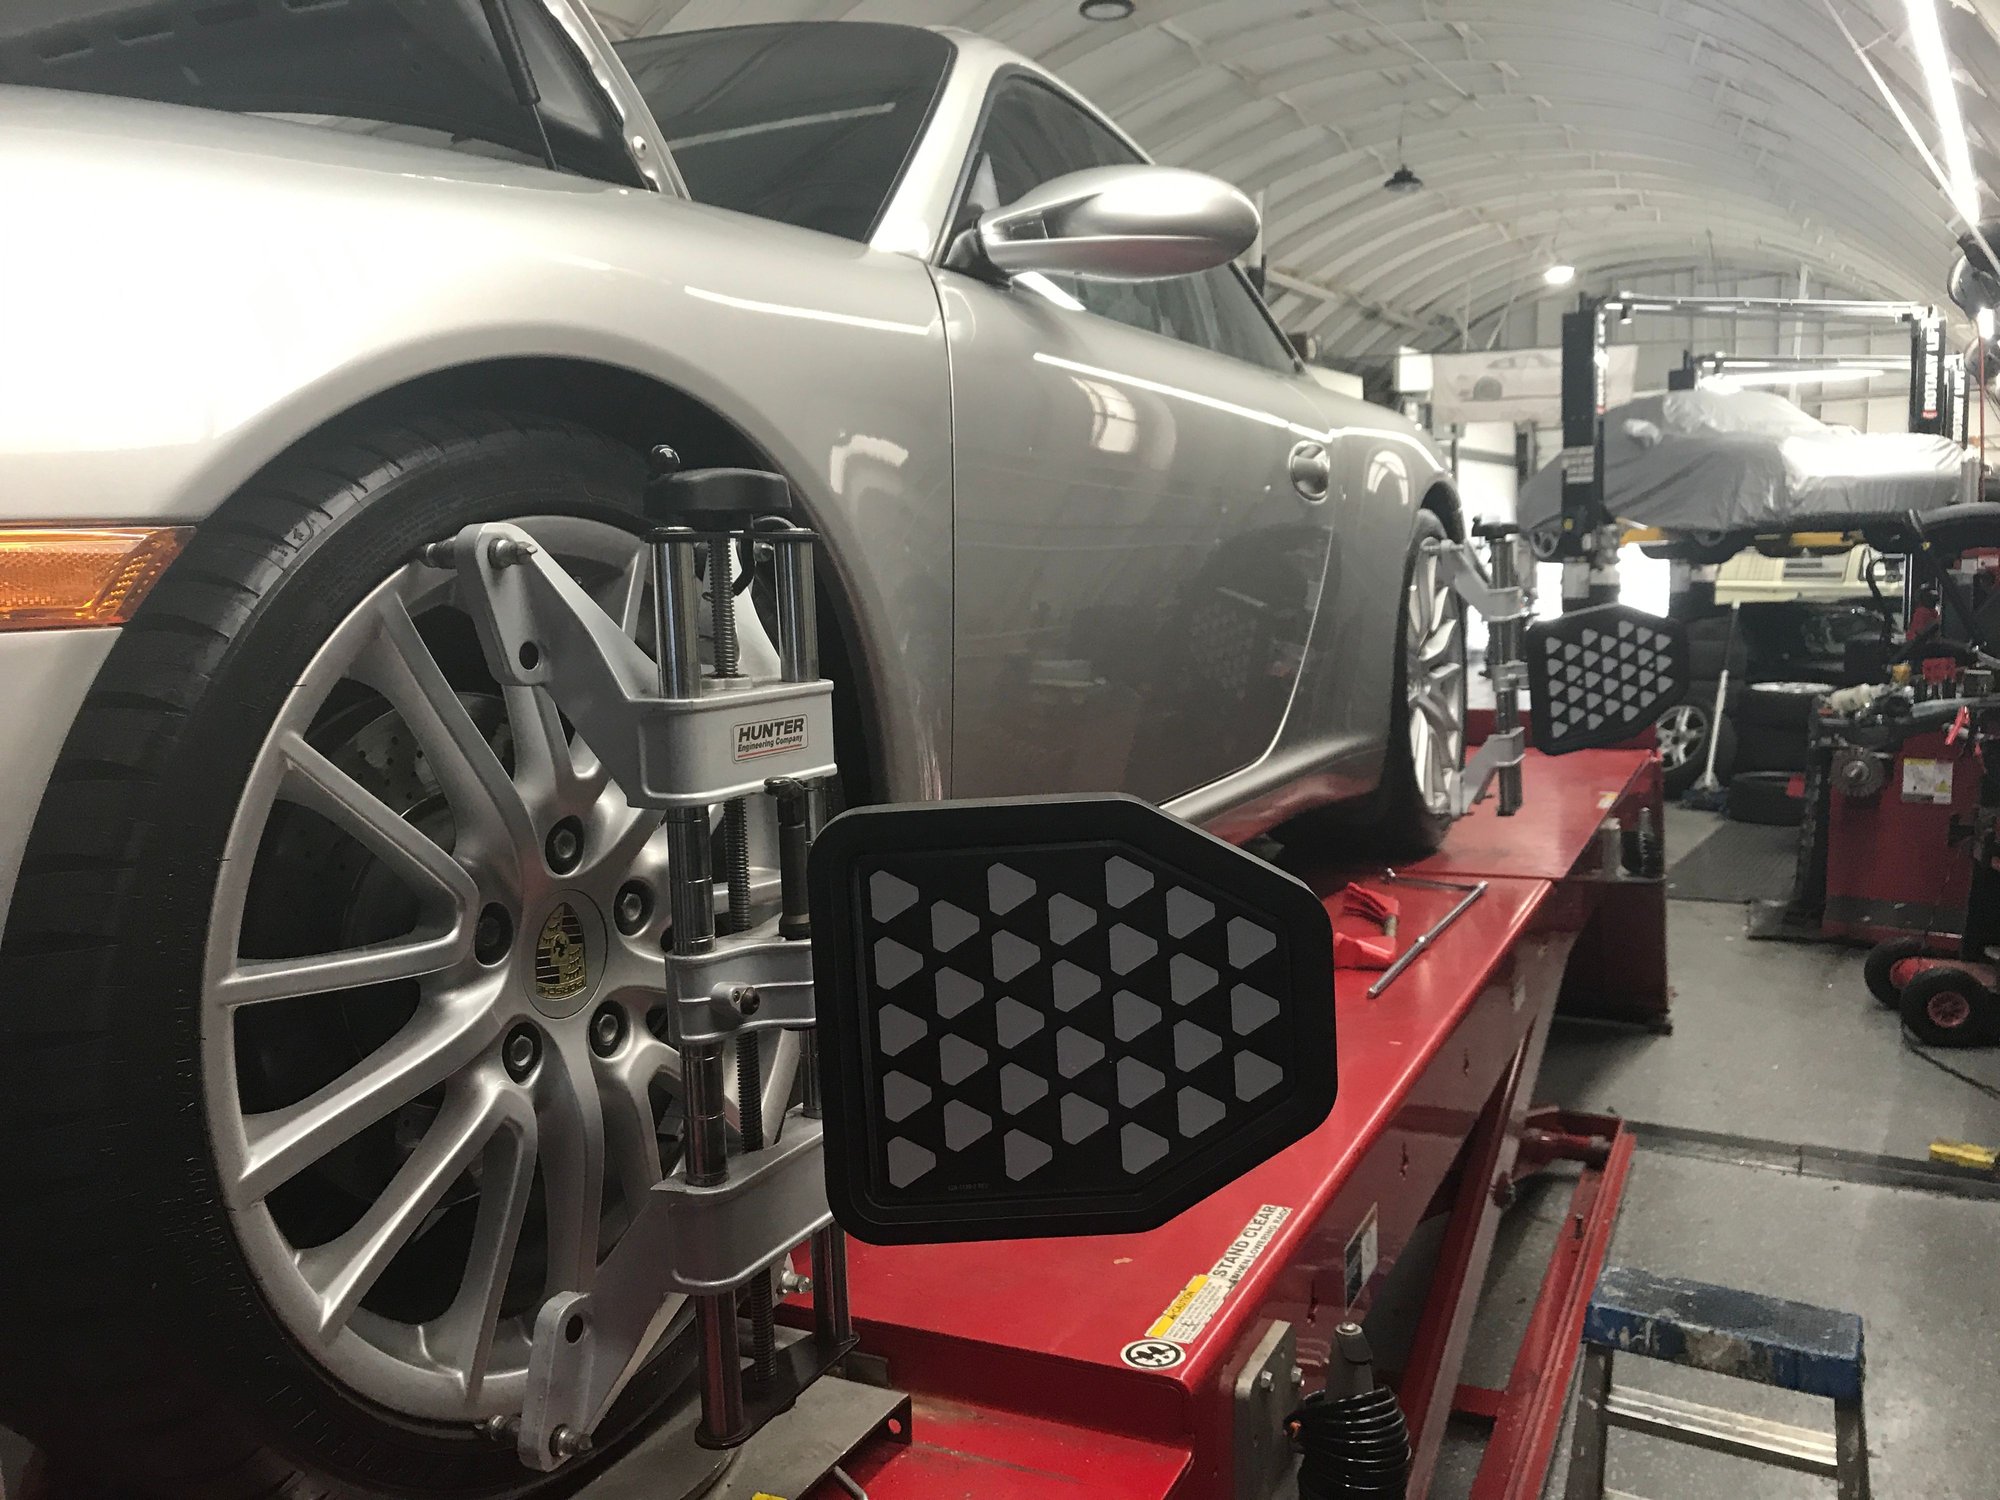
Step 11 - before you grab a couple beers and admire your work I would go take her for a spin to let the springs compress down and see if the alignment is noticeably out. Mine was not but I will still get it aligned later this week.
Congratulations on finishing a pretty major project and learning a ton about your suspension and brakes in the process. If you don't enjoy that sort of thing then definitely have your indy mechanic handle this project and give them an extra tip after. They will have earned it.
Thank you very much. You need to add the extra 3 hours it took just to document this! This will be helpful for me this week. I'm replacing my rear struts.
Again thank you for the hard work it took to create this!
Thank you very much. You need to add the extra 3 hours it took just to document this! This will be helpful for me this week. I'm replacing my rear struts.
Again thank you for the hard work it took to create this!
No problem. It would have saved me a ton of time having something this detailed. Send me a note if you have any questions when you get into your project this week.
I finished installing the rear struts today. Have a lot of vacation so took the day off.
I aligned the spring insulator to the second notch as it was before removing (see pic). I was able to remove and replace without disconnecting the rear track arm. Removing the upper control arms really helps a lot because it allows the hub to tilt back and forth.
I used Bilstein B4s which is a direct replacement. Very interesting how PASM Sport mode changed from an awful bouncy ride to a much more muted yet still stiff ride. Actually tolerable now. With the original struts PASM Sport made me feel like I was in one of those low rider Honda's with stiff suspension. It was really brutal on the back.
Your DIY was helpful and the link to removing the Bose was just what I needed to. Thanks again.
Sweet. Glad it helped. Yes I aligned the spring insulator the same way. I don't know if it has any impact on alignment or ride height. Im headed over to my Indy tomorrow to get an alignment and was planning to ask them.
Why did you replace the struts? Did you keep stock springs?
I have had a couple back road rips on the new Eibachs and I'm really liking them. Its feels much more planted in the corners. Its slightly firmer than stock but not harsh at all.
Im just pissed my RSS spacers haven't arrived yet. They got shipped to the wrong address so I won't be able to officially close out this project until next week.
Side question: what tire pressure are you running? My ride quality improved dramatically after I bought PS4s but the backend was a little floaty in turns. I checked my tire pressure and they put 32 in the front and 35 in the reads. My door sticker recommends 37 in the fronts and 44 in the rears. Trying to get some data points on this.
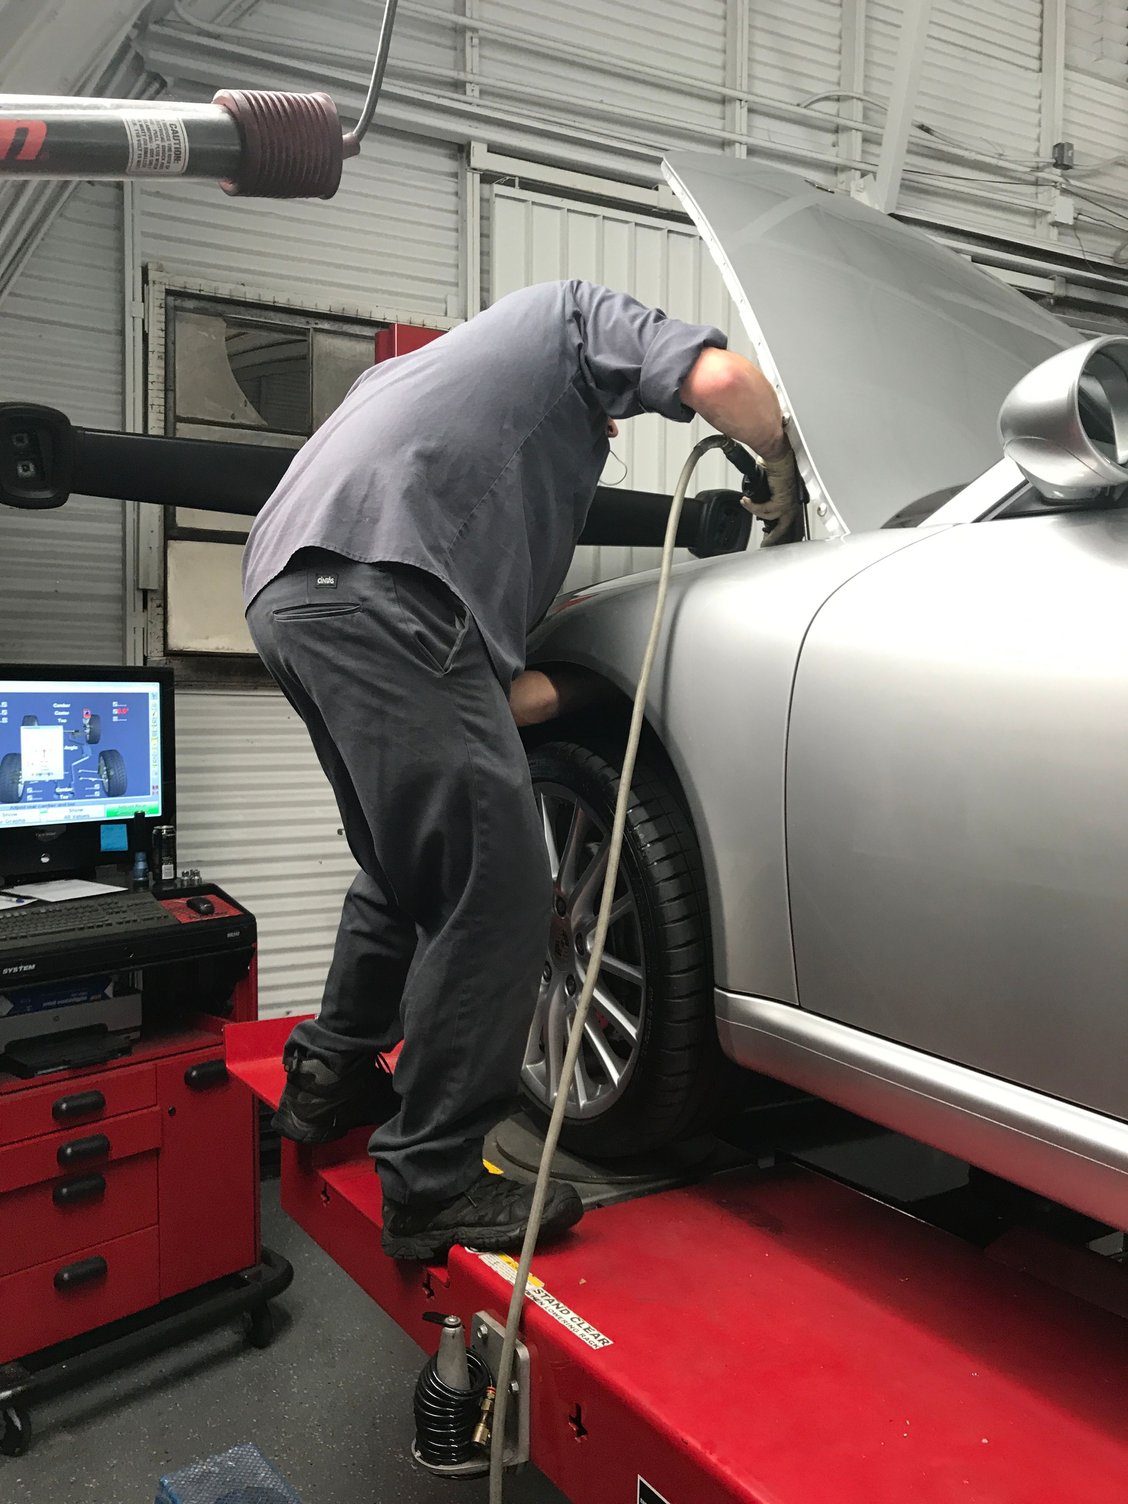
Ouch. Brought it over to the guys at S-Car-Go racing for alignment and asked Wells to check my work in the process. 2mins later he smiles and says..."so you installed the front cup washer upside down dumba$$!". Amazing. I installed the top front left cup washer facing down instead of facing up. Left was installed correctly.
Wells is a rockstar and was able to jack it up on the alignment rack and reach in to flip the washer without taking the strut out. Pretty impressive. That's why these guys are the pros. I got a great education from him in the process.
...Why did you replace the struts? Did you keep stock springs?...
Instinct . I'm pretty sure the originals might be fine. With only 50k miles I don't know why not. Think I'll try to recover some cost and sell them on Ebay.
I drove the car today. I can't get it aligned until next Wed and I'm able to get things pretty good with Nascar alignment method (strings). The rear shouldn't have been impact so I'm not too worried about dog tracking. Also it becomes pretty obvious when toe is out in the rear...don't ask me how I know .
I'm still blown away with the difference in ride with PASM Sport on. The Bilsteins should be just like the orginals. If I could get fronts here quick I would change them too! Next year I figure.
Finally installed the RSS spacers yesterday and the project is complete. 7mm in the front and 15mm in the rear. Rears look perfect but I could have gone with 15mm in the front as well. 7mm isn't enough for the fronts.
The car has the perfect stance, no harsh ride, a nice drop but not slammed, and I got rid of the floaty back end at high speed corners (which was also from under inflated rears).
Now need to to figure out the next project...maybe repainting the faded calipers.
I vote for calipers. Car looks great. I think the front looks pretty good. I got after market wheels that I don't need spacers on. It saved me some money. Of course I didn't look that closely when I ordered them but it was a nice benefit. I think my front is like 13mm and it is 'almost' too much for me.
Oh and I'm glad to hear someone else noticed the 'floaty' rear end. I have a Boxster also (no float) and it was the first thing I noticed on the 911, but mainly on 90 degree turns, i.e. turning onto a side road. The new shocks have basically cleared that up.
Just a couple tips.
Spring compressor and ball joint separators are not needed for this car. There is barely any preload on these springs at all, and a few large zip ties to compress the spring is quick, simple easy, and more than enough.
Next. The ball joints are tapered. Loosen the not on top. Now leave the nut on and give it a tap with a hammer. The ball joint will pop right out. Faster than you can find a 10% off coupon for Harbor Freight.
The entire car takes 6-8 hours to complete if you have a floor jack and do one wheel at a time.
One more thing. Removing MORE parts will save you time, frustration, and risk of damaging your fender.
Once you have the calipers off, remove the disks, and dust cover. Now you have more room to work.
Next pull the entire front hub off. It's only 1 or 2 more bolts! Now the whole assembly comes out with ease.
Before putting all together, get some Spraynine and clean everything.
Cheers.
Nice! I 100% agree (in hindsight) "removing more parts will save you time...".
How did you remove the fronts? There is still some debate on the best approach.
I hope soon to do the same, but still struggle between the Eibach and H&R. It's such a personal decision, but I go between looks then the reality on constantly scraping my front lip.
Did you mention where you got your spacers and lug bolts?
I hope soon to do the same, but still struggle between the Eibach and H&R. It's such a personal decision, but I go between looks then the reality on constantly scraping my front lip.
Did you mention where you got your spacers and lug bolts?
Cheers
I really like the Eibach height. Its 1/2" lower than a S and 1" lower than the base model. It fills the wheel well nicely and I can get it in the driveway and over speed bumps taking it slow. H&R were out of the question as I wouldn't be able to get in my driveway and had a bit too much of a slammed look in the front. I also like that the Eibachs have rubber tubing around the spring to eliminate squeaking.
Re spacer, I bought RSS spacers from Sharkwerks here in the Bay Area. They came with longer lug bolts and locating pins. I think they are $175 for the 15mm rears and $135 for the 7mm fronts. I had also looked at ECS and the brand Suncoast sells. I think they are all about the same price however ECS only makes them in black and the Suncoast 7mm spacer didn't look to be hubcentric (but its not really needed at 7mm).
They took 20minutes to install. The rears were a really tight fit on the wheel wouldn't go on flush. I was worried about jamming them on crooked so I ended up putting the spacer on the wheel first and tapping it flush with a rubber mallet (making sure to keep the holes aligned with the locator pin) then installing on the hub. That worked better.
The only thing I don't like is the lug bolts are chromed and don't look right with my silver sport design wheels.


 08-07-2017, 11:13 PM


 . I'm pretty sure the originals might be fine. With only 50k miles I don't know why not. Think I'll try to recover some cost and sell them on Ebay.