When you click on links to various merchants on this site and make a purchase, this can result in this site earning a commission. Affiliate programs and affiliations include, but are not limited to, the eBay Partner Network.
You don't need to remove the axle nut, just remove the six allen bolts (6mm) where the axle meets the transfer case. Then remove the nut for the lower drop link, remove the three bolts at the top of the strut mount, then loosen the control arm at the frame, finally remove the strut bolt from the carrier and voila, in and out with no coil compressors!
You don't need to remove the axle nut, just remove the six allen bolts (6mm) where the axle meets the transfer case. Then remove the nut for the lower drop link, remove the three bolts at the top of the strut mount, then loosen the control arm at the frame, finally remove the strut bolt from the carrier and voila, in and out with no coil compressors!
Agree. Only other thing I would add is consider removing the outer tie rod end at the carrier so it doesn't get stressed during removal of the strut.
Just ordered Ohlins R&T for my 2006 C2 after hemming and hawing forever (thanks eBay $100 off for pushing me over the edge) and am super psyched.
Are you guys replacing hardware? I've only done a Mk7 GTI suspension, which required nearly every nut and bolt be replaced, but based on torque specs it doesn't look like anything here is torque-to-yield (not XX ft-lbs + YY degrees).
How about top hats? Bushings on these and other components were in good shape?
Shouldn't top hat and strut bottom bolts be torqued under load? Any others?
Found a great video here that makes it look pretty easy: https://youtu.be/7xIa22V3HTg
Don�t cut corners, go in once, replace everything that wears, torque everything correctly especially your front drop links. Yes replace the topside components, mine were making noise and utterly thrashed despite looking fine, and the control arm nuts are cheap, and inspect bushings. Everything needs to be torqued under load and it�s not the easiest thing to do. When I had my car aligned afterwards I asked for the tech to double check all my torque values........You don�t want to take that thing apart again after you�re done, trust me. Be dead certain on your strut and spring combo too or life will be hell........look for my posts in this thread.
Hey guys - wanted to add an addendum to this guide. I just replaced my rear strut mount and used a revised technique based on some of the feedback to my original guide. If you can believe it I had the rear strut out in 15 mins the second time around. The revised method for the rears is waaaay better.
TheBruce - really appreciate your post here - it helped give me confidence to tackle this job and I wanted to relay my experiences on my 2005 997.1 C2.
This is indeed is a big job in particular when you haven't done it before - but I had the luxury of being able to take my time with it and worked on in spare time here and there.
I really did enjoy doing the job, it's very doable and didn't run into any major challenges.
A few tips/photos on things I ran into for the fronts:
Step 11 - This one tripped me up a bit - not sure if there is a variance in the front drop links but I had no Torx to counter as you note (but did on the rear). I used small vice grips (wrench I had was too wide to fit) to hold while turning the socket (as pictured).
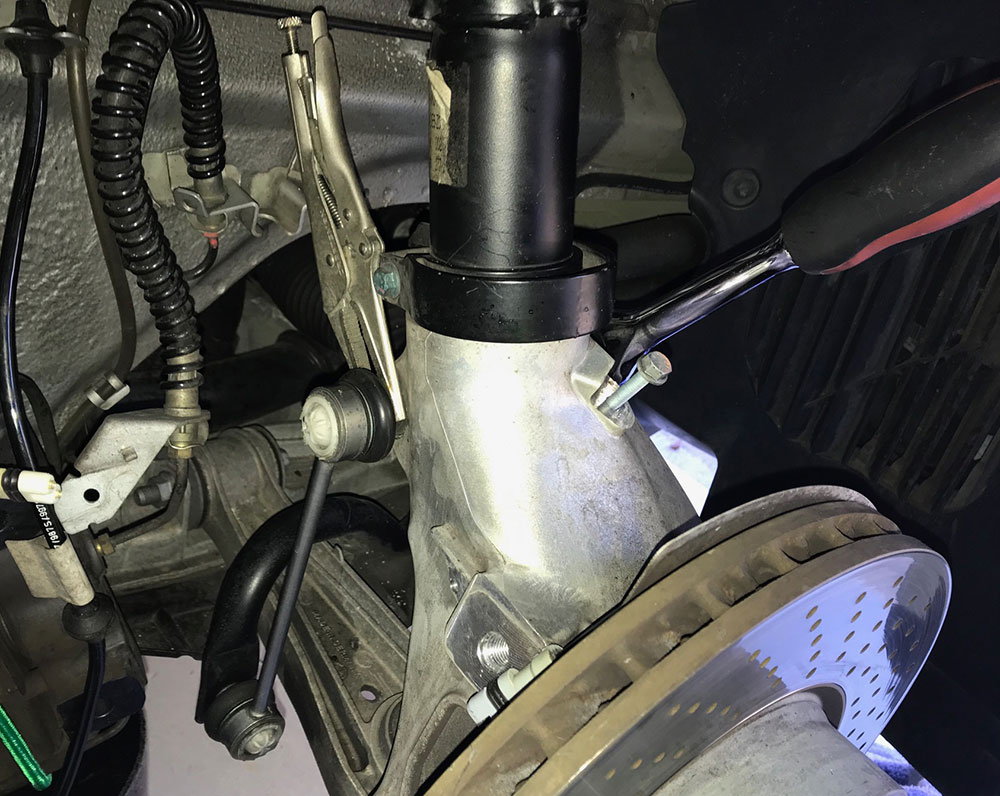
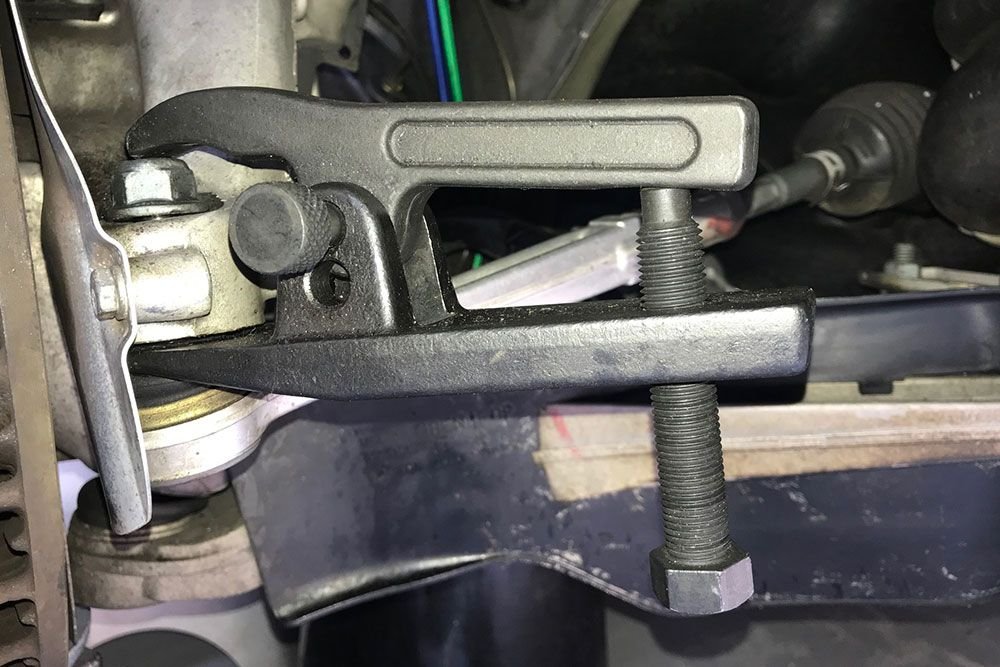
Step 12 - another image of usage of the separator (Harbor Freight) for the tie rod. First, loosened nut leaving a gap so when it breaks it doesn't fall hard to the floor. "FLA 997" on this thread notes a separator isn't needed and a tap of a hammer will get it...that did not work for me. I soaked it over night in WD-40 as well, gave it several good whacks before deciding I should use the separator to avoid damage. Also others note here (as you amended) that removing the tie rod isn't necessary. After removing the front strut, it seems that is likely true as there is a good bit of play there - but others noted not removing it can put stress on the rack. The shop manual notes to remove it, so I figured would just to play it safe - not that big of a deal to do.
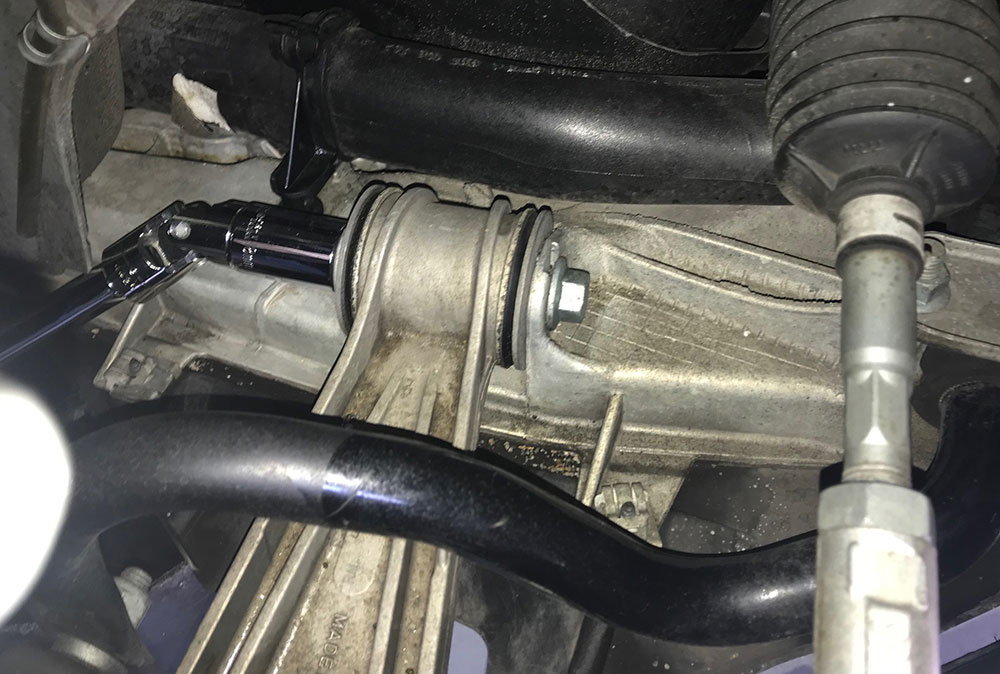
Step 13 - I did go the suggested route of loosening the inner control arm bolt to permit pushing down the carrier so spring compressors are not needed while still on the car. Clearance was still certainly tight going past the fender but it worked. People have noted this inner/lower control arm bolt should be tightened when back on the ground under weight - which seems would be pretty difficult to do due to difficult access. I marked the nut before turning, and found I only needed to turn it about a half turn to free the wheel carrier enough to drop. When I put all back together, I just tightened it back to where it was - it didn't move up/down so I'm not really concerned about the doing under full weight concern (but did have a floor jack under the wheel carrier).
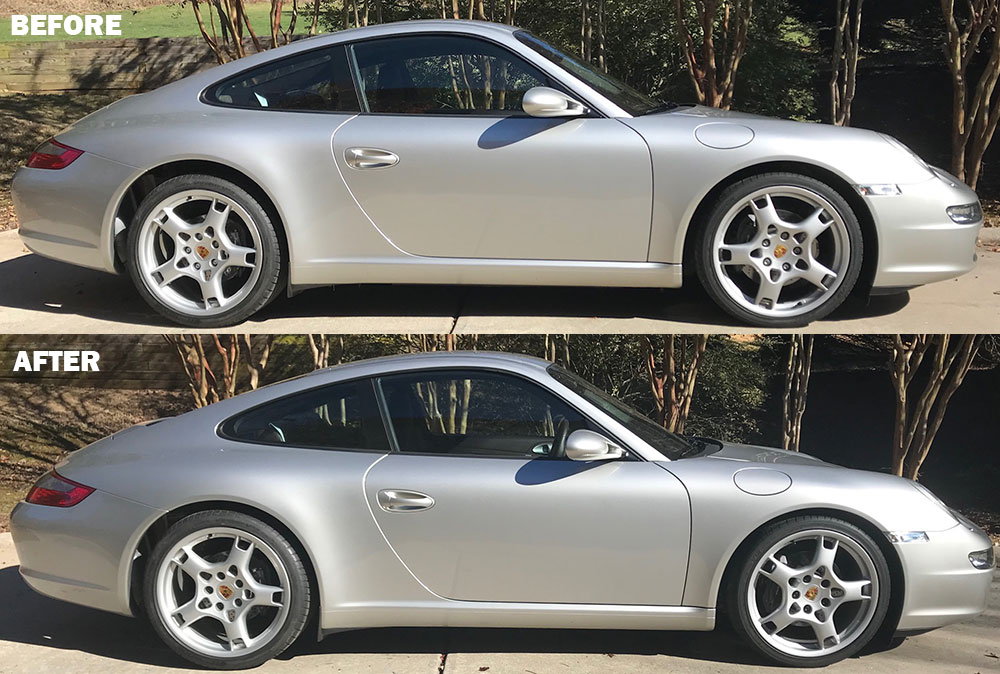
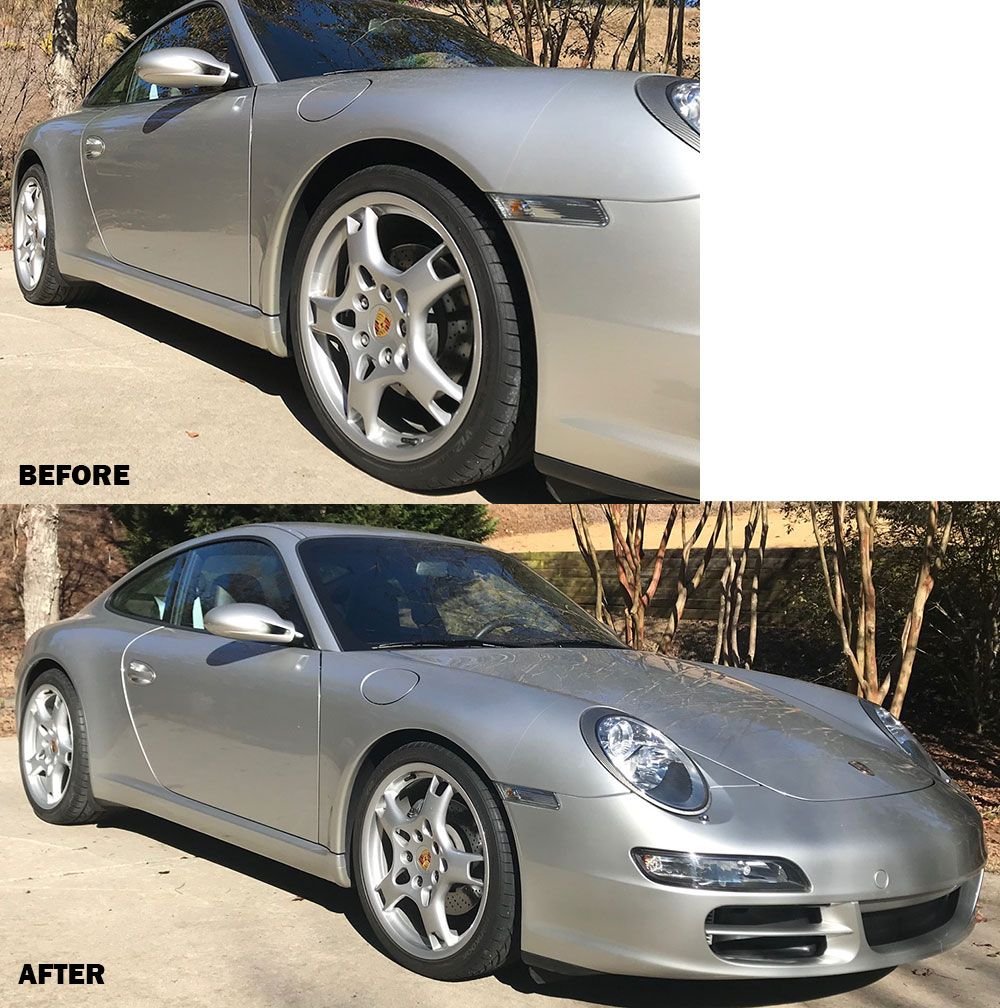
Finally done! Very pleased with the end result - it's a subtle drop with the Eibachs (for me turned out to be 1" in the rear, 1/2" in the front). The ride feels great - not a dramatic change, but I'd say slightly firmer and slightly more noise over bumps in the rear.
I also put spacers all around. I started with 15mm's from ECS, but found the 15mm was too much for my taste on the fronts. I have lobsters and on the fronts they protrude out from the wheel rim about 14mm (is not flush with the tire) and for my eye it did not look right...messed with the line of the car. I replaced them with 8mm's for the front (ECS doesn't have 7's) to soften it a bit and I'm pleased with the end result. So while the 15mm all around recommendation may often apply, I'd put a caveat to any lobster owners that while the tire may be flush with the fender - the front wheel is sticking out considerably which is a trade-off I personally did not like.
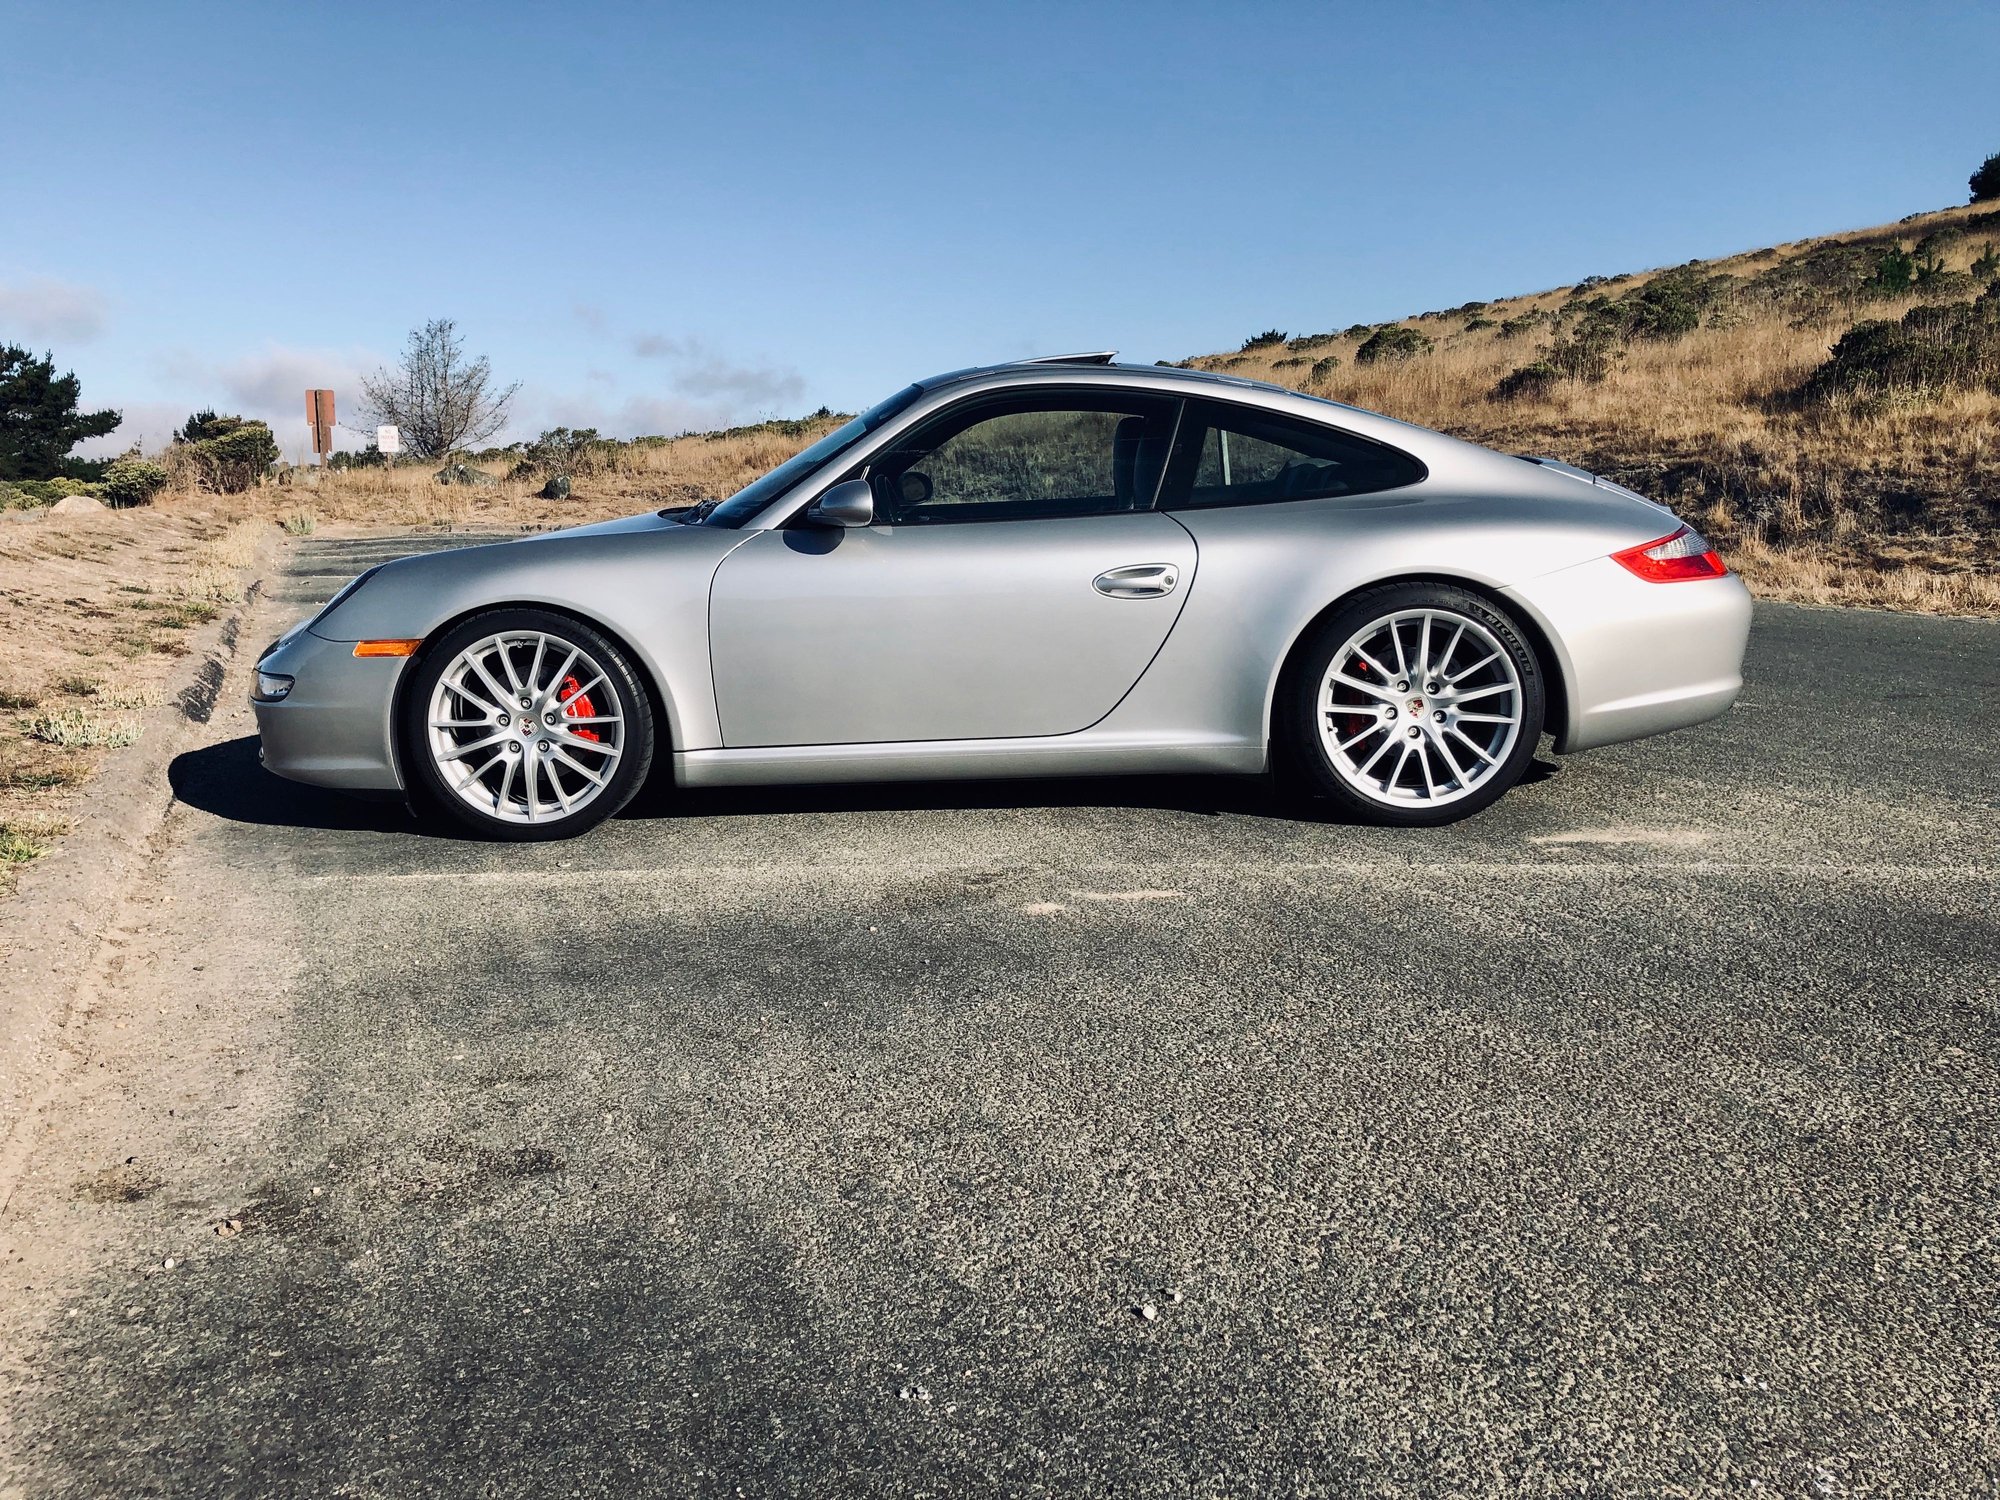
Some photos below - similar light but my angles are off a bit - but enough to get the general idea. It's subtle but I think just the right amount. The difference is more material in person than in the photos, in particular on the rear. I've been looking at the car for years now at the stock height, and this change is pretty dramatic for my eyes in a positive way.
It's funny how the car looks good at stock height, then you see a side-by-side comparison (stock vs. lowered) and the stock car suddenly looks jacked up and silly. Your post has strengthened my resolve to install my Eibachs sooner rather than later
Car looks great. Sorry for my bunk recommendation on the 15mm spacers in front. I put 7mm in the fronts and think they look too tucked in compared to the rears. I guess 10mm might be the right balance. I've been meaning to swap mine out.
I think you will also find the car will settle a bit more over the next week or so. I think the recommendation I got was wait 2wks before you get the alignment. Your drop in the front is odd. I recall mine being greater.
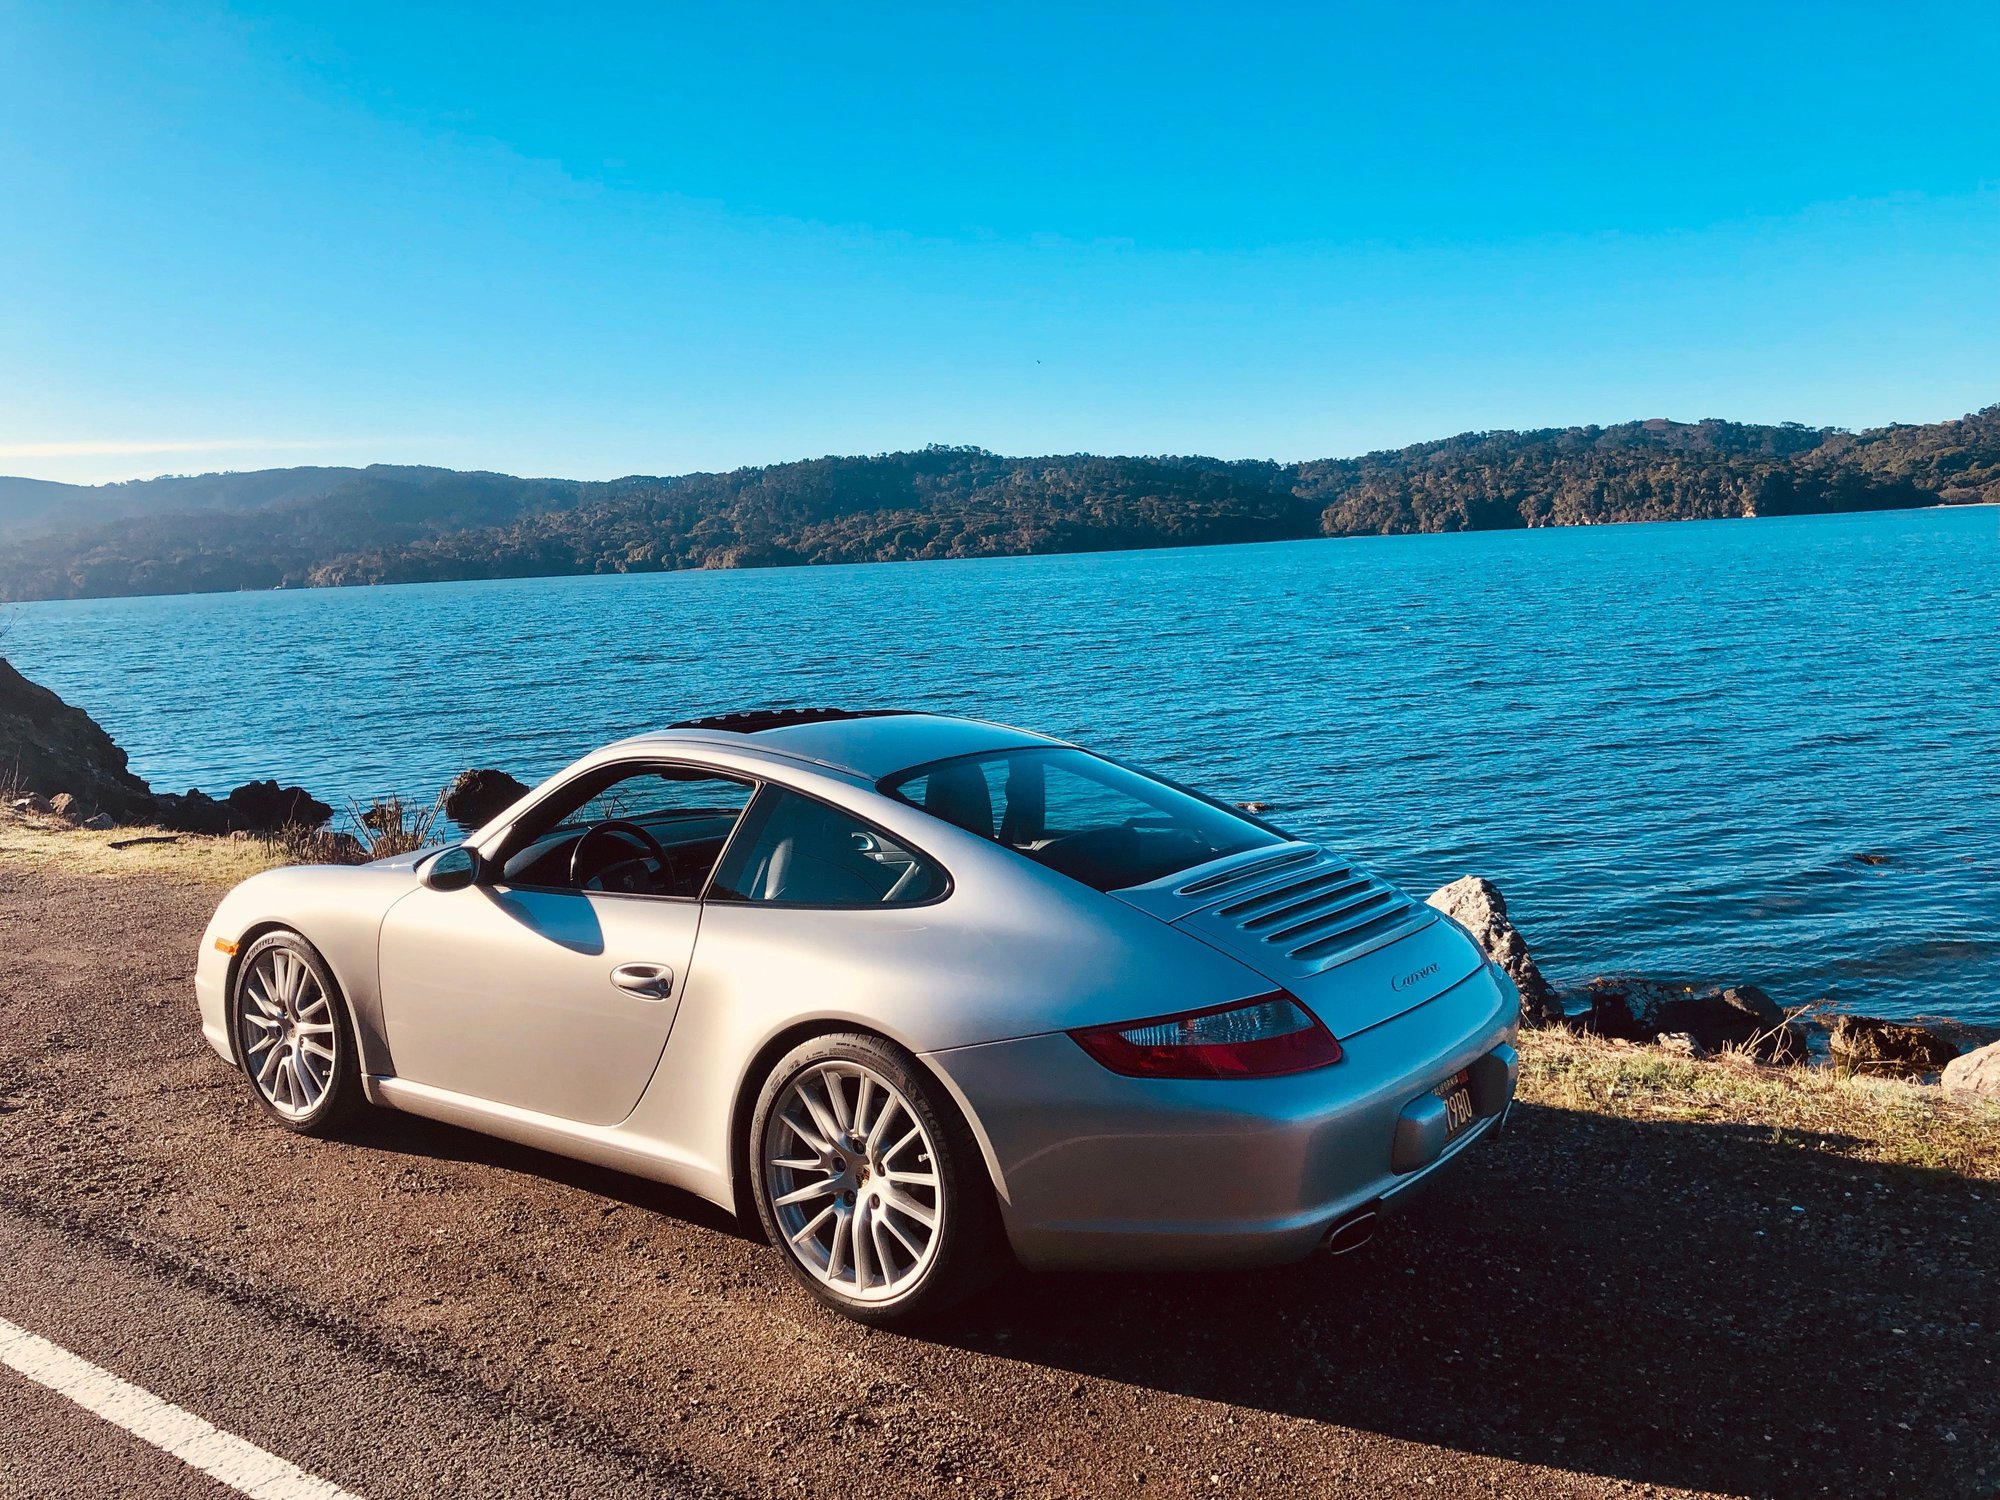
As for the look, yea ive found it hard to truly capture how good it looks in photos. I get a smile every time I walk to the car in the grocery store. The view from the rear is badass.
It's funny how the car looks good at stock height, then you see a side-by-side comparison (stock vs. lowered) and the stock car suddenly looks jacked up and silly. Your post has strengthened my resolve to install my Eibachs sooner rather than later
Totally agree and what pushed me over the edge. I really can't emphasize what a positive change it is visually. I'm finding myself standing in the garage staring at the car like I did when I first got the car years ago.
Car looks great. Sorry for my bunk recommendation on the 15mm spacers in front. I put 7mm in the fronts and think they look too tucked in compared to the rears. I guess 10mm might be the right balance. I've been meaning to swap mine out.
I think you will also find the car will settle a bit more over the next week or so. I think the recommendation I got was wait 2wks before you get the alignment. Your drop in the front is odd. I recall mine being greater.
As for the look, yea ive found it hard to truly capture how good it looks in photos. I get a smile every time I walk to the car in the grocery store. The view from the rear is badass.
Your car looks awesome - great photos. It really is hard to picture and is more appreciated in person. And no big deal on the spacers was a simple swap - I tested the 15mm's on the fronts first only. Never used one set of the 15's and moved the 15's I tried on the front to the back and just exchanged. Seriously, it's unlikely I would have tackled this job without your helpful post here. Getting some guidance to be able to work on projects like this on the car brings a lot of additional pleasure of ownership to me, so greatly appreciate the effort here and happy to try to contribute where I can.
As far as the fronts dropping so little - I was pleased they dropped 1/2" and will see if settles some more. When I first pulled off the stock springs and compared to the Eibach, I was pretty concerned the Eibach was actually taller - take a look - the stock spring is in the center (again off my 2005 C2), the new Eibach's on each outer side.
I double checked and I had the right part numbers. Regardless, it's still went 1/2" lower despite the fact the spring is thicker and taller on the Eibach. On the rears, the Eibach's were clearly shorter...I didn't measure but visually looked like at good inch. Regardless worked out fine - but an interesting detail.
Great supplemental video for this thread from "Steve 911" from his original post here on BC Racing Coilover installation thought may be helpful for additional reference.
No, but you will need to get a 4 wheel alignment. I took mine to the Porsche dealership. Many people have gone to a local repair and tire shop, but they may not know about how some of the bolts get loosened. One in particular in the front requires 2 wrenches and you can't use an impact as it will ruin it. I let the pros do it.


 07-04-2018, 09:05 PM