When you click on links to various merchants on this site and make a purchase, this can result in this site earning a commission. Affiliate programs and affiliations include, but are not limited to, the eBay Partner Network.
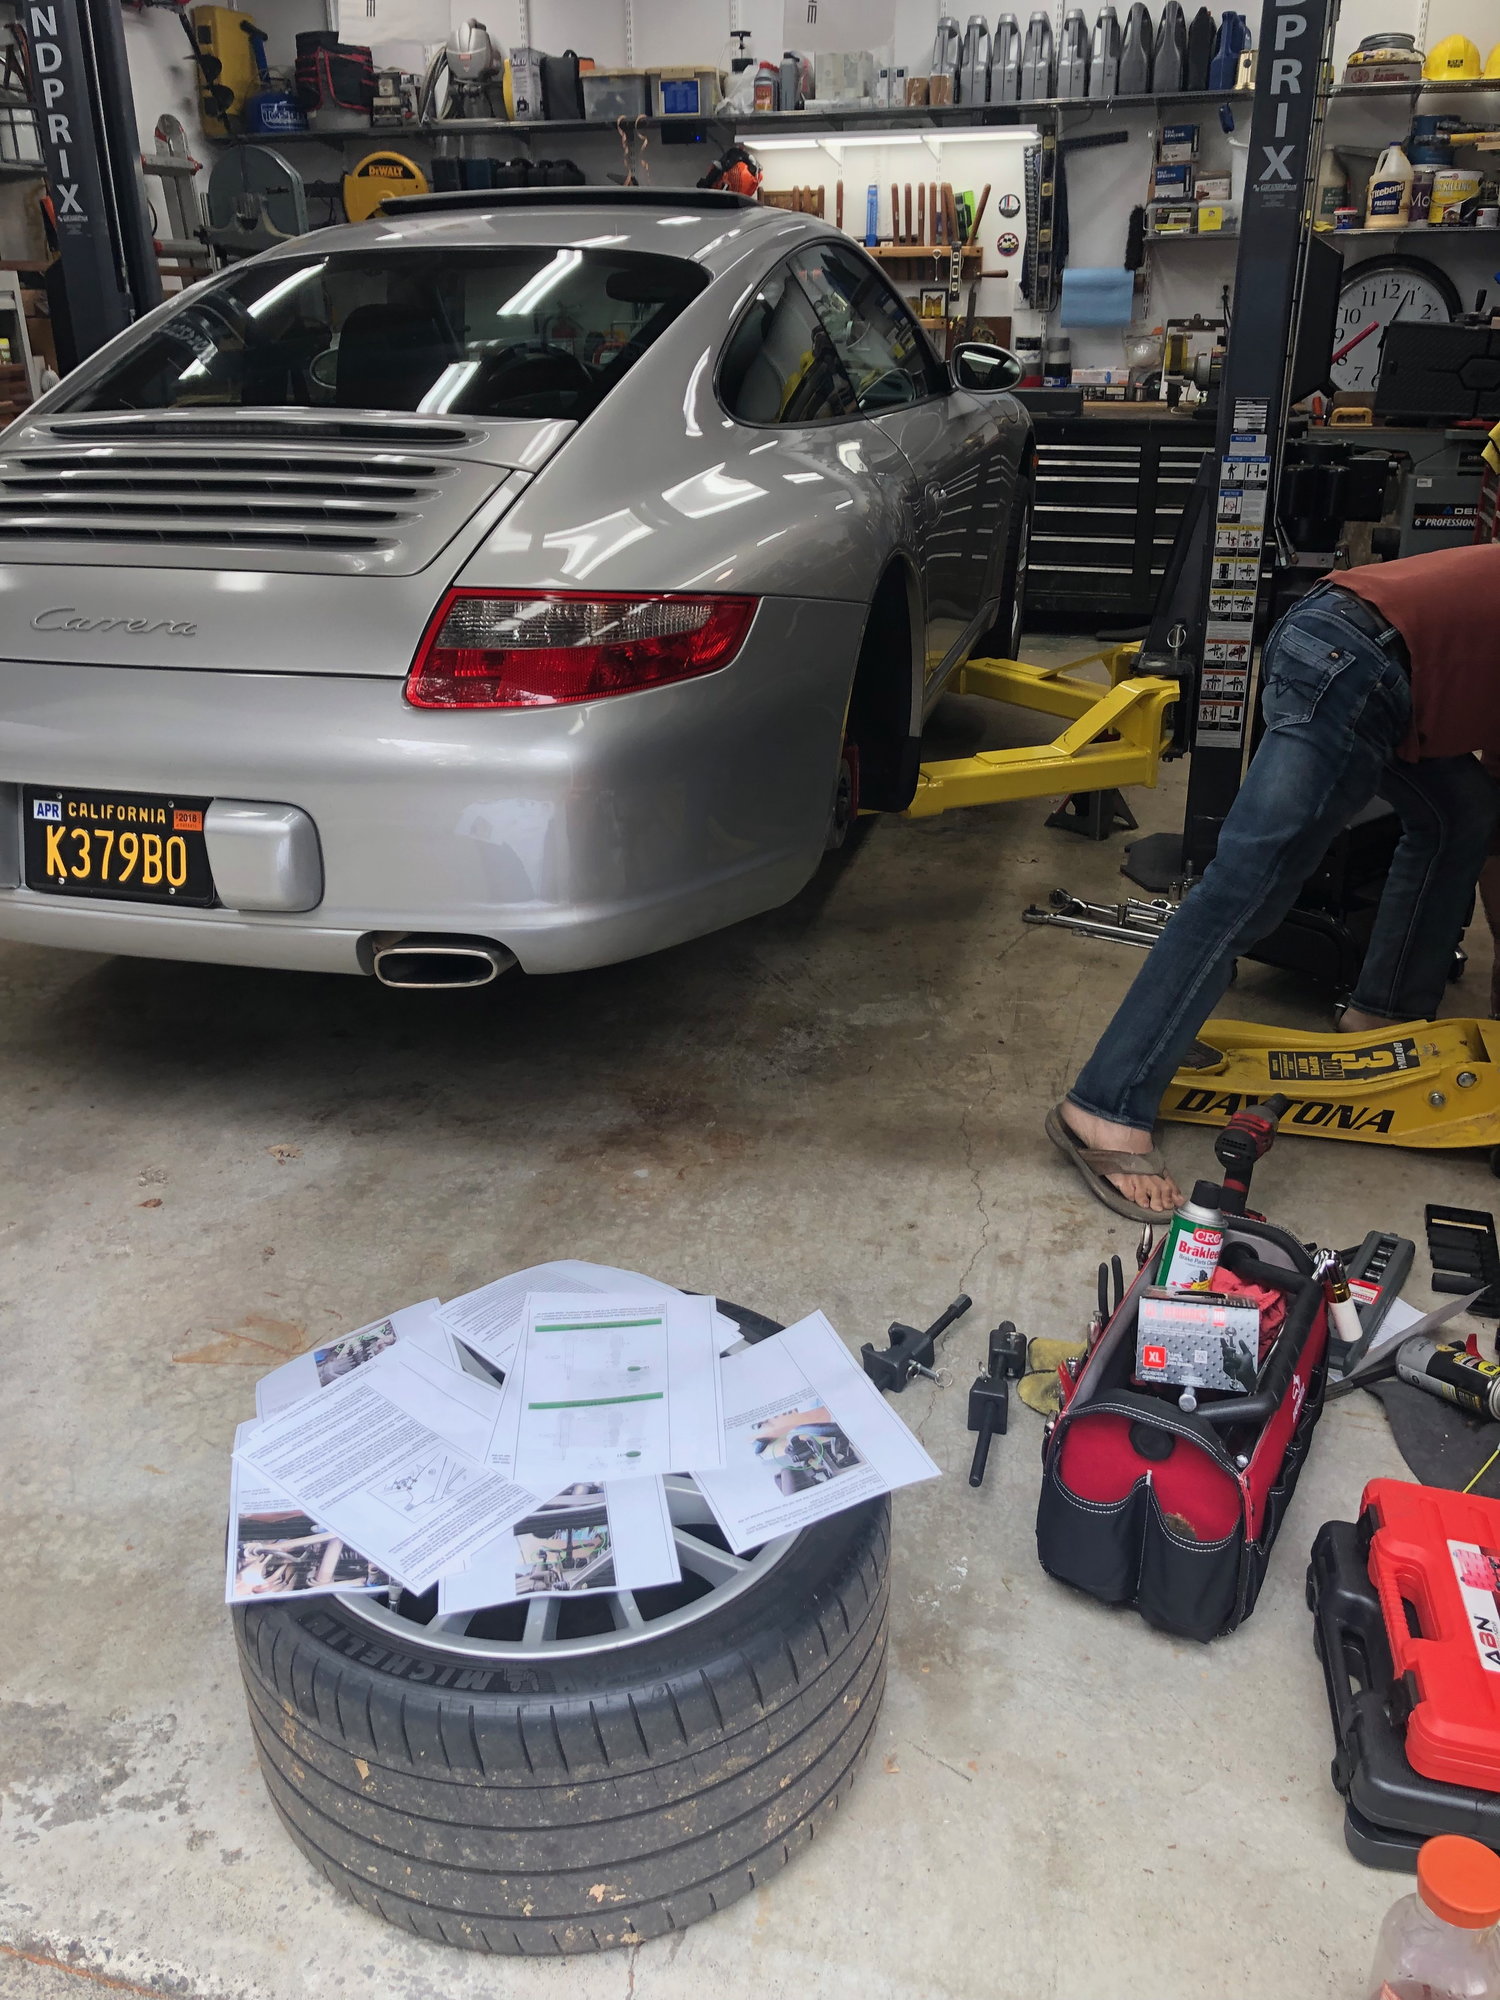
First, a big shout out to @Wayne Smith. Projects are sooo much easier when you have a lift and friends to help.
The Symptoms
I started to hear a slight knock from the passenger rear wheel when going over rough roads and I suspected the rear strut mount was shot. I think its more common for the front mounts to go but I assume my stiffer Eibachs led to their early demise. In hindsight I should have replaced them when I installed the Eibachs but they looked fine. Unfortunately I didnt know what to look for. I believe the 996 strut mount is rubber and visibly cracks. However the 997 strut mount has a foam-like bushing. Instead of cracking it appears the foam gets compressed with age and/or you can get some creasing in the foam around the center washer. Between the two of these some play can develop.
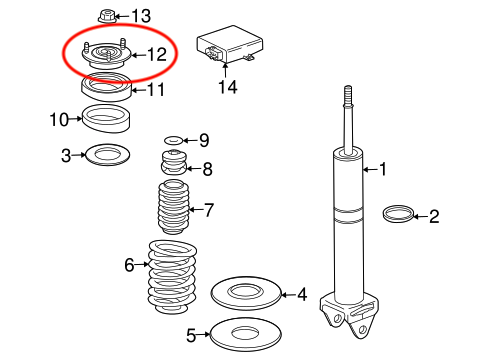
The Parts
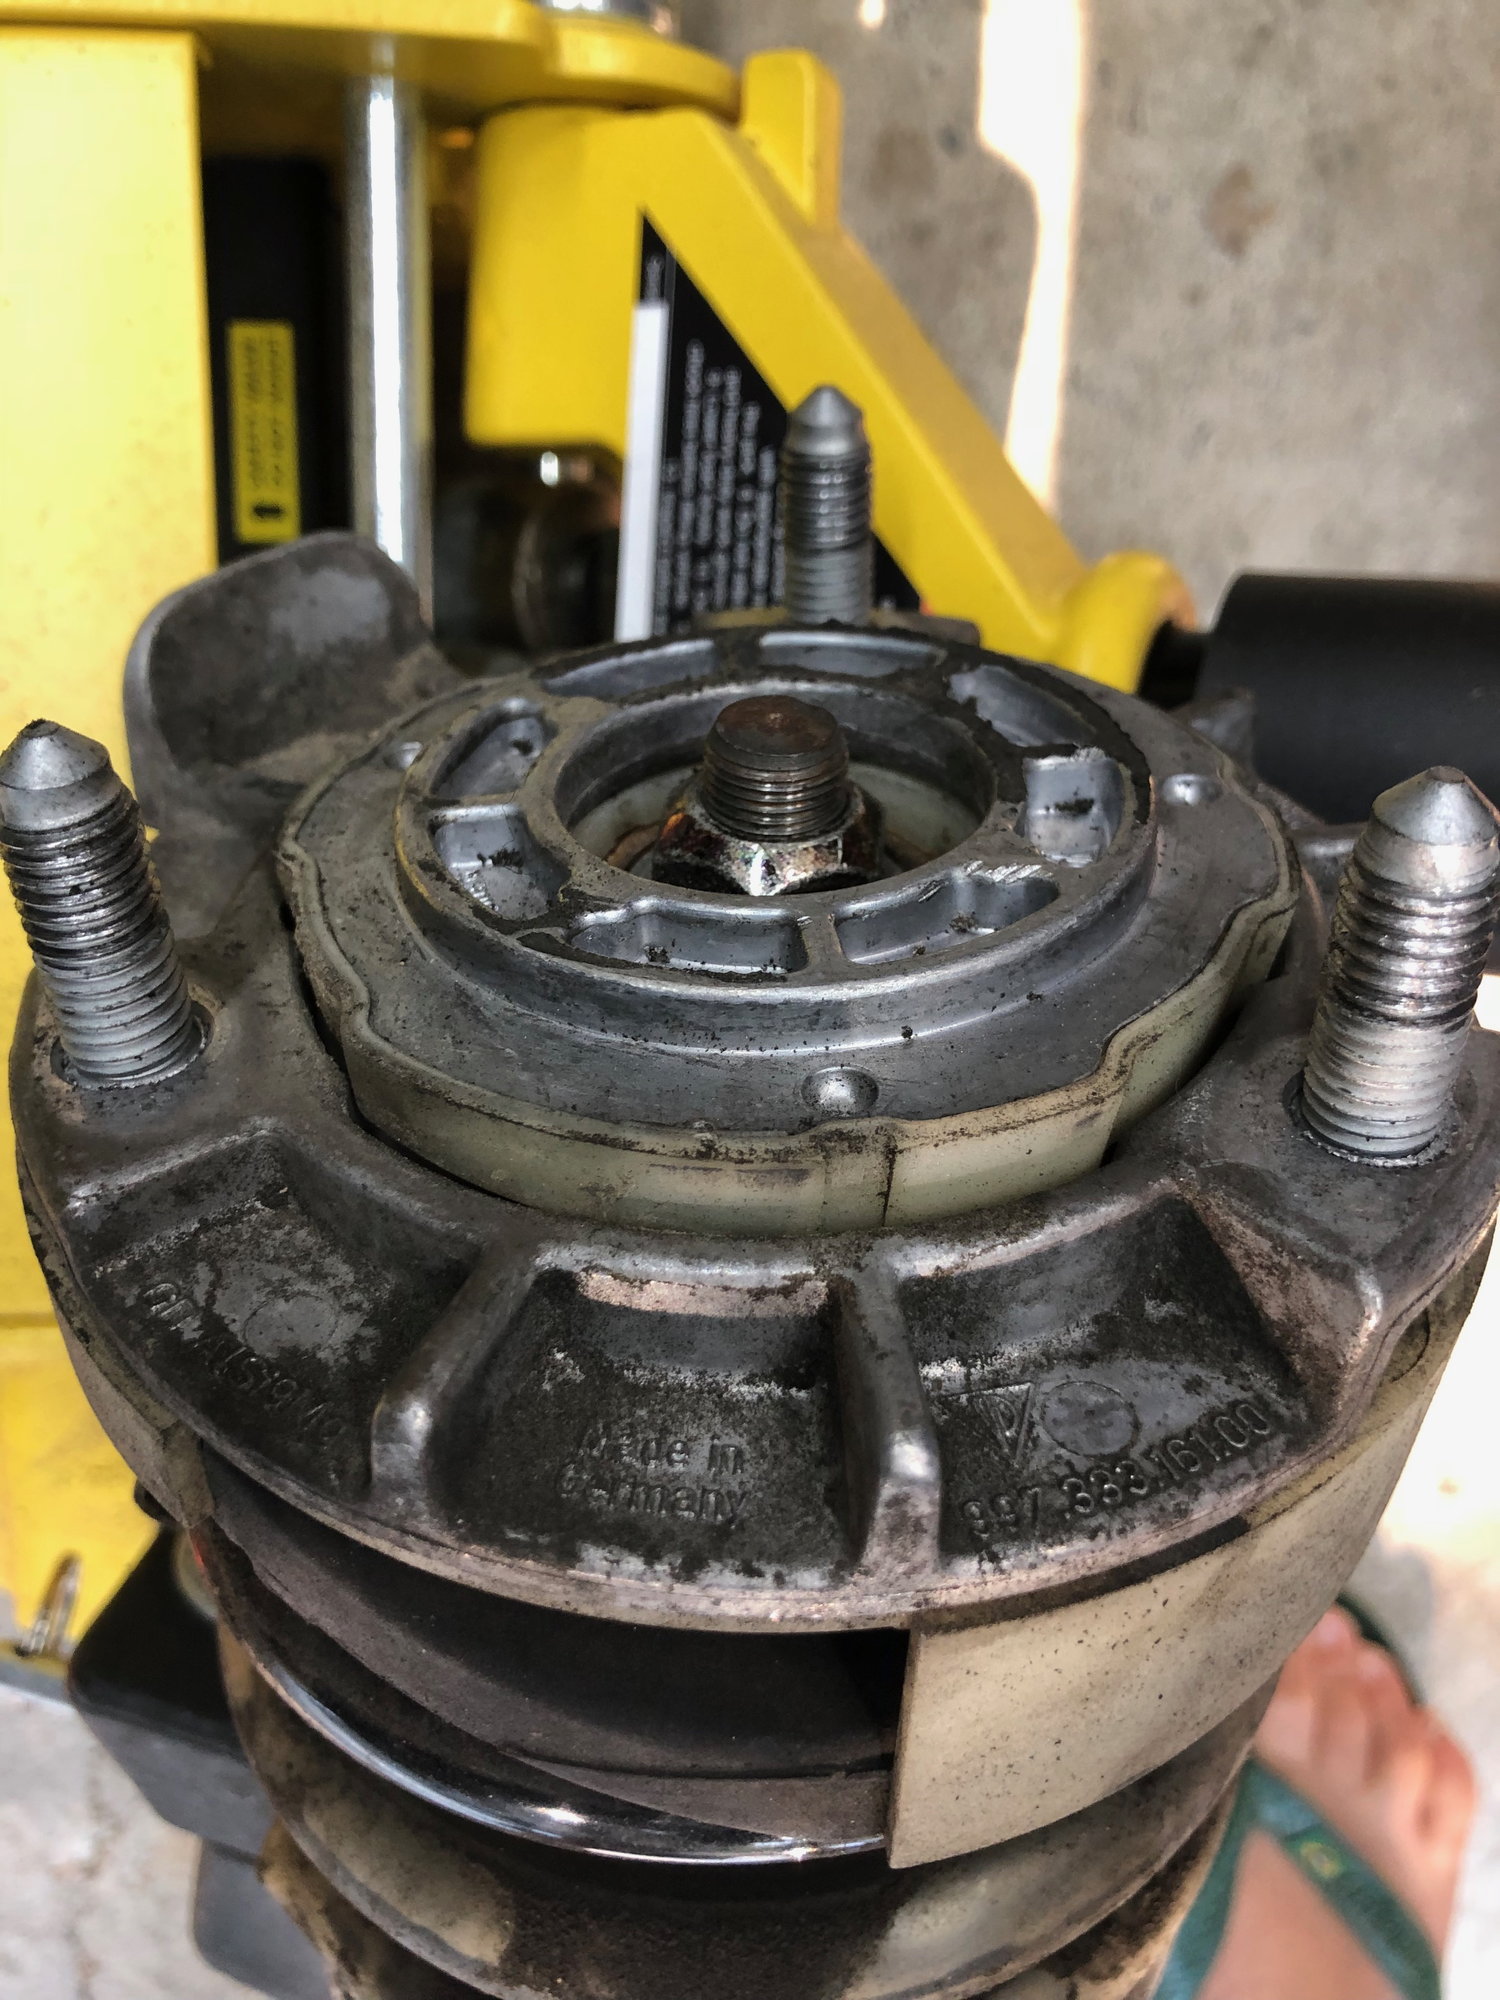
A rear strut mount cost around $140 per side. Part number 997-333-061-00. I picked up mine at my local dealer parts website. Fronts are a bit cheaper.
Funny thing is if they just sold the foam bushing this project would only cost $5. I could have swapped out the bushing into the old mount because the metal itself is fine.
The Time Required
When I installed my Eibachs last year it took me 4+ hrs per strut over two days. I had no lift, no impact wrench and no idea what I was doing.
If you can believe it we had the rear strut out in 15mins this time. The whole project start to finish took 2.5hrs. I can't stress how much having an extra set of hands on this project speeds things up. I could be under the car removing or torquing bolts while Wayne manipulated the strut from above.
I elected only to do strut mount that was knocking because I didnt think there were any efficiencies in doing both. I was probably wrong. It would have only taken us another 45mins to replace the other side one once we got into the groove.
Instructions
You will find a more detailed writeup on my original Eibach install above. I changed my strategy in a few key areas based on the comments and suggestions I had from this writeup. I will explain the recommended changes below.
The Steps: Removal
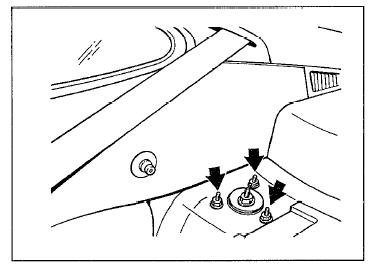
1. Remove the rear carpet, Bose subwoofer and insulation to get access to the 3 strut mount bolts. You can see instructions how to do this in my original writeup. You need a T27 to remove the 2 screws holding the speaking in place and a 6mm hex to remove the rear seat latch. It was really easy the 2nd time around. This maybe took 15mins.
2. Loosen the 3 15mm strut nuts inside the car. Leave one still threaded until you get everything else removed then go back in to remove it once you are ready to drop the strut.
3. Once we got the car up on the lift I checked for any play in the wheel to make sure it was in fact the strut mount and not a wheel bearing or control arm bushing. Everything seemed tight so we proceeded to take the wheel off.
4. Once we had the wheel off we identified the 6 bolts we were going to remove. As mentioned I changed my strategy a bit after reading some of the feedback to my earlier DIY. Revised approached is way better.
5. Remove the 16mm bolts holding the 2 upper control arms at the wheel carrier. An impact wrench makes quick work of these but you need an 18mm box wrench on the nut.
6. Remove 2 16mm bolts holding the drop link. I tried removing only one but taking the whole link off gives you more clearance. Again, an impact wrench simplifies here. If you dont have one you need an open wrench with a T30 to counter it from spinning.
7. Remove the 2 13mm bolts holding the sway bar bushing. This allows you to push the sway bar back a bit and gives you more clearance to get the strut down.
8. Remove the 16mm bolt hold the bottom of the strut to the wheel carrier. Use a 18 box wrench to counter.
9. Go back in the car and remove the last nut on the strut mount. The strut is now completely free.
10. Spray some silicon on the wheel carrier arm where the strut sits to help slide the strut off. I went under the car and gave a couple taps to the strut with a rubber mallet while Wayne held it from above. Once it was free Wayne pulled it up and out of the wheel well.
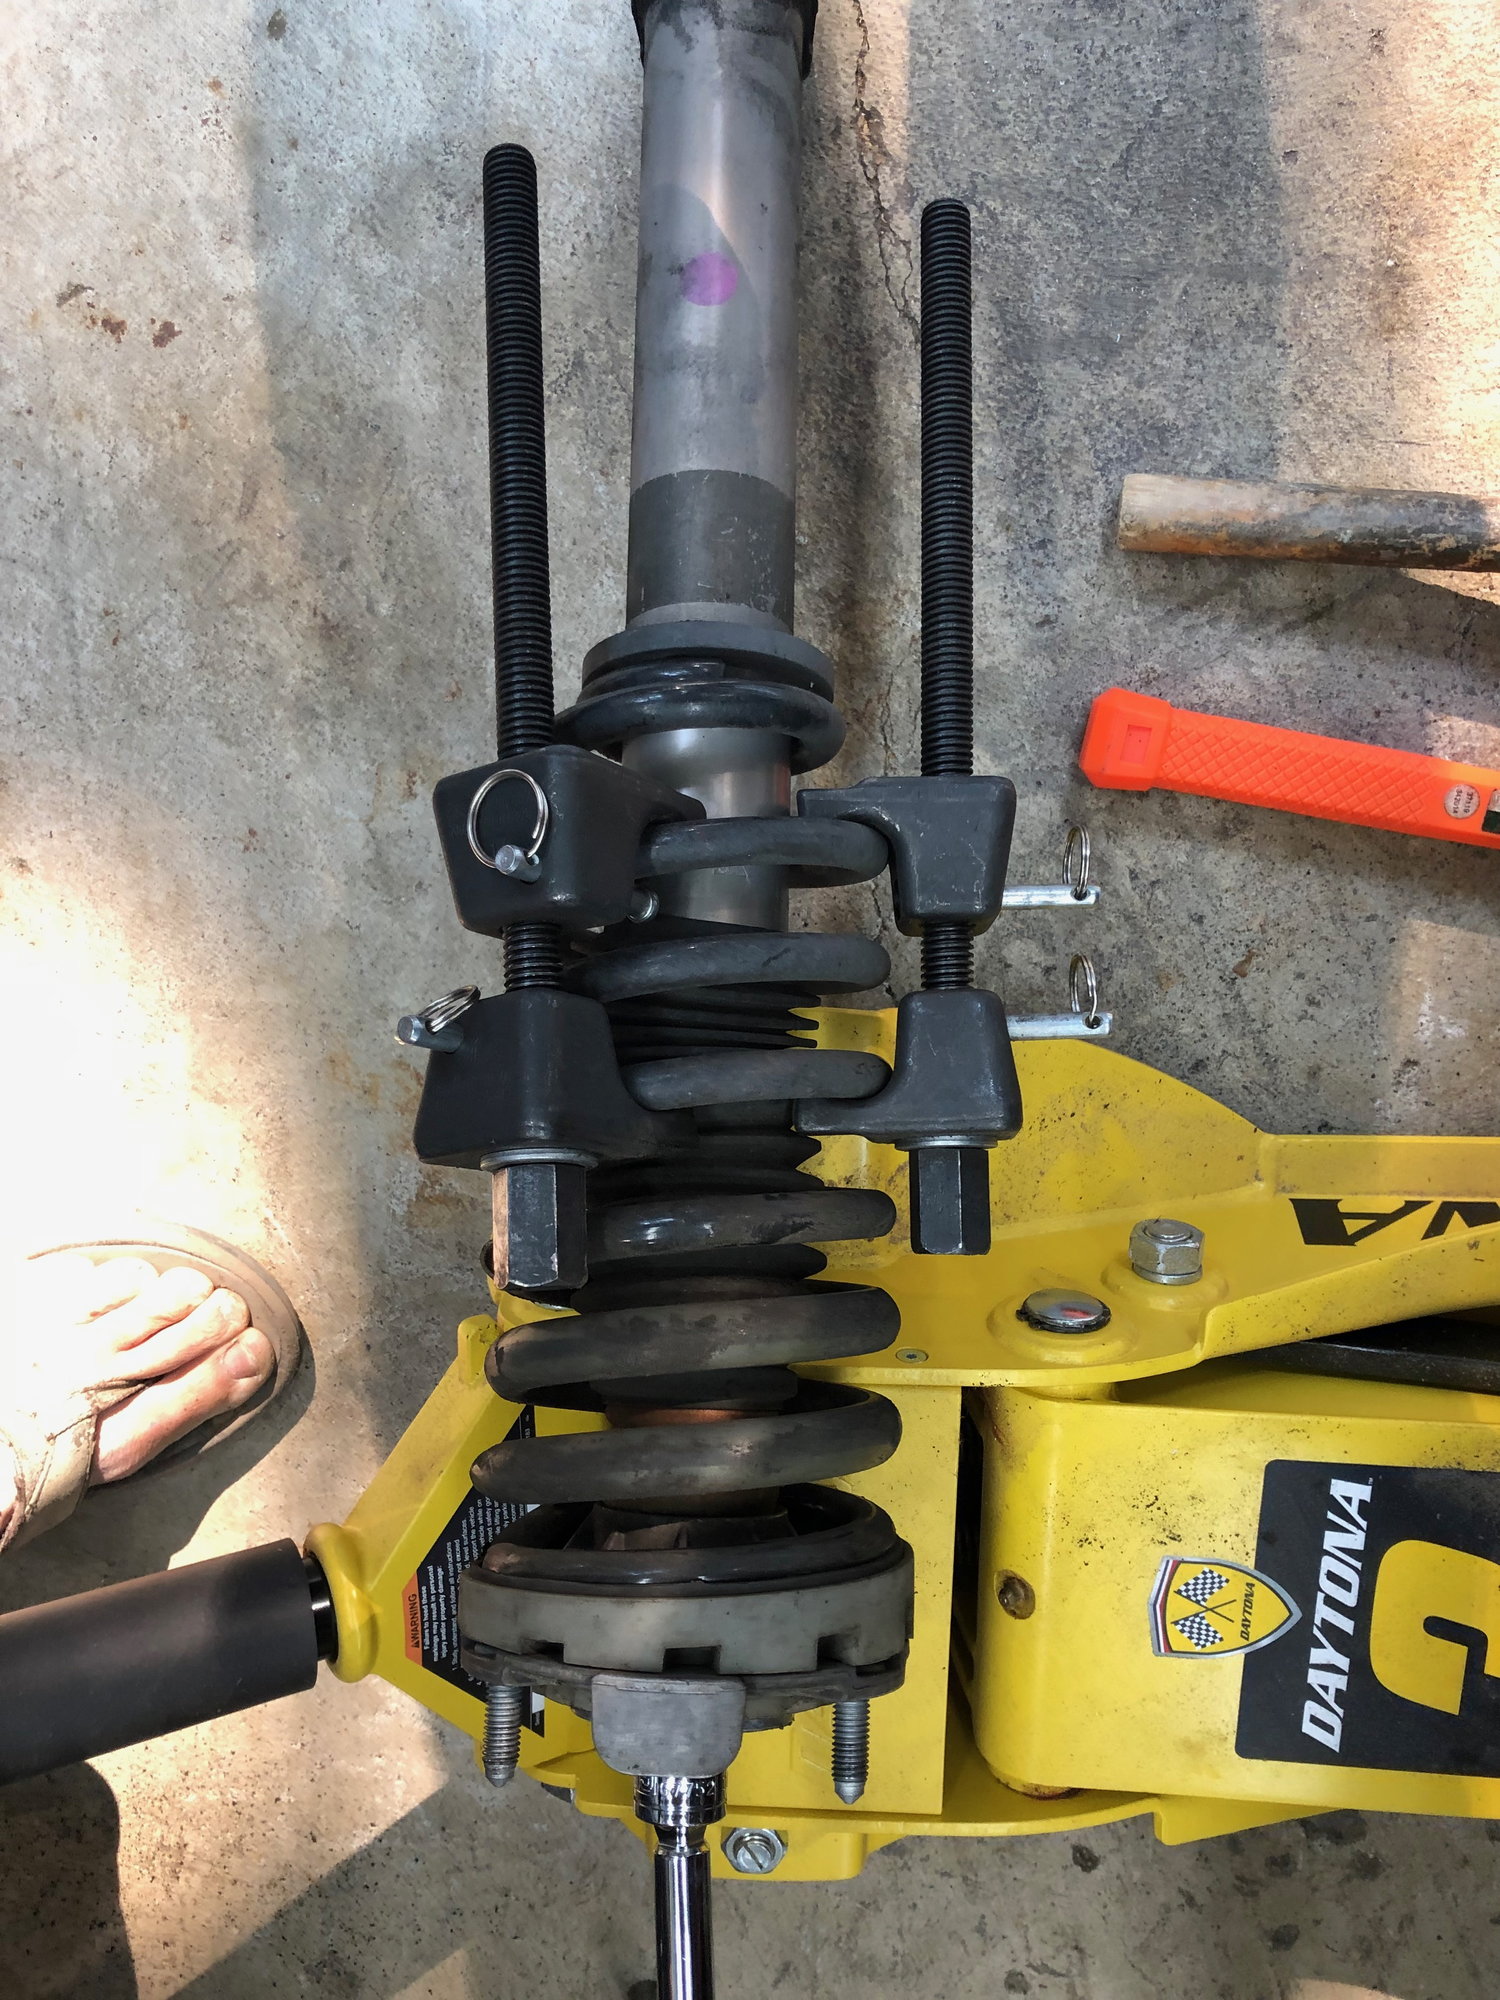
11. Once you have the strut out we put spring compressors on and removed the 19mm strut nut. Note: we likely didnt need the spring compressors with the Eibachs on.
12. As mentioned above, we found found the strut mount foam bushing to be a compressed compared to a new one and some creasing formed around the center washer. I assume this enabled some play to develop. Unfortunately no pictures of this.
The Steps: Installation
1. The most complicated part was remembering how to line up the strut, strut mount, spring, and spring insulator after installing the new strut mount. The details are as follows:
- The strut has a purple dot indicating which side is facing out
- The strut mount has a flat tab which should face out and align with the purple dot
- The spring and spring insulator can then spin a bit between these two.
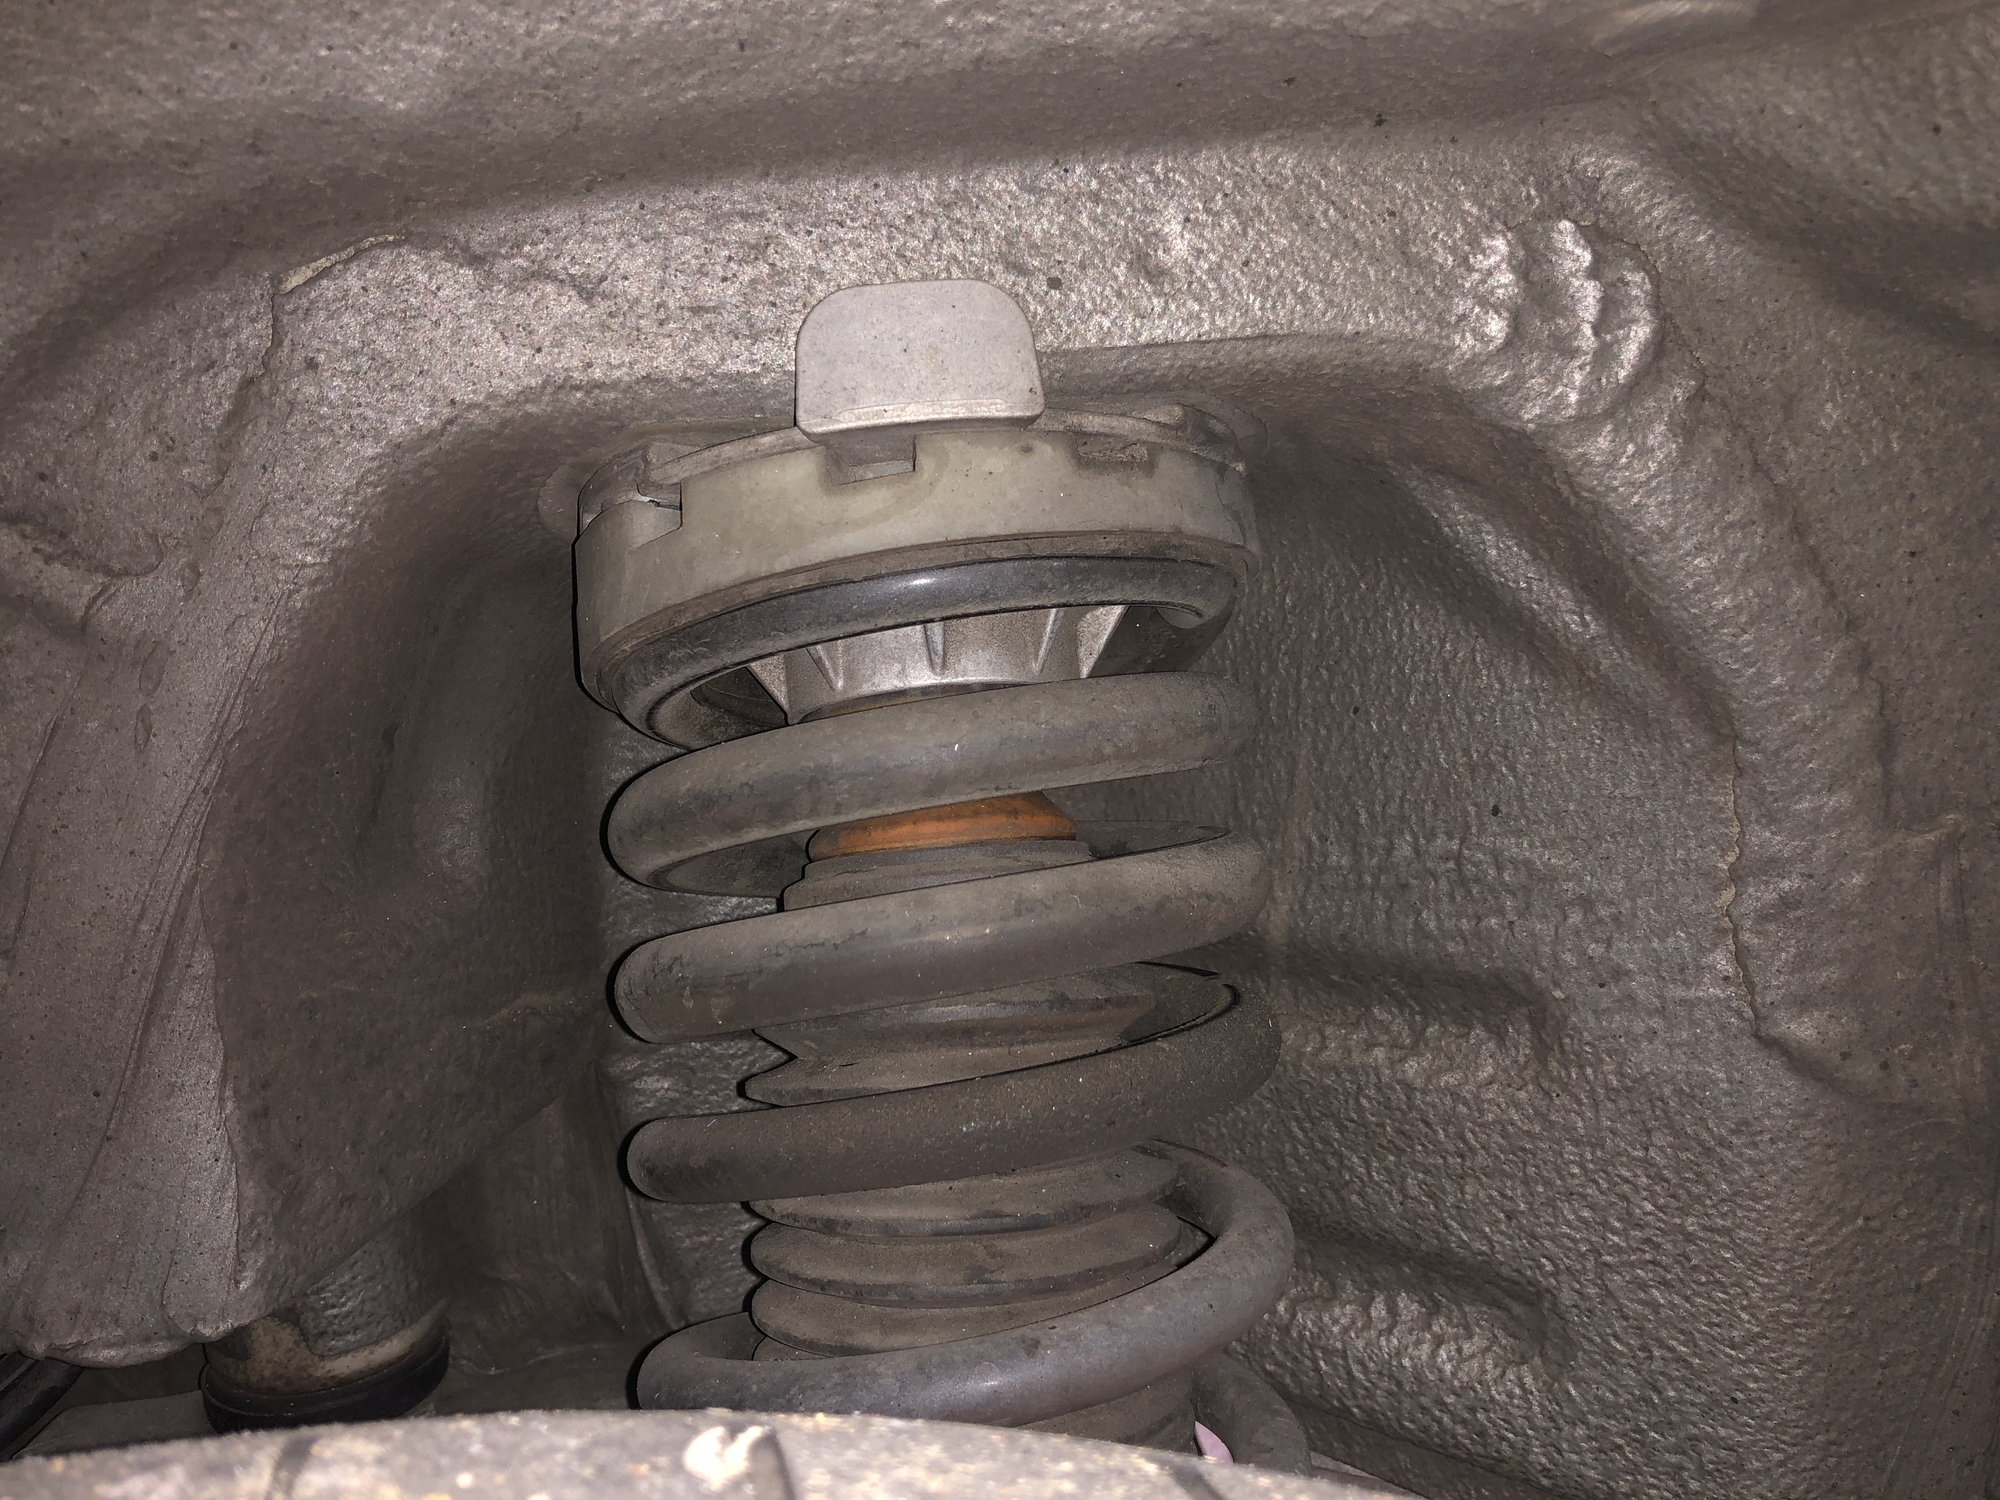
- The insulator is the white plastic wedge and the end of the spring needs to sit flush in this.
- Once the spring is properly seated on the insulator then twist the insulator so it looks like below (take a picture before you remove the strut to be sure)
2. Now put the stut back in the way you pulled it out. I got under the car and Wayne fed it down to me. Its a little fiddley to get aligned. What we found to work the best was to seat the bottom of the strut on the wheel carrier arm then push down on the wheel carrier to give us clearance to get the strut studs into their holes above. This definitely would not be feasible with one person.
Note of caution: make sure you get the strut studs all the way through the frame and seated properly. If you have it cocked the threads can catch and you can strip them if you try to force it. The first time I did this job I was having to muscle everything into place. If you do it properly you shouldn't have to.
3. Now that everything is back in place you need to go back around and torque everything properly:
15mm strut bolts: 34lbs
16mm strut bolt to wheel carrier (18mm box to counter): 81lbs
16mm strut bolt upper control arm to chassis (18mm box to counter): 81lbs
18mm toe control arm to wheel carrier (T30 to counter): 56lbs
13mm anti roll bar mounting bracket: 17lbs
16mm rear drop link (T30 to counter): 48lbs. Note the Workshop Manual says you should torque these to 35lbs, then back the nut off 90 degrees, then torque down to 48lbs.
4. Next we reinstalled the back seat carpet and Bose speaker. There is a little fiddley spring clip the speakers screw into and it wouldn't line up correctly. We put some tape on them to hold them in place and that solved it. When you are 6'2" I also found it much easier to have the car raised off the ground a little so I could just lean in vs having to crouch down and get all the way in the car.
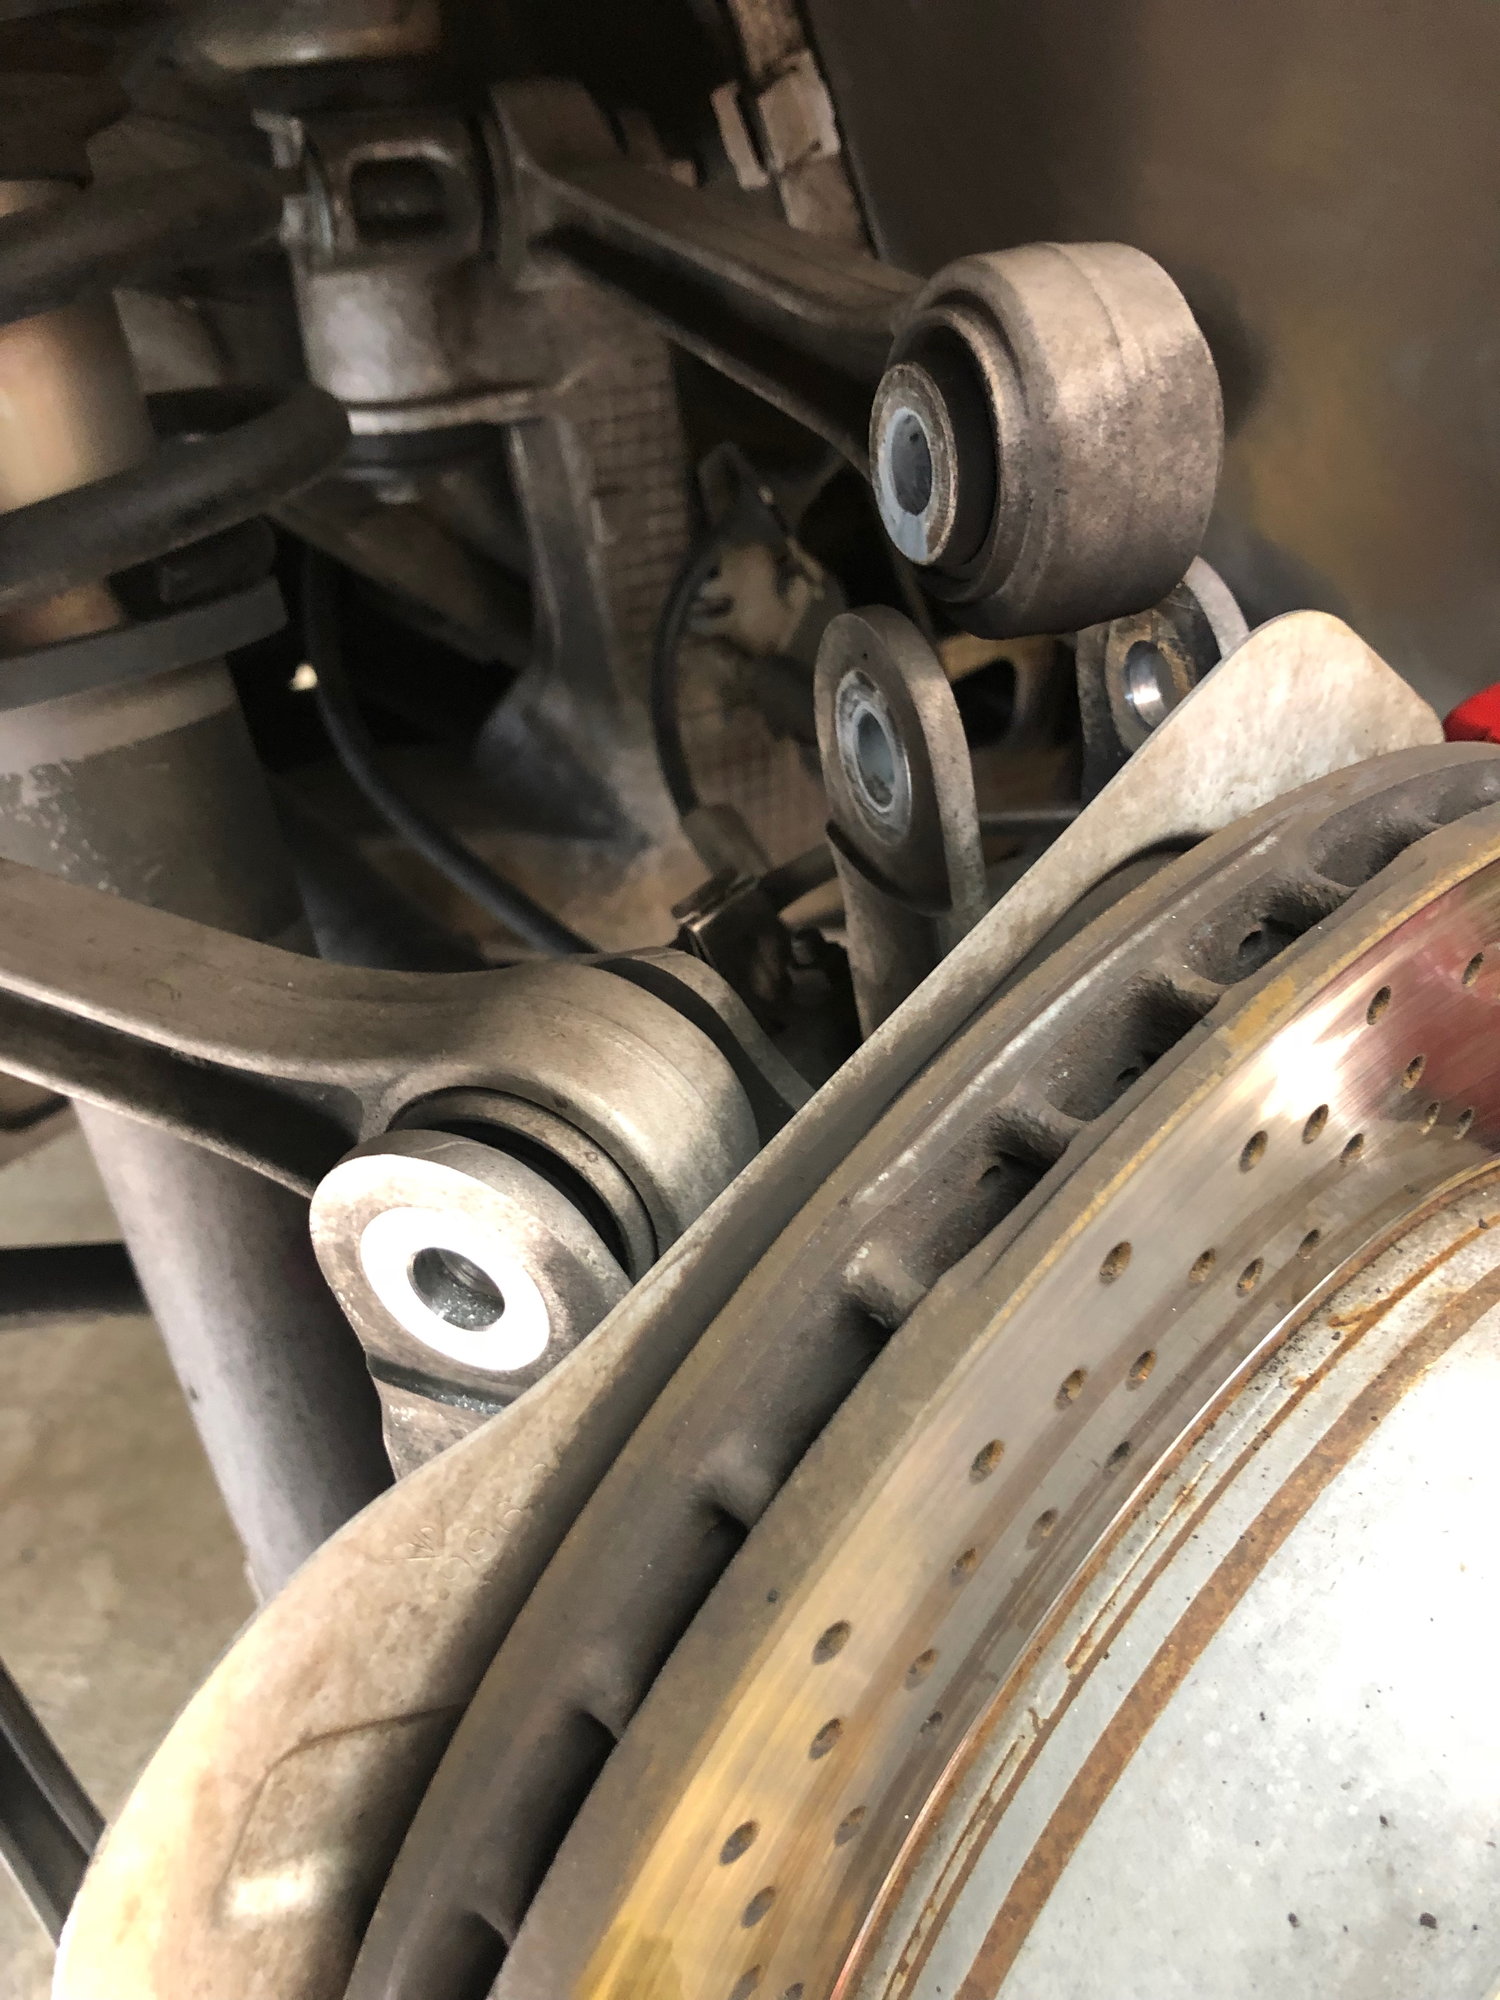
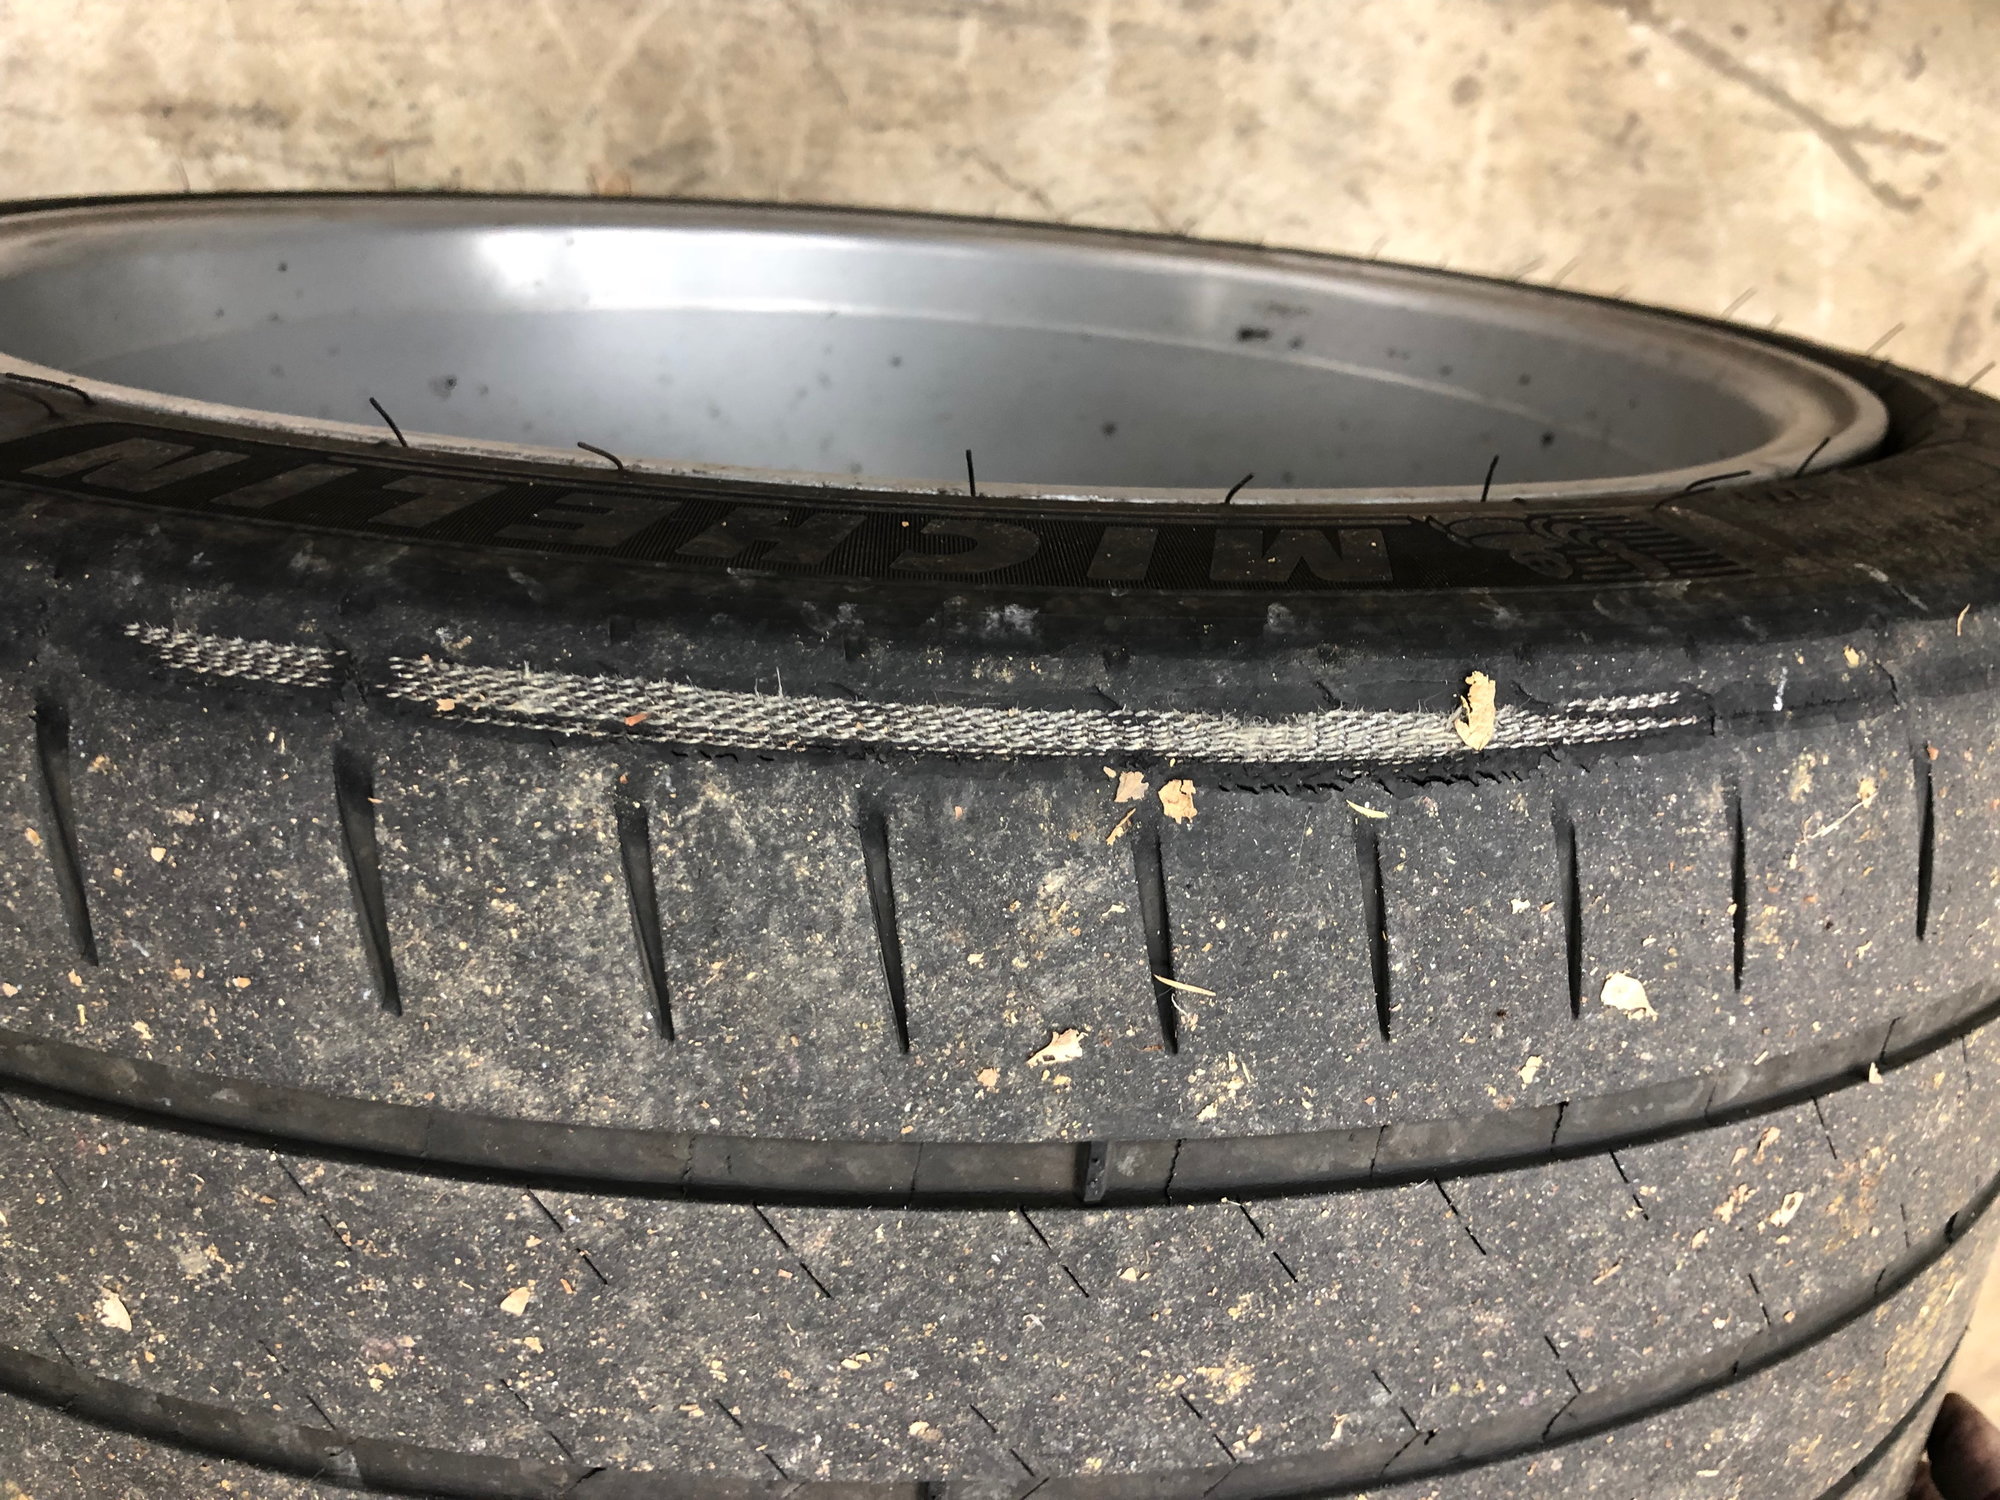
4. Once we had everything buttoned up I spent some time inspecting all the other bushings, boots and bits you dont get to see often. Everything looked solid except for this discovery. How embarassing. I had 20k miles on these PS4s and figured I had another 2-5k miles based on my wear indicators. You really need to get under the car to inspect the tires regularly. That could have ended badly.
Conclusion
I did a test run trying to hit every pothole I could find and it sounded tight and solid. I love projects with instant feedback. I will likely do my other mount in a few months and bet I could do that one in 1.5hrs.
Once I get some new tires next week I will take it out for a proper rip and report back.
I love these DIY writeups. You're doing a huge service to the 997 community, so thank you for taking the time. Glad that the knocking is gone. I have the exact same issue, I believe front and rear passenger side are both shot - should have also replaced my mounts when I put on the Eibach springs about 6 months ago.
Something that saved me a lot of time and work on the rear shocks was the judicious application of 5ft long 2x3 to pry down between the lower rear control arm and the sub-frame without removing the any of the control arm bolts. I did unbolt the sway bar.
I only removed the nuts and bolts holding the shocks in place. Prying down (with the 2x3) to move the suspension just about 2 inches allowed me to freely move the lower end of the shock off of the mount and move the upper end down and out through the top between the upper control arms.
I was able to R&R the right shock assembly in about 45 minutes -- and that was a first attempt on the suspension of this car for me. Getting to the upper bolts in the tower (and that damnable PASM cable) were more challenging than any other part of the job.
BTW, This is my 100th post on the Rennlist -- and that's about 90 more than I have done on any of the other forum sites (VW, Toyota) I have used. If I was a bit tipsy I might say "I love you guys"
Something that saved me a lot of time and work on the rear shocks was the judicious application of 5ft long 2x3 to pry down between the lower rear control arm and the sub-frame without removing the any of the control arm bolts. I did unbolt the sway bar.
Love the technique! I was thinking I might have had clearance to remove the strut without removing the control arms. However they literally only took 10 mins to remove and re-torque.
Great write up! I really appreciate your contributions, your coolant reservoir tank replacement DIY was particularly helpful.
I guess there's no easy way to check the condition other than the full removal.
Btw, I thought you were changing cars and getting an S?
Thx Rampage.
Yea I forgot I didnt update that thread with the latest. My plan turned to **** when I realized I was trying to sell a car, drive to LA and buy another...and close an investment in a new company I founded all in the same month. It was becoming a clusterfuk so I pulled the chute to put my head down at work. The buyer who wanted my car couldn't wait so bought another 997 in the east bay and the S I was looking at sold a few days later.
The good thing is I realized how easy it is to sell a 997. I have 2 open offers for it and I pulled the craigslist ad because I was getting too many inquiries. The bad thing is its getting harder to find good value 997s. I've only found one other low mile S at a reasonable price and it was sold in a few days.
Thanks for asking. I will update the guys on that original thread.
As usual, great write up. Thanks for sharing this.
As a thought for next time, we could mill a chunk of Teflon to make the inner bushing. I've got the Bridgeport mill and a good lathe at the office. If you still have the old bushing ...
I don't know if this might tighten things up too much ... we'd want to think about it ... but in the past whenever we wanted to improve handling Teflon was a great bushing option.
@Petza914 thx. Let me know how the project goes and any tricks you discover.
Will do. I still need to do the PCCB brake upgrade on the Cayenne now that the adapters have shipped from Germany and add paddles to the steering wheel of that same car. Then it will be finished, well almost - need to also do a catch can install to keep oil from accumulating in the driver's side intercooler from the OEM design.
Theon Goes Full Carbon Fiber With Stunning New Build
Slideshow: Built around a carbon-bodied 964 and a naturally aspirated 4.0-liter flat-six, this bespoke commission highlights how far the restomod formula has evolved.
Tuner Is Converting Porsche 911s Into Shooting Brakes
Slideshow: A Polish Porsche specialist is moving ahead with one of the most unusual 911 conversions in recent memory: a shooting brake version of the 991-generation sports car.
This Coachbuilt Creation Is A Modern Take on the Legendary Porsche 917
Slideshow: A Porsche Carrera GT has been transformed into a one-off coachbuilt machine that blends analog supercar engineering with styling inspired by the legendary 917 race cars.
Is This Convertible Cayenne A Steal, Or A Returnless Investment?
Slideshow: A heavily modified Porsche Cayenne convertible with faux wood trim and a long list of flaws recently sold at auction for surprisingly little money.
Porsche's Top 5 Most Questionable Naming Decisions
Slideshow: For a company obsessed with engineering precision, Porsche has occasionally named its cars in ways that left even loyal enthusiasts scratching their heads.
Pogea Racing's 964 Porsche 911 Reimagination Stands Out in a Crowded Field
Slideshow: Pogea Racing's latest Porsche 964 project blends carbon-fiber construction, modern chassis upgrades, and up to 500 horsepower while keeping the air-cooled 911 experience firmly analog.