When you click on links to various merchants on this site and make a purchase, this can result in this site earning a commission. Affiliate programs and affiliations include, but are not limited to, the eBay Partner Network.
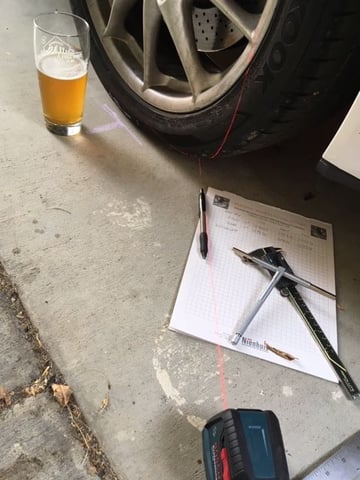
Measurement day to understand the suspension starting point and define what I need to do if I want to try corner balancing at home.
But first, a bit about the madness that affects us, it was 110 degrees outside while I was doing this work. If this doesn't qualify as mad, I don't know what does...
First, figure out the method:
-collect tools necessary, telescoping gauge, calipers, chalk, 15" rule, laser level (and a local brew)
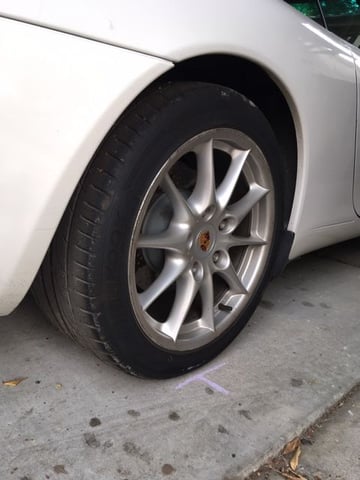
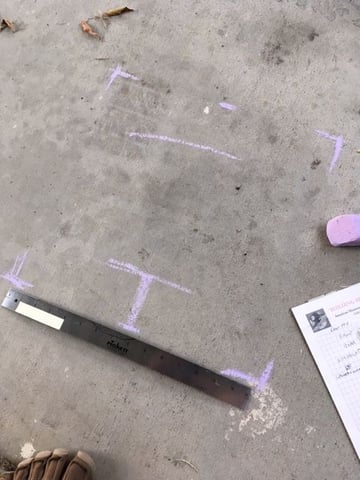
-mark the centerline, outside, and inside edge of each tire
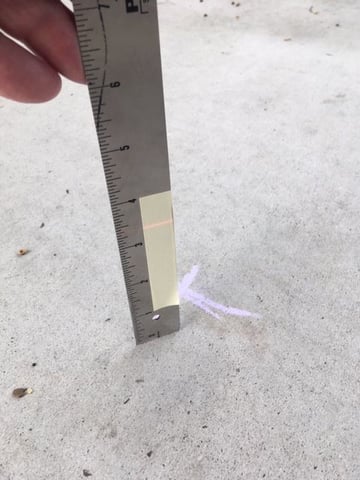
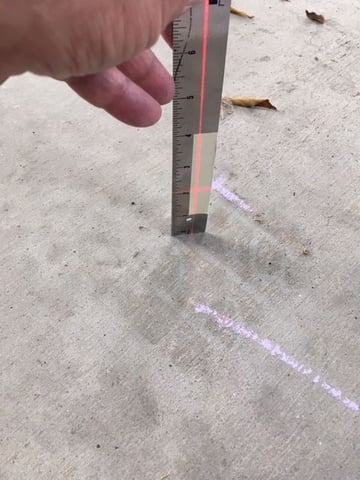
Use the telescoping gauge to measure the defined points to ground
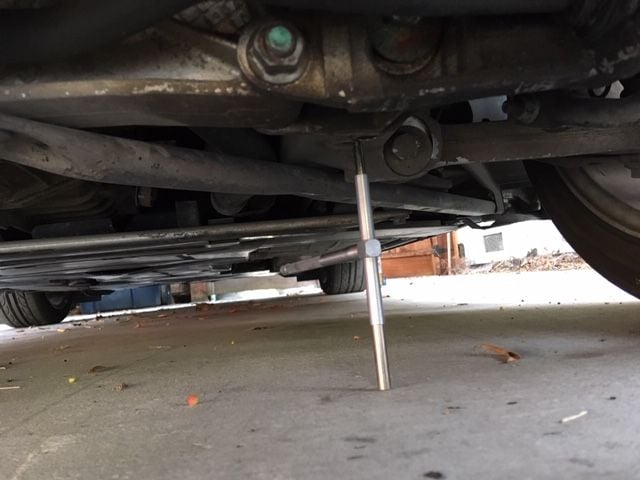
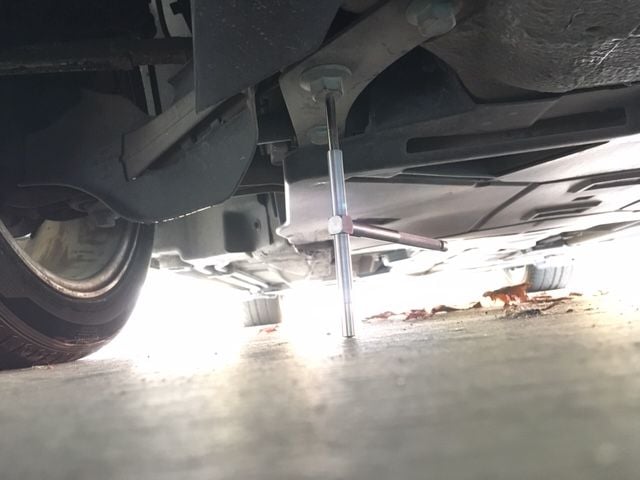
There is a reference bore on the rear suspension crossmember. The Bentley manual shows it clearly
measure to the bolt head that holds the diagonal arm on the front
Here are the numbers relative the different specs of different suspensions:
This car is as stock as they get and the ride height is 17mm below spec. The surprising part is when you look at the gap between tire and fender, it already seems large. Did the original car come 17mm taller? IDK. The bottom end of the spec would be 7-10mm higher than it is today. Needless to say, these springs are TIRED! I added the Ohlin's spec as this is a potential replacement.
Next measurement was to measure fender to center of wheel. Here are the numbers: (I did not measure directly to the center, I measured to the edge of the rim and subtracted half the rim diameter. It seems a bit more accurate.
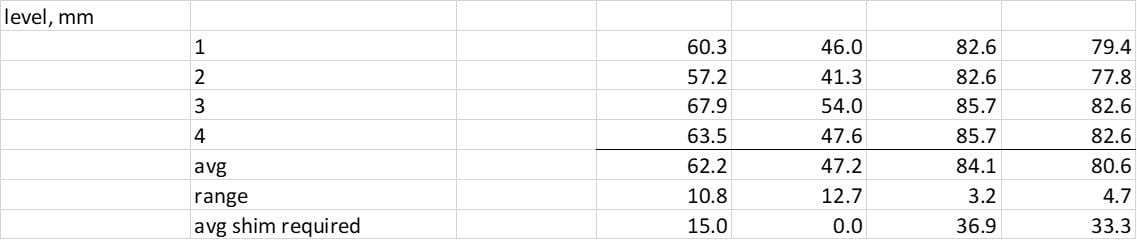
Next step was to measure the level of the carport. Ultimately, I need to correct for this in order to corner balance the car. All the numbers make sense relative the expected slope away from the house.
First, define the area where the scale will sit: a 15" x 15" square around the center of the tire
Then measure the height of each corner of each wheel to the laser level
Here are the numbers:
In order to level the scales to get an accurate reading, I'll need these shims along with the corresponding increases to the ramps to get the car up on the scales.
The next step, which is to get the coil overs, install, then corner balance, will be delayed until December. I've been called away to our factory in Thailand for 2-3 months.
Additional, there seems to be a bit of discussion whether corner balancing is necessary for street use. I actually don't care. It's an interesting procedure that I've never done, so I would like to try. This should also increase my tool kit as I need to find the scales to do the work. If anyone is aware of a used set for sale, I'm willing to discuss.
I pulled the front bumper off and cleaned the radiators and condensers. The job had its moments, but overall was not that bad. There were no real surprises with just the typical clot of leaves and junk stuffed in the intake boxes and between the radiator and condenser on each side. I had the hardest time getting the center radiator shroud back on. I actually had to laugh at myself at getting hung up on that stupid shroud. Getting the bumper back on was definitely harder than taking it off. Getting the holes to line up was a bit of a trick, but I prevailed. I did this while replacing the front brakes. I figured while the rotors were off there was plenty of room to remove the inner fender liners. While in there I relocated the frunk emergency pull cable to the tow hook hole. I wasn't sure how to fasten it to anything so we'll see if it stays put once I start driving.
Next step is to finish the front brakes and drive, drive, drive!
What did you feel before? Any noticeable symptoms they were shot?
Yeah....long story, but I have only been driving the car for a couple weeks now. (Bought it in Jan/Dec while I was still deployed, but didn't get home from Afghanistan until the end of August.) The exhaust tips were hanging very low (and uneven). The car did idle very roughly with lots of interior noise (high NVH for you fellow engineers)...my daughter refused to ride in it.
Now I notice less NVH, crisper shifting (but I also just recently installed aluminum shift bushings as well), and a generally more enjoyable experience. Overall, one of the best $200 I have spent on a car.
Next steps will be continued work on refreshing the suspension.
Finally finished the coolant tank replacement. I put in a new Porsche tank (heard the aftermarket ones suck), bracket and coolant level sensor. It's a '99 so I didn't have to lower the engine. One of the hardest parts was getting the rightmost bolt tightened on the bracket. I removed it to make it easier to get the tank back in. Once the tank was in, I didn't have enough room to have a straight shot at the bolt with the socket and extension I had.
The other problem is that the well nuts (before this I didn't know what a well nut was) that hold the air pump to the body were shot and I had to buy new ones from amazon along with slightly longer bolts from Home Depot.
Nothing leaked so I'm grateful for that! In a month or two I'll probably replace the water pump & t-stat. I have them already.
I'm in San Diego. No ash but the sky is a really interesting color.
 09-08-2020, 02:35 AM