
Teardown begins. Suspension madness...

 02-28-2016, 11:58 PM
#575
Race Car
Thread Starter
Celebrity sighting today at dbfd garage...Flyintomato came for a visit. Great to have ken in the shop...
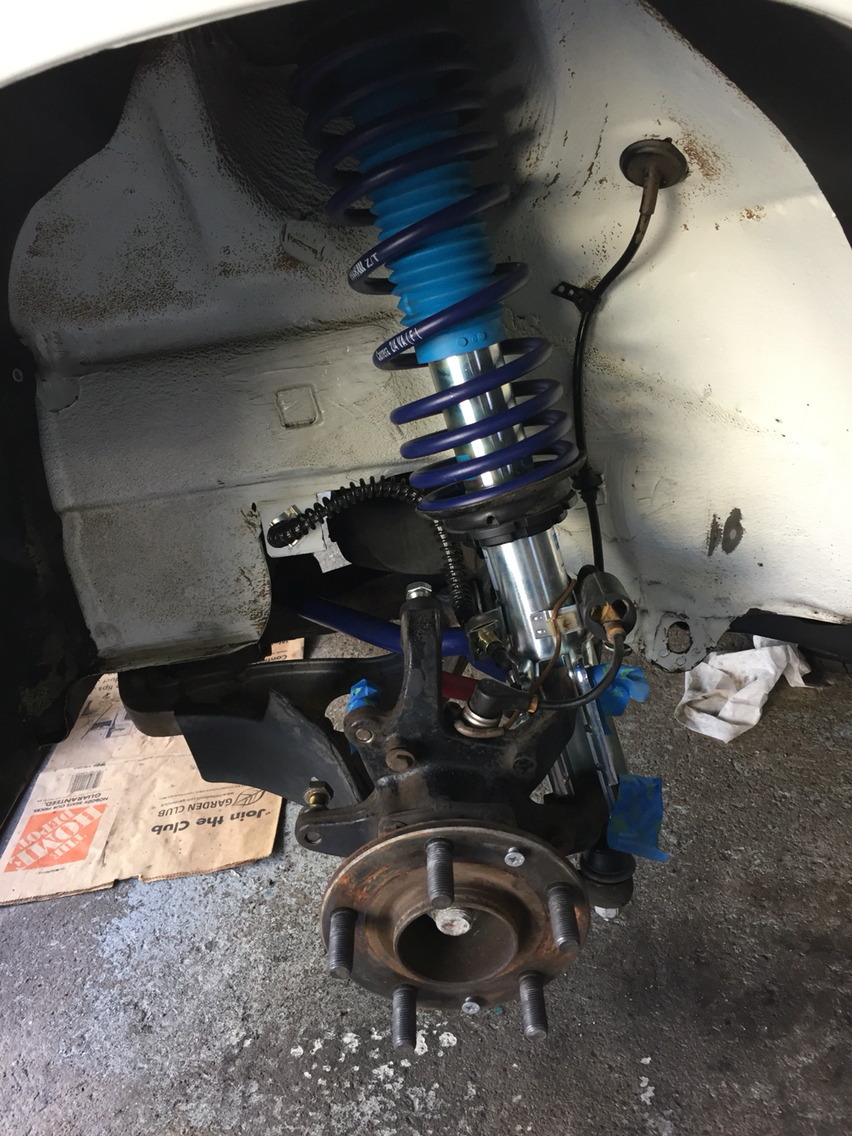
Good day today. I got the front end bolted together. Haven't really torqued it all yet. Waiting for hard lines for the brakes and gaskets for the top hats up front. But good to get parts off the floor and back where they belong.
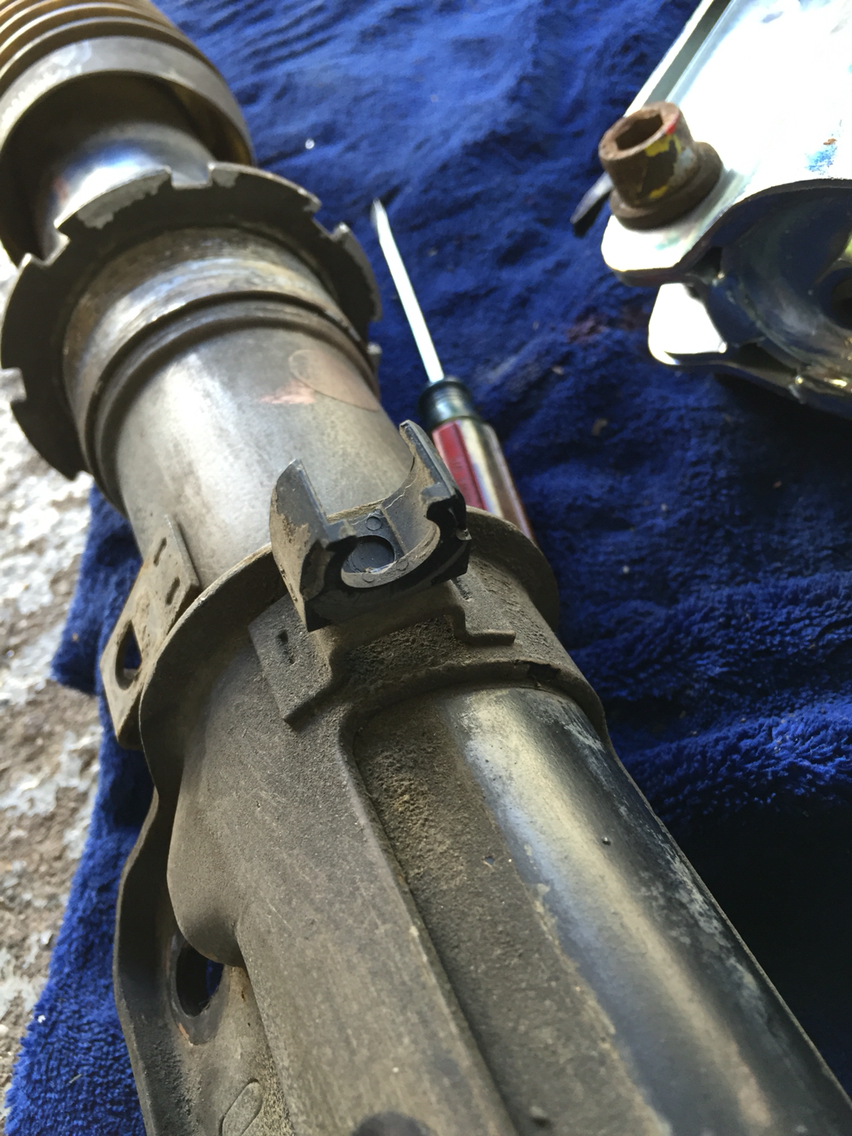
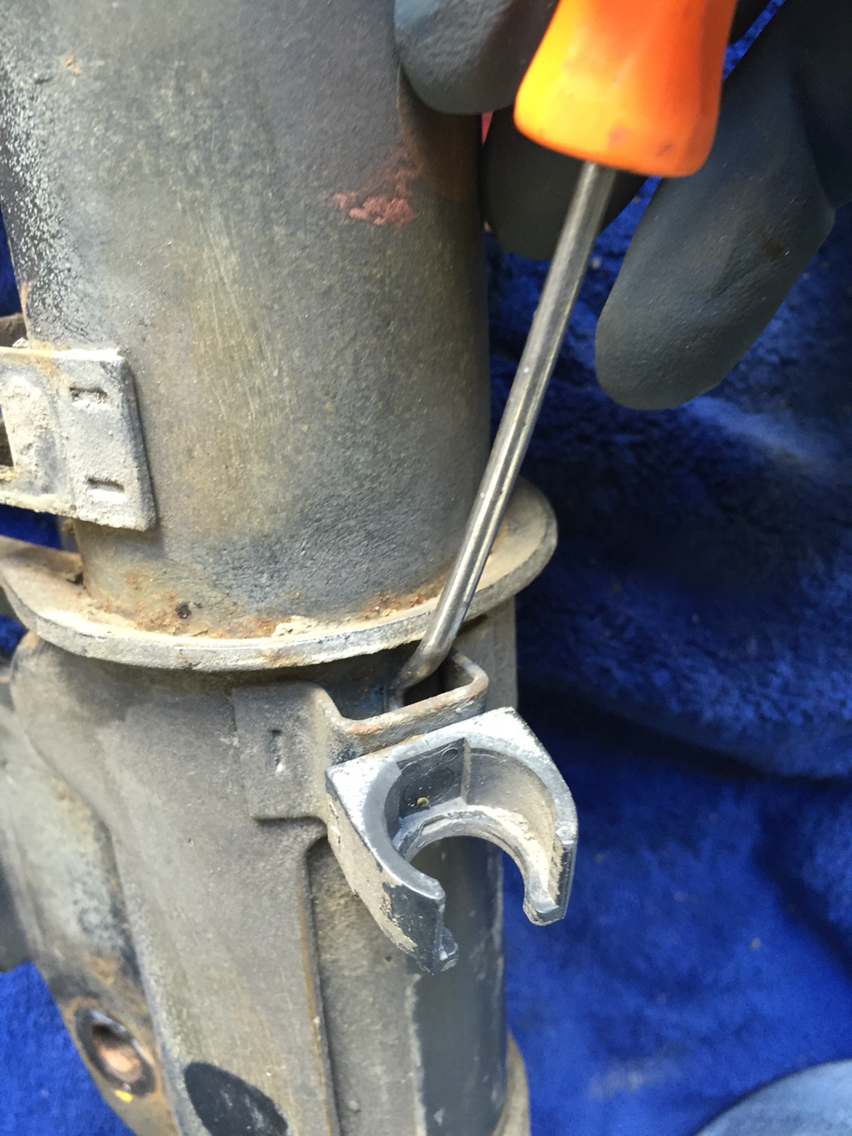
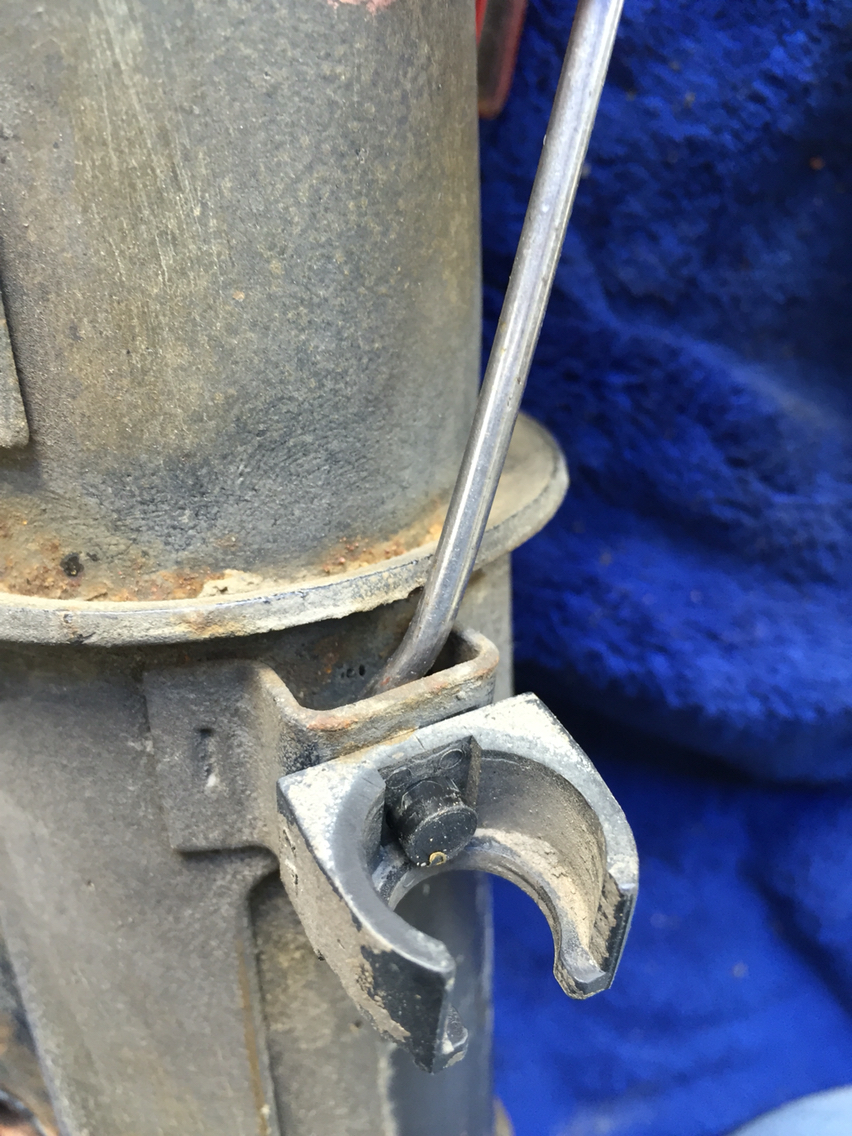
One thing to remember when you are putting new stirs on, is to re-use if you can, the grommets and plastic clips and such from your previous struts. I use a screw driver, plastic hammer, a punch, and this old snapon seal pick that has been ground down to not be sharp...
Poke the set from the back through to the front and the clips come off the struts.
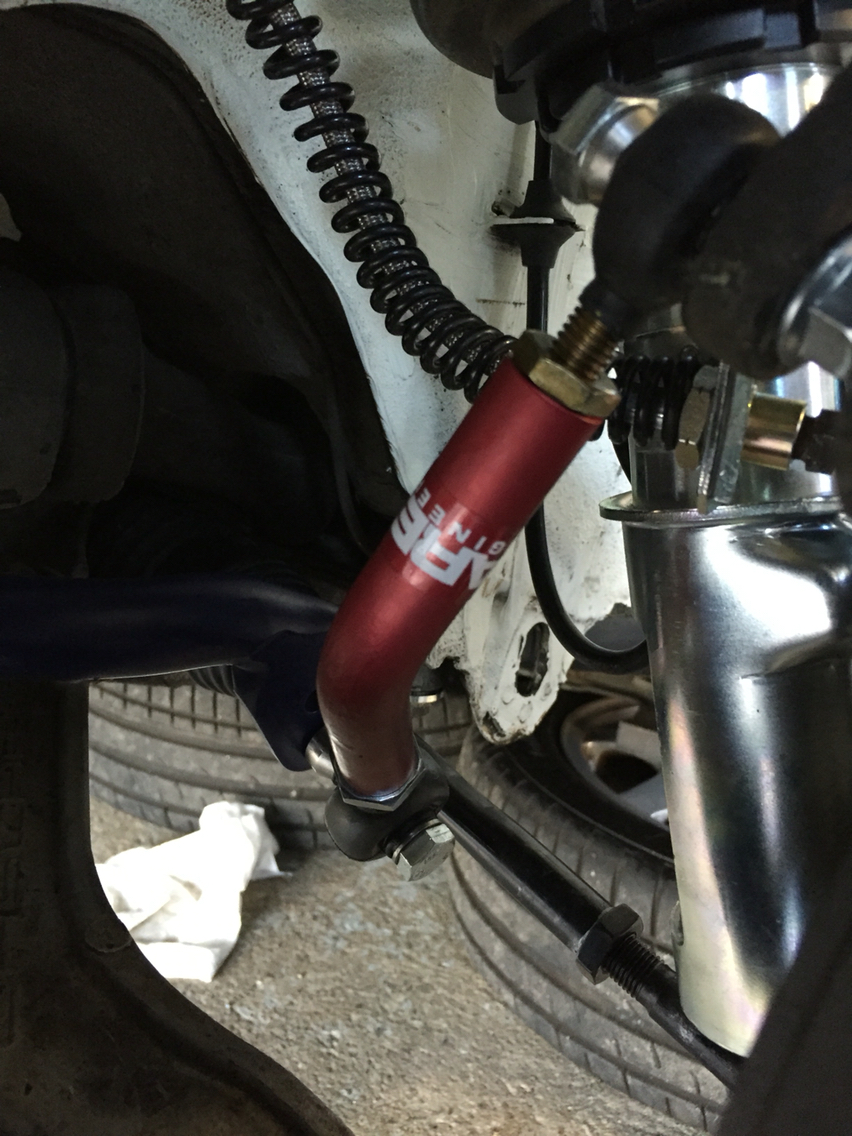
New tarret end links. Booted with sealsit boots. The top boot is RERS1 and the bottom boot is RERS2, the next size up. In the rear for the drop links, if you remember, they are the small RERS1 size.
Then onto the back, we pulled the heater boxes and inspected them and changed the seals. Then replaced them and also new hoses.
So axles are out. And hoses done. Next thing to do "while you're there" are the rear wheel bearings. The bearings were still good, but they are 25 years old. And we are there, so out they went.
Next up, drain the transaxle and replace the axle flange seals. Then brake lines, then rebuild, add wheels and send to alignment. May have to pay another visit to butzigear for this one...if he will have us. We only have 250 hp and we are lacking turbos...so we pale in relation to his usual suspects...although this build will have a pretty awesome set of BBS RS-GT....so maybe that will get us in the door...

Side note, joking aside, I saw some of the detail work on some upcoming bbs wheels for a couple of Butzi clients. The guys at Butzi are doing amazing work and paying attention to serious detail. Love it.
Good day today. I got the front end bolted together. Haven't really torqued it all yet. Waiting for hard lines for the brakes and gaskets for the top hats up front. But good to get parts off the floor and back where they belong.
One thing to remember when you are putting new stirs on, is to re-use if you can, the grommets and plastic clips and such from your previous struts. I use a screw driver, plastic hammer, a punch, and this old snapon seal pick that has been ground down to not be sharp...
Poke the set from the back through to the front and the clips come off the struts.
New tarret end links. Booted with sealsit boots. The top boot is RERS1 and the bottom boot is RERS2, the next size up. In the rear for the drop links, if you remember, they are the small RERS1 size.
Then onto the back, we pulled the heater boxes and inspected them and changed the seals. Then replaced them and also new hoses.
So axles are out. And hoses done. Next thing to do "while you're there" are the rear wheel bearings. The bearings were still good, but they are 25 years old. And we are there, so out they went.
Next up, drain the transaxle and replace the axle flange seals. Then brake lines, then rebuild, add wheels and send to alignment. May have to pay another visit to butzigear for this one...if he will have us. We only have 250 hp and we are lacking turbos...so we pale in relation to his usual suspects...although this build will have a pretty awesome set of BBS RS-GT....so maybe that will get us in the door...
Side note, joking aside, I saw some of the detail work on some upcoming bbs wheels for a couple of Butzi clients. The guys at Butzi are doing amazing work and paying attention to serious detail. Love it.
02-29-2016, 01:16 PM
#576
Rennlist Member

So that's probably the noise I hear when I go over a big speed bump. The suspension compresses (usually after one of those large, but smooth speed bumps), and I hear a clank at the bottom of the suspension travel. Otherwise no noise.
02-29-2016, 02:53 PM
#577
Burning Brakes
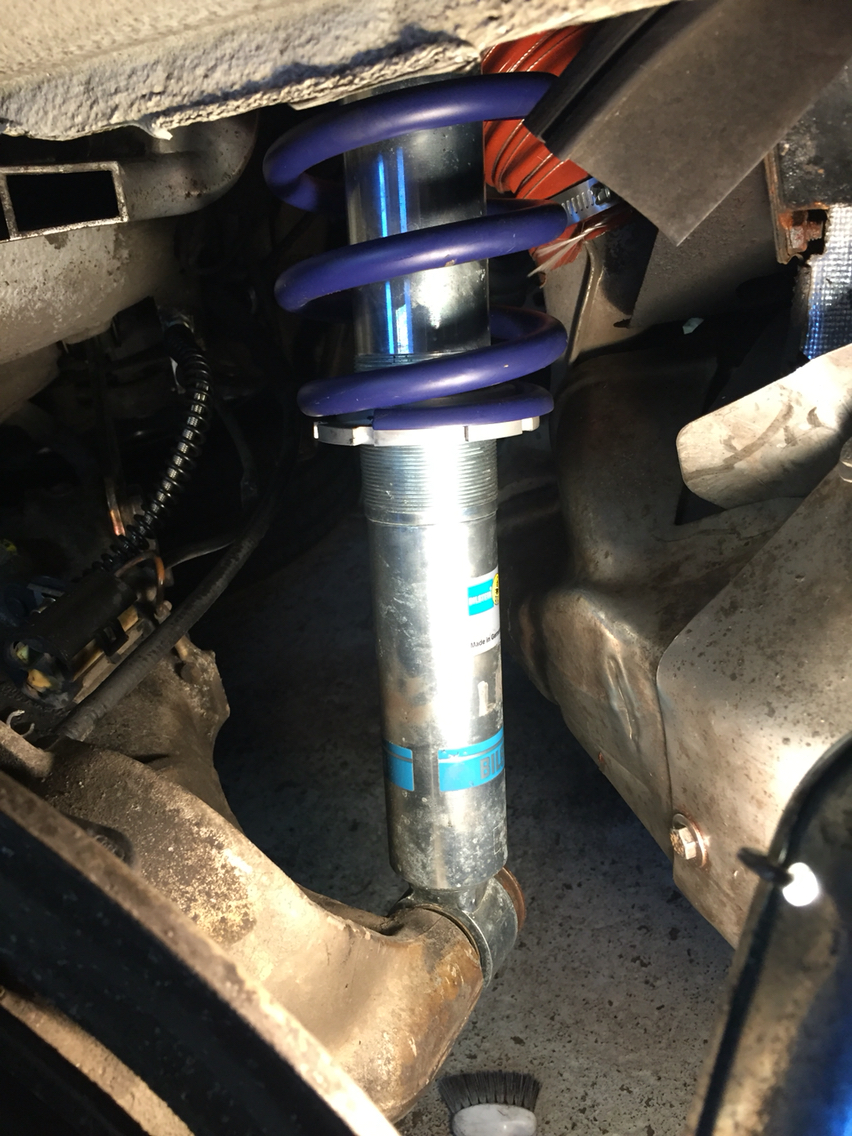
On the pic of front strut, I see you have bottom plate set all the way down, will it be close to bottom after alignment? I have mostly all the way up to match stock strut removed before off to align.
Do you orient the spring any certain way, i.e. Writing visible ? I just turn so writing is facing out of wheel well?
Do you orient the spring any certain way, i.e. Writing visible ? I just turn so writing is facing out of wheel well?
02-29-2016, 09:00 PM
#578
Race Car
Thread Starter
The bottom perch is set that way cuz the shop that put the springs on for me left them that way. I may crank them up an inch. May not. The ride height will get set in alignment. No corner balancing again because the springs are new. They will settle a lot...
02-29-2016, 11:37 PM
#579
Burning Brakes
Yeah, I'm getting the impression that one should not corner balance new springs. So, my alignment guy will just set caster, toe, camber? Me, with simple Eibach's, what would be the mileage or time to get back to alignment shop? Corner balancing of any value in my street only situation?
02-29-2016, 11:45 PM
#580
Race Car
Thread Starter
There is really no benefit to corner balancing for street only. (Sort of)...
So yeah, go get a basic alignment . Cheep as you can...and in a few months, go back and get it properly aligned. If you plan on really driving the car, with no passengers...then corner balance too...but only if yu are going to be driving hard in corners.
So yeah, go get a basic alignment . Cheep as you can...and in a few months, go back and get it properly aligned. If you plan on really driving the car, with no passengers...then corner balance too...but only if yu are going to be driving hard in corners.
02-29-2016, 11:58 PM
#581
Race Car
Thread Starter
I'm tired. And posting pics w this phone app is a pain in the ***...so I'm going to do today's posts in steps.
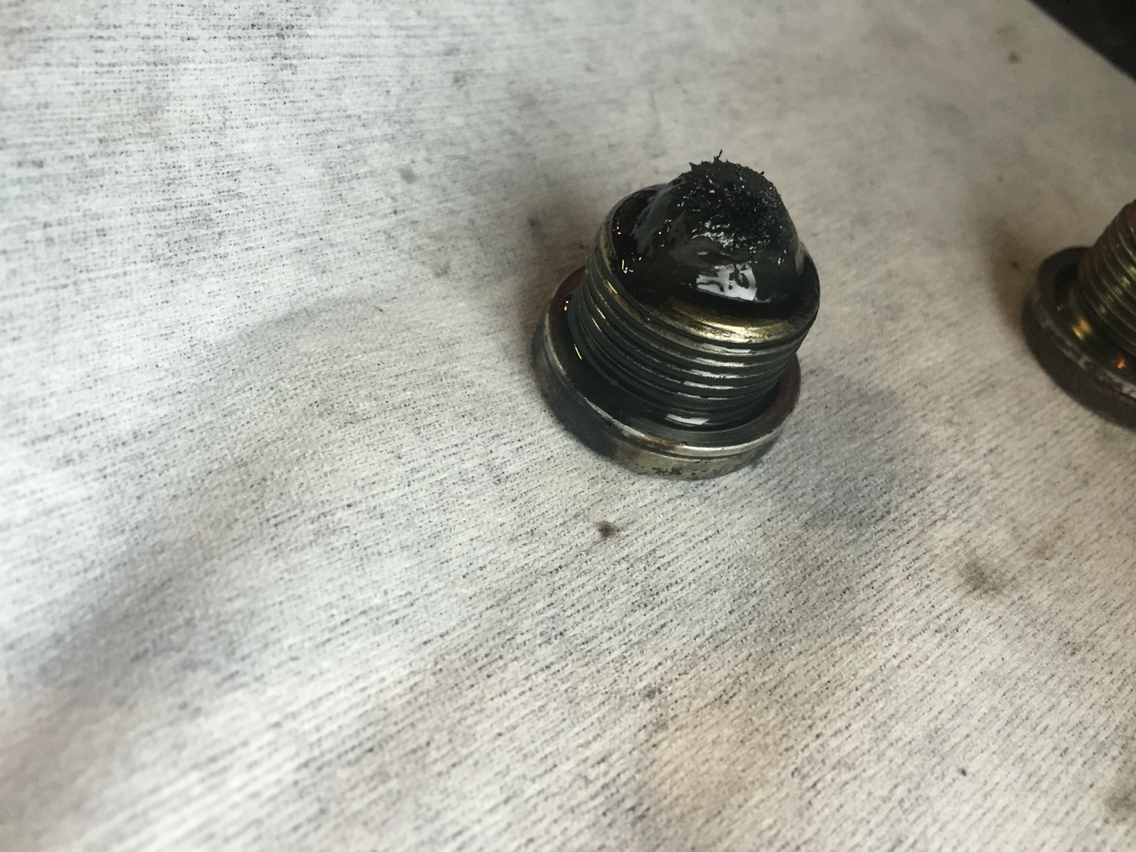
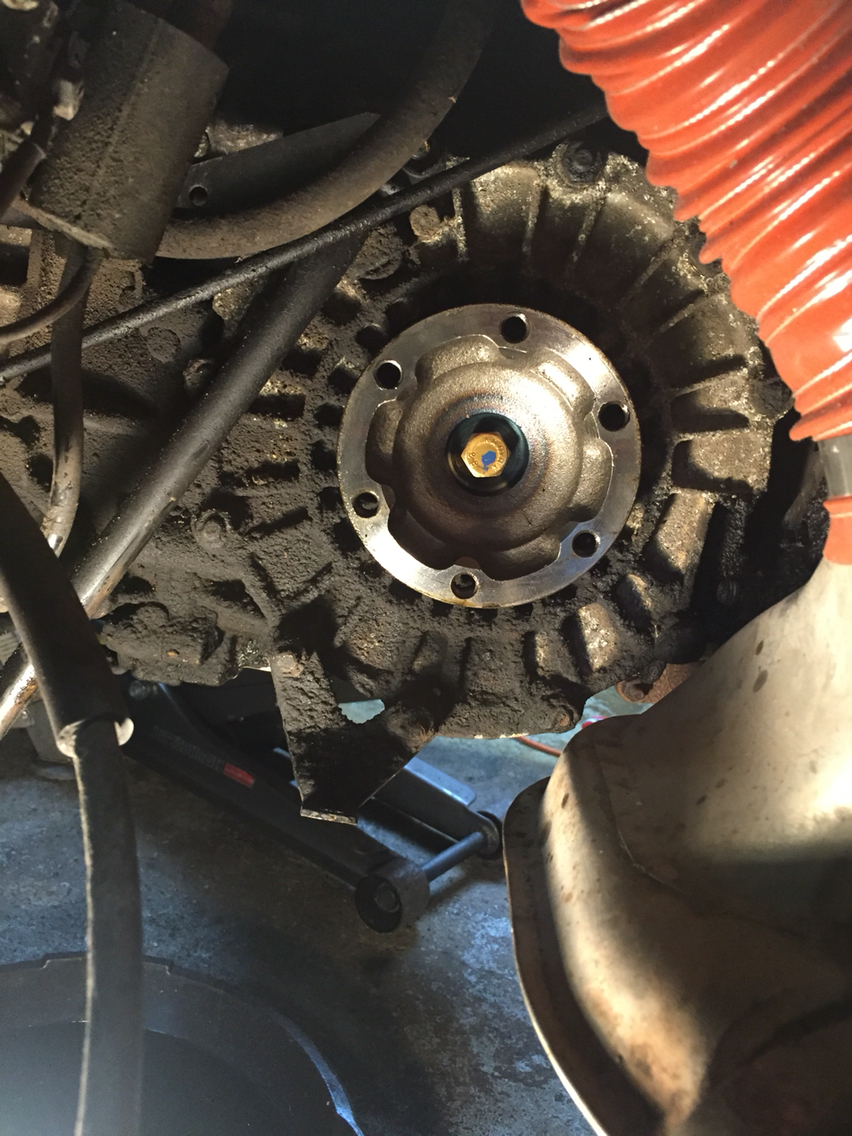
I started today with axle flange seals. But prior to pulling the flanges, I need to dump the fluid. The fluid in this car is obviously old, as evident by the nasty on the plugs...that's old crap on the outside. So must be old crap on the inside.
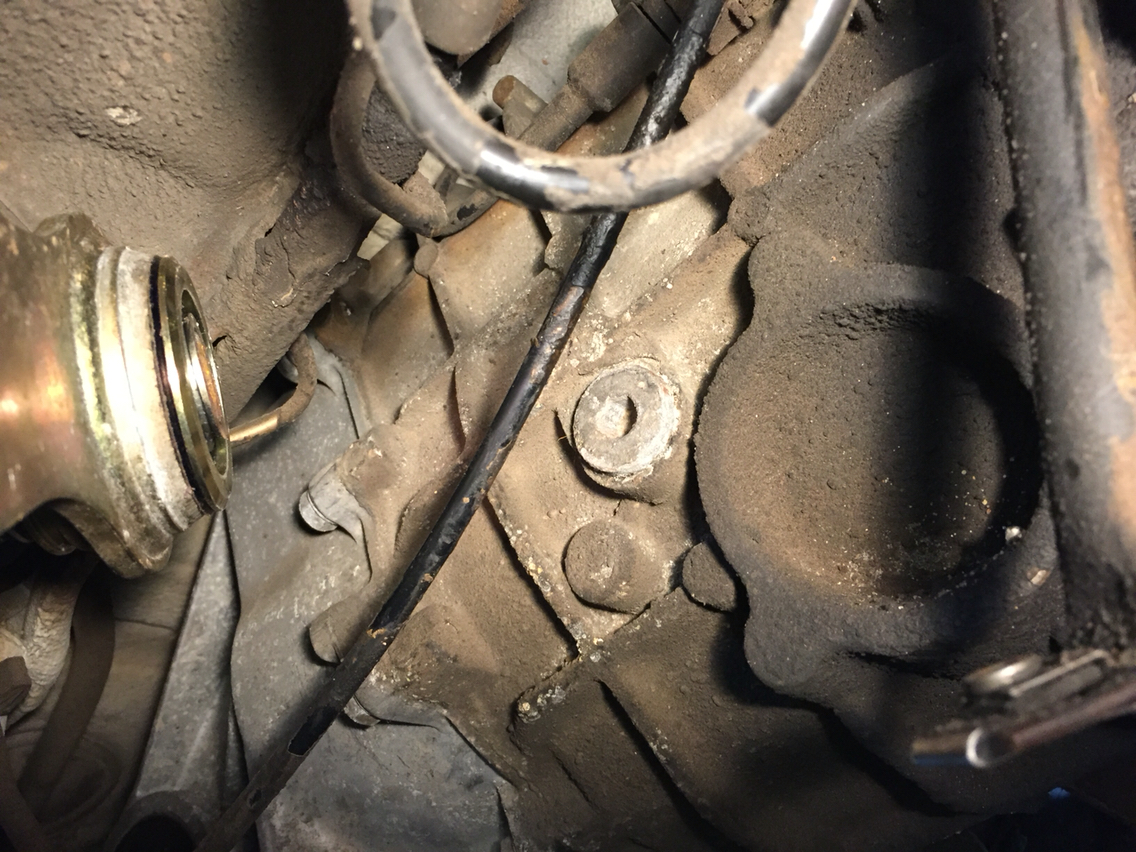
So I clean that off. Quick shot of wd40 and a brass toothbrush...
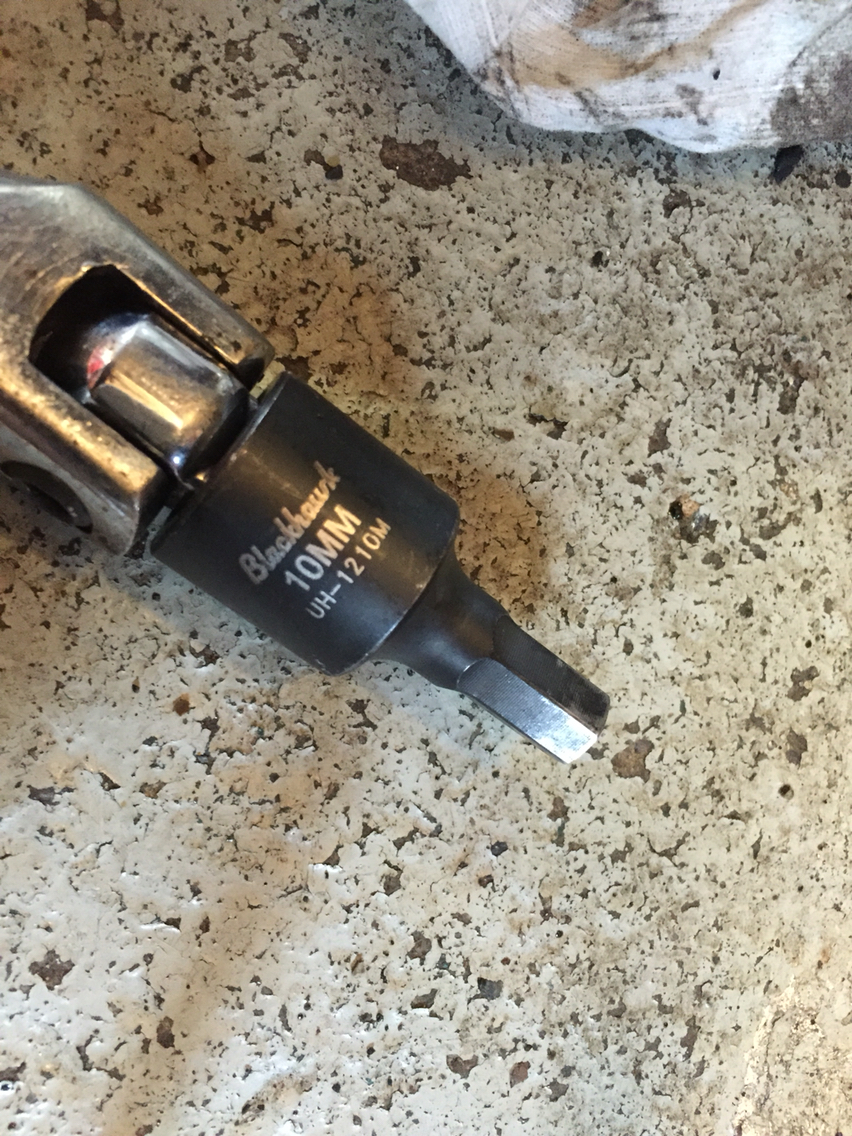
Important point here. These have been on for a long time. And the manual year ago was mis-printed with the wrong torque spec for the plugs. Porsche had it listed at something like 52 foot lbs. it should be approx 35 ft/lbs. so these sometimes are seized. You have to have a proper set of good quality impact Allen sockets to do some of these jobs. I recommend buying a set of Blackhawk impact allens. Not expensive and they are awesome. If you only buy two, and not a set, but 10mm and 12mm. Those are the two you will use the most.
Oil is out and yes, it was dirty...I drained it with the fluid cold. Between that and the fact that it was so dirty, we are going to fill it w new fluid and drive it a few months and flush the fluid again when I can do it hot. Get the trans nice and clean inside.
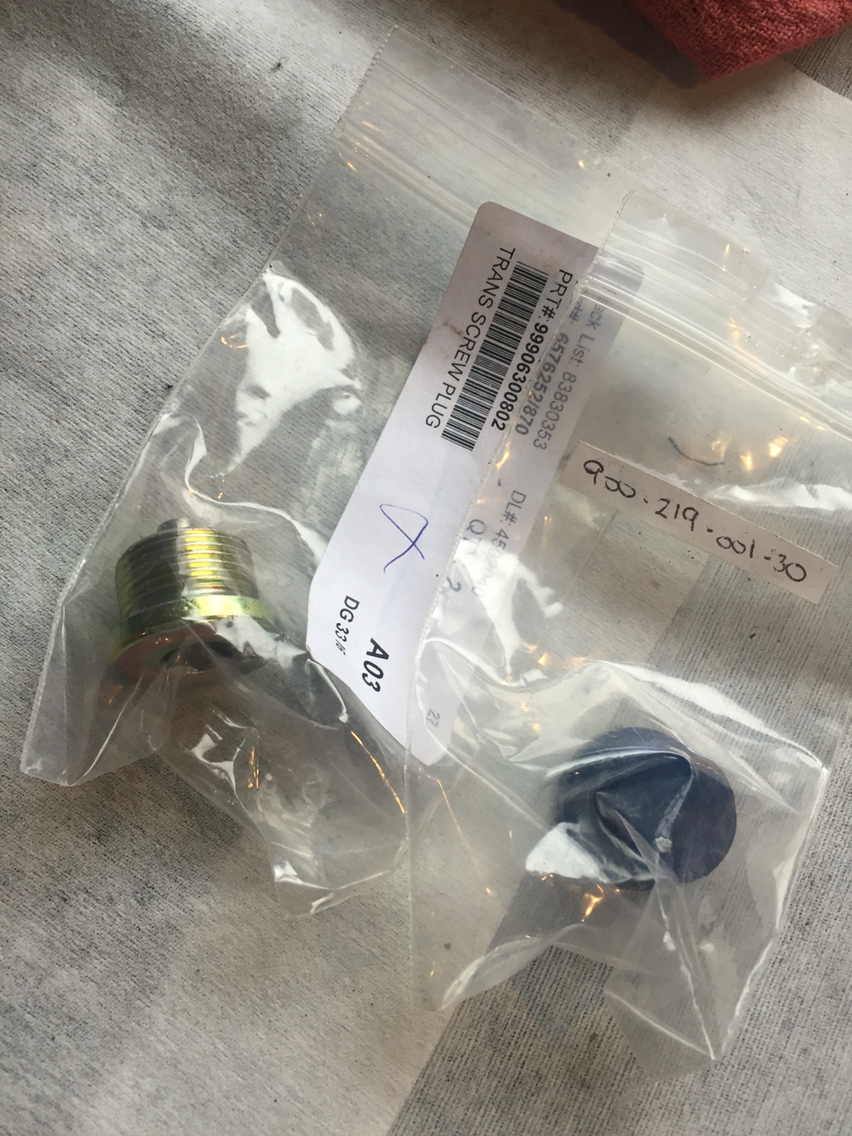
New drain and fill plugs.
I started today with axle flange seals. But prior to pulling the flanges, I need to dump the fluid. The fluid in this car is obviously old, as evident by the nasty on the plugs...that's old crap on the outside. So must be old crap on the inside.
So I clean that off. Quick shot of wd40 and a brass toothbrush...
Important point here. These have been on for a long time. And the manual year ago was mis-printed with the wrong torque spec for the plugs. Porsche had it listed at something like 52 foot lbs. it should be approx 35 ft/lbs. so these sometimes are seized. You have to have a proper set of good quality impact Allen sockets to do some of these jobs. I recommend buying a set of Blackhawk impact allens. Not expensive and they are awesome. If you only buy two, and not a set, but 10mm and 12mm. Those are the two you will use the most.
Oil is out and yes, it was dirty...I drained it with the fluid cold. Between that and the fact that it was so dirty, we are going to fill it w new fluid and drive it a few months and flush the fluid again when I can do it hot. Get the trans nice and clean inside.
New drain and fill plugs.
03-01-2016, 12:09 AM
#582
Race Car
Thread Starter
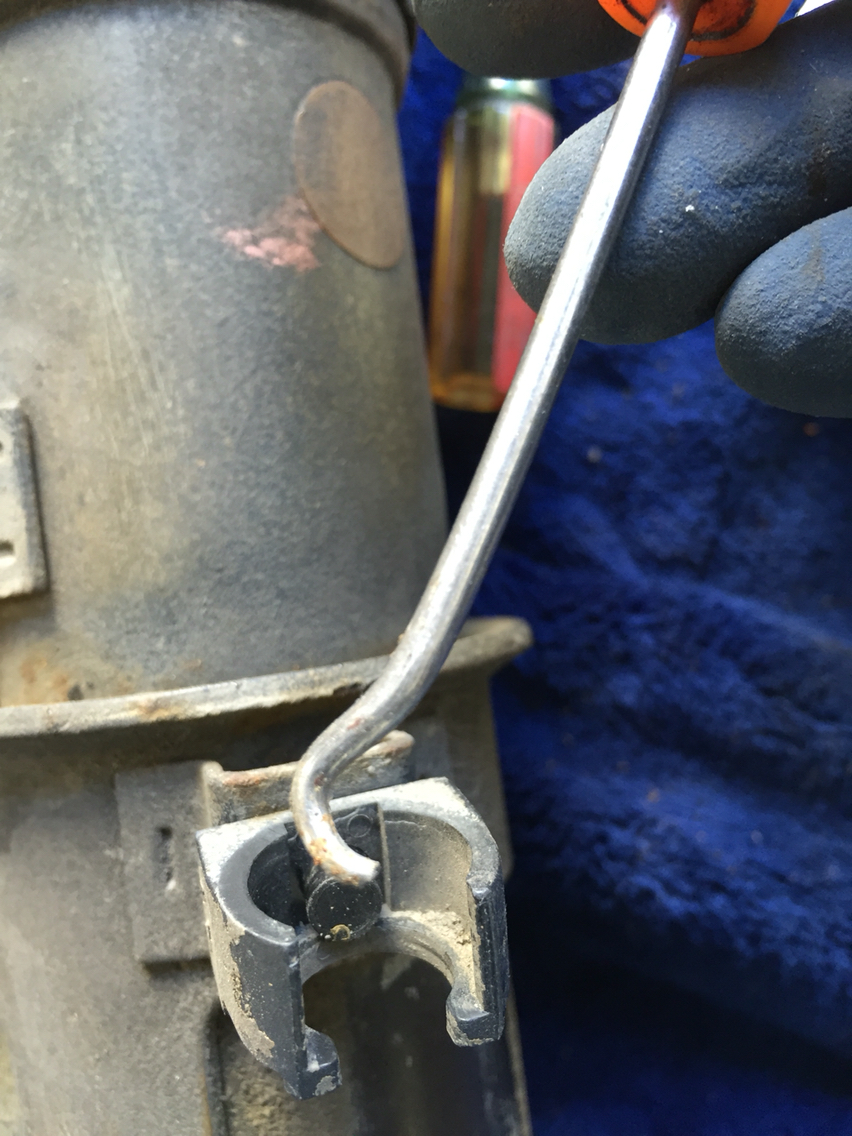
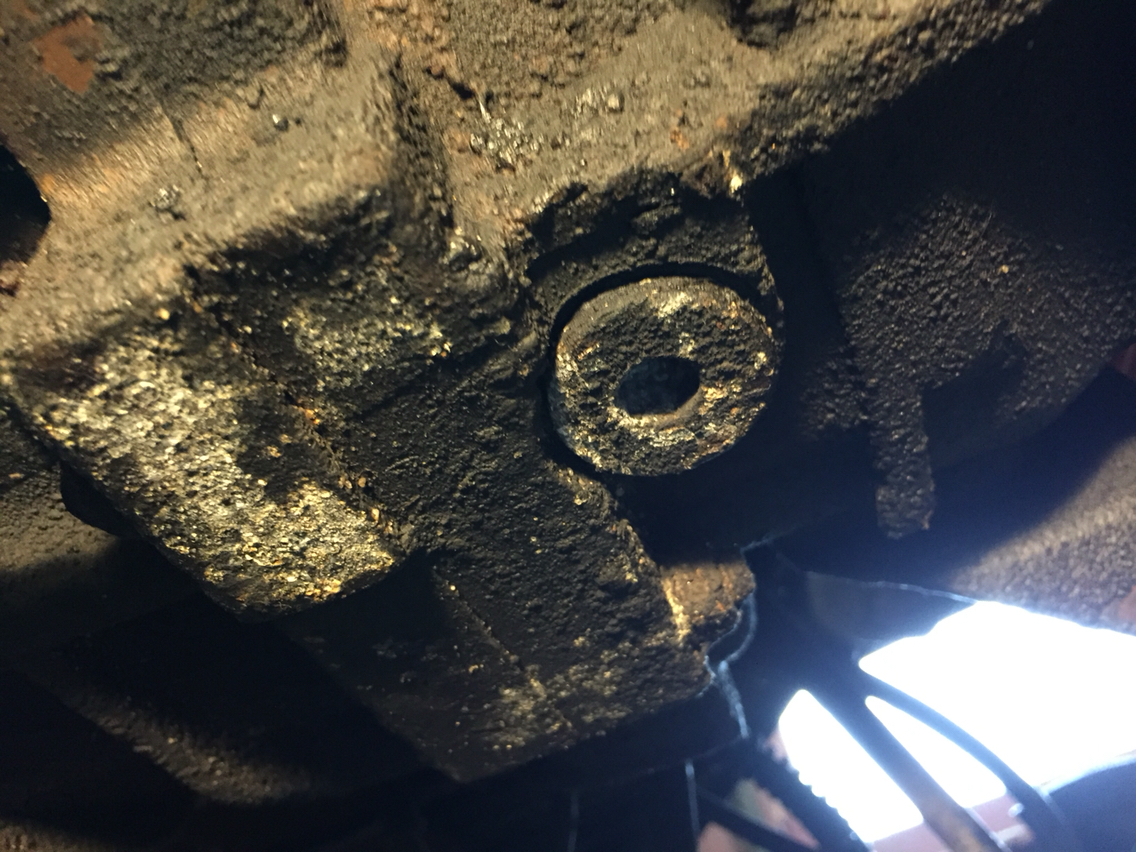
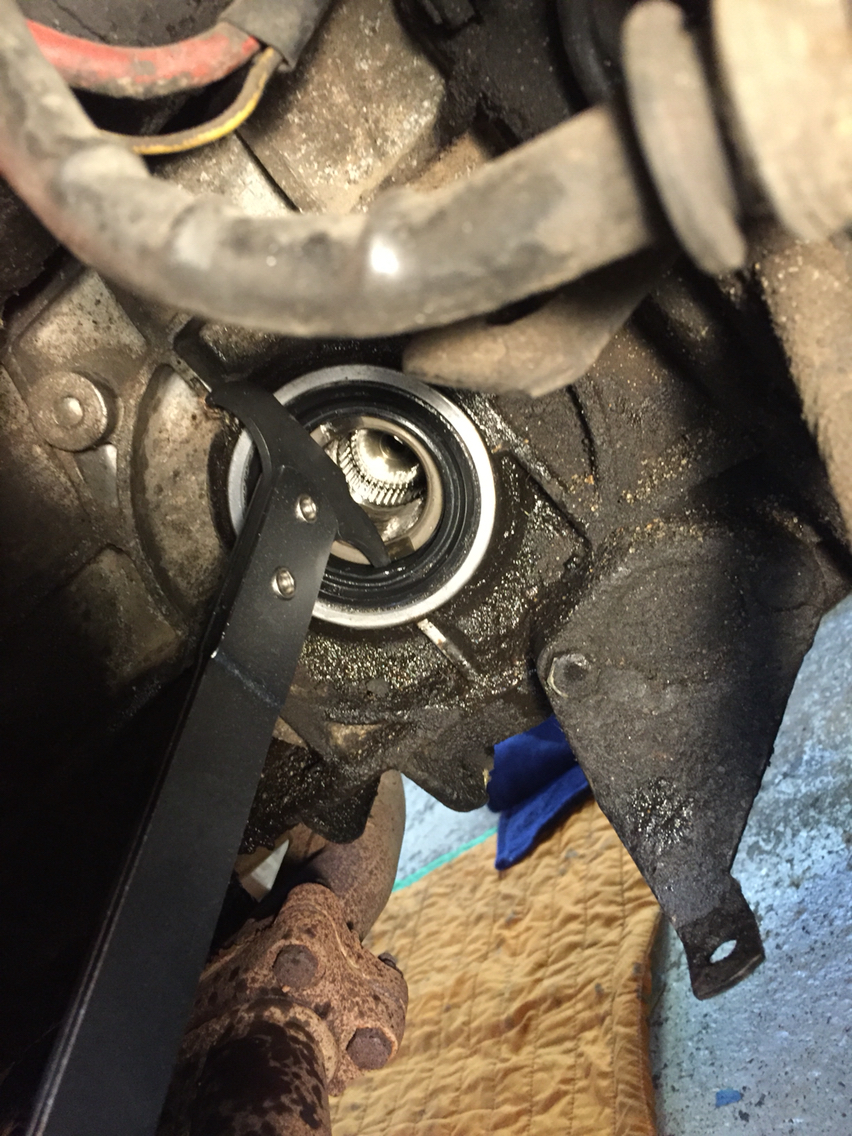
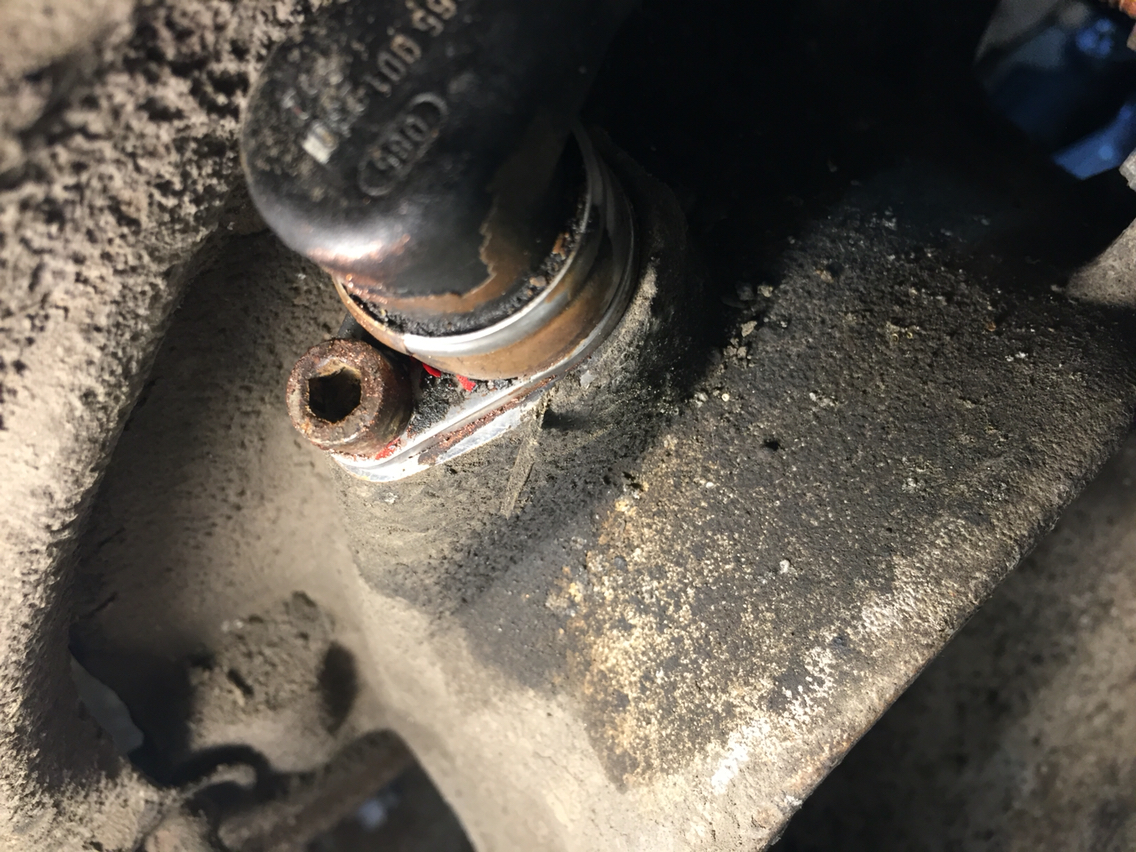
Next are the flange seals. It's such an easy job that it now amazes me that I was worried once about doing this. You do need to buy a seal
Pik for the job. I picked one up at Napa for 13 dollars. Gearwrench.
However, backtrack a moment...
The axle flanges. Use an impact gun on the bolt in the center. Go lightly, it's not on with a lot of force. Pull the bolt out, then the flange. And then use your pik and pop the seal out. Clean well and make sure to not get dirt inside the trans.
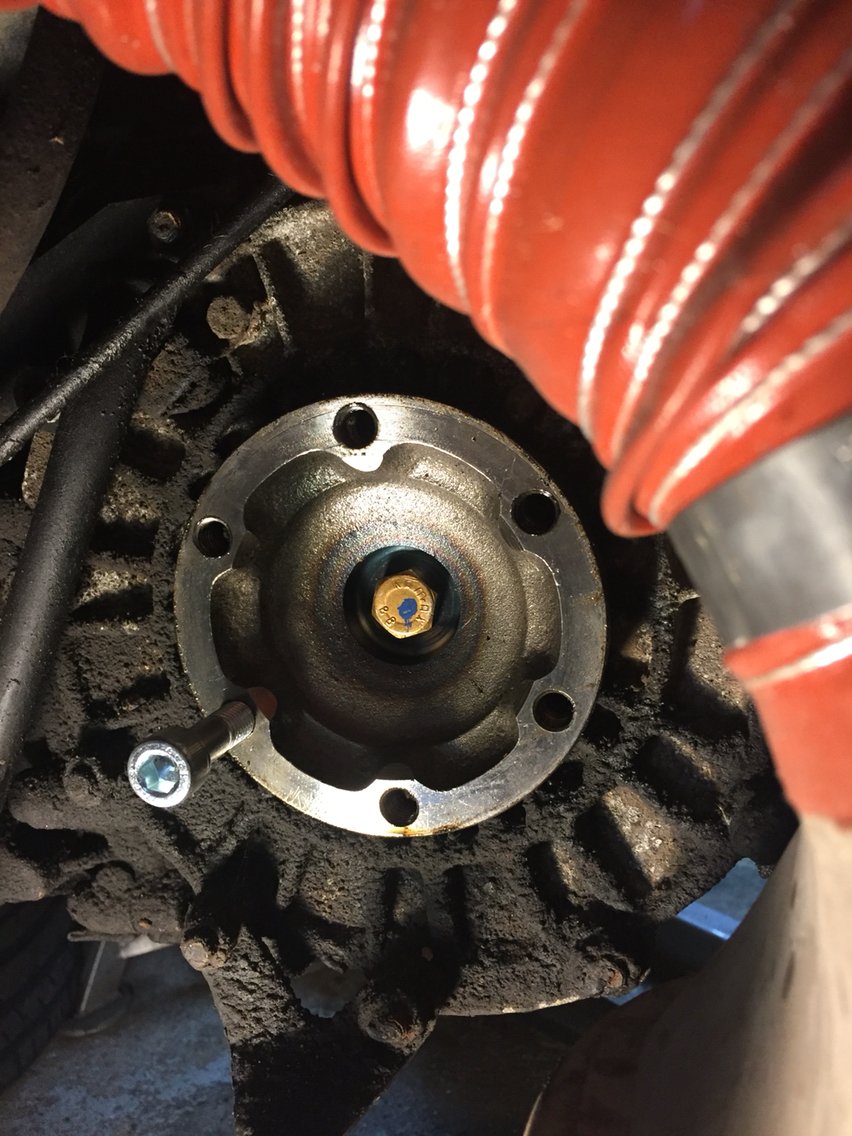

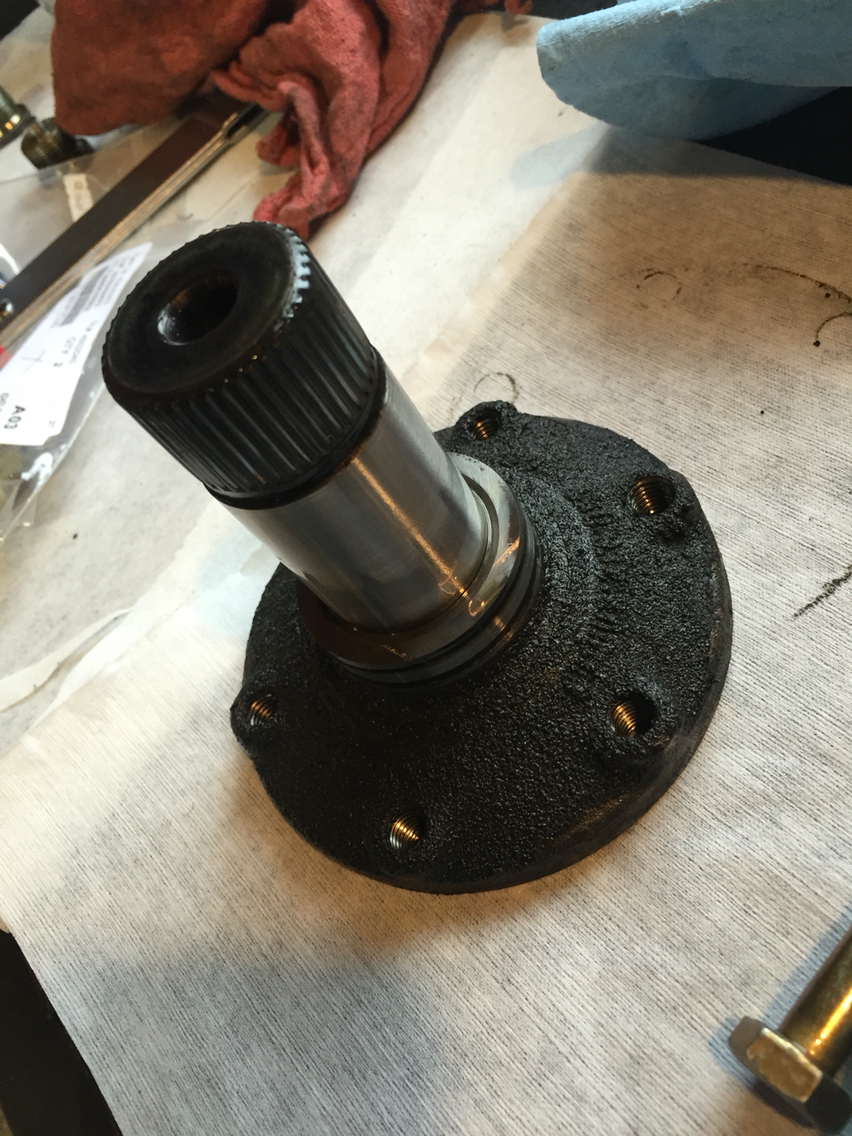
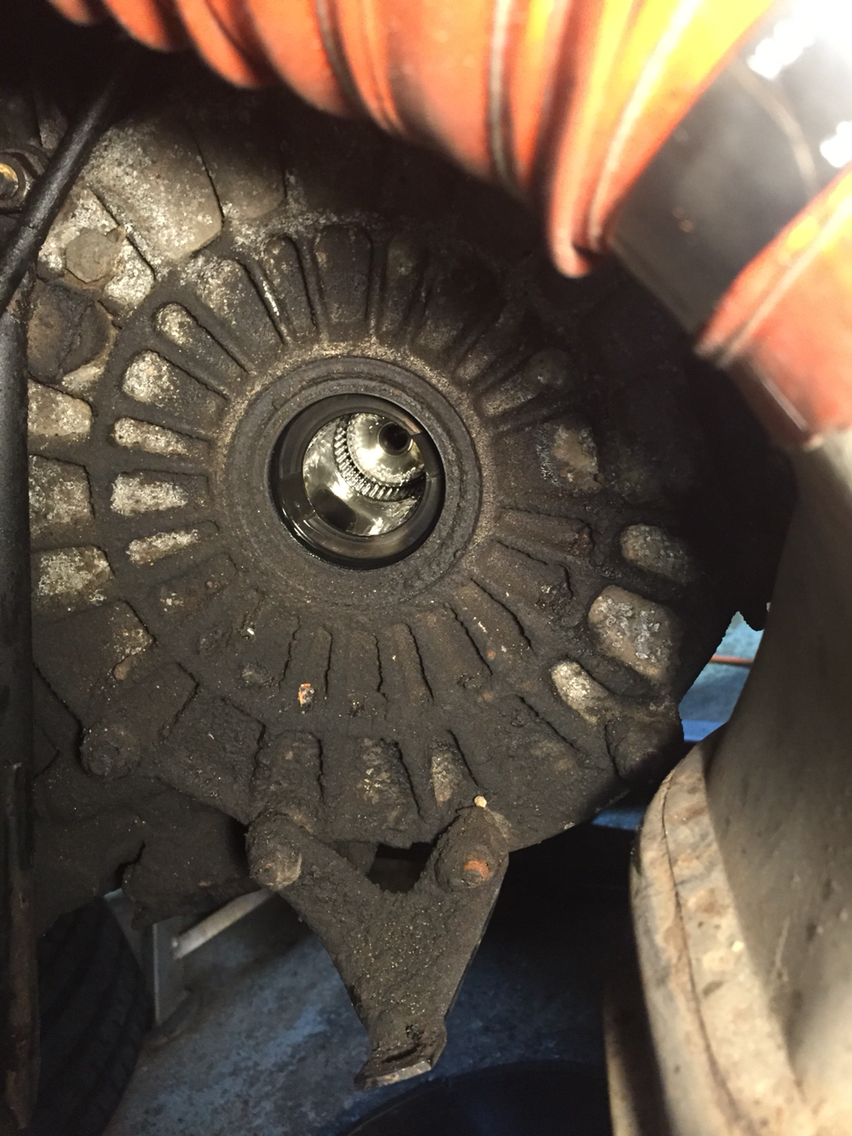

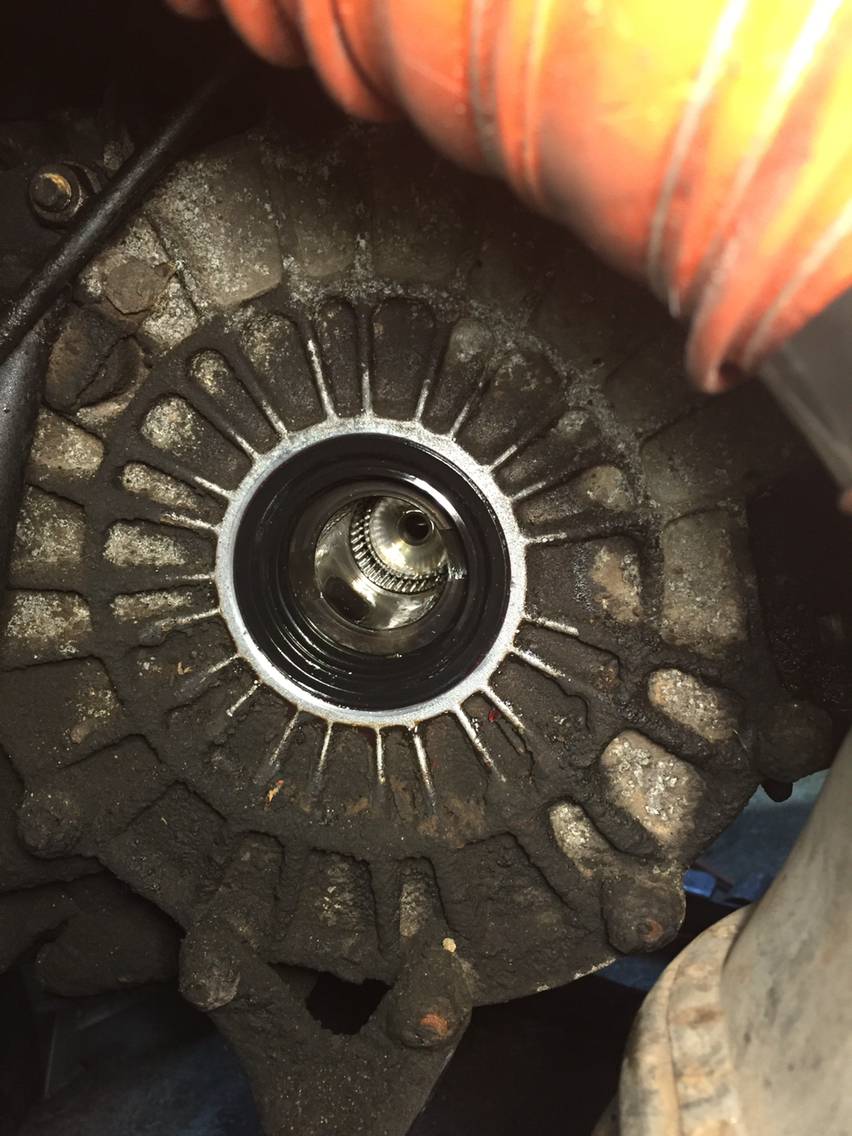
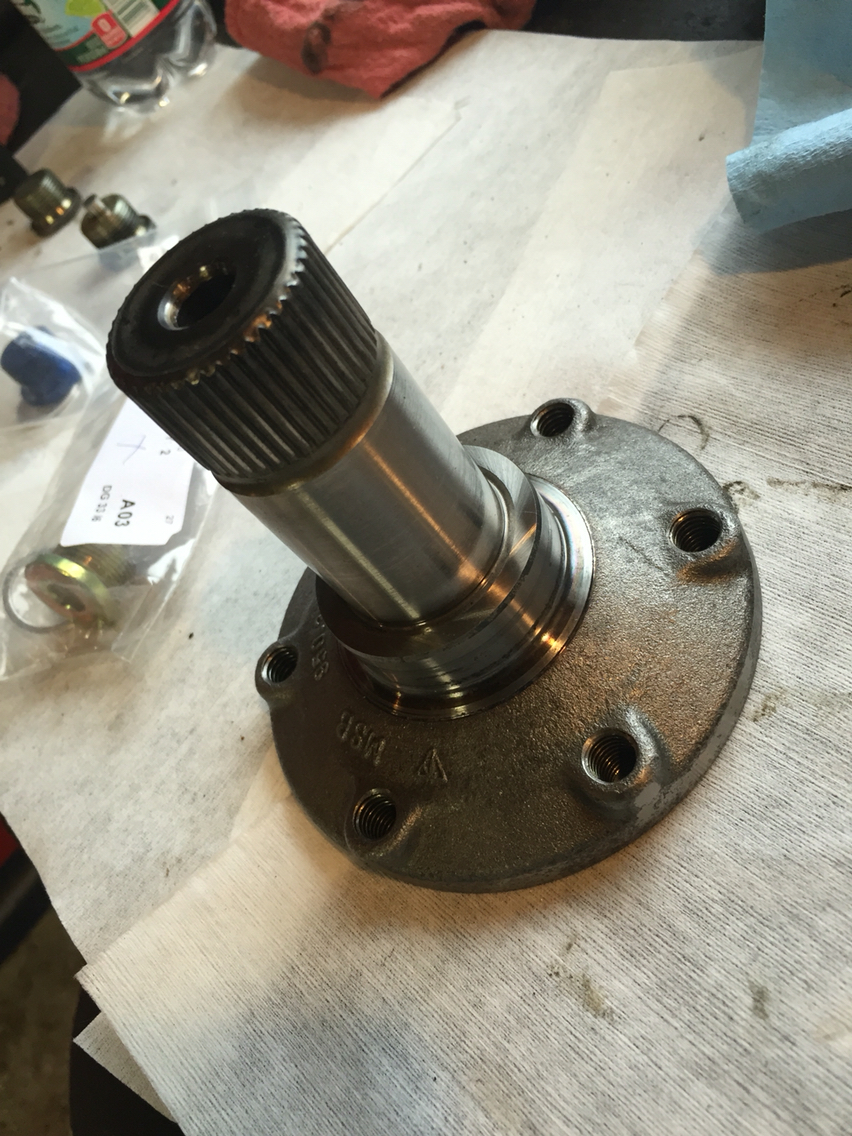
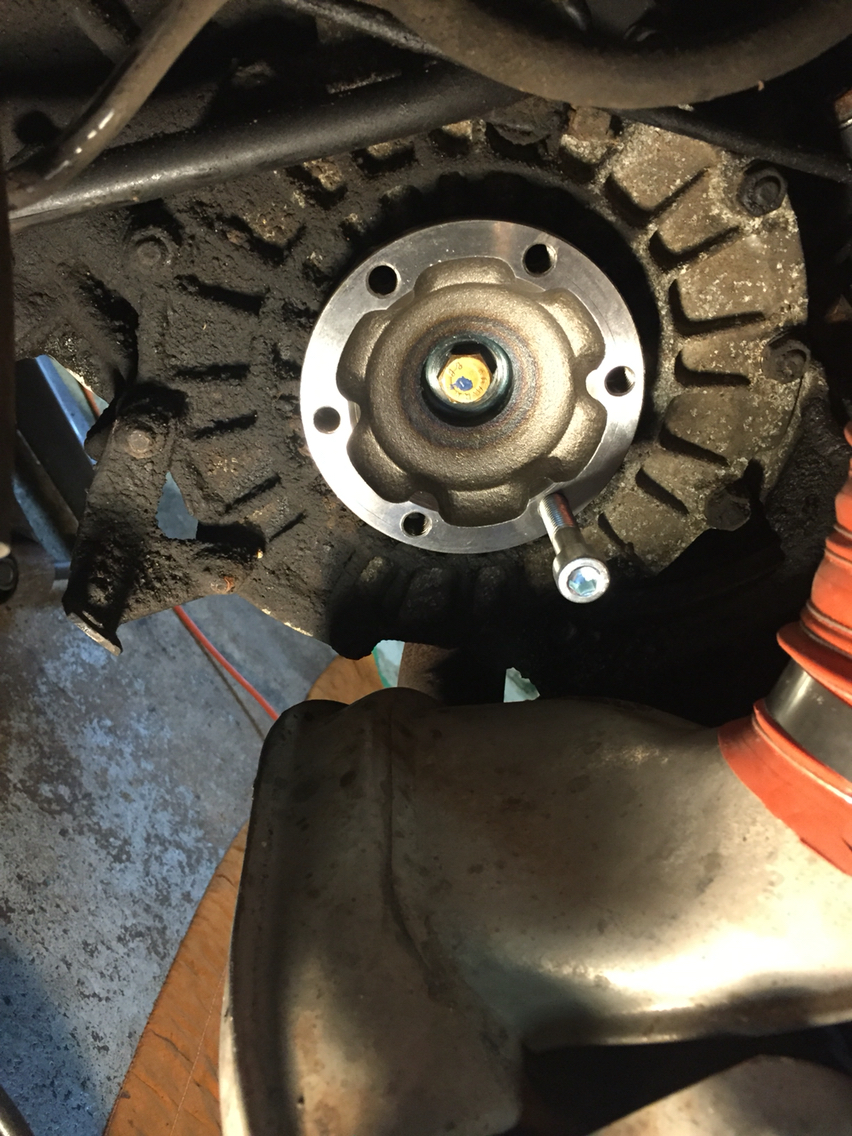
Once you have it all cleaned out, grease up the seal and tap it in with a seal press. I use a 74mm steel disc on a punch, but anything flat and you just tap it in straight. And then slide the flange back in. Put the bolt in, and hold the flange from turning by inserting an axle bolt into the flange all the way to the trans case. Then torque the bolt to 32 ft/lbs
Pik for the job. I picked one up at Napa for 13 dollars. Gearwrench.
However, backtrack a moment...
The axle flanges. Use an impact gun on the bolt in the center. Go lightly, it's not on with a lot of force. Pull the bolt out, then the flange. And then use your pik and pop the seal out. Clean well and make sure to not get dirt inside the trans.
Once you have it all cleaned out, grease up the seal and tap it in with a seal press. I use a 74mm steel disc on a punch, but anything flat and you just tap it in straight. And then slide the flange back in. Put the bolt in, and hold the flange from turning by inserting an axle bolt into the flange all the way to the trans case. Then torque the bolt to 32 ft/lbs
03-01-2016, 12:16 AM
#584
Race Car
Thread Starter
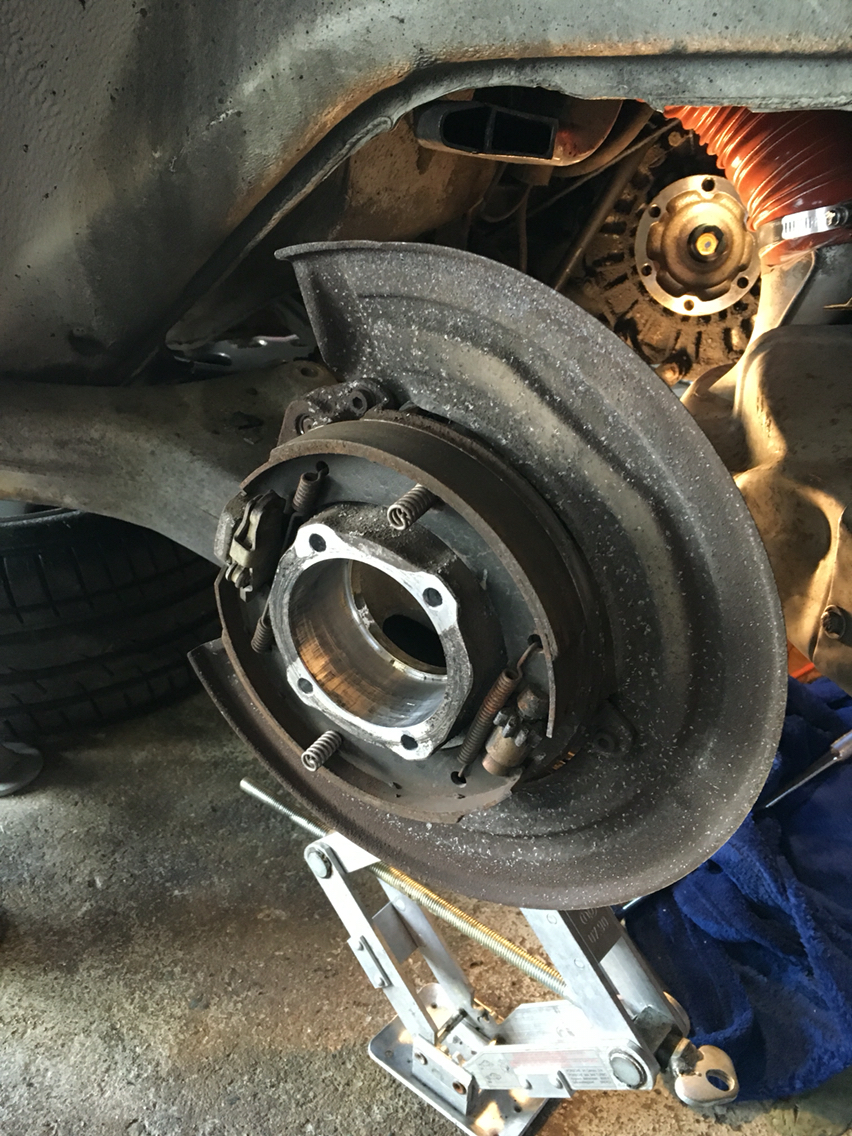
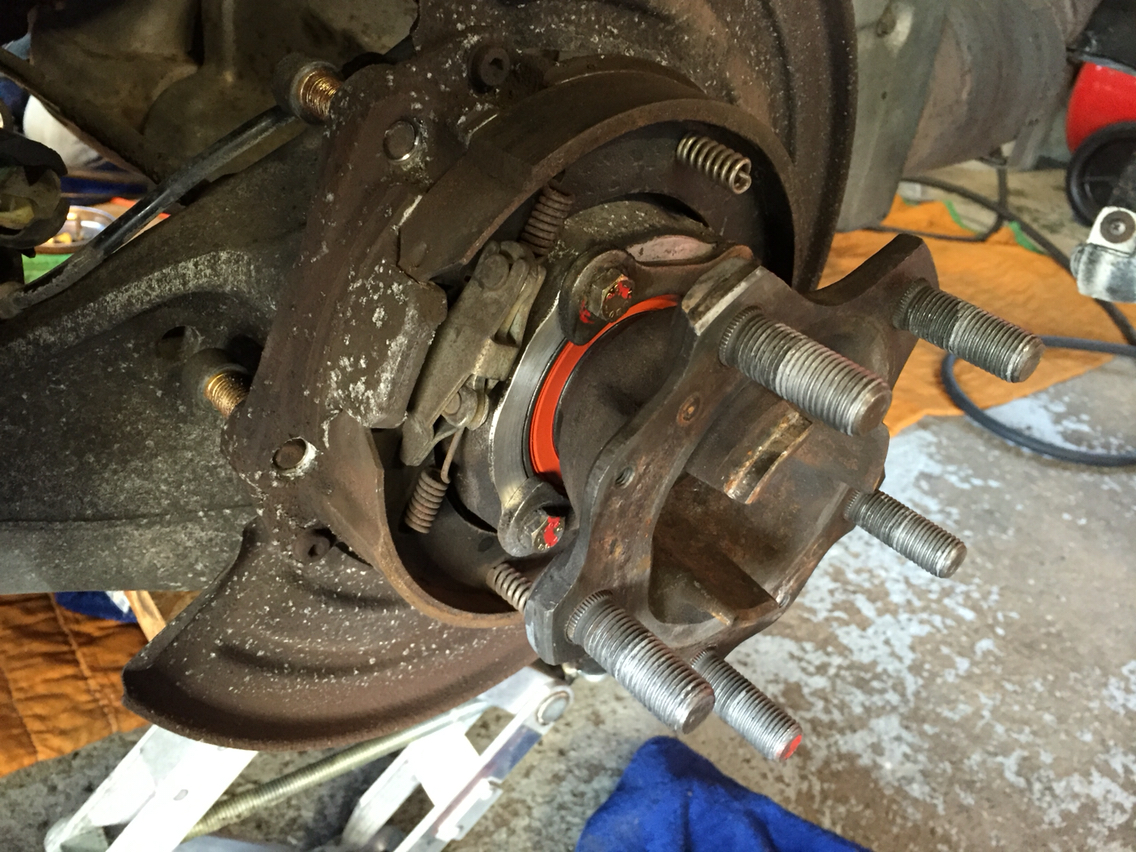
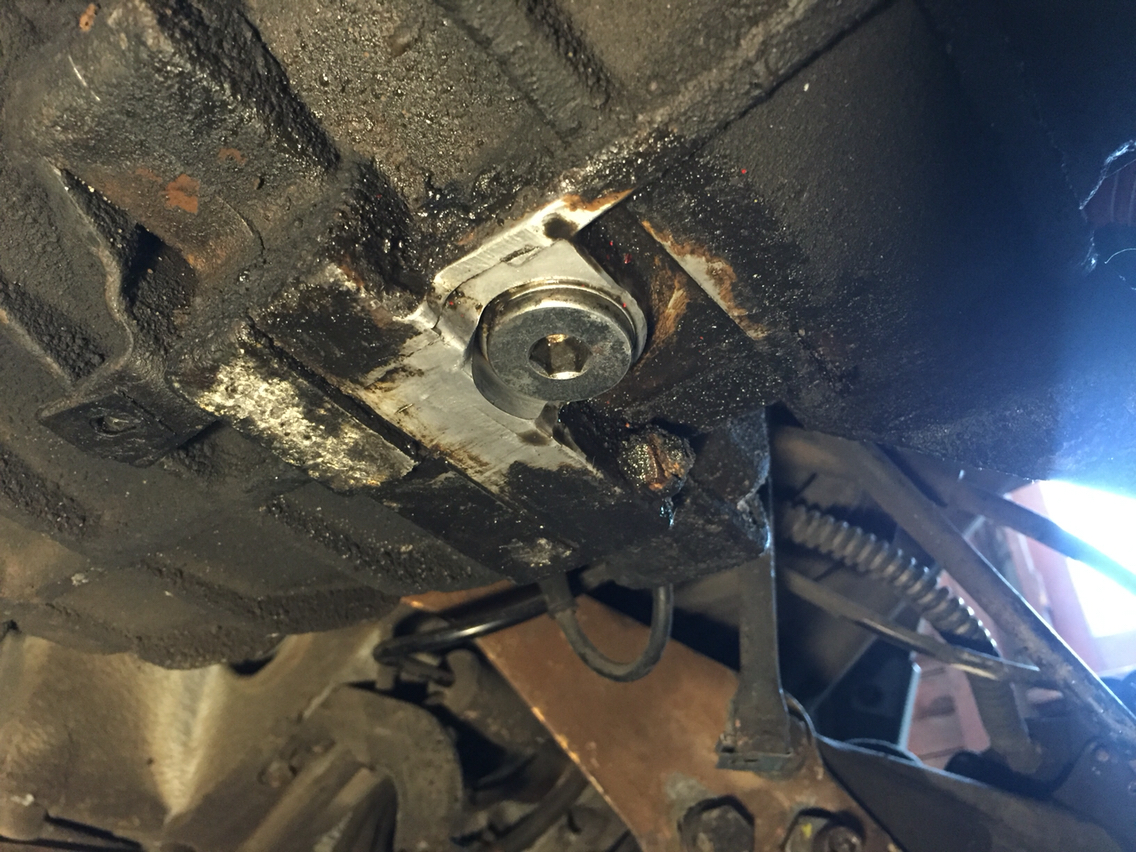
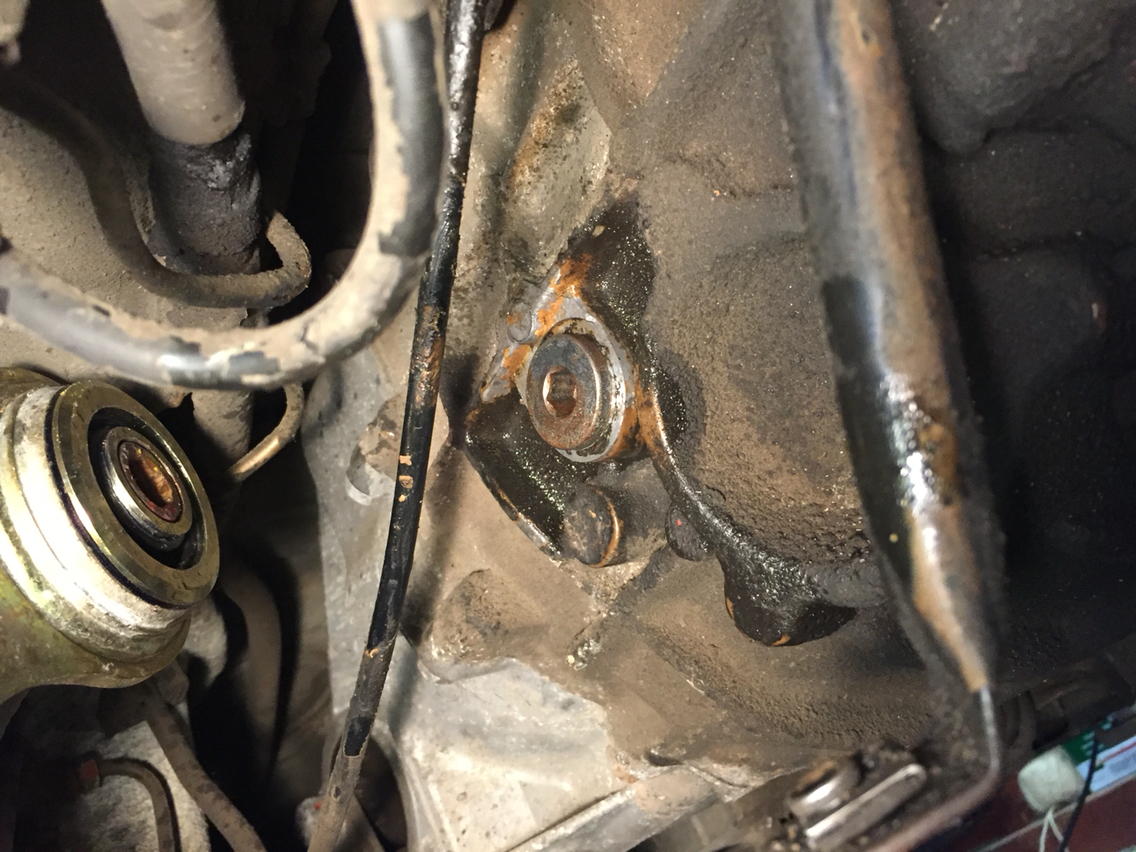
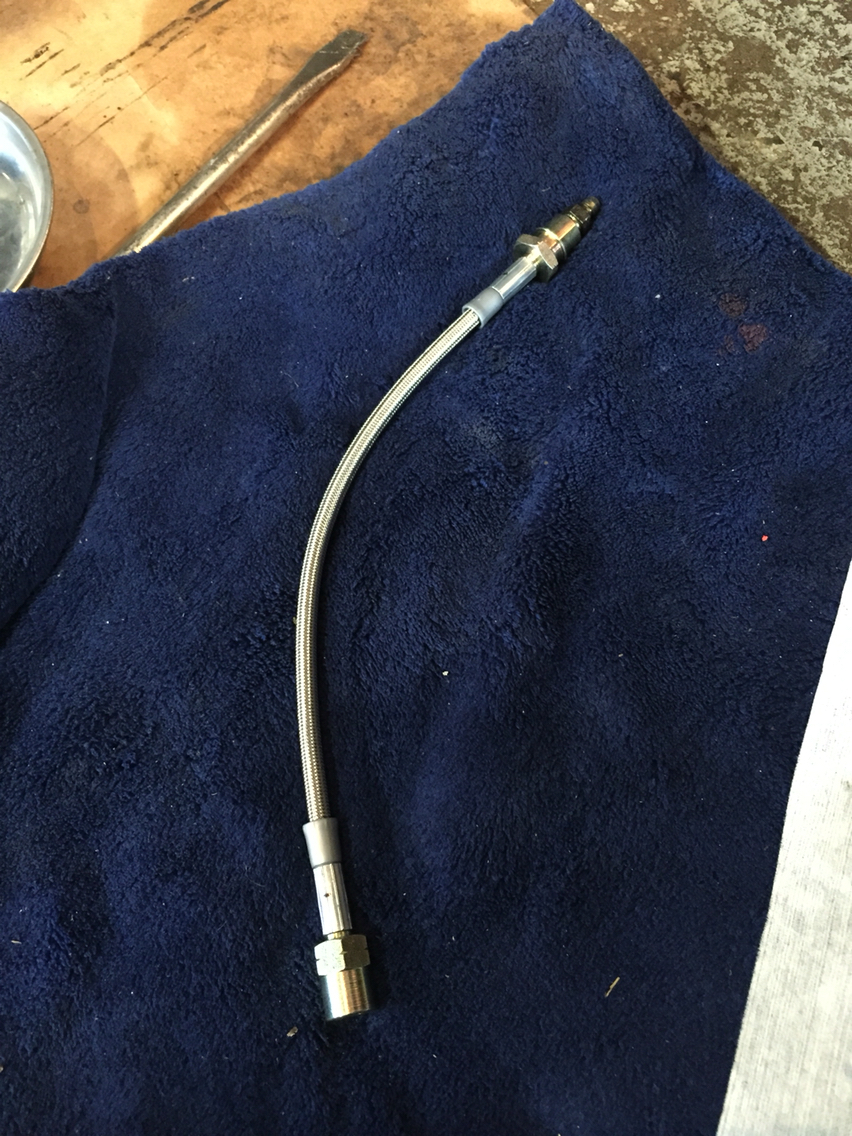
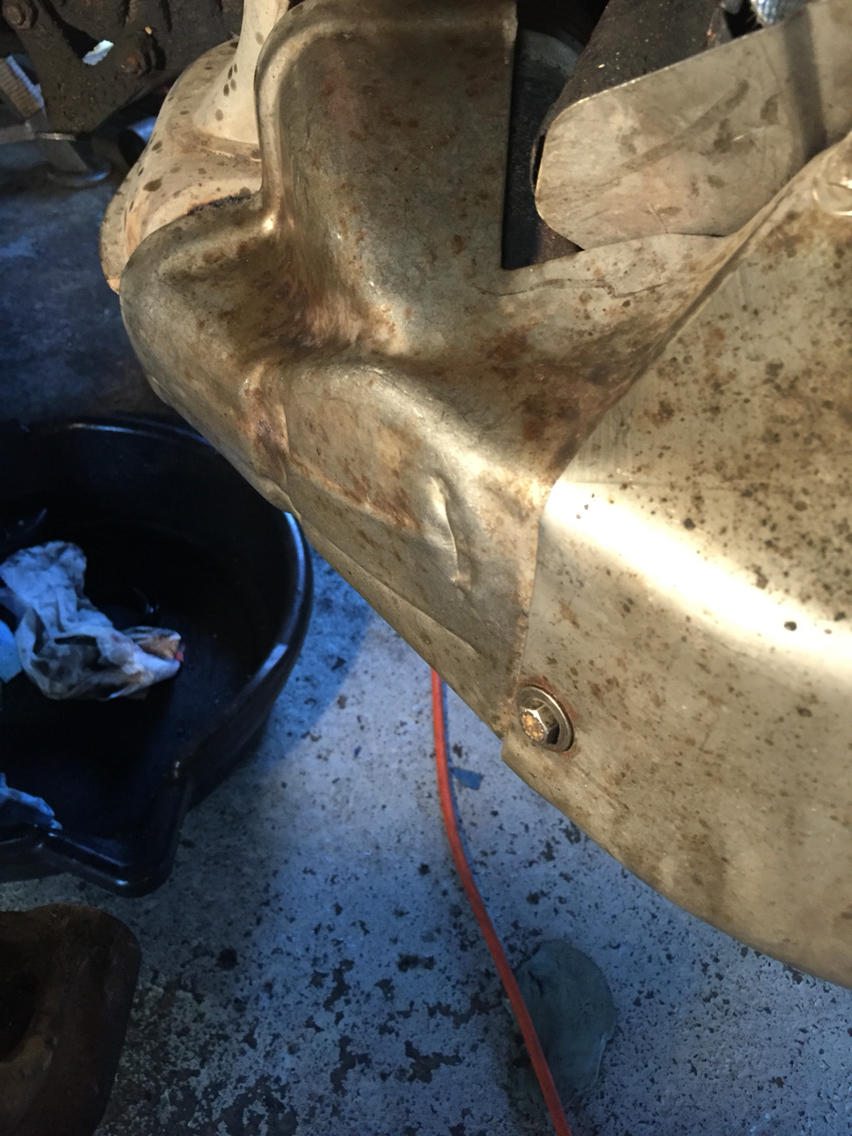
For the rest of the day, I changed the rear brake lines. Cleaned the wheel wells, cleaned the abs sensors, hammered on of the heat shields straight and installed the rear struts. We are, once I torque the rear end, ready to button it up and install the wheels.
This car has been so good that it's made everything very easy for me. Must be amazing to be a shop in LA where cars don't corrode.
This car has been so good that it's made everything very easy for me. Must be amazing to be a shop in LA where cars don't corrode.
03-01-2016, 12:43 AM
#585
Rennlist Member
My techs work on my cars with white limo driver gloves :-)
The cars here can be dirty but if native corrosion is rare.
However joey was doing another 964 before mine that lived somewhere else and it was tough, some bolts need a lot of encouragement to come out.
I would however bring that car to have the underside power washed!
The cars here can be dirty but if native corrosion is rare.
However joey was doing another 964 before mine that lived somewhere else and it was tough, some bolts need a lot of encouragement to come out.
I would however bring that car to have the underside power washed!