When you click on links to various merchants on this site and make a purchase, this can result in this site earning a commission. Affiliate programs and affiliations include, but are not limited to, the eBay Partner Network.
Another happy customer - surprised by how good a 964 can be. Grinning from ear to ear as he got reacquainted with his rare bird.
Aja arrives maybe Tuesday, and the in a month or two, it'll finally be time for my own car. That will leave the summer open for lots of new business...who's next in line for major suspension sorting?
Rock on...If I can get mike and or John to pop up Sunday, you can feel one done. Justin's is a c2, and he may be there, but the two cars are apples and oranges.
And they didn't take a lot of pics. These dirty bleed days are tough for me. I don't like touching my phone when I have brake fluid and serous grime on my hands. So I only have a couple pics...which I'm not entirely happy about.
Enso's car was here for a bit of correction...not really though. Cuz it was here really for a first go-round. Some basic maintenance, and a "getting to know you" type deal...the real correction hopefully is coming soon. Cuz this car would be unreal awesome after the full kerdoodle...but we have some tidying up to do prior. Pedal box rebuild, loose gear shift ***, all the little stuff that's in the way of base enjoyment...that are too common on a 25 yr old car. Thankfully everyone that comes, eventually has all this stuff fixed, cuz I can't be in these cars and not fix all the stuff...love them too much.
The seats didn't end up going in. We had no brackets for the seat belt buckles...so until that's here, they won't go in.
The calipers will end up being rebuilt at some point. If we do suspension madness to this car ( which he may do only because he likes the badge so much - so let's all encourage him ) I'll just rebuild the calipers while everything is off the car...
So that's it. Fun day. Always awesome to drive another 964. Every one is different. But they are all amazing creatures. We had four other dbfd cars here today. And two of them for driven by non-owners and both were visibly pleased when they came back. I'll leave the emotional response to the guys that did the driving. Cuz for me, when I drive these cars, I get too excited, and then I get back into my car and I get palpably sad, cuz mine, uncorrected, is that bad. Showroom fresh sucks. Corrected, awesome.
Stay tuned for more. Aja coming to begin teardown Tuesday.
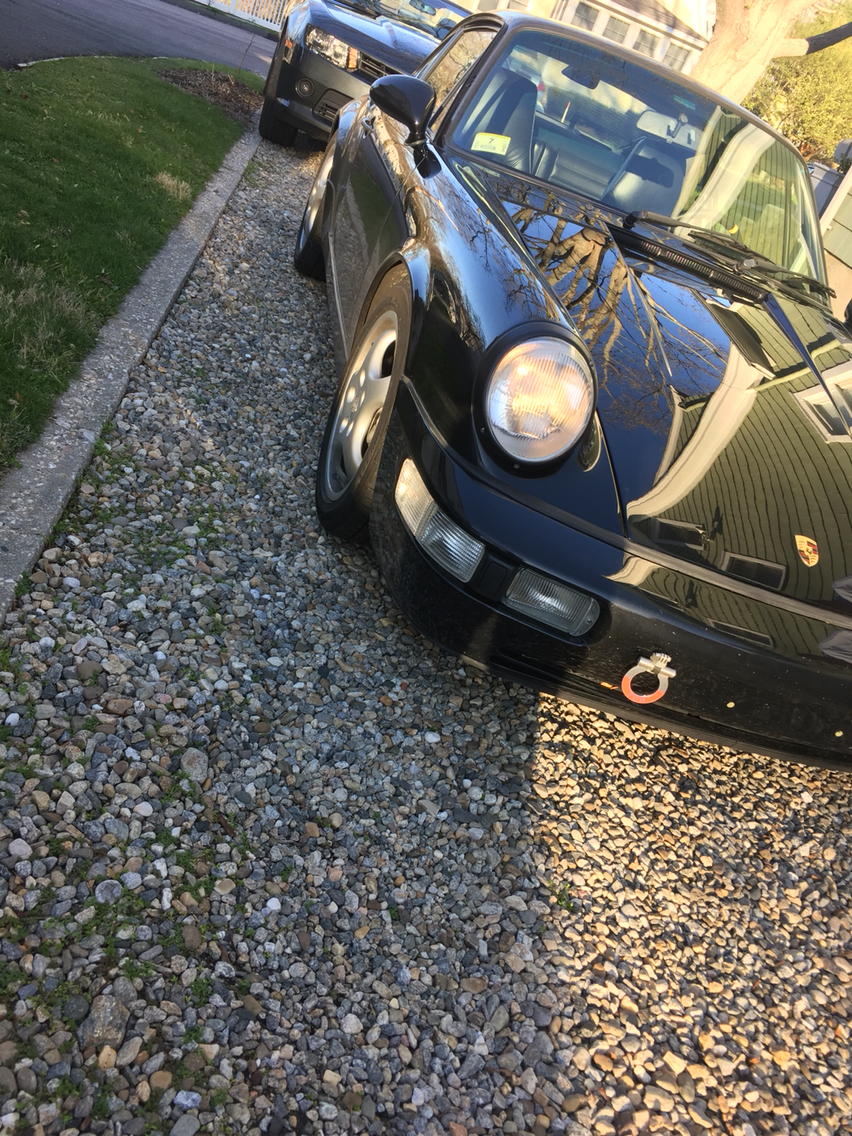
Drove the spotted owl today during my customary role as lunch gofer. So smooth and stable. Didn't push it hard, the clutch take-up is very different from the lobster rocket's new clutch. But it clearly drives as good as it looks with it's new 18" BBS wheels.
Drive report. Just did my spring bleed on my c4...this solved my hanging clutch pedal issue w my 993 pedal box for all of five minutes. I was excited. And then nada. Same problem.
So after six more liters through the system, there is no air. Everything feels good, except it doesn't rise all the way until the pressurizer turns on and repressurizes the system. So I'm thinking the issue is the return spring not being strong enough at the end of its travel. So back to the drawing board. I wonder if another spring has a higher spring rate. 964 turbo. 993 turbo, etc. maybe even the standard 964 spring...more to come.
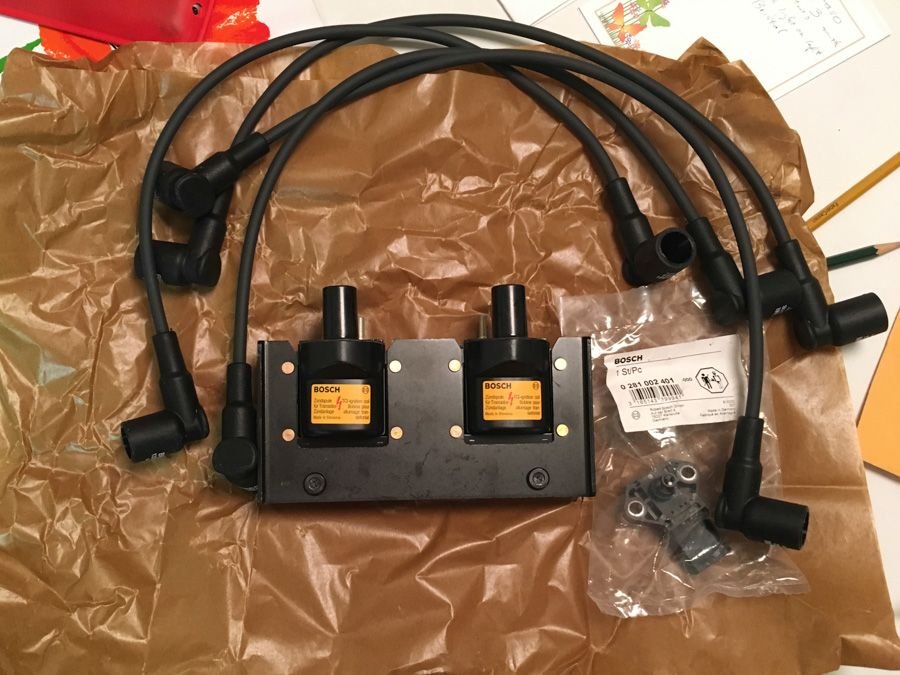
Stopped by to help Rob bleed his clutch and to do a 993 coil upgrade. As discussed elsewhere, the 993 dual coil is more reliable than the made-in-Brazil silver Bosch coils that are now available (RIP black coils), is slightly cheaper, and weighs about 2-3lbs less than the 964 setup.
That said, we weren't too excited by the existing DIY upgrade instructions, which involved reusing parts of the original bracket and using pieces from the original coil-to-distributor wire (this is necessary because the 993 coils have a different connector than the 964 coils).
To address this, I had Kingsbourne (www.beruparts.com) make me a couple sets of custom wires with 993-spec coil end connectors and 964-spec distributor end connectors to 964 length (21 inches).
Here is the coil pack with 2 sets of the cables:
BEFORE YOU START, DISCONNECT YOUR BATTERY!
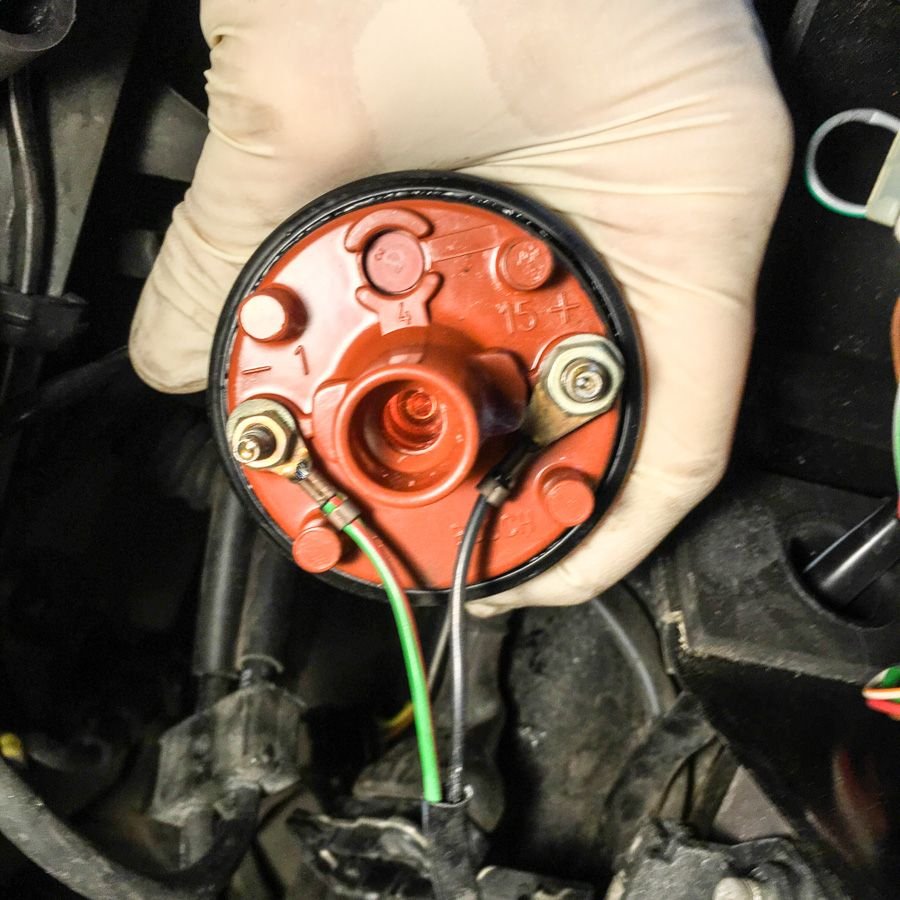
When removing the old coils, it's worth checking out how they're installed and taking a look at their condition. You can see that this coil looks pretty decent, and note that the black wire is connected to the larger terminal (15+) with the 10mm nut.
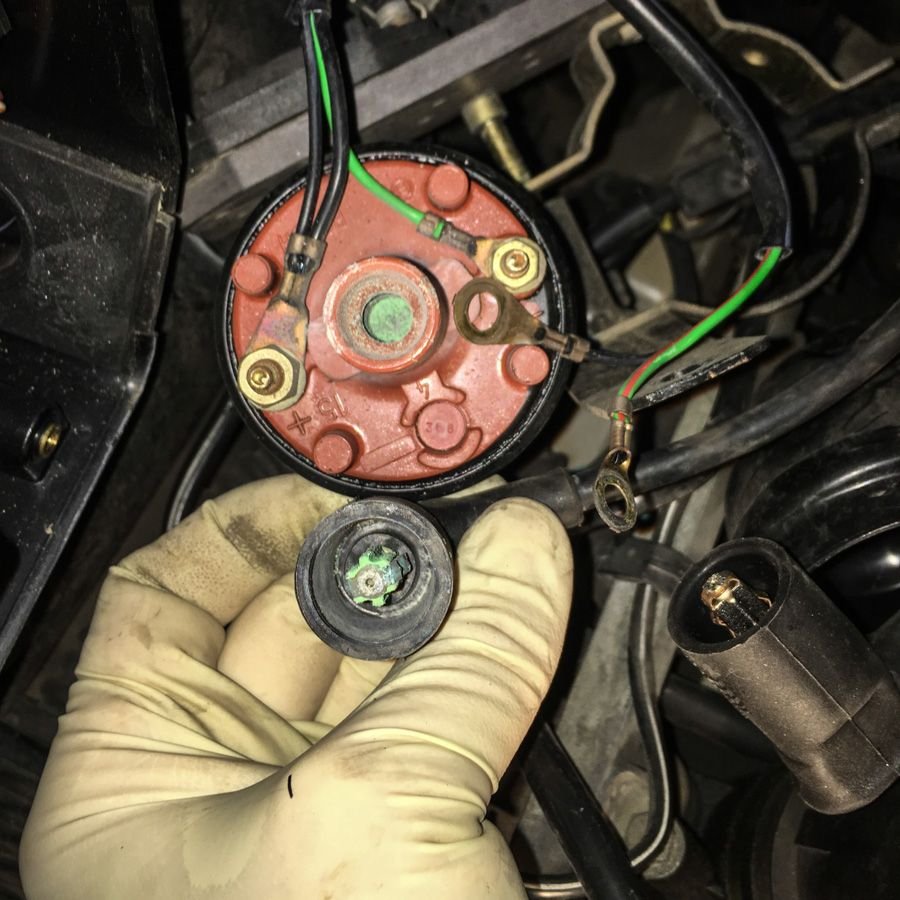
This coil, on the other hand, looks pretty awful - check out all that corrosion!
This can potentially cause all sorts of issues.
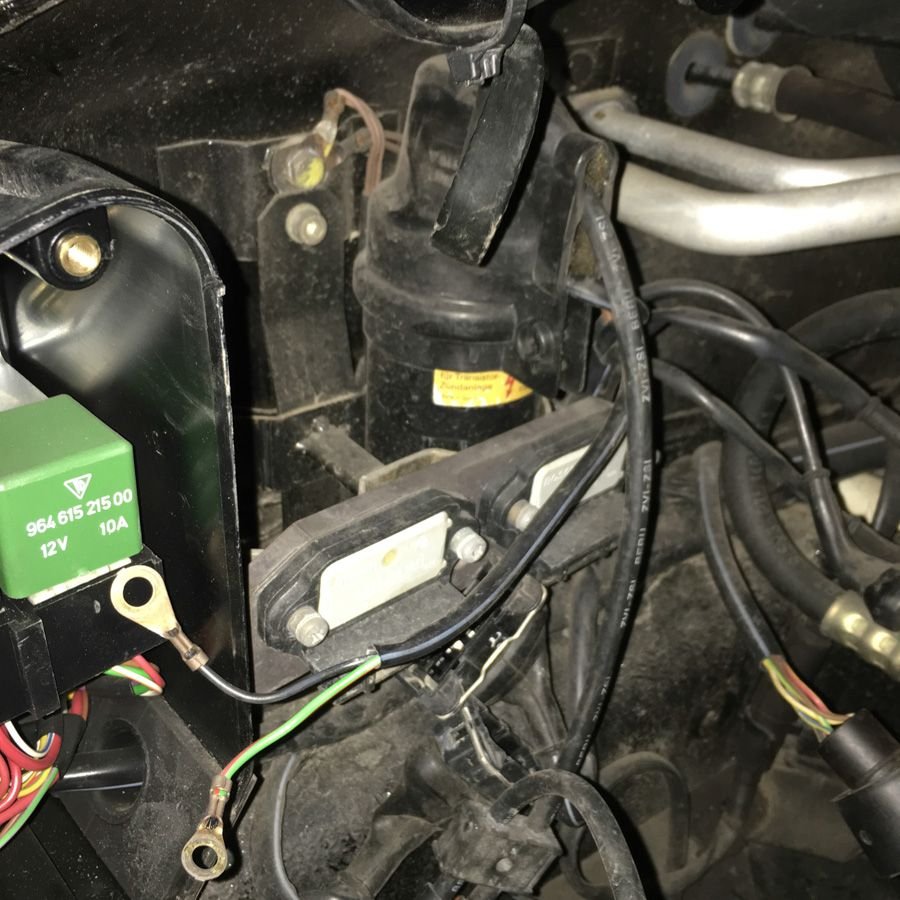
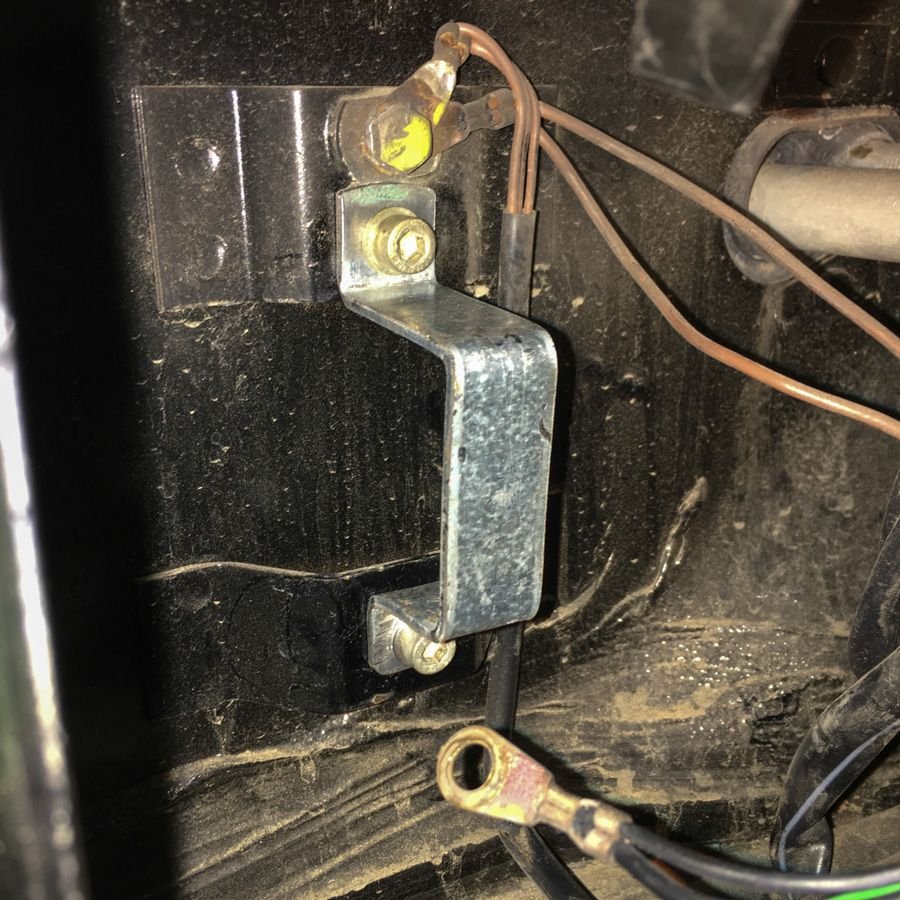
Note the OEM mounting solution in the background of this next picture. It's designed to hold two cylindrical coils, not one dual coil pack. For a neater solution, we're going to remove the whole thing.
Unplug all the connectors, then remove the 5mm allen bolts holding the coils to the car. Once everything is out, you can remove the 4 Phillips screws holding the ignition modules to the heatsink, and then remove the 2 small allen bolts holding the heatsink to the bracket.
Because the new coil pack is flat in the middle, we decided to fabricate a new bracket that is smaller and lighter.
This picture is from the test fitting - unfortunately the photograph of the finished and painted bracket with an m6 hole tapped in the middle didn't come out.
We then mounted the heatsink to the coil pack using a pair of 3/4" aluminum spacers and some 1.5" M4 bolts.
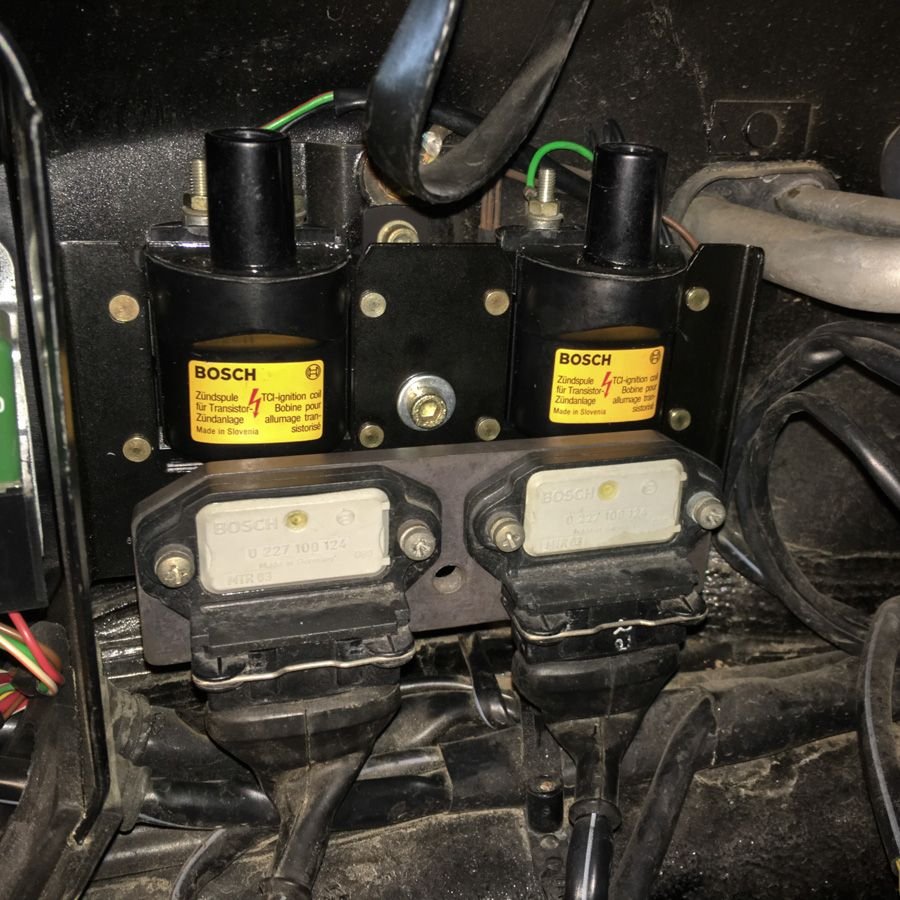
Then, with the completed bracket installed, the coil pack and ignition modules went back into the car. The 993 coils don't have the nice 15+ and -1 markings, so make sure that you put the black wires on the larger posts (the ones that take the 10mm nut). The entire assembly attaches with a single M6 bolt and the assembly cannot vibrate because the edge is flush to the fusebox.
At this point, it was simply a matter of attaching the new coil-to-distributor wires, putting the engine bay back together, and reconnecting the battery. The car fired up first try and definitely seemed to pull harder above 4000 rpm. After a quick drive to get everything up to temperature, we used the PDT-999 to check the Motronic for fault codes (there were none) and ran an idle adaptation.
Best of all, the modification is totally reversible - nothing permanently attached to the car has been changed, the original brackets are unaltered and could easily be replaced, and no wires were hacked up (although one coil end needs a bit of a cleanup). I can't see any reason to go back though - the final product runs better and looks totally factory!
Bravo! Well done on the coil upgrade. I need to re-arrange my heatsink and modules to be mounted in that fashion. Right now mine are mounted atop the wiring harness like every other DIY thread shows. I'm not crazy about that and like this much better. Thanks for sharing.
Also, did you get the dust boots to sit on top of the new coils? Pretty cheap and good protection. The arrangement of the wires make it tough for the boot to sit perfectly, but I got mine to work ok.

 04-08-2016, 08:00 PM