
Teardown begins. Suspension madness...


 02-21-2016, 01:47 PM
#543
Haha, just think how easy the rest will seem from here. I like the badges too. Who came up with the design?
And that GPW 964 is sweet. I like my black car, but would love to add a GPW car when I become rich and famous........
02-22-2016, 04:19 PM
#545
Race Car
Thread Starter
Don't worry about tears in spring plate boots. You can't get new boots. And there is a huge monoball in there. So if it doesn't clank, it ain't broke yet. When they do go, elephant makes a replacement that's easy to install. So leave it till its dead.
Unless of course, you need a performance upgrade, then by all means replace it w something much stiffer. But those don't last very long. So for me, it's use till dead, then go elephant.
Unless of course, you need a performance upgrade, then by all means replace it w something much stiffer. But those don't last very long. So for me, it's use till dead, then go elephant.
02-22-2016, 11:39 PM
#546
Race Car
Thread Starter
Moving quickly on this car. So clean and easy this time around. Like the car has never seen bad weather. So much nicer to work on a car that complies. I say "come off" and the bolt just comes off...novel...
Did bushings today front and rear. Spring plates went back on.
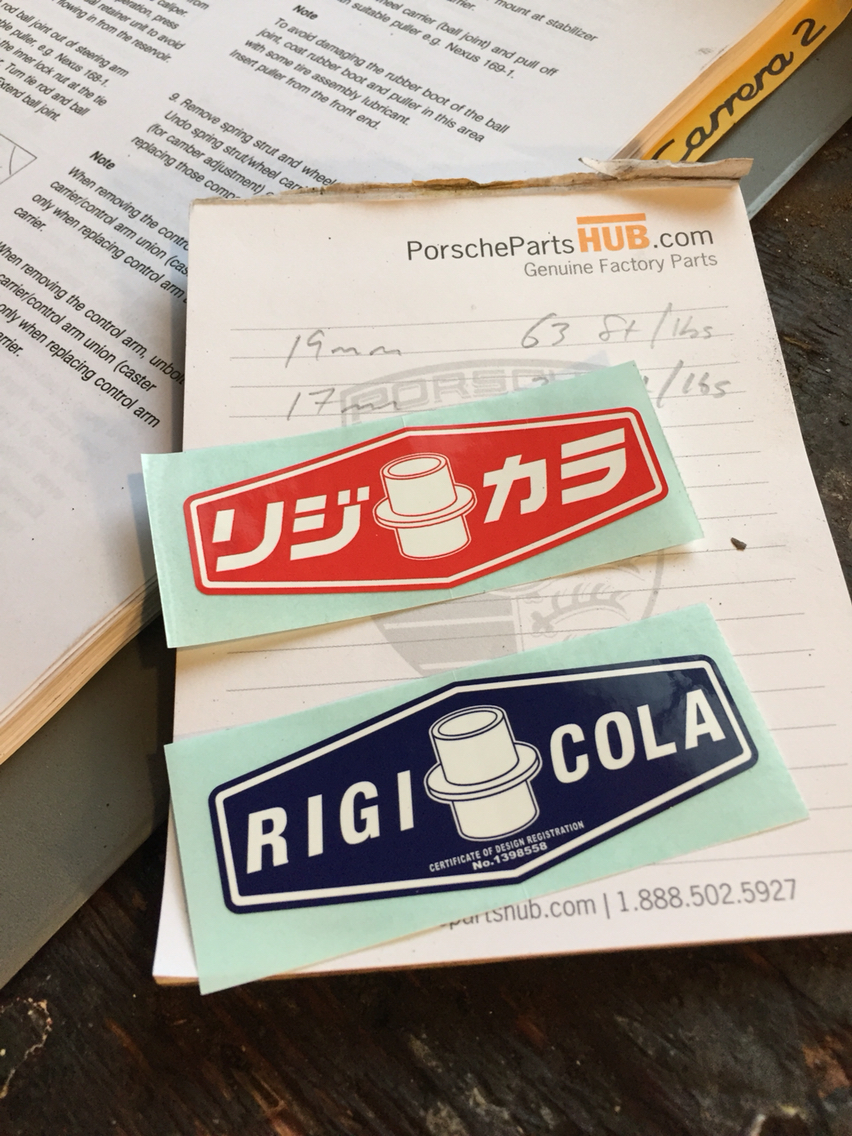
Tomorrow is take out the sun frames and put new 10mm steering stops in and swap out the outer tie rods, and rod boots. Install rigid collars if I have time...
Did bushings today front and rear. Spring plates went back on.
Tomorrow is take out the sun frames and put new 10mm steering stops in and swap out the outer tie rods, and rod boots. Install rigid collars if I have time...
02-22-2016, 11:46 PM
#547
The spotted owl is out of place with all of the black cars down there. I'd be happy to make a swap for my black C2 so that all is well with the world again. After you work your magic on the suspension of course.
I never thought I would like white cars, but after my white widebody SC, they have really grown on me.
I never thought I would like white cars, but after my white widebody SC, they have really grown on me.
02-23-2016, 08:13 AM
#549
Racer

As soon as the car is back from alignment, we year out the interior and get that done. New pedal box, adjustable rennline pedal, and the front and rear seats get replaced with the new ones...
And then I can really drive it and see how the godspeeds are relative to the same setup on bilsteins and eibachs in John's car...
And then I can really drive it and see how the godspeeds are relative to the same setup on bilsteins and eibachs in John's car...
 02-23-2016, 09:25 PM
#550
Race Car
Thread Starter
Funny you should ask...it is back and Mike just texted me and said "now that it's breaking in you have to drive it this week"...
I took it for a slow but fun drive once, it's awesome. How awesome-----I'll find out when I'm alone in the car and no one is looking....hehhehehe
I took it for a slow but fun drive once, it's awesome. How awesome-----I'll find out when I'm alone in the car and no one is looking....hehhehehe
02-23-2016, 11:46 PM
#551
Race Car
Thread Starter
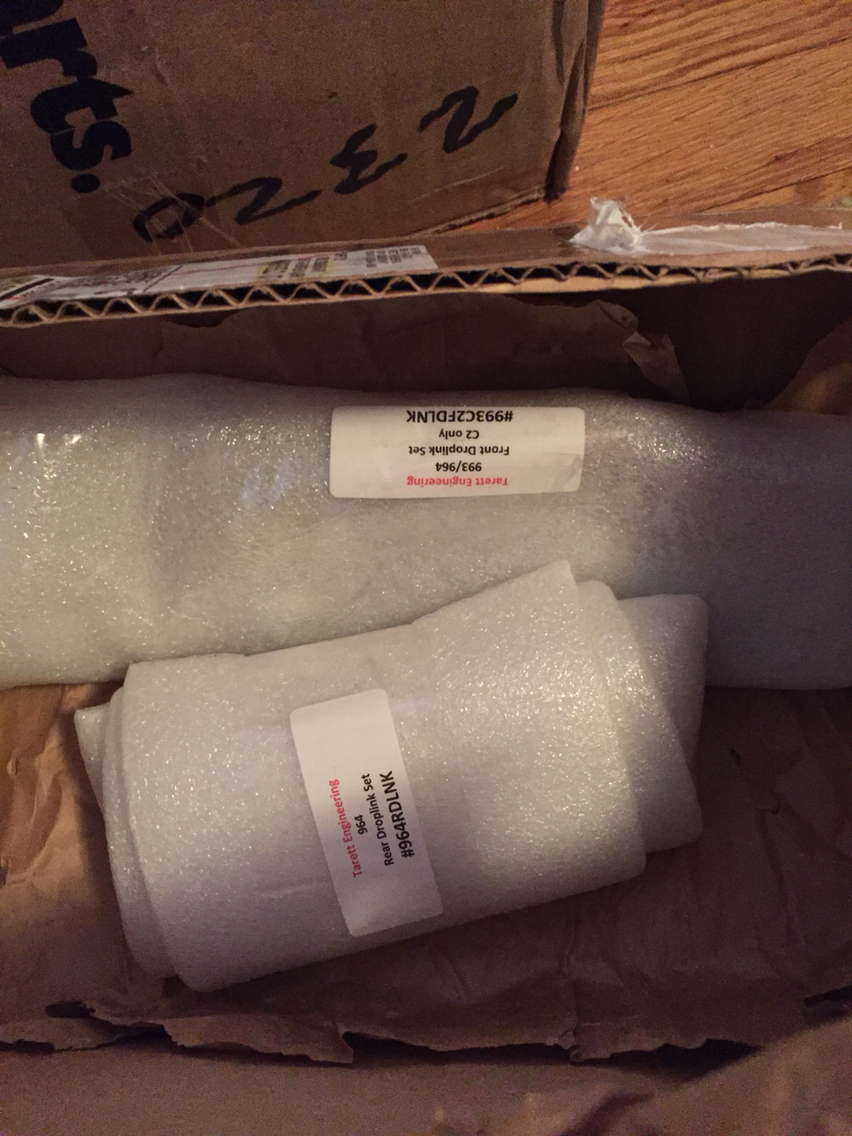
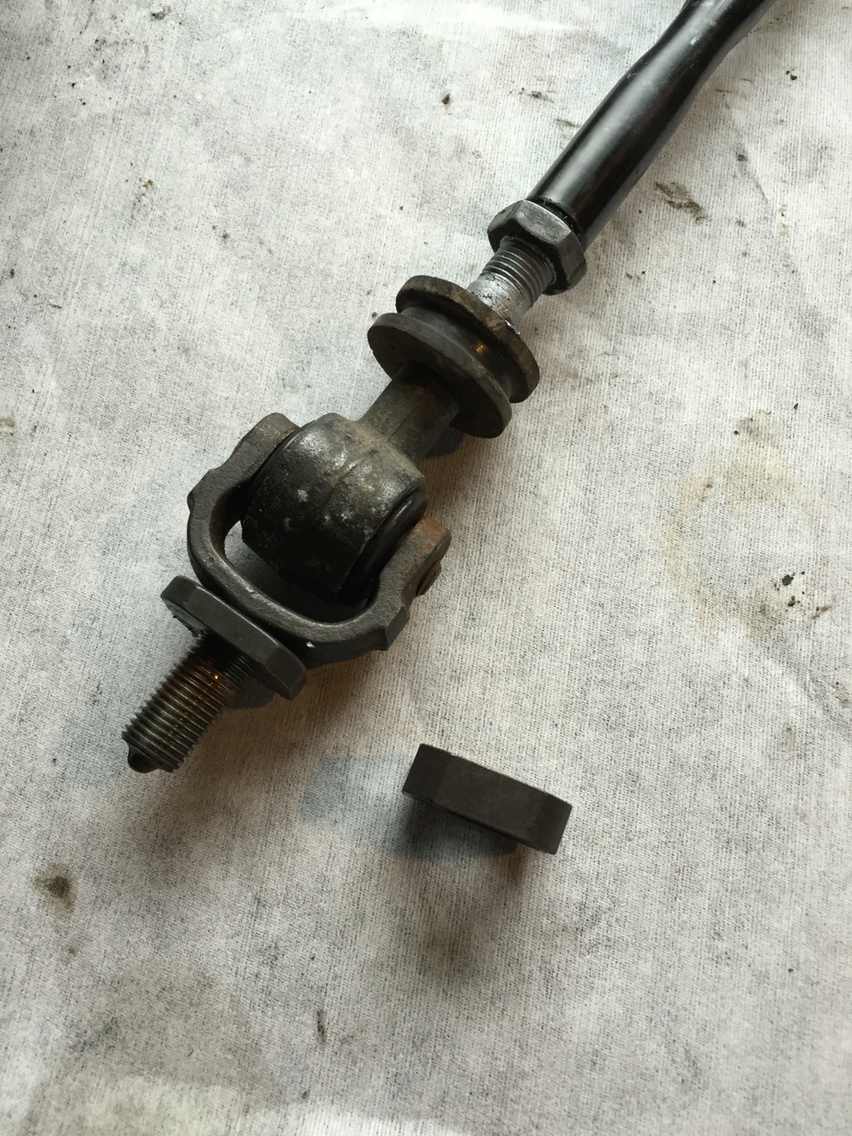
Tomorrow might be all about booting the tarret end links and drop links. The boots come in packs of six from www.sealsit.com an the size for the tarret rod ends is RERS1. The smallest they make. Don't forget to buy the installation tool...makes it easy, and you know these boots aren't going to last forever. So you will be doing this again...
02-24-2016, 12:07 AM
#552
Race Car
Thread Starter
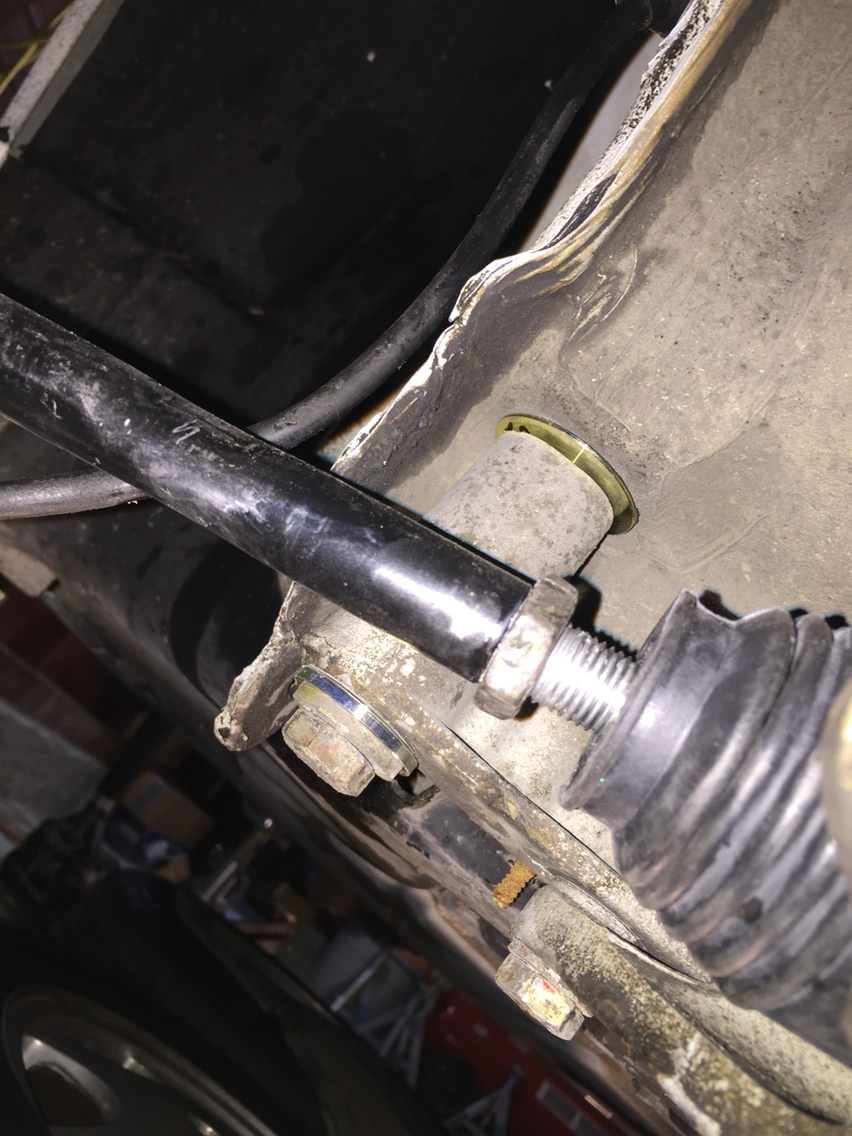
Today was a big day. The inner tie rods were still fine, so I switched the outers. We bought lemforder from pelican, since the oem outers are way more expensive and not much better. No need to spend the extra money there...
Tie rods are pretty easy, especially when the front is apart like this. No need to remove the sun frames. Turn the wheel all the way right and the left inner tie rod is fully exposed.
The boots were all torn, so new boots went in.
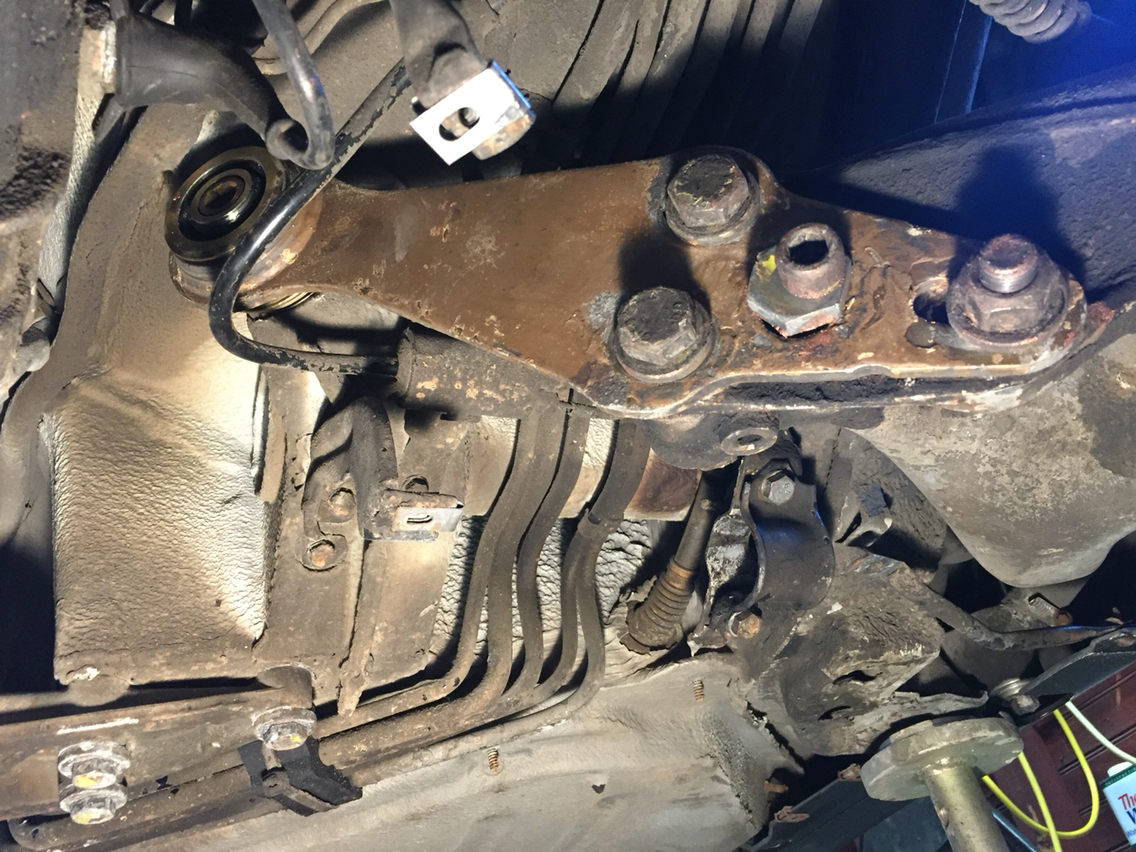
The bigger issue here, and the reason why I had to take the inner out, was that the original 6mm steering stops were in there. So I had an extra set of the 10mm stops and I put those in. So all had to come out, even though I was just replacing the ends.
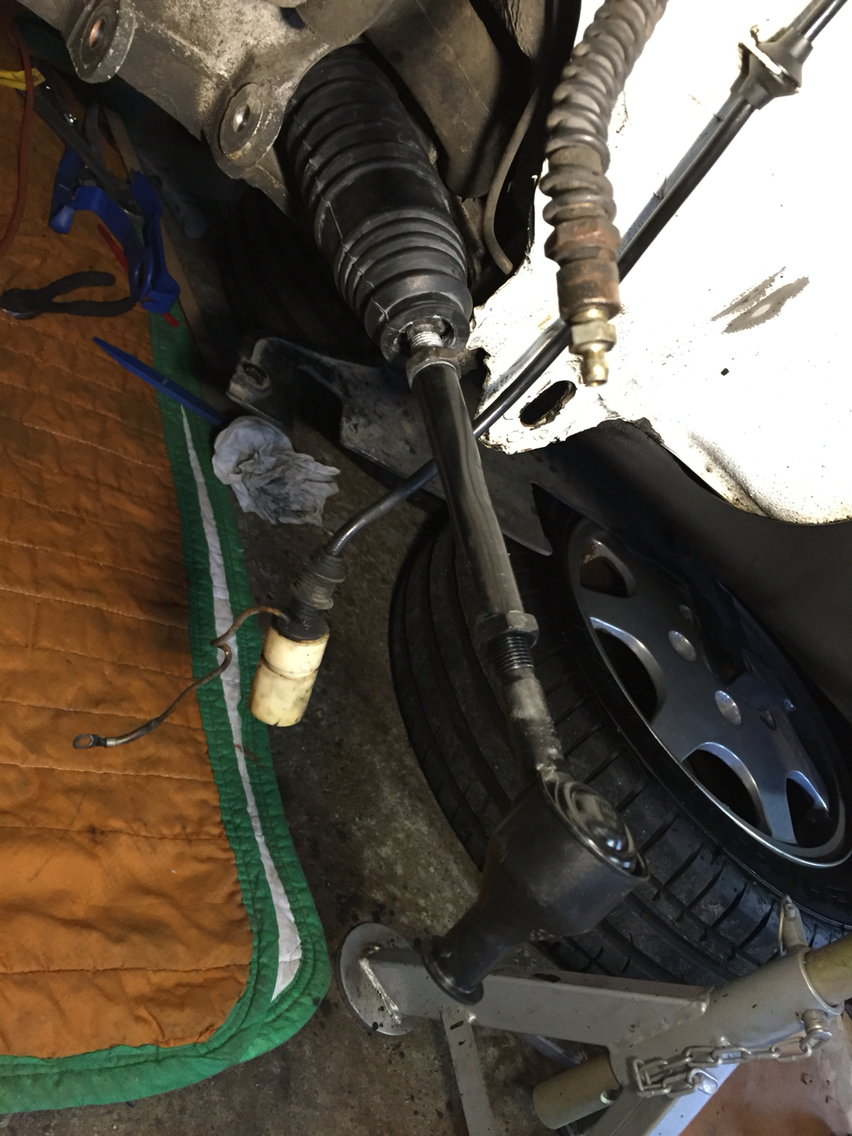
When you pull new tie rods out of the box, make sure to inspect the threads, get everything slathered up w antiseize. You don't want to have stuck tie rods and not be able to adjust toe...these lemforder outers come dry as a bone, nothing from the factory.
I measured the length that was there prior to pulling them out, marked a ruler and then reassembled same length. Put the boot on before assembly , and then the whole thing screws into the steering rack and the steering stop acts like a lock nut against the steering rack...the hardest part by far of this job is to get the boots to seat.
Any tricks I don't know? Special tool?
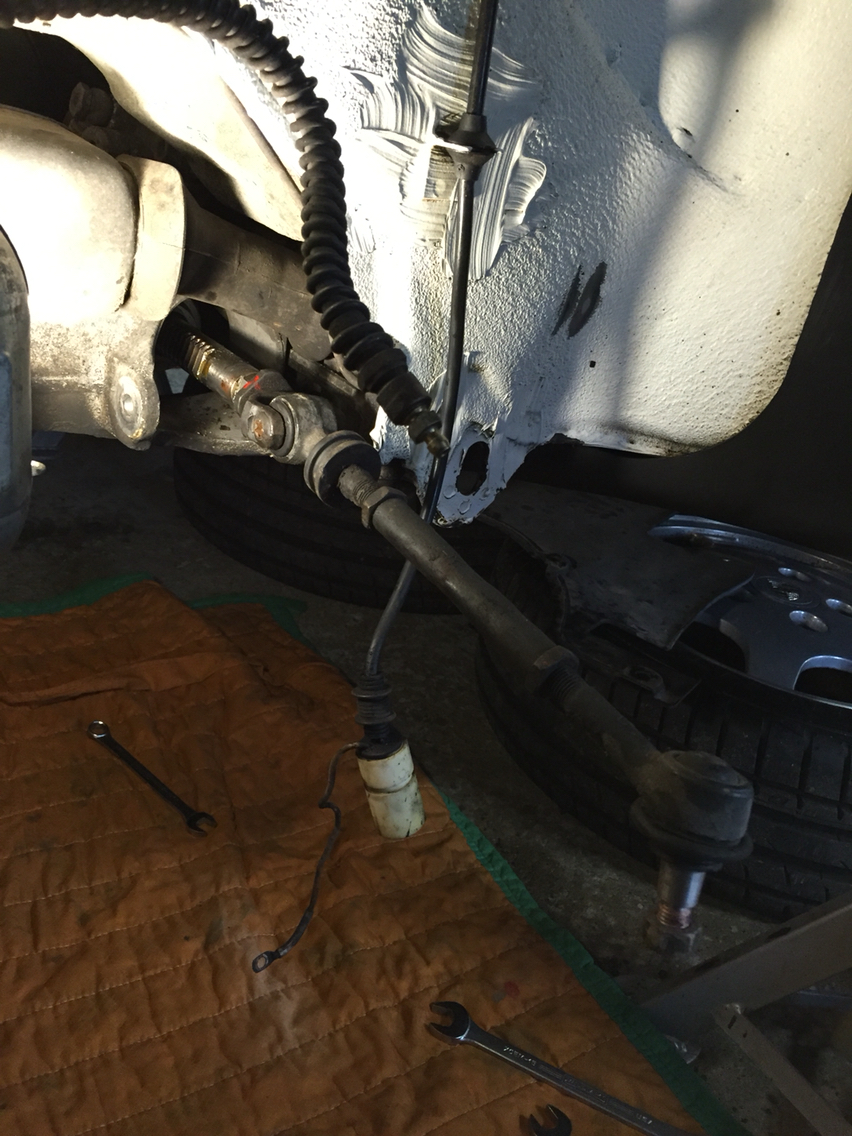
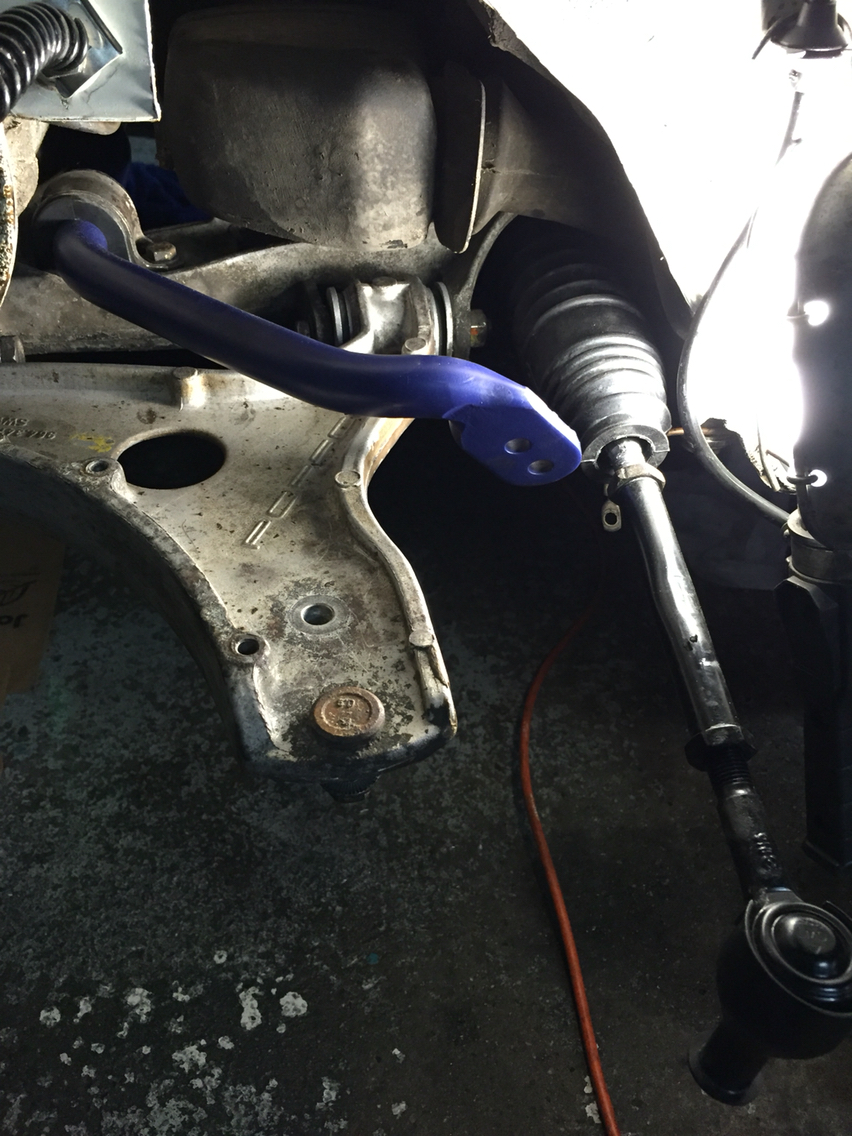
Then with the tie rods all set, it was on to Goodridge braided brake lines. Super easy when all is apart since there is so much room to work. This car, btw, has likely never seen rain. It's super clean, zero corrosion, and everything so far has been easy.
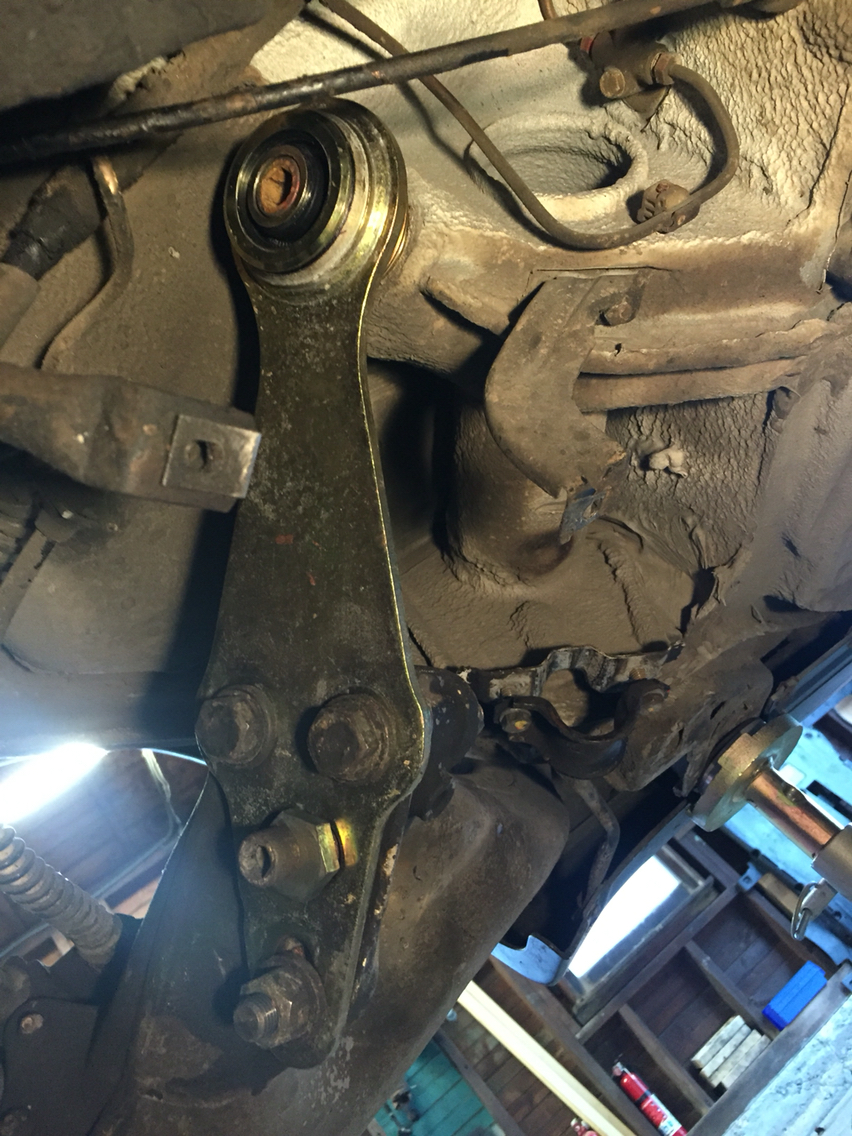
After brakelines came rigid collars...I can't tell you if they do much, but let's hope...
And then with the subframes and cross member torqued to 63 ft lbs for the larger bolts (19mm) and 34 ft lbs for the smaller bolts (17mm)...
on to the swaybar...I use a long bolt to start the swaybar clamp. And then pull that out and the short oem bolt goes right in. It's just hard to get the clamp to come down over the new bushing...
Control arms went back in, and it was time to clean up.
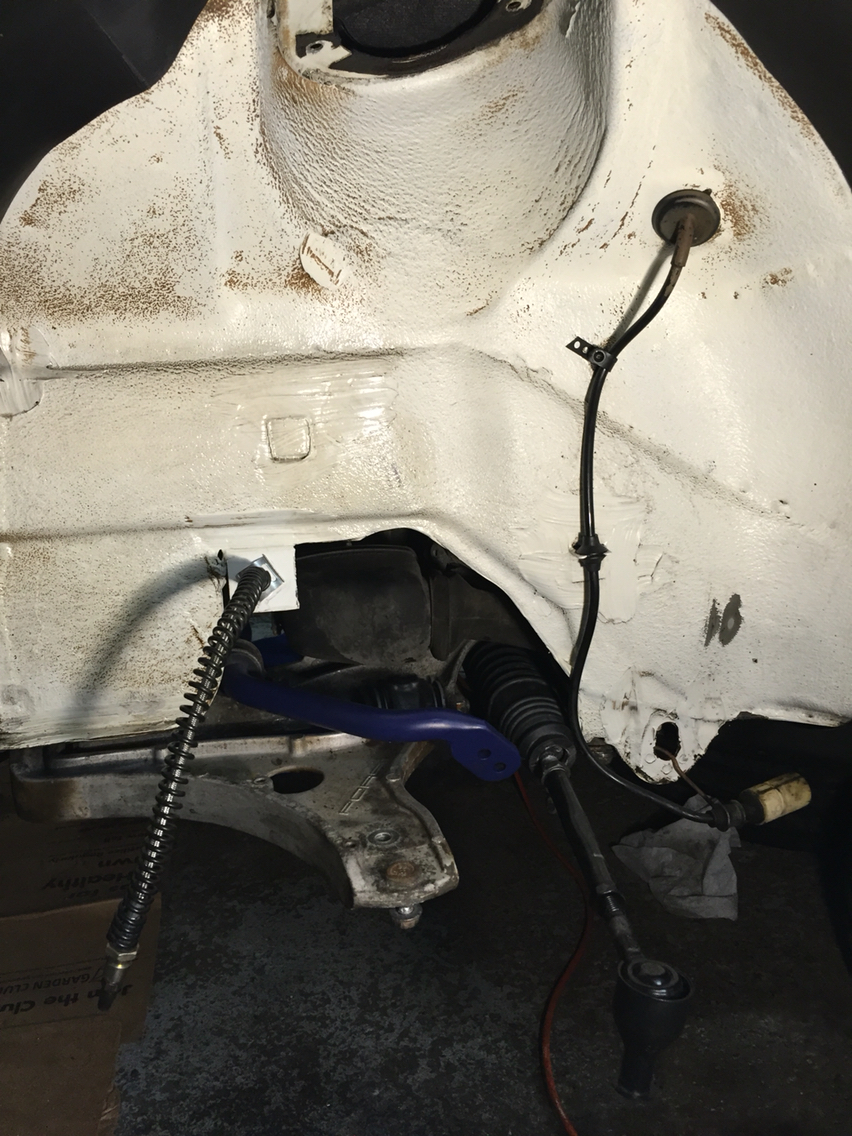
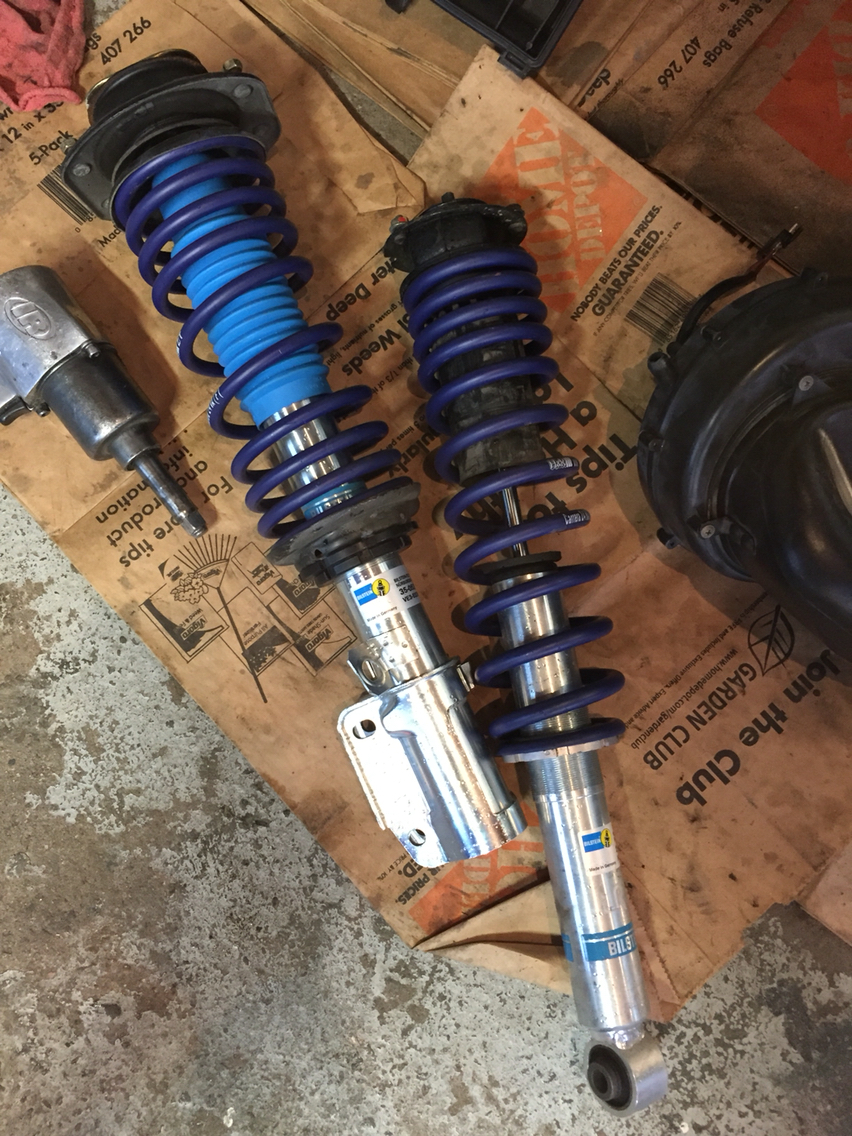
Long day. Had the struts rebuilt with h and R springs as well. So I'm approx one half of one hour from finishing the front end. Crazy how quickly this is going.
Attachment 1
Knock on wood.
Tie rods are pretty easy, especially when the front is apart like this. No need to remove the sun frames. Turn the wheel all the way right and the left inner tie rod is fully exposed.
The boots were all torn, so new boots went in.
The bigger issue here, and the reason why I had to take the inner out, was that the original 6mm steering stops were in there. So I had an extra set of the 10mm stops and I put those in. So all had to come out, even though I was just replacing the ends.
When you pull new tie rods out of the box, make sure to inspect the threads, get everything slathered up w antiseize. You don't want to have stuck tie rods and not be able to adjust toe...these lemforder outers come dry as a bone, nothing from the factory.
I measured the length that was there prior to pulling them out, marked a ruler and then reassembled same length. Put the boot on before assembly , and then the whole thing screws into the steering rack and the steering stop acts like a lock nut against the steering rack...the hardest part by far of this job is to get the boots to seat.
Any tricks I don't know? Special tool?
Then with the tie rods all set, it was on to Goodridge braided brake lines. Super easy when all is apart since there is so much room to work. This car, btw, has likely never seen rain. It's super clean, zero corrosion, and everything so far has been easy.
After brakelines came rigid collars...I can't tell you if they do much, but let's hope...
And then with the subframes and cross member torqued to 63 ft lbs for the larger bolts (19mm) and 34 ft lbs for the smaller bolts (17mm)...
on to the swaybar...I use a long bolt to start the swaybar clamp. And then pull that out and the short oem bolt goes right in. It's just hard to get the clamp to come down over the new bushing...
Control arms went back in, and it was time to clean up.
Long day. Had the struts rebuilt with h and R springs as well. So I'm approx one half of one hour from finishing the front end. Crazy how quickly this is going.
Attachment 1
Knock on wood.
Last edited by Goughary; 02-24-2016 at 09:30 AM.
02-24-2016, 01:53 PM
#555
Racer
4MM on steering stops makes a world of a difference in clearance only?
It looks like that car has OEM D90 wheels, so it shouldn't be a problem?
Any other reason to install these?
It looks like that car has OEM D90 wheels, so it shouldn't be a problem?
Any other reason to install these?