
So what did you do to your 928 Today......
 04-18-2011, 01:16 PM
#781
Drifting
 04-18-2011, 01:24 PM
#782
Rennlist Member
Thanks!
I have an airpump delete one, but might need to add back airpump.
Just wanted to see an installation up-close. This is perfect because engine is out.
I have an airpump delete one, but might need to add back airpump.
Just wanted to see an installation up-close. This is perfect because engine is out.
04-18-2011, 01:30 PM
#783
Chronic Tool Dropper
Lifetime Rennlist
Member
Lifetime Rennlist
Member

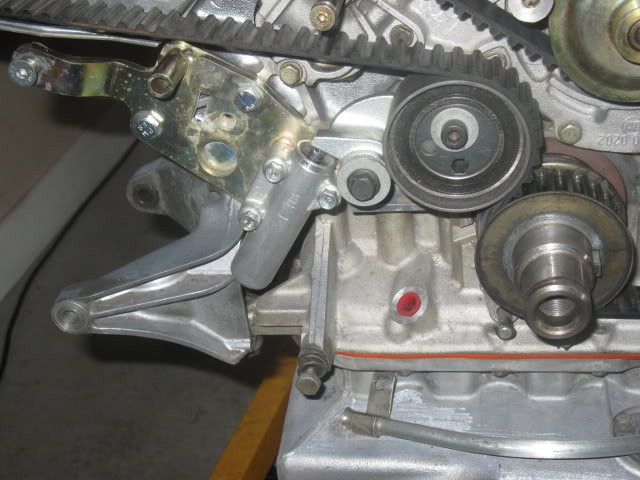
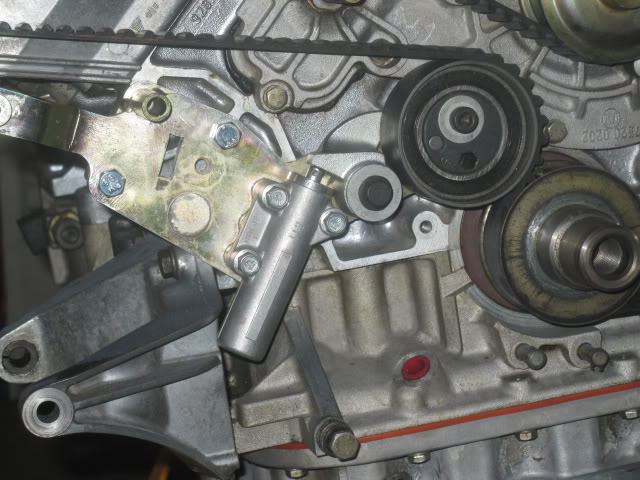
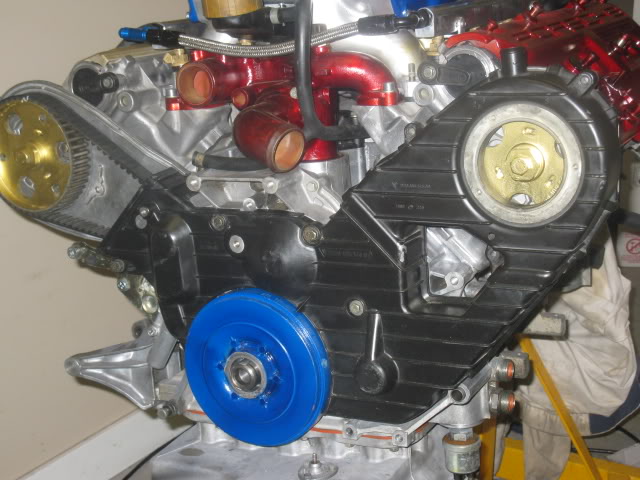
Flappy operation and bearing seal should be inspected and the Orings on the intake side plates.
Previously on RL we've had interesting discussion on the orientation of the intake stud shoulders.....whats your thoughts?
If you are talkng about the sleeves on the intake mounting studs from the heads, the flared end goes down. There are reliefs around the studs for them, and the flared end guides the position of the rubber intake gaskets. Keeps them aligned perfectly over the ports. Gaskets go on, sleeves next pushed into the gaslkets and the reliaf in the head, then intake, then rubber hold-down grommets, then washers and hold-down nuts.
04-18-2011, 10:12 PM
#784
Chronic Tool Dropper
Lifetime Rennlist
Member
Lifetime Rennlist
Member
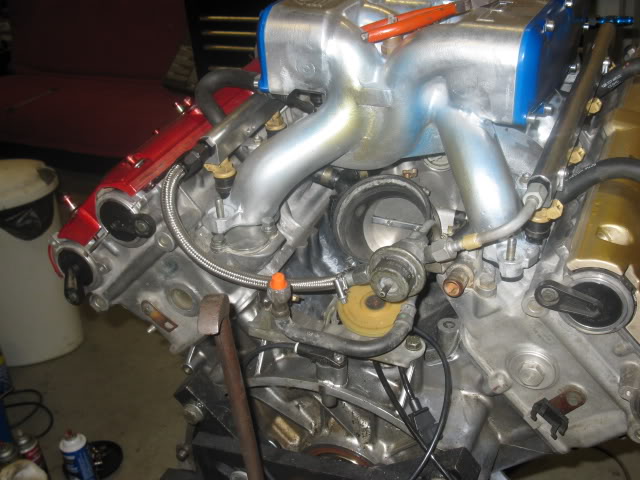
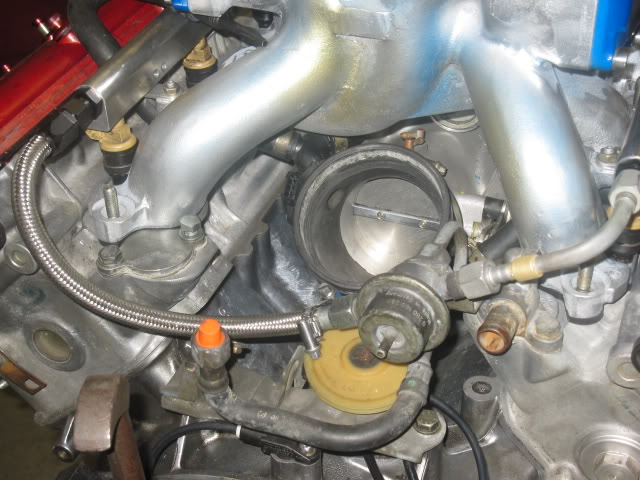
Fixed the fuel line connection seepage, finished dressing out the fuel rails, added covers, restored tie-wraps in original colors and positions for everything that was disturbed during intake and cam covers adventure, Changed the oil, and splurged on NEW oil and filter this time... 
Lots of clean-up both on the car and the work bay. Tools are mostly cleaned and put away. Floor will get scrubbed tomorrow, car will get a wash-n-clean, and all will be well in my little 928 universe for a few days anyway. Until the little brake project starts later this week.
Lots of clean-up both on the car and the work bay. Tools are mostly cleaned and put away. Floor will get scrubbed tomorrow, car will get a wash-n-clean, and all will be well in my little 928 universe for a few days anyway. Until the little brake project starts later this week.
04-18-2011, 10:17 PM
#785
Nordschleife Master
Installed S brake spindles, hubs, rotors, steel lower ball joints and calipers on front of my MY1980. Thanks to Sean (Zoltan944) for the donation (back in '09). My son insists I paint the calipers red. So, the calipers, at least, will be coming off.
04-18-2011, 10:40 PM
#786
Three Wheelin'
Drove my MY86.5 - S3 approximately 276.9 miles... approximately
04-19-2011, 12:06 AM
#789
I sealed up the exhaust leak at my cat-backs that happened when the fiberglass wrap worked its way loose over the past few months.
It's nice and quite now. It would have been annoying to listen to during the entire drive down to Sharks In The Mountains
It's nice and quite now. It would have been annoying to listen to during the entire drive down to Sharks In The Mountains
04-19-2011, 12:47 AM
#790
Rennlist Member
Not clear which stud shoulders you are talking about. Link to the discussion?
If you are talkng about the sleeves on the intake mounting studs from the heads, the flared end goes down. There are reliefs around the studs for them, and the flared end guides the position of the rubber intake gaskets. Keeps them aligned perfectly over the ports. Gaskets go on, sleeves next pushed into the gaslkets and the reliaf in the head, then intake, then rubber hold-down grommets, then washers and hold-down nuts.
If you are talkng about the sleeves on the intake mounting studs from the heads, the flared end goes down. There are reliefs around the studs for them, and the flared end guides the position of the rubber intake gaskets. Keeps them aligned perfectly over the ports. Gaskets go on, sleeves next pushed into the gaslkets and the reliaf in the head, then intake, then rubber hold-down grommets, then washers and hold-down nuts.
I too believe the orientation as you do.
 04-19-2011, 02:00 AM
#791
Drifting
Well thats it for tonight.
I got the fuel lines sorted and got the cam timing right and the belt on with everything else behind it done.
Im going to replace the rubber hose from the regulator to the cooler with steel braided hose as well
Remember I will not have distributor caps, might go plexiglass
I got the fuel lines sorted and got the cam timing right and the belt on with everything else behind it done.
Im going to replace the rubber hose from the regulator to the cooler with steel braided hose as well
Remember I will not have distributor caps, might go plexiglass
04-19-2011, 09:57 AM
#792
Pro
Join Date: Dec 2010
Location: Palgrave, Ontario, Canada
Posts: 700
Likes: 0
Received 2 Likes
on
2 Posts
Finished leather restoration of removed front seats with Leatherique (5 day job with soak in periods) - results were excellent. Now filling an abrasion on the passenger side in advance of a re-dying.
04-20-2011, 06:23 PM
#793
Rennlist Member
Put a little jesus torque on the rear bearing pins, new hoot struts, and tightened one front wheel bearing..that bearing would have been a 5 minute job, if the bearing cap wasn't designed to survive the apocalypse.
04-20-2011, 06:25 PM
#794
Rennlist Member
Well thats it for tonight.
I got the fuel lines sorted and got the cam timing right and the belt on with everything else behind it done.

Im going to replace the rubber hose from the regulator to the cooler with steel braided hose as well

Remember I will not have distributor caps, might go plexiglass

I got the fuel lines sorted and got the cam timing right and the belt on with everything else behind it done.
Im going to replace the rubber hose from the regulator to the cooler with steel braided hose as well
Remember I will not have distributor caps, might go plexiglass
Didnt get a new regulator huh...that'll **** you off more than $50 worth later..maybe. (Considering everything else that was done..didnt get a new one?)