What did you do to your 924/944 today
 09-09-2013, 12:40 AM
#5326
Burning Brakes

I continued my trans build today. I started the morning with a crowded work area. I'm also in the middle of rebuilding a 996 TT that has the dreaded 2nd gear popout problem.
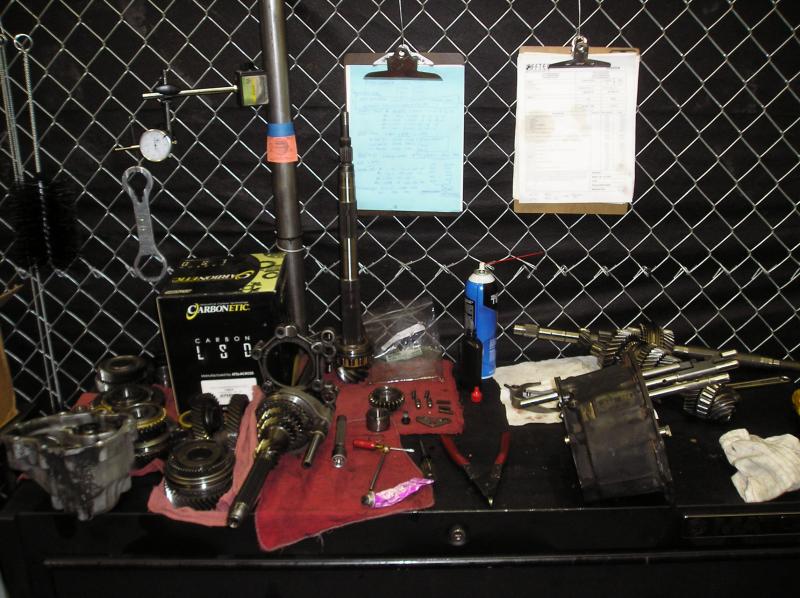
Within 1/2 hour I had assembled a dozen parts into one unit. The work went smoothly, all parts seemed to drop into place nicely.
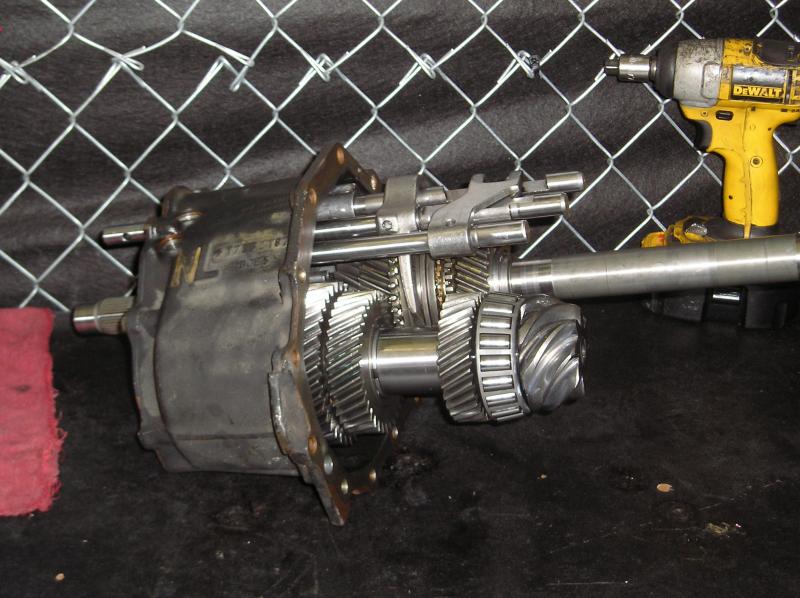
Overall the trans was in decent shape, no real problems. It had a little bit of gear whine in 5th gear and it was hard to shift into second gear. The shift rail interlock pins had some grooving that made the shifting feel notchy, second gear syncro was still within the factory wear limits but it had signs of being overworked. I was impressed that none of the gears had any signs of grinding type wear, it's a good design. The bearing preload on the pinion shaft was a little loose, and coincidentally the pinion height was a little low. Luckily I just had to add .002" preload and everything was in spec again. All bearings were in great shape, so I saved a few bucks there. I also installed new keys and syncro springs since the old springs were sagged, that should tighten up the shifts a little. Looking forward to putting it back in!


 09-19-2013, 06:07 PM
#5329
Yeah, I'm going to need details on that.
Does it mount with anchor bolts to the slab? It doesn't look like you dug a hole and poured a footer, so is this portable or will it be a permanent fixture?
What brand and how much?
I need something like that...
Does it mount with anchor bolts to the slab? It doesn't look like you dug a hole and poured a footer, so is this portable or will it be a permanent fixture?
What brand and how much?
I need something like that...
09-19-2013, 06:46 PM
#5331
It's a Max Jax portable lift. It was roughly $2200. It bolts to the floor, but the bolts are removable so you can wheel it out of the way. It's not completely installed yet. I still need to route the hydrologic lines and stuff. I'll get more pics when I'm off work.
 09-20-2013, 12:07 AM
#5333
Ok, here's more pictures:
As I stated, it's the Max Jax made by Dannmar equipment.

It has two wheels on the back, so you can unbolt it from the floor, tilt it back, and roll it around. Be careful though. These posts are HEAVY and if you tilt them back too far too quickly they will slip out of your hands and fall backwards onto your foot.

It bolts to the floor using 4 or 5 of these things. You have to drill holes in the floor and insert these things. Then you just roll the post on top and bolt it down.

There are 2 holes drilled in the post. You raise the lift up to the height you want then insert this safety bar. I can't recall the heights off of the top of my head. If you're not happy with the predrilled holes, you can drill your own custom holes to insert the safety bar.

It's powered by this hydraulic pump. You just plug it into the wall, push the button, and the lift goes up and down.
 09-20-2013, 12:20 AM
#5334
Rainman
Rennlist Member
Rennlist Member
I continued my trans build today. I started the morning with a crowded work area. I'm also in the middle of rebuilding a 996 TT that has the dreaded 2nd gear popout problem.
Within 1/2 hour I had assembled a dozen parts into one unit. The work went smoothly, all parts seemed to drop into place nicely.
Overall the trans was in decent shape, no real problems. It had a little bit of gear whine in 5th gear and it was hard to shift into second gear. The shift rail interlock pins had some grooving that made the shifting feel notchy, second gear syncro was still within the factory wear limits but it had signs of being overworked. I was impressed that none of the gears had any signs of grinding type wear, it's a good design. The bearing preload on the pinion shaft was a little loose, and coincidentally the pinion height was a little low. Luckily I just had to add .002" preload and everything was in spec again. All bearings were in great shape, so I saved a few bucks there. I also installed new keys and syncro springs since the old springs were sagged, that should tighten up the shifts a little. Looking forward to putting it back in!
09-20-2013, 10:14 AM
#5336
Three Wheelin'
Fixed the clutch pedal squeak and clack sound...now feels and drives like a new car.
Fixed the alternator charging problem (damaged wire connection)
Drove it and boy oh boy those Conti Sport 3 tires grip..before it used to spin wheels with every ocasion, now it grips like a zoo monkey to your food.
Fixed the alternator charging problem (damaged wire connection)
Drove it and boy oh boy those Conti Sport 3 tires grip..before it used to spin wheels with every ocasion, now it grips like a zoo monkey to your food.

 09-23-2013, 02:13 PM
#5339
Rennlist Member
Installed 19 mm 3-way adjustable M030 rear sway bar and KLA drop links.
Getting the brackets bolted down over the new bushings (stock) was a major PITA, but after some swearing and thinking it through I got it done.
Have only taken a check ride so far, but it certainly seems to transfer the weight better in the back. There doesn't seem to be any noticable change in ride quality, and there are no noises. That works!
Last edited by SpeedyC2; 09-23-2013 at 02:14 PM. Reason: typo