When you click on links to various merchants on this site and make a purchase, this can result in this site earning a commission. Affiliate programs and affiliations include, but are not limited to, the eBay Partner Network.
Fiddled around with my throttle cable and pedal - my kick-down switch now works for the first time for me. I was surprised that it would go to 2nd from 4th (at around 50 mph). Serious!
I also put in a convex mirror from a mirror I bought at Frenzy last year. Even with one to practice with on the bench, I found the release ring difficult to manipulate through that little hole on the bottom. Pointing the mirror down exposed some tabs on the top that were far easier to reach. If anyone needs a mirror (with flat glass), let me know.
I should also mention another recent improvement last week: I was going to put in a new vacuum modulator to fix my harsh shifting, but one bolt on the old one didn't want to come out. So I did something I should have done before - a bold full turn of the adjustment CCW. I'd read that it is sensitive adjustment, but this did the trick. I might even give it another half-turn at the next opportunity. I'd been too shy with it previously.
Don't be shy with this adjustment... It can make a huge difference.
Also make sure that the rubber cap on the modulator is not leaking (cracked).
BTW, it is available separately.
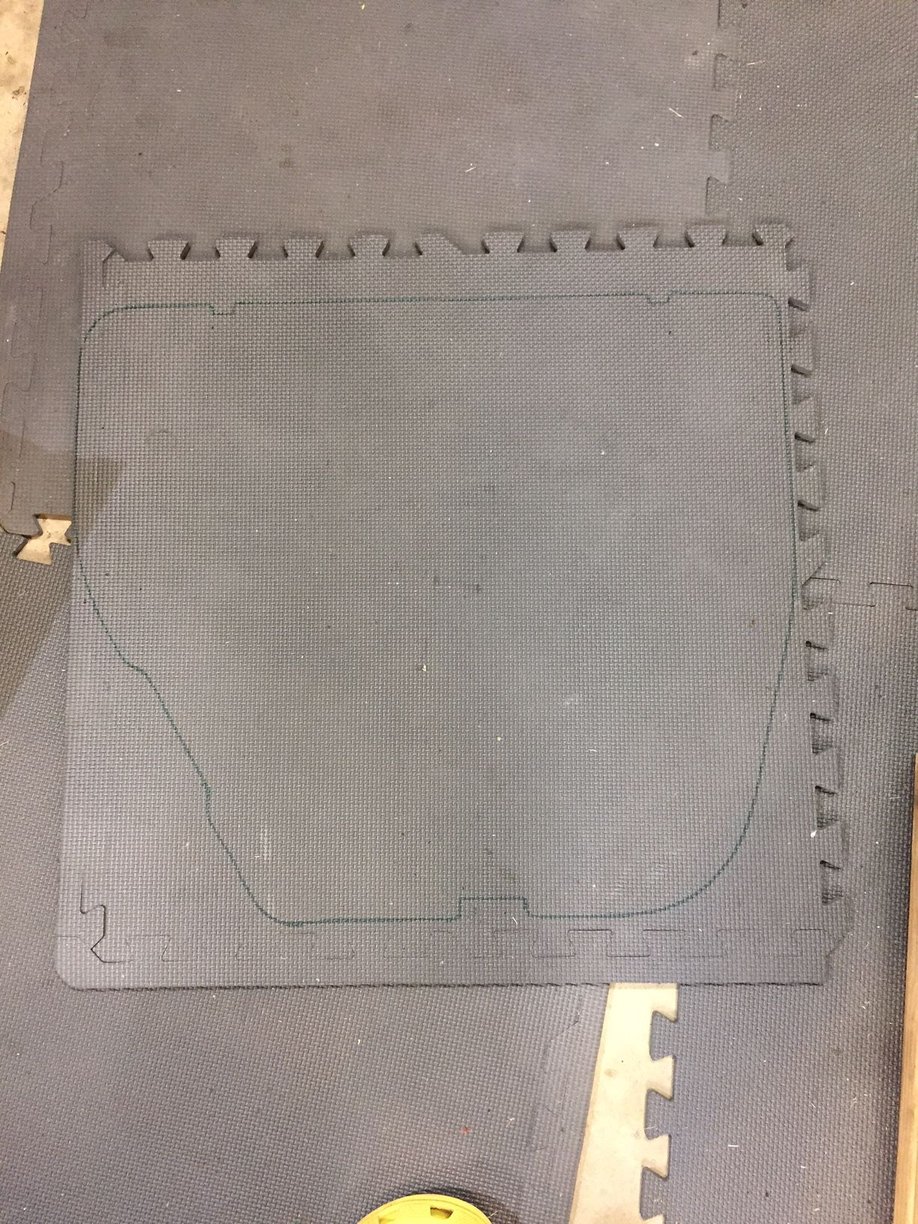
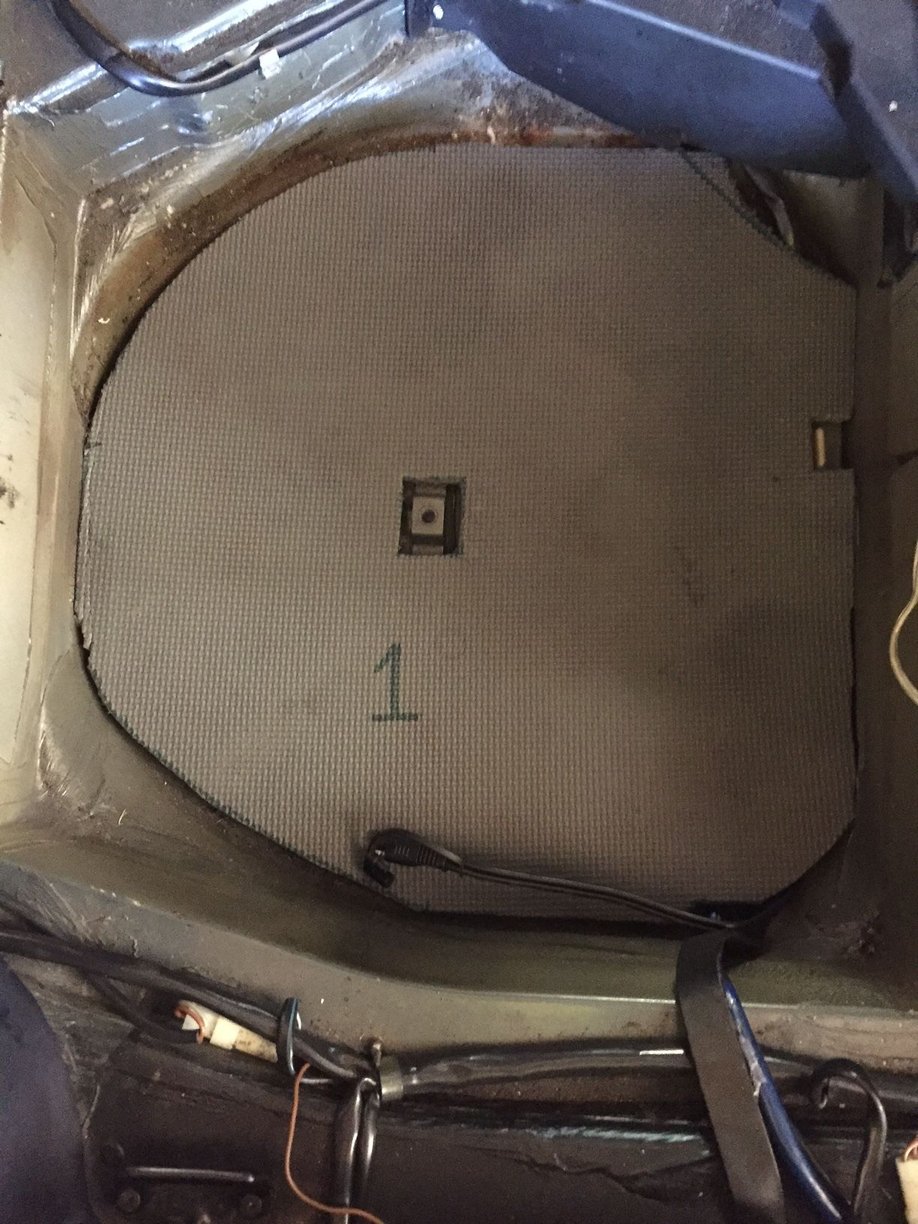
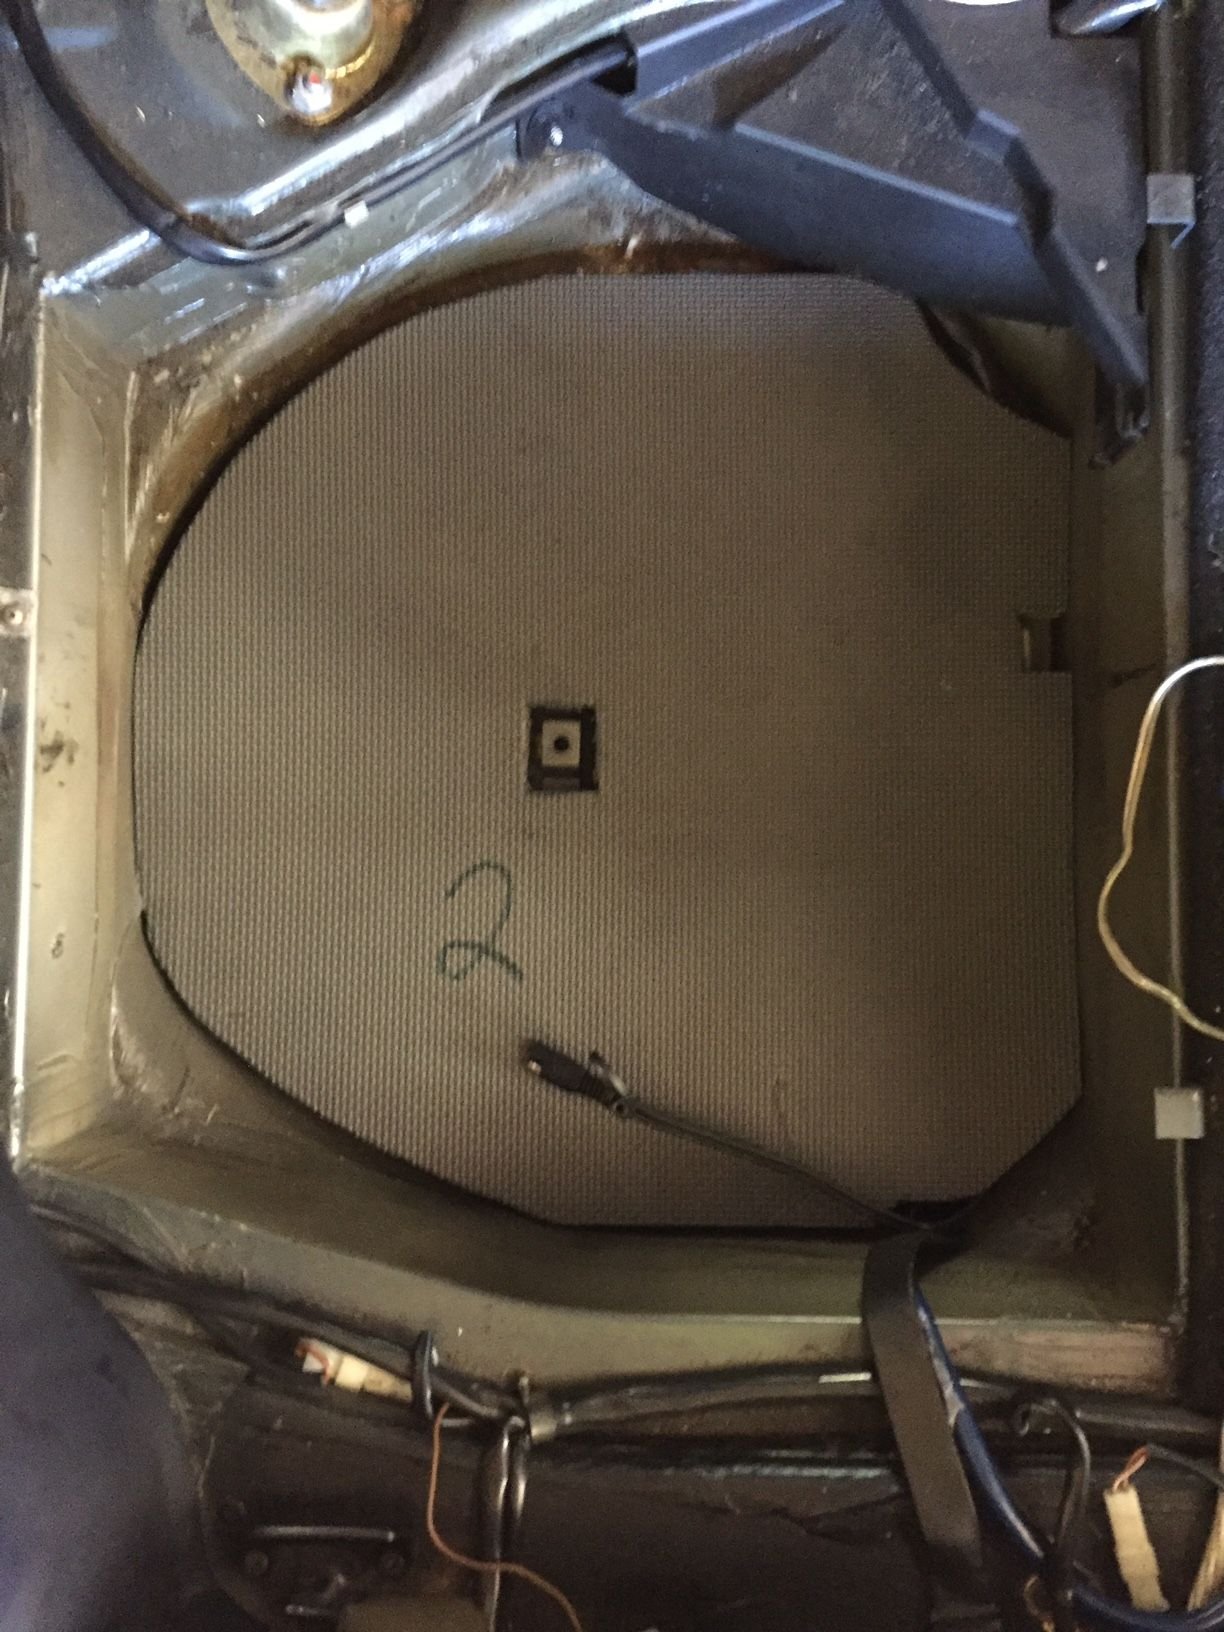
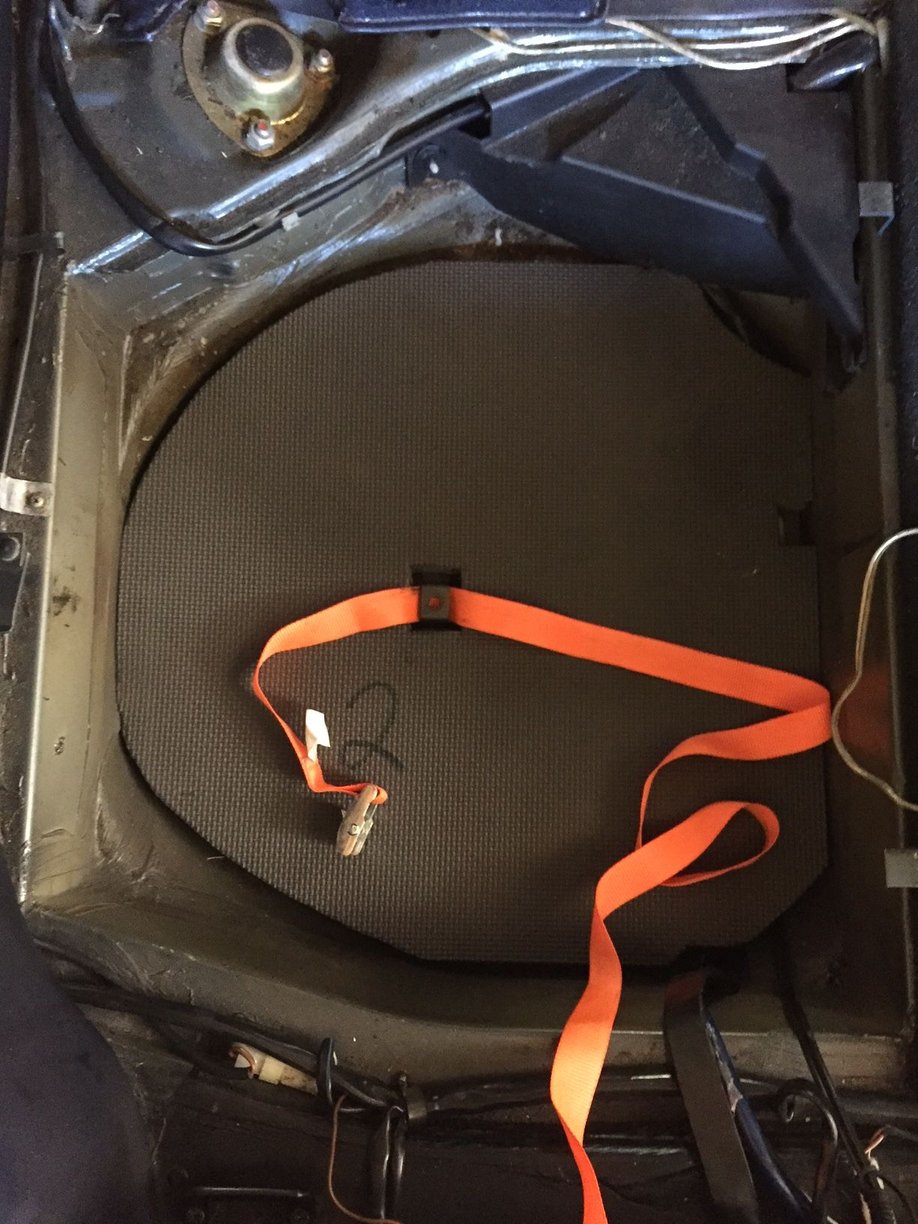
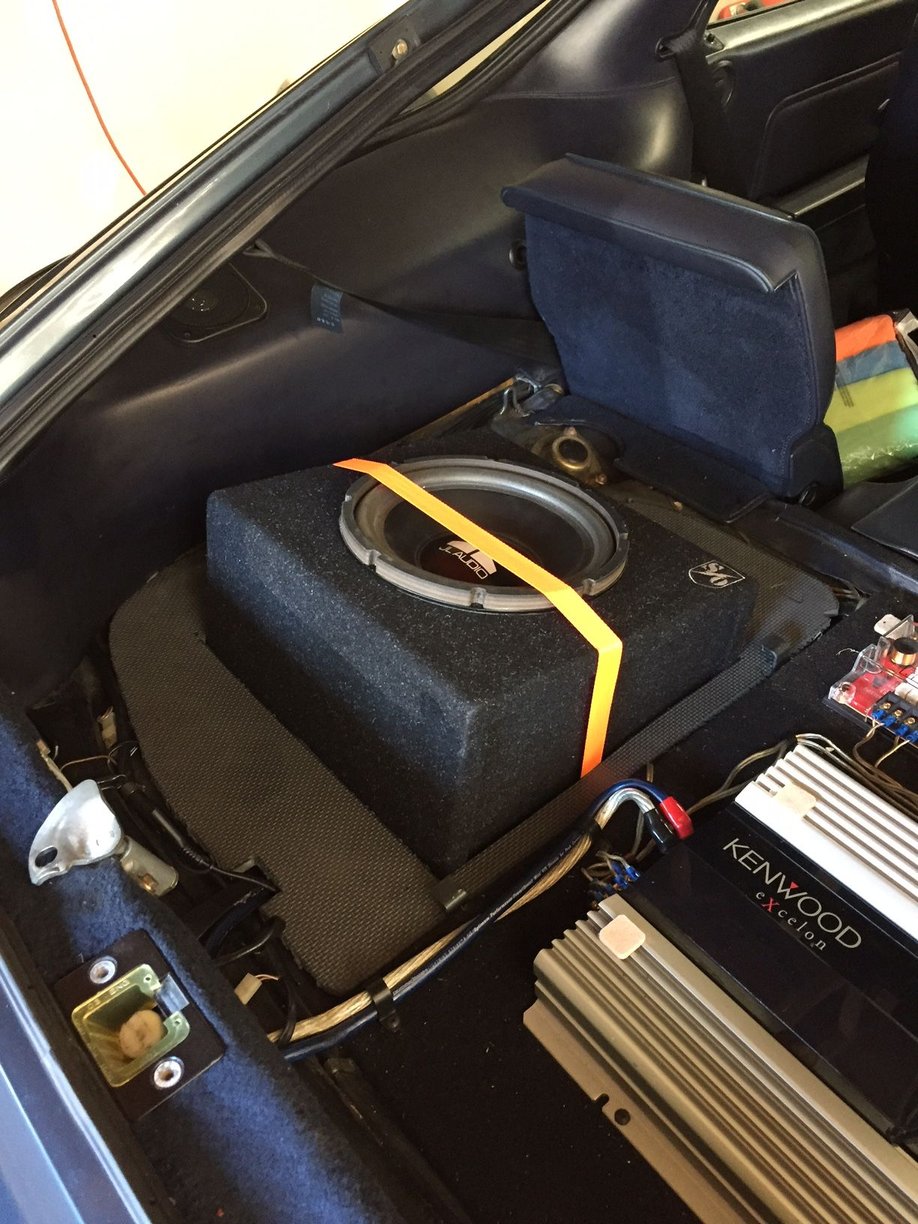
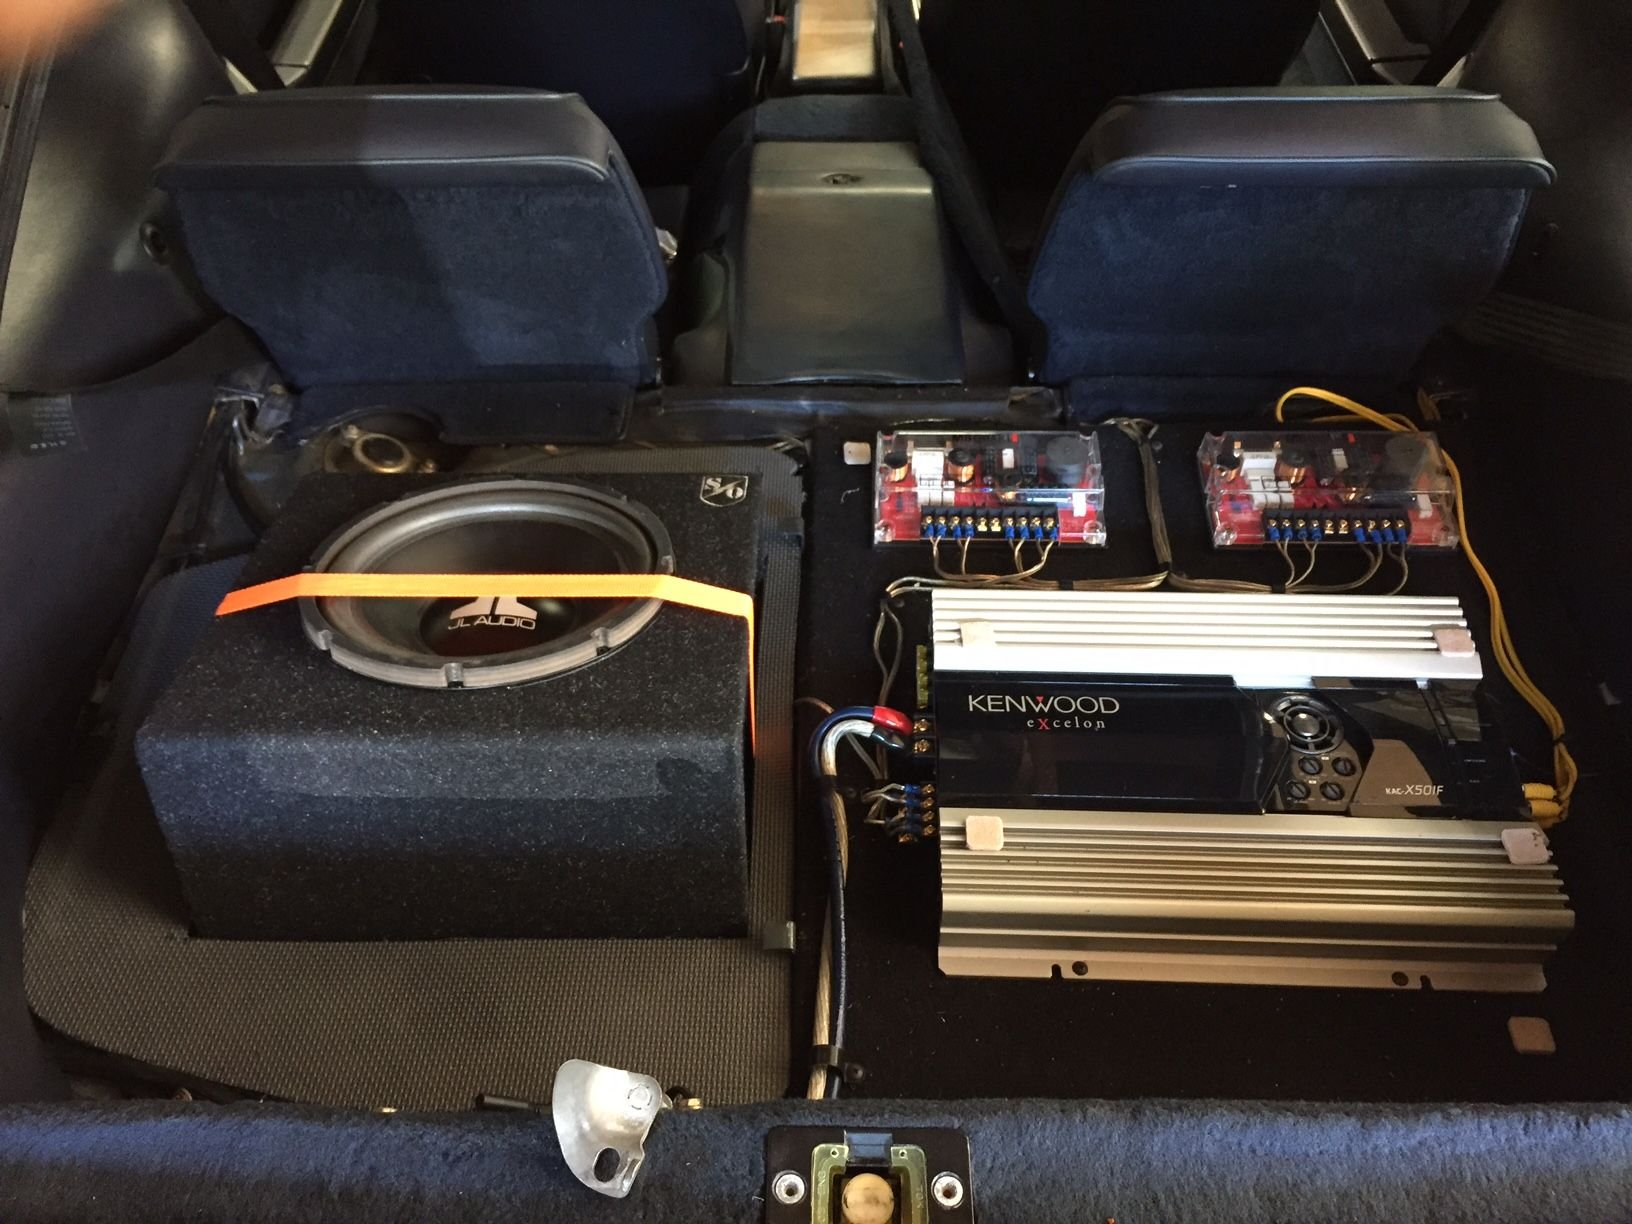
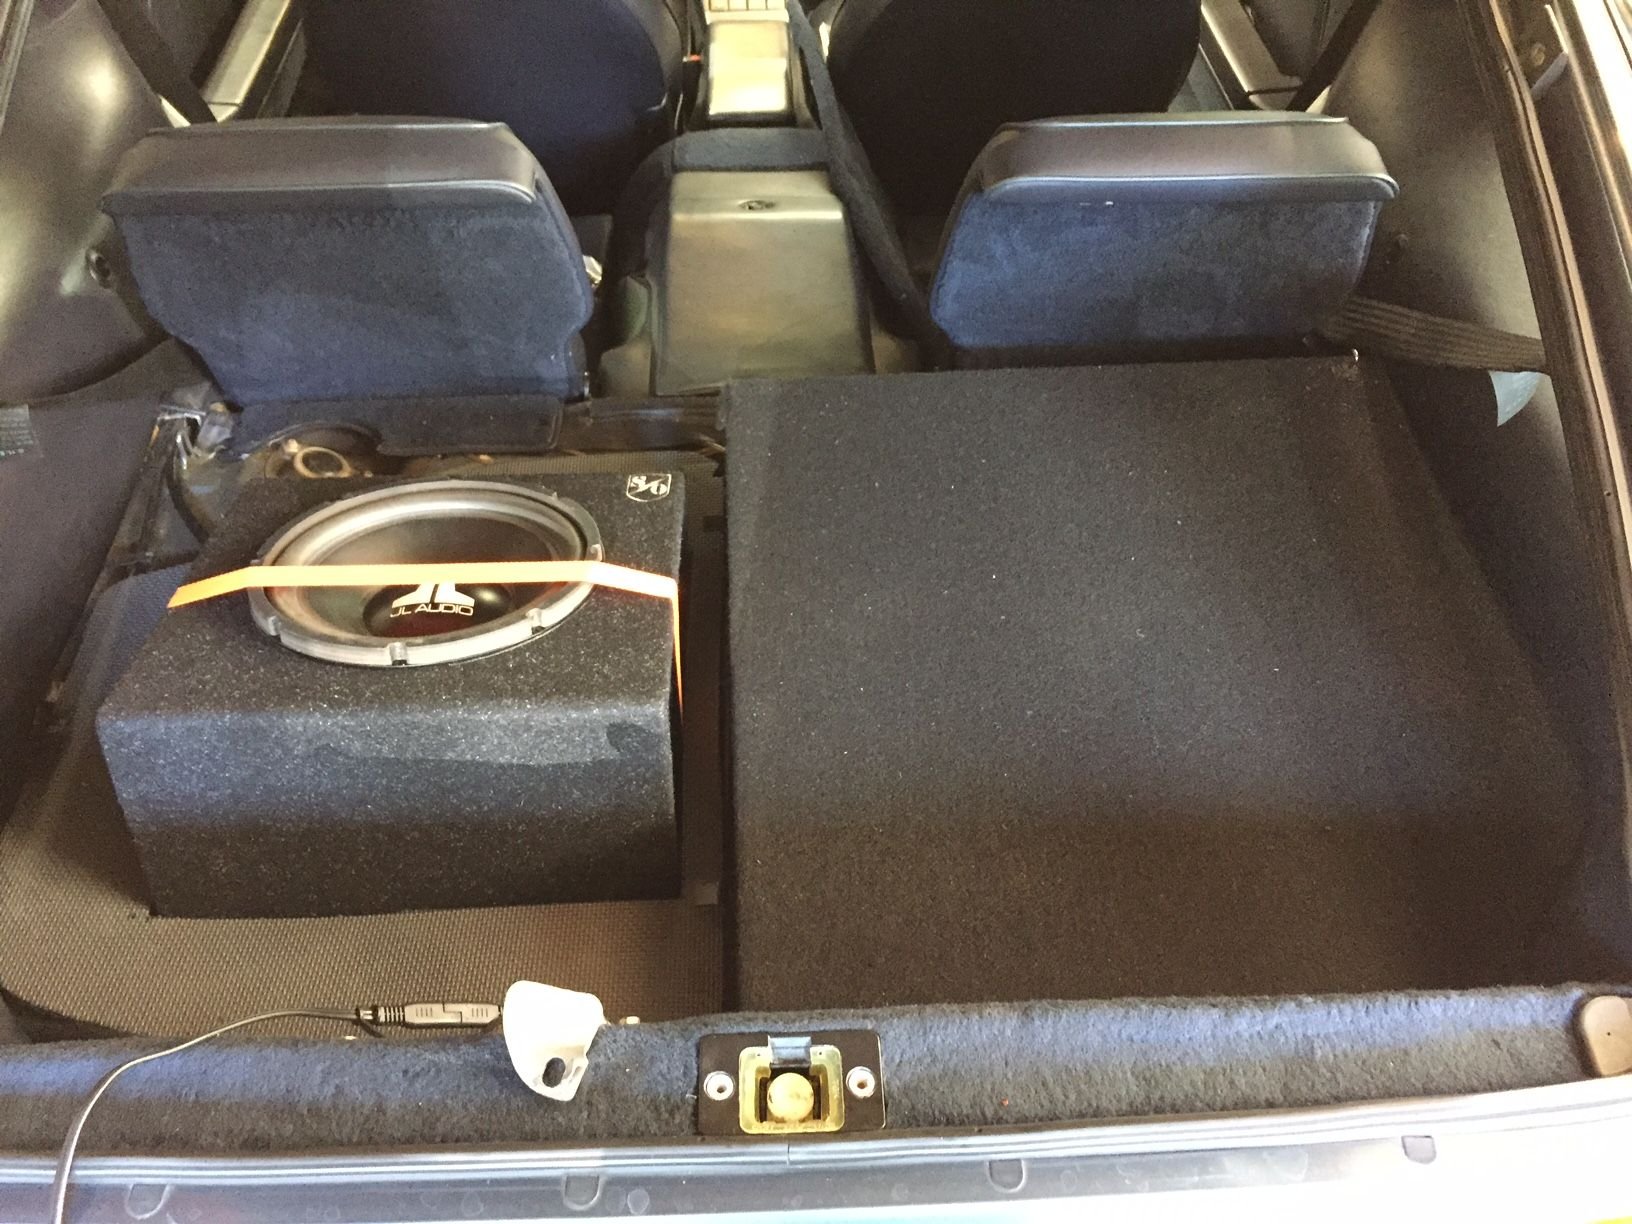
A few unplanned household "projects" have forced me to limit spending to 928 maintenance essentials. So I put a woofer that came with the car in a cheap box, changed the three-way component speakers from bi-wired to all on the A channel, then bridged the B channel for the woofer, and moved the RCA output on the Alpine from B to subwoofer and hooked it up just to see how it sounded. Just an inexpensive experiment to see if I liked the sound with a subwoofer. The 10W0 JL sub is OK, not great, but overall it sounded really good. But...before heading out to survey the Frenzy 21 Fun Run road conditions I had to deal with the box being unsecured and not able to rest flat due to the spare tire hold-down bracket. Well..."poverty" is the mother of repurposing...time for a Harbor Freight mat hack...
It takes about two minutes to remove the sub and replace the spare tire cover. So far I like it enough to consider building a second carpeted wooden cover, with cut-out for the sub box. Thinking of designing a wooden handle in Inventor and using the cnc router at work to put a recess in the top to carry a black strap over the woofer (and grill waiting to go in).
The Frenzy 21 Fun Run route is great. It includes the best of last year's run...and a return to a twisty road from two years ago. A few of the roads have have fresh pavement, too. Today was a stunningly beautiful day for a scenic drive through Virginia horse and vineyard country.
^^I'm even worse when it comes to "hacks" I just buckle in my sub tube into one of the rear seats. Takes about 15 seconds to remove when I need to haul stuff around.
Speak-on terminals are key here. Don't want any exposed wires.
Anyway, just ordering more parts to get both of them ready for the drive up to Monterey in 2 weeks.
Plus now I finally have all the parts to install my stereo in my 81. I think 2, 6 channel amps and a separate amp for the sub should be sufficient
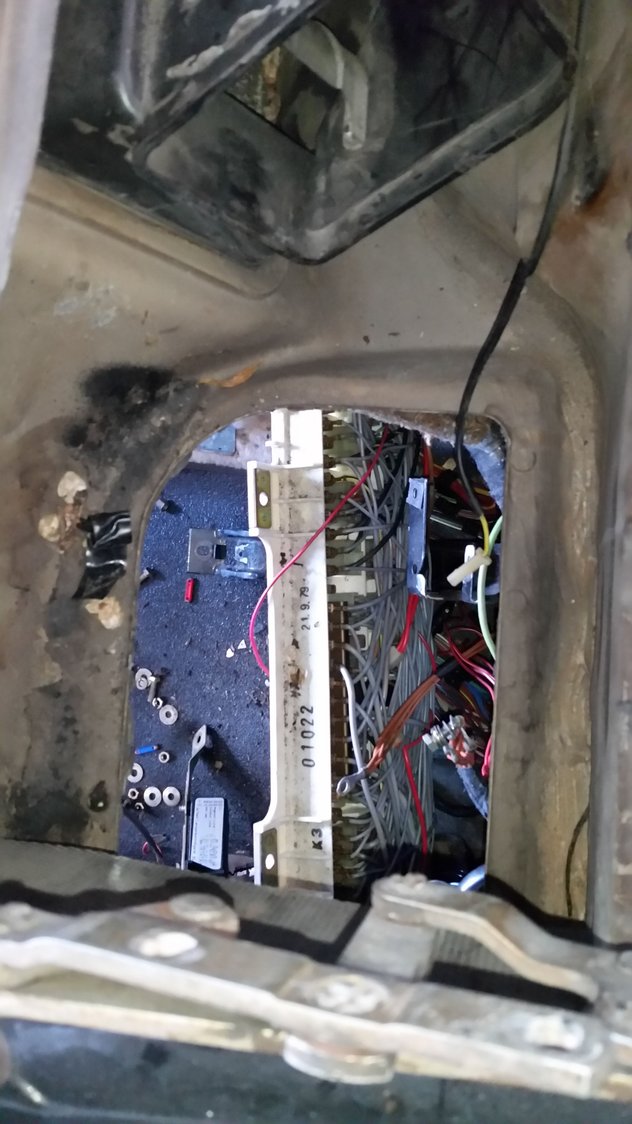
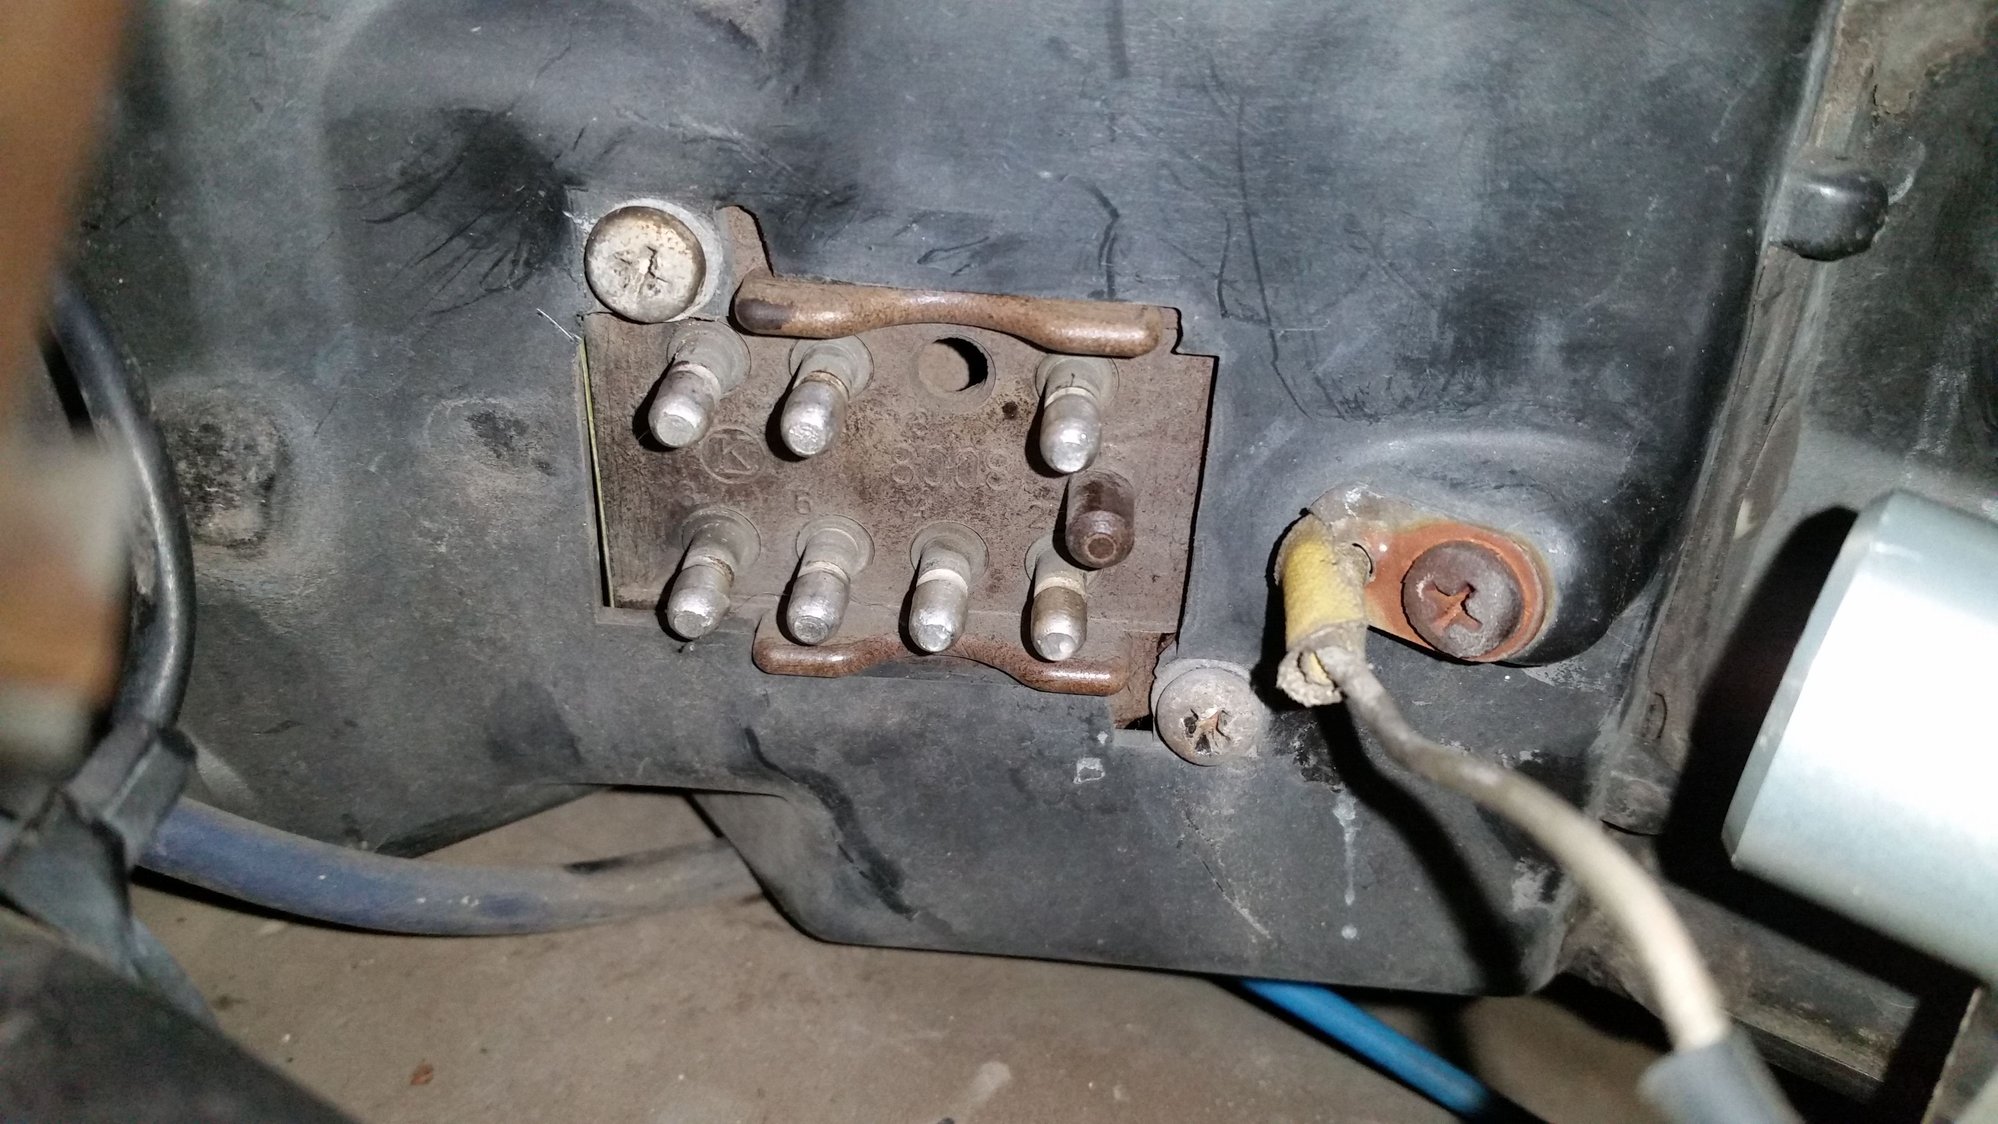
I removed the carpet panels below the console to access the cruise control brain, as instructions casually advise. I was greeted by a densely-packed tangle of wires, cables, and mysterious components, through which I could catch an occasional glimpse of the the shiny object of desire. An excellent example of why my phobia about under-dash work is justified.
Is it really possible to extract the brain without further disassembly? It seems the trays must come out, at least.
Curt - You can probably get by with pulling your radio partially out and removing the under trays. It depends how much added wire mess has been added over the years. I spent more time on wiring clean up (mostly identifying which wires were original and which were added), it required a lot of patience and careful study. How are your HVAC vent actuators? Might be a good time to pull the console and redo the center vent and floor vent pods. I remember looking at the wire mess was really intimidating...especially with all the added aftermarket wires. But like all things on the 928 your mind starts to filter out all the stuff individually instead of seeing all the complexity at once. Go slow...spend a day just looking at all the wires and trace them from end to end. Be careful with the wire connecting to your interior temp sensor. I yanked the console out and thus began my first soldering lesson.
Originally Posted by Adk46
I removed the carpet panels below the console to access the cruise control brain, as instructions casually advise. I was greeted by a densely-packed tangle of wires, cables, and mysterious components, through which I could catch an occasional glimpse of the the shiny object of desire. An excellent example of why my phobia about under-dash work is justified.
Is it really possible to extract the brain without further disassembly? It seems the trays must come out, at least.
Jon, I got it out. For those who will be doing the same: passenger carpet panel comes out. The bracket that holds the shelf has to come out. Two plugs unplugged to make an opening. One 7mm bolt comes out on the brain itself. Twist and pull to get it out.
I opened up the brain to see if anything looked bad - nope. Then proceeded with the diagnostics done by probing the socket in the car. Checked that pin 12 is ground, +12v to 3, brake pedal and stalk switches show the right things, etc. Pumped down the vacuum reservoir. Stuck a paper "flag" on the right part of the throttle quadrant so I could see it from inside the car, jumpered 3 to 5, then 7 to 12: flag moved. Gotta spin a wheel and see if 11 to ground alternates between low and high resistance (the speed sensing signal). Probably will, leaving brain as the guilty party. Will get it repaired by the Ebay guy.
Had I taken more apart, I'd consider the WYAIT stuff - the HVAC stuff is inop. Maybe this winter - would be nice to put a better radio in it, too. Among other things.
Mine is sitting in the garage with its front wheels in the air awaiting x-pipe transplant and Porken's S300 EZK chip. The battery went kaput 2 weeks ago and a new Interstate battery is sitting in stasis awaiting to be connected to give the car life again.
Your going to like that bit of of power upgrade Mongo, did it recently on a Friends '91
I've almost completed my SC installation, still need to make some holes for Fresh Air and Install the Inter cooler Rad. Despite not being tuned it runs great down low for now.
Sometime ago in Ken's '88 S4 Dyno thread about the S300s for S4+ cars, someone had posted they dynoed their S4 with the EZK chip and x-pipe. This combination yielded a 33HP gain to the rear wheels. Impressive, and this is without the LH chip and injectors.
I will try and get the exhaust buttoned up tonight before I begin the lobotomy.
Car's SC install is looking great Davek!
Originally Posted by davek9
Your going to like that bit of of power upgrade Mongo, did it recently on a Friends '91
I've almost completed my SC installation, still need to make some holes for Fresh Air and Install the Inter cooler Rad. Despite not being tuned it runs great down low for now.
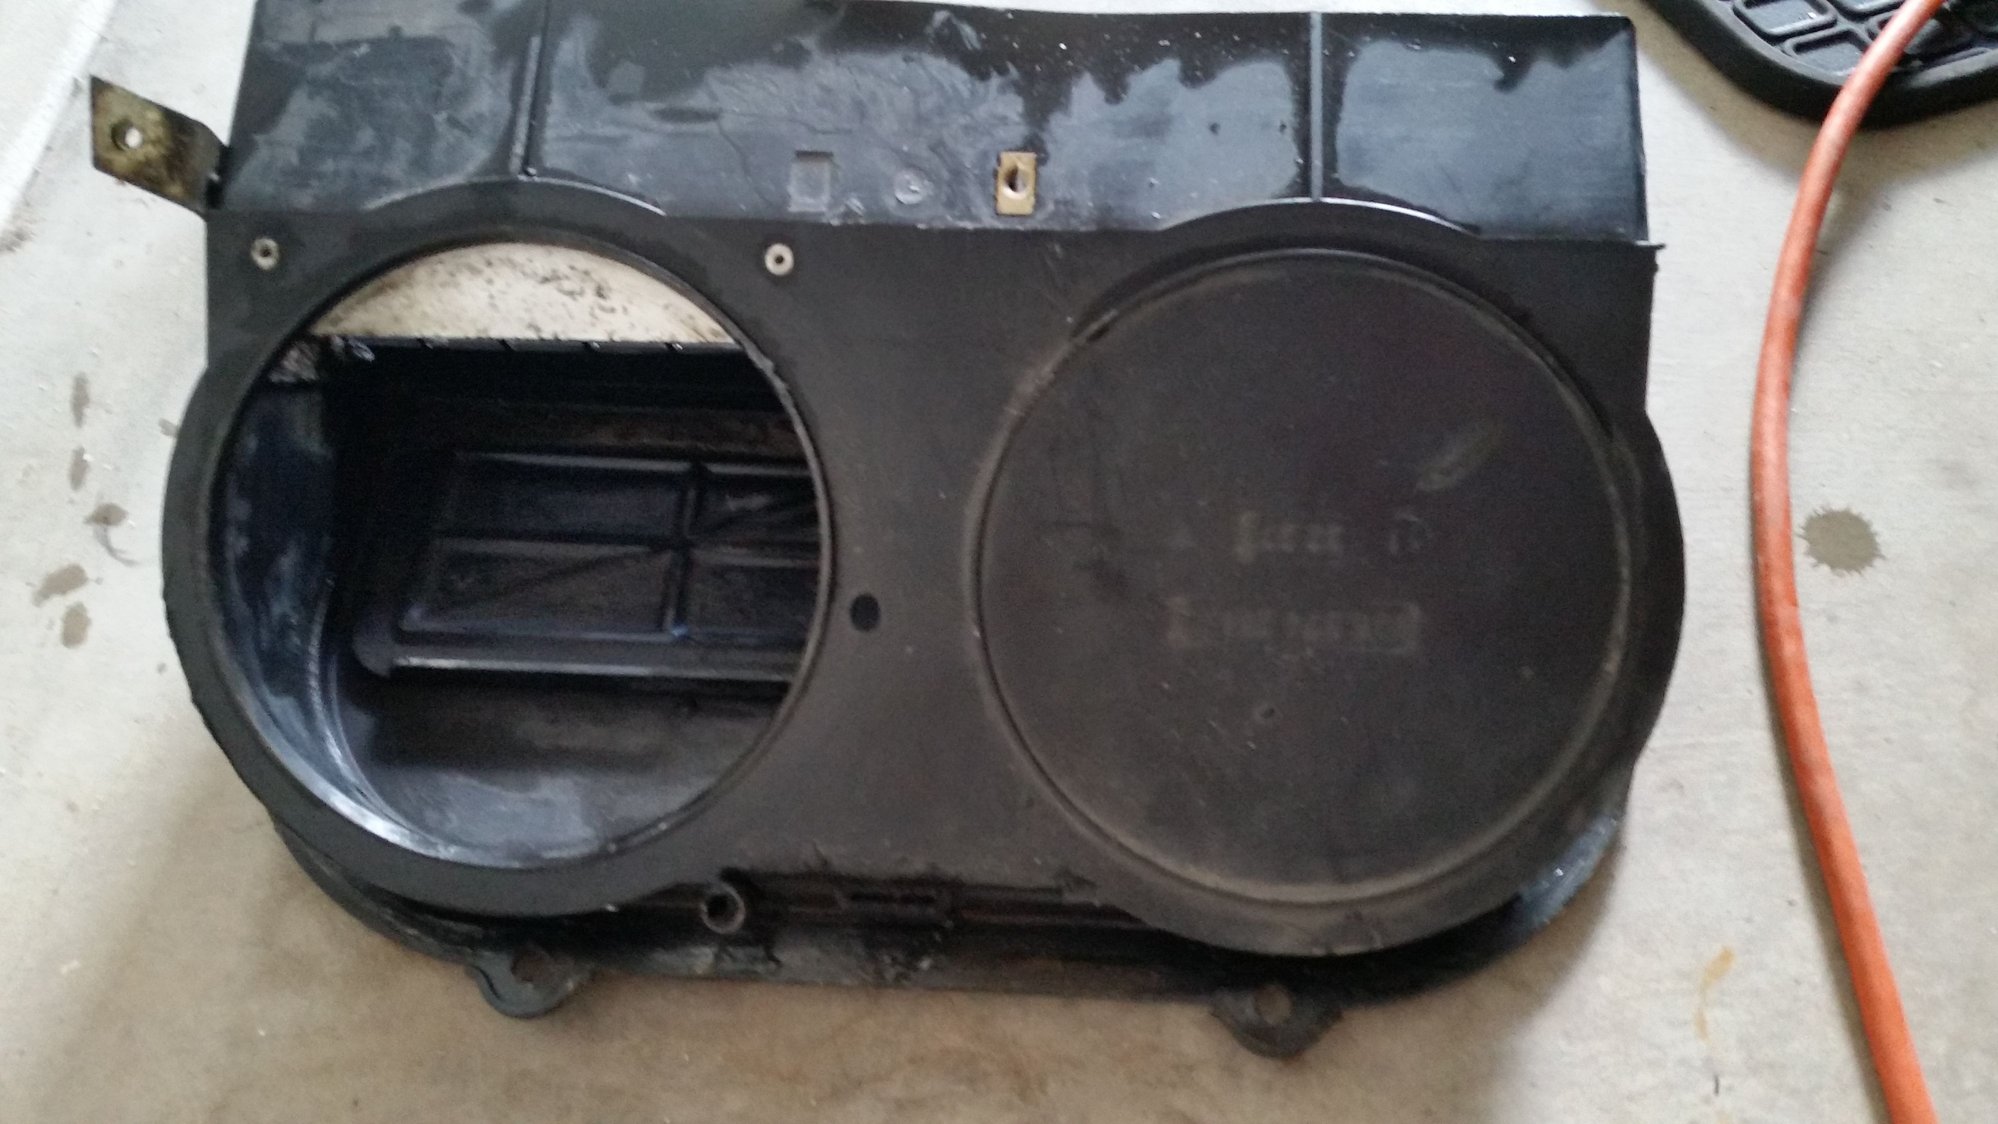
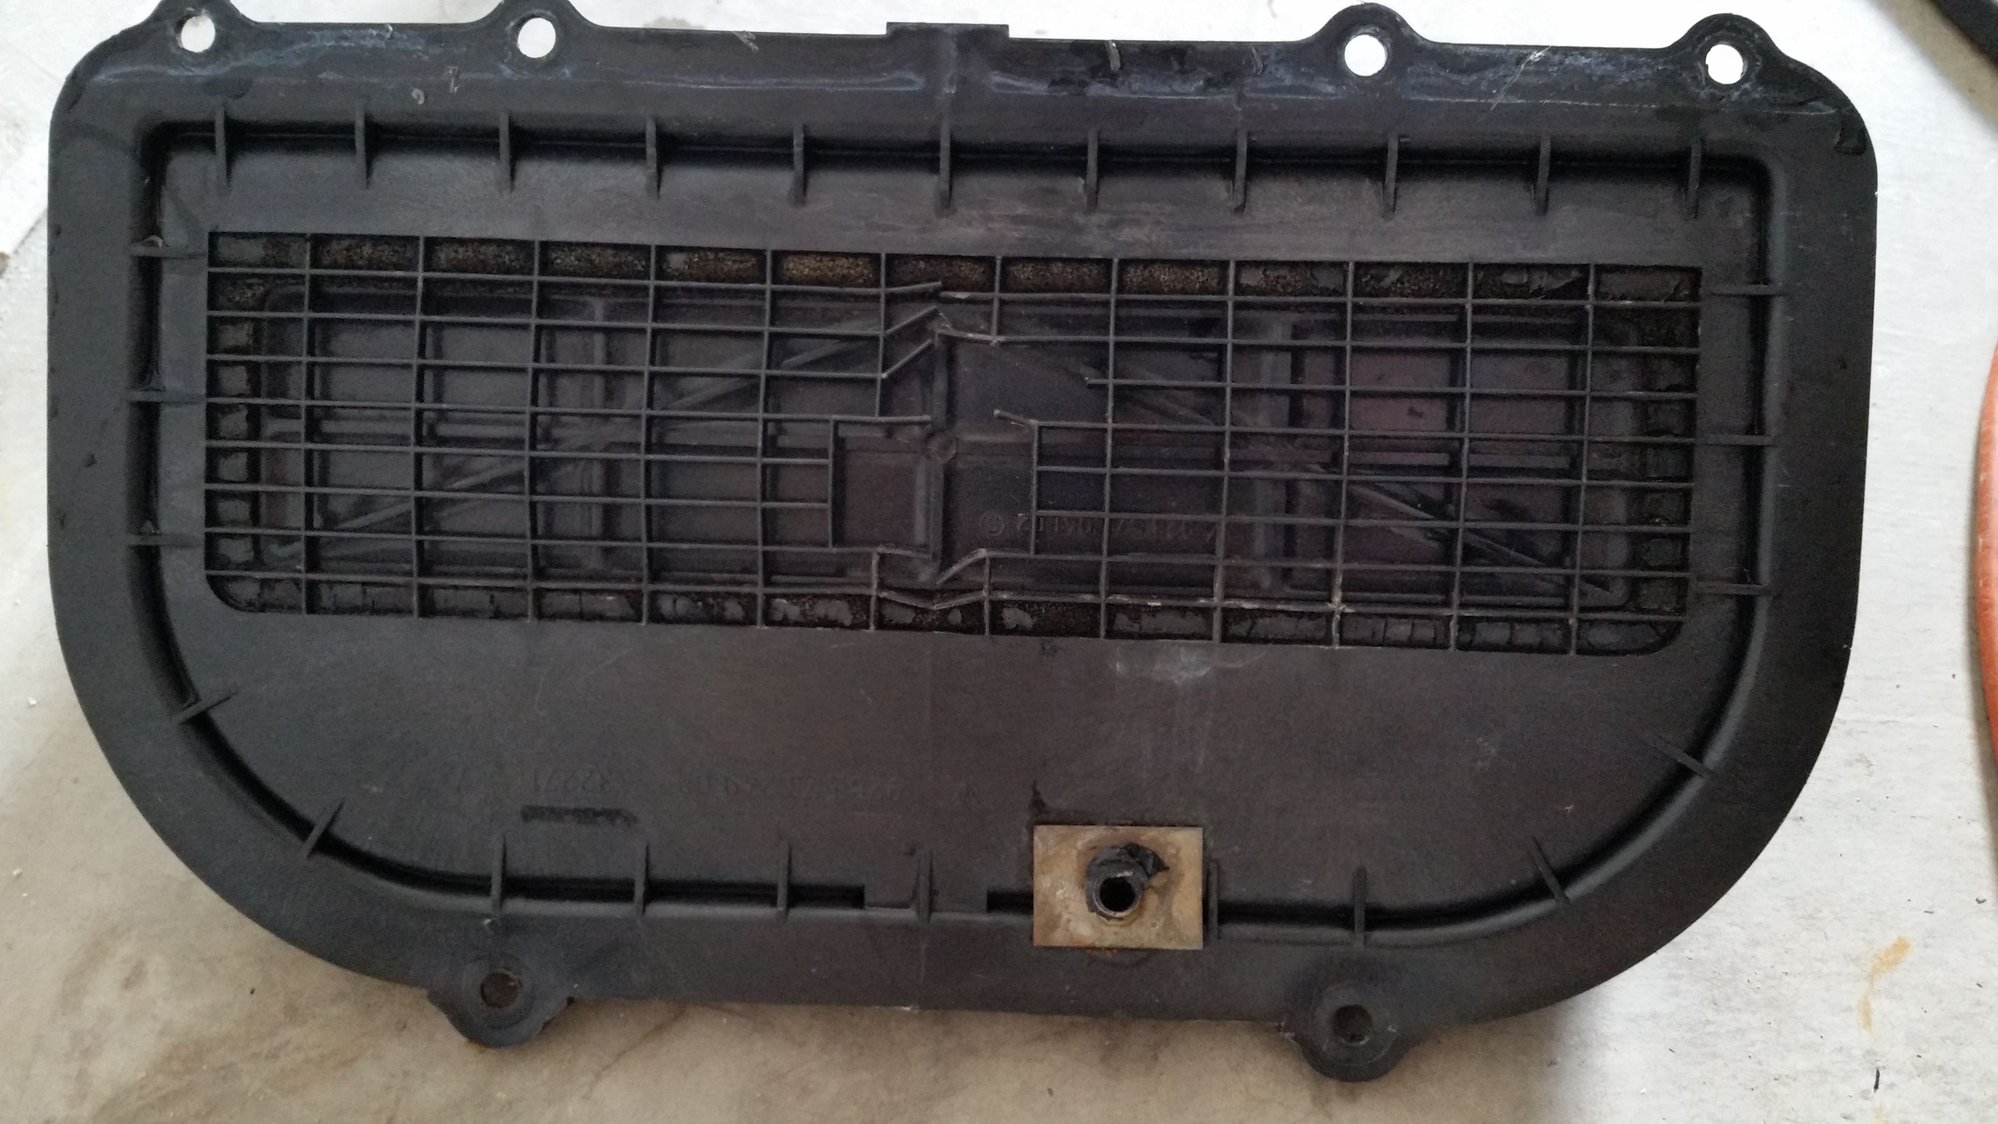
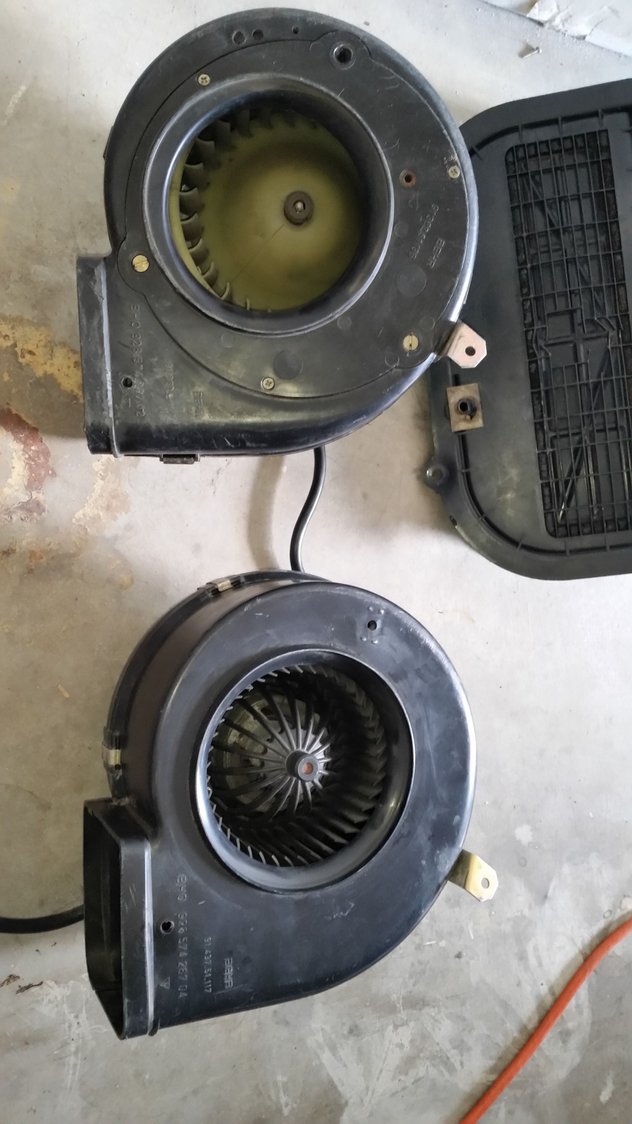
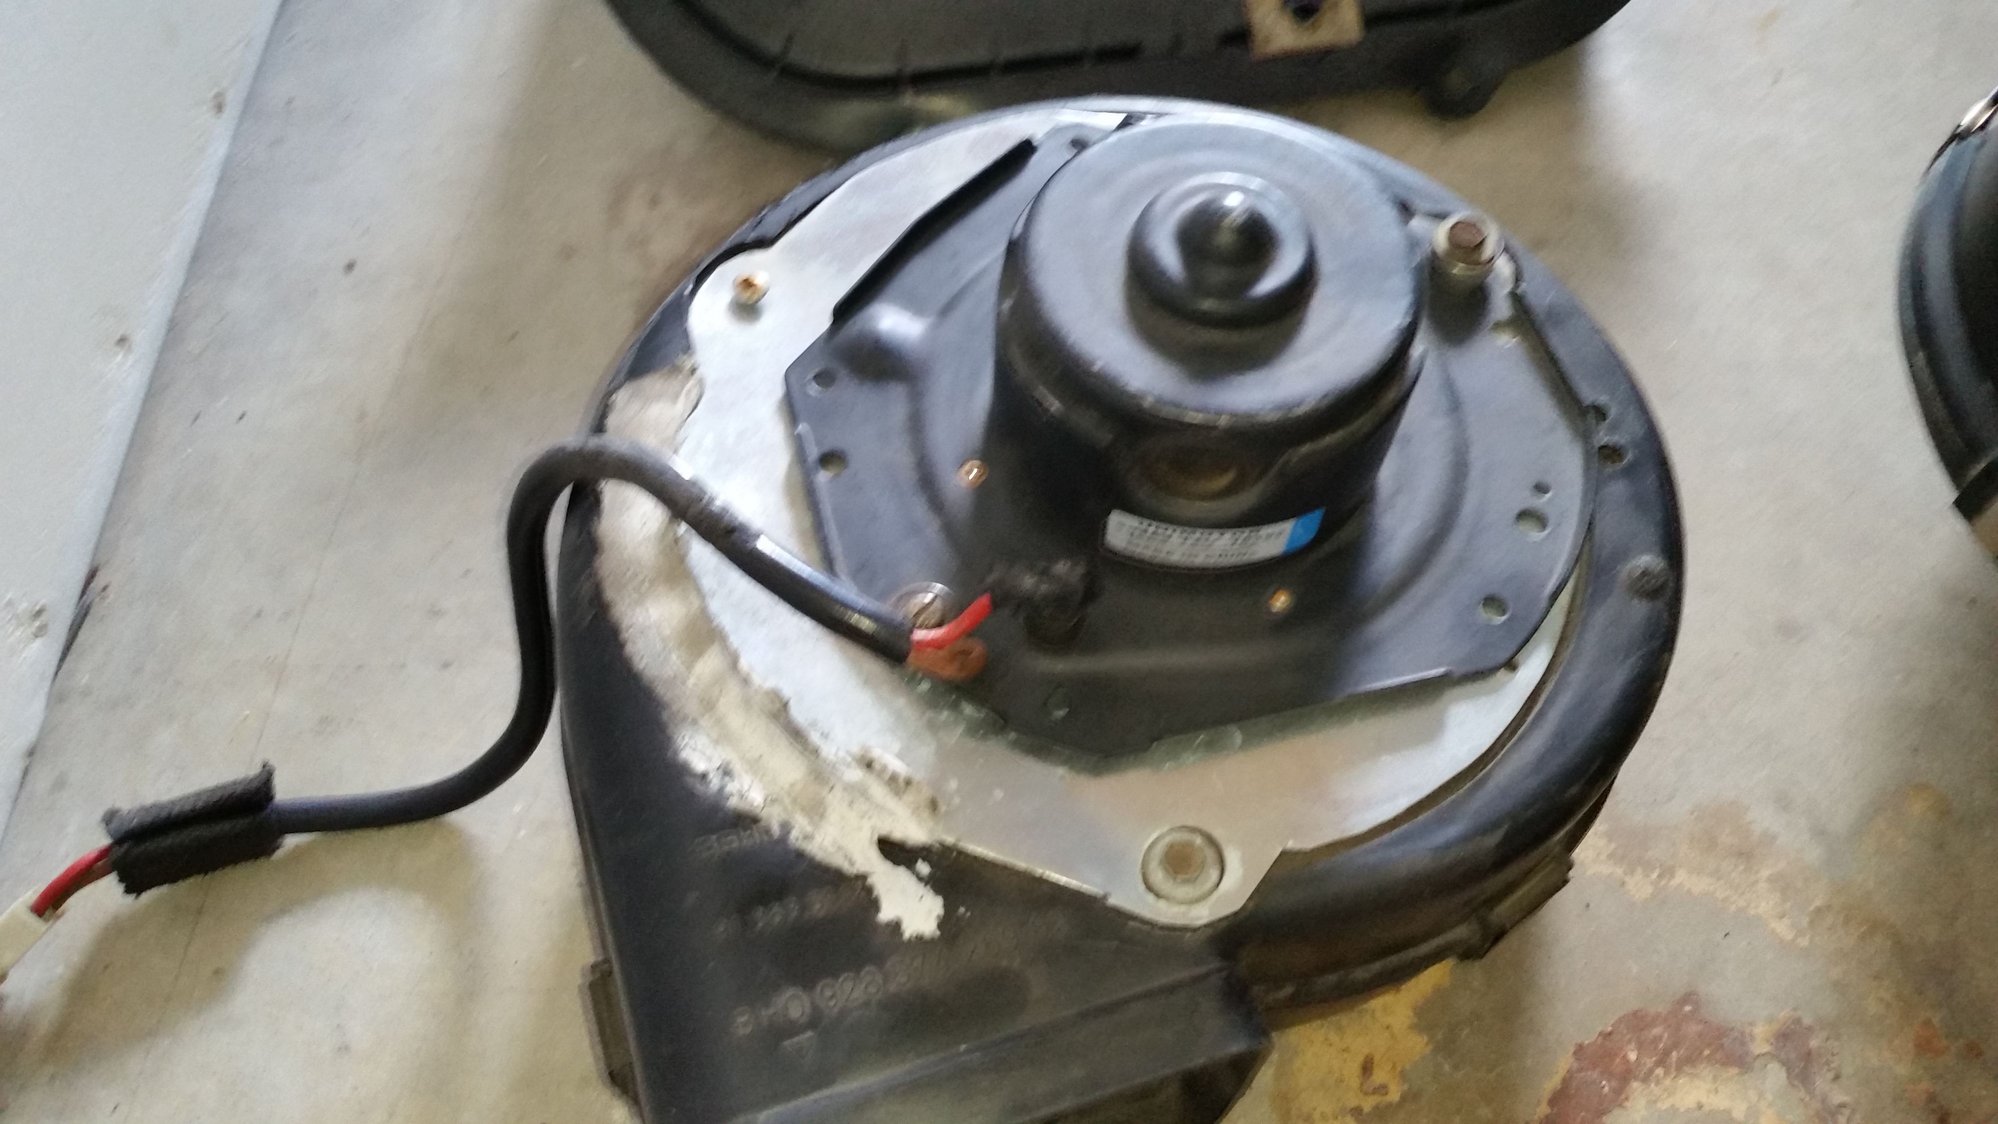
Spent the day clening up the boched blower motor from the PO. Installed the new style. And cleaned grounds while I was at it. Why do I even put the hood back on this car.


 07-29-2017, 10:11 PM