When you click on links to various merchants on this site and make a purchase, this can result in this site earning a commission. Affiliate programs and affiliations include, but are not limited to, the eBay Partner Network.
Only downside is that the Head Unit itself, whilst having any map App available for Android, does not have an internet connection (or if it does I haven't found it). As such I cannot do live traffic updates through the Head Unit, although I can through the CarPlay - which has a selection of map Apps (controlled by Apple but includes Apple Maps, Google Maps and Waze, I think). Personally I don't use the maps often in any event and am happy to use my phone when I do.
There are strictly defined apps that appear on CarPlay so don't assume that everything is there - far from it, and if a particular app is important to you I would suggest you look up the latest list of 'recognised' apps.
Cheers
Rich
All Android head units have wifi. Turn on tethering on your phone, then connect to your phone's internet connection from the head unit, at the wifi connection settings. You get to the wifi settings through the wifi settings menu, the same way you would with your phone. I don't know what unit you have, but many of them are set up with a slot for a sim card. Then you could get your data from that sim card's data connection. My head unit has the slot for a sim card, but I just tether off of the connection on my phone. Makes more sense to me, than maintaining a separate sim card, just to use for a data connection in the car.
i will get to the install for this specific owTowsin 2020 unit shortly - and will do my best to compile and organize all the information here + create a separate thread to make a definitive installation guide.
This would be most appreciated. I�m tempted to go this route but I�d prefer to be able to go thru a checklist knowing accessory compatibility is verified and not having to spend a day figuring out the wiring for everything. I�d rather just follow a guide knowing I can trust the outcome.
This would be most appreciated. I�m tempted to go this route but I�d prefer to be able to go thru a checklist knowing accessory compatibility is verified and not having to spend a day figuring out the wiring for everything. I�d rather just follow a guide knowing I can trust the outcome.
Care to expand on the colour selection and technique to achieve your very nice looking finish?
I took the unit out and taped it up carefully. No surface prep other than a wipe down.
2 gentle coats of rattle can paint (Nissan metallic grey KR2) followed by about 3 coats of Matt clear coat on top. Take your time - Really shake the rattle cans to mix the paint; the base grey will be covered so this only needs a good even covering, not loads of layers.
Do NOT let the clear coat run. Put it on slowly and steadily and don�t forget you can cover minor imperfections with the next layer. The more layers the more resistant.
Took about 10 minutes to remove the unit and then about 5 minutes between each layer. I actually did it whilst working from home - nipping out to the garage for 2 mins to spray and then leaving for 15 mins. I started at about 9 and had it all back in before I left the house at 12.30.
I also did the panel by the coin �cubby� as you can see in the pic, and the door handles in the same effect. The latter look really good (IMHO).
Yes the HU will connect to my phone and have the internet.
Yes you can have YouTube etc. YouTube is pre-loaded, in fact.
I have not tried to get the HU to use my phone for live traffic but will try at some stage. Its probably easier to use CarPlay to be honest.
Rich
Run one of the USB cables trough the firewall near the battery and attach a 4G modem with a SIM card to it. The radio unit can either Wifi tether or use the 4G dongle as USB connected network adapter. The HU then is always connected whilst maintaining your phones connecivity.
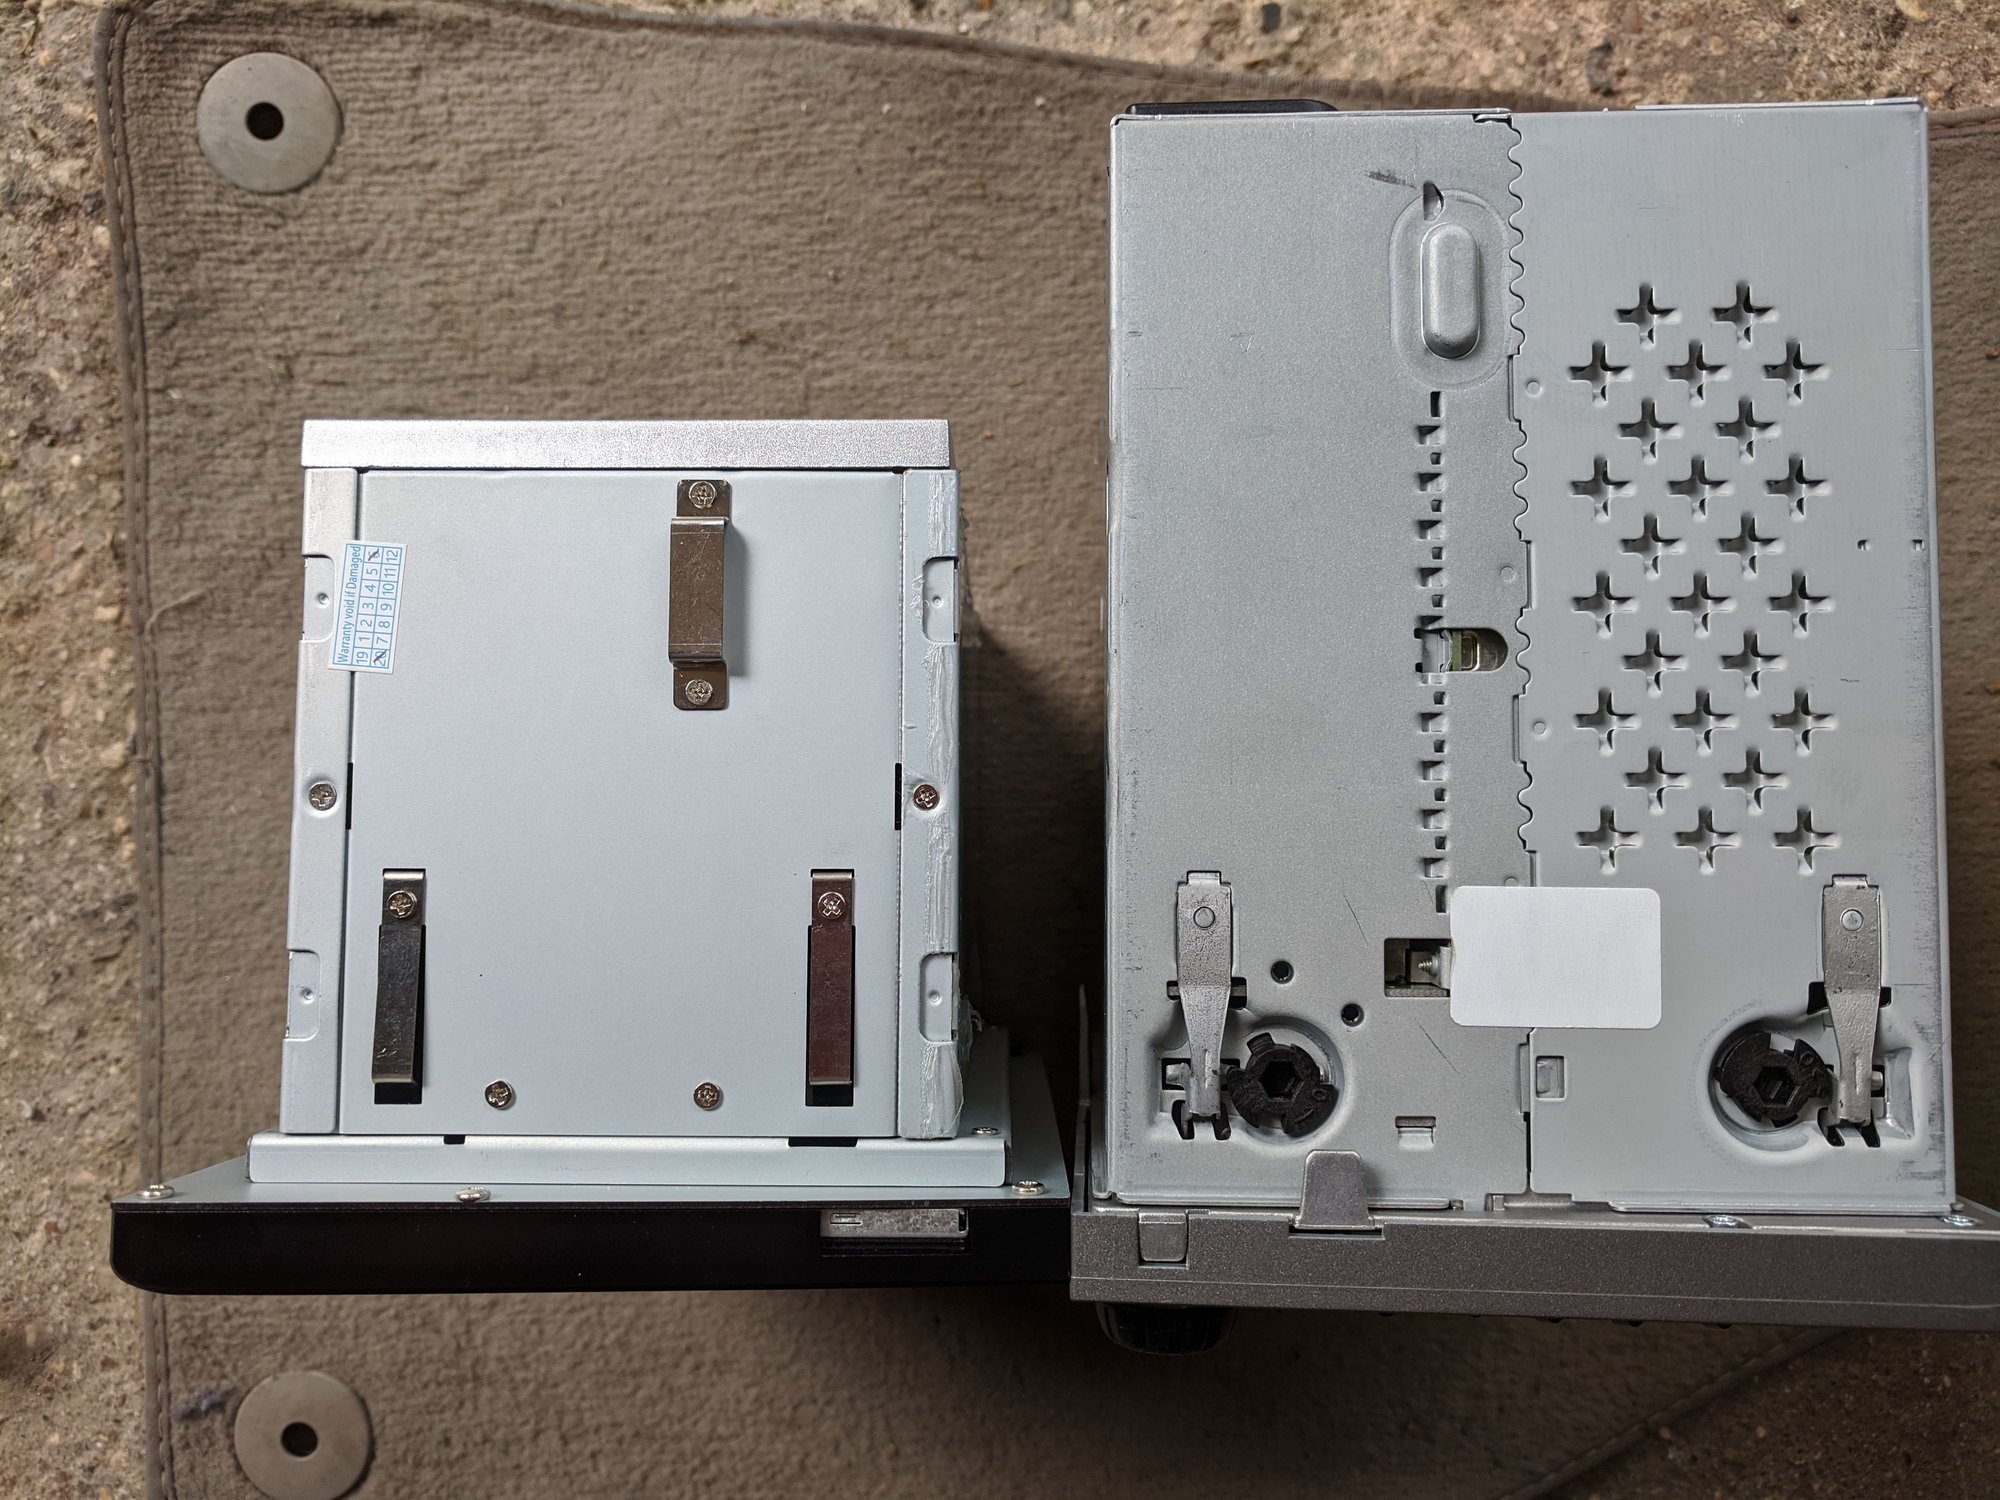
This may help future installers with the problem of poor fit of the PX6 into the aperture left by the PMC 2.1
Comparing the two units
Size difference side by side shows where the rear support of the PCM (the raised, rounded, rectangular piece) is compared to the PX6 (raised, shaped strip)
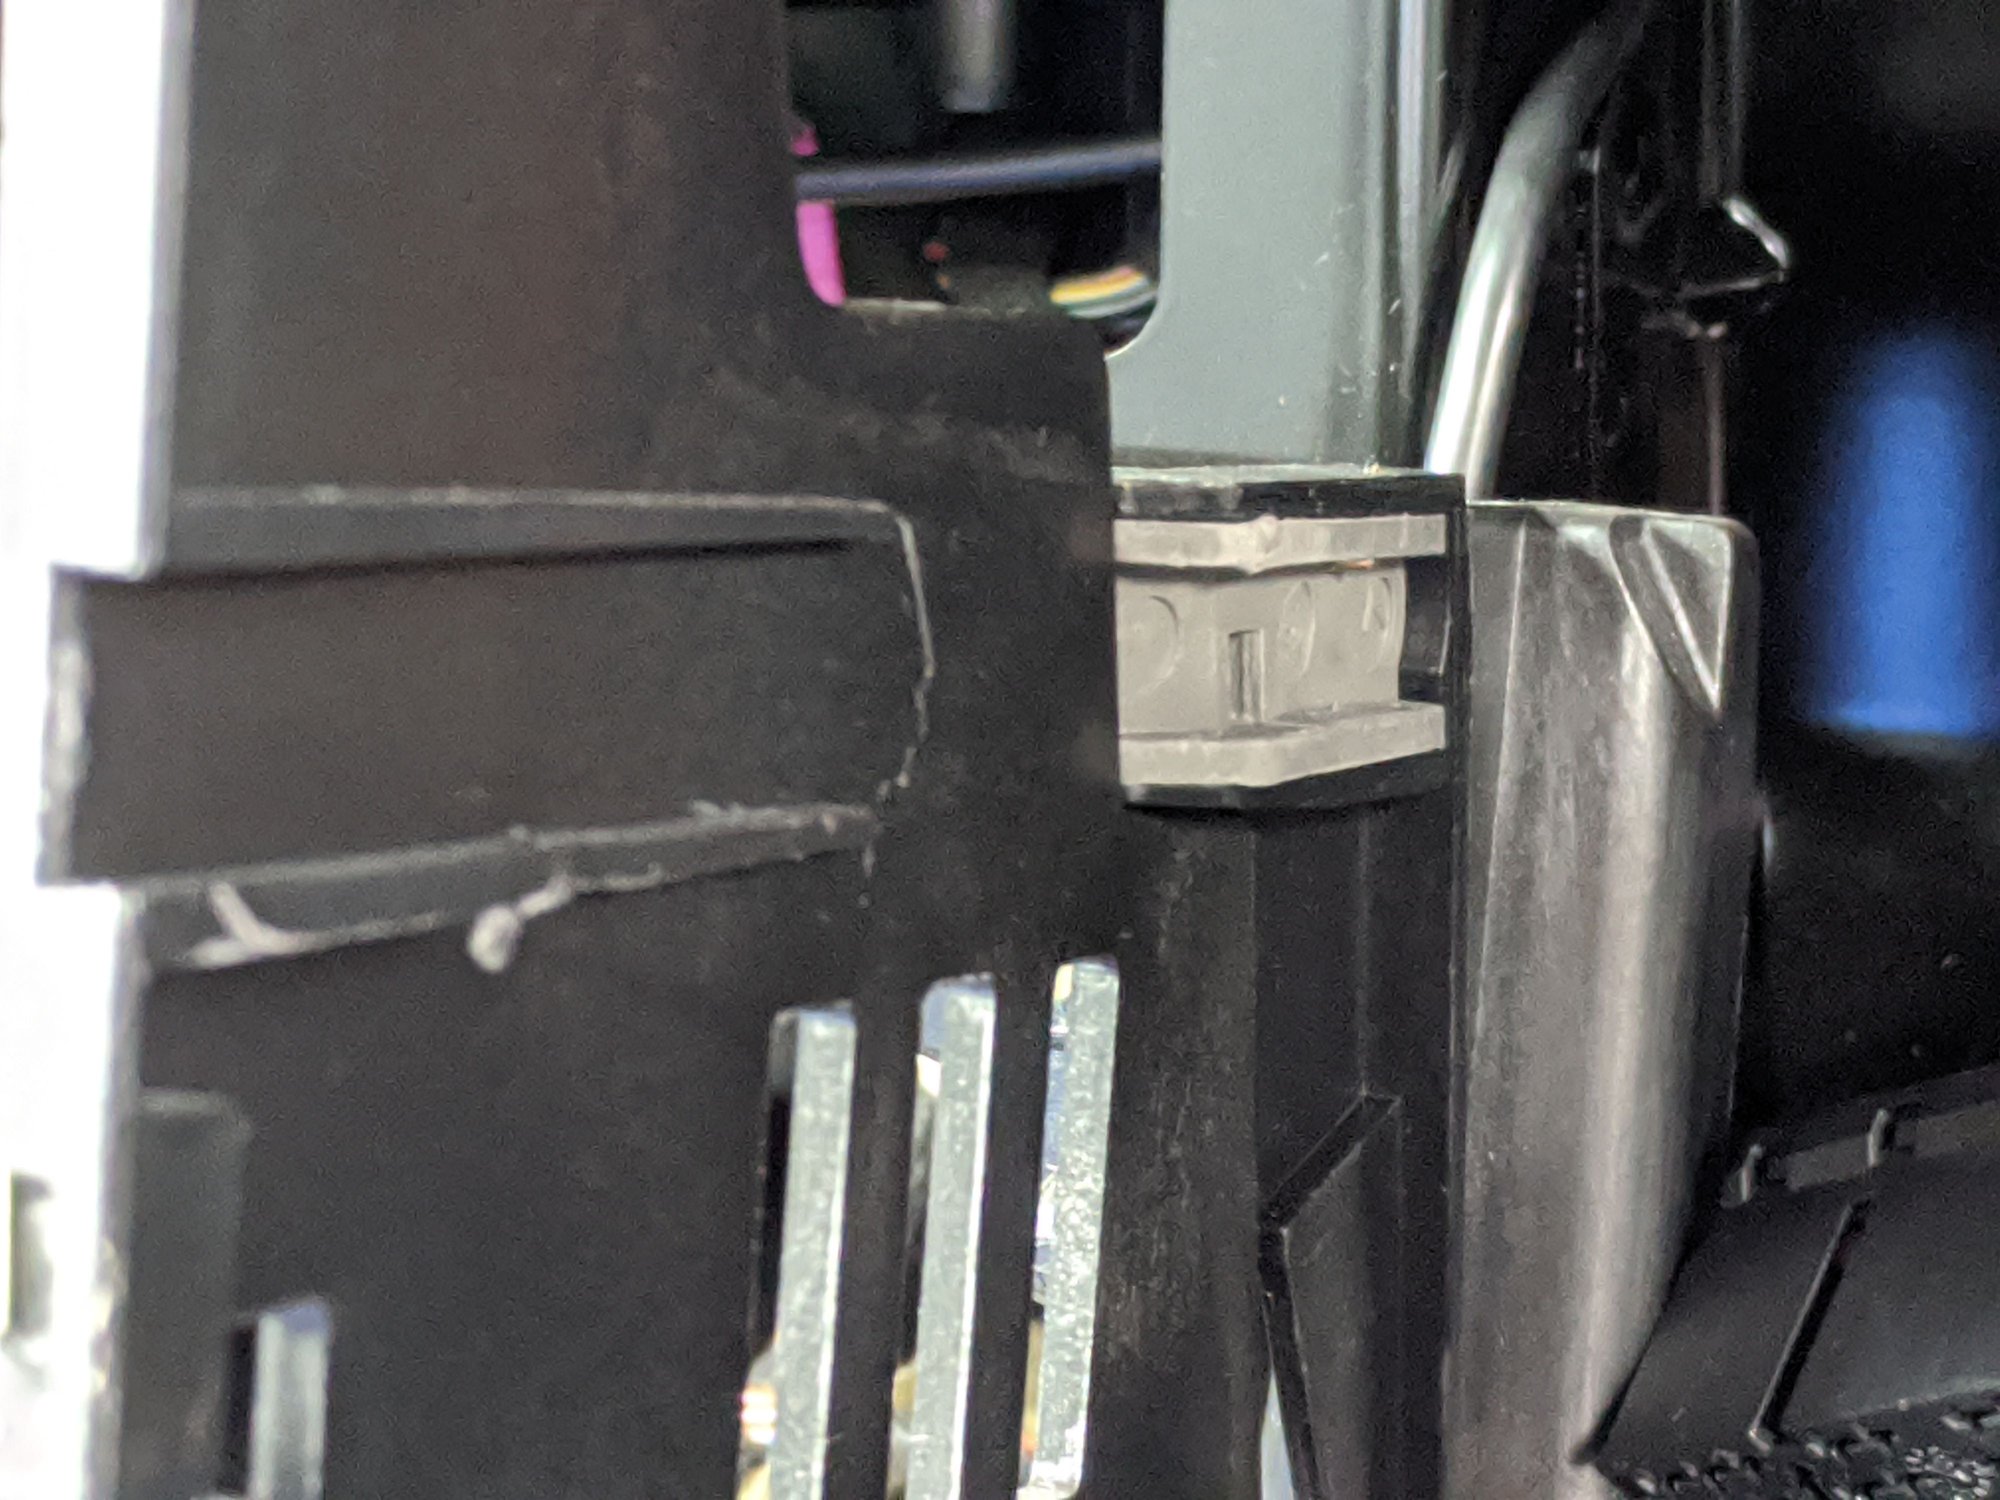
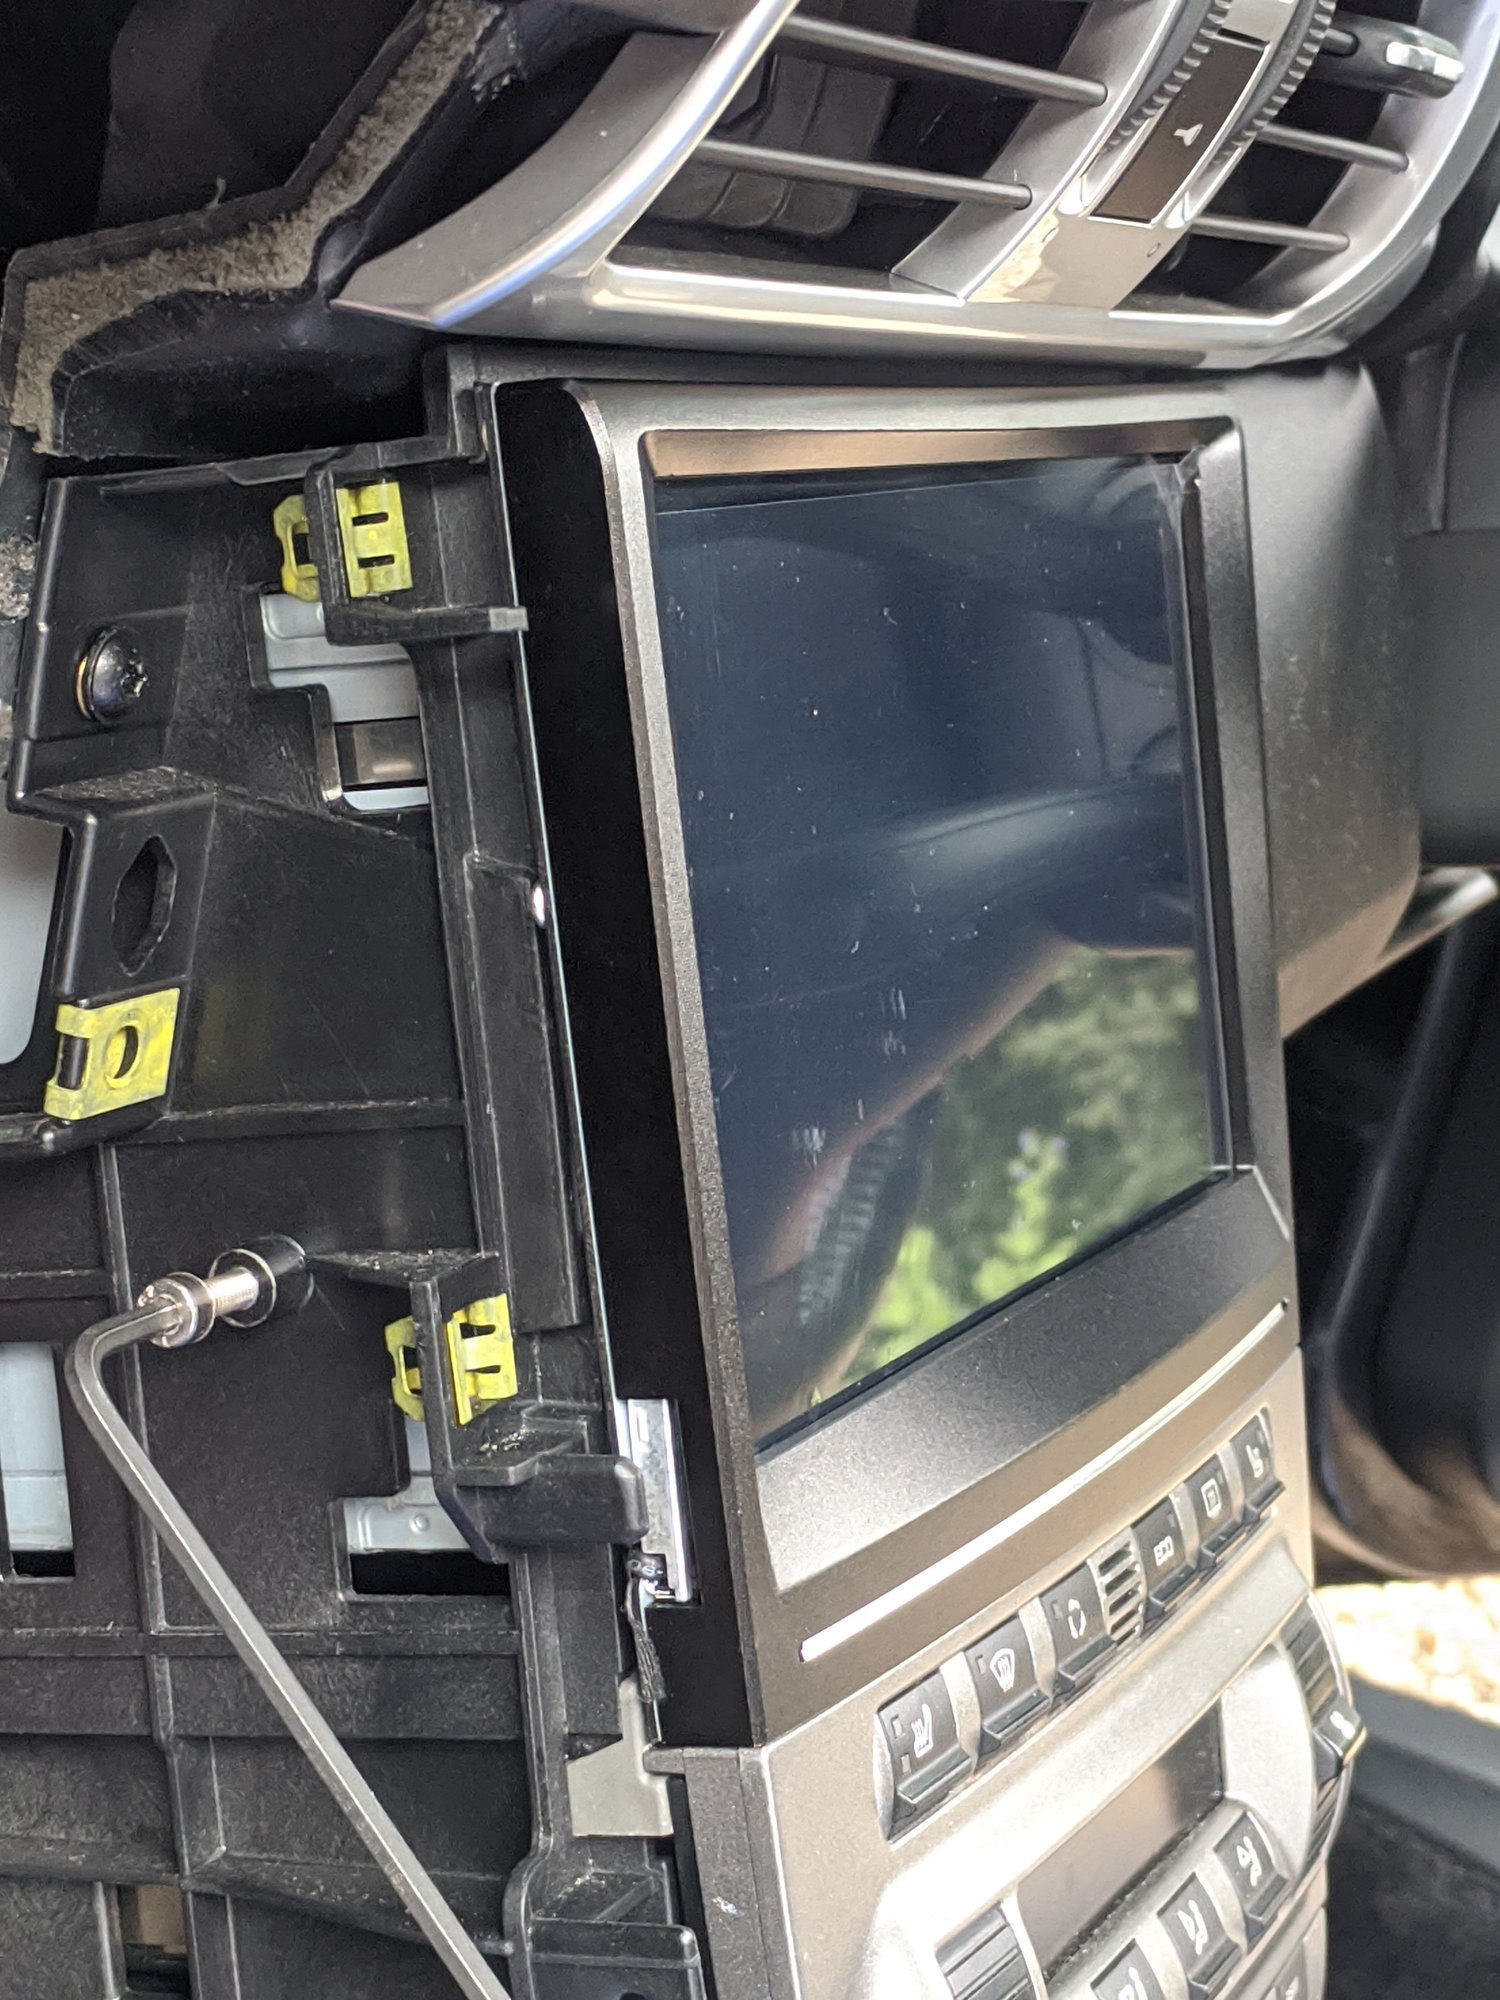
This shows the guide and support channels in the aperture for the PCM2.1 the grey channel to the rear is the final locating point and supports the rear of the PCM. The PX6 rear supports end in the plain area before the grey channel and so allows the back of the unit to drop under its own weight.
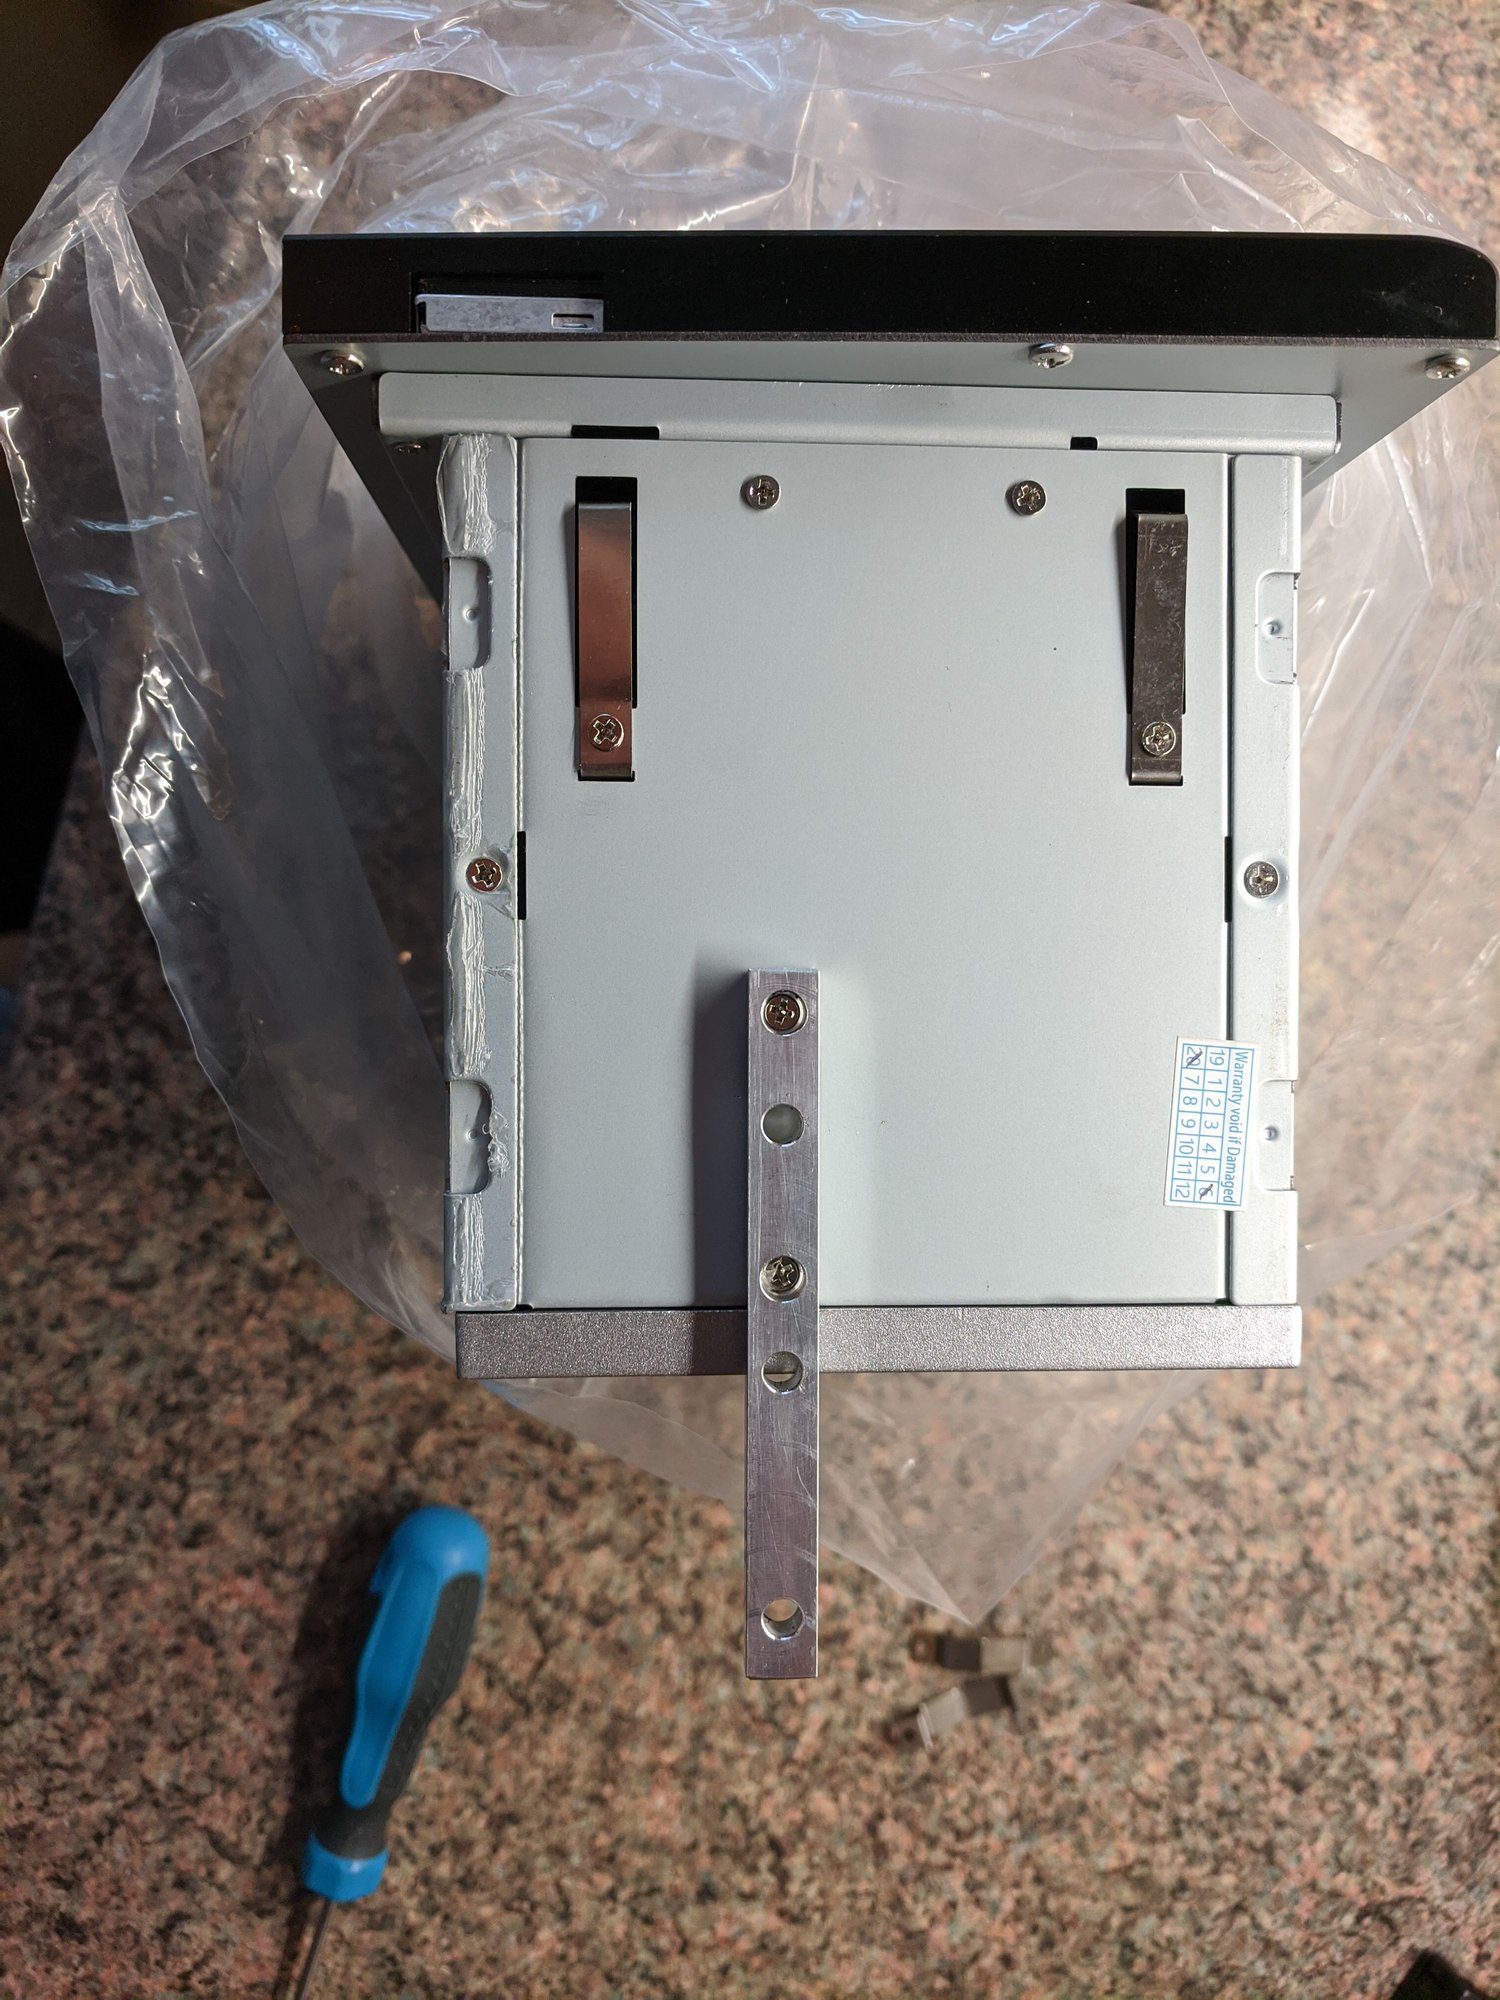
So I had a couple of aluminium pieces made to extend into the grooves and support the unit. These are held in place using the M2.5 c/sunk screws and replace the bent brackets. Dimensions are 8mm wide x 5 mm deep x 70mm long. The centre of the first fixing hole is positioned 5mm from the front edge. The second hole centre is 30mm from the first hole centre. The holes are 2.5mm through then countersink is taken to within 0.5mm of the bottom far enough to allow each screw to protrude say 4mm
The ali extenders hold the PX6 firmly in the guide slots and allow setting up and testing without having the unit trying to fall out and cause damage.
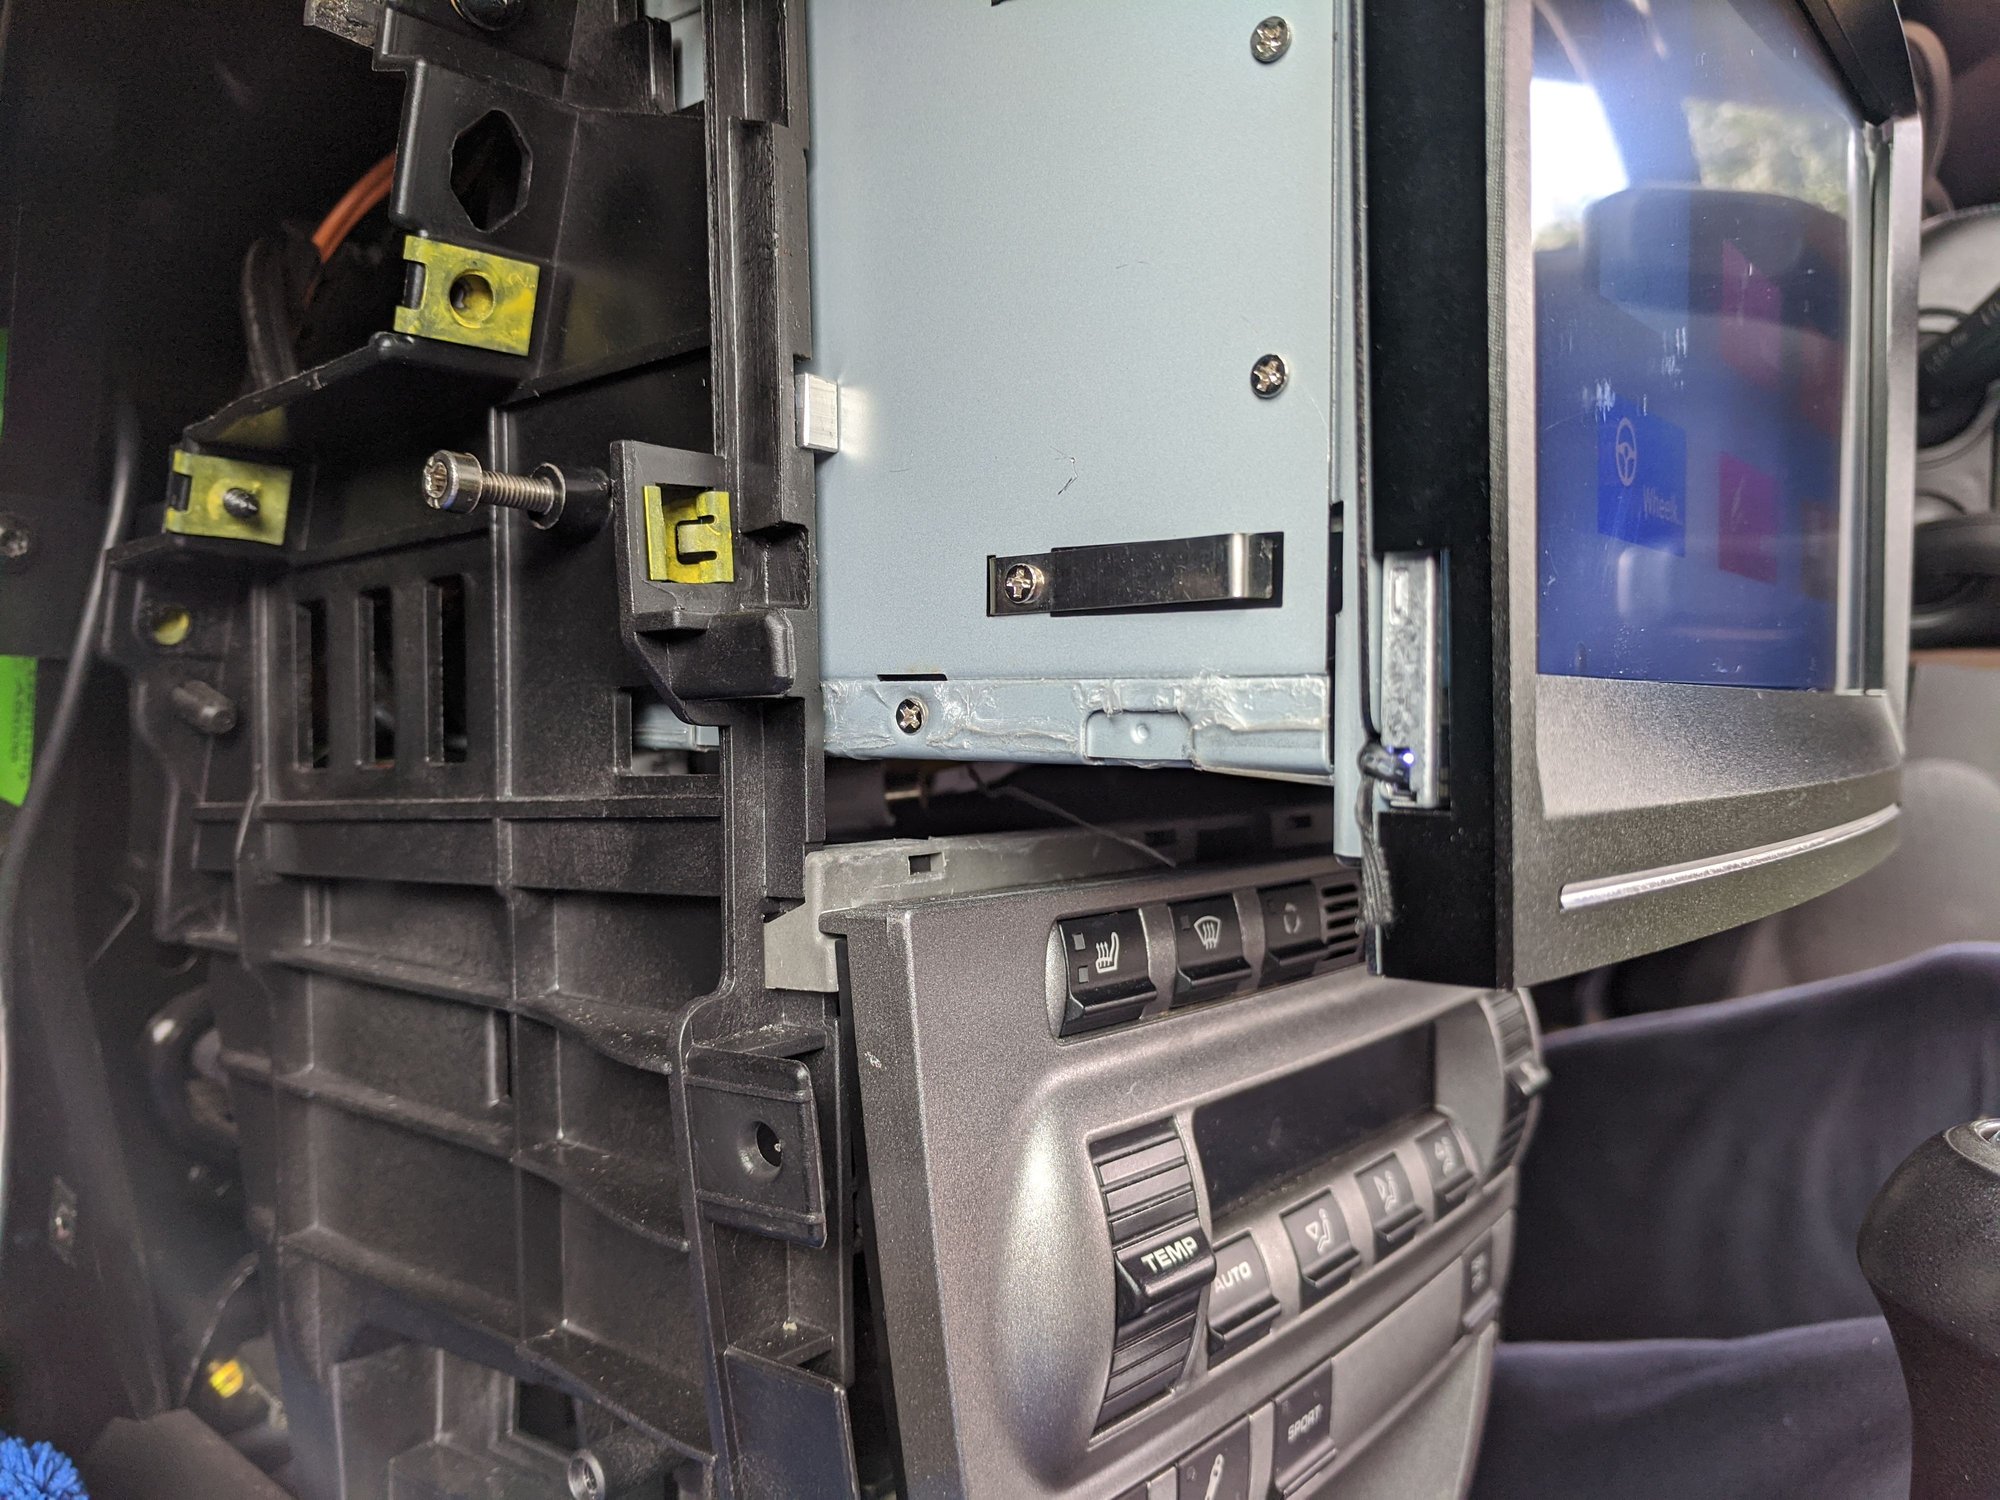
This is the PX6 pushed fully home and held by only the ali extenders. It fits so snug, it doesn't really need any other fixing. Ignore the allen screw, it's doing nothing.
I fixed all my previous issues except the alternator whine. It ONLY happens during use of the FM radio, not when I use Bluetooth, Spotify, etc - - any leads on what this could be? Thanks!
This may help future installers with the problem of poor fit of the PX6 into the aperture left by the PMC 2.1
Comparing the two units
Size difference side by side shows where the rear support of the PCM (the raised, rounded, rectangular piece) is compared to the PX6 (raised, shaped strip)
This shows the guide and support channels in the aperture for the PCM2.1 the grey channel to the rear is the final locating point and supports the rear of the PCM. The PX6 rear supports end in the plain area before the grey channel and so allows the back of the unit to drop under its own weight.
So I had a couple of aluminium pieces made to extend into the grooves and support the unit. These are held in place using the M2.5 c/sunk screws and replace the bent brackets. Dimensions are 8mm wide x 5 mm deep x 70mm long. The centre of the first fixing hole is positioned 5mm from the front edge. The second hole centre is 30mm from the first hole centre. The holes are 2.5mm through then countersink is taken to within 0.5mm of the bottom far enough to allow each screw to protrude say 4mm
The ali extenders hold the PX6 firmly in the guide slots and allow setting up and testing without having the unit trying to fall out and cause damage.
This is the PX6 pushed fully home and held by only the ali extenders. It fits so snug, it doesn't really need any other fixing. Ignore the allen screw, it's doing nothing.

 07-06-2020, 05:30 PM


 .
.