When you click on links to various merchants on this site and make a purchase, this can result in this site earning a commission. Affiliate programs and affiliations include, but are not limited to, the eBay Partner Network.
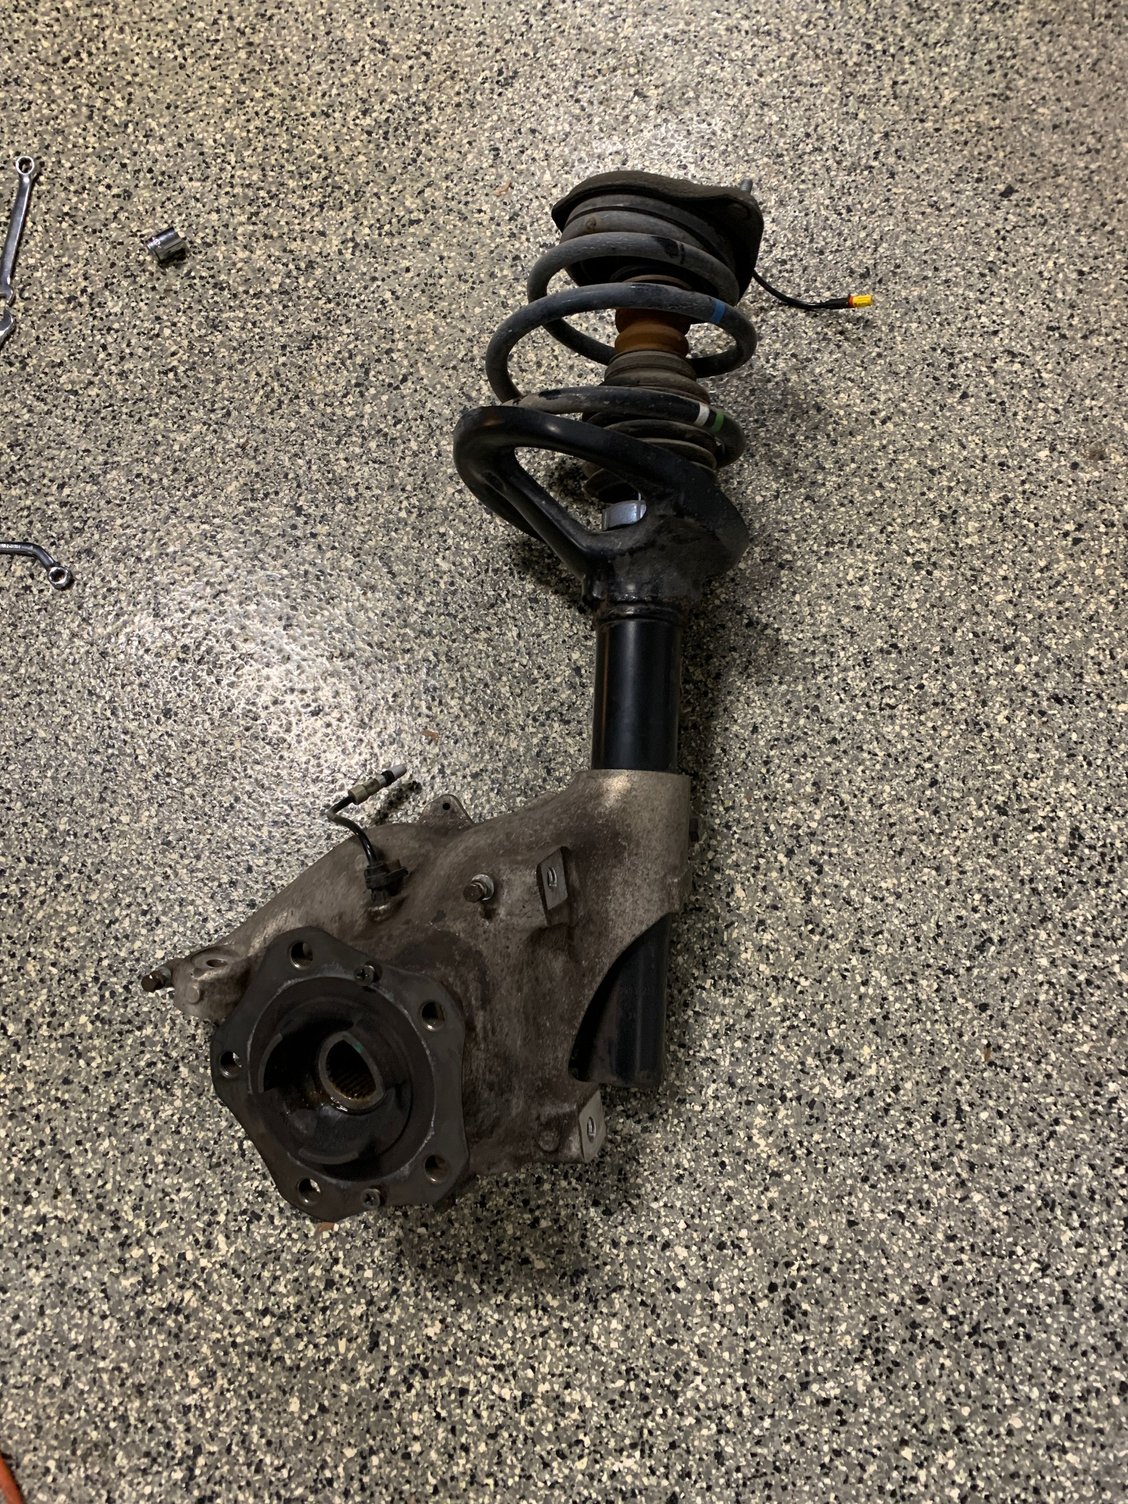
Very straight forward job. I would recommend to remove the entire front assembly. Very easy to do (even on turbo/4), and makes everything so simple.
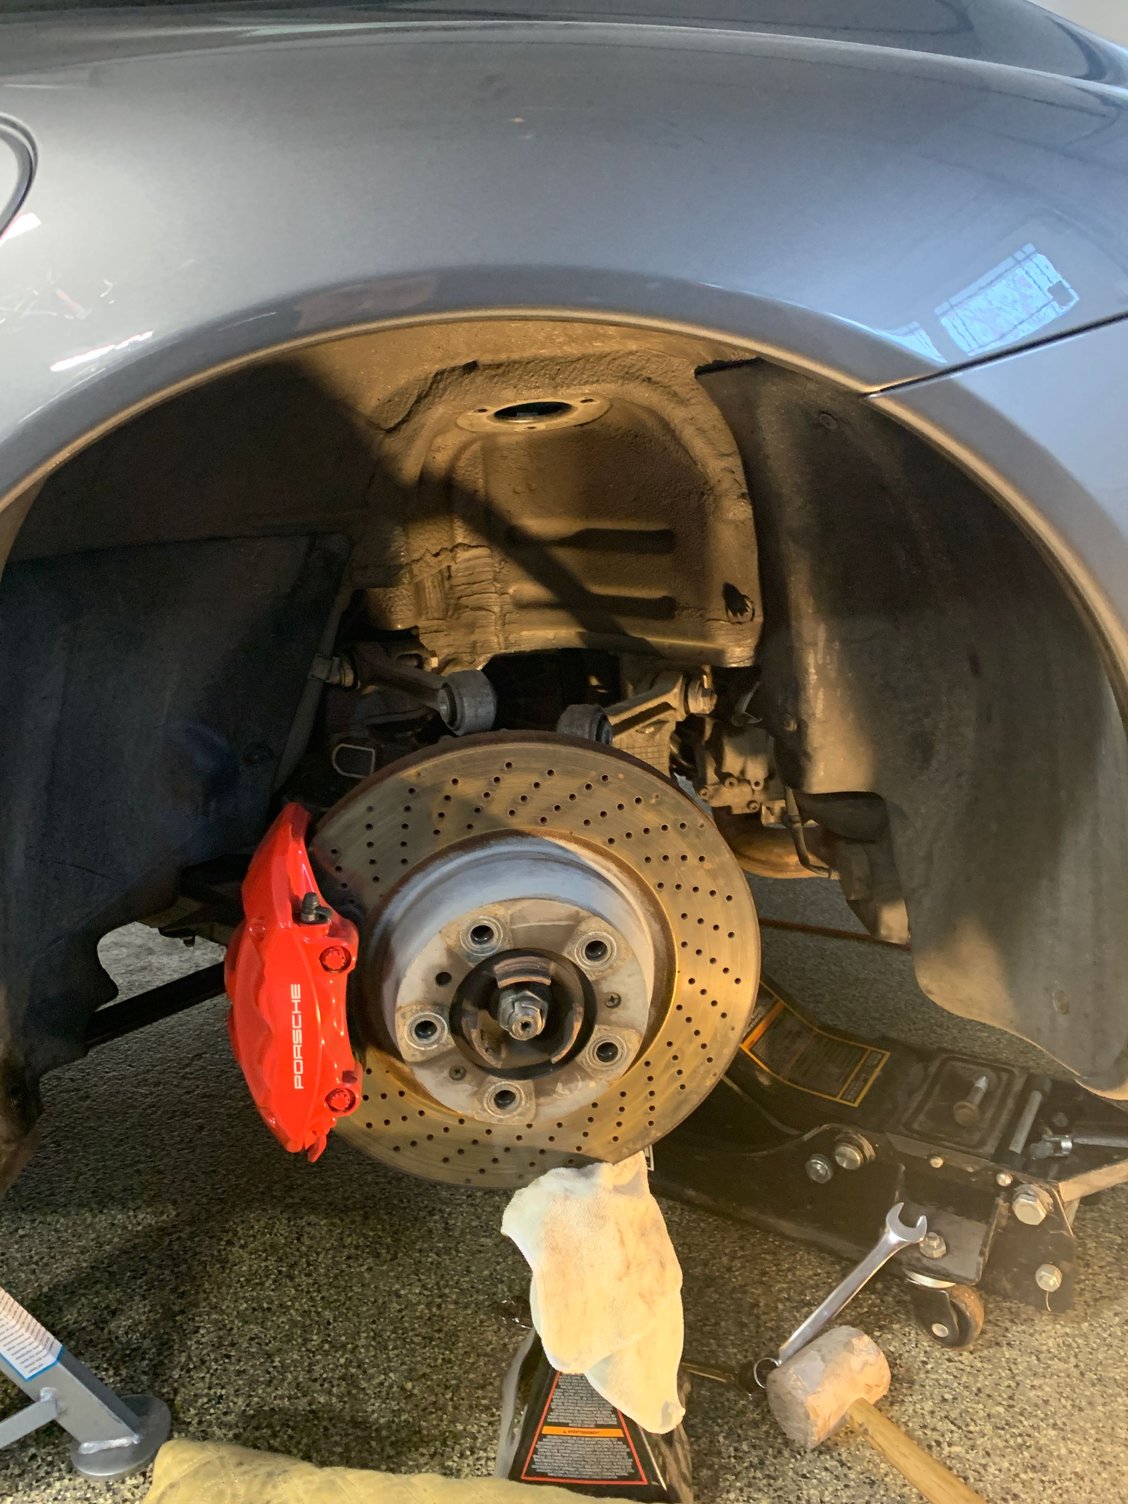
Followed the technical manual, except for removed the lower control arm at the body instead of the wheel carrier. Also removed shield and brake disc. Much simpler.
Rear is straight forward also. I removed the entire sway bar, with drop links (which I disconnected at strut mount) then remove the two upper stabilizers at
wheel carrier. Also remove the lower arm at wheel carrier. Very straight forward. Hardest part is working inside the rear of the car. This almost makes it harder then fronts....
B8 Damptronic/Eibach springs/new upper mounts and bearings/7 mm and 15mm spacers.
Very straight forward job. I would recommend to remove the entire front assembly. Very easy to do (even on turbo/4), and makes everything so simple.
Followed the technical manual, except for removed the lower control arm at the body instead of the wheel carrier. Also removed shield and brake disc. Much simpler.
Rear is straight forward also. I removed the entire sway bar, with drop links (which I disconnected at strut mount) then remove the two upper stabilizers at
wheel carrier. Also remove the lower arm at wheel carrier. Very straight forward. Hardest part is working inside the rear of the car. This almost makes it harder then fronts....
B8 Damptronic/Eibach springs/new upper mounts and bearings/7 mm and 15mm spacers.
very nice! I am planning on tackling my Targa 4S soon. Looks like you went the axle bolt route, any issues with torquing it off/on? Where did you source the Bilsteins? Candian suppliers seem to vary considerably in price
very nice! I am planning on tackling my Targa 4S soon. Looks like you went the axle bolt route, any issues with torquing it off/on? Where did you source the Bilsteins? Candian suppliers seem to vary considerably in price
I actually ended up redoing my suspension, replacing the H&R Springs with Bilstein B16s. This time I used the above method and removed it at the wheel carrier and not the axle shaft. Outside of having to get a 3/4 breaker bar, torque wrench, and socket, it was a whole lot easier. breaking the 340ft/lb nut wasn't hard with a 48" breaker bar.
I'd see if someone has centerlocks near you that you can use their torque wrench for this, but otherwise, this is a much quicker way to do it,certainly on a AWD, but I bet on any of them.
very nice! I am planning on tackling my Targa 4S soon. Looks like you went the axle bolt route, any issues with torquing it off/on? Where did you source the Bilsteins? Candian suppliers seem to vary considerably in price
No issues at all with removing the axle nut or re-installing. The only thing you need to be careful of is that the shaft can come out from the differential housing. It does not require much force...if it comes out, you just push it back in.
It is basically just pressed in.
I got the B8s from Sumit Racing. They had them in stock. Price was not bad.
OK, I used a strap wrench around the top collar and just a 19 mm open end to do it. Struts back in car and tomorrow AM anti sway bar w new bushing and drop links.
I'm replacing my front strut mount today using the method from Dan Tsuchiya. Looks sooo much smarter and faster than my original approach. Anybody done this? Any tips and torque values?
Ohh ****. Dan's method ^ is soooooo much better. You can swap out a front strut mount in under an hour - start to finish. No need to remove the brake caliper, no need for spring compressors, no death grip trying to get the strut under the wheel well without destroying the paint. It literally falls right out. @dekek zoolander had suggested the same in the comments but I kinda figured If it was this easy...somebody would have done a better job writing it up
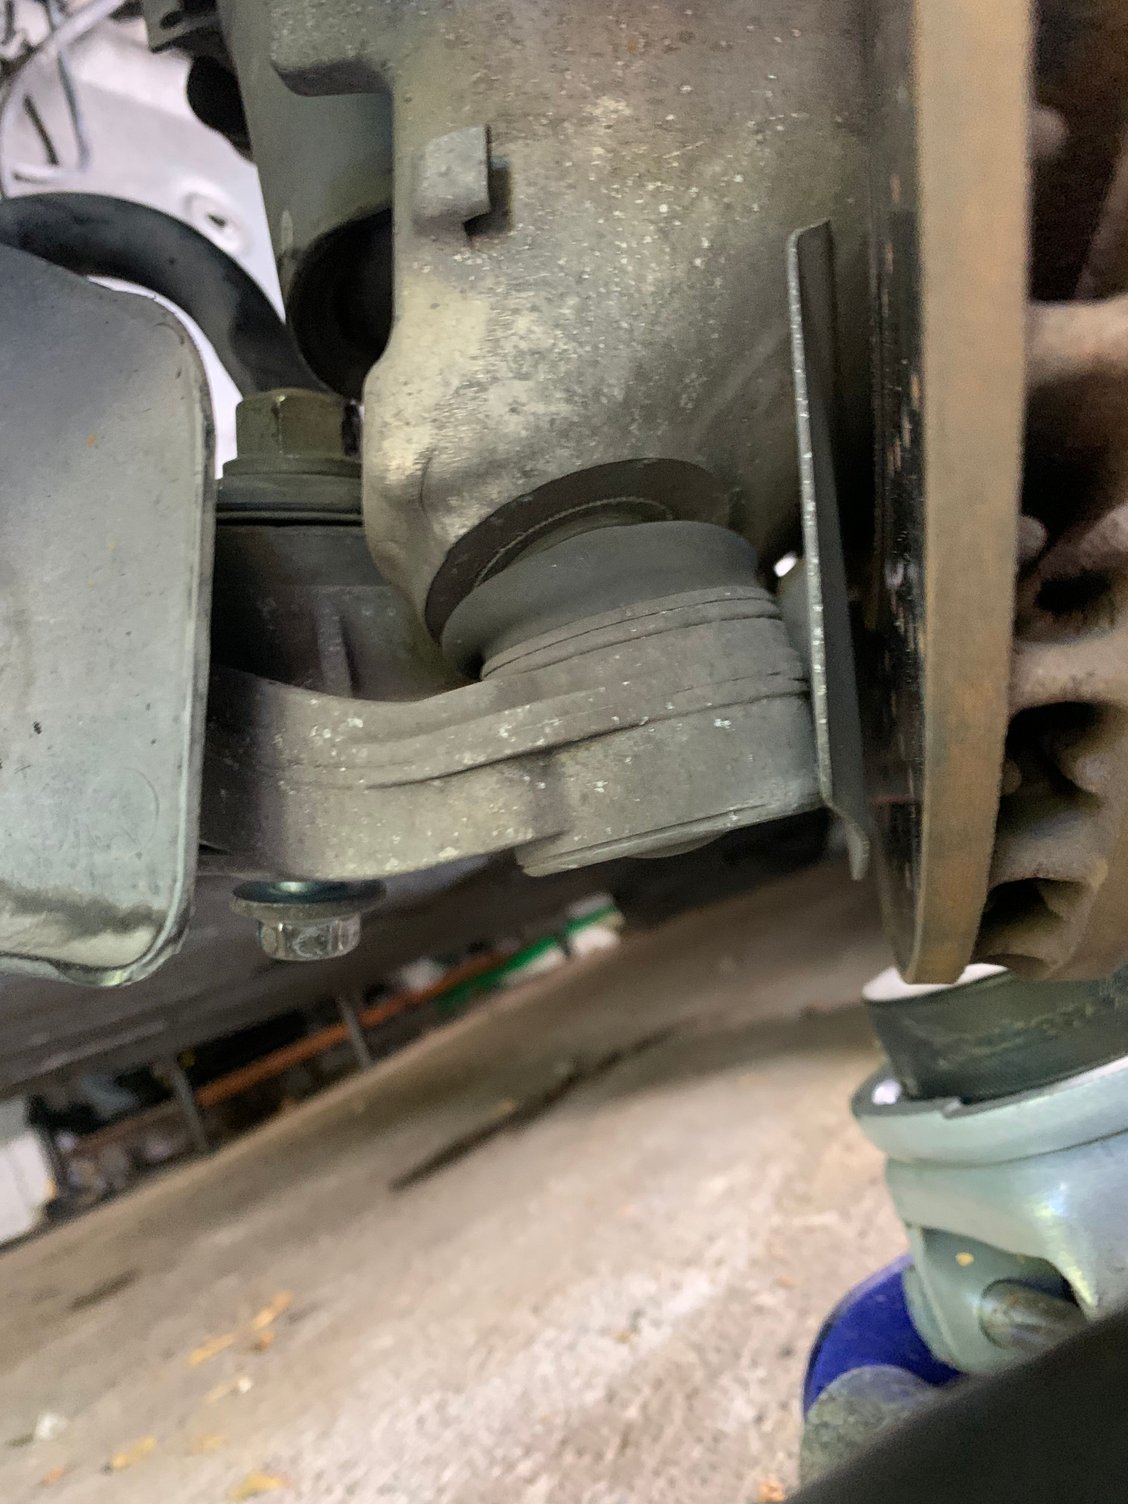
I will say they both left out a very important step. You not only need to loosen the 16m bolt from the control arm to the frame, but you also must loosen the bolt from the control arm to the wheel carrier. If you dont the bottom of the strut jams into the top of that bolt and wont let the arm go down any further. Loosen it a quarter inch - dont remove it - and it will give you the clearance to bring the strut down.
Loosen that bolt that much ^. You can see the bottom of the strut now has just enough clearance to not bind on it.
I will do a more detailed write on this but its dead simple:
1. Remove the bolt from the sway bar to the drop link.
2. Loosen the bolt holding the lower control arm to the subframe. 16mm on one side, 18mm on the other. Put a floor jack under the wheel carrier to hold it steady.
3. Loose the bolt holding the lower control arm to the wheel carrier
4. Remove the two screws holding the plastic underbody panel to the subframe. This will allow it to slide out of the way.
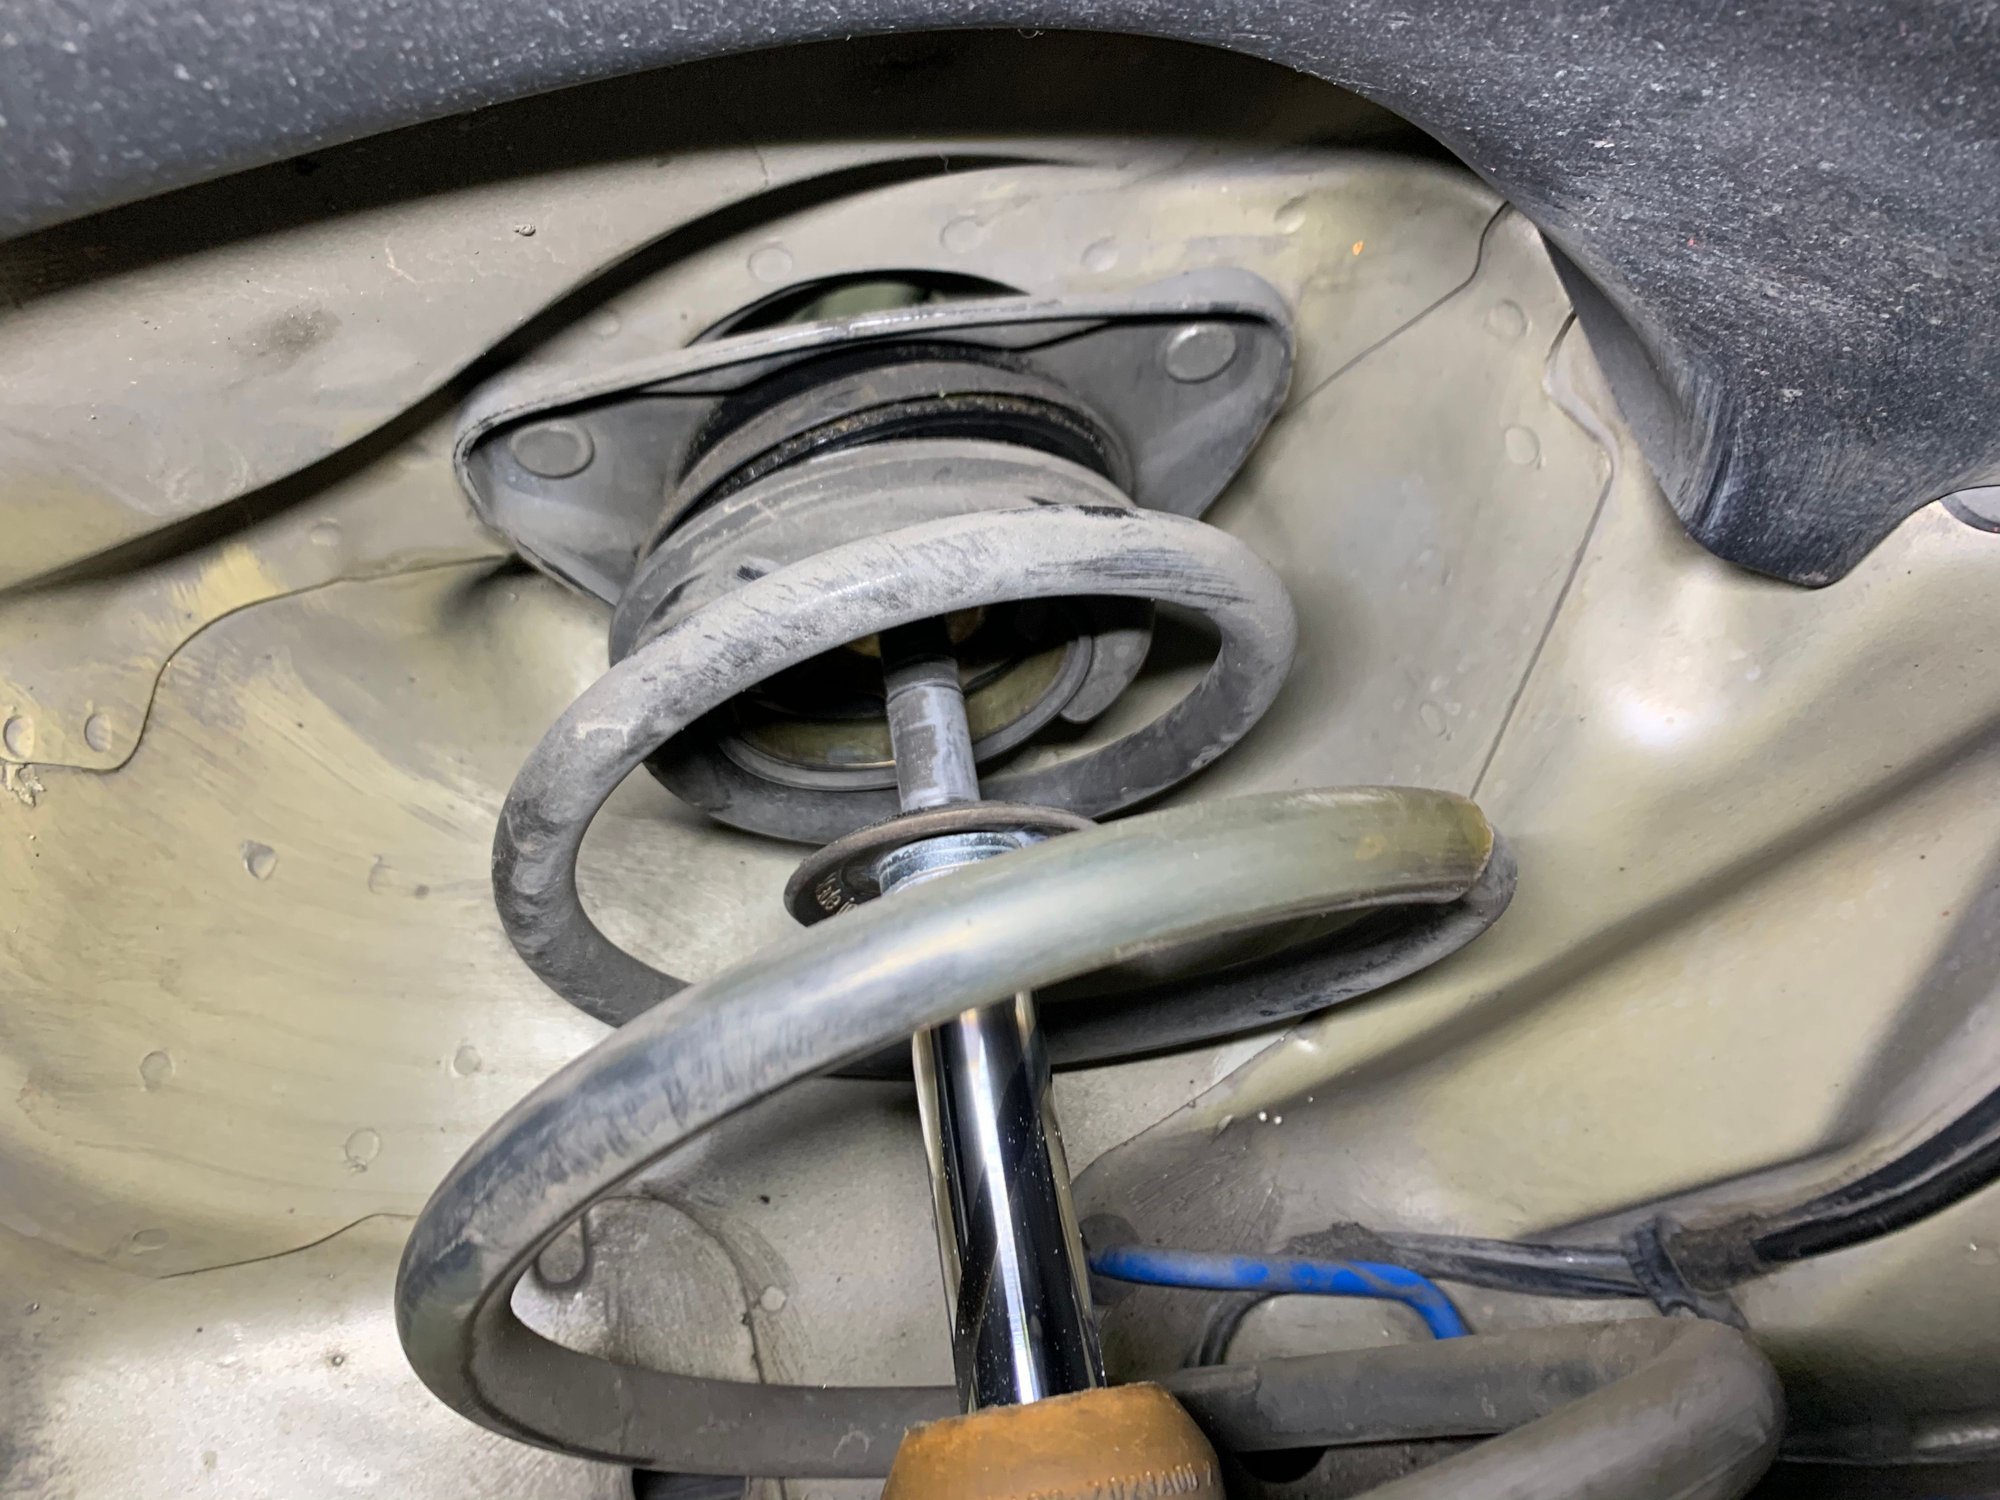
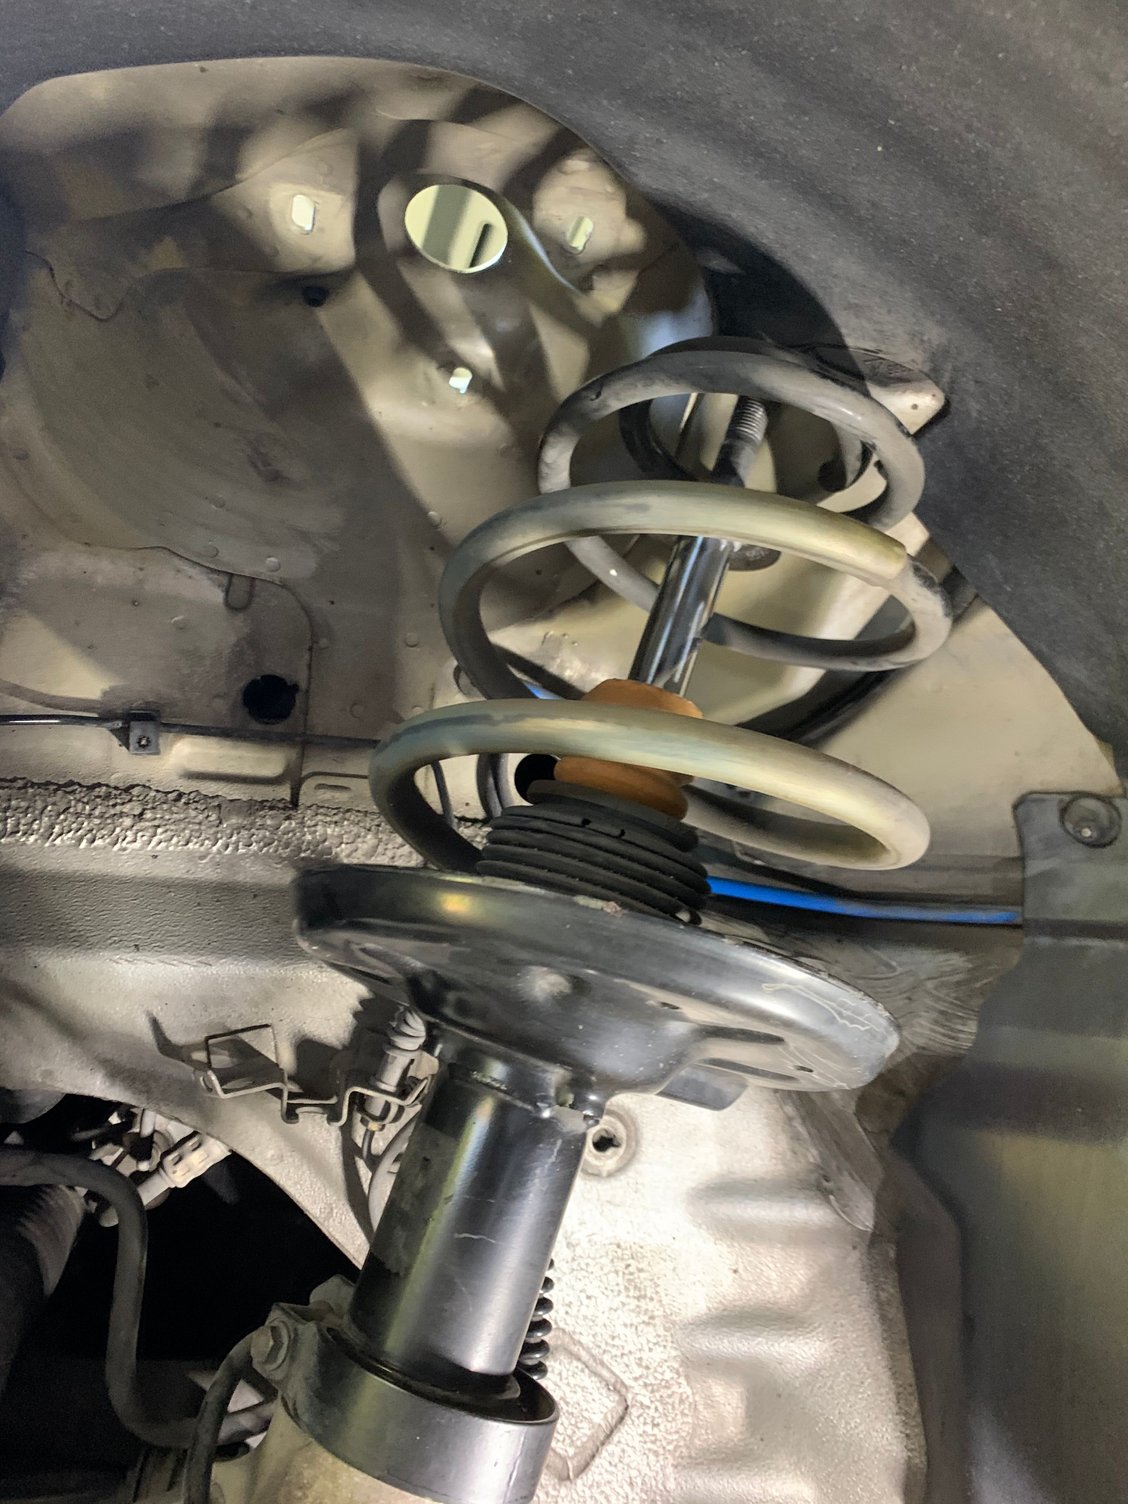
5. Remove the strut nut but leave the 3 strut mount bolts in place.
6. Drop the floor jack slowly and guide the strut rod out of the hole. Be sure to catch the cup washer and lower washer as it comes down.
7. Move the strut out of the way in the wheel arch. Now remove the 3 strut mount bolts and that will drop out easily.
Reinstall in reverse. You can literally do it under and hour. Amazing.
The only thing I would add is that during the reassembly I put the floor jack under the wheel assembly and lifted until the car just lifts off the jack stand, I then backed it down and tightened the lower control arm bolts. This allows me to simulate the car sitting on the ground. It seems to have worked pretty well. I will report back once the car is aligned and share any feedback from that.
The only thing I would add is that during the reassembly I put the floor jack under the wheel assembly and lifted until the car just lifts off the jack stand, I then backed it down and tightened the lower control arm bolts. This allows me to simulate the car sitting on the ground. It seems to have worked pretty well. I will report back once the car is aligned and share any feedback from that.
If you are loosening the LCA to wheel carrier bolt, is it still necessary to loosen the LCA to frame bolt? And, does the above approach allow you to swap the spring without using a spring compressor, since you could just use the jack to compress the spring on the car and attach the top nut?
@UnoMas yes, you are exactly correct. Forgot to add that step ^^ I eyeballed the correct compression but would be good if someone has the measurement.
A couple other notes:
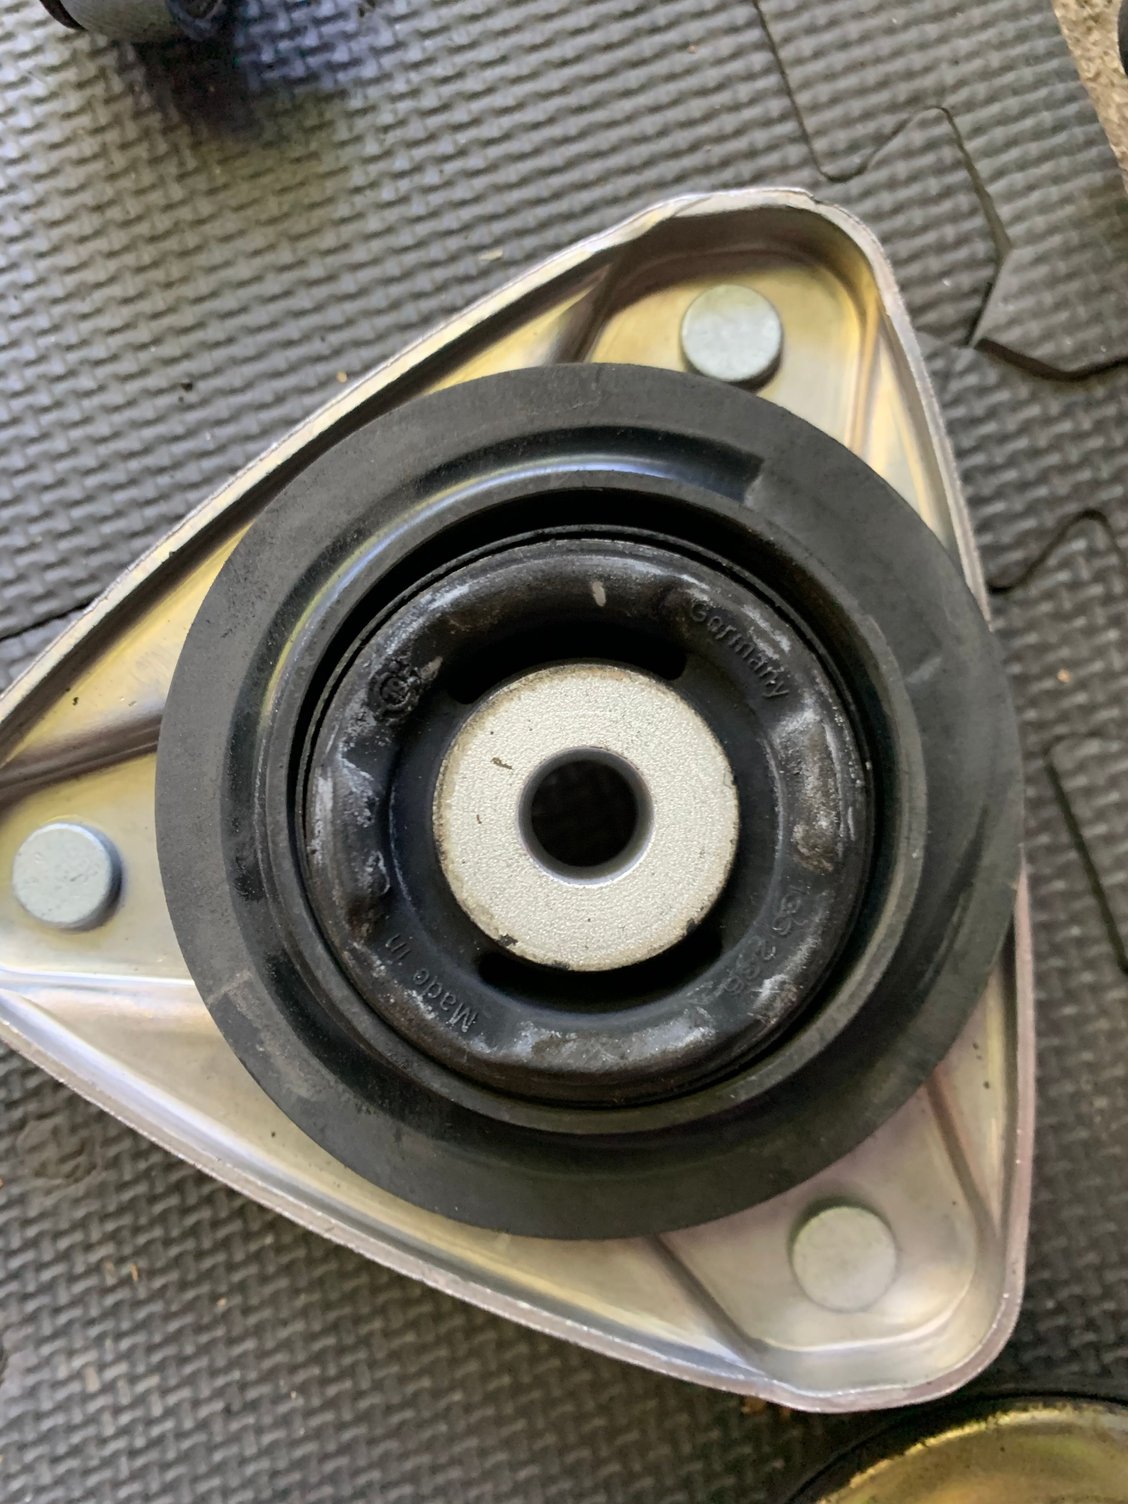
- if you replace the front "bearing housing" 996-343-515-05 that goes under the strut mount (where the spring seats) make sure you also get the new little rubber gasket that lays on it. I did not order a new one as I assumed my original was fine. It was...but the problem is the bearing housing has been updated and its a slightly smaller diameter than the original part. Therefore the rubber gasket is a bit too bit and wont sit firmly. I ended up re-using my original bearing housing and gasket. I just cleaned it up and bit and added some of the extra grease from the new bearing.
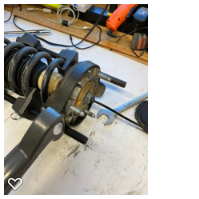
- one thing that concerns me about this method is the stress it puts on leading control arm ball joint at the subframe. Interested to get any feedback from the pros on this. See pic below.
Sorry, I meant to specify that I loosened the LCA to frame bolt, not at the wheel assembly. I did not have to use spring compressors to remove the assembly. I did stand on the new Eibachs to compress slightly and used large zip ties to keep it compressed while I reinstalled. When I finished I cut the zip ties. My Eibach springs were slightly taller than the original springs with no load. I had already removed my calipers and rotors as they were being replaced.
Hope that makes sense.
If you are loosening the LCA to wheel carrier bolt, is it still necessary to loosen the LCA to frame bolt? And, does the above approach allow you to swap the spring without using a spring compressor, since you could just use the jack to compress the spring on the car and attach the top nut?
Yes, you need to loose the LCA to frame bolt. Loosening the LCA to wheel carrier doesn't remove any tension on the LCA bushing, which is where the primary resistance is.
Yes, it allows you to remove/install the springs this way too. You have enough clearance into the wheel well to manipulate the springs out/in. Im not sure about removing the entire strut. But I think you can by just pivoting the carrier to point out of the wheel well.
And yes, you are correct. You just reassemble the strut in the wheel well - minus the strut mount. Slide that in and bolt in place. They guide the strut rod into it, compress the strut with the floor jack and tighten down the strut nut from the top.
One thing you can also do to get the closest alignment is torque the strut mount down before you put the strut back in. That will make it a bit easier to align.
Lastly...dont forget to slide your cup washer in above the strut mount. It will flop around a bit until you guide the strut rob back into it.

 03-14-2020, 10:46 PM