When you click on links to various merchants on this site and make a purchase, this can result in this site earning a commission. Affiliate programs and affiliations include, but are not limited to, the eBay Partner Network.
Busy day today - unfortunately not a ton on the fun car. Had not touched it since I got back from the track and spent the early morning trying to get some stuff accomplished. Air pressures back to street settings. Cleaned a TON of brake dust off the wheels, the DTC60 have noticeable wear after only 1 track hour. Made sure the oil level good and took it for a quick drive to listen for any noises - NONE - car actually drove and sounded great, go figure.
Got it up in the air and checked the wheel bearings and a general inspection - all looks in order. Got the trans fluid changed out and that was all she wrote for fun car time for the day.
Then it was on to 3 oil changes, 2 full brake jobs, hunting down and fixing a windshield washer nozzle malfunction and a general safety nut/bolt on 4 cars...
Big news of the day is the UAOS res drain to oil fill tube that Skip sent me showed up - I am super impressed, he picked some high grade parts and it looks very well engineered. If for any reason you have to take out your oil fill tube and you have a UAOS - Get this, there's no downside and it makes the entire system maint free - Glorious.
For me, its an engine saver, like the UAOS - the amount of oil I caught on track the other day is absurd, I don't think a stretch to say - it could have very well lead to a catastrophic engine failure. Now, it will save me from not only the oil ingestion, but from having to worry about a significant oil level drop due to blow by. So, I'll hopefully get it installed tomorrow and then on to the scavenge pumps and bypass plunger / spring.
Just got the UAOS drain back to the oil fill tube put in and I am STOKED with how it came out.
Mocked the hose to roughly where I wanted to run it to the fill tube. As directed, a little soapy water on the fitting and the grommet - put the fitting end in a vice and slid the grommet/fill tube in - its a tight fit so plan accordingly.
Then I just reinstalled the fill tube and ran the hose up to the UAOS res... As is a requirement - pulled the old drain plug with my drain fitting out and left the plastic threads in the UAOS res - can't have everything go smooth - this was totally as a result of my mod to add the catch can setup - not an issue with the drain plug if you don't remove 3/4 of its material.
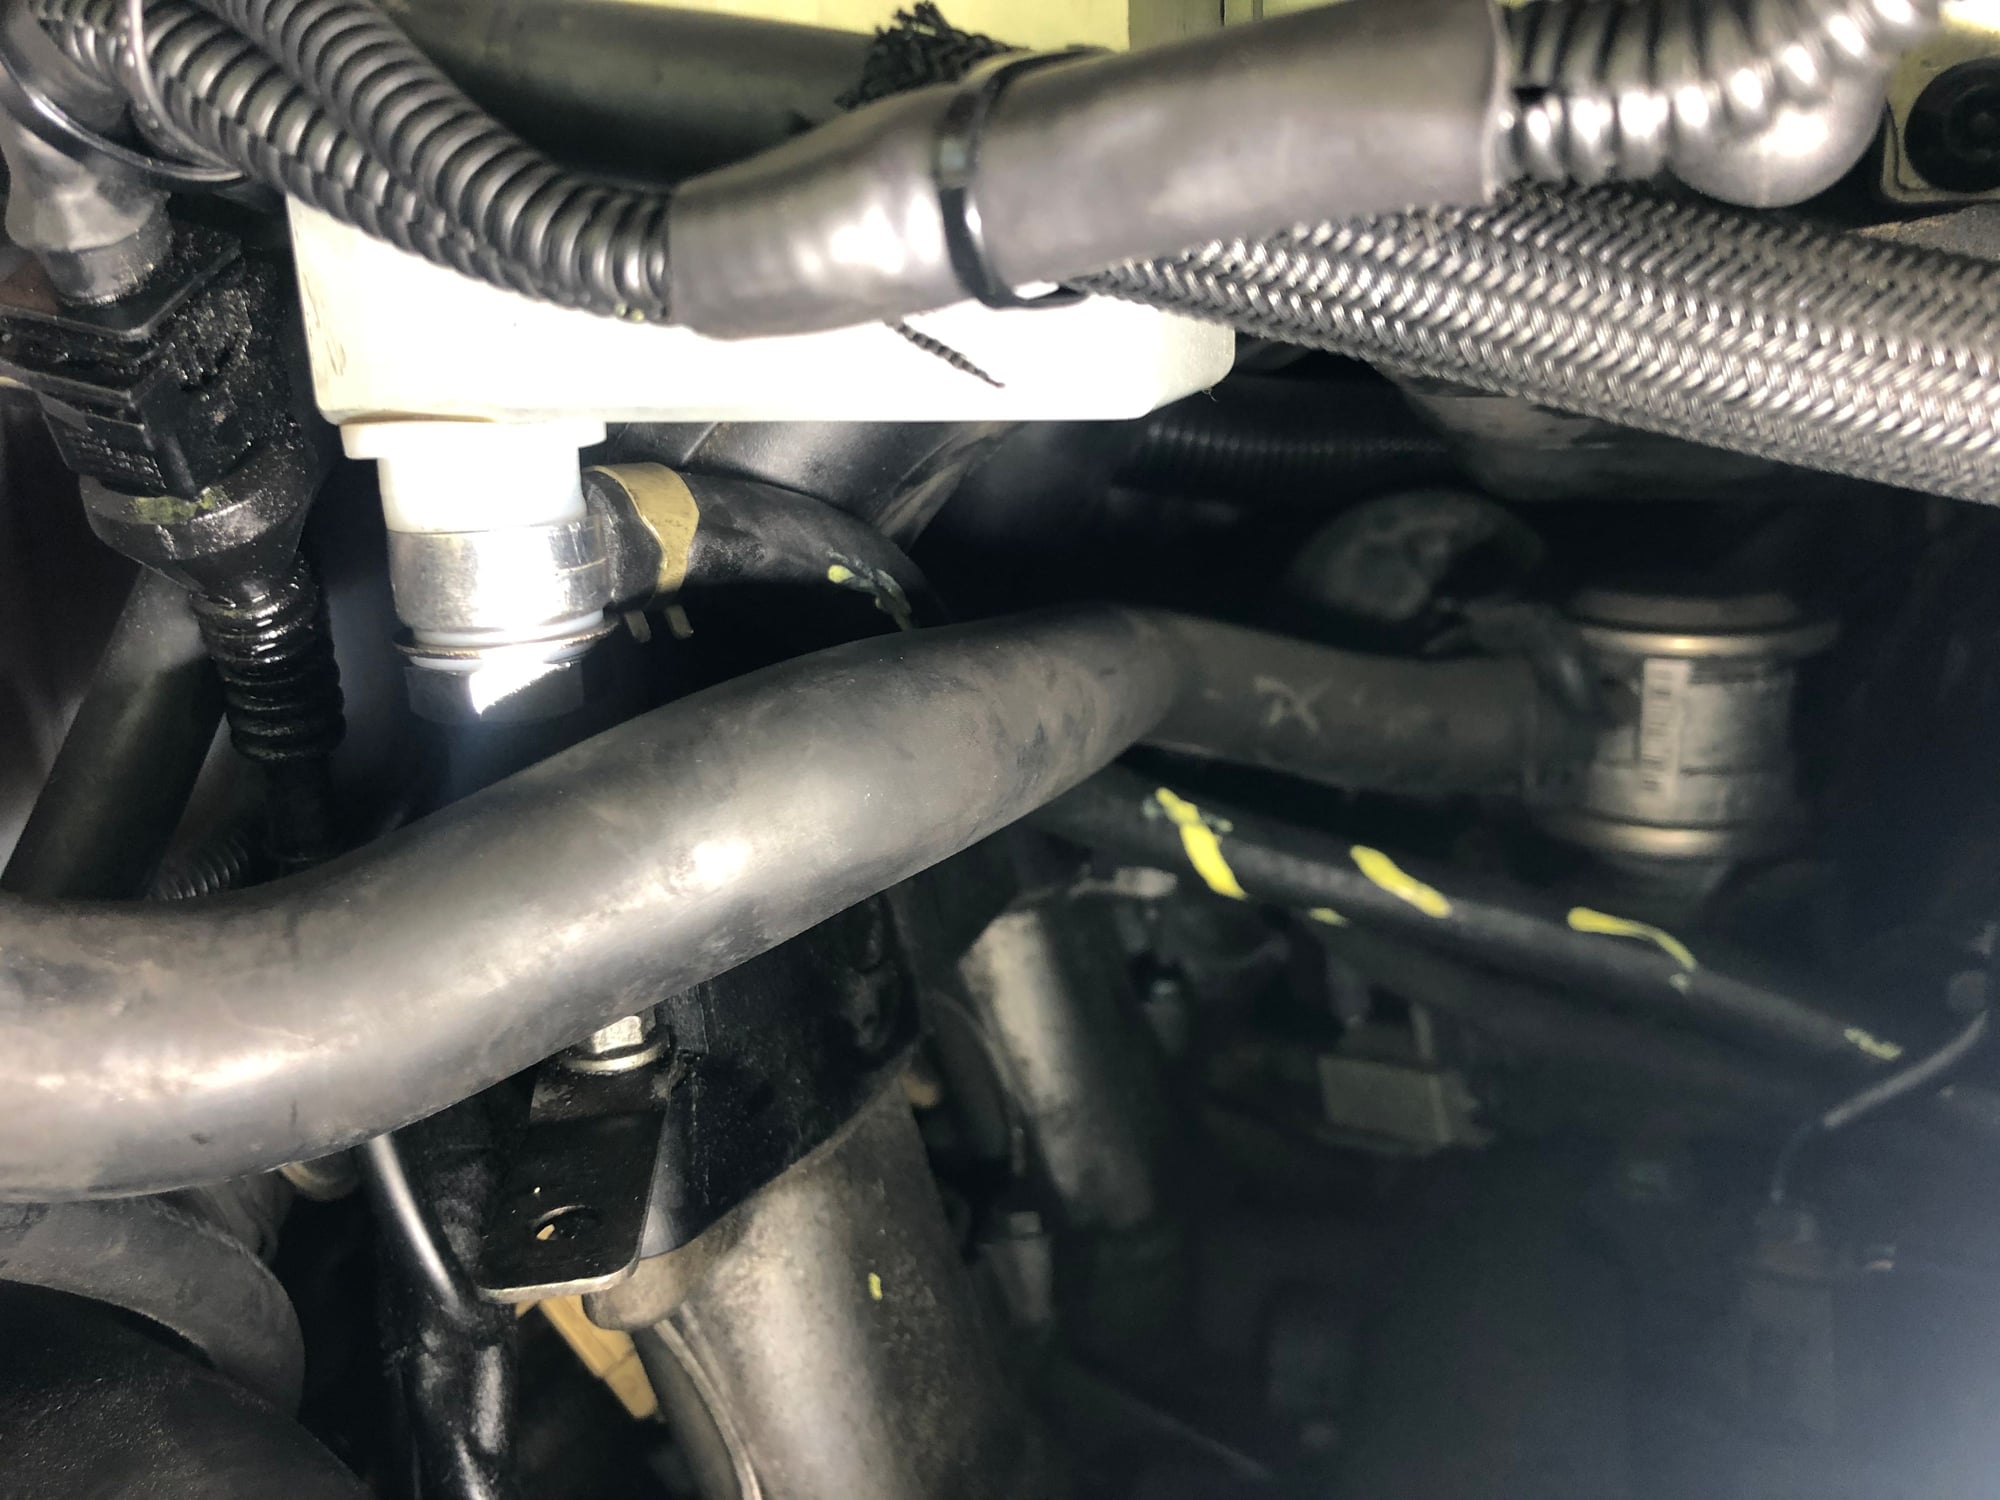
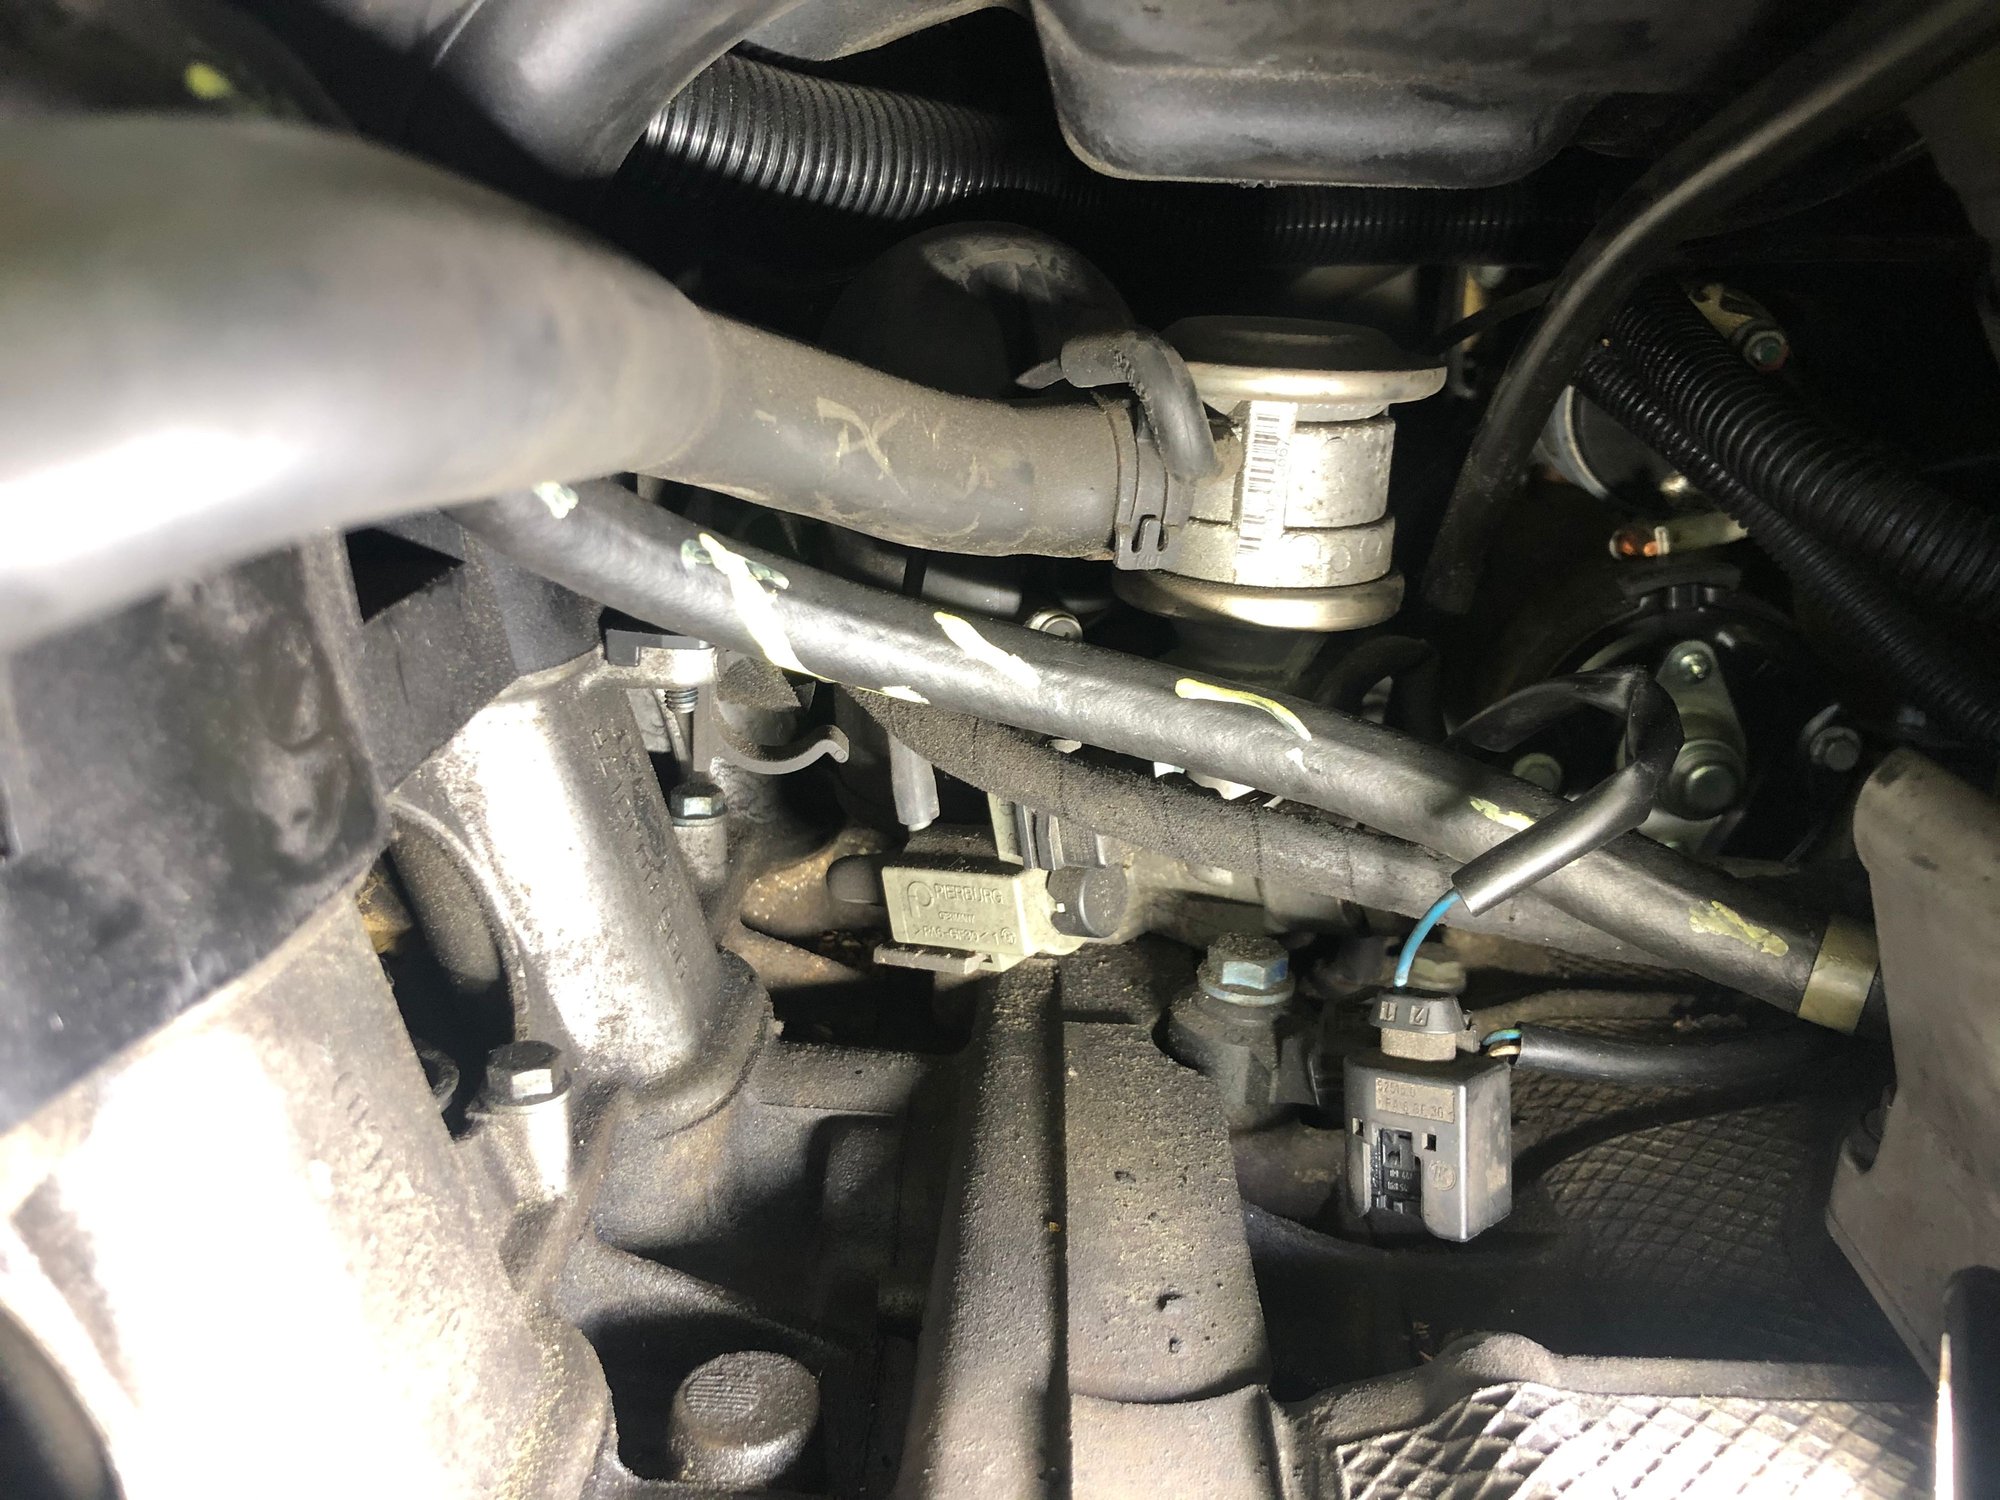
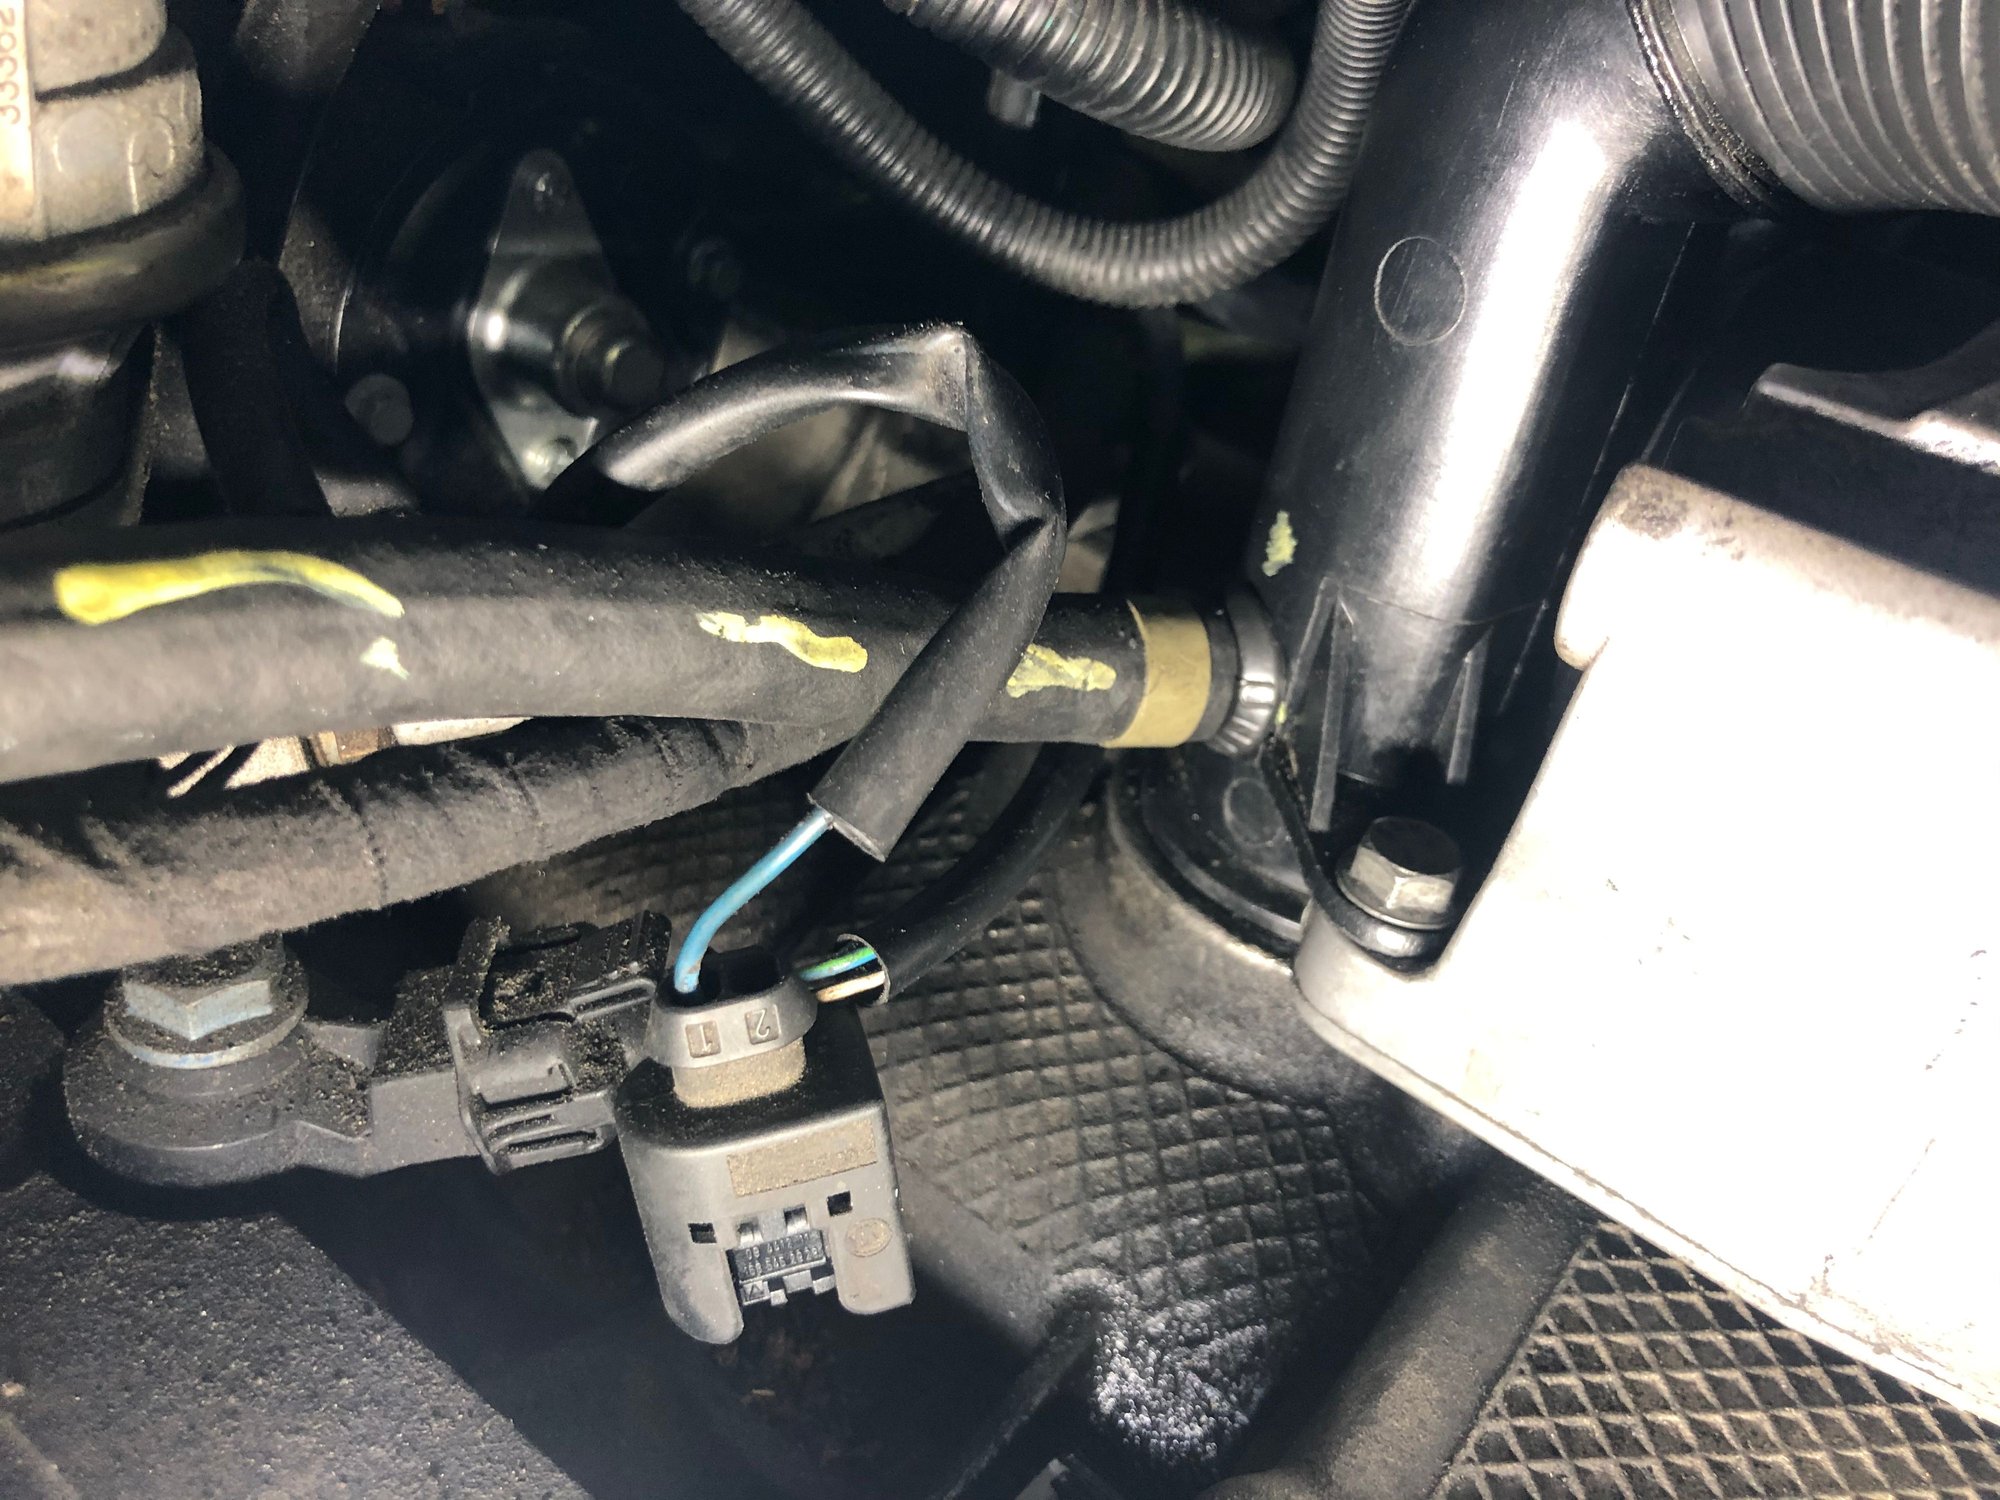
Then... Got the banjo on to the UAOS res and let me tell you, it's perfect. Nice gentle downward slope, no worries of interference with the alternator - STOKED. I added yellow lines to the new hose so you can tell it apart from the rest of the spaghetti back there.
Just got to get everything else back together... Easy. Well done Skip !!!
Just got the UAOS drain back to the oil fill tube put in and I am STOKED with how it came out.
Mocked the hose to roughly where I wanted to run it to the fill tube. As directed, a little soapy water on the fitting and the grommet - put the fitting end in a vice and slid the grommet/fill tube in - its a tight fit so plan accordingly.
Then I just reinstalled the fill tube and ran the hose up to the UAOS res... As is a requirement - pulled the old drain plug with my drain fitting out and left the plastic threads in the UAOS res - can't have everything go smooth - this was totally as a result of my mod to add the catch can setup - not an issue with the drain plug if you don't remove 3/4 of its material.
Then... Got the banjo on to the UAOS res and let me tell you, it's perfect. Nice gentle downward slope, no worries of interference with the alternator - STOKED. I added yellow lines to the new hose so you can tell it apart from the rest of the spaghetti back there.
Just got to get everything else back together... Easy. Well done Skip !!!
Thanks Glenn - got to say, with how clean it came out, the fact that it totally removes what would otherwise be a frequently bothersome issue and is so simple in design but executed so well with materials selection - its one of my favorite mods on the car - I LOVE removing headaches that just let me focus on the fun and this fits my style totally !
If you have a UAOS and need to remove the alternator for any reason, this install adds about an hour taking your time - totally worth it.
Nice and tight in there but looks like you have a pretty clean path to run that hose. What was the total install time? I noticed that after replacing the crossover hose after the UAOS install I could have both intakes out in under two hours easily if needed.
Nice and tight in there but looks like you have a pretty clean path to run that hose. What was the total install time? I noticed that after replacing the crossover hose after the UAOS install I could have both intakes out in under two hours easily if needed.
Never really keep track of install time but for estimate :
Remove airbox
Remove TB (I did, not require though)
Remove Serp belt from Alternator
Remove Alternator
Roughly place new UAOS drain hose to where you want it to go on fill tube and mark tube
Pull oil fill tube
Drill 1/2 in hole in fill tube, press in grommet and the accumulator drain hose
Reinstall oil fill tube
Remove UAOS accumulator drain plug and replace with hose / banjo bolt
Put the alternator back in
Put the belt back on
put the airbox back in
Maybe 3HRS... depending on how hard the alternator bushing to get out, first time I removed it, no problem, this time was tapping away / PB blasting on it for 1/2 hour or if you encounter any other weirdness.
The alternator doesn’t have to come all the way out in order to remove the oil fill tube.
You only need to shift it an inch or so to the left.
Can you run the hose without removing the alternator?
Might save a bit of time.
The alternator doesn�t have to come all the way out in order to remove the oil fill tube.
You only need to shift it an inch or so to the left.
Can you run the hose without removing the alternator?
Might save a bit of time.
You're right, when I was just replacing the fill tube, I just shifted the alternator over, but it's really only the time saved unclipping the alternator connections and finagling it out and then back in - maybe another 1/2 hour, you still have to drive the bushing back which was where the majority of my time spent on the alternator today was.
I wanted max room to be able to mark the spot I wanted to drill the oil fill tube and route the hose so I would have the angle I wanted, I could not have done it without removing the alternator.
If you get the version from Skip with the pre setup oil fill tube, you can likely do it without having to remove the alternator.
New scavenge pumps (hoping they have a positive impact on oil pressure stability and funded by the RL community for data collection and sharing)
Fresh brake fluid (Castrol SRF)
Fixed a broken battery terminal
Oil change
I believe I found the source of the noise I was hearing during track video review - the bolts that secure the cross braces to the aluminum cross member were 1. hand tight 2. backed a couple of threads out. It is possible the last time I had the skid plate off (I hate the skid plate) I did not torque them down or that they backed out - in any event, they are now torqued down and I added some blue loctite. The skid plate transmits a really funky resonance, I fixed this with some gasket material at all mounting locations it bolts to a hard point on the car, but, the fact they were loose makes a lot of sense that the noise was some of that resonance... I'm going with that for now.
For anyone interested in the scavenge pumps remove and replace:
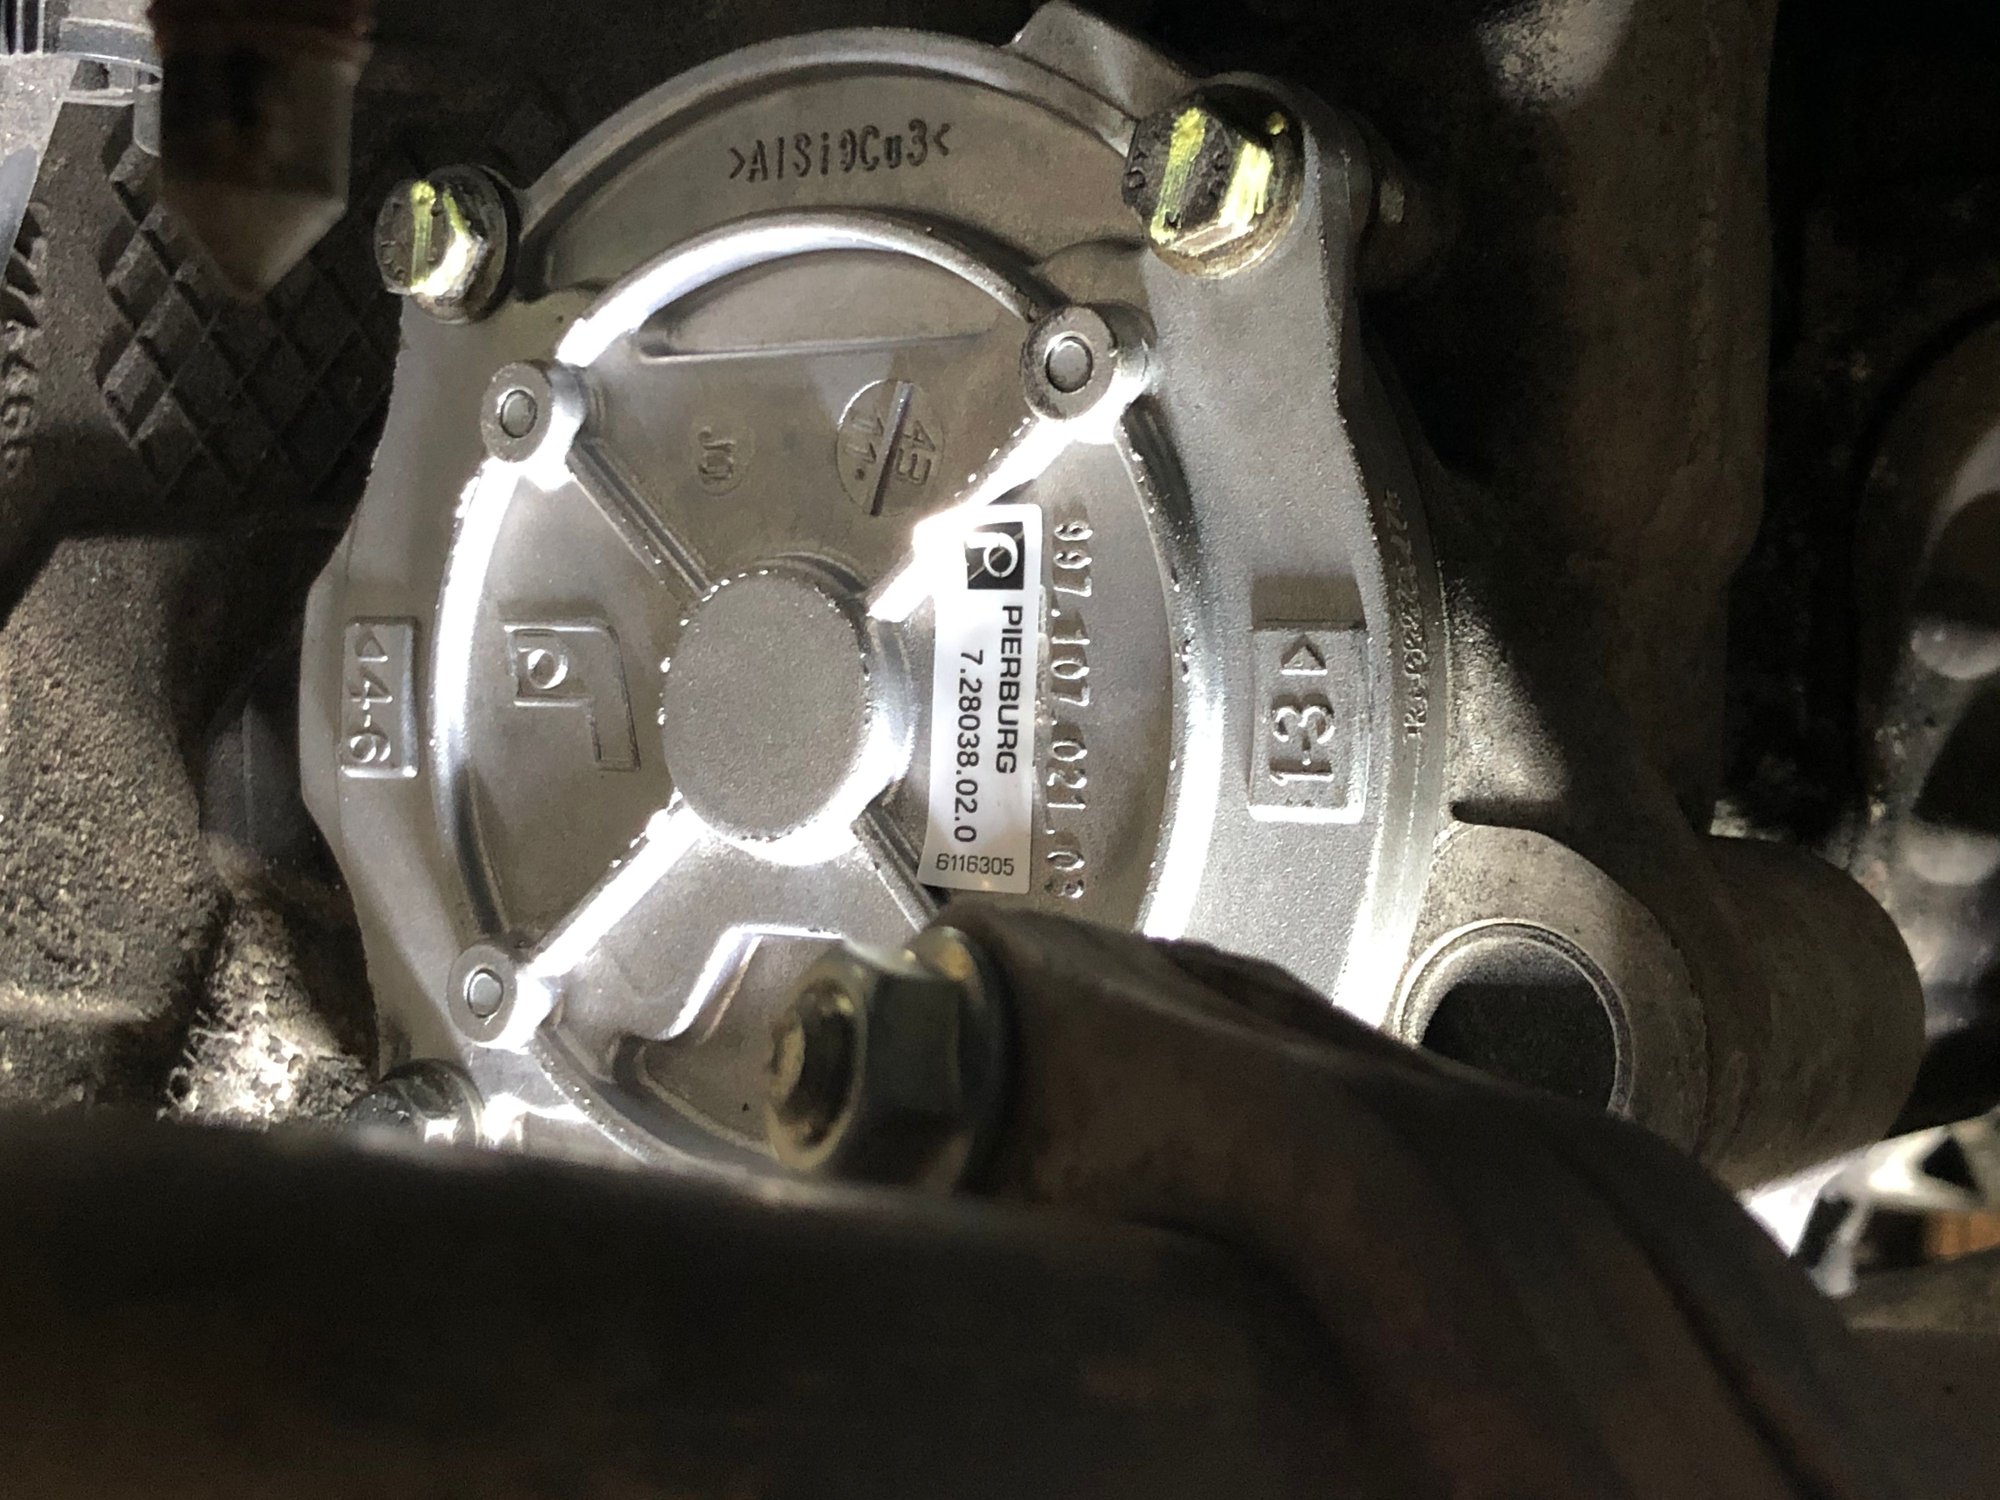
Bank 2 - 10 minutes, everything visible, plenty of room and in my case, the pump just slid out.
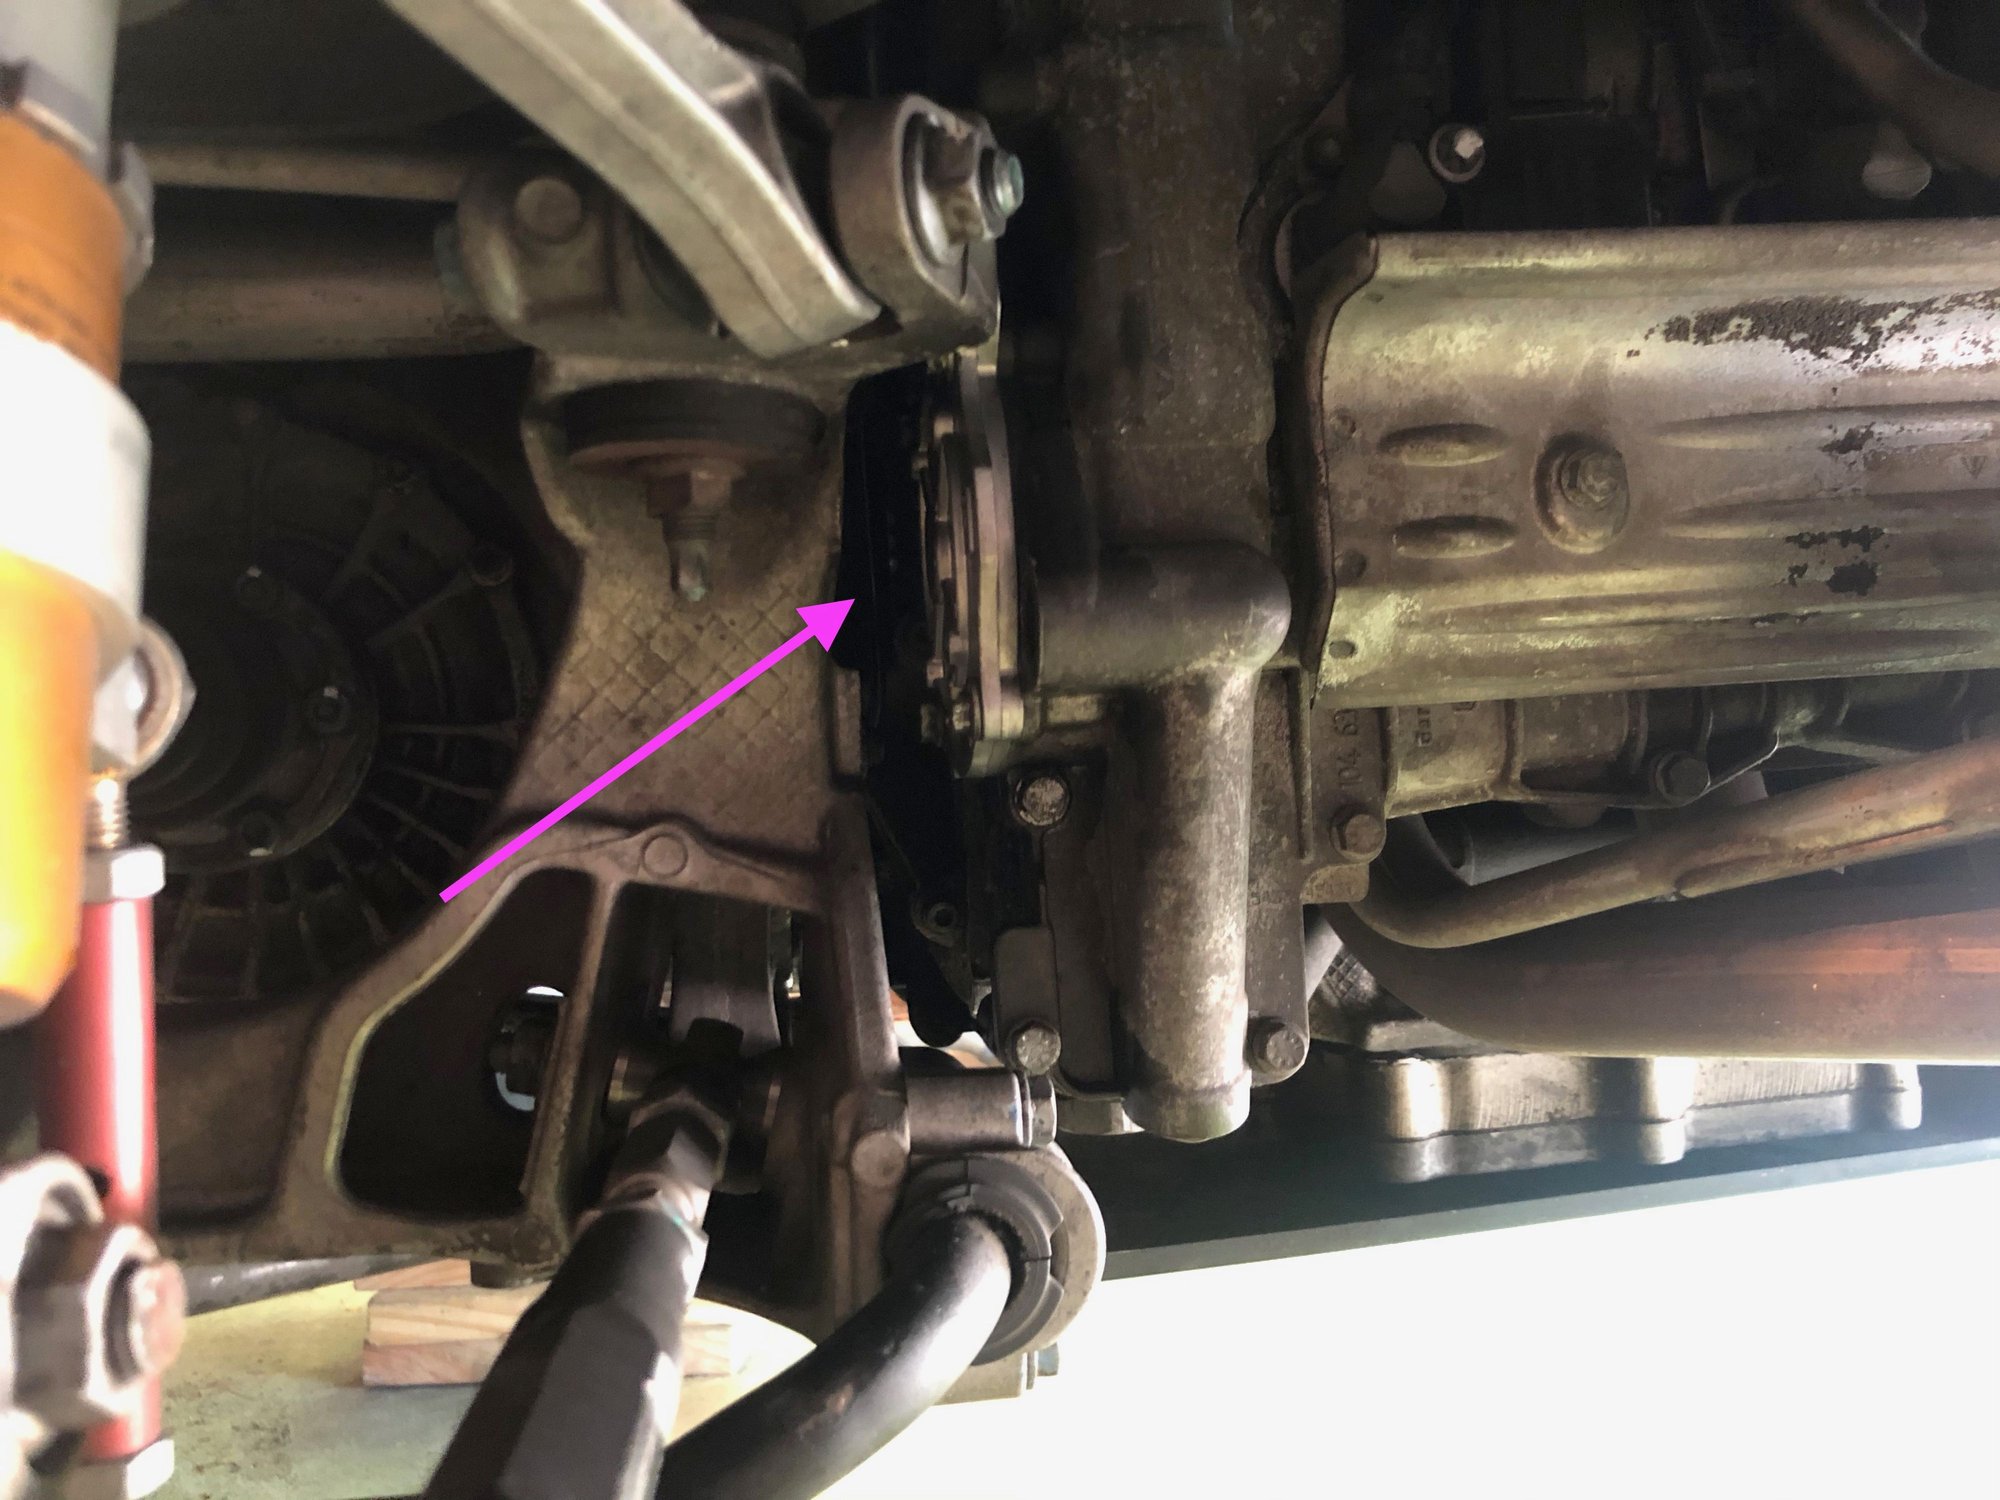
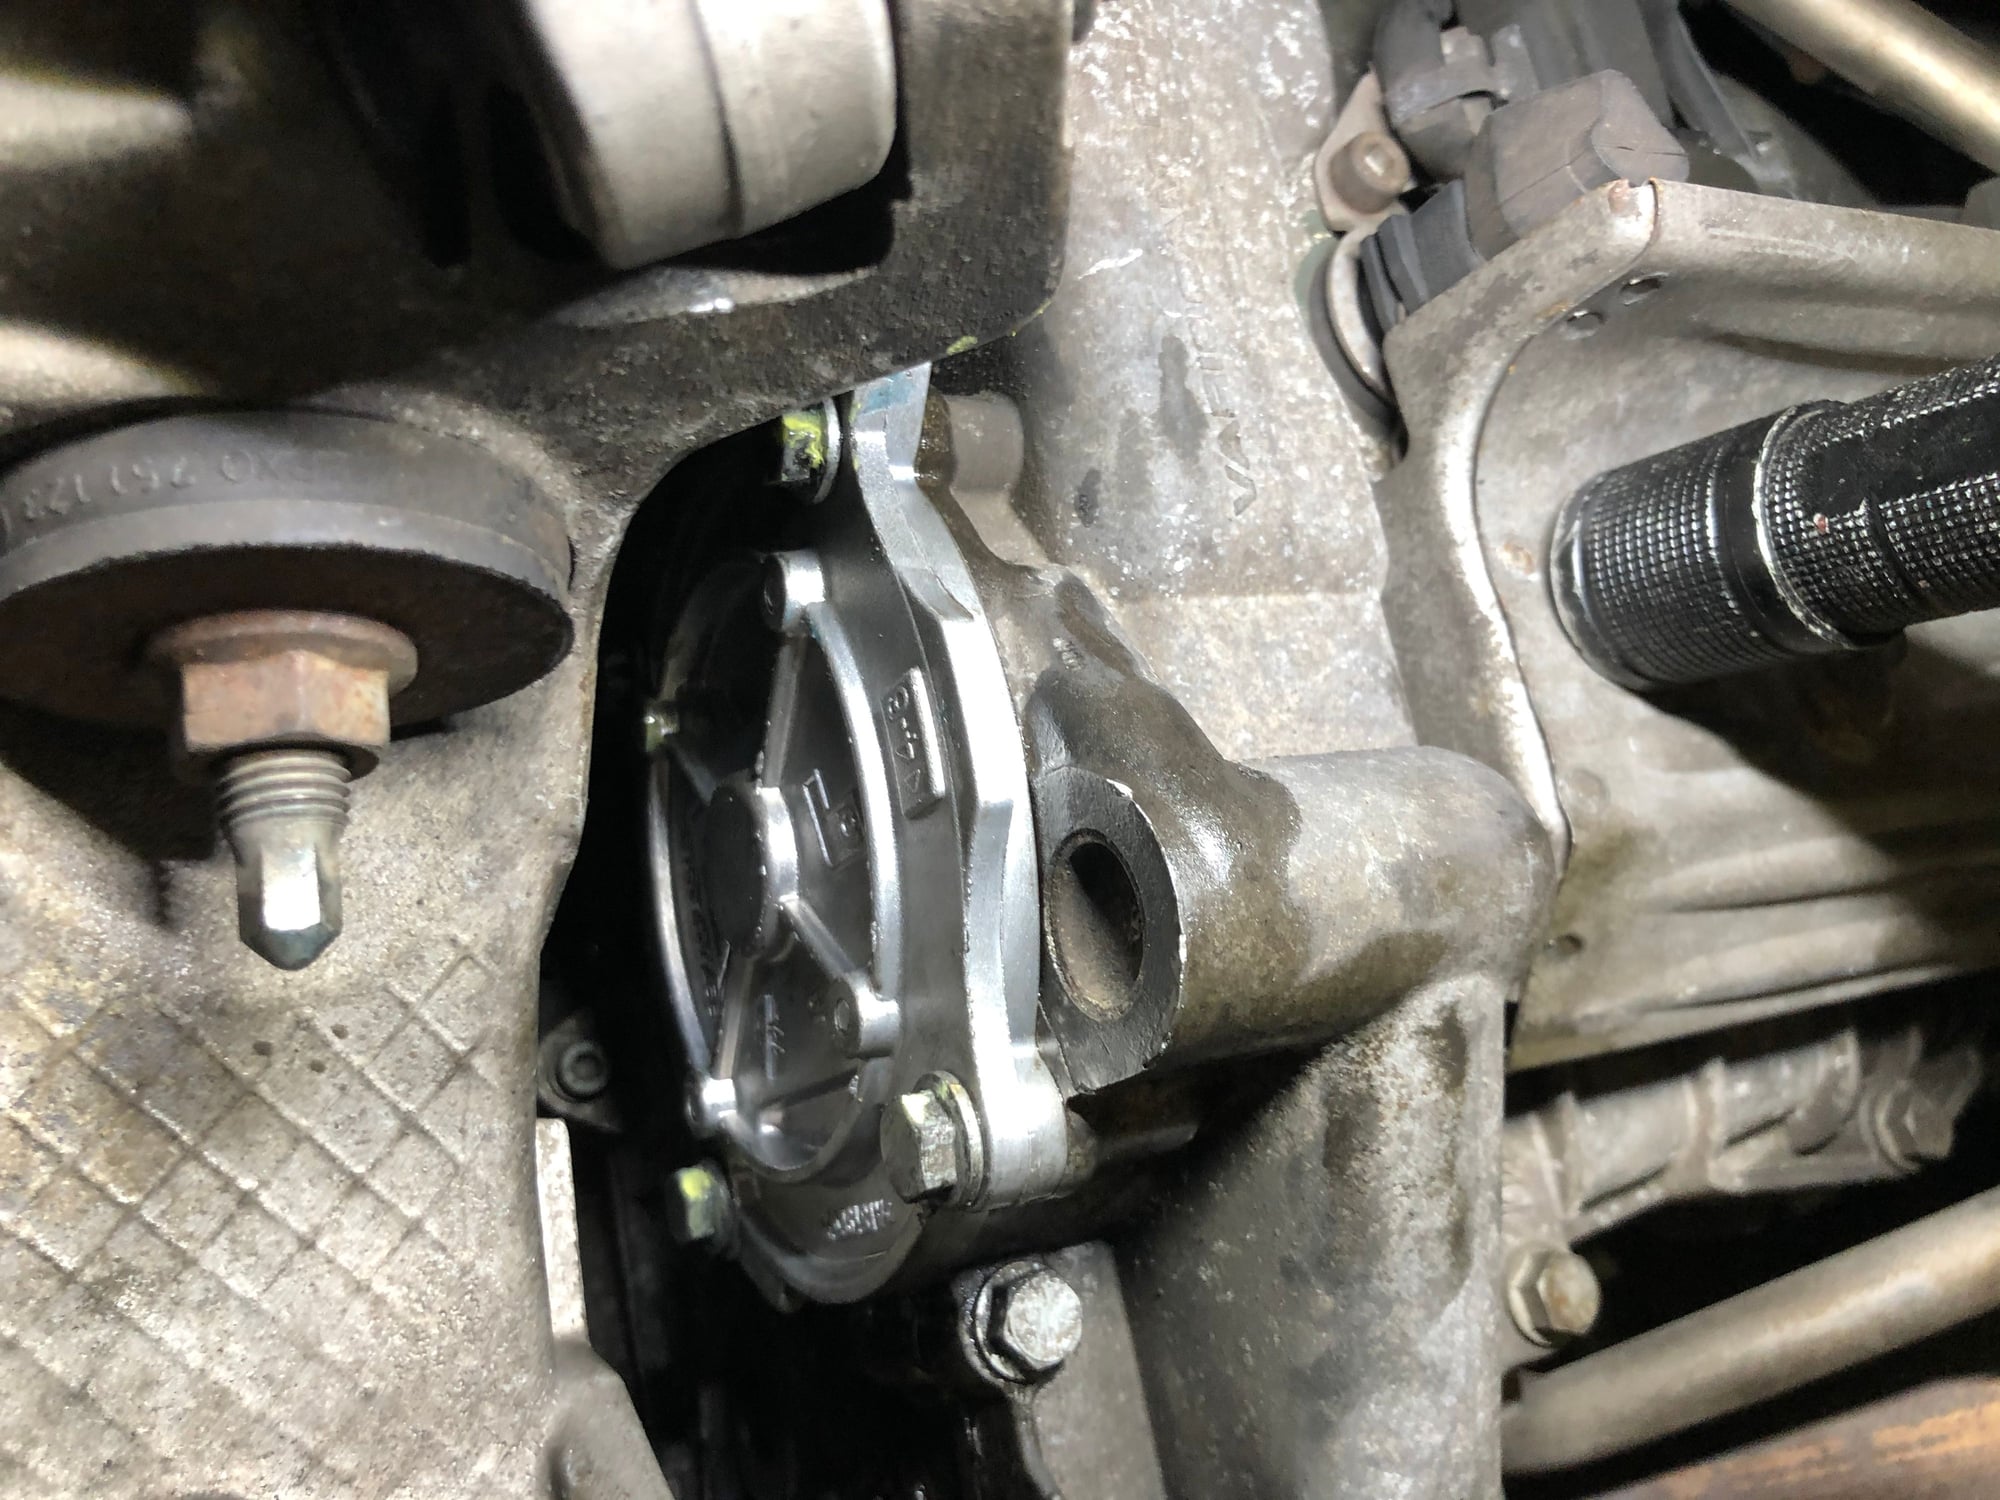
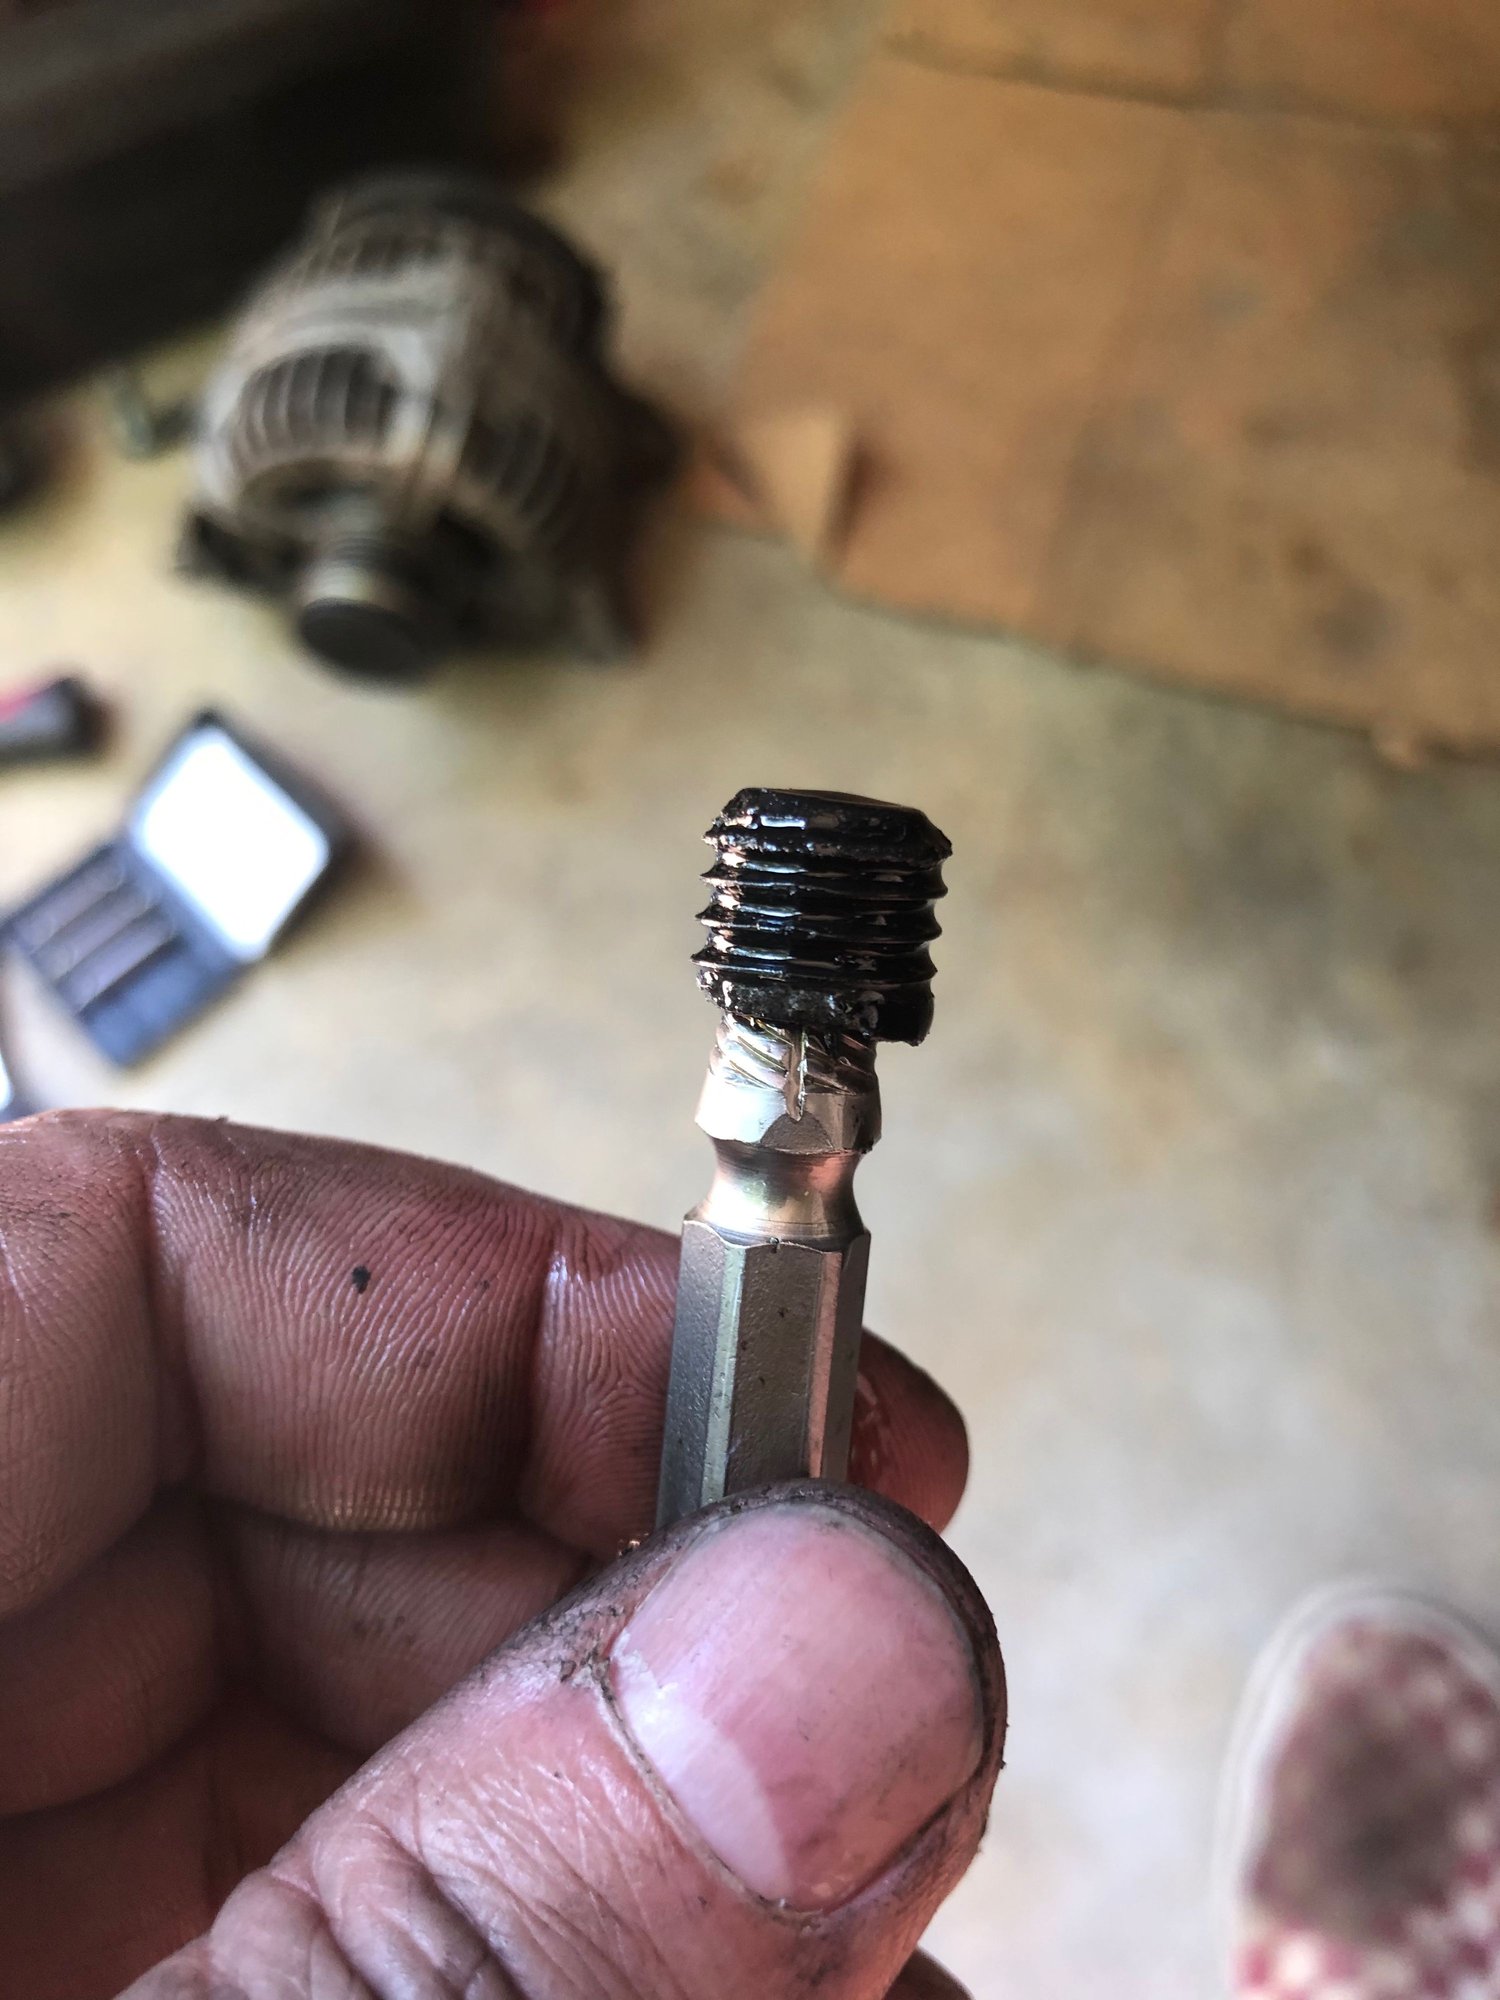
Bank 1 - NOT 10 MINUTES. The access is tight, but not too bad, I was working from inside the wheel well. The bolts are easily accessible although you will be moving from a ratchet to hopefully a ratcheting / open ended. Once I had the bolts out it did not want to move... at all. Given the fact the pumps engage the cams, I was hesitant to yield my awesome strength on them. A phone a friend to Aaron gave me the magic ticket - I tapped the pump (gently) radially and once it broke free was able to continue that process to get it walked out. Now that she's out, there is not sufficient space to slide the pump fully out as the sub frame is in the way. So, I dropped the motor onto a jack and slowly lower and checked the clearance of the pump until I had just enough room to slide it out. Install - lube the **** out of the new pump with fresh oil, contact surfaces and especially where it engages the cam. Wiggle it into place the same way I got it out and gently pushed the pump in while turning until it engaged the cam, this took a bit, if you're doing this job - be patient here. once engaged, I rotated the pump into its correct orientation and bolted it in, no room for a torque wrench so the 4 bank 1 bolts were torqued to gudandite specification. Blue loctite used on all hardware.
I did not have to loosen any of the gearbox bolts, which made me very happy.
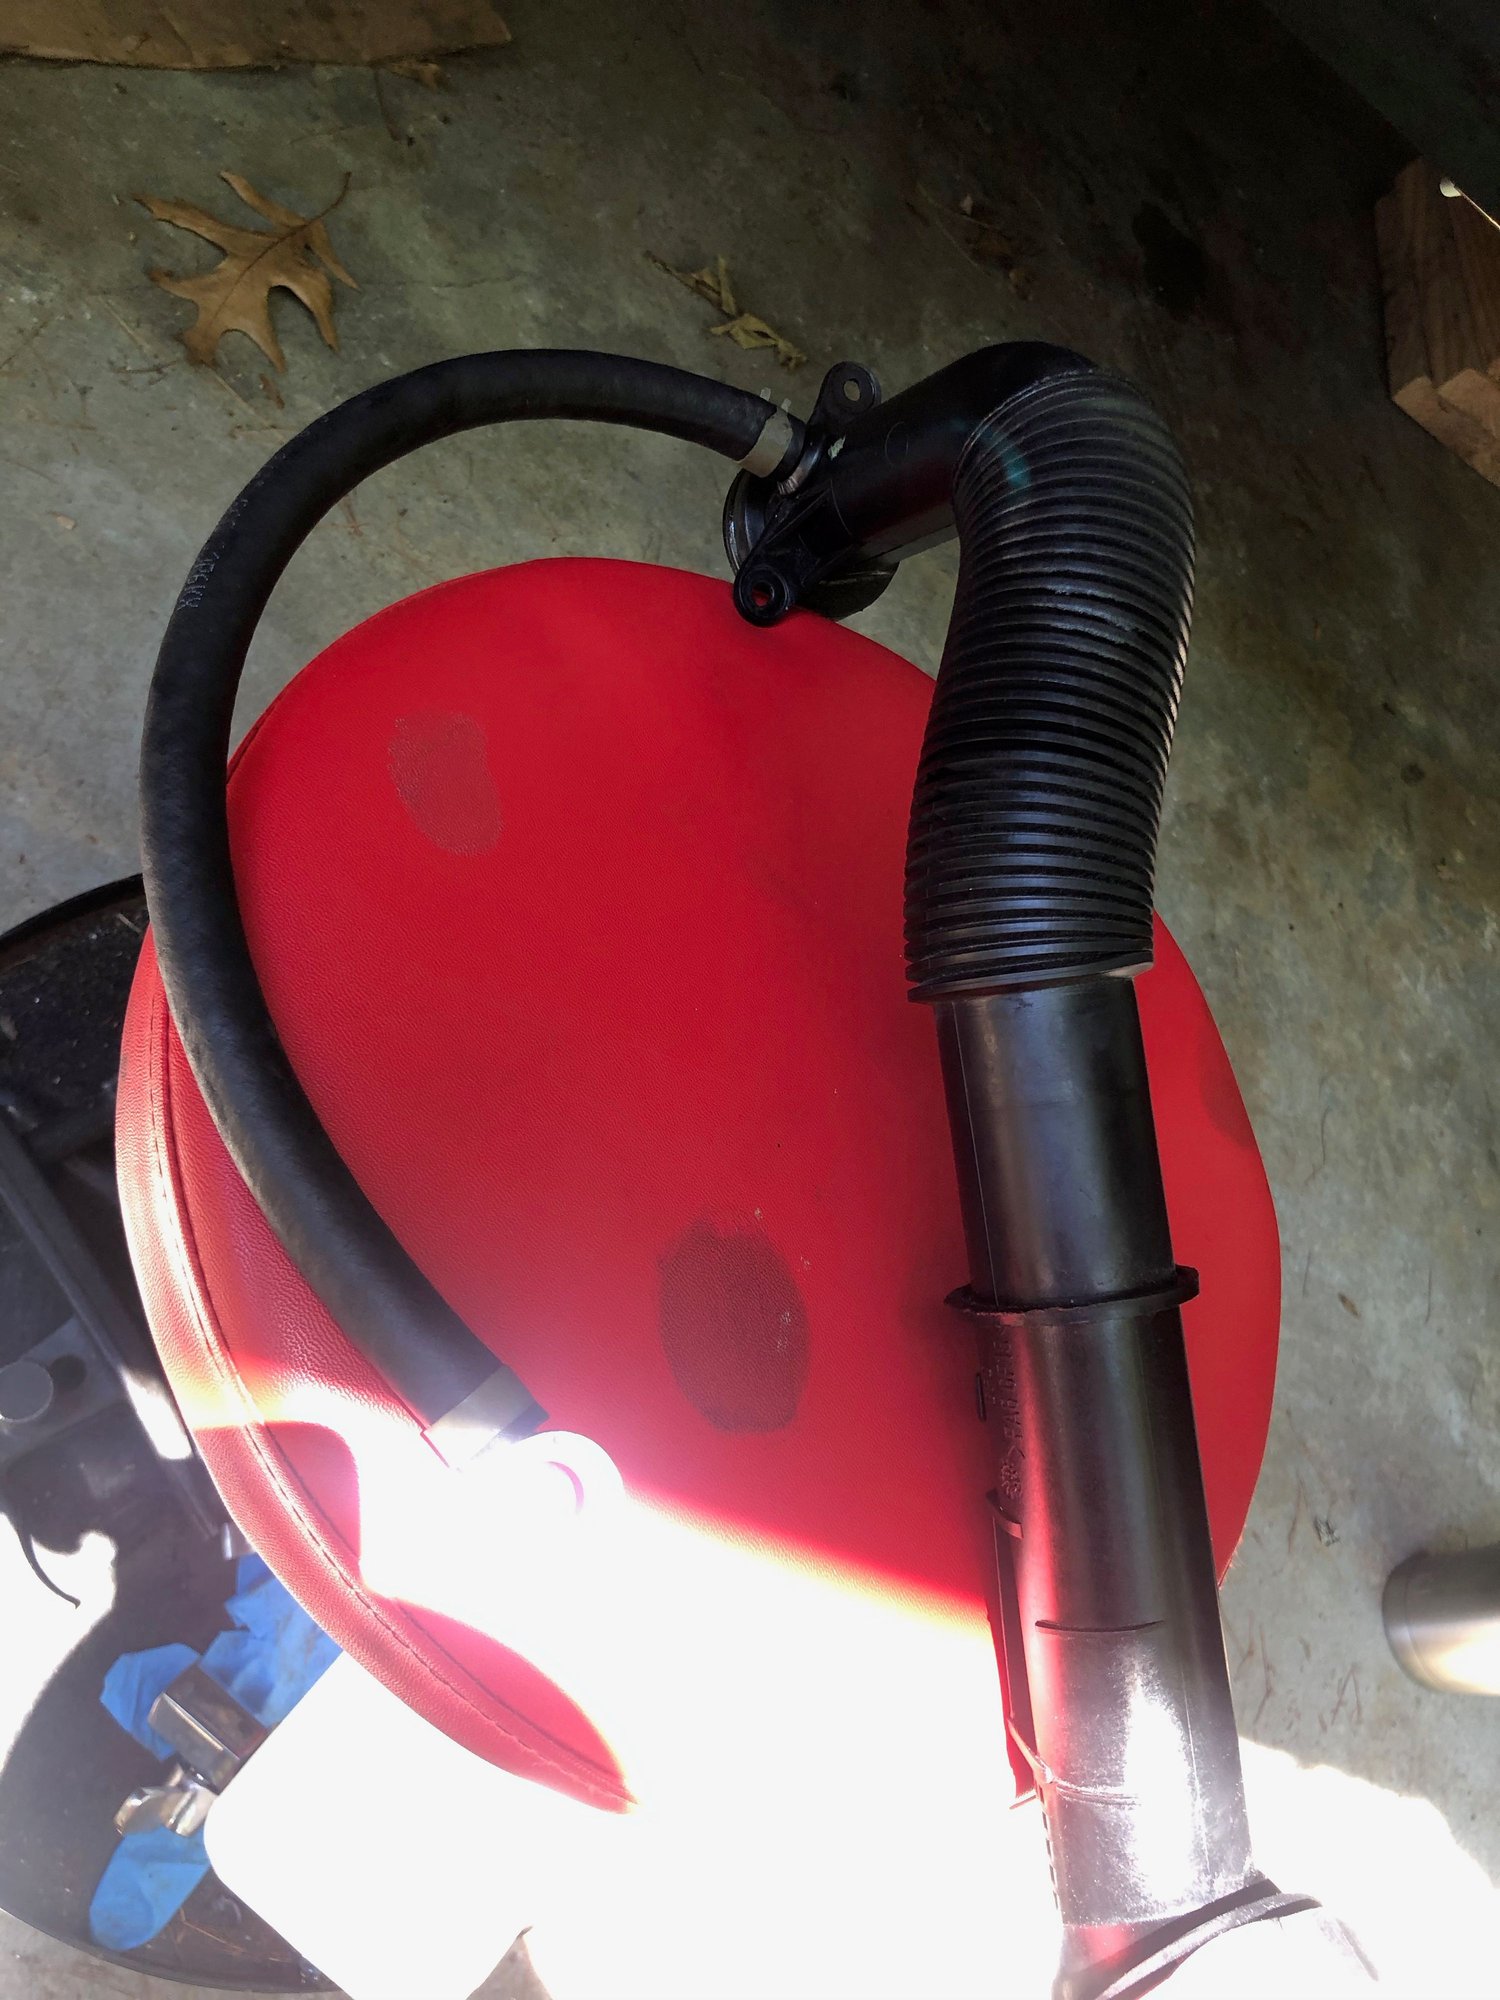
Bank 1 view from the wheel well.
Bank 1 closeup
Bank 2
Last edited by zbomb; 06-13-2021 at 06:21 PM.
Reason: How do I mis-spell GUDANDTITE
Let's hope it add some improvement that can be measured.
Out of curiosity, how did the original parts look?
Thanks Glenn - I have really good resources with both Aaron and Skip just a call away - and I use them haha ! I'm lucky...
I can't wait to see the data, I've said before I don't think we will see much, if anything - but what's pretty awesome is... my opinion doesn't mean **** ! the data will say what it says and we'll have a result... I love it !
I would say the pumps both did exhibit some signs of wear - I guess it was more than I was expecting, but I have nothing to base either my expectations, or what I saw off of.
I'm sending both pumps off the car to Skip tomorrow so he can take a look, I will trust his opinion on the wear a lot more than I do my own.
Originally Posted by Brian_C
Tremendous work, zbomb!
Thanks Brian - Felt pretty cool to be installing parts that were funded by people here on RL - it's really amazing people were intrigued enough by the idea of seeing what this part change would reflect in data to pitch in their hard earned US Dollars... kind of humbling. And for Skip to come up with the idea and really push both with donations from the UAOS sales but also with the weight of his knowledge and experience - I think it gave people confidence in the idea and the importance of data driven answers.
 06-05-2021, 09:02 PM


 on them. A phone a friend to Aaron gave me the magic ticket - I tapped the pump (gently) radially and once it broke free was able to continue that process to get it walked out. Now that she's out, there is not sufficient space to slide the pump fully out as the sub frame is in the way. So, I dropped the motor onto a jack and slowly lower and checked the clearance of the pump until I had just enough room to slide it out. Install - lube the **** out of the new pump with fresh oil, contact surfaces and especially where it engages the cam. Wiggle it into place the same way I got it out and gently pushed the pump in while turning until it engaged the cam, this took a bit, if you're doing this job - be patient here. once engaged, I rotated the pump into its correct orientation and bolted it in, no room for a torque wrench so the 4 bank 1 bolts were torqued to gudandite specification. Blue loctite used on all hardware.