When you click on links to various merchants on this site and make a purchase, this can result in this site earning a commission. Affiliate programs and affiliations include, but are not limited to, the eBay Partner Network.
Repairing the “black foam coming out of vent” issue
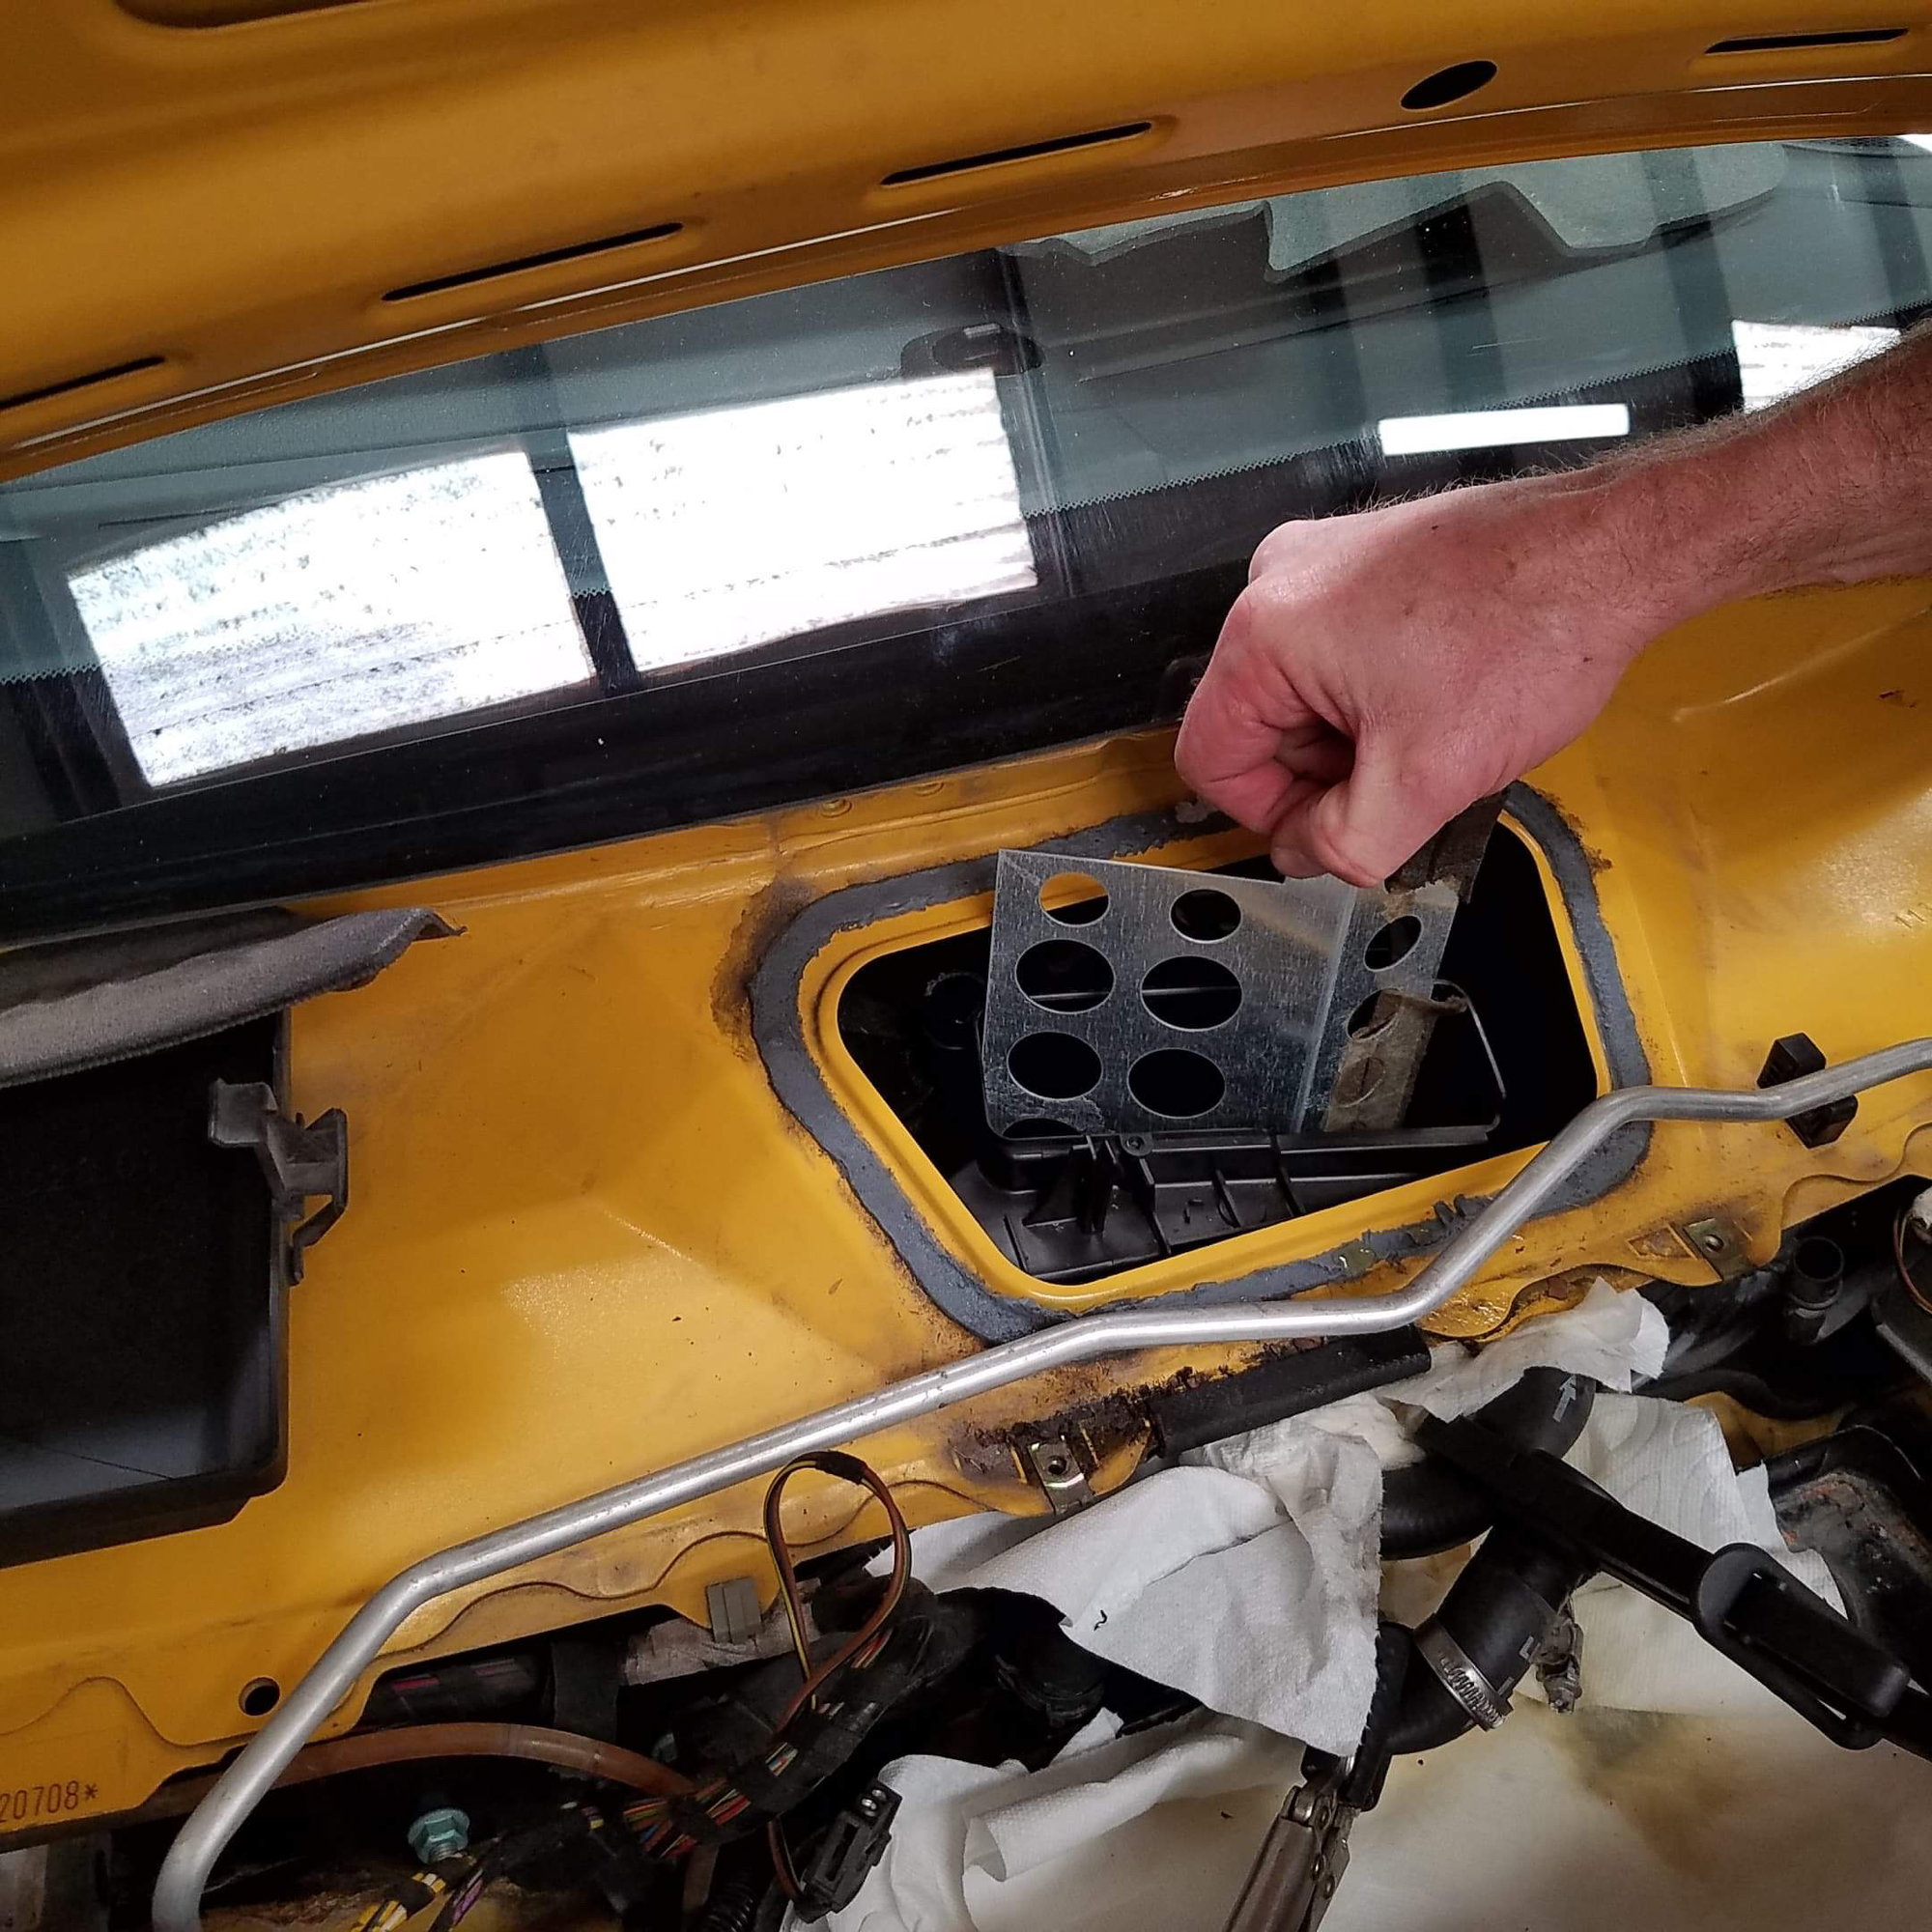
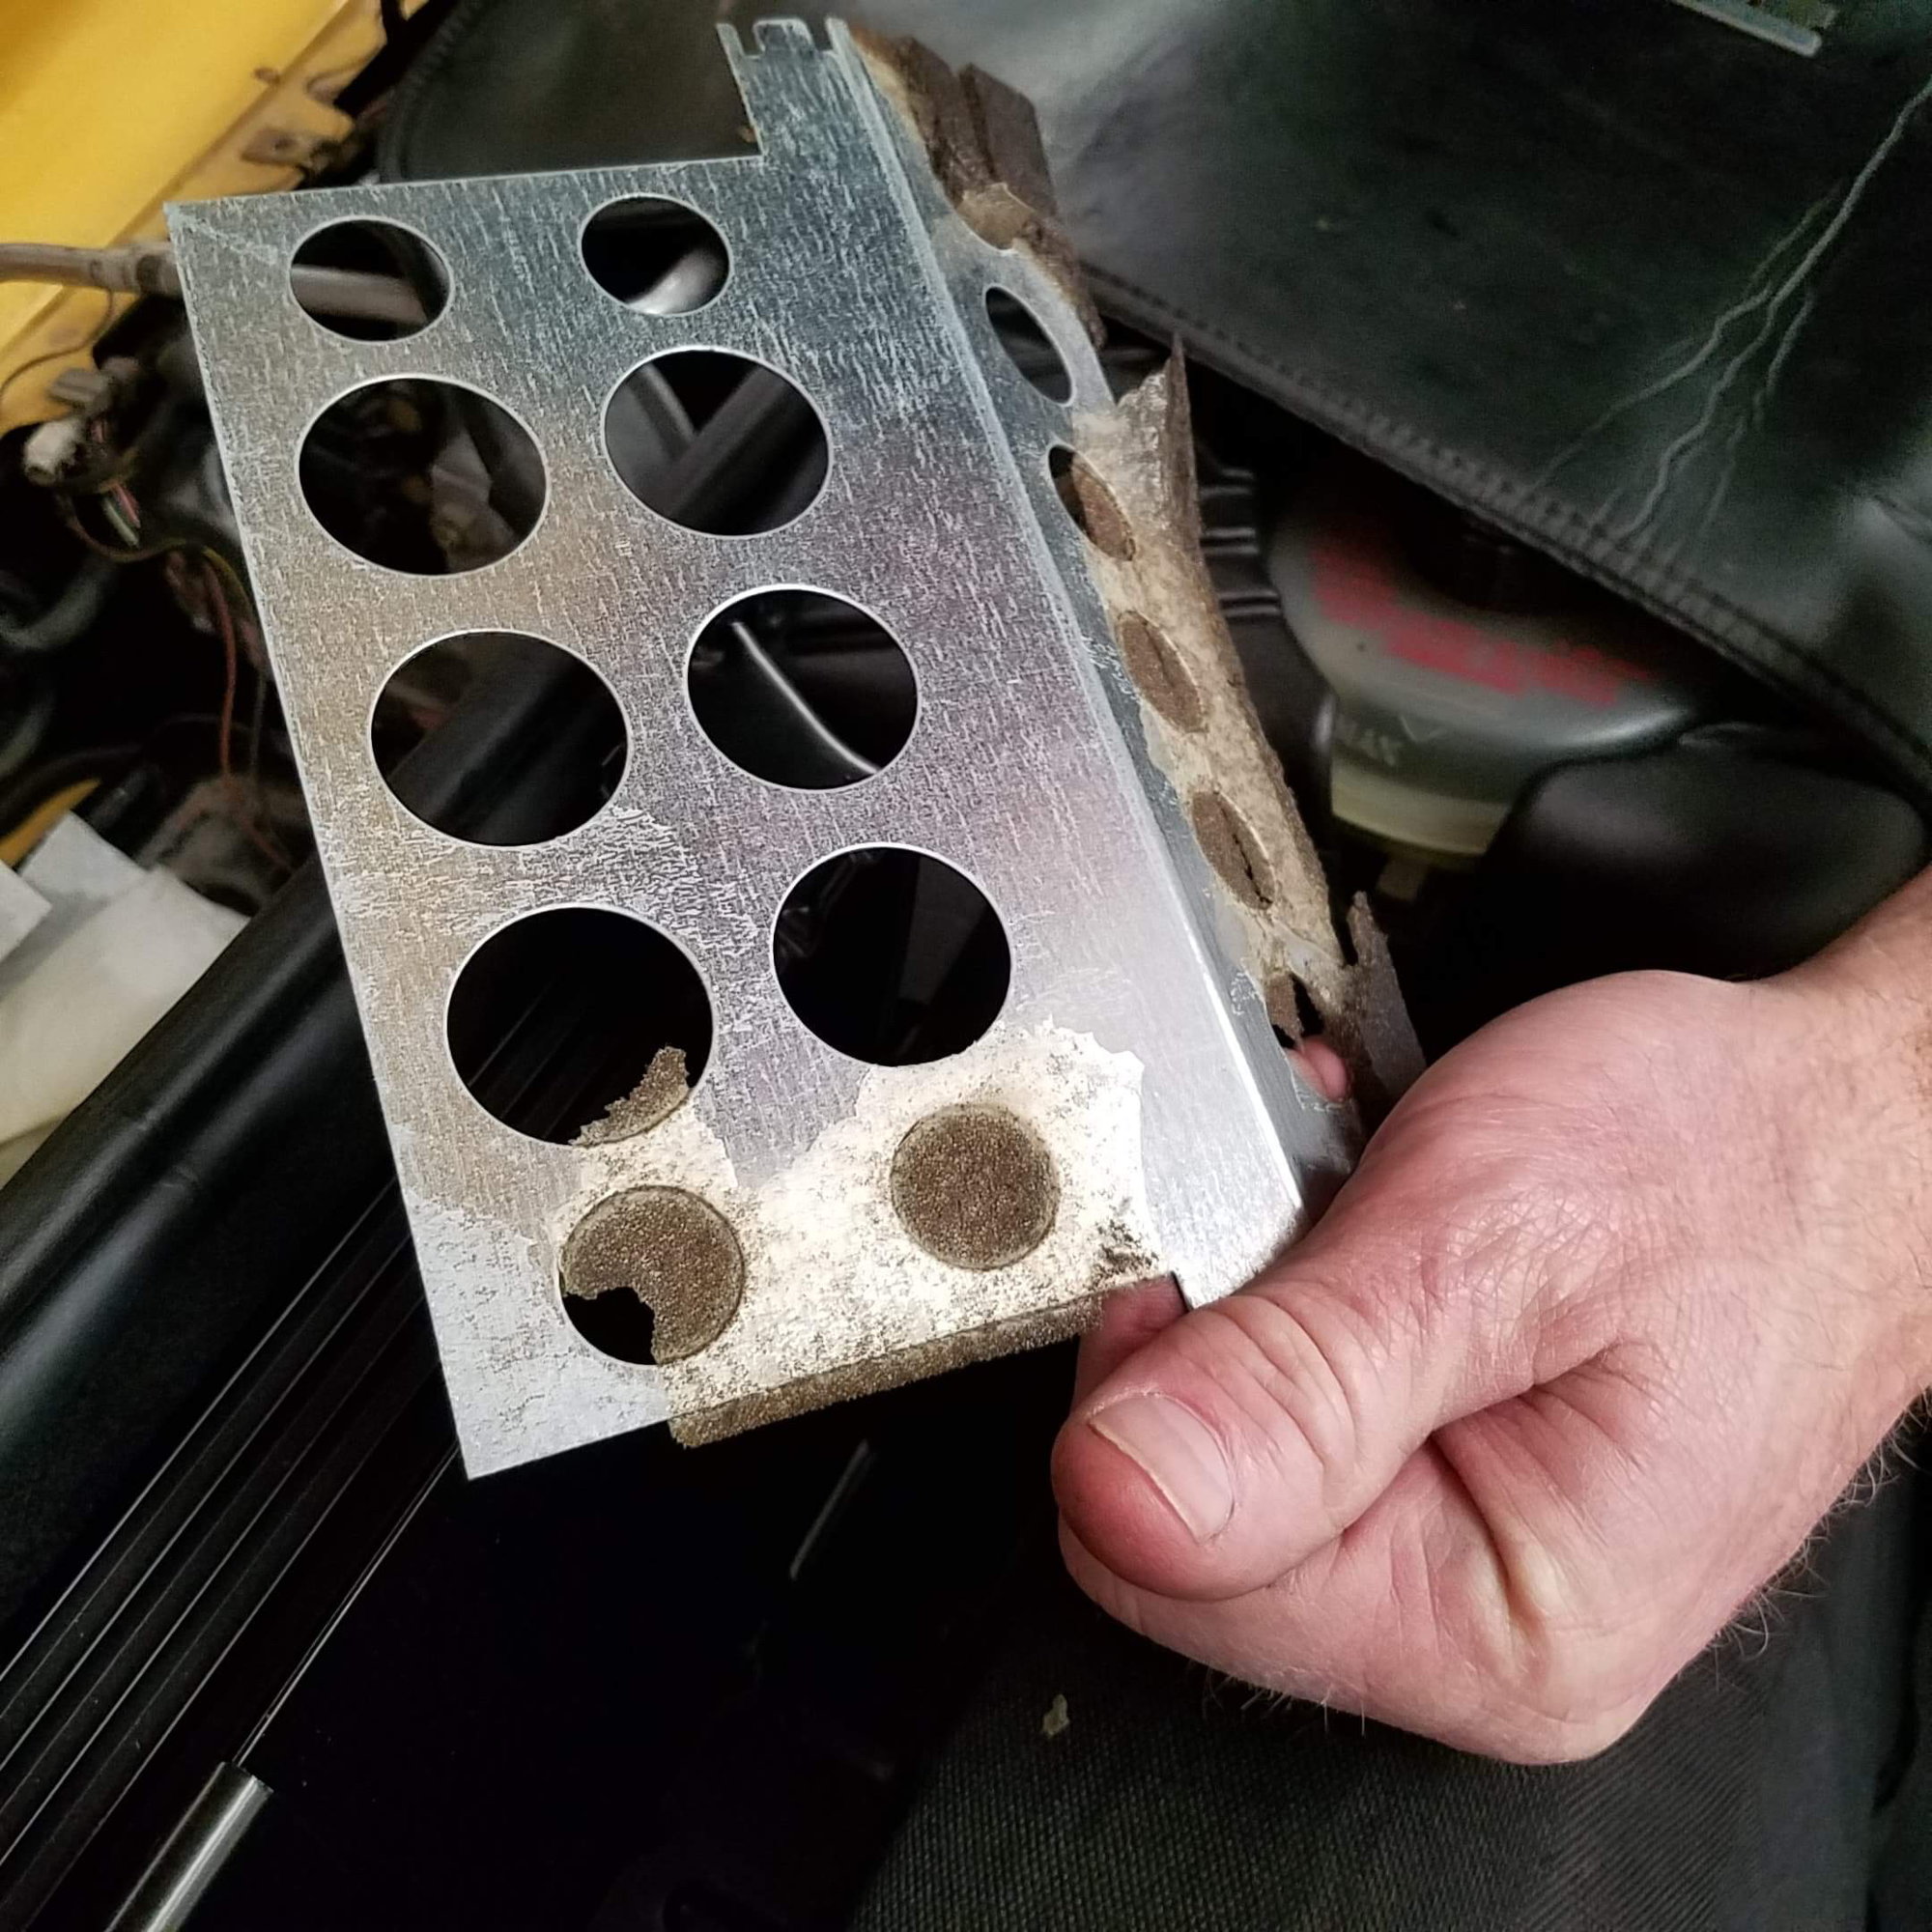
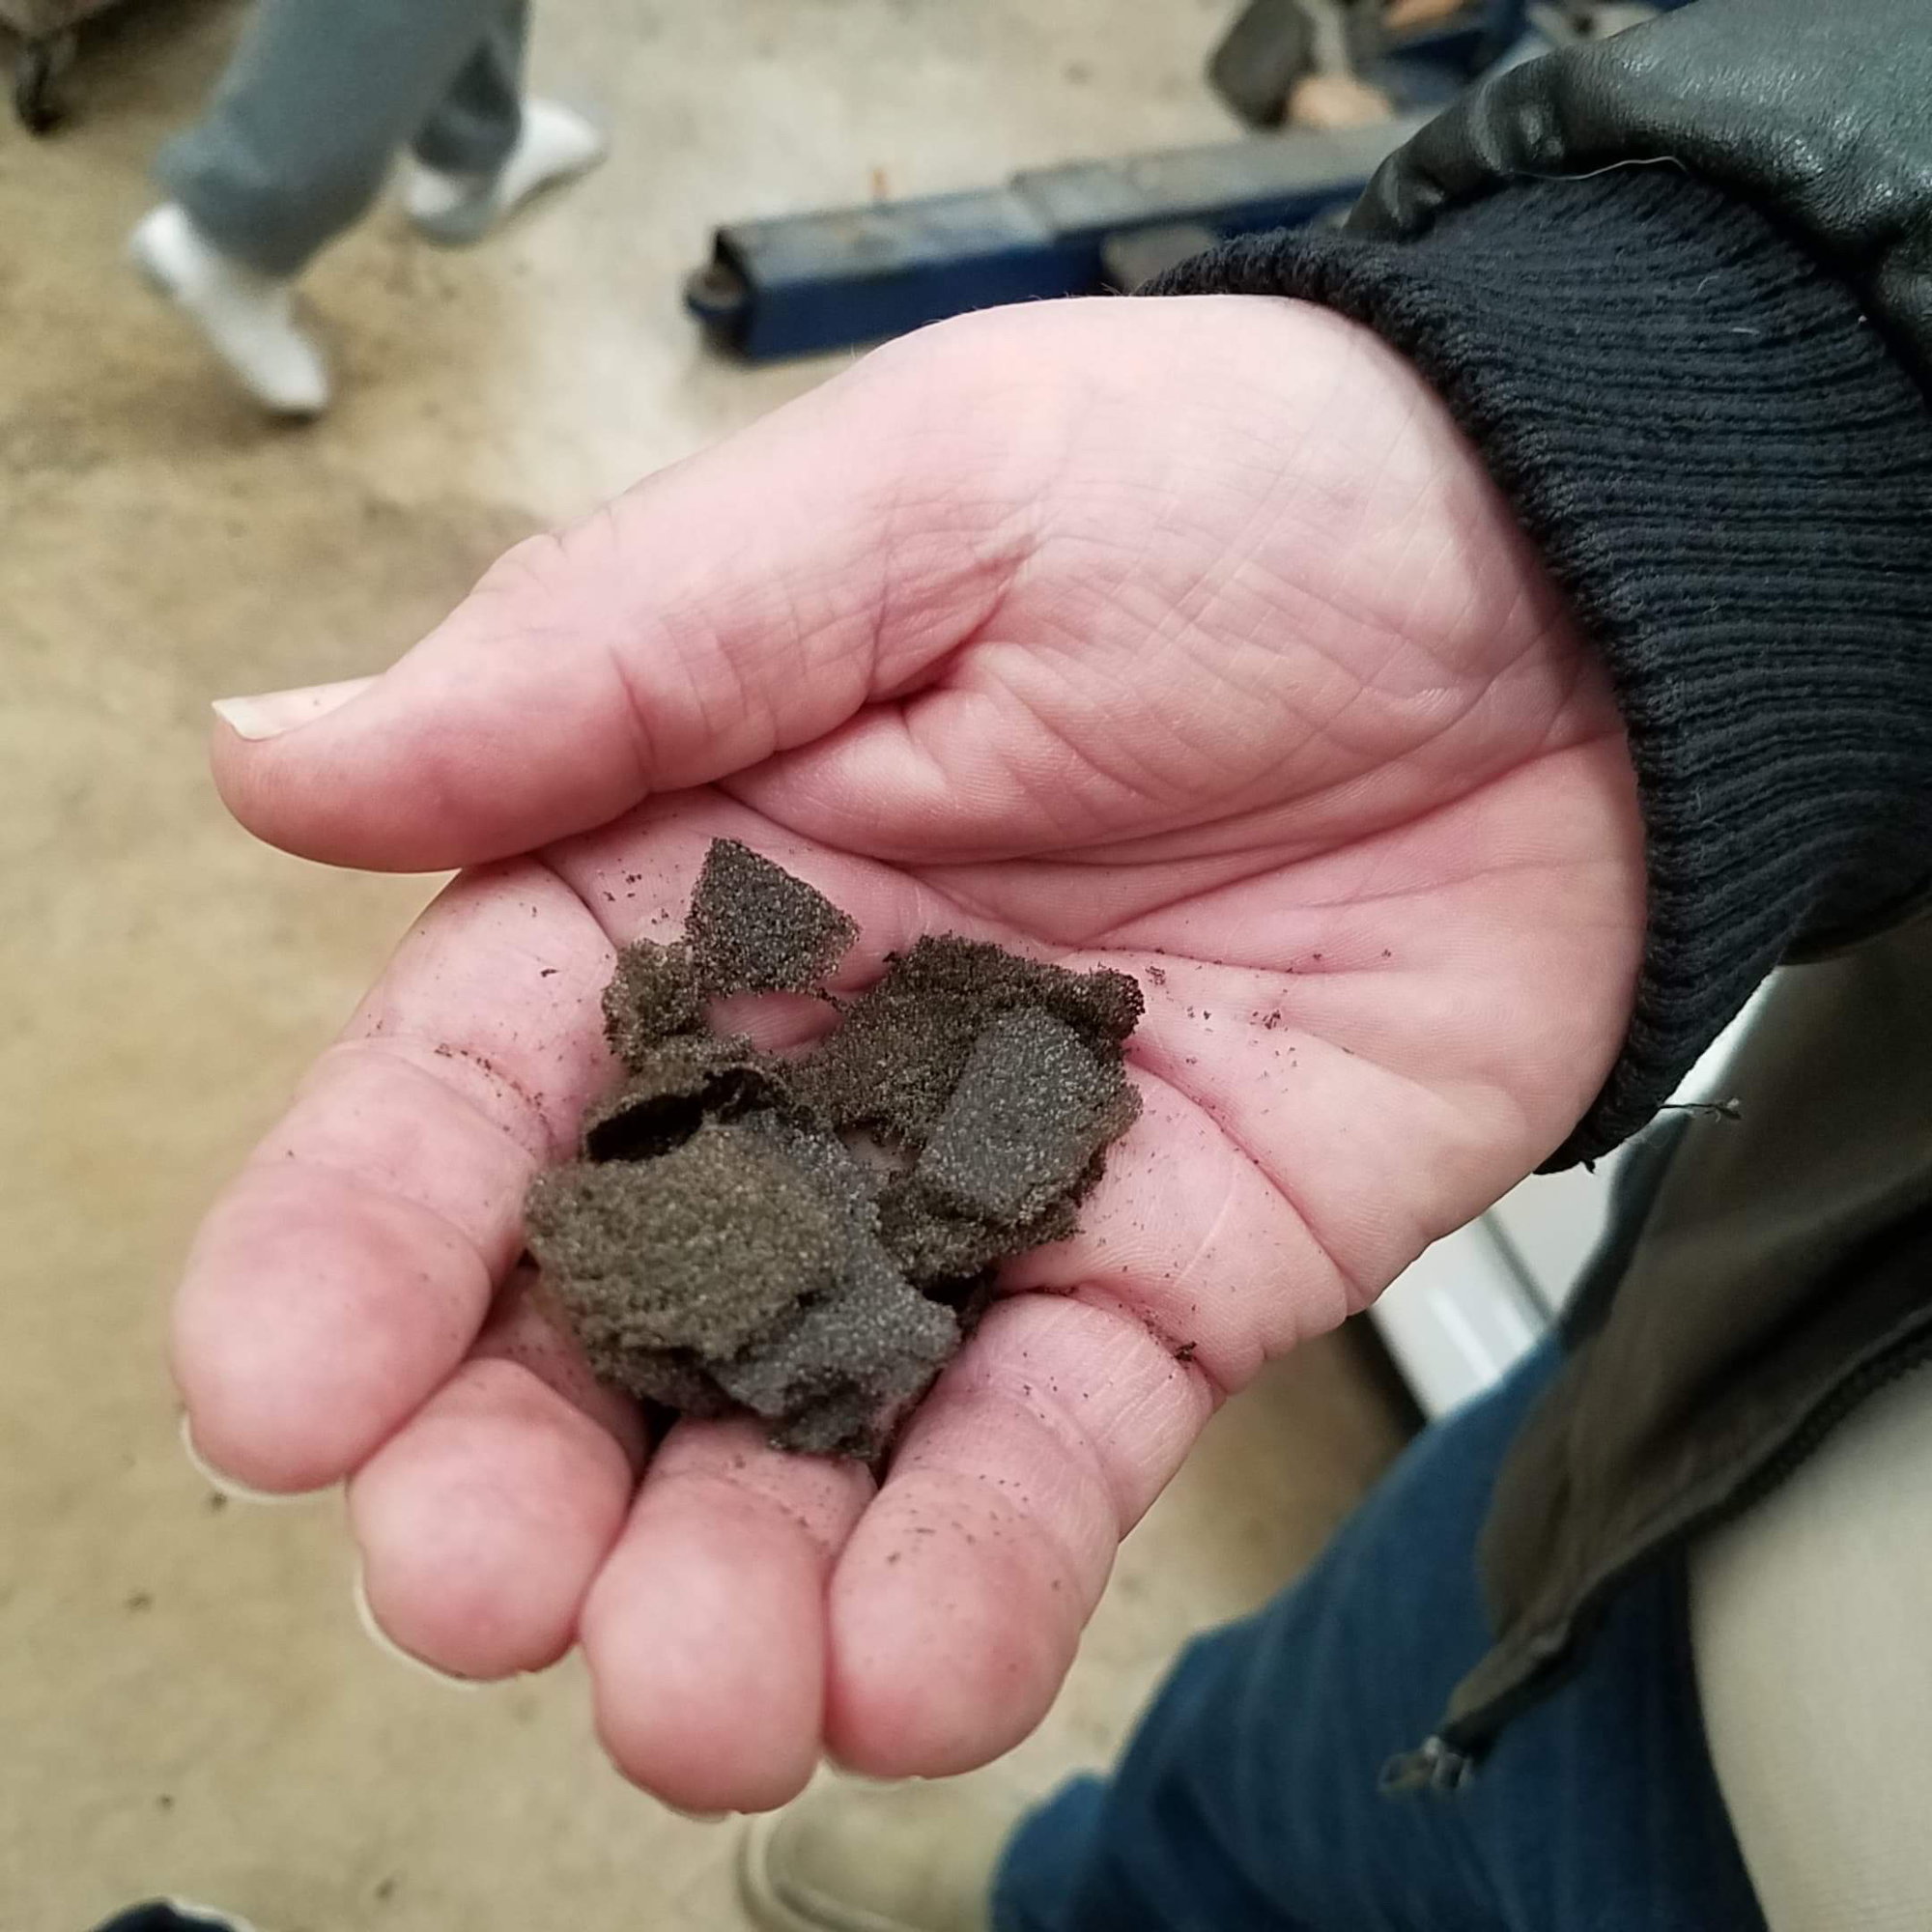
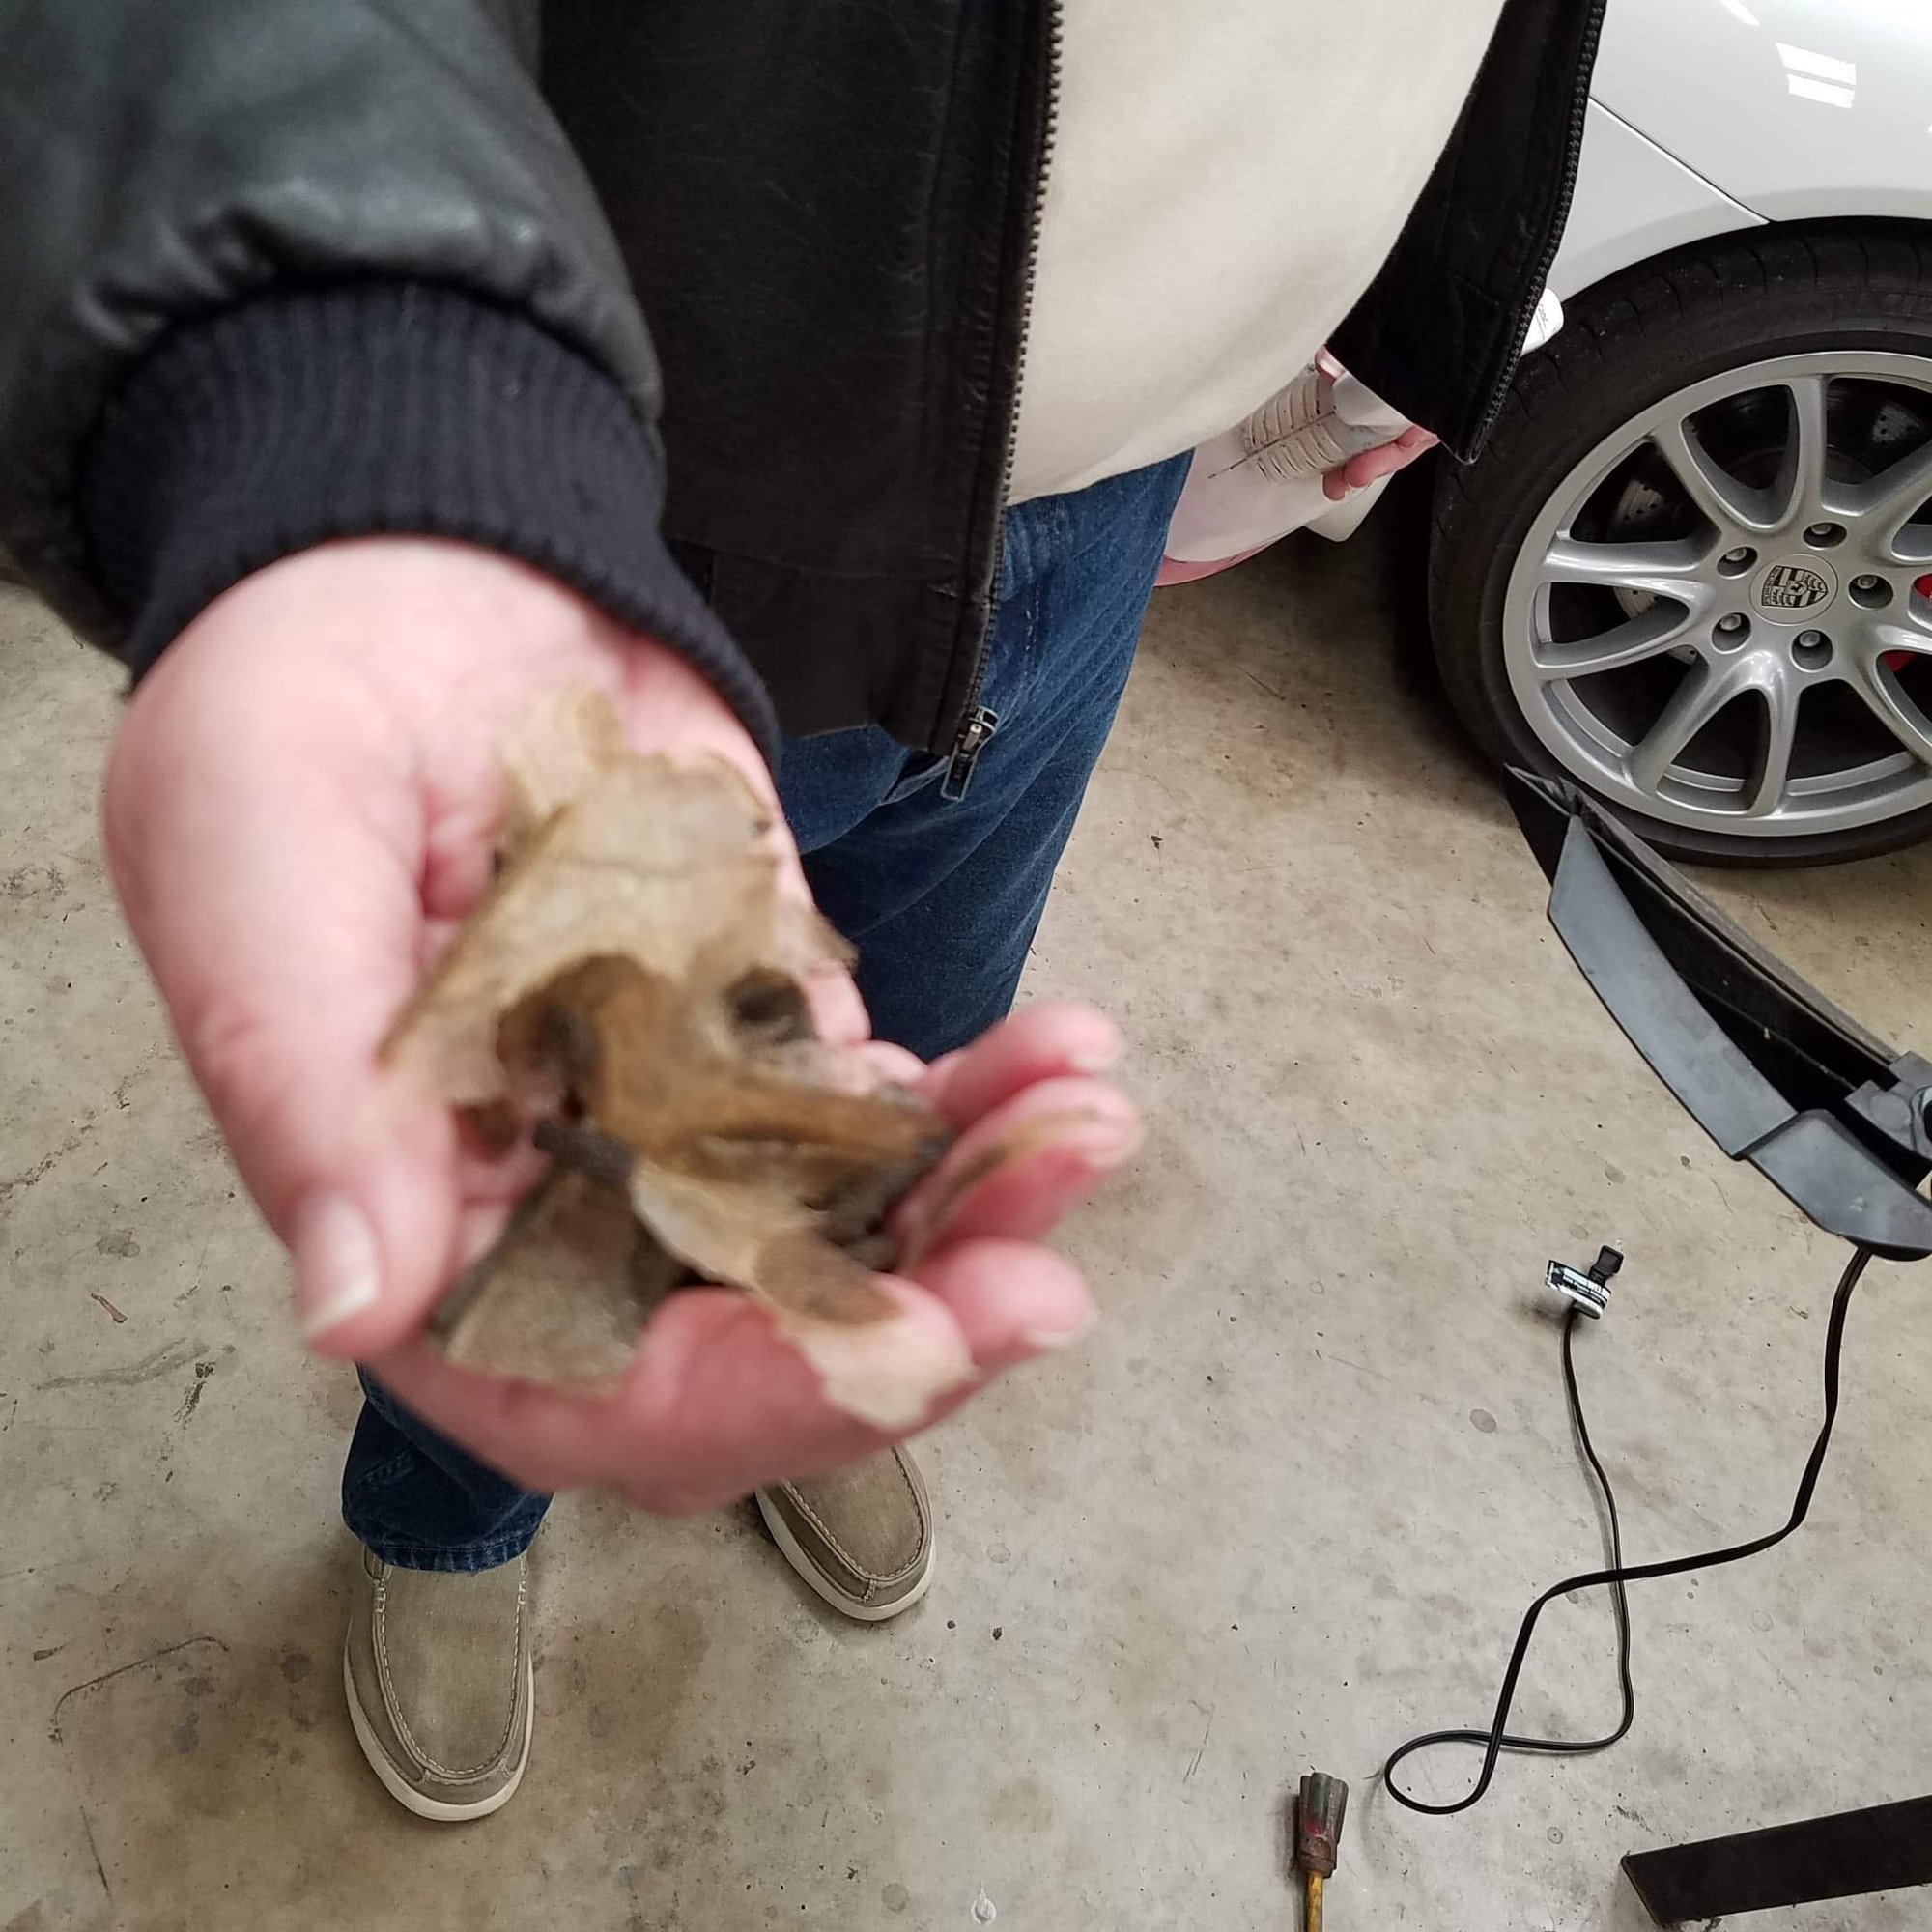
Did another repair of the “black foam coming from vents” repair on a clients car today ... this also causes loss of the ability to heat the interior too, since the foam loss allows cold air to come directly in through all the holes in the vent flap as shown. I do this repair a lot as all 996, 986, 997 and 987 Porsche’s will suffer from this issue.
here are some photos of how to do this repair ... hope it helps some facing this issue. Check out this and other projects at my Instagram page #joeslastchancegarage
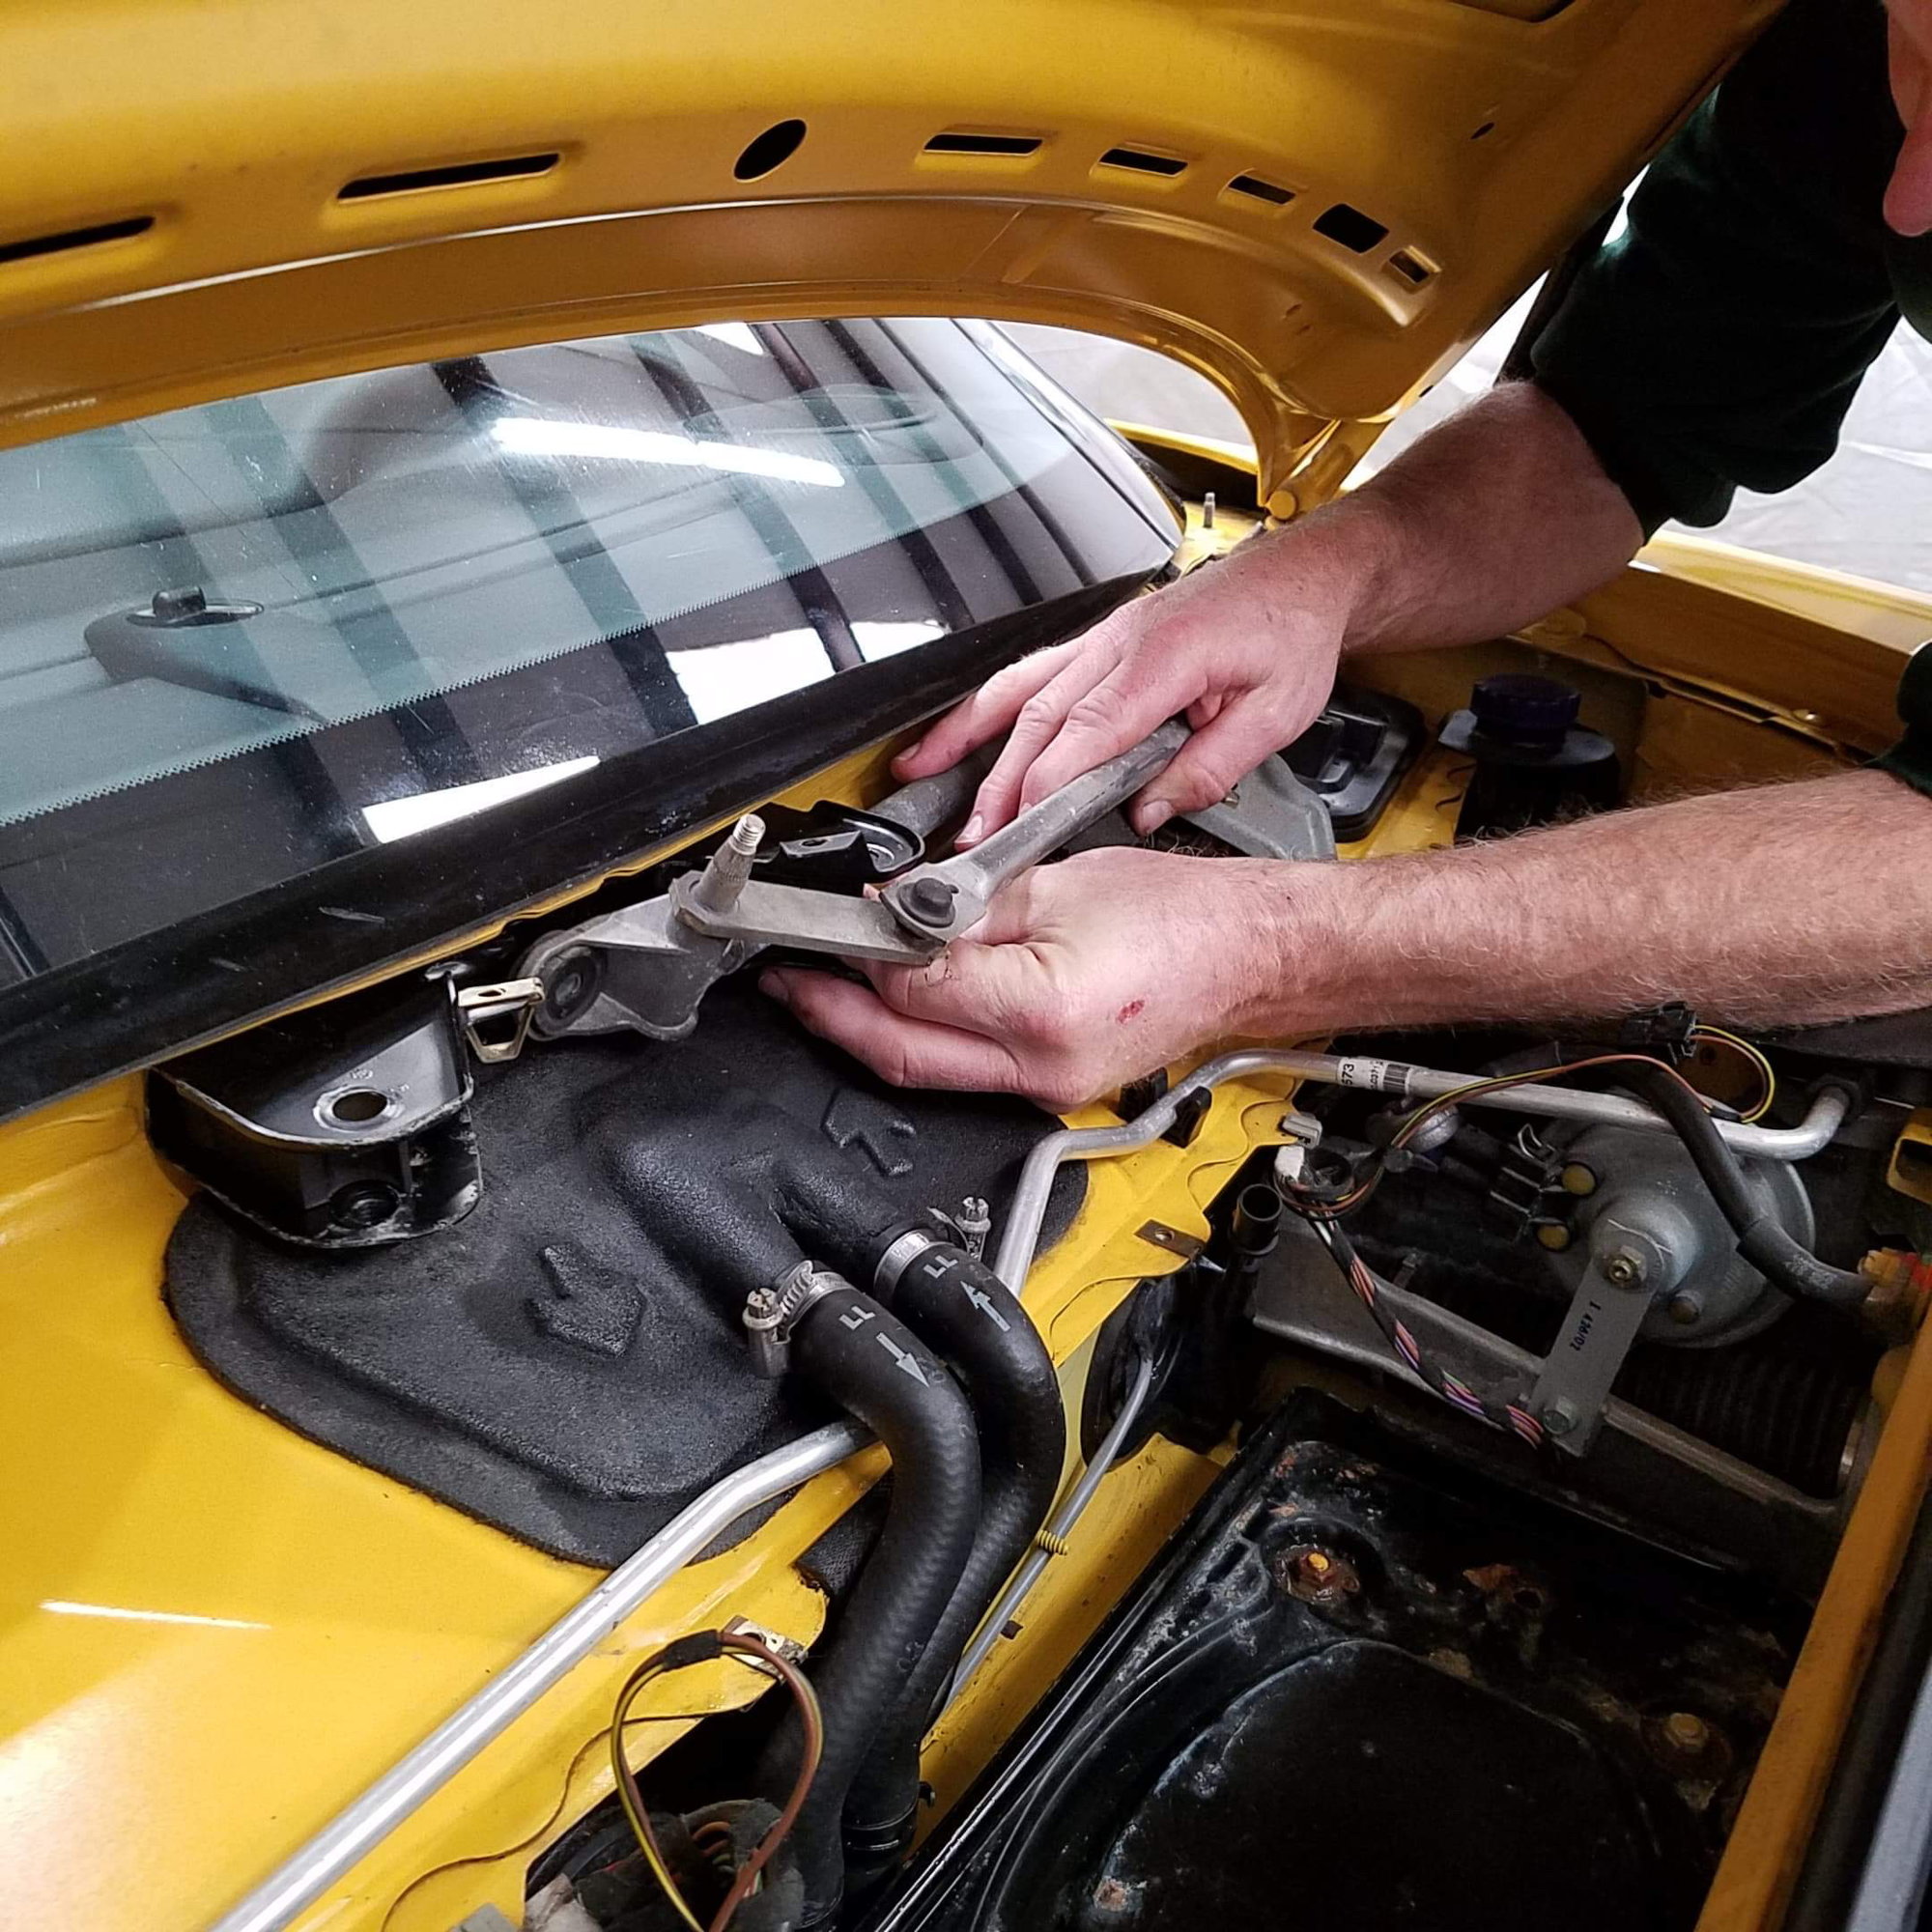
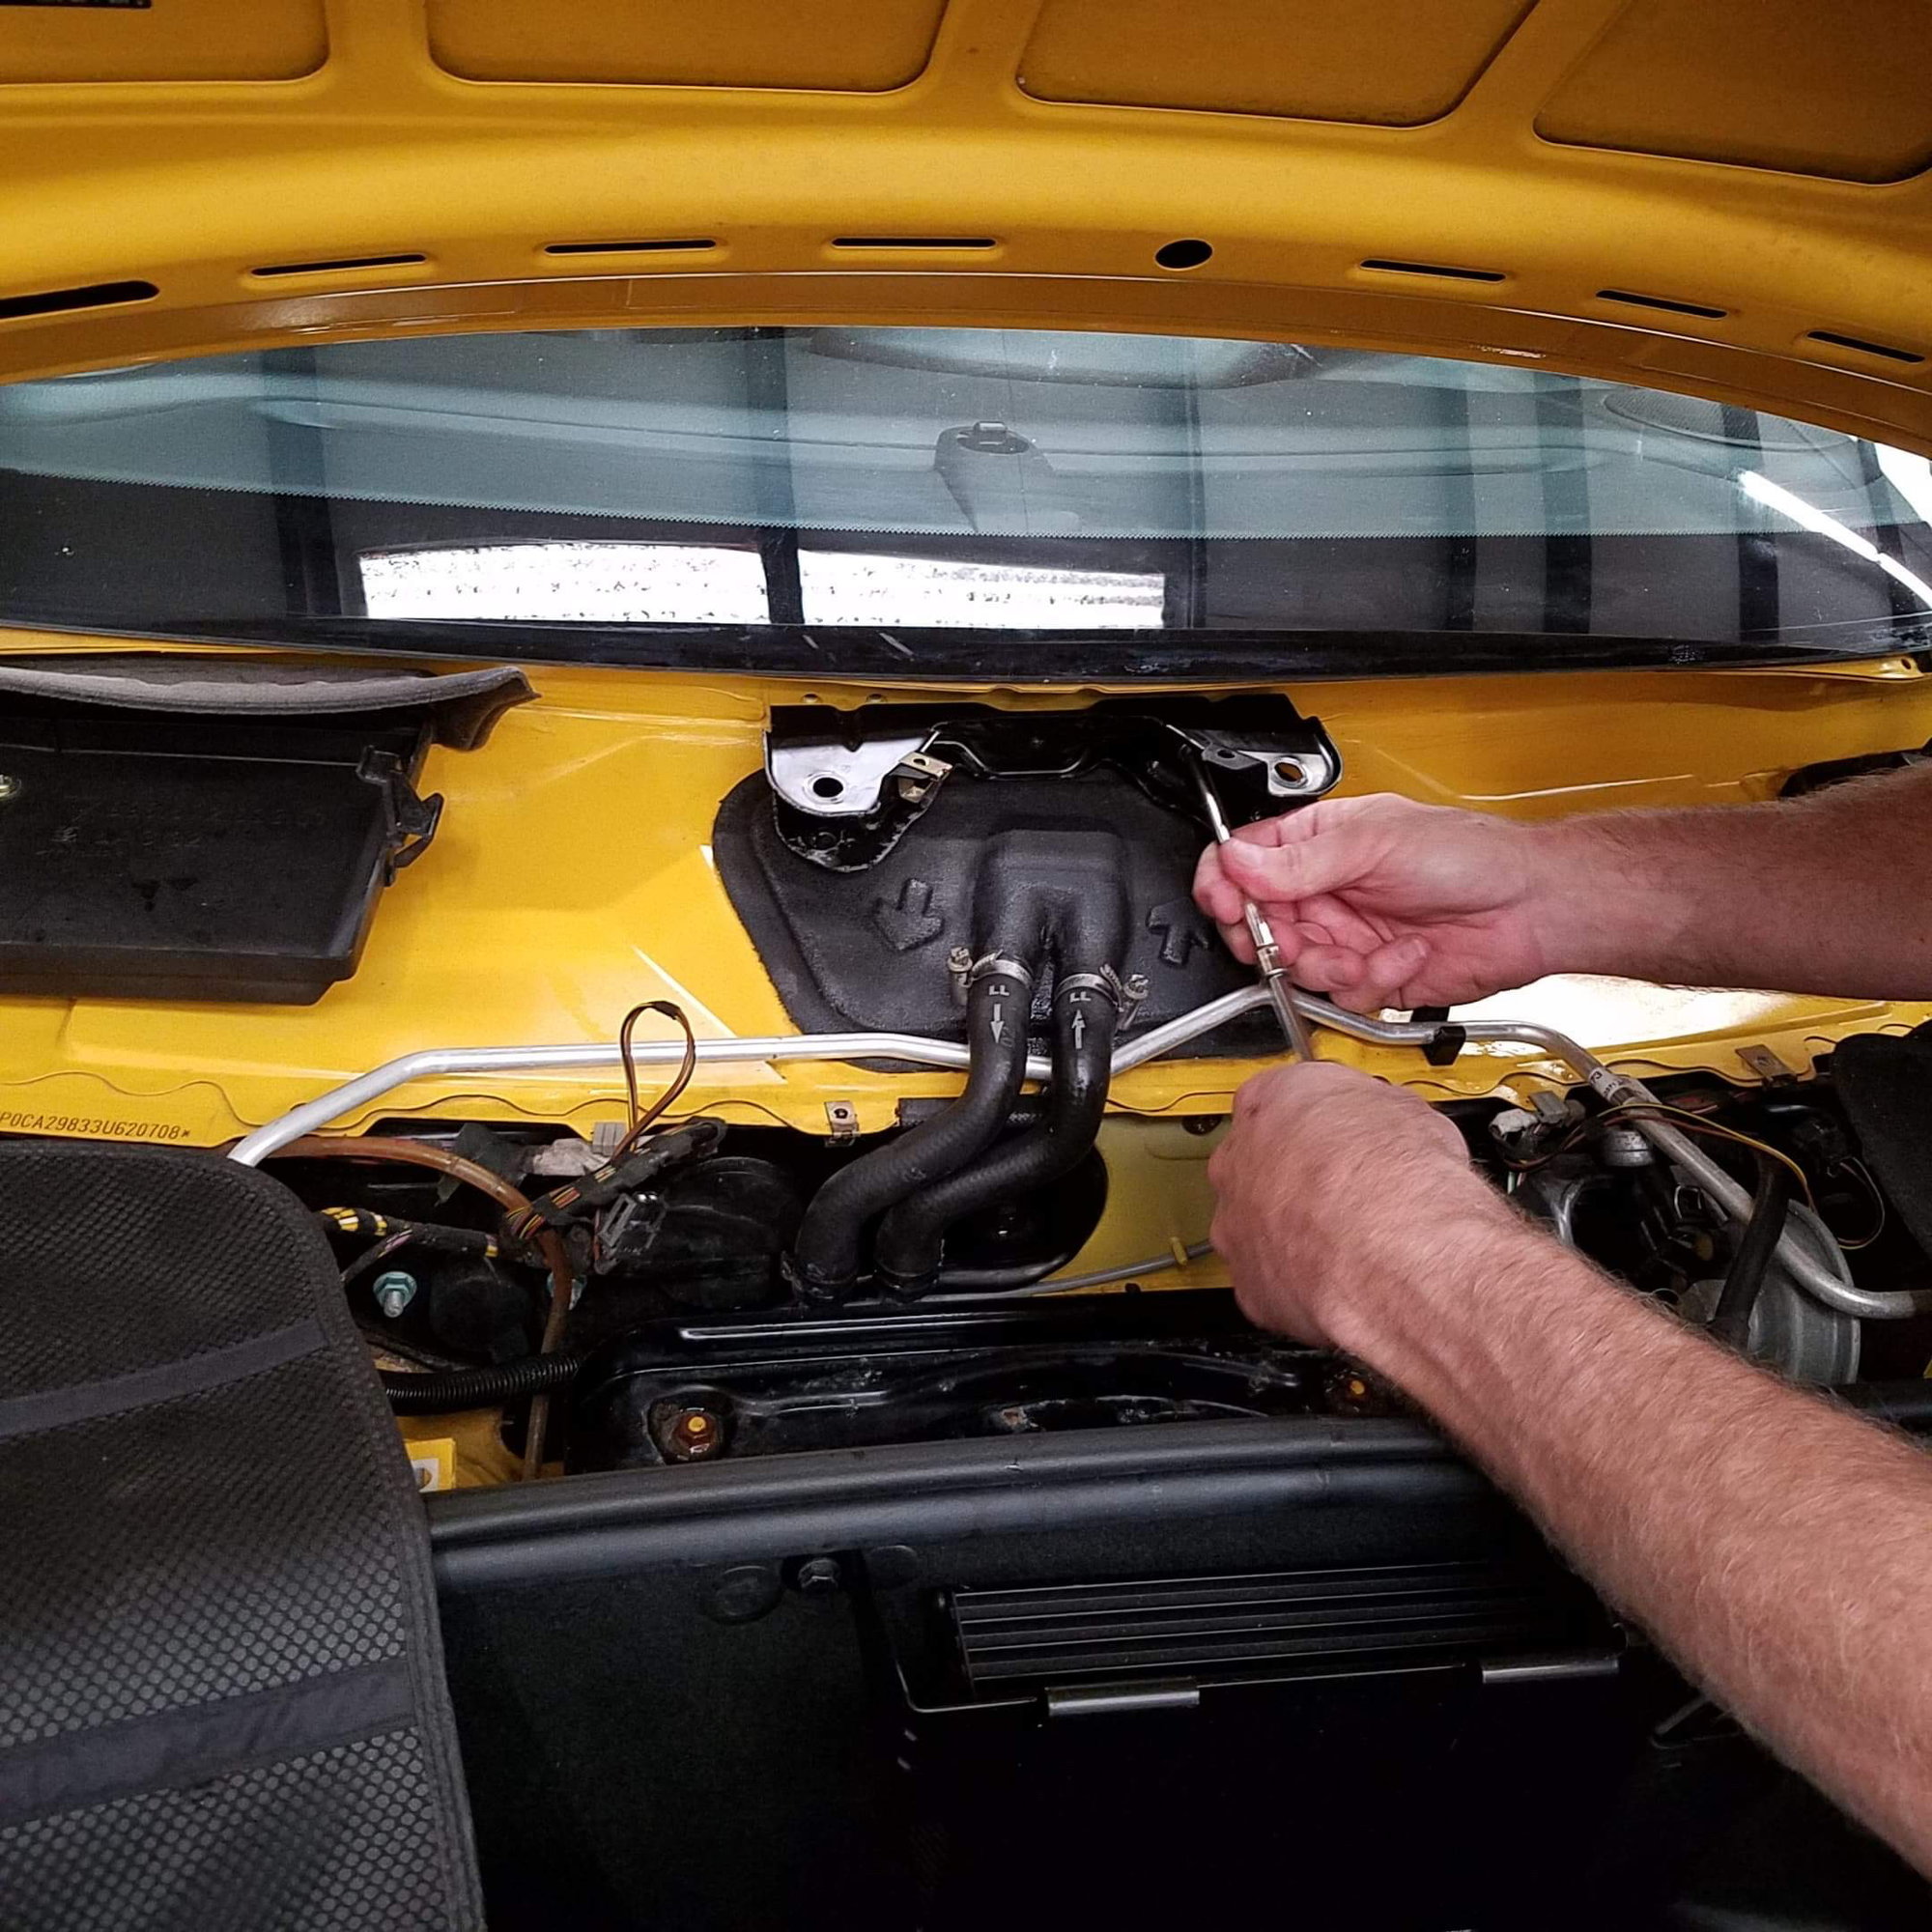
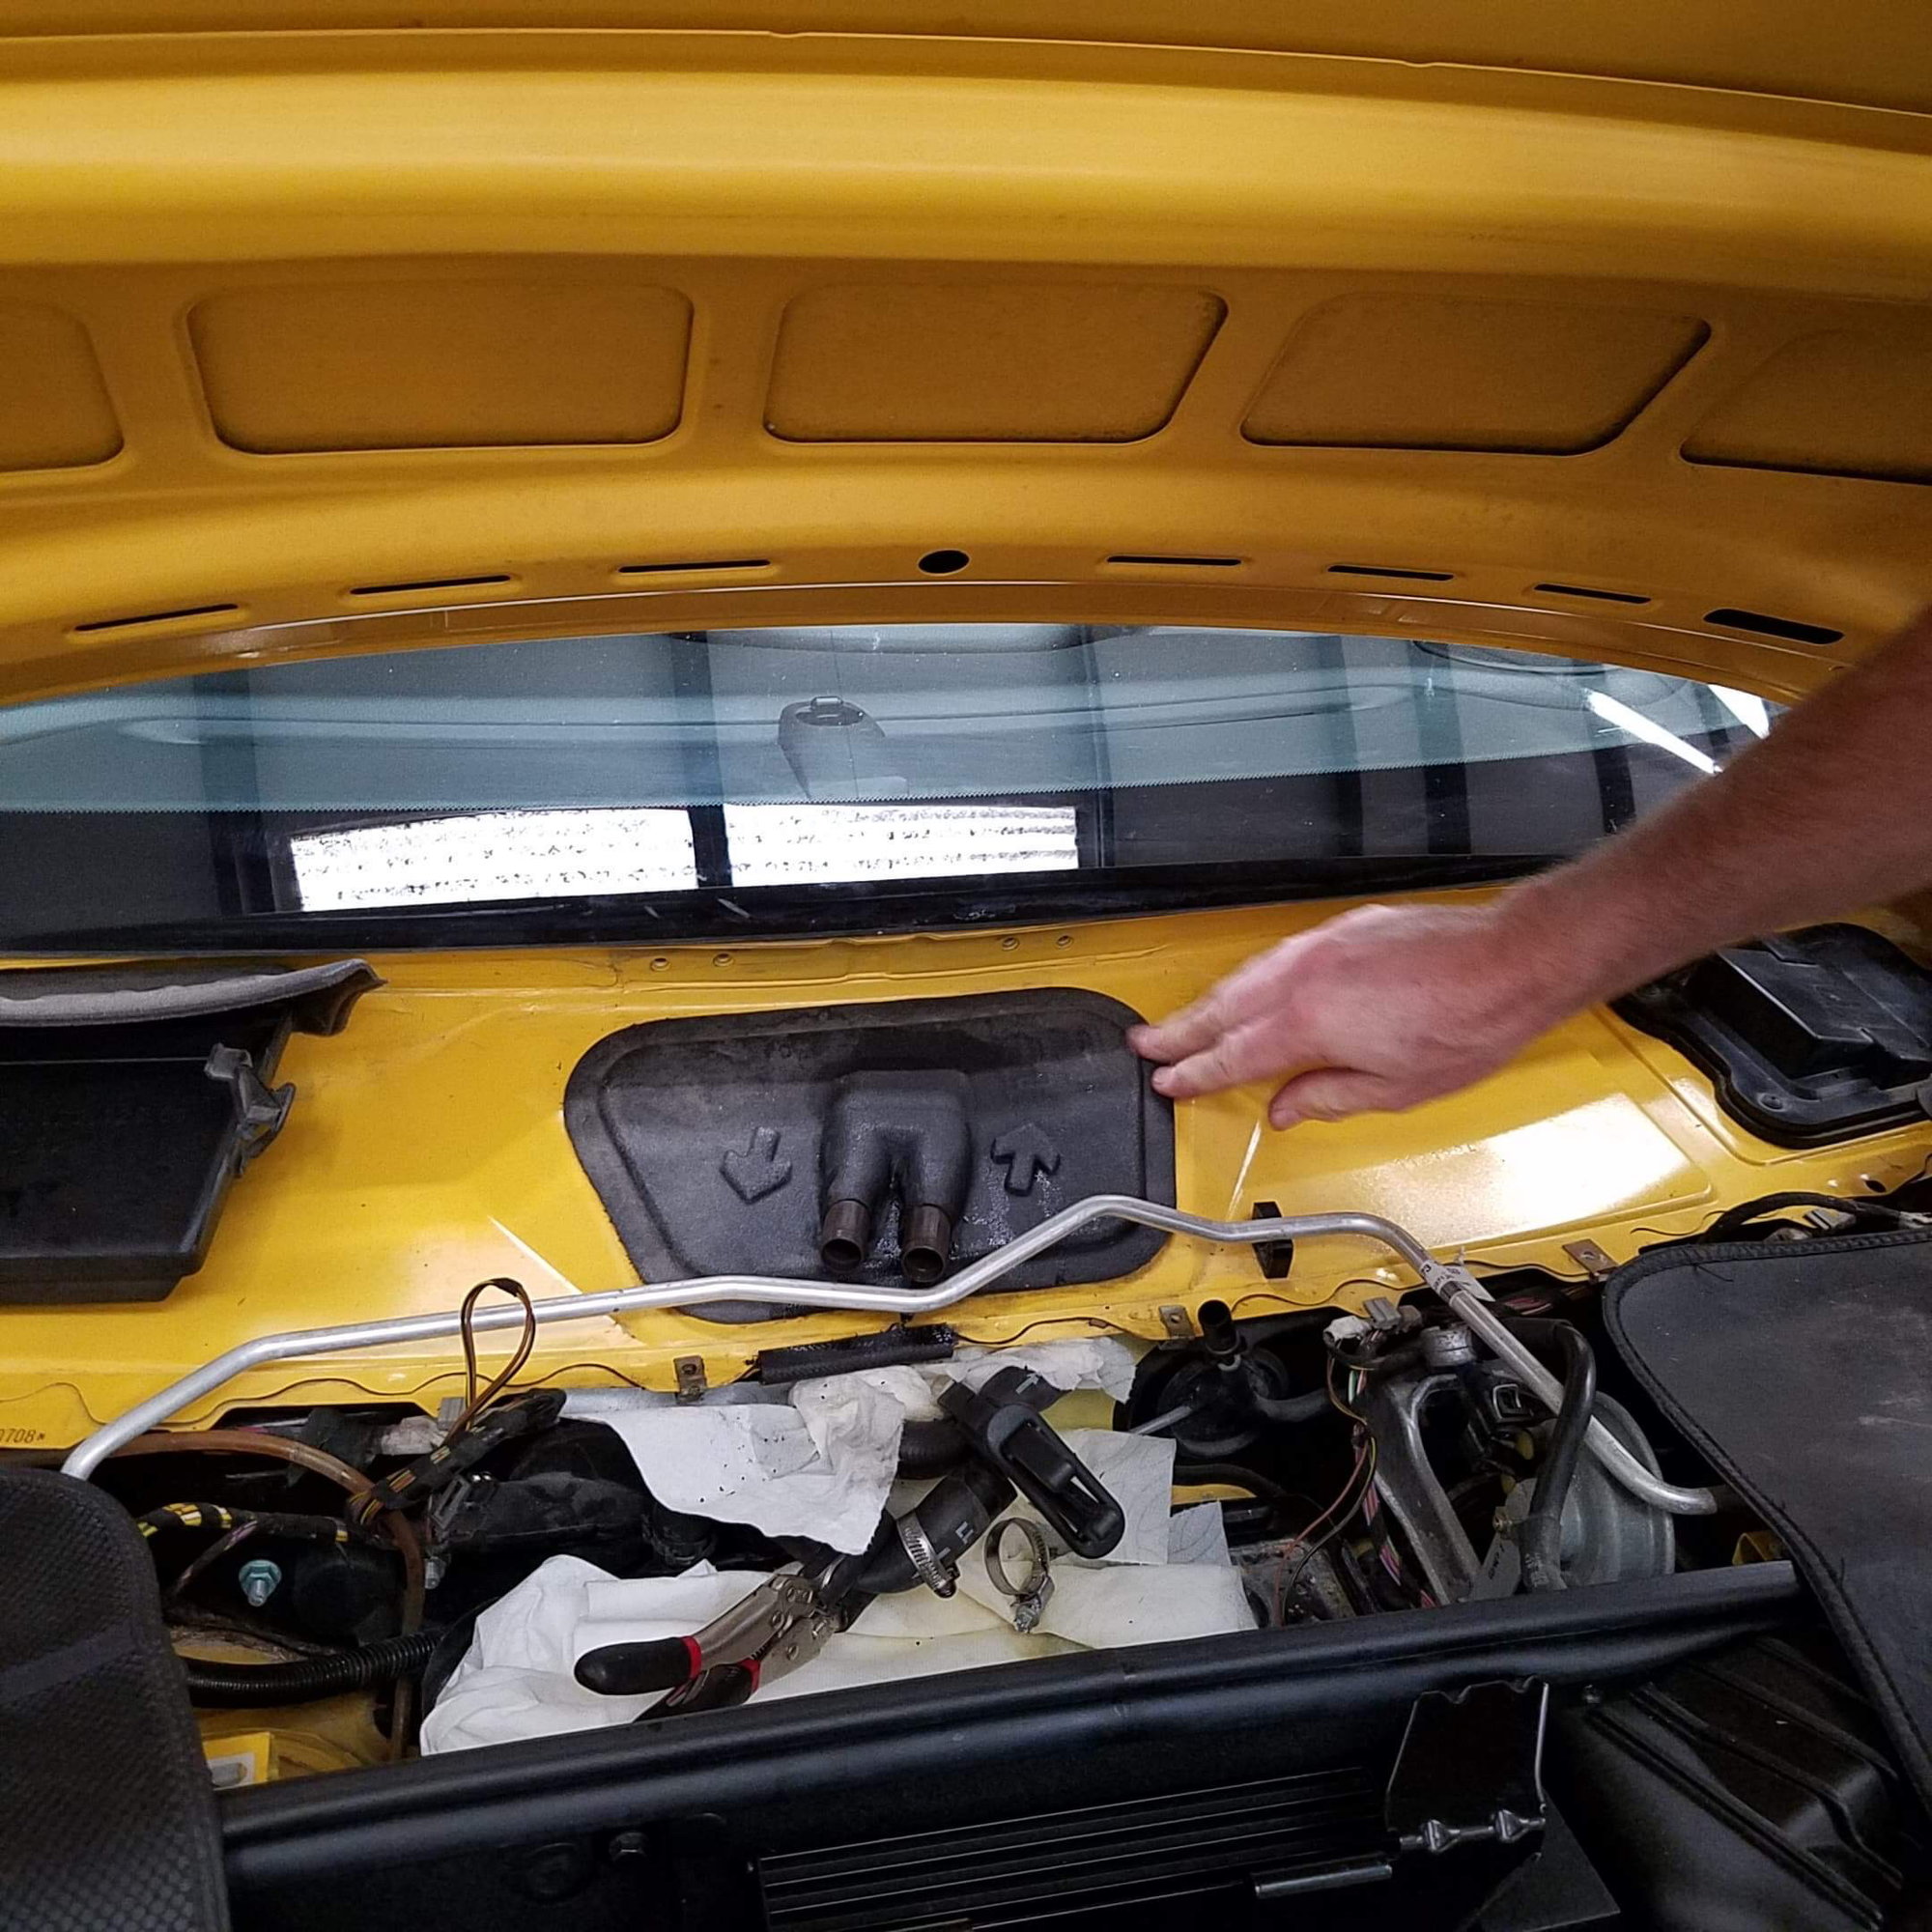
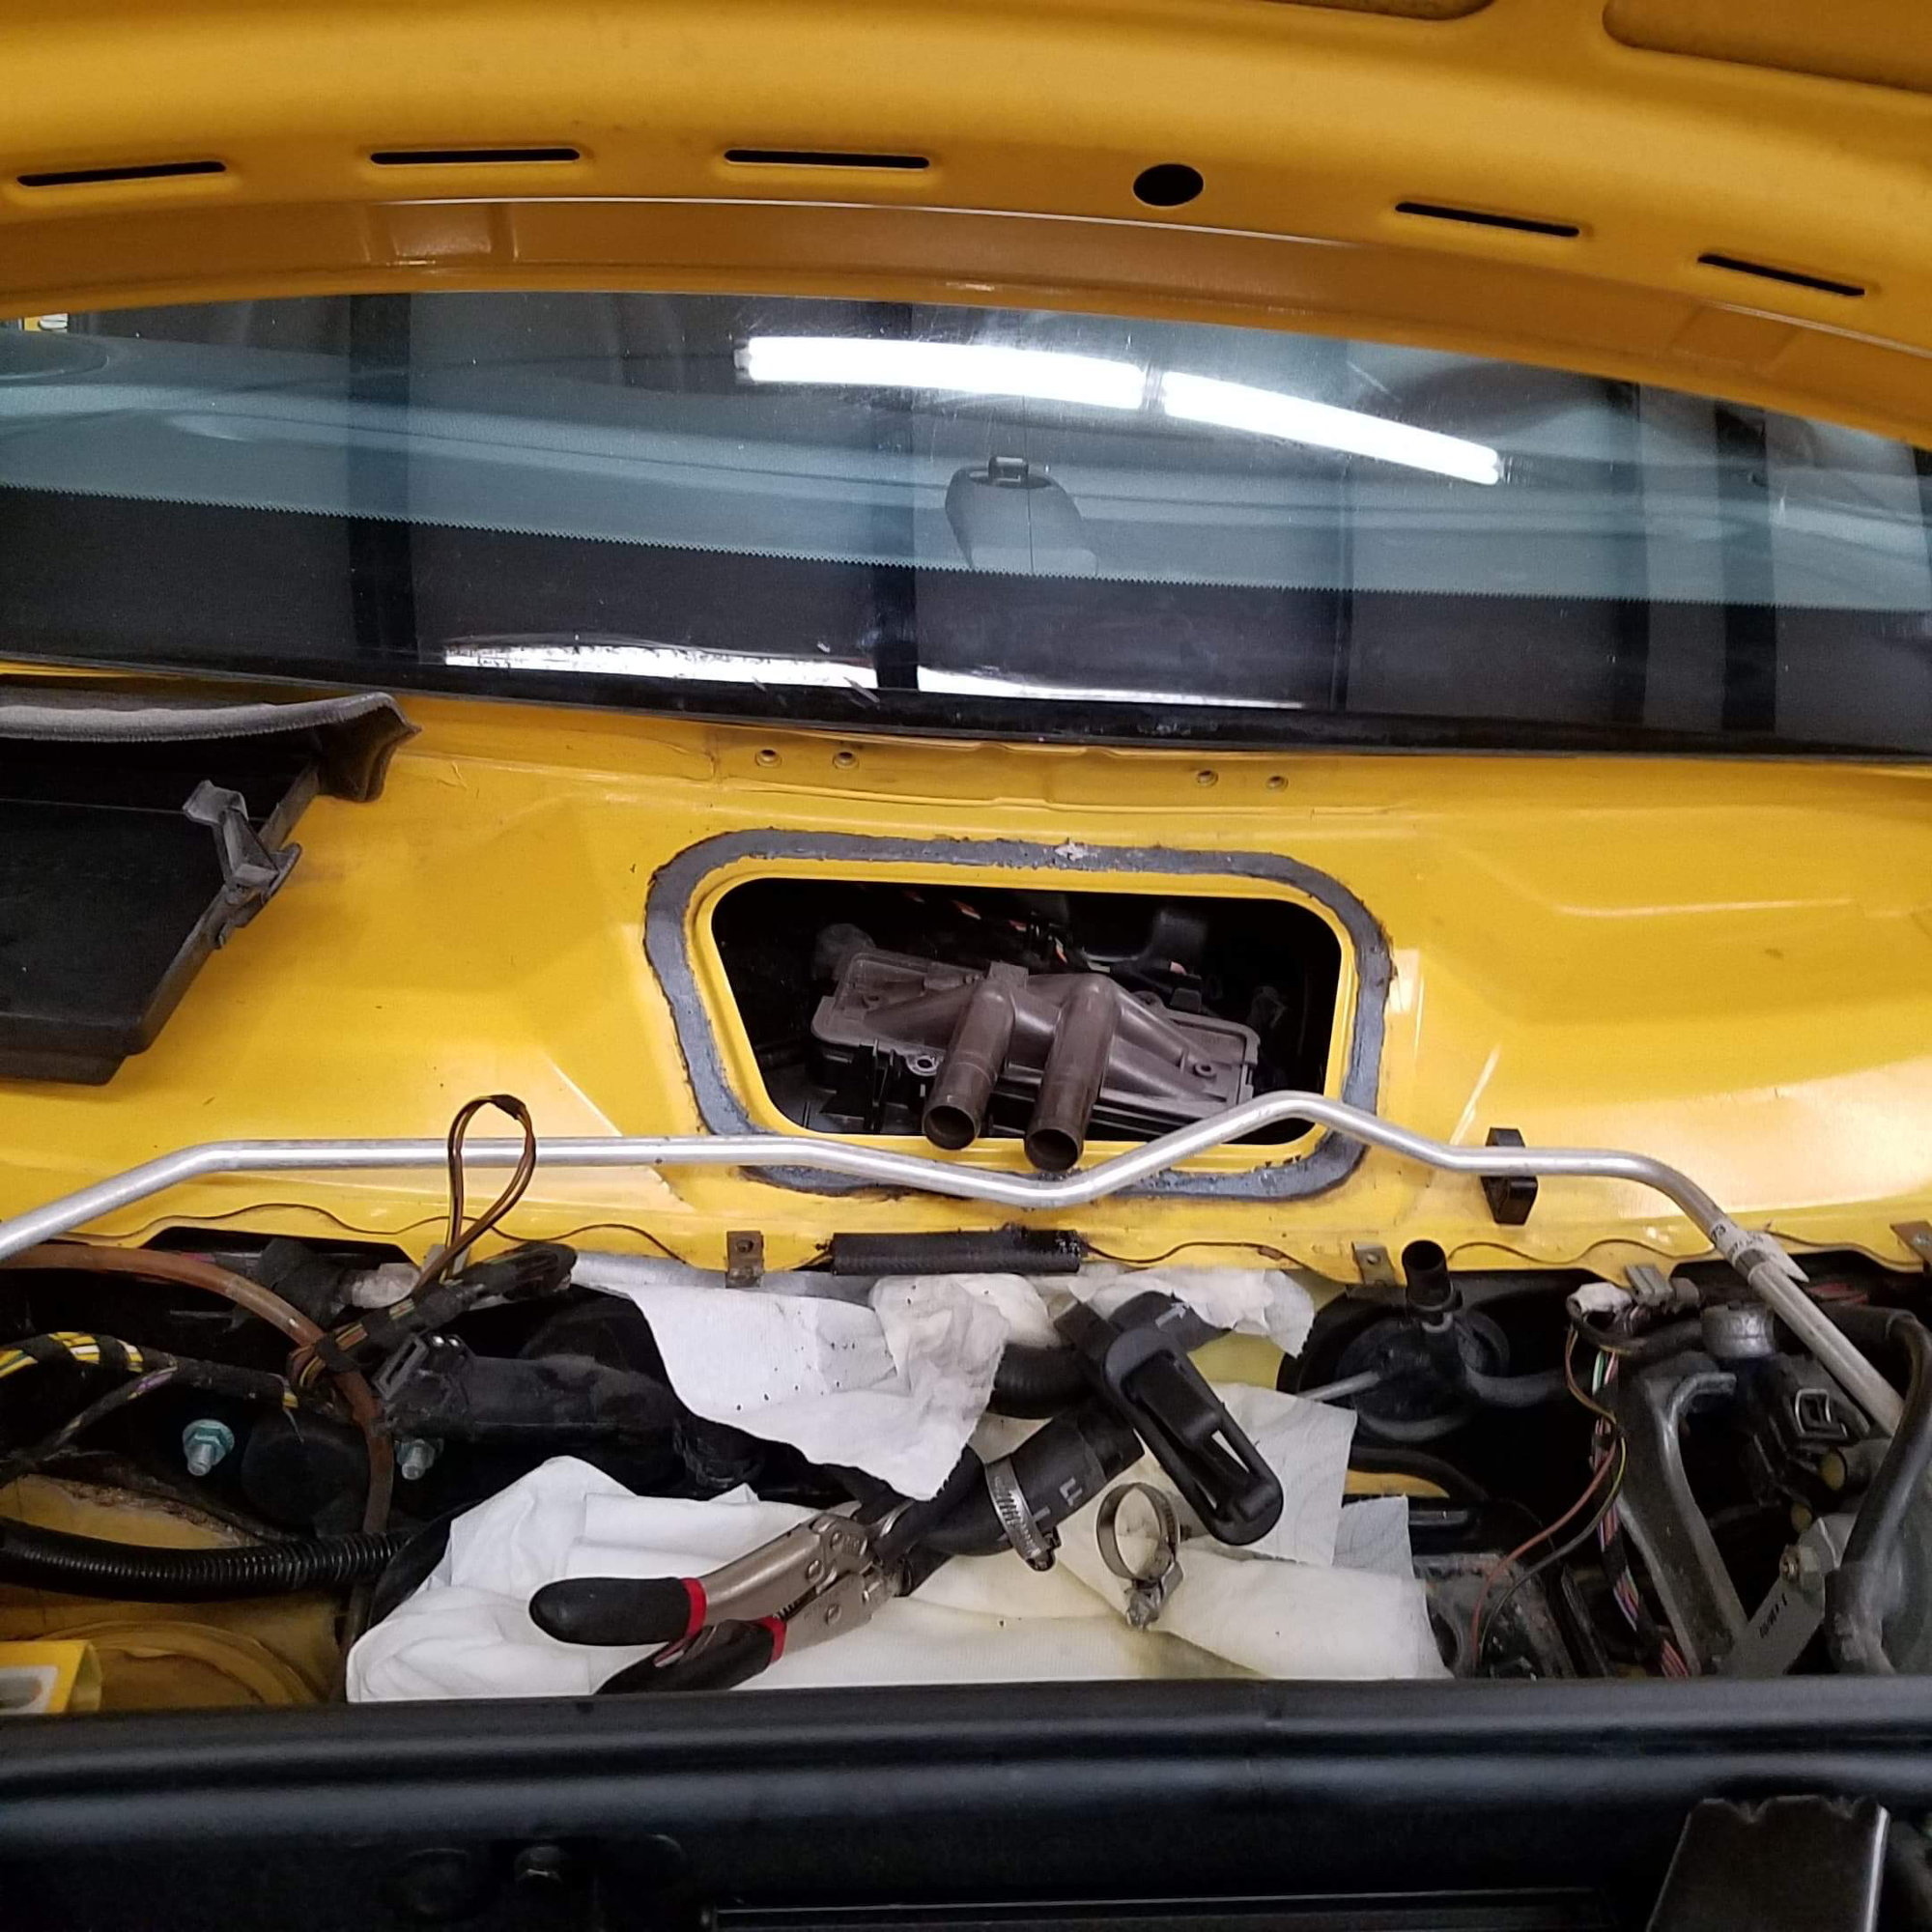
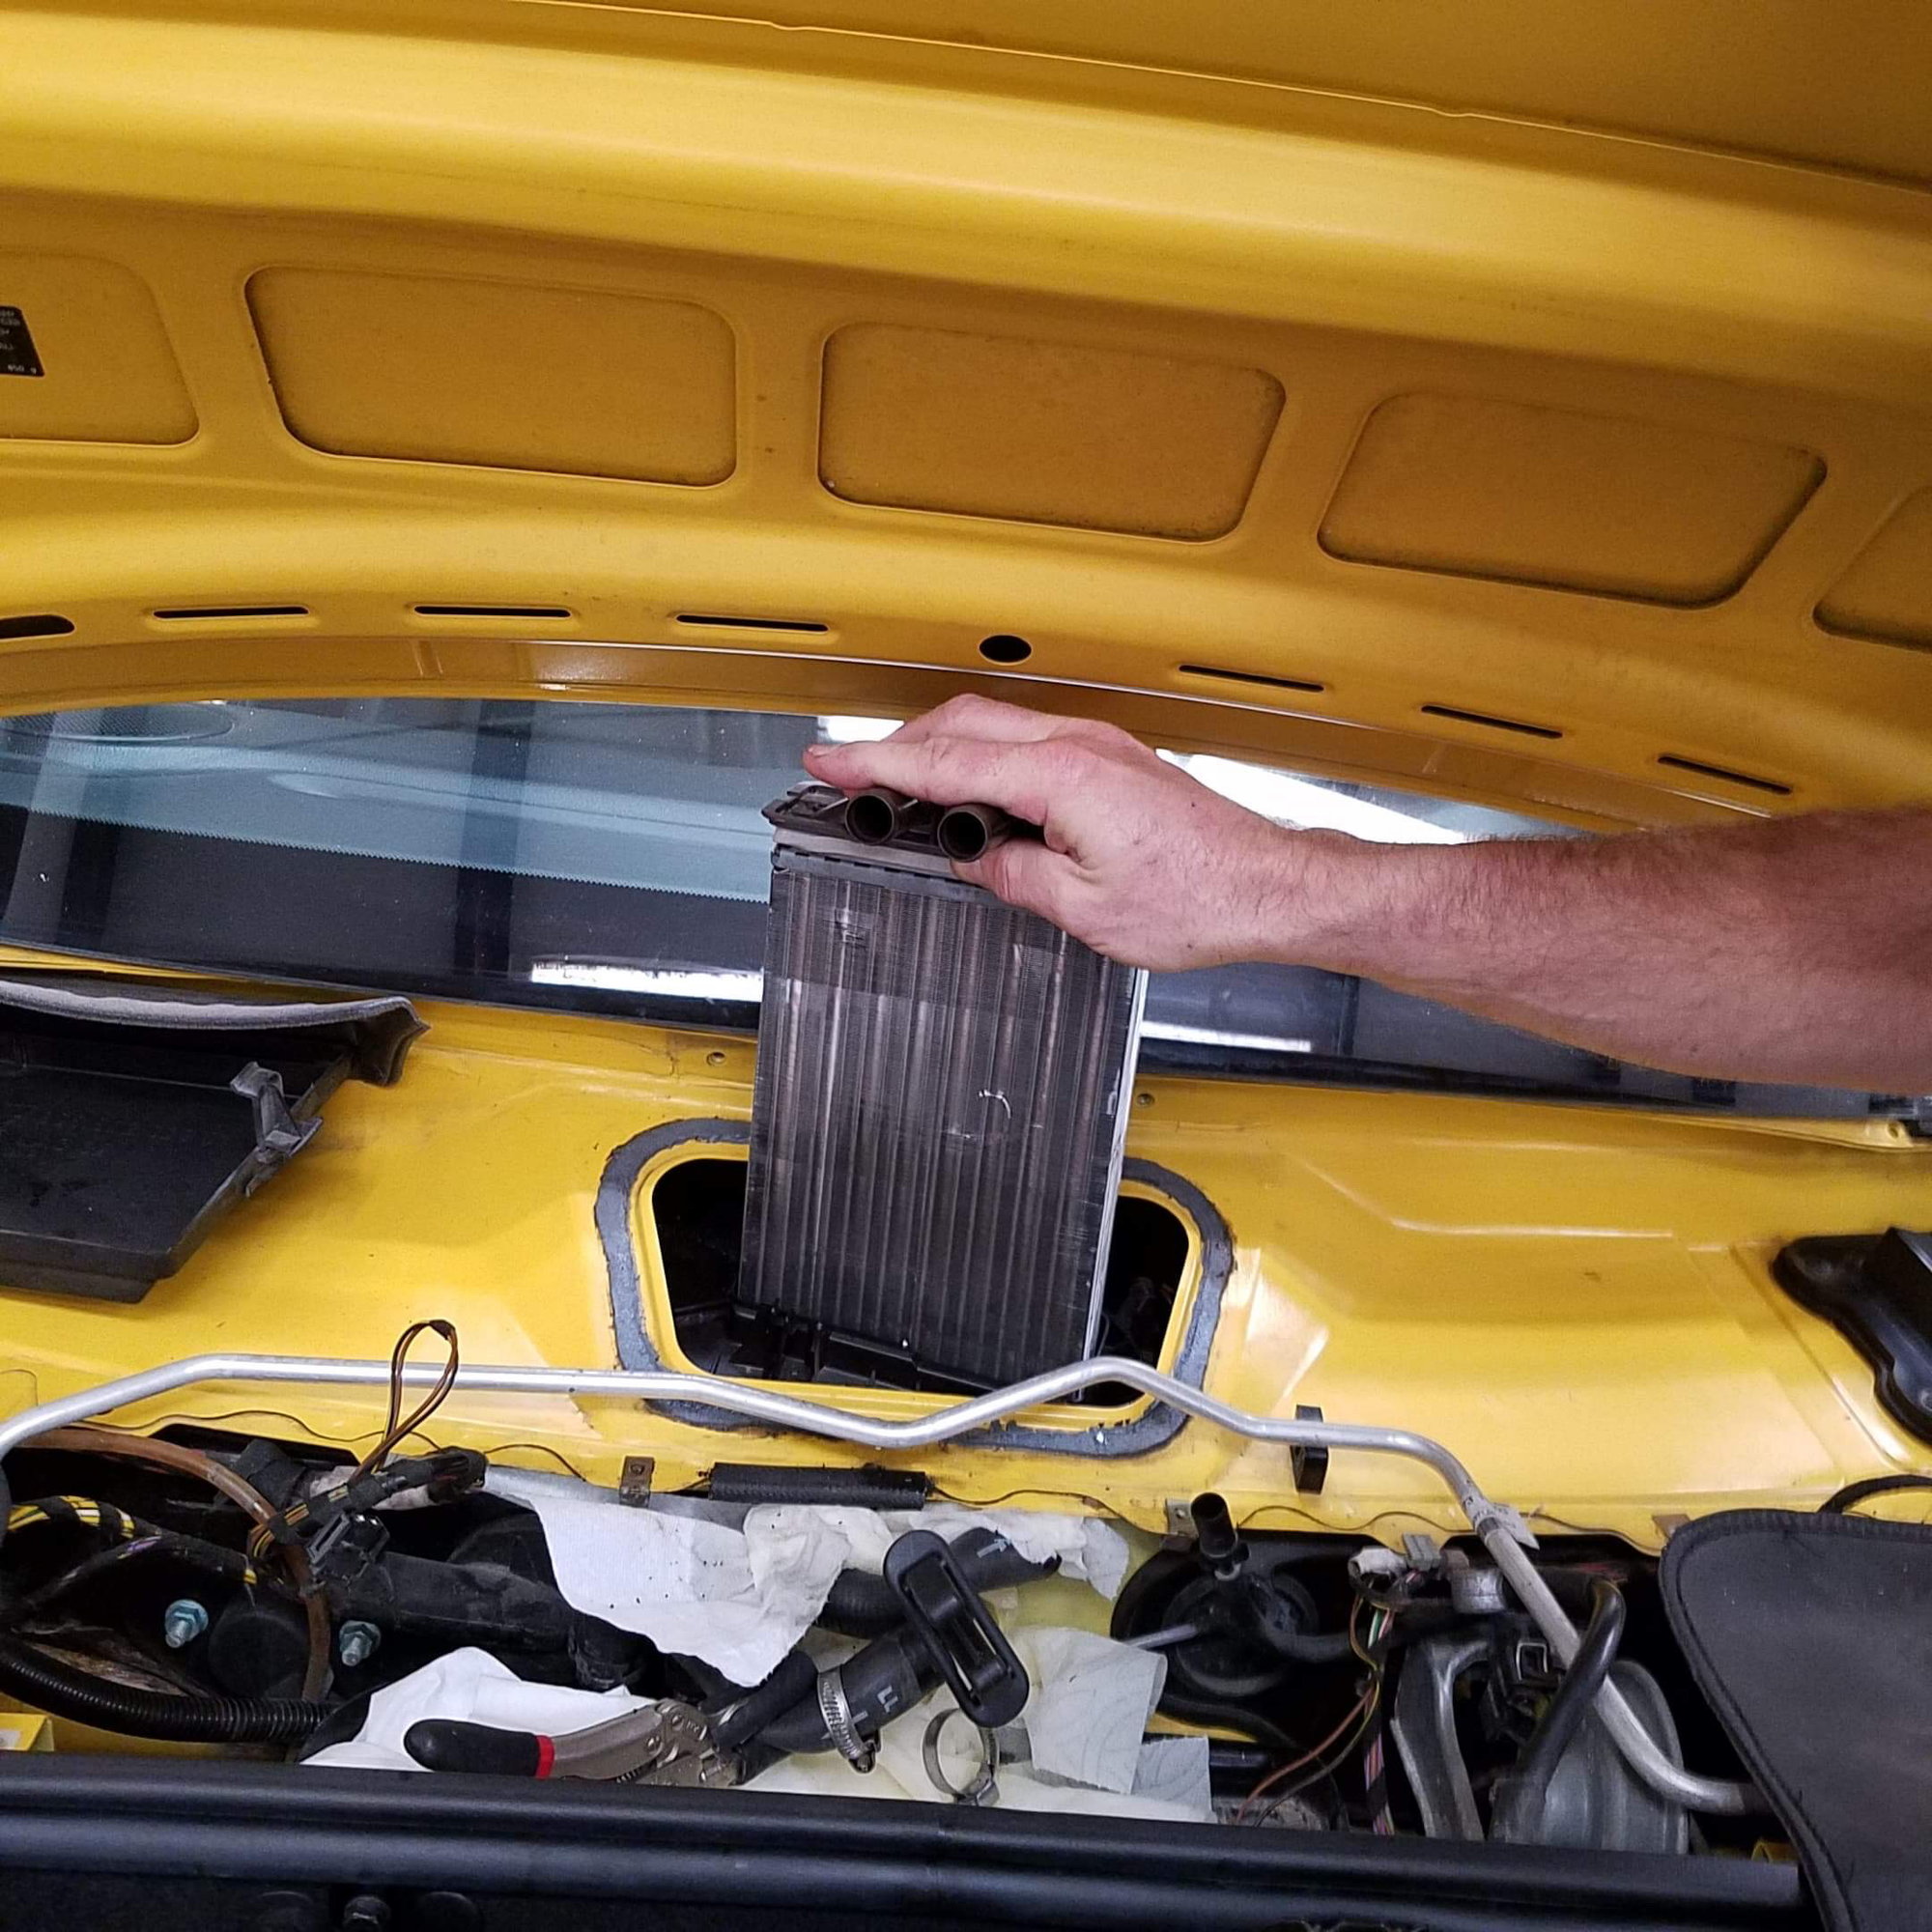
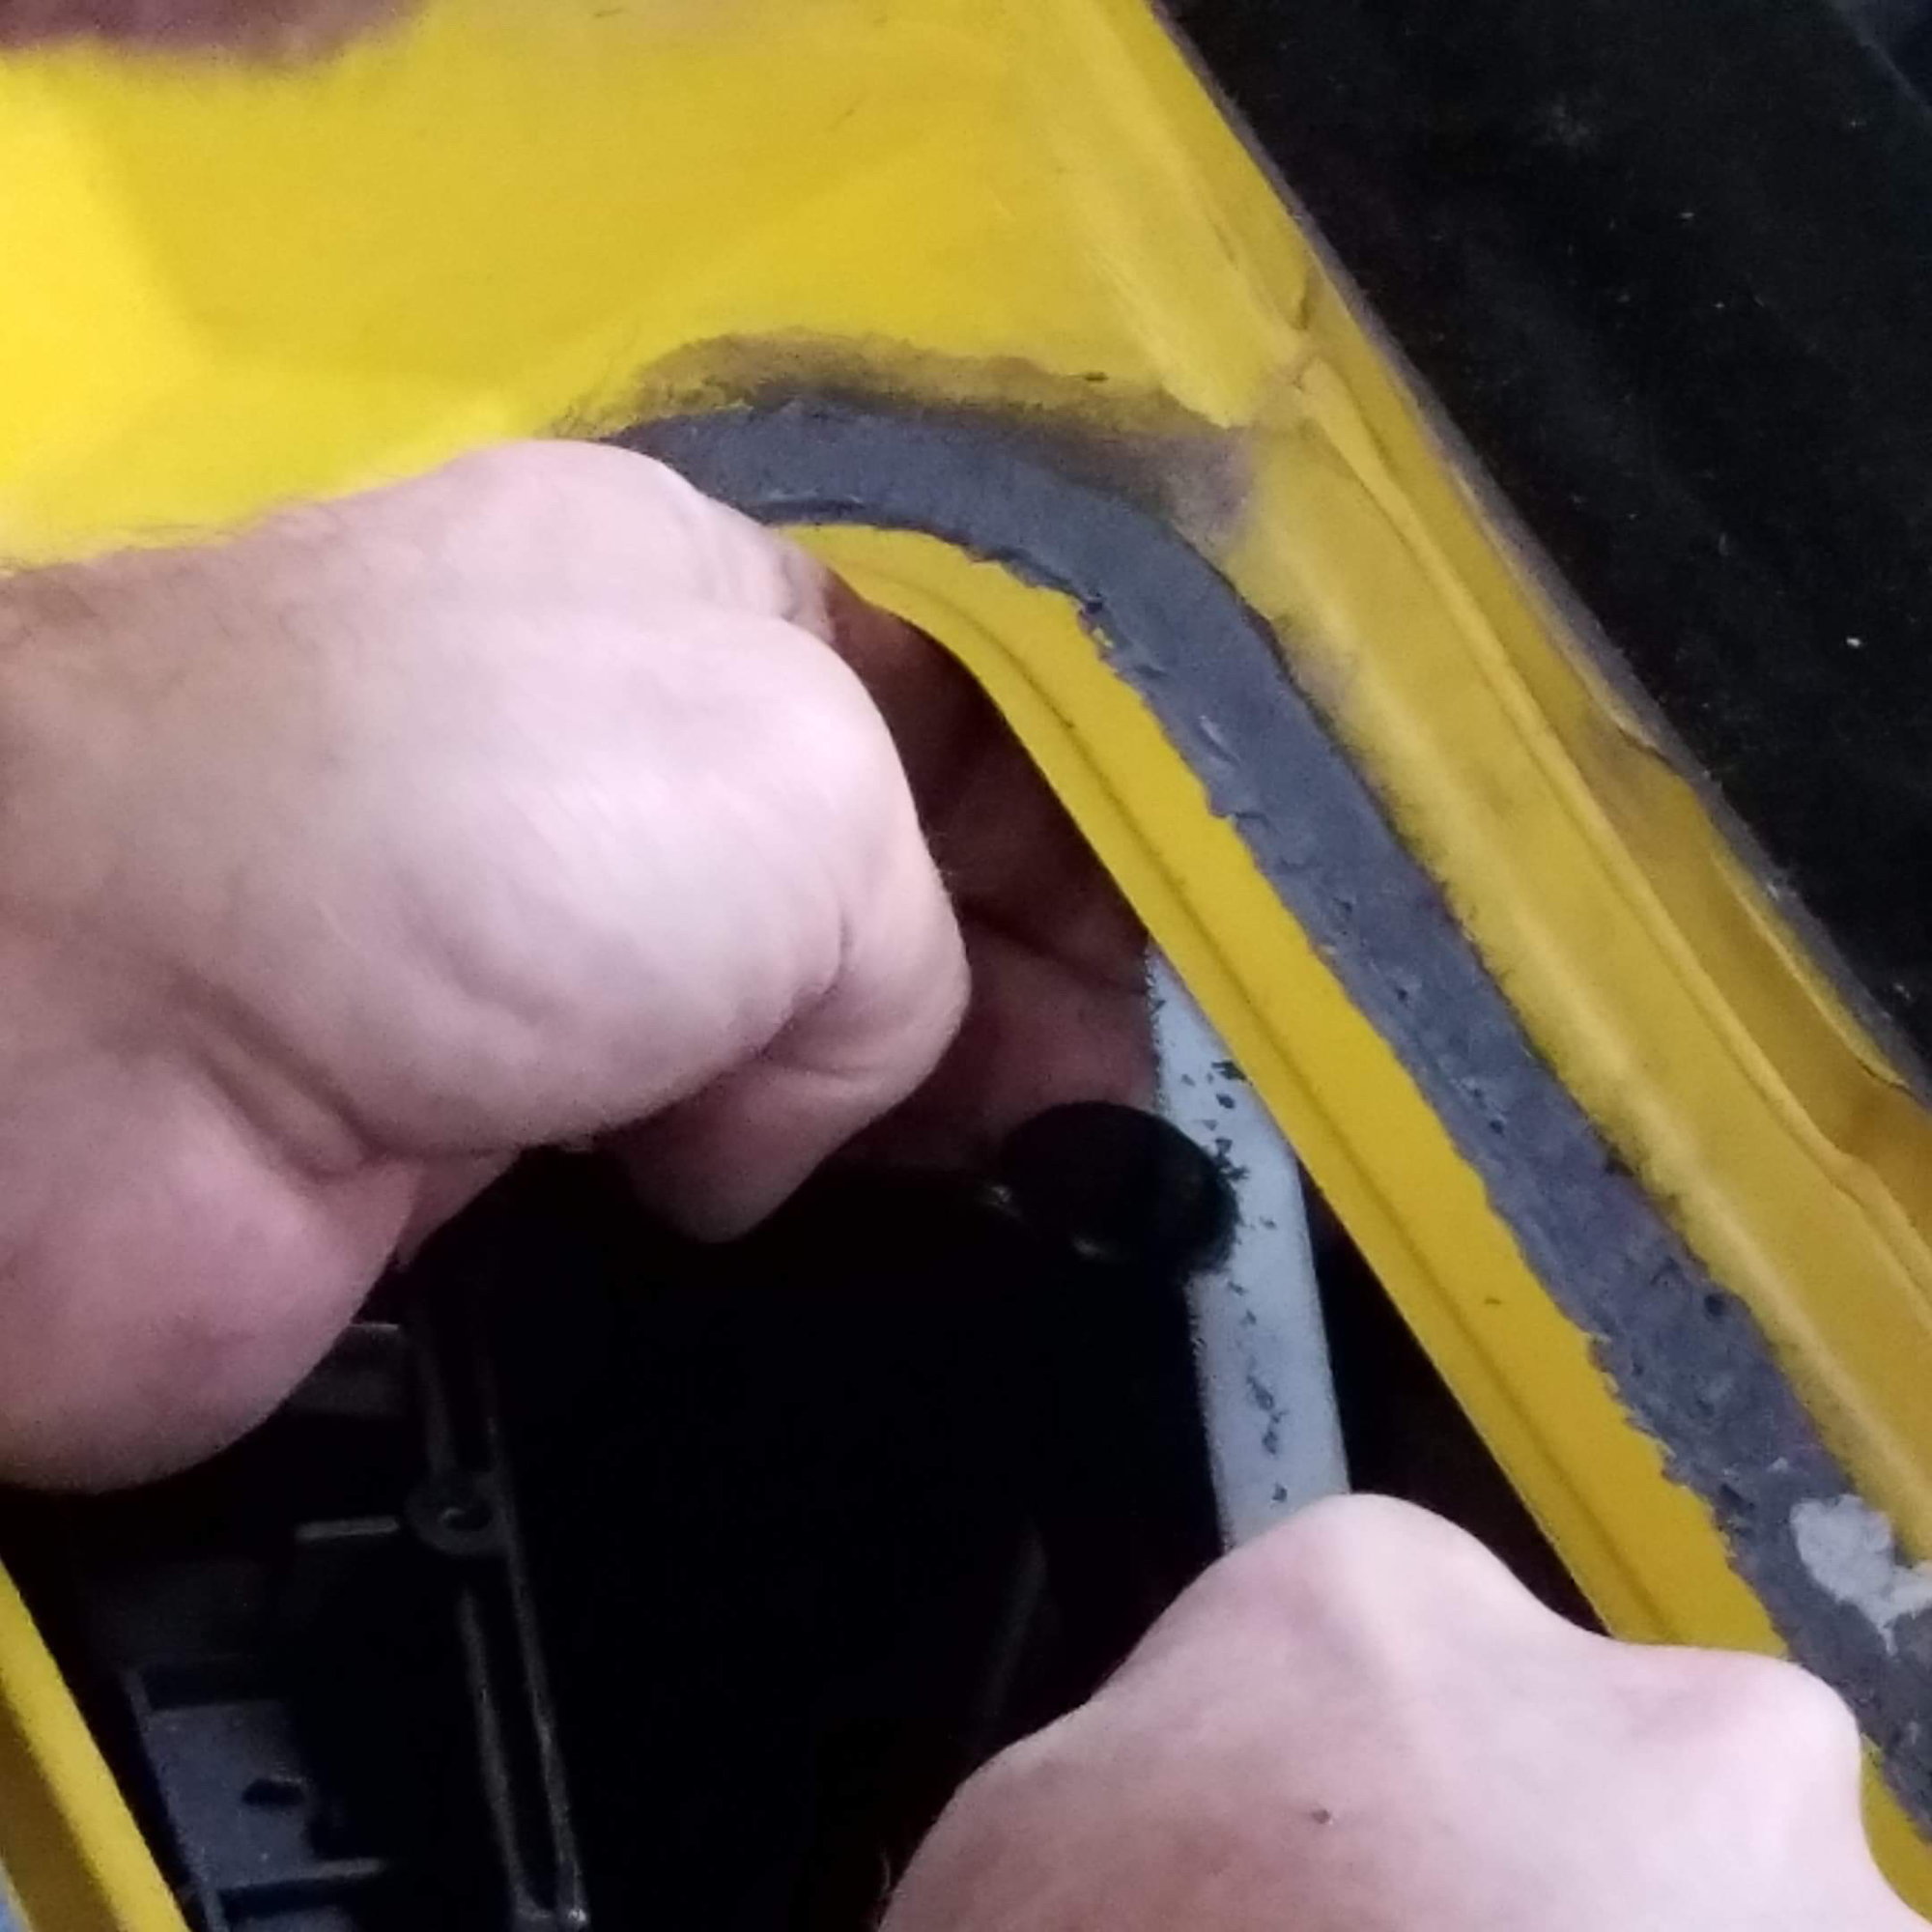
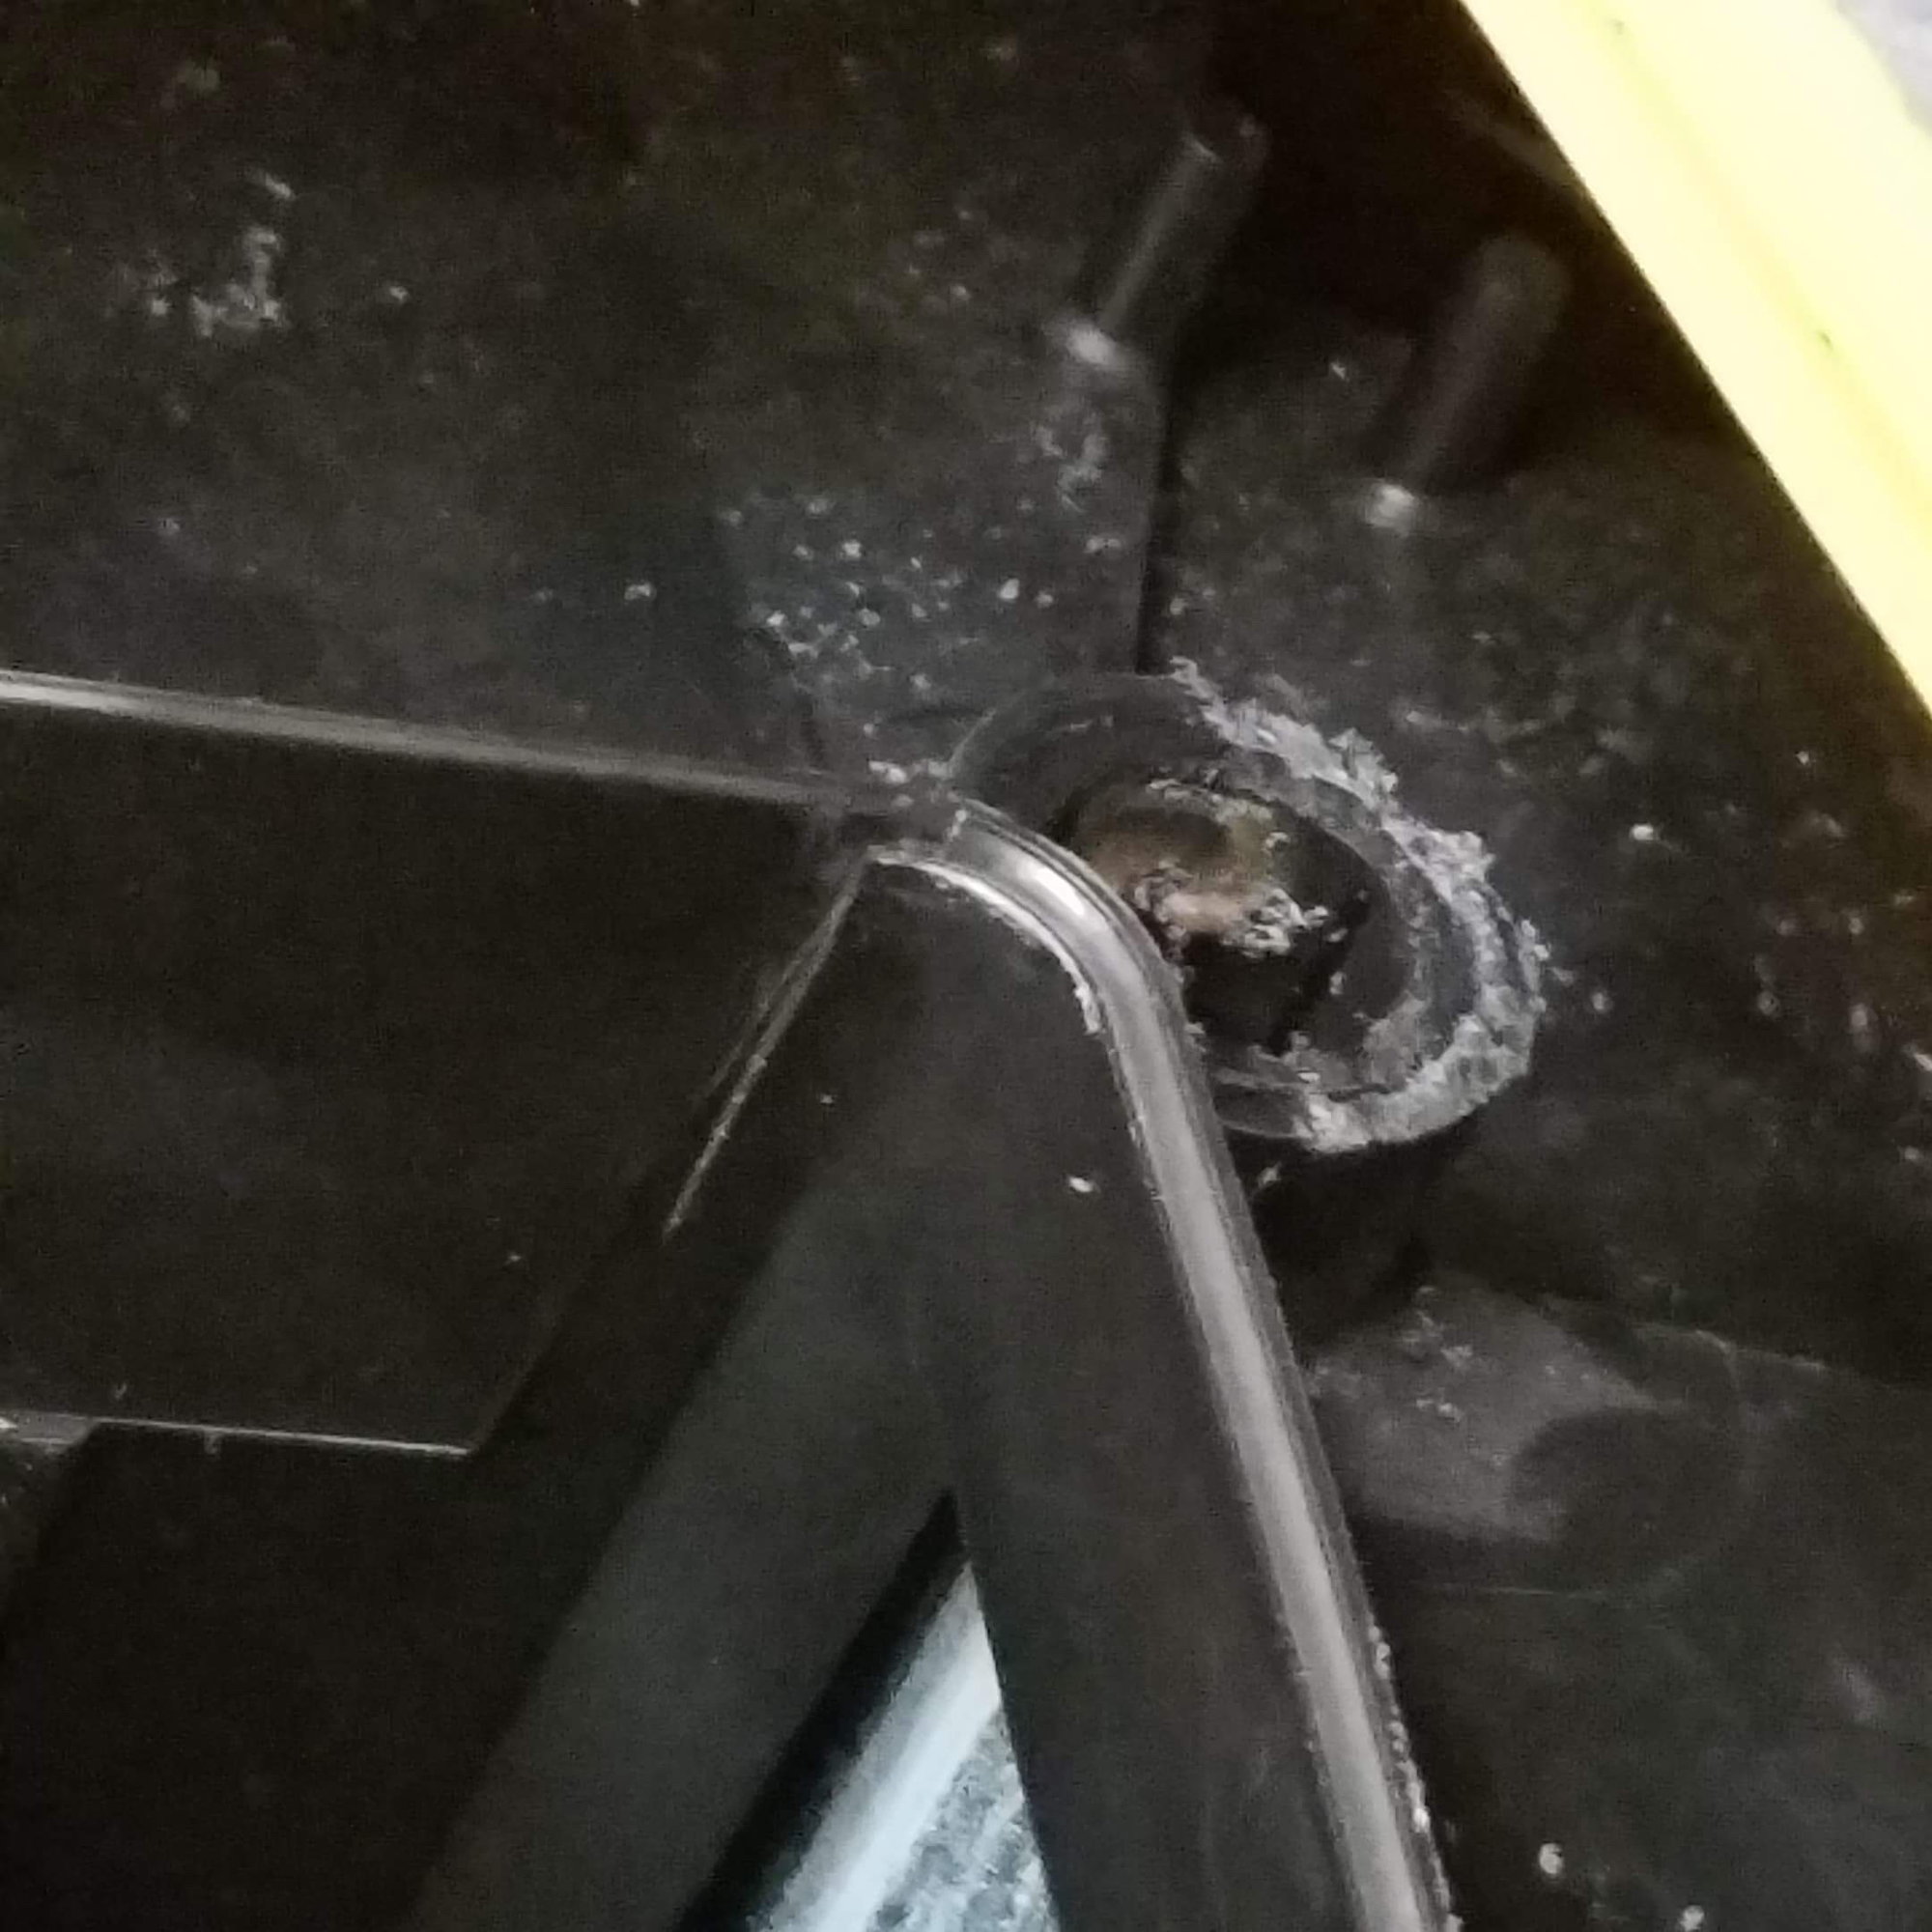
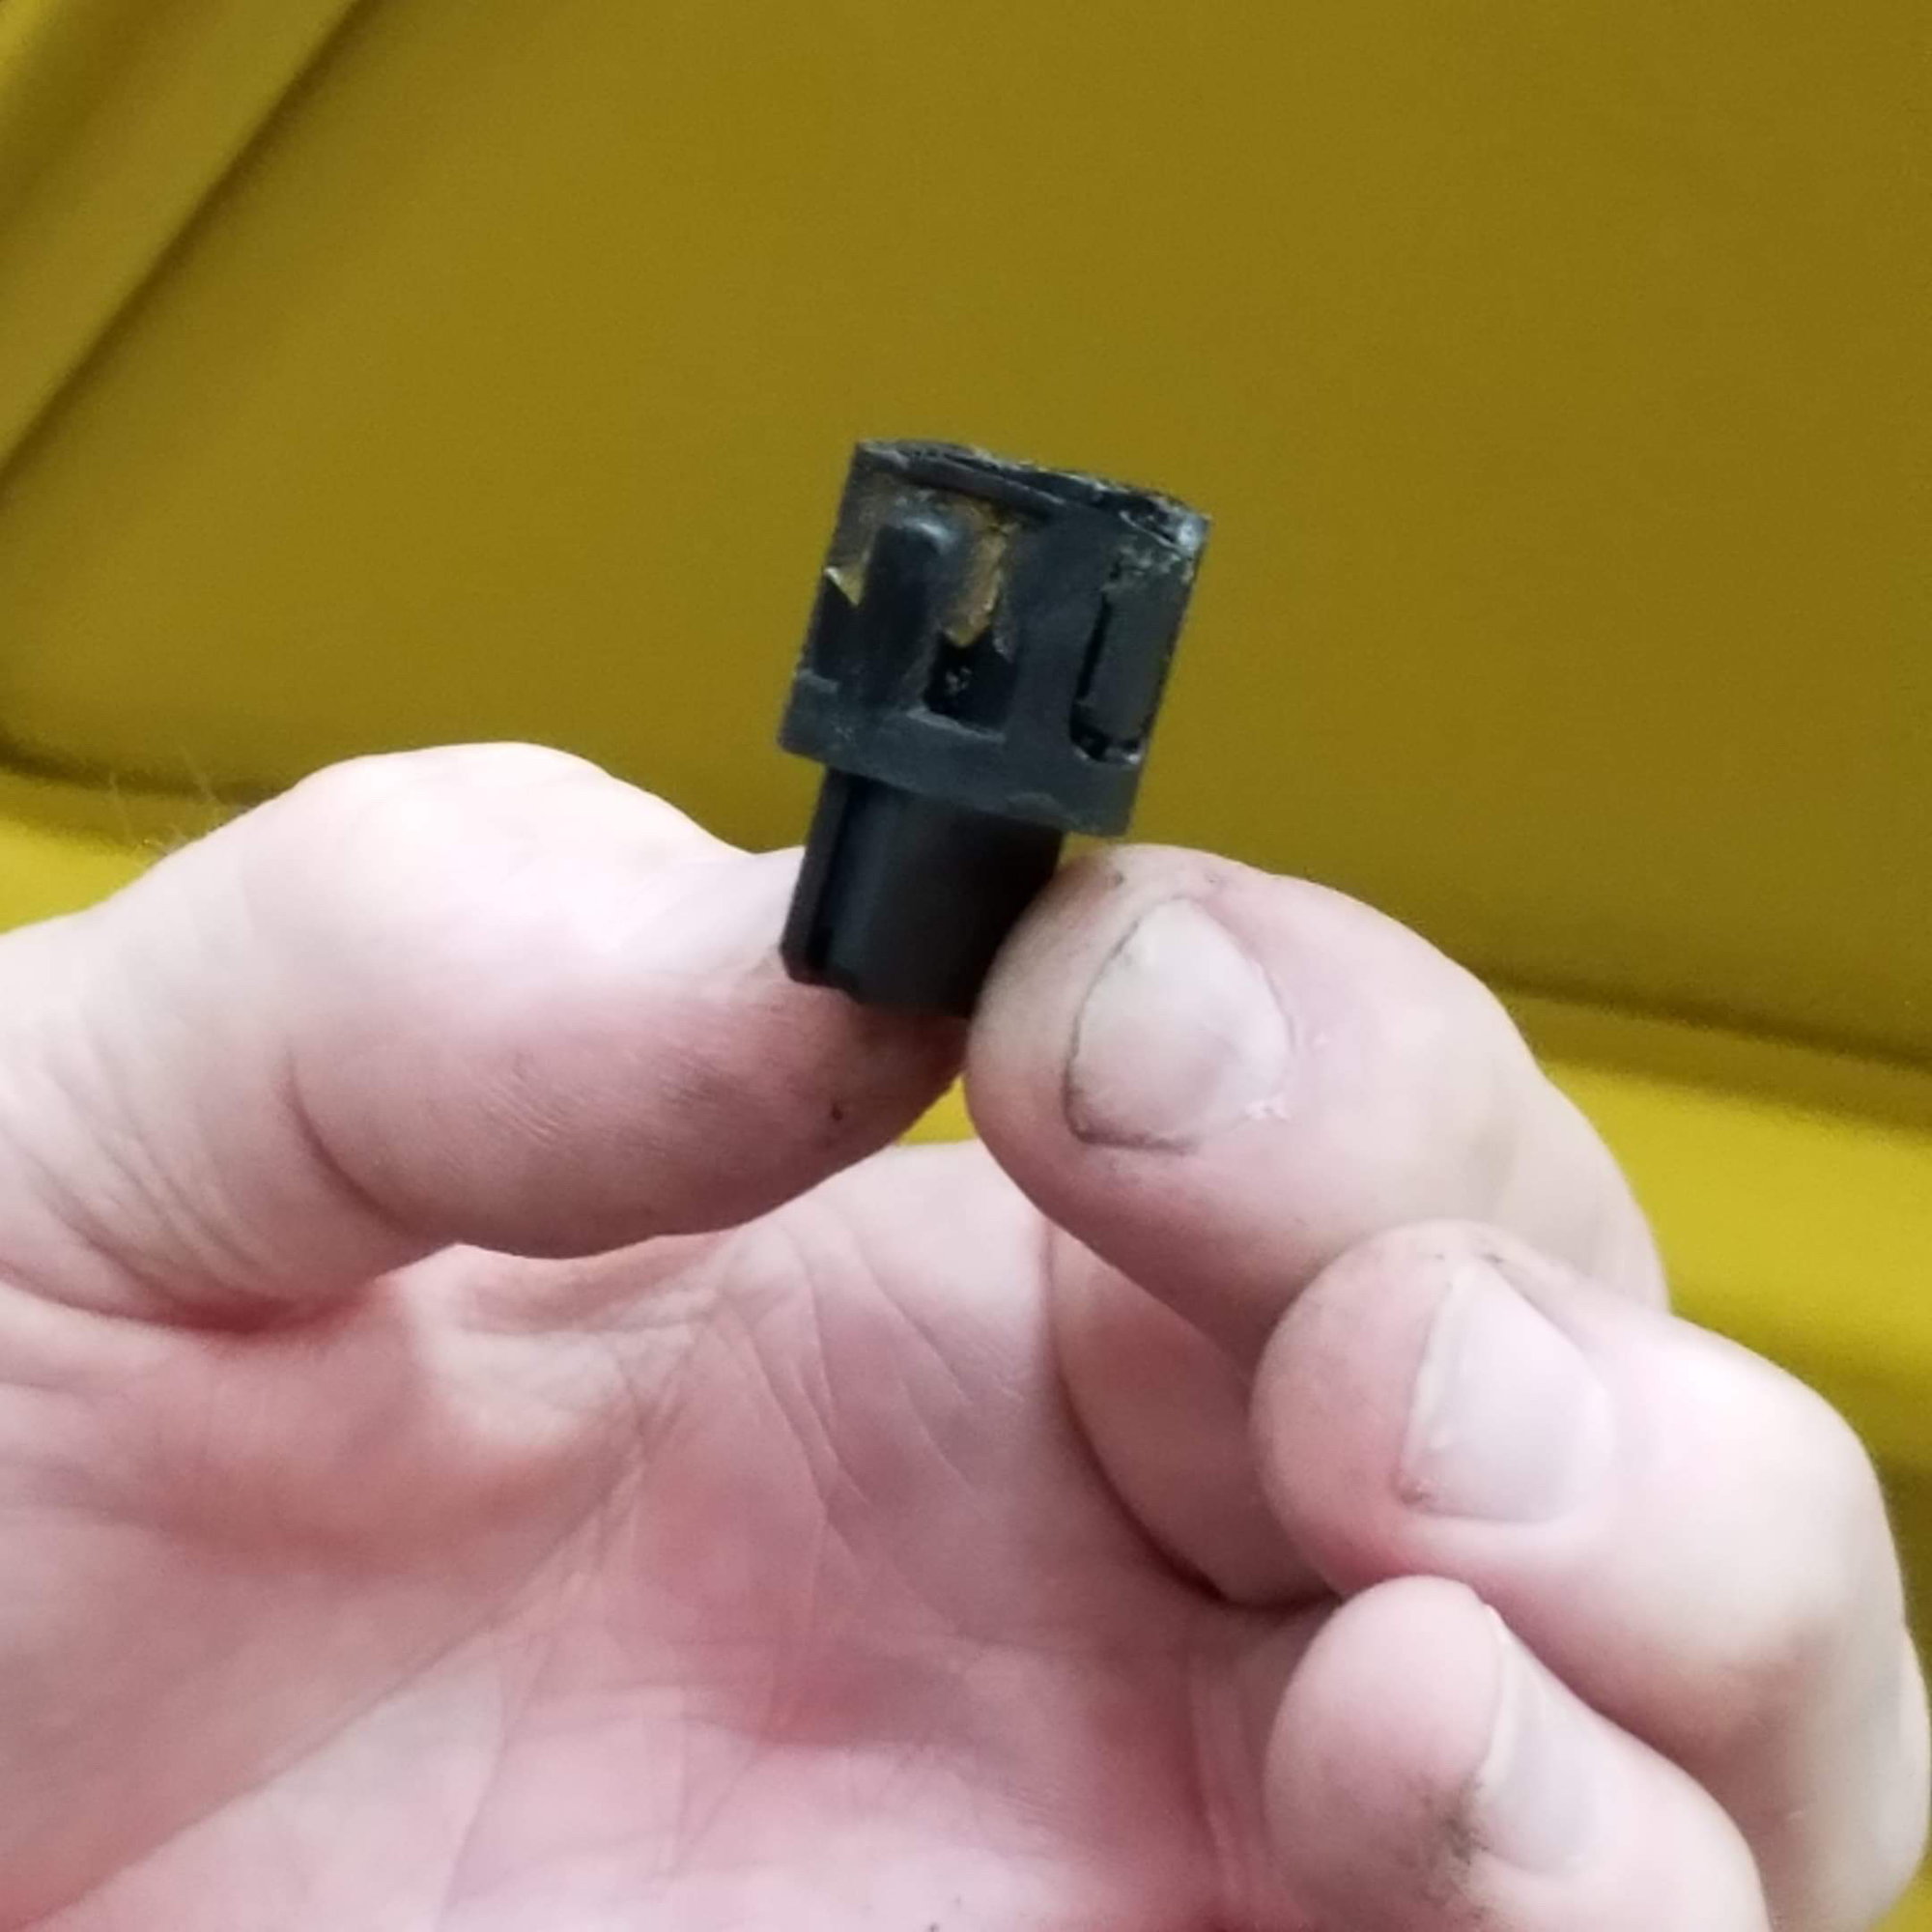
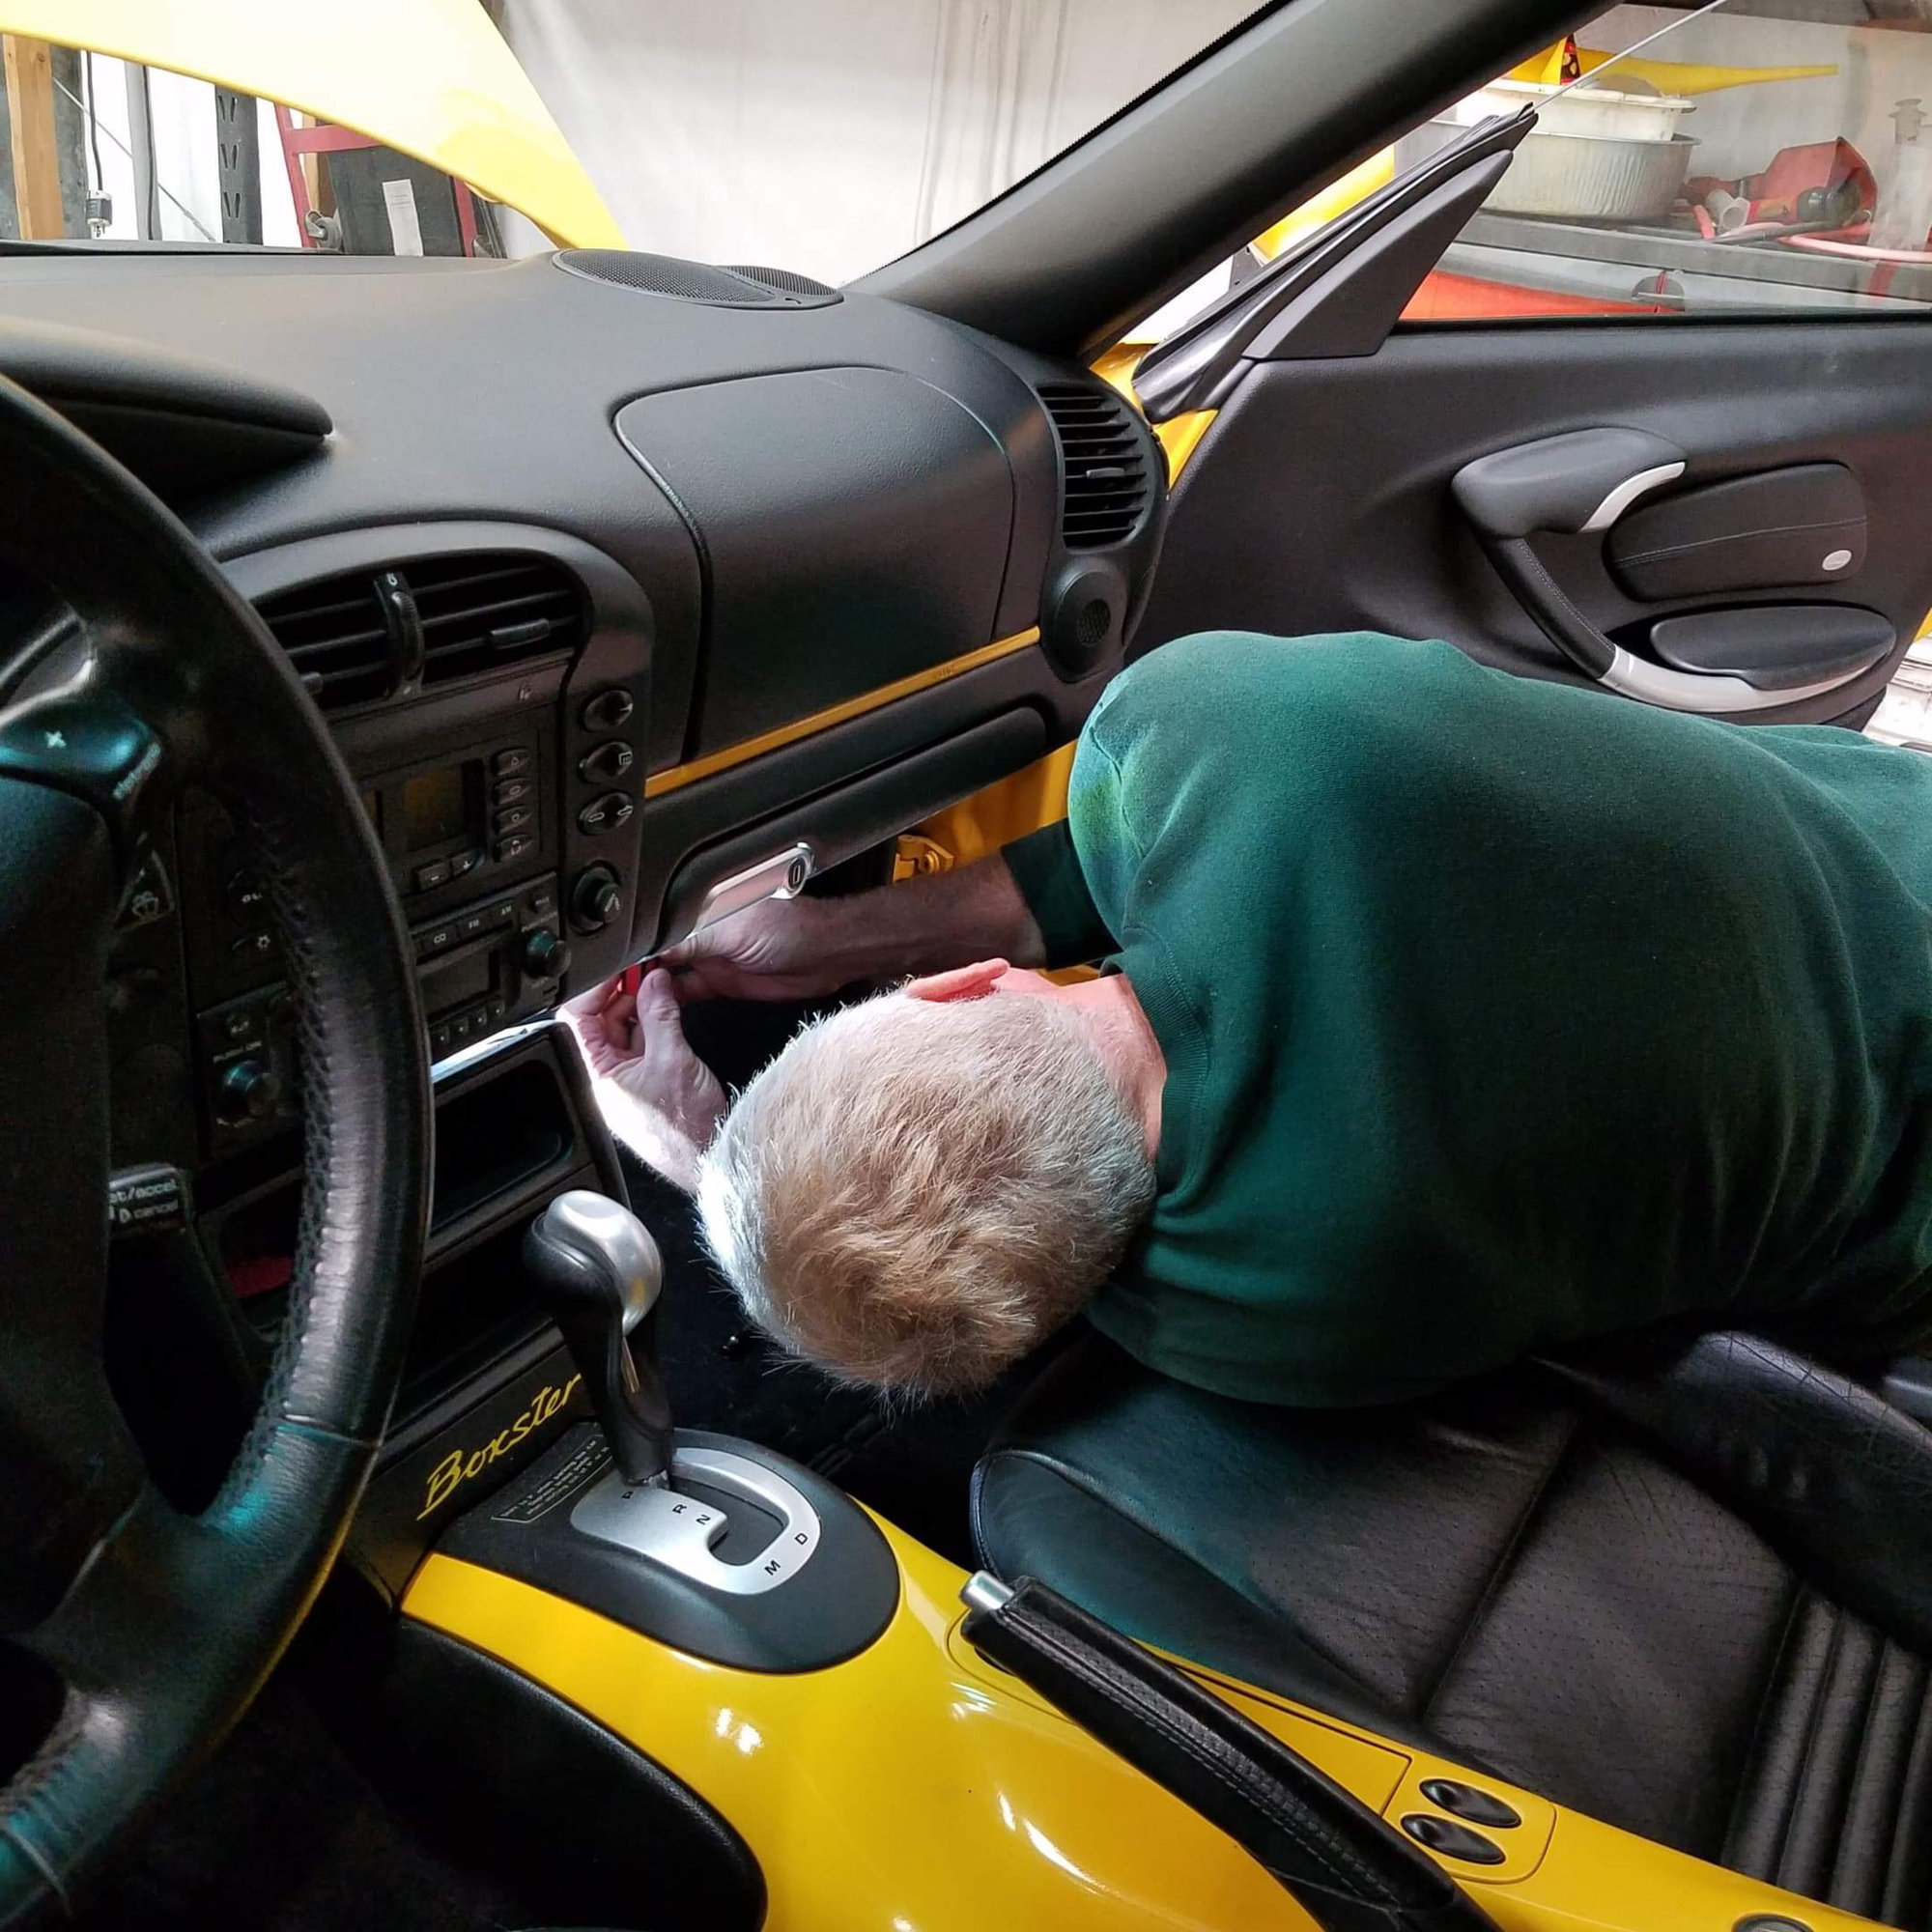
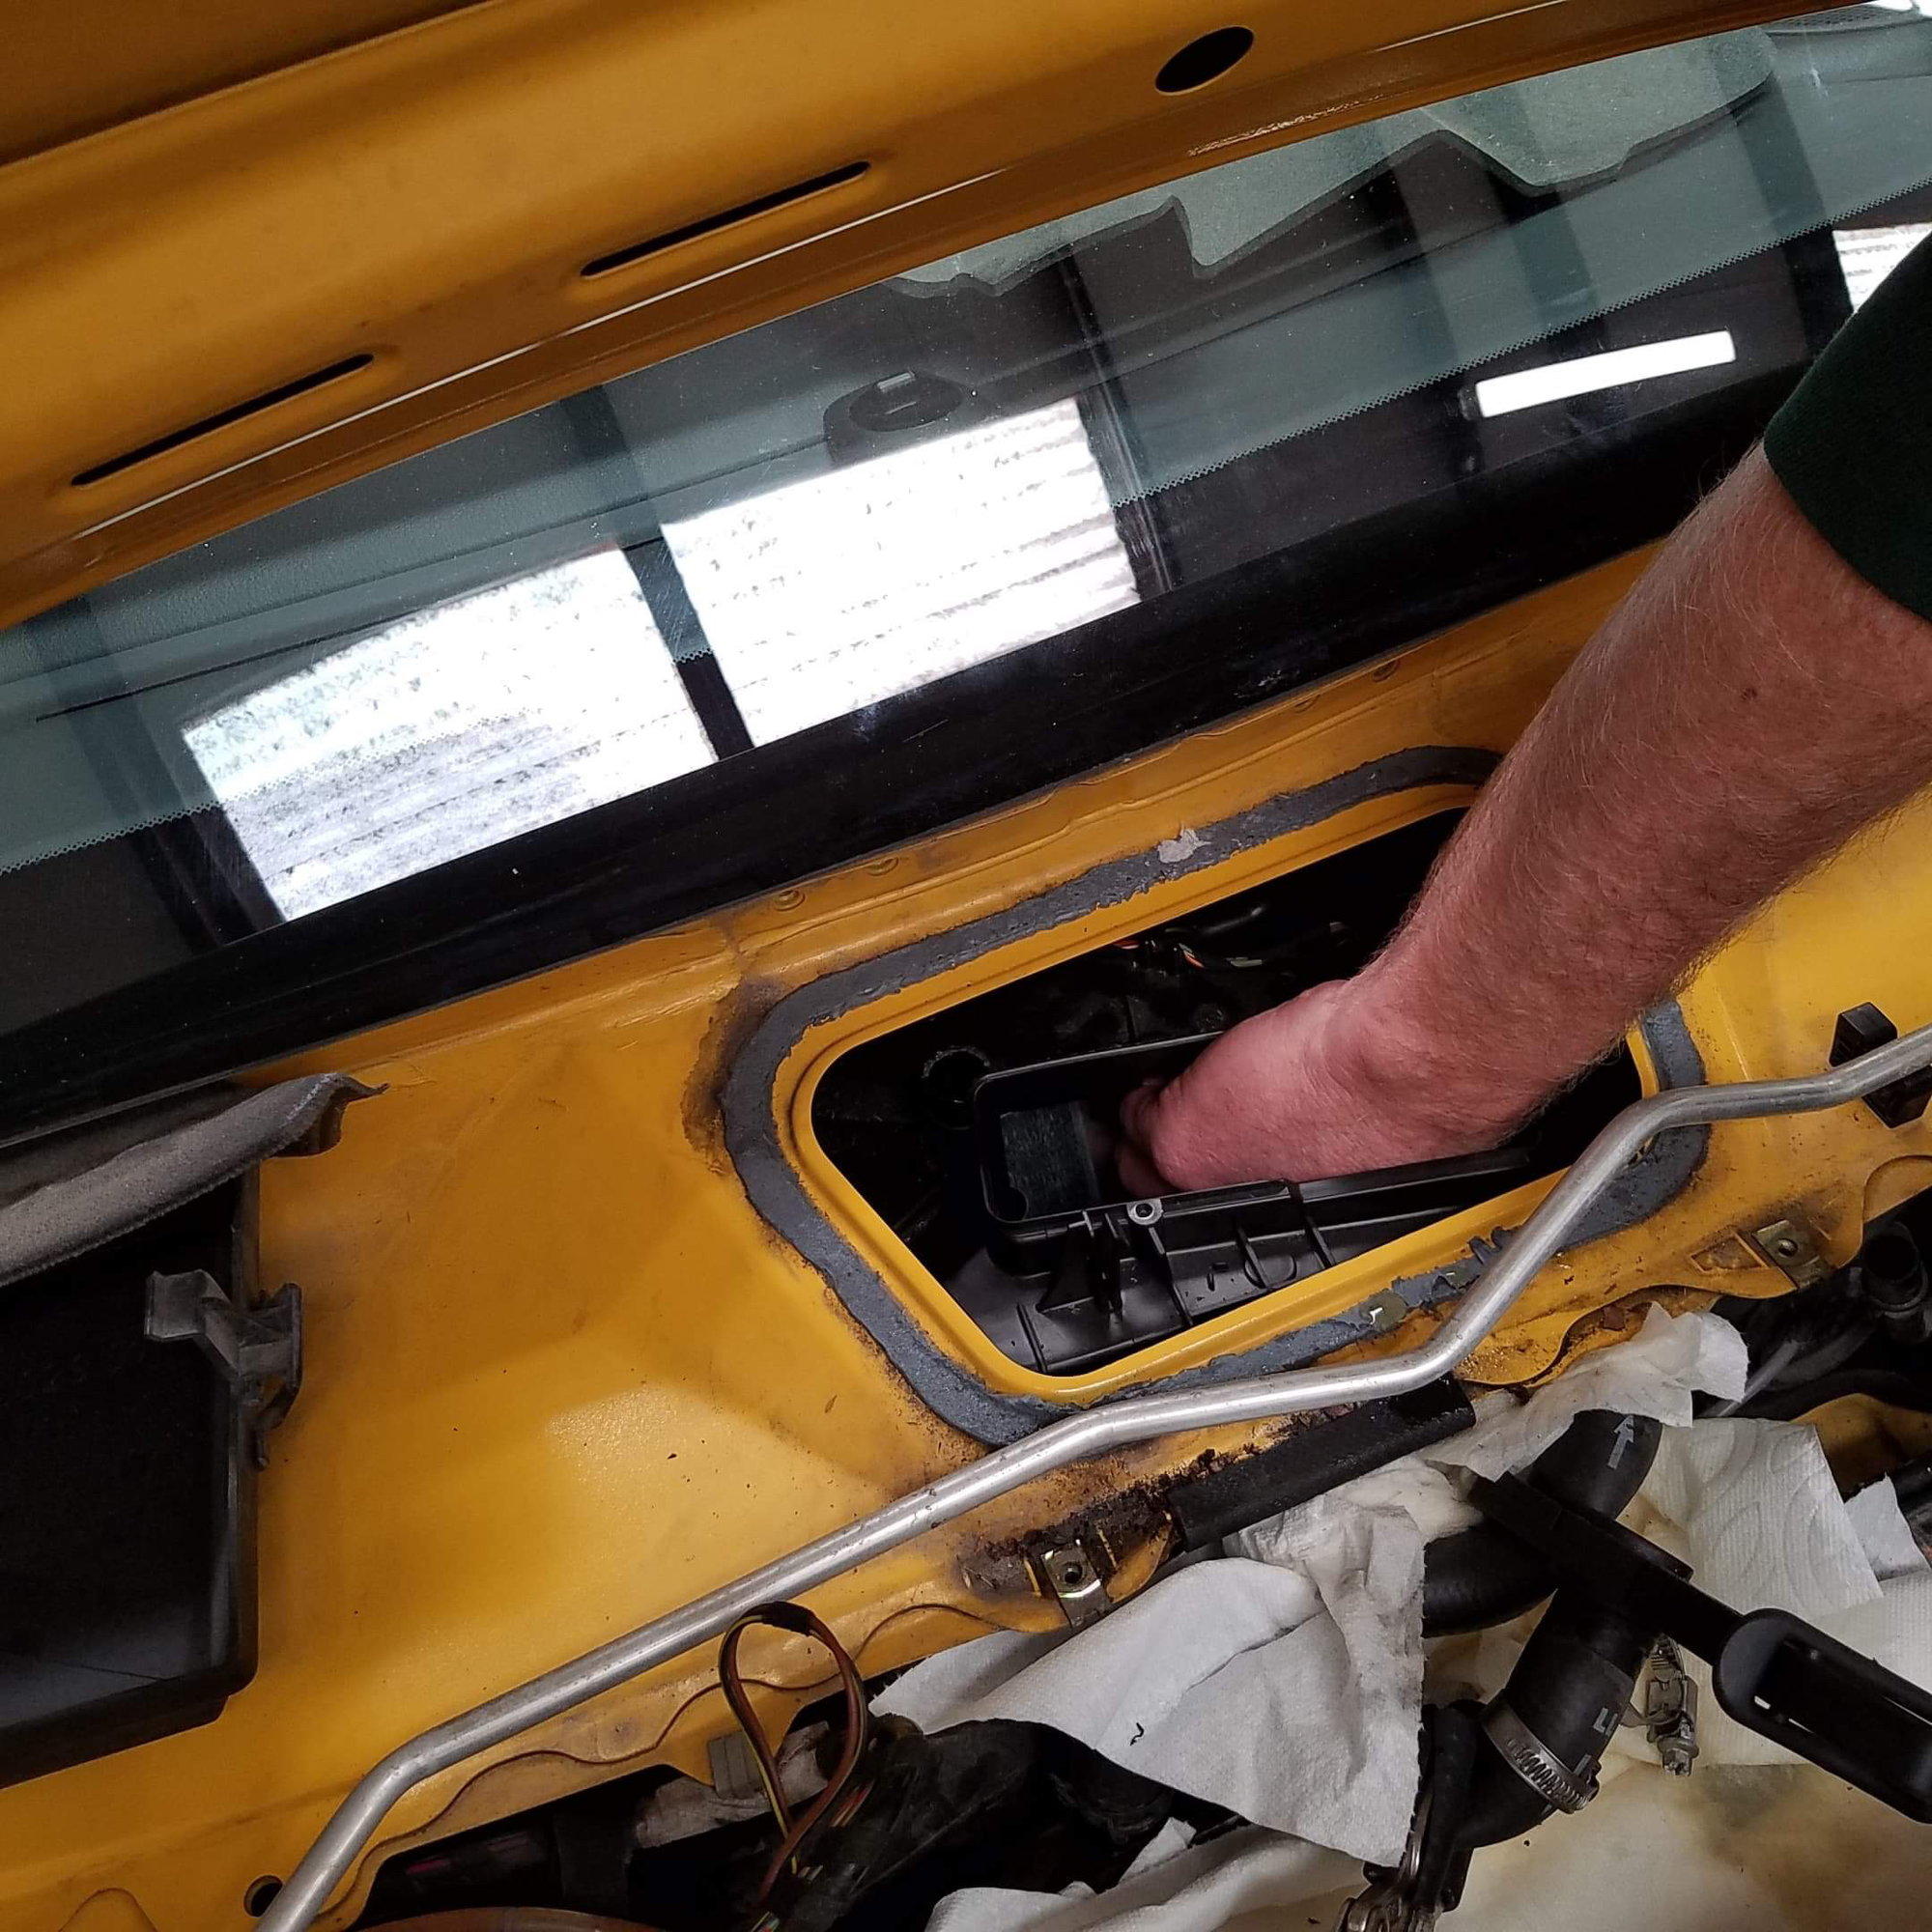
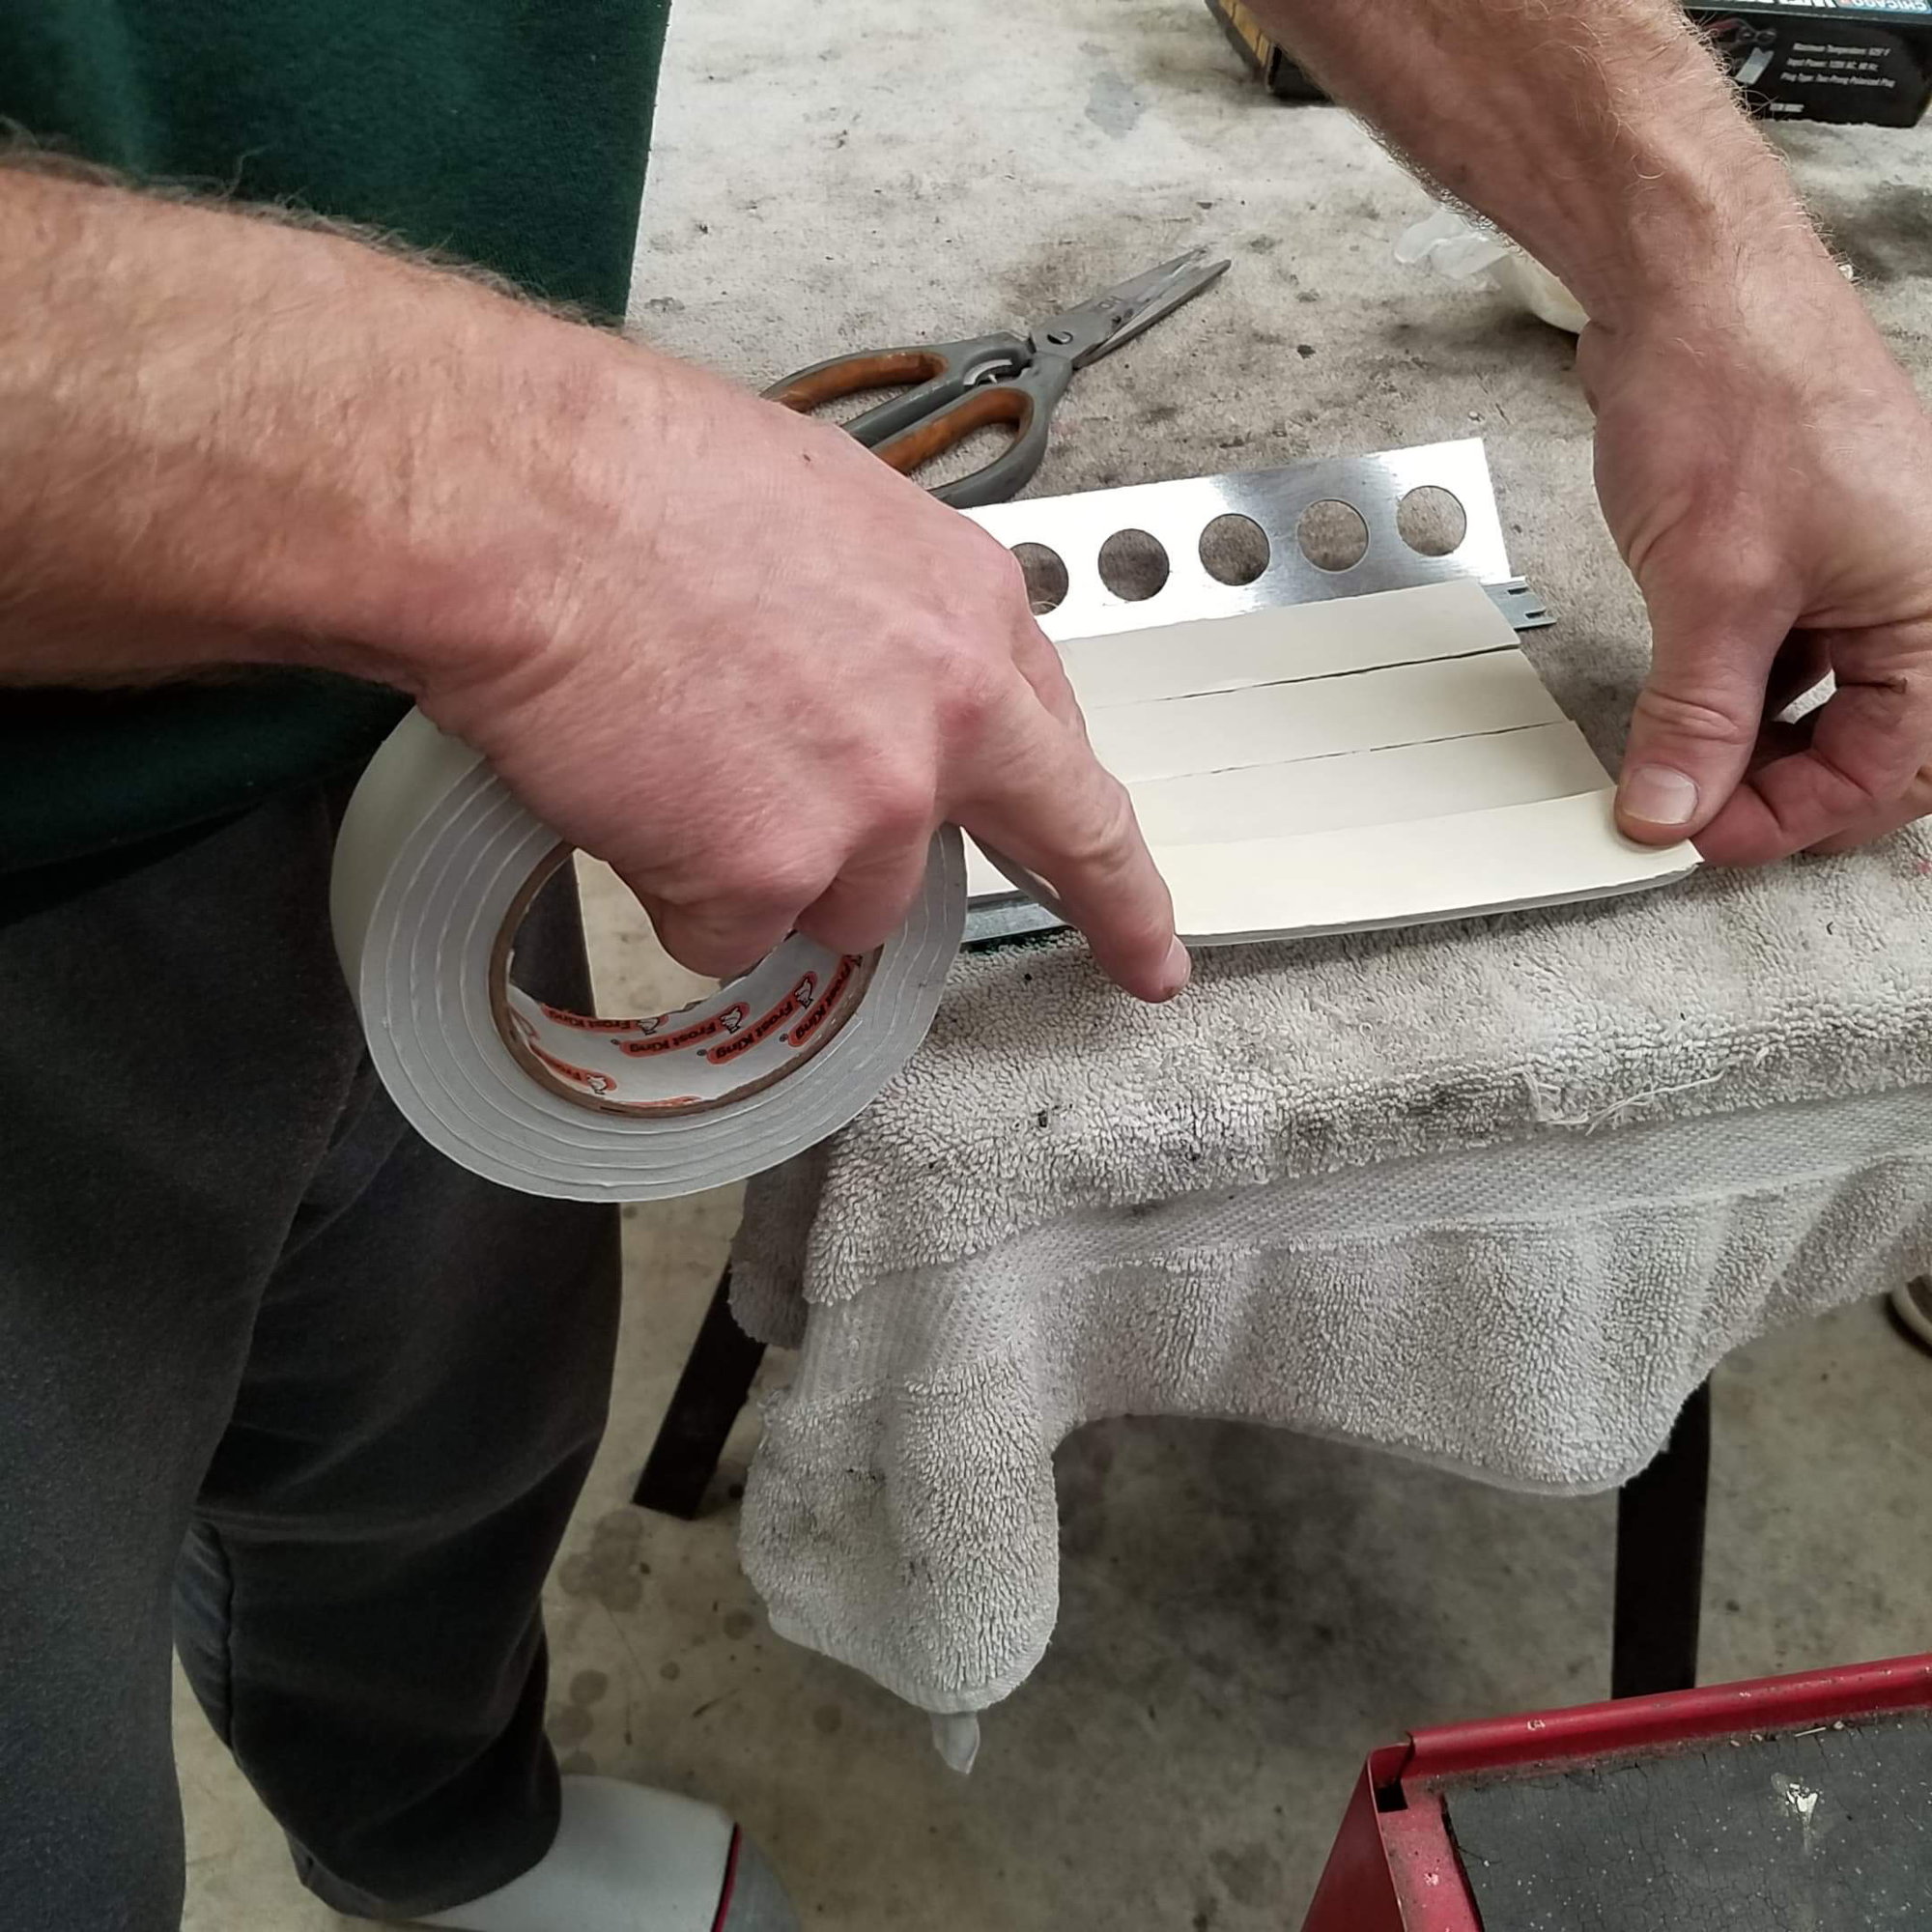
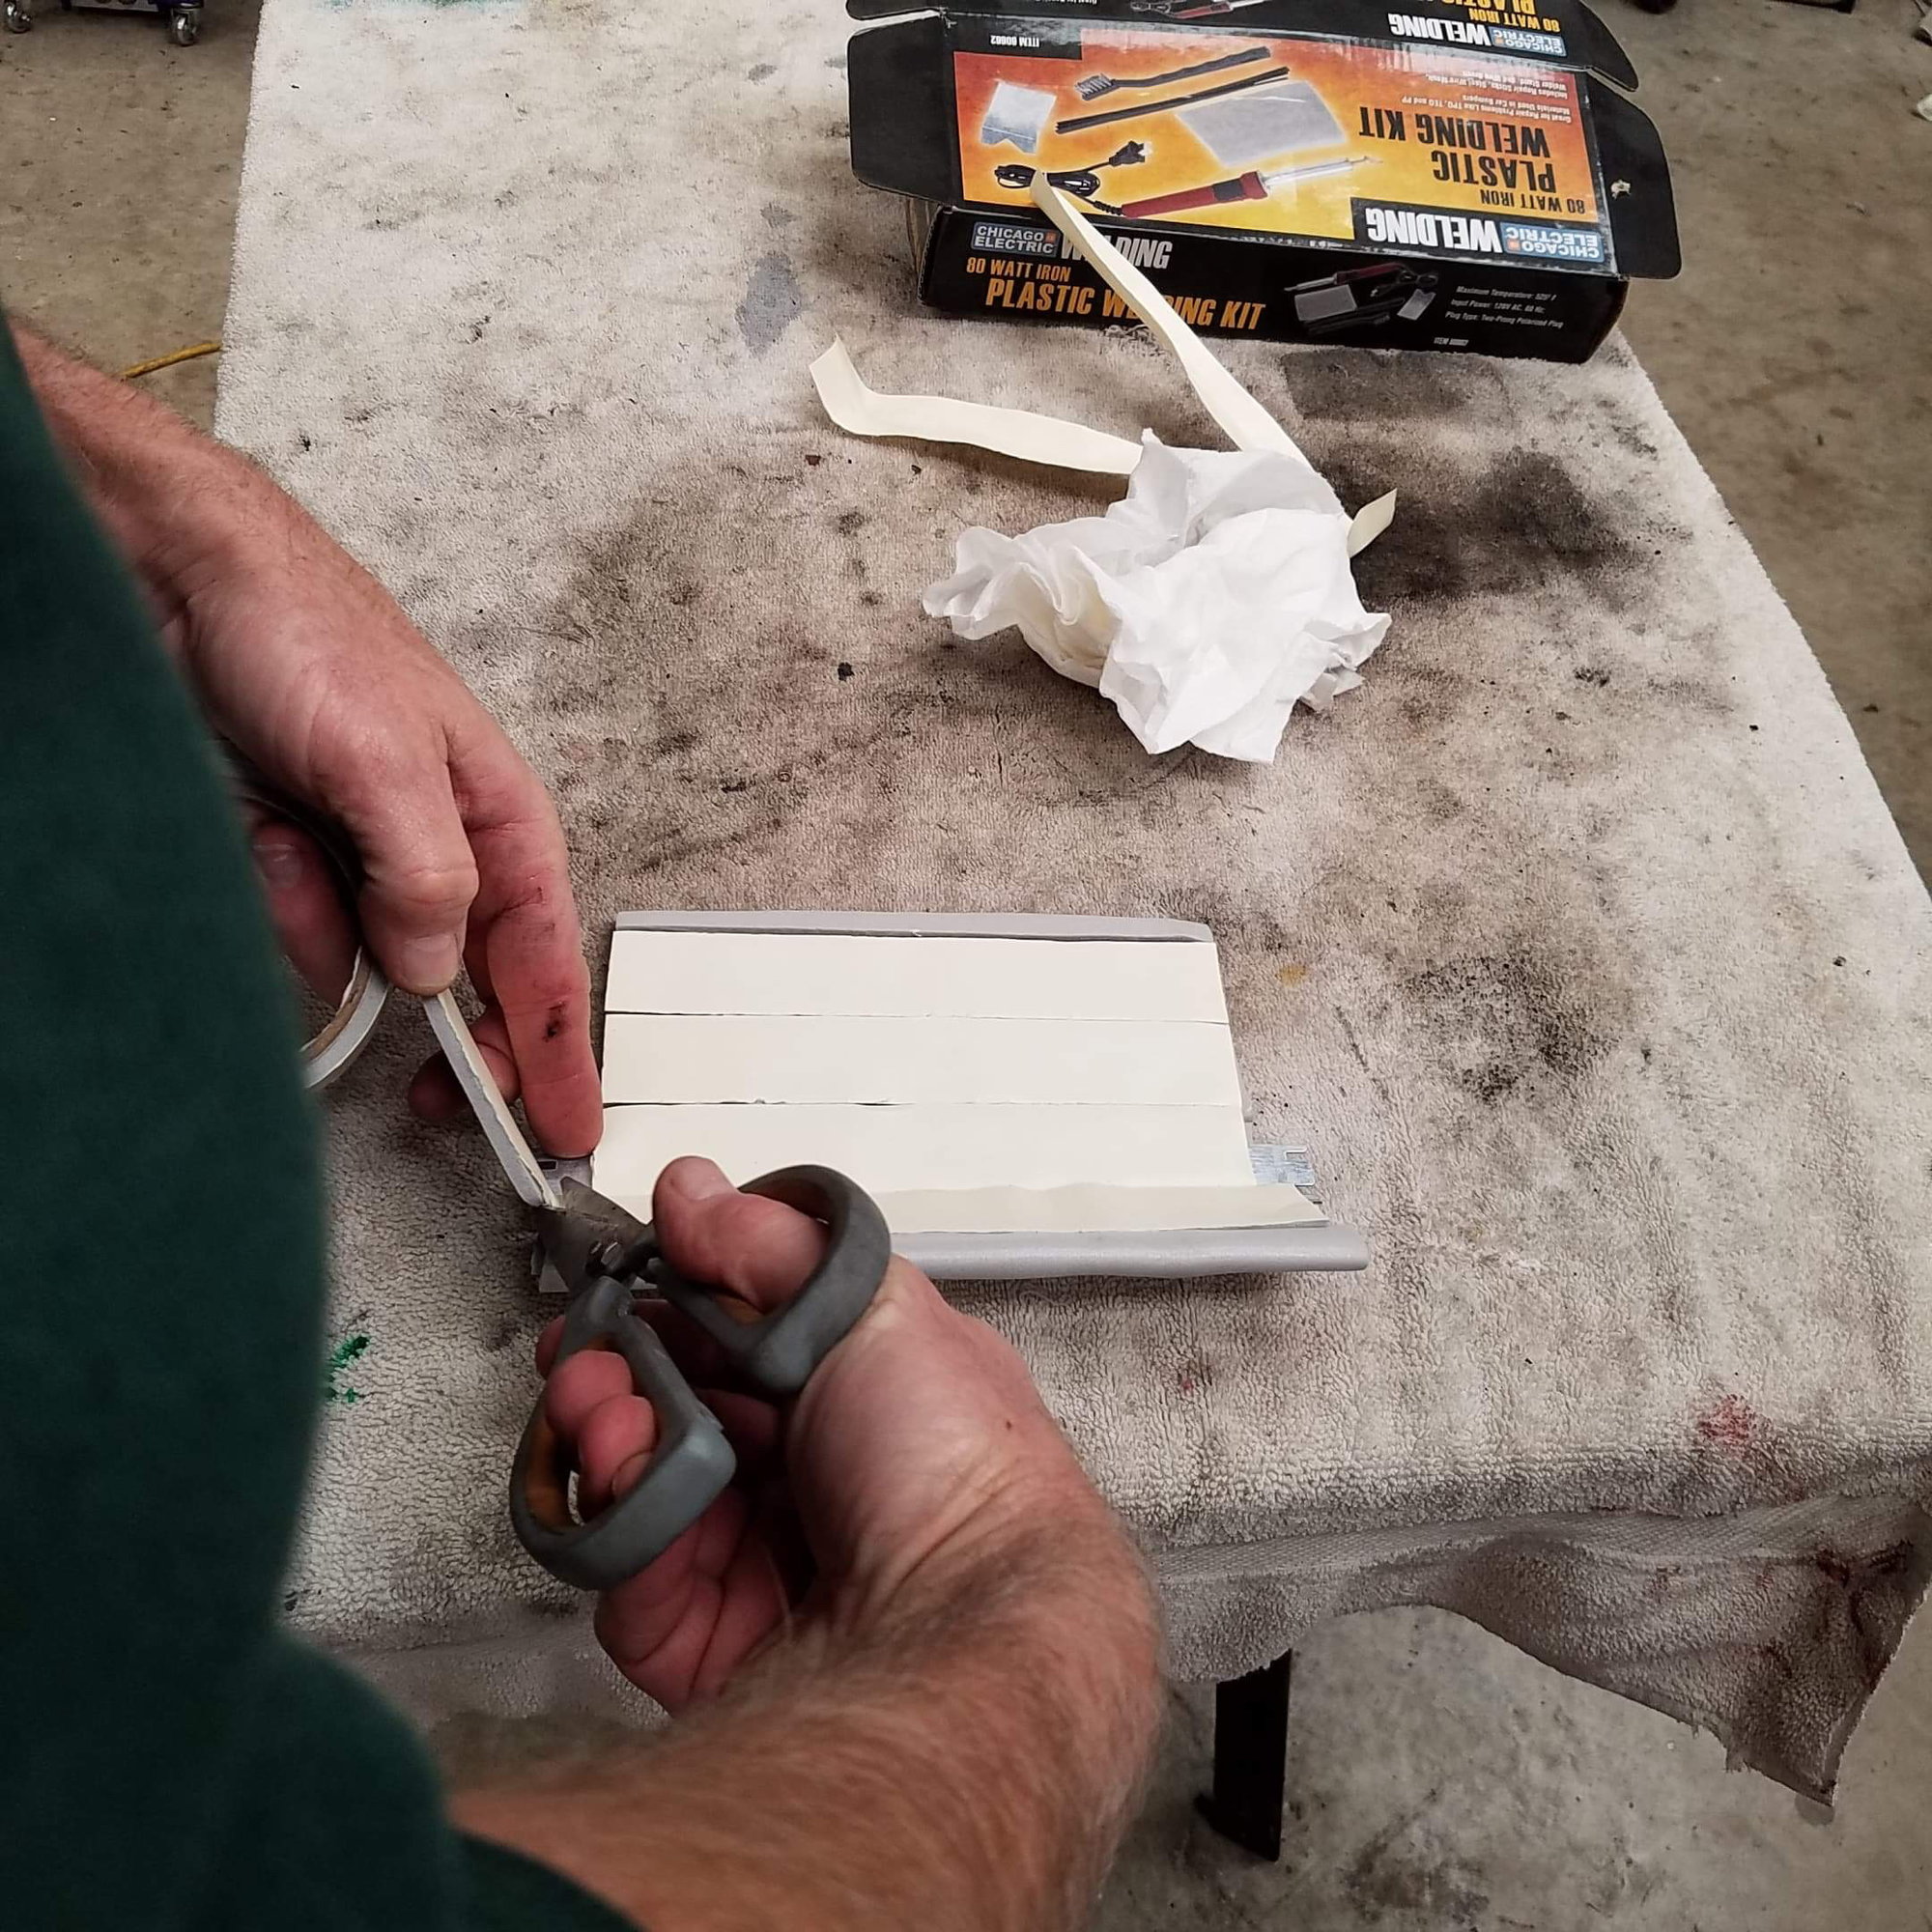
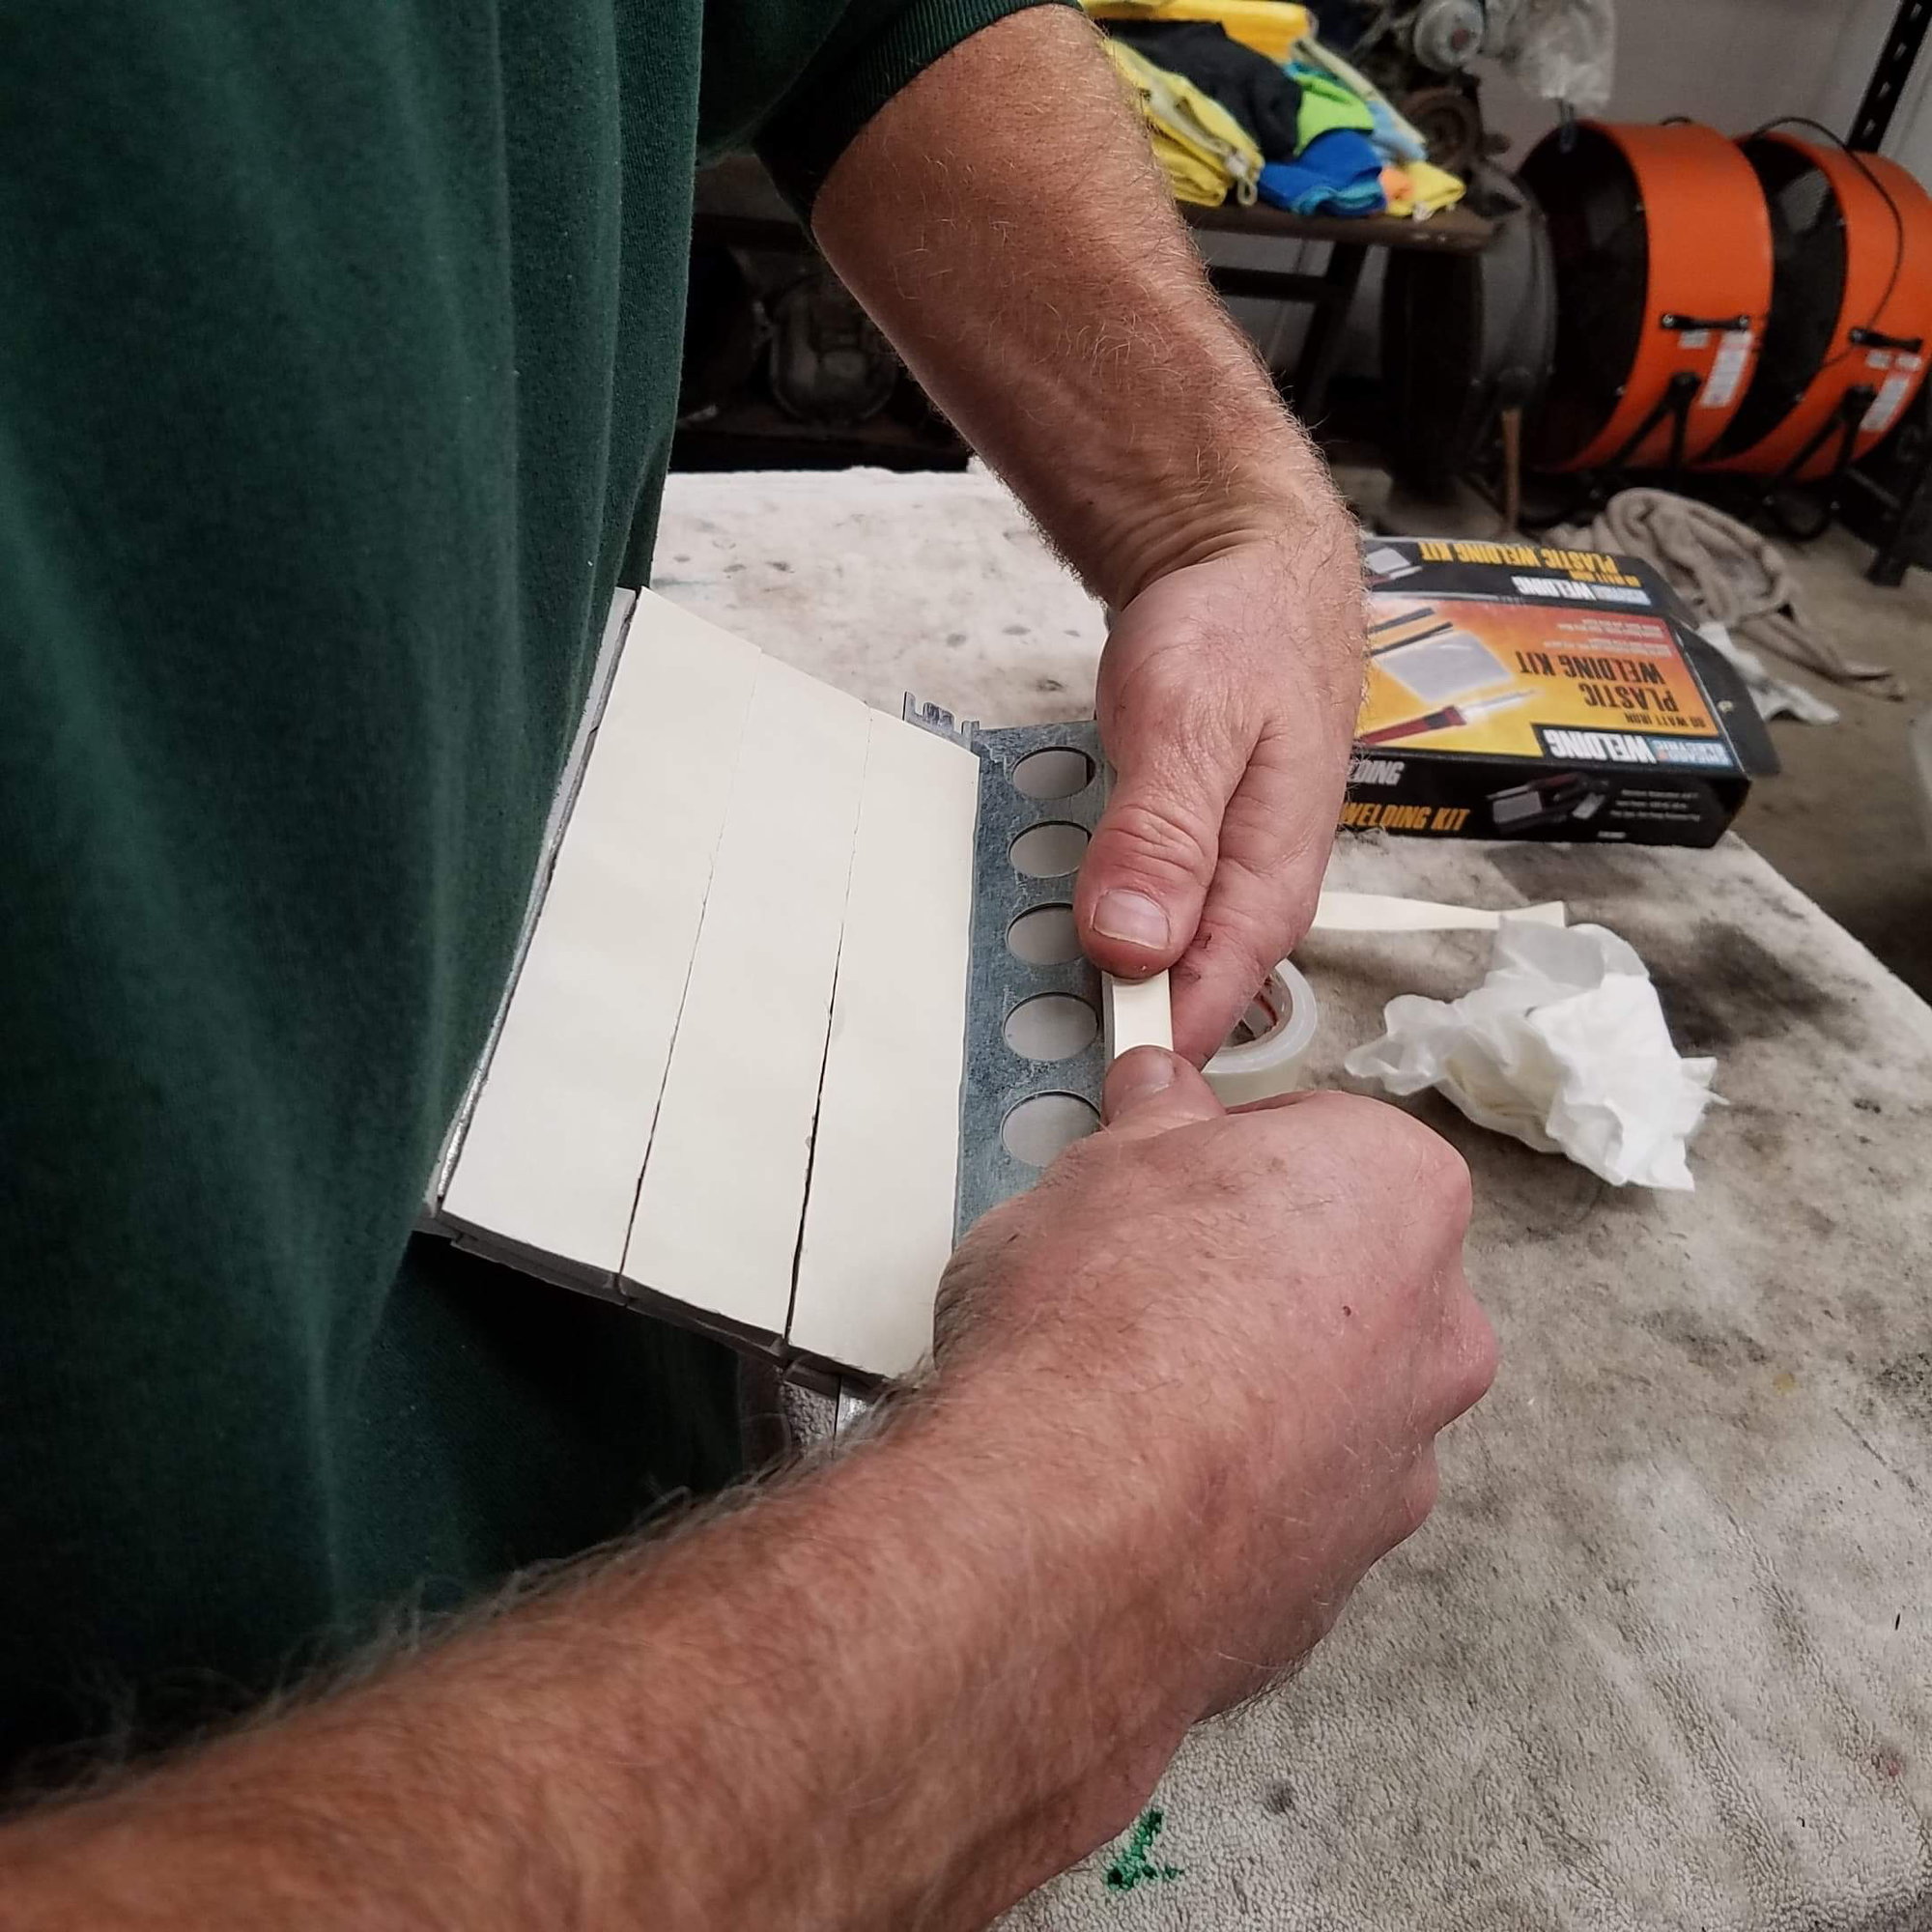
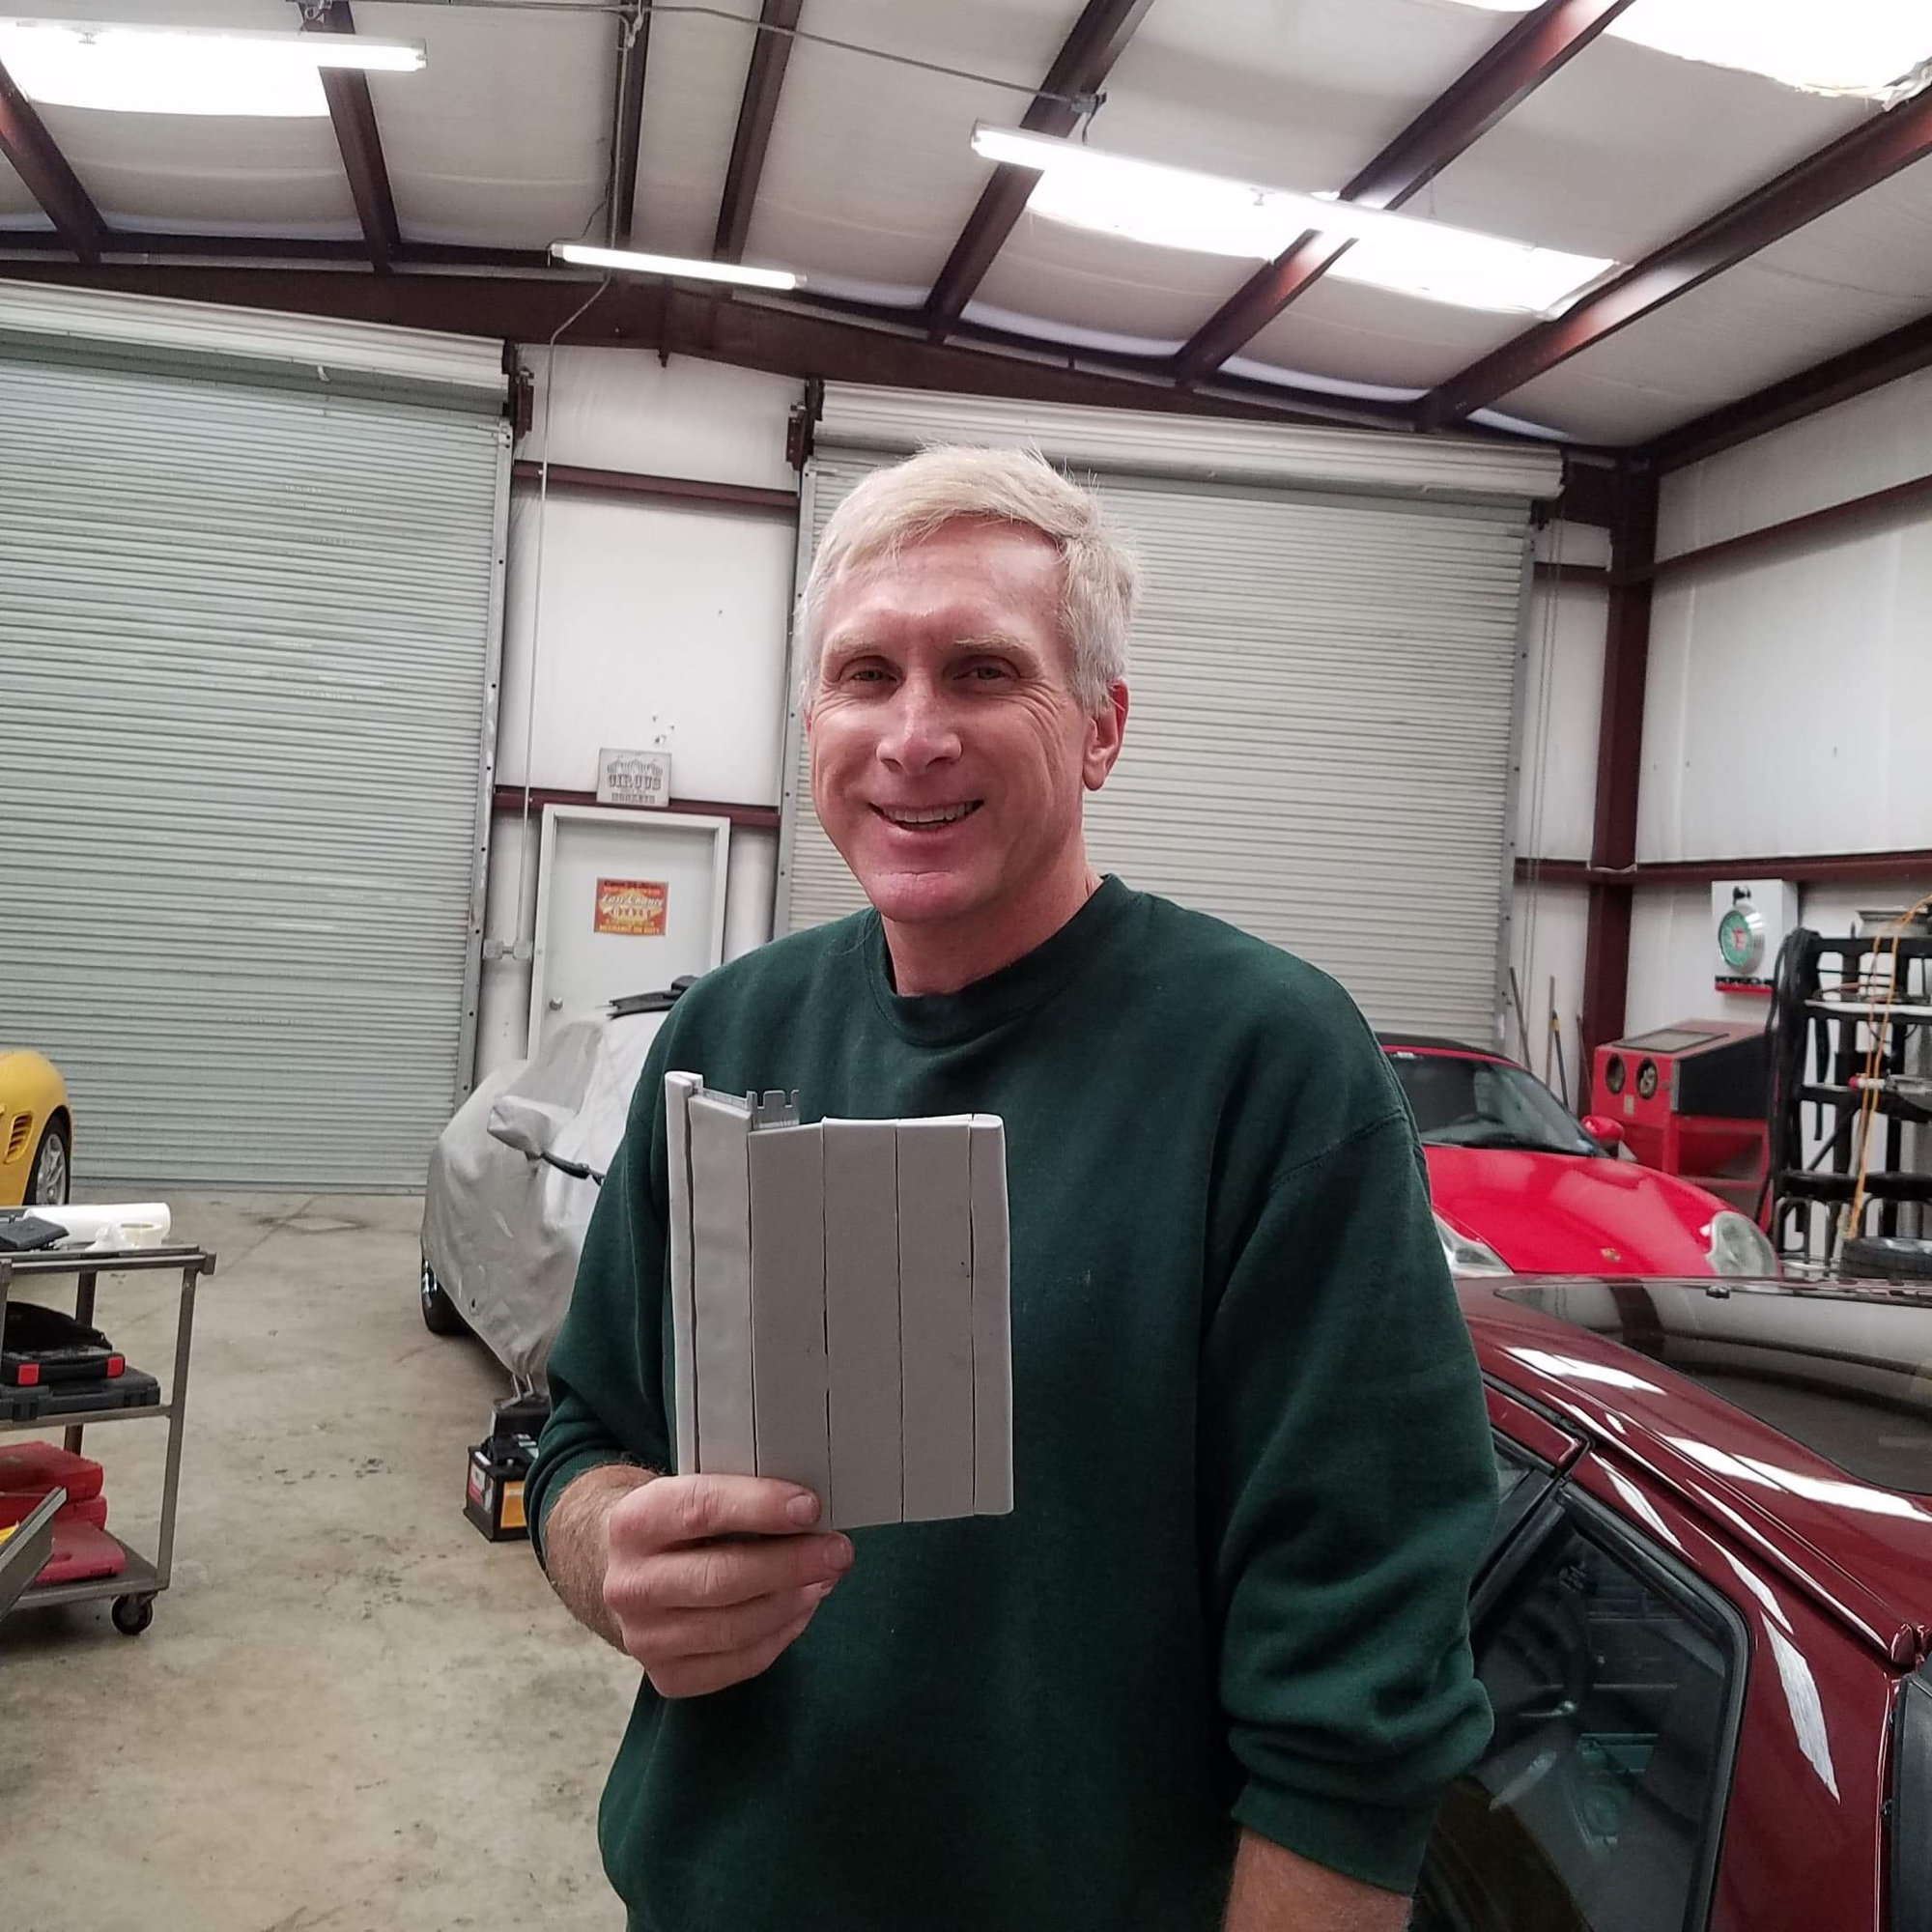
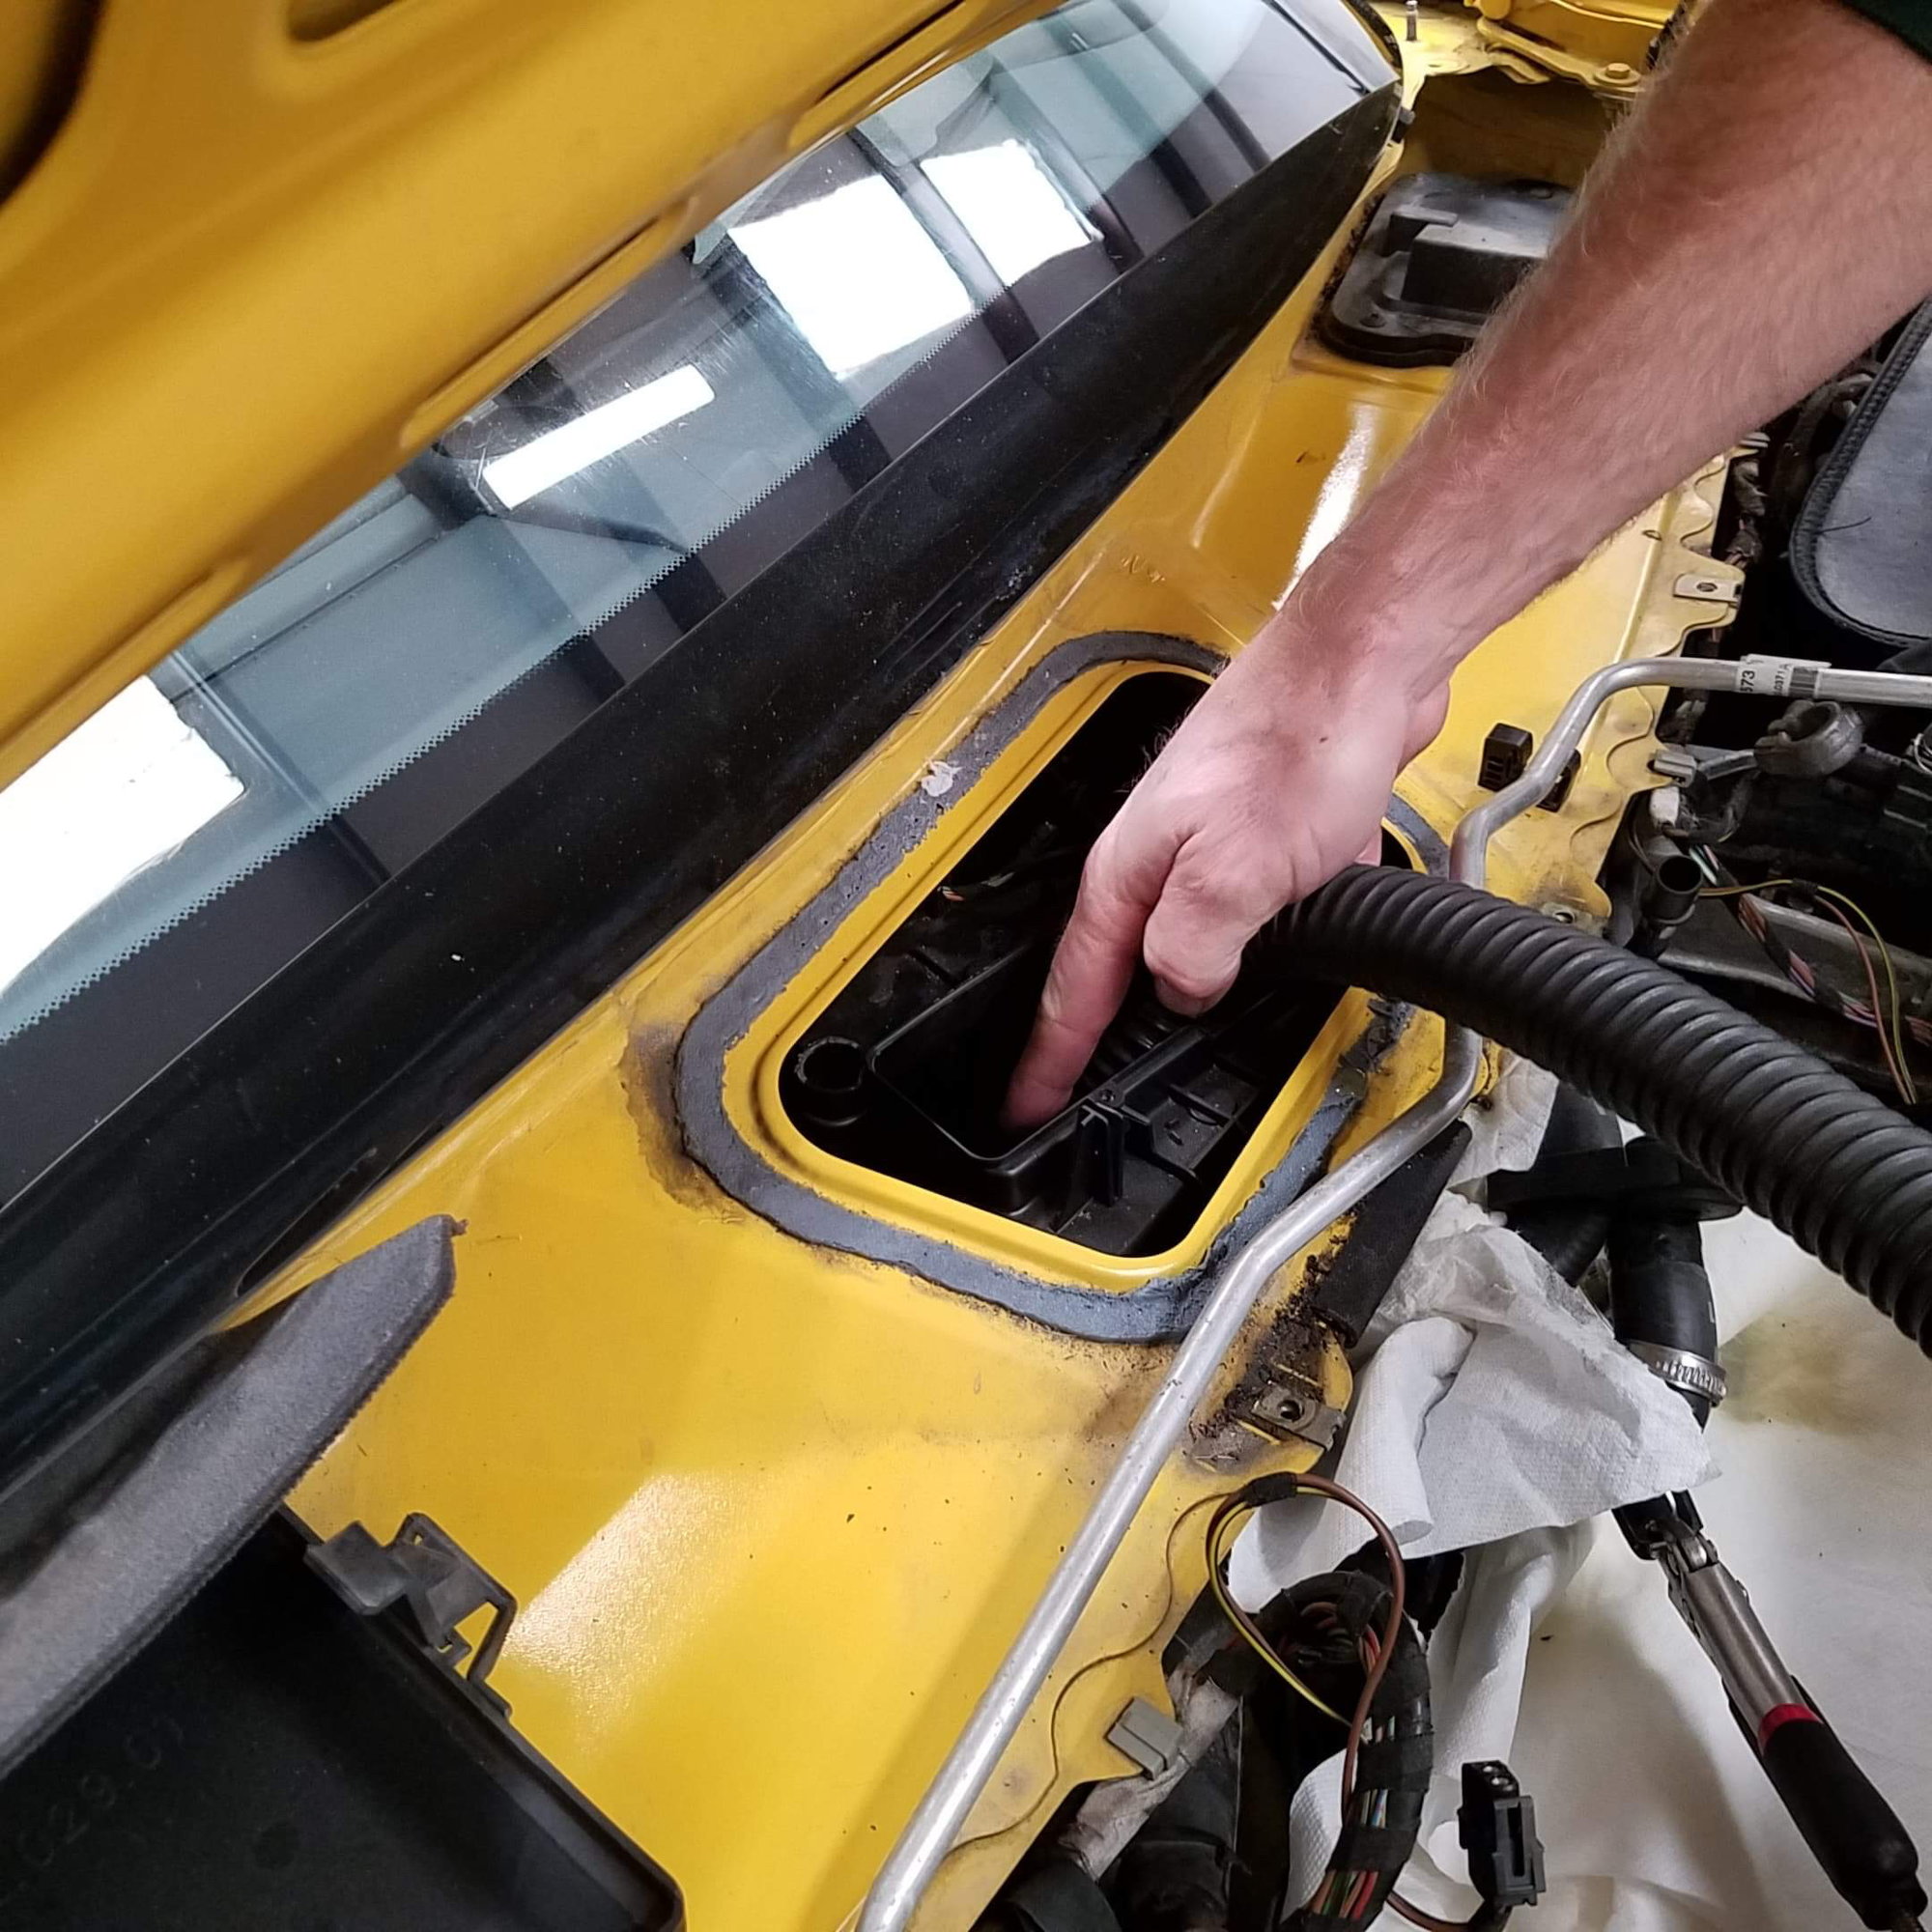
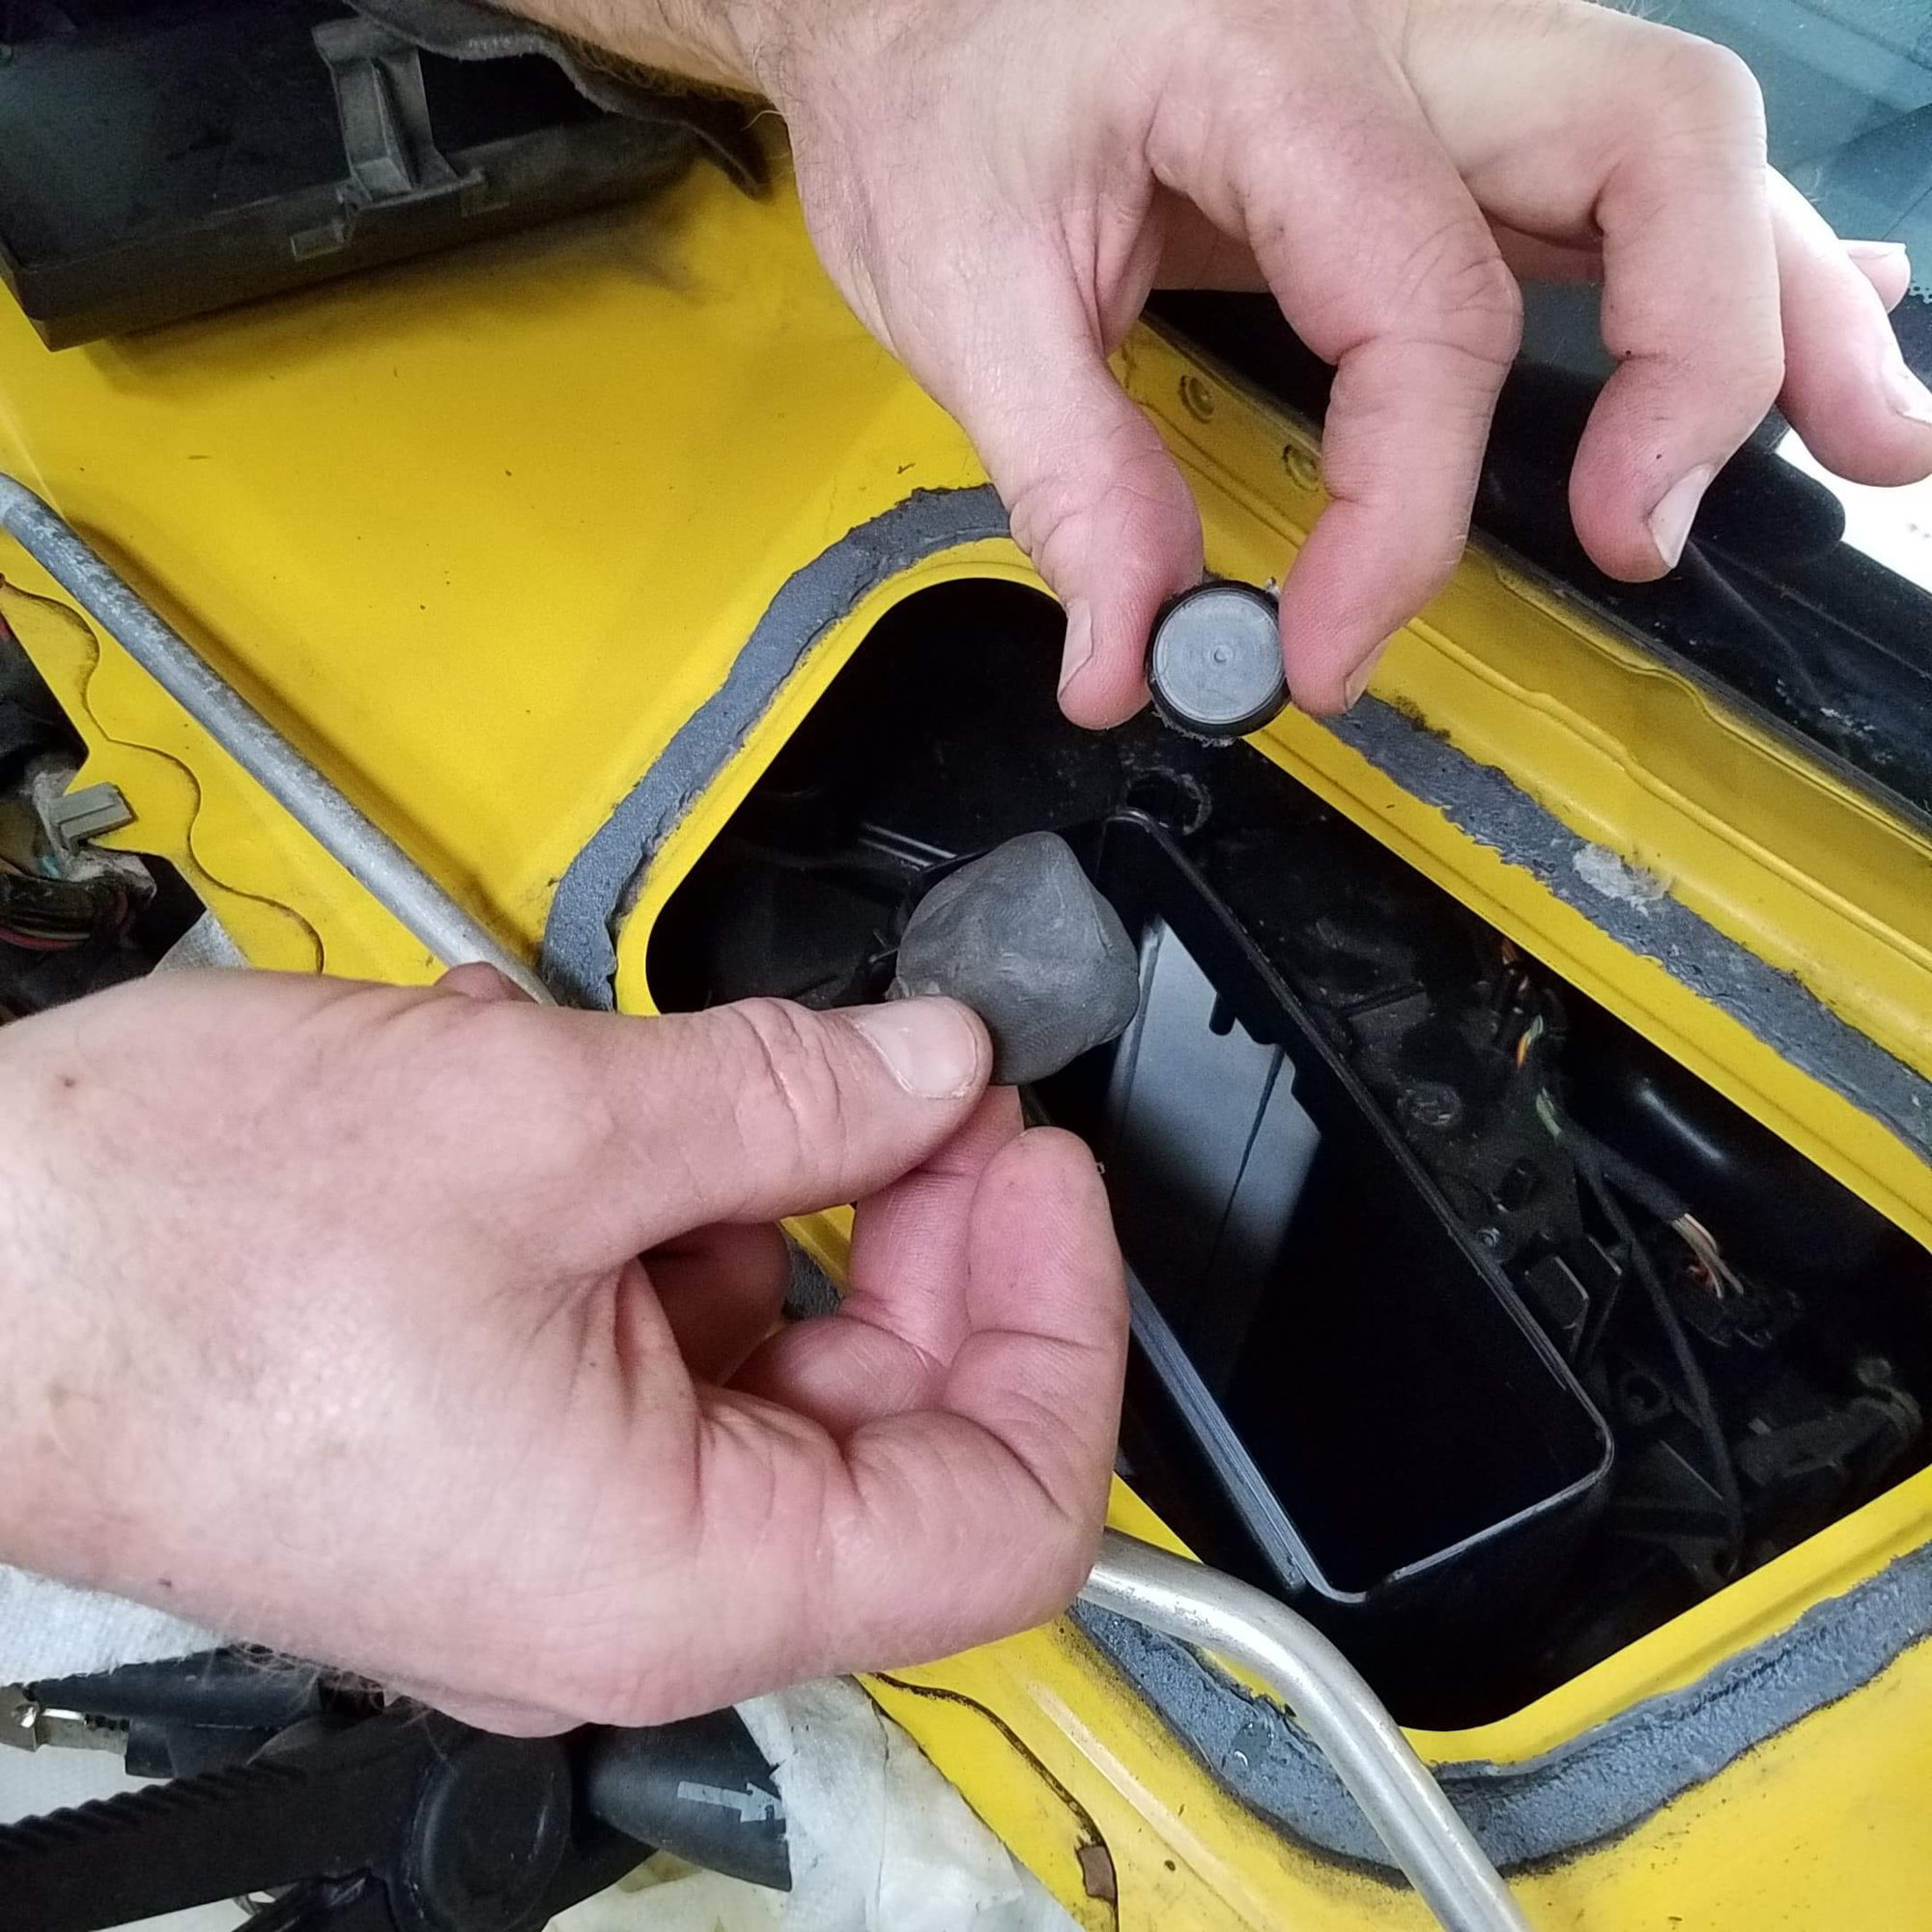
Removing the wiper mechanism ... as you can see, I’ve already removed the wiper arm, the cowl panel and the battery to gain access Removing the strut brace to get access to the heater core area ... note I’ve already removed the main strut brace bars in this photo Remove this rubberized panel by gently pulling up at the edges to separate from the sealant ... don’t rip this panel so take your time Clamp off and remove the two coolant hoses ... use some paper towels to catch a little coolant that comes out ... should not be very much if you clamp the hoses as shown Remove the heater core This is the only “mod” ... carefully cut off the top of the flap pivot housing ... just about 4 mm is all you need to cut off Here it is with the top 3-4 mm cut off and you can see the flap pivot This is the flap pivot removed ... just use a small pick to carefully pull it up and out Removing the lower flap pivot ... it’s only help on by a single screw and the flap motor pivot and then pull down. Reach in and remove the flap Flap coming out ... note all the foam has fallen off and most came out through the vents ... the “black foam” apocalypse every 996, 986, 997 and 987 owner will experience at some point Flap fully removed and note all foam gone ... these holes allow cold air to come directly in, preventing any heat inside the cabin. Remaining foam removed from the heater core box Foam adhesive also removed from heater box Replacing lost foam on the flap Replacing the lost foam Me replacing the lost foam This is what it looks like with the flap repaired ... I put foam on both sides as the factory did, but this foam should last much longer Vacuum out any remaining foam in the heater box ... there could be quite a bit Reinserting the flap ... it is critical to ensure you put it back in the exact orientation that it was originally in ... it is easy to put it in backwards and if you do that, it will not function correctly Put the flap pivot cap back on once the pivots are reinstalled ... I use black “dum-dum” to hold it on ... works great and avoids problems using glue or epoxy fouling the pivot. Now just reverse the steps above to reinstall everything.
You can use whatever material you like ... I have found this foam to be easy to install, inexpensive, and long lasting. I've found through experience and actually doing this dozens of times that this is a very effective solution. To go through the center dash, in my opinion and experience, you have to remove the entire dash, A-pillars, center console and the steering wheel just to get access tot he HVAC housing. I've seen some really butchered attempts at going through the center without removing the dash, but whoever did it and posted about it really destroyed a big part of the car. It was really an amateurish and destructive way they went about it ... not recommended. I can do my method in about an hour from start to finish.
I have done it once by removing the entire dash and the HVAC box but it was prohibitively time consuming, costly, and complex. My client was finicky and wanted it done this way, but then complained about how much it cost and the time it took. I don't recommend it, but people can choose to this however they like.
I'm just trying to help others .. and this is just one way to approach the problem. Not sure if I can really add any more to what I've tried to convey.
It’s a semi-sticky and stretchable material kinda like play dough (but rubberized and meant for cars) so it forms a moldable cap that I use to secure the cut-off plastic pivot cap ... it’s flexible and sticky enough to keep everything together. It’s the same stuff 944’s have used from the factory to seal the tail lights. ... I get it in rolls and then just cut off a bit, form a cap as shown, then put it on and form it around the housing to hold it together. Very easy and cheap but effective and long-lasting.
Thanks for posting this, much easier to follow than previous versions I've looked at. After many years, most of my foam seems to have worked it's way out of the vents so I only get the occasional piece now. One question though... you mention the car won't heat up well without the foam ? I live in MN and drive mine daily and even at below zero temps have no issues with heating up inside the cabin, so I'm not sure if this is necessary ?
My experience is that the loss of foam (as in this example) greatly reduces the heat capability in the cabin and after the fix, it is much, much better. Can’t say for sure in your particular case, but I suspect you’ll get better heating after the fix.
Thanks for posting this, much easier to follow than previous versions I've looked at. After many years, most of my foam seems to have worked it's way out of the vents so I only get the occasional piece now. One question though... you mention the car won't heat up well without the foam ? I live in MN and drive mine daily and even at below zero temps have no issues with heating up inside the cabin, so I'm not sure if this is necessary ?
Interesting, I live in the Chicago area and don't really drive much below freezing because of my heat issue. It takes a while to heat up and I usually have to keep it on HI at all times to keep up with extreme cold. Luckily I don't have to drive it in extremely cold weather. I'll probably tackle this at some point and this is the best write up and pics I've seen on this issue so far.
R324U ... this fix will definitely help with your heating issue ... all of my clients are amazed at how well the heater works (gets really hot inside on HI) after I do this repair.
Thanks for posting this, much easier to follow than previous versions I've looked at. After many years, most of my foam seems to have worked it's way out of the vents so I only get the occasional piece now. One question though... you mention the car won't heat up well without the foam ? I live in MN and drive mine daily and even at below zero temps have no issues with heating up inside the cabin, so I'm not sure if this is necessary ?
My foam blew out over 10 years ago. Shop vac, high fan speed and cleaned it up. It stopped blowing out foam, and I have never noticed any difference in heating and cooling. I know that this "fix" is for the fresh air blend door, but again, I get hot air, nice and toasty, and nice cold air in the summer. You might say, well of course, you live in Florida. But we do get some 20 degree days and it has always worked very well getting warm in the cabin. I would undertake this project if there was a problem, but I don't have a problem with the way it works now.
I think if you turn off the A/C compressor (snowflake button), you can "survive" even with a de-foamed vent door. The A/C runs even when on heat, especially when in defrost mode,( to keep fog off the windshield), unless you manually turn it off.
AMCPILOT ,very nice write -up and pictures, I wish I had a write-up/pictures like that for my UAOS install procedure !!
You can use whatever material you like ... I have found this foam to be easy to install, inexpensive, and long lasting. I've found through experience and actually doing this dozens of times that this is a very effective solution. To go through the center dash, in my opinion and experience, you have to remove the entire dash, A-pillars, center console and the steering wheel just to get access tot he HVAC housing. I've seen some really butchered attempts at going through the center without removing the dash, but whoever did it and posted about it really destroyed a big part of the car. It was really an amateurish and destructive way they went about it ... not recommended. I can do my method in about an hour from start to finish.
I have done it once by removing the entire dash and the HVAC box but it was prohibitively time consuming, costly, and complex. My client was finicky and wanted it done this way, but then complained about how much it cost and the time it took. I don't recommend it, but people can choose to this however they like.
I'm just trying to help others .. and this is just one way to approach the problem. Not sure if I can really add any more to what I've tried to convey.
thank you! great writeup. I have this issue on my new to me 2003. I think most of the foam is out but super annoying anyway. i hate the little particles on my dash etc. I rigged up a tube to my shop vac yesterday and tried to suck a bunch out...
one question, after reassembly do you need to bleed the coolant system?

 02-24-2020 | 11:53 AM