When you click on links to various merchants on this site and make a purchase, this can result in this site earning a commission. Affiliate programs and affiliations include, but are not limited to, the eBay Partner Network.
My arm came off which made it a lot harder since I didn’t remember which way it went. My clip came right out which was nice because it’s awkward working under there.
like I think I saw in one thread, Mark the wiper location on the glass with tape.
the bottom plug is easy to remove if you put the screw in part way and pull down on the screw to pull the plug out.
make sure you run the foam around the vertical outside corners It not thick enough to rub on the plastic at the bent point air gets by.
when I took the cap off the bottom the pink arm was in one position. When I went to reassemble, it had moved. I think the thermostat required it to be in a different position so it had moved. I had to play with the temperature button to get it to move to its original position.
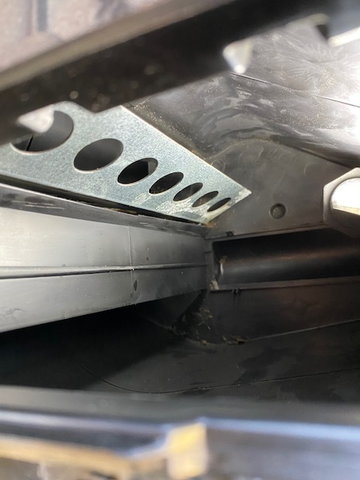
Has anyone reviewed this thread? There seems to be another blend door with oval holes that is not accessible from the heater core. http://986forum.com/forums/performan...-debris-2.html
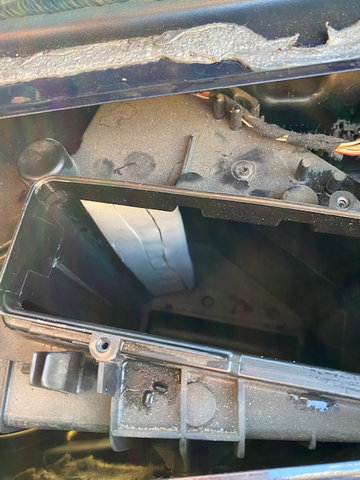
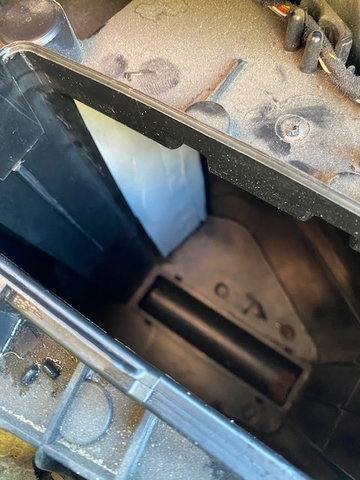
Any idea what this one does?
Has anyone reviewed this thread? There seems to be another blend door with oval holes that is not accessible from the heater core. http://986forum.com/forums/performan...-debris-2.html
Any idea what this one does?
Yes, this is what I and others have said on this thread. There are 2 blend doors. Second one, as R234U said, directs air to the different ducts. You cannot get to it from the bonnet.
About to do this, still researching the best solution. Looking at some of the questions posed earlier, why did Porsche, BMW, etc. use open-cell foam and not a solid plastic or aluminum door? I am starting to think there is some need to let some fresh air into the blend and therefore use open-cell foam. I’ve seen DIYs from other forums where people used filters from room a/c units, etc. vs. foam or aluminum tape.
Thanks for the great write up. I did BOTH vent repairs last weekend and took less then 4 hours to do both. 2+ hours to do the "heater core one" (has the round holes) and 1+ hour to do the "behind radio one" (has the oval holes).
After i took apart the one in the frunk per AMCPILOTs great write up my flap still had a ton of foam tape on it. It just didn't make sense that i had so much foam coming out of the vents over the years. So in the middle of the repair i did some more research and found out about the second flap. When i got access to the second flap that one barely had any foam left on it. So that's where the most of my foam came from. With the "heater core one" mostly in tack i would have foam coming out for long time.
Because of the foam problem i rarely used my vents....and when i had to defrost windshield it annoyed the heck out of me having the foam bits get everywhere....all over the dash and i'm sure fine foam dust all over me!!
It's soooooo nice now to use the vents without the stupid foam dust coming out of them.
Just wanted to say thanks for a great, detailed write-up. I think I know why I have been getting the foam shower. I would not have attempted this fix without this - by far the most difficult part was cutting the cap off.
Speaking of the pivot cap, what is everyone using to re-attach? I was thinking about using some clear silicone caulk.
I had a plastic cap that was the right size to slide over the original. Slid that over the top of the cut-off piece and epoxied the cap so I didn't gum anything up.
Used a coping saw with the blade turned around to cut the cap.
-clamp BOTH heater hoses before you begin to loosen them. Doing one at a time will lead to losing more coolant than you want to.... (ask me how I know)
-you can secure the cut-off cap with duct tape. Yes, most of you are about to scream right now, but compare this to the putty originally suggested. I used black duct tape that is very secure and you can’t even see it because of the color.
Otherwise, a good repair procedure that didn’t take too long.
First of all I would like to thank Joe Tegtmeyer (AMCPilot) for his very helpful DIY.
I fixed my flap today but was surprised to see that its design was different. My 996 C2 is has been built in 1998 which explains perhaps the difference?
Every thing was the same until I removed the heater core.
The flap is a smaller one covering only the passenger side of the black box..
I have been able to remove the remaining foam and to replace it without removing the flap. I just release the single screw inside the car in order to move freely the flap.
After removing the remaining foam and vacuum
Flap Open: Foam installed on both sides, covering the edge
Flap closed
Check again. Your flap is just like mine. If you follow the procedure originally suggested, you will see that your flap is L shaped as well. The rest of the flap is to the left in your photos. The longer part is hidden behind the rest of the duct. You have replaced the foam on the short section of the flap, but the longer section of the L is still back there.
Check again. Your flap is just like mine. If you follow the procedure originally suggested, you will see that your flap is L shaped as well. The rest of the flap is to the left in your photos. The longer part is hidden behind the rest of the duct. You have replaced the foam on the short section of the flap, but the longer section of the L is still back there.
Thank you for your advice. I was afraid of that.after reviewing some pictures of the flap. .. I will have to take the flap off to complete the job.
Check again. Your flap is just like mine. If you follow the procedure originally suggested, you will see that your flap is L shaped as well. The rest of the flap is to the left in your photos. The longer part is hidden behind the rest of the duct. You have replaced the foam on the short section of the flap, but the longer section of the L is still back there.
You were perfectly right. I redid the job today but took off the flap in order to fix the large hidden part. Took only 1 hour and 1/2 today... I'm becoming an expert of the heating core flap
I didn't delete my initial post as it may help someone else to repeat my mistake.

 03-01-2020, 09:18 PM