New! 9m93 Speedster widebody - full build in detail
 02-20-2010, 10:28 AM
#271
Addict
Rennlist
Site Sponsor
Rennlist
Site Sponsor
Thread Starter
How's this for dedication to the Speedster cause??
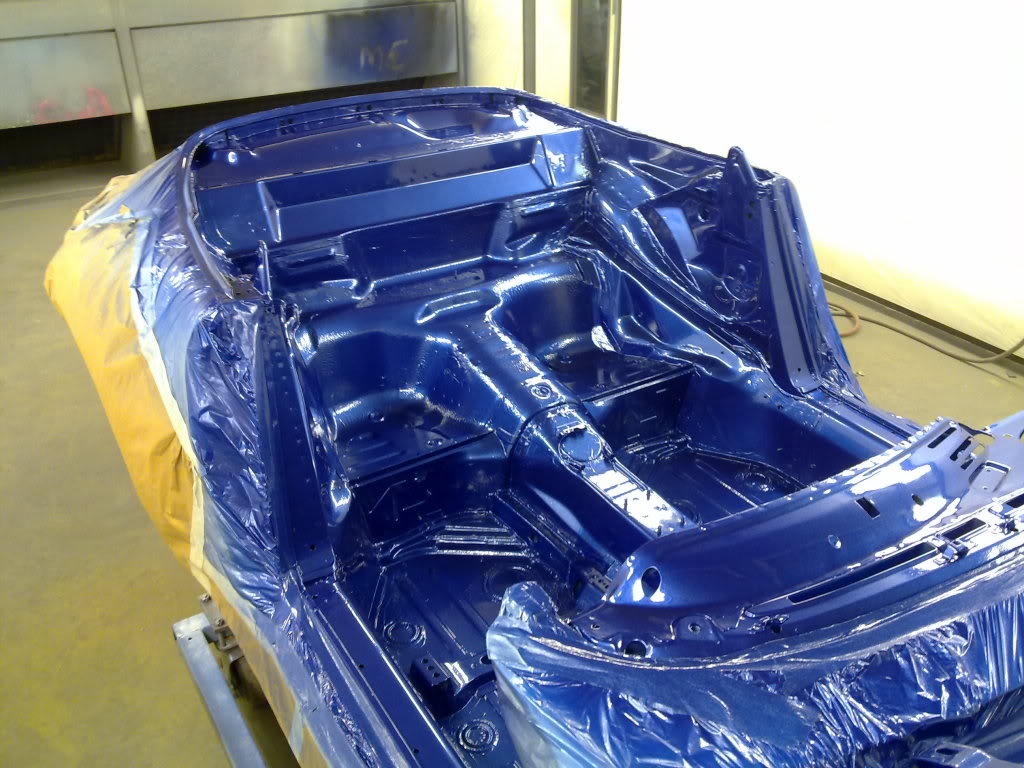
Since me and Marc are away in the first week of March, we need to press on with the work that nobody else can do so that progress can be made whilst we're not here. So although it is Saturday afternoon, rather than spend the afternoon watching sport on the 'box we have both been in to finish prepping the shell & to gun the colour on the inside of the Speedster whilst the shop is quiet.
Here you can see that the shell has been fully masked and bagged all around to prevent overspray on the floor and outer panels, Marc is in the booth with the pressure pot spray gun loading the first layer of the water based cobalt basecoat. Unlike a conventional gravity fed gun (with the paint container over the top of the nozzle assembly) the pressure pot set up feeds the paint up to the gun through a pipe & hence allows you to spray upside down. This is the only way to get into all the nooks & crannies around the dash & bulkhead when you are painting the shell the right way up.
We're just waiting for the basecoat to dry, we'll then hit it with another layer followed by a coat or two of laquer as before.
 02-20-2010, 02:01 PM
#273
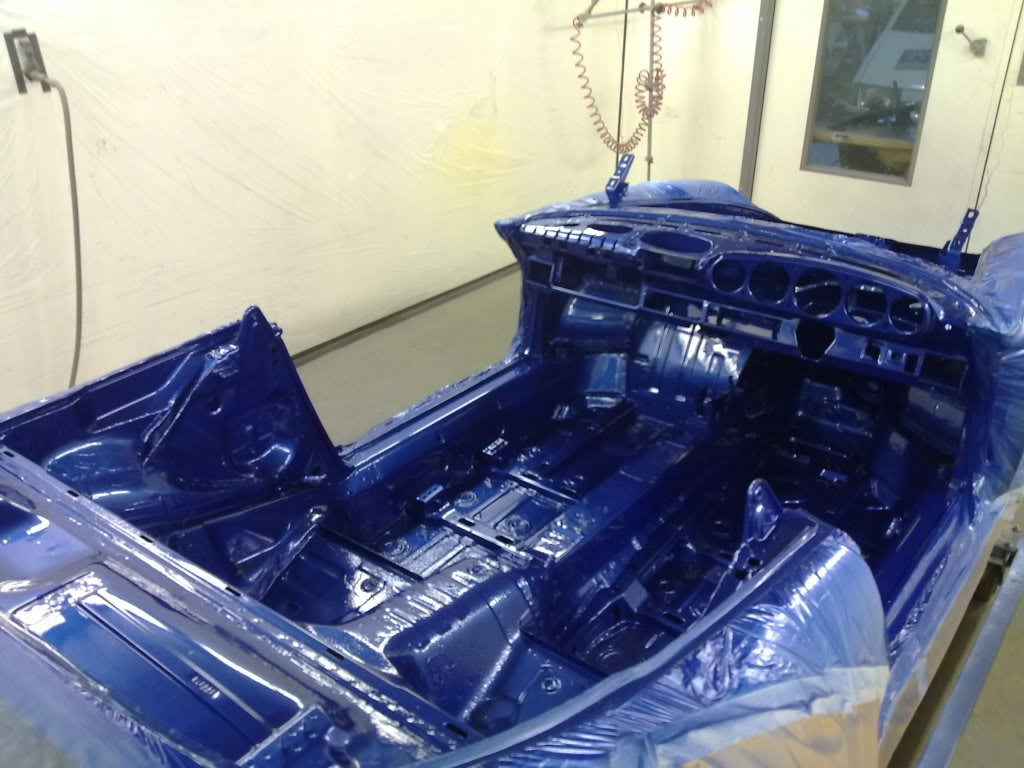
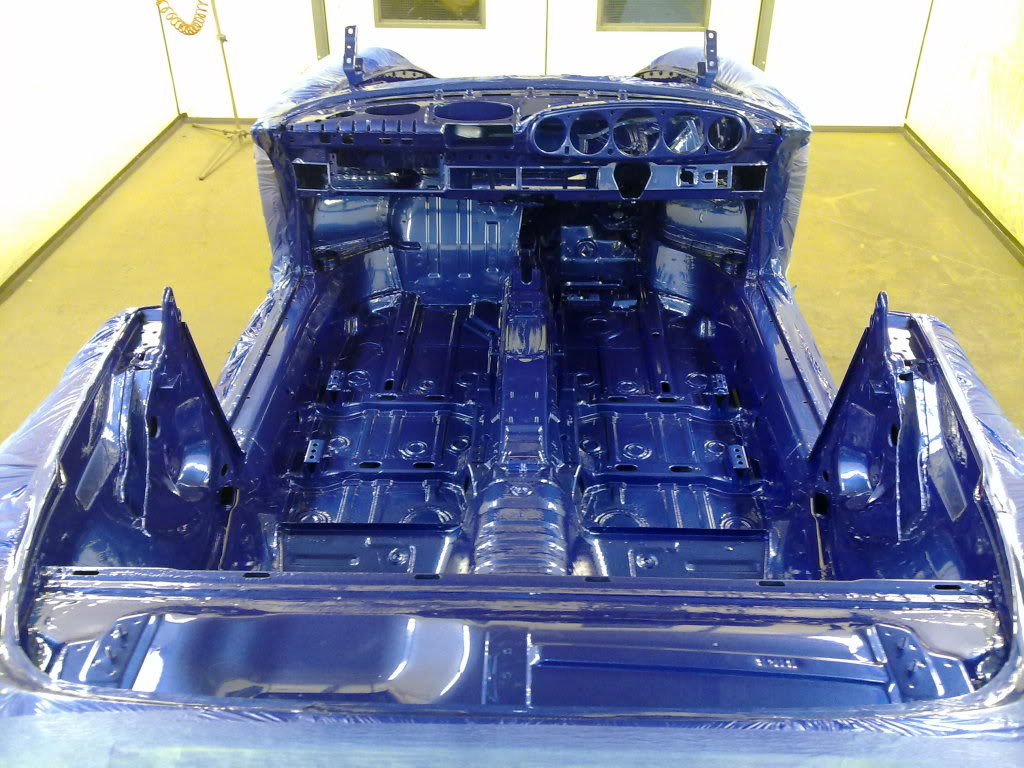
The internals have all now been painted, so the rebuild begins in ernest next week.

Graham
Oh and perhaps Porsche do only flick primer over the internals, but I for one, think it looks sweet painted!
Graham
Oh and perhaps Porsche do only flick primer over the internals, but I for one, think it looks sweet painted!
02-20-2010, 02:39 PM
#274
Nordschleife Master
Absolutely. This is a custom 9m build and the name alone implies a premium in value over factory processes not to mention the documentation of the build. It doesn't get any better than this.
02-21-2010, 07:03 AM
#276
Addict
Rennlist
Site Sponsor
Rennlist
Site Sponsor
Thread Starter
You must be getting excited Graham, apart from dropping in on a Saturday afternoon (sorry I missed you) there's a little bit of camera shake in some of those photo's!
 02-22-2010, 06:33 AM
#278
That's Marc with the shakes - food depravation obviously!
Does seem such a shame to have to stick all the sound proofing and carpets on!
G
02-22-2010, 11:23 AM
#279
King of Cool
Rennlist Member
Rennlist Member
02-22-2010, 12:15 PM
#280
Addict
Rennlist
Site Sponsor
Rennlist
Site Sponsor
Thread Starter
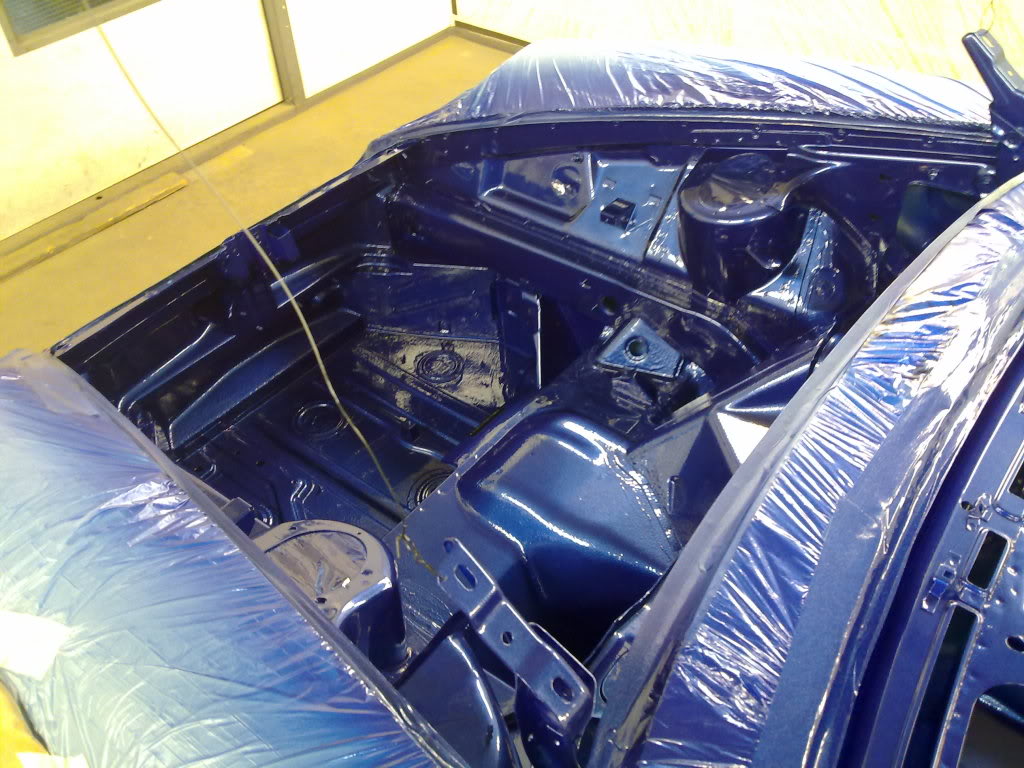
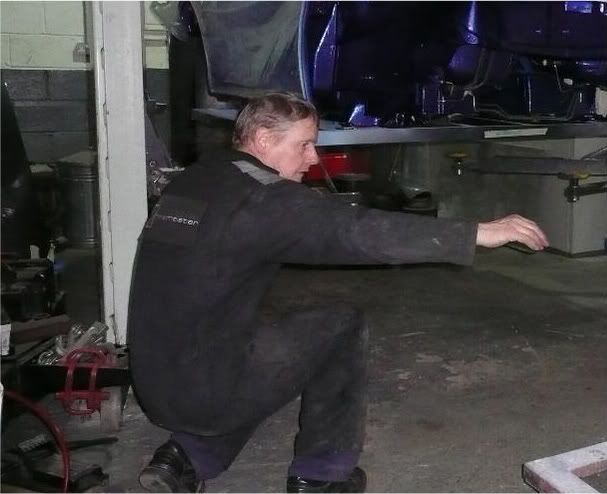
Dash, floor & rear hood mounting areas now painted satin black, so let the assembly begin!!
Now that all but painting the outer panels is completed, it's time to crack on with the assembly which is definitely Marc's favourite part of the job, which is why you can see him crawling all over the car whilst I wandered around taking a few shots on the way through the shop. Something tells me that I will have to pay a lot more frequent visits to Panelcraft if I am going to keep you all up to speed with the assembly!
Now that all but painting the outer panels is completed, it's time to crack on with the assembly which is definitely Marc's favourite part of the job, which is why you can see him crawling all over the car whilst I wandered around taking a few shots on the way through the shop. Something tells me that I will have to pay a lot more frequent visits to Panelcraft if I am going to keep you all up to speed with the assembly!
02-22-2010, 12:31 PM
#283
Nordschleife Master
Holy Cr*p, the pace of production here compared to shops I've had dealings with is unbelievable! No time-lapse photography needed ....
02-22-2010, 01:00 PM
#284
POACB
Rennlist Member
Rennlist Member
Loving this thread and the attention to detail. I notice that the front wings haven't been removed - have you done anything to reinforce behind the door hinge to prevent the dreaded door strap click from rearing its ugly head?
The rest of the job will last for decades, it would be a real pisser if those spot welds gave up the ghost after 2-3 years...
The rest of the job will last for decades, it would be a real pisser if those spot welds gave up the ghost after 2-3 years...
02-22-2010, 02:03 PM
#285
Addict
Rennlist
Site Sponsor
Rennlist
Site Sponsor
Thread Starter
Loving this thread and the attention to detail. I notice that the front wings haven't been removed - have you done anything to reinforce behind the door hinge to prevent the dreaded door strap click from rearing its ugly head?
The rest of the job will last for decades, it would be a real pisser if those spot welds gave up the ghost after 2-3 years...
The rest of the job will last for decades, it would be a real pisser if those spot welds gave up the ghost after 2-3 years...
Yes, we did. If you look back to the start of the thread you can see the shell on the Celette jig stripped to its bones. The A-pillars were replaced with the Speedster version at this stage of the fabrication process & Marc reinforced the support on the inside of the new pillars before he fitted them.