When you click on links to various merchants on this site and make a purchase, this can result in this site earning a commission. Affiliate programs and affiliations include, but are not limited to, the eBay Partner Network.
Just a thought....have you got an ipad? Why not use that + remote desktop ap to view(and maybe control) the mapping laptop? Much more portable and easier to mount to to view the details while you are driving.
My laptop is small/light and when the screen is folded all the way backwards onto the underside of the base, it switches to touch screen tablet mode (Win8)
Looks top class stuff as ever with this project Rob.
You know this... but it bears repeating - it's really surprisingly dangerous to map and drive at the same time. I mean properly flipping bananas carahazy dangerous.
Personally the only way to avoid frustration seems to be: drive - log - analyse - tweak - repeat
I'm not using my knock detection gear (Phormula Knock KS3) at the moment Rob if you want to borrow it. It's single channel but might give you some piece of mind while you are playing.
Totally agree - I'll be using the logging. Thanks for the offer of the KS3, I may take you up on that a little further down the road.
Lastnight I modified the Motronic/Typhoon adapter to add two additional ignition channels for a wasted spark setup
How the hell do you remove the pins from the Motronic harness plug? I spent close to 2 hours trying to get one out. I can normally pop these kind of things out with a bit of paperclip wire or something. Even with the use of a magnifying glass and backlighting the rear of the socket with a torch I couldn't see how those little ******* are held in
I wanted to pop out two wires from the Motronic harness related to options my car doesn't have. I was then going to install them into 2 of the 'unused' holes in the socket and wire my new ignition channels to those. It didn't work out like that. In the end I gave up and snipped the wire off from the rear leaving a small stub to solder on the new wire. The pins will have to stay where they are for now.
Rob, this is the thread that keeps on giving.
Not sure a lot of us will understand what's being discussed, so be prepared for some stupid questions (from me)
Stupid question(s) No 1. The injectors.
Are these an improvement over the OE ones and why?
What difference does the spray pattern make and should the pattern match the OE pattern in order to work effectively.
No such thing as stupid questions - only stupid answers
I'm by no means an oracle in this area so I encourage those with far greater knowledge/experience to correct my rep(lies). This is what I've learned from reading around the subject.
It's generally understood that the stock injectors run pretty close to max duty cycle on a stock engine so if you're looking to modify the engine to any significantly degree, you'll want to swap these for a higher flow rate. The injectors I've been supplied are 440cc units, which from searching around seems to be a common rate for these engines to allow a good amount of head room for future modifications.
Injector spray patten does make a difference. Ideally, you want the spray to be a direct shot at the back of the valve. Engine design/packaging however doesn't always make this possible so there are compromises.
Ignoring fuel pressure and electrical impedance for a moment, for a multipoint injector system, selection of an injector is roughly based on a few parameters
1) desired max flow rate
2) distance from the valve
3) size of the valve
4) number of inlet valves per cylinder
So you can see that a single cone injector with a spray angle of X could in theory be used in a multitude of different applications ie with small valves and short distance from the injector tip or larger valves with a larger distance from the tip etc.
Ignoring the extremes for a second here (ie a spray area that is considerably larger than the valve area) variances over this range will mostly have minor effects on the efficiency of the burn. You want the fuel to be properly atomised when it enters the cyclinder.
If the position and/or spec of the injectors were such that all the spray was hitting the wall of the inlet tract, the efficiency of the burn would be quite hampered. Reason being the atomised fuel will pool and run down the walls. This is further impeded by the air velocity being less at the inlet walls.
So will the injectors I've been supplied (and almost identical to the big greens) work? Short answer - yes. Is it the best one? - We'll probably never know.
There will be a multitude of injectors of different specifications that will work. On paper, some will be better suited than others. In practice, that set will change again once a whole host of real world parameters such as fluid dynamics, inlet tract pulses, air velocity is thrown into the mix.
For emittions reasons a manufacture will go to extreme lengths in modelling/design/selection to get it as close as they can. There will be many different injectors they could use, all offering minor differences in result.
For the likes of us and the vast majority of engine builders, we're merely just dabbling with engines when compared to the efforts of manufactures.
It's more of a (hopefully) educated 'suck-it-n-see' approach that gets built upon via experience and iterations. We can of course see what does and doesn't work better on the dyno. I don't feel I'm forging a new path here, these injectors have been used by others before me and I'm merely following in those footsteps. Maybe Specialist Components is doing the same here or perhaps considering the equipment and skill sets at their disposal these injectors have actually been specifically selected and tested. Back-to-back tests on an RR would tell, but for now I'll give them benefit of the doubt and assume they've done there homework as developing a truely effortless plug-n-play kit such as this is not cheap and I'm sure they'll want a return on it. Time will tell
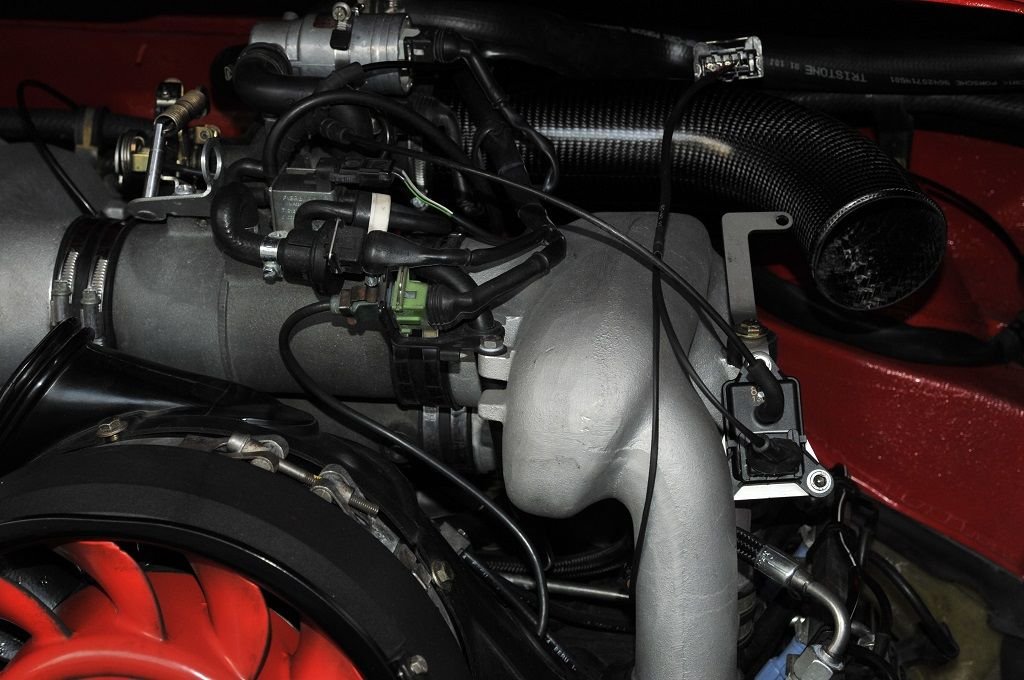
Fit the MAP sensor. For the purposes of getting things up and running, I used the supplied mounting bracket for holding the MAP sensor (as shown in the picture). I've since made my own bracket that relocates the sensor up next to the vacuum solenoid on top of the plenum - looks a little more OE. I'll add another picture over the weekend.
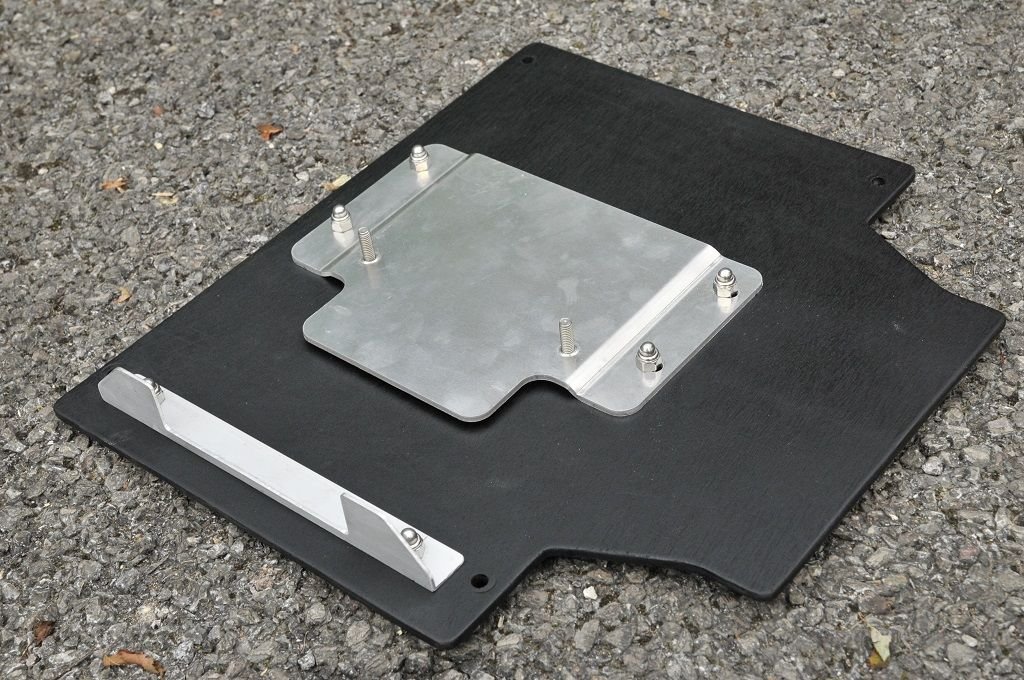
Fit ECU. Now I did't much like the original Porsche pressed metal sheet that the ECU fits to under the seat. So.... I made a lighter one together with a bracket to hold the Motronic harness plug.
And here it all is nicely tucked away. I'll take another picture of this at some point as I also added the fittings to hold the loom connectors you can see hanging loose from under the seat runner.
All in-all - a very straight forward installation. We've been away for the past week so I haven't had the chance to take the car out for a proper drive. Guess what I'll be doing early Saturday morning

 09-11-2014, 07:06 AM