

Aussie 964C2 Maintenance Diary (pic heavy!)
 04-22-2013, 04:58 PM
#466
Nordschleife Master


 04-22-2013, 09:51 PM
#469
Instructor
Join Date: Sep 2012
Location: ND, USA
Posts: 223
Likes: 0
Received 0 Likes
on
0 Posts
Just finished my third light project. Removal and new LED addition, looks like a German 964 now!
Safe and looks good too. Don't know how to post link to thread from ipad. But there is thread of the project with more pics.
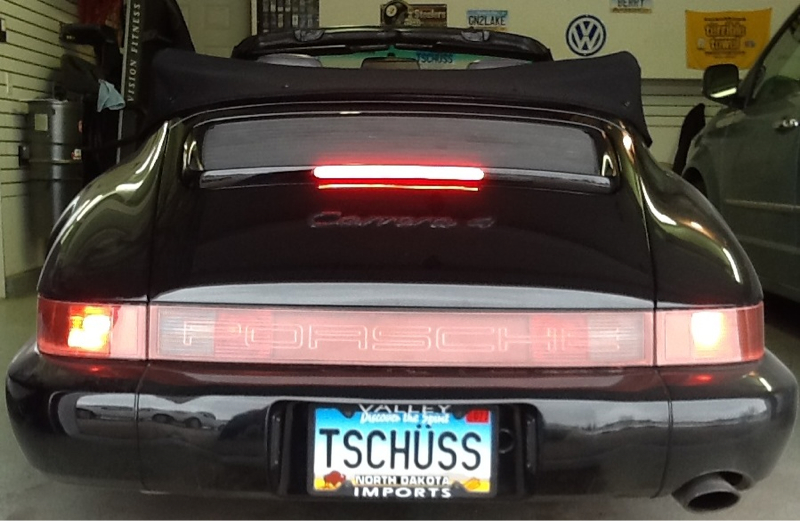
Brake on, Daytime.
https://rennlist.com/forums/964-foru...ird-light.html
Safe and looks good too. Don't know how to post link to thread from ipad. But there is thread of the project with more pics.
Brake on, Daytime.
https://rennlist.com/forums/964-foru...ird-light.html
Last edited by RayB_911; 04-22-2013 at 11:24 PM.
04-23-2013, 12:07 AM
#471
Three Wheelin'
Sir, in all respect, I'm sure that it is something that you would do in much less time. By the time you took it in, got a ride home, waited all day, got a ride back, forked over your plastic, signed stuff, and drove home you could have been sitting in the easy chair with the paper and a cold one.
Given your talents and the overall state of your car it would likely be a half day, less when it came time to do it again. Furthermore, there is more than a good chance you would do a better job, what with your natural tendencies.
And before you brag that your neighbor drives it to the dealer for you just remember it's not his, so he's got a kind of a blank check doesn't he?
Just kidding. Do whatever. I need to do mine soon and sure wish you'd do yours first-with photos and commentary and the usual top notch attention.

ps very sorry to see the parking mishap. You are a brave man to leave it parallel parked. People, in general, are 'tards.
04-23-2013, 12:33 AM
#472
Burning Brakes
Thread Starter

Sir, in all respect, I'm sure that it is something that you would do in much less time. By the time you took it in, got a ride home, waited all day, got a ride back, forked over your plastic, signed stuff, and drove home you could have been sitting in the easy chair with the paper and a cold one.
 I drive the car into his garage, give him the keys and walk back to my house across the street
 04-23-2013, 01:17 AM
#473
Three Wheelin'
Oh, well that's a whole different critter. Surprising they didn't have enough pride in their work to own up to it. Musta been a real crap-tastic piece of maneuvering. Makes ya think they might have been impaired. It's like that old bumper sticker, "HELL YES I'M DRUNK. I'm no STUNT DRIVER."
04-23-2013, 01:21 AM
#474
Burning Brakes
Thread Starter
The place I was parked was near a theatre, and well, let's just say that at 6pm a whole lot of very senior people in really large SUVs appear out of nowhere 
05-14-2013, 04:14 AM
#475
Burning Brakes
Thread Starter
So...recently the car's been like this..

...because one day I returned to the car park, and found this. Some douche had reversed into the front bumper and then drove off:

So, this seemed as good an opportunity as any, to get the front bumper resprayed, and we could also get the RS bonnet painted to match the car, too. It turns out that the RS bonnet was a strange, slightly greeny shade of white, and when you put it next to the car, it was quite obvious that it wasn't the same shade.
I went to see my friend Col at Gordon Smash Repair, who I've used for many years. Unlike most panelbeaters, he actually likes classic cars, and usually has something interesting and old in the workshop. Also, he's quite okay with me helping, by stripping the bumper off, and also leaving the stock steel bonnet with him as a colour sample. And a couple of weeks later, the RS bonnet and bumper is back, in a beautiful coat of Grand Prix White!

So, we start reassembling...

But before I buttoned it all together again, it was a good opportunity to renew the sway bar drop links. Mine weren't clunking or anything, but as always...when a pair of RS ones came up for sale at a good price...

As you can see, the RS droplinks have a more severe curve, which is to free up more space between it, and the brake lines (the RS rides 2 inches lower than a stock Carrera). The RS items also seem to be about an inch shorter.

My car is set at the RS ride height, but I didn't see any witness marks on the brake lines to suggest that they were rubbing...but it's nice to renew them anyway. I find that new balljoints are very stiff, to the point where you can barely move them by hand. But my old droplinks could be smoothly moved around like a joystick, so while there was no slop, I think they are quite worn.

First, the RS bonnet goes on...which turned out to be a pretty fiddly task

It takes ages to align it, such that the front edges line up with the fenders, and the panel gaps on the side of the bonnet are even

But when I was done, I realised that the rubber gasket for the front bumper rides up on the fenders a little, so all of a sudden, the bonnet doesn't align with the fenders anymore and it looks like you didn't give a crap

So I think the bonnet needs to sit a few mm further back, which will also open up the panel gaps to the side a little...but as it is, there is very little clearance between the rear corners of the bonnet and the cowl.

With the current fitment, I had to put a washer between the hinge and the rear mounting point, so that the rear corners didn't touch the cowl when you opened the bonnet...I will do a little more experimentation, but I think we might possibly have to file this away under "Because Race Car" and live with some slightly wonky fitment

While the bumper was being painted, I also asked Col if he could repaint the brake ducts too, and he also painted up a pair of screws for me as well. The proper look is to have a silver screw, but I figured it wouldn't hurt to try this for a change.

The bumper also had a few minor scratches from over the years, so it's nice to have it all pristine once more.

Interestingly, the RS bonnet is too flimsy to use the stock Carrera hood shocks, so it relies instead on this rod, which pokes into a cup-shaped allen nut that screws into the top of one of the strut mounts.

But because I'm running a Ruf-style strut brace, I have them already! This spot normally lives under the carpet though (the RS has a cut-down carpet) so I'll have a think about what I'm going to do there. I think it might be best if I had a custom boot carpet made, which leaves the sides bare, like the RS.

And we're done!
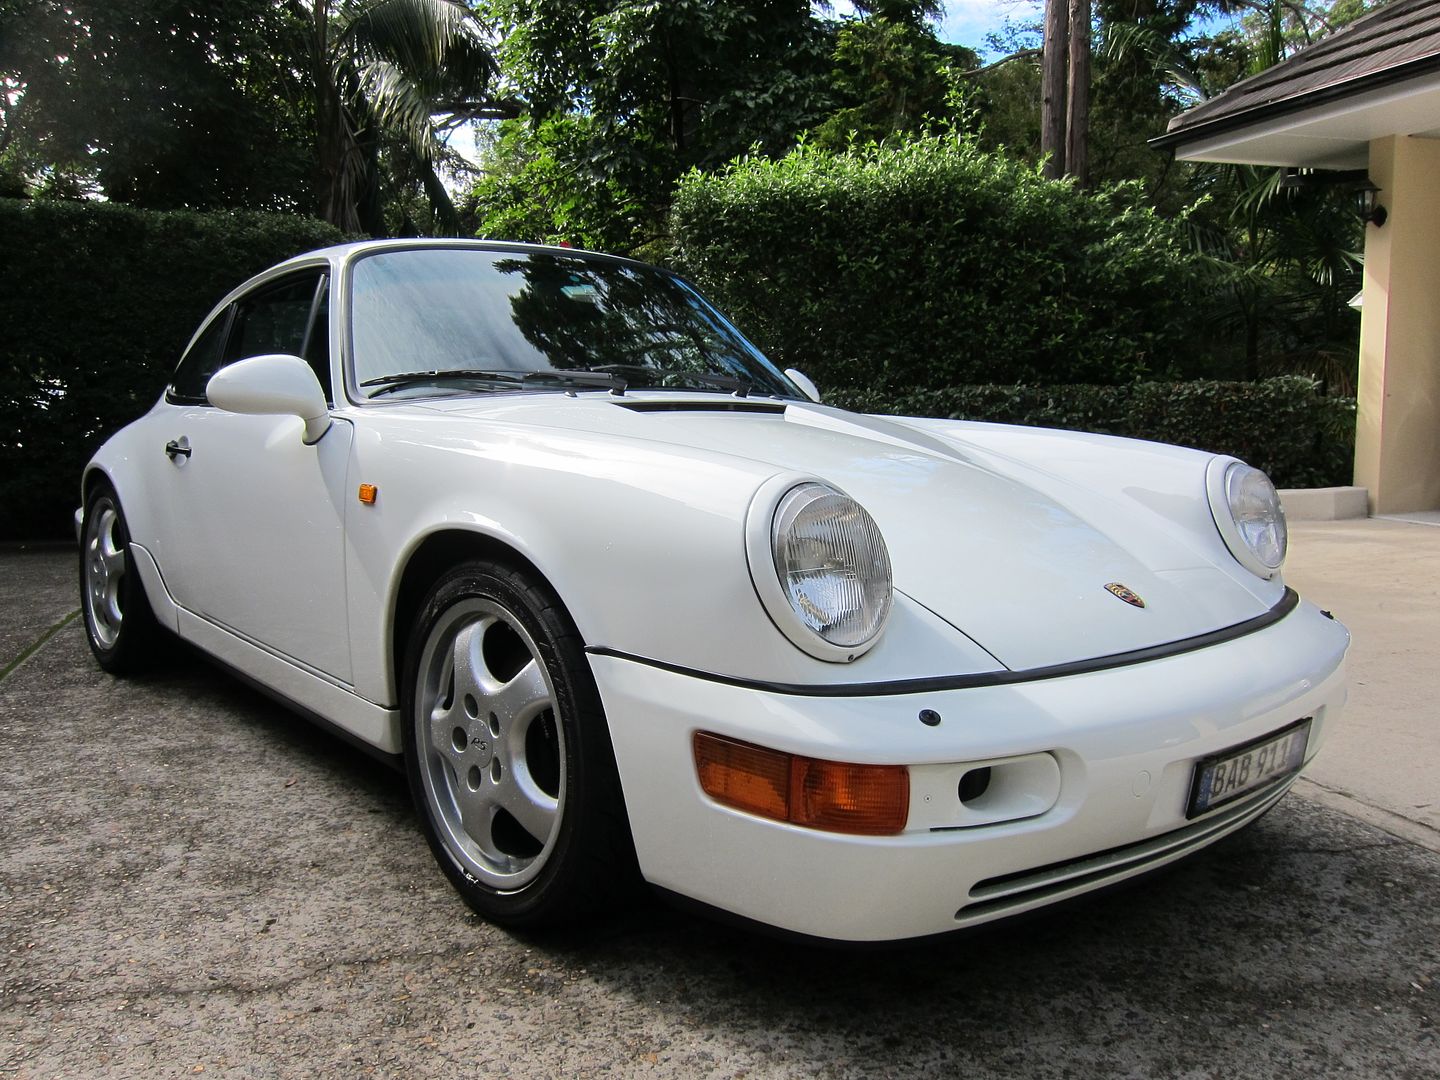

The stock steel bonnet weighs in at 16kg and the RS alloy one is 6kg, plus removing the carpet and hood shocks means a 12kg weight saving, I suppose.
...because one day I returned to the car park, and found this. Some douche had reversed into the front bumper and then drove off:
So, this seemed as good an opportunity as any, to get the front bumper resprayed, and we could also get the RS bonnet painted to match the car, too. It turns out that the RS bonnet was a strange, slightly greeny shade of white, and when you put it next to the car, it was quite obvious that it wasn't the same shade.
I went to see my friend Col at Gordon Smash Repair, who I've used for many years. Unlike most panelbeaters, he actually likes classic cars, and usually has something interesting and old in the workshop. Also, he's quite okay with me helping, by stripping the bumper off, and also leaving the stock steel bonnet with him as a colour sample. And a couple of weeks later, the RS bonnet and bumper is back, in a beautiful coat of Grand Prix White!
So, we start reassembling...
But before I buttoned it all together again, it was a good opportunity to renew the sway bar drop links. Mine weren't clunking or anything, but as always...when a pair of RS ones came up for sale at a good price...
As you can see, the RS droplinks have a more severe curve, which is to free up more space between it, and the brake lines (the RS rides 2 inches lower than a stock Carrera). The RS items also seem to be about an inch shorter.
My car is set at the RS ride height, but I didn't see any witness marks on the brake lines to suggest that they were rubbing...but it's nice to renew them anyway. I find that new balljoints are very stiff, to the point where you can barely move them by hand. But my old droplinks could be smoothly moved around like a joystick, so while there was no slop, I think they are quite worn.
First, the RS bonnet goes on...which turned out to be a pretty fiddly task
It takes ages to align it, such that the front edges line up with the fenders, and the panel gaps on the side of the bonnet are even
But when I was done, I realised that the rubber gasket for the front bumper rides up on the fenders a little, so all of a sudden, the bonnet doesn't align with the fenders anymore and it looks like you didn't give a crap
So I think the bonnet needs to sit a few mm further back, which will also open up the panel gaps to the side a little...but as it is, there is very little clearance between the rear corners of the bonnet and the cowl.
With the current fitment, I had to put a washer between the hinge and the rear mounting point, so that the rear corners didn't touch the cowl when you opened the bonnet...I will do a little more experimentation, but I think we might possibly have to file this away under "Because Race Car" and live with some slightly wonky fitment
While the bumper was being painted, I also asked Col if he could repaint the brake ducts too, and he also painted up a pair of screws for me as well. The proper look is to have a silver screw, but I figured it wouldn't hurt to try this for a change.
The bumper also had a few minor scratches from over the years, so it's nice to have it all pristine once more.
Interestingly, the RS bonnet is too flimsy to use the stock Carrera hood shocks, so it relies instead on this rod, which pokes into a cup-shaped allen nut that screws into the top of one of the strut mounts.
But because I'm running a Ruf-style strut brace, I have them already! This spot normally lives under the carpet though (the RS has a cut-down carpet) so I'll have a think about what I'm going to do there. I think it might be best if I had a custom boot carpet made, which leaves the sides bare, like the RS.
And we're done!
The stock steel bonnet weighs in at 16kg and the RS alloy one is 6kg, plus removing the carpet and hood shocks means a 12kg weight saving, I suppose.
05-14-2013, 05:08 AM
#477
Burning Brakes
Thread Starter
05-14-2013, 10:32 AM
#478
Rennlist Member

I like the look of the frunk without the carpet, but wanted to hide the spare tire and tools...that's when I found out the (an extra) front passenger floor mat was perfectly sized to cover that area.
BTW, I love the frunk rod.

The top of the floor mat tucks in perfectly.

 05-14-2013, 10:48 AM
#479
Burning Brakes
Thread Starter
Thanks for the tip, Jetta! But basically what the Euro-RS has, is essentially what you did
The RS has a shortened version of the stock carpet, which kinda just reduces it to the square that covers the spare, as you've done. The main visual difference is that that button-down pocket (where we all keep our toolkits) is replicated in the middle of the square.
I was basically planning to trim up a square section of carpet, with a wooden backing, that sits over the spare, and then there would be a flap of carpet that pop-studs onto that removable plastic trim piece at the front of the frunk.
Plan B was to cut a hole in the carpet, and pop in an eyelet or something, so that the rod can pass thru. But that might be dangerous, since it requires that the user know that they're supposed to aim for a certain hole underneath
05-14-2013, 11:12 AM
#480
Rennlist Member
...The RS has a shortened version of the stock carpet, which kinda just reduces it to the square that covers the spare, as you've done. The main visual difference is that that button-down pocket (where we all keep our toolkits) is replicated in the middle of the square.
I was basically planning to trim up a square section of carpet, with a wooden backing, that sits over the spare, and then there would be a flap of carpet that pop-studs onto that removable plastic trim piece at the front of the frunk...
I was basically planning to trim up a square section of carpet, with a wooden backing, that sits over the spare, and then there would be a flap of carpet that pop-studs onto that removable plastic trim piece at the front of the frunk...
As always, we can't wait to see what you come up with.
