When you click on links to various merchants on this site and make a purchase, this can result in this site earning a commission. Affiliate programs and affiliations include, but are not limited to, the eBay Partner Network.
Using the TDC mark is not 100% accurate and the dowel pin that locates the fan housing is offset to the right side of the case. The marks are different sizes on the pulley vs the cast housing and I found they vary from engine to engine but you can make some minor adjustments to make them line up better. IMO this is more of a reference. When setting actual cam timing there are several methods to determine actual TDC. I like the Stomski tools but they add up if you don't do this too often. It is hard to see since everything is painted black but the engine is set to actual TDC the marks are not perfectly in line but quite close I had to play with the housing to get it as accurate as possible. I have seen many of these removed and reinstalled with the housing twisted or misaligned by quite a bit.
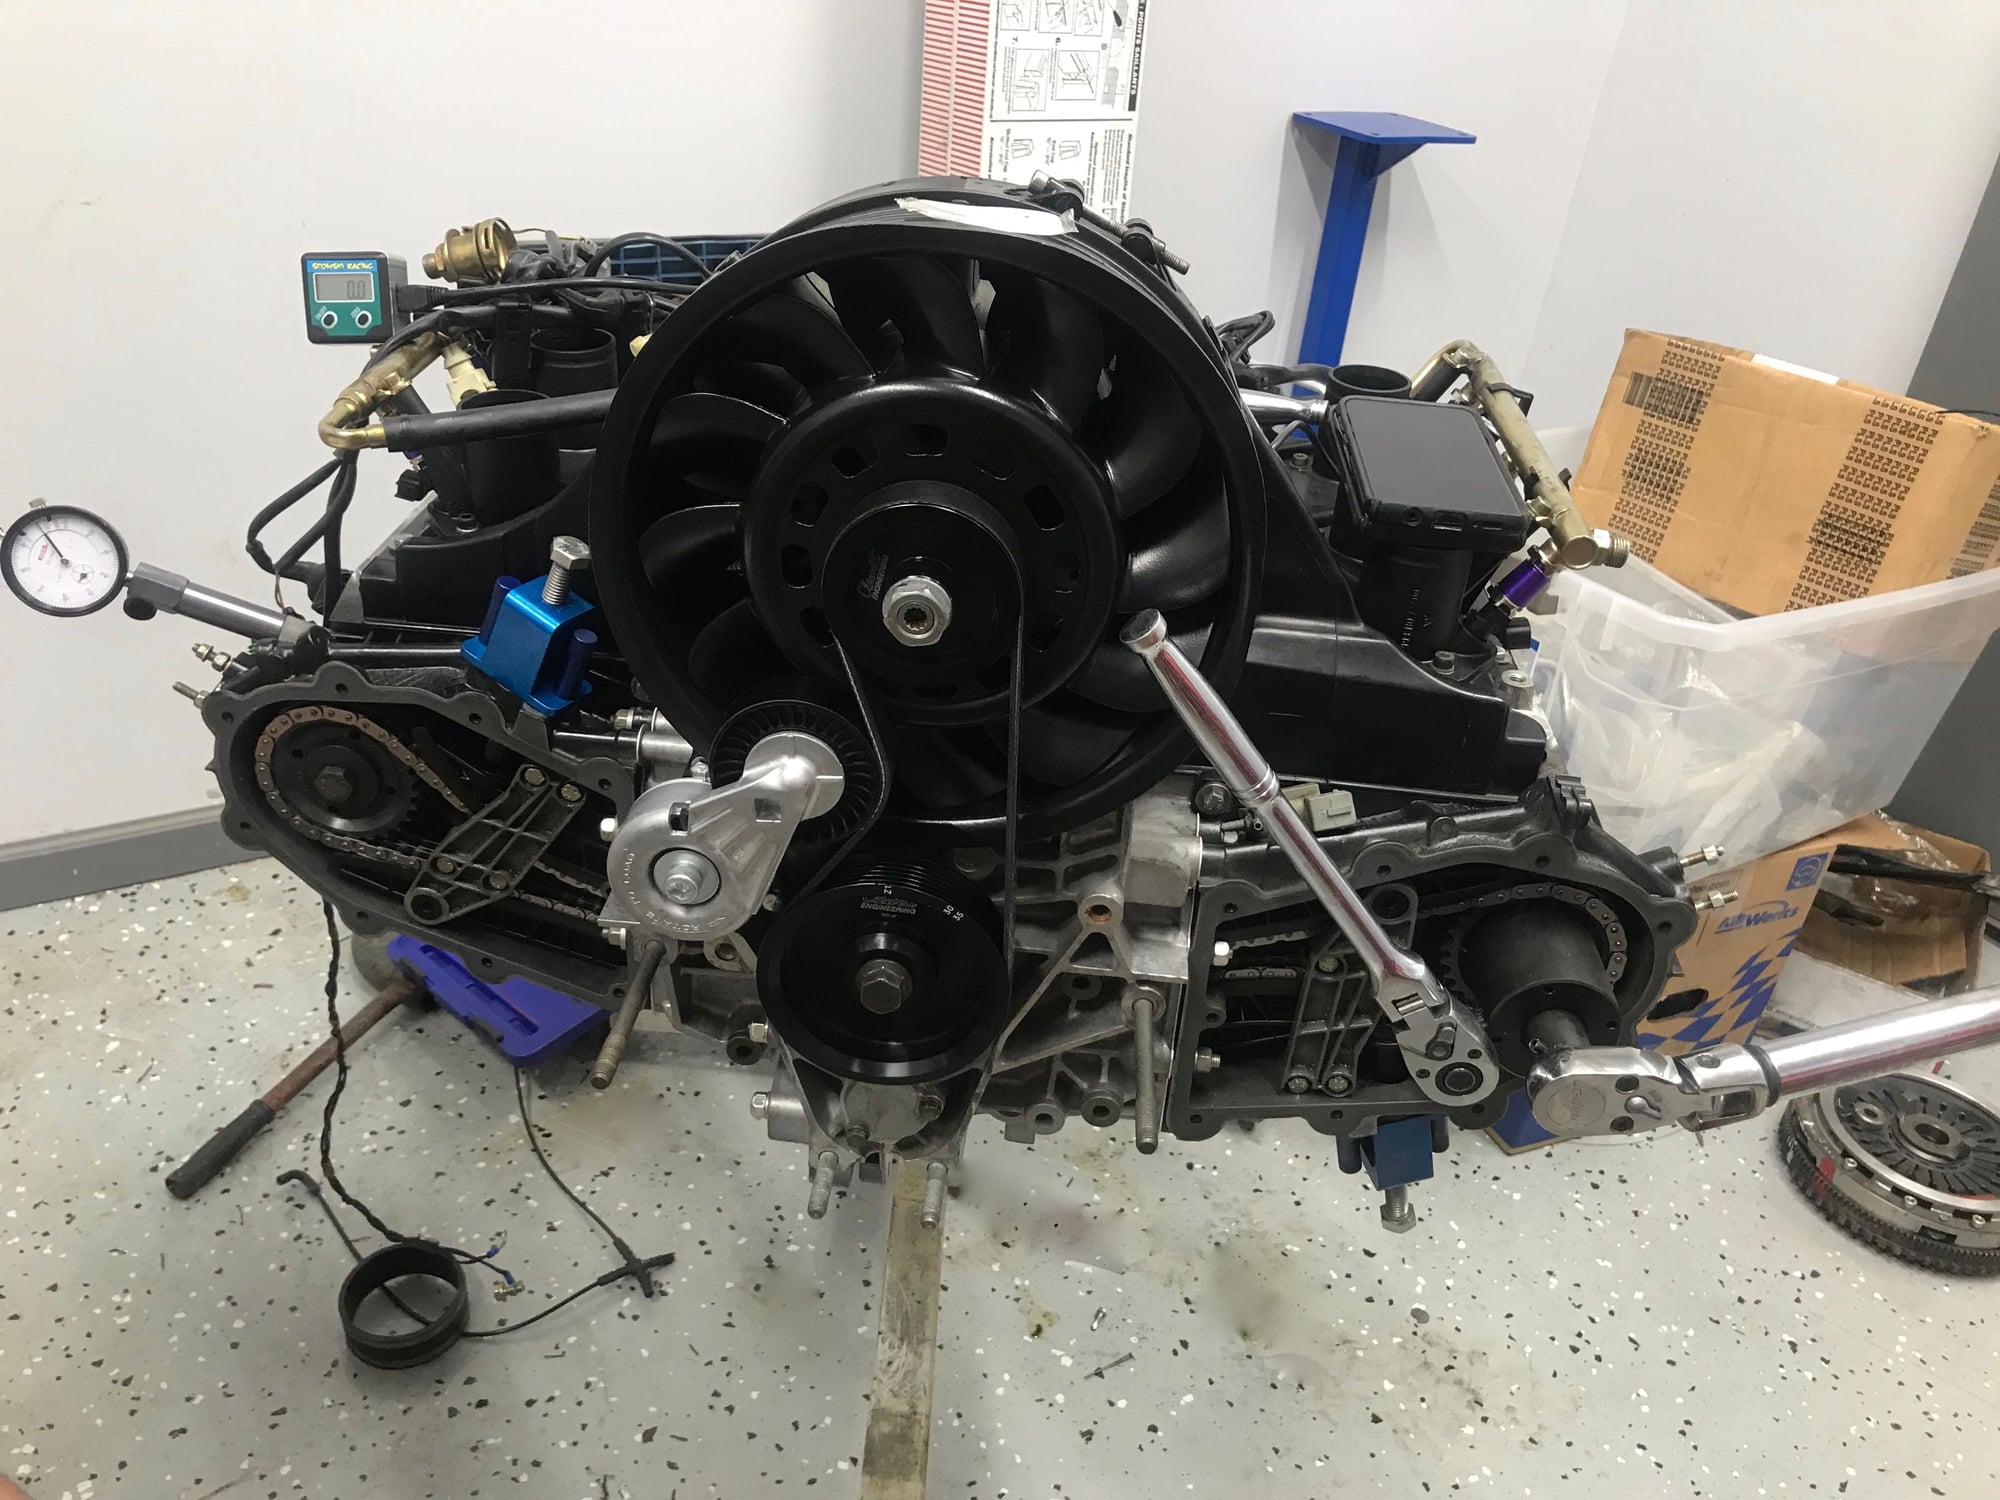
Please excuse the mess the workbenches weren't installed yet.
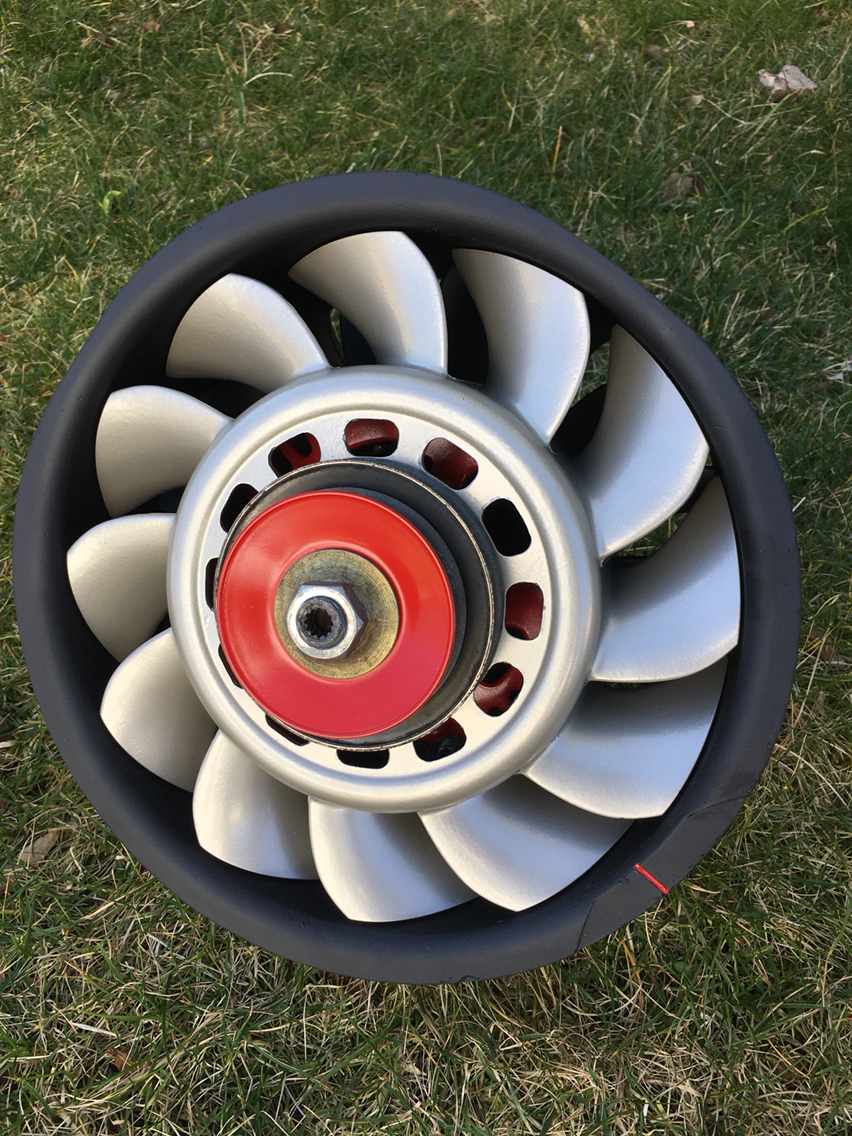
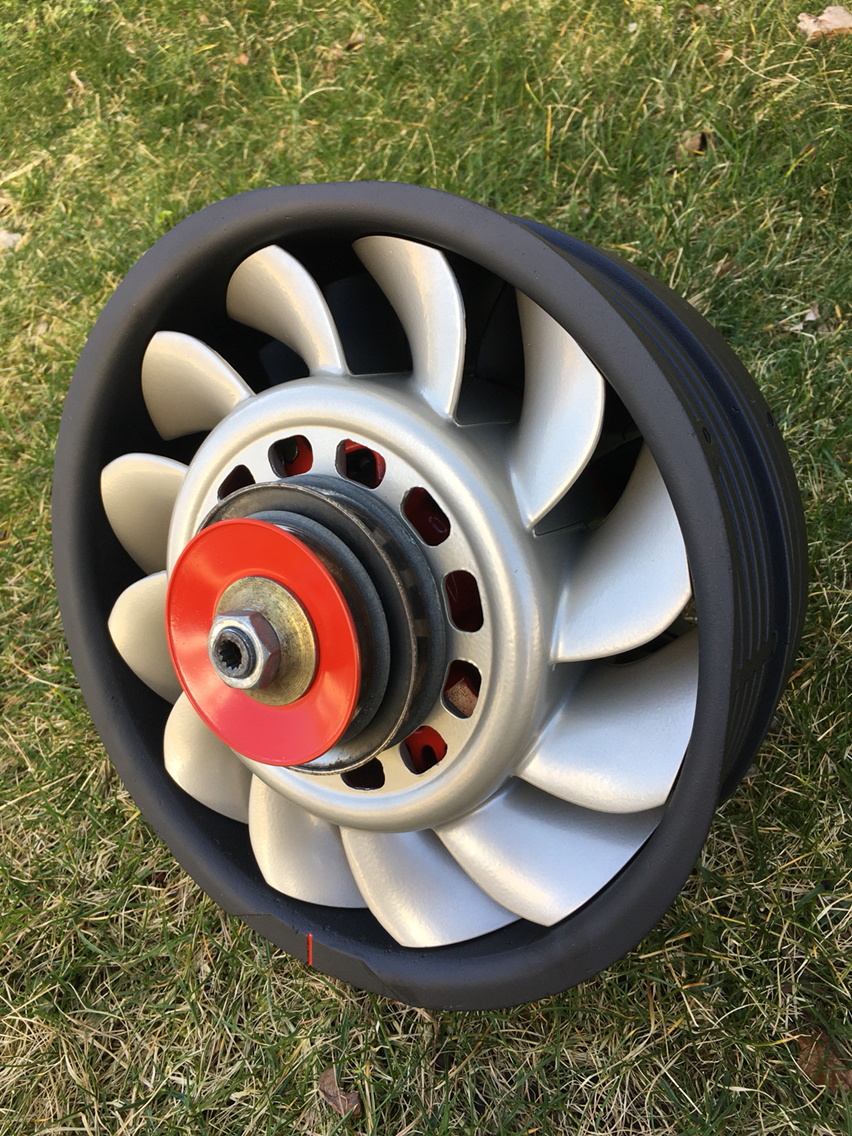
BTW if you look at the picture of your fan, the two lower veins appear to be scabbing. This might have been a result of the casting process or it is from corrosion. You might want to take a pick and see if the material lifts and flakes off. It doesn't look bad but can trap moisture and cause further damage if it is a scab and not a surface irregularity.
BTW BigMike is a great source of knowledge and help.
Thanks Anthony. Yes there are a bunch of areas on my housing like that- they've been buried under thick powder coating so had never noticed. I had taken a pic and a screwdriver to all of them- they are solid as a rock. So just an issue with the casting.
Today it's time to sand and seal it all up- light coat of enamel if i can find some heat somewhere (garage is freezing cold and need to get the temp up over 60)
Anyway- Yesterday i picked up yet another entire intake which included injectors - so i think i might pause and have those cleaned and add new injectors to this job while I'm in there...
If you plan to rattle can spray paint this I would consider a self etching primer like Sikkens, SEM, Por 15 or Eastwood makes along with a catalyzed paint. They make some decent two part paints in spray cans today that work fairly well. I used them on mine and have held up quite well. My local auto paint store can mix them to specific colors if needed.
So that is just a surface irregularity which is good.
Interesting topic... I am sort of at the same point but ended up using penetrating oil for the housing. Would something like this be more robust? I like the option to be able to wipe vs spray..
I would be a little cautious about using it on magnesium. If it isn't 100% protected from the elements it will corrode quickly and then you will have problems.
I would be a little cautious about using it on magnesium. If it isn't 100% protected from the elements it will corrode quickly and then you will have problems.
The Eastwood Exoarmour or the penetrating oil (Gibbs)?
I wonder about using VHT Epoxy paint? I use it on engine tins and suspension components, and I've been pretty satisfied with the results. The satin black is what I use. I found the best price at my local NAPA. FWIW I've considered using it on my targa bar when I repaint
The Eastwood Exoarmour or the penetrating oil (Gibbs)?
Penetrating oil. I have never used the ExoArmour. I like the eastwood products for the most part. If I can have something professionally painted IMO it is the best when done properly.
Exoarmour reads well. I would need a lot more to go by than this before trying it. My take
Easy to apply - Wipe on, spray on, or dip Great
Protects bare metal, plastic, fiberglass, ceramic and painted surfaces. That is a pretty tall claim to group such a broad range of materials that can vary greatly. Magnesium being one of the more temperamental.
Tested to 2000F degree for temperature resistance LOL You would have a molten puddle of magnesium
Passed 4000 hour salt spray test ??? On what materials and what procedure was followed. If it meets a given Mil spec for salt fog testing I might consider it. If you have ever seen a mag sample Salt fog tested. The swiss cheese unprotected magnesium becomes after just 120 hours you would understand how critical keeping mag free from exposure is.
Unaffected by MEK and other solvents That is a plus.
I could be wrong but I wouldn't trust such an expensive part to something that might work. What you don't see on the backside can end up being an expensive problem one day.
You can always redo it. My suggestion knowing the material quite well is protect it as soon as the raw surface is exposed. Any grit blasting and or surface stripping should be cleaned in a water bath and dried under fans at around 120 degrees F and have some form of surface coating or conversion done as quickly as possible after.
I used it on my front suspension a-arms, and it has been about 2 years. They still look new and once the exo-armor has "soaked" in and and dried, you can't really tell it is there. I put three coats on, but the second and third coats did not seem to soak well since it seems to have sealed the metal. I am a big fan of it. When I reinstalled the a-arms, my hands were a little greasy and it wiped right off and did not leave a stain on the suspension pieces. That is my $.02. If I was doing something as protected as in the engine bay, I would use it on the housing by have the fan cerocoated.... but that is just my personal preference.
I used it on my front suspension a-arms, and it has been about 2 years. They still look new and once the exo-armor has "soaked" in and and dried, you can't really tell it is there. I put three coats on, but the second and third coats did not seem to soak well since it seems to have sealed the metal. I am a big fan of it. When I reinstalled the a-arms, my hands were a little greasy and it wiped right off and did not leave a stain on the suspension pieces. That is my $.02. If I was doing something as protected as in the engine bay, I would use it on the housing by have the fan cerocoated.... but that is just my personal preference.
Your choice. I can only tell you what i know regarding my 30 years of manufacturing both aluminum and magnesium parts like this. Give it a shot although if you start seeing white or black spots forming it is corrosion and once the white spots form you will see pitting of the surface when cleaned again.
Anyone ever seen an old *** slot car wheel? Not one has been outside in the rain and snow like my C4, and not one is not falling apart from white crusty gross corrosion.
So. Bottom line- magnesium is a great material that i wish Porsche had left alone and that they had chosen aluminum.
Anyone ever seen an old *** slot car wheel? Not one has been outside in the rain and snow like my C4, and not one is not falling apart from white crusty gross corrosion.
So. Bottom line- magnesium is a great material that i wish Porsche had left alone and that they had chosen aluminum.
Mine will be painted and sealed.
When? God only knows. It's cold outside.
Wow that brought back some memories and you just dated us. I did a search on them and I can't believe what some of the asking prices on cars I had growing up and long since gone to the dumpster.
The fact that these parts when protected have lasted the better part of 30 years isn't bad but Porsche IMO did not properly prepare the surface prior to painting. Also people don't realize how damaging a simple scratch or how the ends of the fan can easily chip from debris being sucked into the fan while driving. So not only important to properly protect it but to maintain the covering.
So- this being the slowest thread on rennlist - it's time for an update.
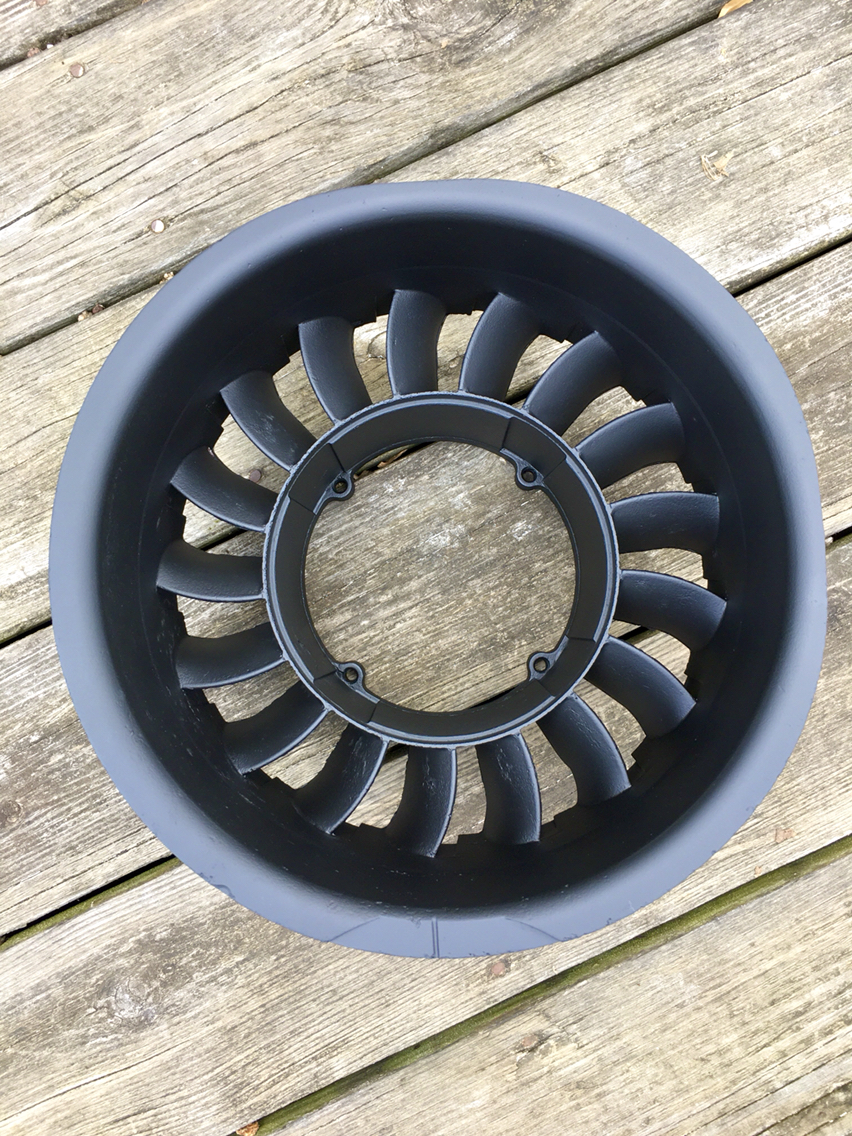
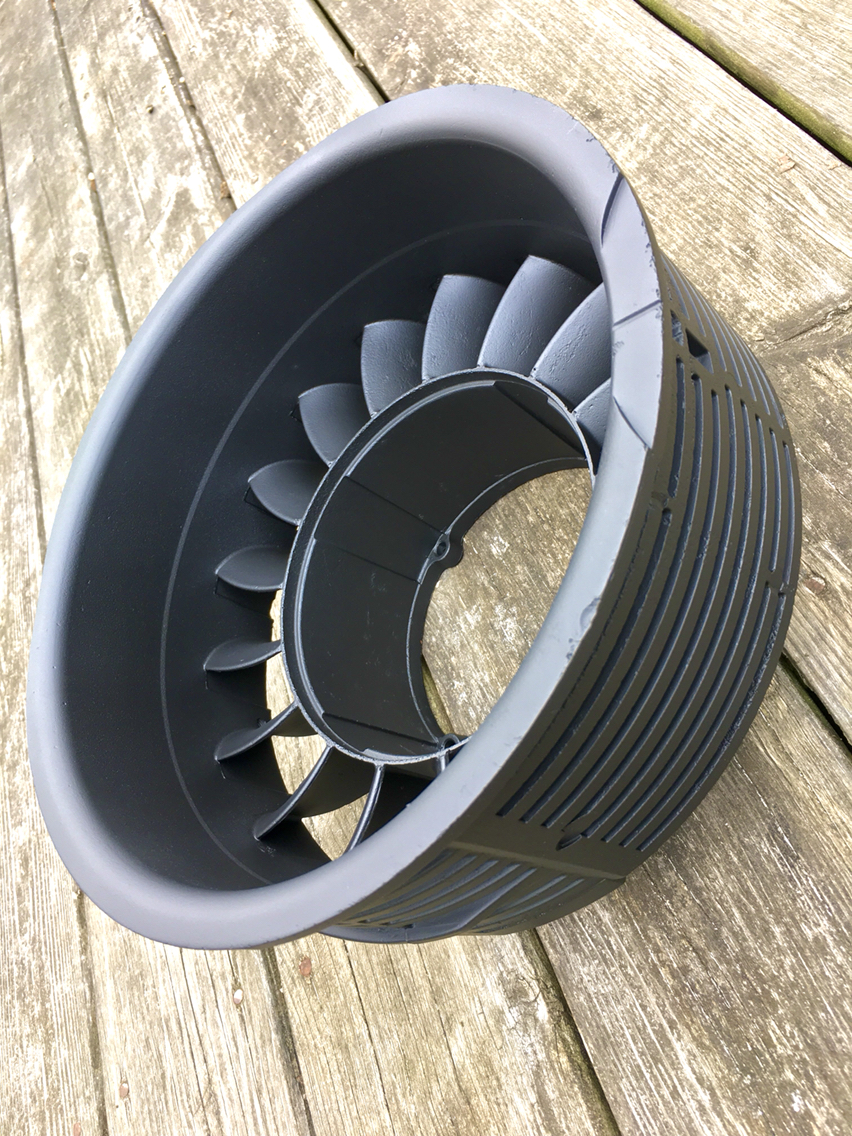
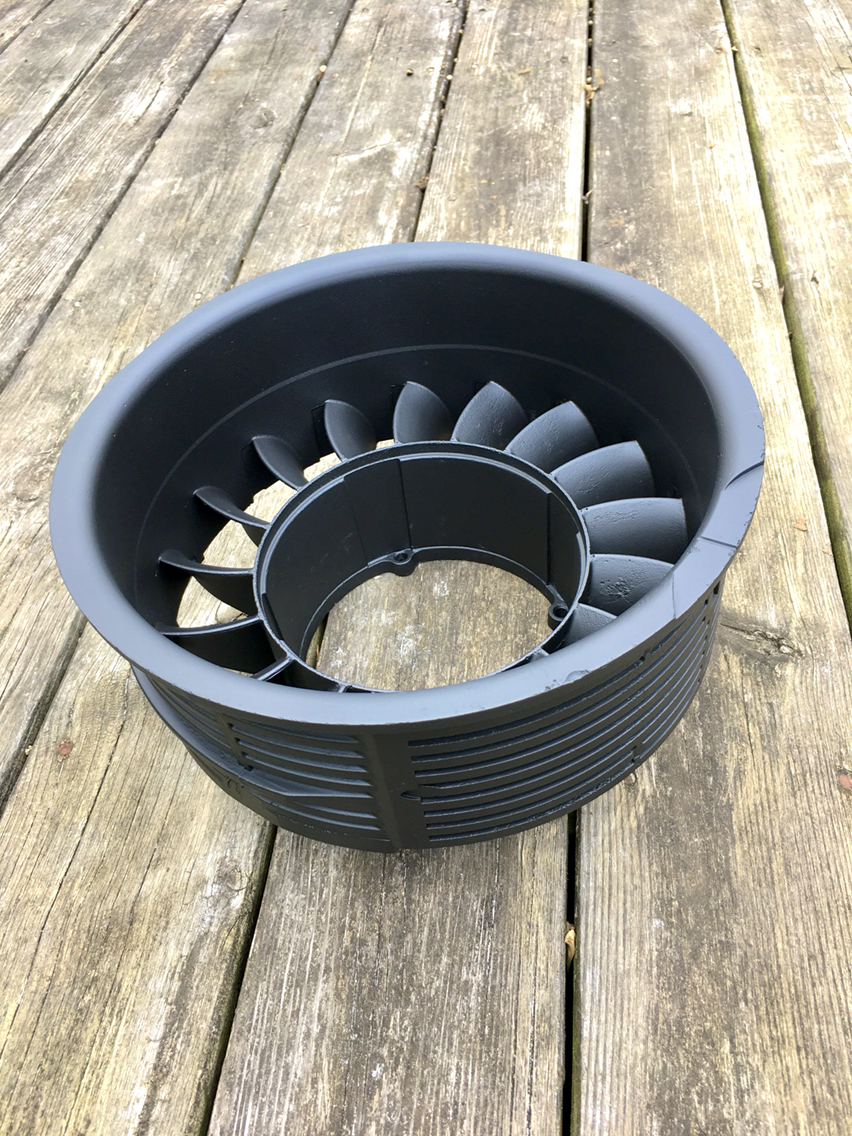
The one thing that has been holding me up- is that i decided many weeks ago to attempt to strip my fan housing. It was too cold and the stripper wasn't effective- so i passed it off to a friend that threw it in a stripping tank. So finally with that done - i had thought to paint- and it was still too cold. So off to the Cerakote guys at Shoreline Coatings in North Branford, CT that have a fair amount of experience with magnesium parts and they did a fantastic job...so I'm a fan. They also communicate well, which i have to say is rare, unfortunately, so for that and the quality, they have my business.
You'll notice that the Cerakote being so thin- you are all the imperfections of the surface of the metal. So if you go down this road with your parts, keep in mind you will need to pre-finish them like you are going to the plater- or live with imperfections- which i like.
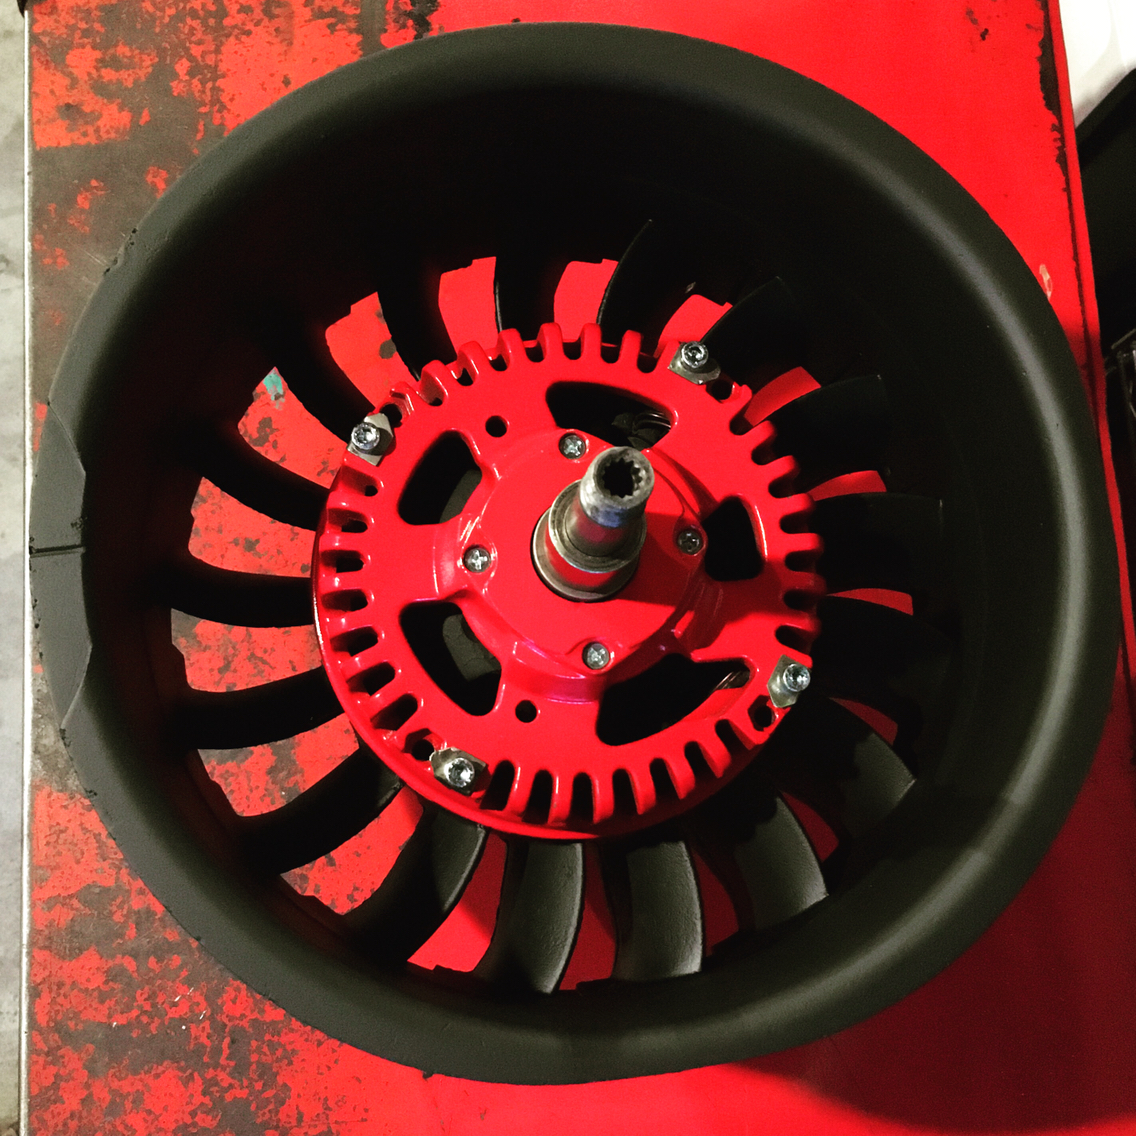
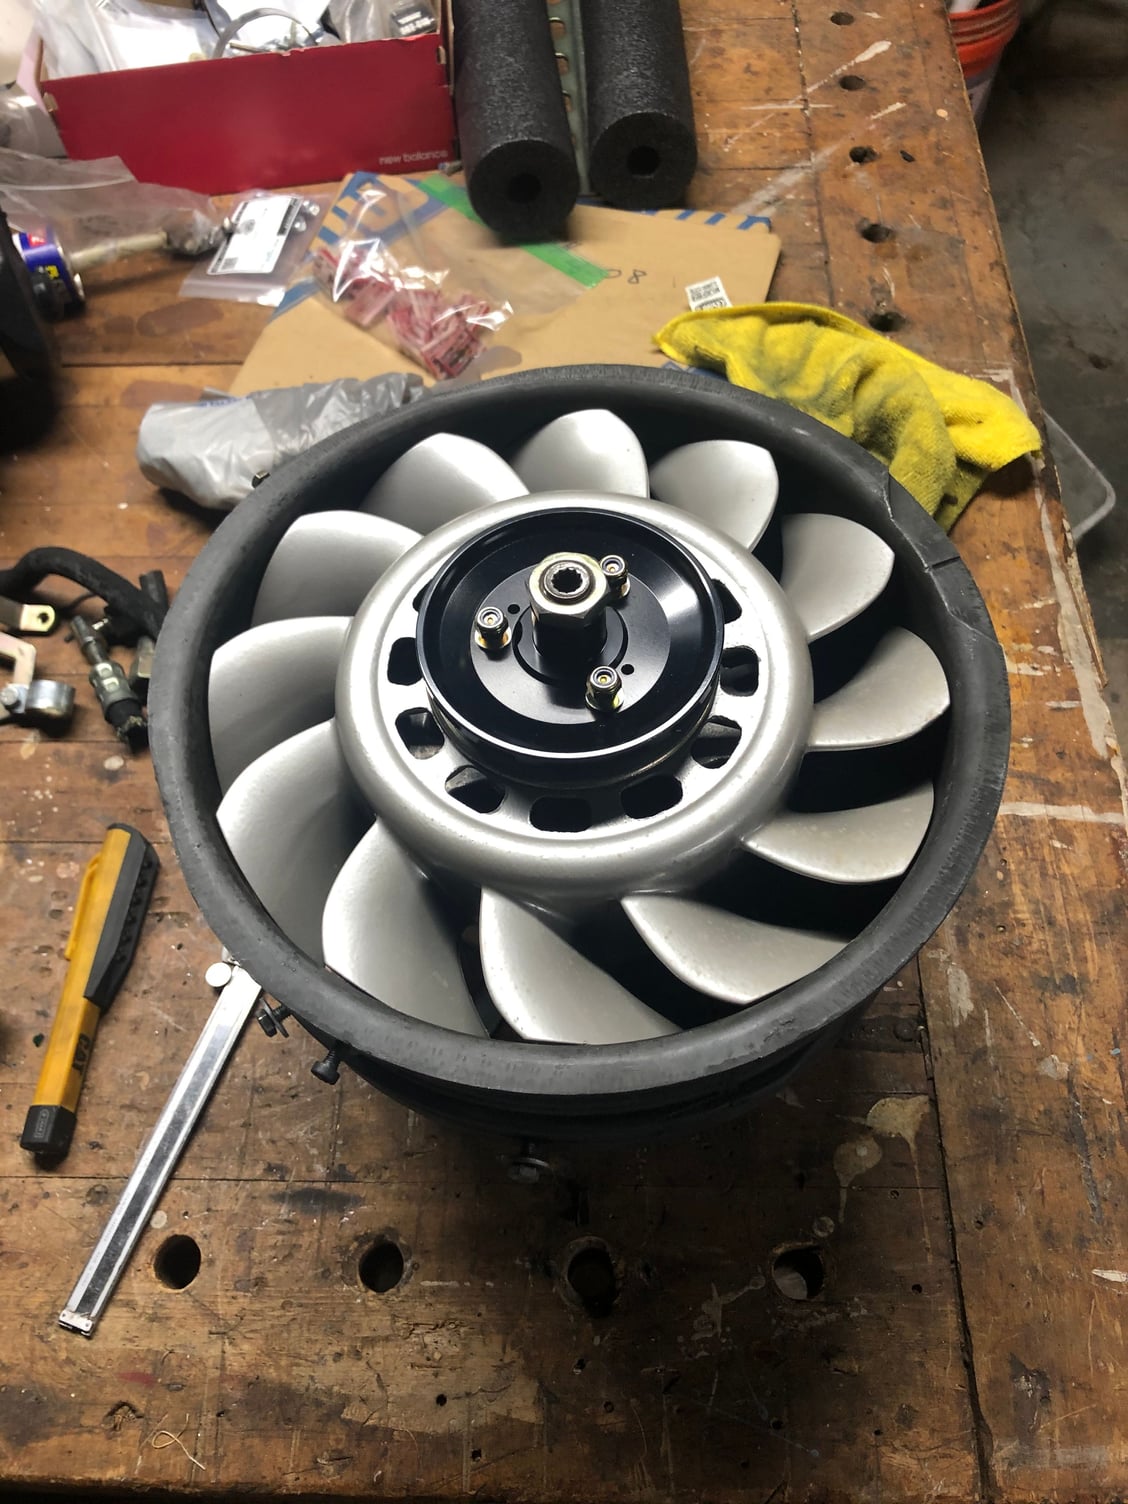
And then to finish it off- a little color for top dead centering....
And then the test fit...
And then...
Can't wait to have the time to actually install this and get the car running again.
Finally got some time to button this up. Wish i had some time to handle the details, but it just needed to go back together...
Started by getting the fan housing and alternator in....kind of a shame to cover up the intake, but here we go...
I nicked the front of the passenger side manifold- which sucks as it is on plain view. Next manifolds i do will be Cerakote. (I have 4 sets that i plan to renovate and sell....2 may still be spoken for, but let's see now that the world is upside down.
And then all buttoned...
So here is the thing...the car has CRAZY good throttle response now, which this car never had. It was always very slow to respond to the pedal, especially at low rpm.
But - with lack of any empirical testing, it's hard to say what accounts for the change. I did swap out the fuel filter and fuel pressure regulator- but these have been changed in the past, and the difference wasn't this staggering...
I still need to adjust the throttle cable length. But for the most part- this bit of the job is done. I have a ton to go back in and do, but with the world as it is, i needed this car to be roadworthy and not sitting in pieces. Next up will be, afm, airbox, Heater blower motor, etc. I have a lot of detailing to do.
I also, for next winter, will go back in and do the intake stacks and new seals, and rebuilt injectors and replated runners and and and. But for now, I'm so happy to be driving this car again. So much better than the 996....
This is one of my all time favorite threads and Rob has encouraged me to document my journey on his thread. So the madness is spreading.
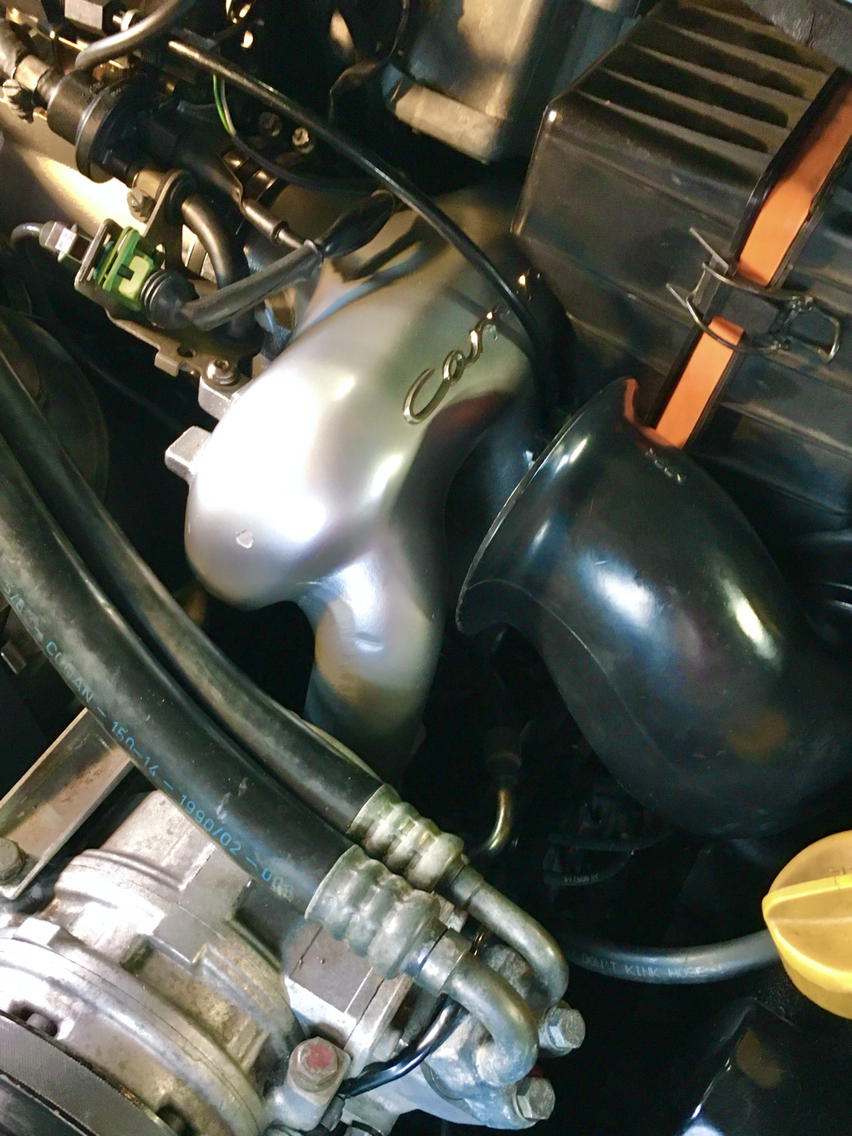
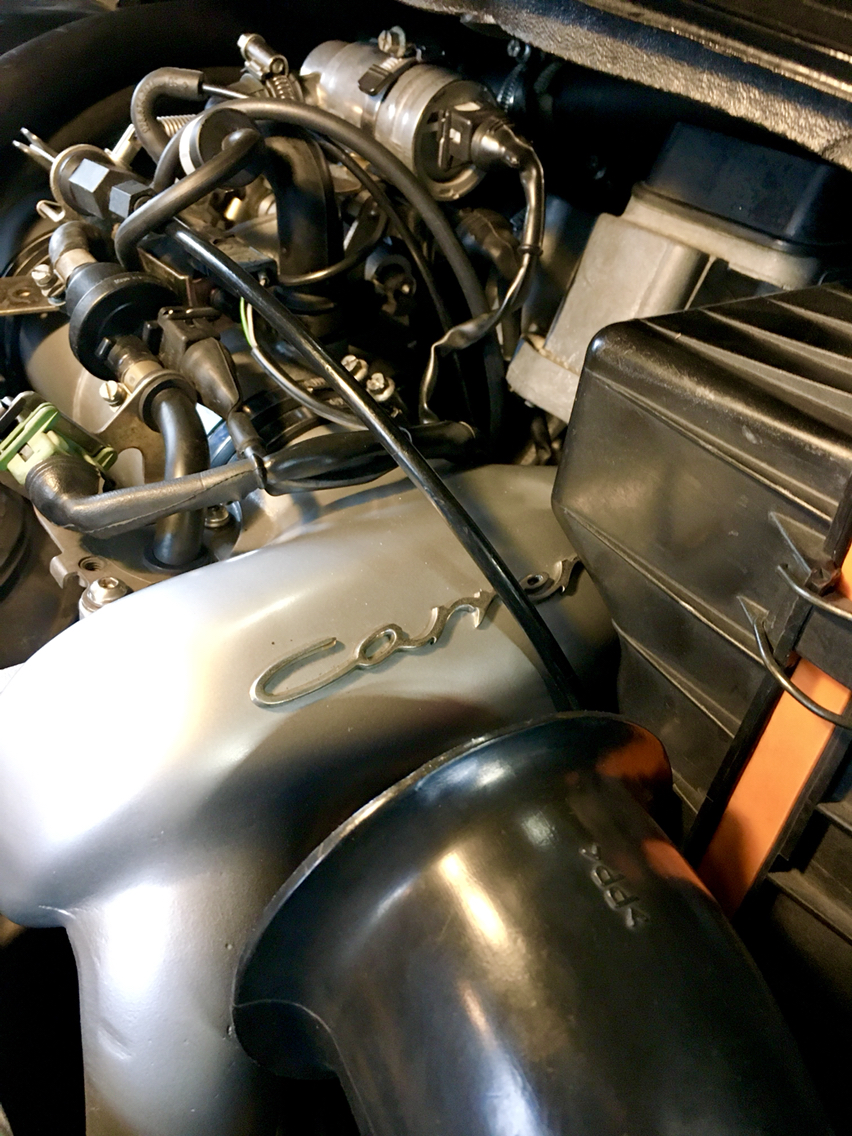
First the BEFORE picture.
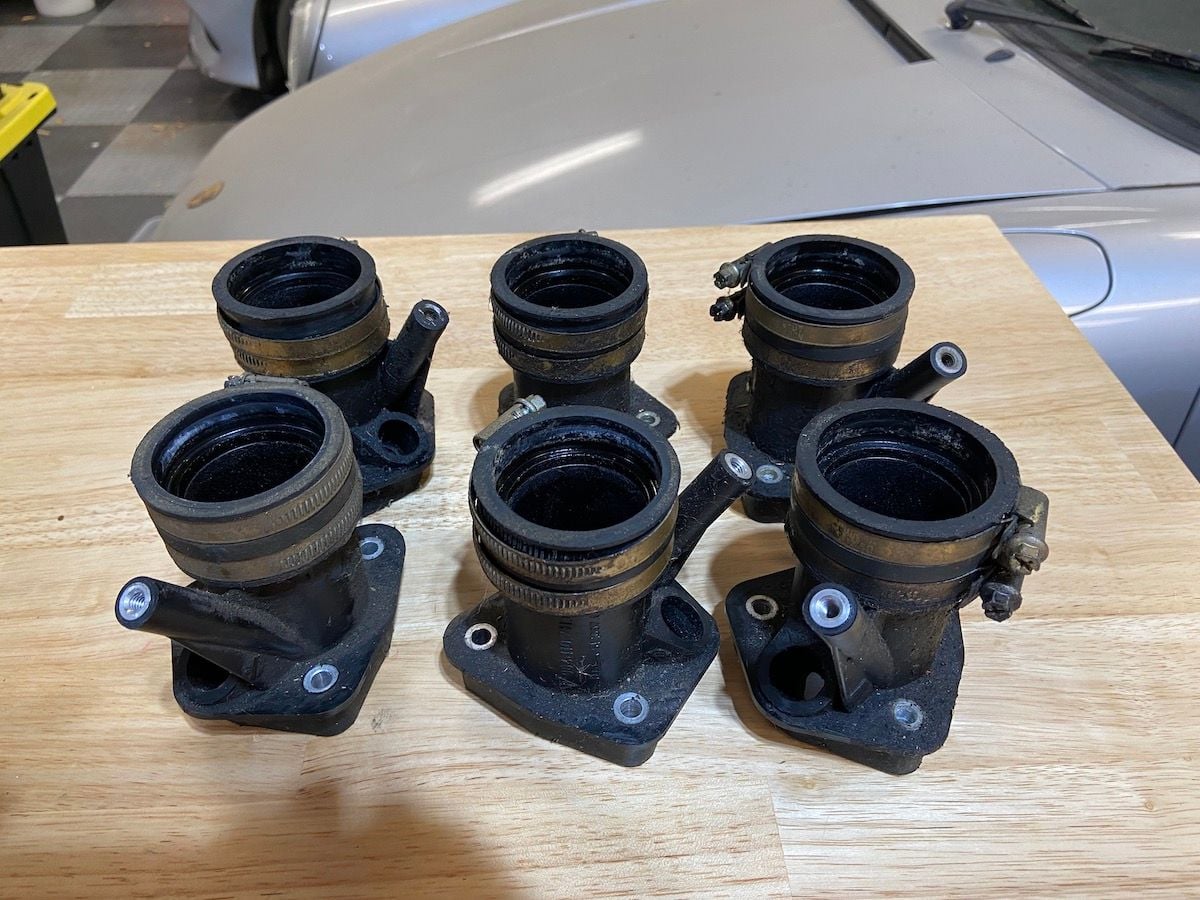
My very first step, remove the 6 intake manifolds. I have a dirty parts cleaner to do the initial degreasing and I may finally have an excuse to buy a garage ultrasonic cleaner to help me out with this job.

 02-23-2020, 08:40 AM


 My suggestion knowing the material quite well is protect it as soon as the raw surface is exposed. Any grit blasting and or surface stripping should be cleaned in a water bath and dried under fans at around 120 degrees F and have some form of surface coating or conversion done as quickly as possible after.