When you click on links to various merchants on this site and make a purchase, this can result in this site earning a commission. Affiliate programs and affiliations include, but are not limited to, the eBay Partner Network.
My advice is to buy the biggest one you can afford. Also they are not all created equal, you get what you pay for. Some features to look for are sweep mode and degas mode.
I'm excited to see what you find when you open the intake and dig in. Watch for cracks in the plastic intake stacks. There was a thread a while back where someone had cleaned them thoroughly and used plastic epoxy to fix the cracks. You basically just want to make sure as best possible, anywhere vacuum can leak is kept to a minimum.
First some shopping (USA based), thanks to Goughary!!!
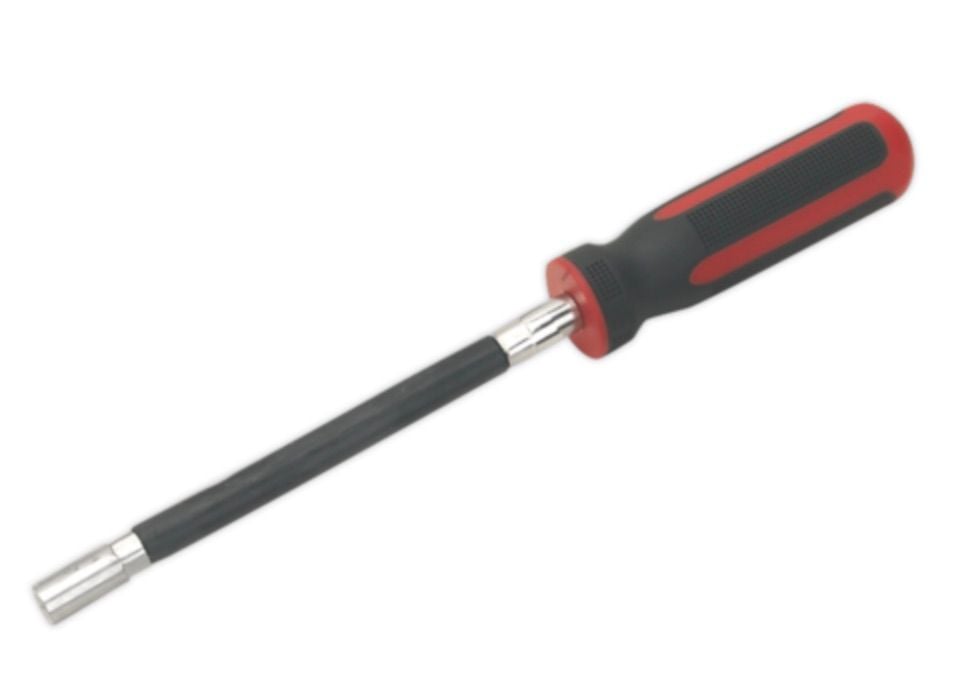
If you don't have one, get a 7mm socket flexible nut driver (6mm for some BMW stuff) as this will help you with every German hose clamp you encounter.
Not a comprehensive list, just stuff I am getting now for this job.
Rubber Reconditioning:
Look for Methyl Salicylate which is Wintergreen Oil, and not labelled as an essential oil for $$$ per oz.
Isopropyl Alcohol, 91% (good luck finding this in the middle of a pandemic)
Mix 3 parts Alcohol to 1 part Wintergreen Oil
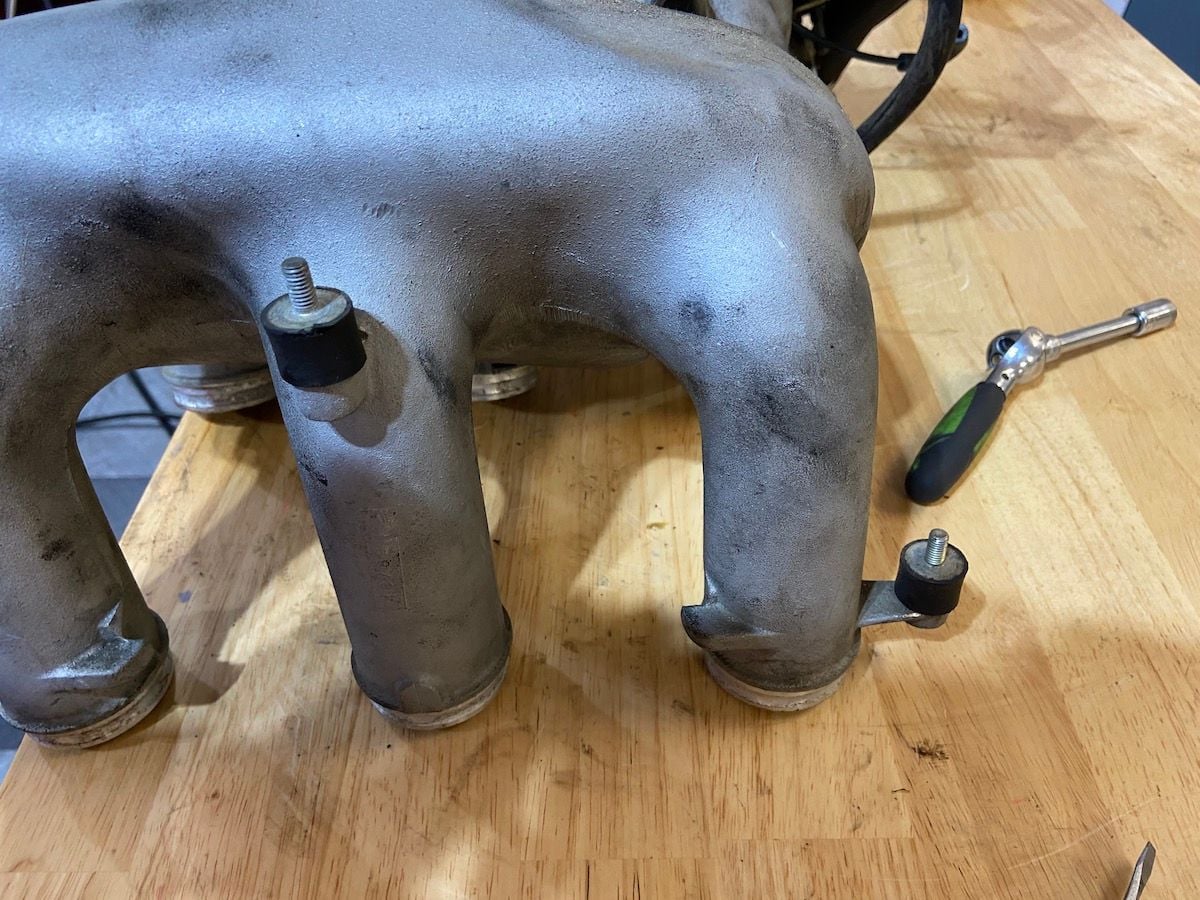
Vibration Damping Airbox Mounts: pick these up at McMaster Carr
- part 9225K63, details on this in another post above
I can not recommend these. They are taller than stock and will cause alignment issues with your intake. Order the OEM ones or OEM equivalent.
Intake Bearings
Qty 2 of SKF HK 0812.2RS (for little throttle body flap)
Qty 4 of SKF HK 1012 RS (for the resonance tube, and larger throttle body flap, if you have an early throttle body you will need another 2 of these for the 2 resonance flap version that debuted in 1989)
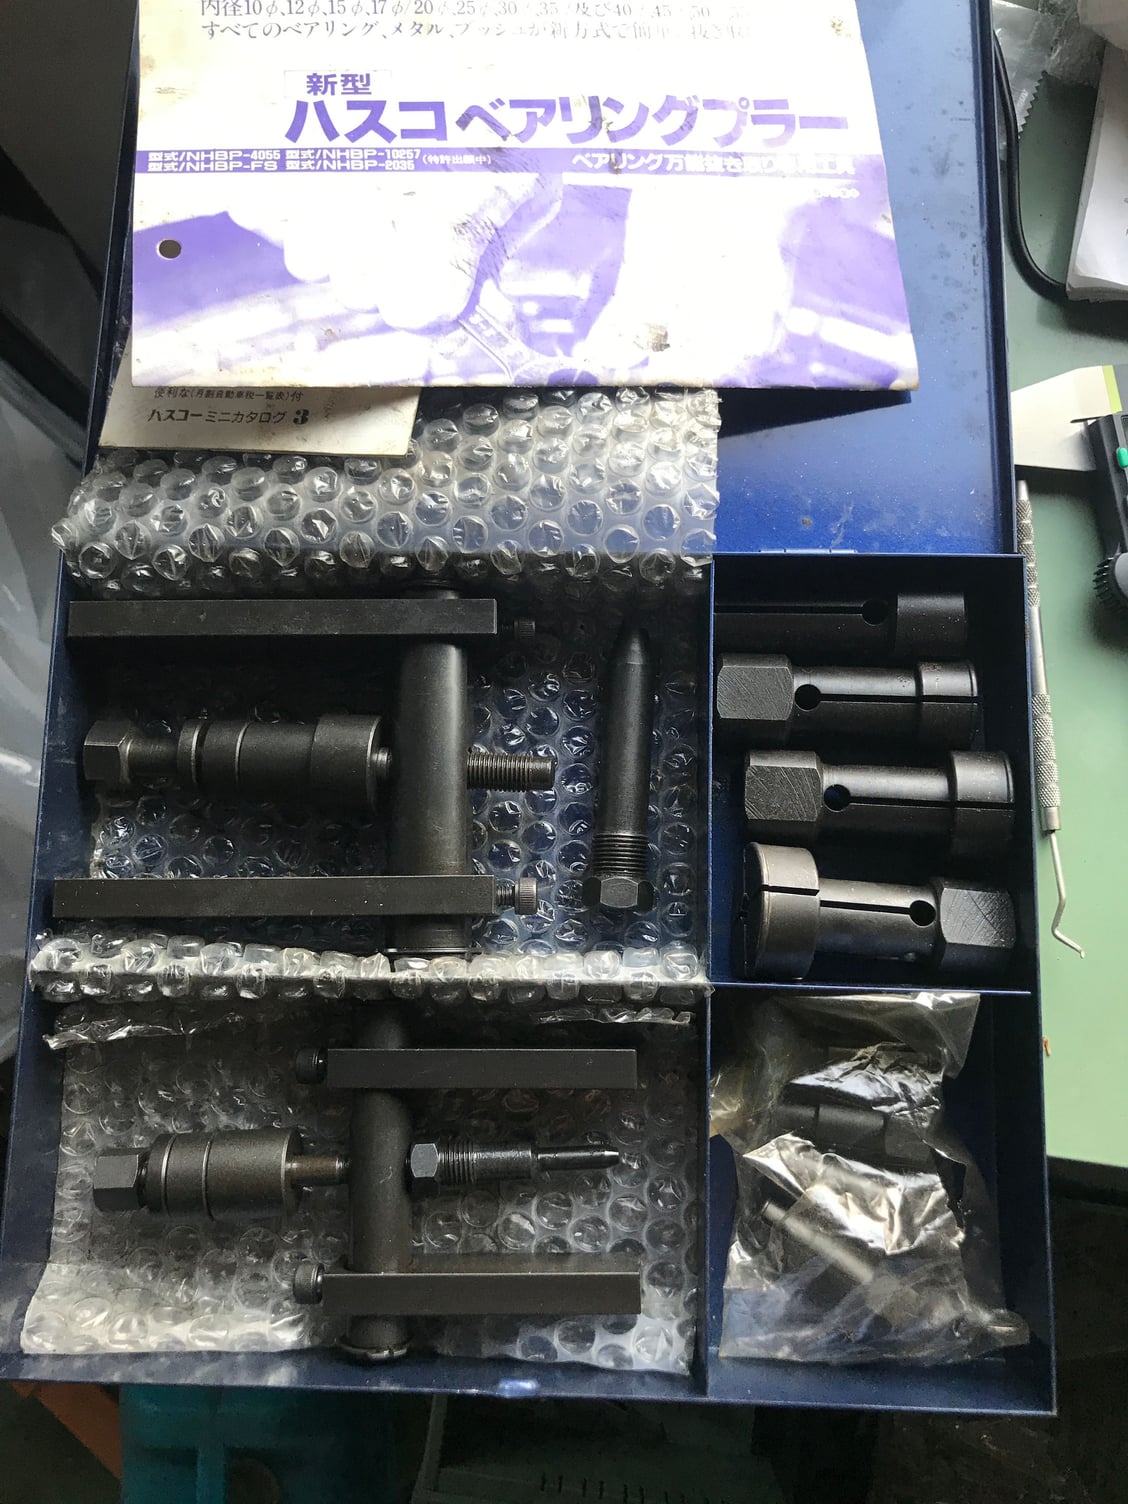
Yes, you will need to get an blind intake puller , look for ABN 16 Piece Blind Pilot Inner Bearing Pullers
Want to get into the Yellow Chromate Business?:
Yellow Chromate YCHRC5G from https://www.caswellplating.com
(you can even get into DIY Zinc Chromate plating, but Goughary's clean, then Yellow Chromate is the way to go for me)
Electronics Cleaner
CRC 5103 Quick Dry Electronic Cleaner (or similar spray can).
recommended as the cleaner for all the little vacuum bits and the ISV
"Industrial Ultrasonic Cleaner" Madness
Want to get things super clean (not mentioned in Goughary's posts above but part of the madness)
I am buying a 30L one for my garage to support my many car projects, "honey, I can clean your rings!)
Pierburg Stuff on eBay or elsewhere
New Pierburg EGR Change-Over Valve Exhaust Gas Recirculation, 7.21071.50.0
Pierburg 7.05817.10.0 - that black & white thingy
Bosch
Bosch 0280142308 Vapor Canister Purge Valve ~ $34, not necessary you can check if yours works
Porsche
964-110-940-00 Vacuum Valve, the large disc one, one side translucent white
- I will see if I can check if mine is ok, and then use that on my other car, I bought a new one just in case
Brake Bleeder Vacuum kit
not necessary, but I am not a nut job like Goughary who is going to blow and suck on every tube and vacuum valve I remove from my car
- this will allow me to measure the vacuum I am pulling and then check what happens, I think some mouth blowing may be required as a pull a vacuum on one circuit and see if air flows through another
I bought the cheapest one I could find on Amazon for $22 - Brake Bleeder Kit Hand held Vacuum Pump Test Set
I will edit as I order more stuff. Again, you do NOT need to buy new valves. Goughary's advice is to clean vacuum valve bits with electronics cleaner and then check for function
Well, I finally dove in tonight, and did a first pass cleaning in my nasty parts cleaner tub. I used Simple Green HD (purple stuff which is long term safe for aluminum). I am not into bringing difficult to dispose chemicals into the home so Simple Green HD it is.
My C4 is a low mile gem at 67k but an oily leaky mess. It is originally a pacific northwest car then down to California for me. So it is not a corroded mess like typical east coast cars. It is just grime on the parts.
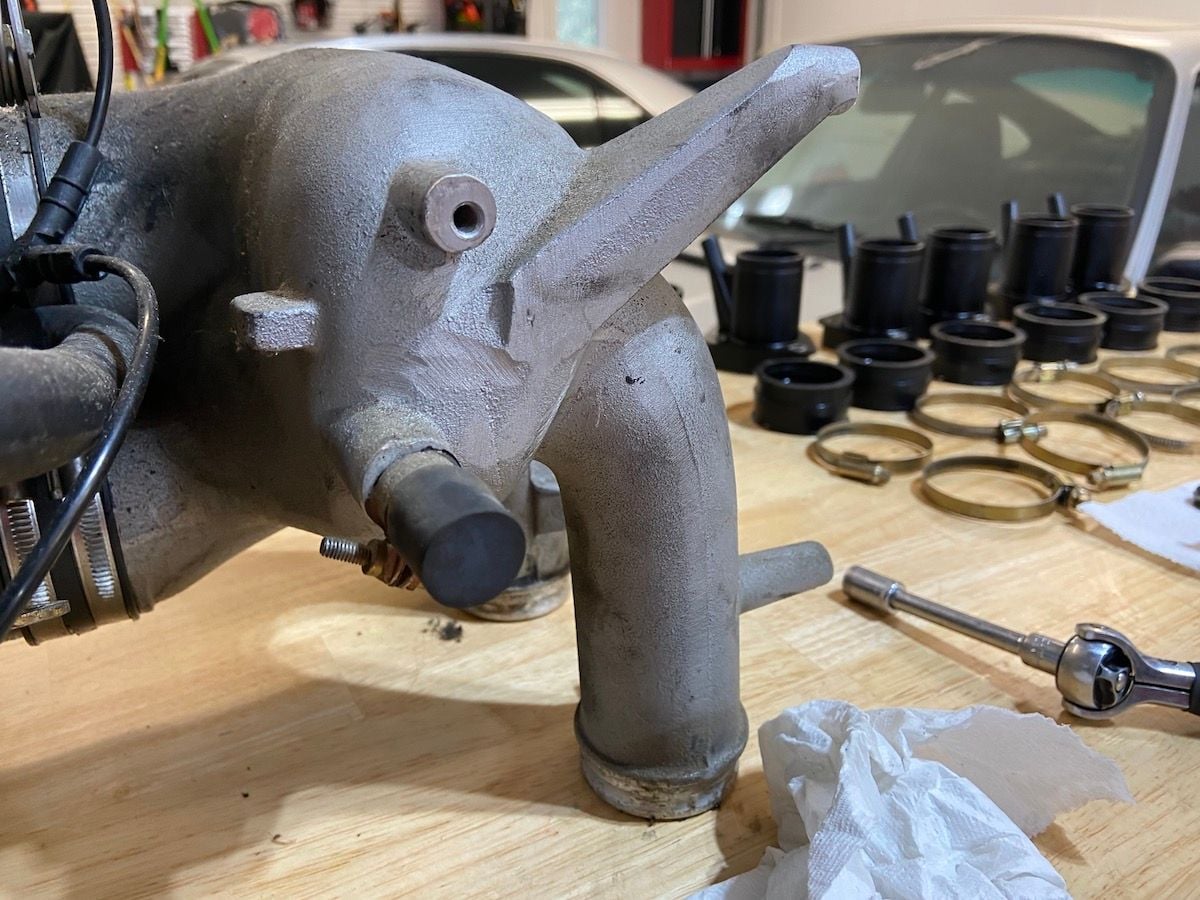
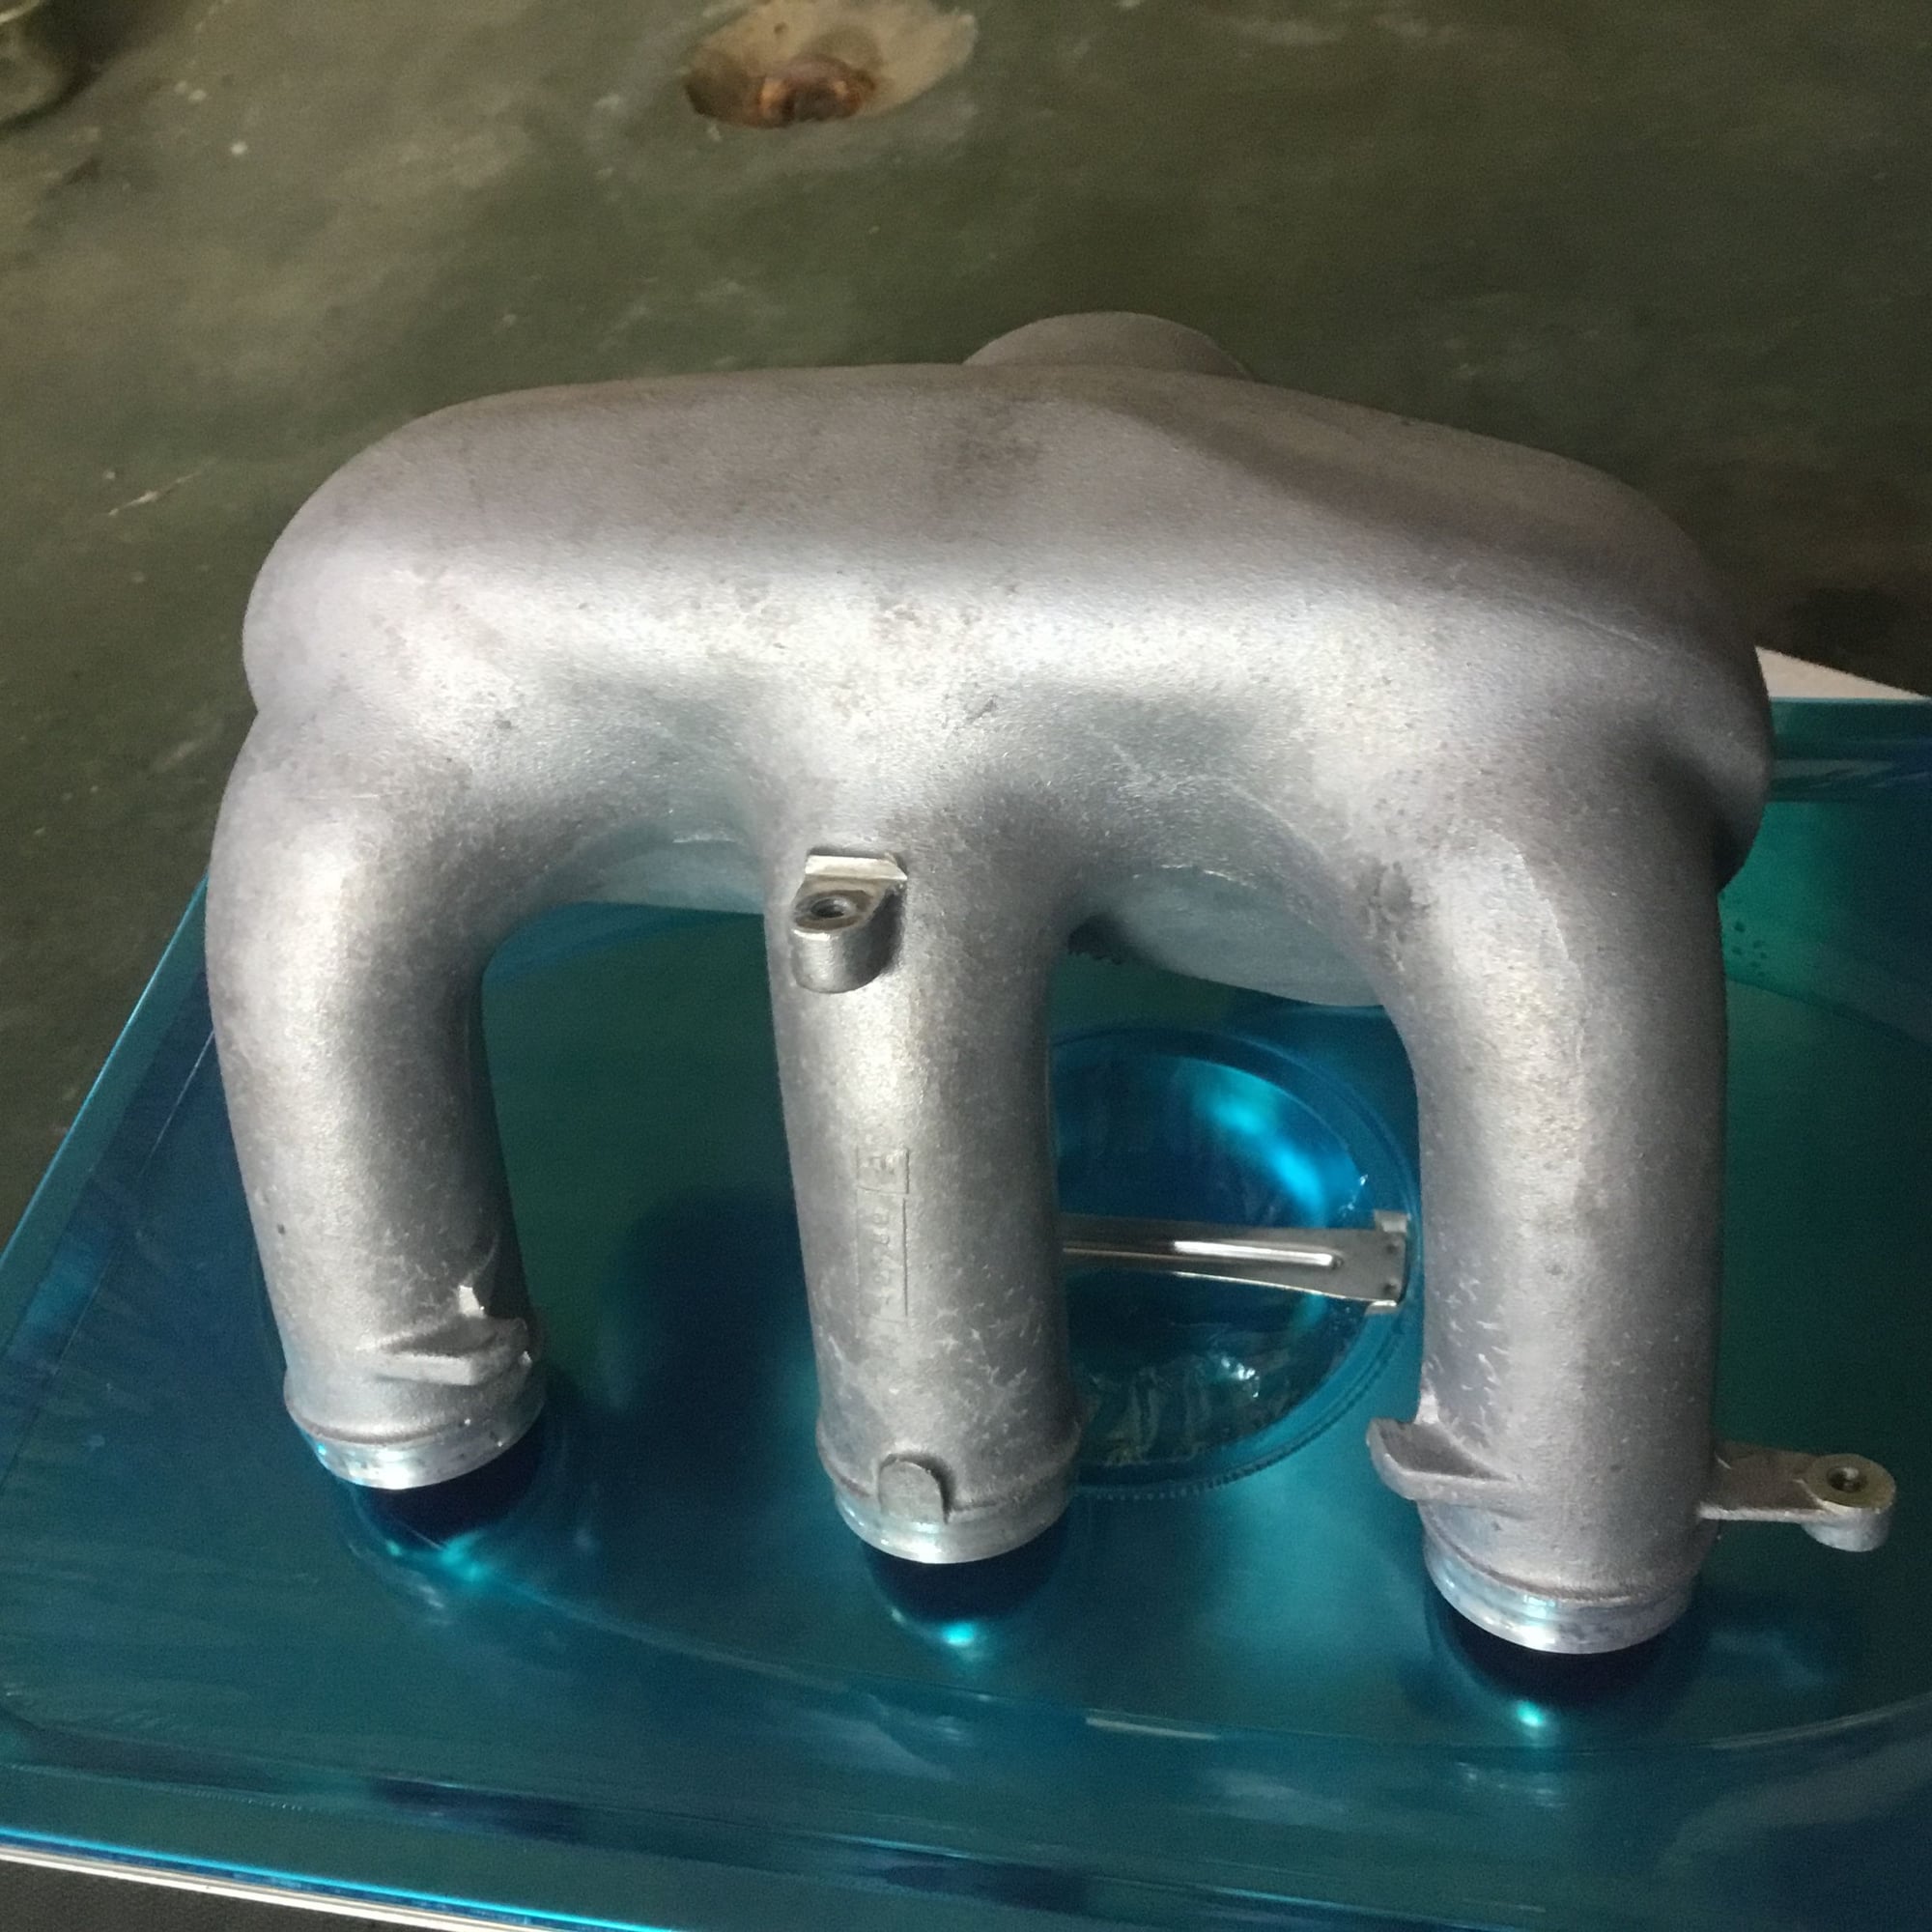
Pretty clean intakes overall. I want to get them extrude honed and there is a place local to me in San Jose that I think can do the job.
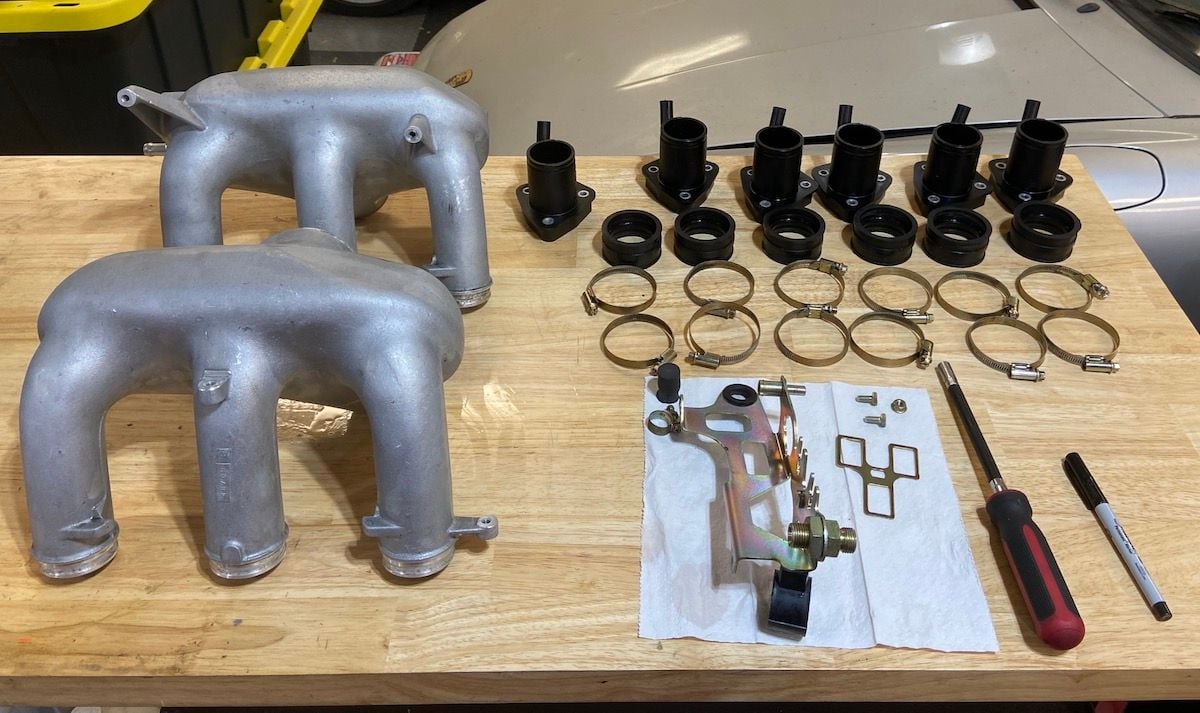
These are the rubber airbox mounting bits. I have new one on order at McMaster
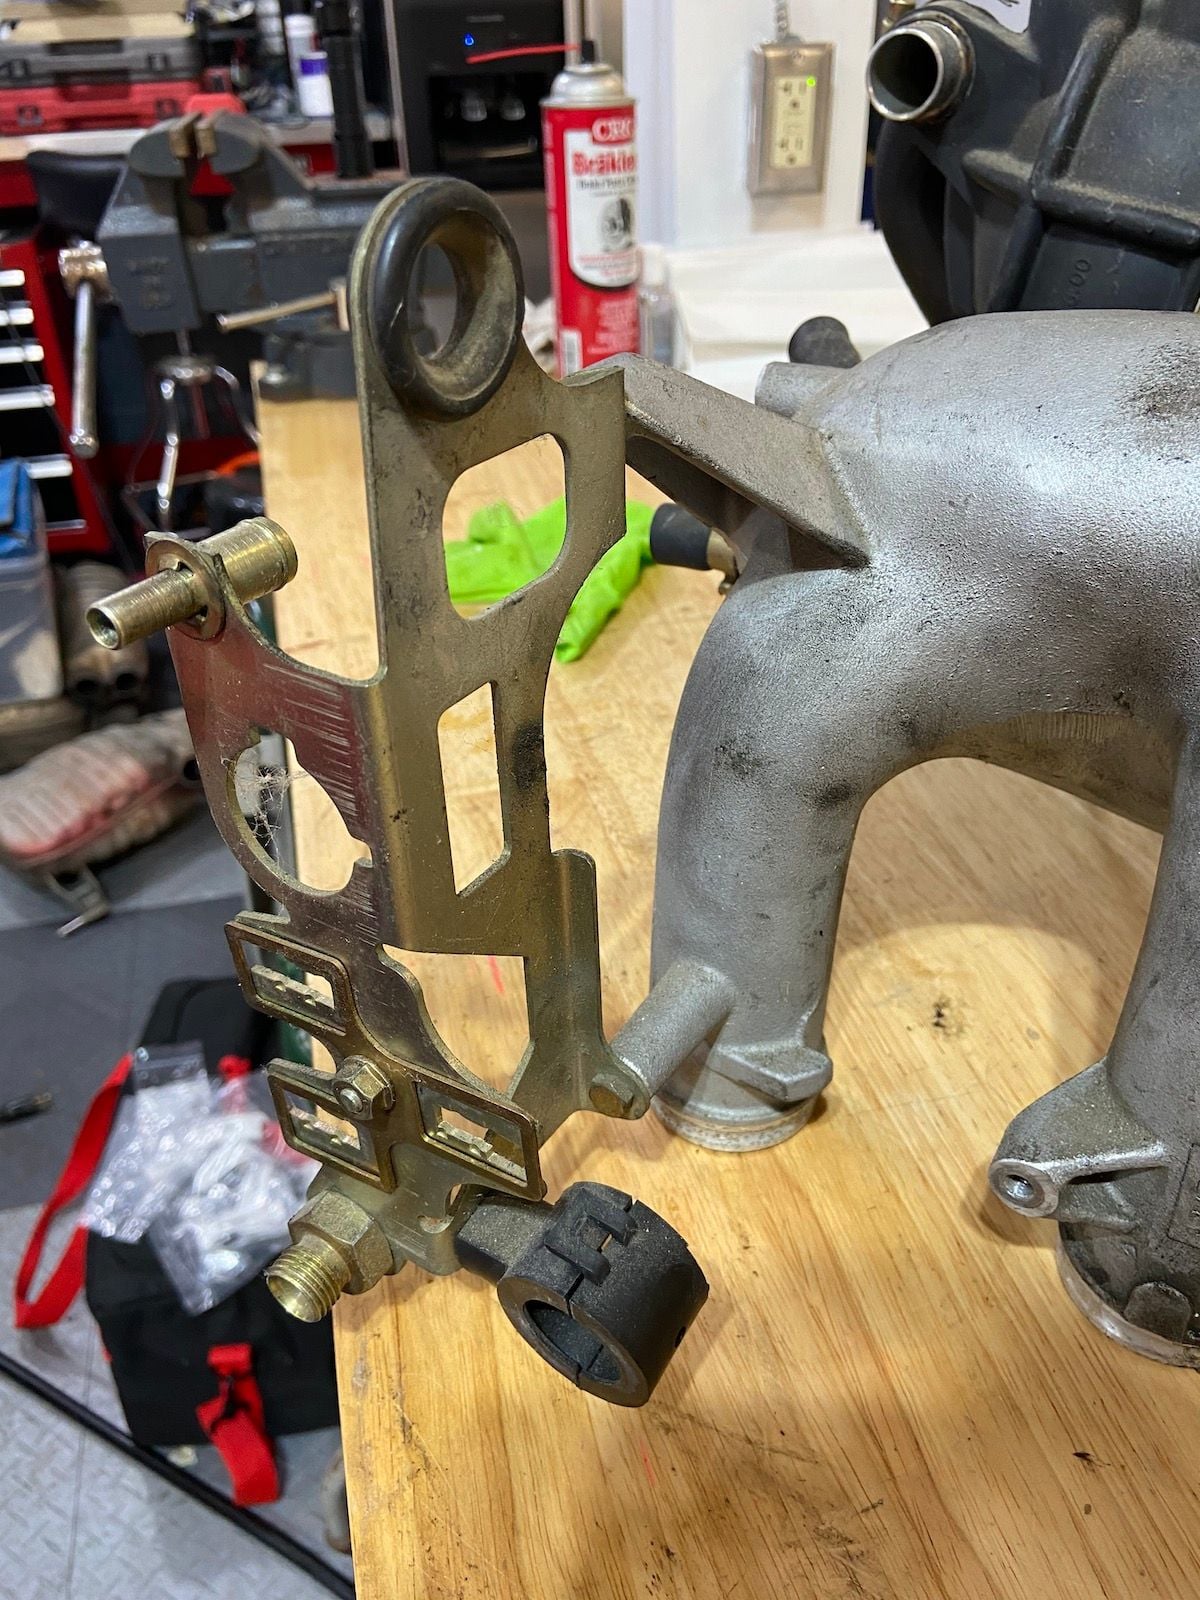
Some of Goughary's early post show a rats nest of tubes, I think that was a California emission setup. I have this plug on the back of one of my intake tubes. Easily removed and will be re-used.
Progress so far after initial cleaning. I am curious to see what an ultrasonic cleaner will do to get me to the next level of clean. Especially for my clamps. And will explore extrude honing my aluminum intakes and perhaps ceramic coating on the outside.
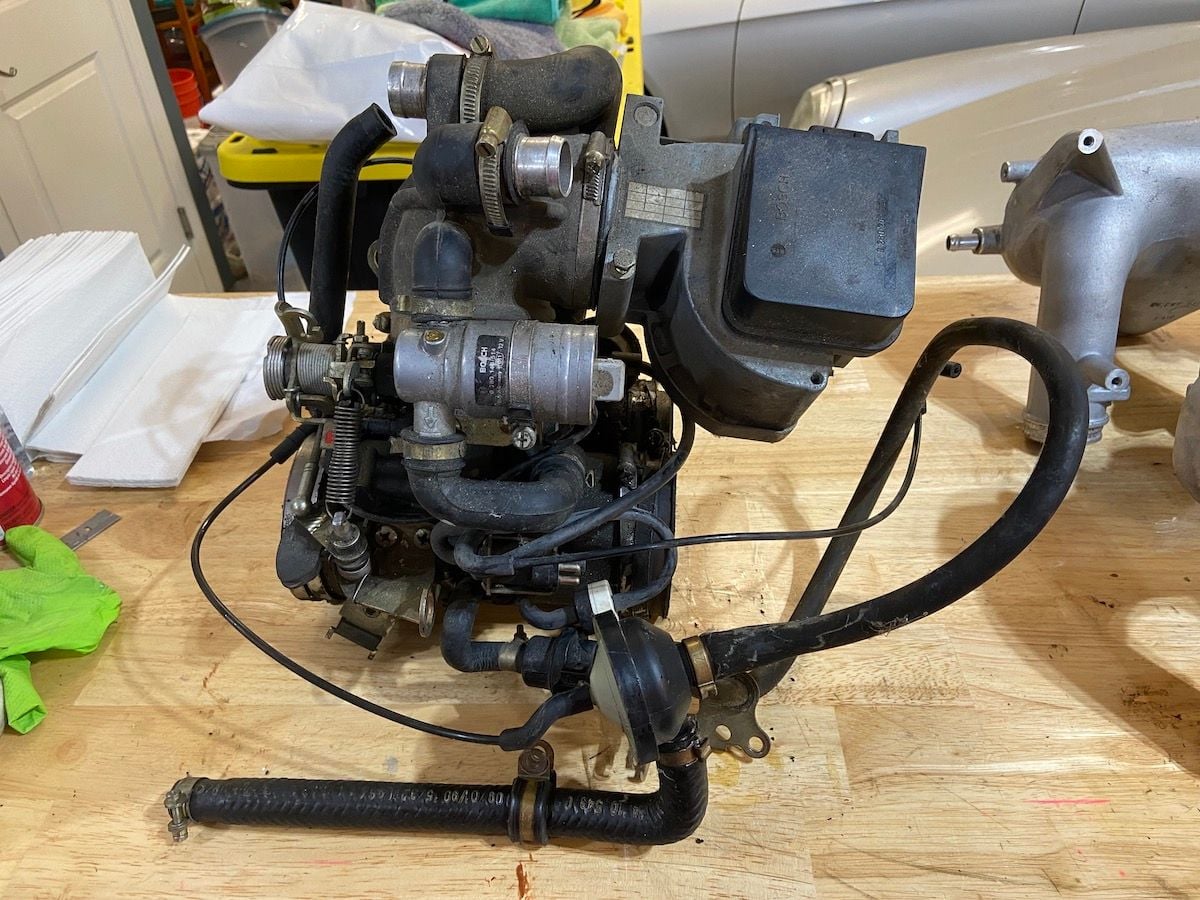
That leaves me with this mess that I am too scared to dive into right now and waiting on some parts. In parallel I can jump to my engine rebuild which is in my other DIY thread
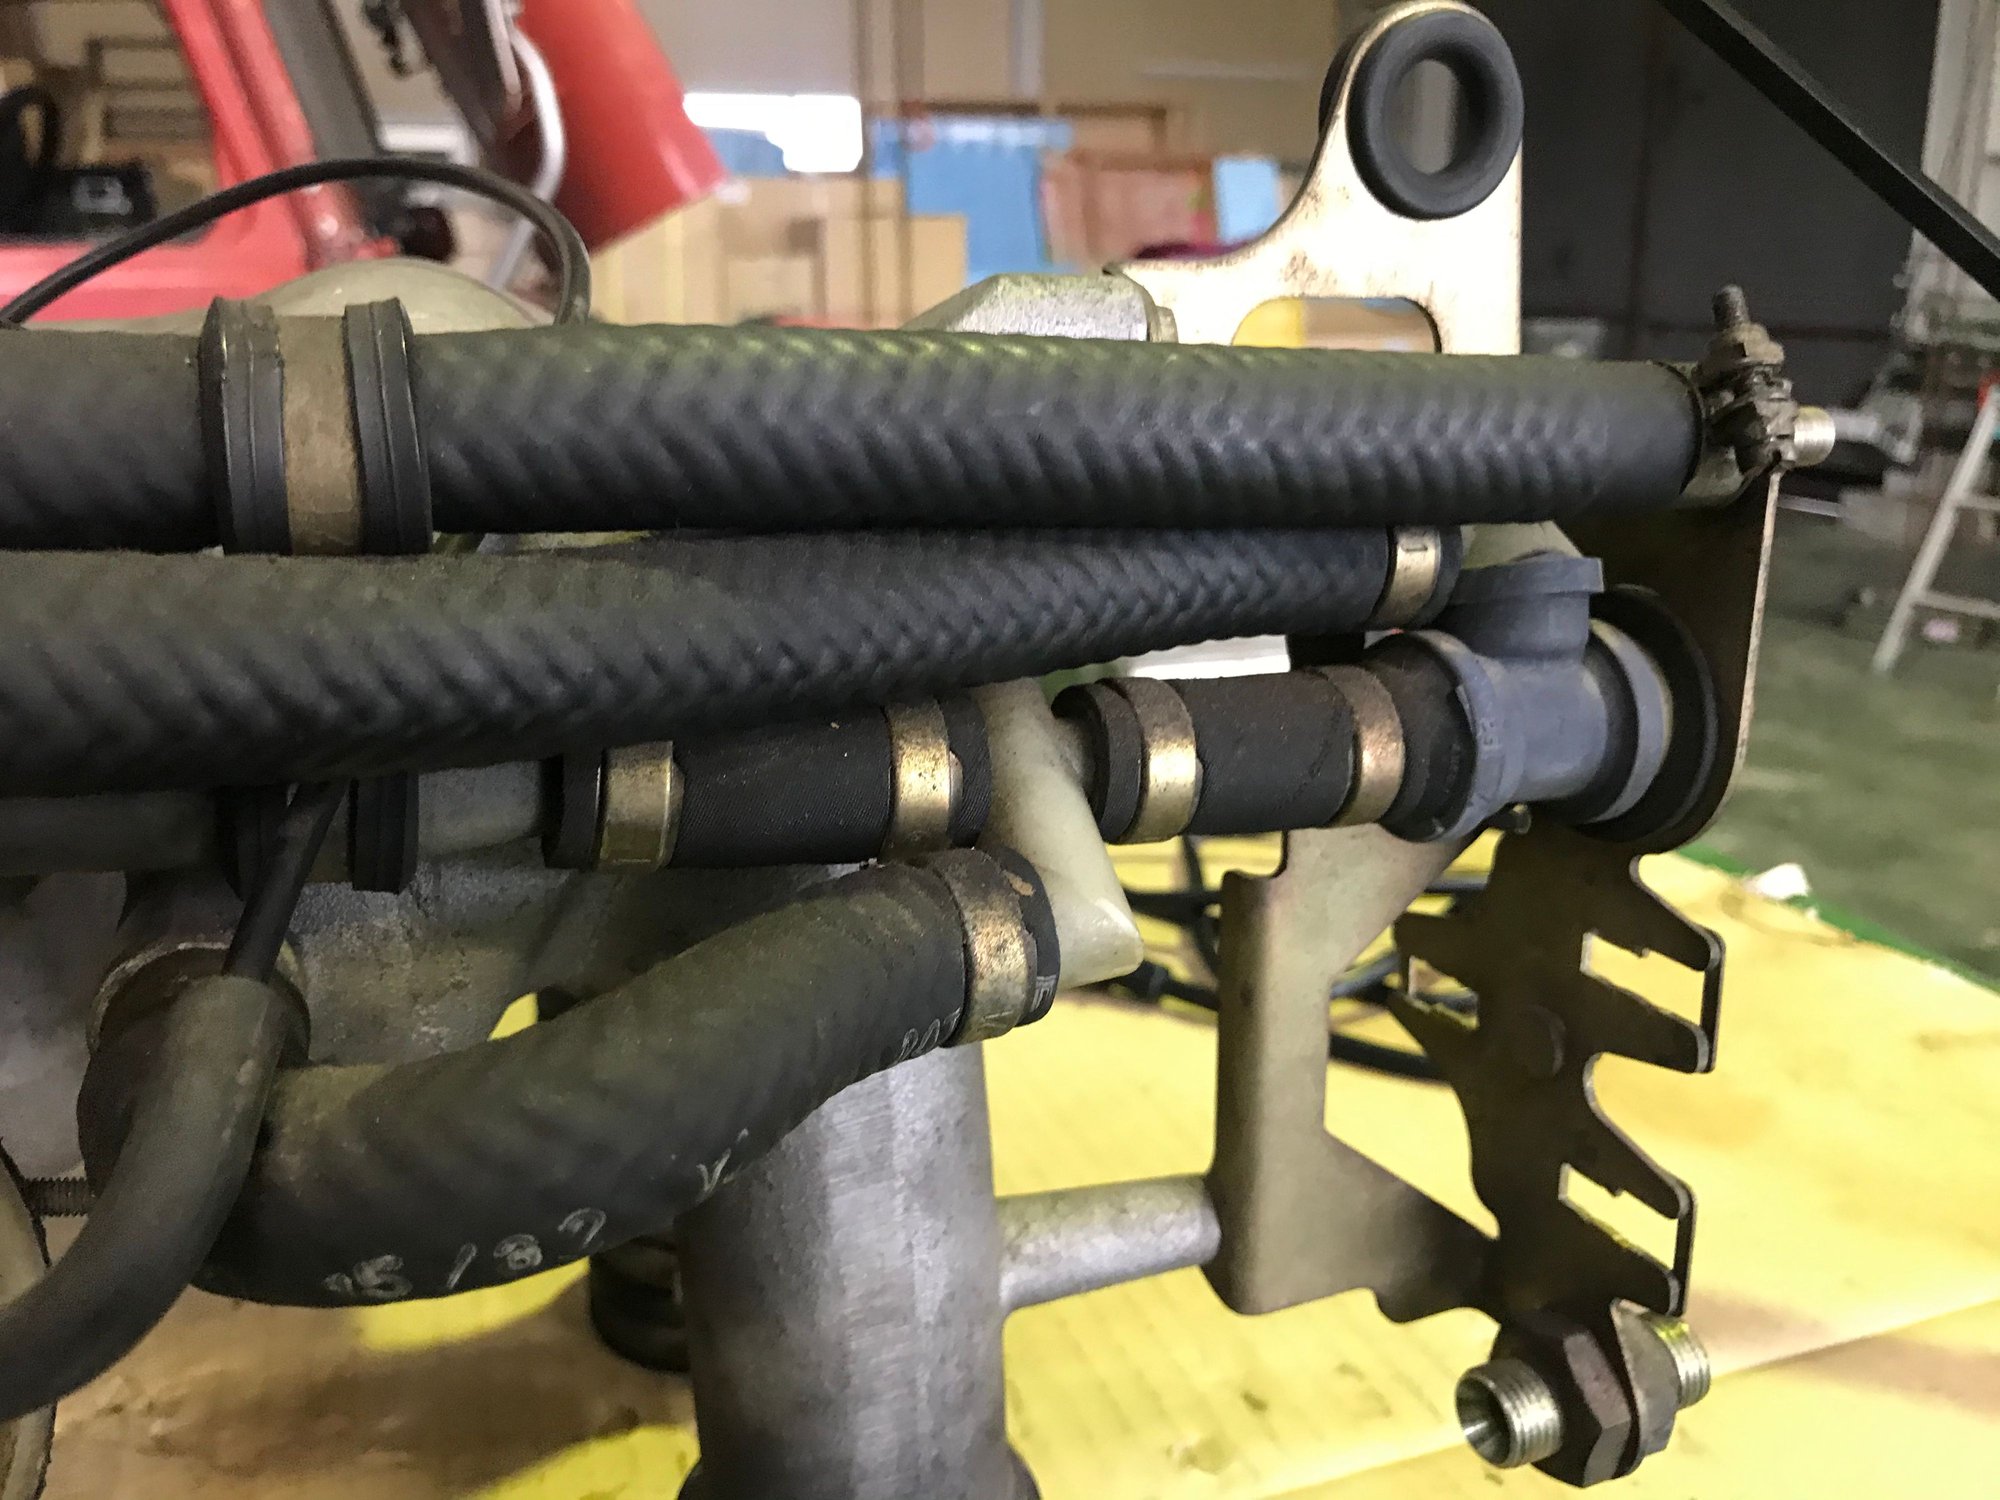
Take a lot of pics before taking all the hoses and vac lines etc off the throttle body...it looks like a big mess and complicated- but it'll become very clear soon enough.
I’m also in the midst of an engine rebuild and Ricardo’s thread has been a great help- bookmarked for reference! I’m waiting on the machine shop to fix a machining mistake and they are slowed down at the moment because we have all started lockdown officially about 10 days ago- so I jumped in on the intake train!
Ricardo- I would love to see what you have in place of the rats nest of tubes for the brake booster. I’ve very inclined to a single hose with a check valve like my older cars. I really want to simplify as much as possible and do not need to worry about any EVAP related stuff.
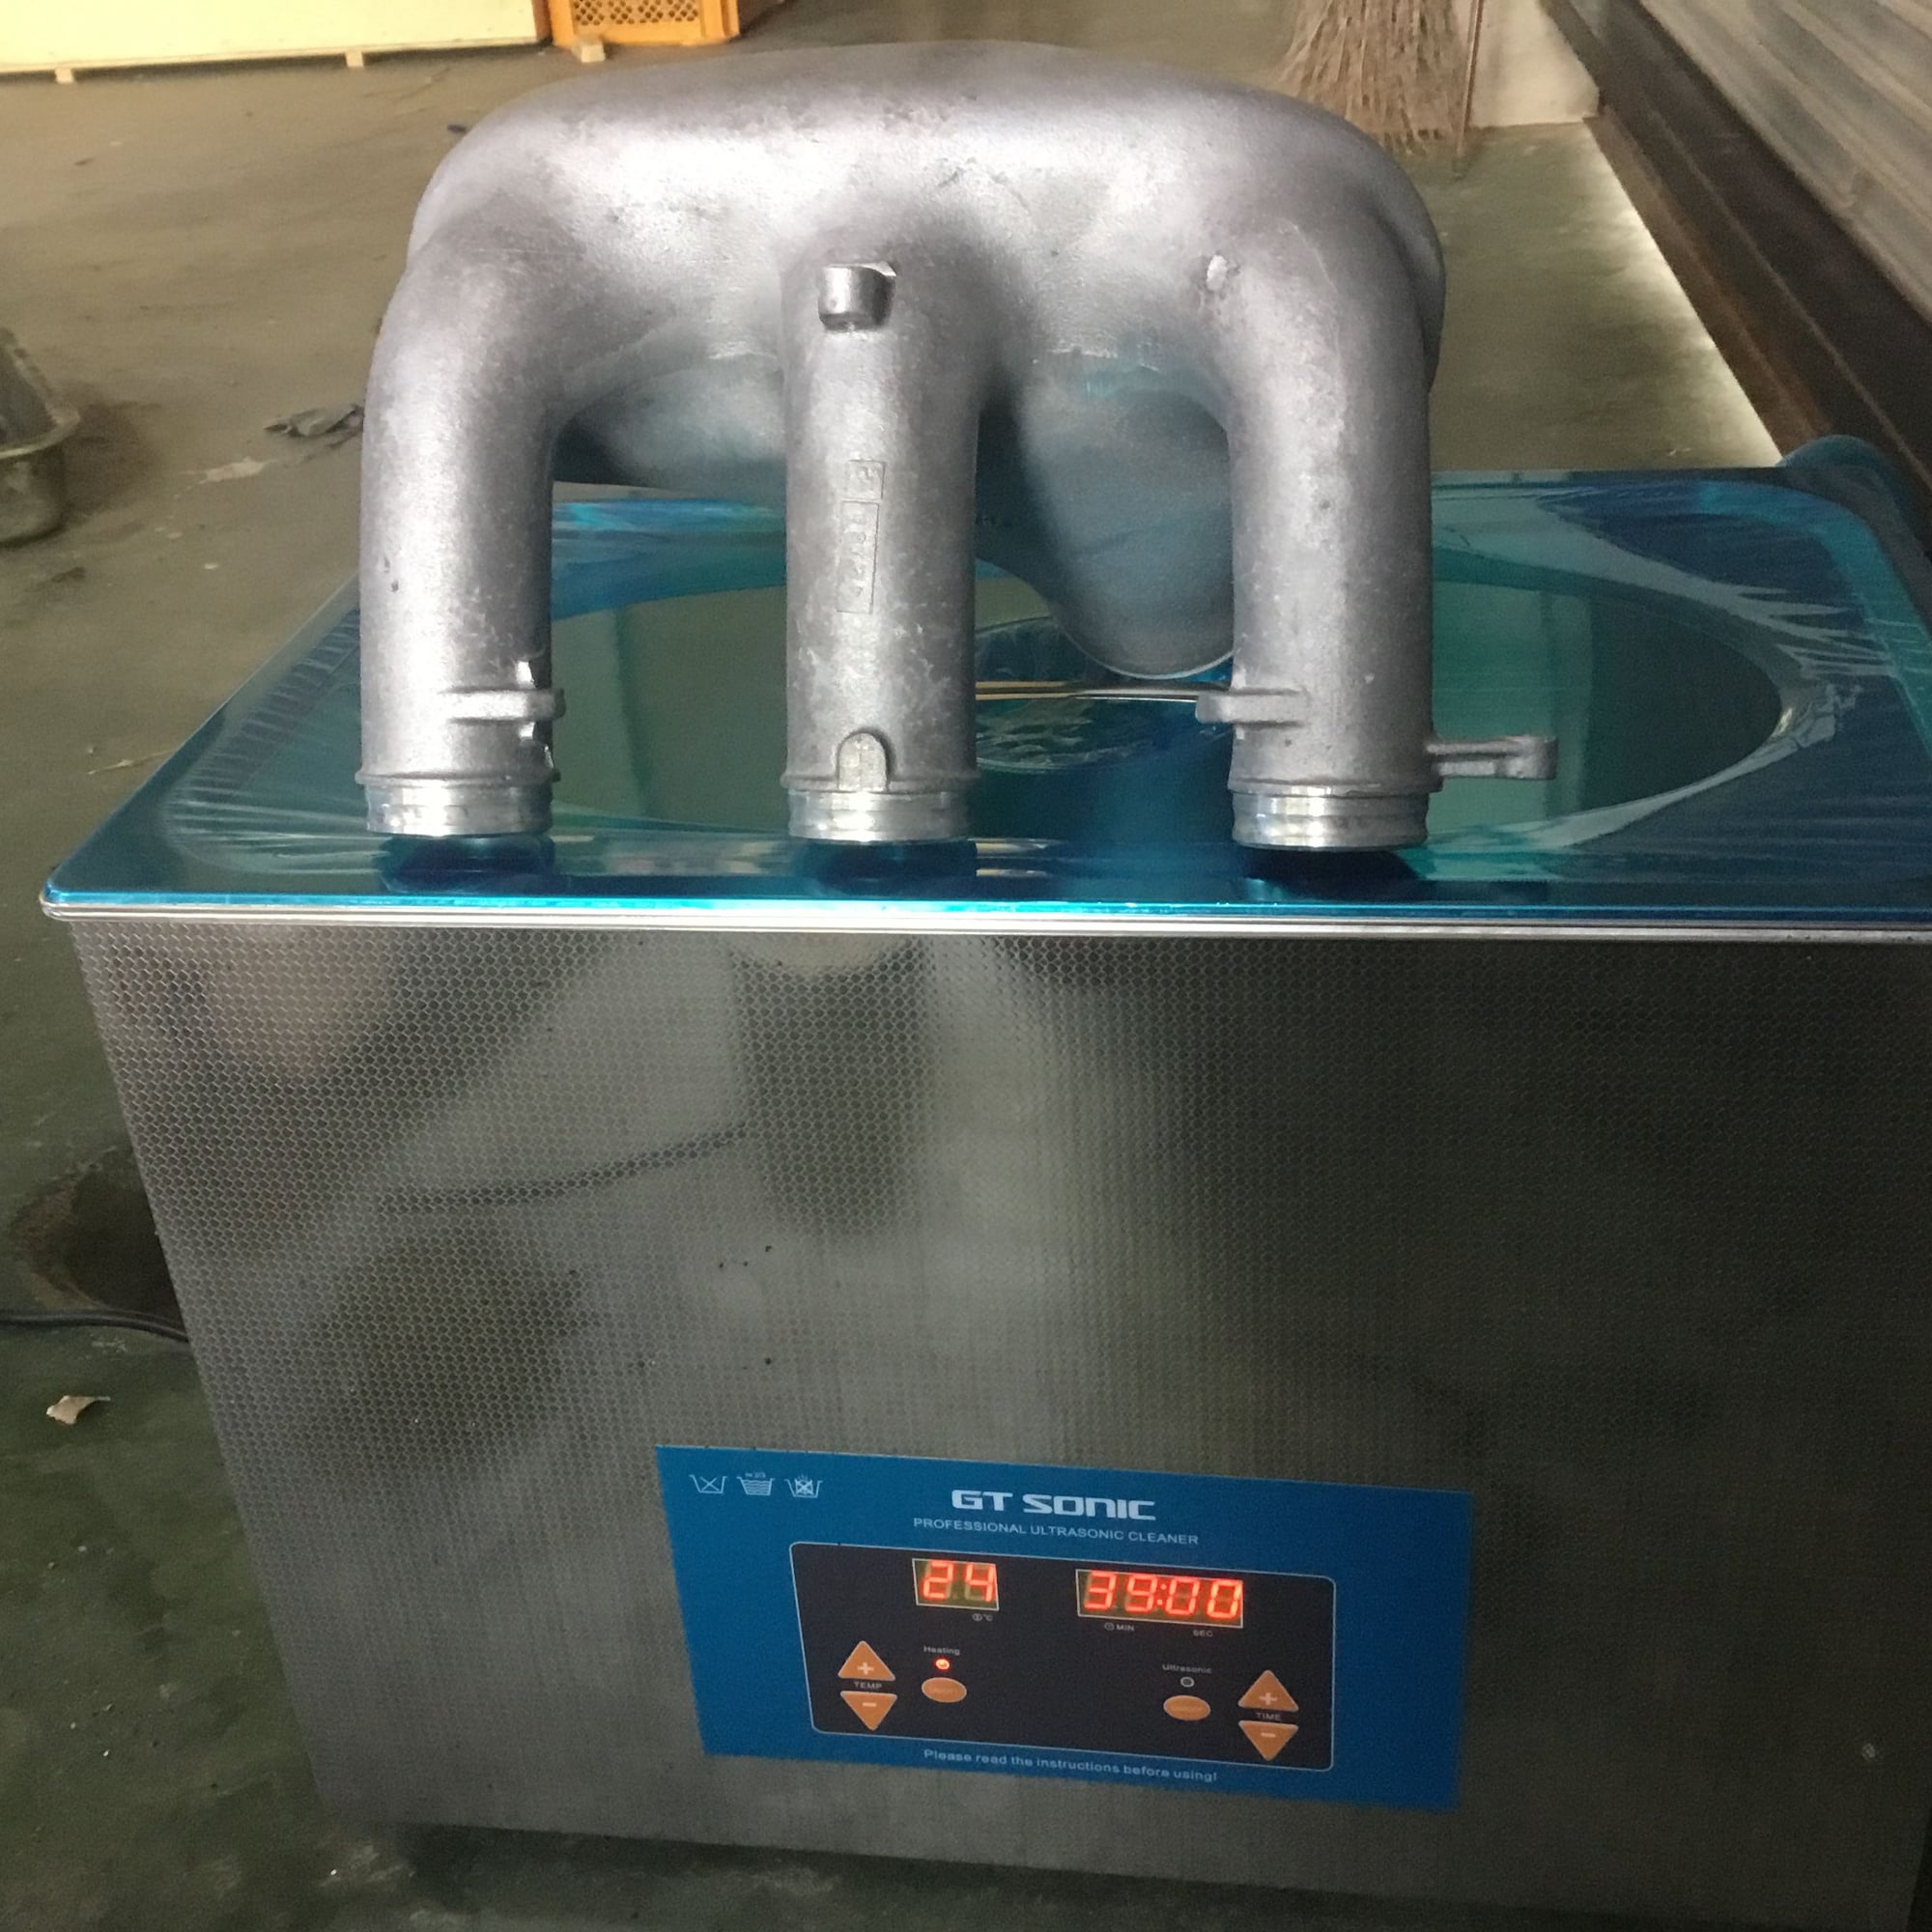
I also got the 30L ultrasonic! Cheap but did a nice job on the cam towers with just liquid dish soap and water. The intake a runners just fit with the cleaner filled to the brim. I did not take the time to rinse well and let them sit overnight with the soap solution still on and there is a bit of corrosion on the aluminum. They can out clean and definitely the cleaner saves time and gets them to a higher level appearance wise than I really have time to do by hand.
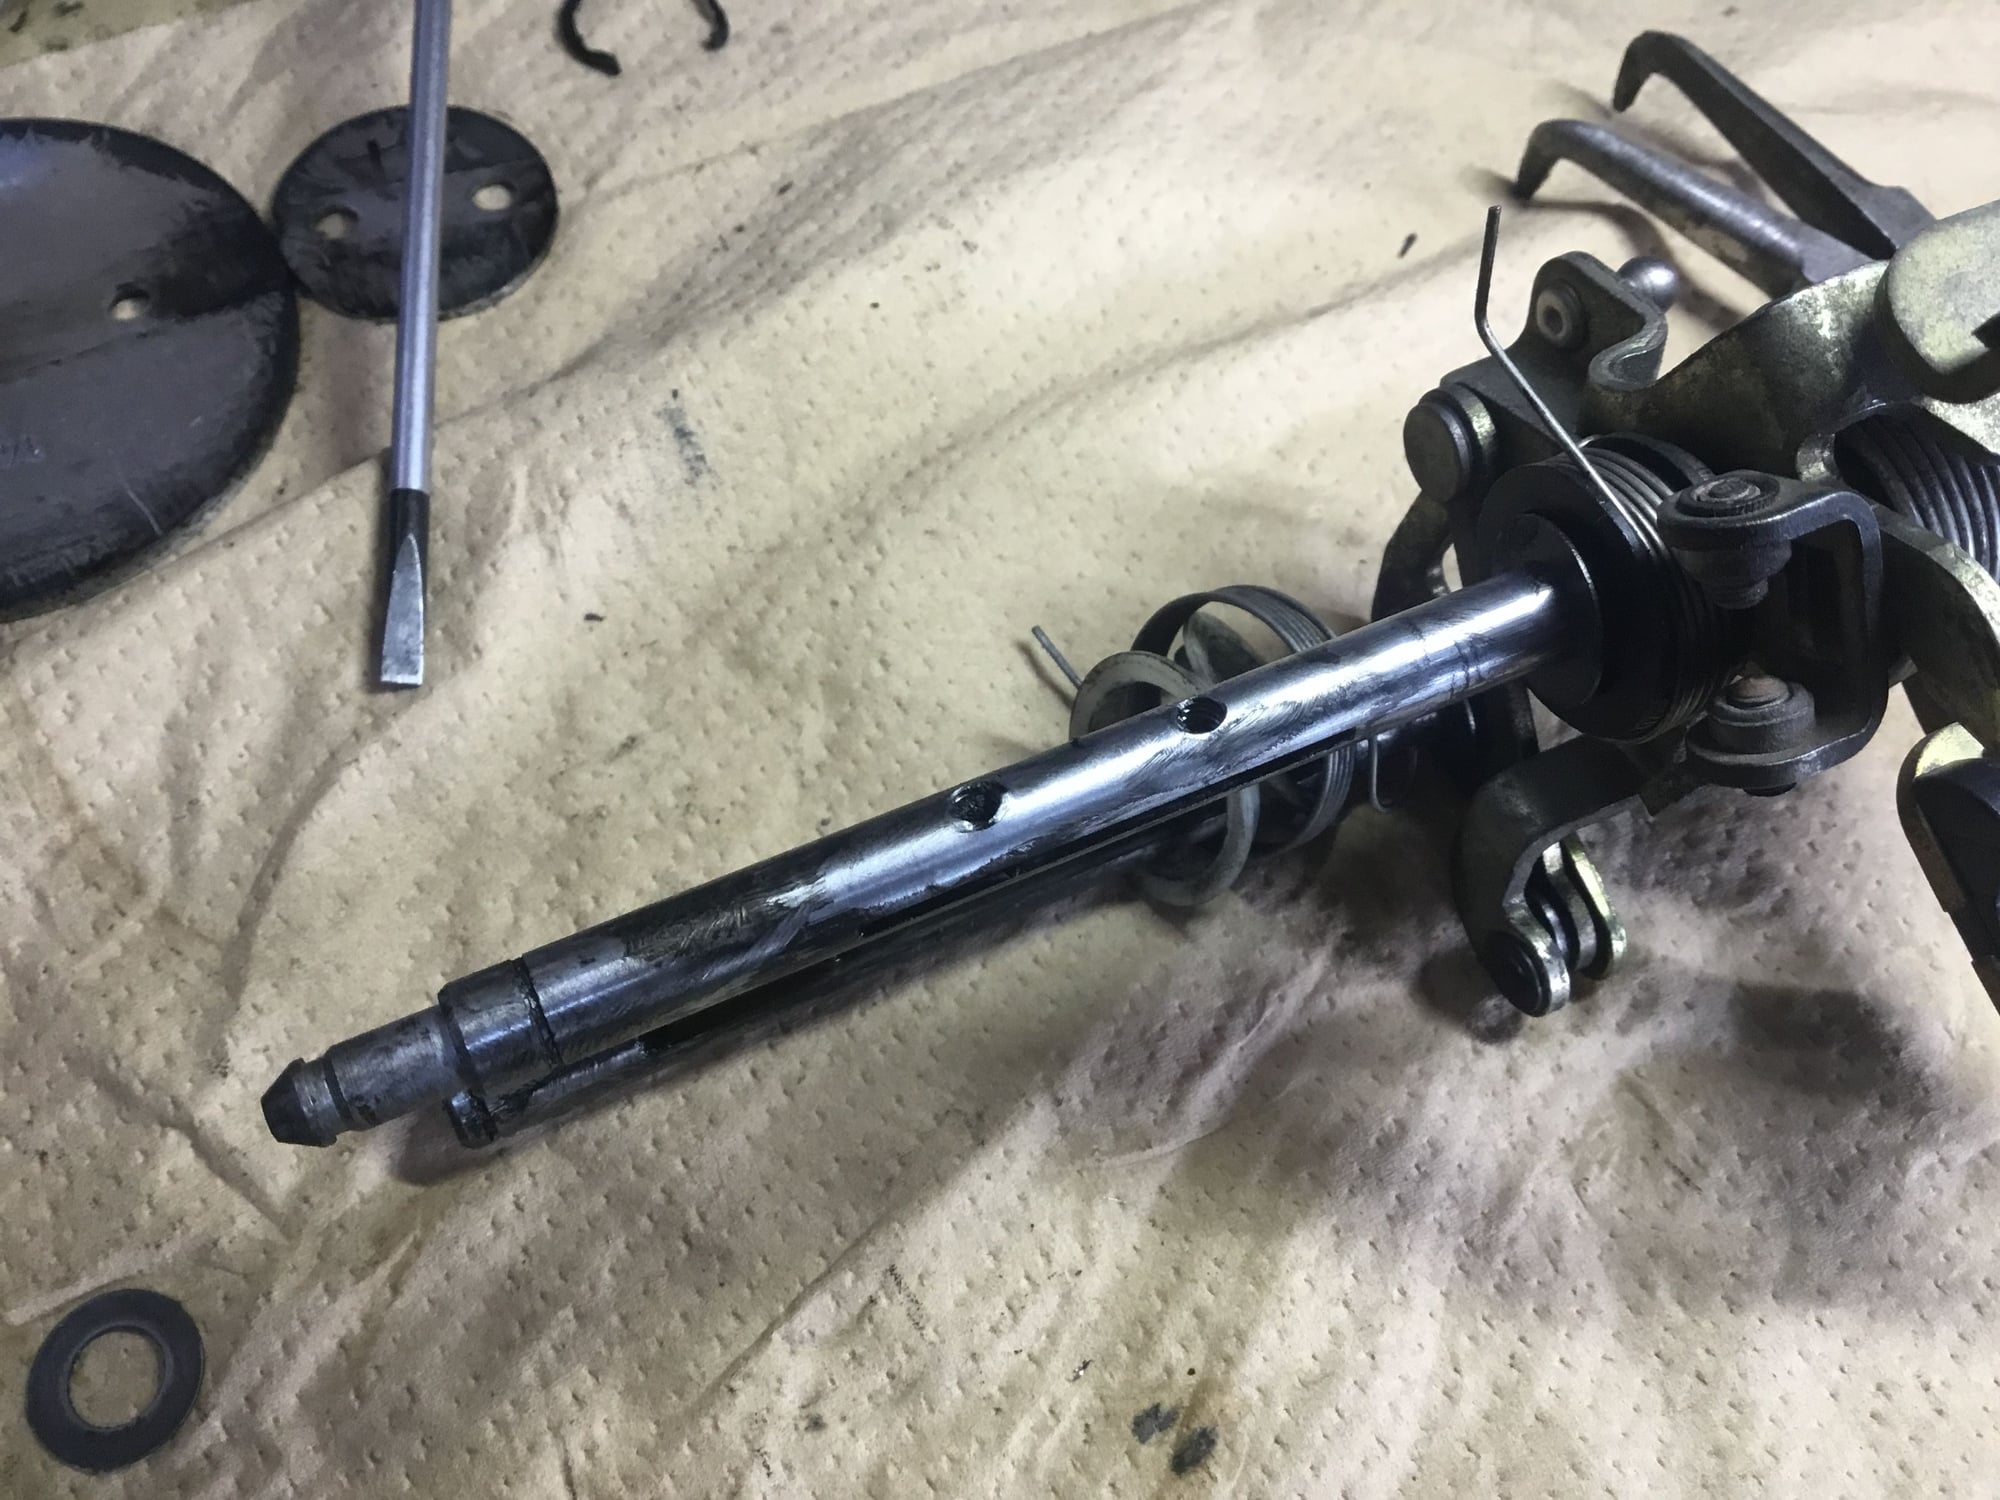
I started to pull the throttle body apart thinking I would remove all the springs and brackets from the 2 shafts- but I realized that they are peened on and I can’t get them plated anyway because they are plastic bits molded on to the metal brackets. So I pulled the shafts out as an assembly which will go in plastic bags with kerosene and into the ultrasonic.
On tip if Rob didn’t mention it before- file down the back side of the shafts before you pull them from the throttle body. The peened screws leave a burr on the shaft when you remove them.
Bearings look great but may pull them anyway for seal replacement (probably should as I egged on Rob to do so.....)
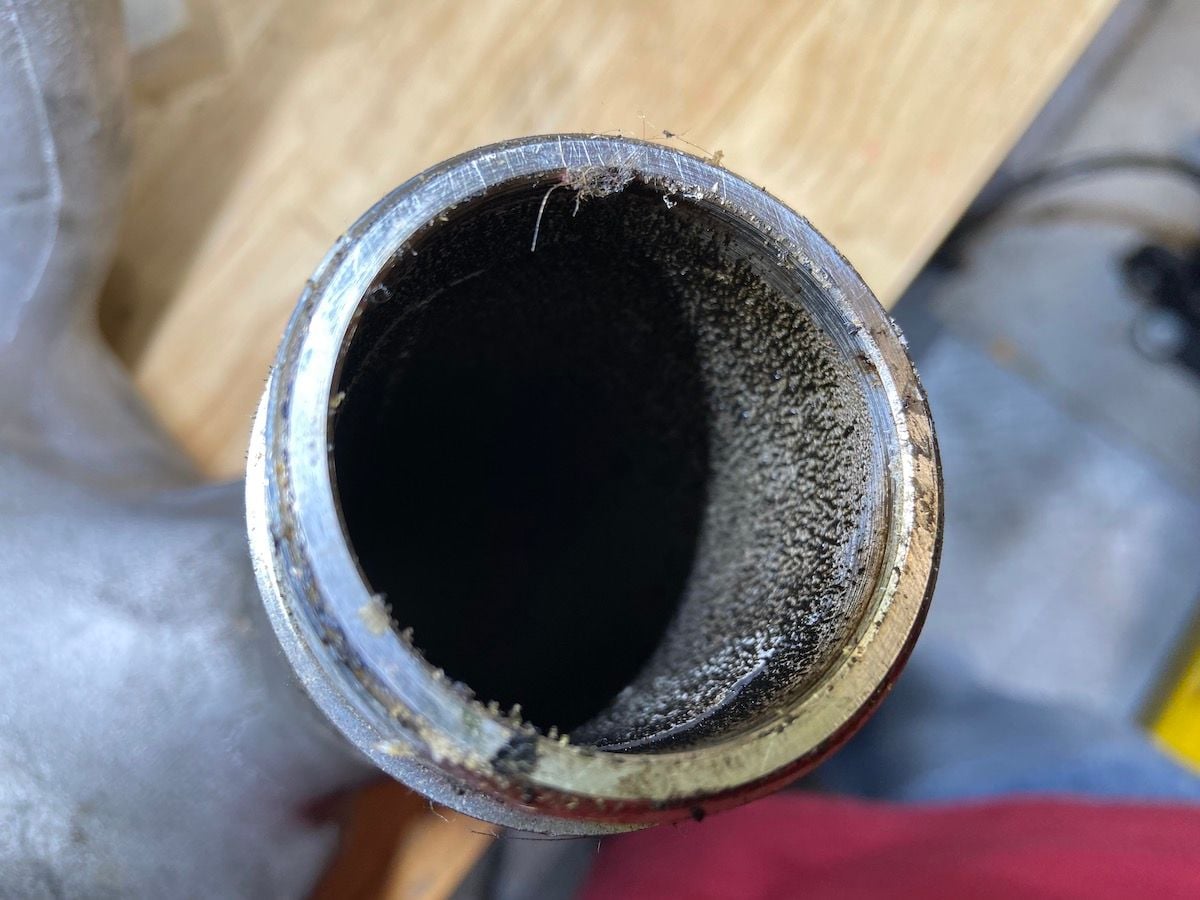
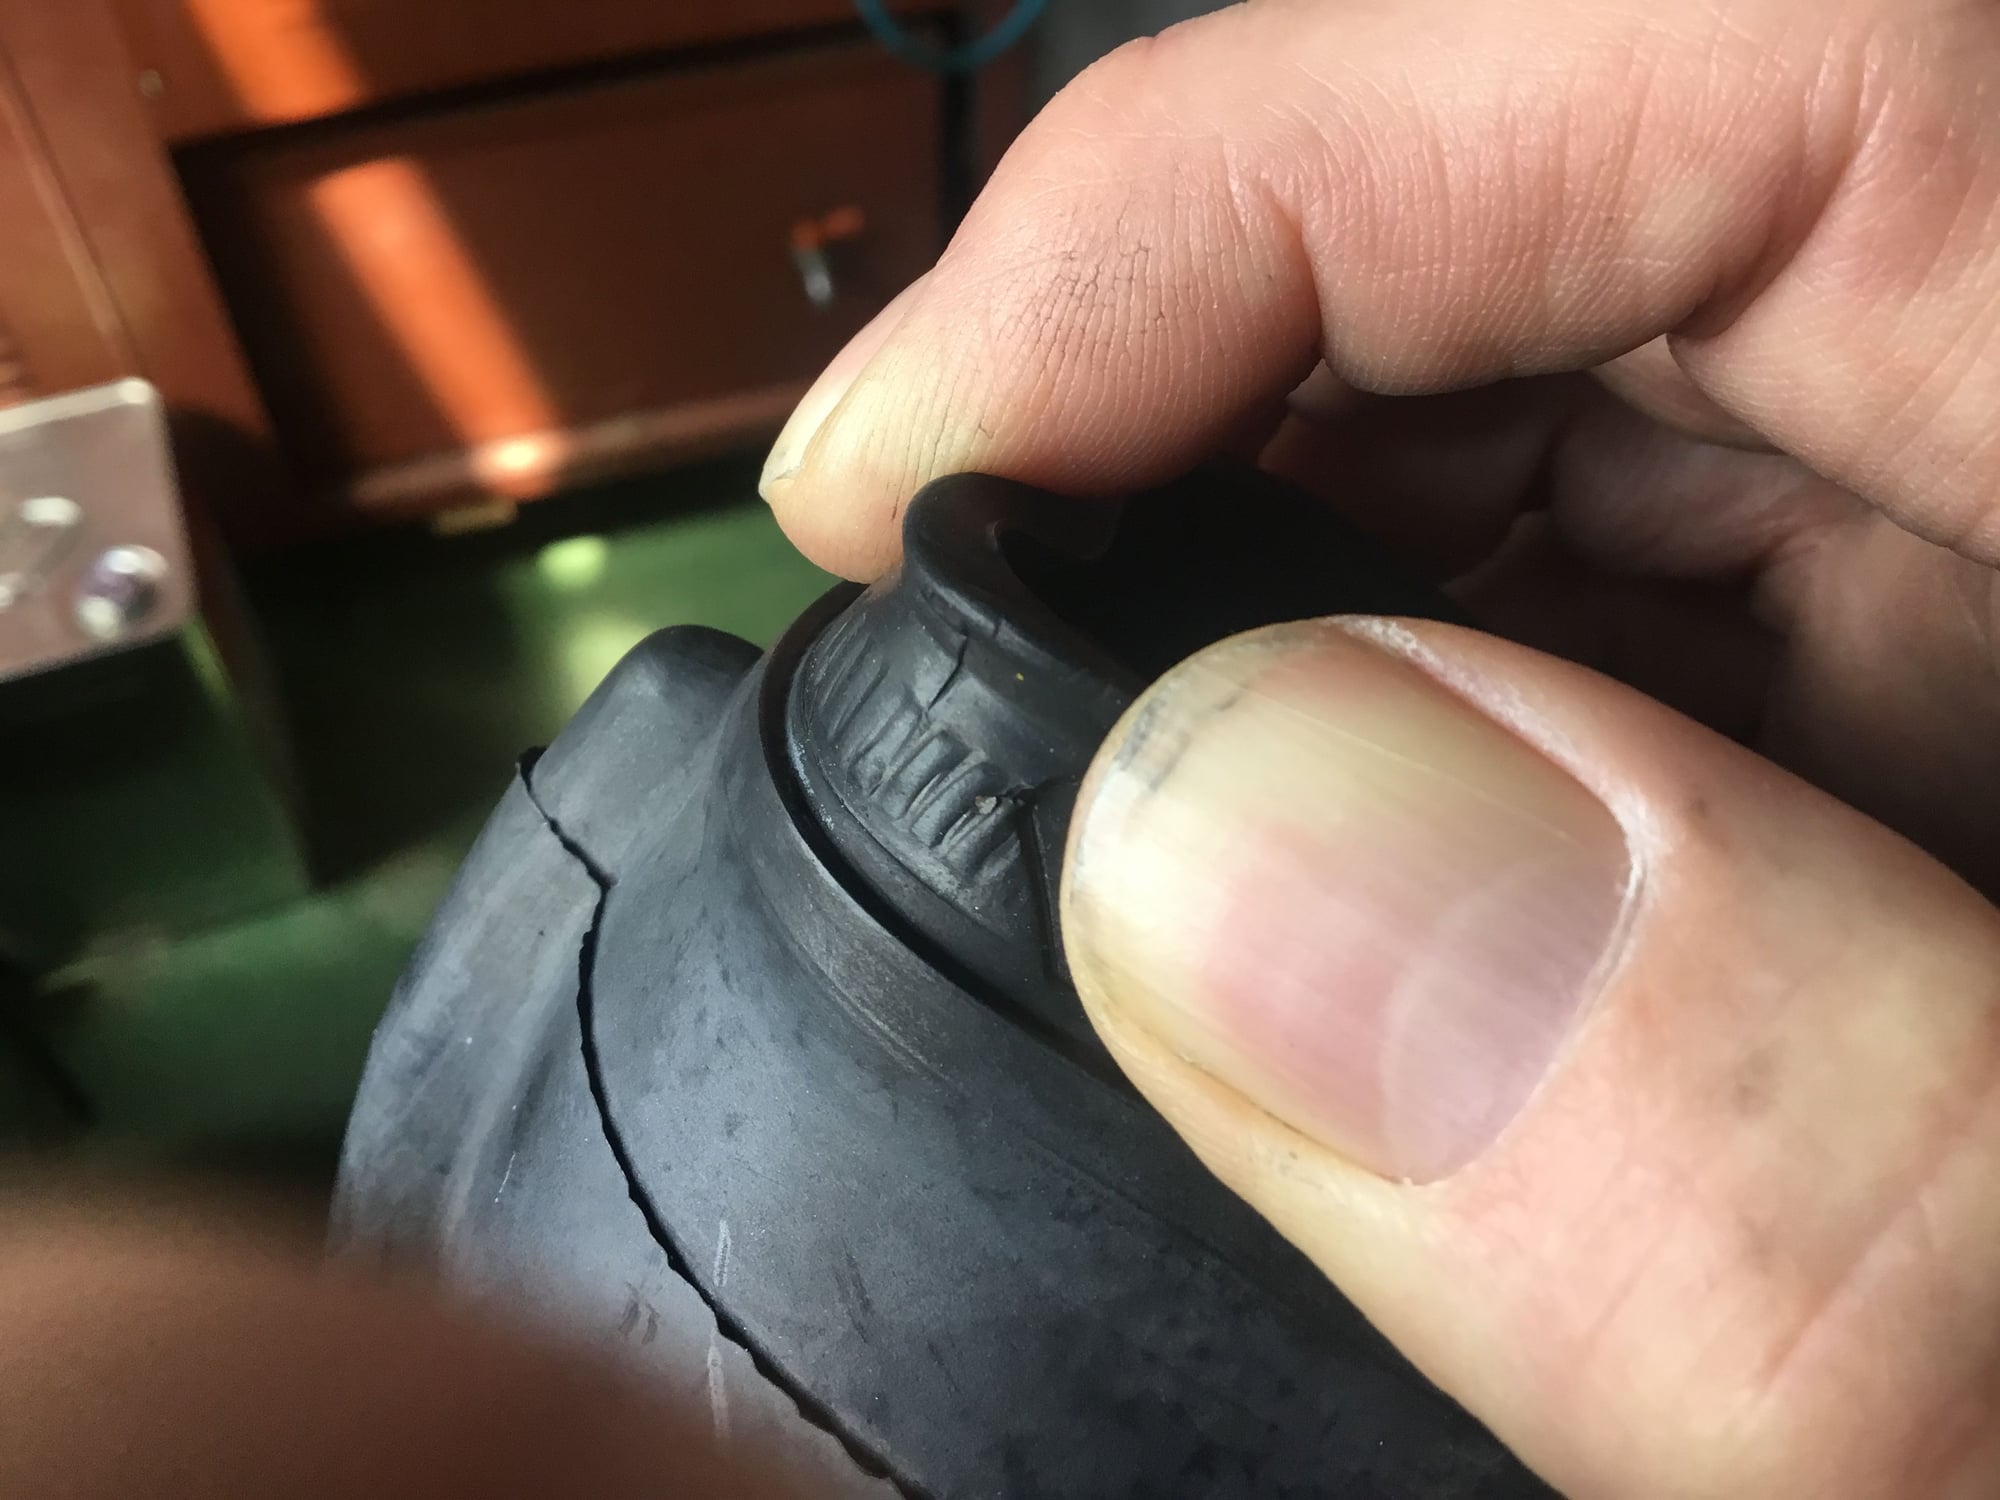
I’m also on the fence about how much rubber to recondition and how much to just replace. On one hand the parts such as the boot is in perfectly serviceable condition but on the other hand as I’ve committed to using this intake for the long term and do not plan on ever selling how long will it last after already having been in service for almost 30 years? I found only one crack, likely from over tightening the hose clamp:
I always get caught up on this point- sure it fine now but will in still be available when its shot?? Expensive question when you start looking at all the rubber parts that are specific to this model.....
Pete. There will always be "one available". And by the time you need one, you will be able to download a file and 3D print one in your house. Don't worry!
In the meantime, do the wintergreen/alcohol thing. It's shocking how well it works.
I'm excited you all are doing this. I actually had another friend here the other day picking up manifolds and a throttle body to get at it as well...
I know I've said it before up above somewhere...but now that I'm all sorted and done- all i think about when driving the car is how good it feels now. Everything is right. Throttle response is fantastic. I should have done this long ago.
I'm looking forward to watching the visual decisions you all make- but also the commentary afterword to hear if i am correct or just talking my own book.
Get on it- and if any of you need extra parts and can't find, i have now a bunch of extras for everything.
Pete, welcome to the intake madness club....
- I am doing zero simplification in the rat's nest area because I don't have that setup on my car. EDIT: The C4 system is simpler on the back side of the intake area. I don't have the Gray Y venturi tube on my car
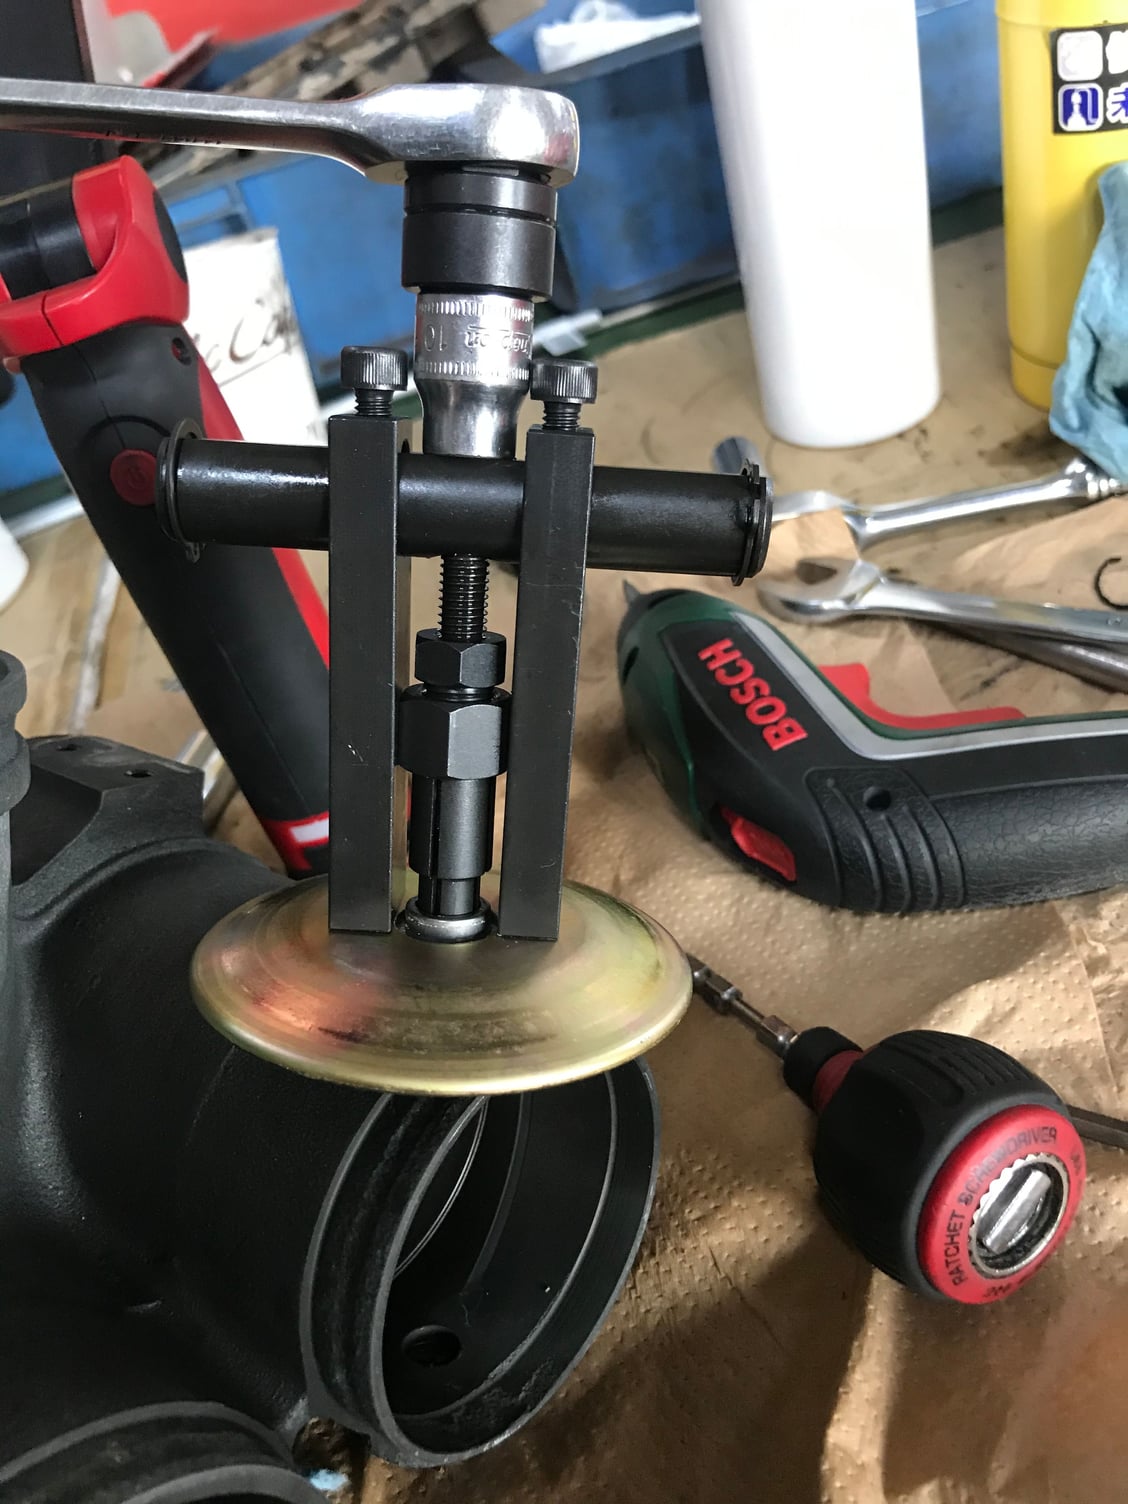
- I am still gathering suppliers. I ordered my bearings via Amazon and then nothing. Global Power is the merchant selling through Amazon. I sent in an inquiry. Ordered on April 11th
- My bearing puller should arrive this week.
- I have not gone any further on the intake teardown as I just finished timing the engine, putting all the rocker arms back in, setting valve lash, and closing up the cam chain housings. That was a lot of tedious work and checking, and re-checking timing and valve gap. I have it nailed now.
- I am waiting on sulphuric acid and trying to get distilled water (is that is short supply too?) to setup my yellow chromate experiments
- I will wintergreen the rubber on the intake tubes, need to build up courage to go to Home Depot, get some small 1/2 gallon buckets and use what little 91% Isopropyl Alcohol I have in the house.
- I received various new Pierburg and Porsche vacuum bits, and just setting up my one workbench once all the materials come together. I should start in intake teardown this week and clean up everything.
Rob- whats you take on piping in the seals without removing the bearings? It�s a pain for me to find things like bearing pullers locally since I cant read Japanese and afternoon washingthe bearings they look good as new.
Ricardo- when you get a chance list up or photo your vacuum hose set. Man you�ll be back in that 964 before you know it at this rate!
loving the ultrasonic.
literally 10 min in the cleaner in a plastic bag with dirty kerosene from my parts washer and no need to disassemble:
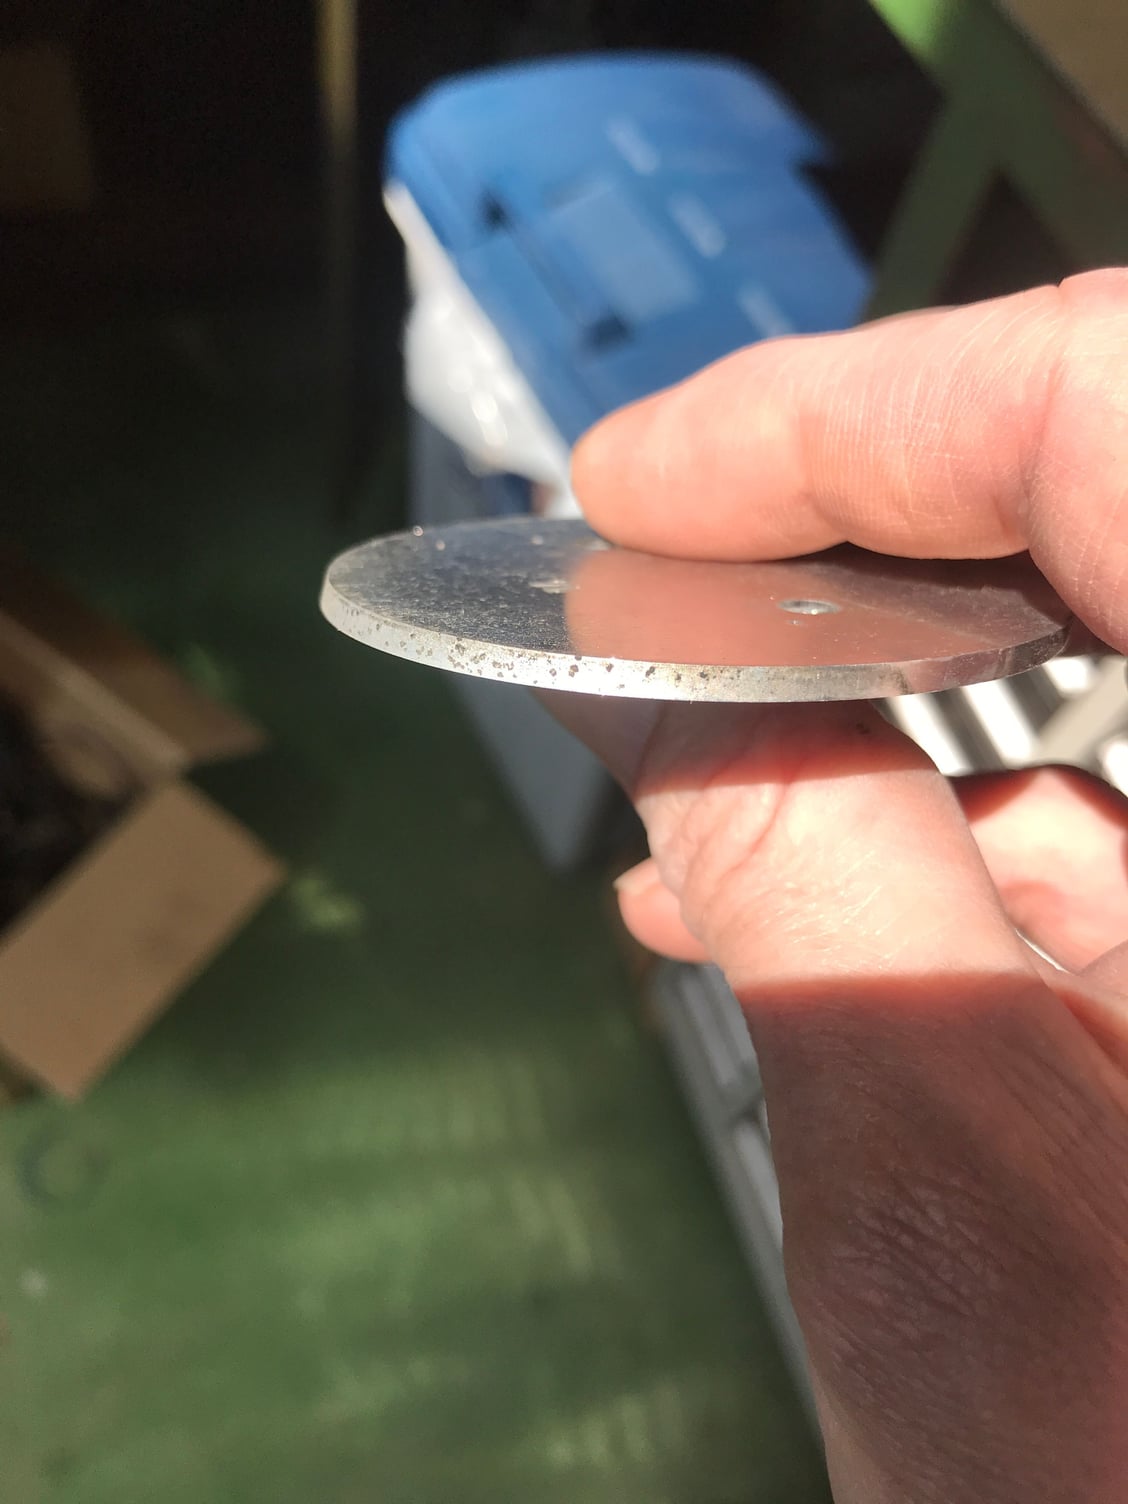
Another bit- probably doesn�t matter but the large throttle plate for the TB is the same as the res flap so not a bad idea to mark them. I didn�t but was able to tell from the photos I took. Also I noticed that the TB plate has some visible corrosion on the bottom edge- WOT exposure?
Bearings are fine.... seals are hurting. About 65,000miles on my car btw.
Decide to take the plunge. I picked up a nice puller used from a motorcycle shop that was shutting down a couple of years ago. Unfortunately no 8mm. I think I found an 8 mm jaw and it�s on order.
The pulley half was replaced by an open end 14mm wrench on subsequent pulls.
Here are some photos of my intake for your reference. 1990 C4. I must correct an earlier statement. The car was bought new at a Negherbon Porsche in Oakland, California.
Pete, welcome to the intake madness club....
- I am doing zero simplification in the rat's nest area because I don't have that setup on my car. I think Rob said that was only on cars with the California emissions setup. I don't have the Gray Y venturi tube on my car
- I will wintergreen the rubber on the intake tubes, need to build up courage to go to Home Depot, get some small 1/2 gallon buckets and use what little 91% Isopropyl Alcohol I have in the house.
The C2 uses a vacuum assisted brake master (reason for the rat nest of the venturi booster pump)... the c4 use a hydraulic pump, right? I've decided to drop the venturi setup on my C2 and see how it goes. If all fails, I plan to add an electic booster pump if needed. Hella has an option used in volvo's.
Instead of wintergreen, have you tried using a quality silicone lubricant spray? This type of lubricant contains plasticizers that will soften rubber. Seems to work for me.


 04-12-2020 | 08:16 PM