When you click on links to various merchants on this site and make a purchase, this can result in this site earning a commission. Affiliate programs and affiliations include, but are not limited to, the eBay Partner Network.
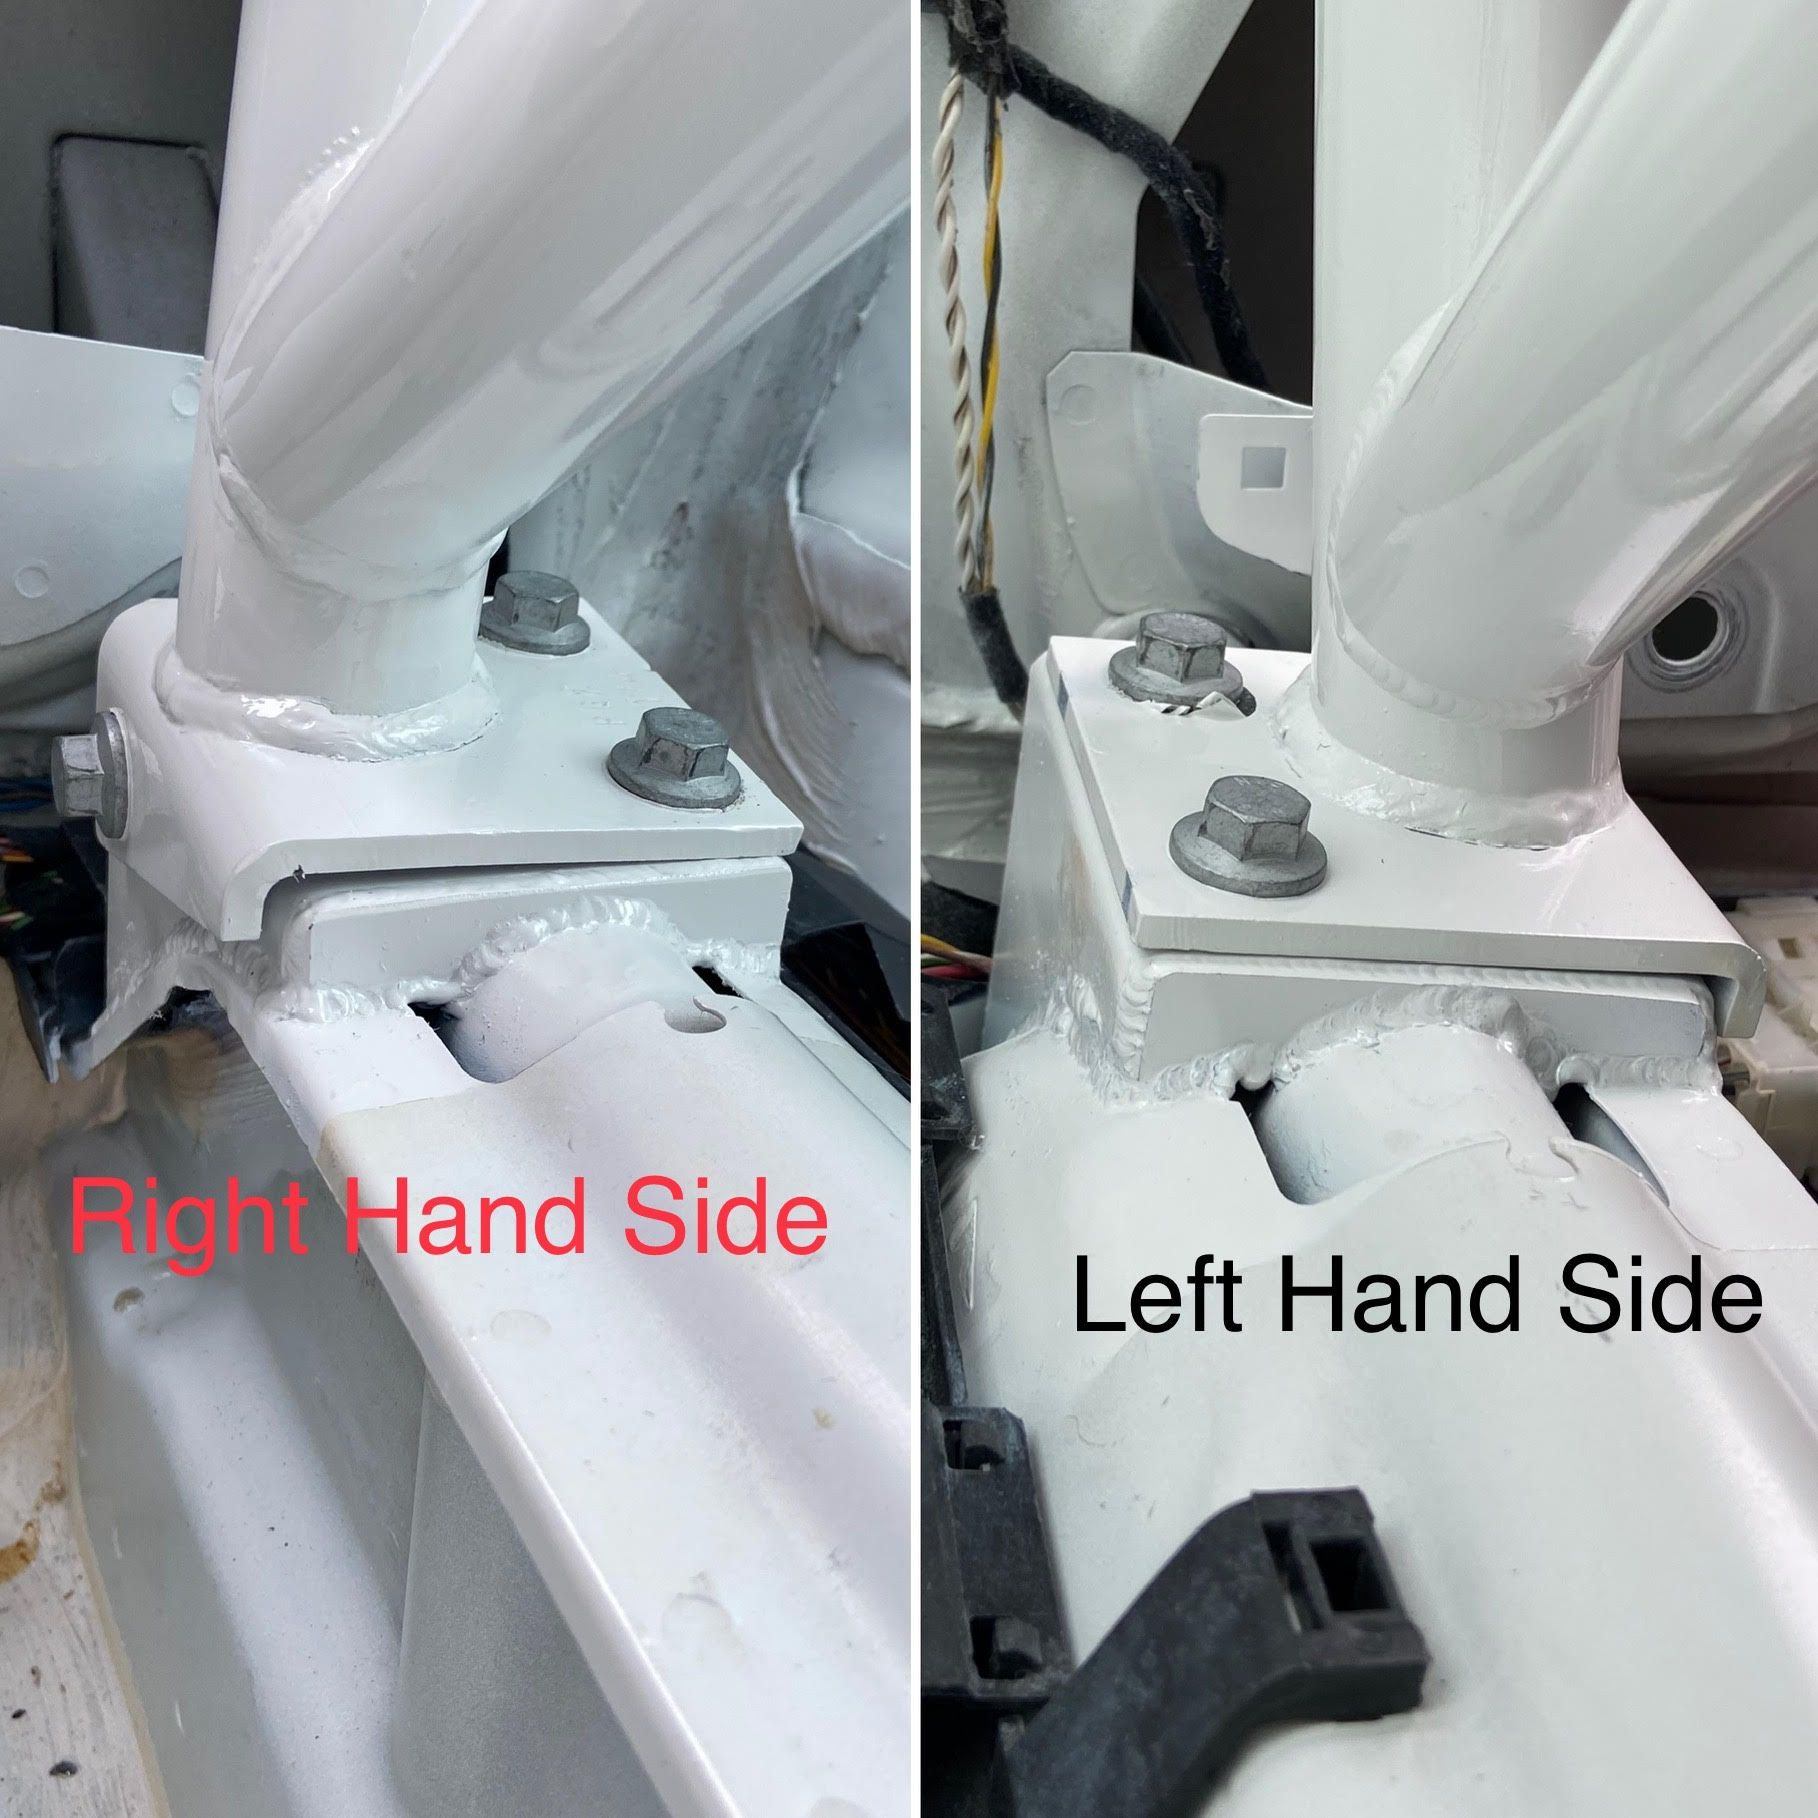
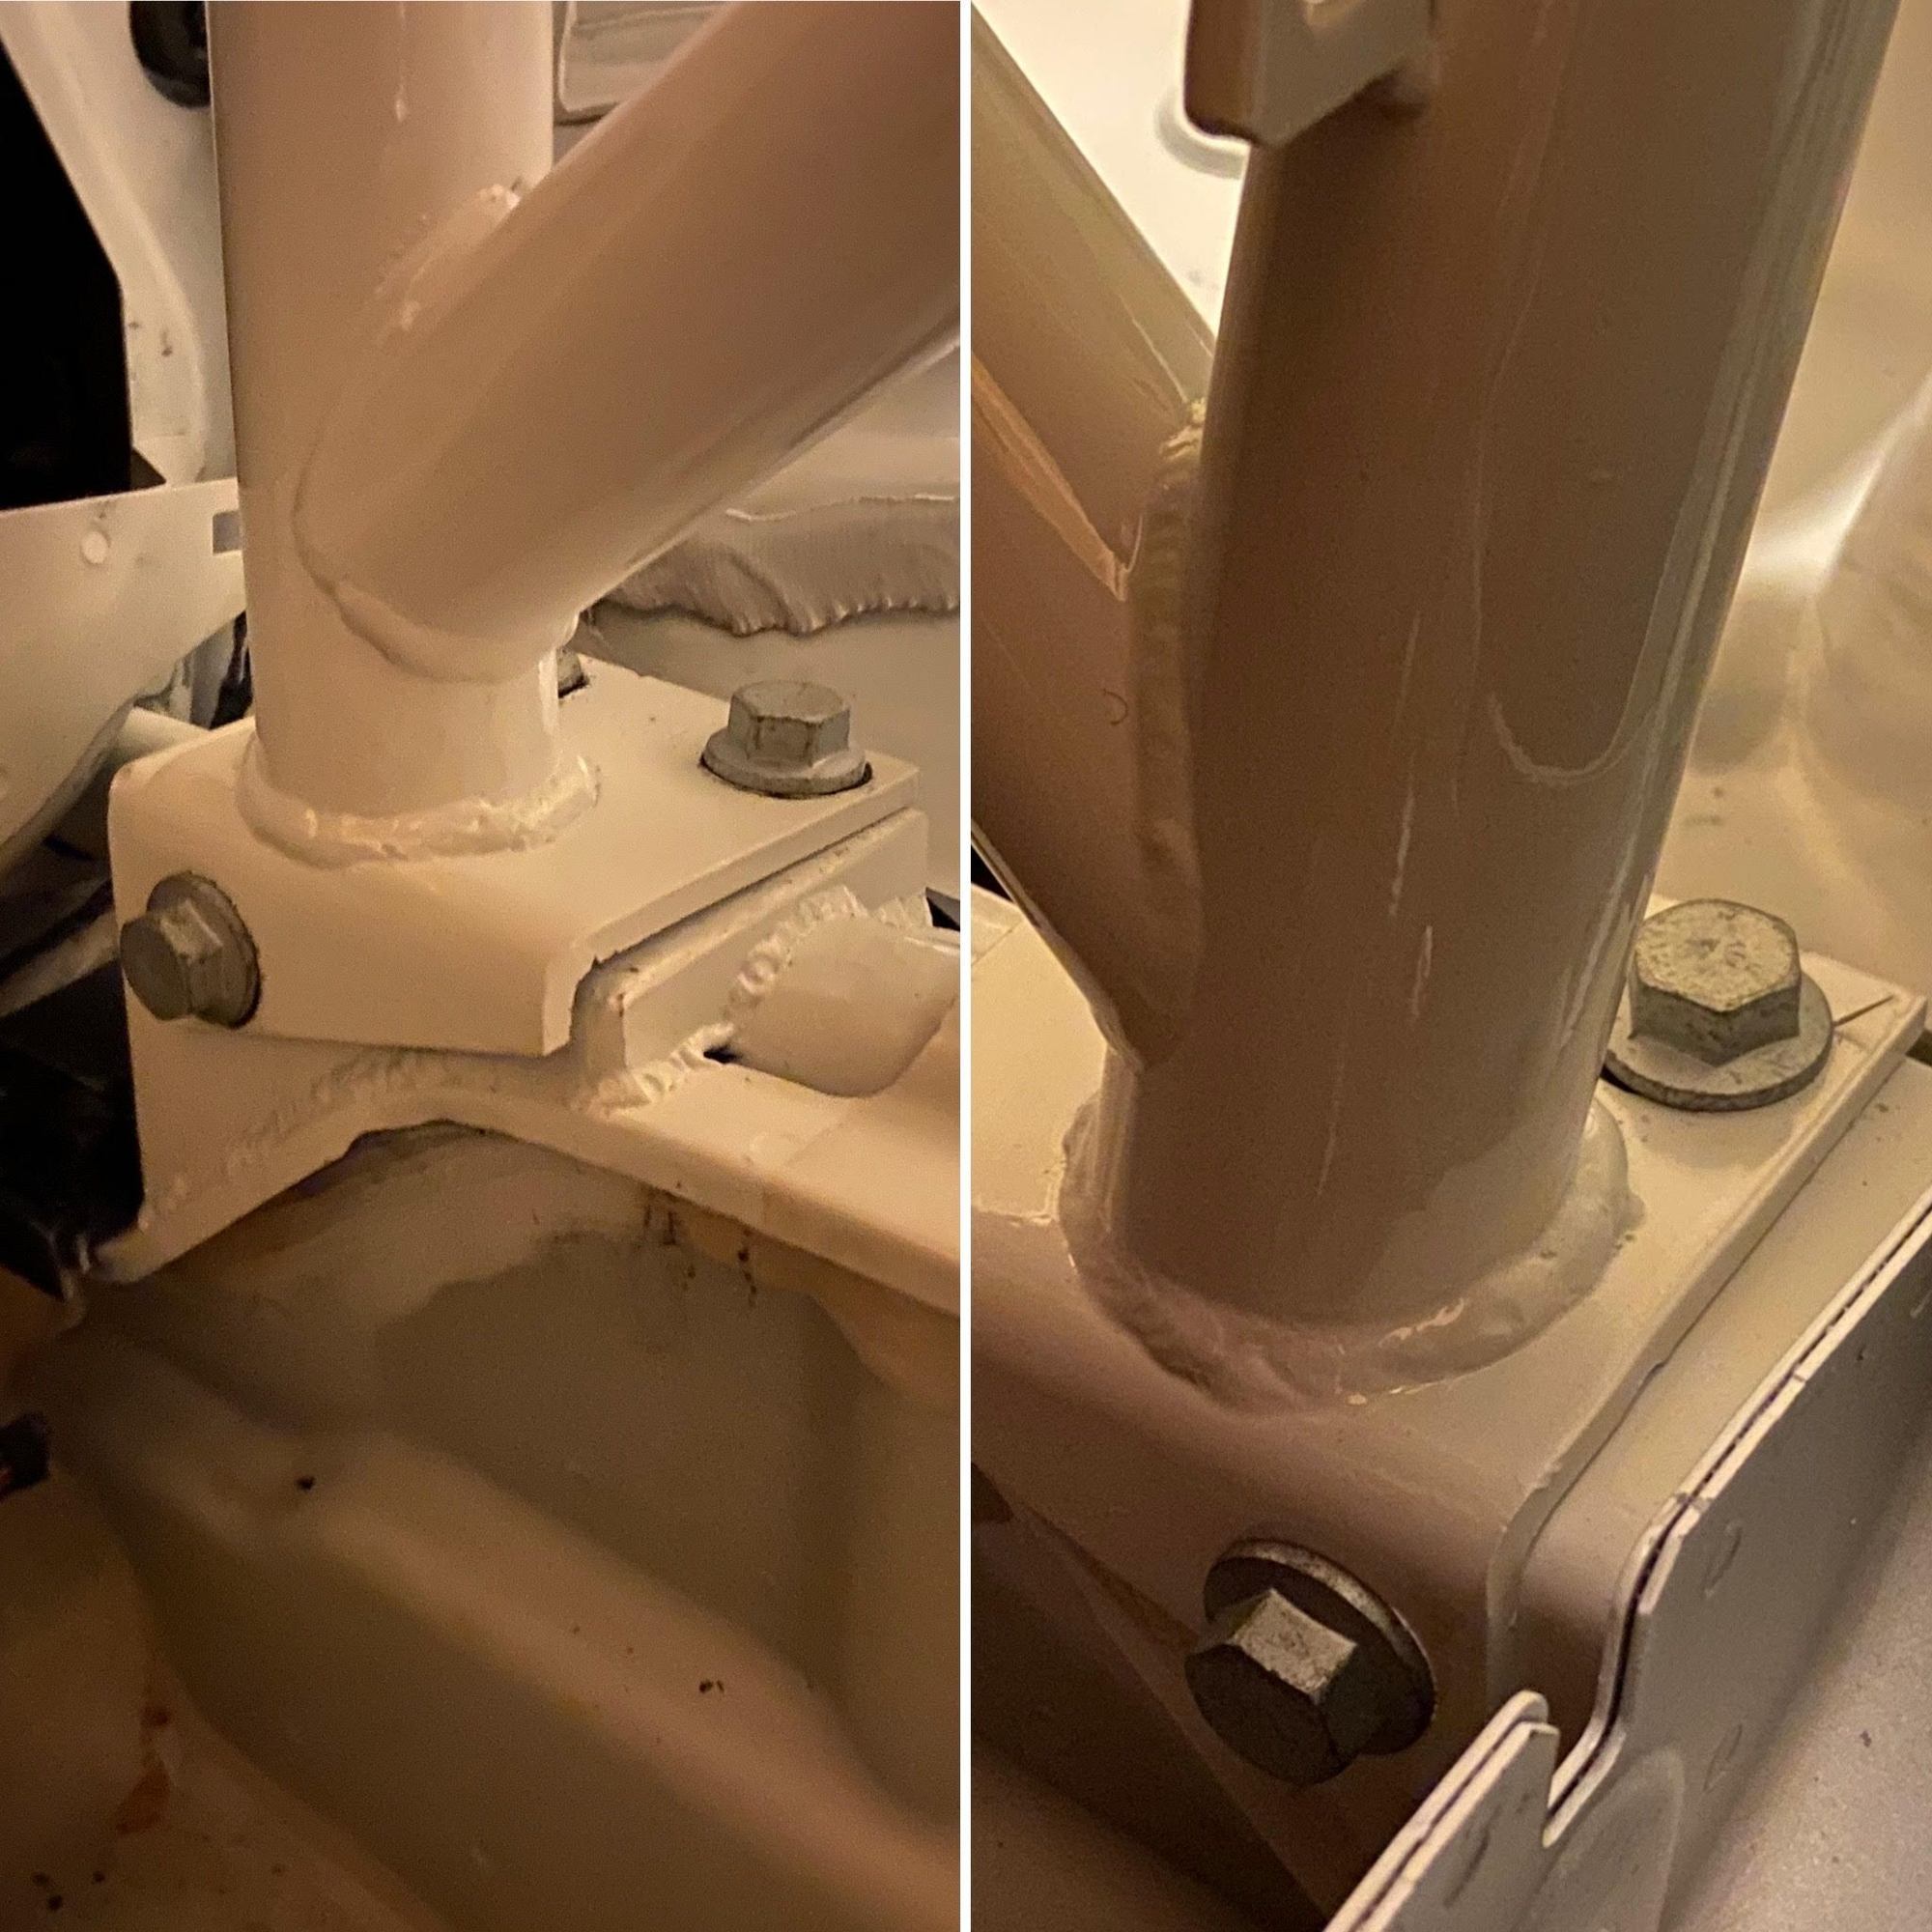
After installing the back half cage, there is something that's been irritating me. Its the RH side of the cage footing not sitting flush to the base. This pic below shows both sides. The LH side is totally acceptable. The RH side not so much. The cage footings were bolted to the bases prior to welding, then the bases were tack welded with the base is making maximum contact to the car's structural tube. The heat from welding must have tweaked the metal. The gap irradiates me more than the paint chipping off.
I am not going to cut the base off and re-weld it because that's just ridiculous and the same thing might happen again from welding. And I just don't feel like cutting off the foot plate and re-welding it either.
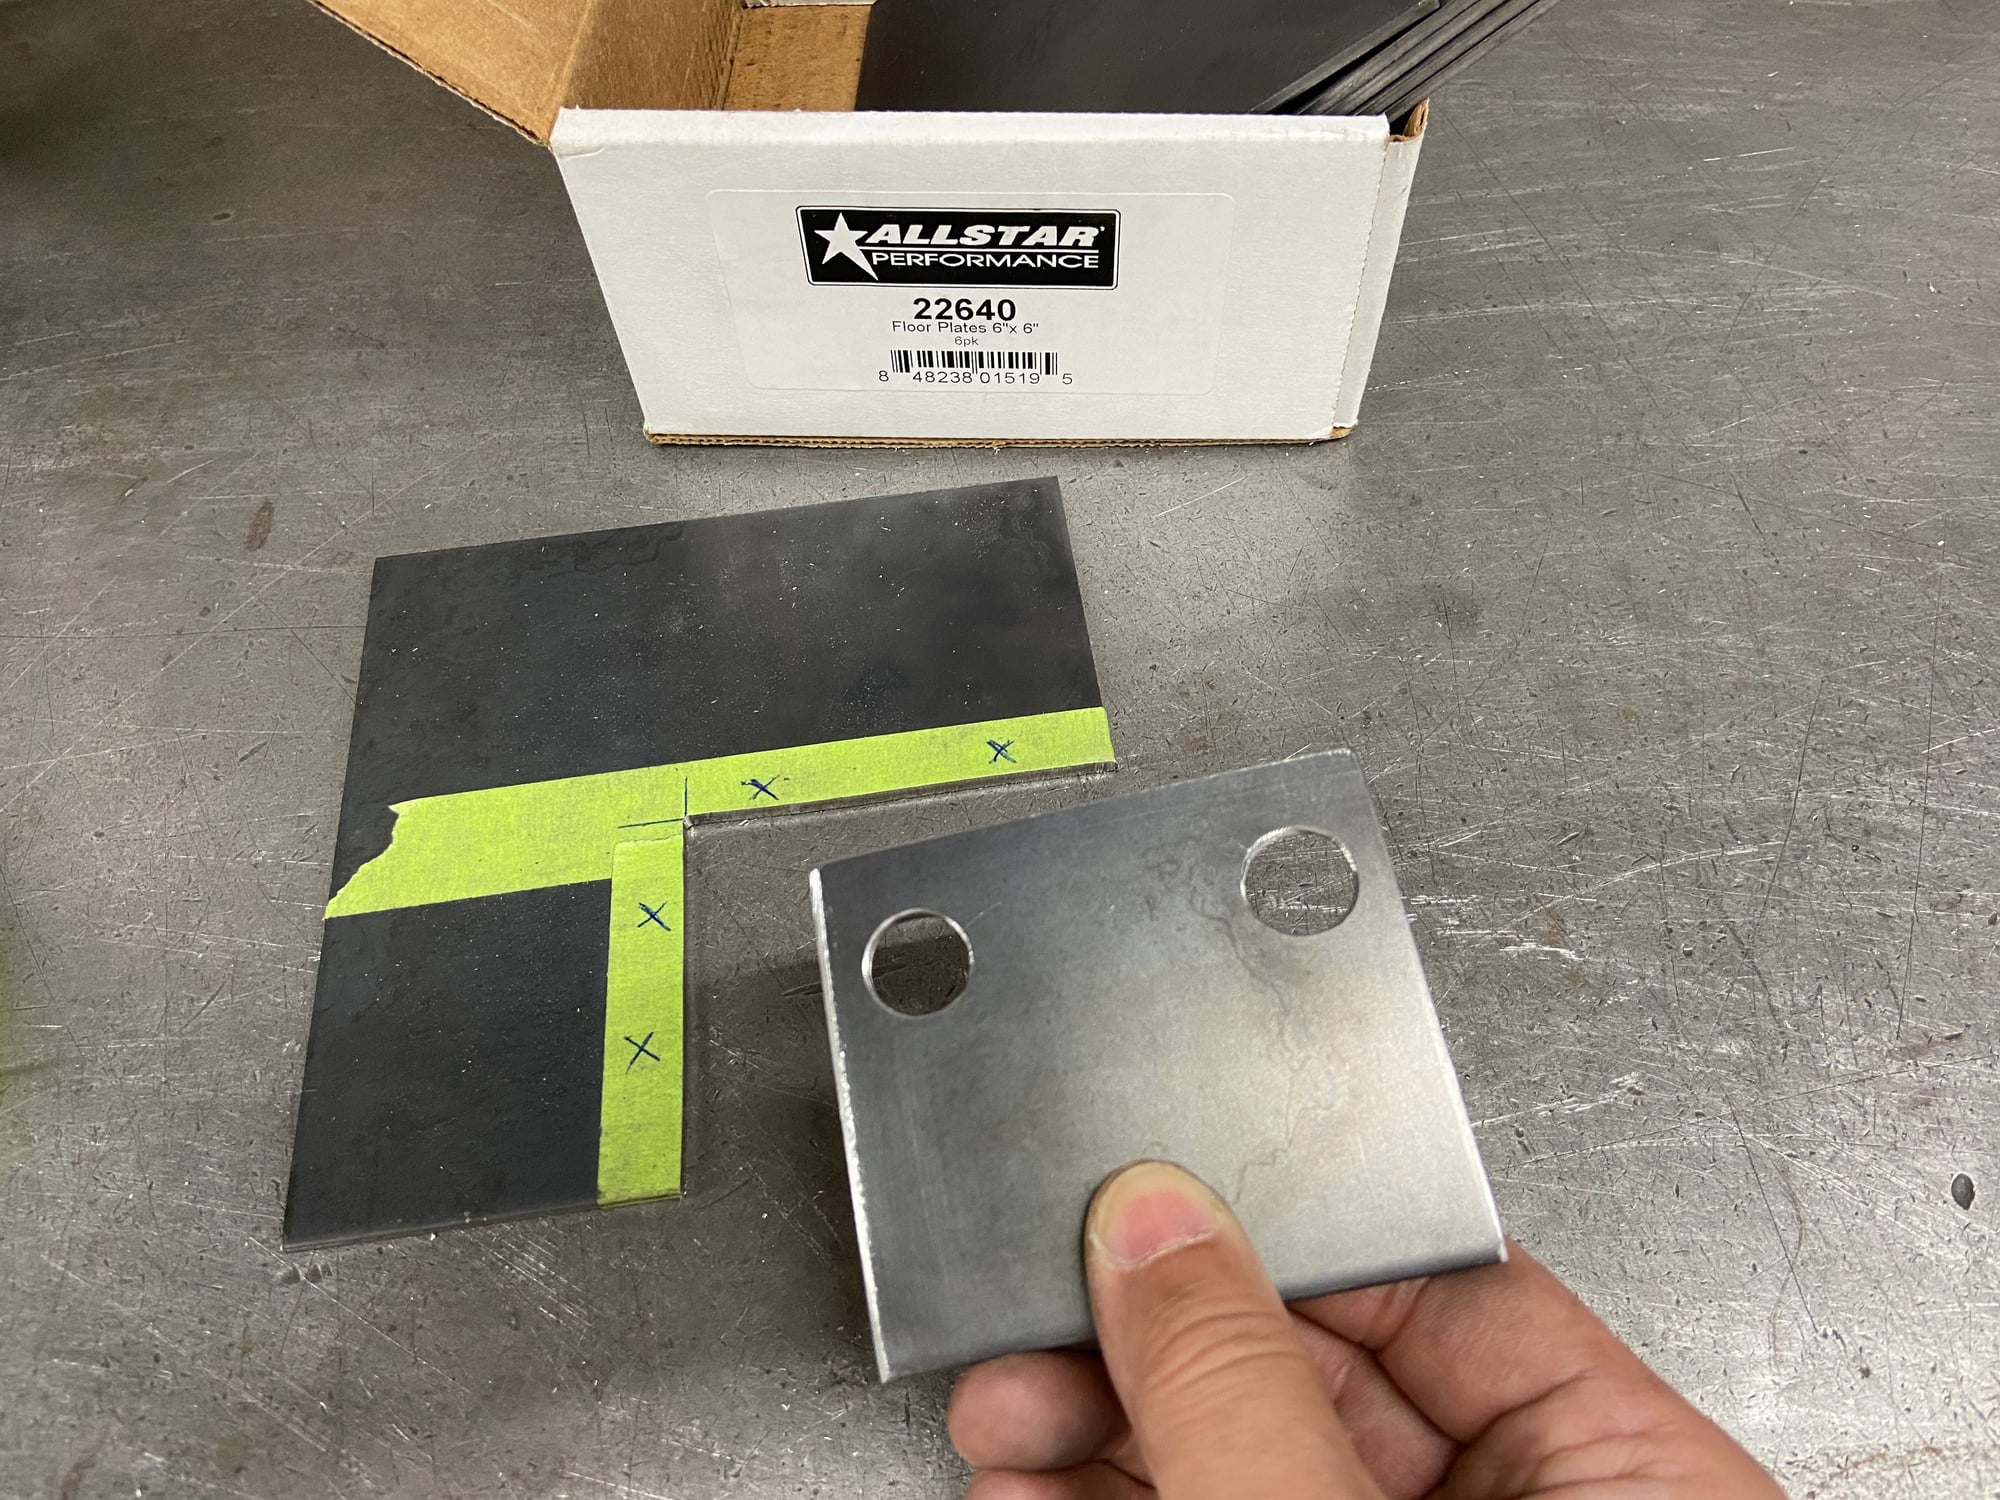
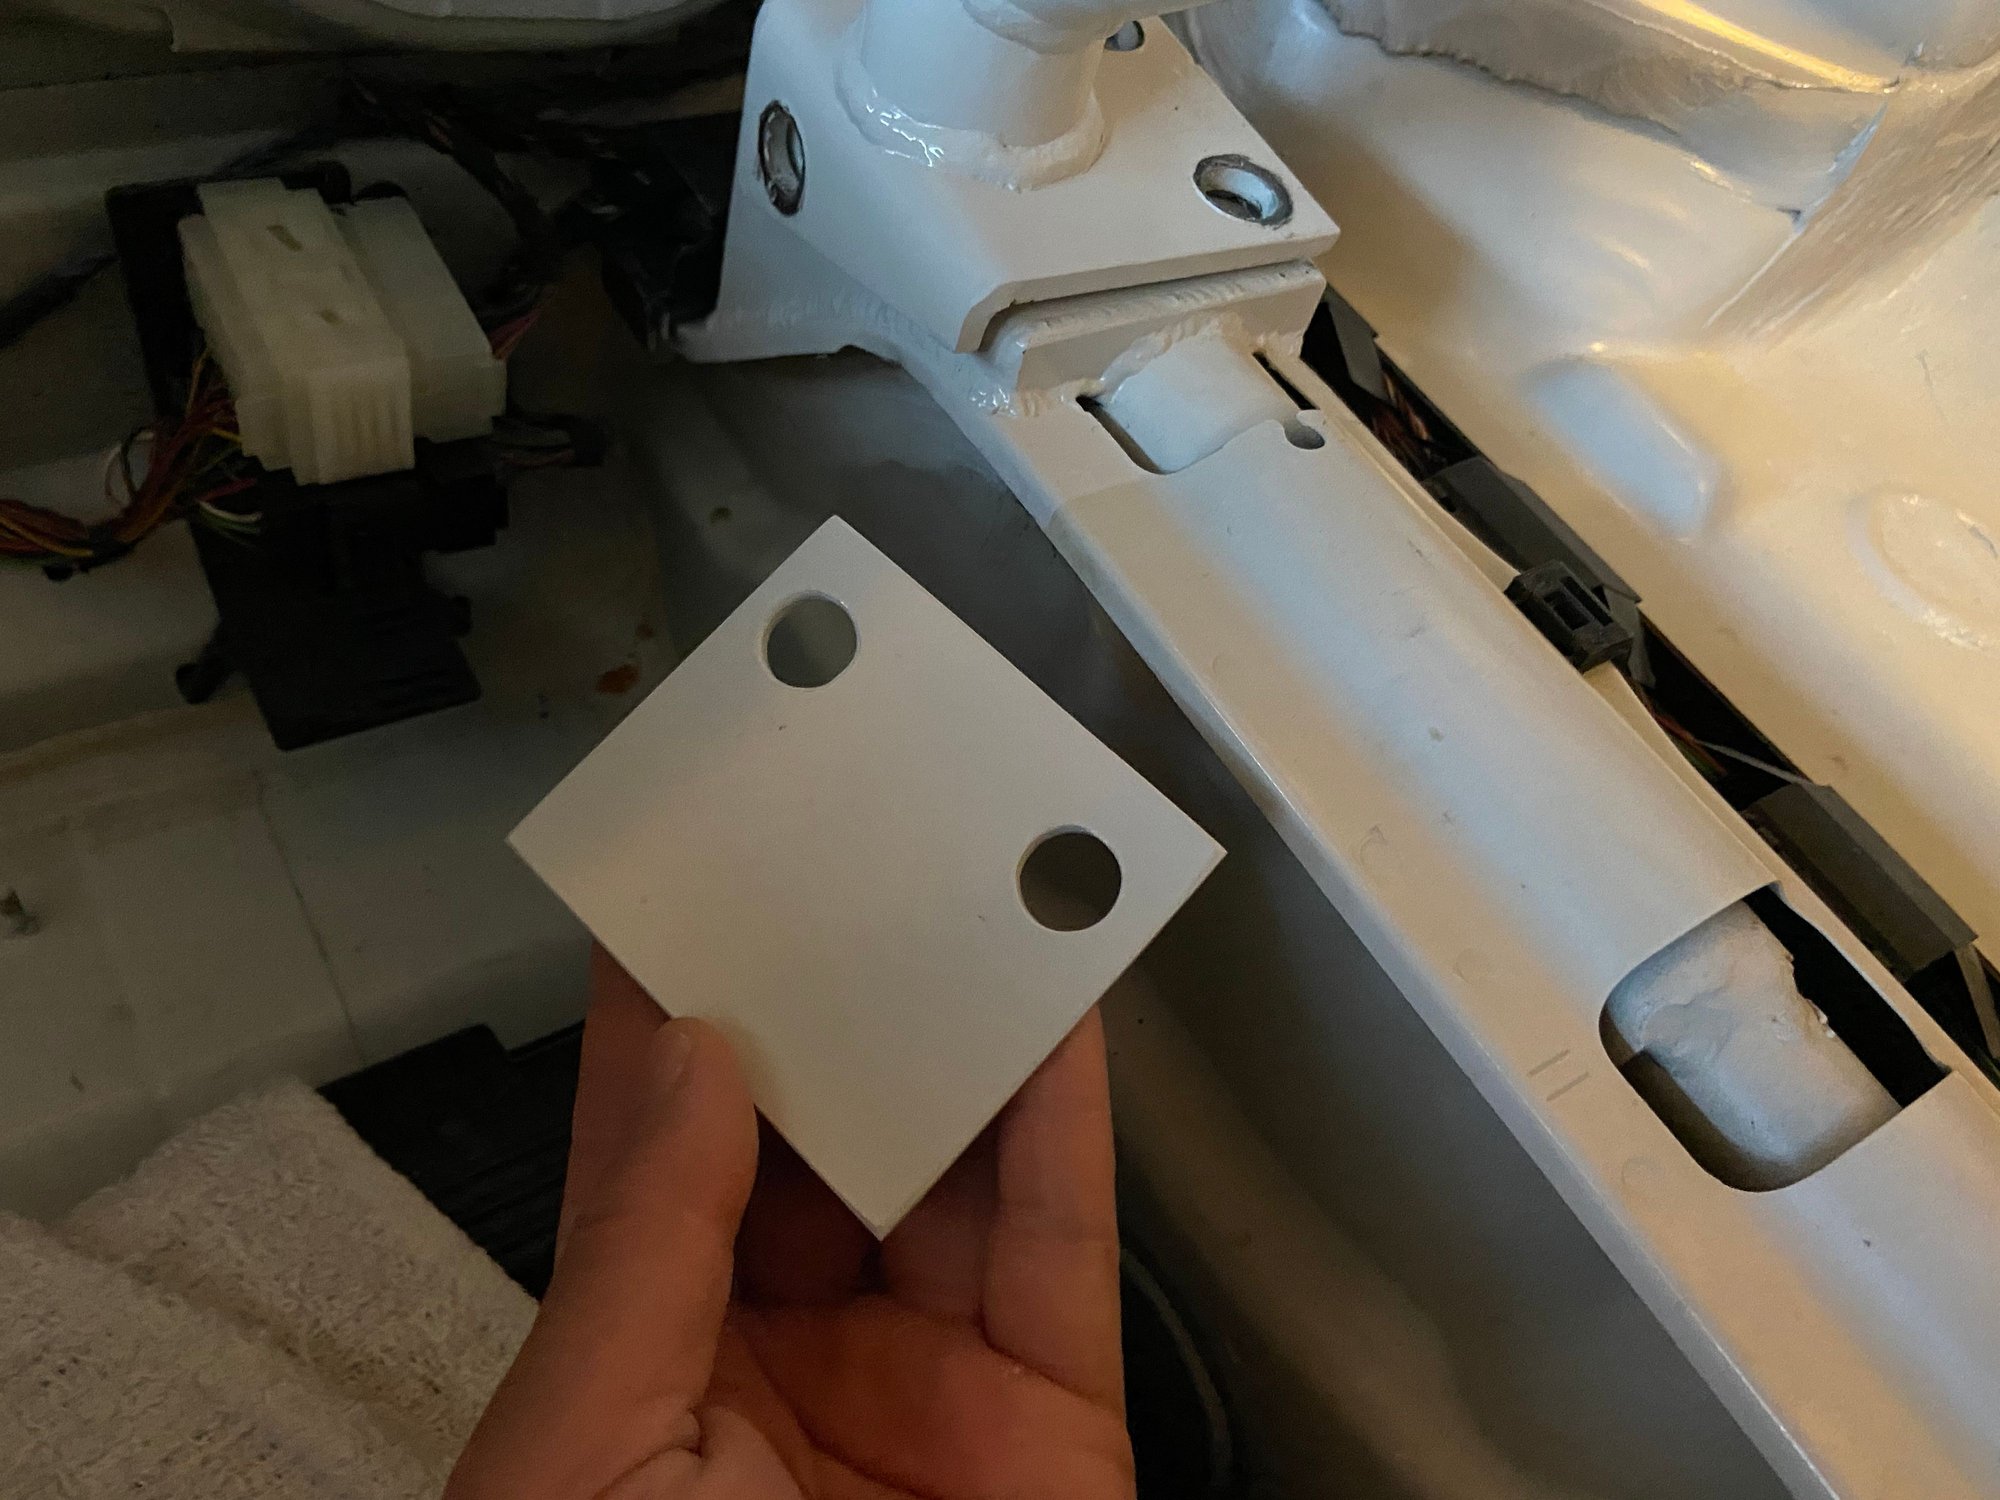
So what came next was my brilliant idea to make a shim, using proper roll cage constructor material of course.
Version 1 of shimming- It was a fail. 3.3mm was too thick, the front hole won't line up, and I am not going to grind the front hole bigger. Version 2- I drove back to the shop to clamp the shim in a vice and milled it down to 2.7mm. It took 2 machining ops to mill down the surface completely because it had to be clamped in 2 different axis for each op to mill the surface completely after the shim was already made. BTW, my car is at my house's garage, the door doesn't open all the way, I crawled in the car to do this). V2 was a fail, still to thick. Version 3- Milled it down to 2.0mm. V3 was also a fail because I realized at that point the shim needed to be angled (wedged) and not a rectangle shape. A flat rectangular shim created high and low spots between the two non-parallel contacting surfaces. Version 4- I made a whole new piece and it was a trapezoid with difference thickness at different sections that was sanded on a belt sander. V4 bolted up fine and filled the gap fine on the side that's shown in the image but created a gap on the opposite side where there was no gap before. Version 5 - Went back to the shop and cut V4 in half and then wedged it some more to only fill the gap on the one side that's shown in the image. It fit, but it just seemed "not right" to me.
Somehow I spent 8 hours on shimming(not counting commute time to the shop) and end up even more irritated than before. In my opinion, the manufacturer of this product really should recommend welding the footing to the base...or provide a heavy duty split clamp that actually "bolts on" to the car's structural tubes. I decided at this point to do the best I can and just let it go, which is loosen up all the nuts and bolts use my body to ram, punch, and kick the cage in anger to may be settle it the footing better.
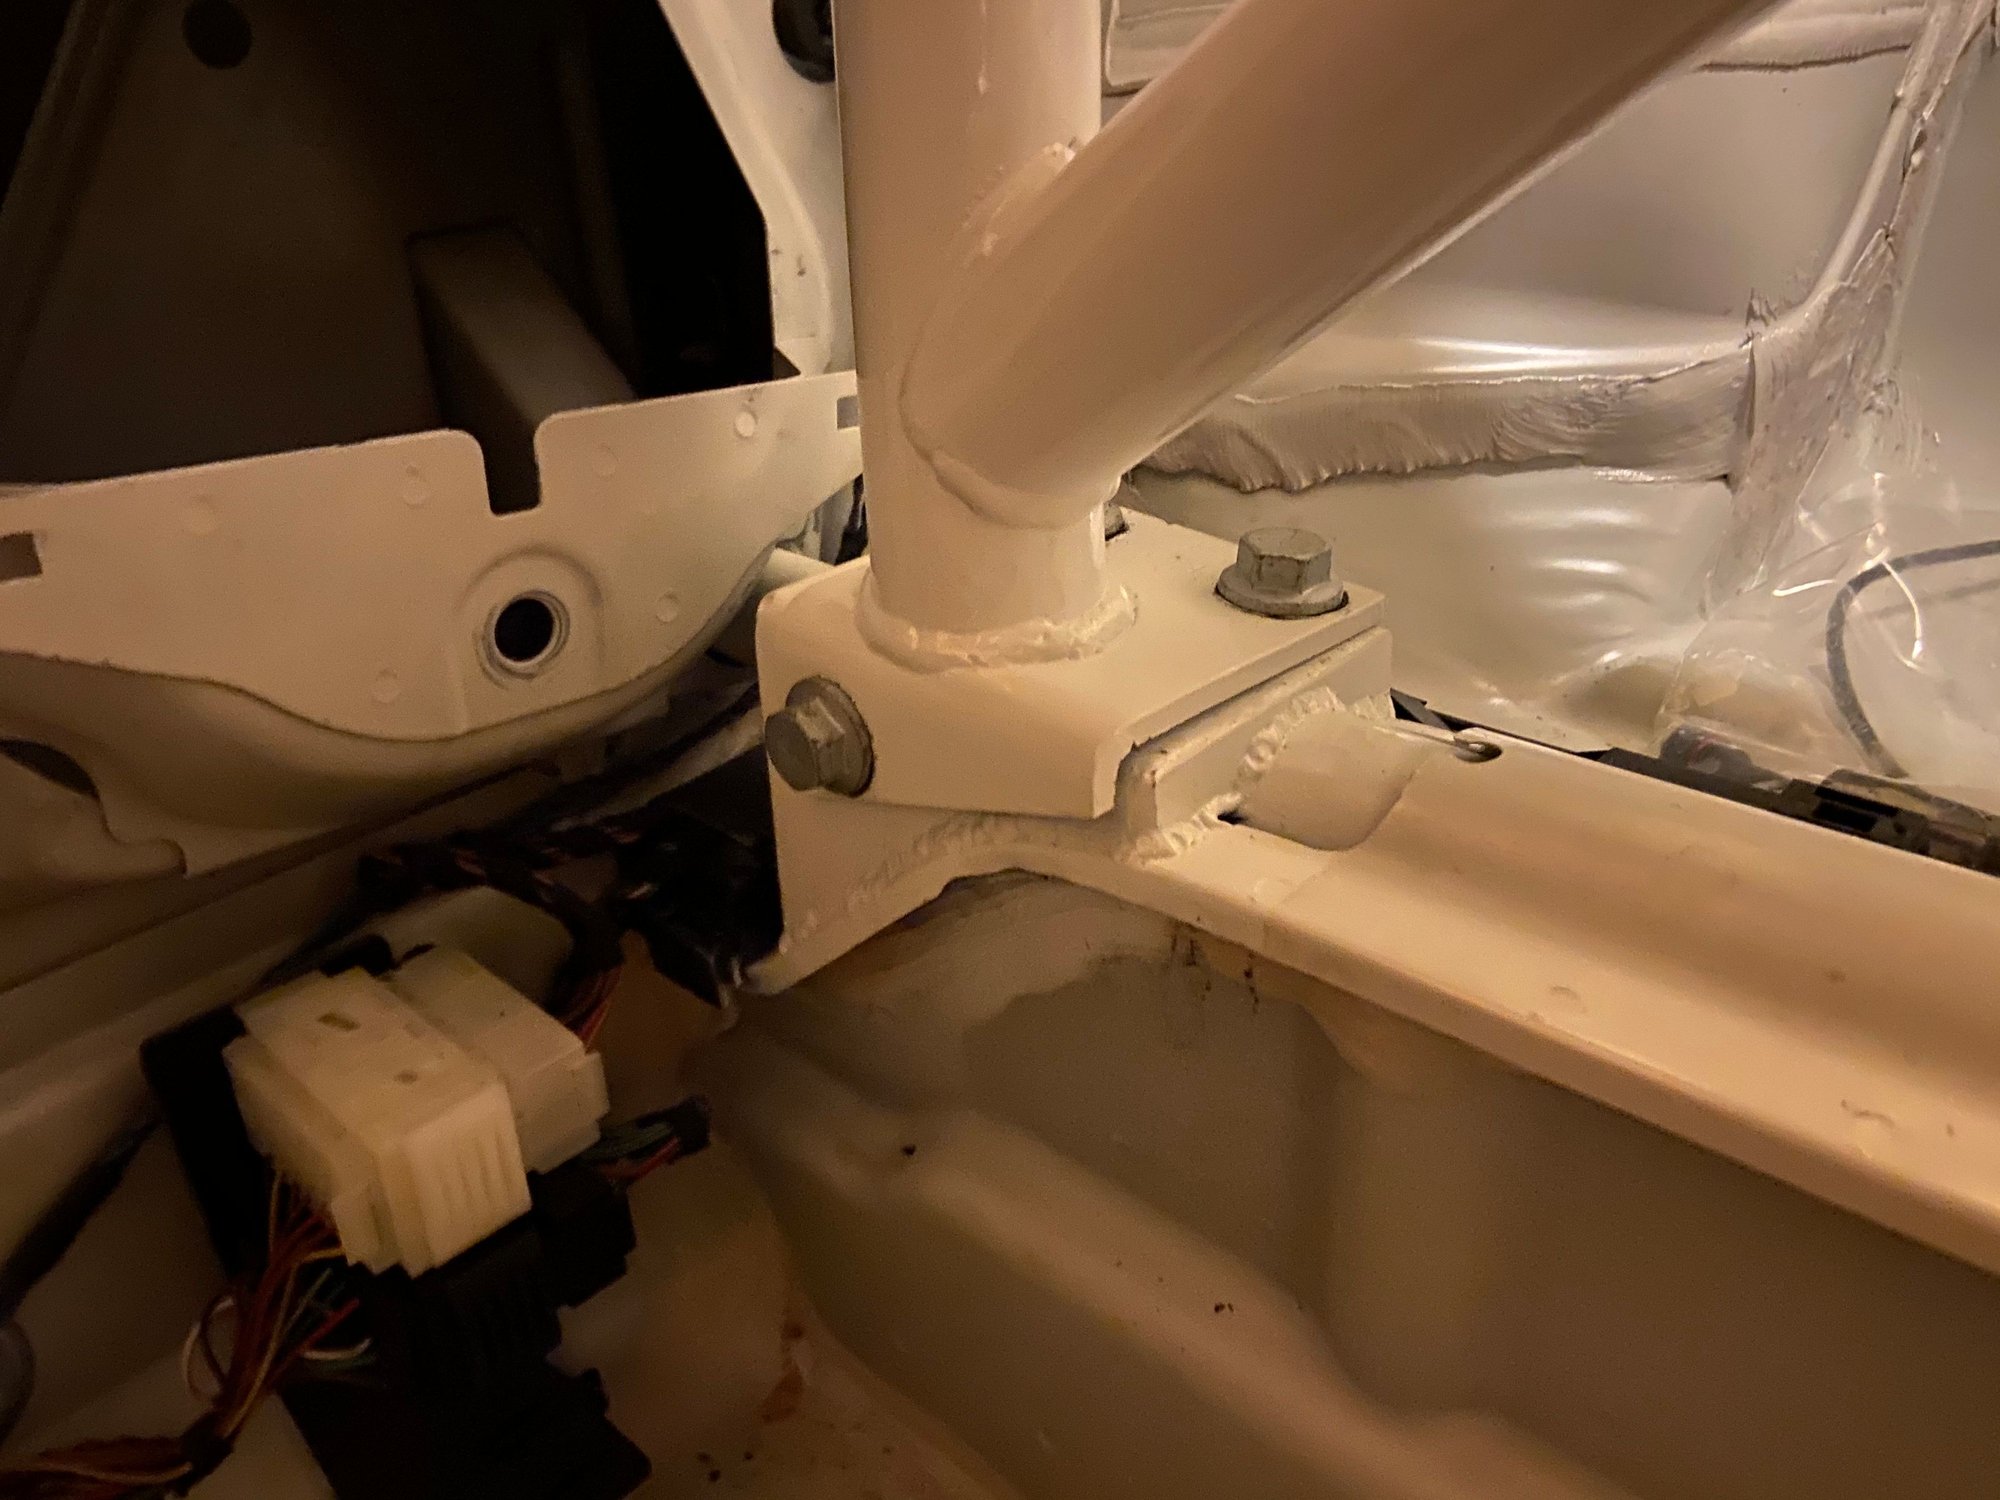
Fortunately, after loosening, tightening, and kicking a number of times the gap got smaller. The opposite side and the back side makes full contact, so in event of a compression force event the base should take the load. This is the best I can do at this time and I convinced myself that's acceptable so I can go to sleep. I might weld in the future. Moving on.
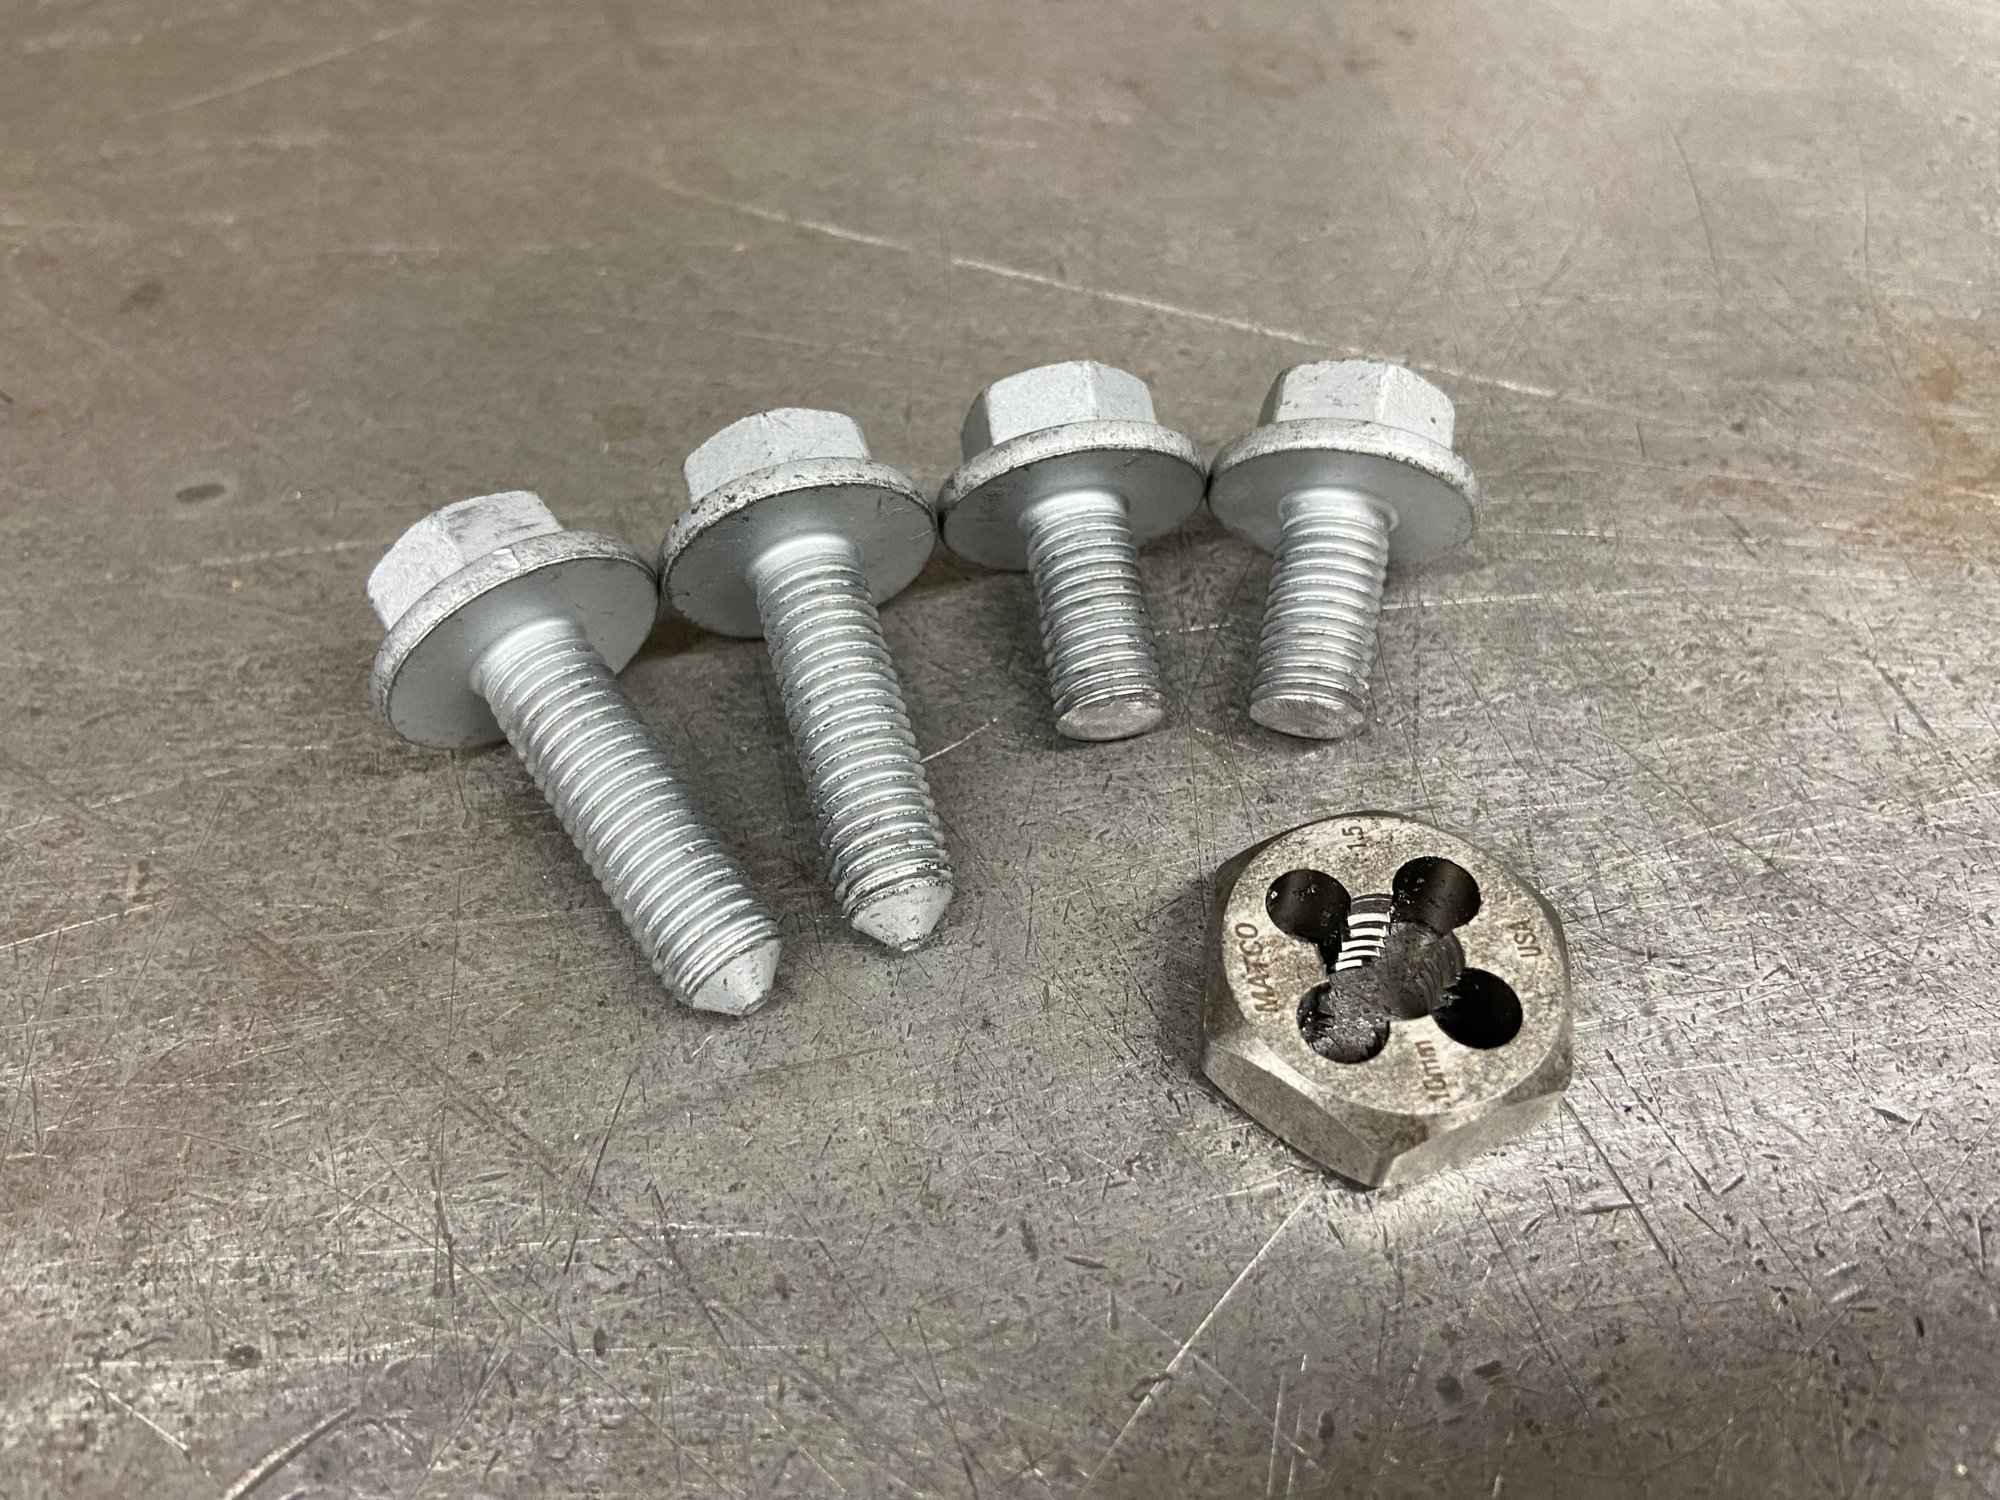
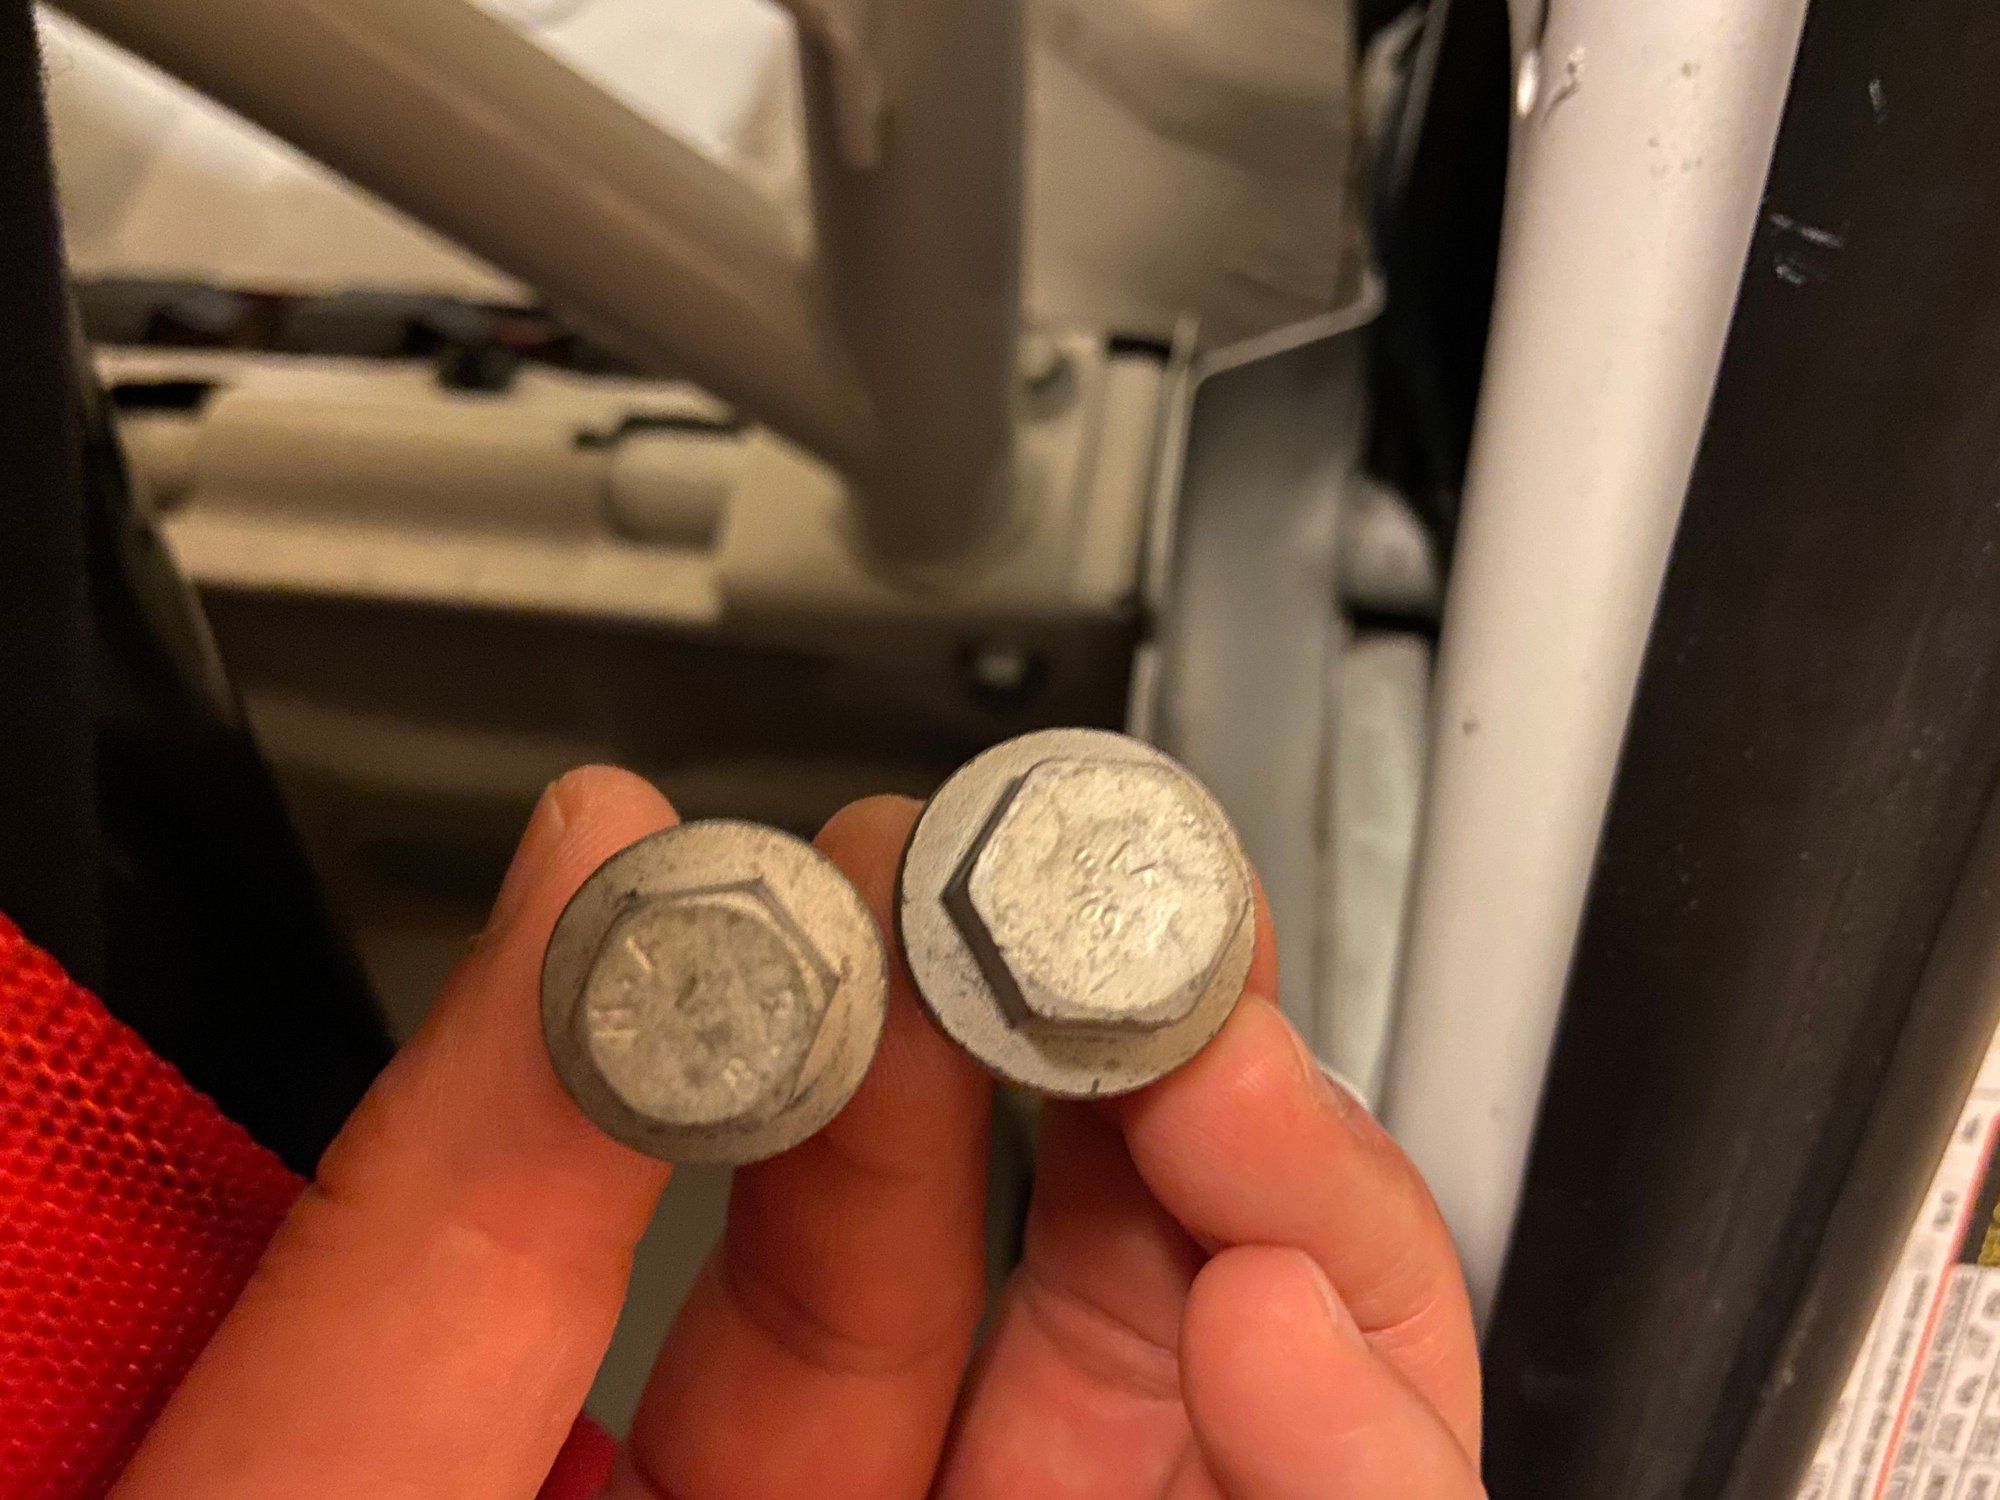
On the bright side, I did find OEM bolts with 24mm flange. These are grade 10.9 suspension control arm bolts from Audi A8.
These bolts are 30mm length so they were cut down to 20mm and had the leading threads re-cut.
The flange OD increase of 4mm doesn't sound like much but that 4mm looks more substantial side by side. That's the power of Pi.
I am okay with this. I have to be, to keep myself sane. I have some paint touch up to do.
I promise the next mod will be more upbeat!
__________________
PCA National Instructor
TPC Racing stats:
2023 Porsche Sprint Challenge 992 Cup Am Champion
2023 Porsche Sprint Challenge GT4 Pro-Am Team Champion
2022 Porsche Sprint Challenge 992 Cup & 991 Cup Champion
2020 IMSA GT3 Cup Challenge 2nd Championship
2018 IMSA GT3 Cup Challenge 2nd Championship
2016 IMSA GT3 Cup Challenge Champion
2013 IMSA GT3 Cup Challenge Champion
2006 Rolex-24 @ Daytona GT Champion
2004 Grand-Am SGS Class Champion
Last edited by Tom@TPC Racing; 06-03-2020 at 03:14 PM.
Now that I had a day to cool off and reflect on the welding/installation, I have concluded that the base could have been either welded on to the car's structural tube area squarely with optimal contact, or welded on crooked to make better contact with the cage's RH foot plate. Its one or the other, not both. Unless I cut off the RH foot plate and re-welded it. I'm not doing that. I think I have chosen the better of the two.
I have also concluded that while the RH foot plate isn't seated to the base perfectly, having the base(the load distribution point) directly on the car's backbone is structurally to take compression load better than other main hoop designs that use single-plane floor plate on the car's thin sheet metal floor or using seat belt hole as load distribution point.. Ultimately, welding the main hoop in fully with multiple contact points to the car's B-pillar(like a Cup car) will be best. That's just too much commitment for me at this time. I bet if I put a piece of carpet around the RH foot plate I'll probably forget there's a small gap there.
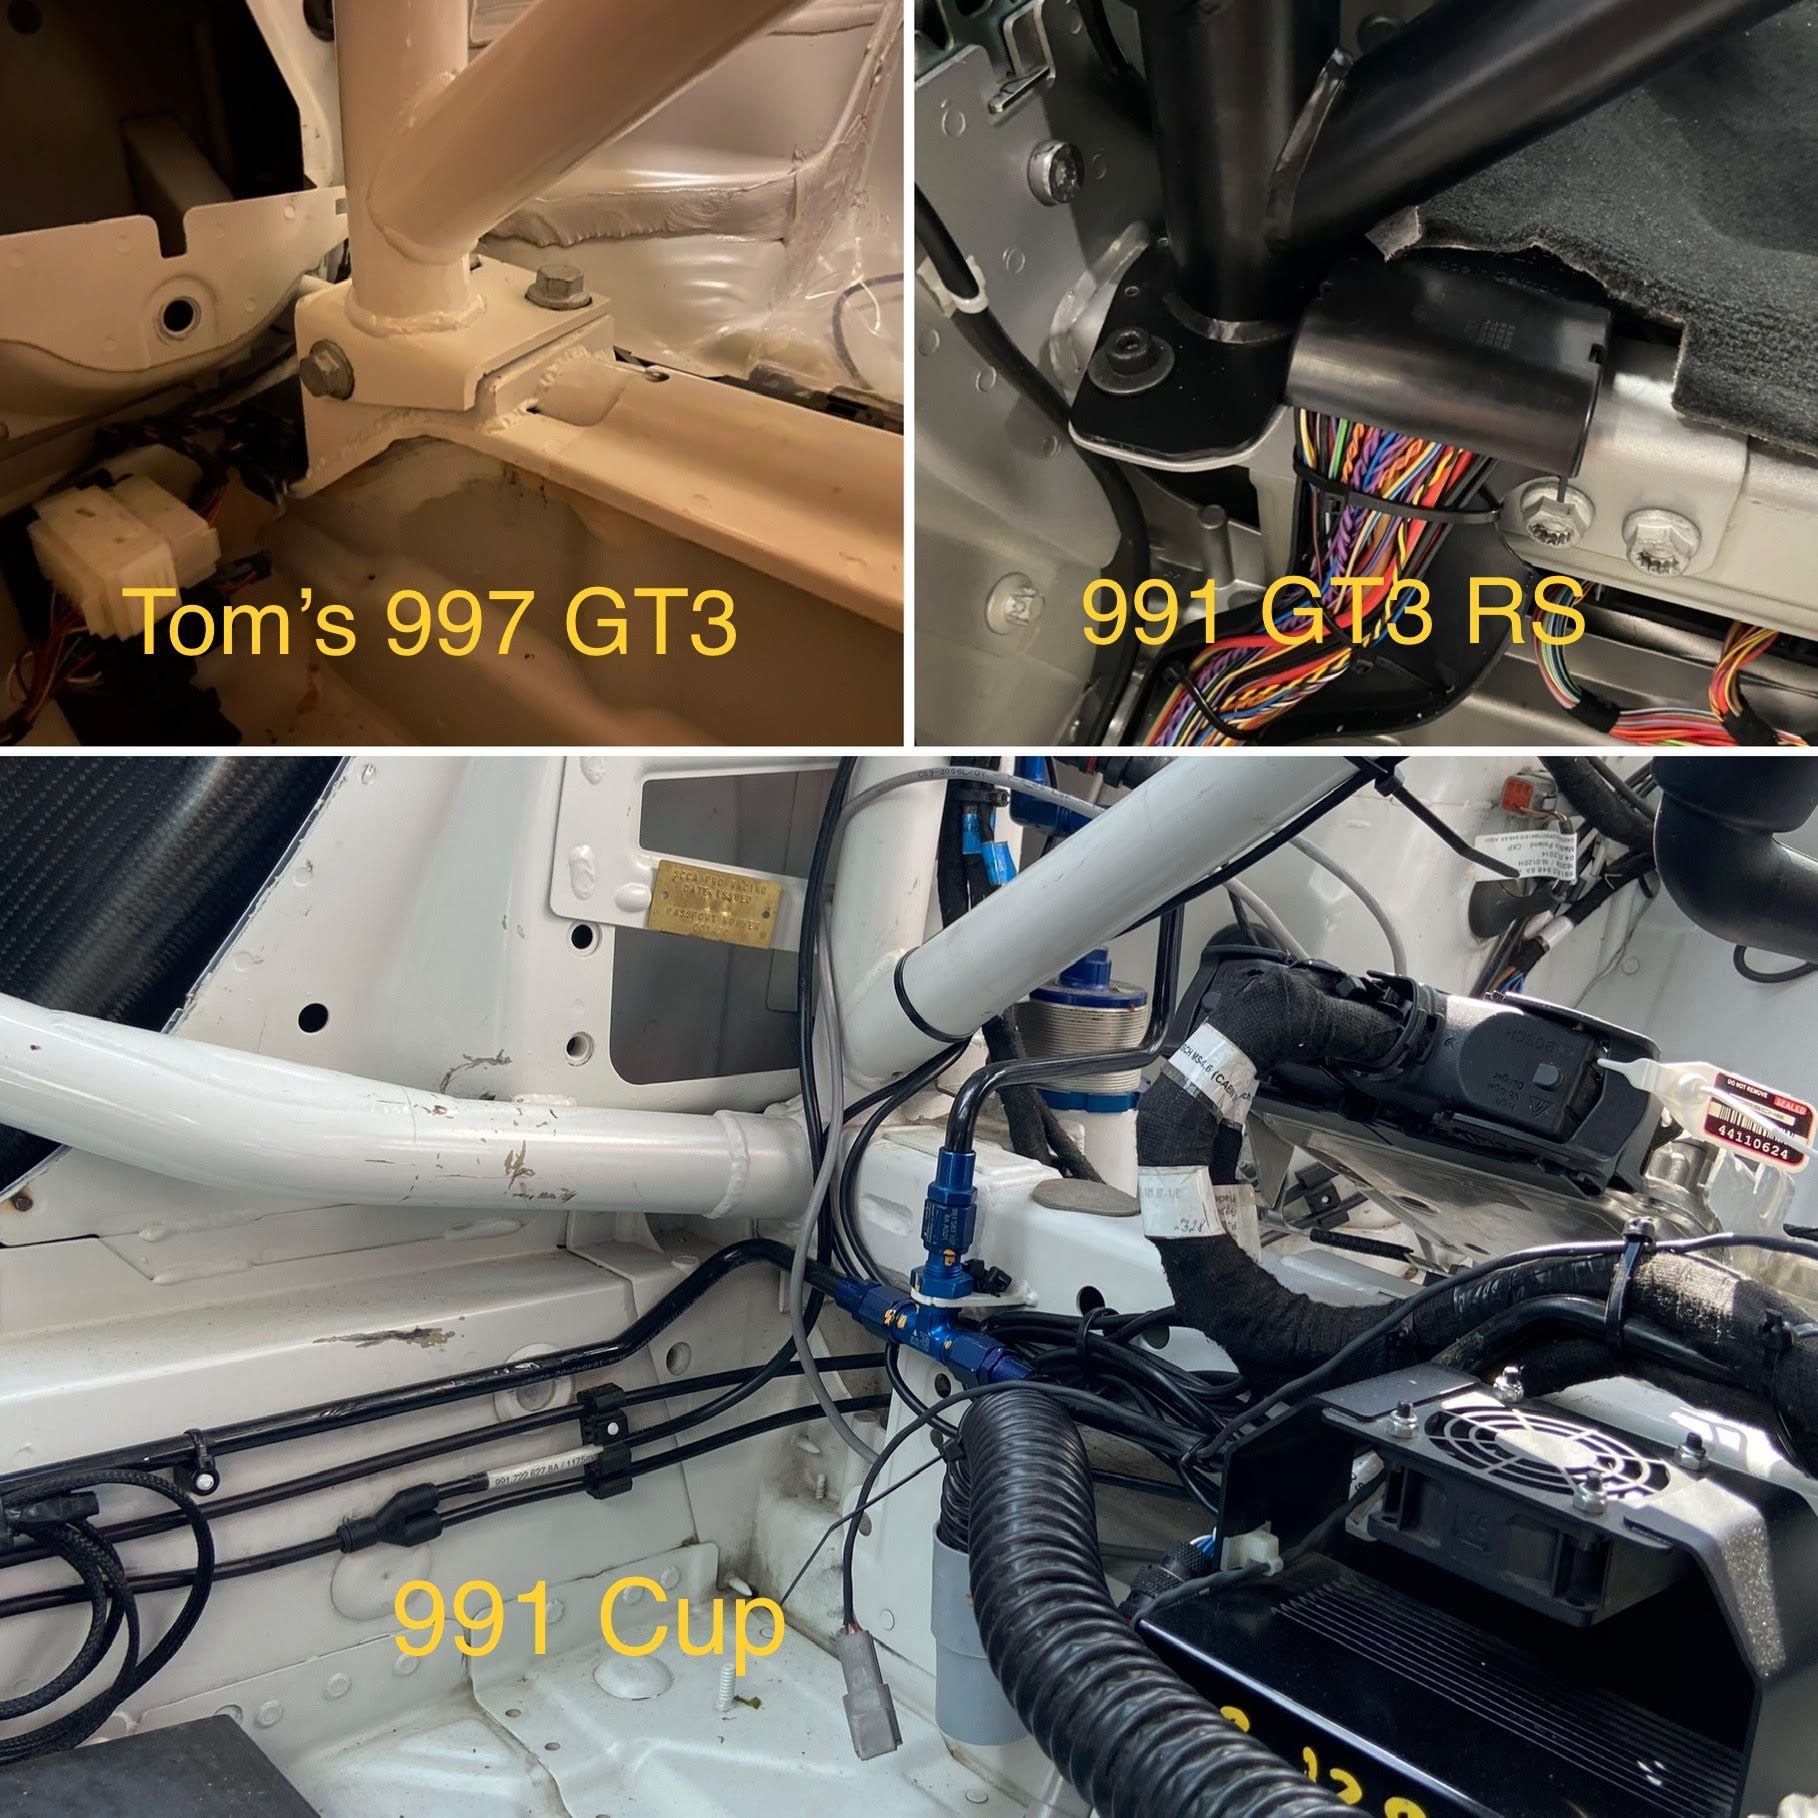
The OEM cage for 991 GT cars and 991 Cup both use the same load distribution point at the backbone of the car. So I do feel good about that for this mod.
Last edited by Tom@TPC Racing; 06-04-2020 at 12:21 PM.
Now that I had a day to cool off and reflect on the welding/installation, I have concluded that the base could have been either welded on to the car's structural tube area squarely with optimal contact, or welded on crooked to make better contact with the cage's RH foot plate. Its one or the other, not both. Unless I cut off the RH foot plate and re-welded it. I'm not doing that. I think I have chosen the better of the two.
I have also concluded that while the RH foot plate isn't seated to the base perfectly, having the base(the load distribution point) directly on the car's backbone is structurally to take compression load better than other main hoop designs that use single-plane floor plate on the car's thin sheet metal floor or using seat belt hole as load distribution point.. Ultimately, welding the main hoop in fully with multiple contact points to the car's B-pillar(like a Cup car) will be best. That's just too much commitment for me at this time. I bet if I put a piece of carpet around the RH foot plate I'll probably forget there's a small gap there.
The OEM cage for 991 GT cars and 991 Cup both use the same load distribution point at the backbone of the car. So I do feel good about that for this mod.
Tom,
That would bother me too. I would unbolt the cage and tape down a thin sheet of wax paper (the stuff used for cooking) on the tub at the attachment point of the roll cage. I would than sand the underside of the cage "foot" base to get it to bare metal. I would then mix up some 3M automotive structural adhesive (the stuff used to bond metal chassis panels) and spread an thick layer of it on the bottom of the cage feet. Then bolt the cage in place and let the excess ooze out (I would lightly oil the bolts to make sure any excess adhesive does not glue the bolts. After the epoxy sets hard (it sets rock hard in 24hrs) remove the cage and file down the excess from the cage base sanding it smooth and even with the base. You would then simply paint the bottom of the cage white to match the rest. The result will be that you will have a perfectly even contact area between the cage feet and the mounting point on the chassis. Personally, I would do that on both the left and right mounting point to get a perfect "match" of the mating surface of the cage to the body. Doing this will also minimize any creaking as the mating surfaces would be perfectly matched.
BTW, the 3M automotive impact resistant structural adhesive is amazing. That is what I was advised to use when installing the steel base plates to the floor of my car when installing the 997Clubsport cage. I was told welding the steel plate to the thin metal floor is actually not ideal as the welding will compromise the integrity of the thin sheet metal. Here is the adhesive. Its a 2 part product and you need a special gun with a mixing tip to mix it. Any high end automotive body shop will have this or you can look it up on line. I borrowed the gun from a friend at my local body shop as purchasing it made no sense as they are about $400.
Tom,
That would bother me too. I would unbolt the cage and tape down a thin sheet of wax paper (the stuff used for cooking) on the tub at the attachment point of the roll cage. I would than sand the underside of the cage "foot" base to get it to bare metal. I would then mix up some 3M automotive structural adhesive (the stuff used to bond metal chassis panels) and spread it thick layer of it on the bottom of the cage feet. Then bolt the cage in place and let the excess ooze out (I would lightly oil the bolts to make sure any excess adhesive does not glue the bolts. After the epoxy sets hard (it sets rock hard in 24hrs) remove the cage and file down the excess from the cage base sanding it smooth and even with the base. You would then simply paint the bottom of the cage white to match the rest. The result will be that you will have a perfectly even contact are between the cage feet and the mounting point on the chassis. In reality, you could do that on both the left and right mounting point to get a perfect "match" of the mating surface of the cage to the body.
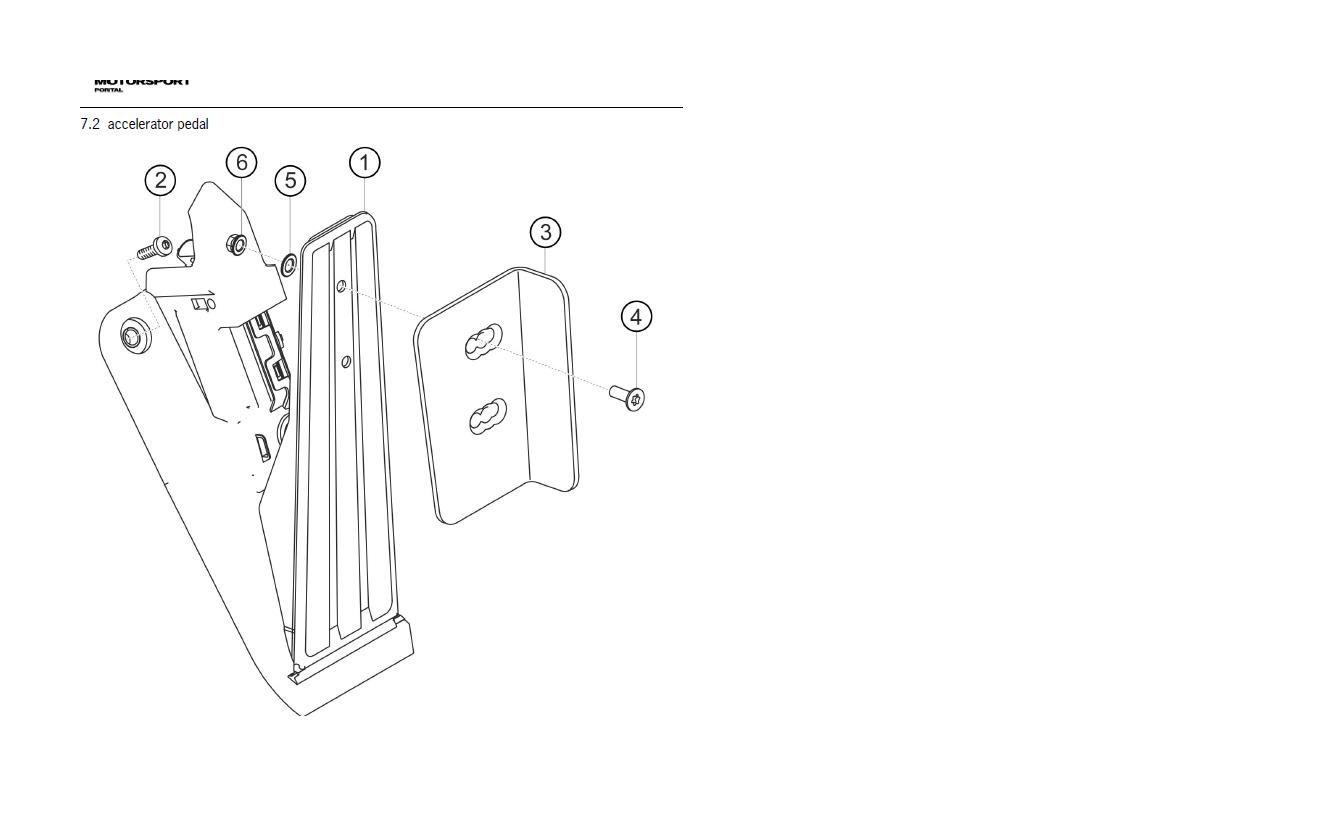
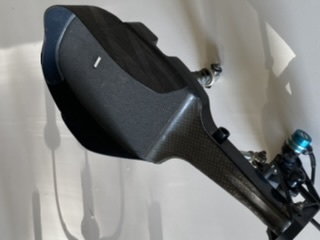
Here's one mod I did without having the car at the shop- 991 Cup gas pedal guard!
Below image shows the pedal guard and next to it is a 991 Cup e-gas pedal assembly(I took it out of Cup car for measurement). I actually bought the pedal guard 6 years ago when the 991 Cup cars first came out as I was completely blown away by how the 991 Cup's evolution over its predecessor. So why haven't I put this pedal guard on for 6 years? Its because the outside flap of the guard won't clear the carpeting. Since I am now converting the car to my version of a Clubsport it is possible to install the pedal guard.
The e-gas assembly is different between a 997 and 991 so measurement and adjustment are necessary.
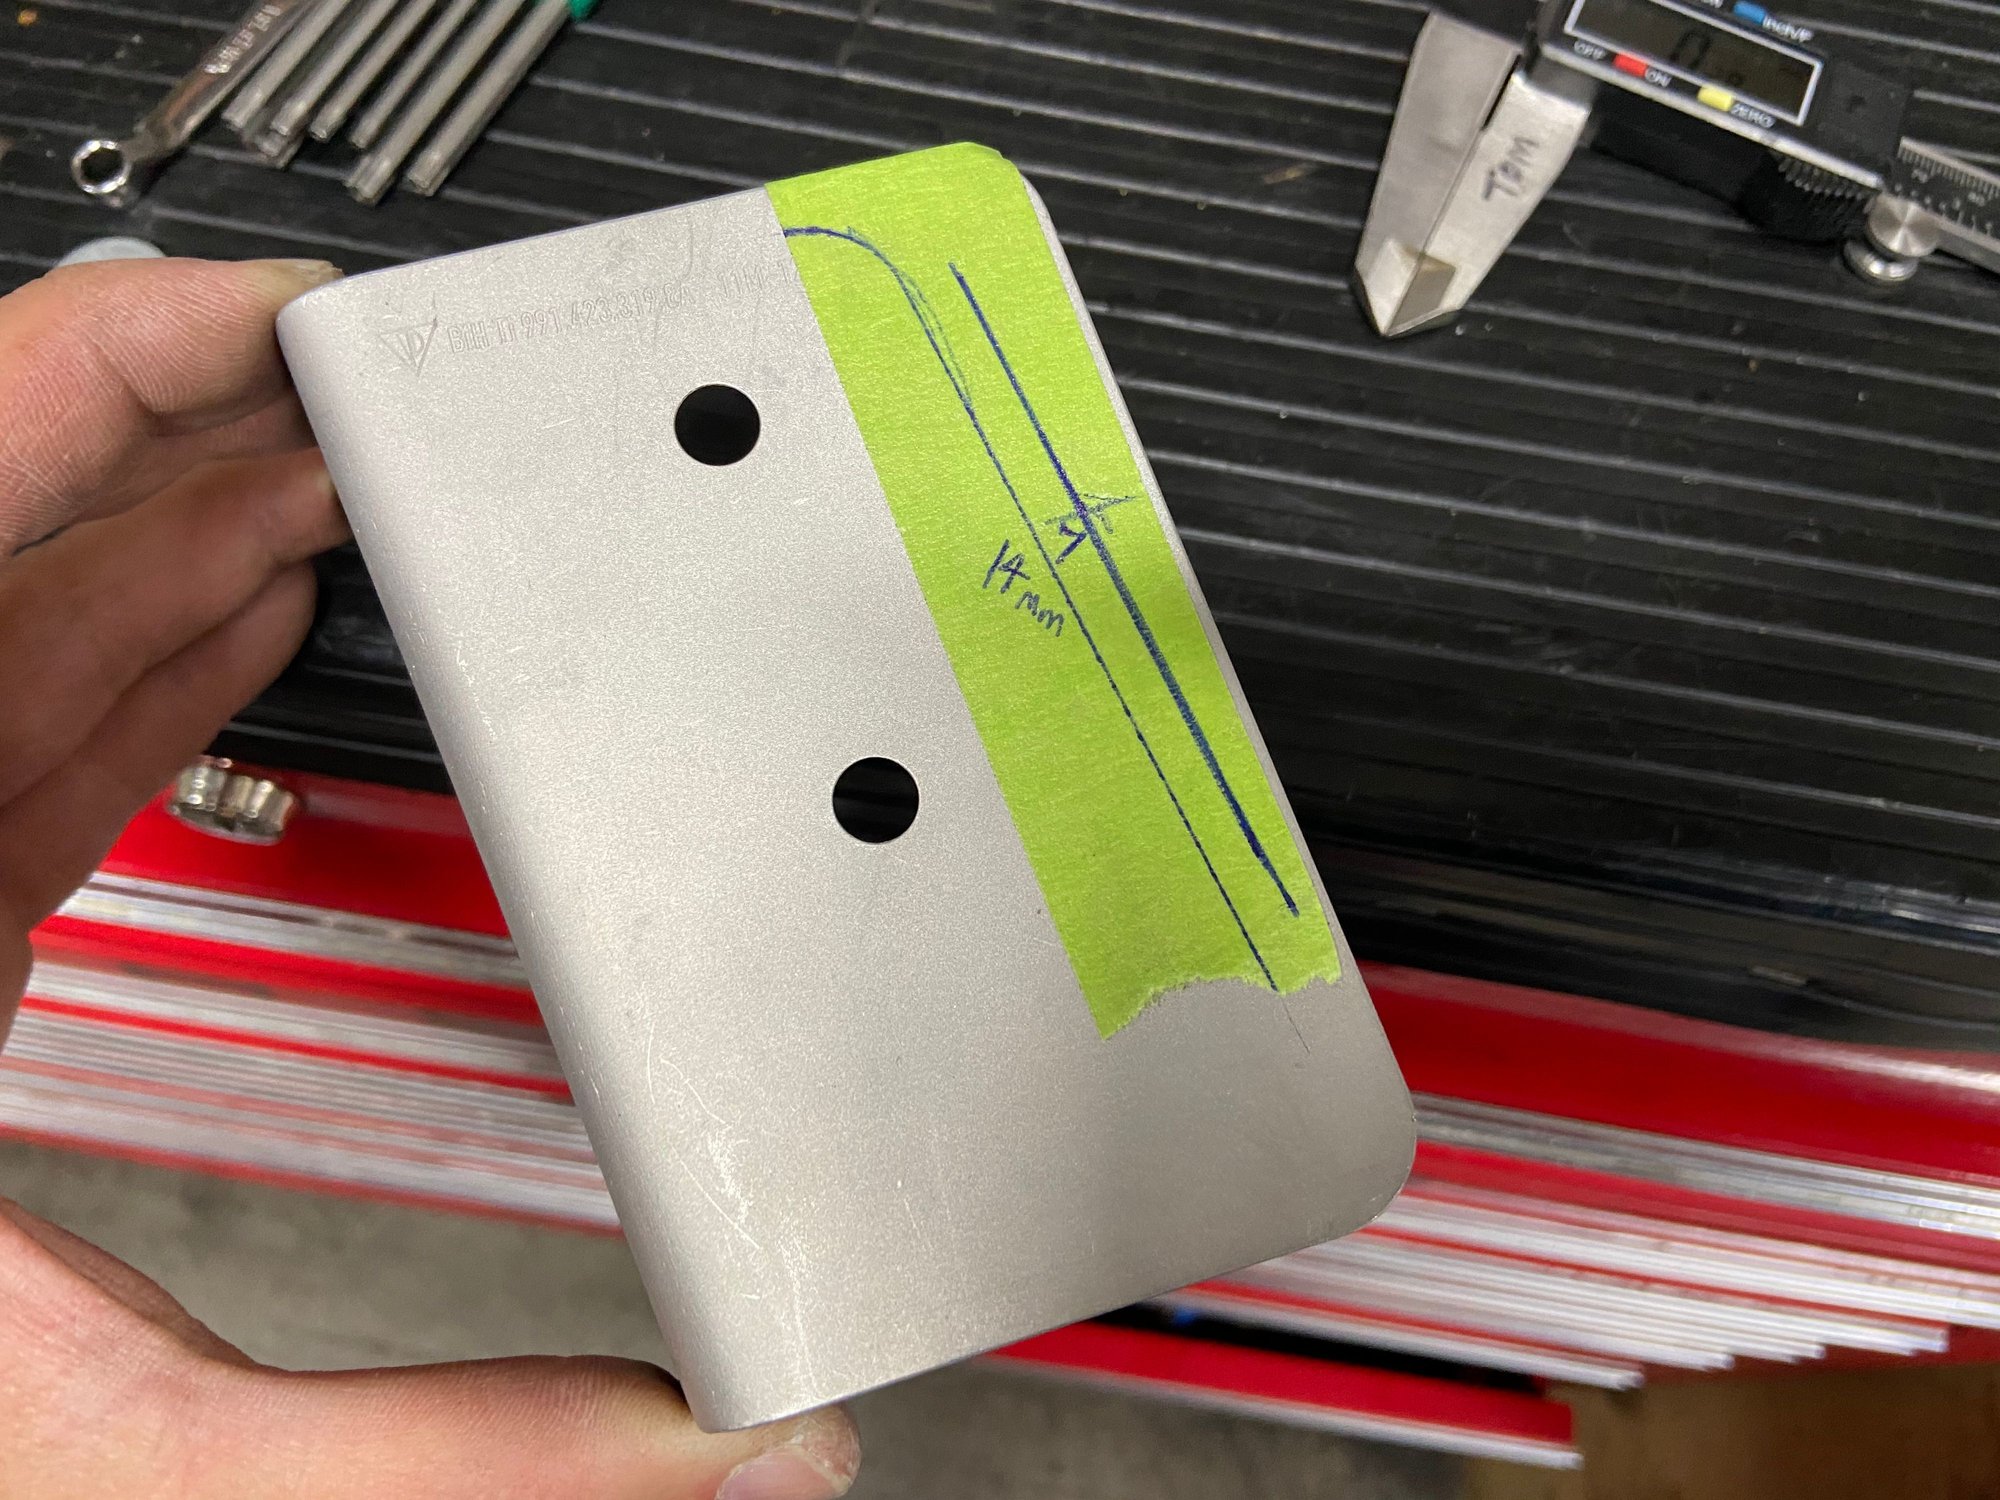
BTW, the pedal guard is suppose to have lateral adjustment holes according to the parts catalog image, but it doesn't. Can't always trust these guys...
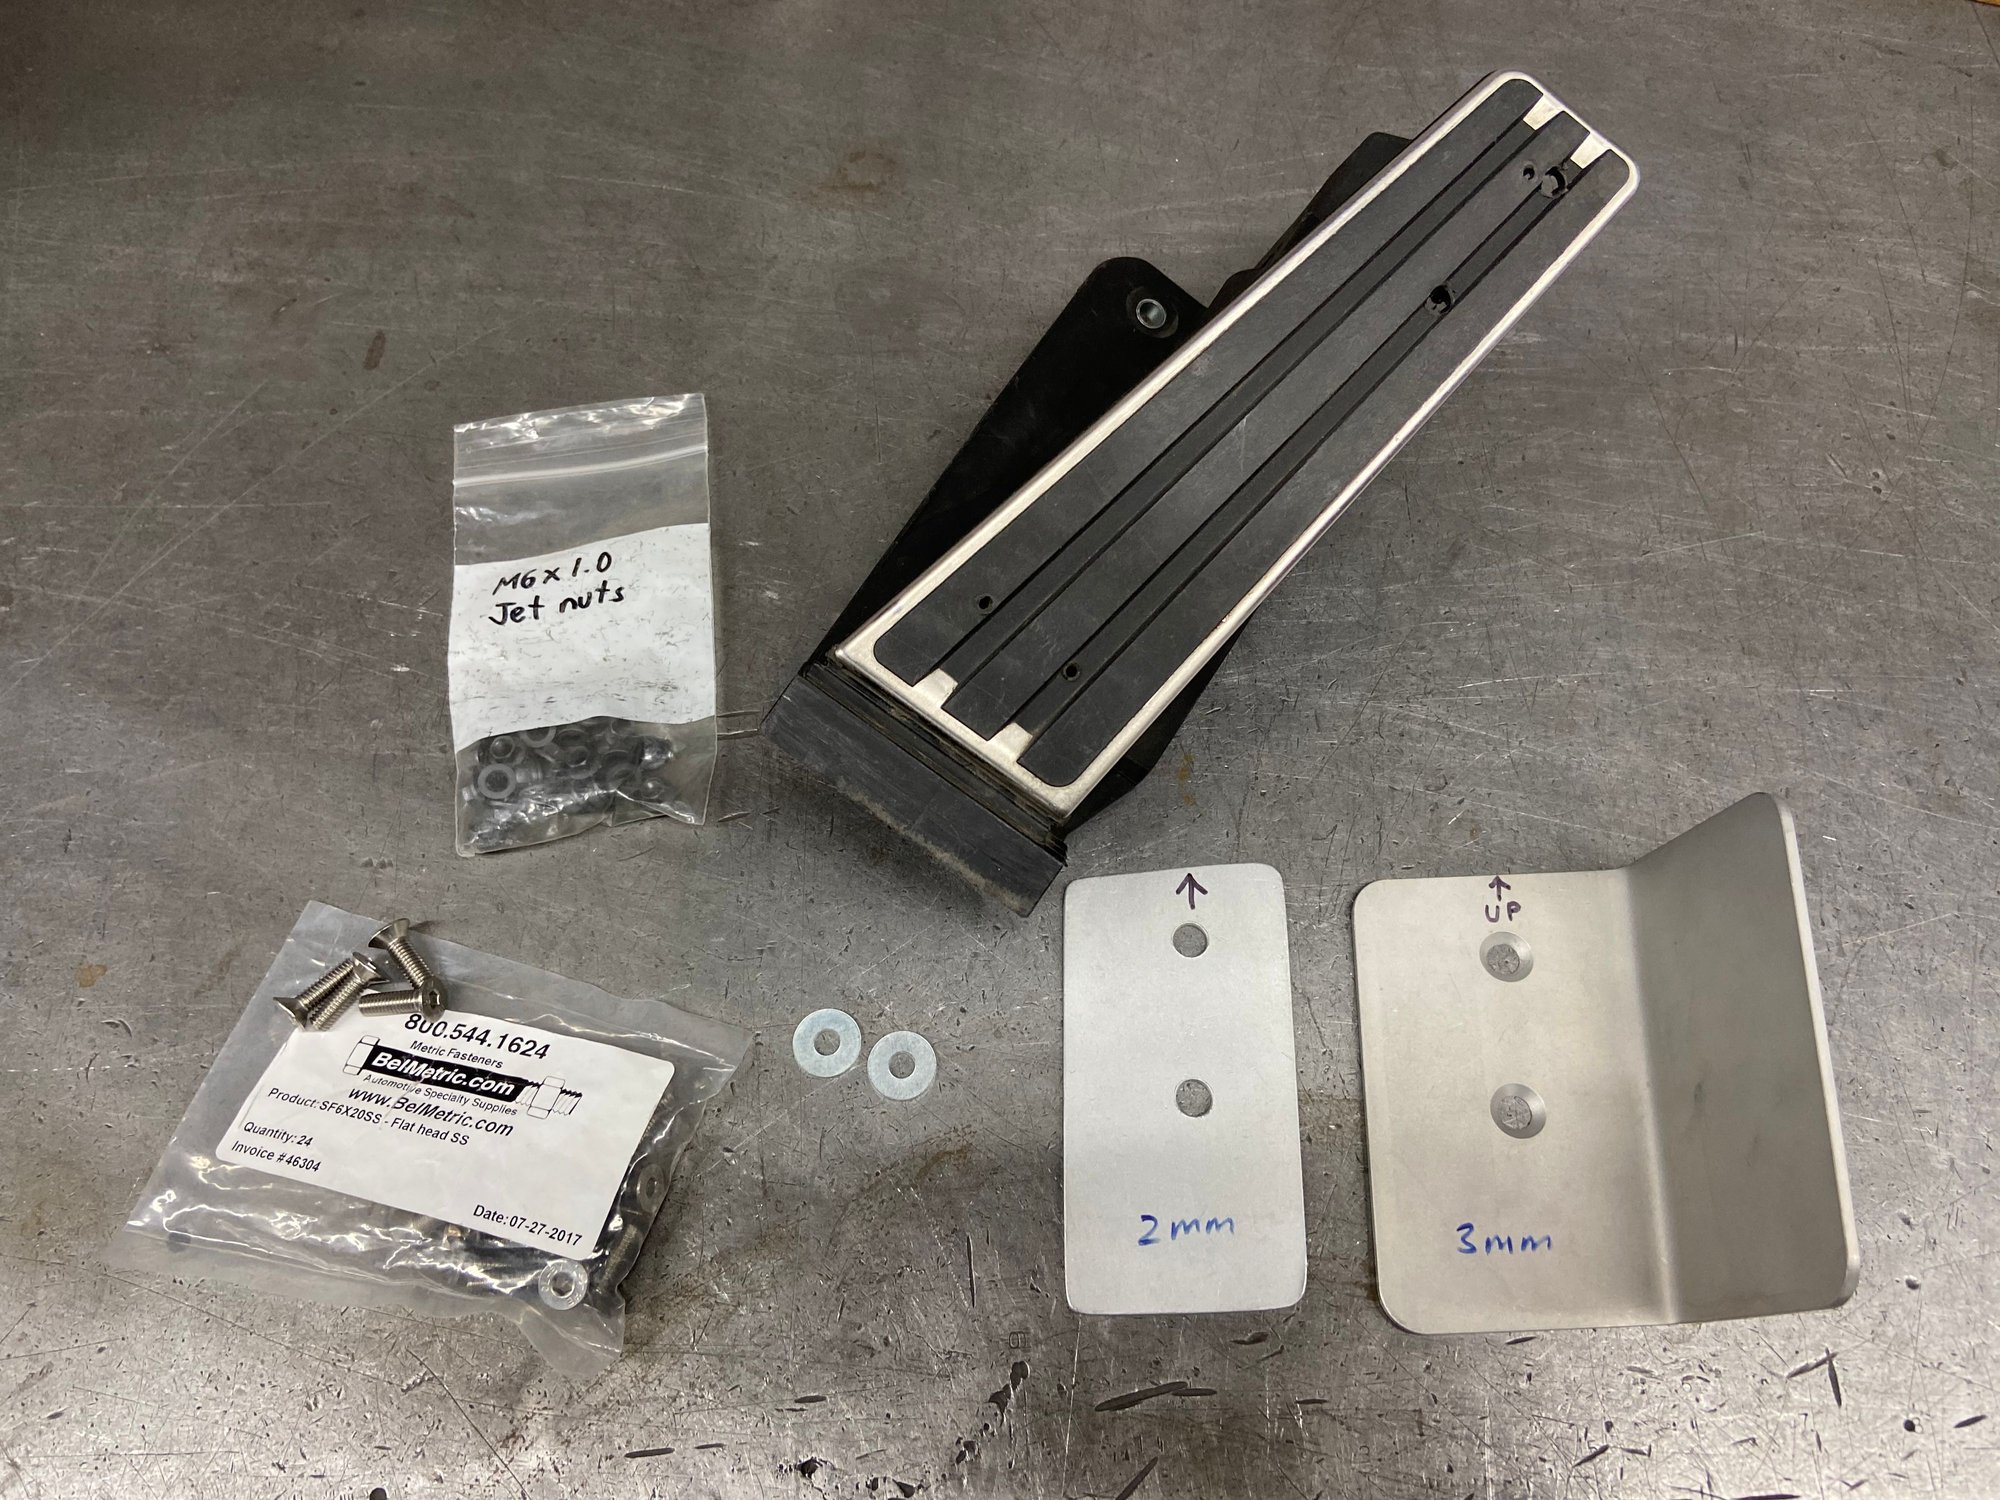
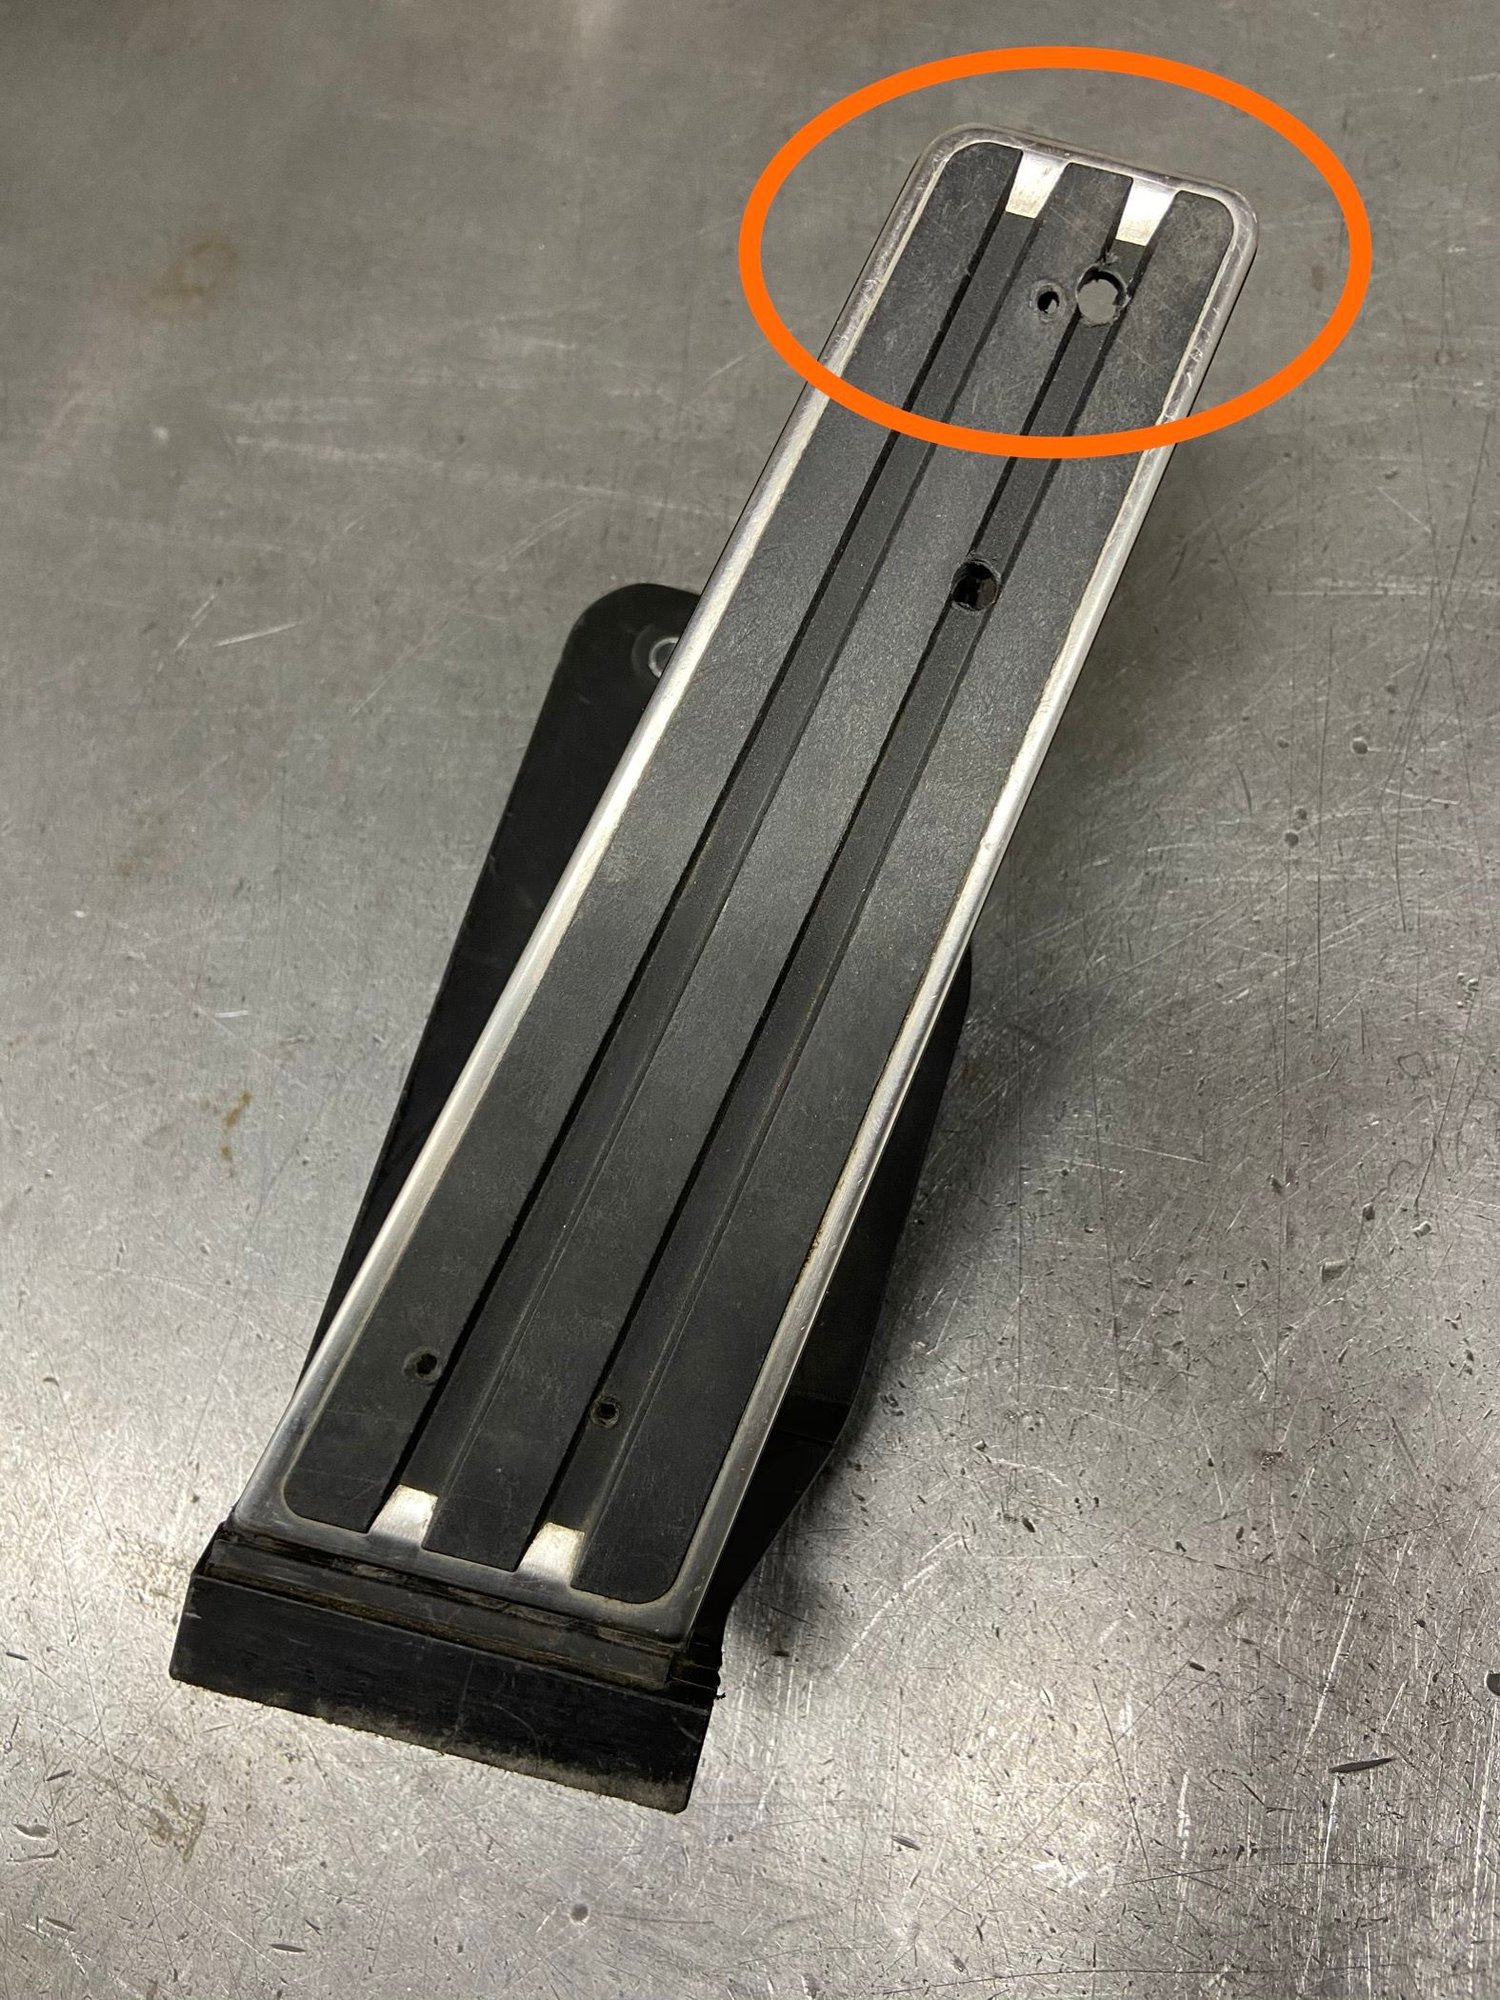
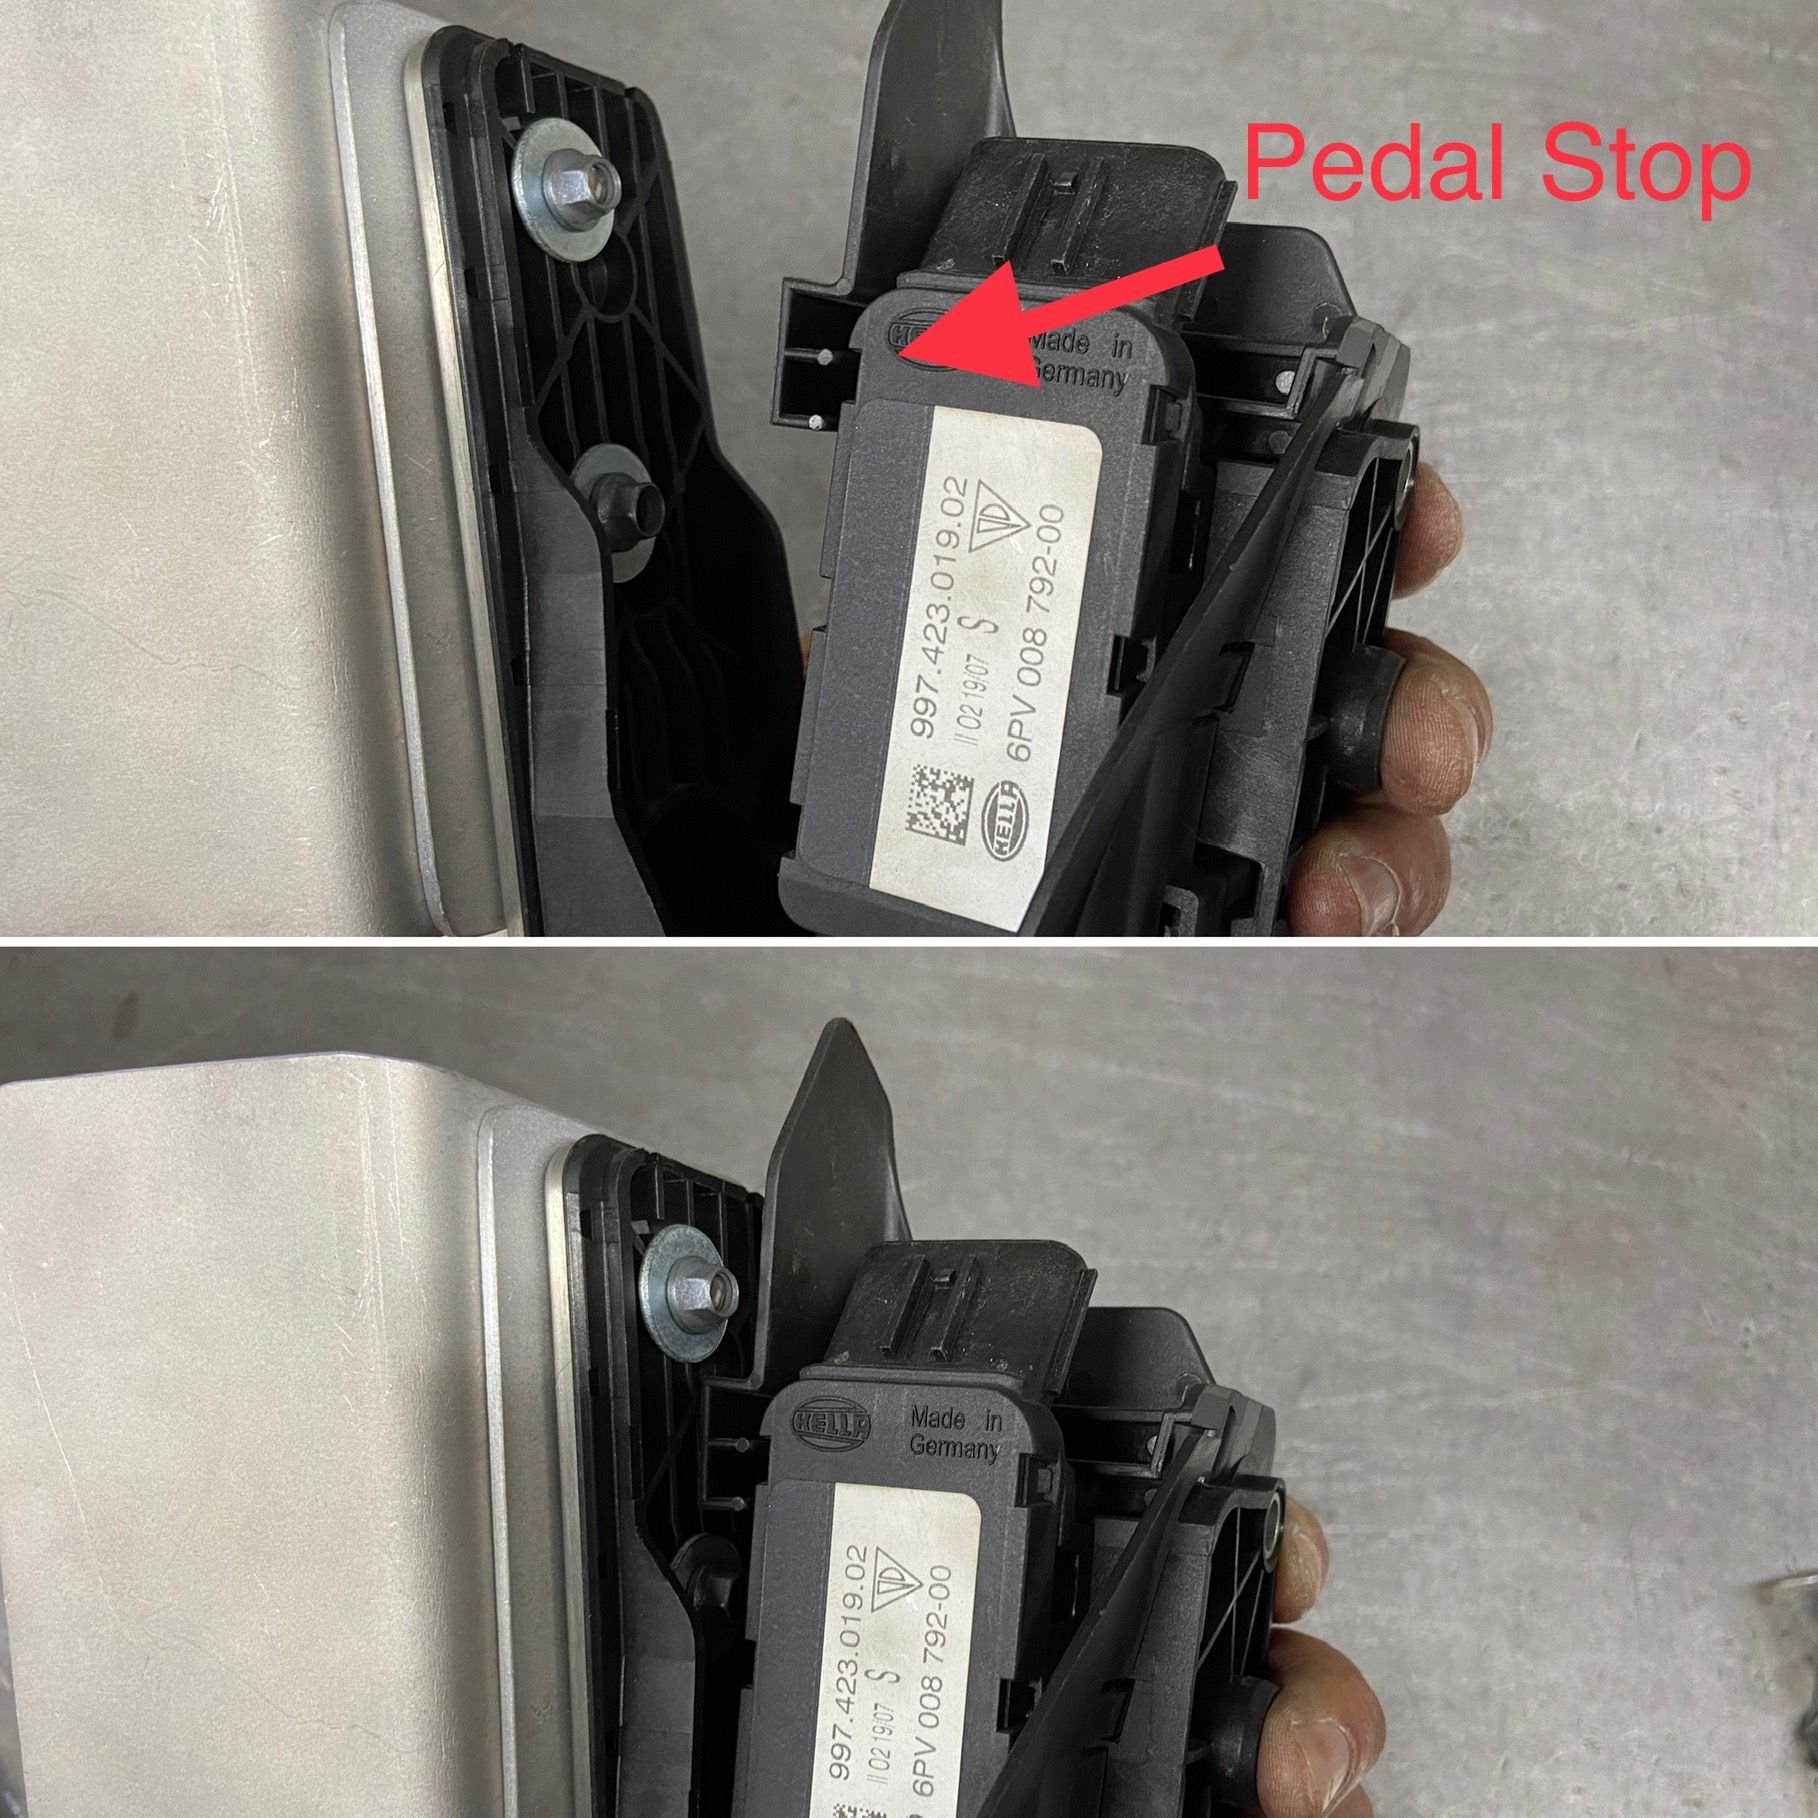
Here's the e-gas pedal assembly from my 997. Look closer and you'll see the 3 small holes drilled on the pedal face for a pedal cover by the car owner before me. Fortunately for the ideal position of the 991 Cup pedal guard the holes are just far enough apart. I took this opportunity to raise the pedal height by 5mm(that's 3mm from the thickness of the pedal guard + a 2mm shim I made) since I've always felt the rotational movement of my ankle to feel a little bit unnatural when blipping the gas. With the pedal raised I have to retrain my muscle memory to avoid over rev. I can take out the shim or add shim to "tune" the blip action. I bought the bag of M6 Jet Nuts 15 years ago for building track bikes, they're hard to find, glad I hung on to them and put them to good use now.
Here's a close up of the holes. The bigger holes are for the pedal guard.
One thing I had to make sure of is the fasteners won't interfere with the pedal stop. Otherwise no WOT. Yes, I know the M6x20 countersunk bolts are too short. Have M6x25's on order.
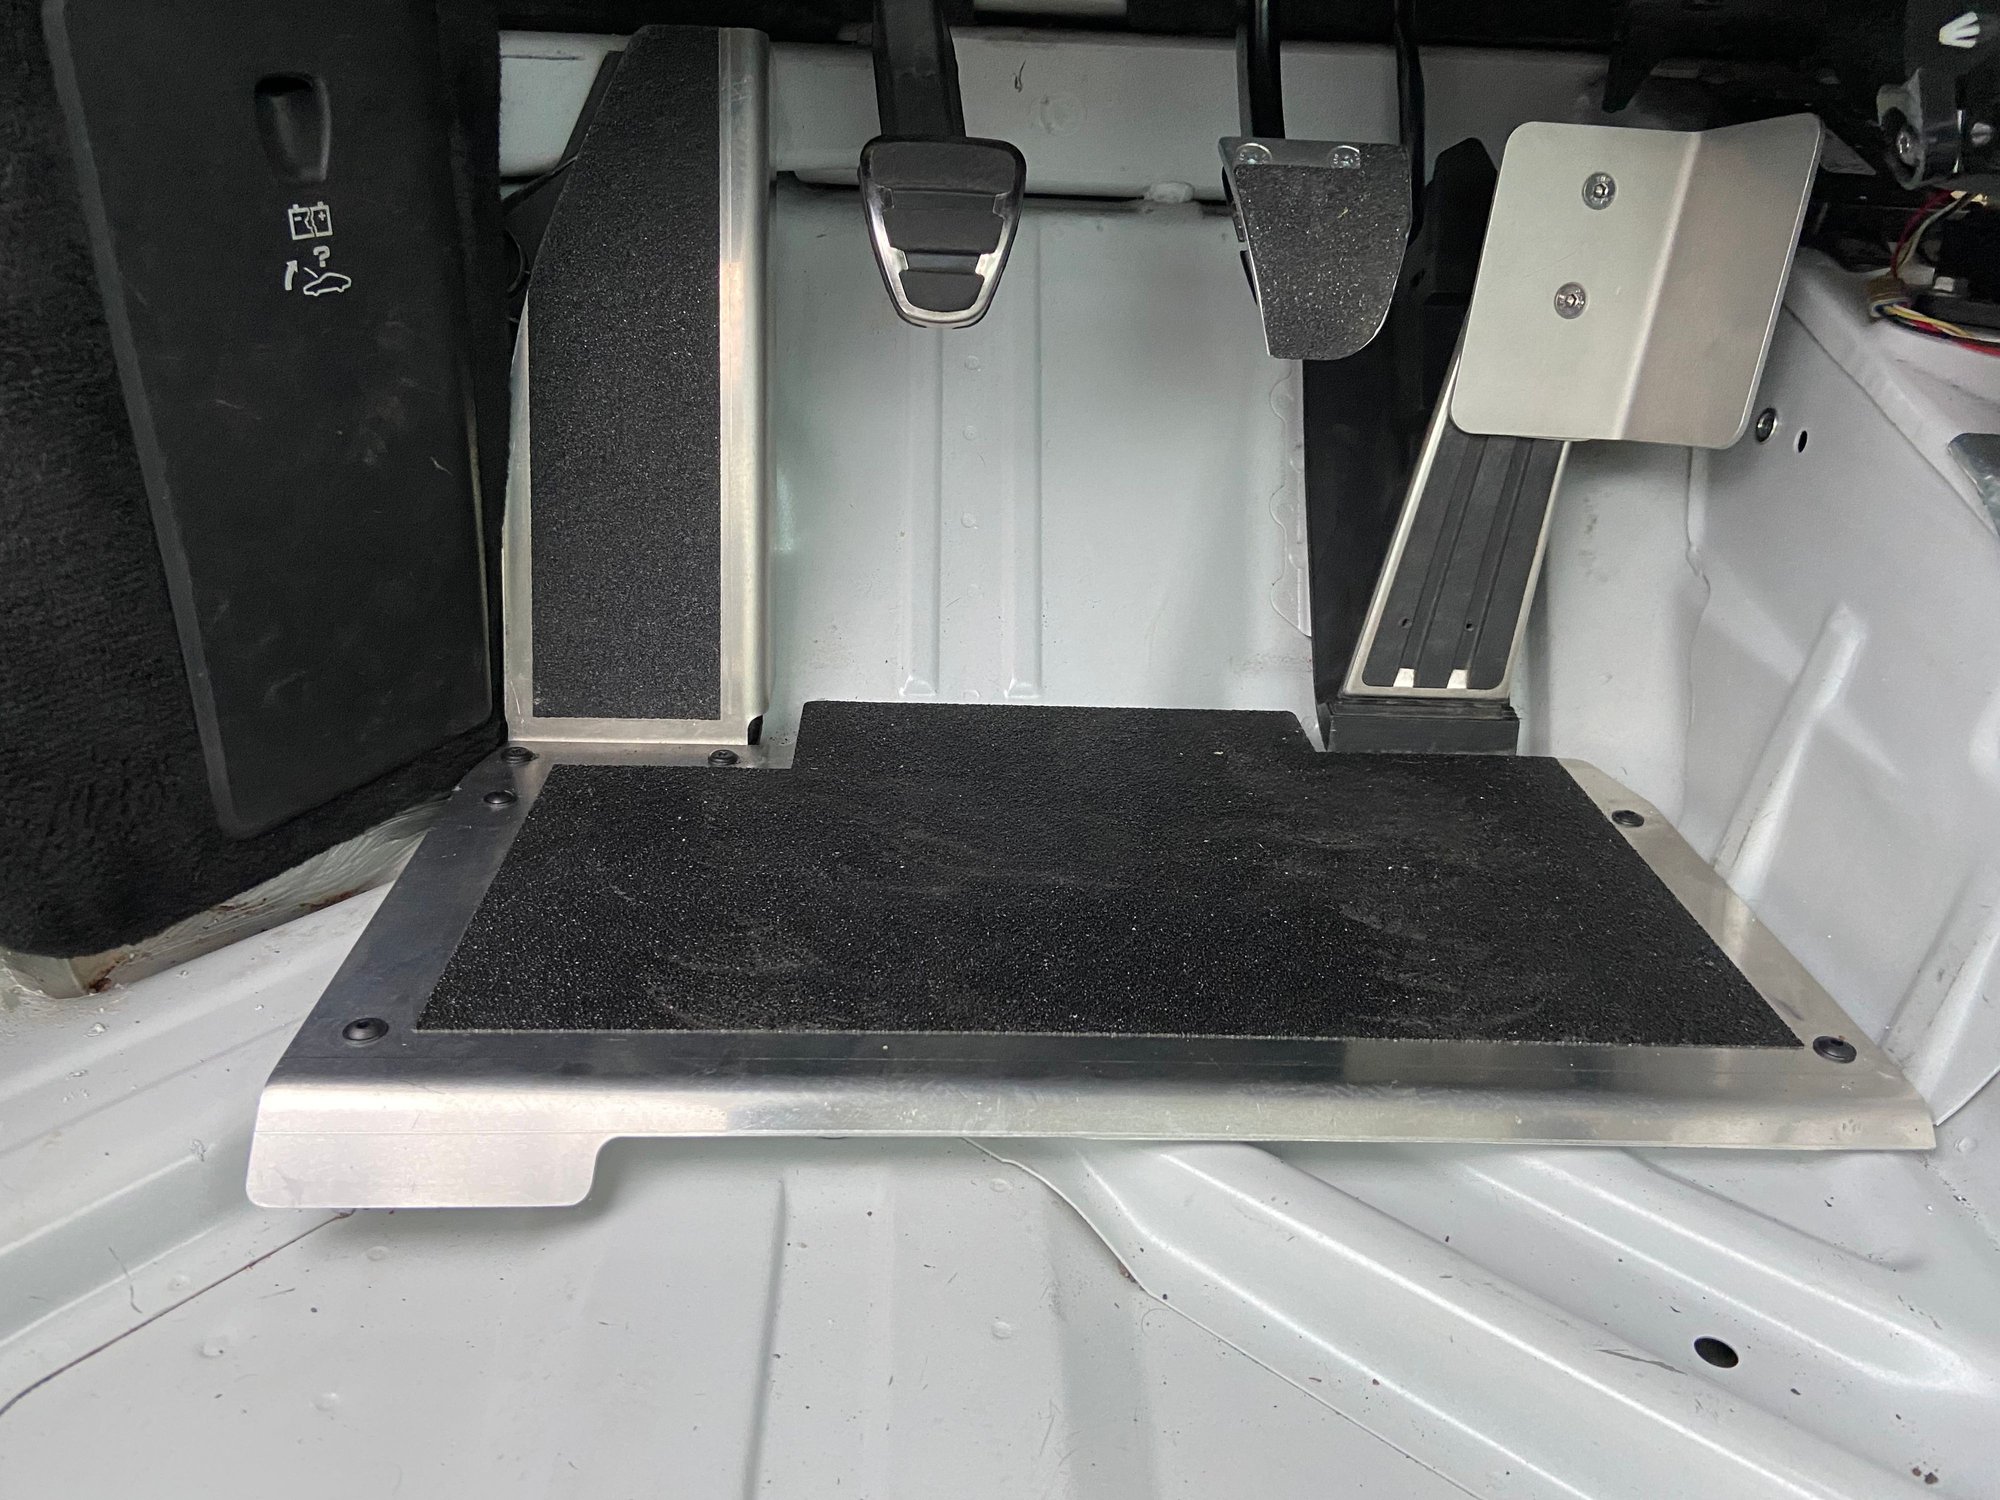
Here it is, my 991 Cup-inspired Clubsport foot controls. I know this mod doesn't add more horsepower nor increase cornering grip but I am super excited for rock steady feel from the foot controls to potentially make my braking and blipping more consistent and to just enhance my driving experience.
PS- I put the pedal assembly on at my house and went for a short drive, man, the foot controls feel PHENOMENAL. And that 5mm raise make the blips much more sensitive.
I'd have to imagine it gives more confidence to the driver that you will always be in the right position when moving foot from brake to gas pedal by butting up to to the side guard


 06-03-2020, 02:49 PM