When you click on links to various merchants on this site and make a purchase, this can result in this site earning a commission. Affiliate programs and affiliations include, but are not limited to, the eBay Partner Network.
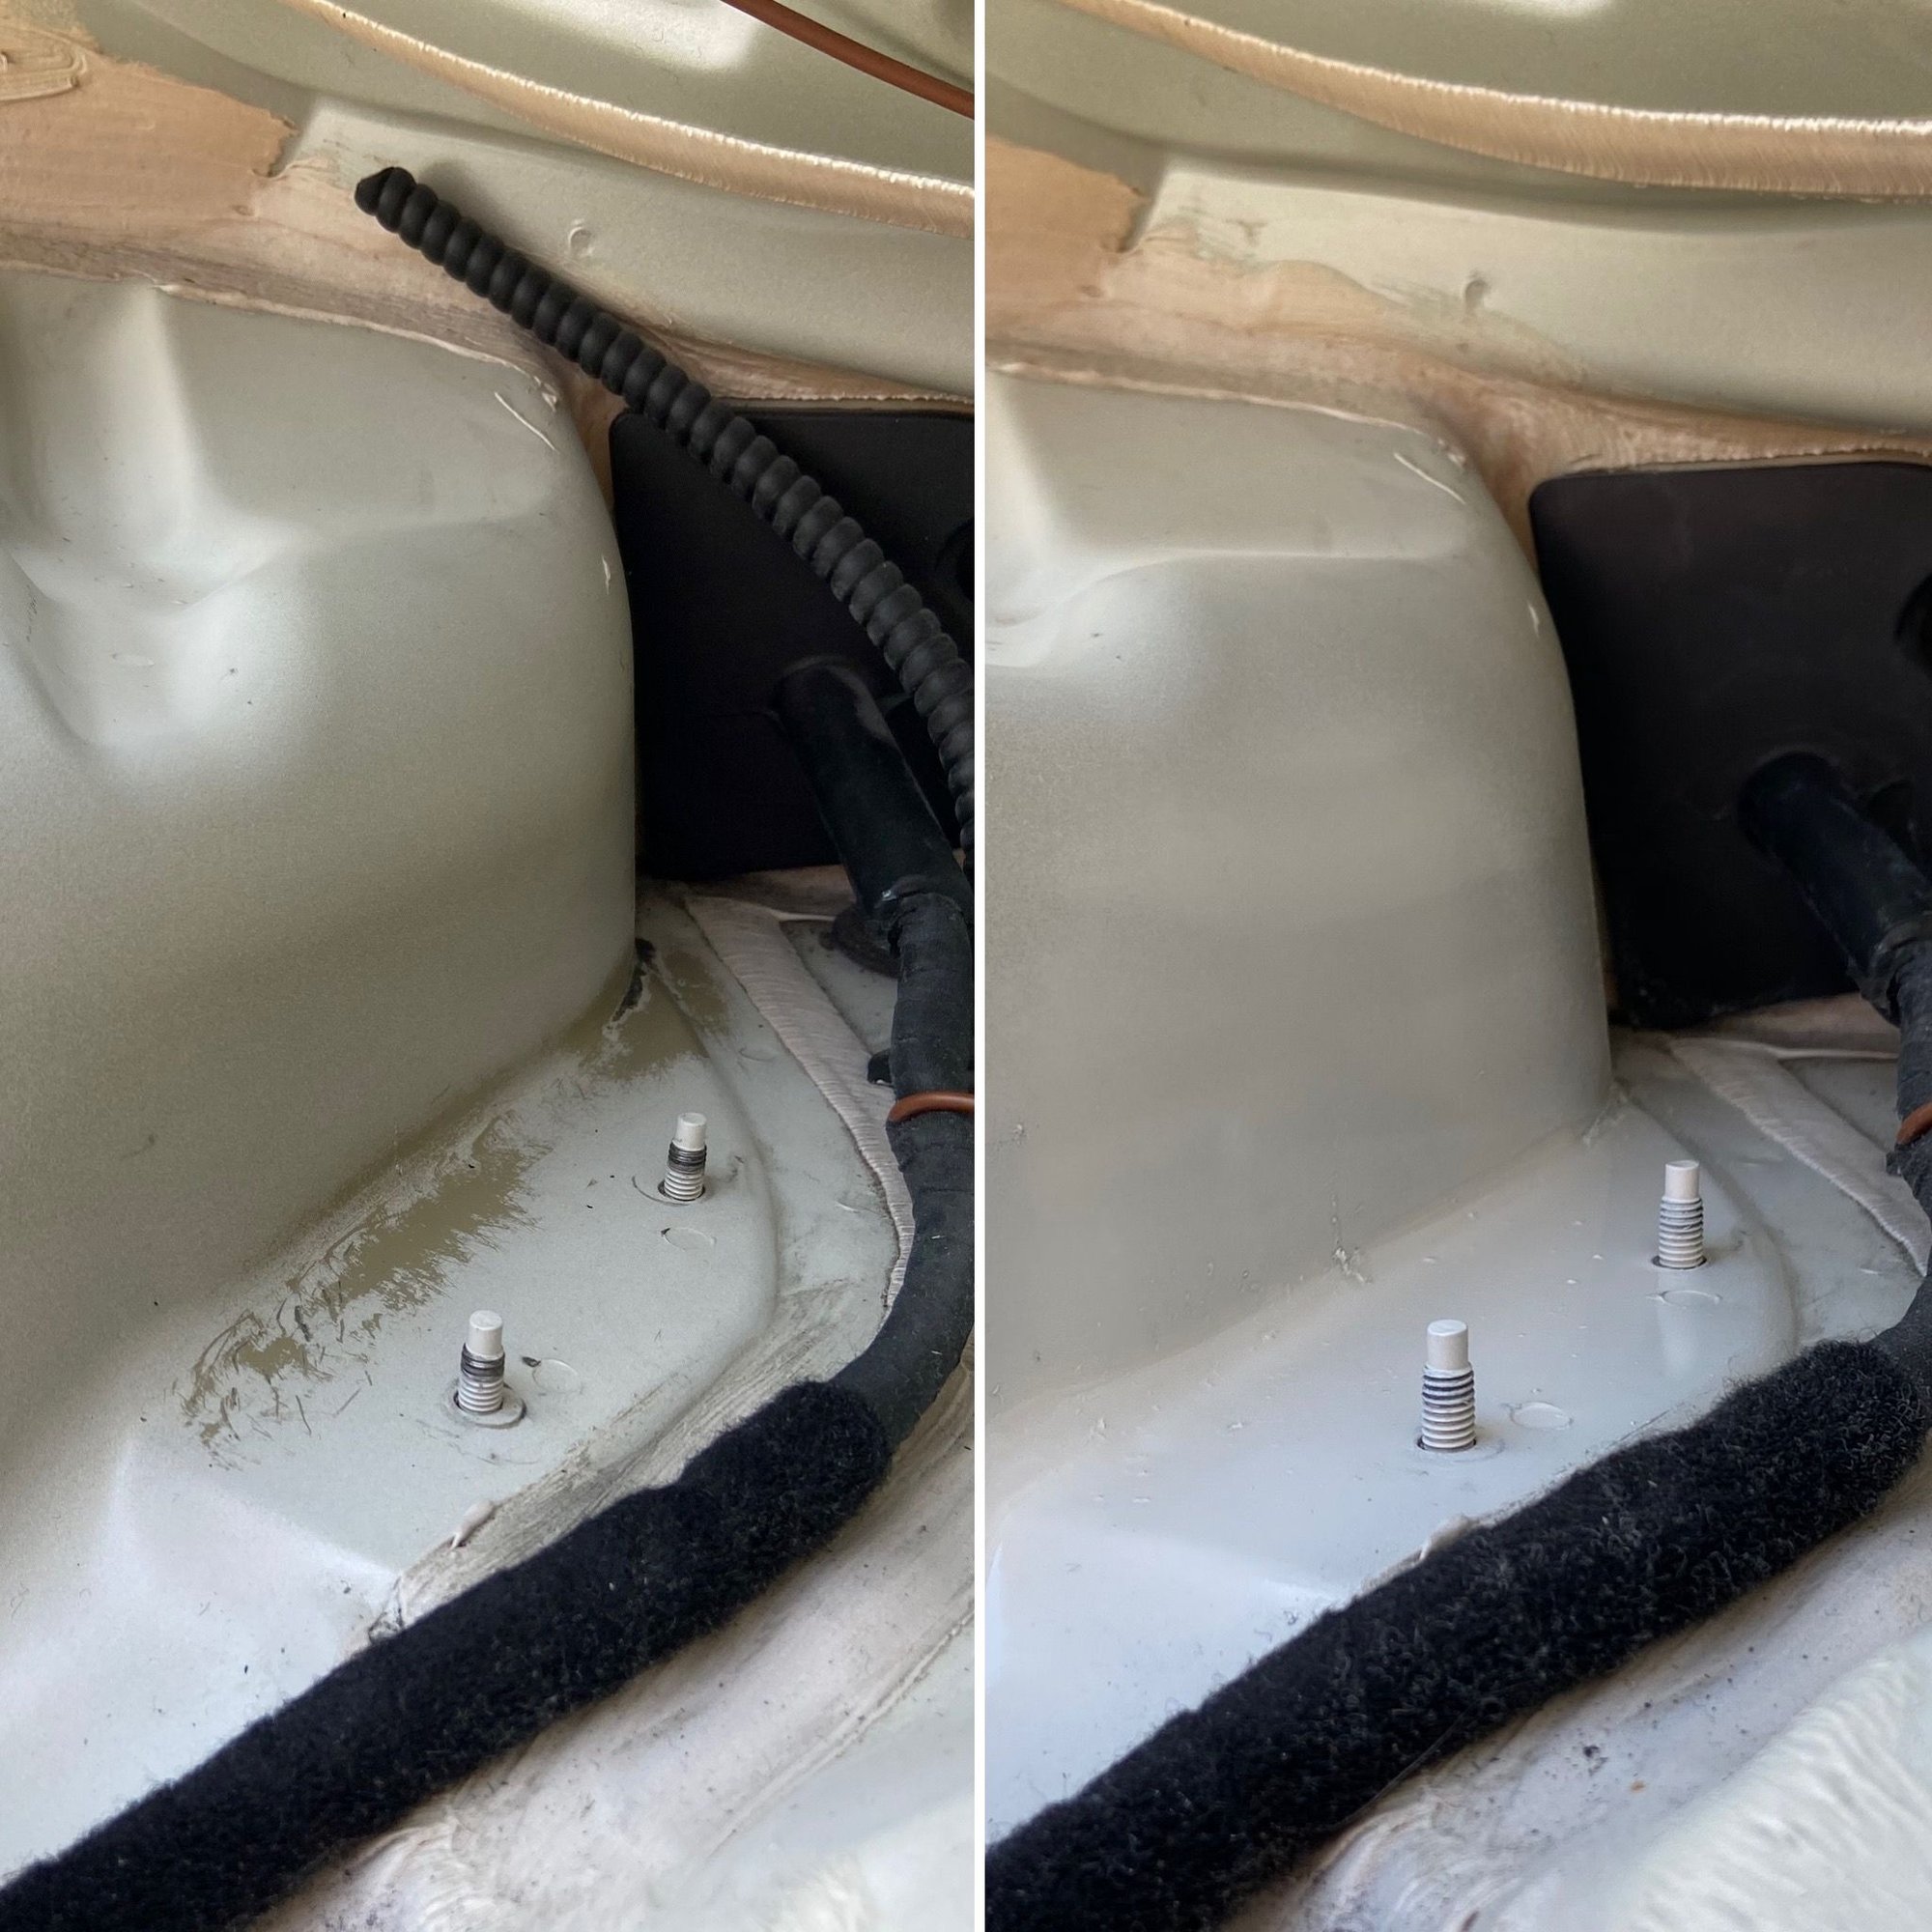
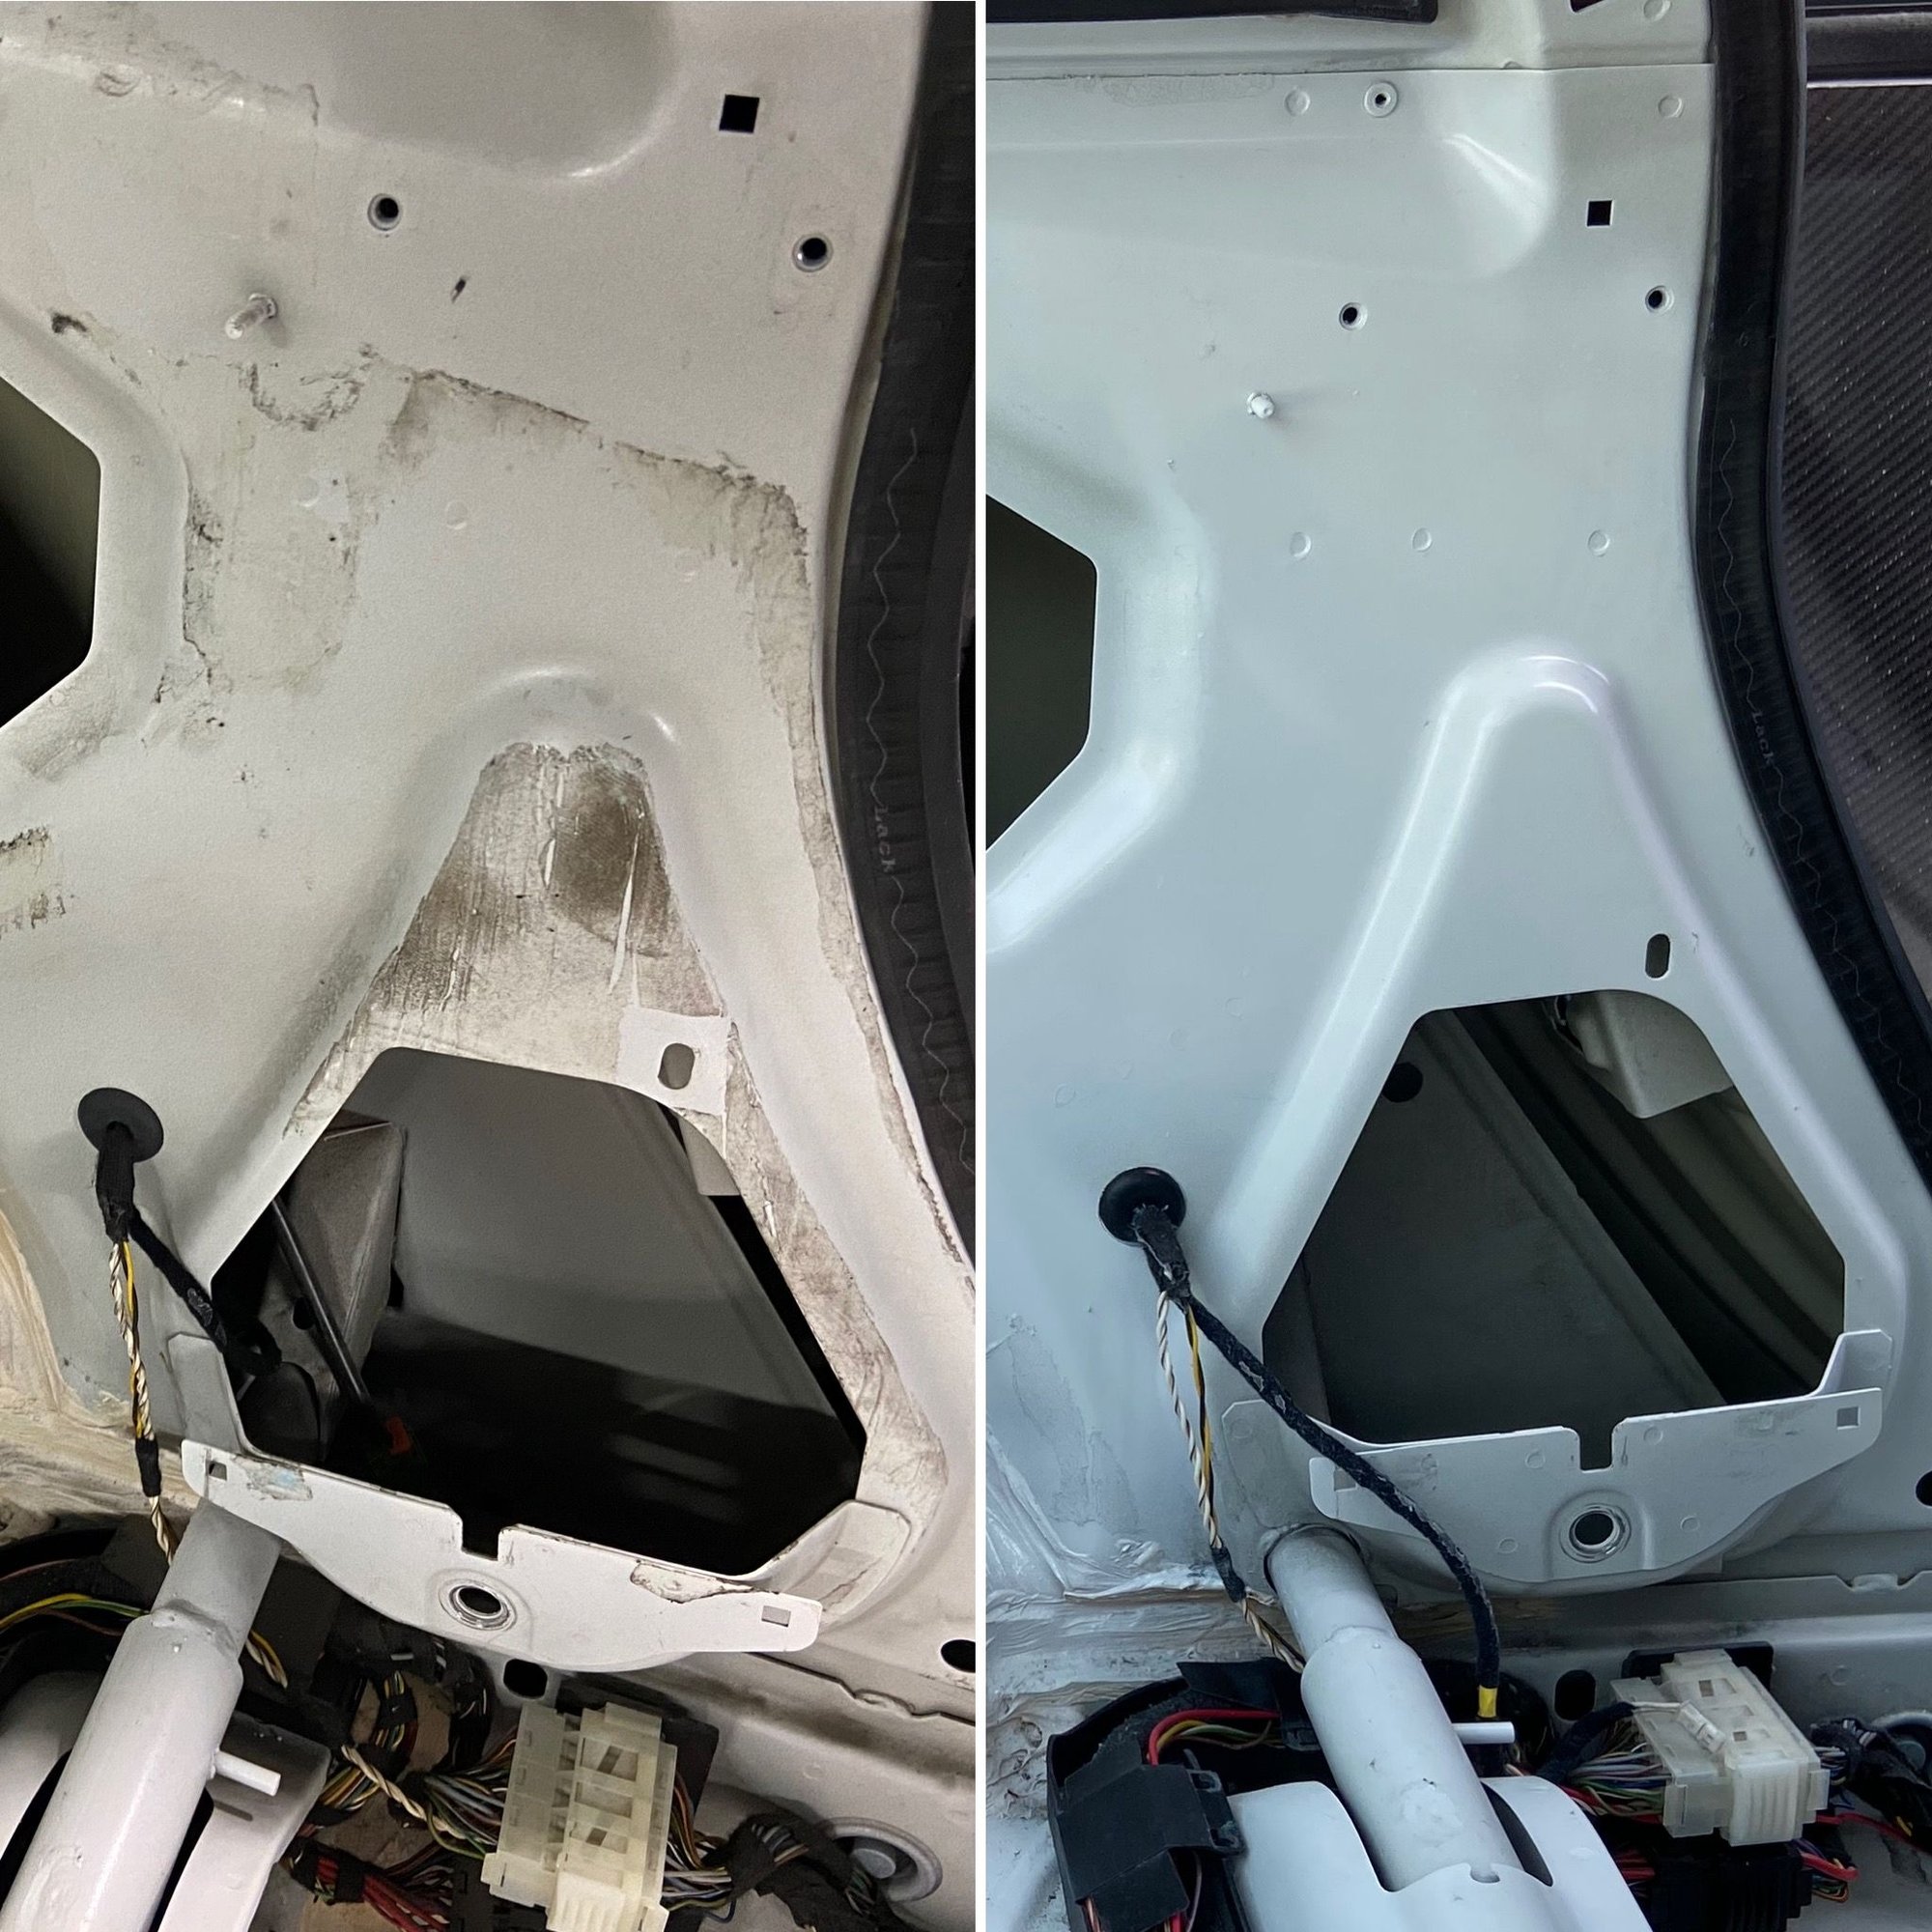
I say this again, the factory residual glue is nasty stuff to clean up! I used a heat gun, plastic scraper, plastic bristle brush, and multiple rounds of chemical. There were small areas of collateral paint removal where the factory paint layer was very thin. Had to refinish these areas. Below are the before/after images.
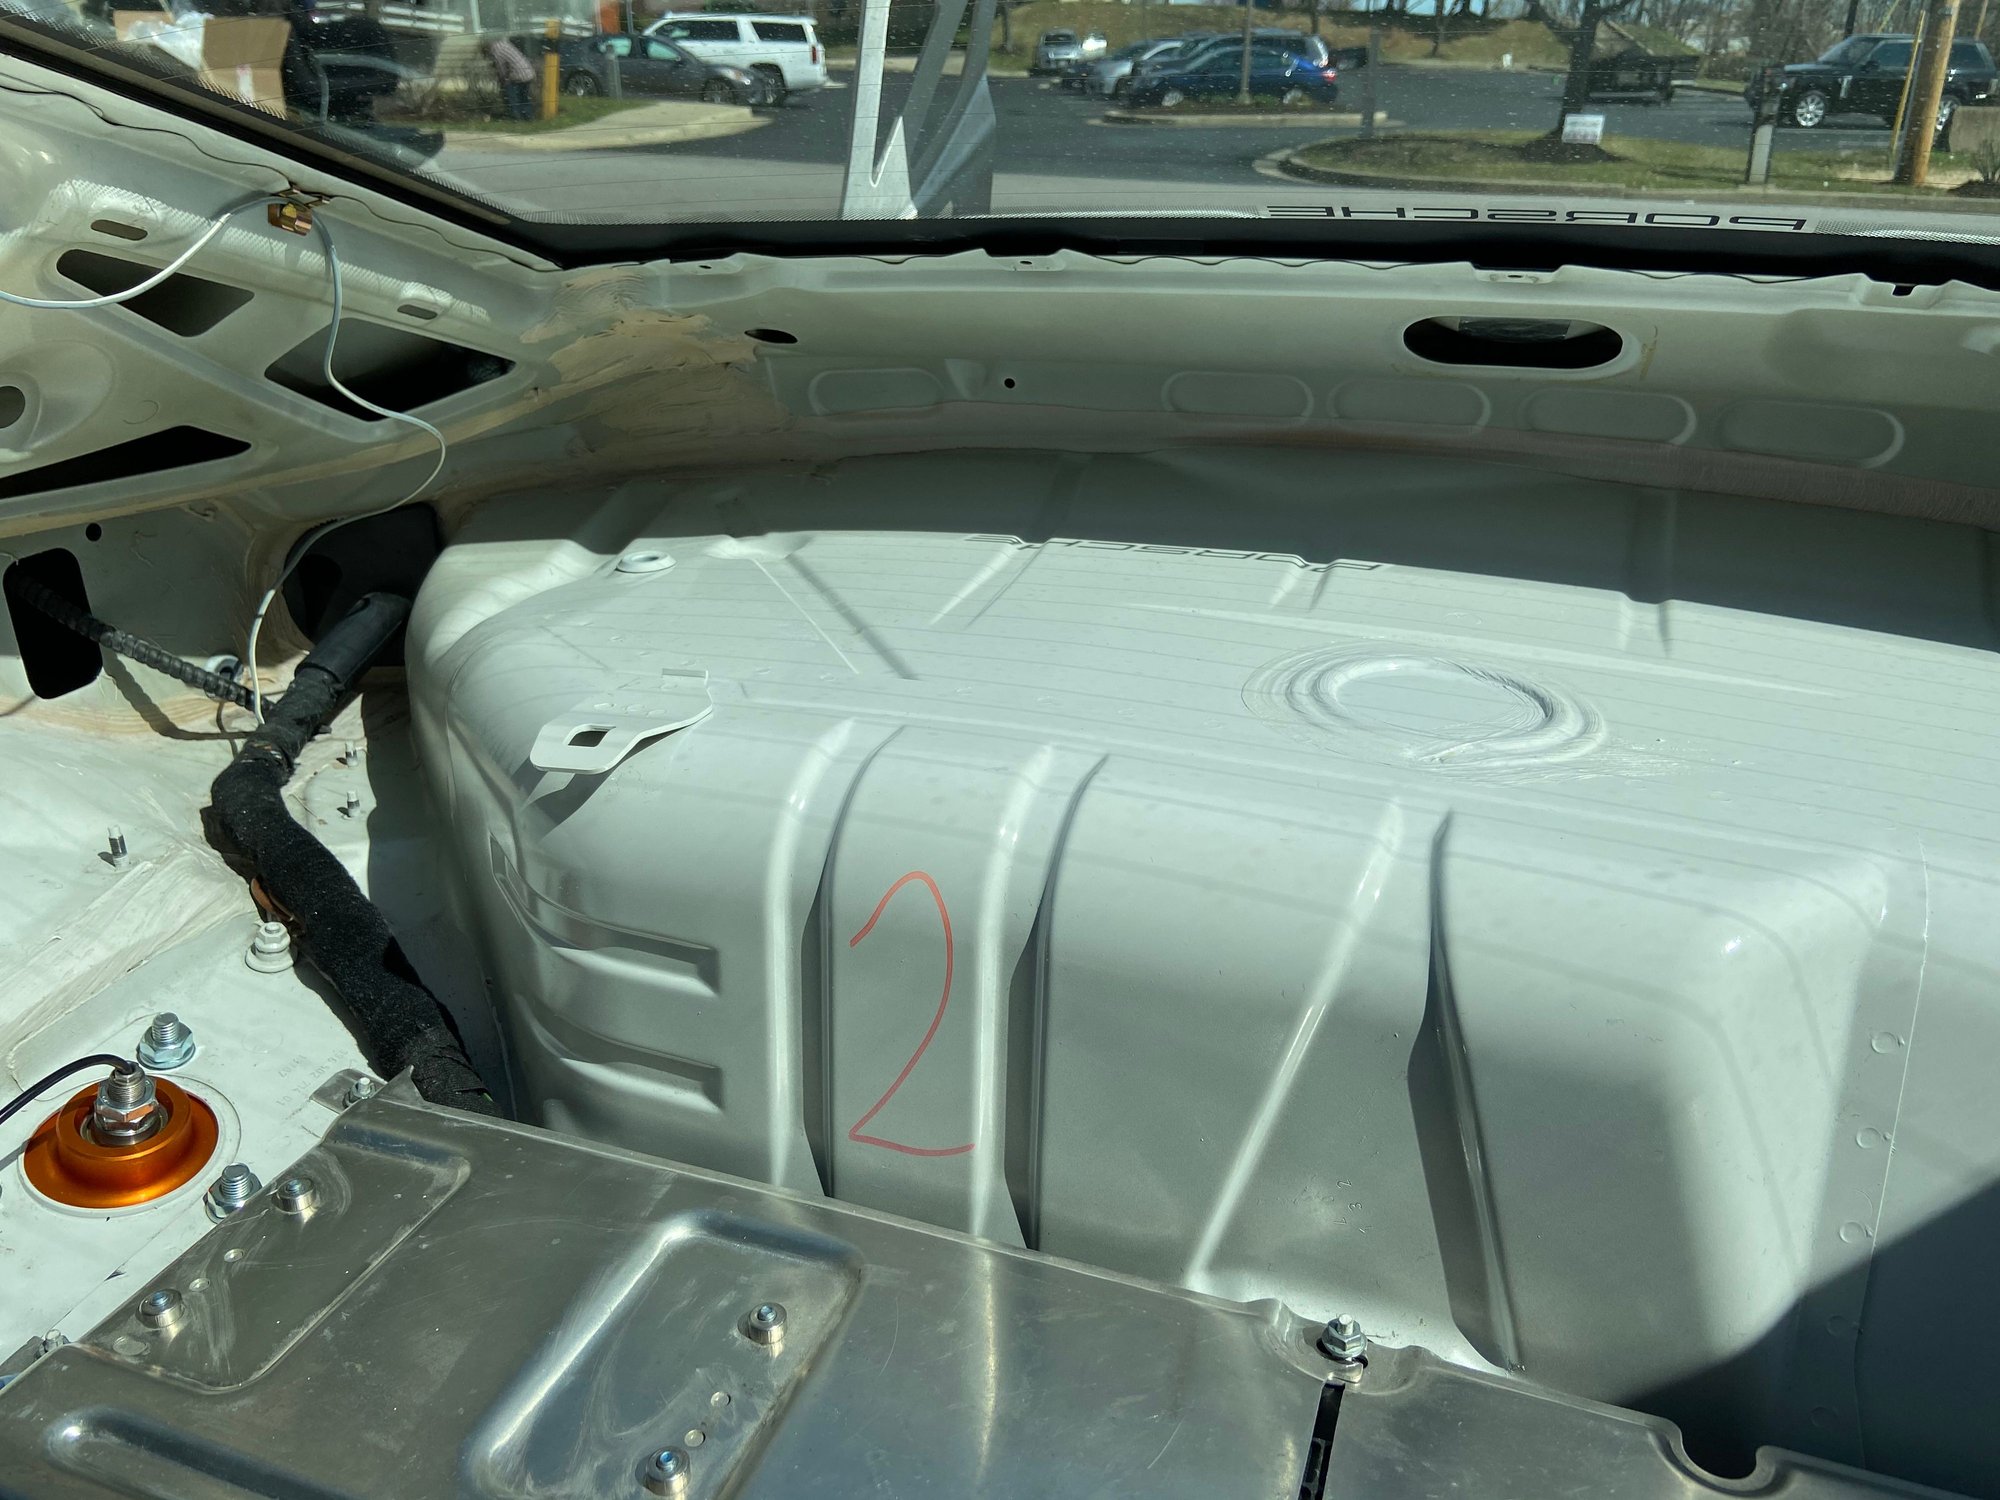
The engine bulkhead has the number "2" hand written on it at the factory assembly line. I don't know what the number indicates but it won't come off because its baked on there by 13 years of engine heat exposure. So I painted over it.
Before.
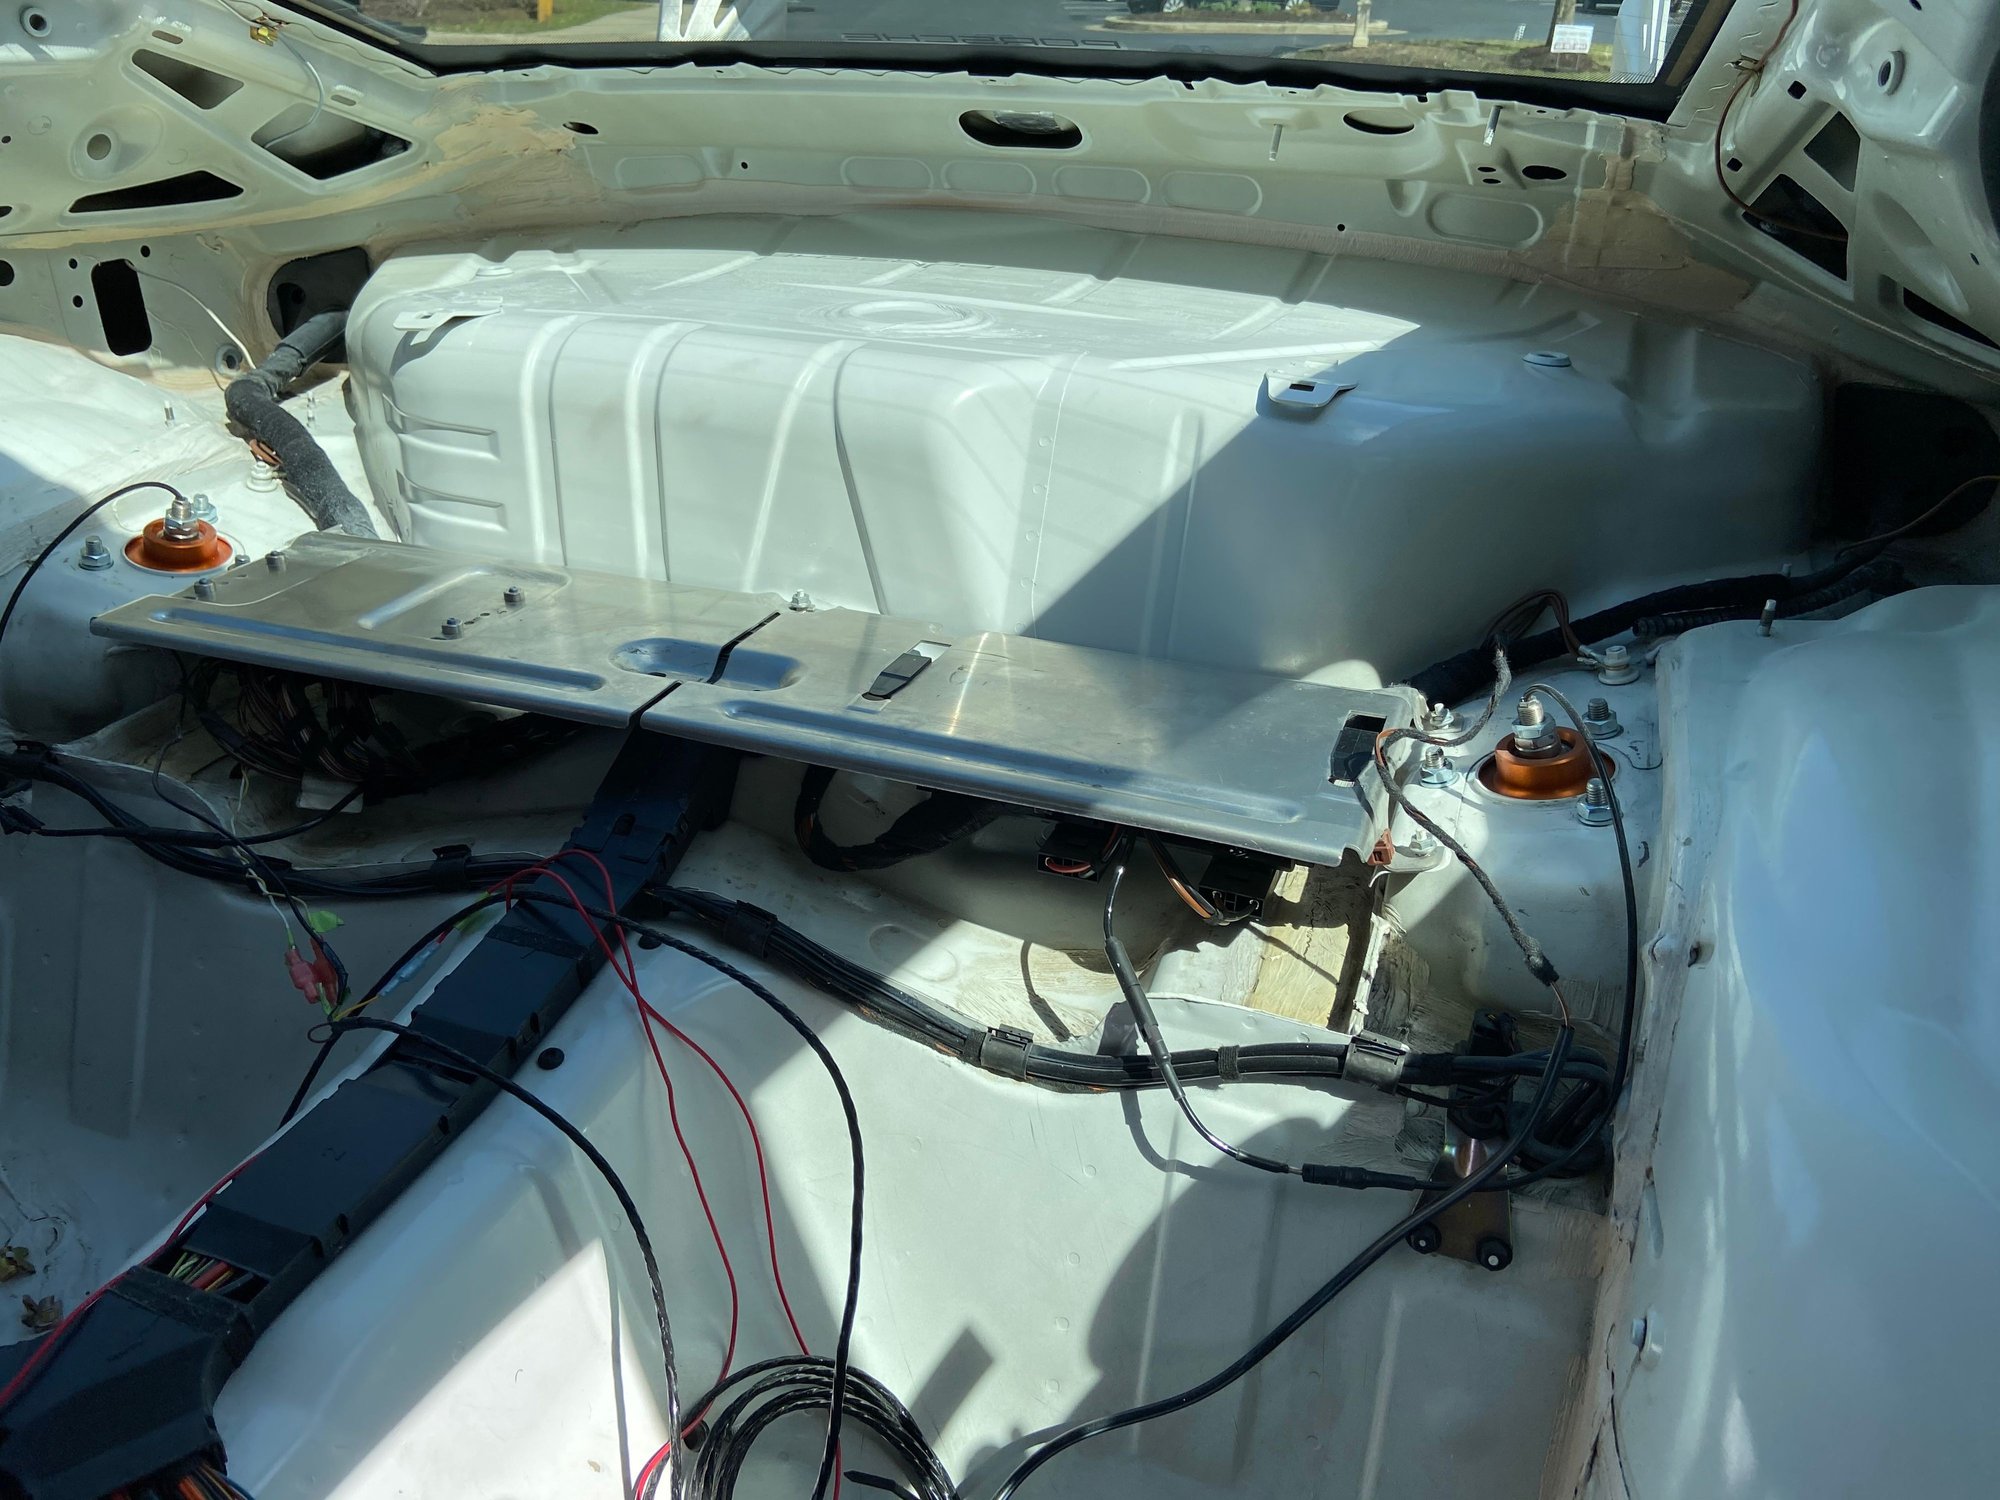
After. I tidied up the loose wires too. No shown in this image is I hid the red wire(for Motec camera) in the factory wire loom.
18 hours- That's all the interior clean up work I can handle.
__________________
PCA National Instructor
TPC Racing stats:
2023 Porsche Sprint Challenge 992 Cup Am Champion
2023 Porsche Sprint Challenge GT4 Pro-Am Team Champion
2022 Porsche Sprint Challenge 992 Cup & 991 Cup Champion
2020 IMSA GT3 Cup Challenge 2nd Championship
2018 IMSA GT3 Cup Challenge 2nd Championship
2016 IMSA GT3 Cup Challenge Champion
2013 IMSA GT3 Cup Challenge Champion
2006 Rolex-24 @ Daytona GT Champion
2004 Grand-Am SGS Class Champion
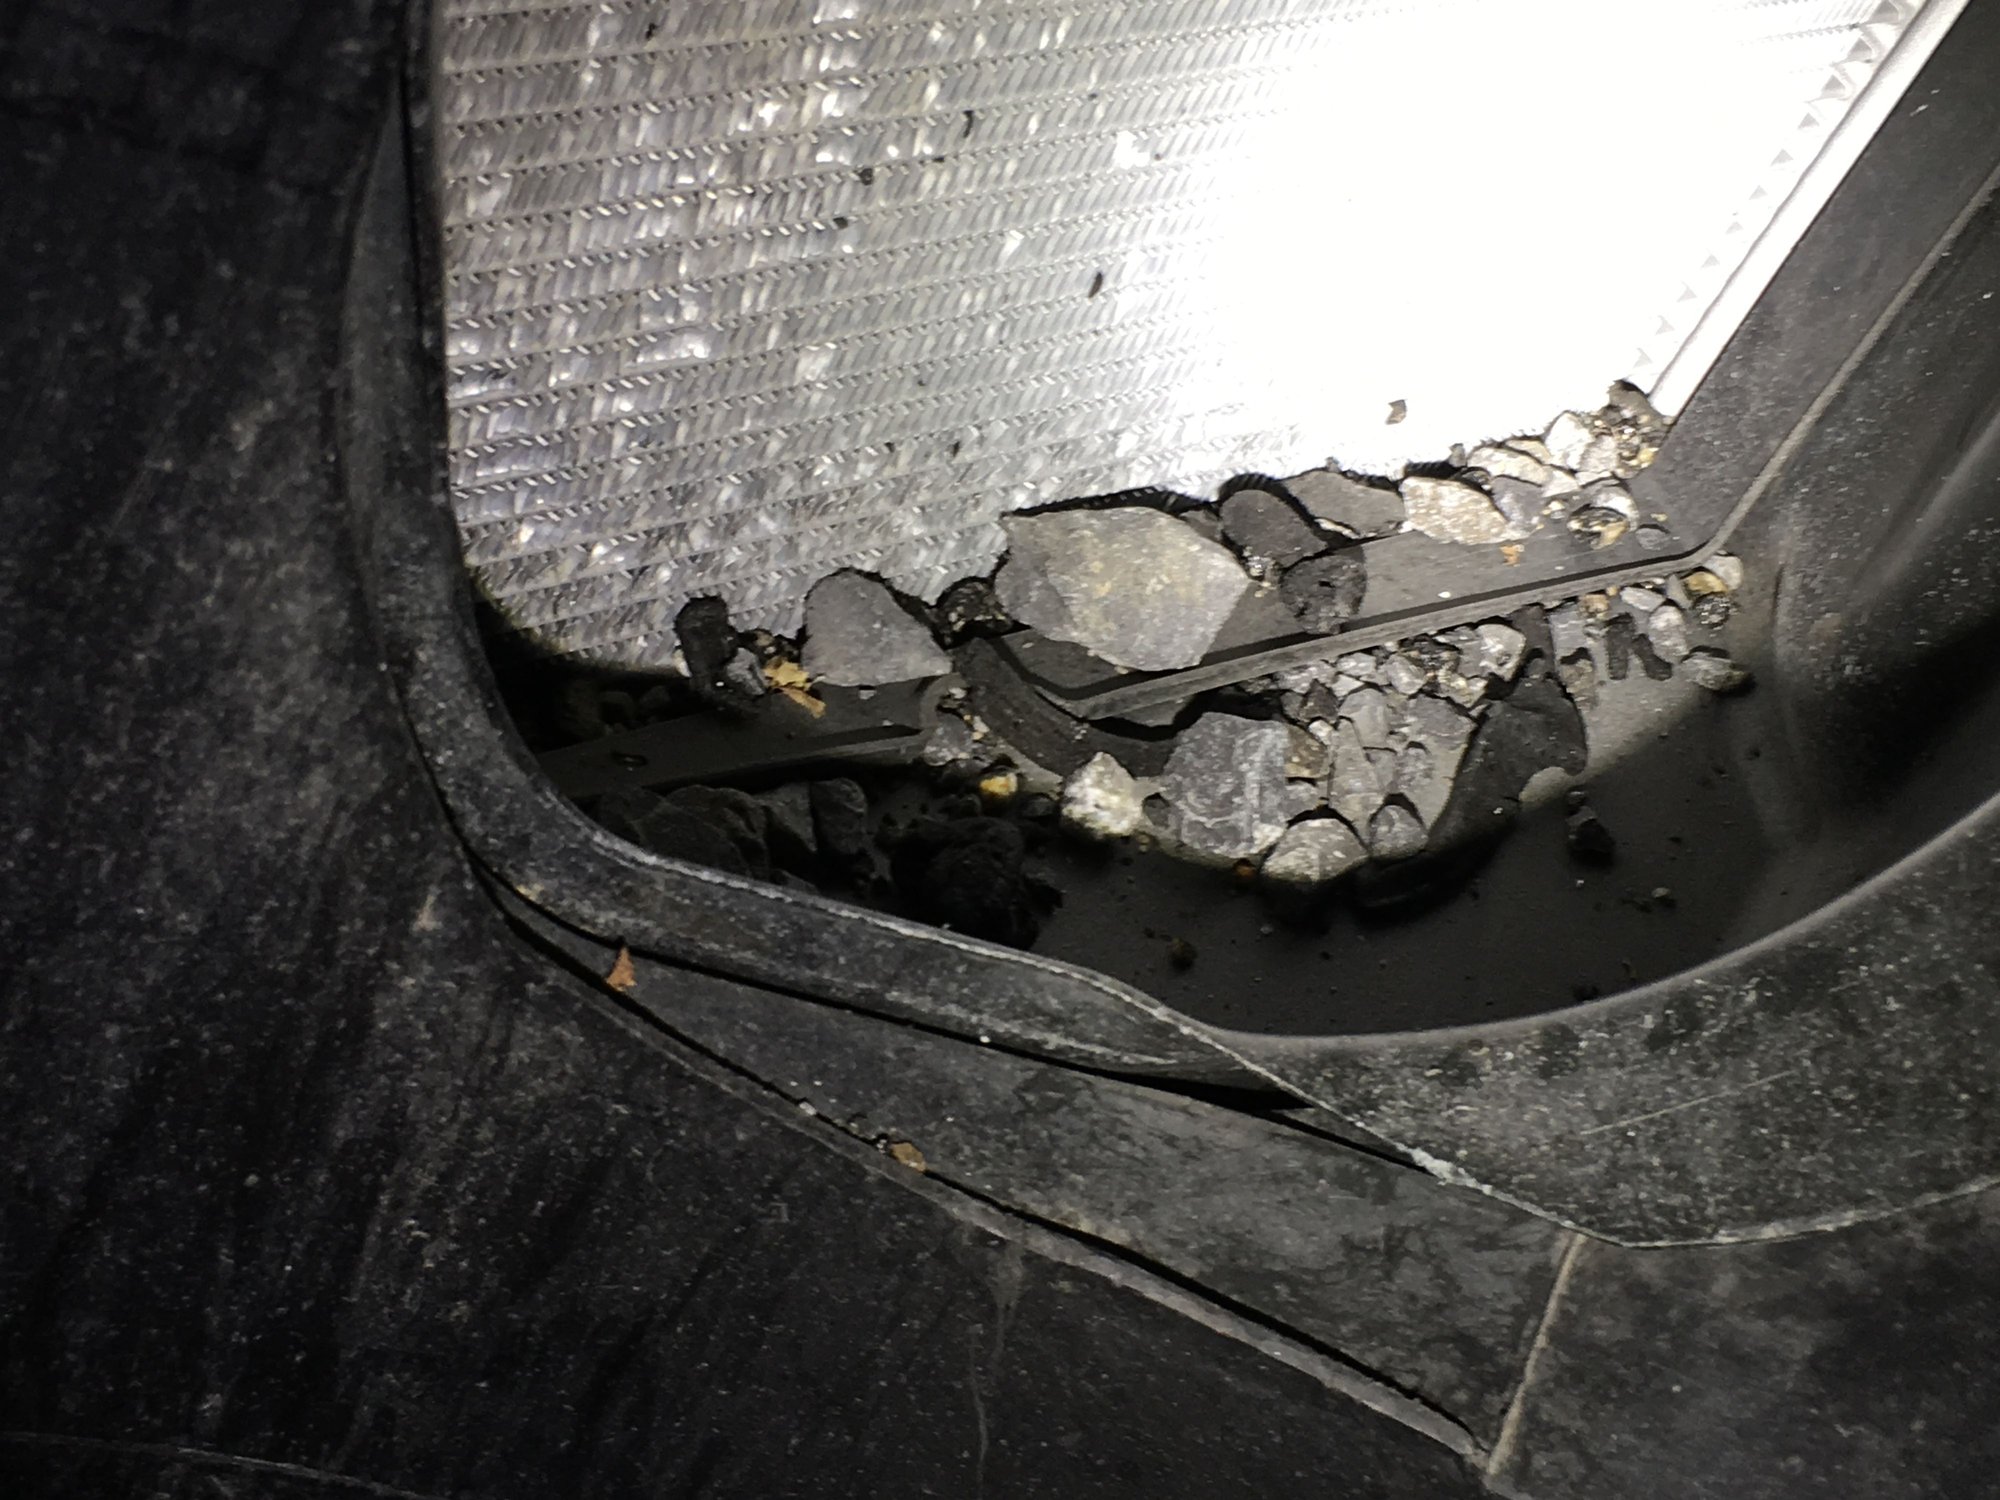
Taking a break from the interior to install front radiator exit grills.
The radiator exit grills should help prevent rocks and rubber pieces collecting in the cavity. More importantly help prevent potential radiator leak from high velocity rock contact.
Pulled the fender liner back and vacuumed out the track debris. BTW, I'm doing this on a parking lot...at night...on a floor jack.
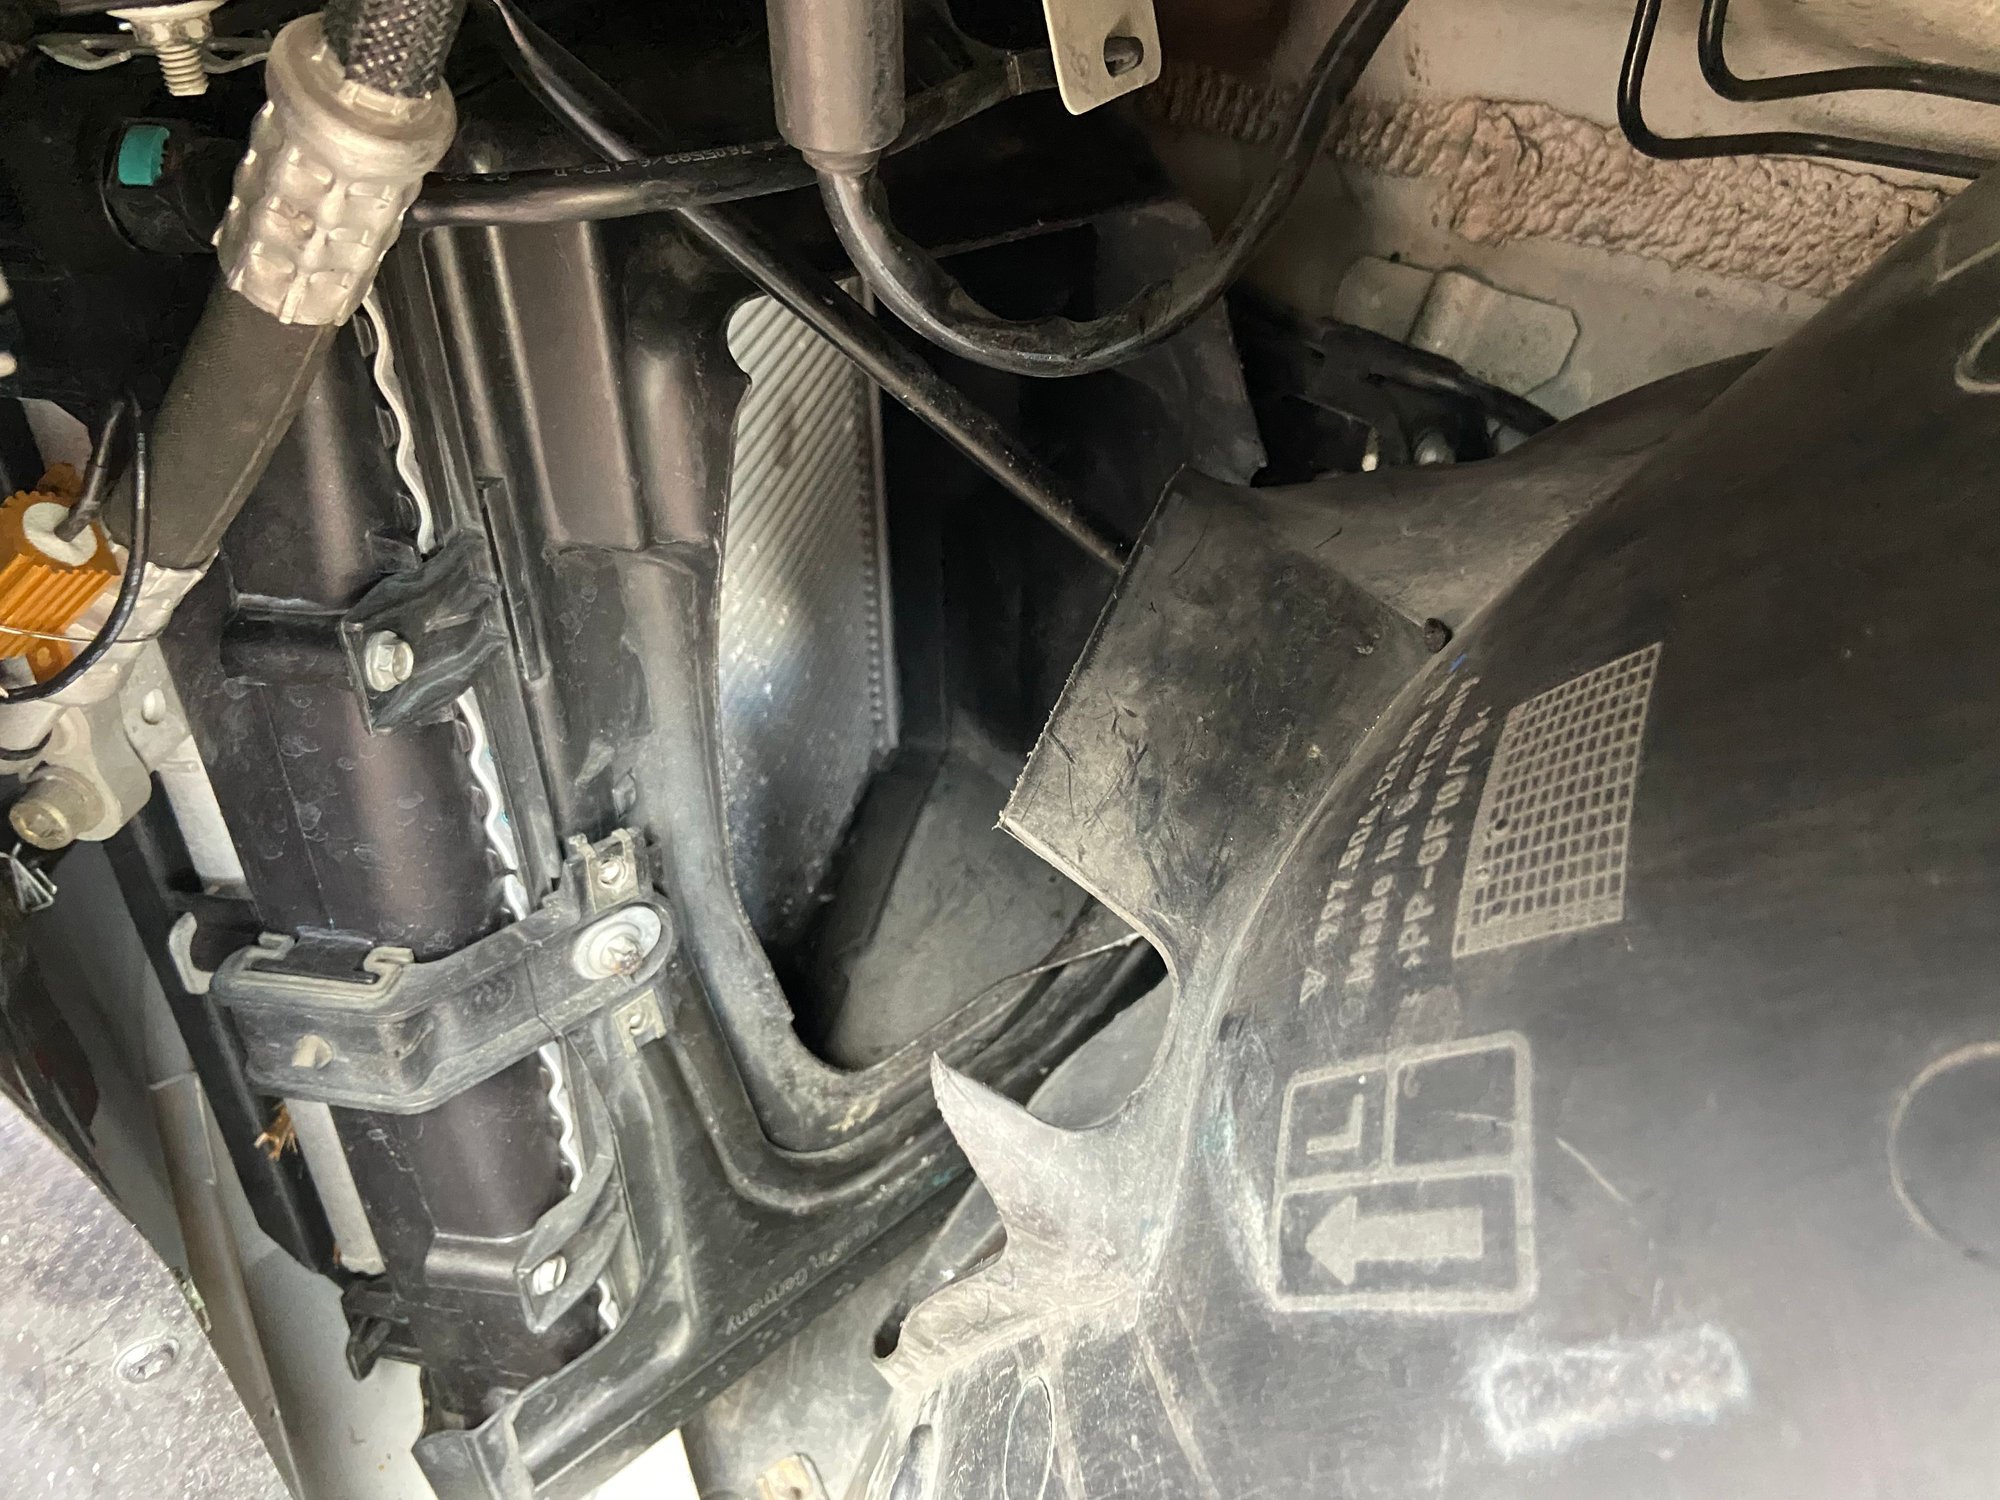
The grills really were meant to be fitted and installed with the radiator exit "airbox" removed from the car. I didn't feel like taking off the front bumper and taking apart the rad assembly to do this on a parking lot at night so I took a different approach.
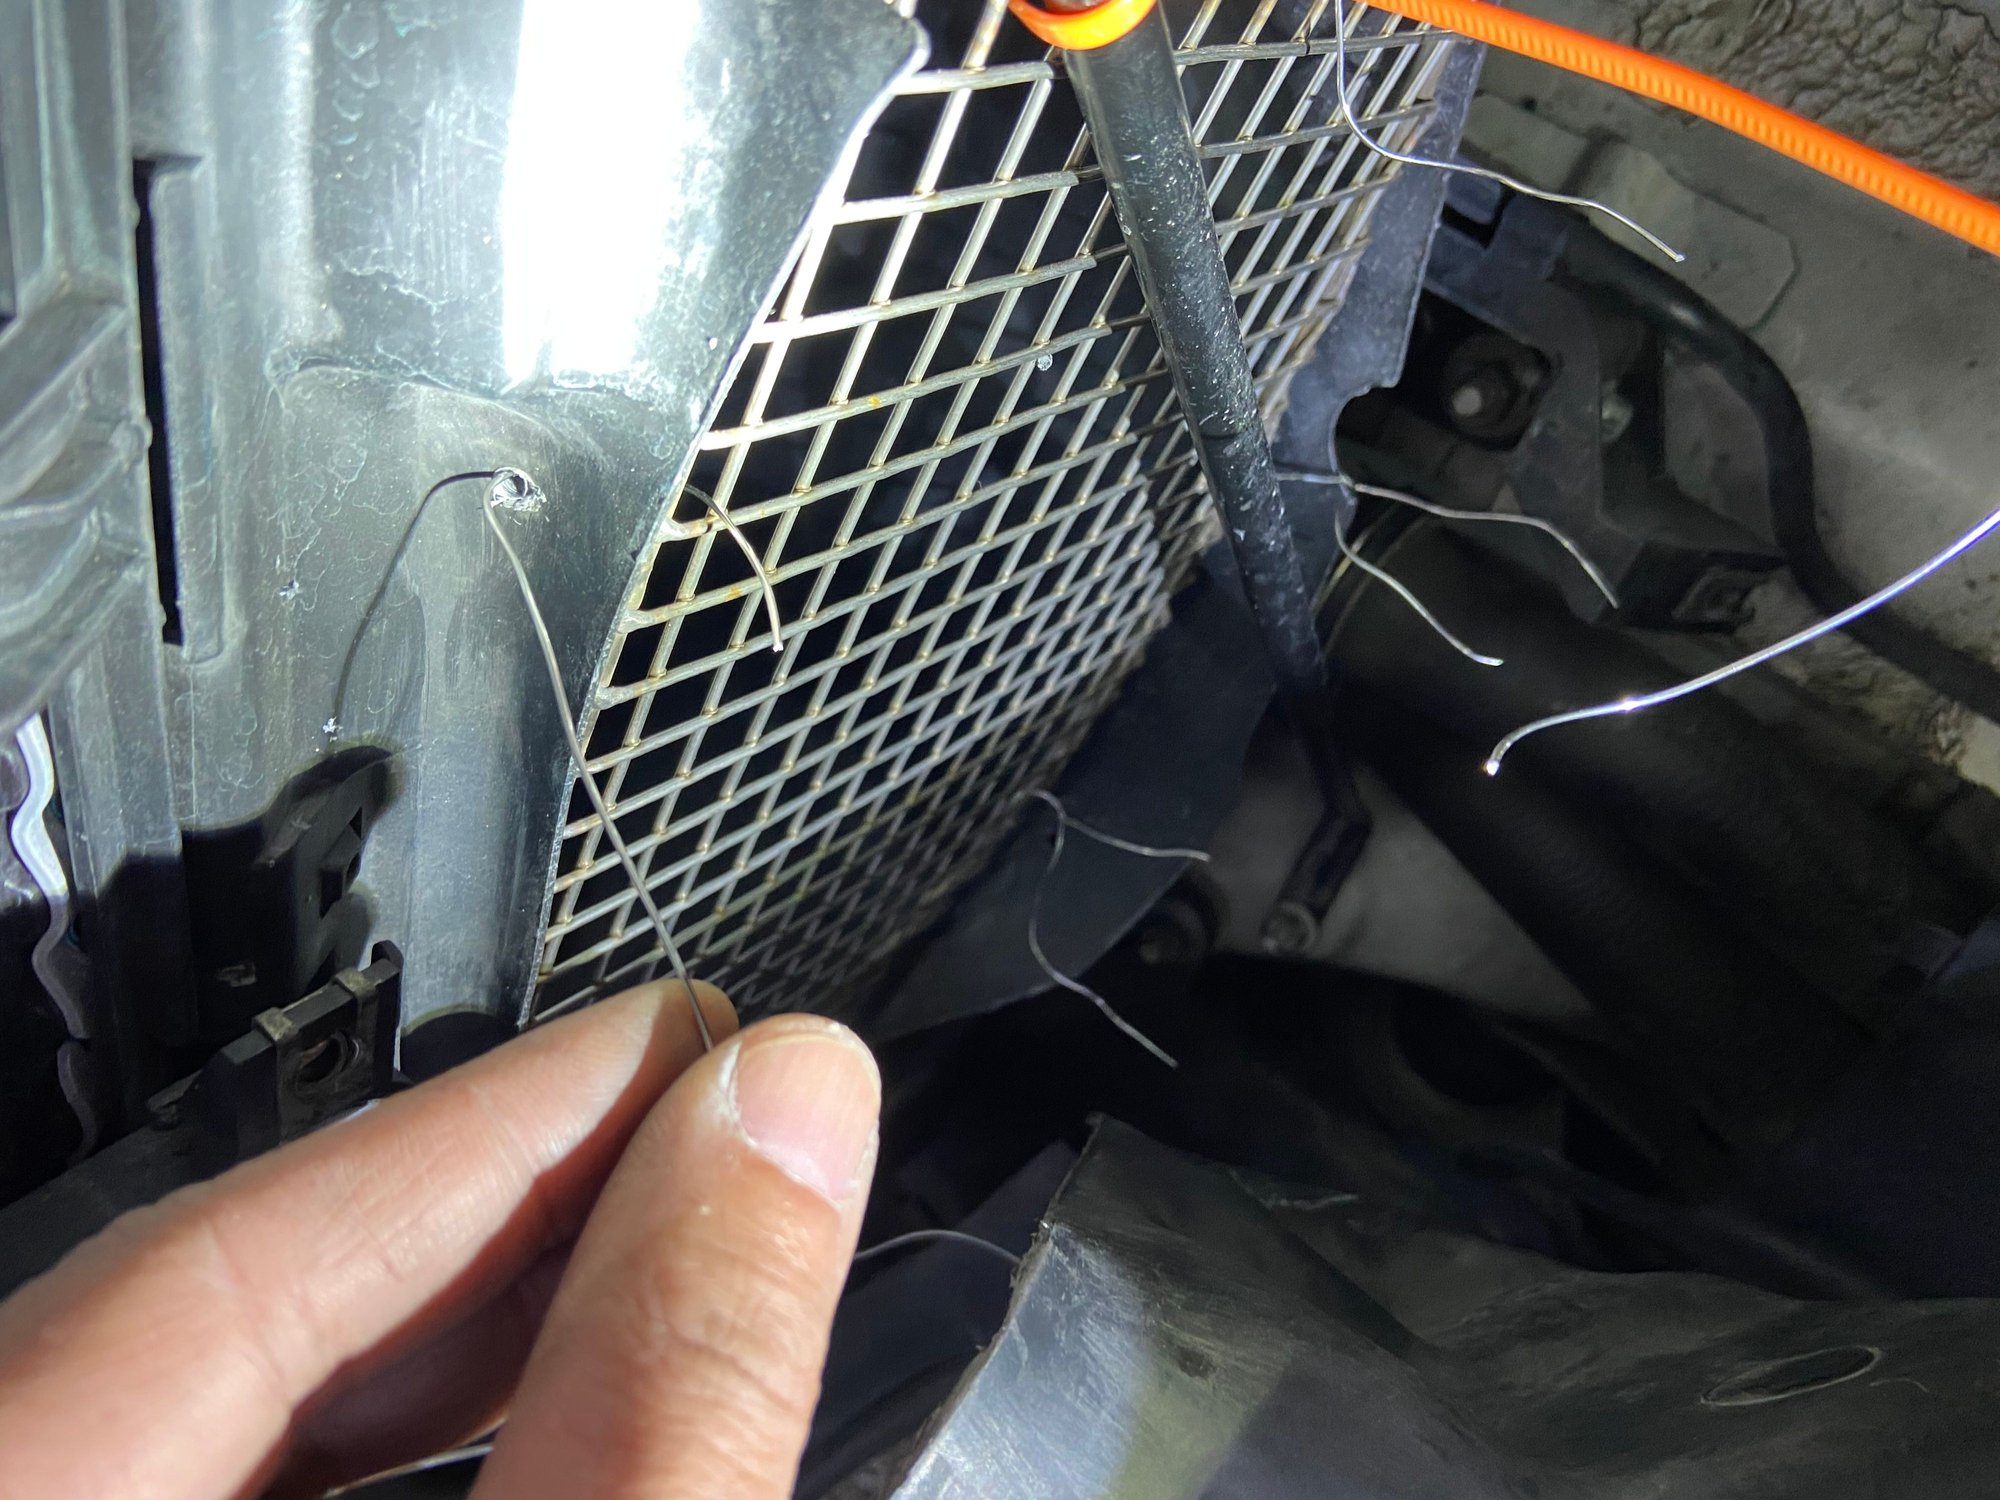
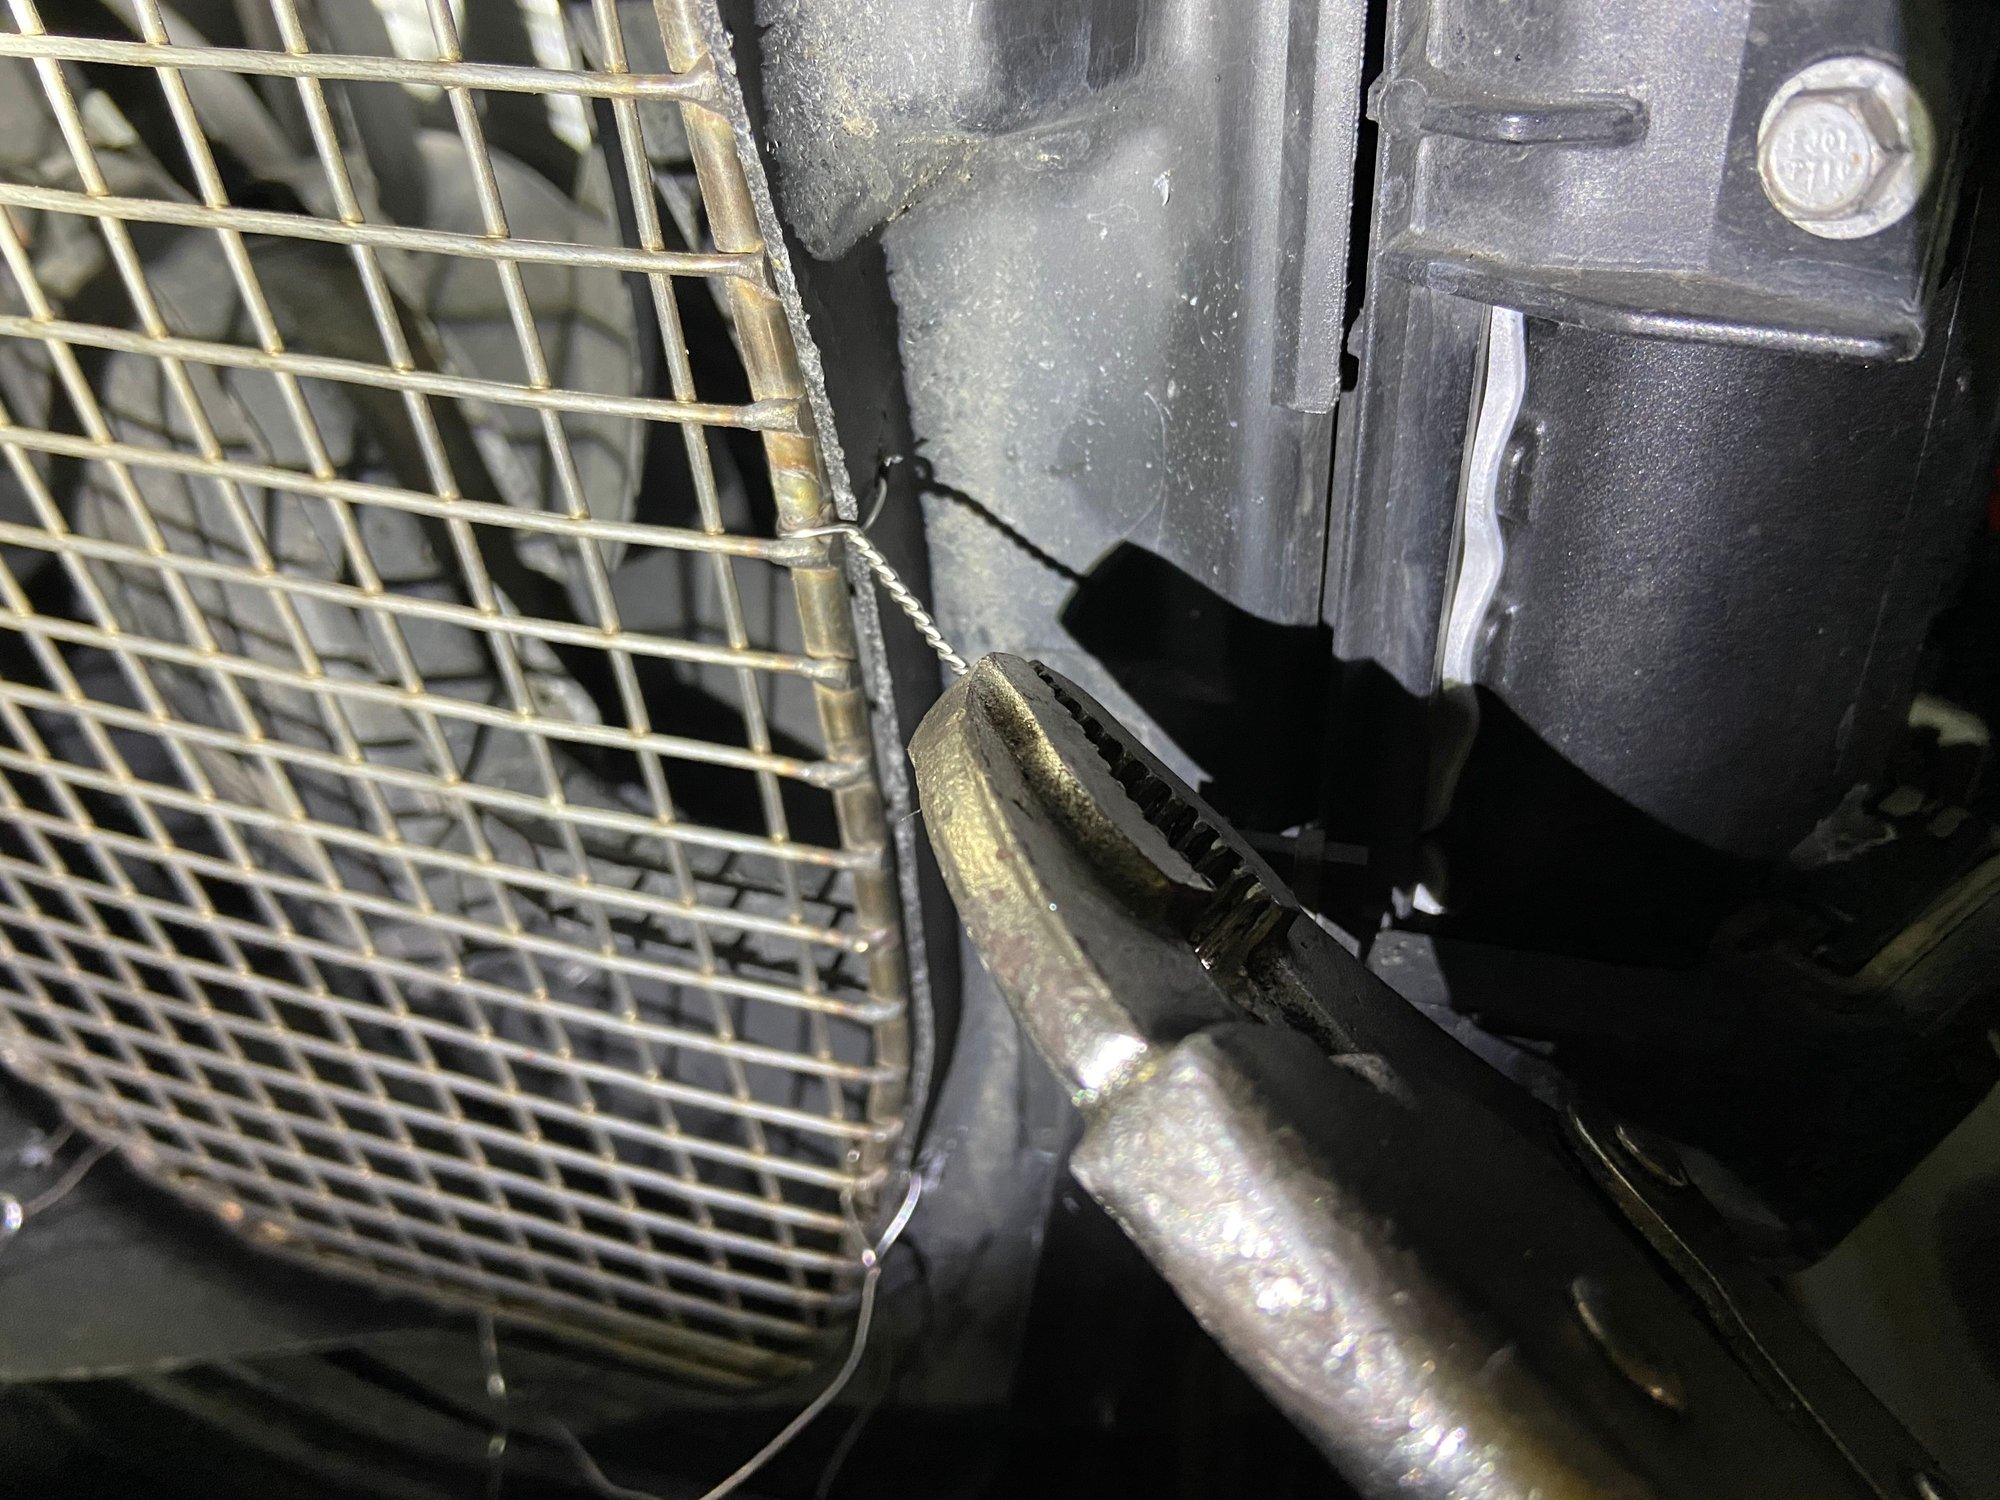
Instead of using the two supplied screws I secured the grill to the airbox using six pieces of stainless steel safety wires. The orange zip tie was used roughly hold the grill in position while I drilled the holes on the airbox and fished the safety wires through.
In my opinion, using six safety wires is slightly more sturdy than using two screws. Either way its only as sturdy as the plastic airbox that the grill is supported by.
Exercising my safety wire twirling skill learned from my motorcycling days.
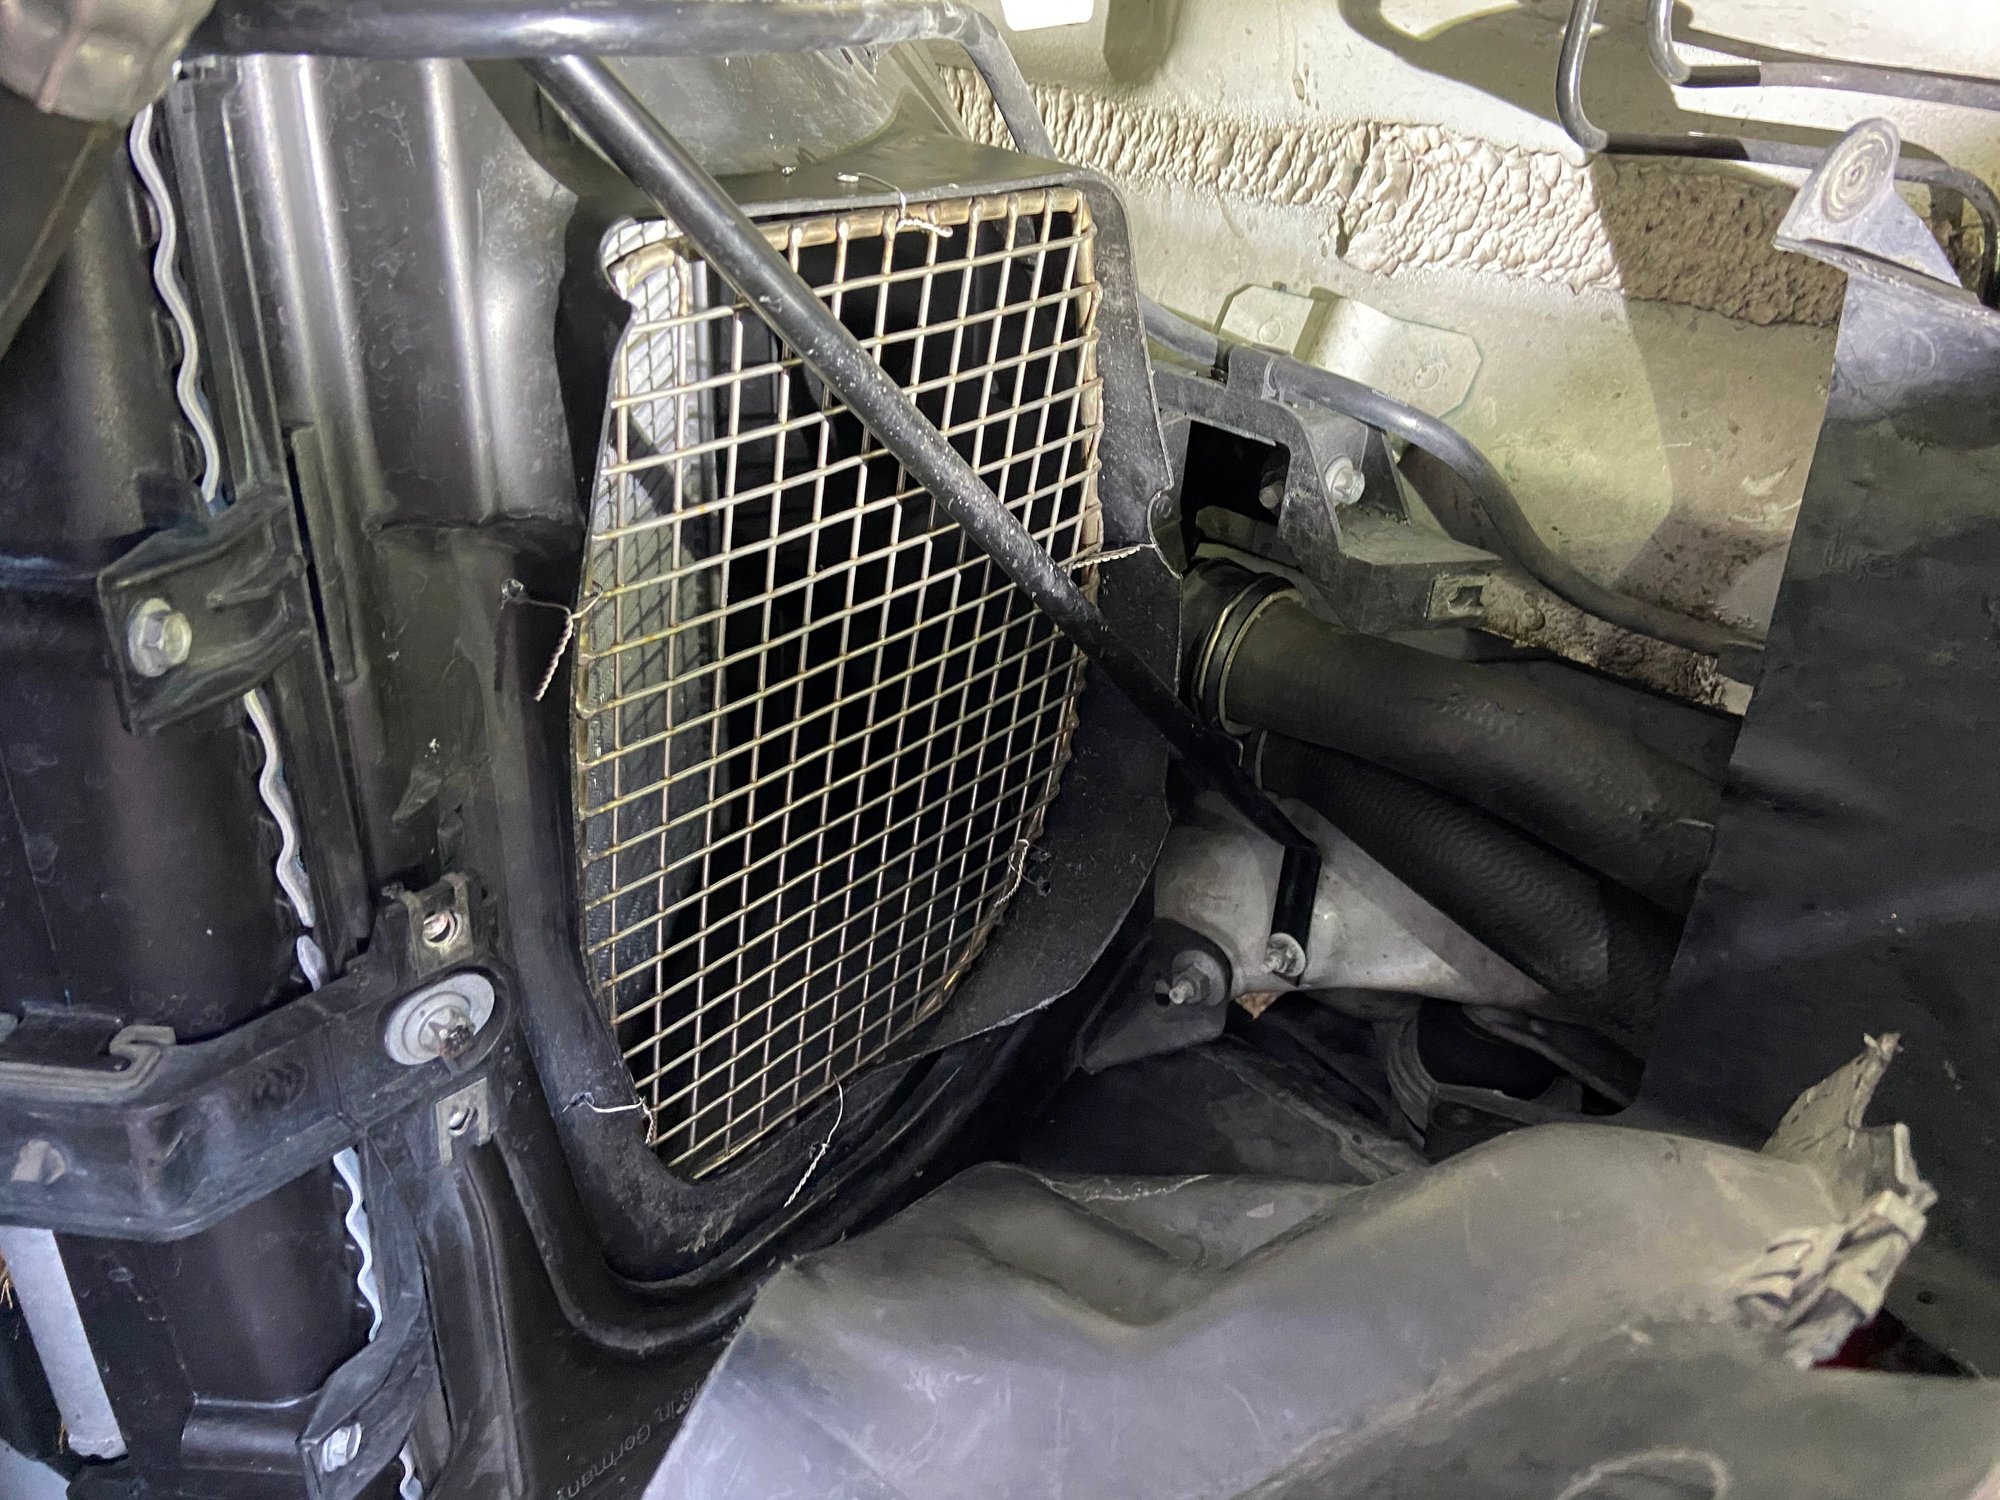
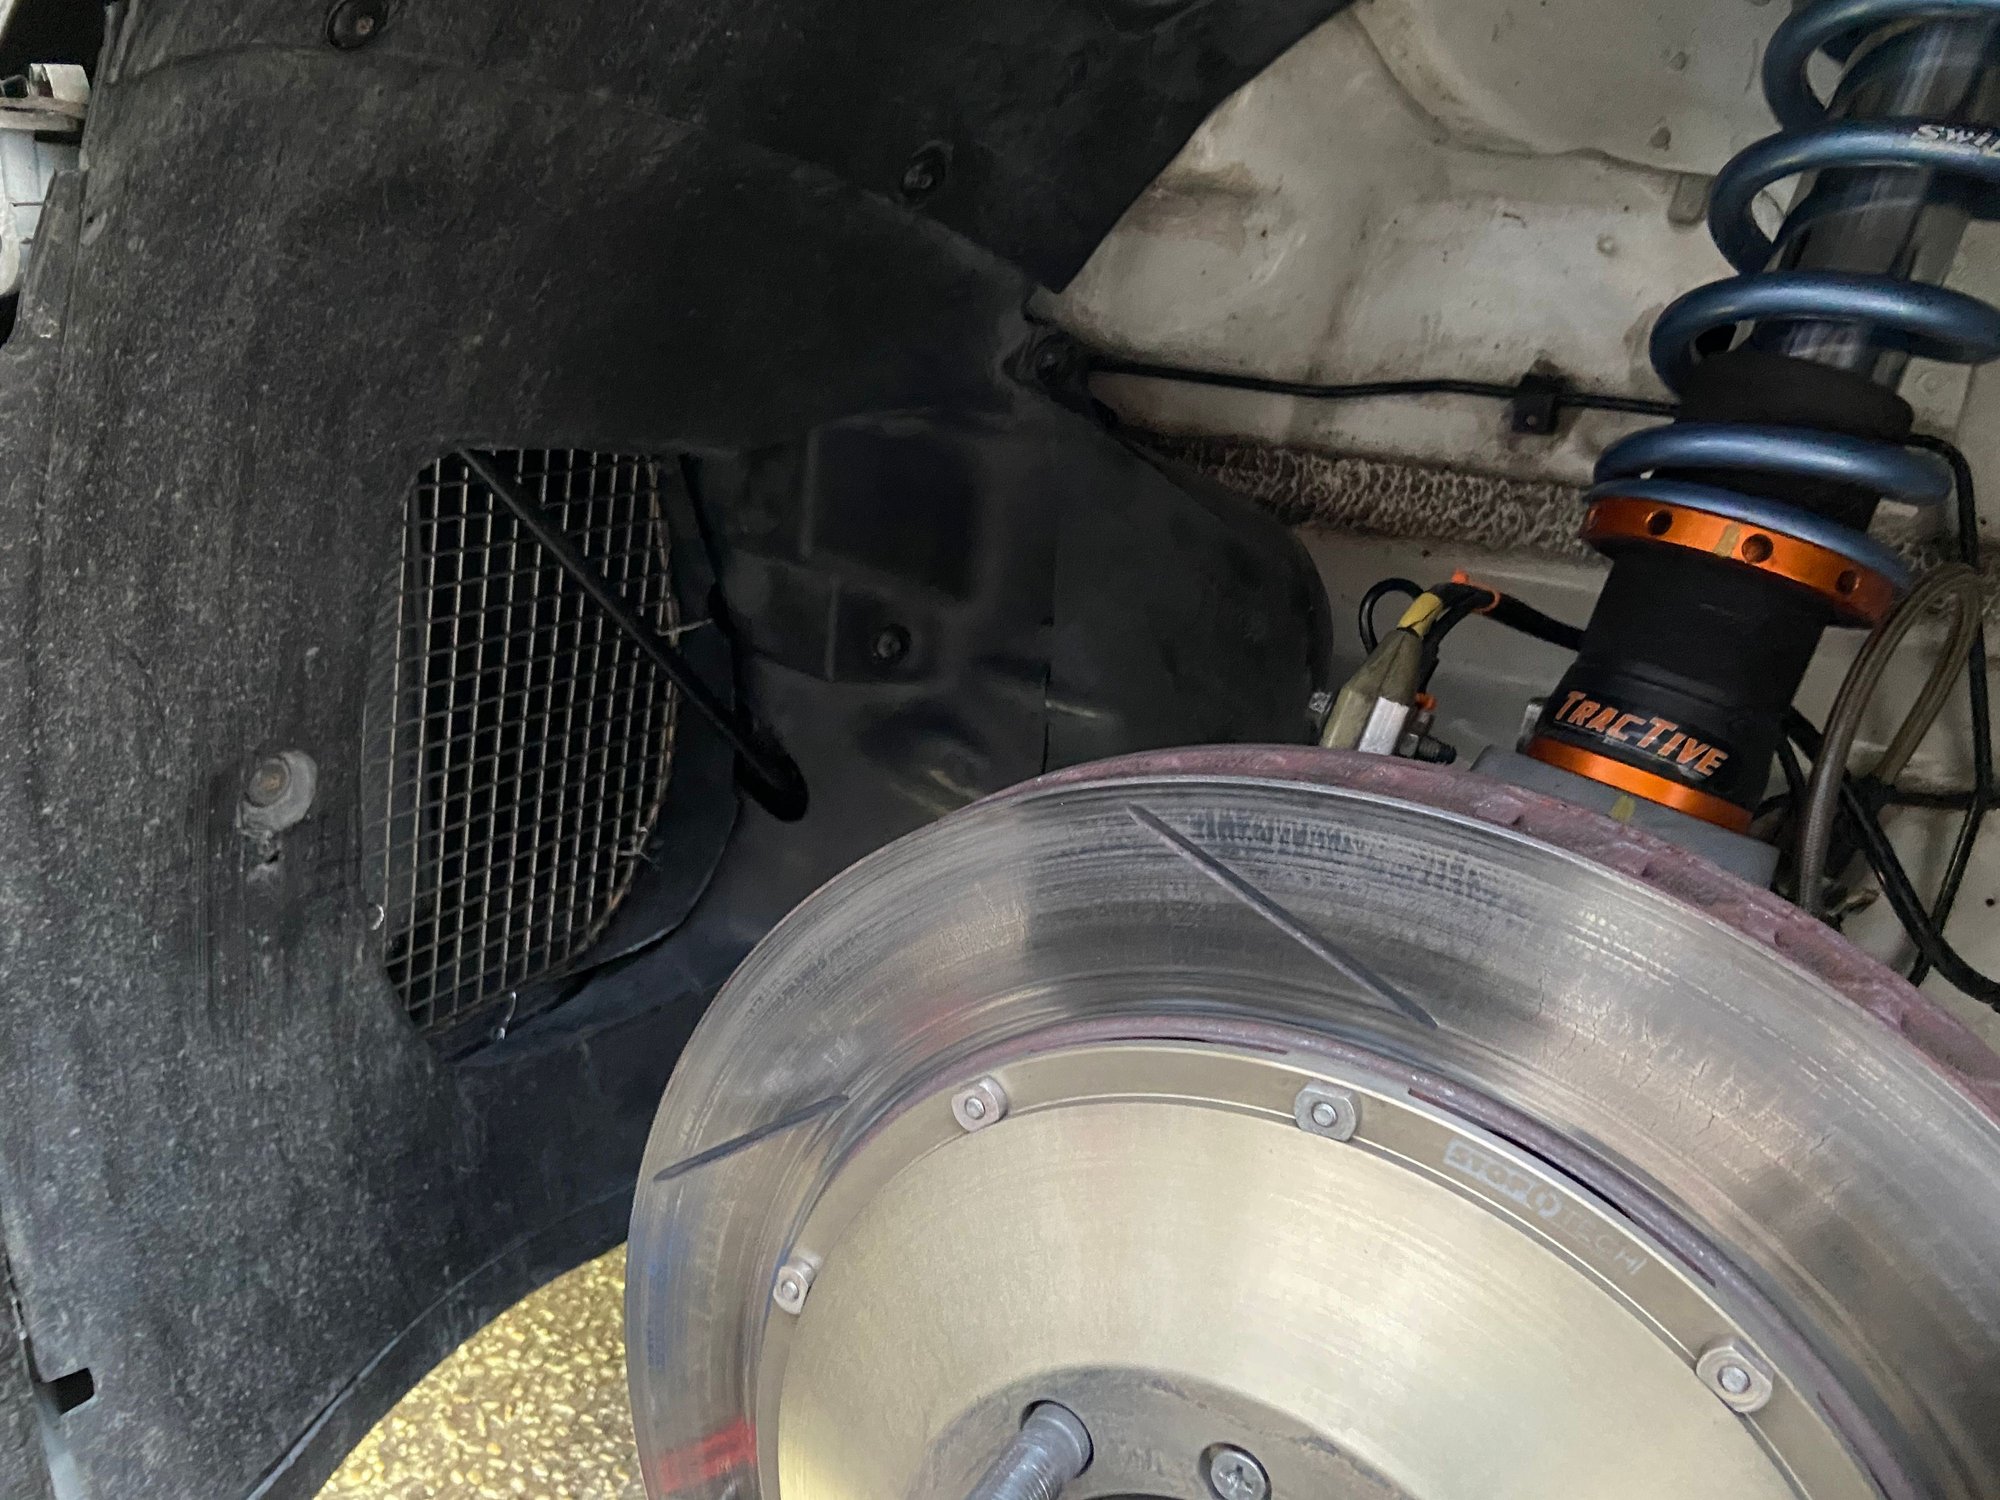
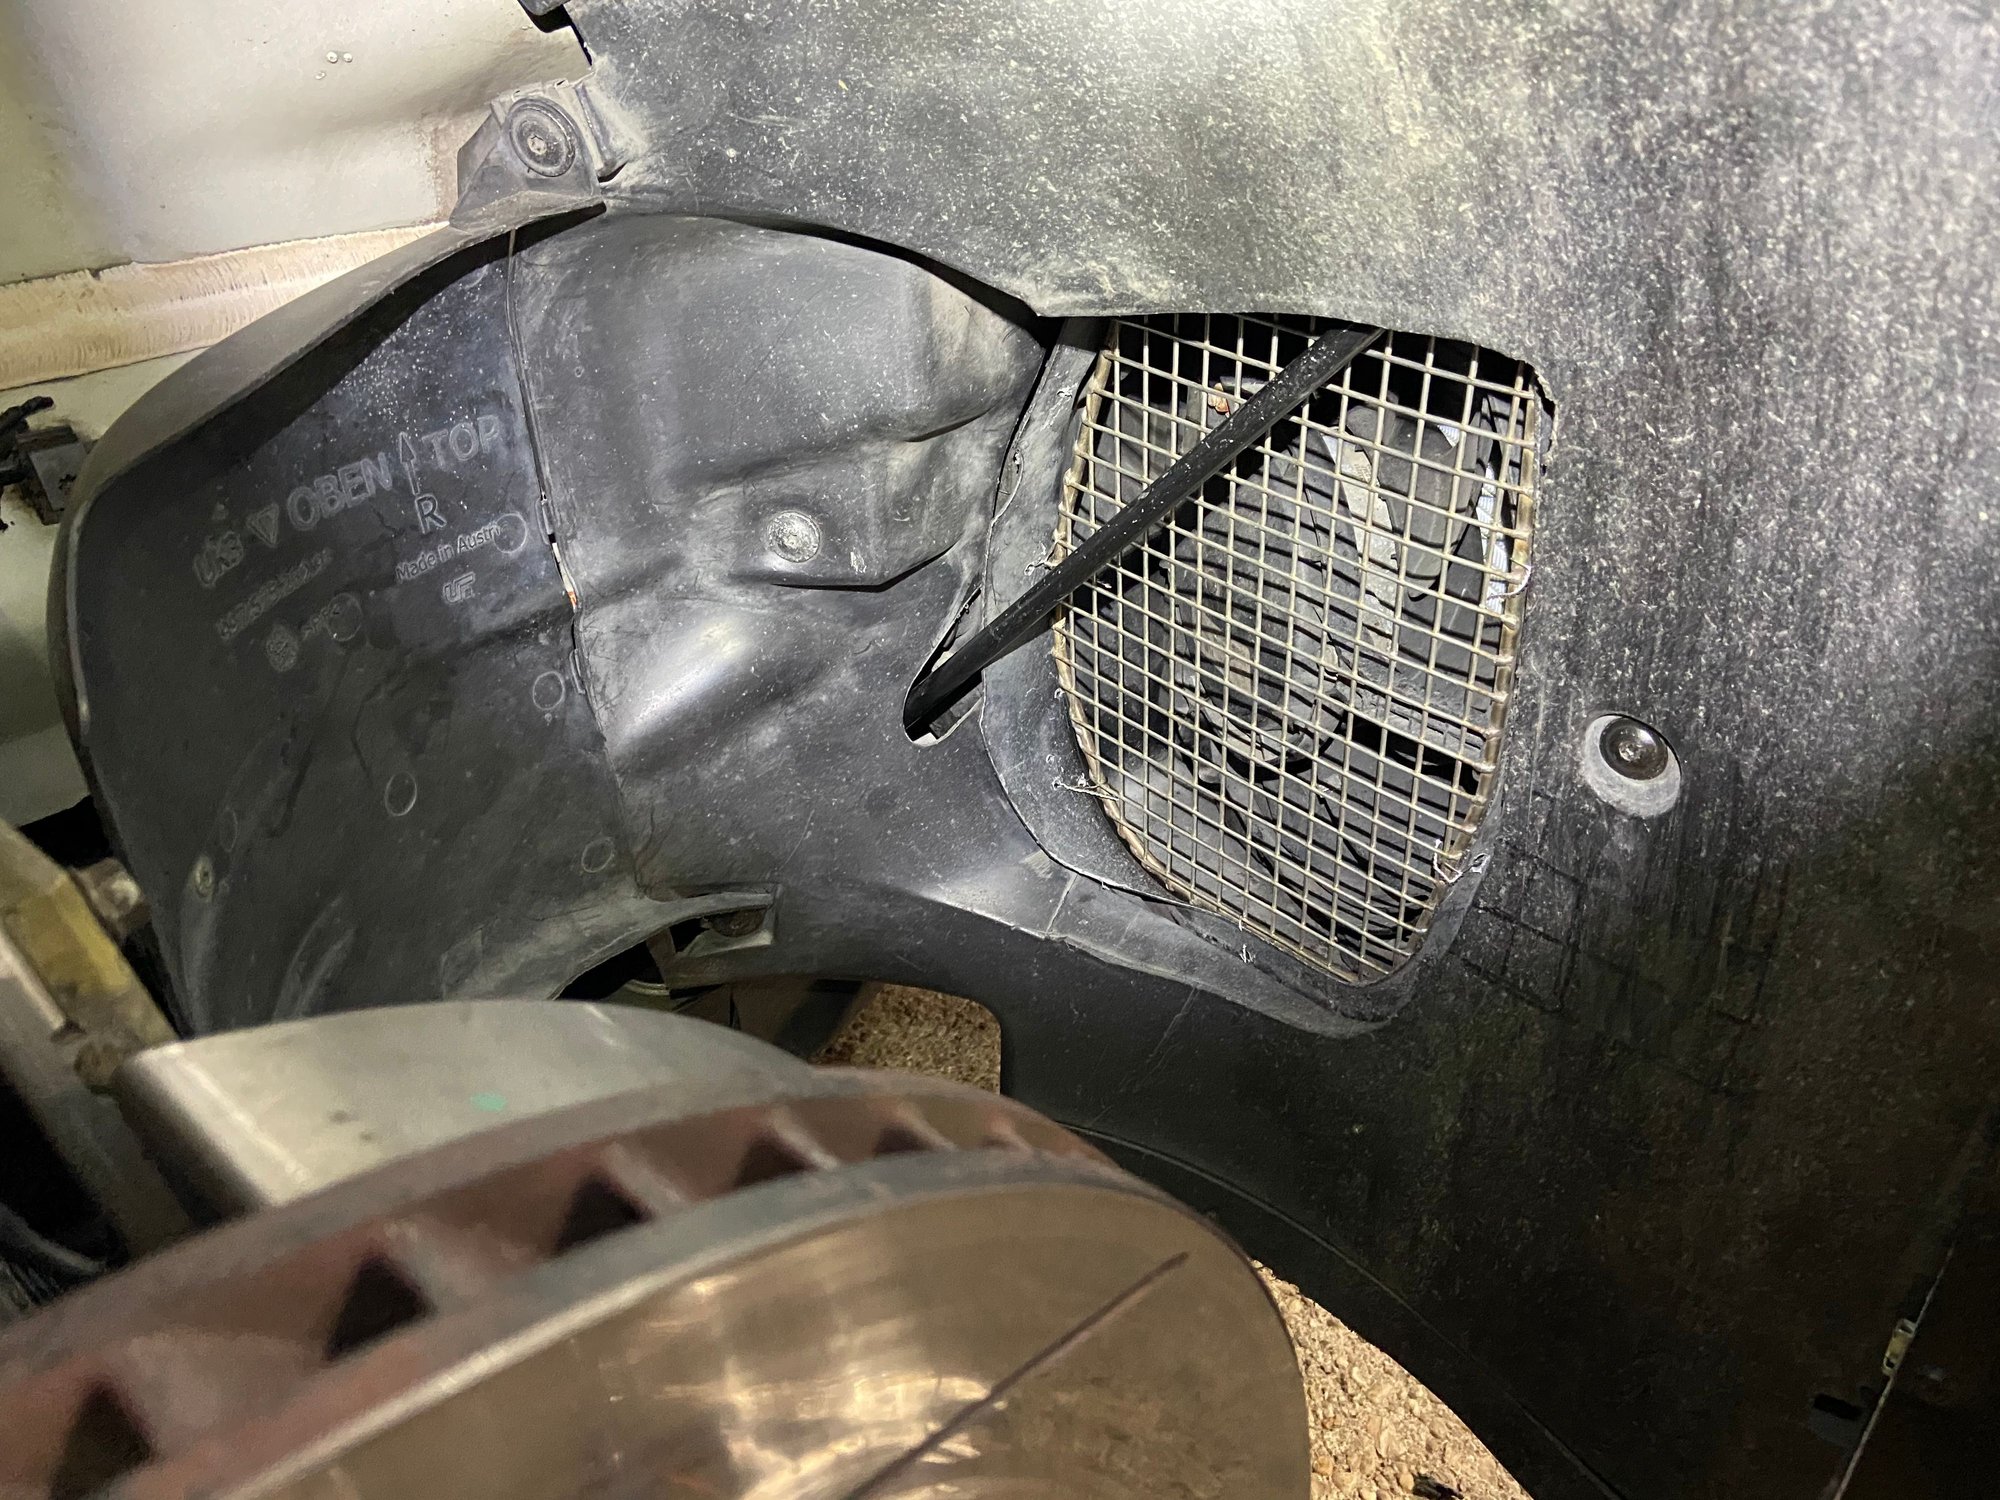
I cut each wire tail short enough so they won't contact the tire, and I folded each tail in to the inside of the grill. I kick-test it, its pretty sturdy.
The right side was slightly more difficult to do because the electric fan is in there(GT3 only has one fan on the right side of the car, Carrera and Turbo has one on each side of the car). The fan effectively serves as a shield to protect the radiator from debris. This side didn't really need a grill, I did it only to maintain symmetry.
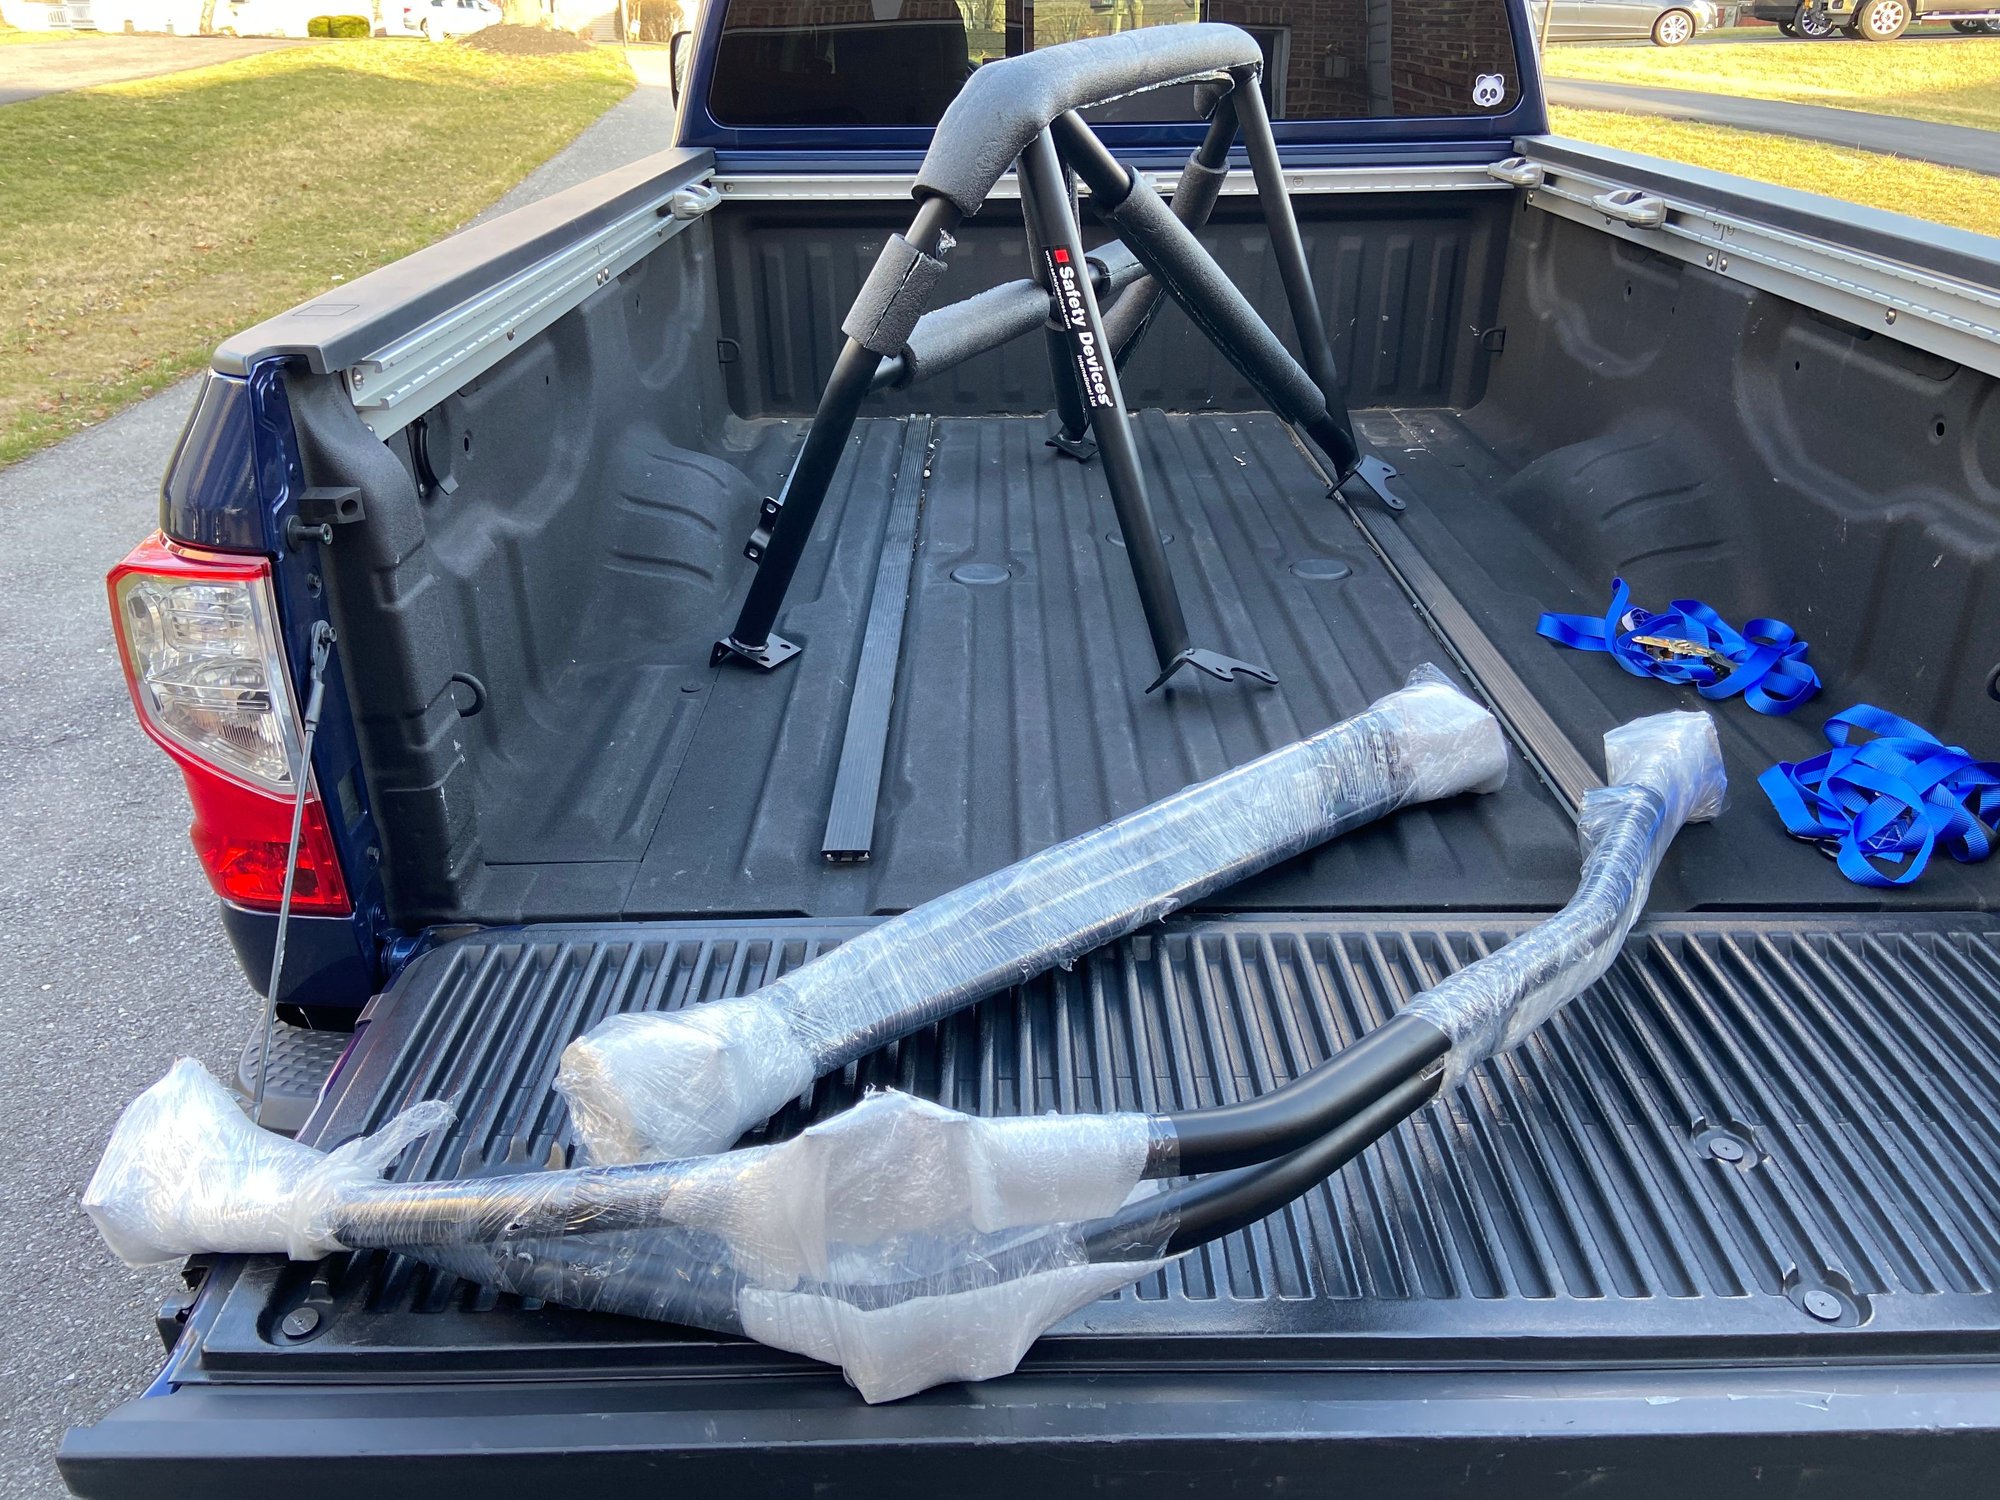
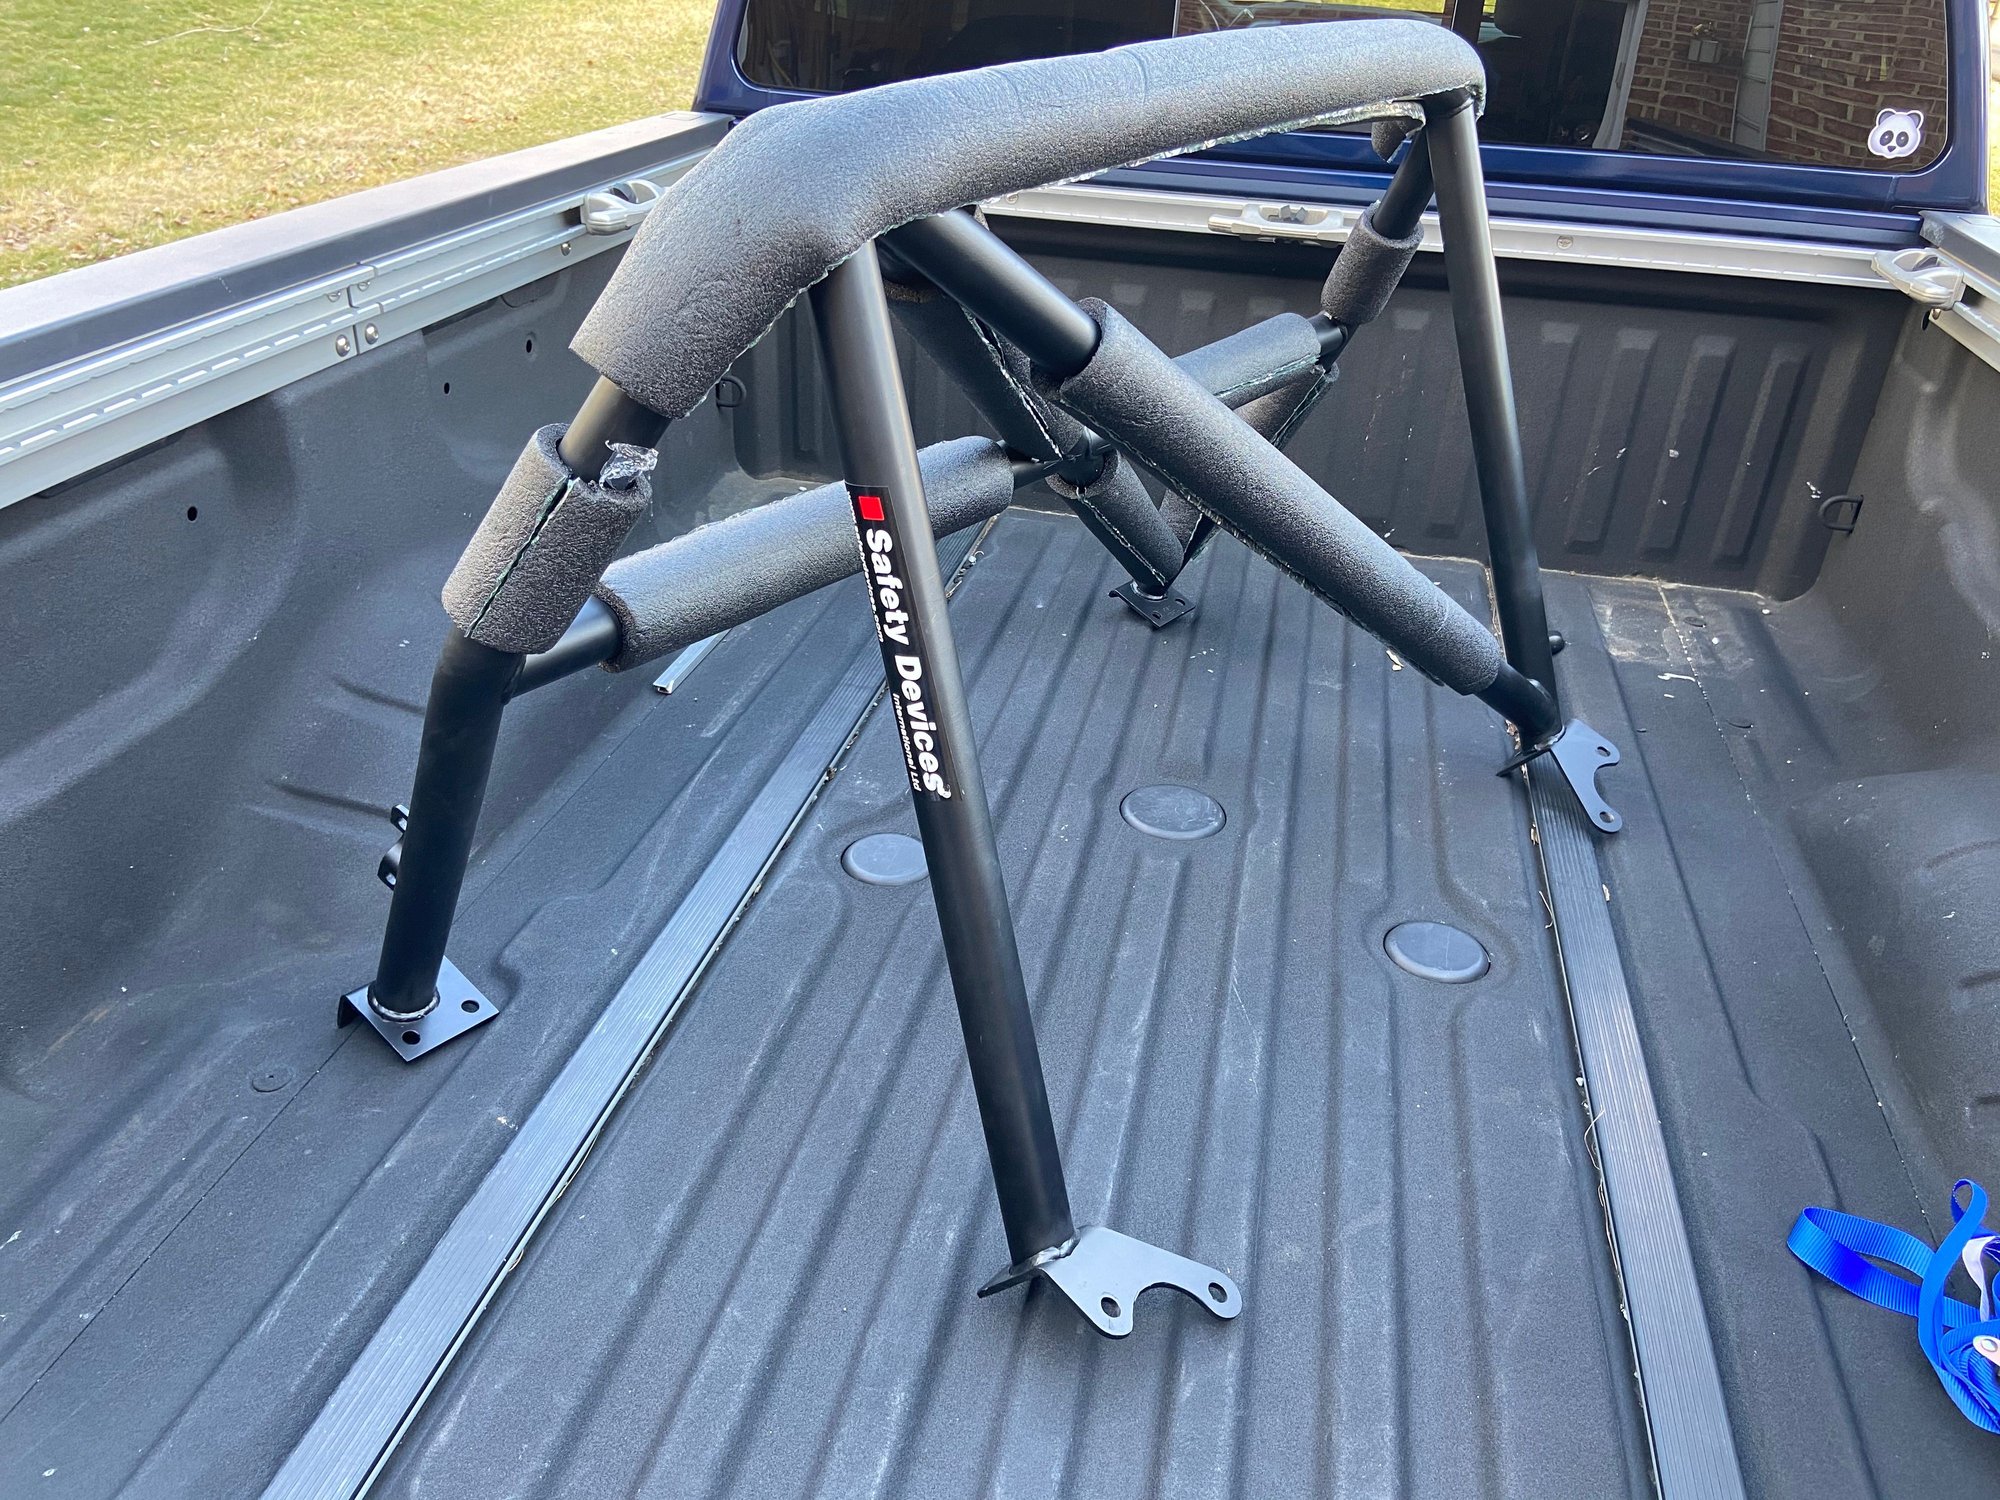
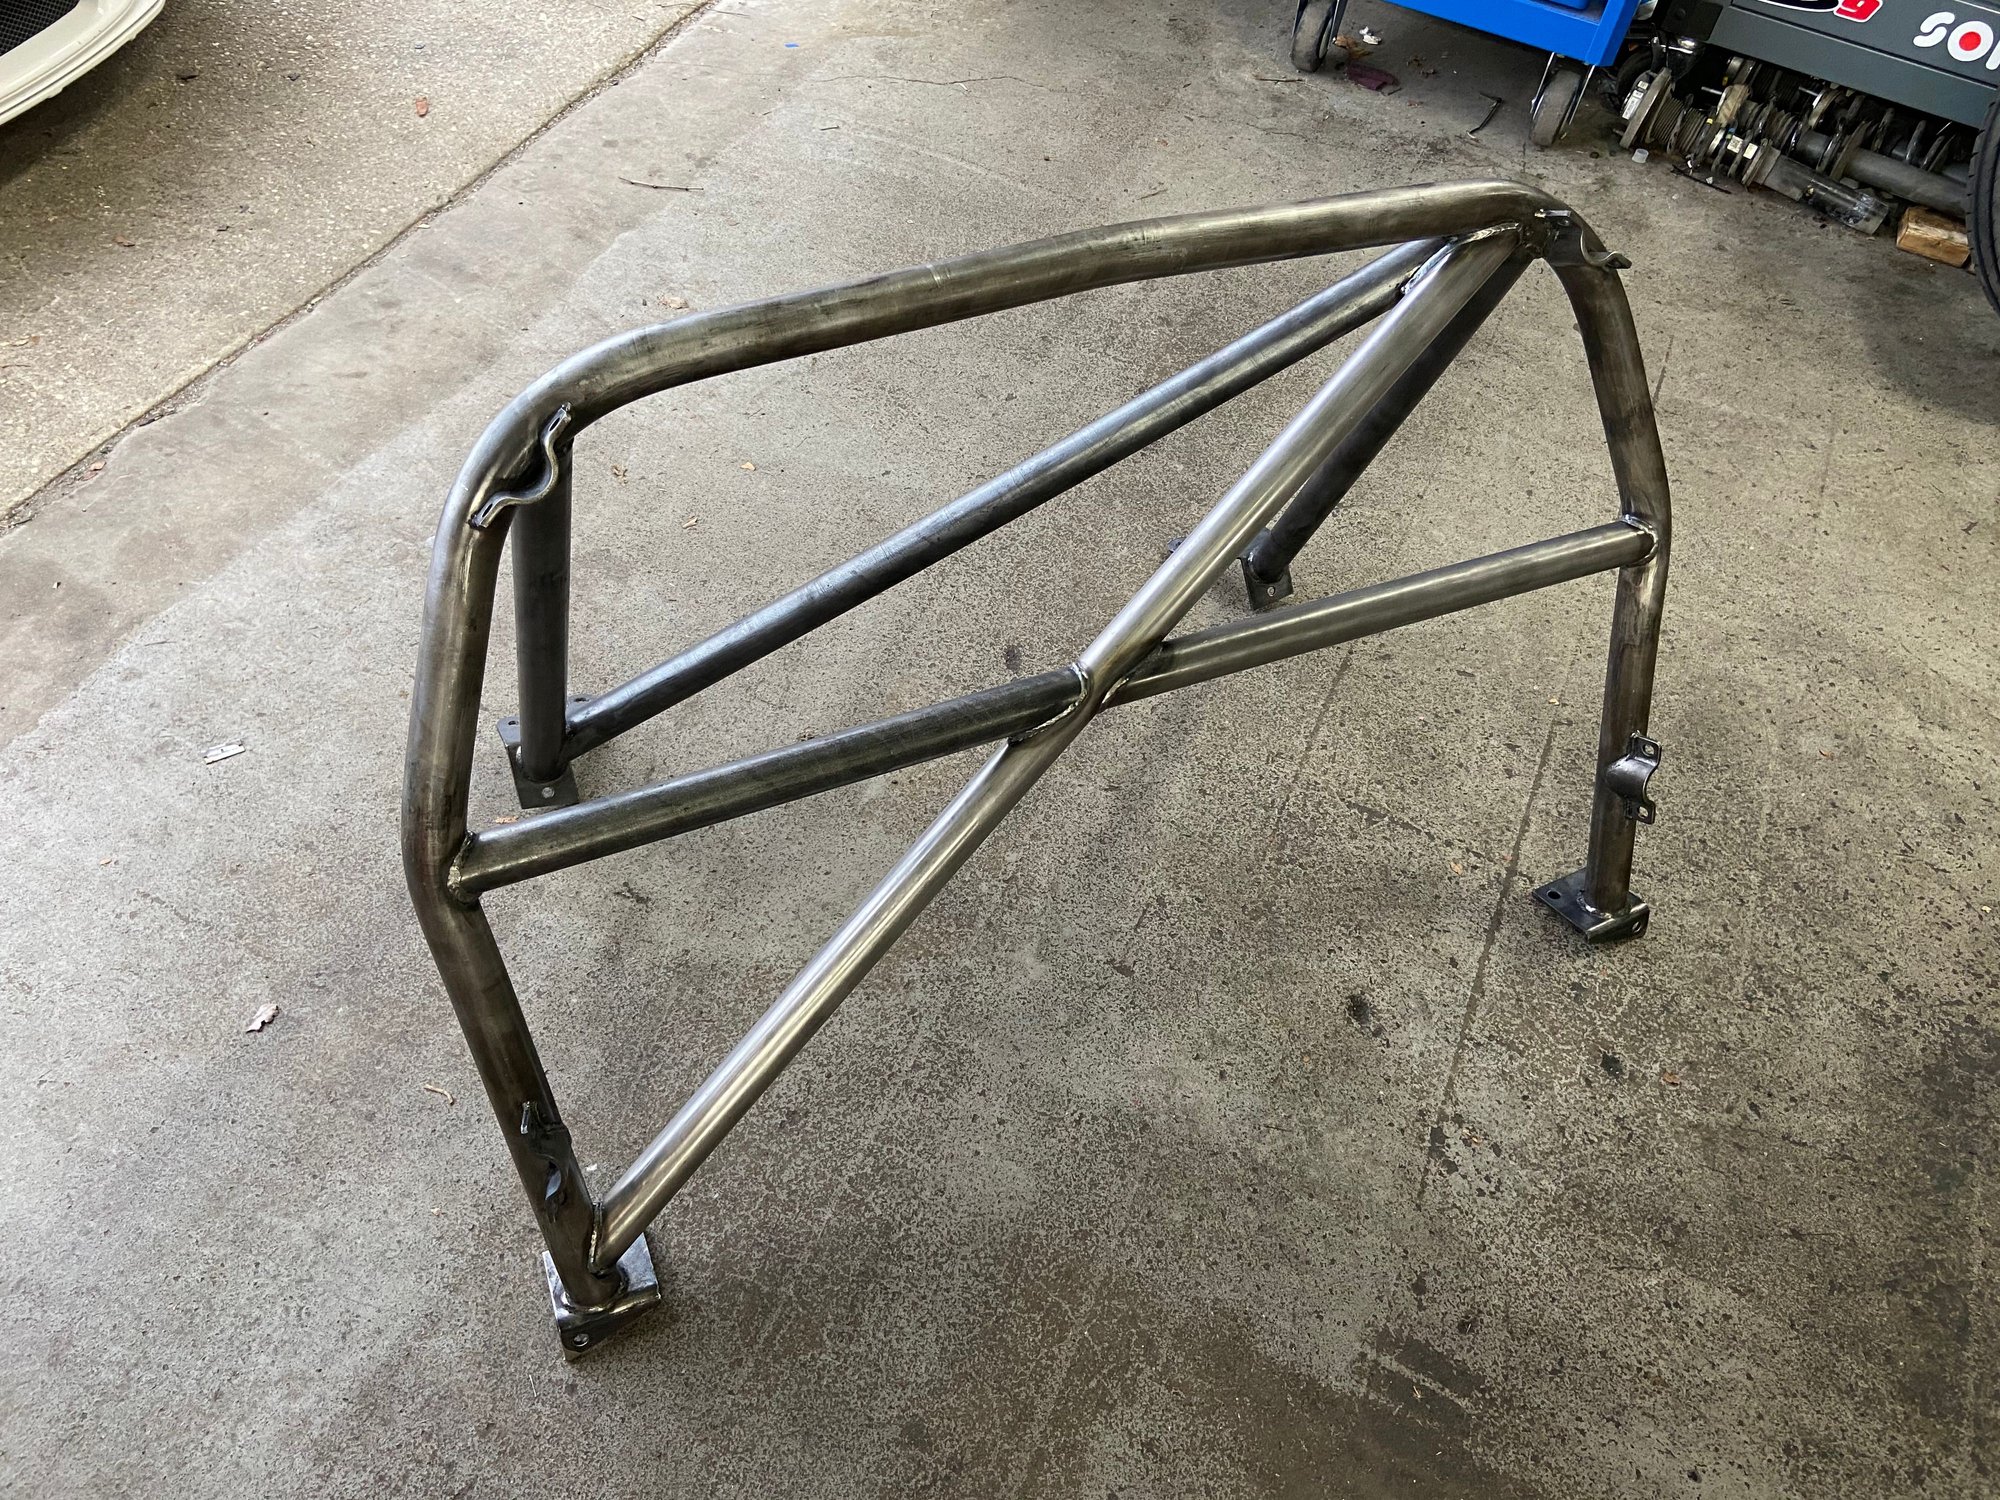
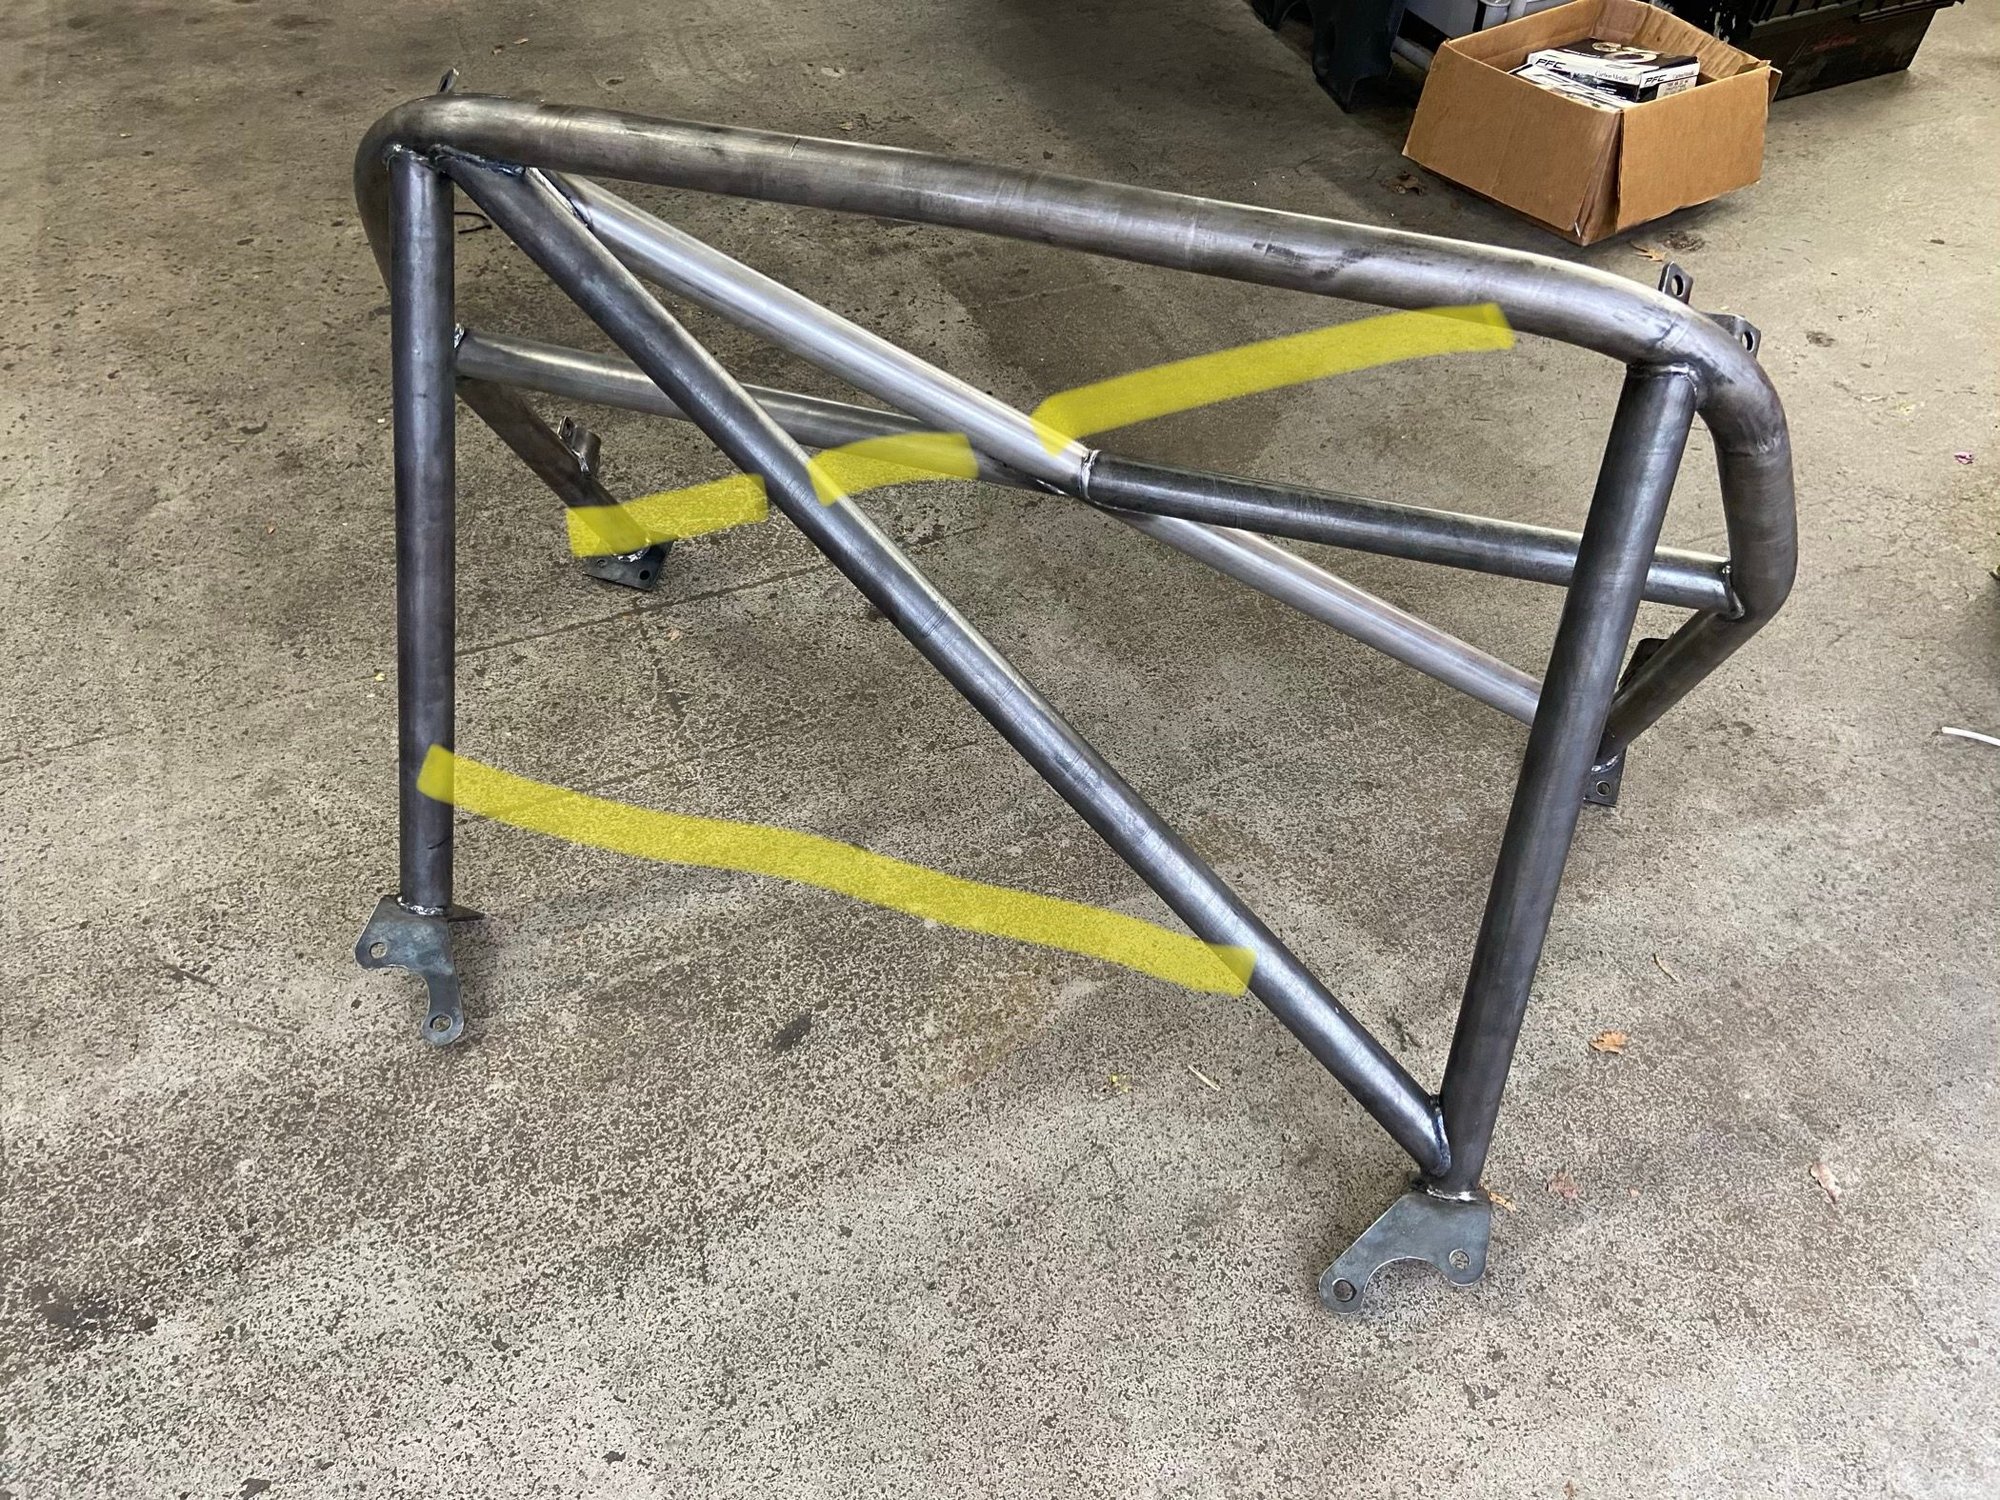
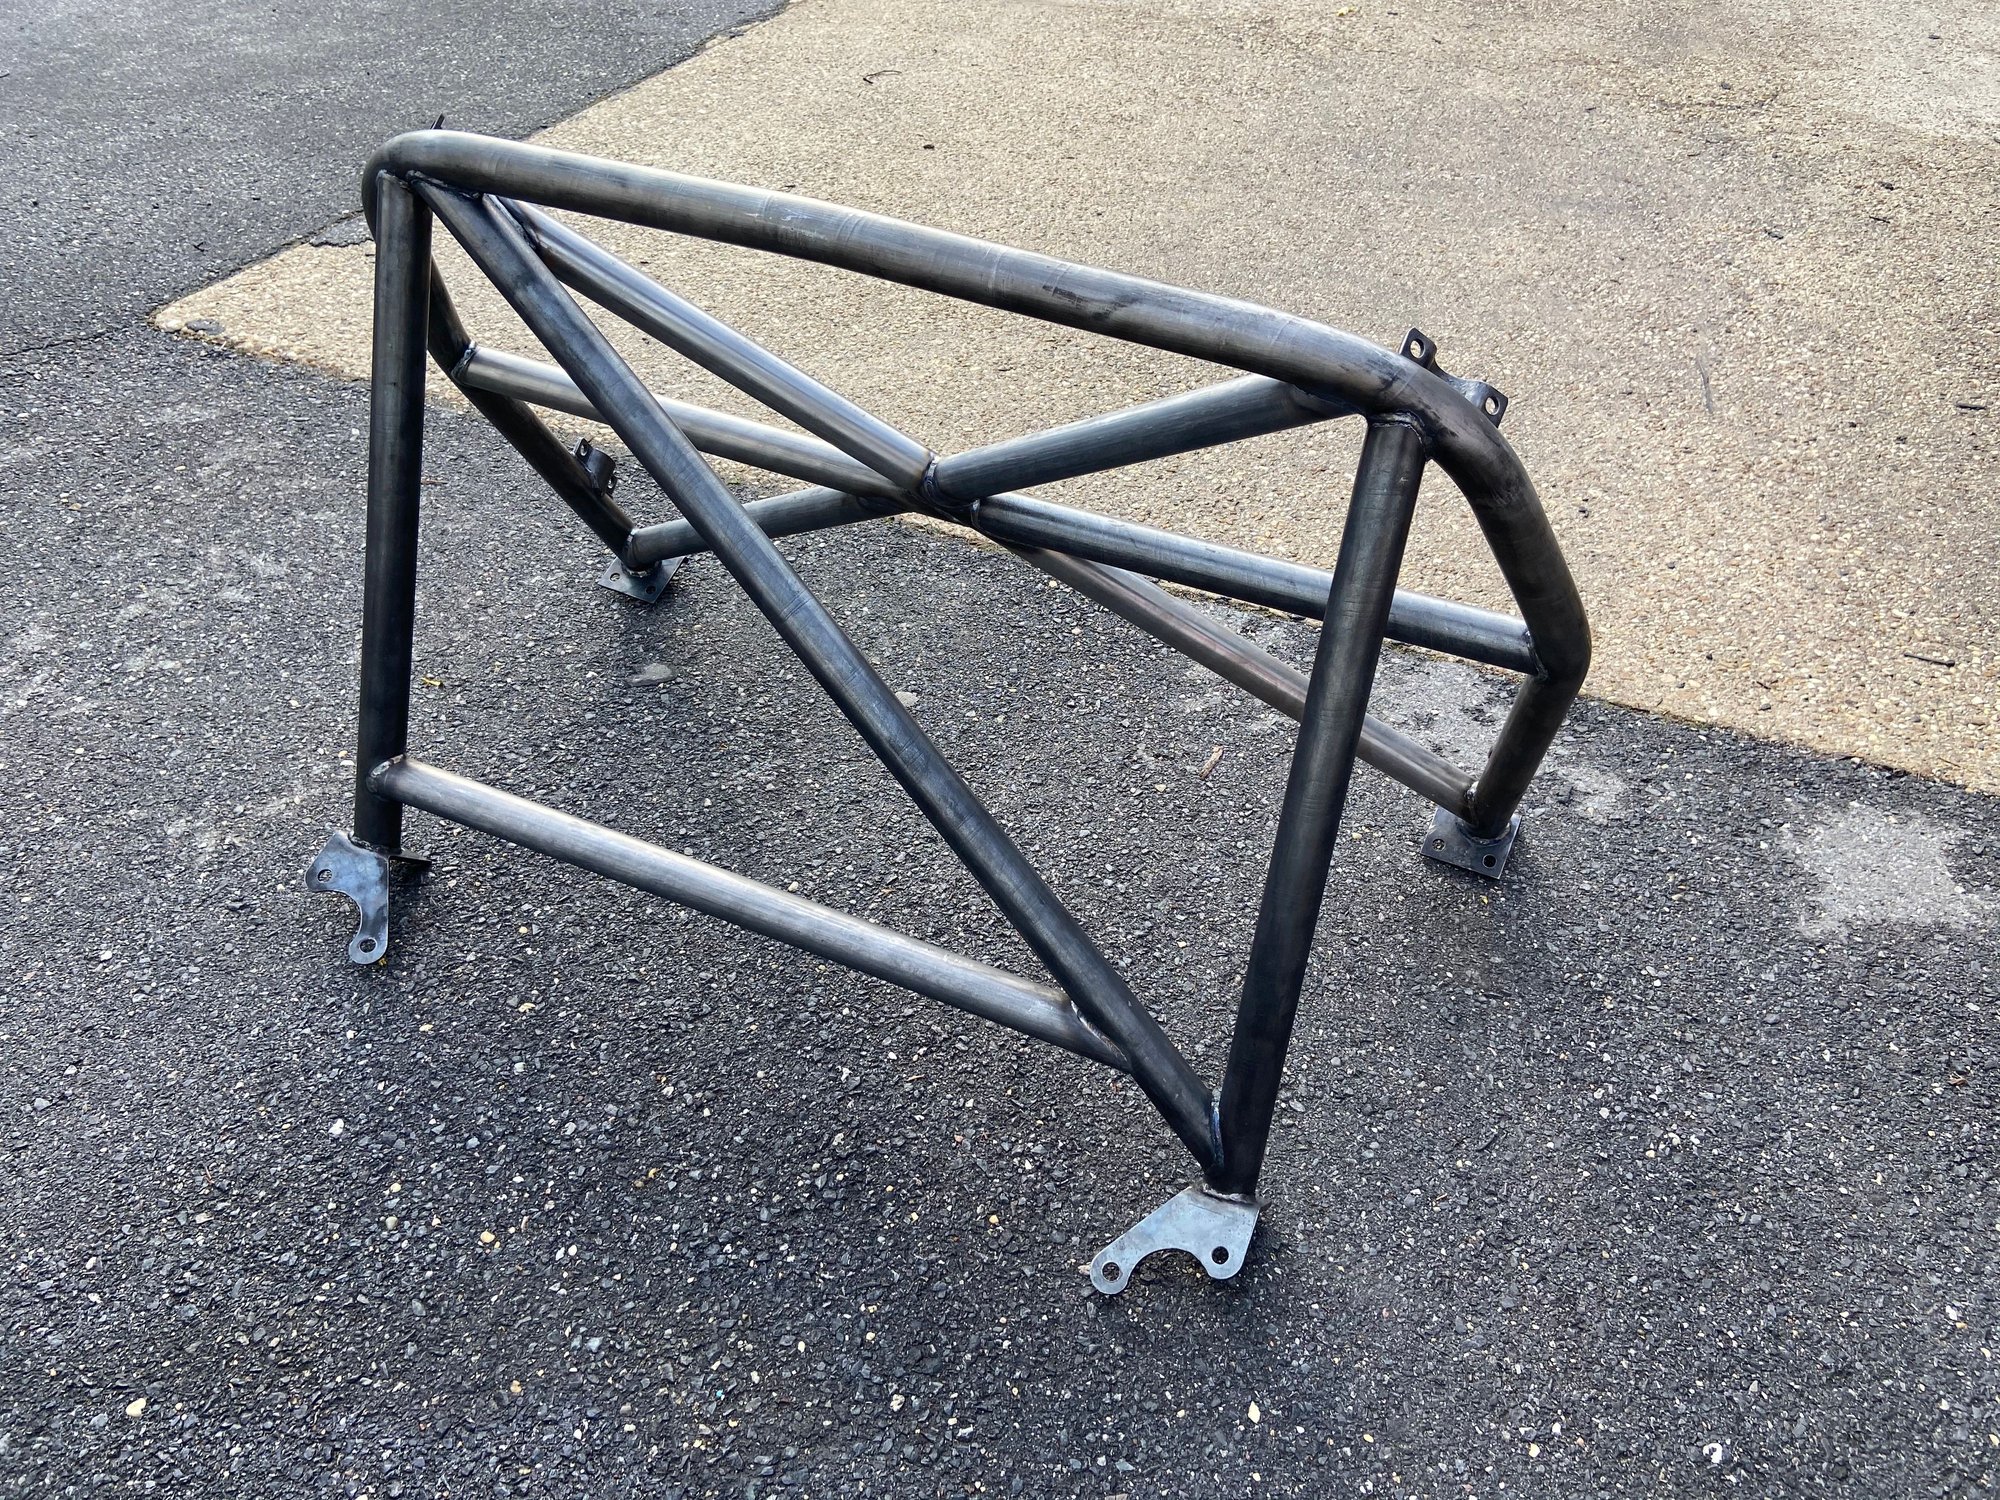
For the cage, I've acquired an unused Safety Device 6-point bolt-in cage from a rennlist member. Its not a "true" bolt-in because the footing for four of the six points has to be welded to the chassis. Once the footings are welded then the cage can bolted on and bolted off.
Here's a better look at the rear section. Made entirely from 1.750" x .120 steel. It is definitely not light weight but it is "heavy" duty for sure.
This cage looks nice but it isn't the way I'd have spec if I'd order it new so I wasted no time stripping down the powdercoating to make mods I want.
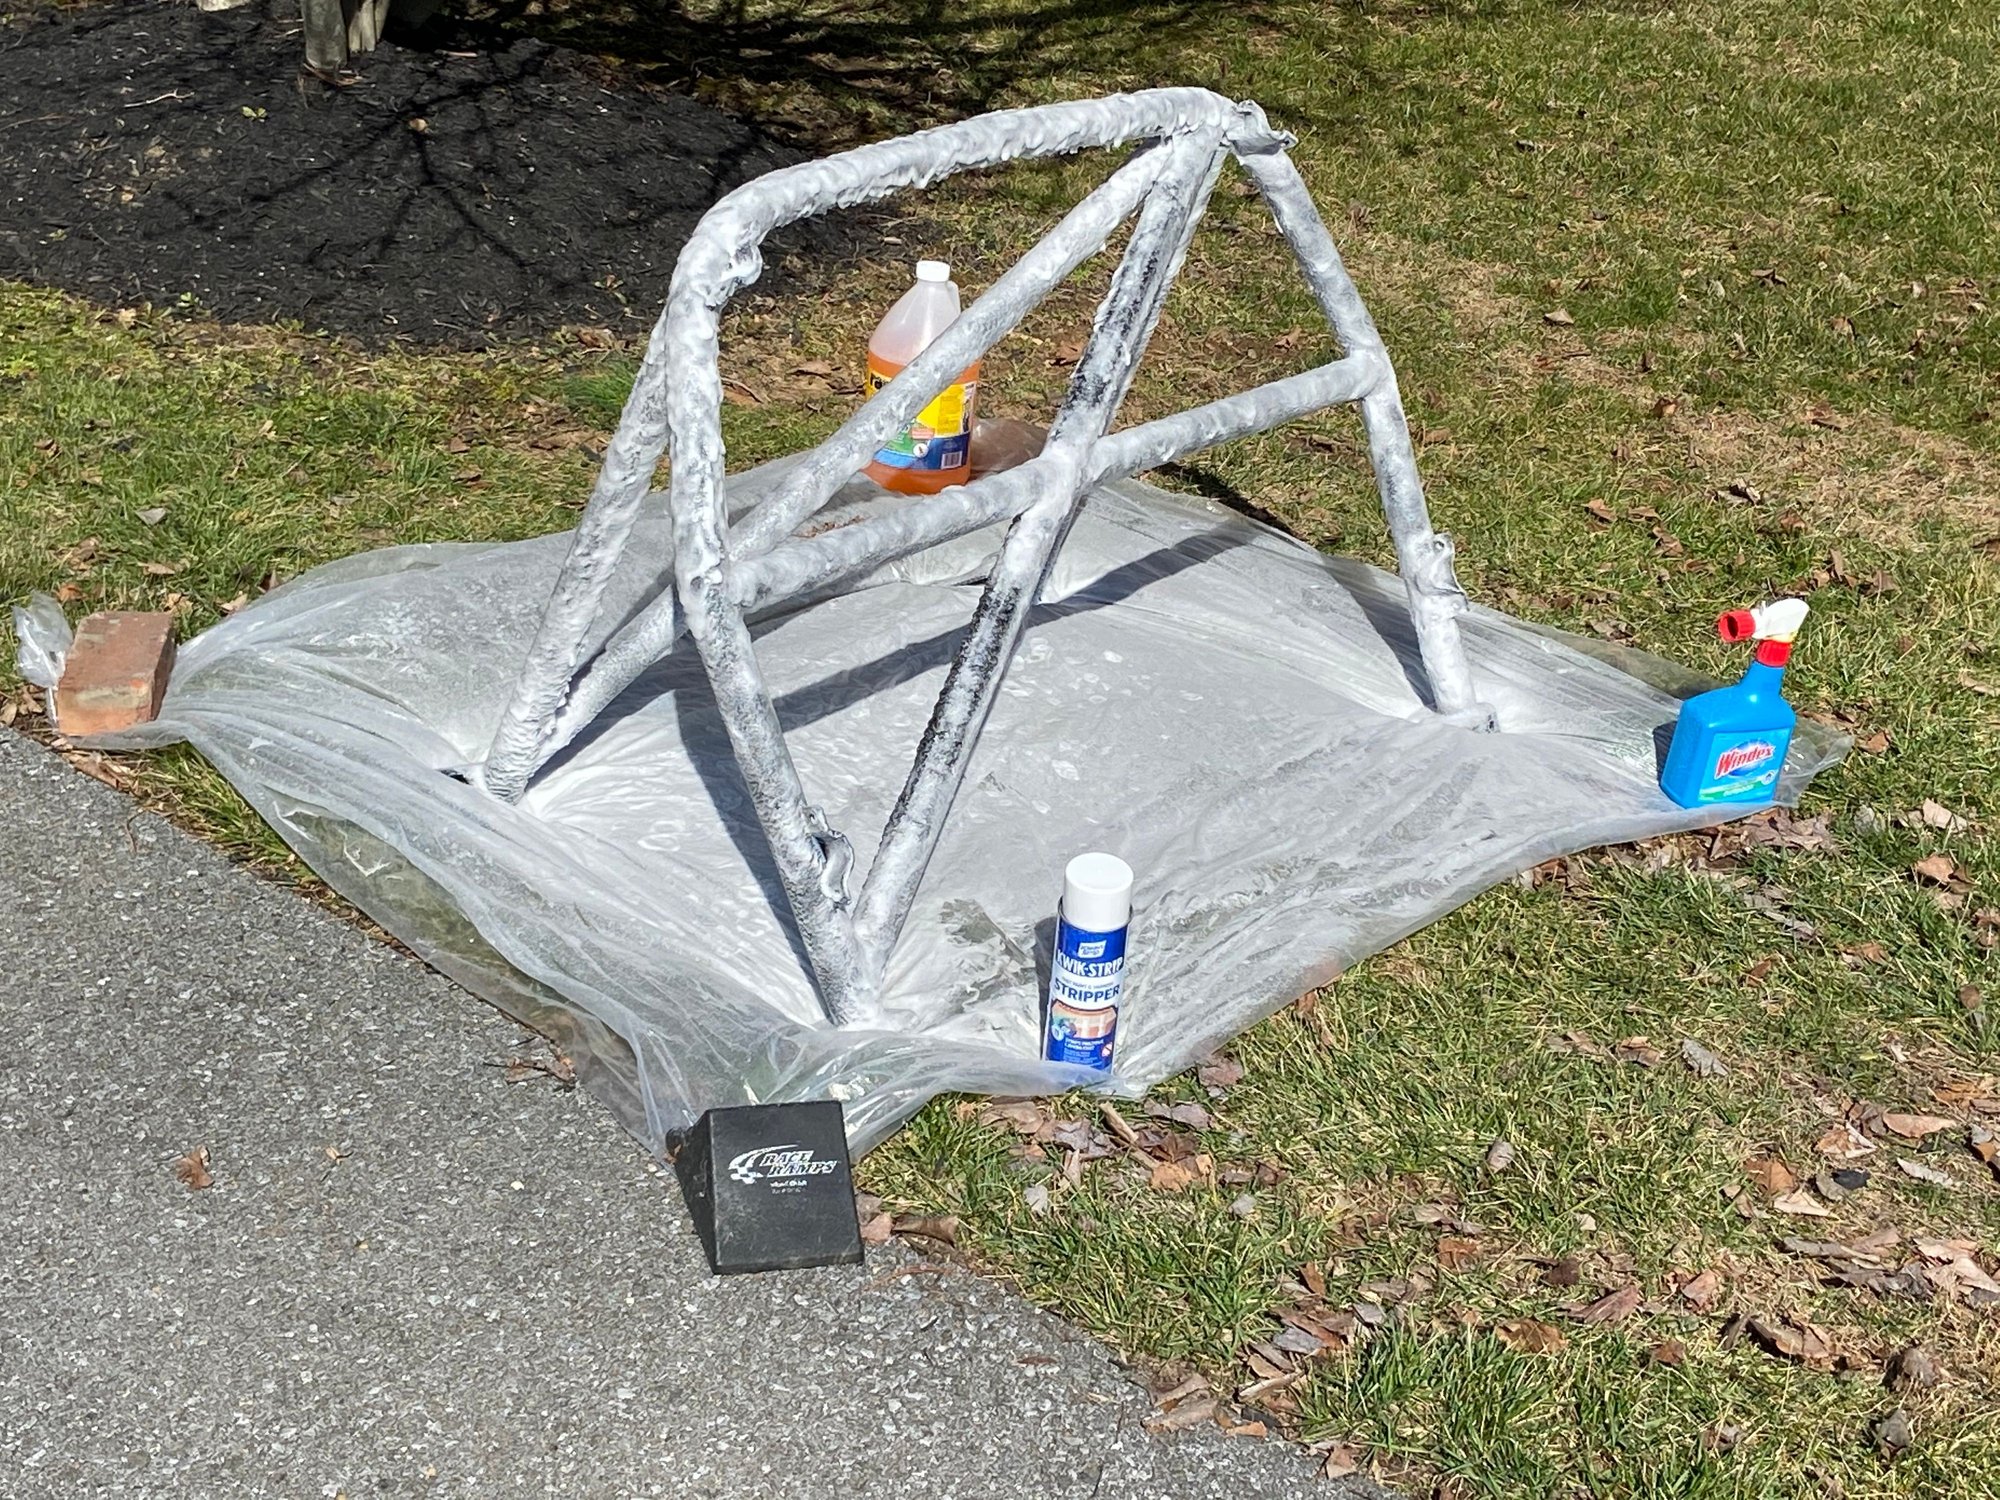
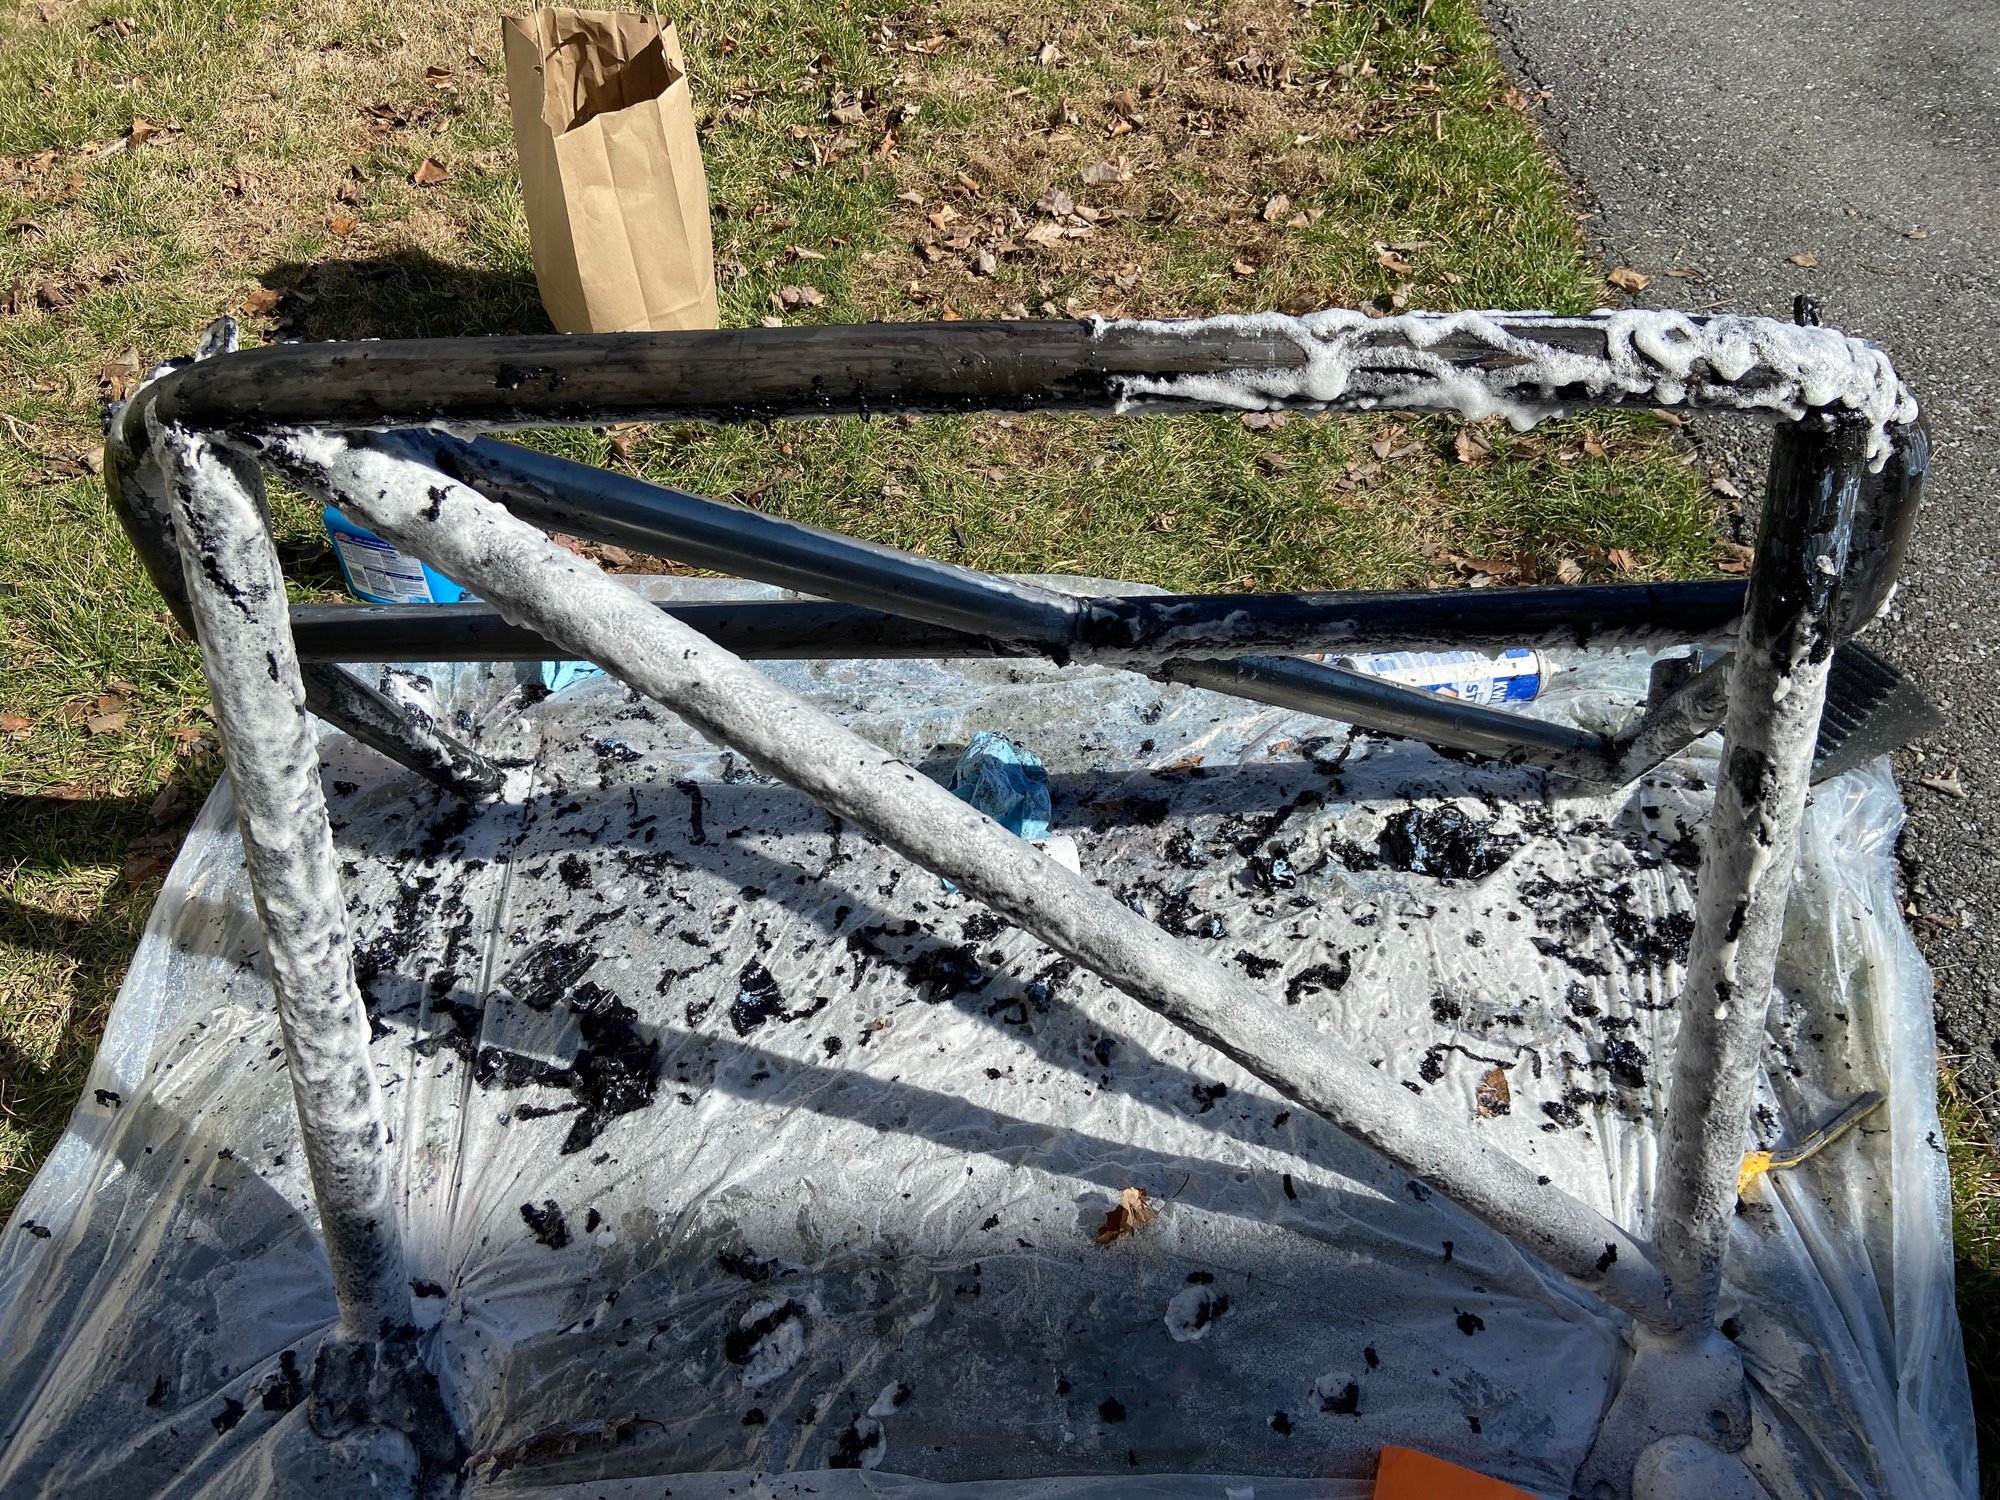
Doused in paint/epoxy stripper on the windy day. Ugh.
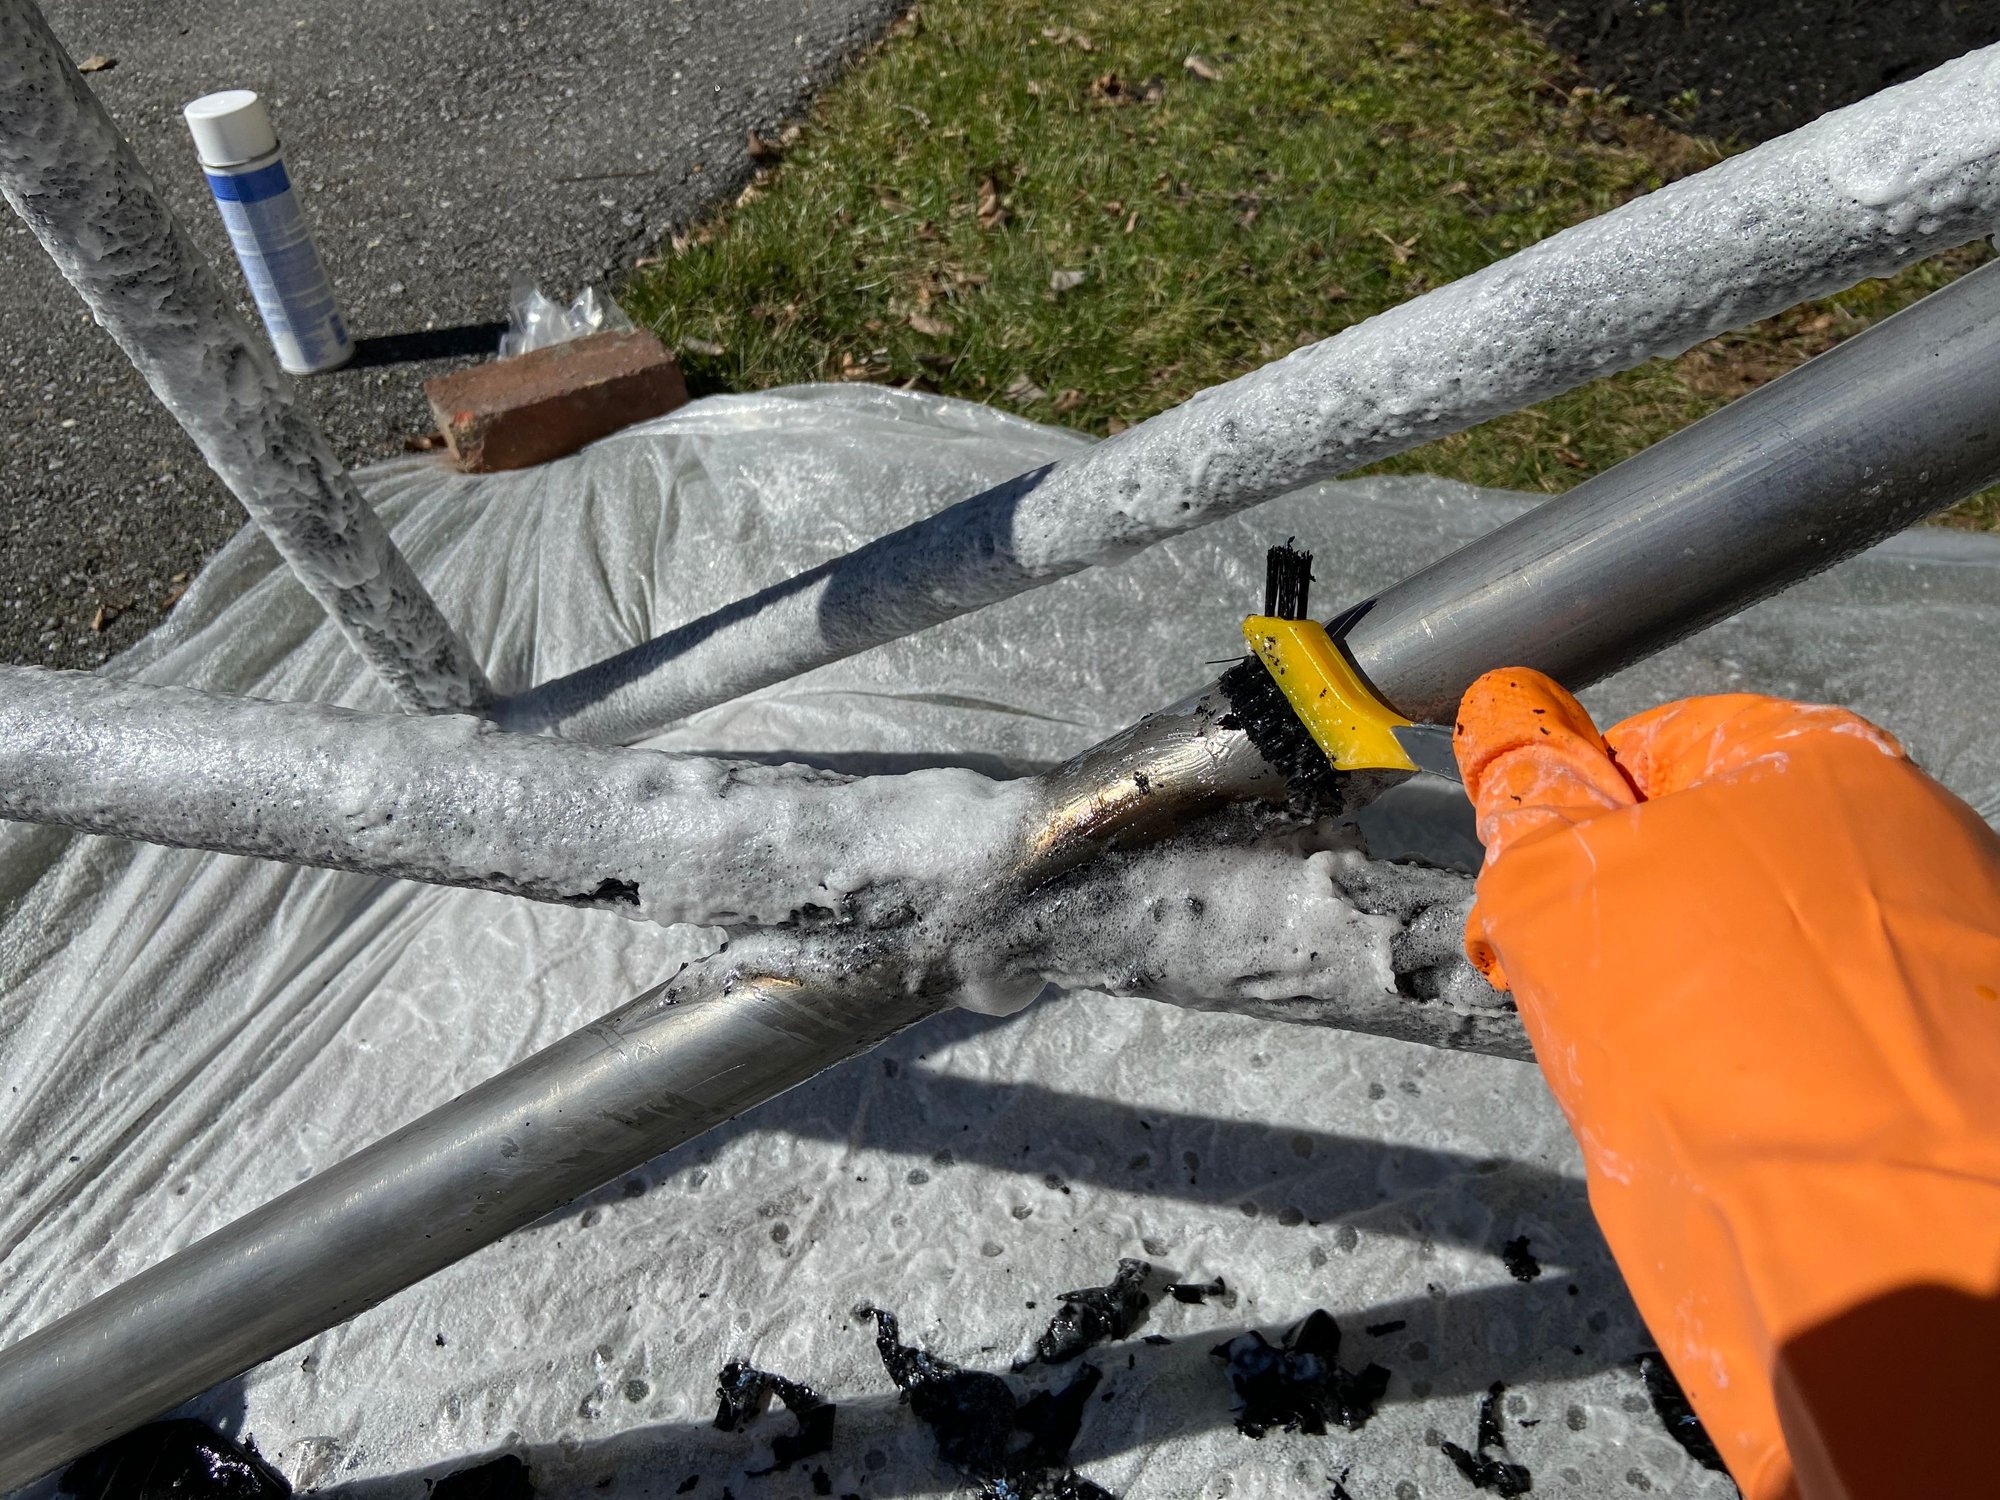
After about 2 hours of soaking the coating on the main diagonal bar of the cage started to separate. That was really nice, the coating came off with ease using a plastic scraper and brush.
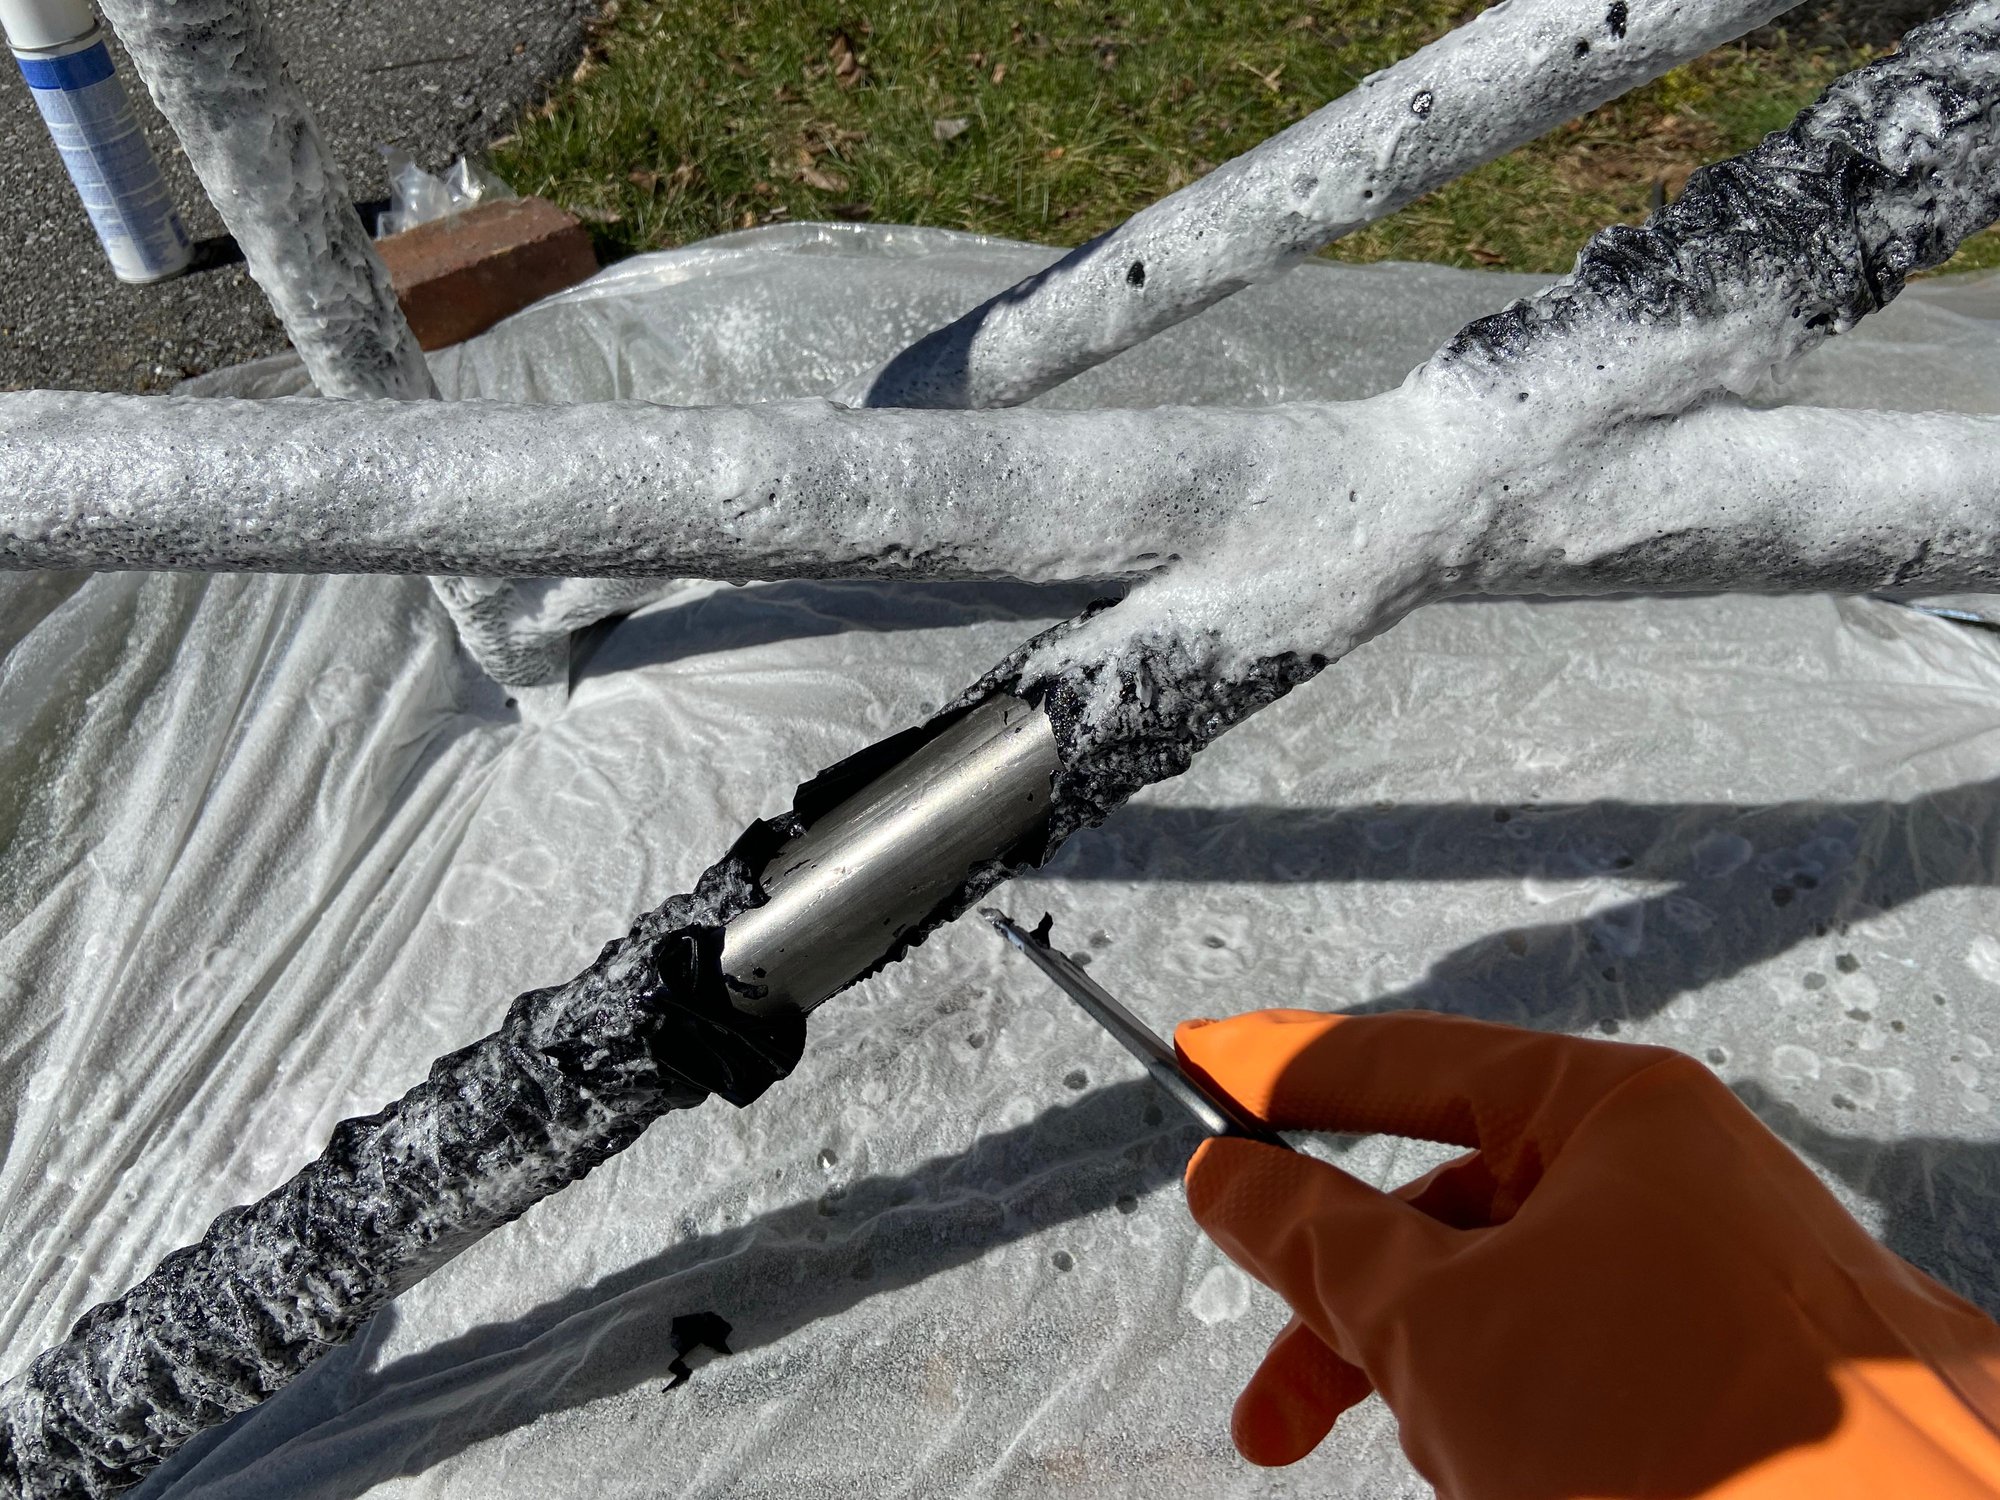
However, on the rest of the cage the coating required serious effort to remove despite multiple round of paint stripper and hours of soaking. Its messy work. The high wind blows droplets of the chemical, its burns my face and makes we think why I do this.
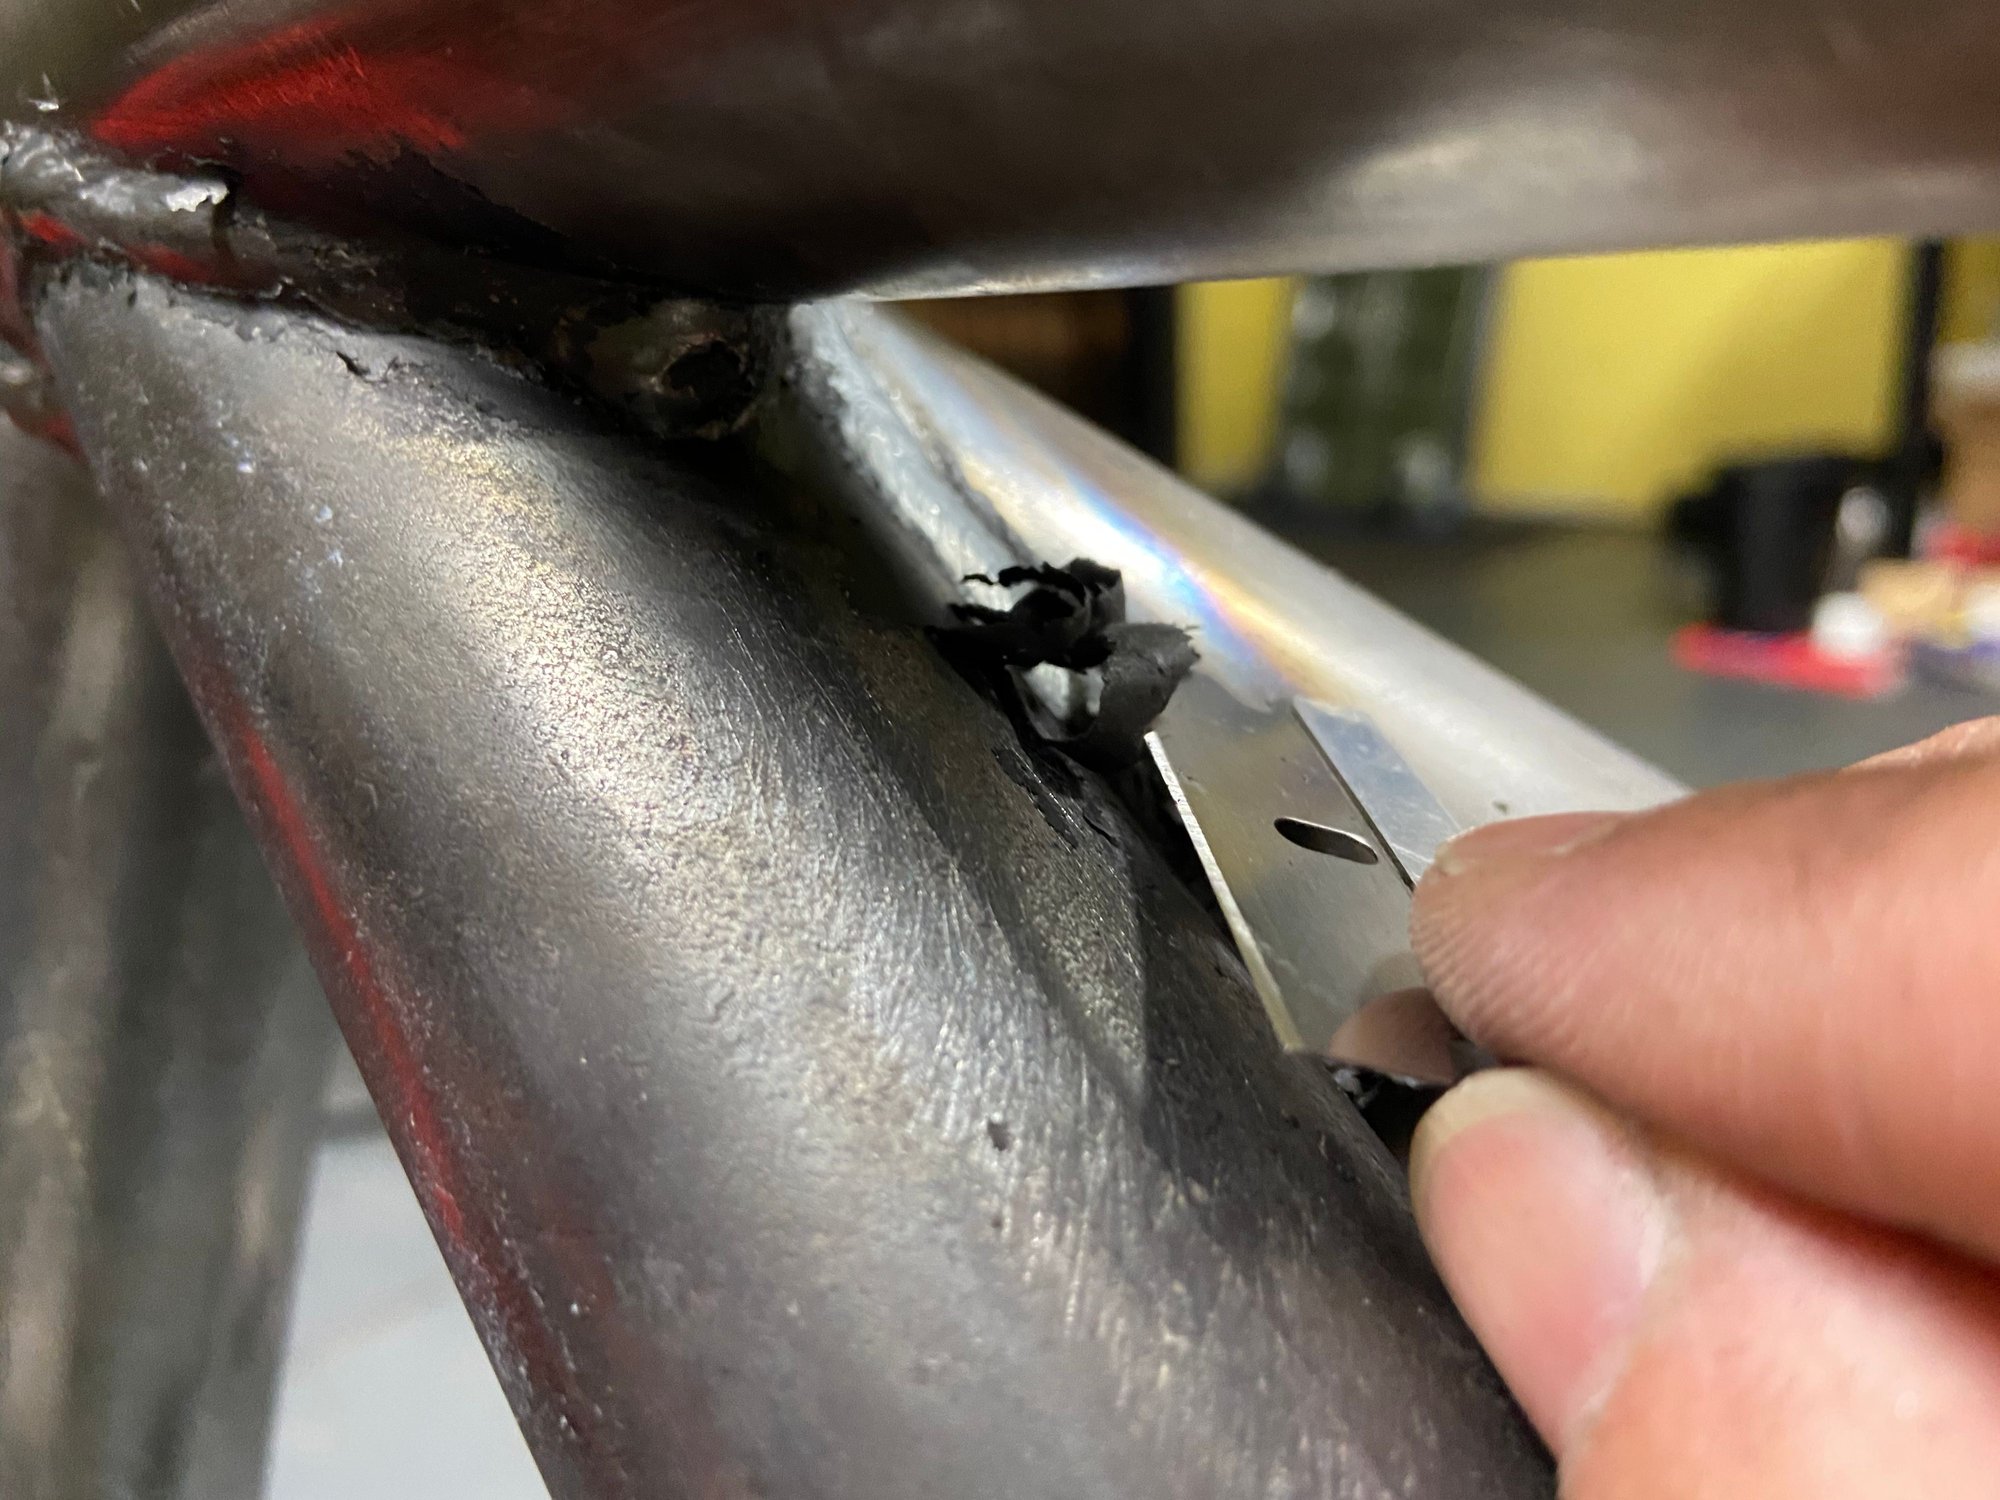
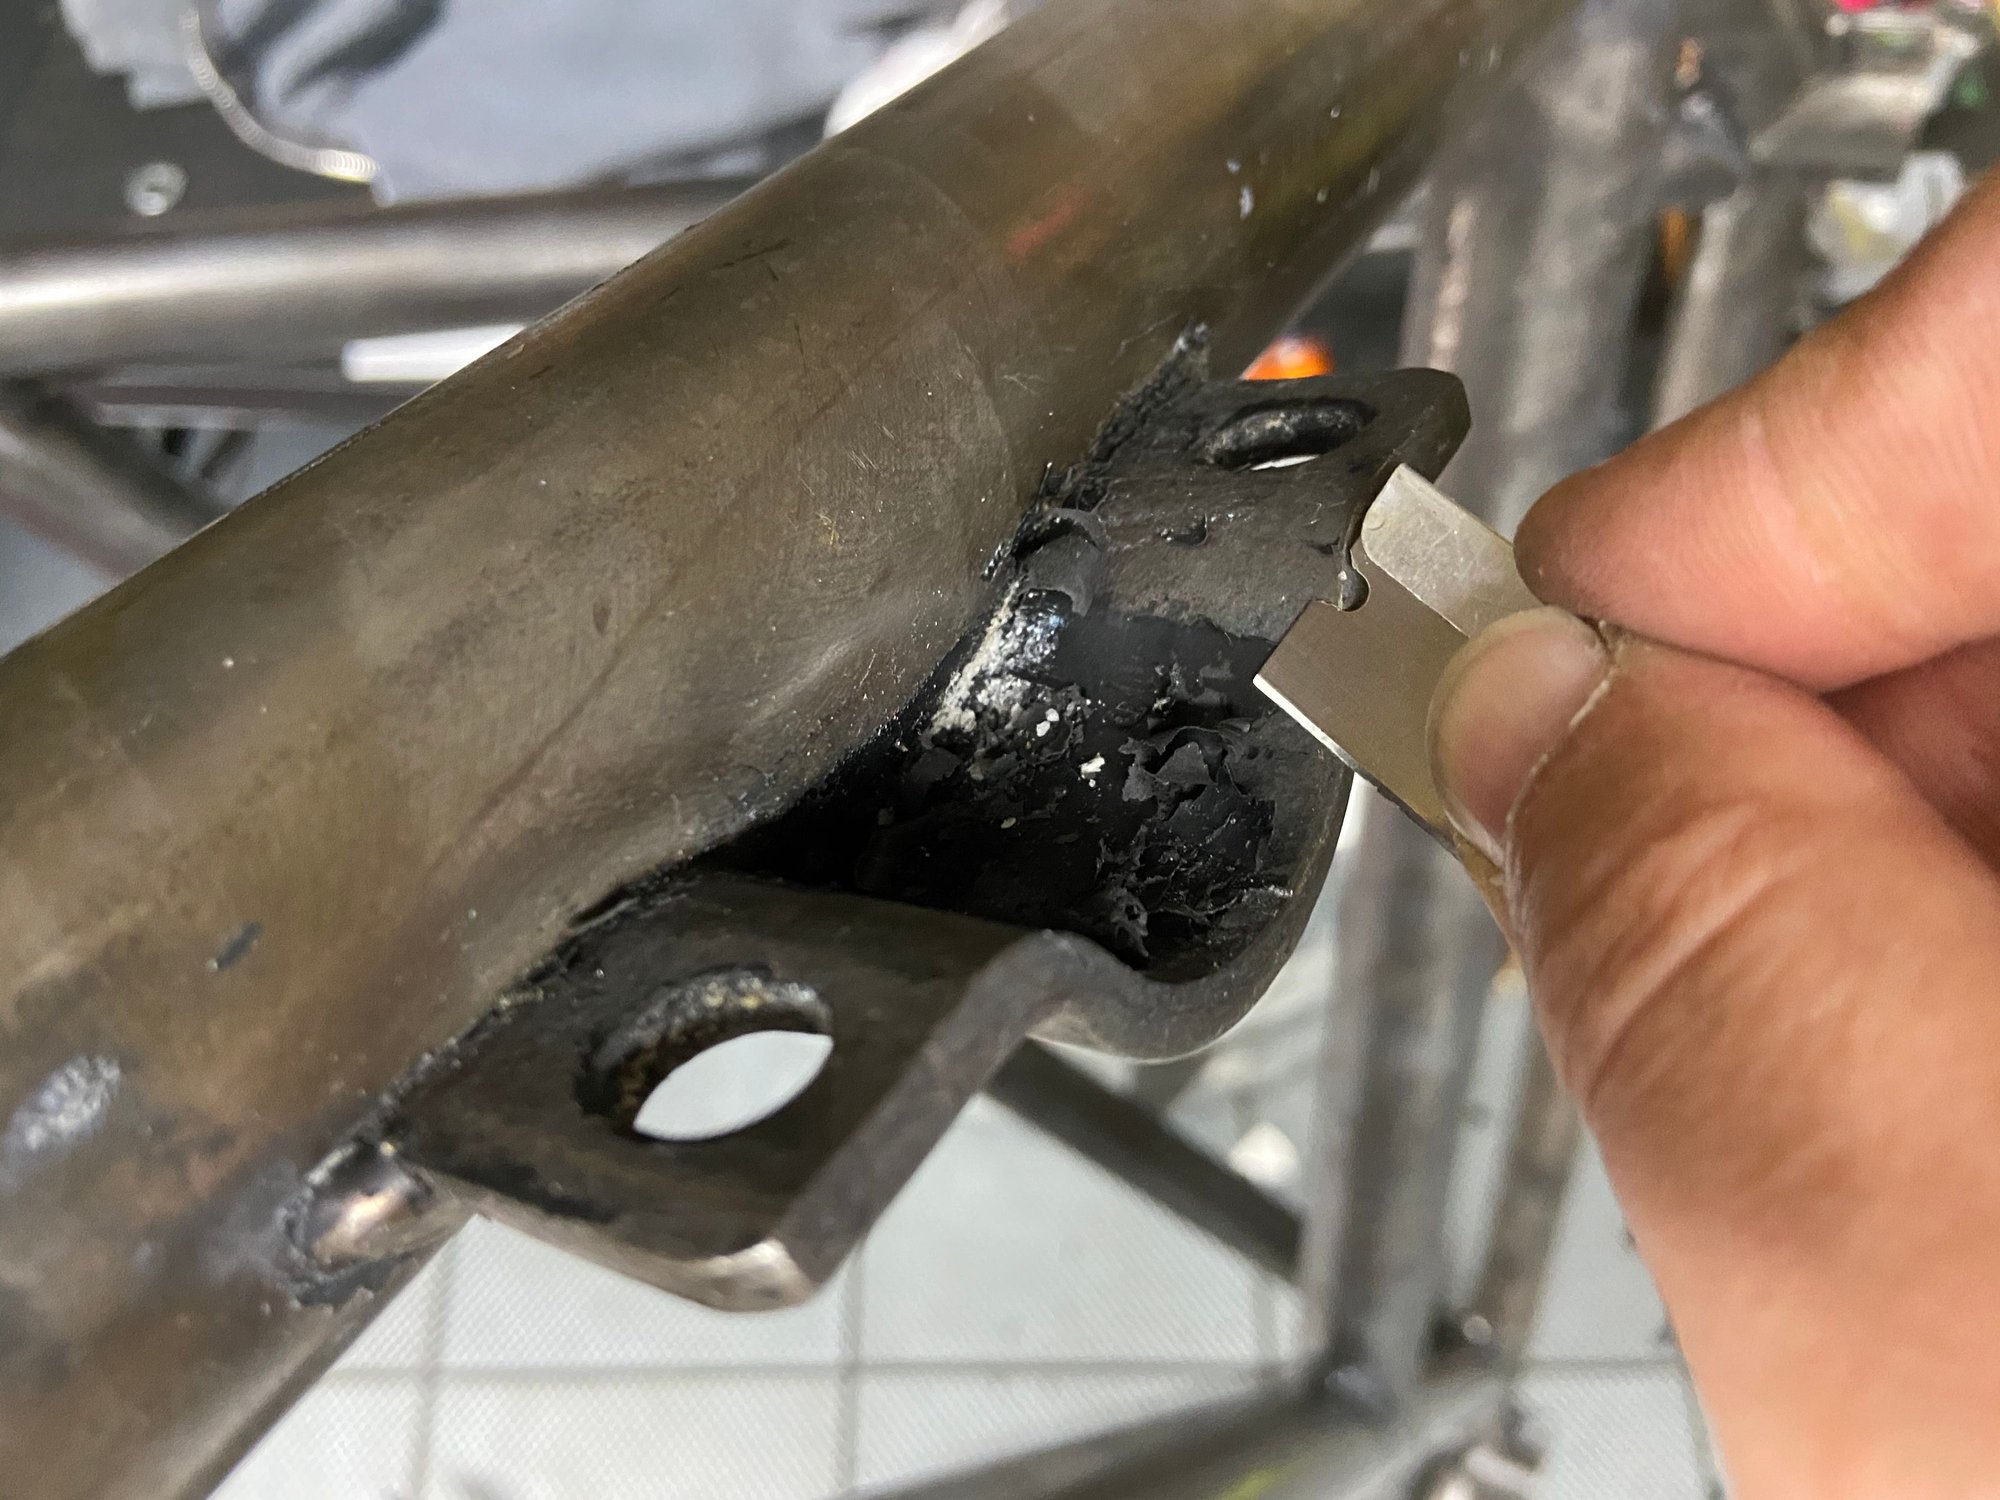
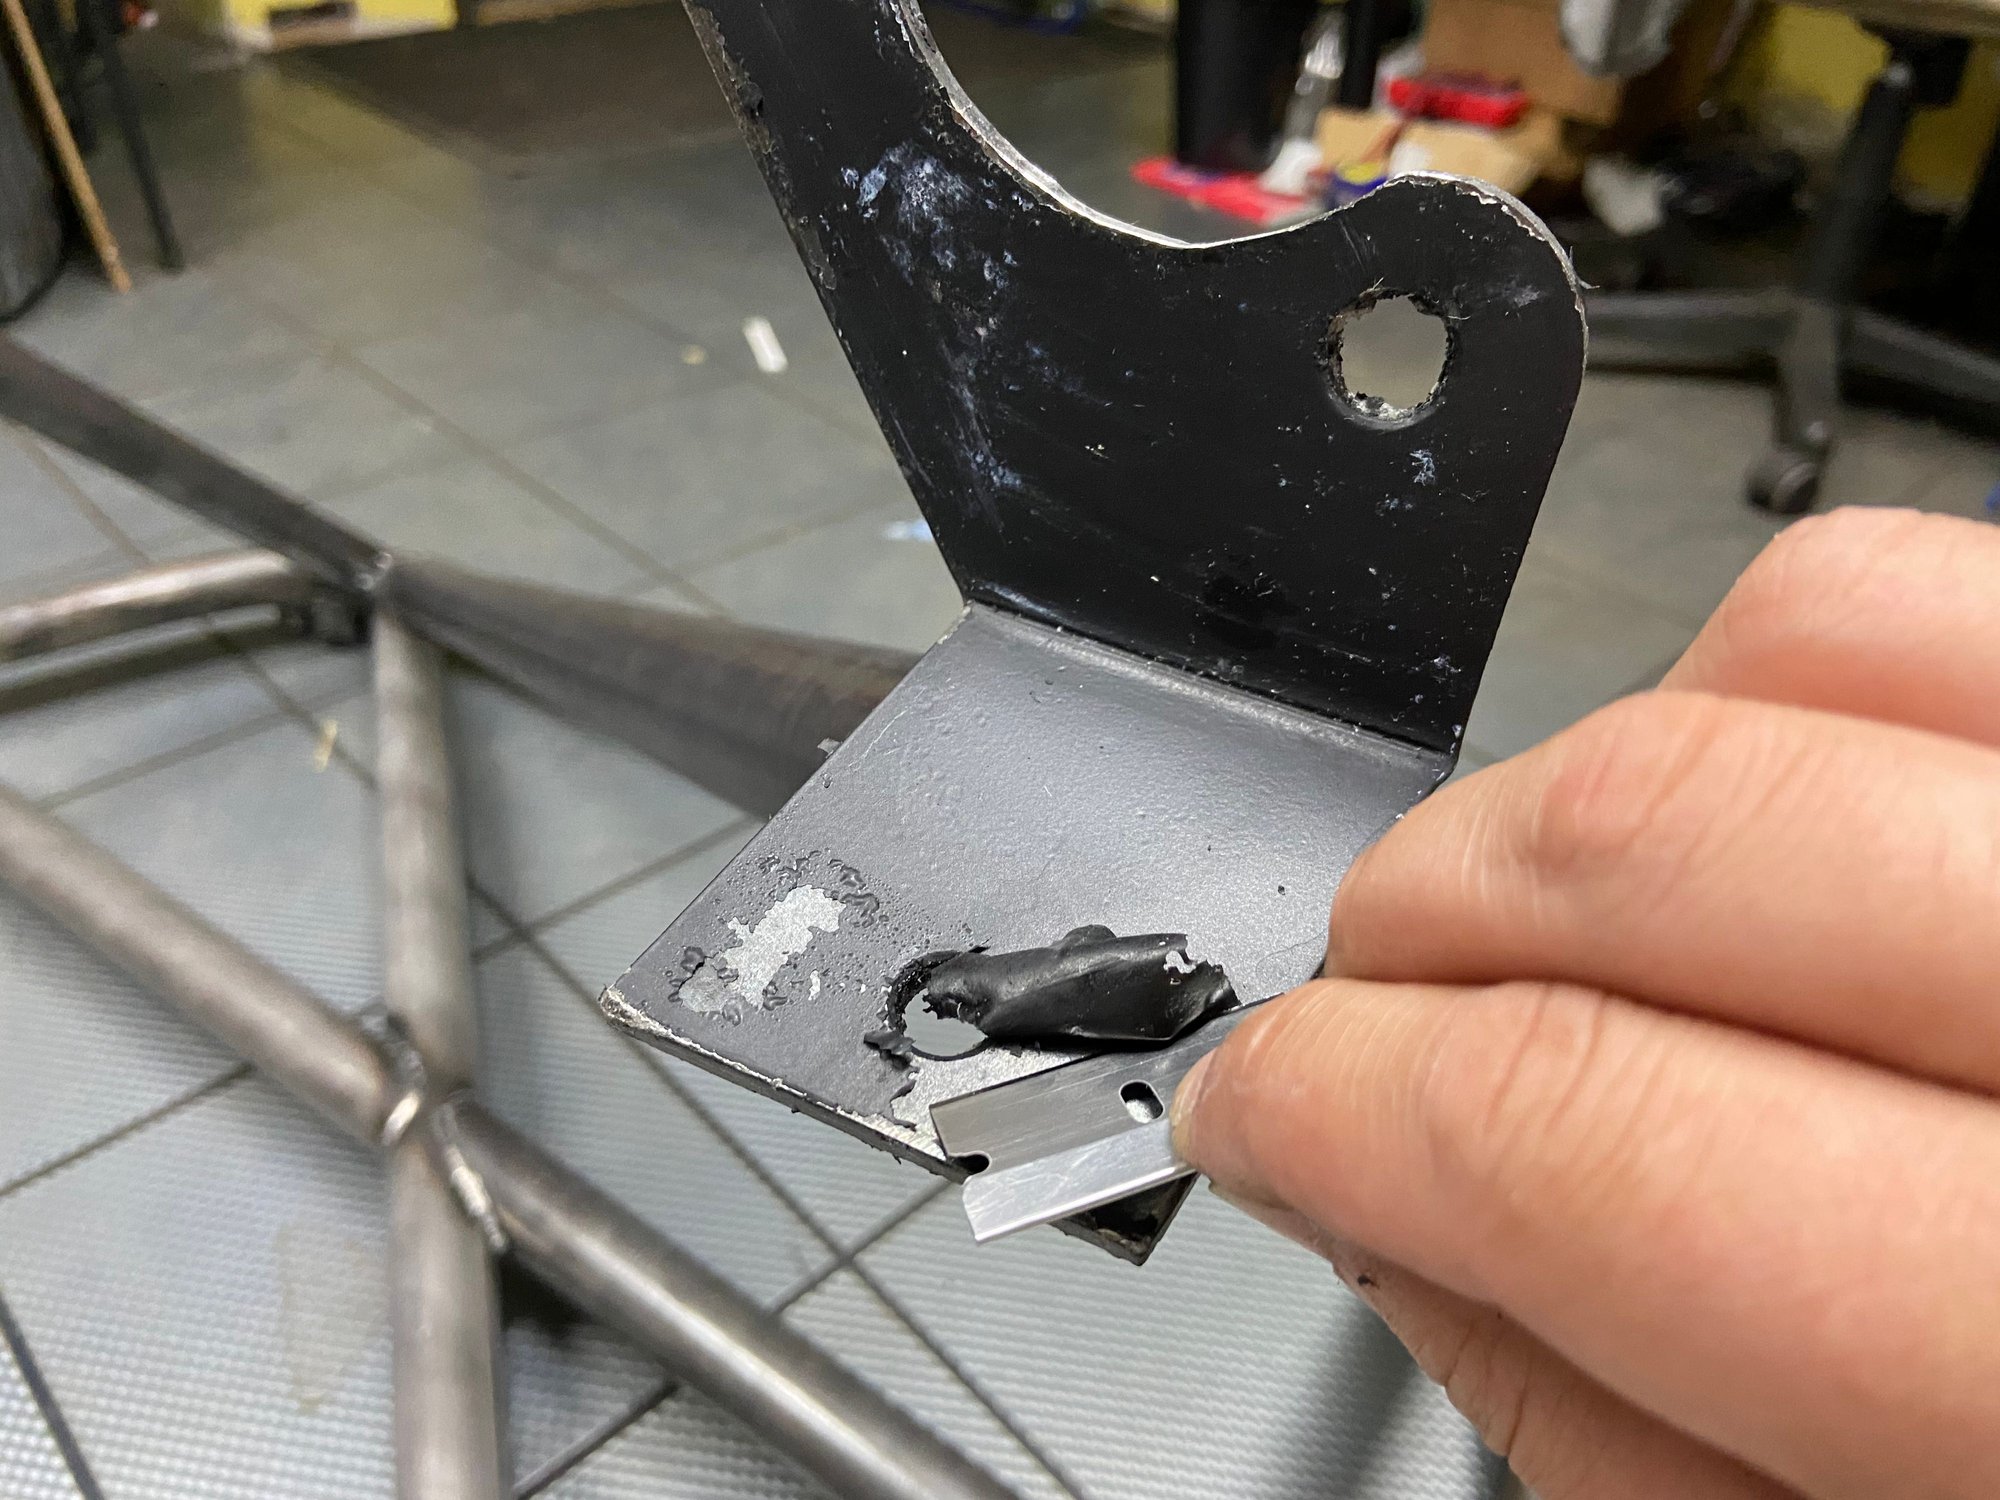
9 hours later I am finishing the tight areas and footings with a razor blade. Fingers beyond sore and numb.
I want the rear section of the cage to be similar to a 991.1 Cup. Here's a pic of a 991.1 Cup cage. The main hoop has an X, the rear legs have a single diagonal with a horizontal bar just above the rear shock towers.
Here's better view of the 991.1 Cup rear legs with a single diagonal bar and a horizontal bar near the bottom that serves both as a rear shock tower support bar and harness bar.
To achieve a similar look I need to weld two bars as shown below.
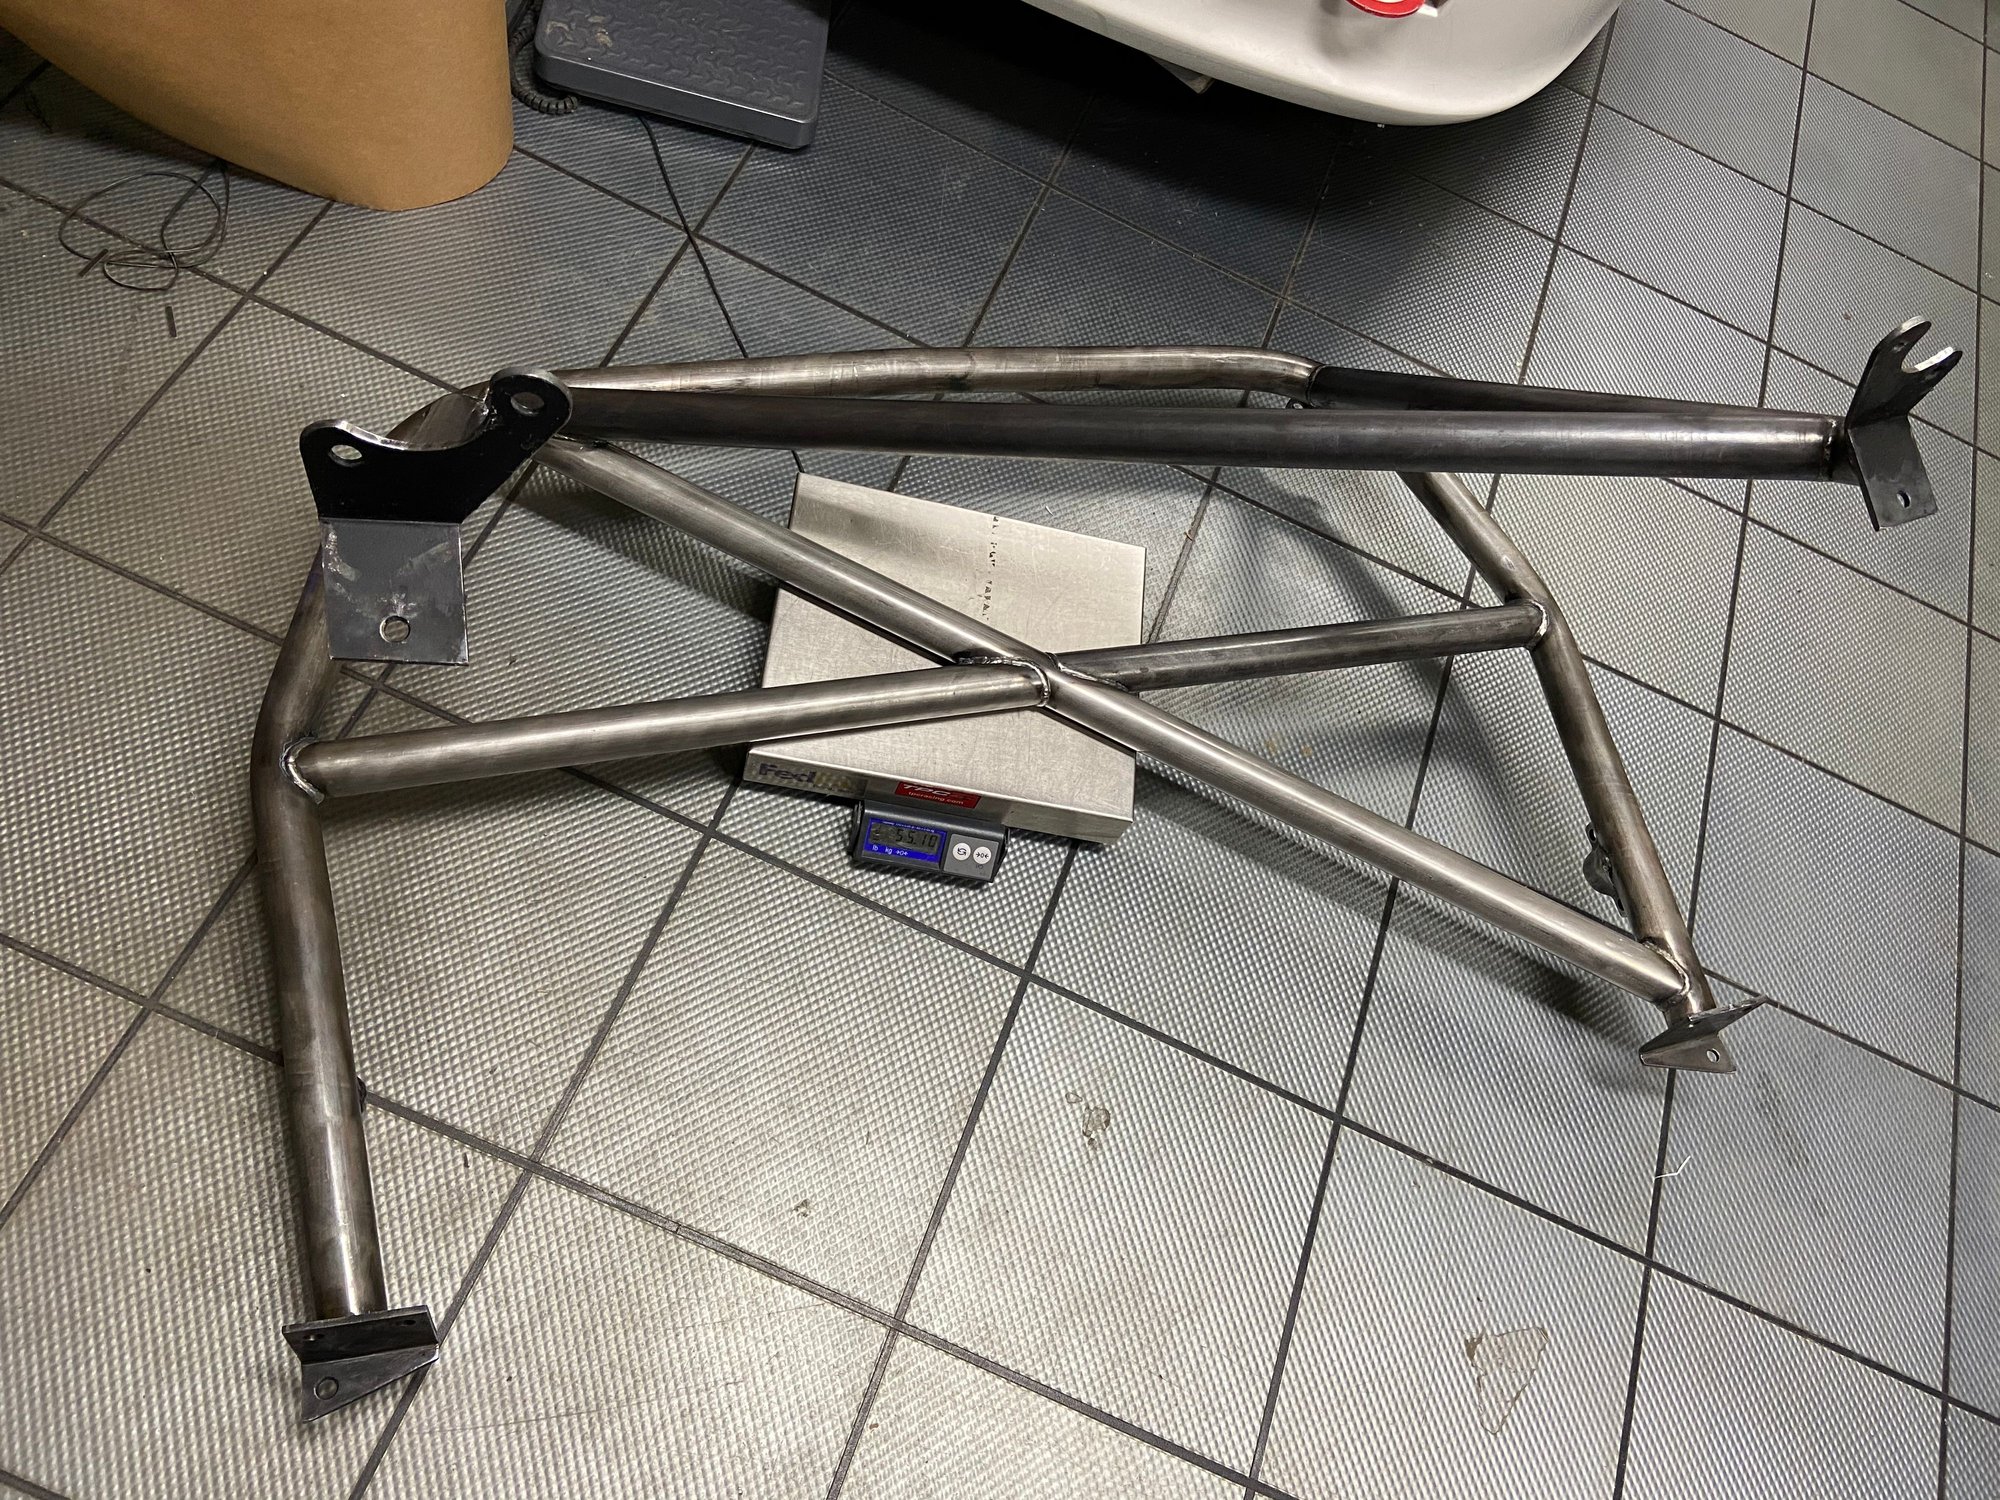
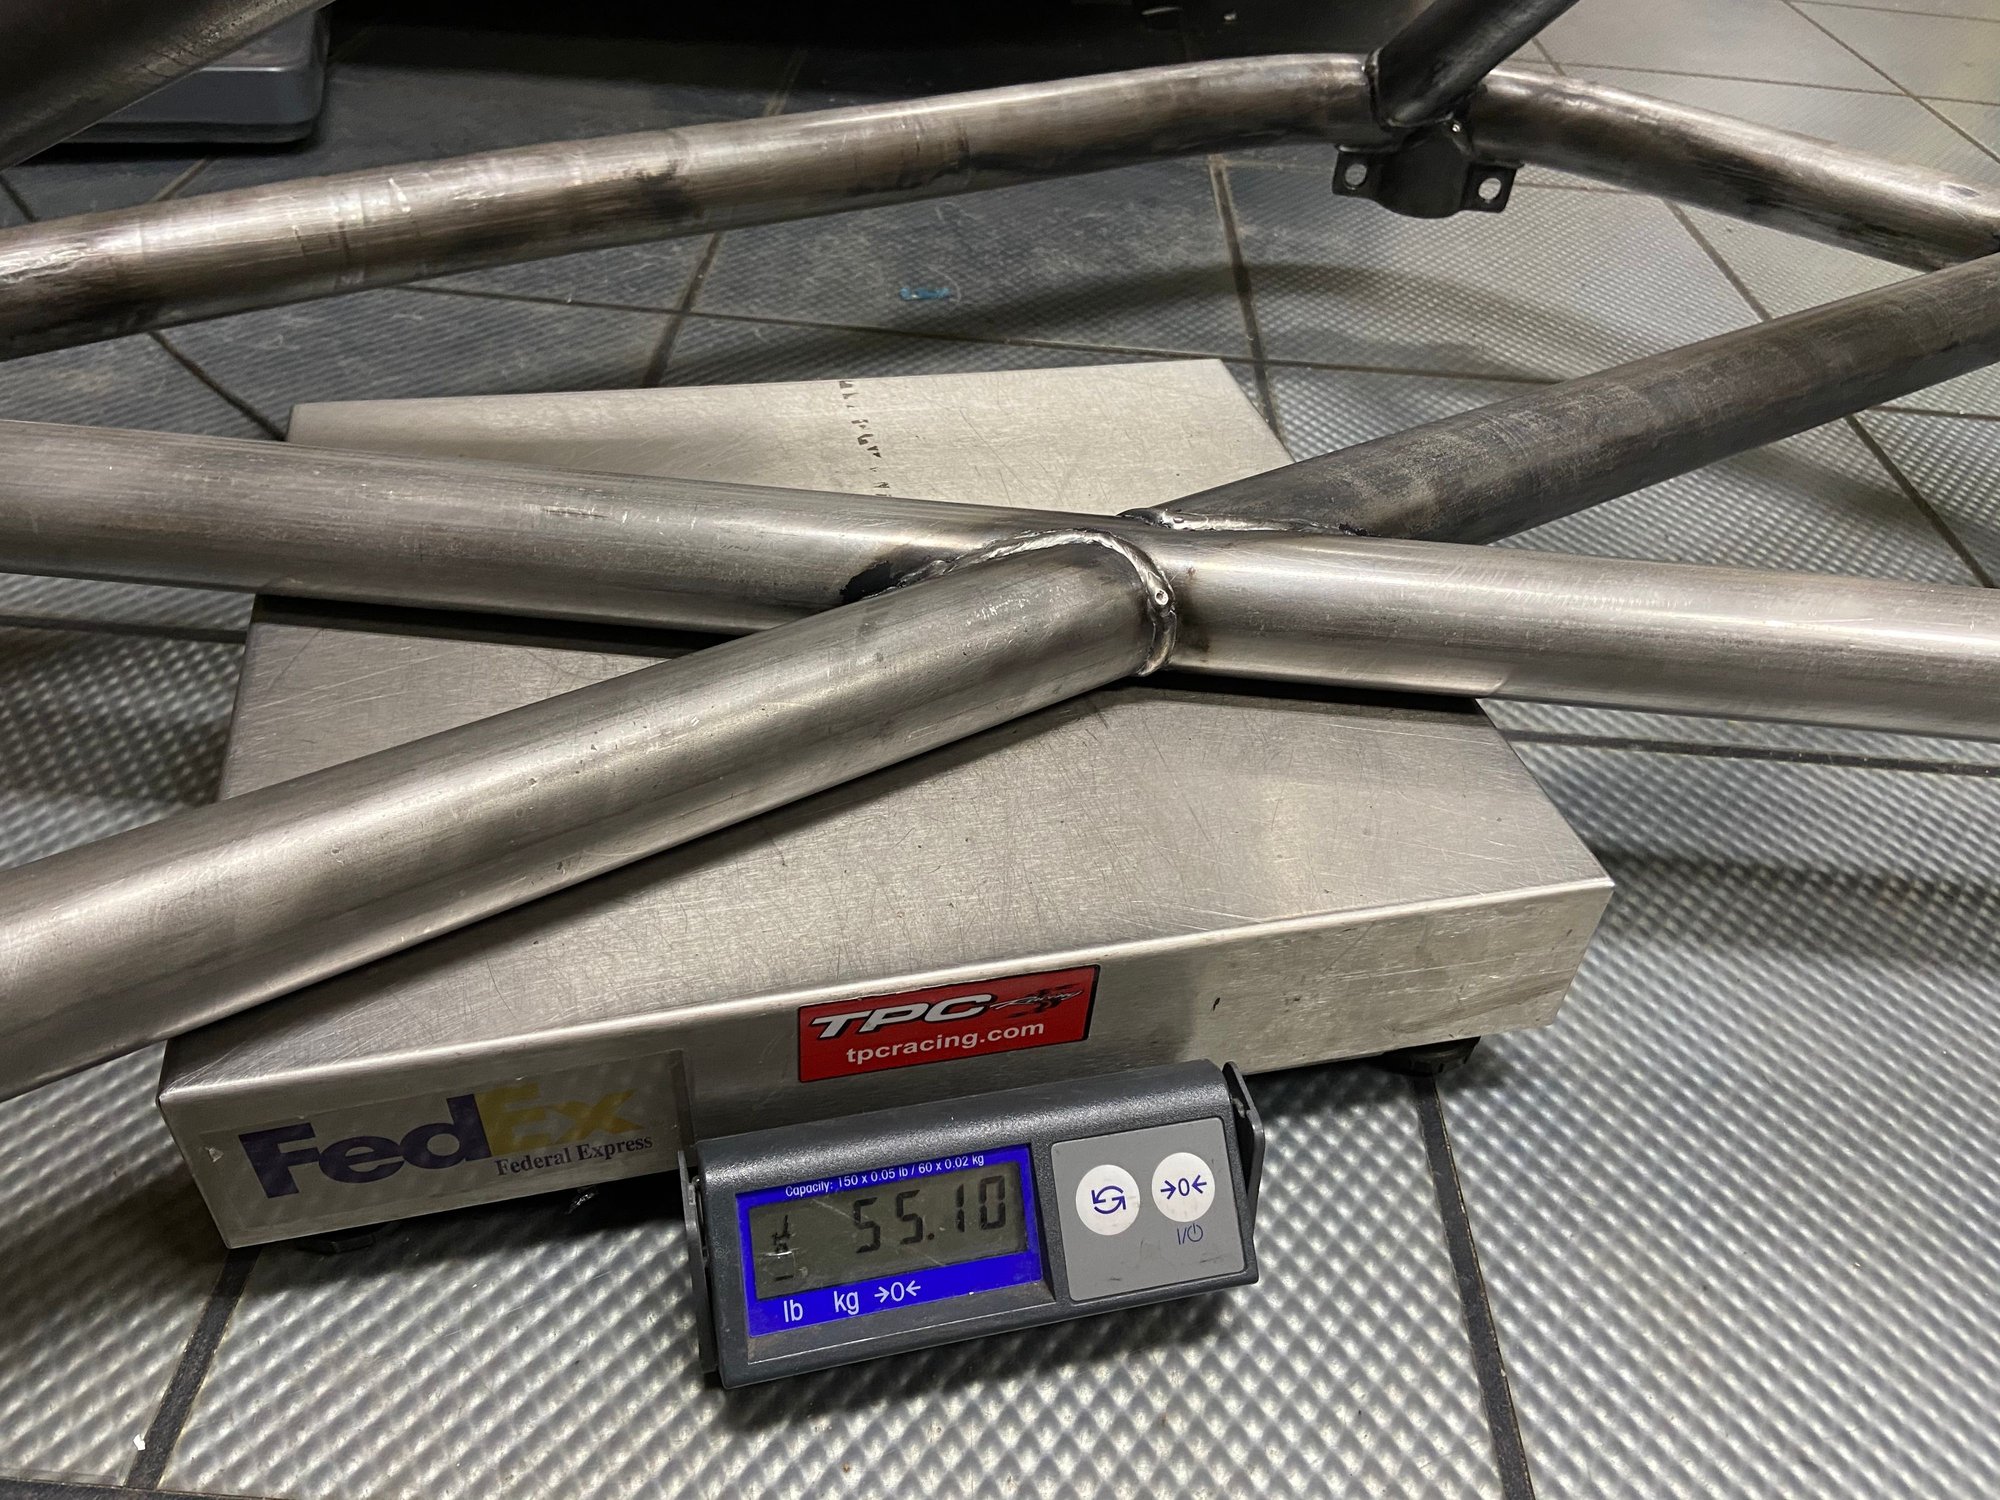
Let me weight this rear section "as is" first.
Yep, its heavy compared to the thinner 1,5" steel, the chromoly, and the aluminum bolt-on options on the market.
Currently at 55.1 lb. and I'm adding approximately 6.5 feet of 1.75" x .120 steel tubing at 2.089 lb per foot.
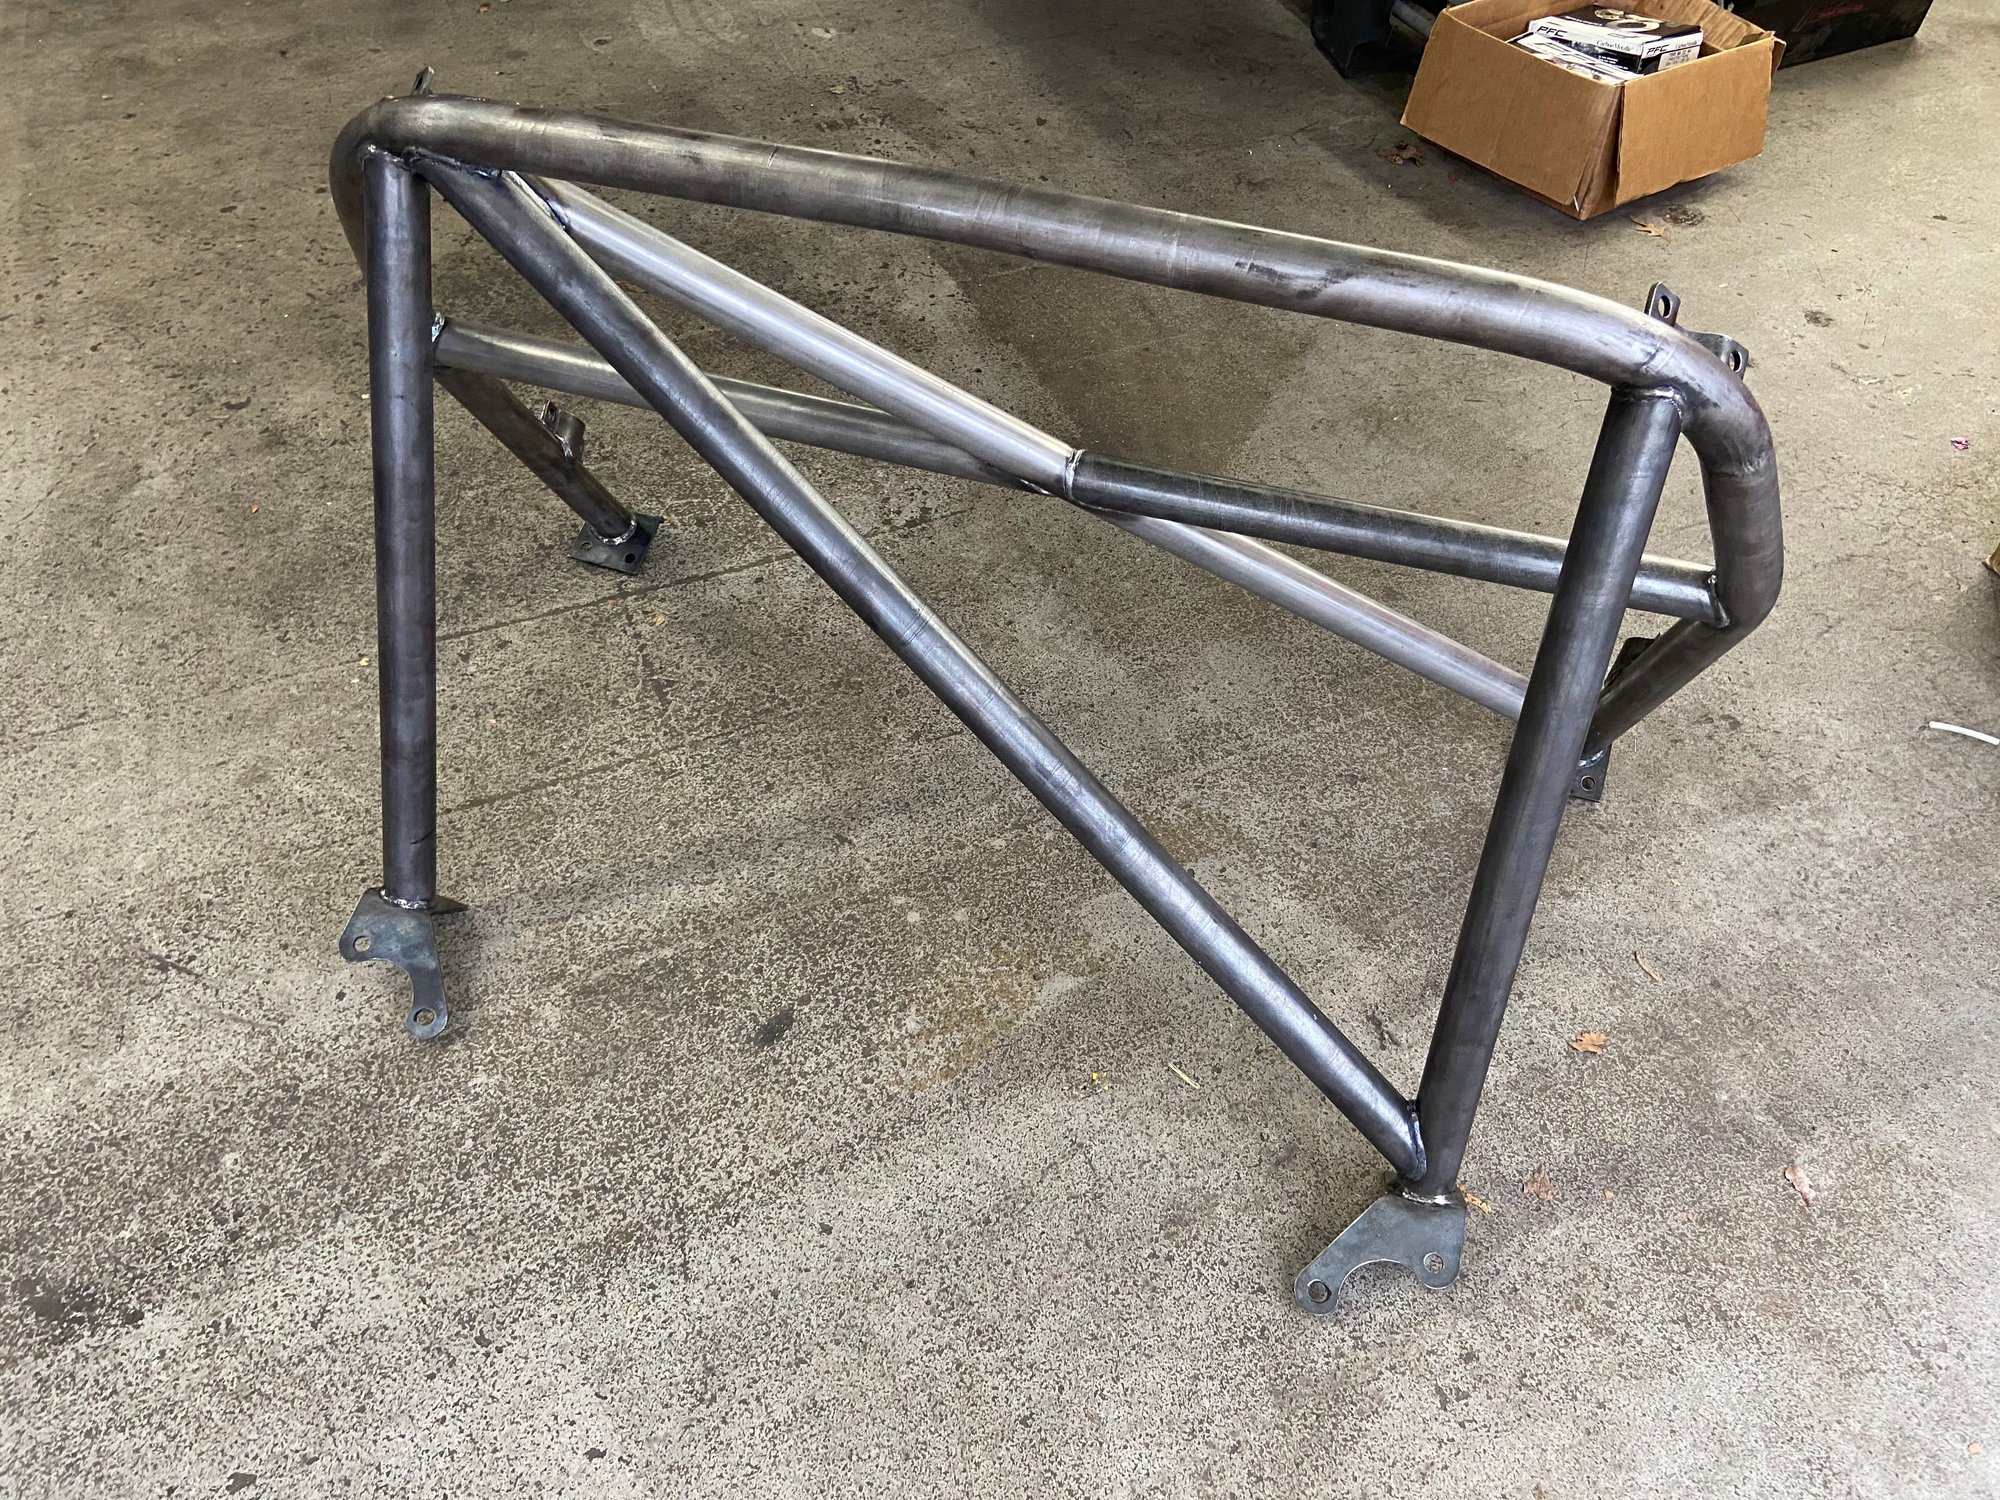
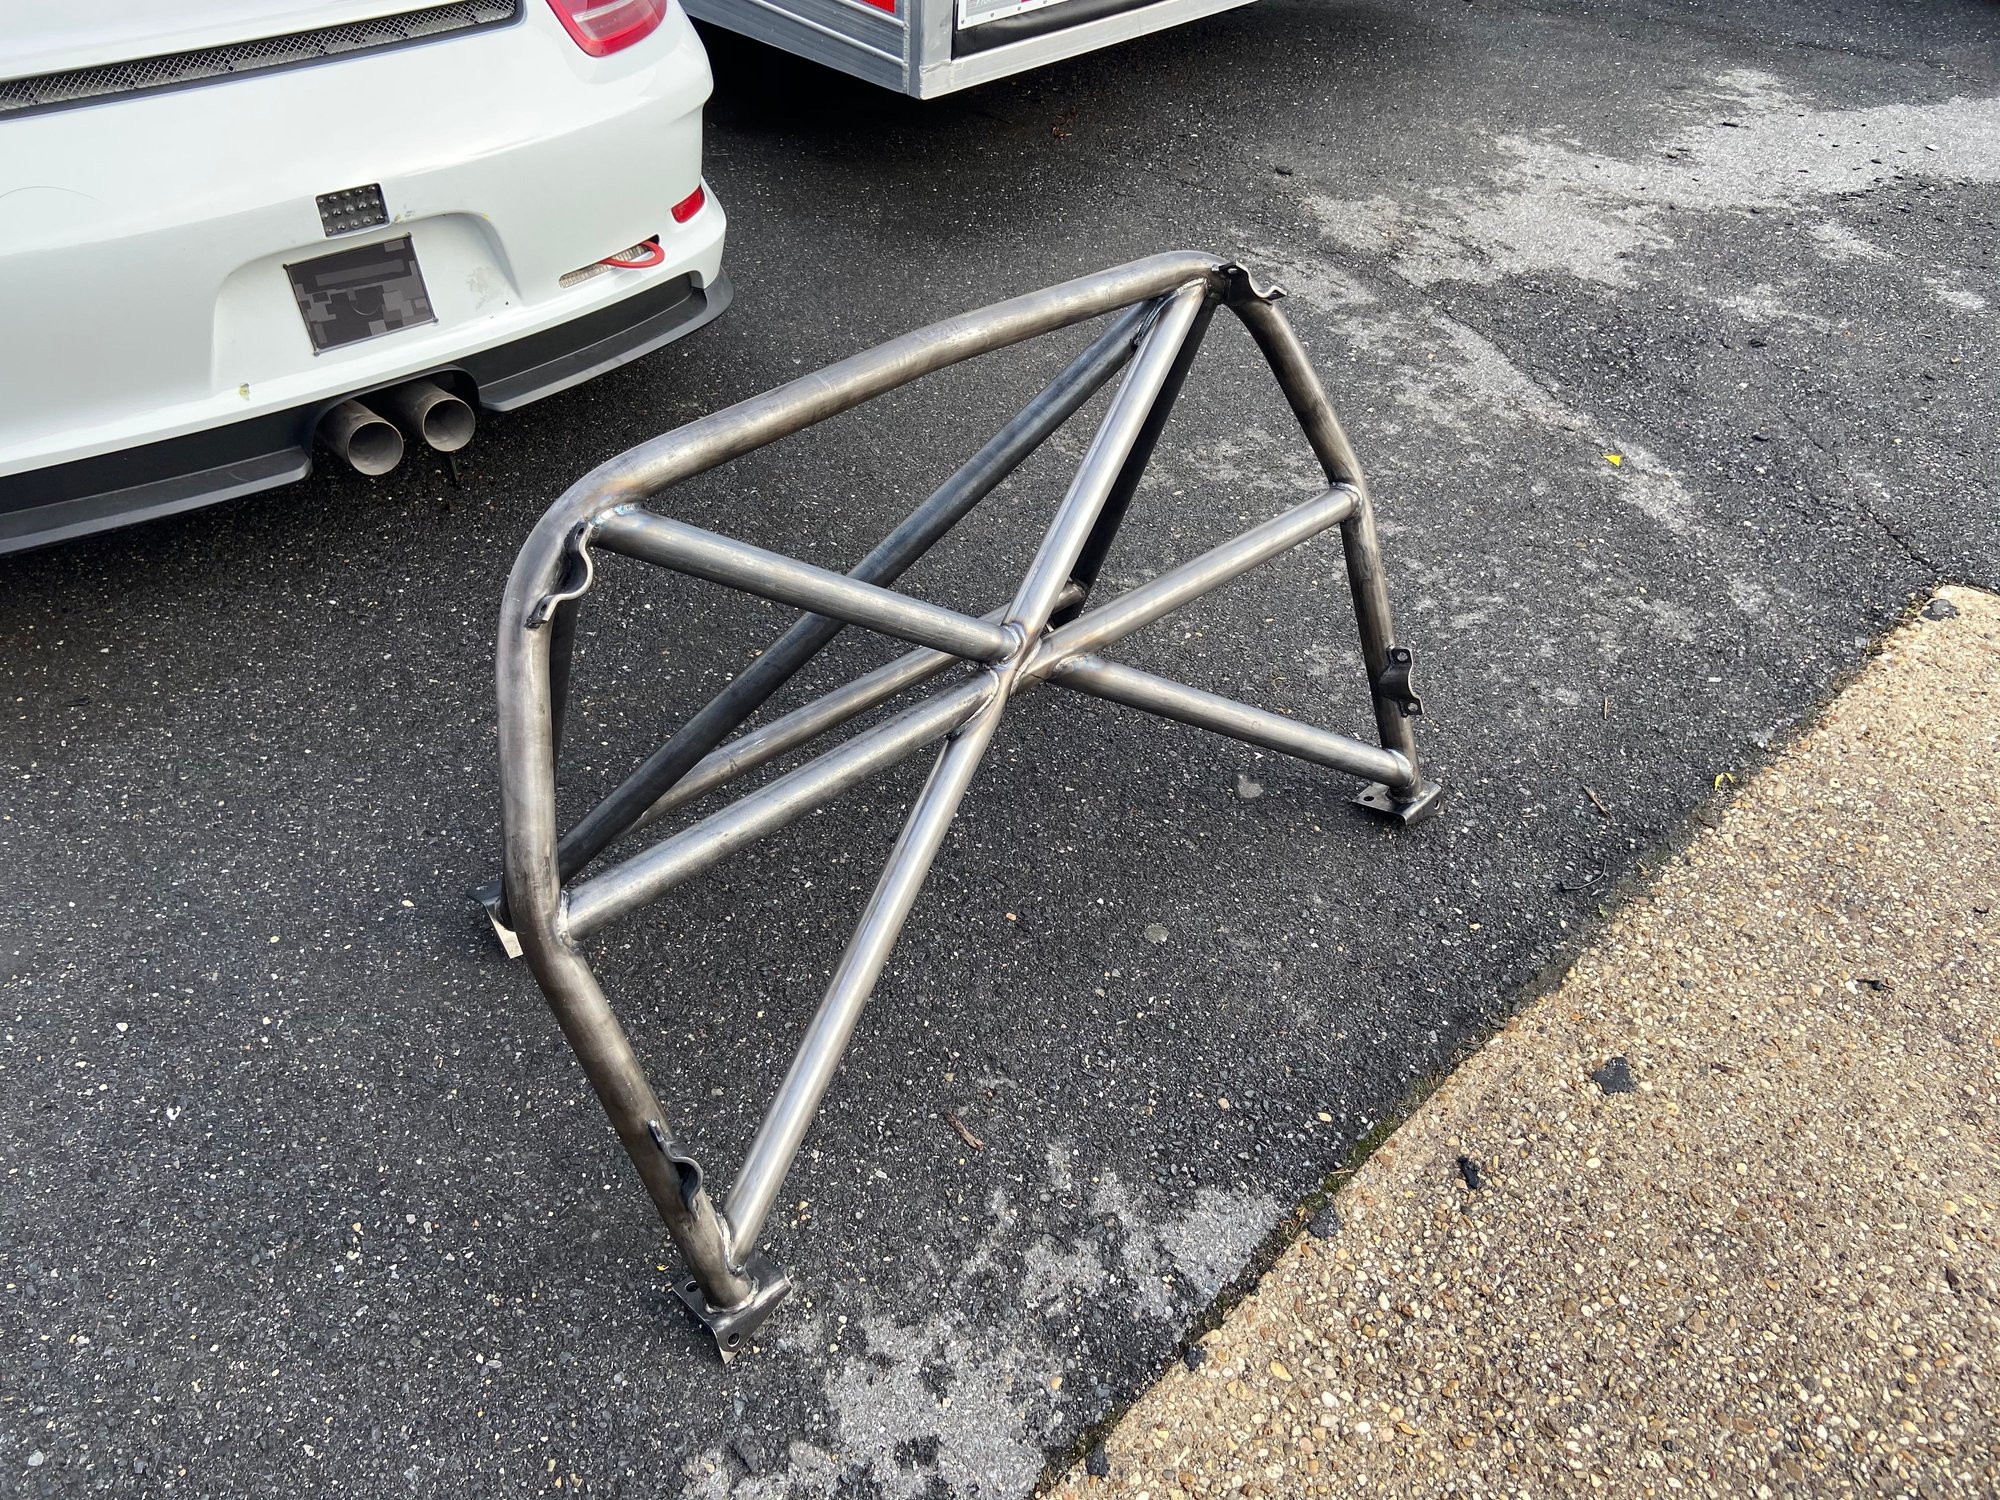
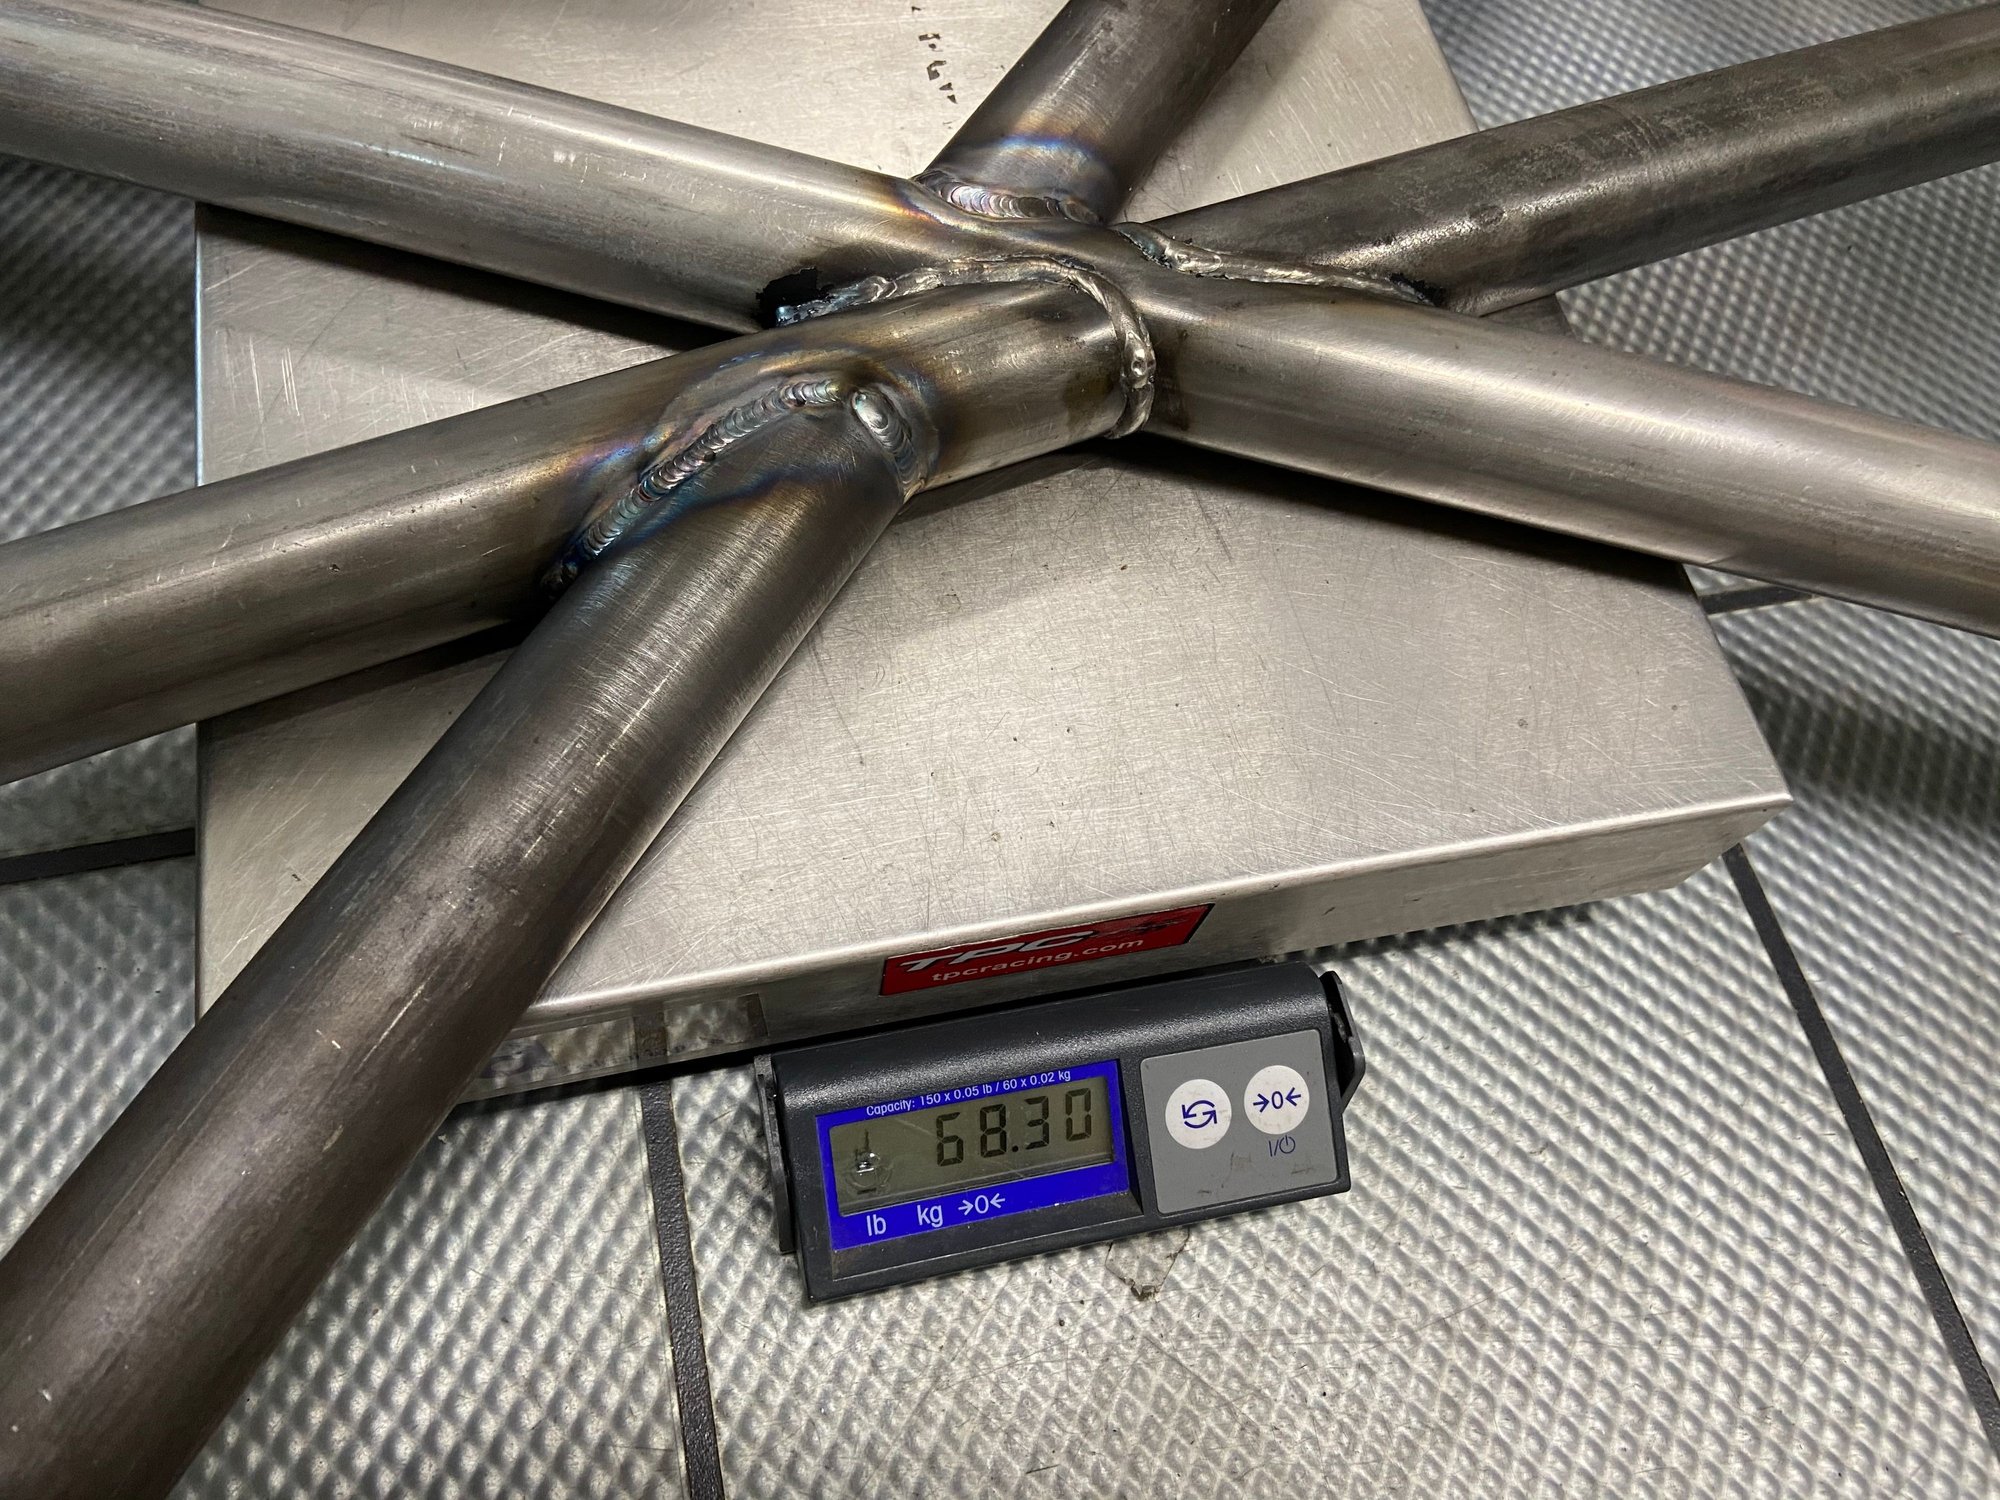
Here it is, the two bars are welded on to make the main hoop an X(well sort of an X, I don't know what to call it with the main hoop horizontal bar) and the rear shock tower brace � la Cup.
Here's the weight penalty for the two extra bars welded on.
As I've estimated previously 6.5 feet of 1.75" x .120 wall thickness steel tubing multiply by 2.089 lb per foot, comes to 13.38 lb.
Before the bars were added it weighted 55.1 lb, add the estimated 13.38 lb...well, my estimated calculation isn't exact but pretty close.
It now weights 68.3 lb. The actual weight added by the two bars is 13.2 lb.
I think the added 13.2 lb isn't all bad because when the cage is in position inside the car the weight distribution of the cage more favors the middle of the car.
It turns out I am just as busy as when life was "normal" so I haven't had the opportunity to install the cage yet. I did layout the rear section's footing for initial assessment and gathered parts for the floor board.
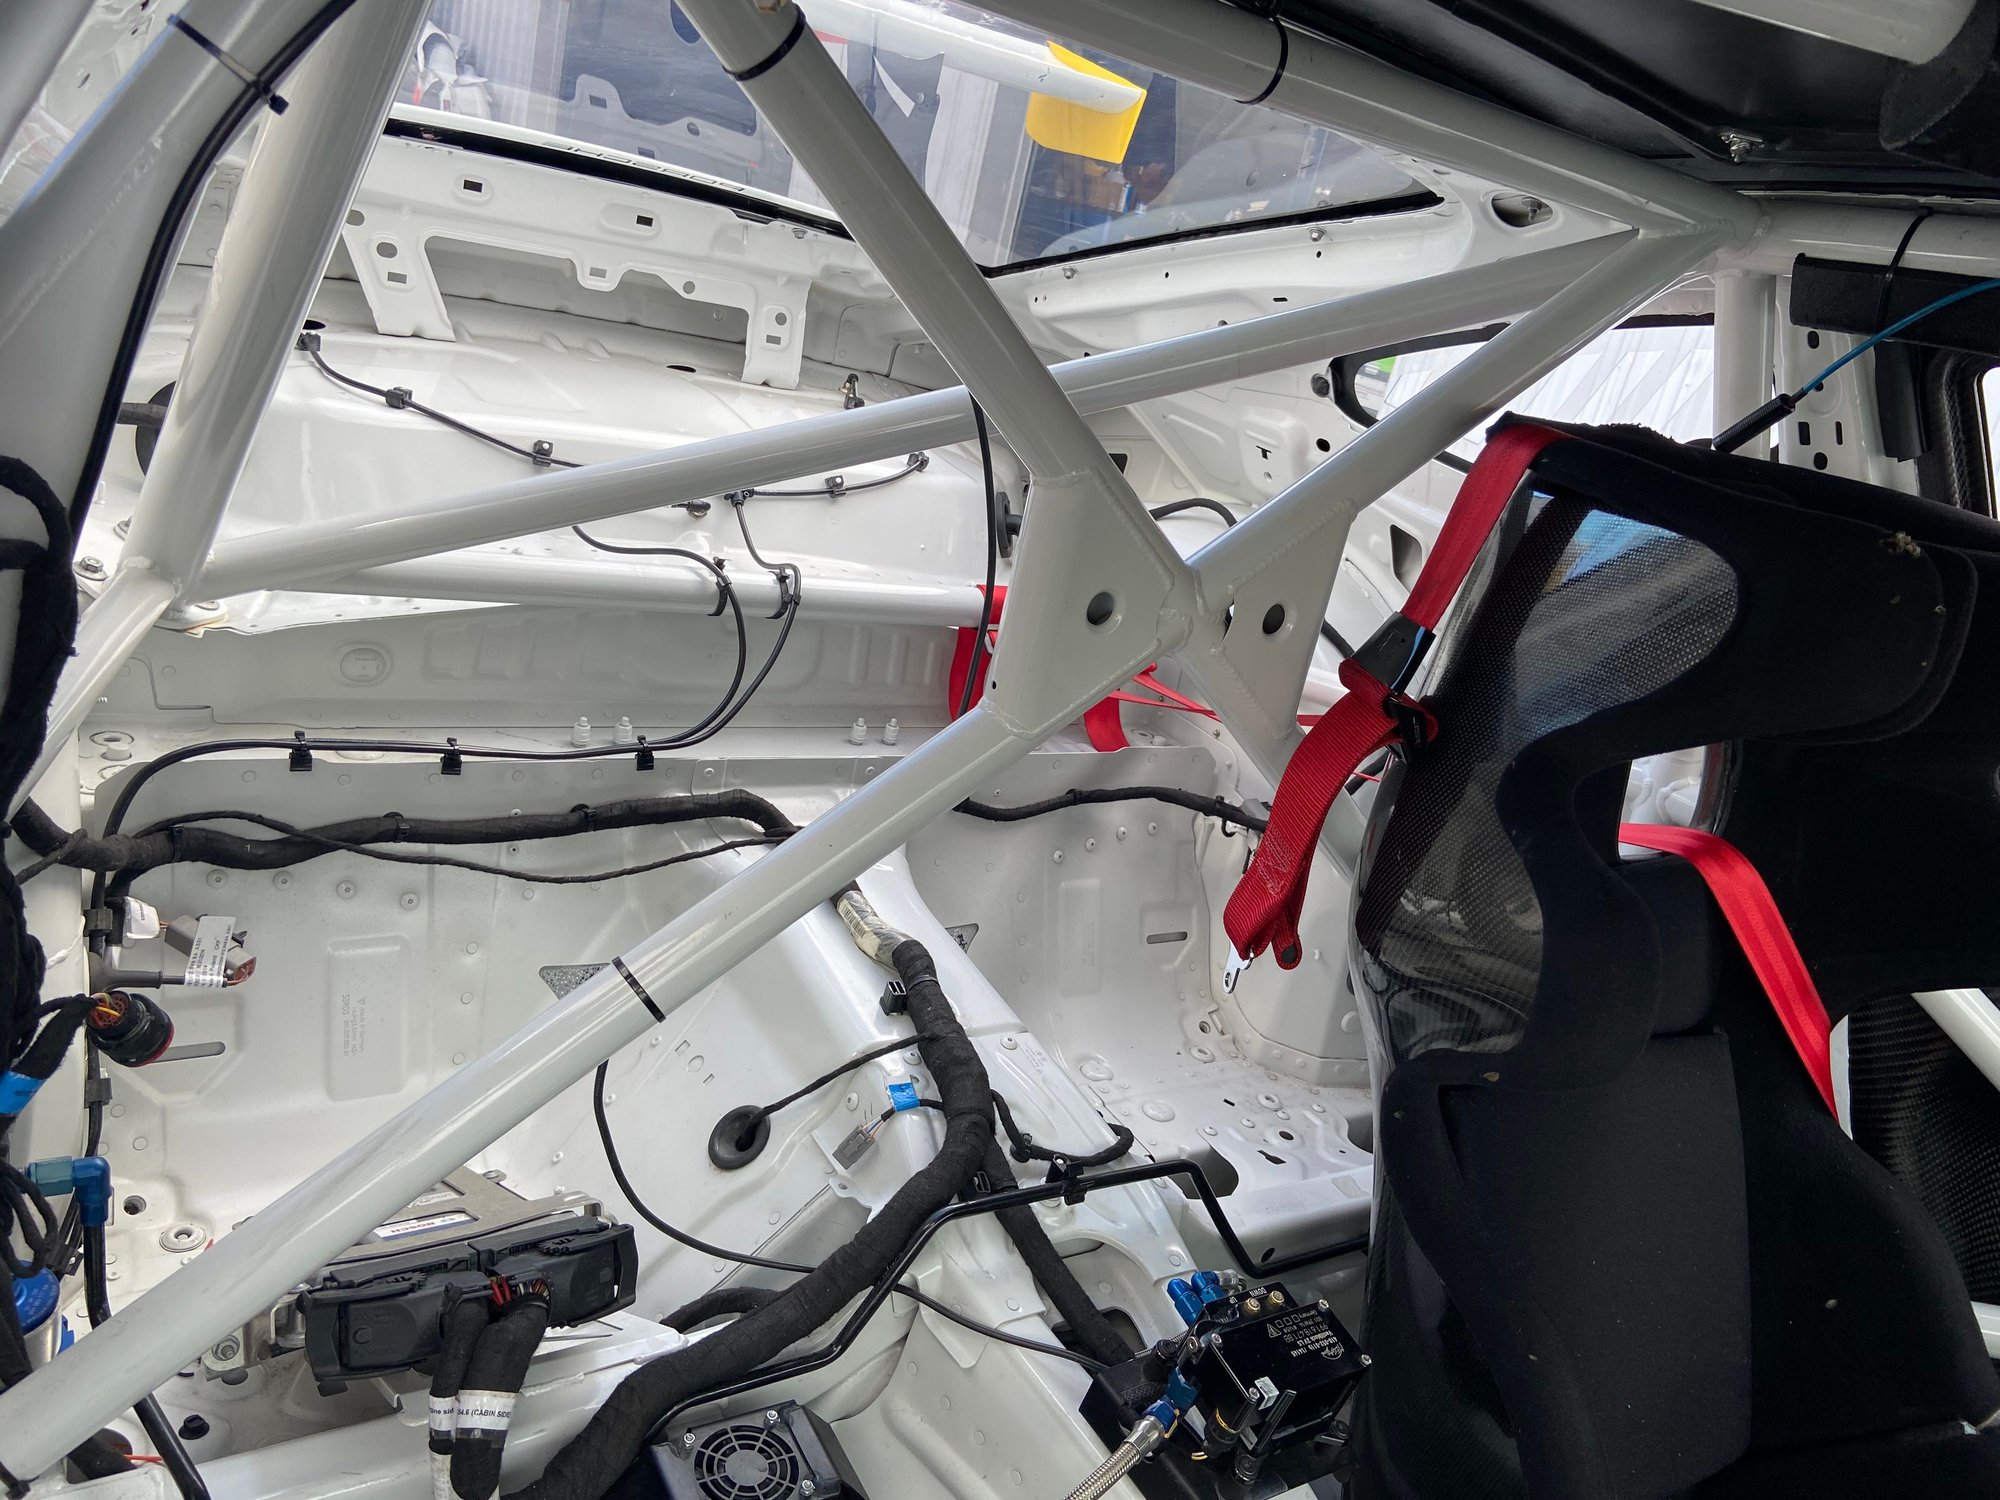
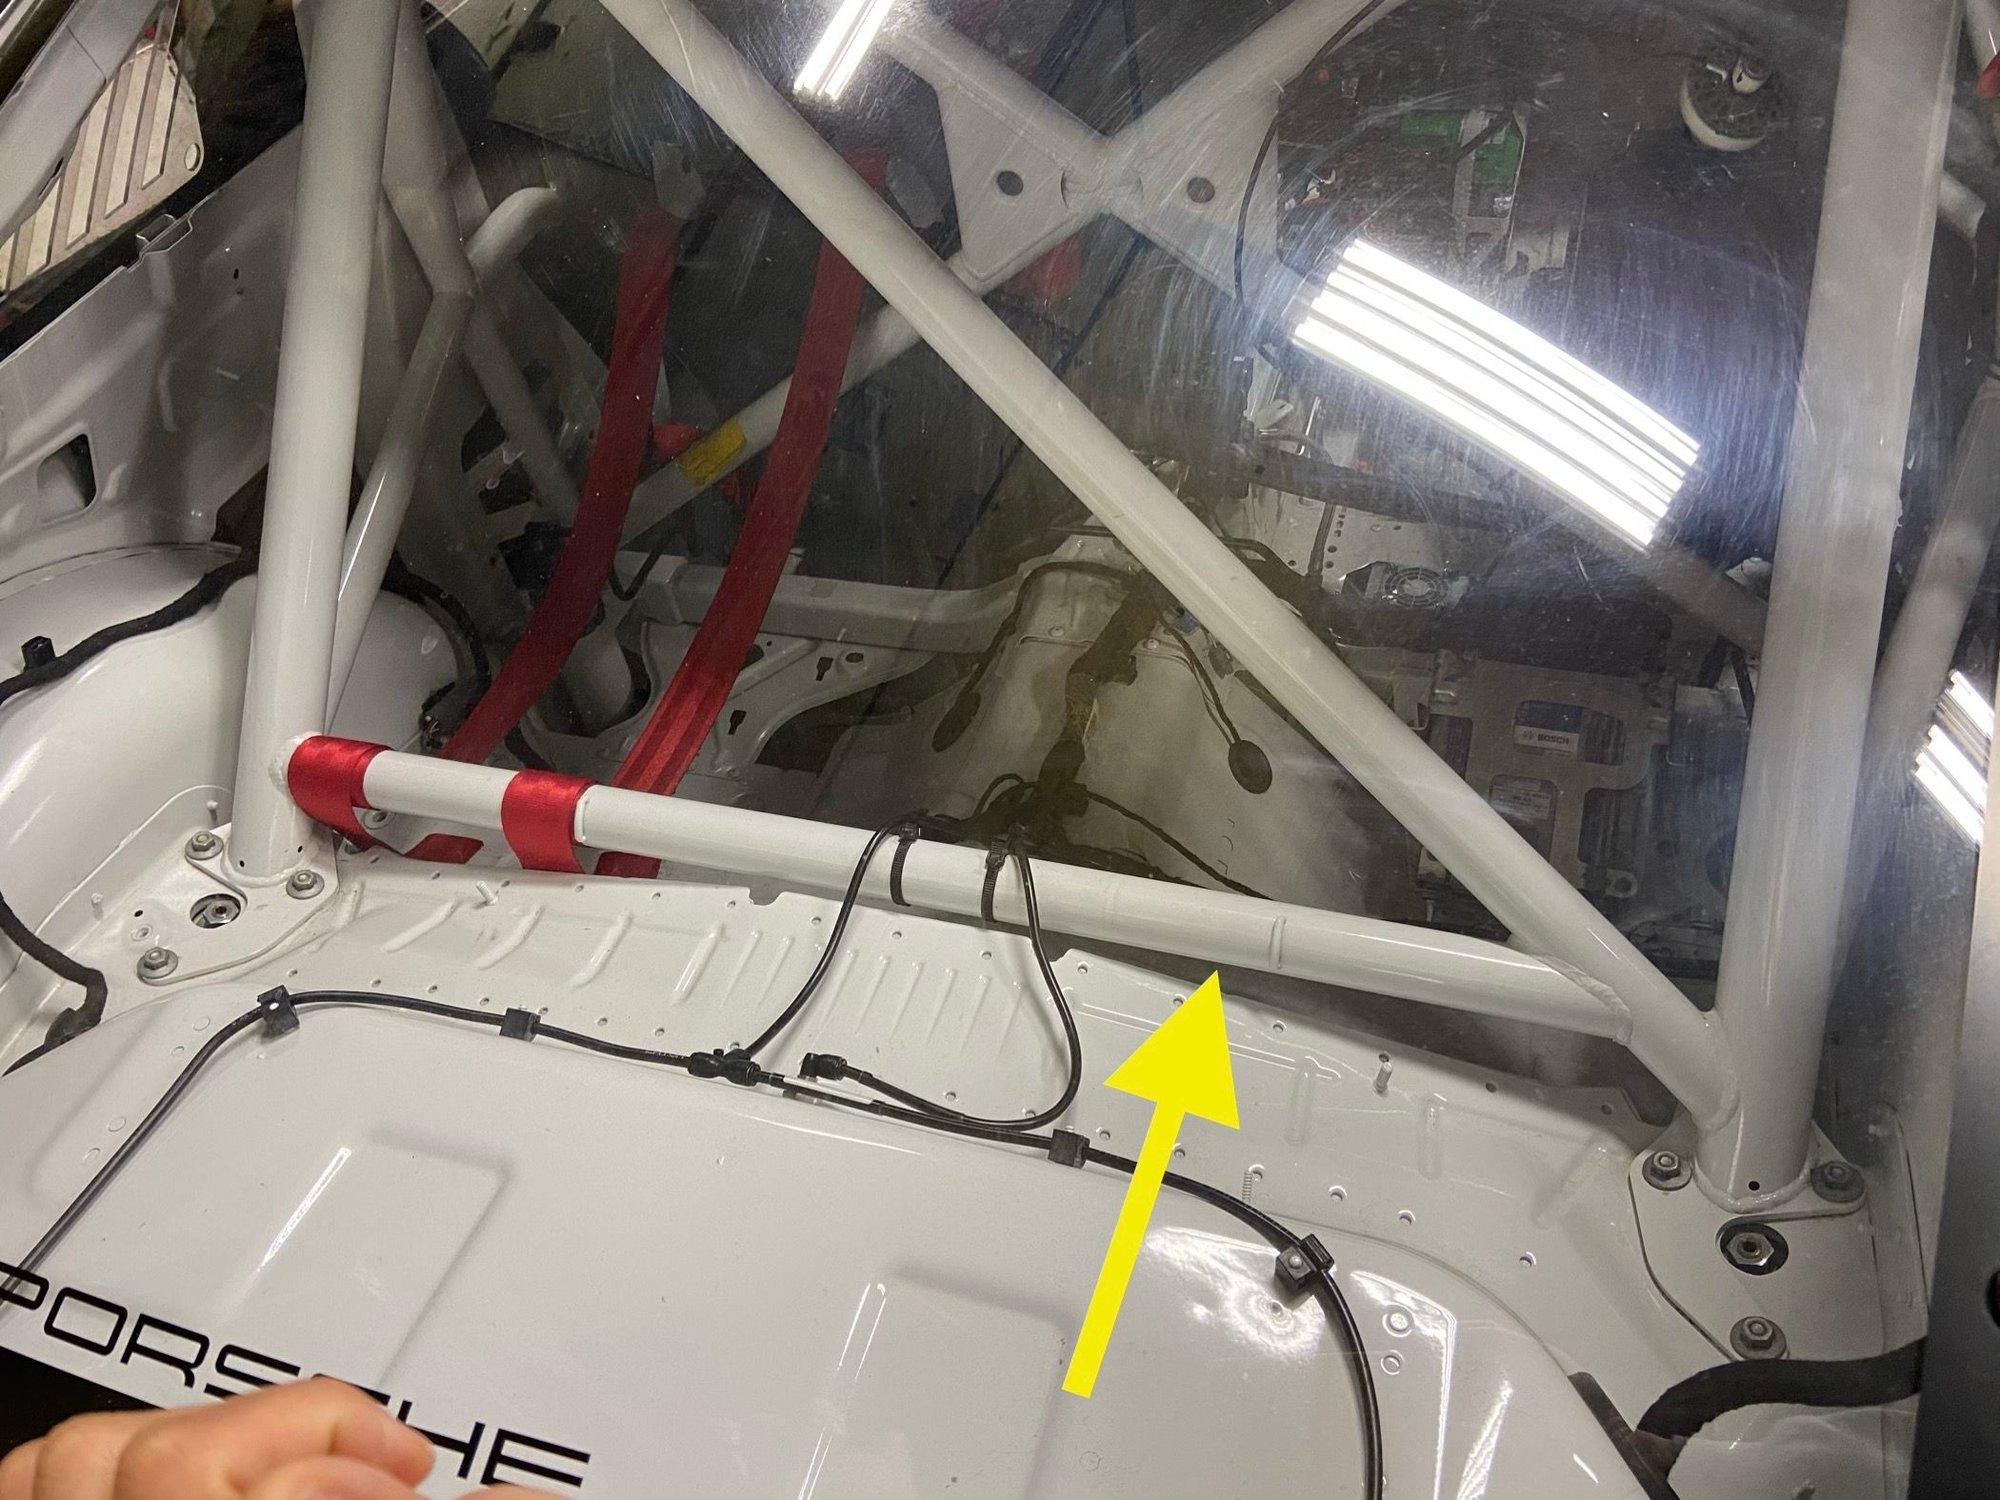
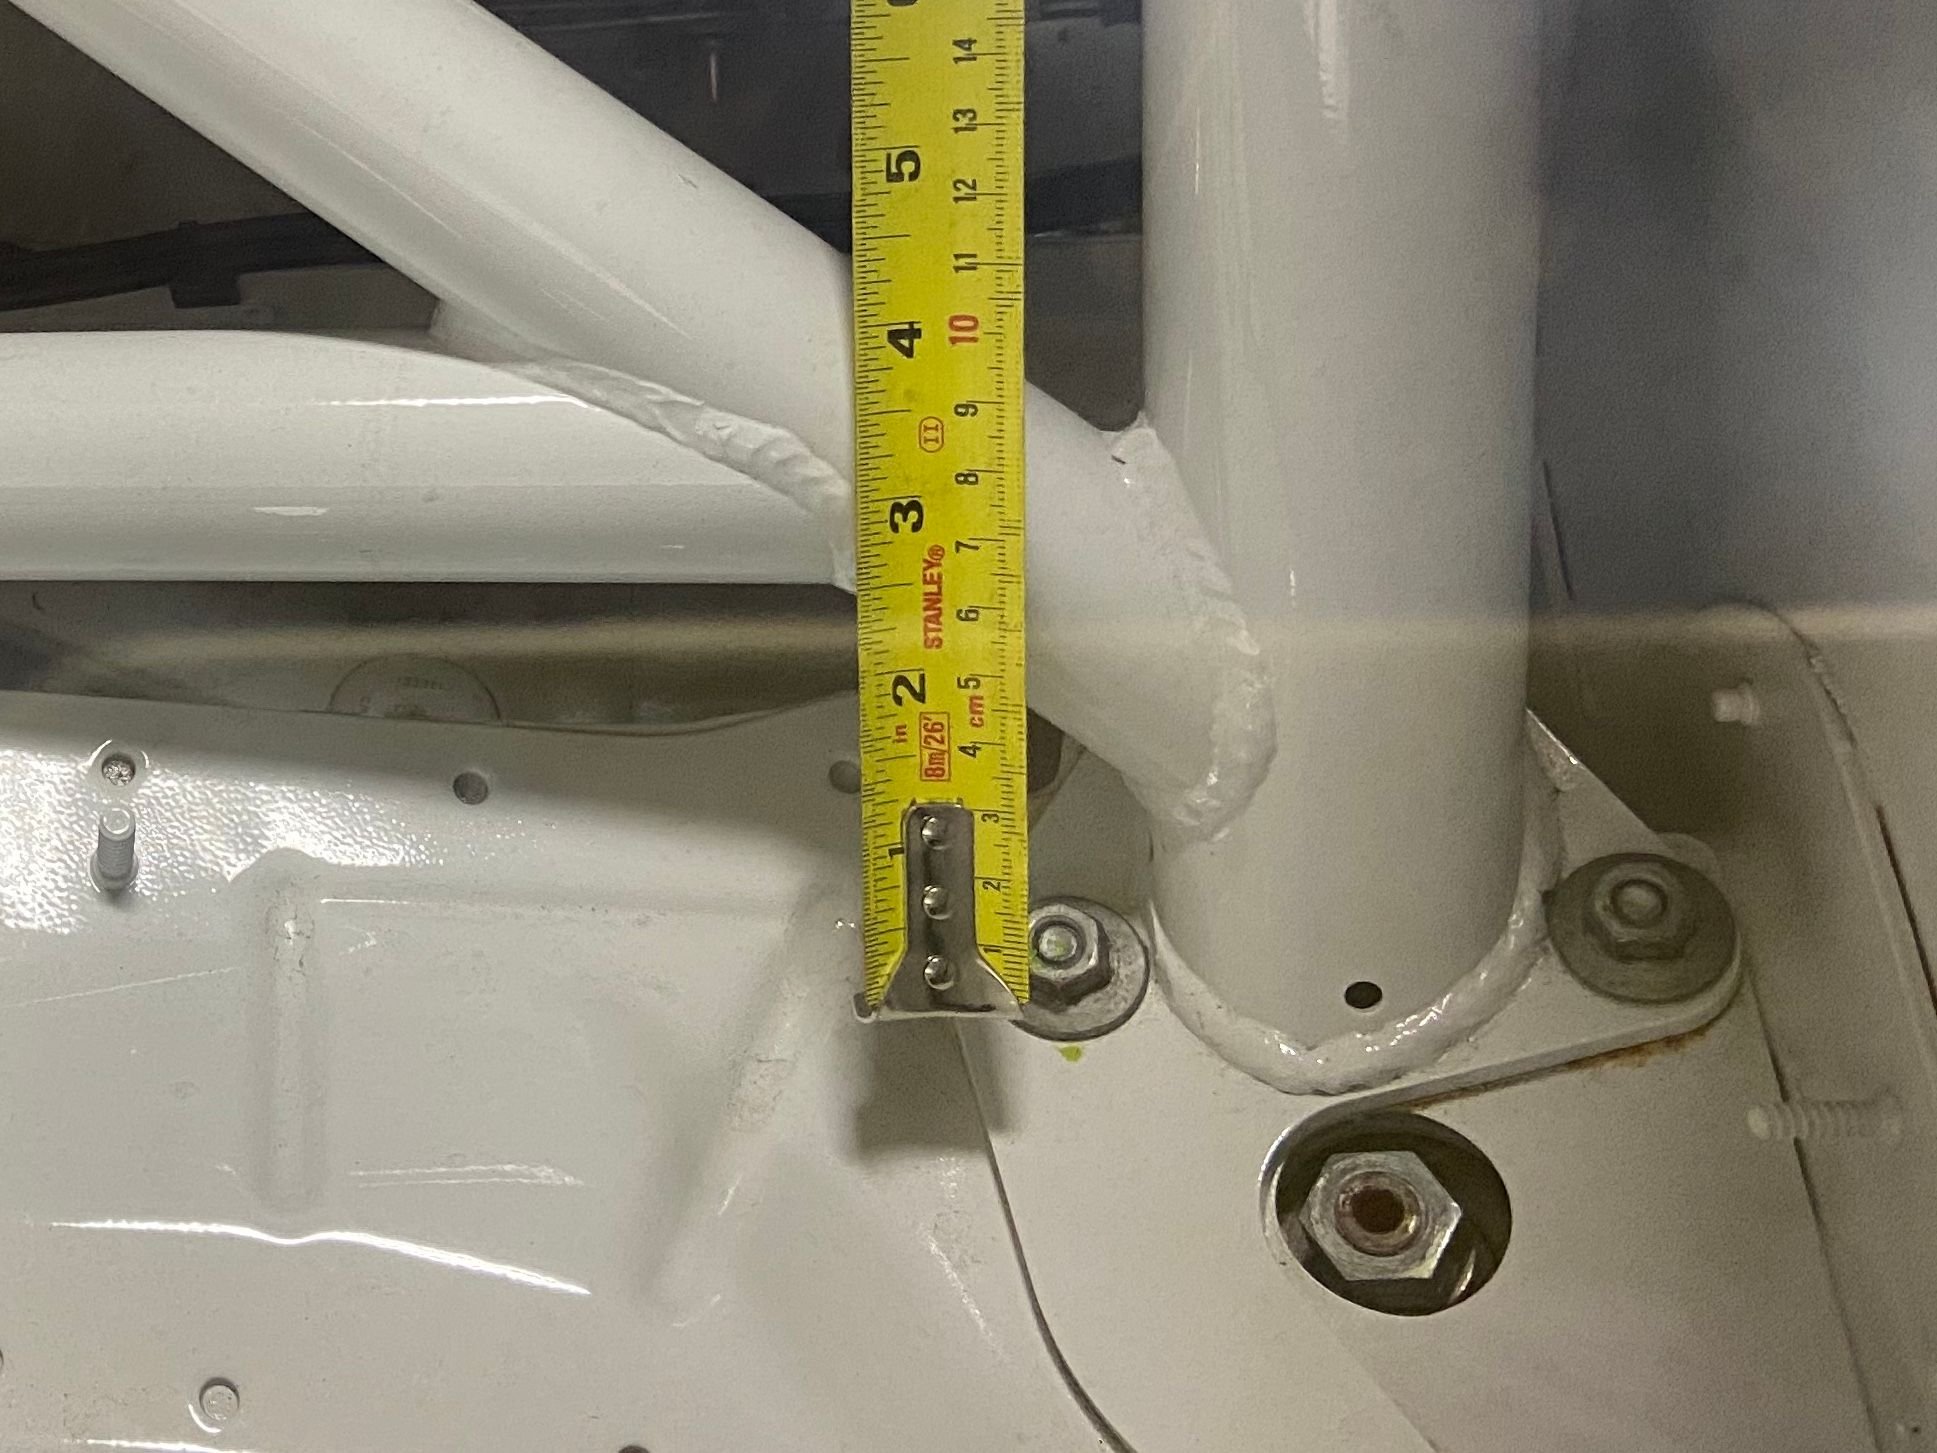
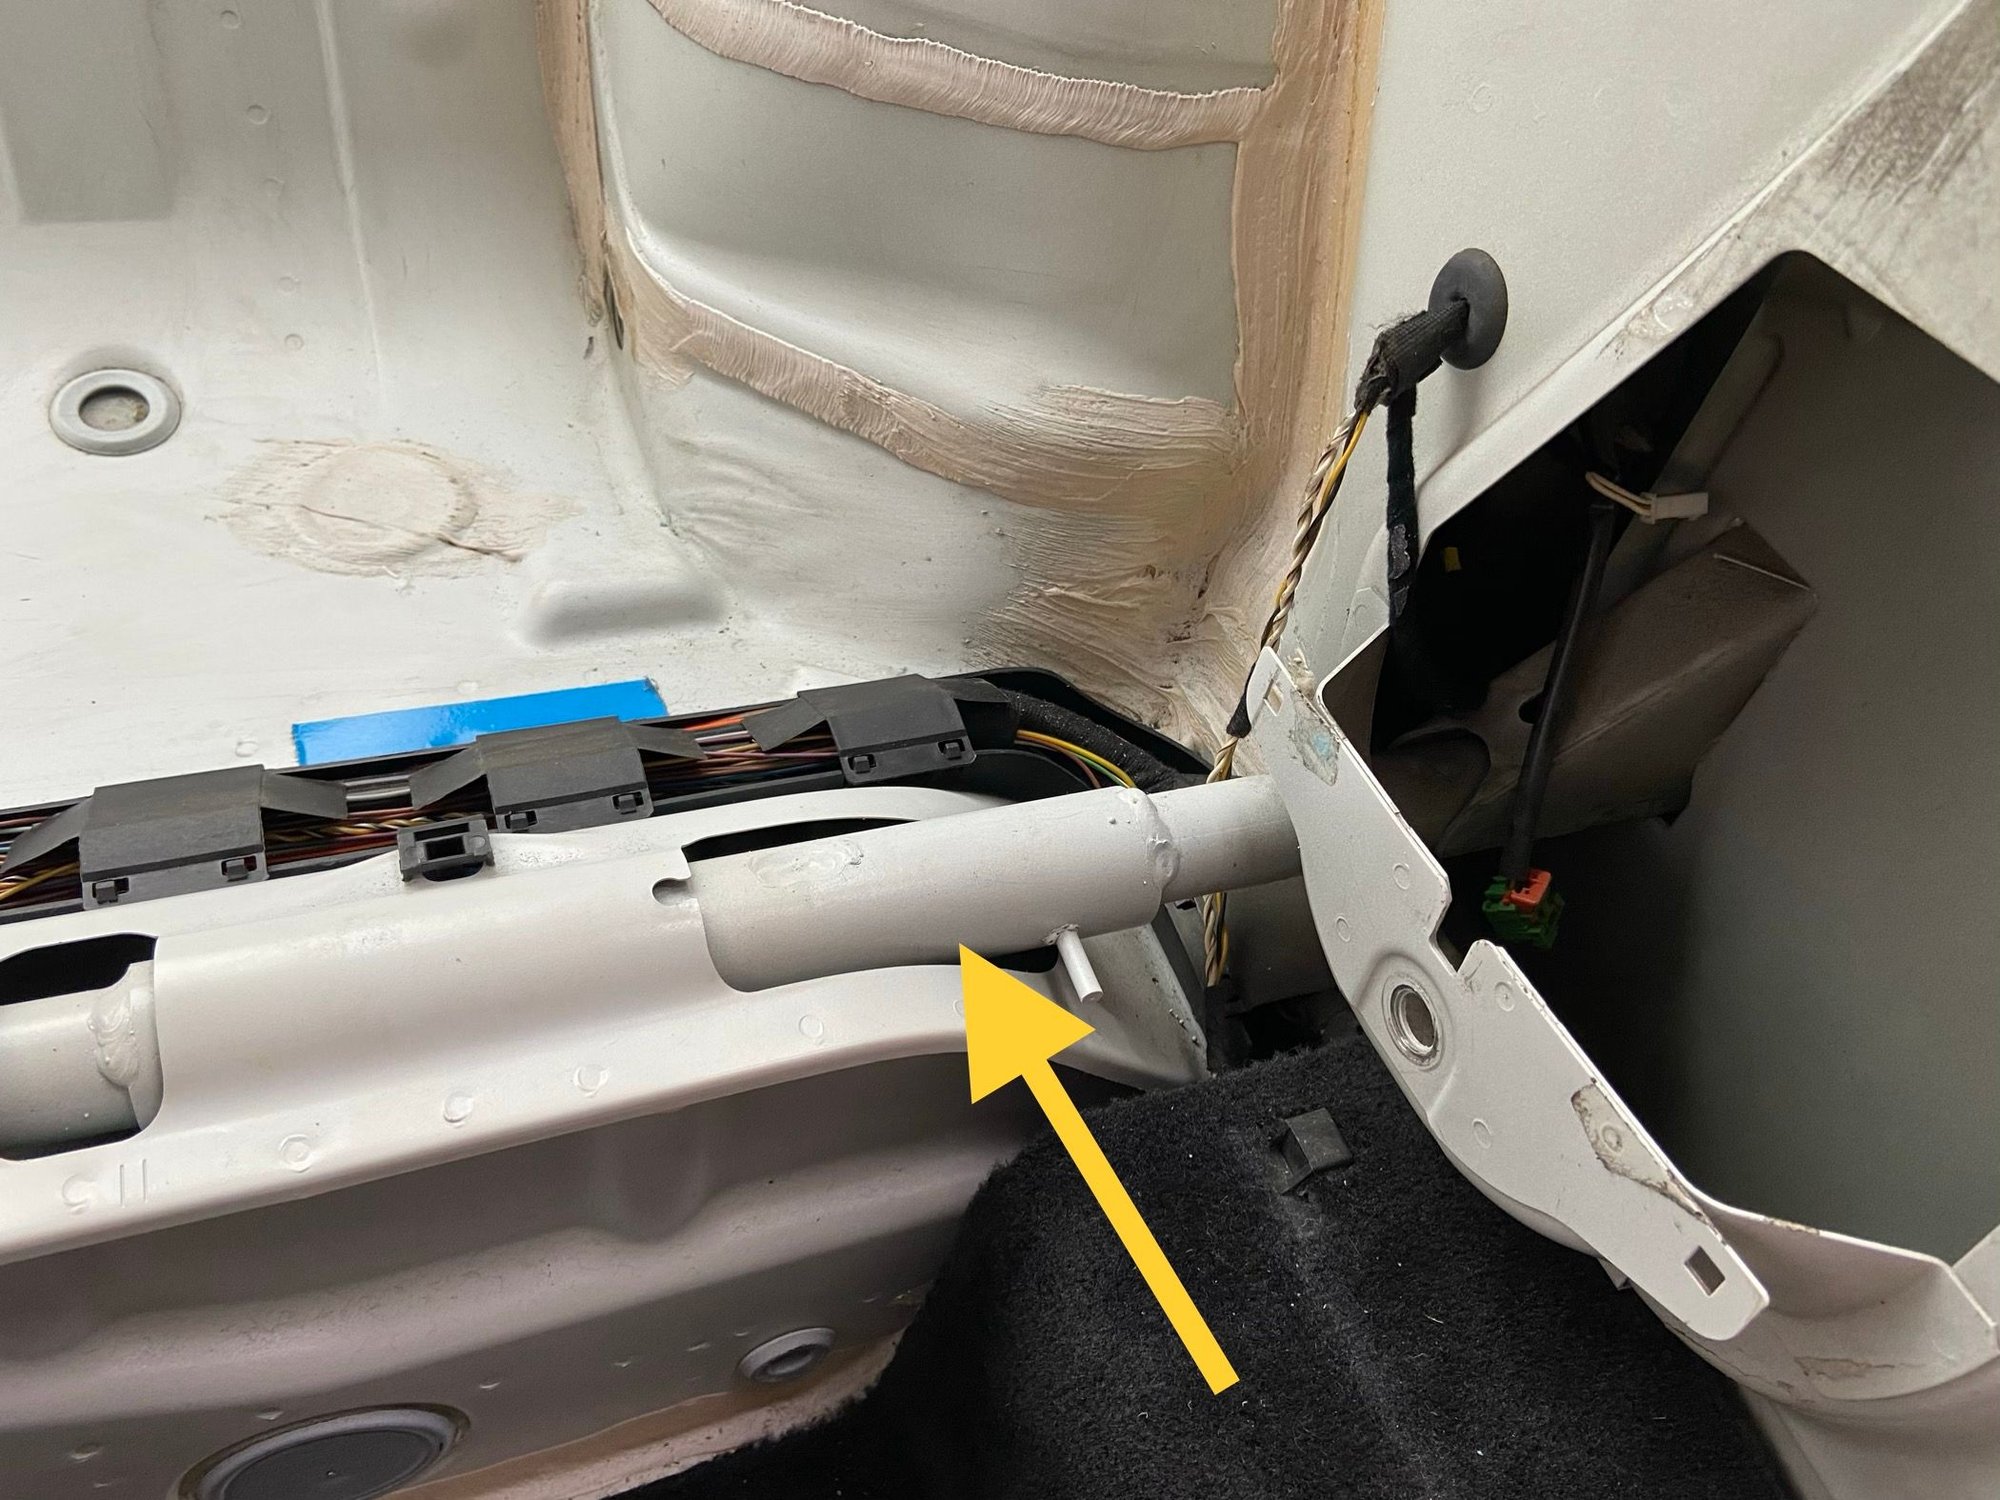
This is something I haven't paid attention to over the years of working on many Cup cars, that is the Cup cars don't have this extra lateral structural support bar shown below. The support bar is on street cars for side impact protection. Whereas a Cup car is fully caged for protection.
Having the street car support bar plus the X main hoop cage I feel pretty good about the structural rigidity and safety.
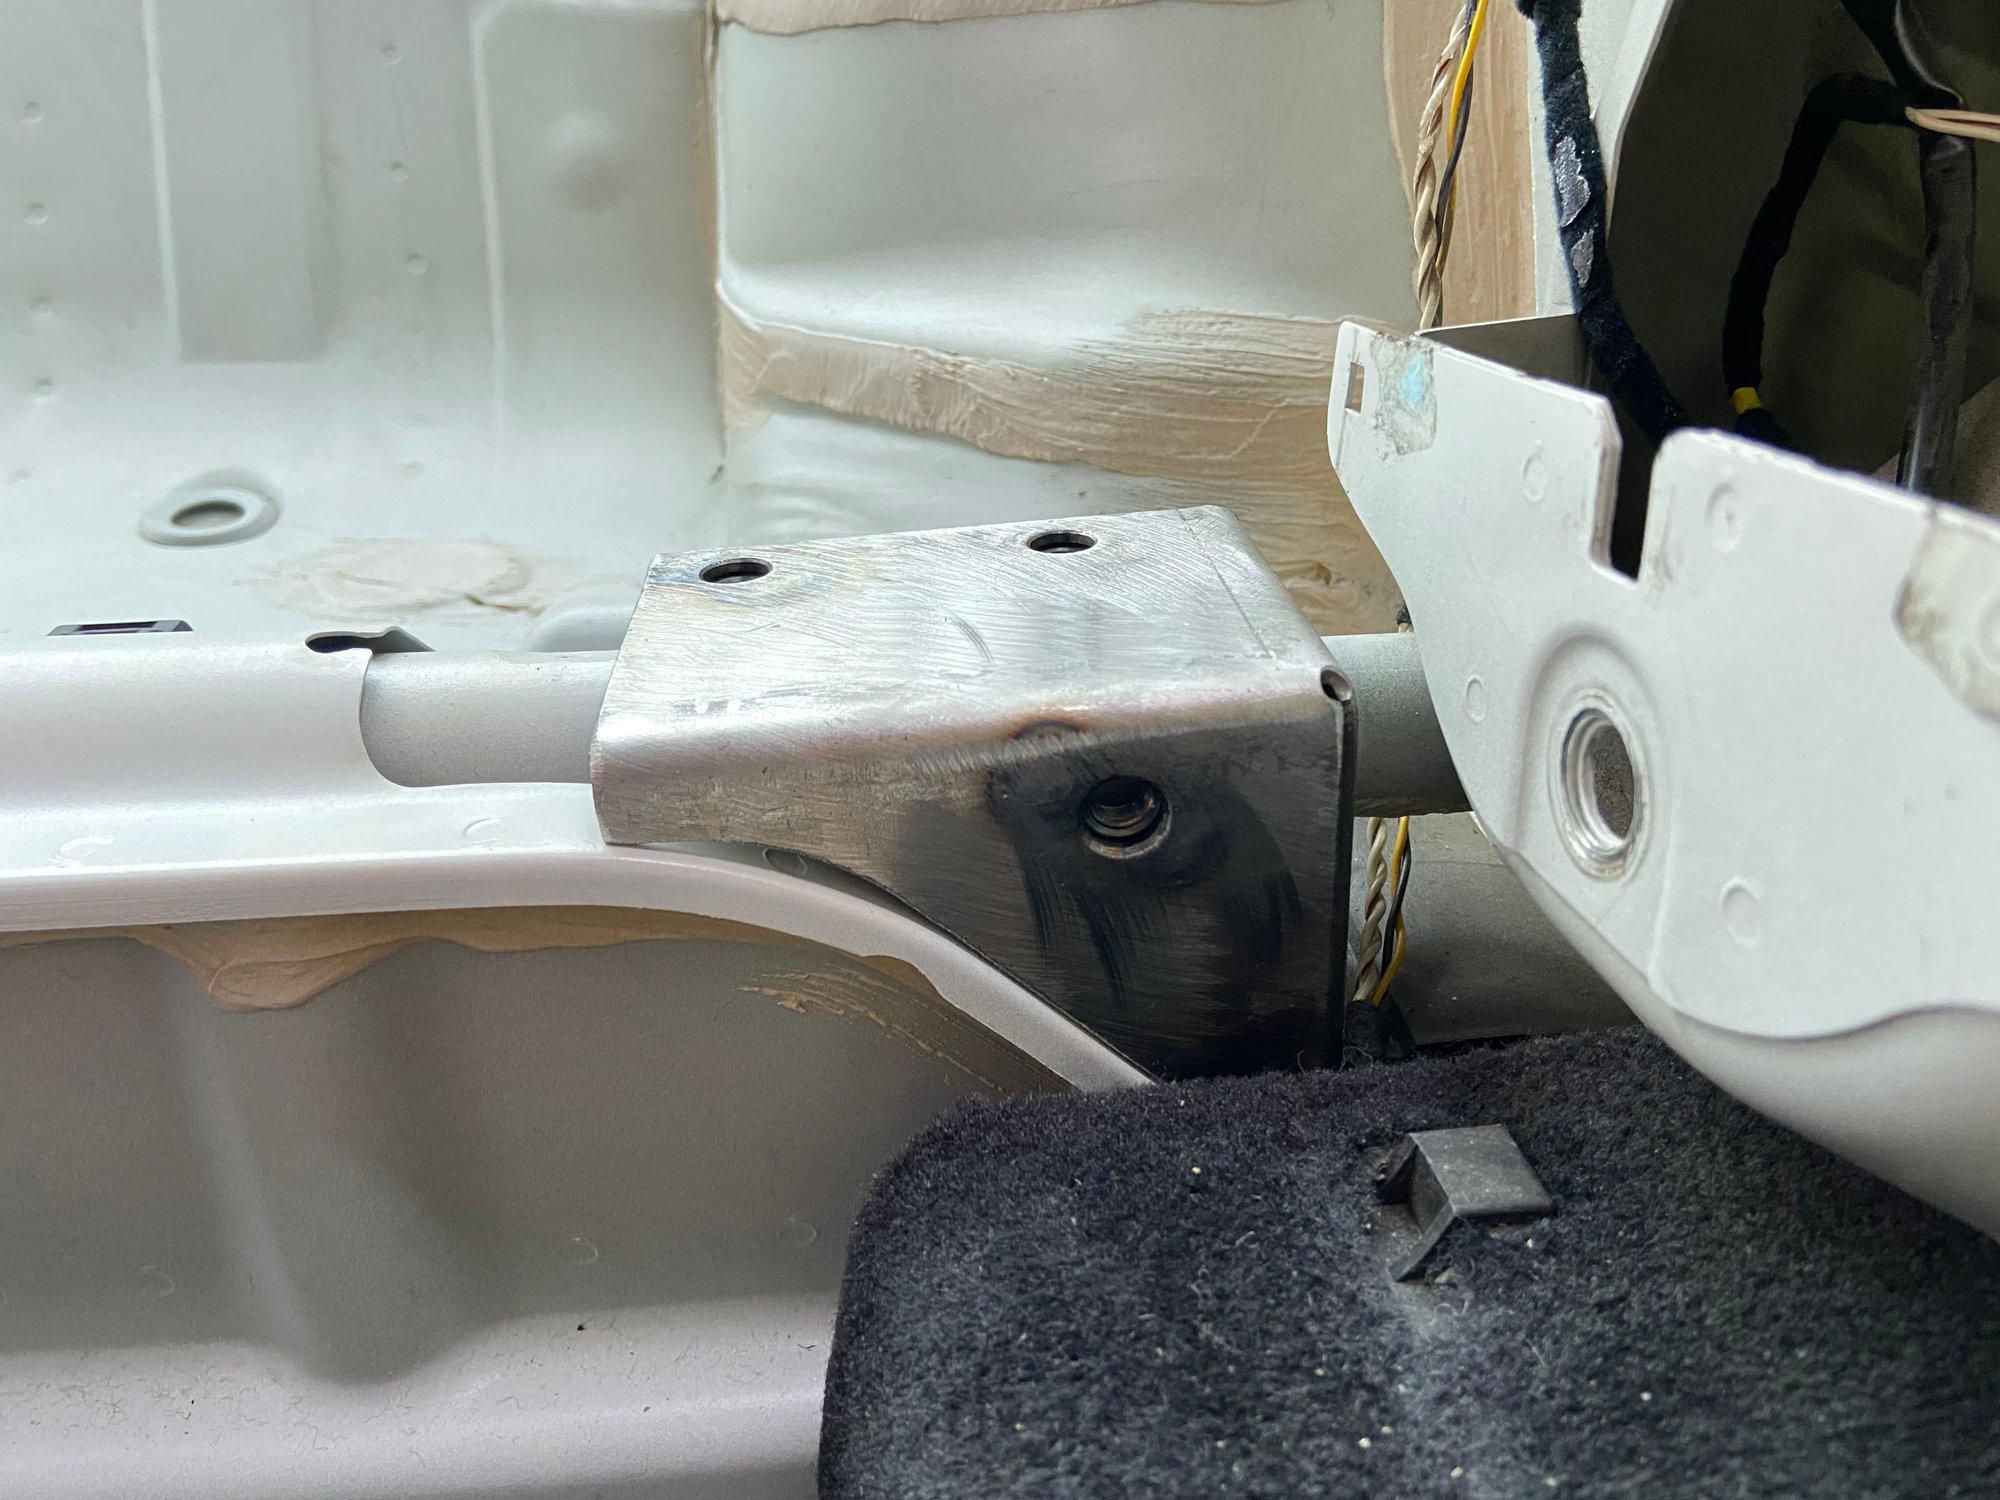
Here's one of the footing to be welded on the "backbone" of the car.
As you can see, it doesn't sit exactly flat so some tweaking will be necessary before welding. The plan is to rest the cage on the footings for test fit then spot weld, then full weld.
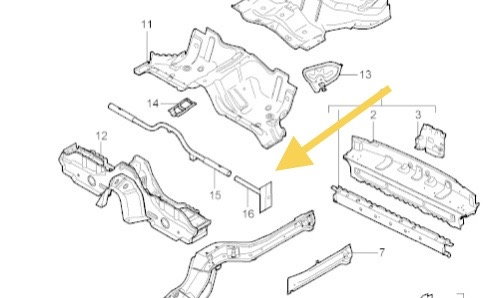
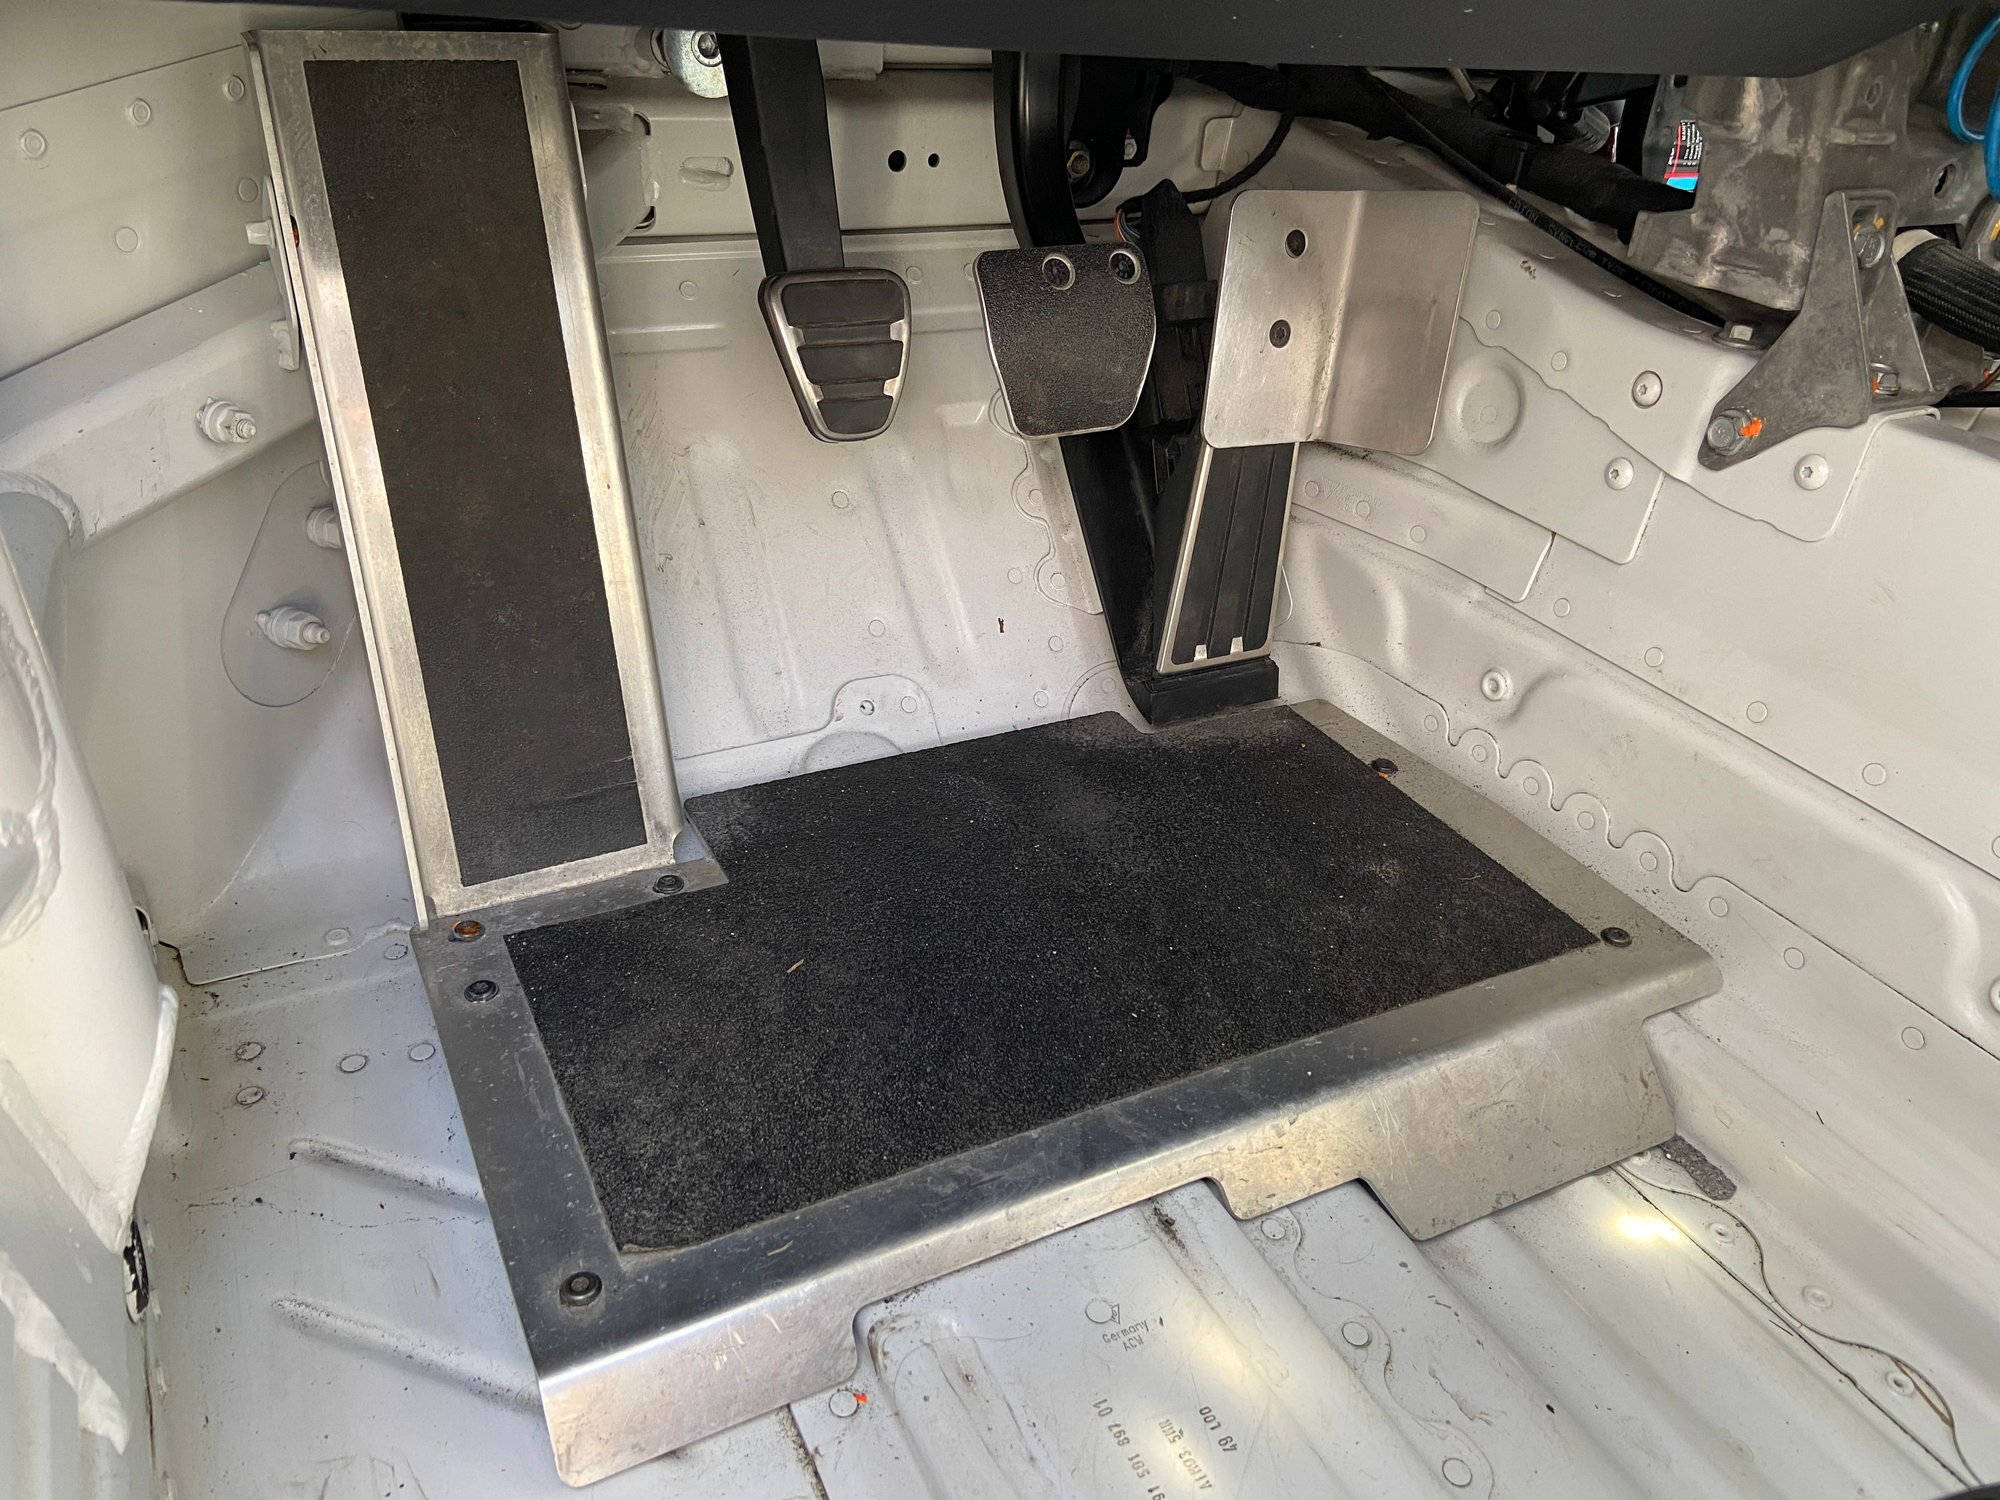
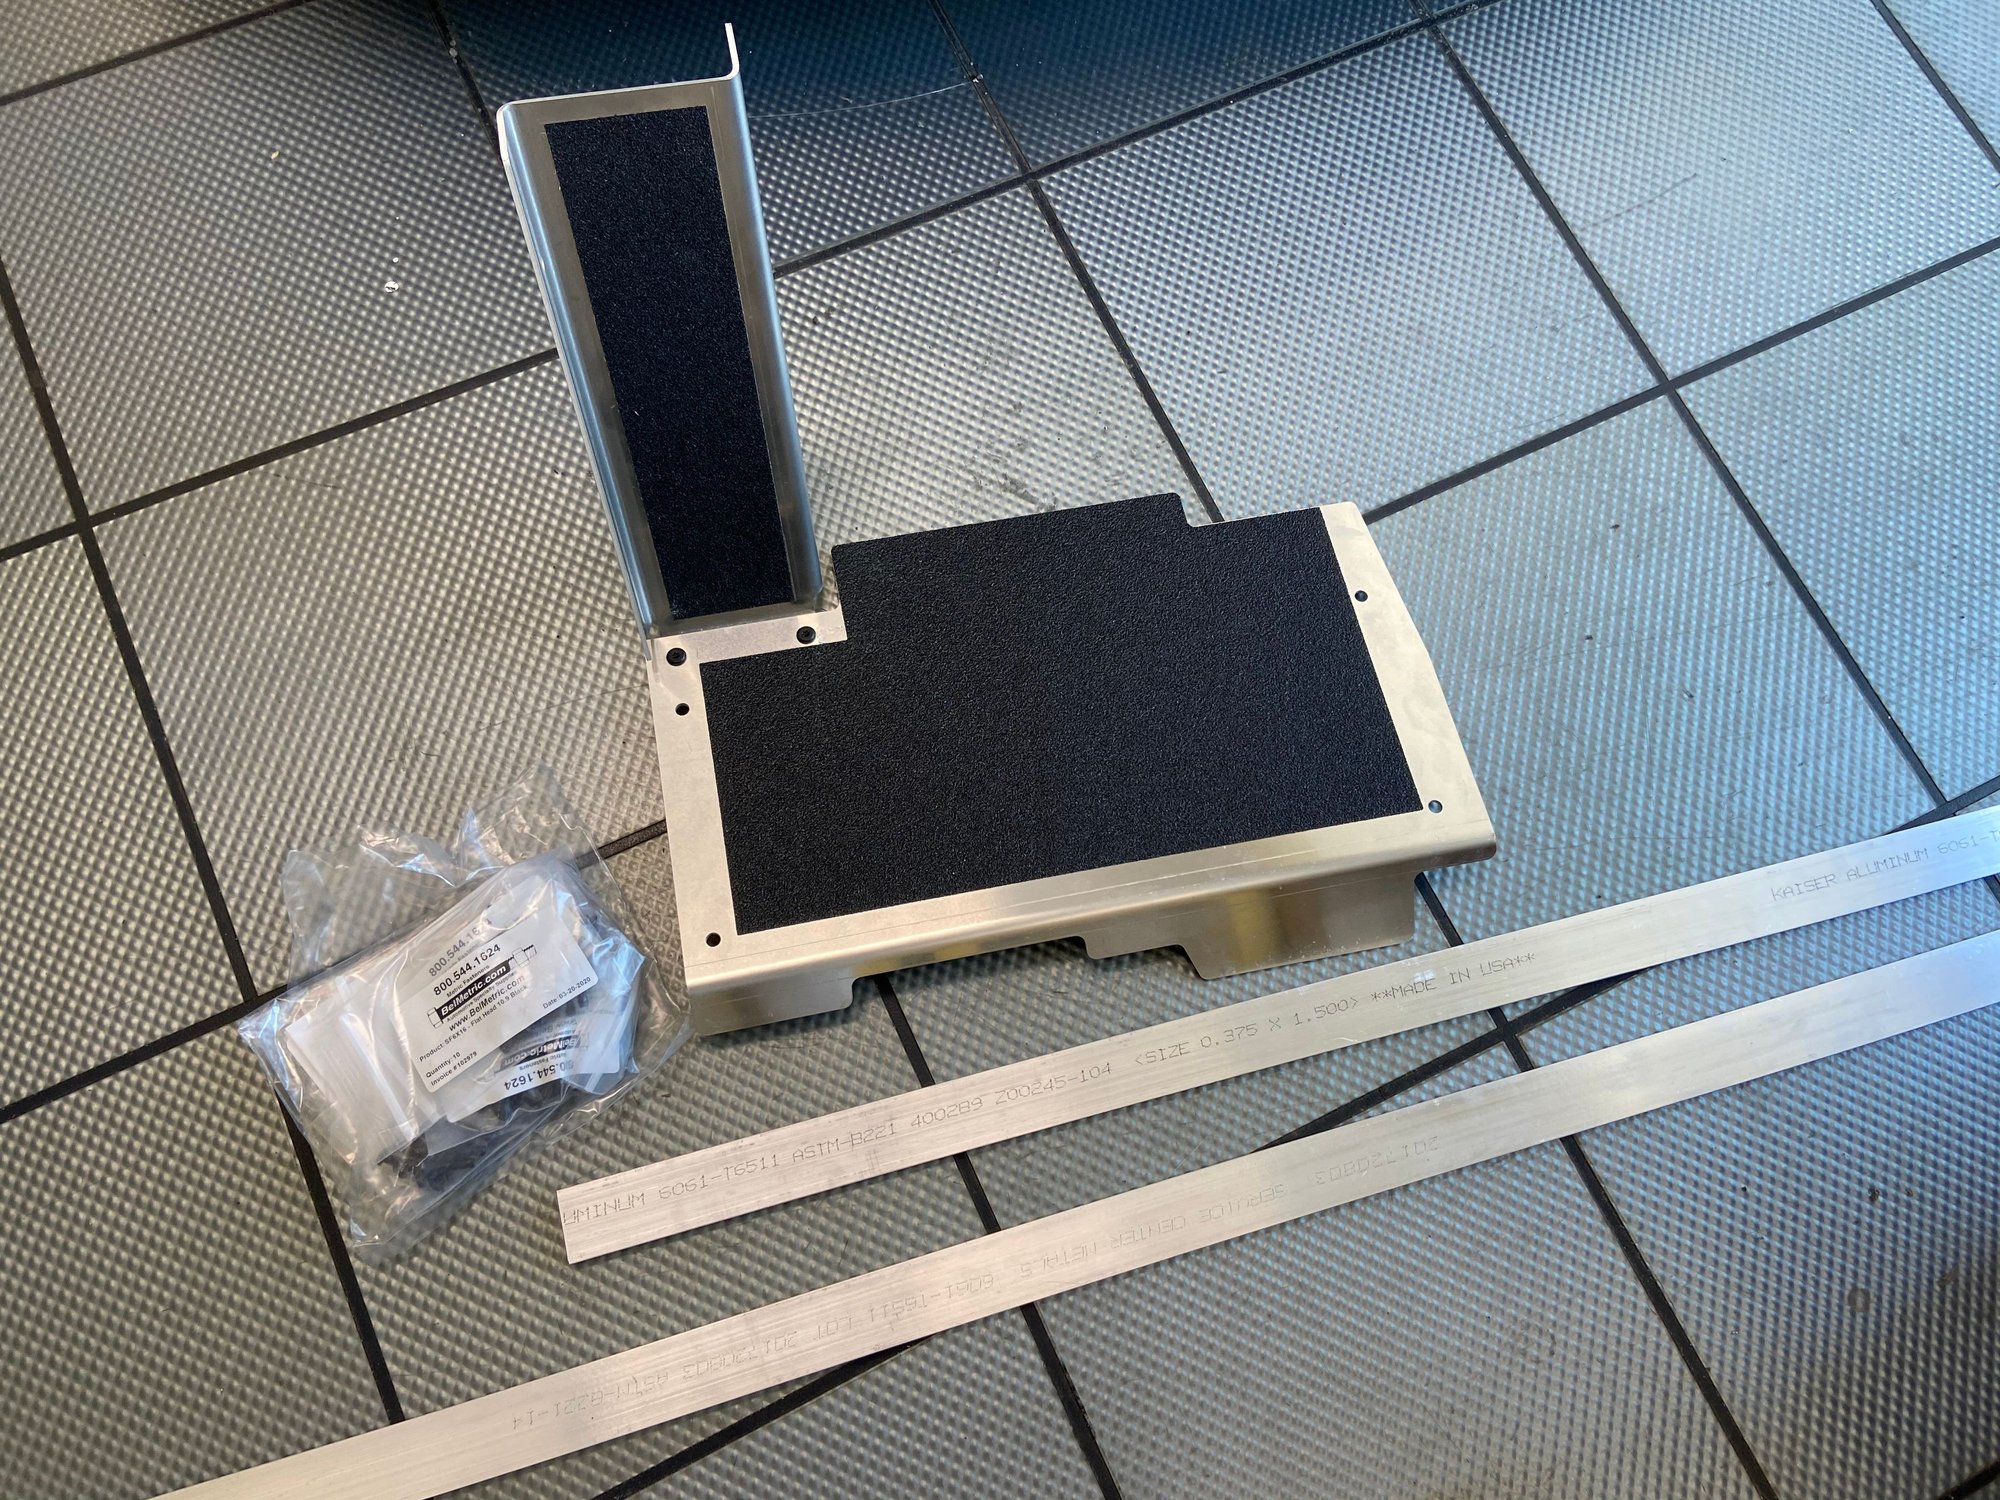
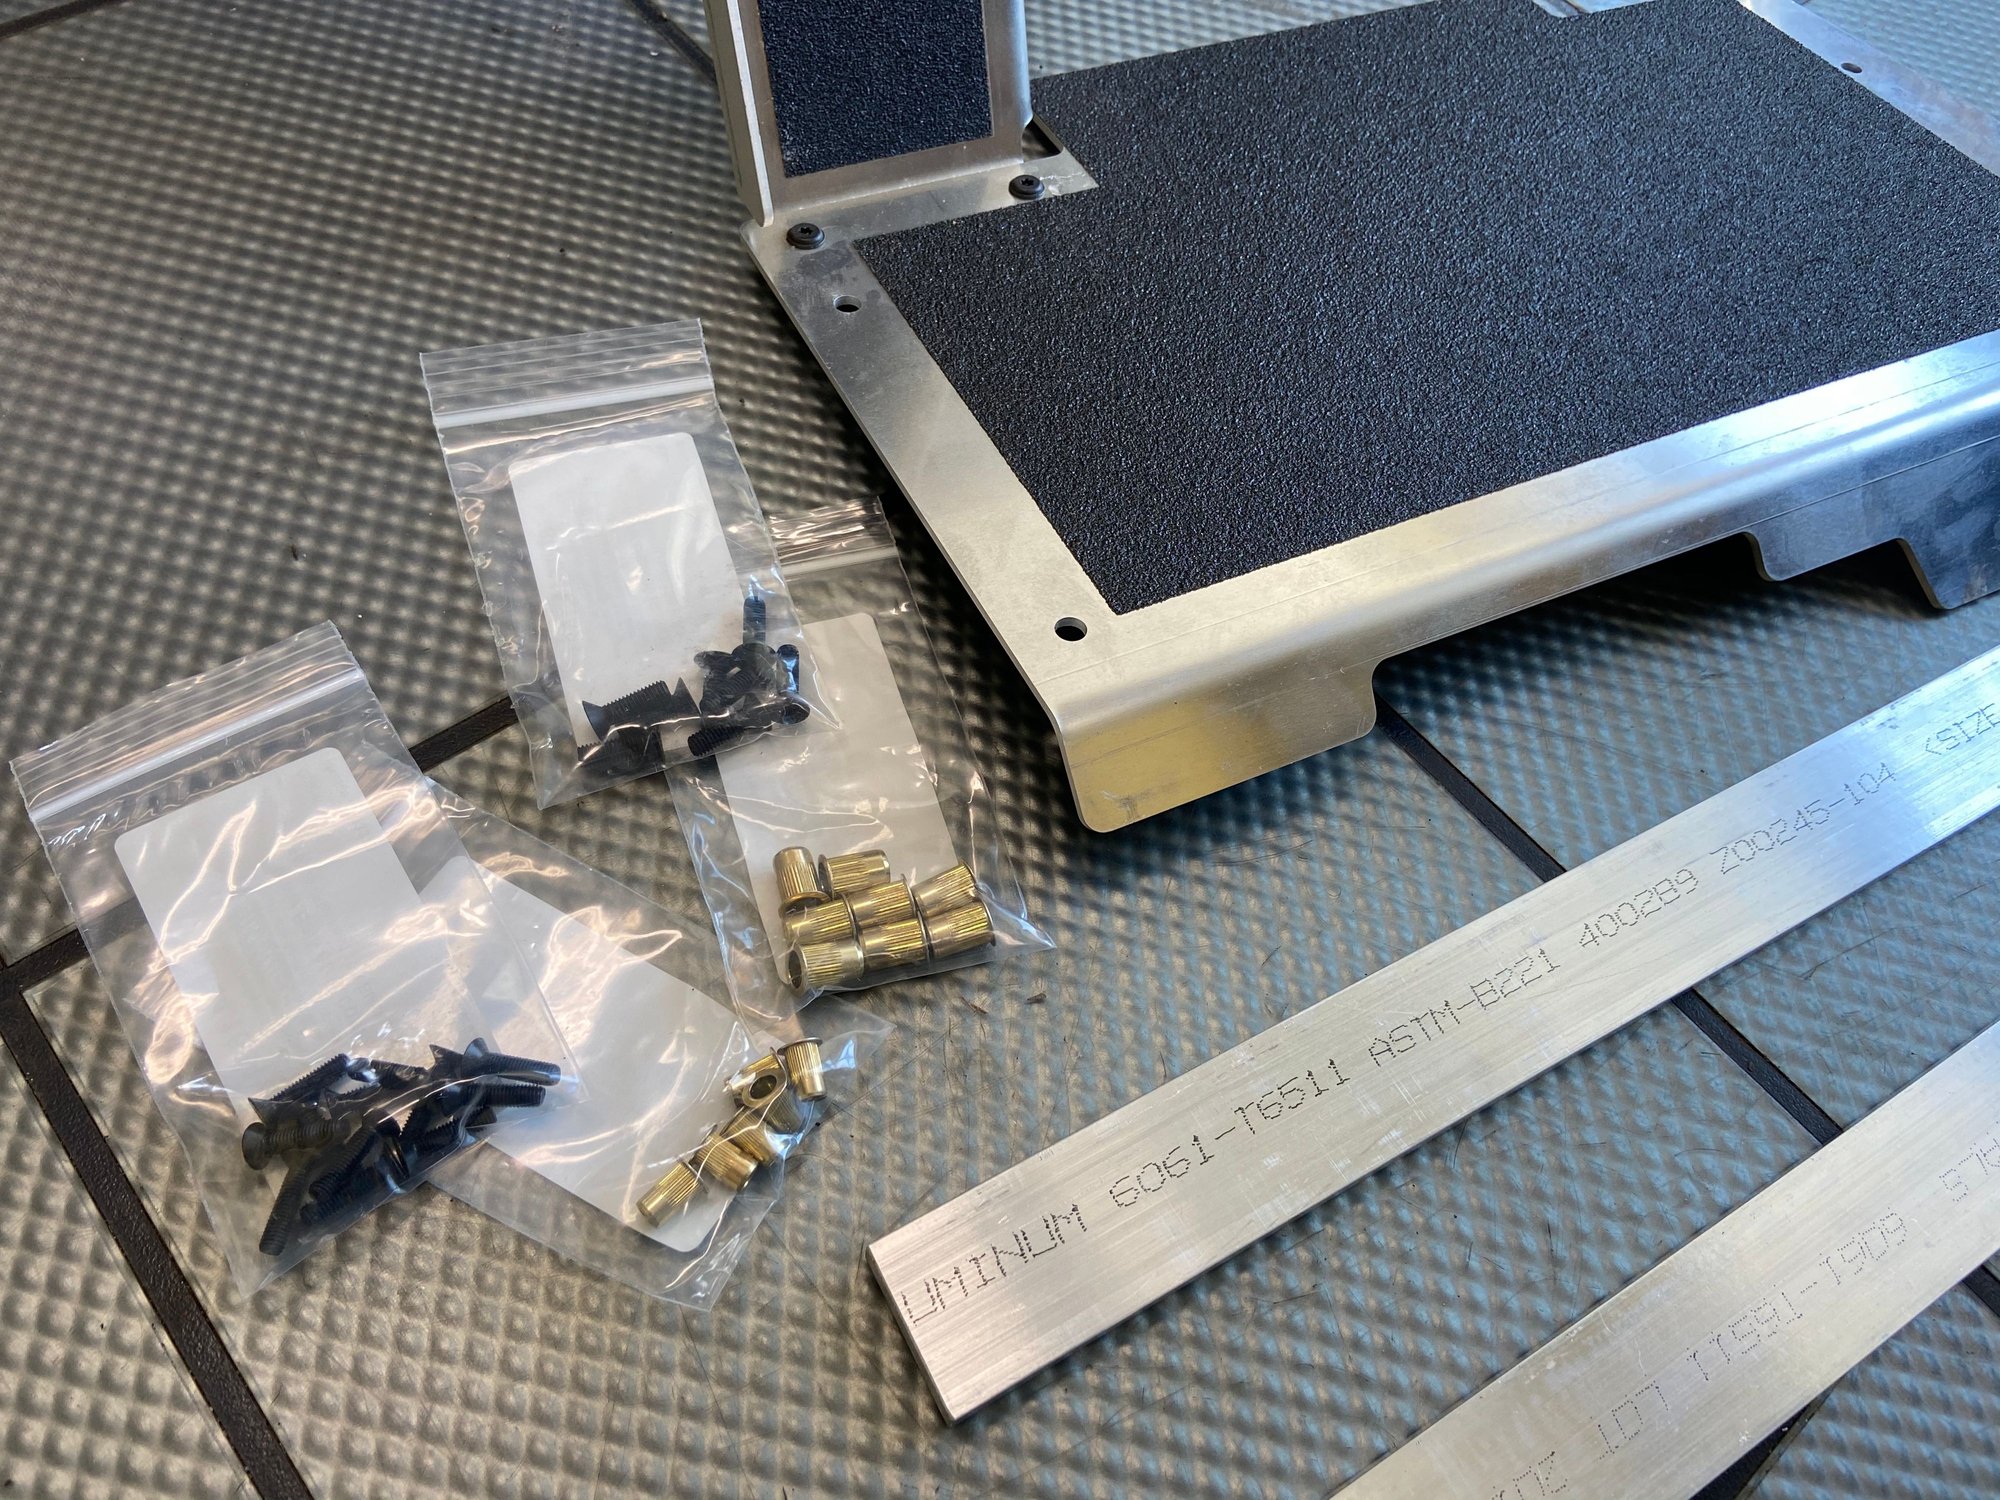
For the floor broad (I am super excited about this!), I am going 991 Cup style! Here's how it look on a 991 Cup.
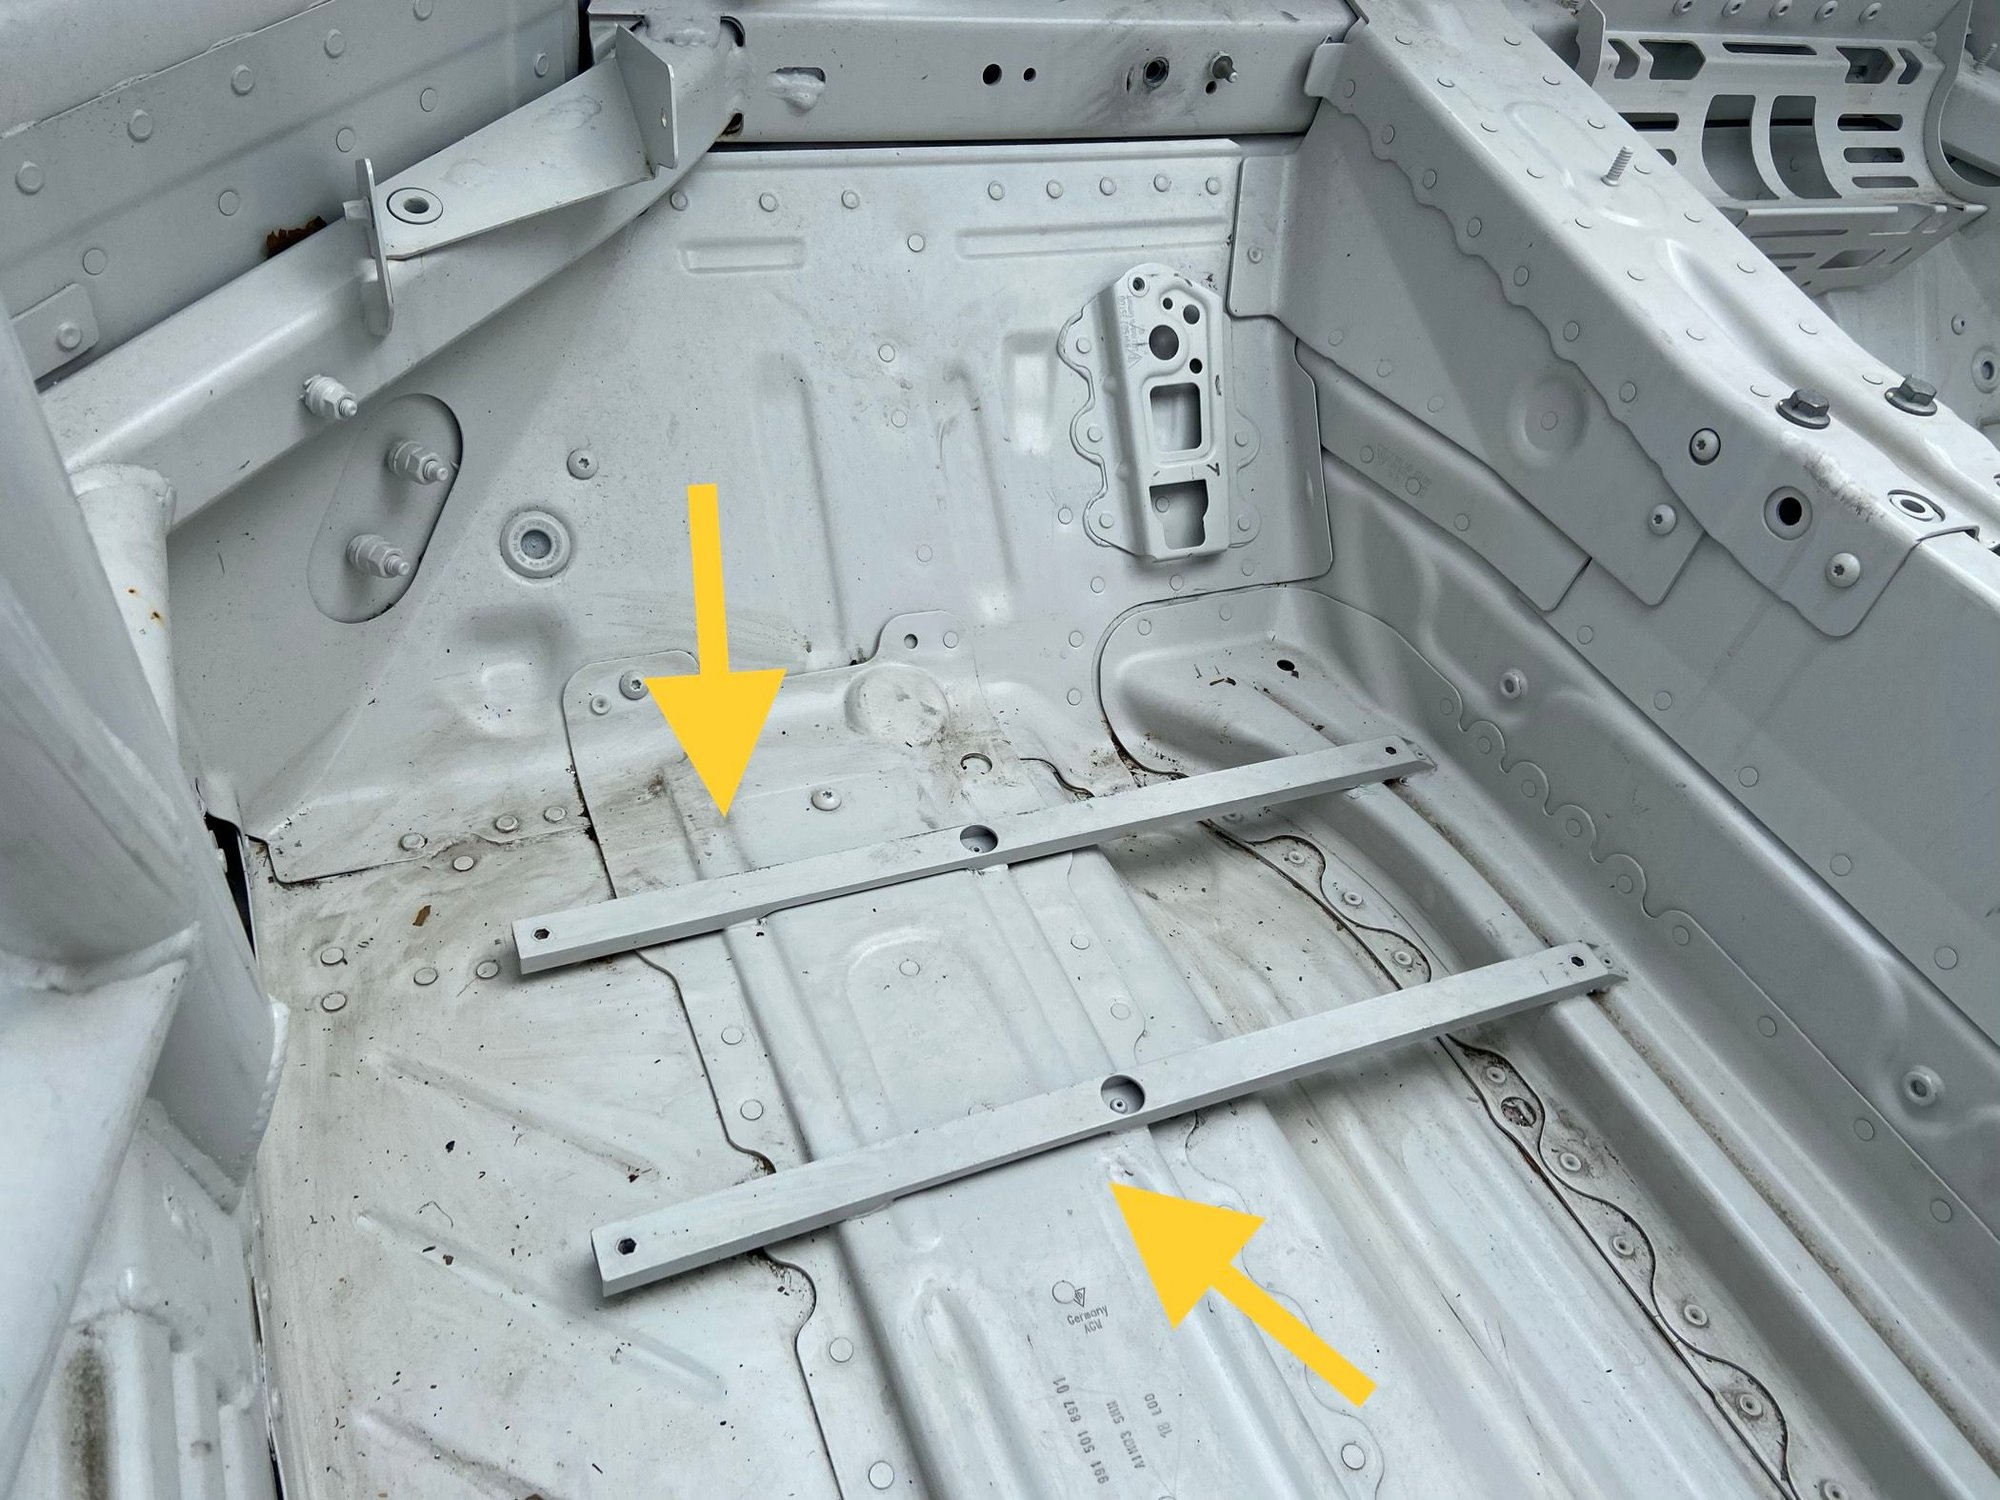
991 Cup has two metal rails to mount the floor board.
I am using 6061 aluminum flat stock to make the rails to mount the 991 Cup floor broad to my 997.
Not sure when I can do this but I have all the parts I need and super excited about it.

 03-18-2020, 02:15 PM