When you click on links to various merchants on this site and make a purchase, this can result in this site earning a commission. Affiliate programs and affiliations include, but are not limited to, the eBay Partner Network.
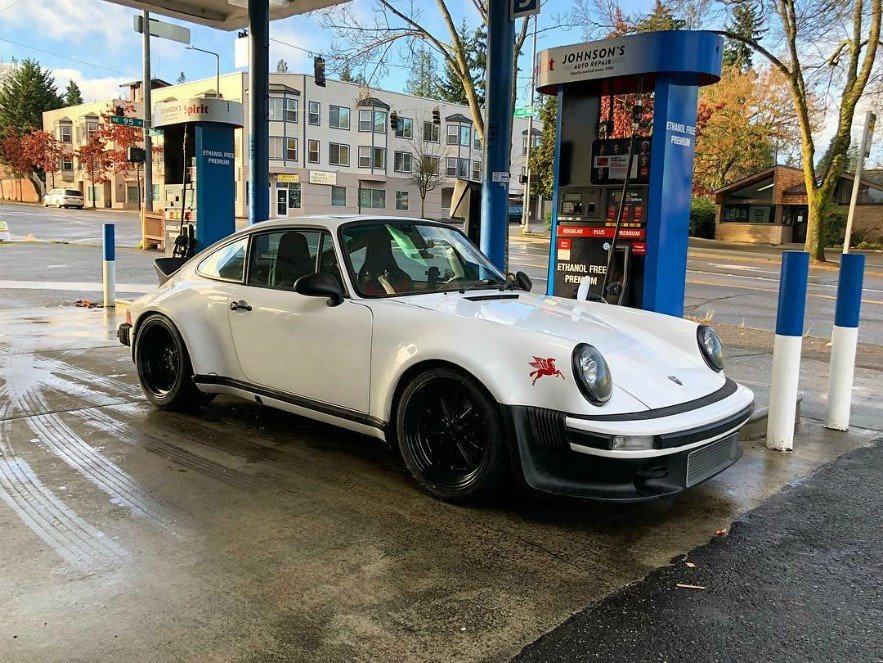
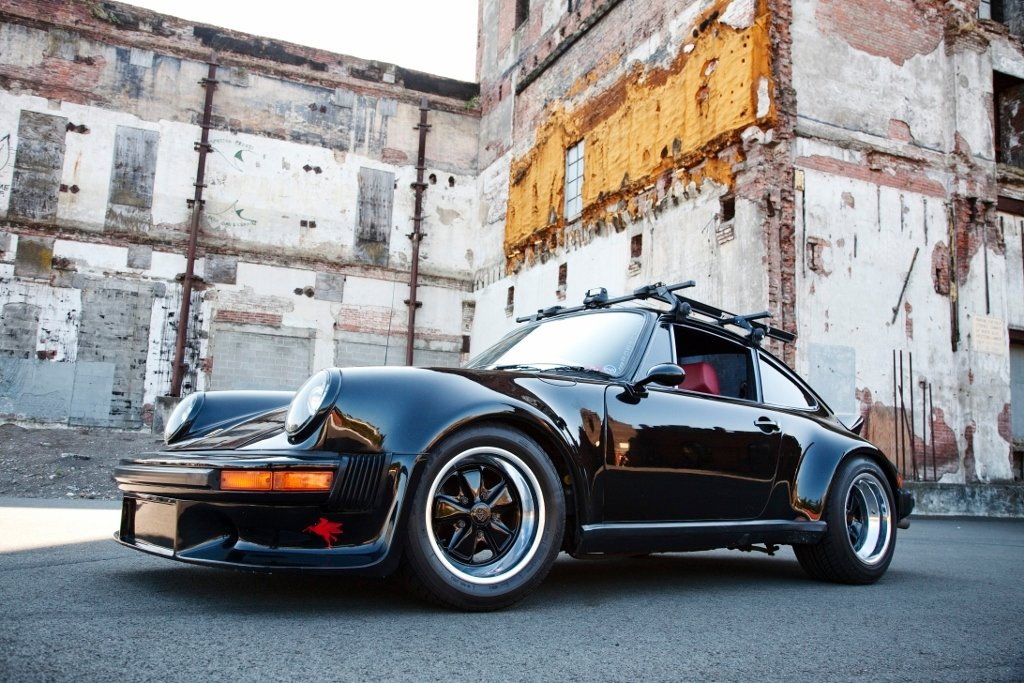
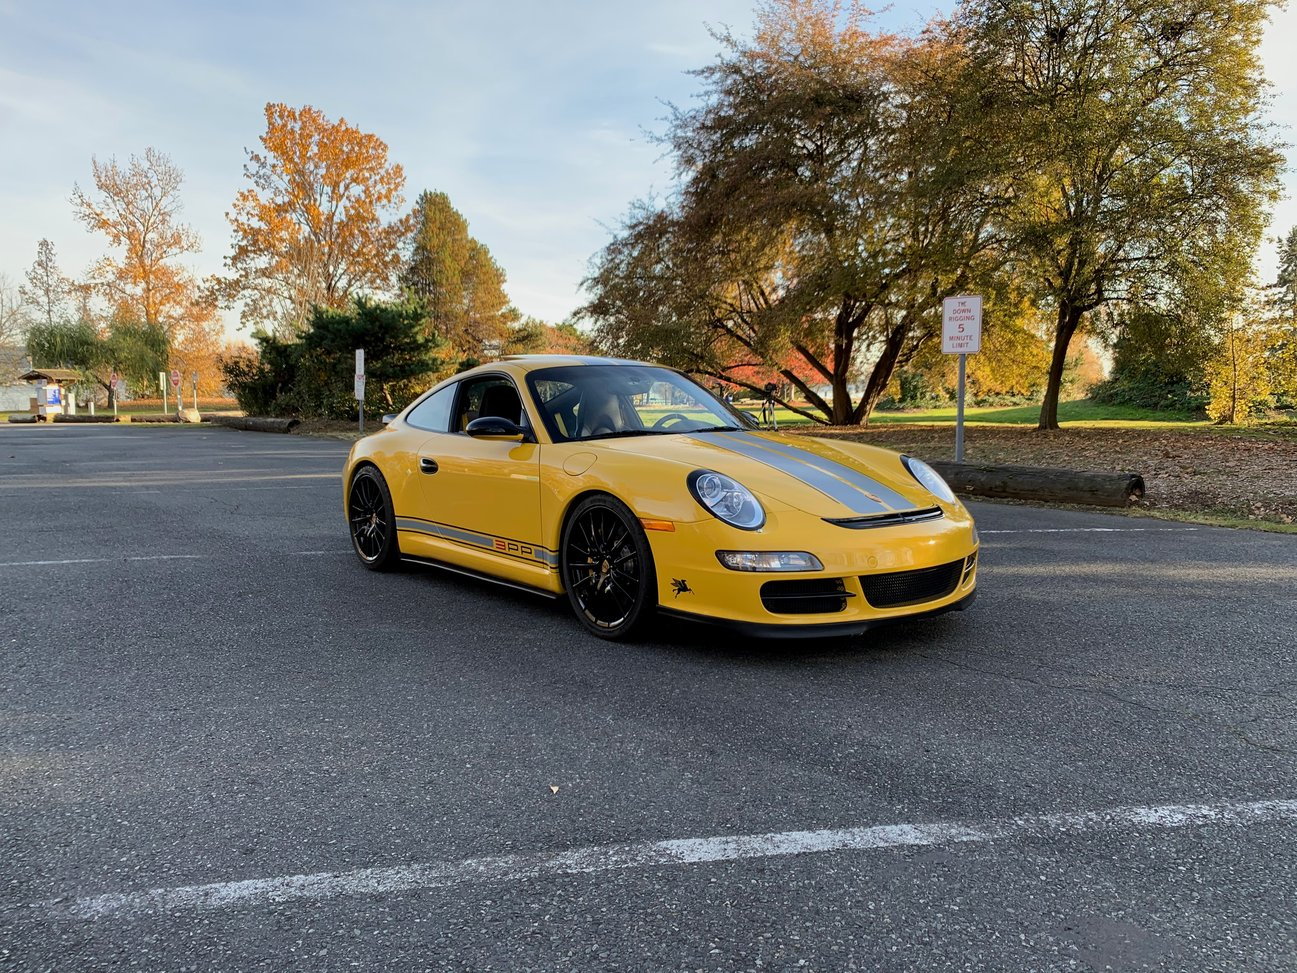
Pegasus is just a thing I started doing with my aircooled cars and just kept it going with the watercooled. I went back and forth about the GT3. It was and is the best 911 I've ever driven and owned. I believe it will become the greatest GT3 Porsche has ever made and destined to be classic: last Mezger engine, last with hydraulic steering, right size, proportions, still analog feel with modern-ish technology. The engine is simply incredible and the howl it makes from 5,000-8,400 RPM is sublime. I had a difficult time justifying keeping it because my driving style has changed as I get older (I'm 55). I don't track my cars any more and when I drive, it is less drive-it-like-I-stole-it and more spirited but casual cruising on country roads. It seemed like I wasn't even using a quarter of the potential of the GT3.
All the things that make it a fantastic driver's car also make it challenging to drive under "normal" conditions. The clutch is heavy, the flywheel is light and needs to be driven hard otherwise it is clunky under 4,000 RPM, suspension is stiff, etc. I finally decided it was time to let it go to another steward and enthusiast who would enjoy it more. The GTS is more suitable to me now (with a few tweaks that will be documented in this thread). That said, I do miss the noise a GT3 makes, especially in a tunnel...
Yo, I am also following your build thread with interest.
FYI, I just replaced my 997GTS center muffler with a Sharkwerks X-pipe.
Here is an A/B comparison between them (with the caveat that an iPhone audio recording never does an exhaust system justice):
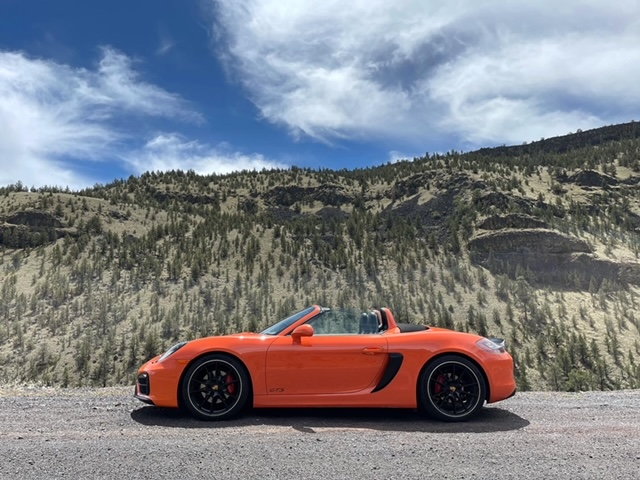
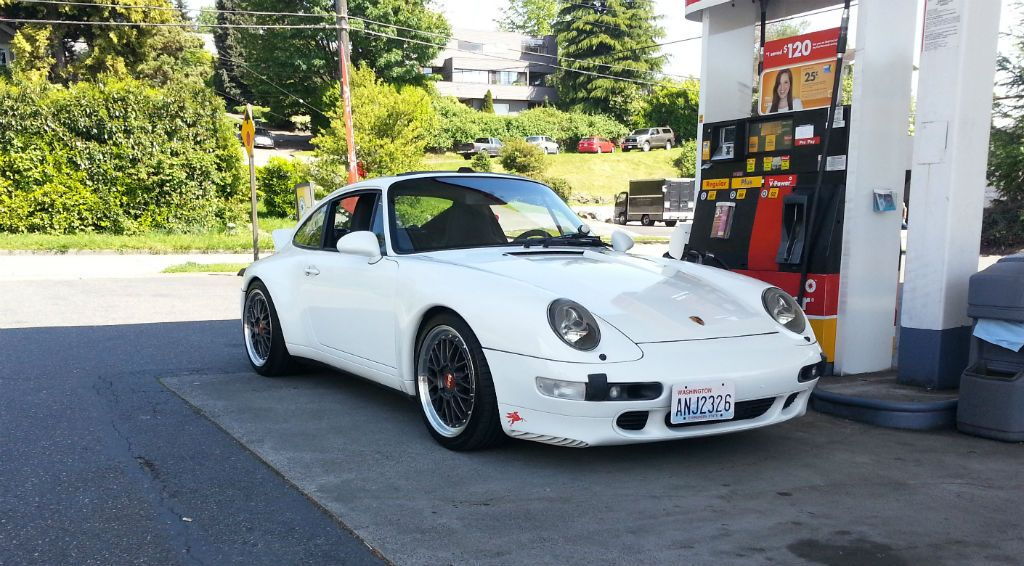
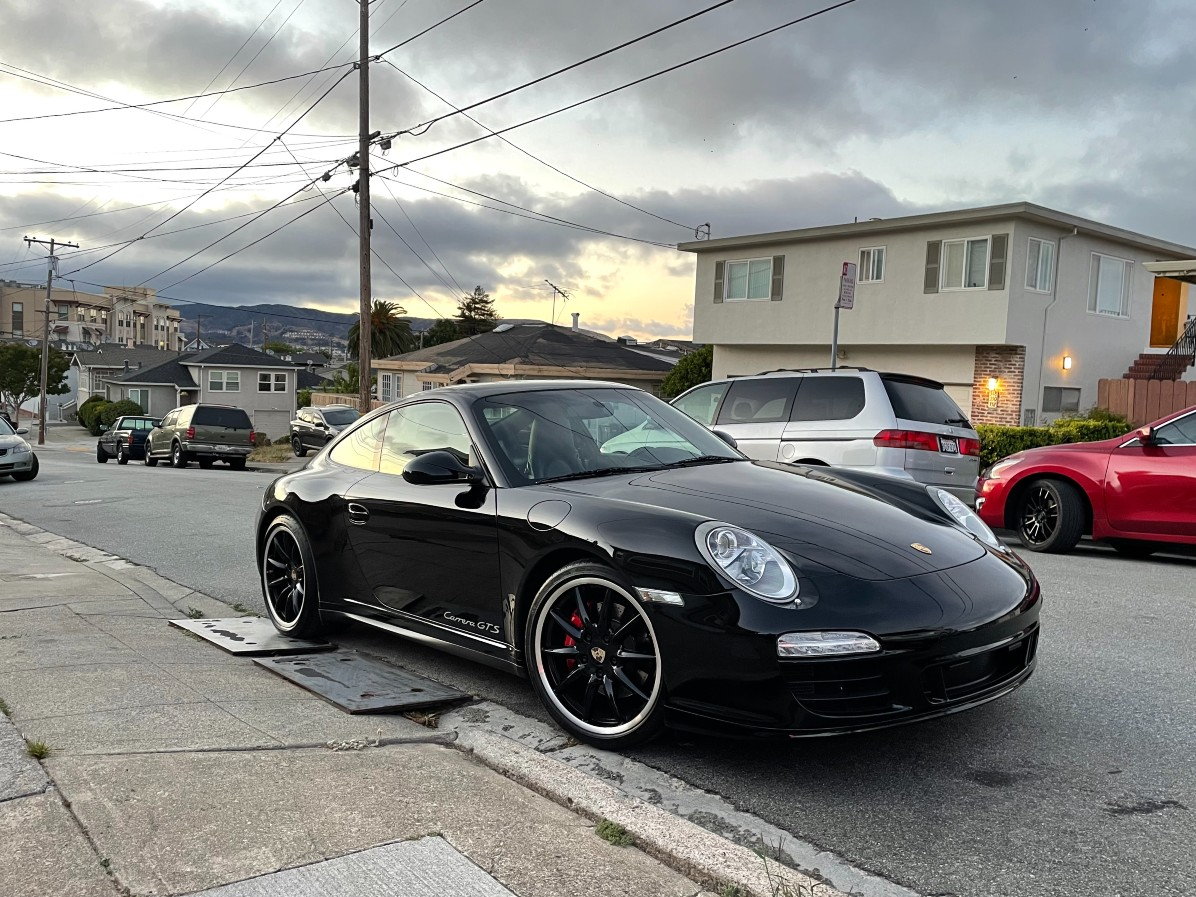
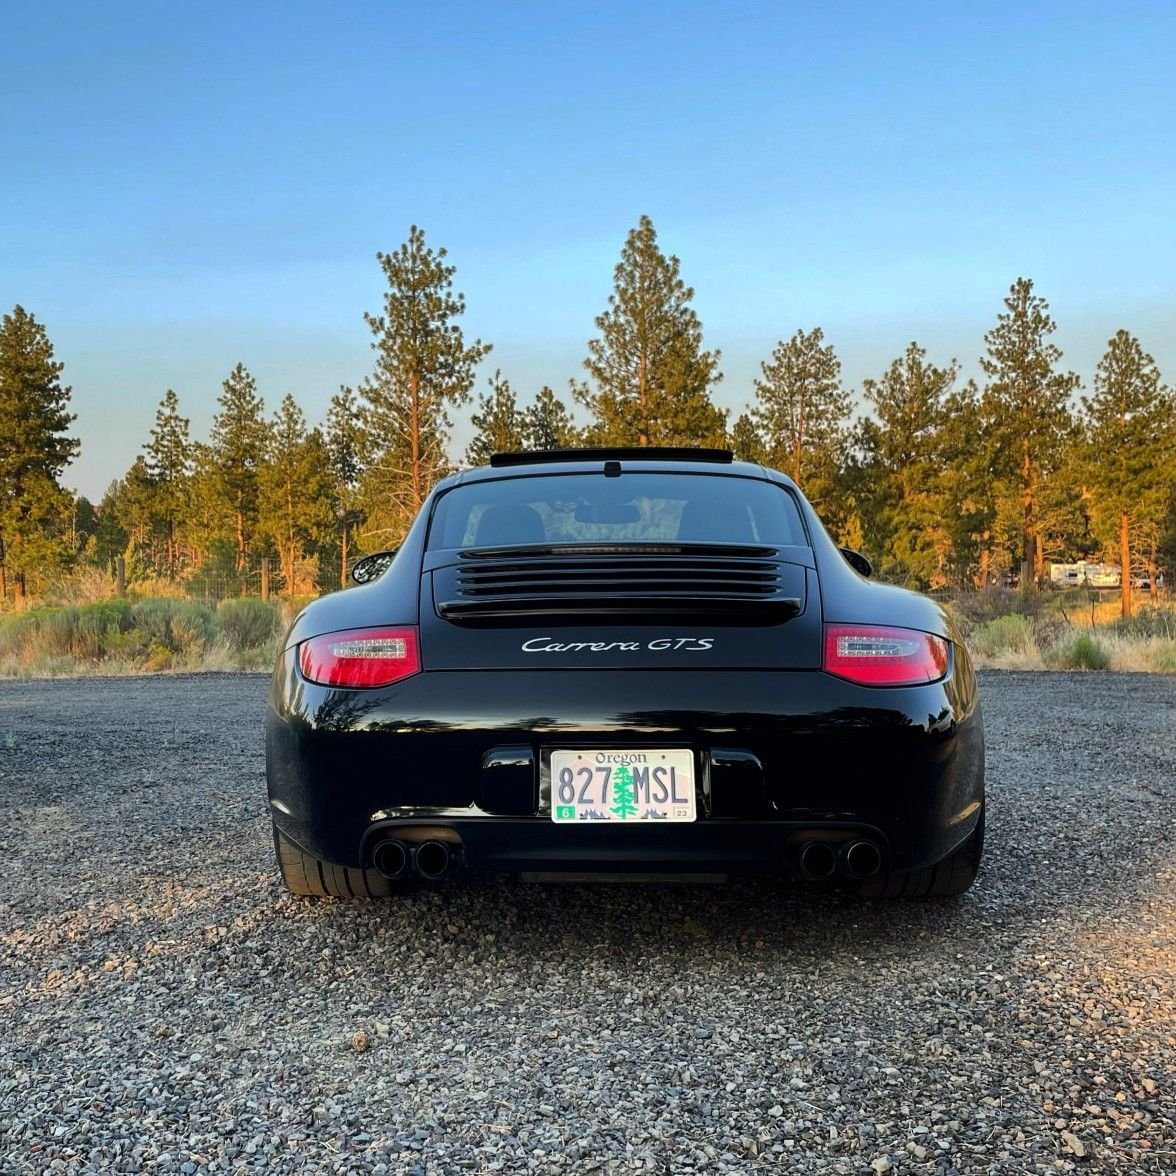
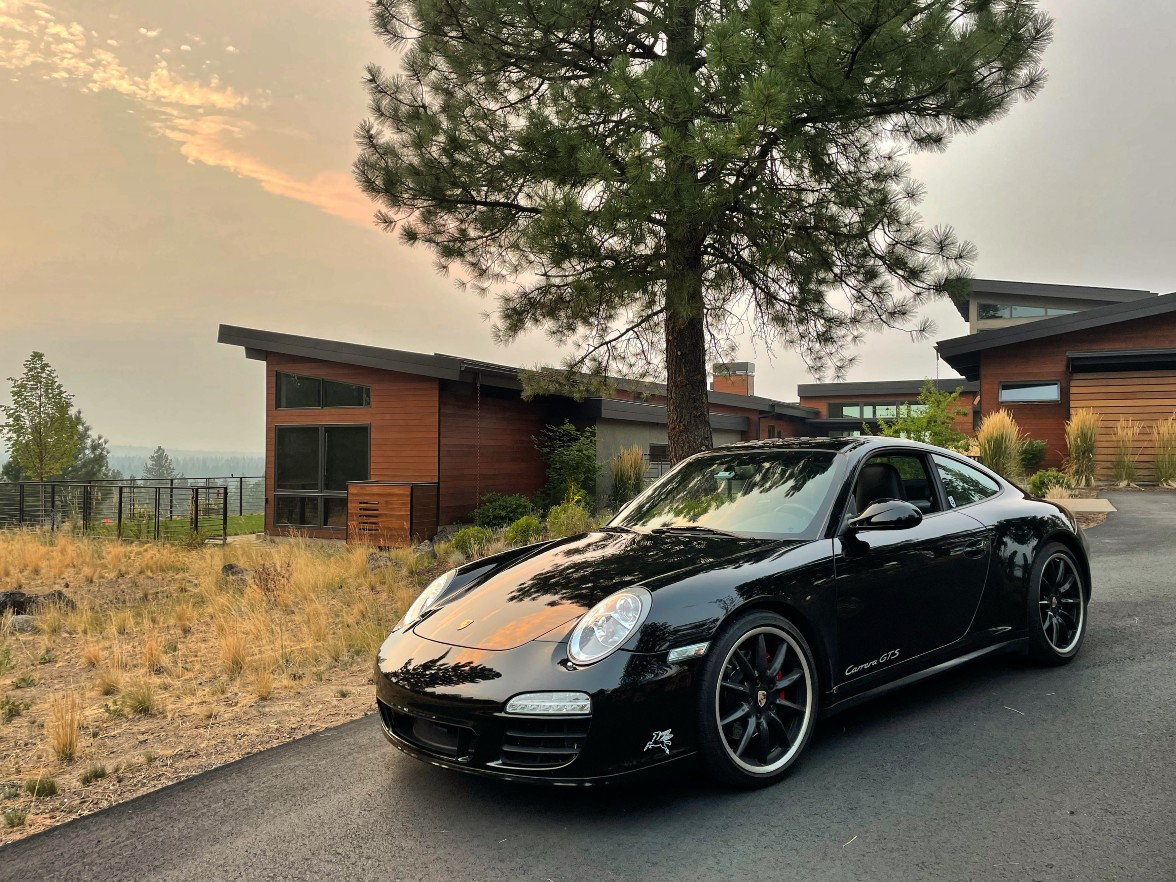
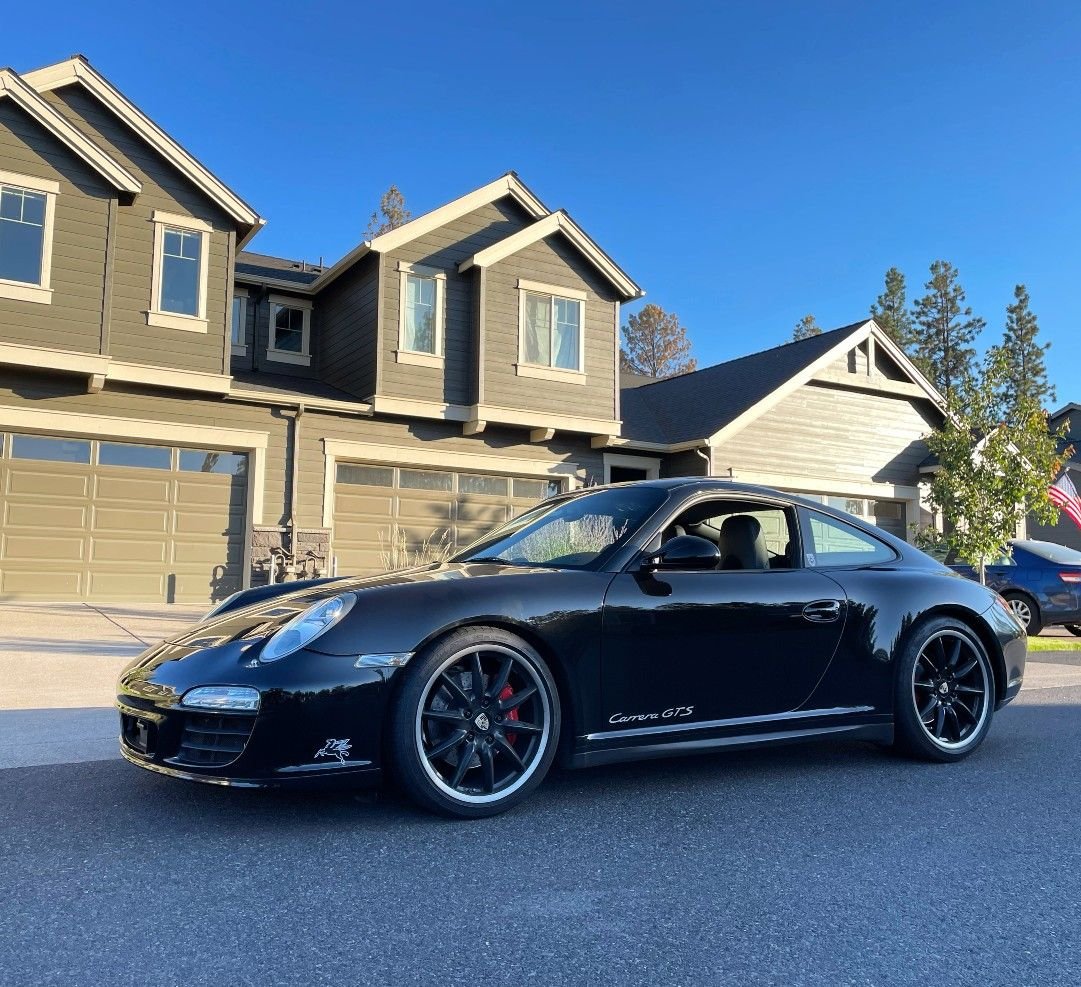
Welcome to my 2011 Carrera GTS build thread. I'm a long time Porschephile and have had the good fortune of owning some amazing 911s (and one Boxster GTS). My purchase and ownership history of late is a little wonky but suffice say it has been an awesome journey with some incredible experiences. Like Goldilocks, it took some experimentation and circumstance to find the right 911 for me and that's the GTS. It is the right blend of performance, luxury, and comfort for me, although the GT3 will forever remain the best and most special 911 I've owned and the Boxster the best best handling. Here's the parade of past cars...
Here's the current ride with some interesting features: manual, 5-lug wheels, heated/ventilated seats, and LSD. I picked it up in San Jose CA with 63K miles and drove it back to Bend OR. Upon arriving home, the water pump failed and promptly got replaced. The clutch will need replacing in about 5K miles or so. I have other plans for it and will be documenting them here.
...
Stunning! Enjoy your GTS - The smile on your face did not go down.
The GTS produced in the 997.2 generation has something special. The WB combined with rear-wheel drive, hydraulic steering and more, makes its chassis wonderful and solid. I call it the GT3 'Touring' of the 997.
Thanks for sharing
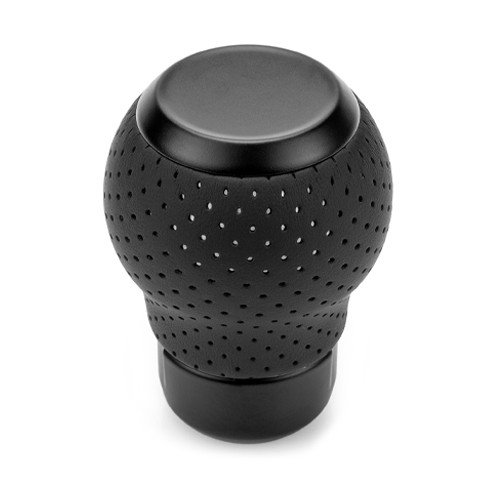
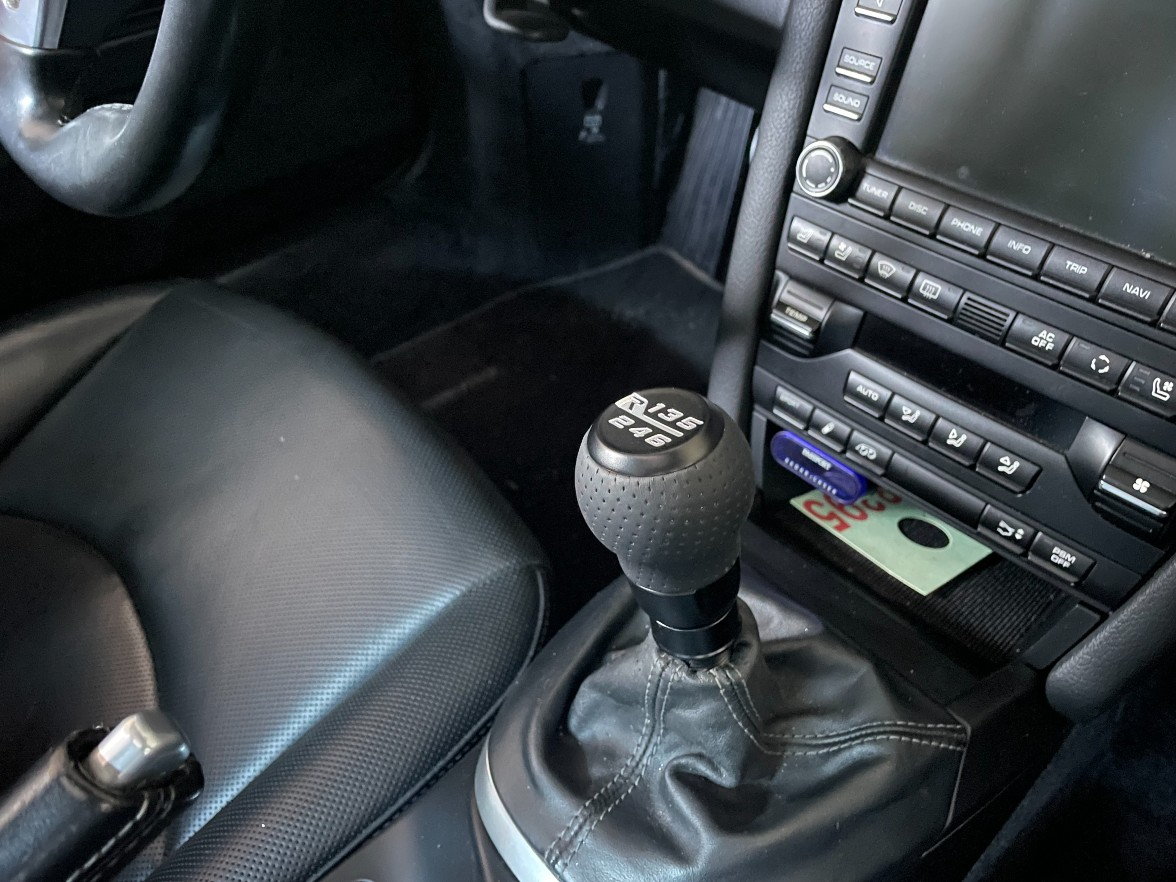
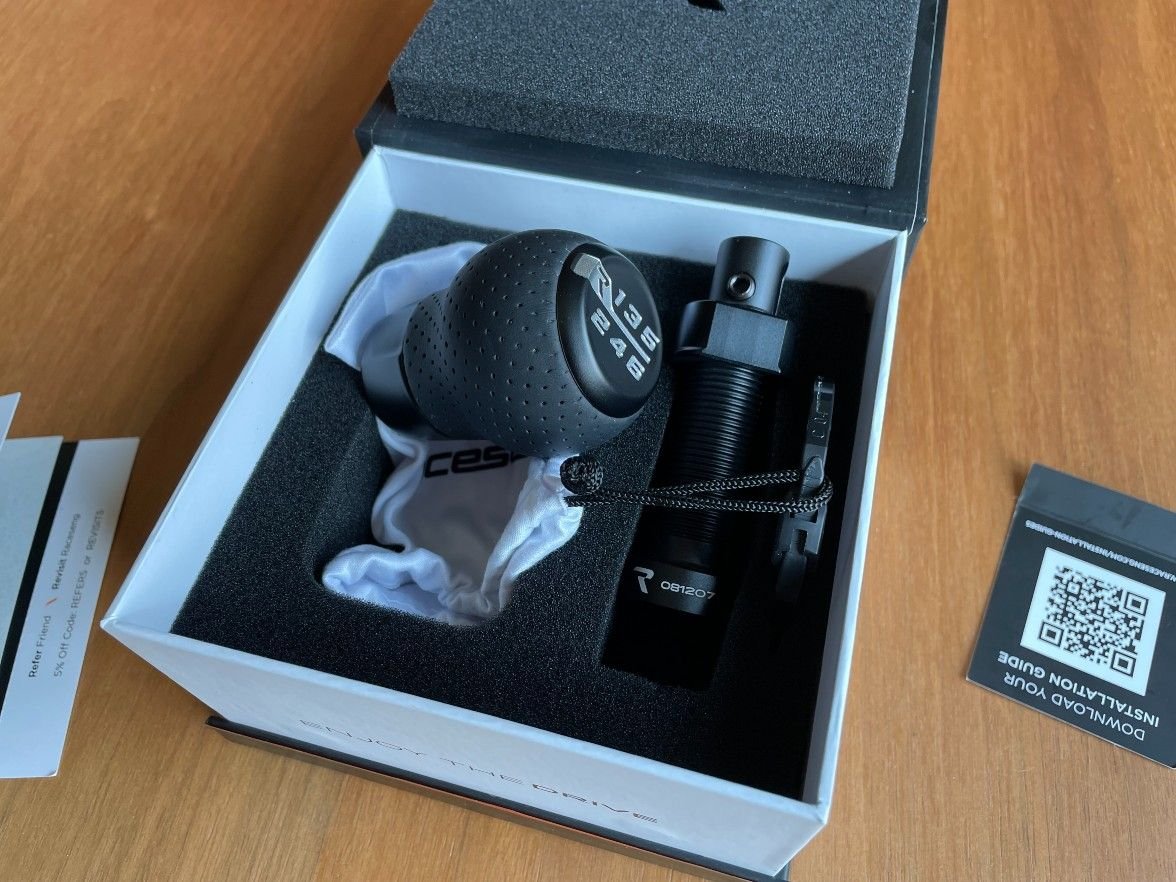
I installed a new Stratose shift **** by Raceseng in black perforated leather. It is spendy (about $300 all-in) but a quality piece of kit. And it feels weighty too at 362 grams. The weight makes a big difference in shifting and engagement feel. Also repurposed the lip spoiler from my GT3 and installed it onto the decklid of the GTS. And finally installed some Pegasus stickers because 5 hp!!
That's nice. A shift **** makes quite a difference. Aside from the steering wheel, it's the thing a MT driver interacts with the most and having s solid feeling well shaped shifter really adds to the driving enjoyment. I really like the shape and feel of the RUF **** that's in my car. So much more solid than the OEM carbon one that felt like multiple pieces moving around, but had to go to Germany to get it
Love the build so far, Busta! The white pegasus on your GTS is a nice choice. I searched for silver for mine, hoping to go with a ghosted look, but settled on classic red in the end.
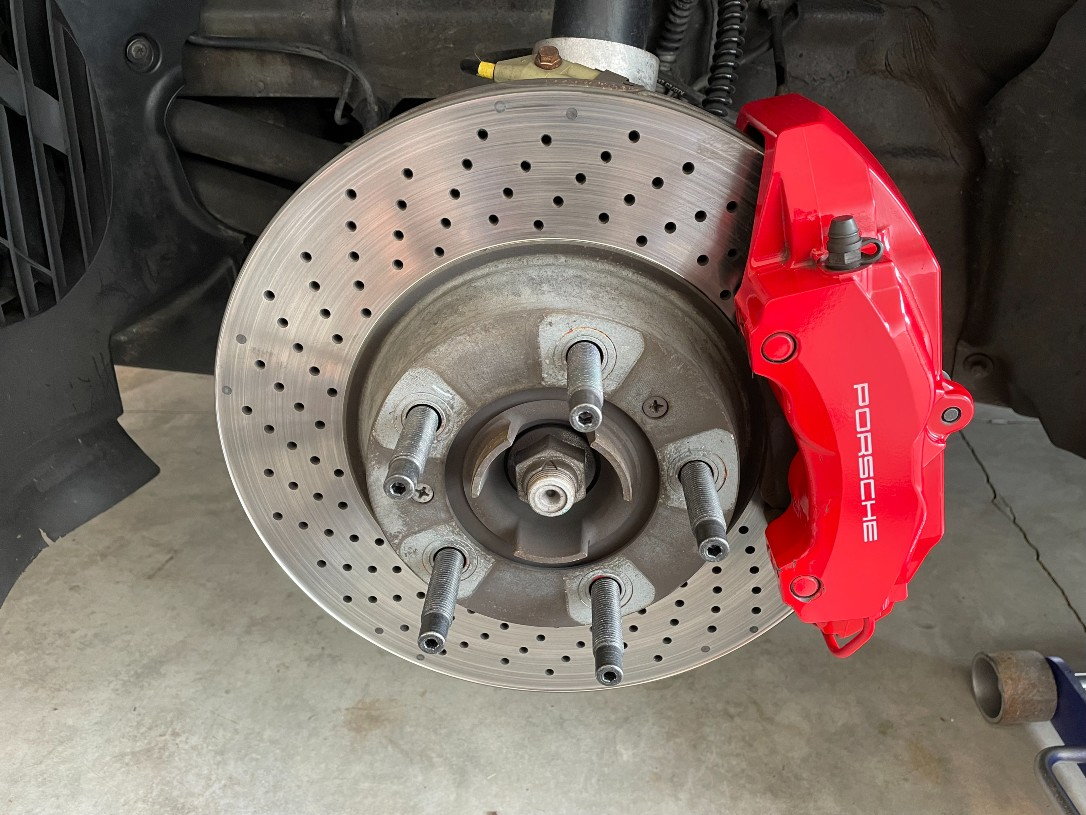
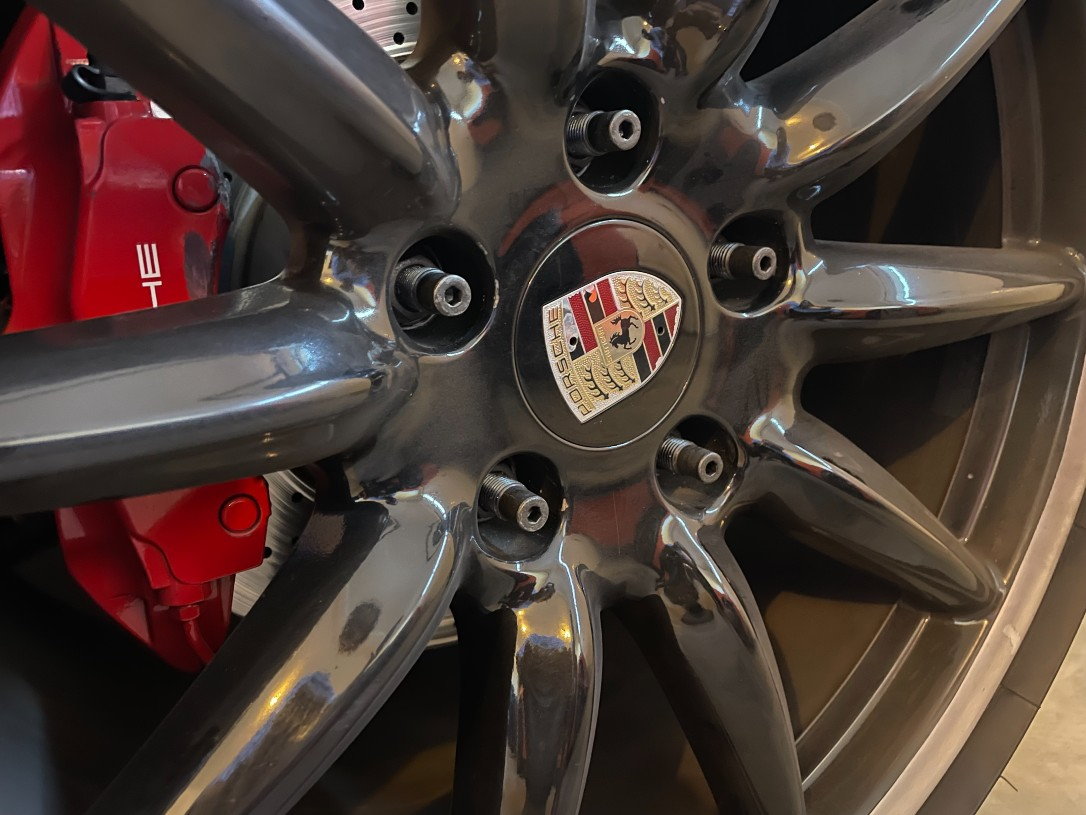
I finally got Eibach Pro Kit lowering springs installed. Besides lowering the car about an inch, the ride is actually improved over stock. Seems more compliant yet firm. I wasn't expecting that. It's definitely different and for the better. I also installed 10mm front and 15mm rear spacers along with 45mm front and 60mm rear wheel studs from Rennline. Total cost for the wheel studs and open lug nuts was $205. I had the spacers left over from another car. The studs are just the right length and don't stick out too far. If you decide to do this install, remember to take the time to clean your brake calipers and inspect your lines while you are in there. Overall, I'm really happy with the ride height and stance.
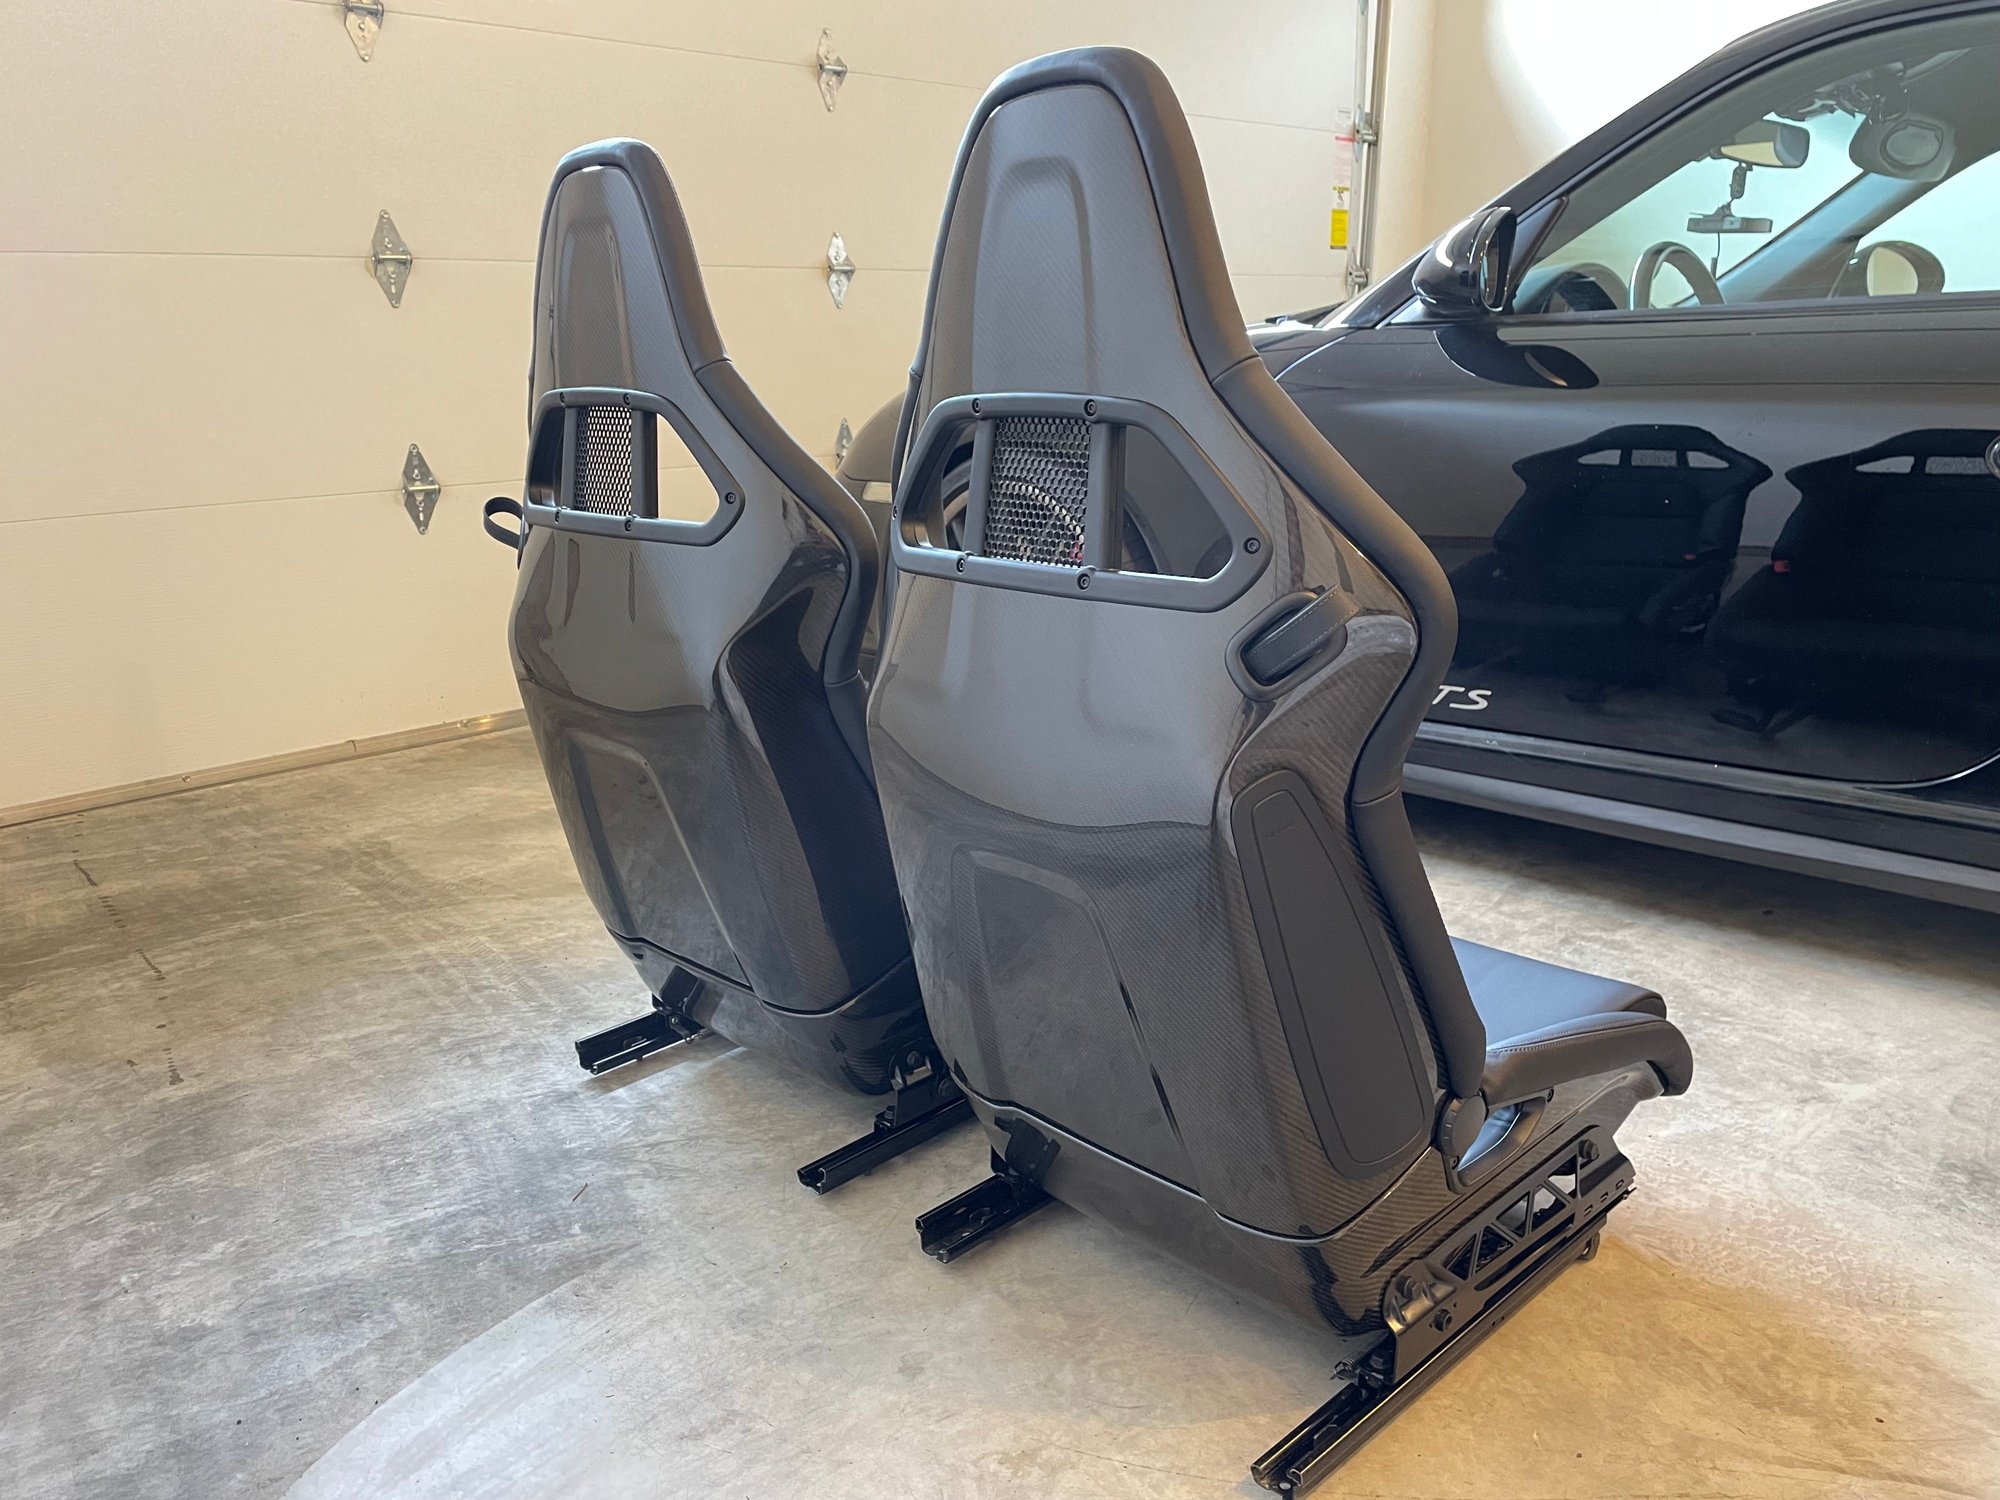
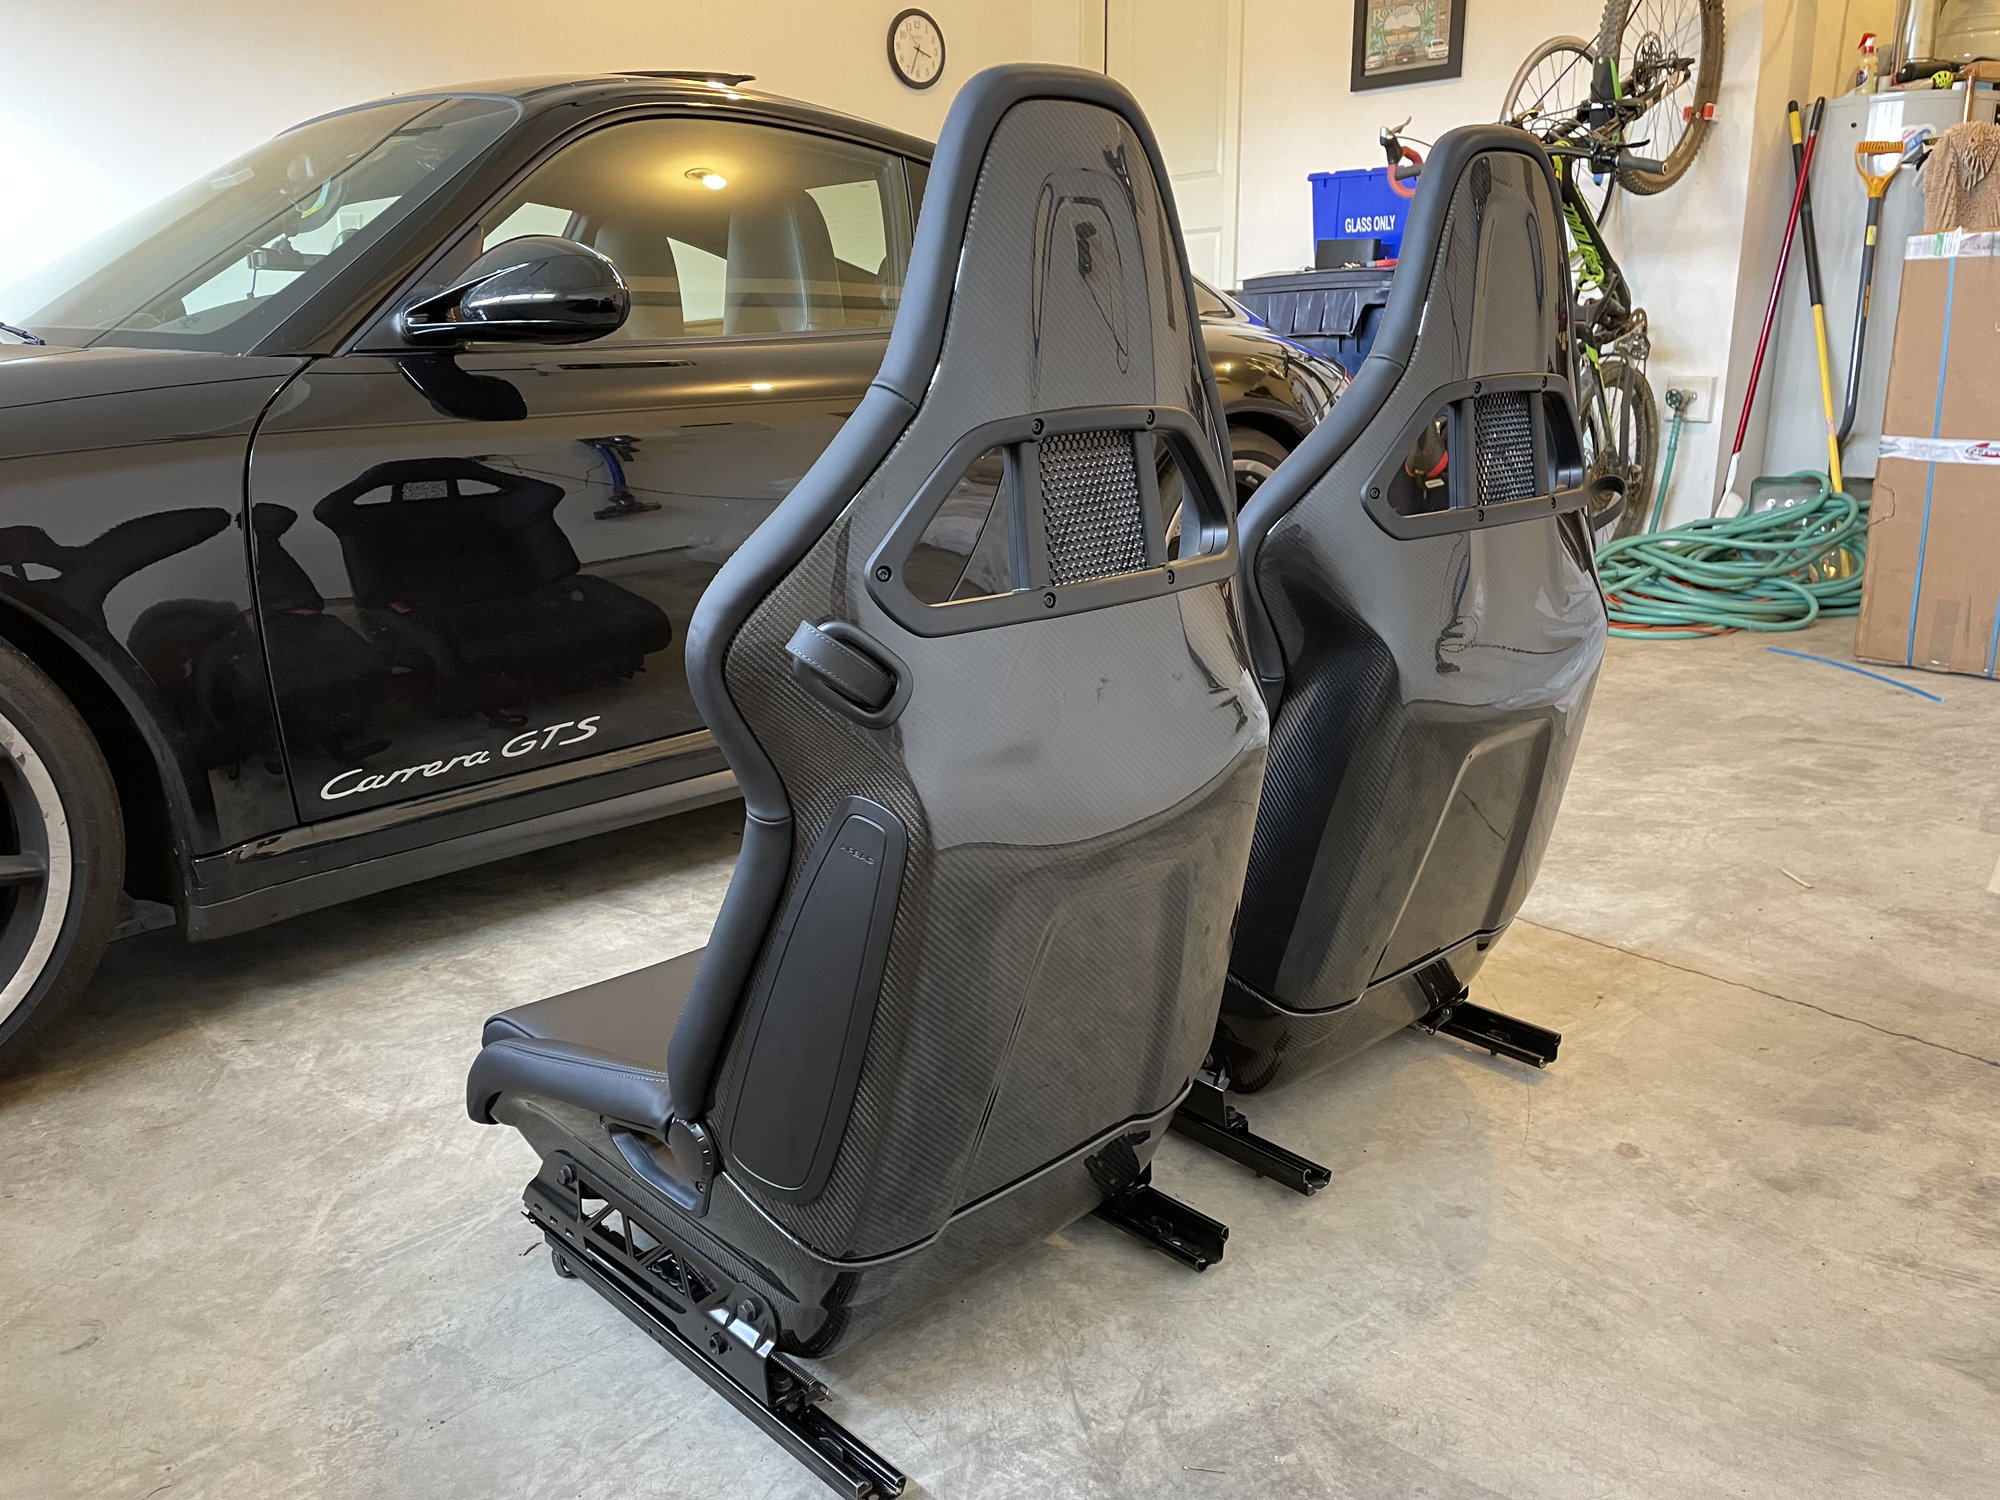
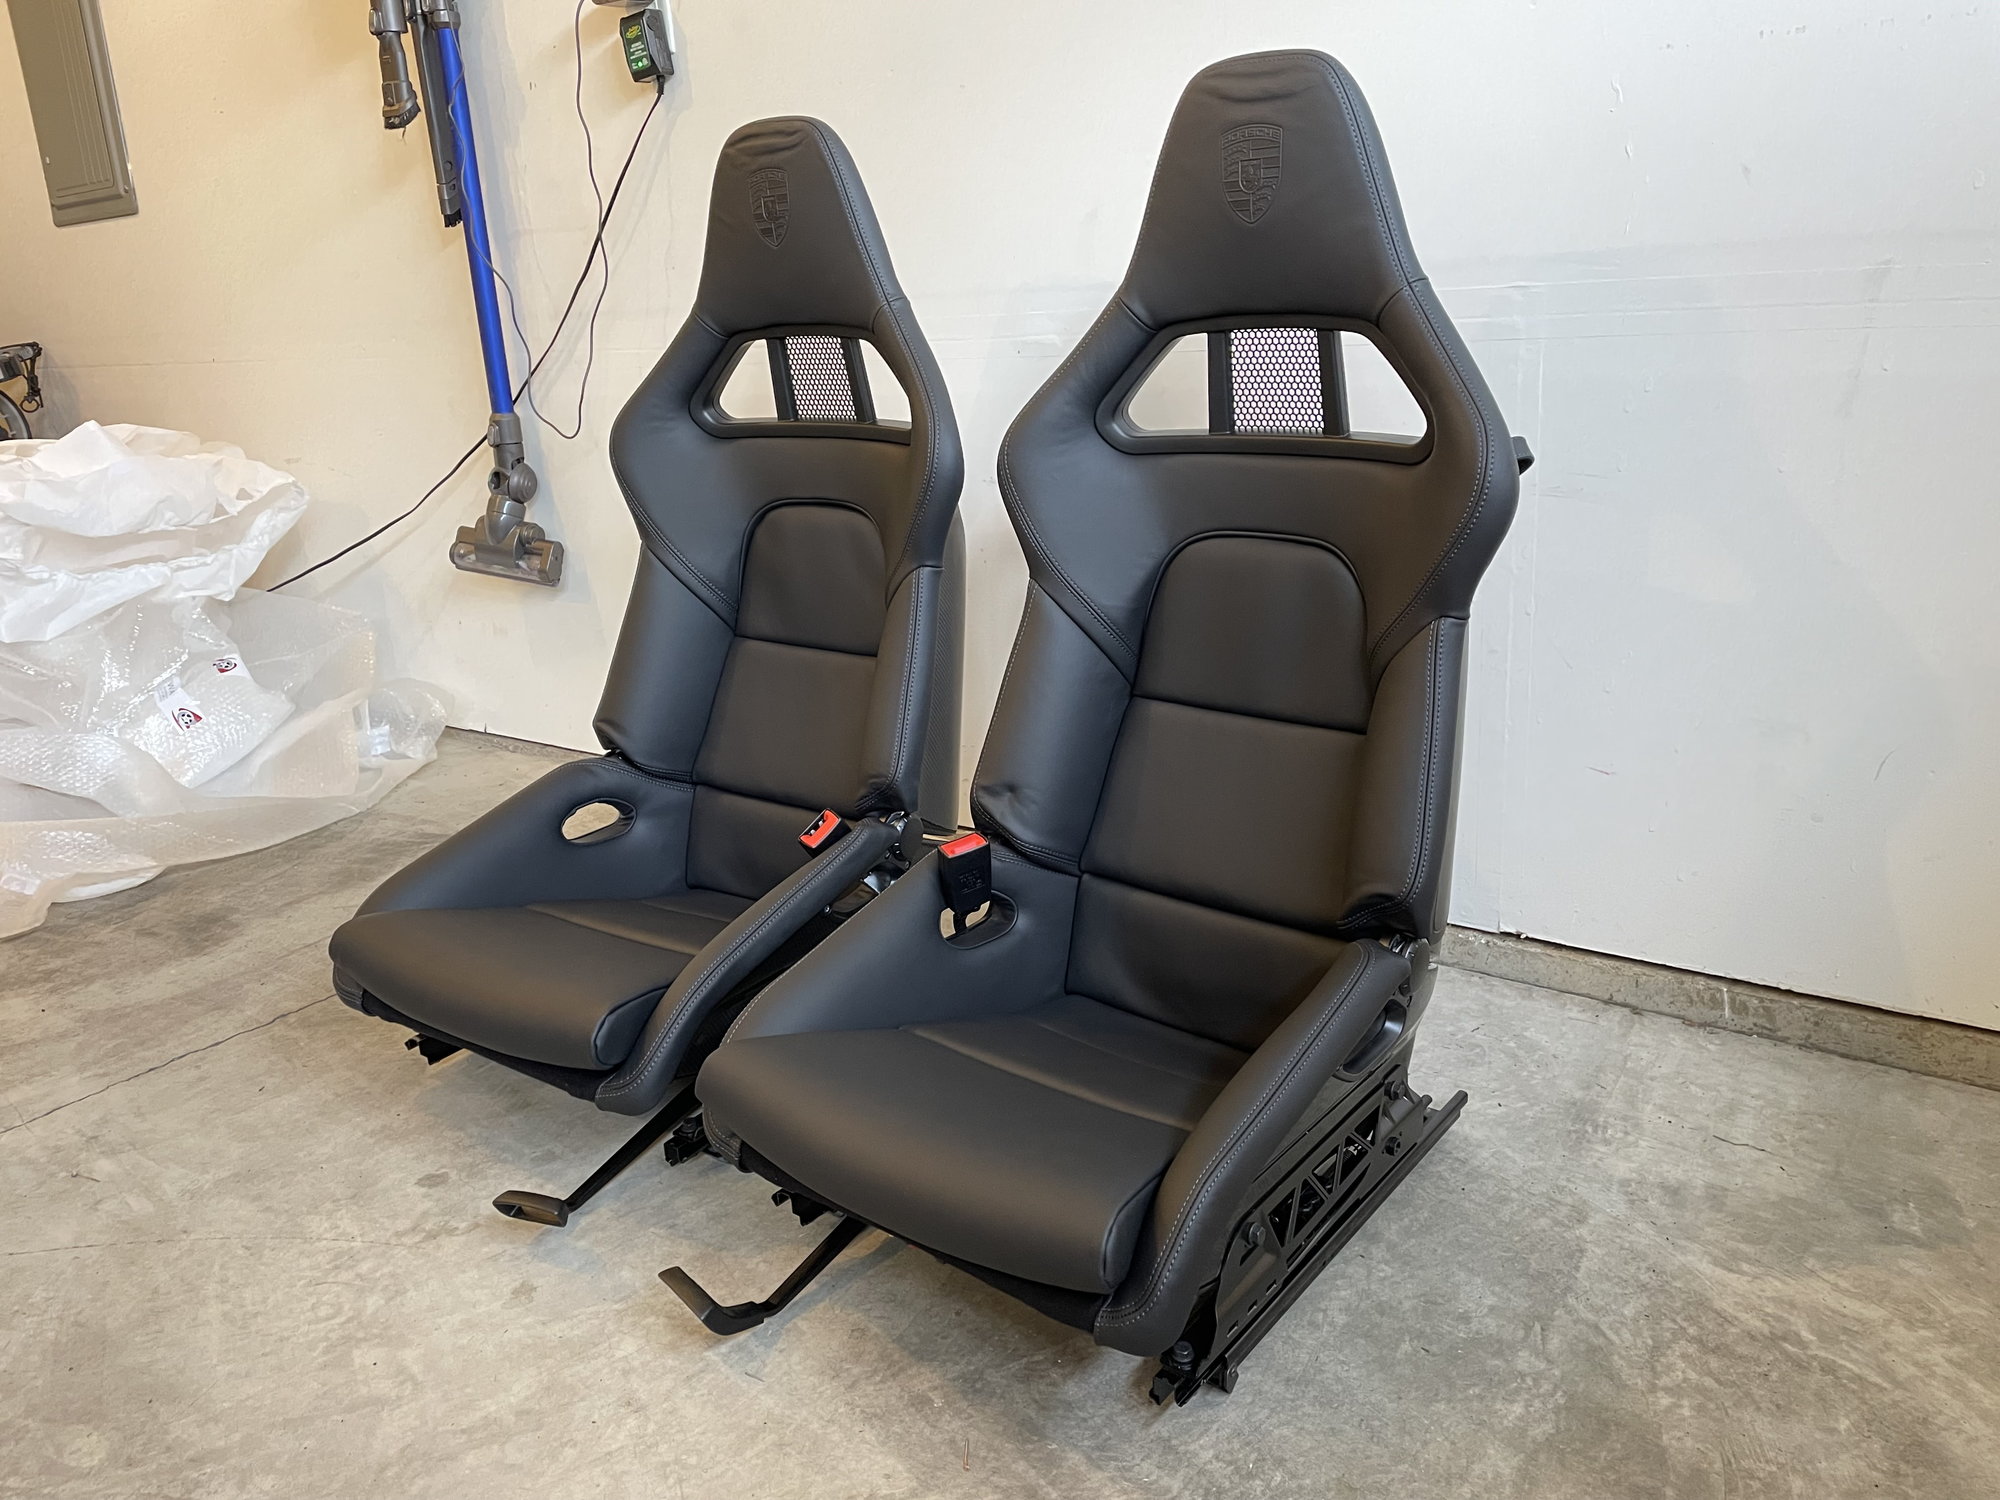
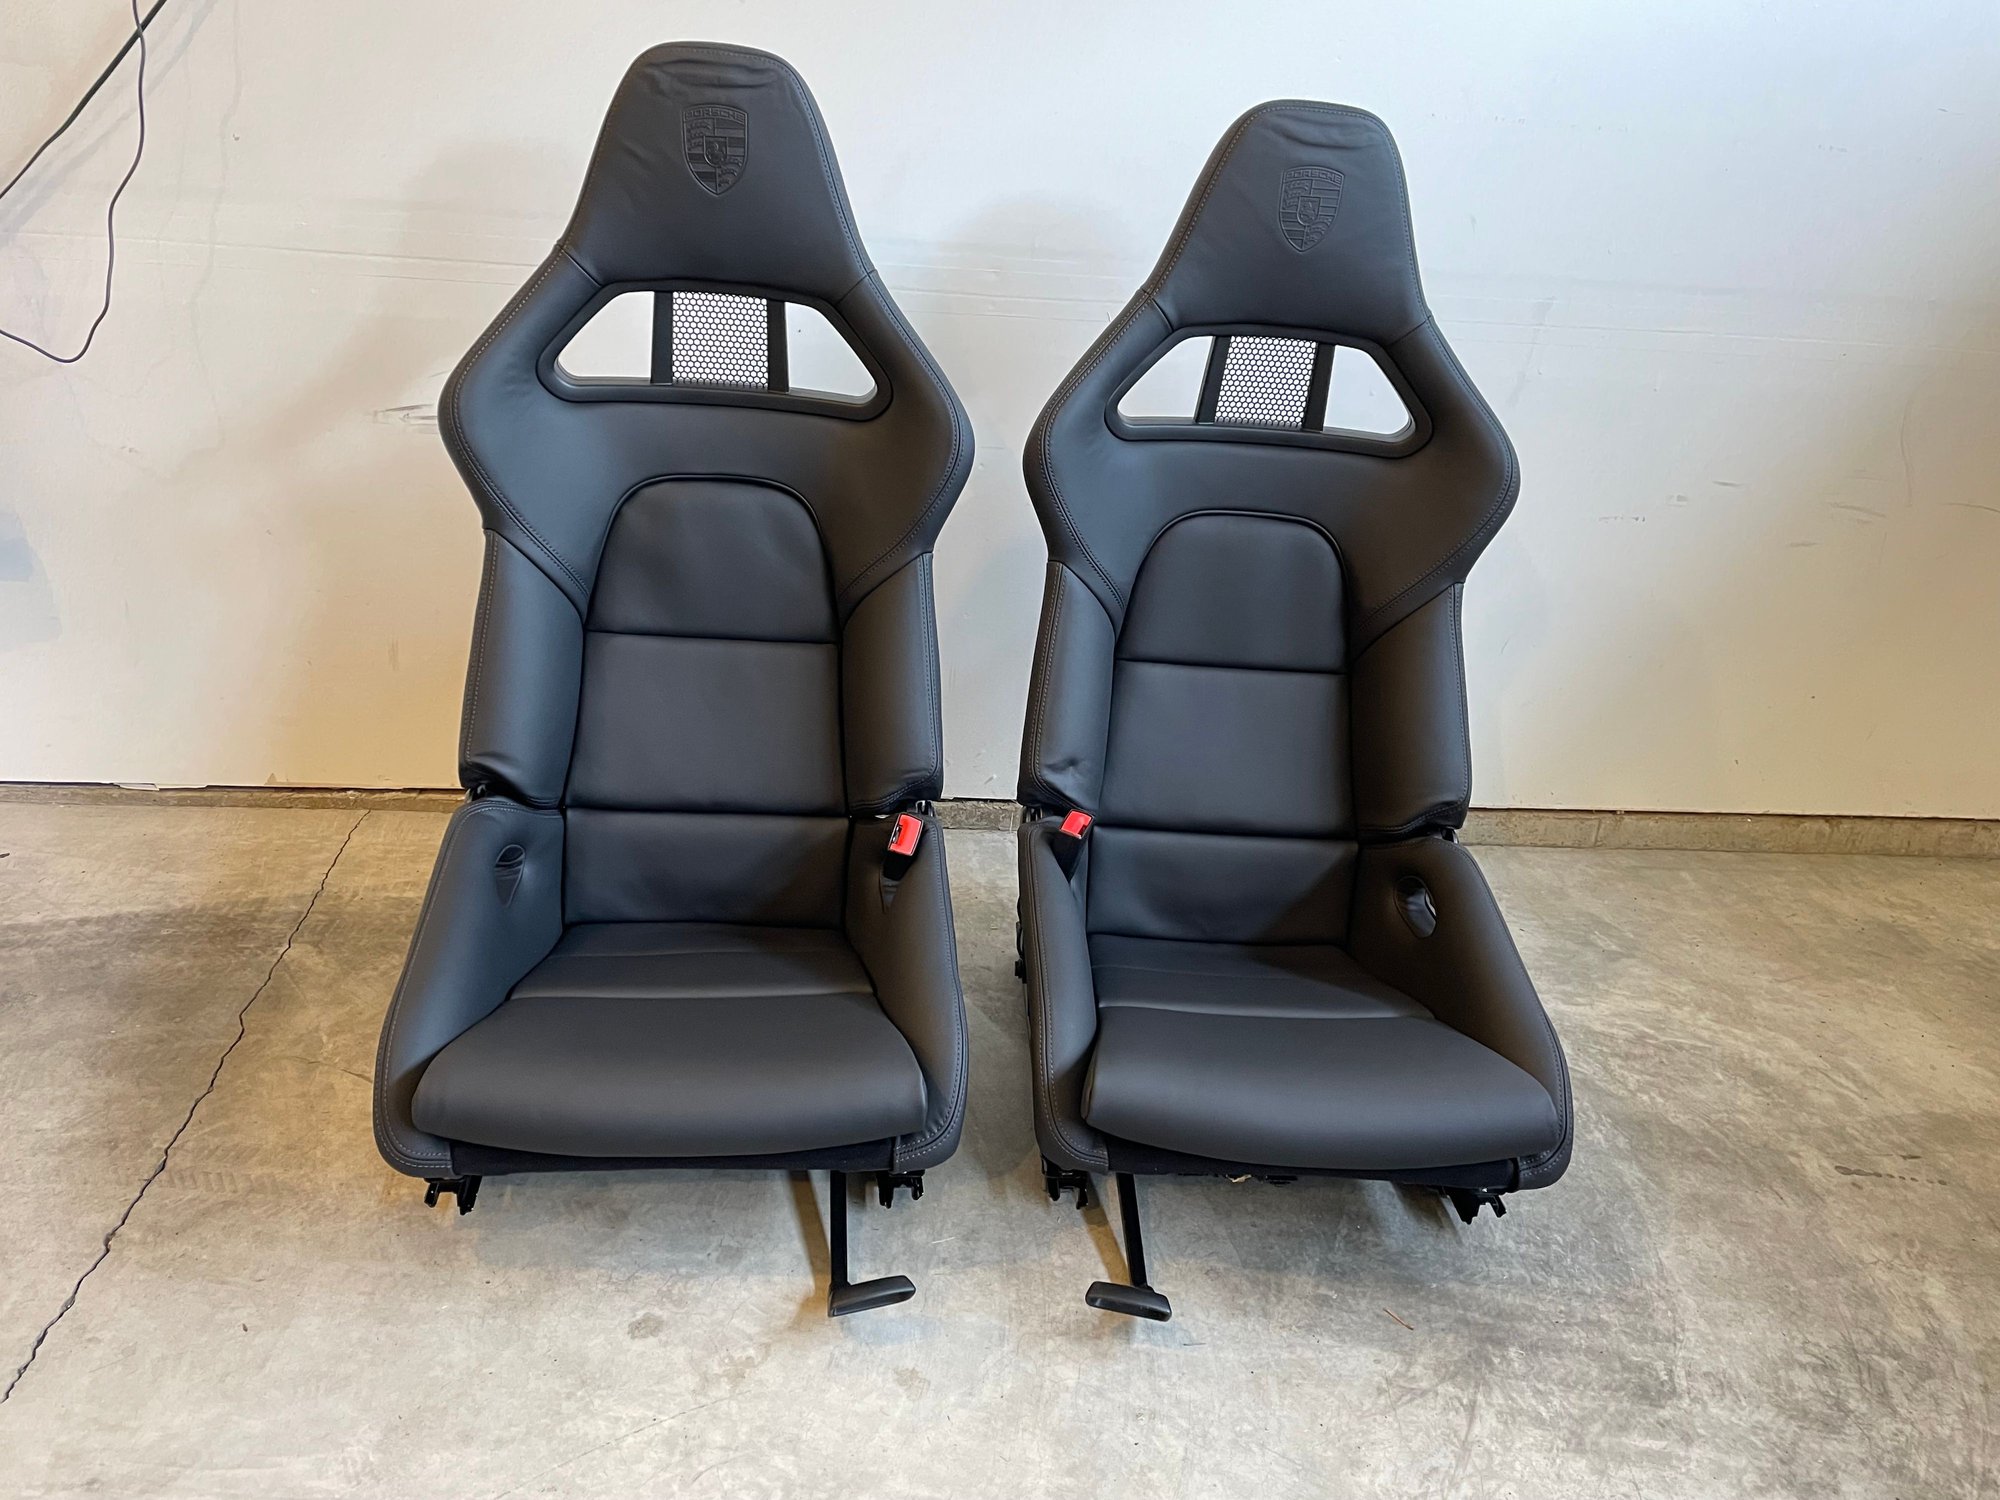
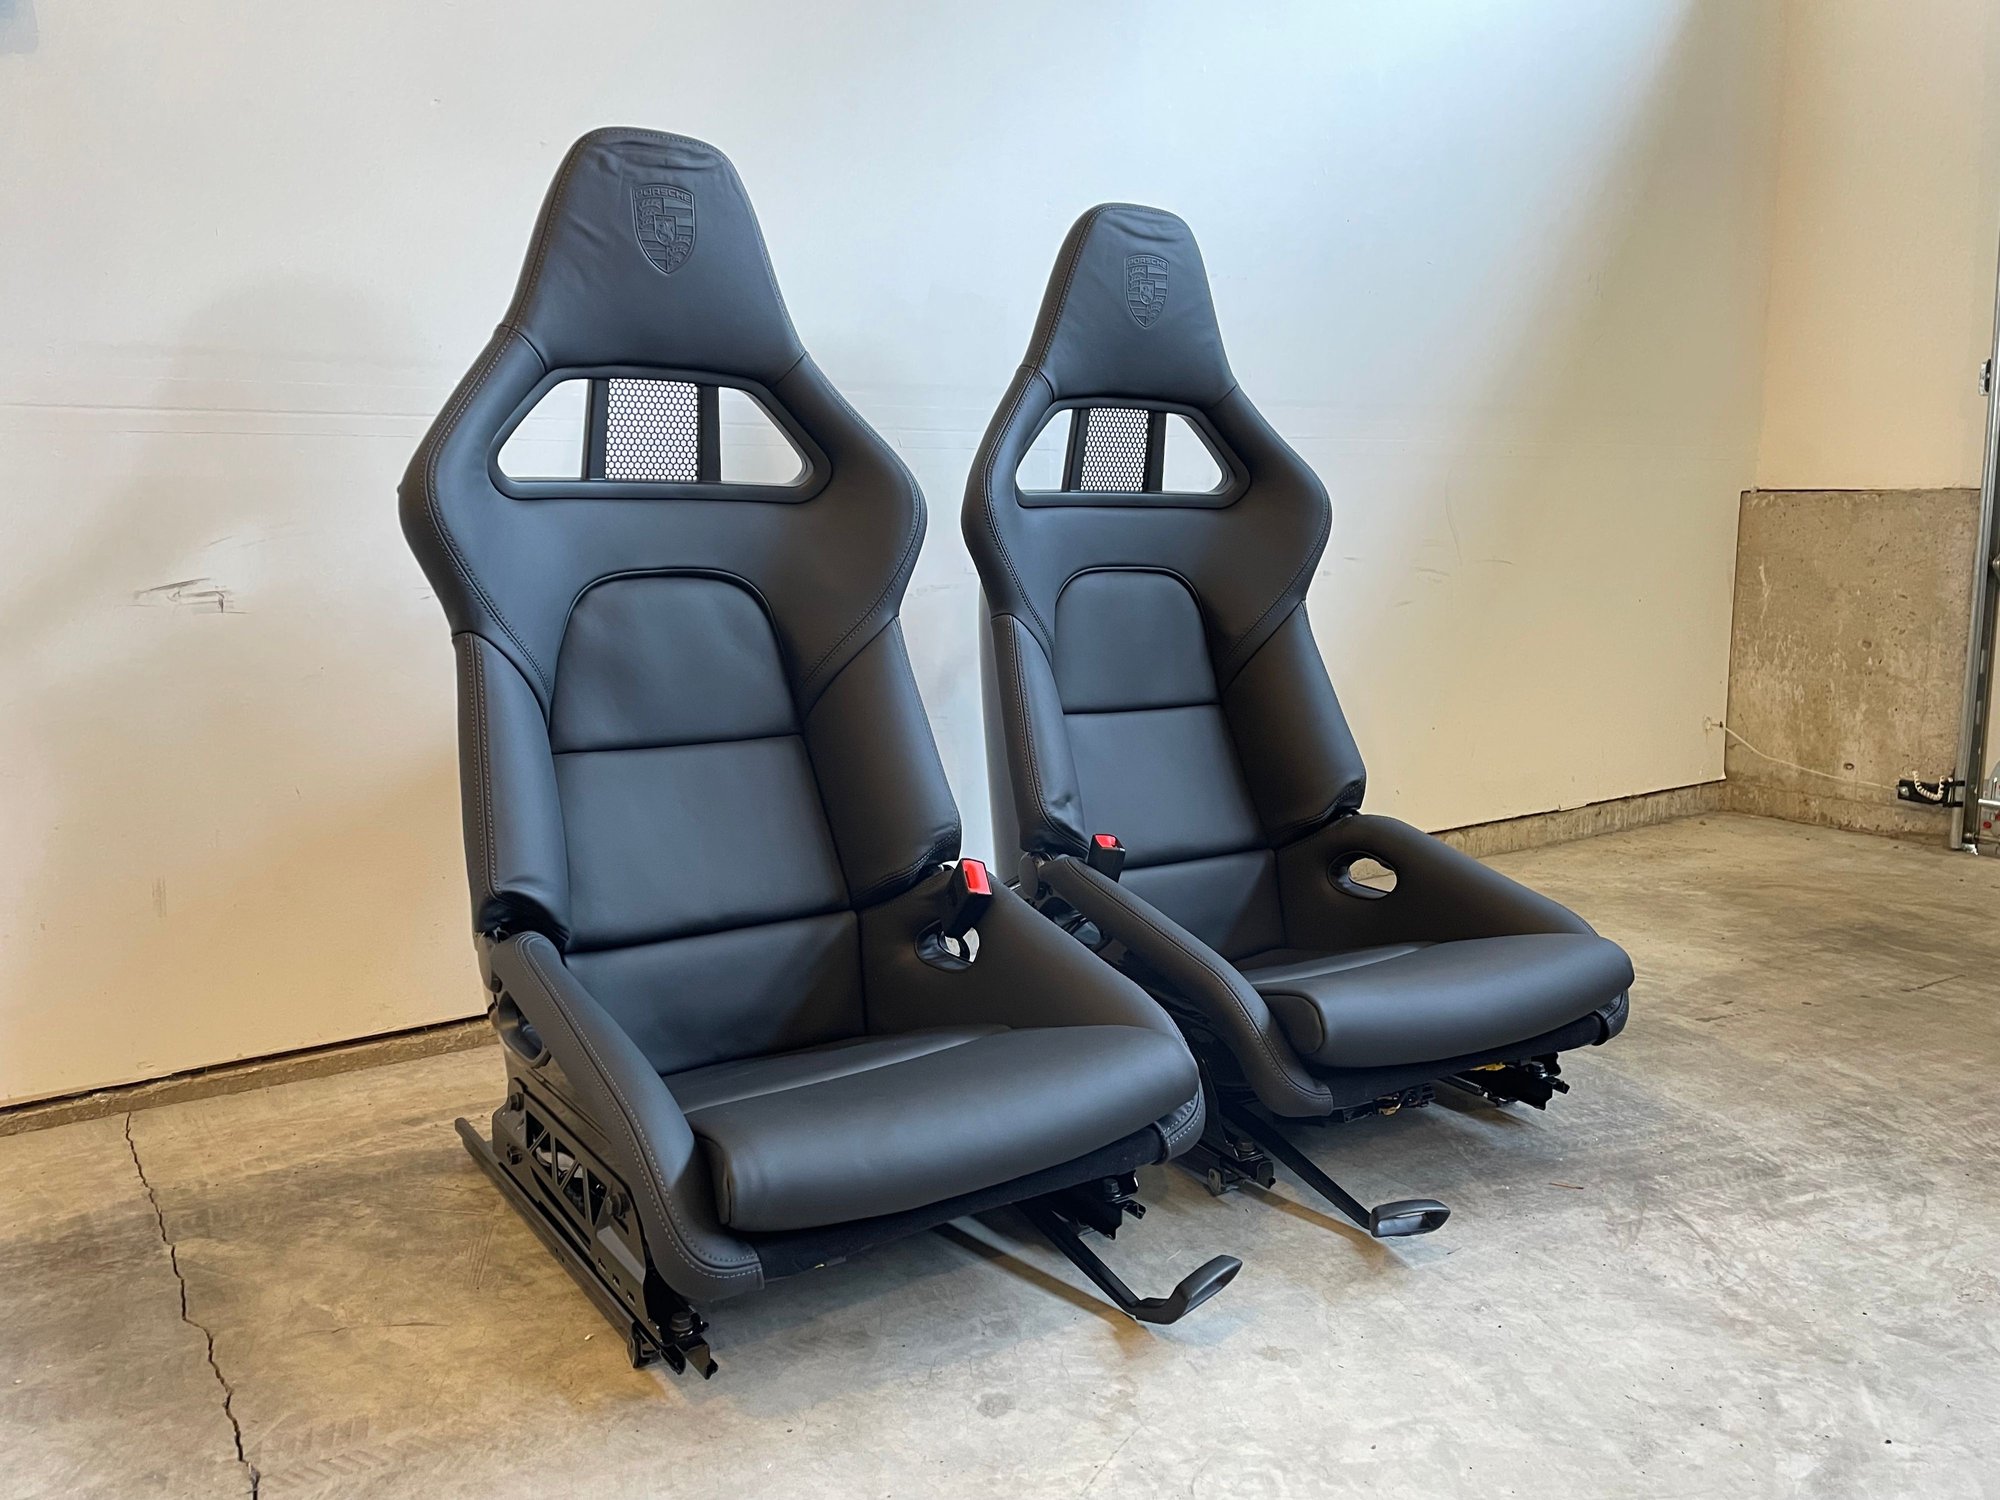
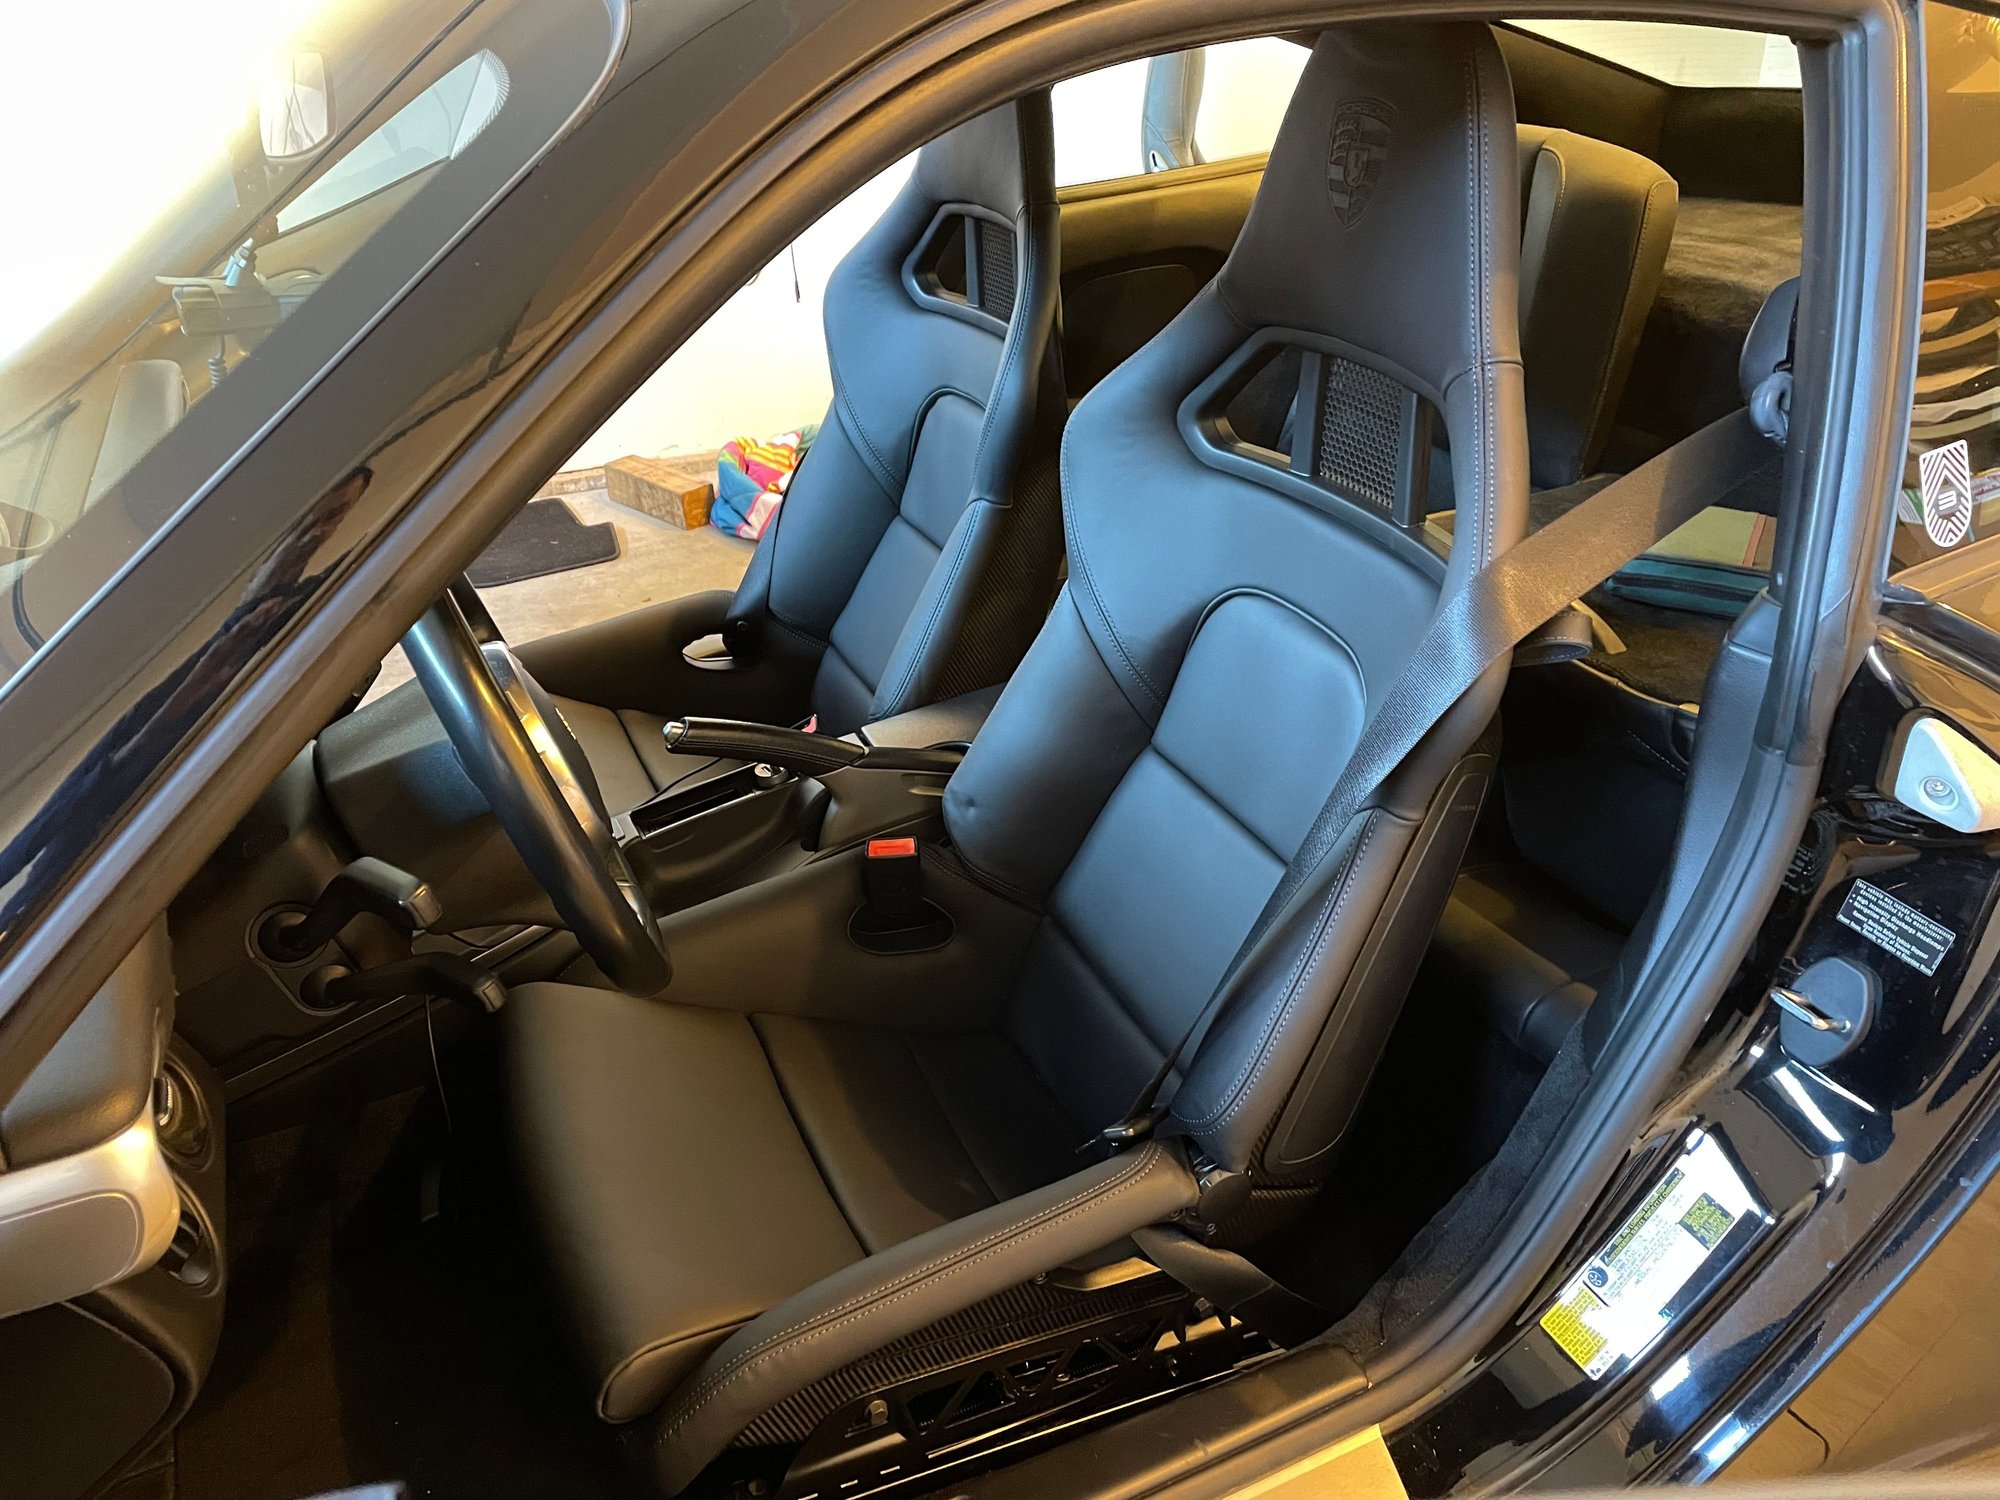
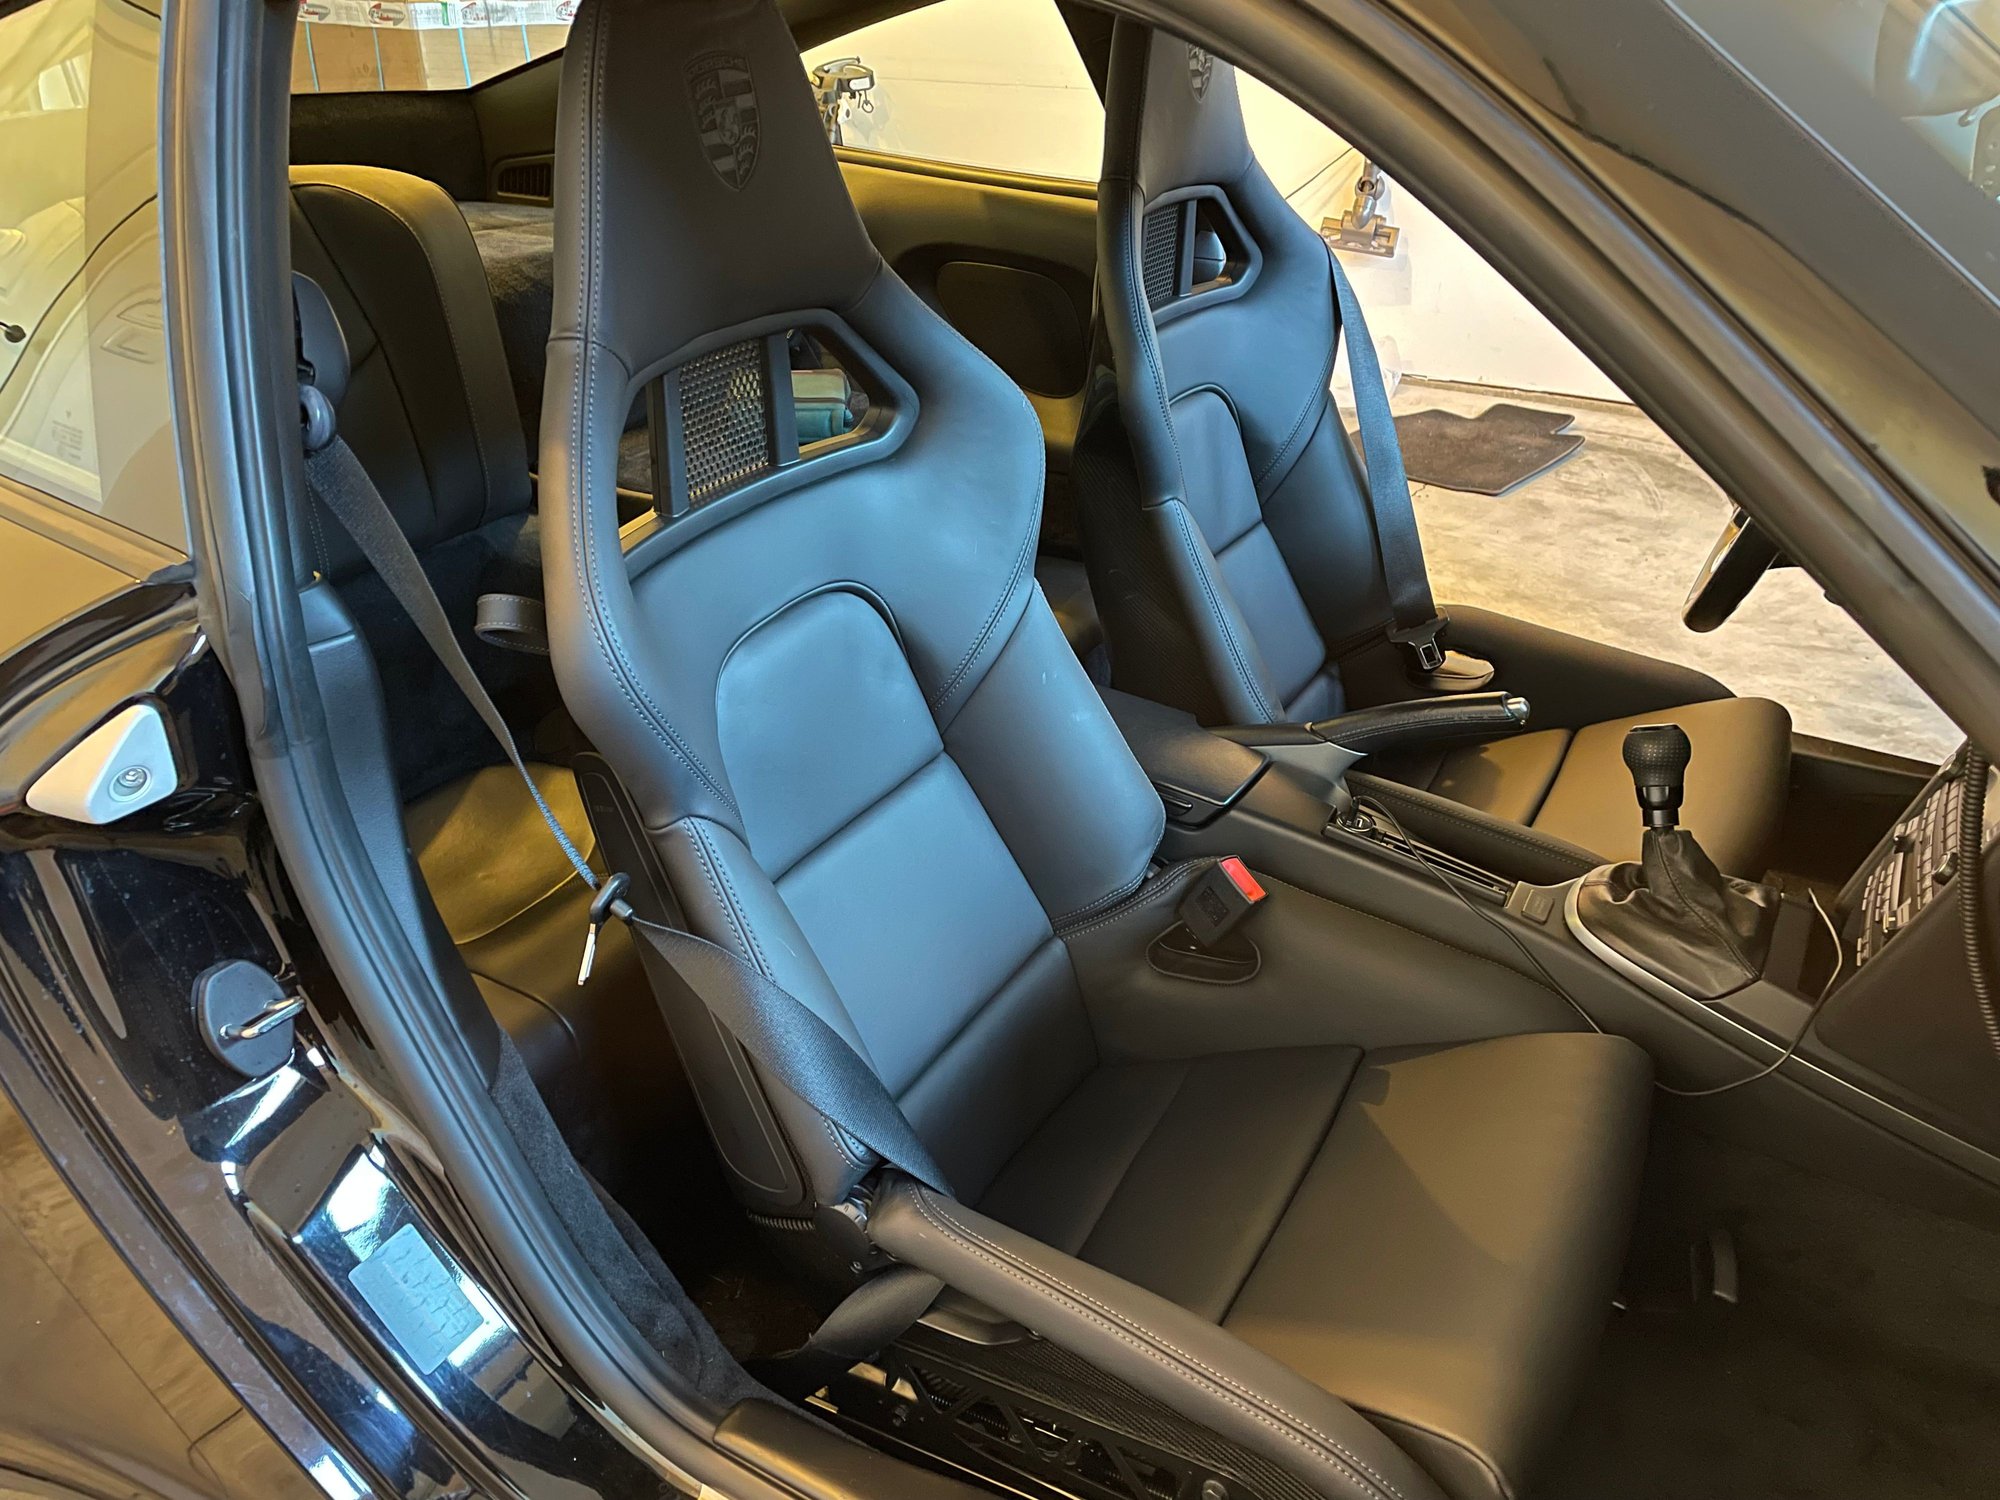
I pulled the trigger and got a set of folding buckets from Carnewal. Total cost was a little over $10,400 after Euro conversion, including shipping. These are full leather ROW 991 versions with heat. The difference between these and 997 folding buckets is the seat cushion has 3 sections instead of two. Plus they are heated, which you can't get in the 997 version. Because these are ROW, there is no sensor mat in the passenger seat so you will have to delete the resultant error code(s).
Gert is easy and great to work with and provides excellent customer service is. It takes about 5-7 business days to arrive from Europe. FedEx will require that you fill out a tax ID form for customs, which will hold up the process a couple days.
The seats arrived packaged well overall, but one of the rails was poking out the side of the box. Not sure how it affected seat rail alignment but installation was a PITA on the passenger seat. I used this DIY thread for guidance on the install (https://rennlist.com/forums/997-gt2-...moval-diy.html).
I have additional comments/tips if you plan on doing this install:
You need to pull the black tab to release the yellow connector for the seat all the way out in order to release the connector. It extends over an inch away from the connector and is a slide release. The final few 1/8ths of an inch locks the connector into place. This proved to be a PITA releasing the yellow connector from my stock passenger seat due to some interference. It required me to push the connector sideways significantly in order for it to release. Difficult to do when the seat is still in the car and tilted up. The seats that came with my car from the factory are ventilated/heated and perhaps that played a factor. YMMV.
There are two connectors that come out of the floor for the driver and passenger seat. Both seats have the same yellow connector and the other is rectangular and black for the driver side and square and grey for the passenger side. According to Gert at Carnewal, you only need to connect the yellow connectors on both seats and the second connectors are un-used and only for power seats. Just zip tie the other connector out of the way.
Alignment of the seat rails and holes was off by 1/2-1" on both seats. The passenger seat was the worst and required a lot of manipulation to align the holes. I'm wondering if one of them got bent in transit. Tighten the rear bolts first, slide the seats back, and then tighten the front bolts (at least for me). For factory seats, I expected them to drop right in and be aligned from the start.
LWBs are a tight fit in the cabin, especially the passenger side. They will slide forward/back just fine, but the interior side of the bolster rubs against the center console. If you have a painted console, that may be an issue.
I'm hoping the wrinkles in the leather on the headrests will relax and smooth out over time. The pics were taken right after I removed them from the box.
The original ventilated/heated seats weigh about 60lbs/ea. The buckets weigh about 37 lbs/ea. I used my bathroom scale so take it for what it's worth.
Remember to vacuum your carpet and back area while the seats are out. Good opportunity to clean. Plus I found 35 cents!
I had LWBs in the GT3 and they are amazing and feel perfect for canyon carving. The only downside is ingress/egress. I navigate this by rotating my legs out first and then standing to get in/out. It helps minimize wear and tear on the bolsters. I also considered installing Recaro CS seats instead. They are over half the price of LWBs and look/feel almost as good. I think they are the best aftermarket seats available. But they are not factory seats and I was concerned about safety in case of a crash. Plus the brackets, sliders, and adjustment ***** require some fiddling to install and I didn't want to deal with the hassle.
If/when I sell my car, I will likely remove the bucket seats and sell them separately. Given current market conditions, they should hold their value long-term.
Great move. I have them except no heat since they're the 997.2 versions. Don't need the heat in Florida so non issue. They really transforms the feel and connection with the car like no other mod imo. Yes....getting in and out of them is a little different but becomes second nature in short order. I just kind of drop into the driver's seat as opposed to sliding into it with regular seats. No big deal. For someone with a bad back or other bodily issues I guess they could pose a problem though.
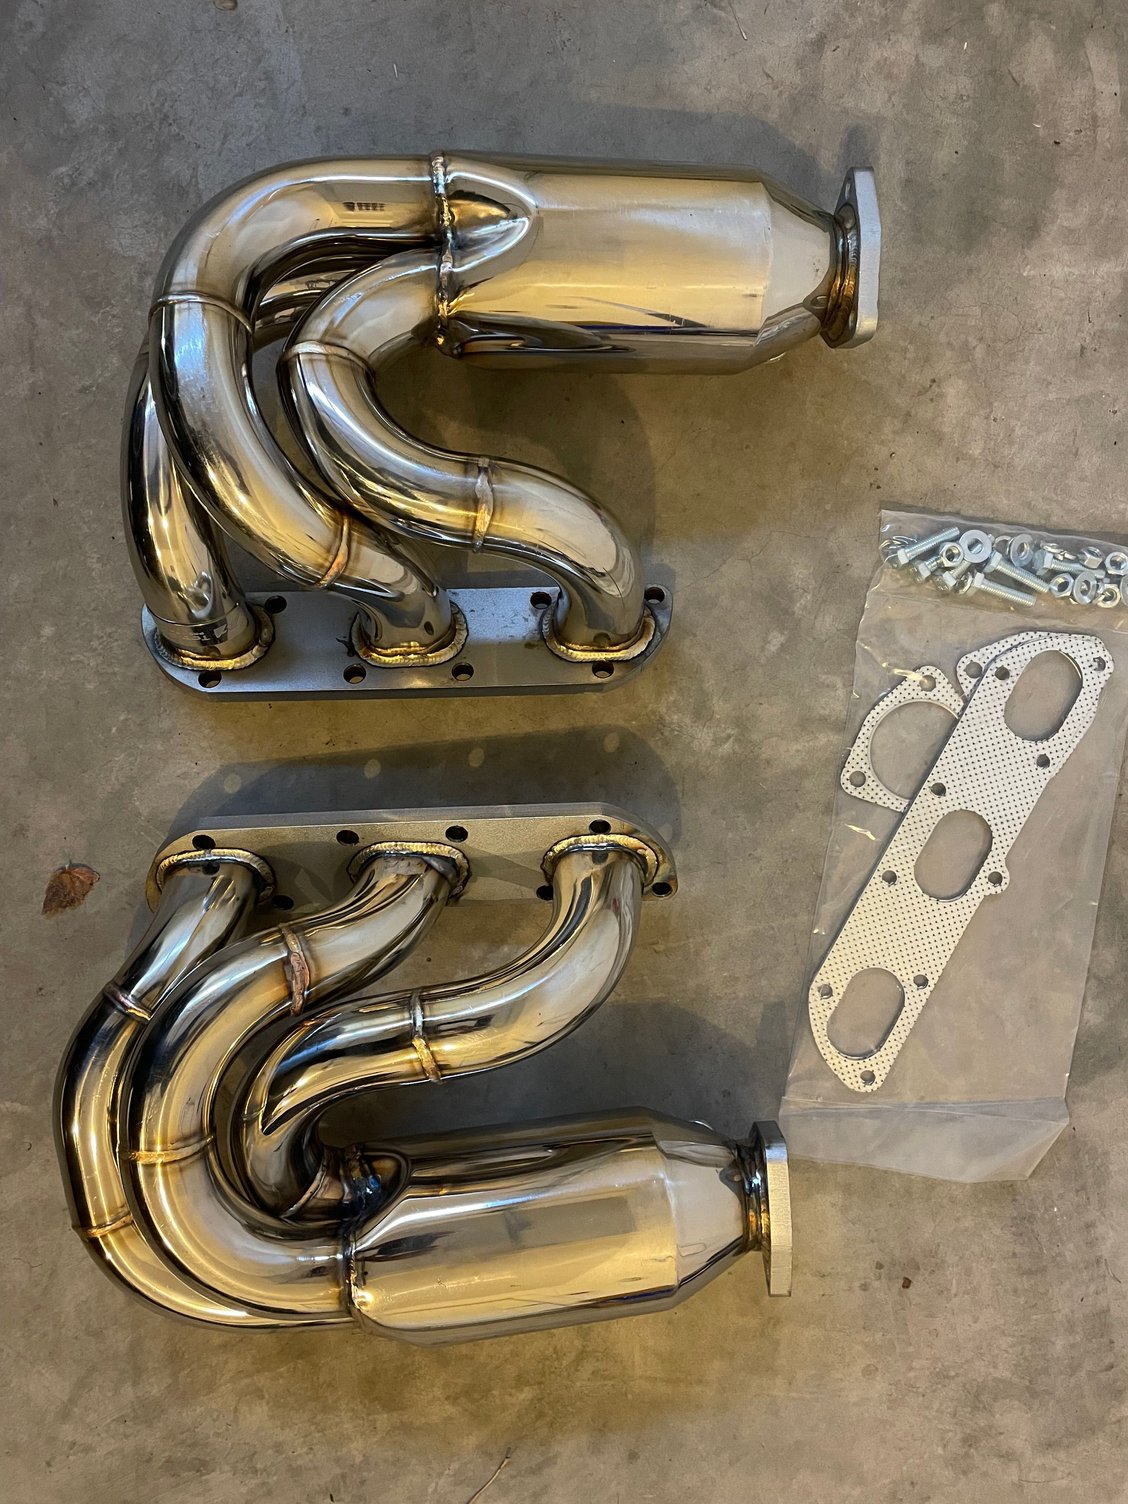
I was recently inspired by RABjr's thread about Top Speed headers (https://rennlist.com/forums/997-foru...-flow-cat.html) and pulled the trigger on a pair. On their site they are listed for $1099.99 (https://topspeedauto.com/fits-porsch...high-flow-cat/). I bought mine on ebay from seller ss.universal_llc. I'm not sure but I believe it is the same company. Like RABjr, I negotiated a sale price of $899 including shipping. They arrived via FedEx in about a week and were packaged well enough to minimize damage. I would have liked if they had wrapped them in bubble wrap but instead they just used folded cardboard and paper to protect the headers.
The quality is pretty good. Welds are not the best I've seen but they are consistent and overall do the job. They are also ported for smoother flow. New gaskets and hardware are included but I did not use them and used factory gaskets instead (997-111-107-31). I also re-used the stock header bolts. The flanges are about 1/4" thicker than stock but the original bolts extended about a half inch past the flange. I will re-check after about 1,000 miles if there are any issues.
First, this is a difficult job if you try to do this solo, which I initially did. Removing the old/stock parts is relatively easy, but installing the new headers without a second pair of hands and no lift is challenging. I did this in my garage using Rhino ramps and the cramped space combined with having to hold the headers, keep the gasket aligned [*Edit: my local tech gave me a good tip to use super glue to hold the gaskets into place. The heat cycles will burn the glue away.], and then thread the bolts was too much and I ended up enlisting a friend, but only after trying a couple hours trying to bolt up the new headers on my own. Perhaps there are some tricks I am missing (will explain below) but overall, I highly recommend using a lift and having another person around for bolting up the new headers.
This isn't a DIY, but I will share some tips and thoughts. My car already had a Top Gear center muffler bypass and I run my car with the PSE valves always open by unplugging the solenoids in the engine bay. It sounds good on cold starts and when I get on it, but was still a little too quiet for my taste. With the new headers, idle is slightly louder but not by much. I can notice a difference on cold start and there is a deeper tone and it is a little louder but not obnoxious at all. The real magic happens over 4,500 RPM and the car sounds amazing: deeper tone, more pronounced Porsche rasp, and louder in a good way. There is no drone and on my initial drive after install I did not get a CEL but this morning when I filmed the video clip, I had a CEL. Going to have it checked out and deleted by my Porsche tech today. [*Edit: it turns out I forgot to reconnect one sensor on the airbox and that is what caused the CEL, not the new headers.]
To help on this project, I recommend having or buying the following:
13mm half moon ratchet wrench. It helps remove the center muffler/bypass from the headers a lot easier. I got mine on Amazon for $32 (
Ramps if you don't have a lift. I used a pair of Rhino ramps and they are solid. You will spend a lot of time underneath the car and I just felt safer with the car on ramps vs jack stands.
Anti seize. I used it on everything that was threaded. It will save you any future headaches when you have to remove anything.
A 22mm O2 sensor socket makes removing and installing the sensors easier.
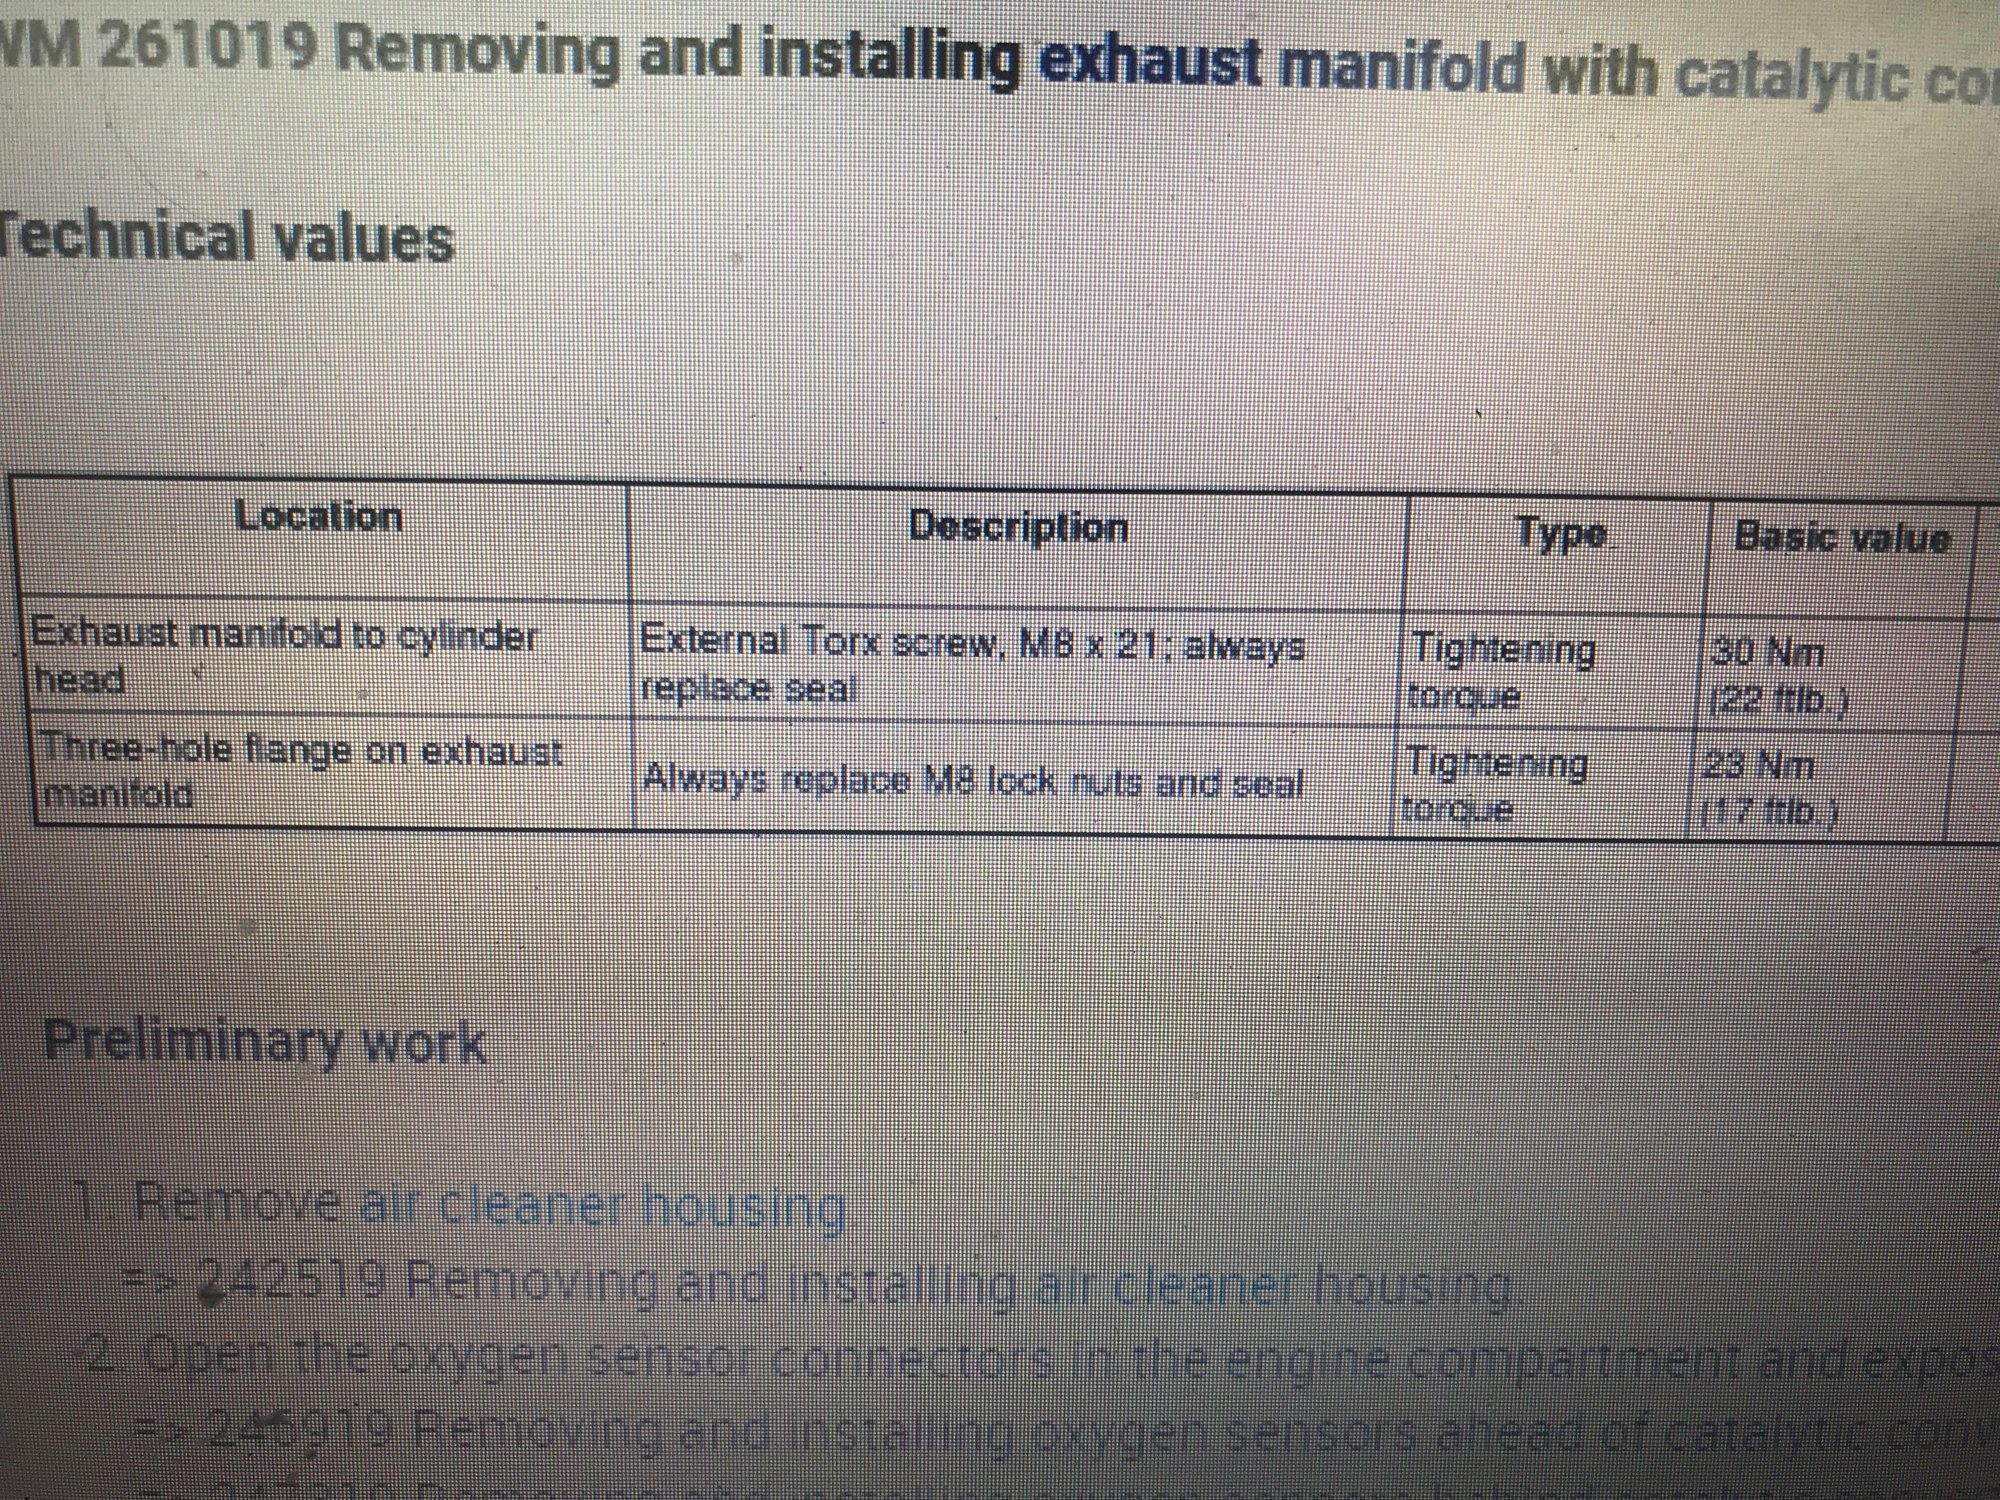
Torque spec is 22 lb-ft for header to cylinder head and 17 lb-ft for the 3-hole flange to the center muffler. There are a lot of questions on RL about this and I am including a screen grab from my tech's PIWIS for a definitive answer.
From my understanding, there are basically two methods to remove the stock headers: remove the bumper and side mufflers for easier access to the 02 sensors, or unplug the sensors in the engine bay and drop them down with the headers and remove them once they are out. I chose the latter but if I had to do it again, I wonder if it would have been easier removing the bumper and side mufflers. I guess it depends on how long it would take you to do the bumper and side muffler removal.
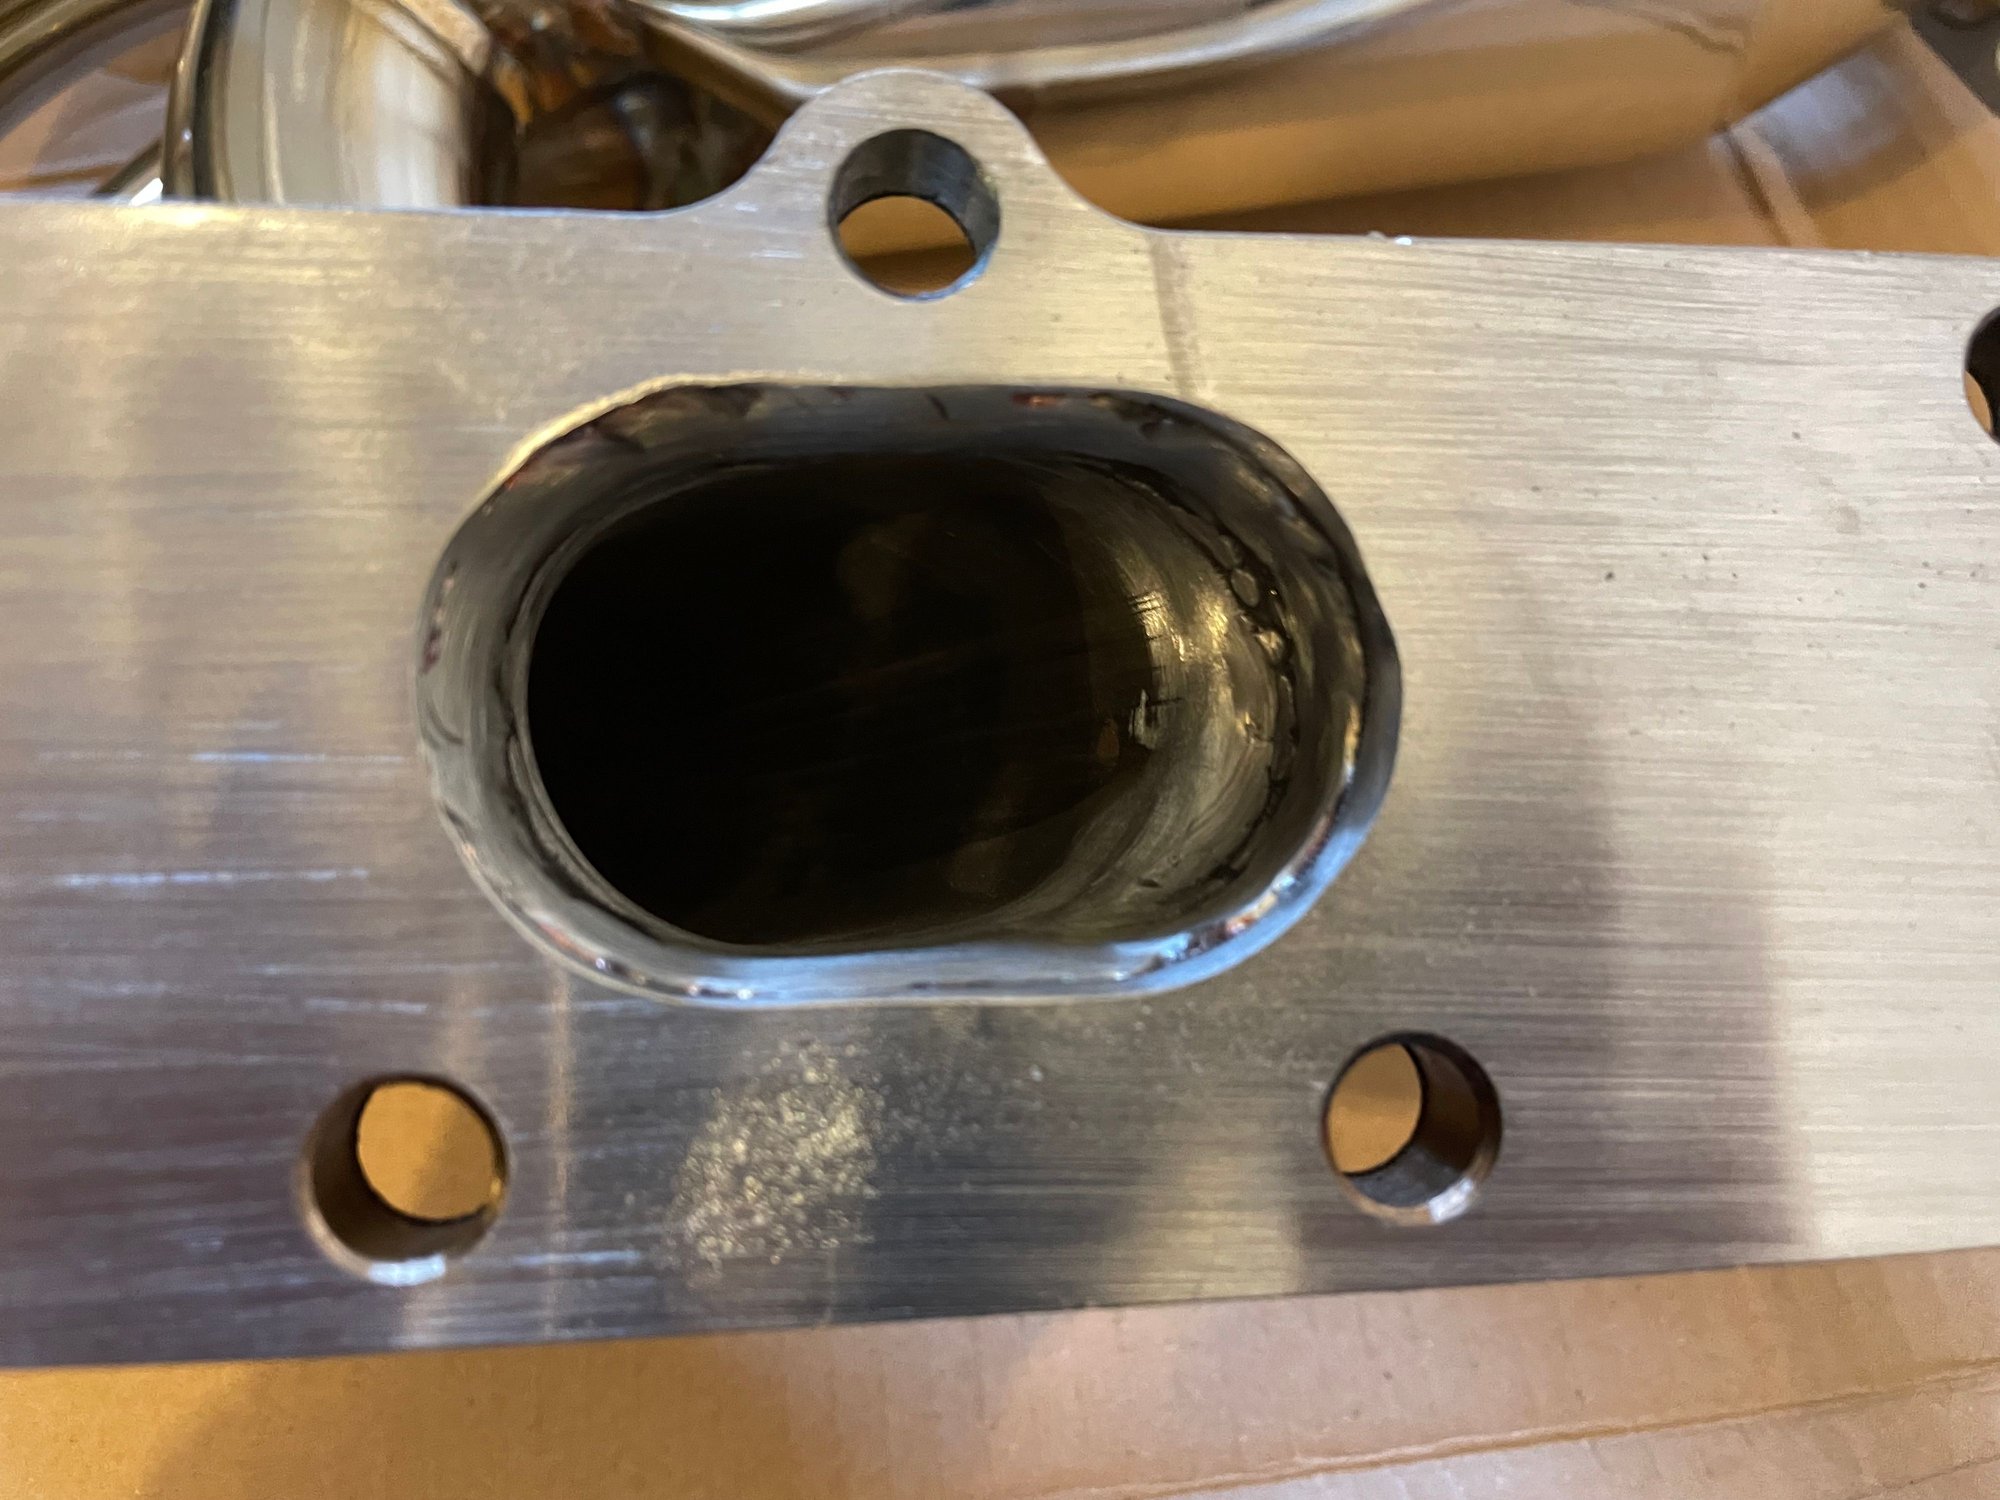
I first removed the airbox to have easier access to the 02 sensor plugs. I used pics from EMC2's thread (https://rennlist.com/forums/997-foru...placement.html) to identify the plugs. The plugs for the front and rear sensors are right next to each other. Just remember which is for the front and rear sensor. In my car, the blue wires were for the front and black was for rear. If you drop the sensors with the headers, you have to unclip the wires in a couple places and access is difficult because space is so tight. I have big hands and it was a pain to get to them. However, this makes it easy to remove and transplant the sensors to the new headers. When you install the new headers, you will need to re-route the wiring to ensure they are out of the way and thread the plugs and wires back into the rear engine bay. I used an old wire coat hanger as a hook to pull them back into the engine bay. Before you bolt the new headers on, make sure the sensor wires are not kinked and properly routed to your satisfaction.
Finally, I had to remove the stock header heat shields in order to install the new headers. They would not fit otherwise. The position of the 02 sensor ports is different on the Top Speed headers than stock and they do not match the existing holes in the heat shields. I thought about drilling a new hole in the heat shields for the sensors but decided just to run them without. I asked my local Porsche tech if this was OK and he said he would prefer to have them on but it should be fine. YMMV. Overall, I get a deeper and slightly louder exhaust note and the price is pretty good.


 08-06-2021, 12:08 PM