When you click on links to various merchants on this site and make a purchase, this can result in this site earning a commission. Affiliate programs and affiliations include, but are not limited to, the eBay Partner Network.
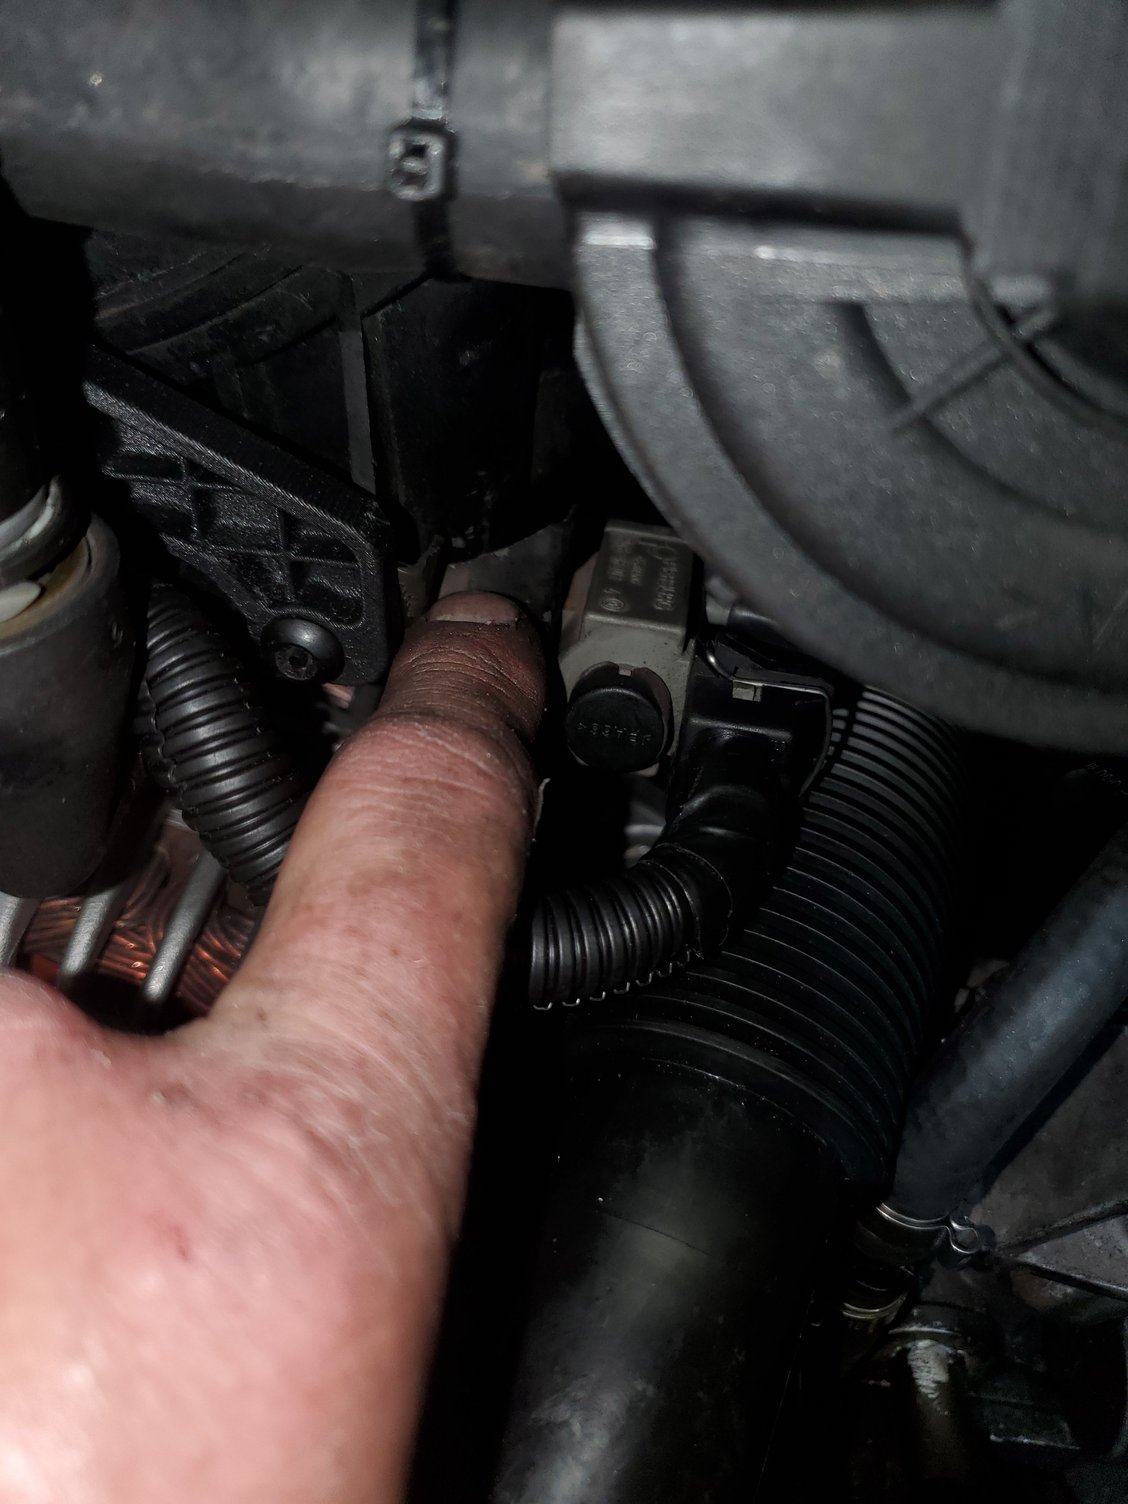
The hose on the left with the 90% fitting, is that the brake booster line? Mine seems to have a vacuum leak at the swivel point. What's the best fix? PO had some rtv around it.
The hose on the left with the 90% fitting, is that the brake booster line? Mine seems to have a vacuum leak at the swivel point. What's the best fix? PO had some rtv around it.
Yes, it's the brake booster line, just replace it..The Elbow is available separately .
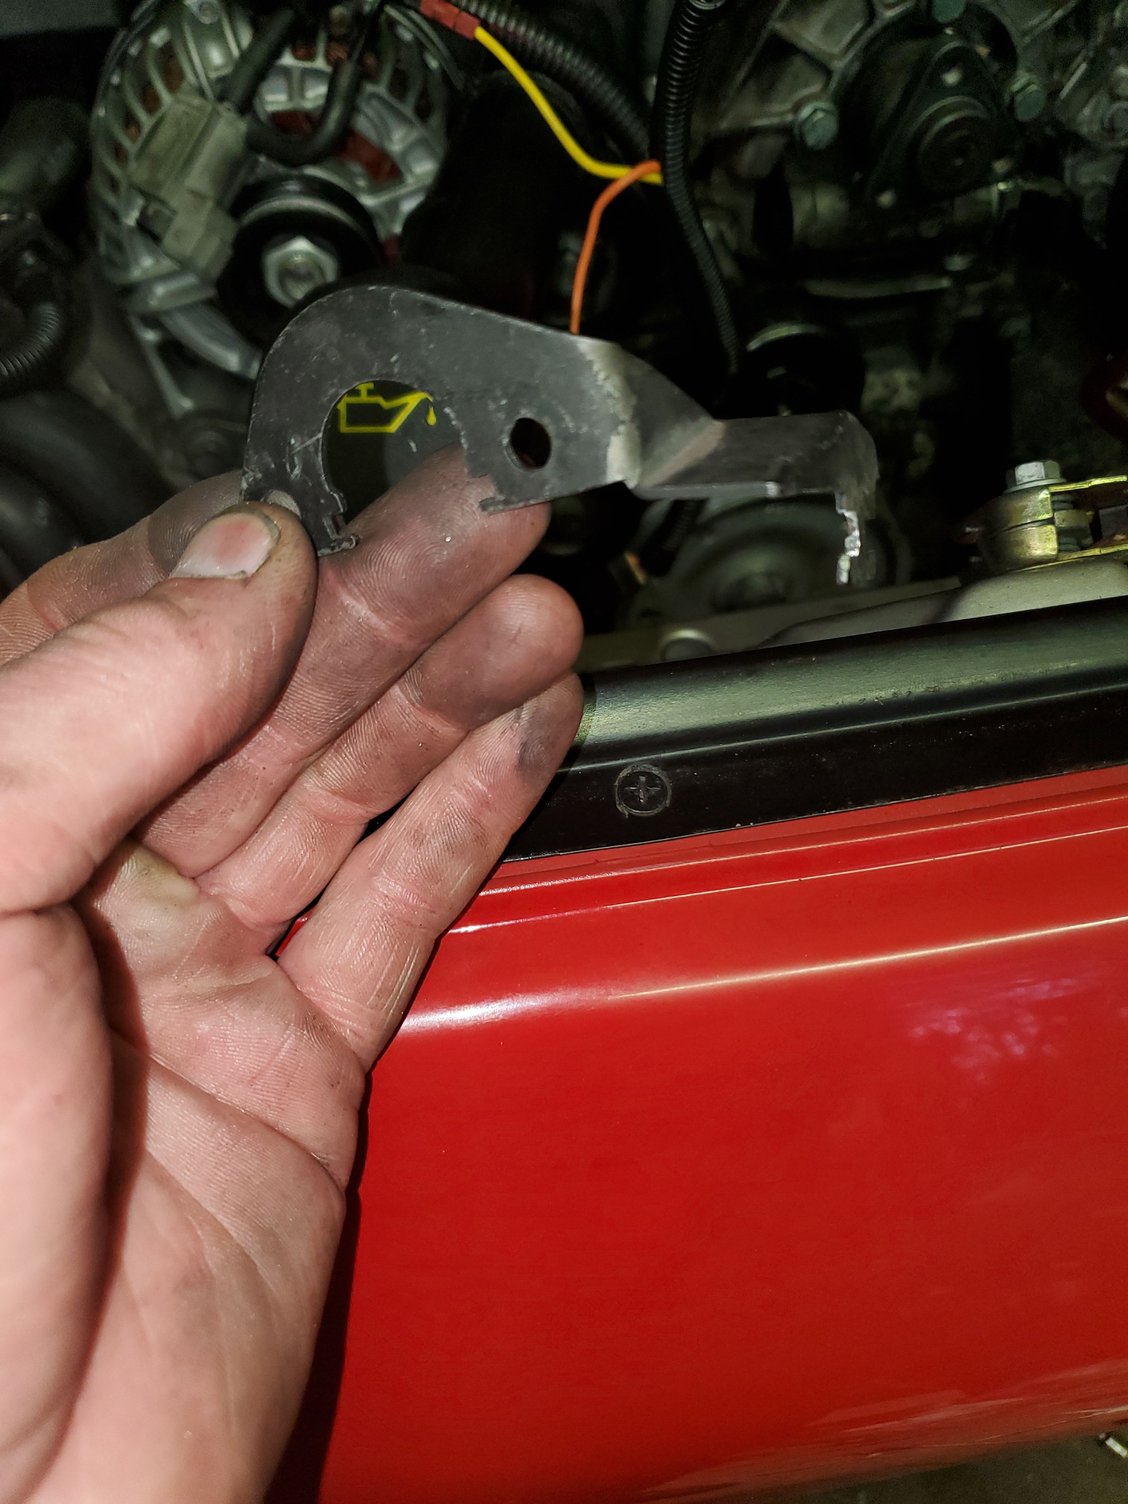
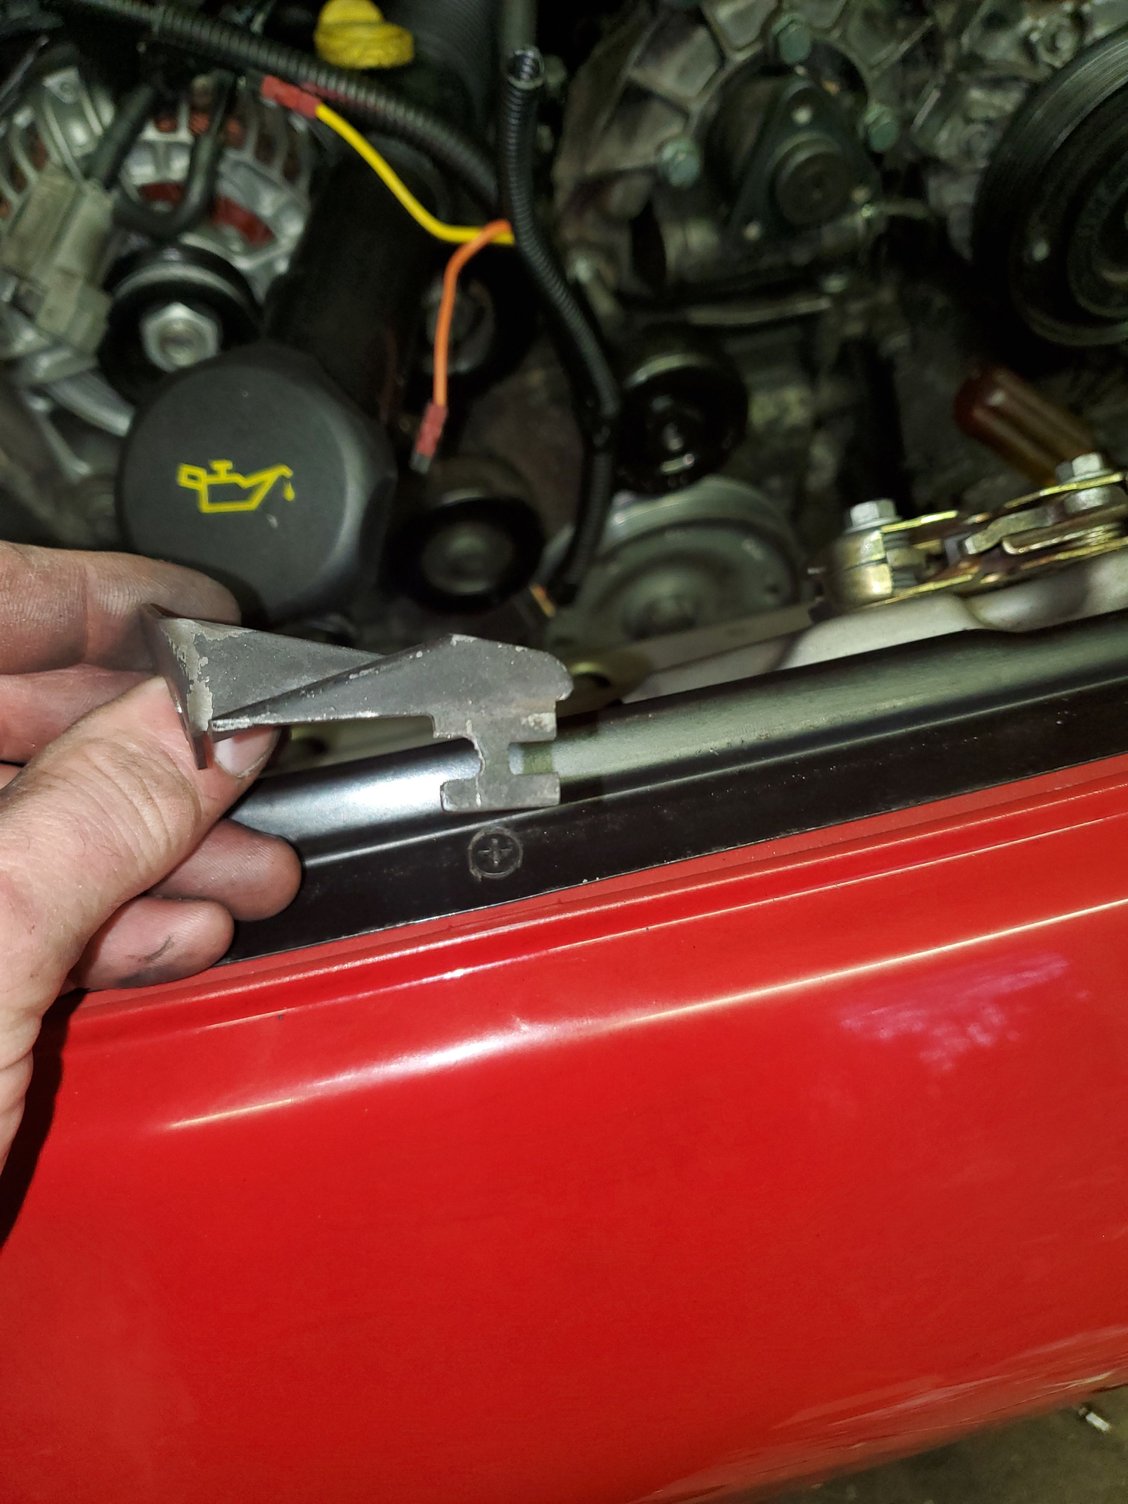
I took a couple pics of the change over valve bracket. I did an additional mod withan 1/8 grinding disk, i made the notch in the opposite side and shortened the length slightly so it clips into place like it was factory.
Edit: the back of the bracket needs slight grinding to clear the intake. Very easy to do.
I took a couple pics of the change over valve bracket. I did an additional mod withan 1/8 grinding disk, i made the notch in the opposite side and shortened the length slightly so it clips into place like it was factory.
Good work on the bracket mod !! The factory bracket will work if you flip it and mount the change-over valve to the other side.
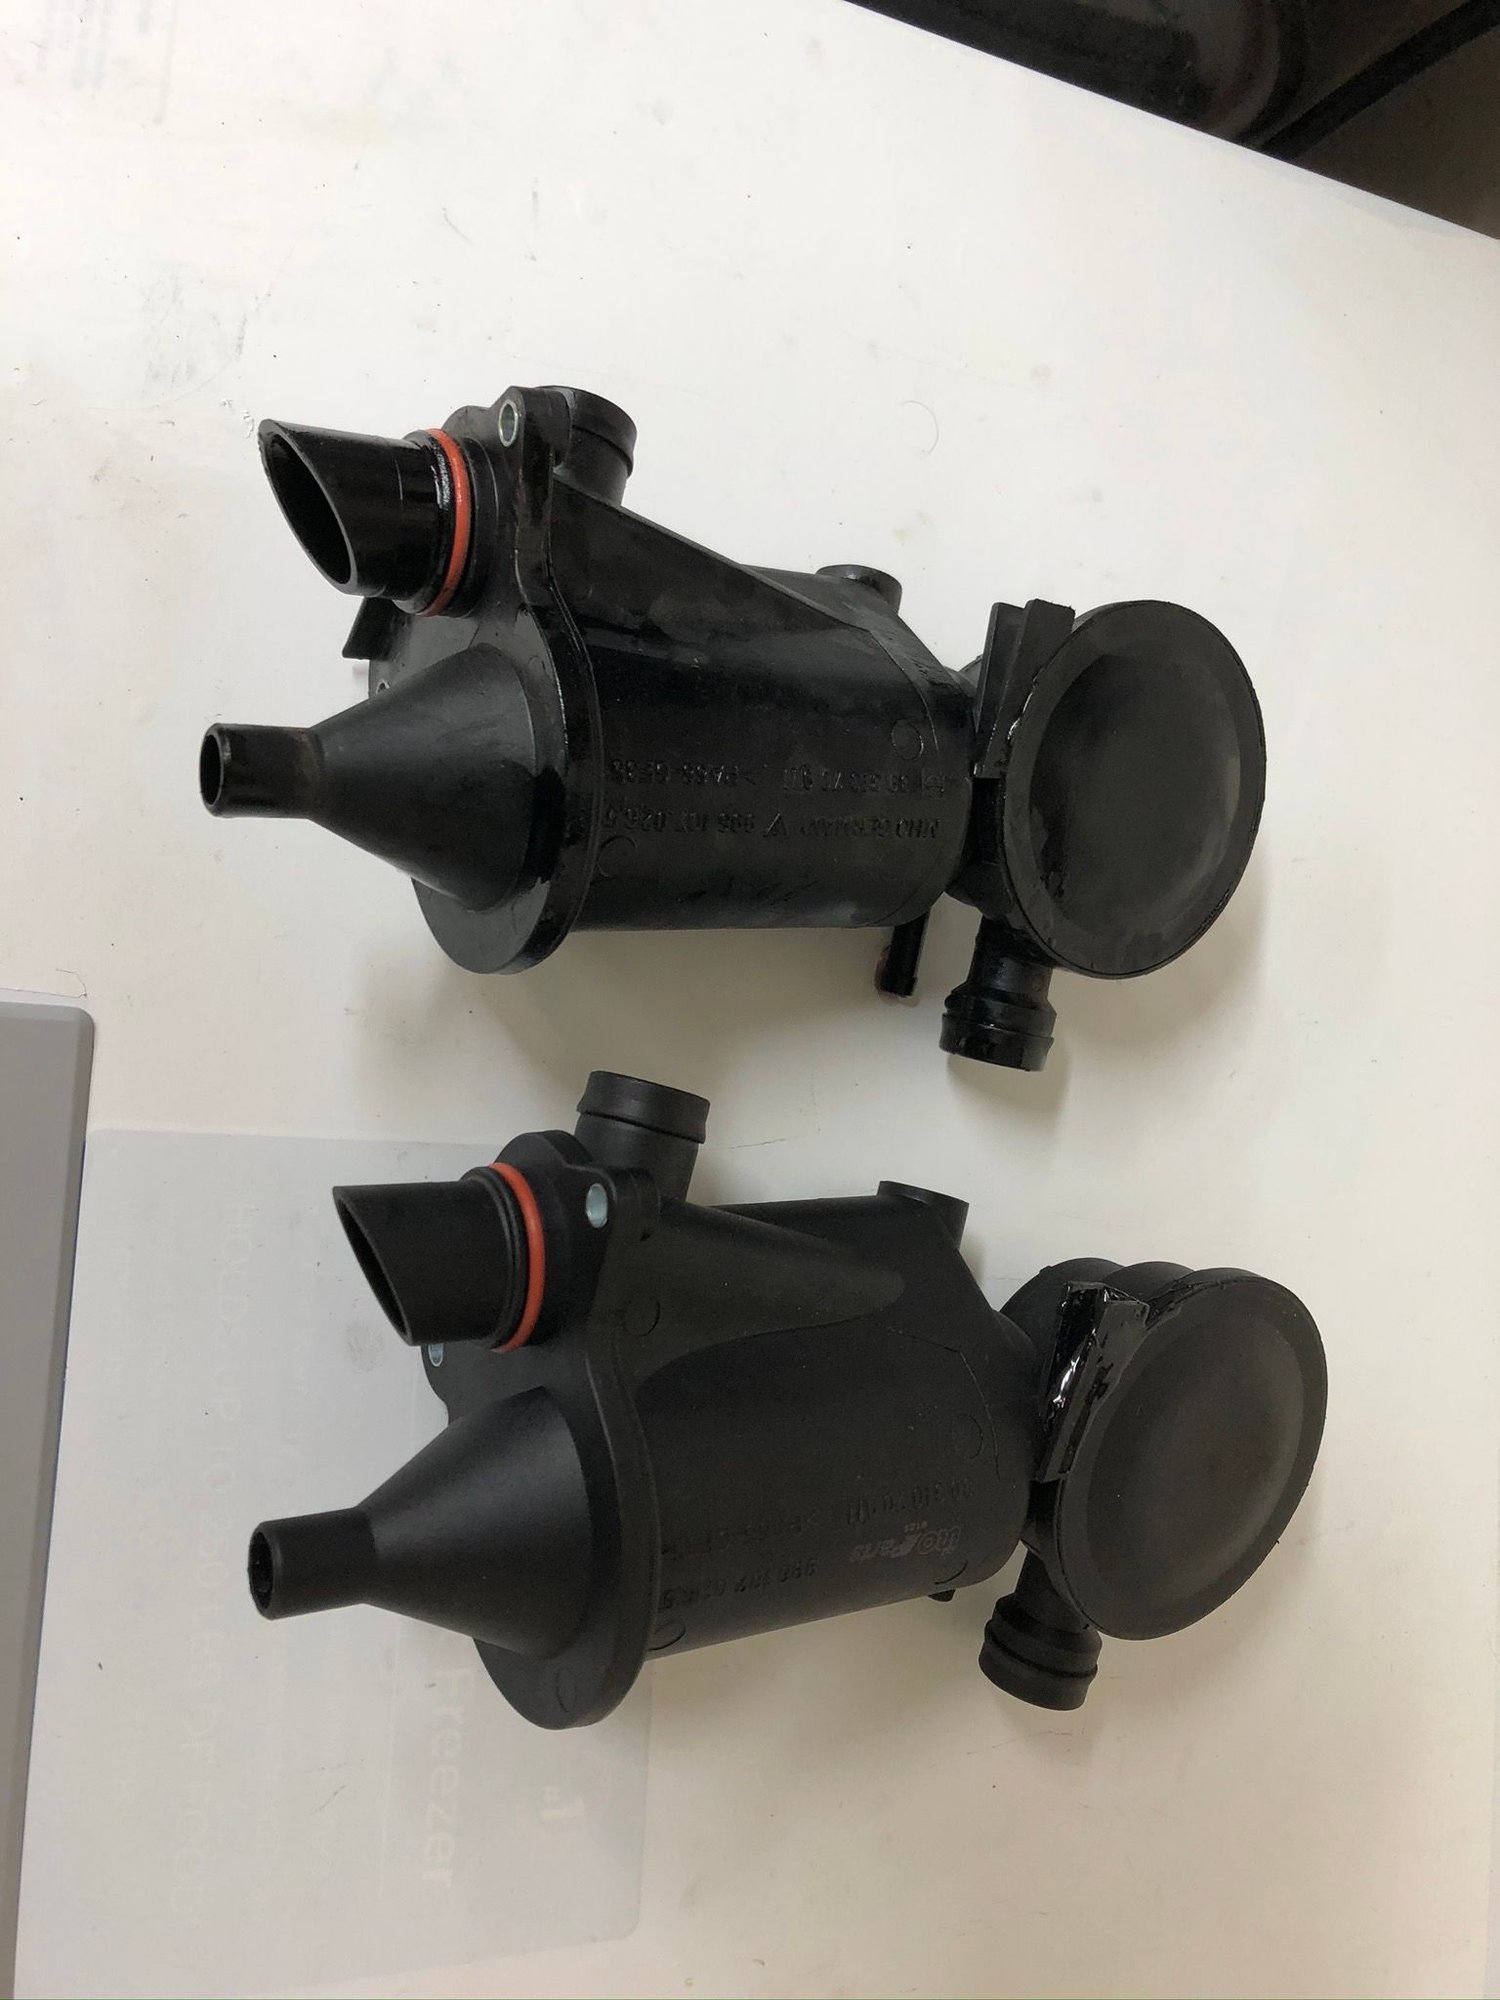
Your UAOS was shipped out a month ago, I have since designed a custom aluminum bracket that fits even better and is easier to mod/bend since 99C2's need to have the bracket bent at a 90 degree to clear the TPS.
All UAOS kits from the last batch were shipped including the custom aluminum bracket.
Not a big deal for me to mod the exitsting bracket but nice that u include a new one.
I did have to clearence the bracket slightly to clear the intake. I will add this additional mod to my earlier post so people dont miss it and bind/bend the bracket when installing.
Not a big deal for me to mod the exitsting bracket but nice that u include a new one.
I did have to clearence the bracket slightly to clear the intake. I will add this additional mod to my earlier post so people dont miss it and bind/bend the bracket when installing.
Yea, I know it's not a big deal and any qualified wrench will instinctively know what to do.
I just am following the Porsche MO, "create a great design, then constantly improve on it" !!!
Hey everyone, I received my UAOS and started to tear things apart. I been reading and preparing for this install and am now stuck on the last 10mm bolt furthest back of the intake (the "bitch bolt"). I can reach it with my fingers and feel where it is. However, right above it seems like the notch of the AOS (the notch that we are suppose to seal up, the atmospheric port I think). It doesn't seem like I can get a 10mm socket in there because the notch of the AOS is directly above it. Anyone experience this?
I have a 02 tip and the AOS looks different. For example, my two 6mm bolt holding the AOS appears to be sitting downwards as oppose to the side mounted one I see in pictures here. Any tips on getting around this issue I am having is appreciated. Worst case, I am going to break the notch off the AOS since I will replace it with the one I ordered with the UAOS. But then I am not sure how I will install that bolt upon putting everything back together -_-
That's the problem I ran into on my 04 tip. You have to first loosen the AOS, both bolts, and shift it out of the way to get to the manifold bolt. And then you can get a wrench on it to loosen it one mm at a turn. At least that what my mechanic told me after I had to toss in the towel and drag my cat to the shop to finish. Good luck!
You need to remove the wiring harness so you can get to the left most bolt that hold the AOS to the cylinder head.
You can get to the right most bolt easily from the right side.
Then move the AOS and you’ll be able to get to the bitch bolt.
That's the problem I ran into on my 04 tip. You have to first loosen the AOS, both bolts, and shift it out of the way to get to the manifold bolt. And then you can get a wrench on it to loosen it one mm at a turn. At least that what my mechanic told me after I had to toss in the towel and drag my cat to the shop to finish. Good luck!
Thanks! Sounds painful, did you use the open box end wrench or the other end (rounded)? When I was feeling it out back there, it doesn't seem like I can get a wrench on it unless I use the open box end and position the handle towards the interior like I am stabbing myself. To loosen the AOS two bolts, were you able to reach it from the top with extensions? I have a 6mm magnetic socket on the way and hope that the bolts are 6mm and that I can reach them with some extensions. I know that if I can move the AOS enough, I am confident about getting the 10mm socket on that last bolt and loosen it no problem.
 04-29-2020, 11:57 AM