When you click on links to various merchants on this site and make a purchase, this can result in this site earning a commission. Affiliate programs and affiliations include, but are not limited to, the eBay Partner Network.
Thanks to all the excellent posts on repairing the old foam on the AC blend doors. I have a 2011 997.2 and just did this job including the second blend door. I wanted to offer a few tips I just learned to build on the excellent post from AMCPILOT.
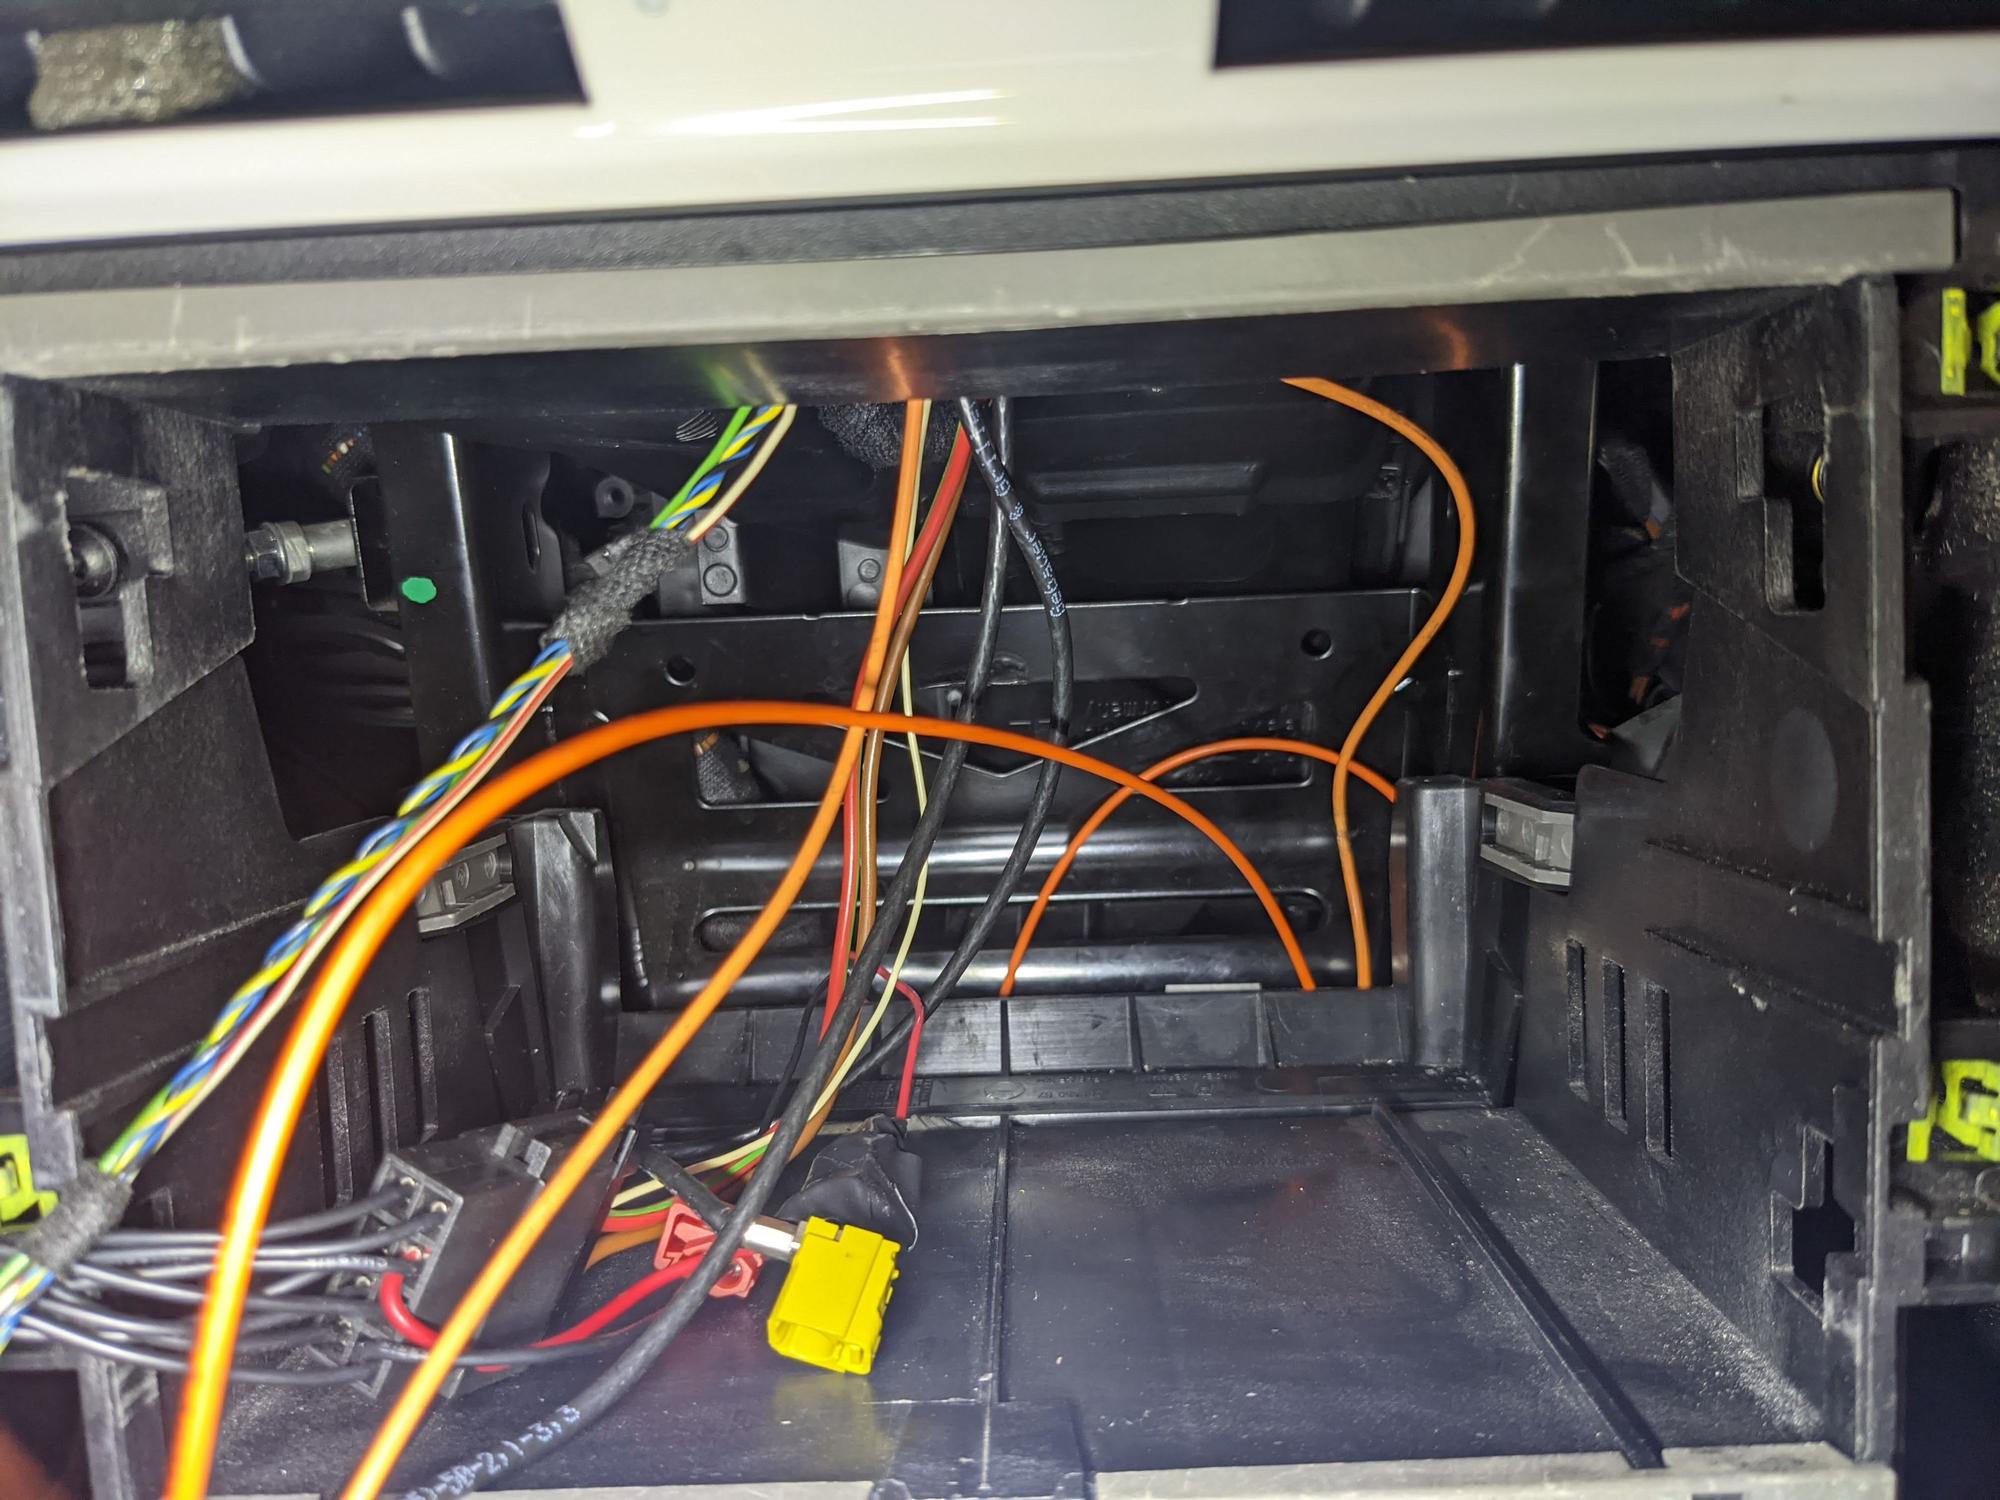
1. As noted in prior threads, it is not possible to access the second AC blend door from behind the radio in a 997 (as AMCPILOT shows in his picture) - there is a bracket in the way
2. It is possible (as noted by AMCPILOT) to access the second door after removing the first blend door accessing from the frunk
3. However, it is VERY VERY difficult to remove the old foam and adhesive on the door, then position the new foam in place - the problem is getting your hands in there
4. As reference, I wear a size Small golf glove (Cadet) and I couldn't get my fingers on the entire door while the door was in any of the three positions
5. My wife has smaller hands and she could access the entire door - so I would recommend getting someone with very small hands to help with the job
6. One of those video probes was helpful to view back in the area but not absolutely necessary
7. I also ordered a hole plug set from eBay to just put caps in the holes but they didn't fit well enough to use (too small)
8. I used 1/8 inch Dynaliner foam (as opposed to Dynamat) as the replacement foam. I've had very good results with this stuff in the past.
9. Brake parts cleaner on a small cloth works well to wipe off all the gummy adhesive left on the door after removing the old foam
10. You can build some flexible angled attachments and duct tape them to your shop vac to clean out all the old foam pieces from the hard to reach areas
11. In order to place the new foam over the door, you can carefully cut out a template (using trial and error) that fits perfectly against the existing blend door to position the new foam perfectly before permanently pushing against the door
12. Then make some double-sided tape out of blue painter's tape to put on the template
13. Then place the Dynaliner foam piece (non sticky side) against the template
14. Practice putting this assembly in place a few times to get good at it - then pull off the protective backing and go in again, position perfectly and stick in on
15. You have to do this for both sides of the blend door
16. It will allow you to unstick it somewhat if you make a mistake, but once you push it on, it is stuck down pretty good
17. If you misplace it a little, you can cut the excess off the edge with a new sharp razor blade
18. Regarding the cap to cover the door hinge bushing that was cut off (as mentioned in prior threads), a 1/2 inch PVC pipe cap (non threaded) works well
19. For the cap, you have to cut a slot to allow for the heater core support to slide through and you have to wallow out the inside diameter of the cap somewhat so it slides on well
20. You can also drill a small hole in the side of the cap and self-thread a small wood screw through it. Then tighten this screw (just a little) to keep the cap secured
21. For overkill, you can paint the cap black and use some black caulk if you see any gaps - but avoid getting caulk inside the cap - only on the outside
22. To help reseal the foam panel flap that covers the heater core, you can scrape some of the tar-type backing off of some Dynamat and roll it into a thin line. Then add to the existing adhesive outline to get a better seal.
23. Note that these comments are in addition to ALL the other posts on this topic that tell you how to remove the heater core and perform the "through the frunk" method, etc.
24. Also note that my heater didn't work at first - I had to drive the car and get the coolant flowing well before it "burped" out the air that I had left in the heater core system. Then the heat started working as usual.
25. Final comment - this took a while to complete - having a helper with small hands and being patient and taking time to do the job right was the key for me - and it saved thousands of dollars!
First off, thanks to AMCPILOT for posting this content, super helpful. I recently purchased a 997 and the very first thing I noticed was foam shooting out the vents and what I can only describe as sound like pennies jostling around in dashboard. I took the car to a shop and was quoted $7k to fix the foam issue. Eff that.
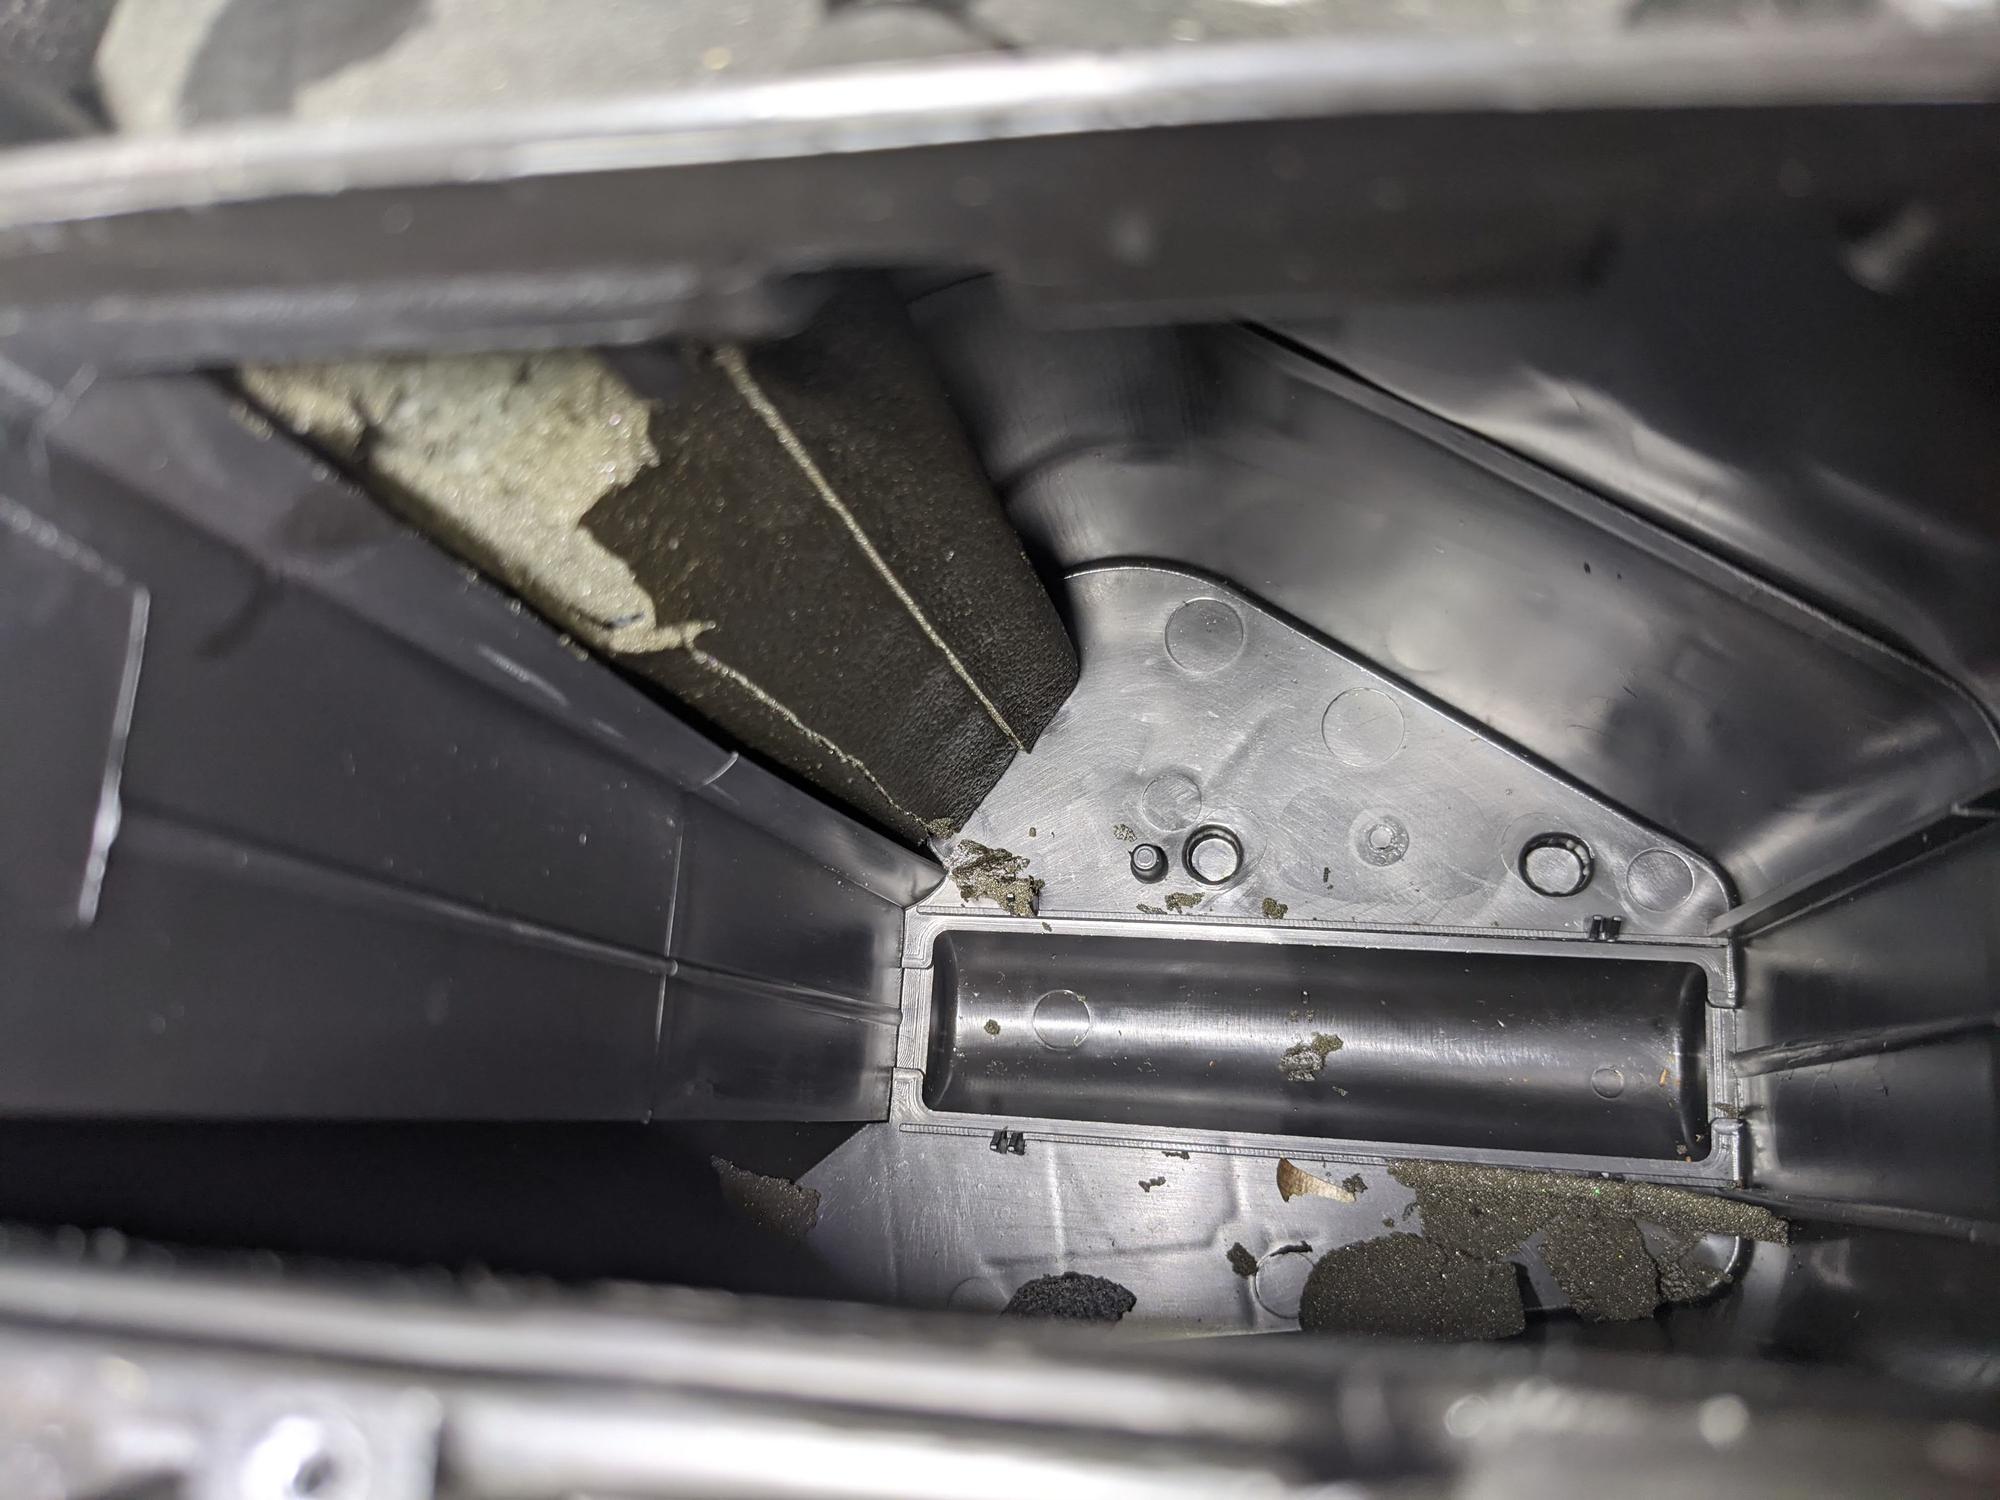
I found this thread and was hopeful this was my issue, and got to work. Sure enough:
Excellent... after a bit of dremel work, here I was:
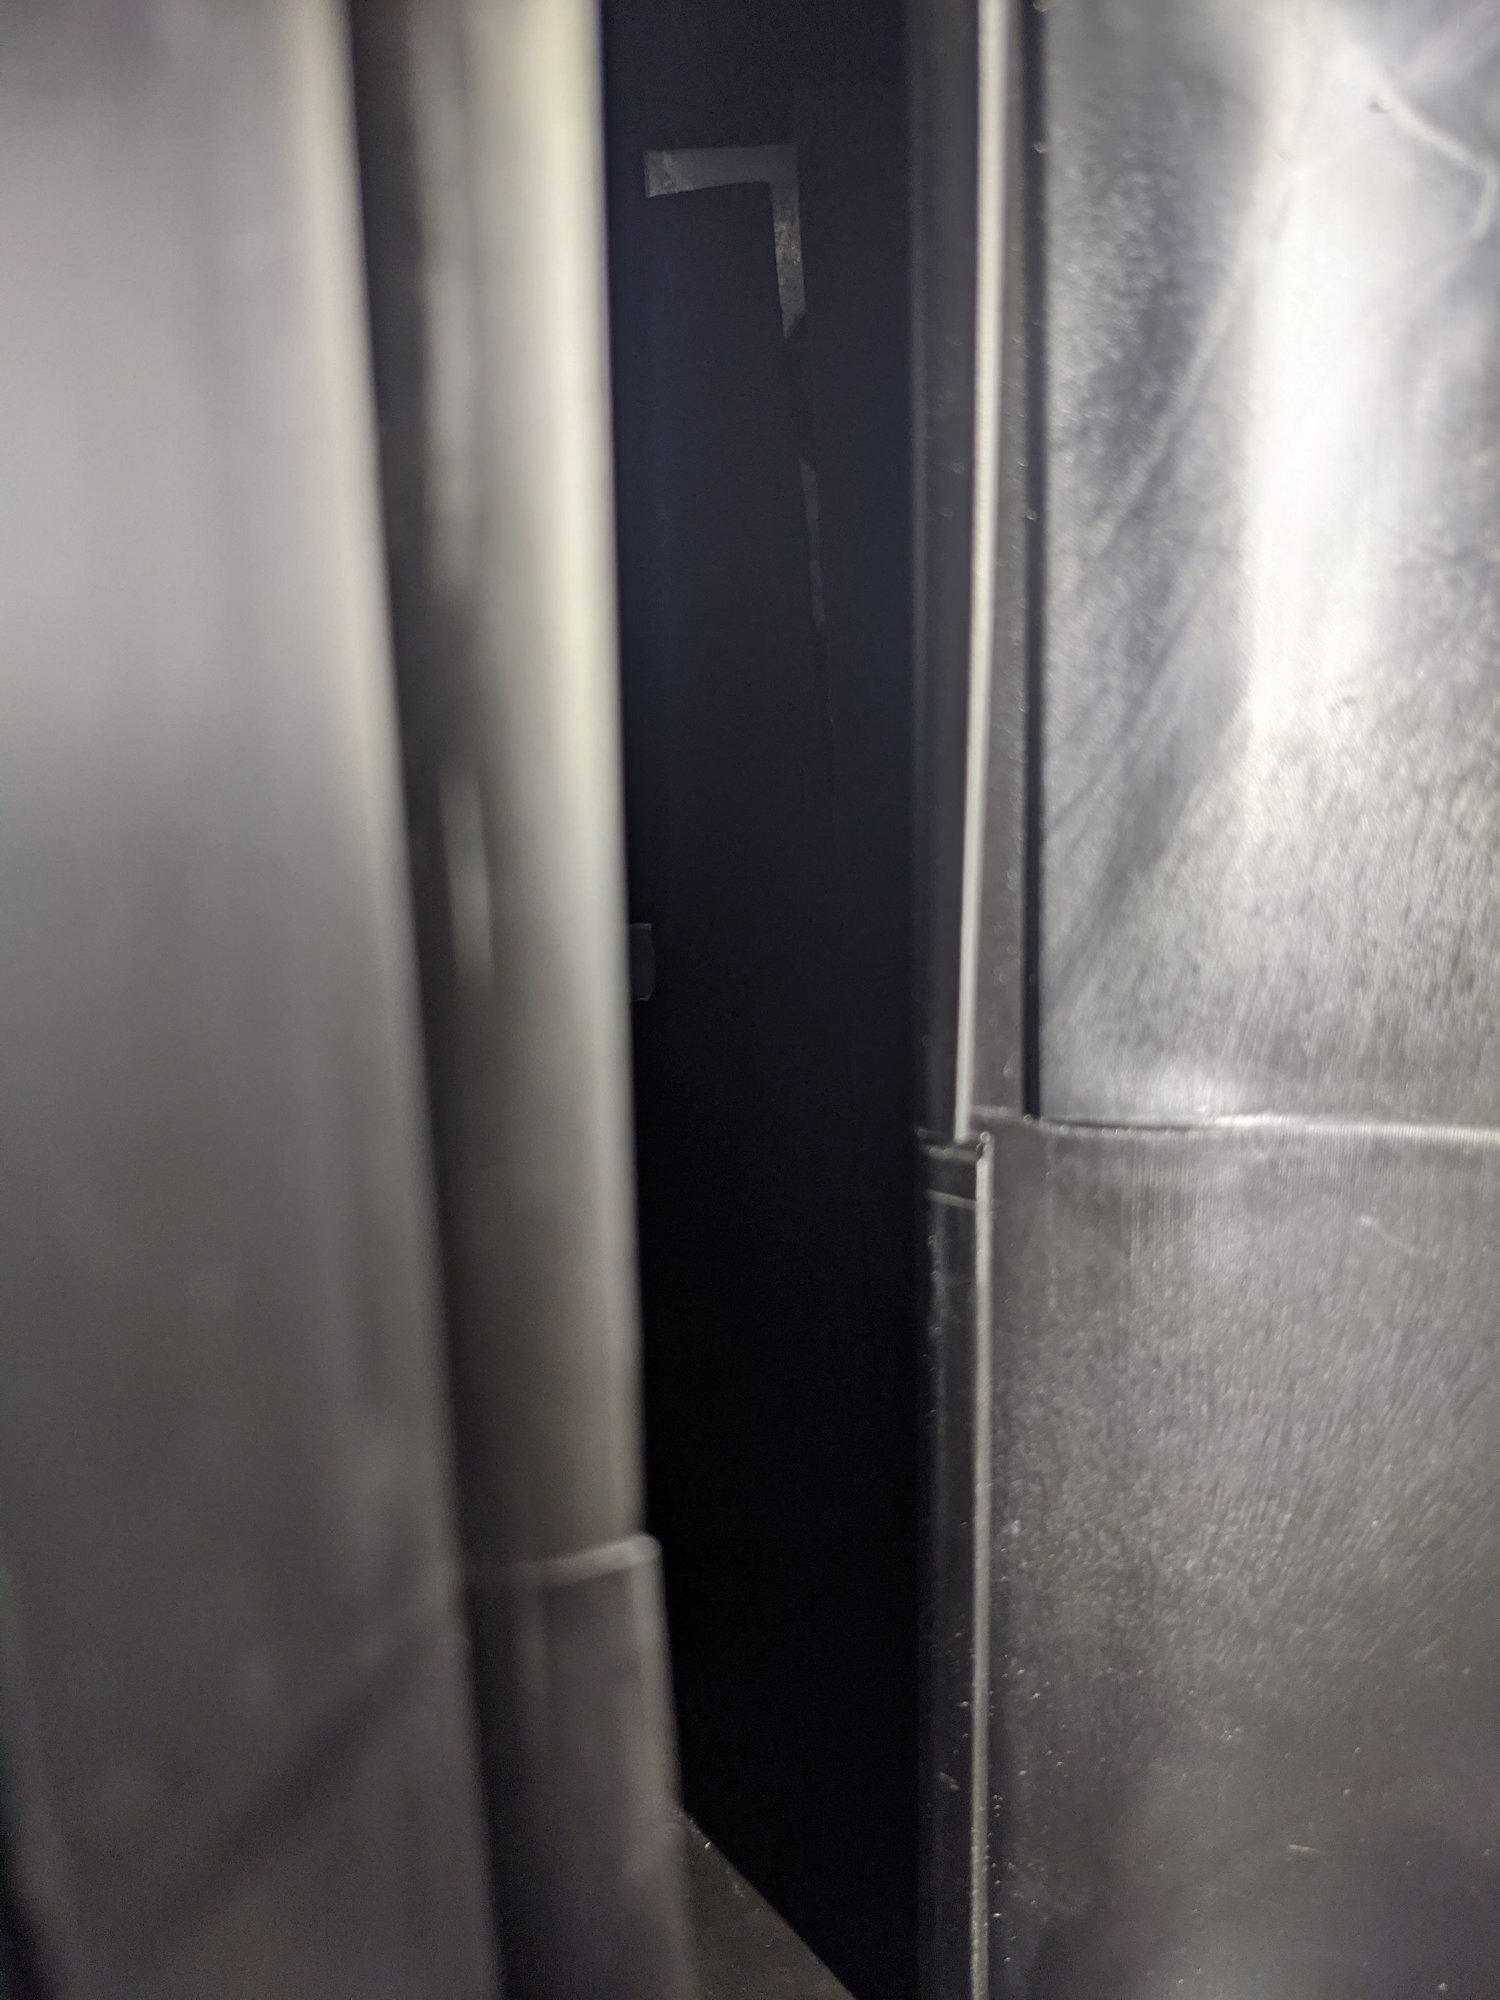
I was feeling pretty good until I read this entire thread and realized there is another flap that also might have issues that is not accessible without taking the entire dash out, or cutting up some the duct work from where the PCM lives, I thought maybe I could see if through the heater core opening and sure enough:
It was almost bare. Shoot, so I found some videos and FAQS on how to cut the duct work to get to it, and took a look if that was an option on my 08 turbo cab, negative.
I realized I could get my hands on that second flap, it wasn't comfortable, but I could do it, so I hooked up some jumper cables and moved the flap into it's three positions, great, I can totally get my hands on all parts of this flap.
You can see it moved:
Then I cut out some new new foam went in by feel only. I was able to totally re-foam this entire flap through the heater core cavity, I had to move the flap into the 3 positions so I could get it totally covered, it took a couple strips/passes per side, and it was a bit time consuming and slightly painful on the wrist, and I had to redo a couple of the attempts because I put it on crooked the first attempt, but all in all, it wasn't that bad. I was able to completely cover that flap all through that heater core opening without having to make any cuts, or remove anything other that the initial guide AMCPILOT provided.
And the good news, no more penny sounds coming from the dash, no more foam, and now not only does the heat and cooling work much better, I can actually direct it as well. woot woot! $7k saved!
Hopefully this is helpful for others looking to fix this issue[/QUOTE]
Thanks to all the excellent posts on repairing the old foam on the AC blend doors. I have a 2011 997.2 and just did this job including the second blend door. I wanted to offer a few tips I just learned to build on the excellent post from AMCPILOT.
And completely off topic, you should replace your cabin air filter. They pull in and separate the pleats like that usually when they start to become clogged, and the HVAC fan starts to pull a vacuum on them. The filter is not flowing air like it should be. Well, that or it wasn't seated properly to begin with so it wasn't uniformly supported.
/ Pedantry off. Now back to our regularly scheduled program.
3. However, it is VERY VERY difficult to remove the old foam and adhesive on the door, then position the new foam in place - the problem is getting your hands in there
4. As reference, I wear a size Small golf glove (Cadet) and I couldn't get my fingers on the entire door while the door was in any of the three positions
5. My wife has smaller hands and she could access the entire door - so I would recommend getting someone with very small hands to help with the job
...
25. Final comment - this took a while to complete - having a helper with small hands and being patient and taking time to do the job right was the key for me - and it saved thousands of dollars!
...
Judging by the level of effort in all these posts, I think I'm just going to continue to pull the trapped foam out of the vents, and run the AC at all times to avoid the windows from fogging up for no reason.
My AC runs poorly anyway, and I need to see if something is wrong with the compressor (makes an odd low audible pulsing whine).
Could the lack of foam on the blend doors cause the AC to be rather worthless in 90f temps?
Yes! The larger door blocks off the heater core or evaporator core or vice versa. When the foam falls off the air just goes through. Fixing the main hvac door is not that hard, I just did mine following a video on youtube
QUOTE=Ben8jam;19072810]Judging by the level of effort in all these posts, I think I'm just going to continue to pull the trapped foam out of the vents, and run the AC at all times to avoid the windows from fogging up for no reason.
My AC runs poorly anyway, and I need to see if something is wrong with the compressor (makes an odd low audible pulsing whine).
Could the lack of foam on the blend doors cause the AC to be rather worthless in 90f temps?[/QUOTE]
Regarding the dimensions of the foam template, I wish I had taken a picture of the template. Using a combination of measurement and repetitive test fit, you can get it perfect using a little trial and error. From memory, it was about 7.5 inches tall and about 4.5 inches wide. Also, I cut 1x1 inch notches in the top and bottom corners of the vertical side that corresponds to the pivot point axis of the door. I did this in order to avoid any adhesive getting gummed up in the swivel hinges. Additionally, the outside edge of the door is wider by about 1/2 inch until you get about 1/3rd of the way up from the bottom. Then it cuts in by bout 1/2 inch and continues straight up to the top. This small cut in can be seen on one of the pix of ACMPILOT. You can also see it easily after you remove the first door. Also note that the first door is a little larger than the second door. And the first door effectively has two doors on different angles (as you can see from the pictures). One on each side of the pivot axis. The second door has only one door side flap that moves. When you cut the two foam pieces for the second door, keep in mind that they are mirror images of each other because they each stick on opposite faces of the door. If you make two identical foam pieces, one of them will be backward when you go to install it. The template works on both sides.
Regarding the dimensions of the foam template, I wish I had taken a picture of the template. Using a combination of measurement and repetitive test fit, you can get it perfect using a little trial and error. From memory, it was about 7.5 inches tall and about 4.5 inches wide. Also, I cut 1x1 inch notches in the top and bottom corners of the vertical side that corresponds to the pivot point axis of the door. I did this in order to avoid any adhesive getting gummed up in the swivel hinges. Additionally, the outside edge of the door is wider by about 1/2 inch until you get about 1/3rd of the way up from the bottom. Then it cuts in by bout 1/2 inch and continues straight up to the top. This small cut in can be seen on one of the pix of ACMPILOT. You can also see it easily after you remove the first door. Also note that the first door is a little larger than the second door. And the first door effectively has two doors on different angles (as you can see from the pictures). One on each side of the pivot axis. The second door has only one door side flap that moves. When you cut the two foam pieces for the second door, keep in mind that they are mirror images of each other because they each stick on opposite faces of the door. If you make two identical foam pieces, one of them will be backward when you go to install it. The template works on both sides.
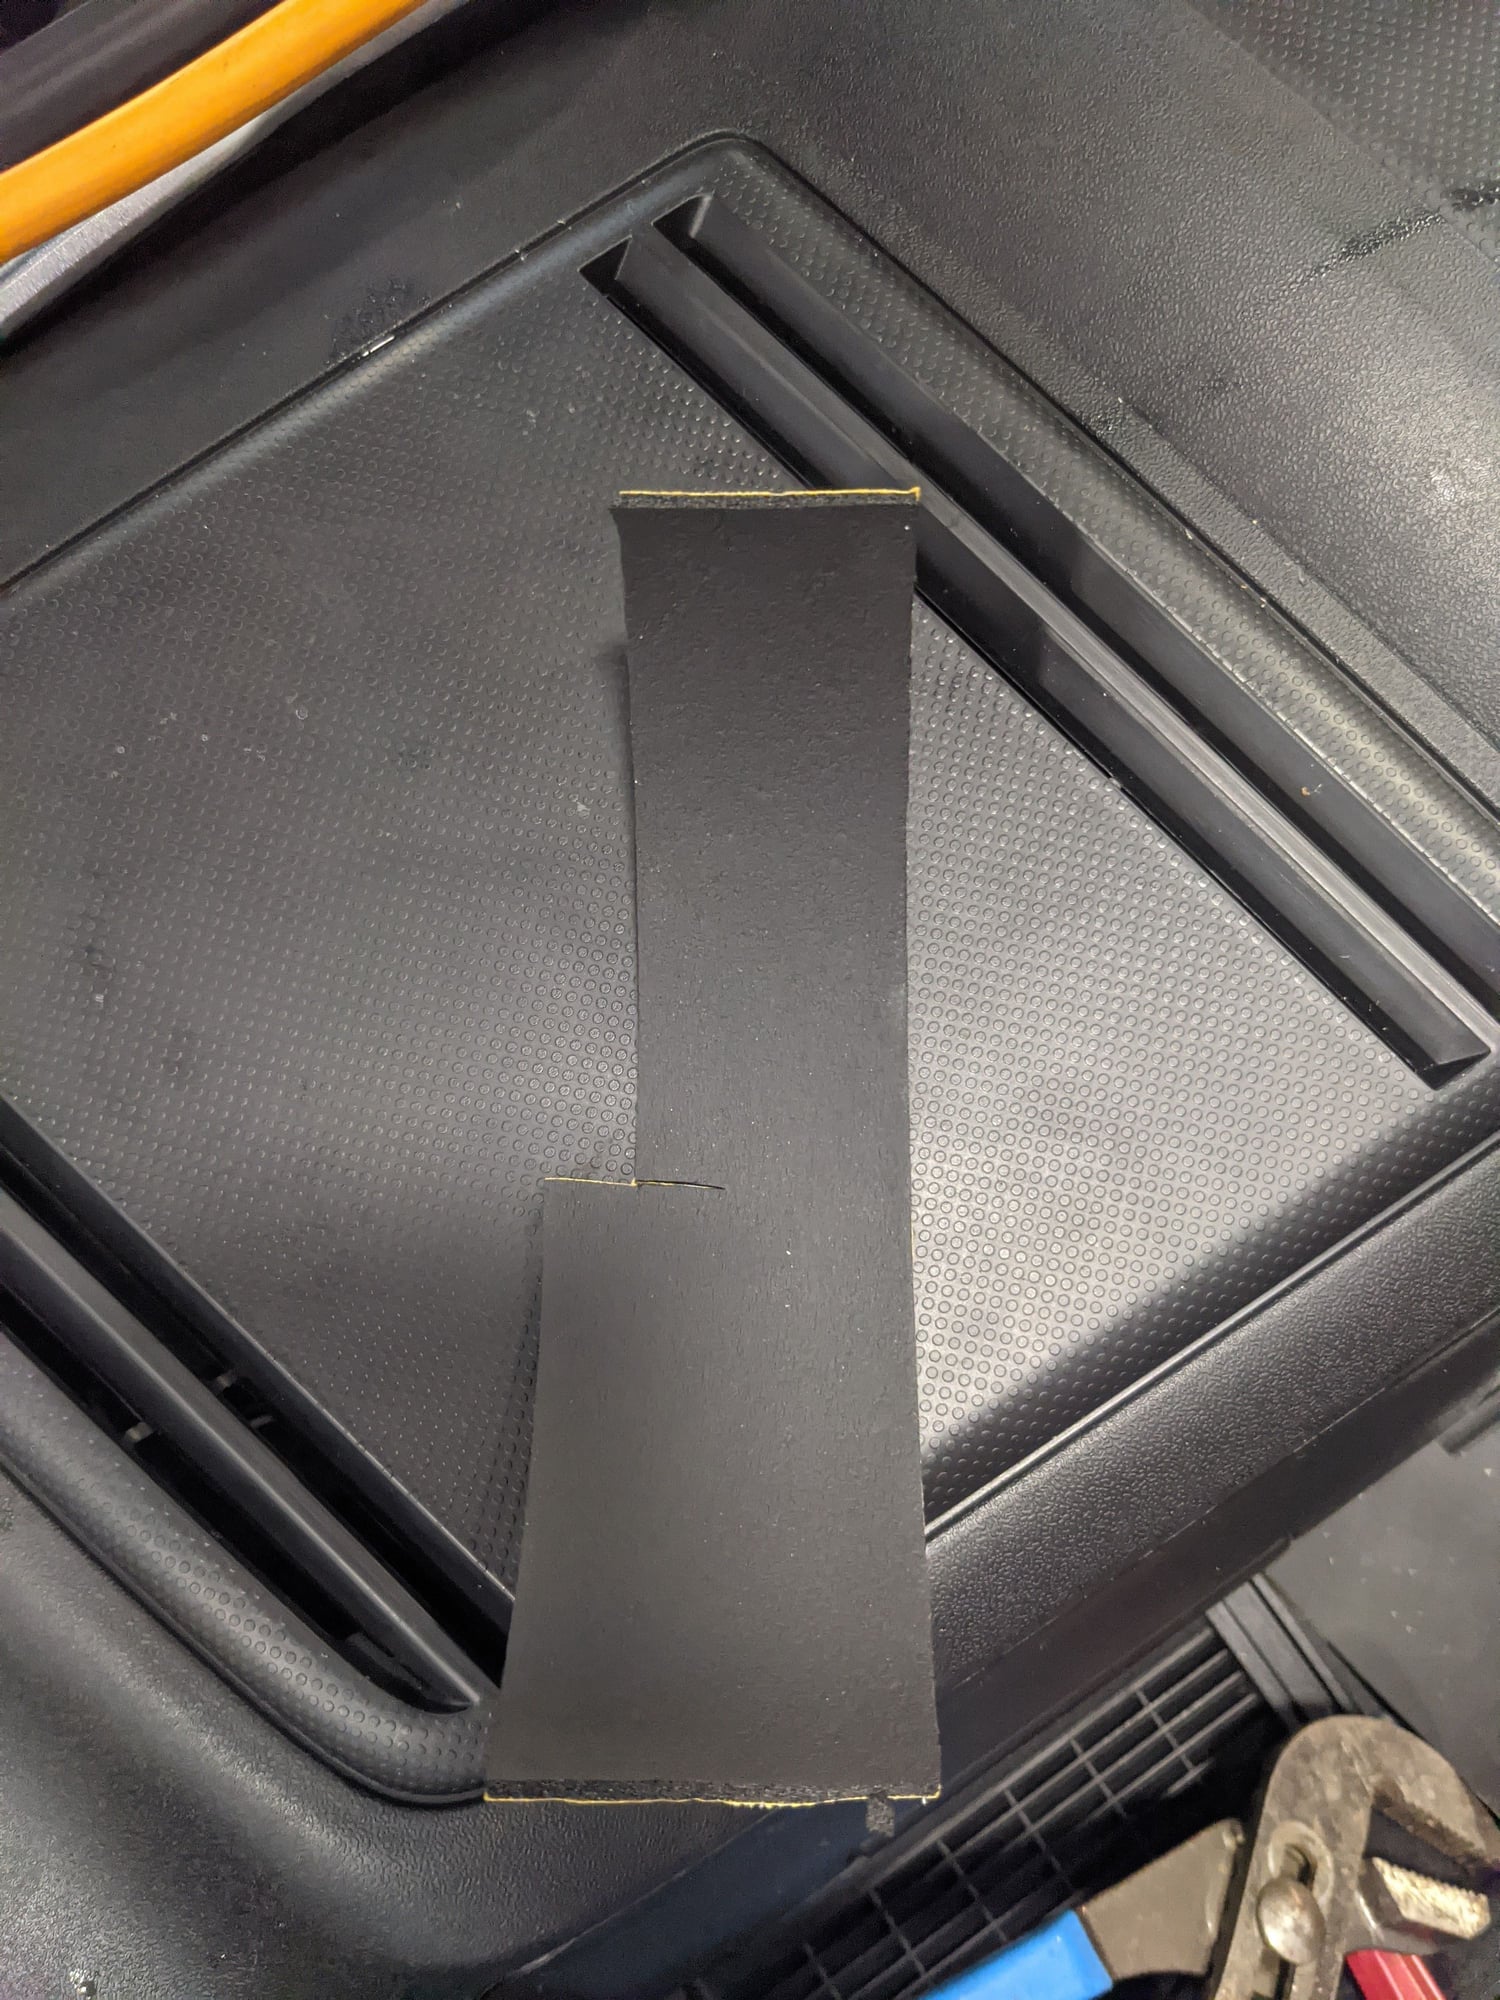
Here is a picture with the dimensions of the 2nd smaller blend door that I used based upon your suggestion of trial and error. Mine were close to what you suggested. I cut these templates from 1/8 Dynaliner. The picture of the templates was taken after I removed the foam from the backing. 997.2 C2S small blend door template - used to repair black foam issue
My AC runs poorly anyway, and I need to see if something is wrong with the compressor (makes an odd low audible pulsing whine).
Do you have enough oil in the A/C system? Compressors hate being run dry, sometimes people recharge the refrigerant and forget that you have to put in a small amount of oil.
How much quieter is the HVAC system with foam on the entire surface vs. only-over-the-holes? Or with the ebay 3D-printed plugs, or some kind of high temp non foam tape? I'm finally getting ready to do this and am trying to figure out the benefit of cutting the foam tape so accurately.
How much quieter is the HVAC system with foam on the entire surface vs. only-over-the-holes? Or with the ebay 3D-printed plugs, or some kind of high temp non foam tape? I'm finally getting ready to do this and am trying to figure out the benefit of cutting the foam tape so accurately.
I went through all the same thought process you mentioned before starting. I tried to figure out whether the HVAC system would be louder in some way if I used the plug kit from eBay or used metal AC tape instead of foam. I was wondering if the "noise" mentioned in blogs was (1) referring to AC duct parts tapping against each other because the original foam had been providing a dampening effect between the duct parts or (2) whether the "noise" was referring to a rushing or whistling sound past duct parts that previously had been foam-covered. There were no definitive blogs on noise except for one guy who used non-foam tape for the procedure and said he thought it might be noisier than before but no detail on what type of noise. In the beginning, I planned to use the eBay plug set for simplicity but the plugs were severely undersized and fell through the holes so I abandoned this pathway. I think the 3D printed plug you refer to covers the hinge bushing mechanism after the end has been cut off to remove the first door (if you were using the "through the frunk" method). I don't think the 3D printed plugs refer to individual plugs to cover the actual holes in the AC damper door (but I could be wrong). Regarding the noise, I started by really listening to the system before I began the procedure to get a baseline. My system had almost no foam loss on the AC doors when I began the procedure so the noise level would have been basically how it came from the factory. I used one continuous piece of 1/8 inch Dynaliner foam (as opposed to Dynamat) for each side of both doors (four sides in total for two doors). As you mentioned, using one piece of foam tape does require a good bit of patience to get cut and installed properly. All of the blogs give excellent instructions on the two possible methods to get to each of the two doors. For a 996 you can get to both doors using the "behind the radio" method and for a 997 you need to use the "through the frunk" method to access both doors. Regarding the noise, I am very happy with the sound after the fix. There is no rattling and the sound quality of the air flowing through the ducts is equal to or possibly quieter than before I started the repair procedure. Unfortunately I don't have a comparison of how it would have sounded by using the plugs or non-foam tape.
I think you have that backwards. The smaller and almost "unreachable" one in the 997s directs the air to the windshield defroster. I did the repair on the easy to get one before I even knew about the second flap. Because I live in Florida, I immediately found out that did me no good as my windshield still immediately fog’s up. There is a reply above (#64) where someone went in through the heater core opening after removing the easy to get to flap and managed to re-cover this hard to get to flap. I’m thinking of going back in to try but there is almost no information about doing this second one on the 997’s. In Florida it’s a real problem with the windshield fogging up.
You were right. Got it reversed. Thanks for that clarification and with some hints from Moxie’s thread, finally did the job, including the second flap too. For 997 definitely the job need to be done from the frunk, across the heater core. For the second one (flap) I did what Moxie suggested, using HVAC aluminum tape and worked by “feeling” only, covering 2nd flap’s holes with several pieces of tape little by little. It took to me at least 2 hours to do that flap alone, and was uncomfortable and hard for my hand, but doable. Then the reassembly was easier and faster. For the big flap all is well documented and did no have any big issues. Just took my time. Now got excellent cold and heat AC (at request) and the most important (for my case at least) is that have again full control of vents flow so no more windshield fogging! I can get cold air full blast thru front vents only at wish. Seems the problem was finally solved. I took some pics of procedure, and planning to put some sort of instructions and hints when I get a little more time.
For those of you that have installed the aftermarket caps vs tape/foam does it matter which side of the blend doors the caps are installed on ? I bought 2 kits to be able to repair my Boxster and 996 .
I don't think it would matter which side they are installed on but thought I would ask . I plan on using some kind of RTV or adhesive to hold the caps in place .
I did not use those caps. I used the tape and foam sheet glued on top as others did. For the 2nd flap just the metallic tape. For the pivot cap, I did no use the putty suggested, instead I found that a rubber cap was a more elegant solution. I affixed it with black tape.
Peripheral question but does turning the system off close the vents? I found an acorn inside the lighter socket yesterday and three more on the passenger seat. Weren’t there a few days ago. Where the heck are they getting in? I already built a fence around the cabin filter which kept them from camping out there but they’re still getting in somewhere.

 10-22-2023, 06:16 PM