When you click on links to various merchants on this site and make a purchase, this can result in this site earning a commission. Affiliate programs and affiliations include, but are not limited to, the eBay Partner Network.
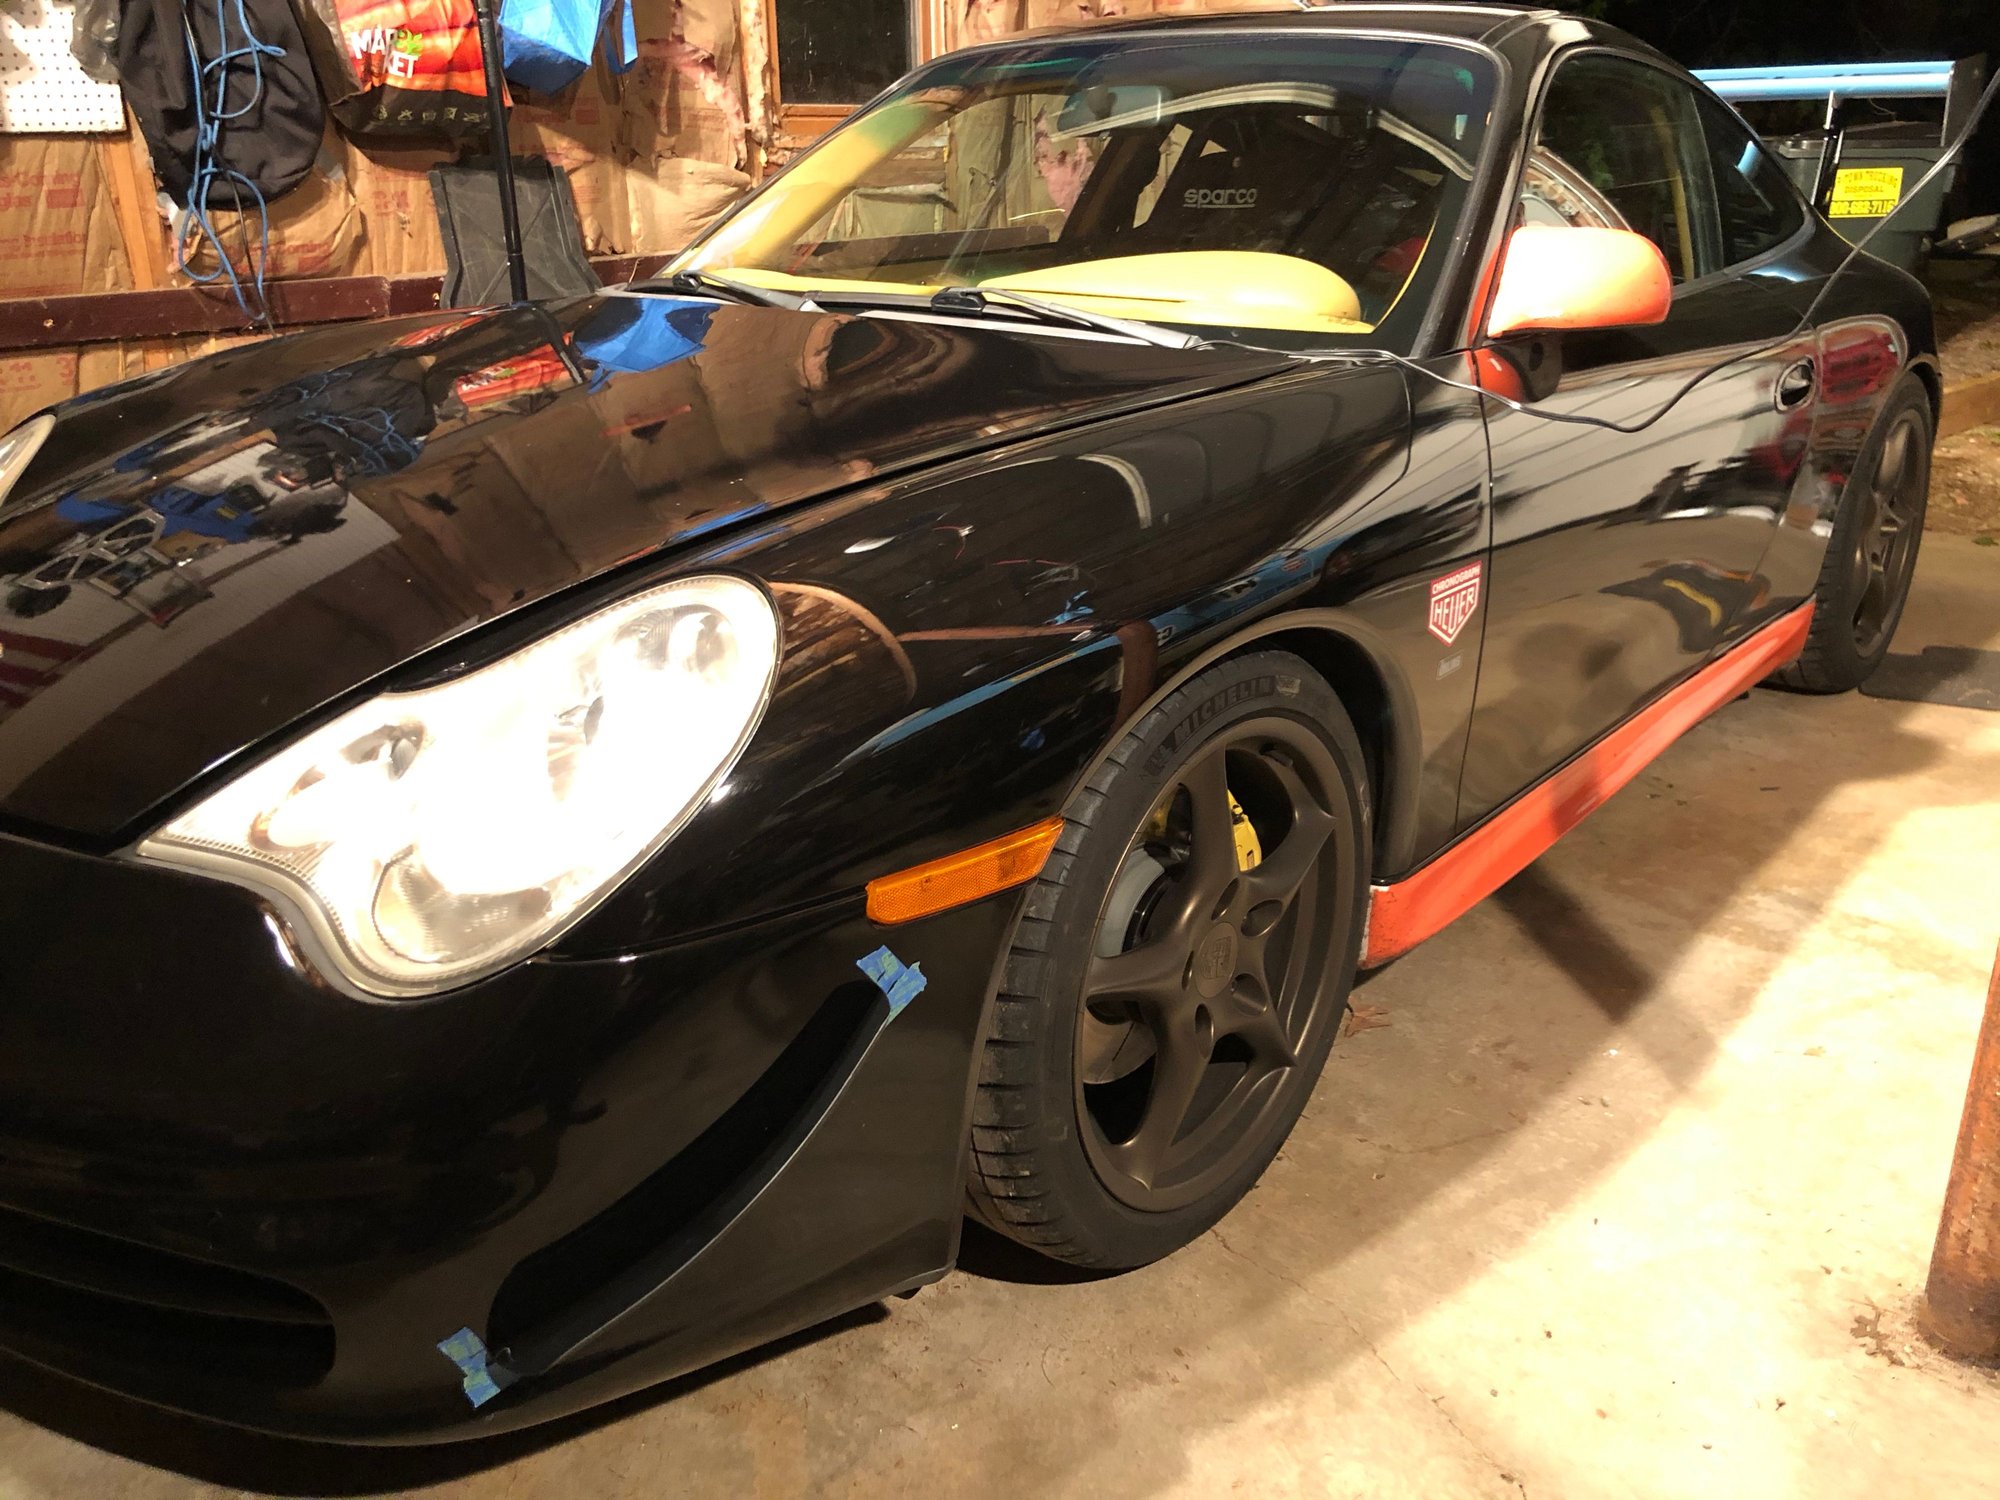
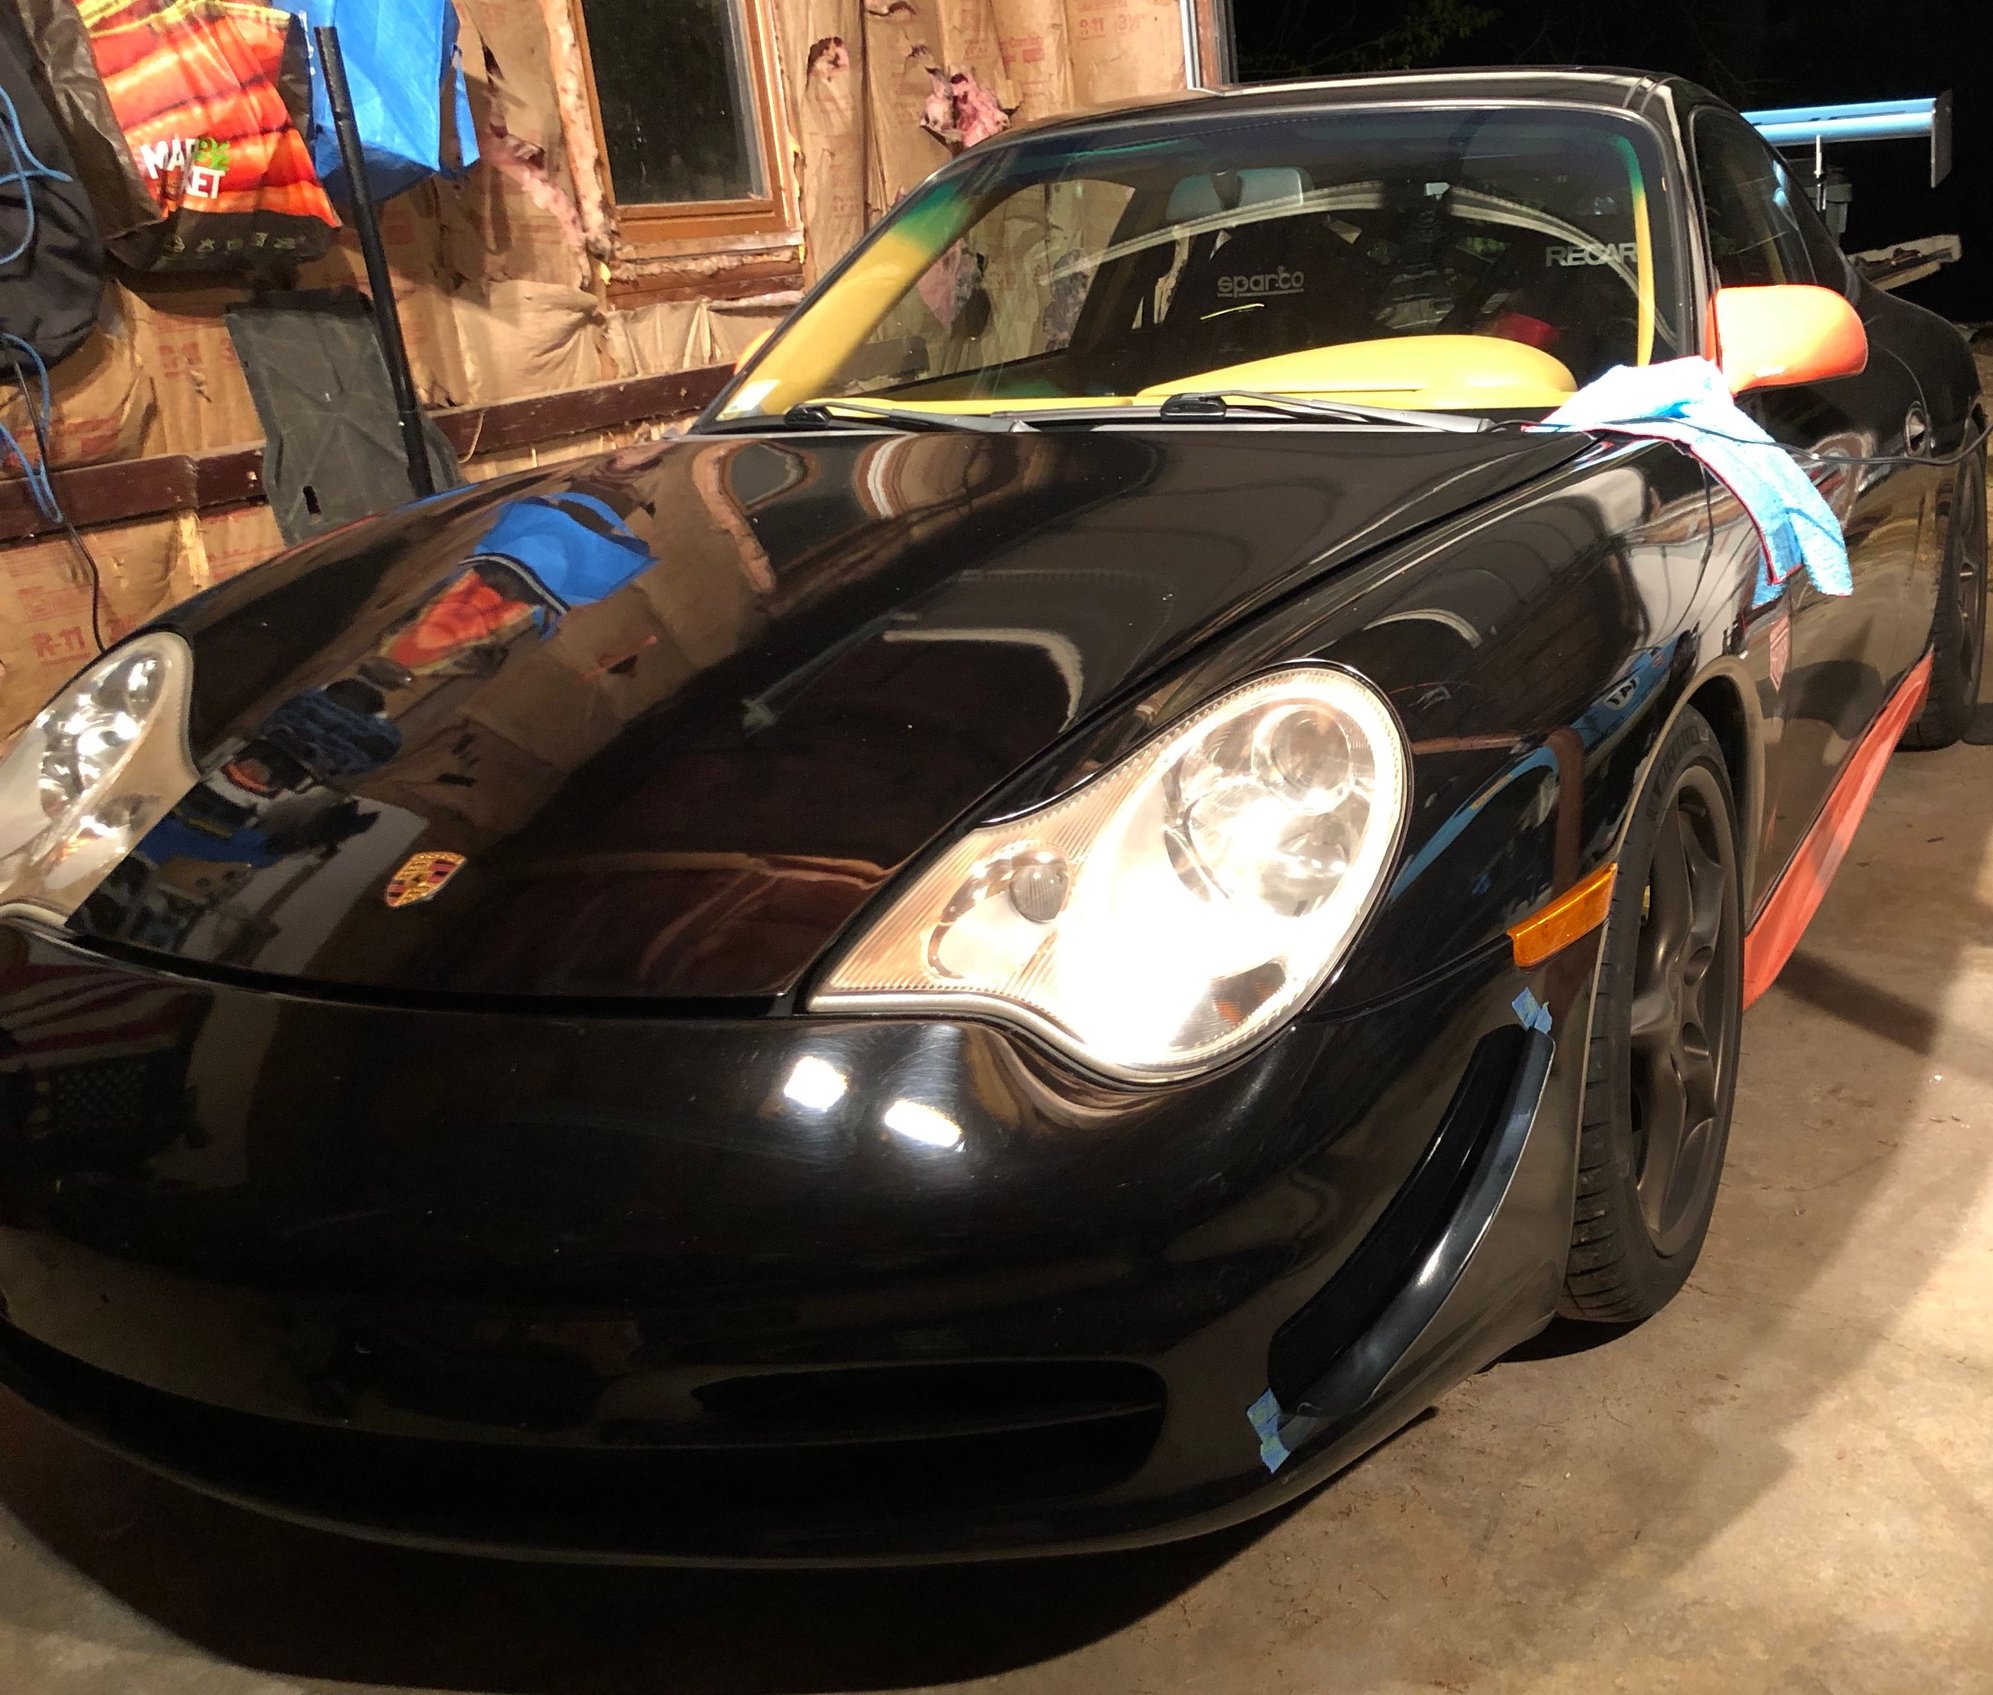
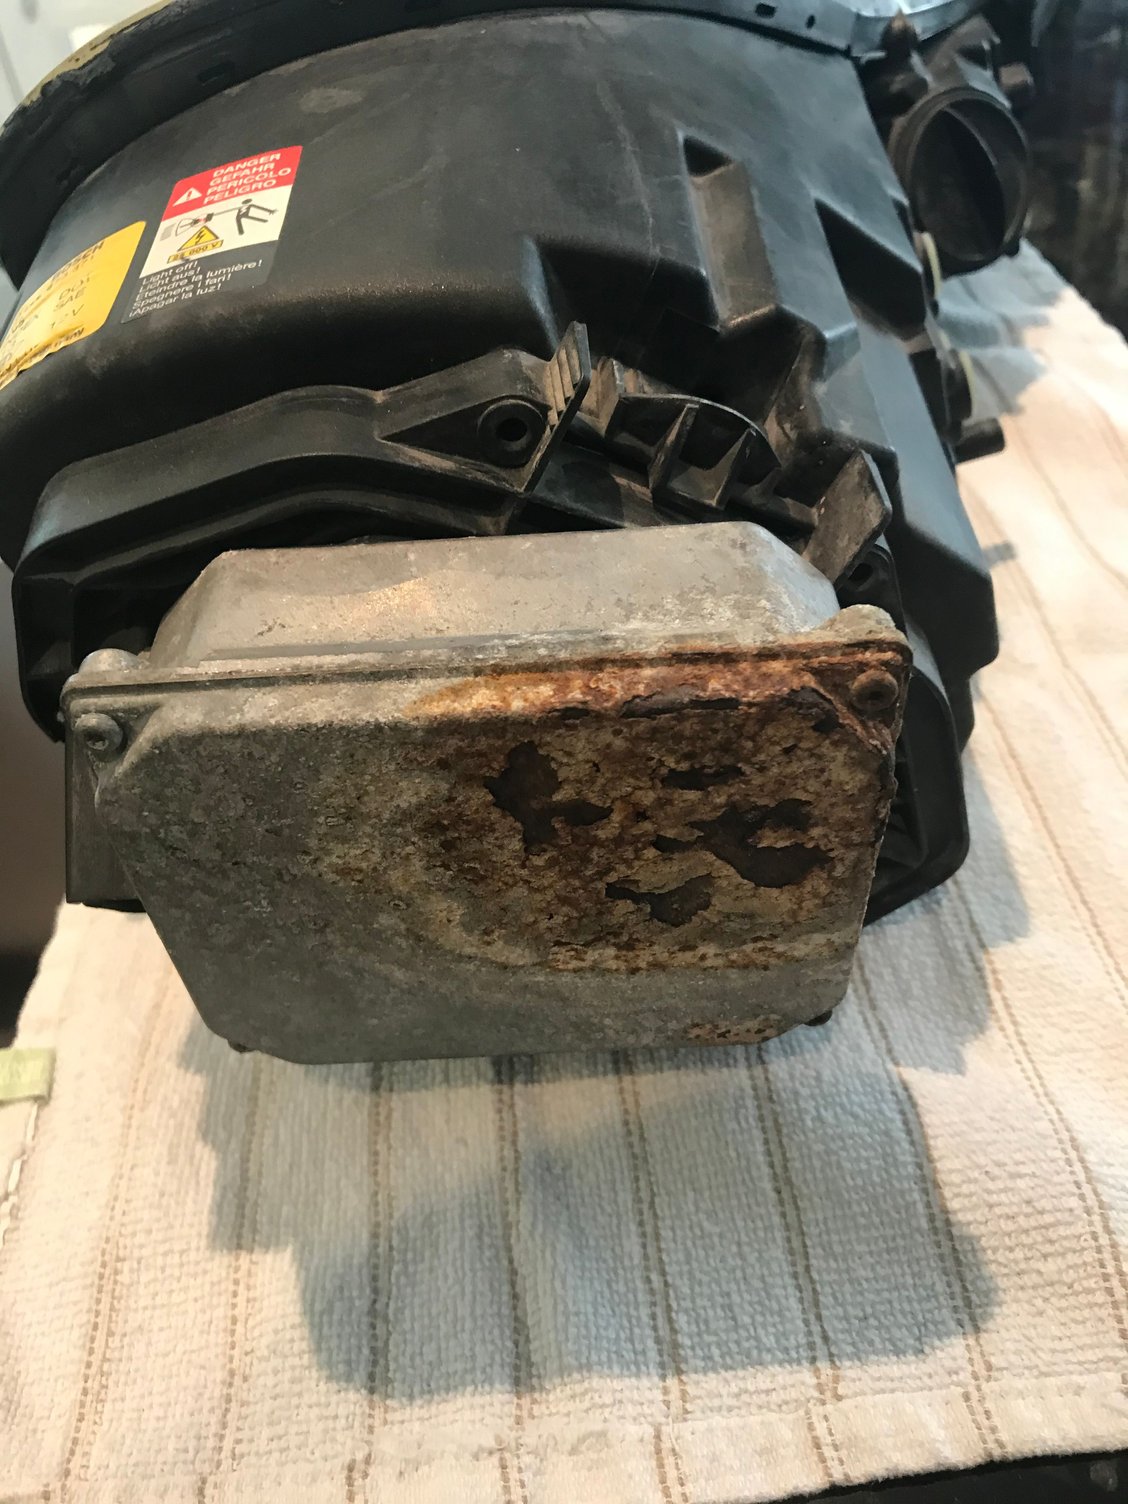
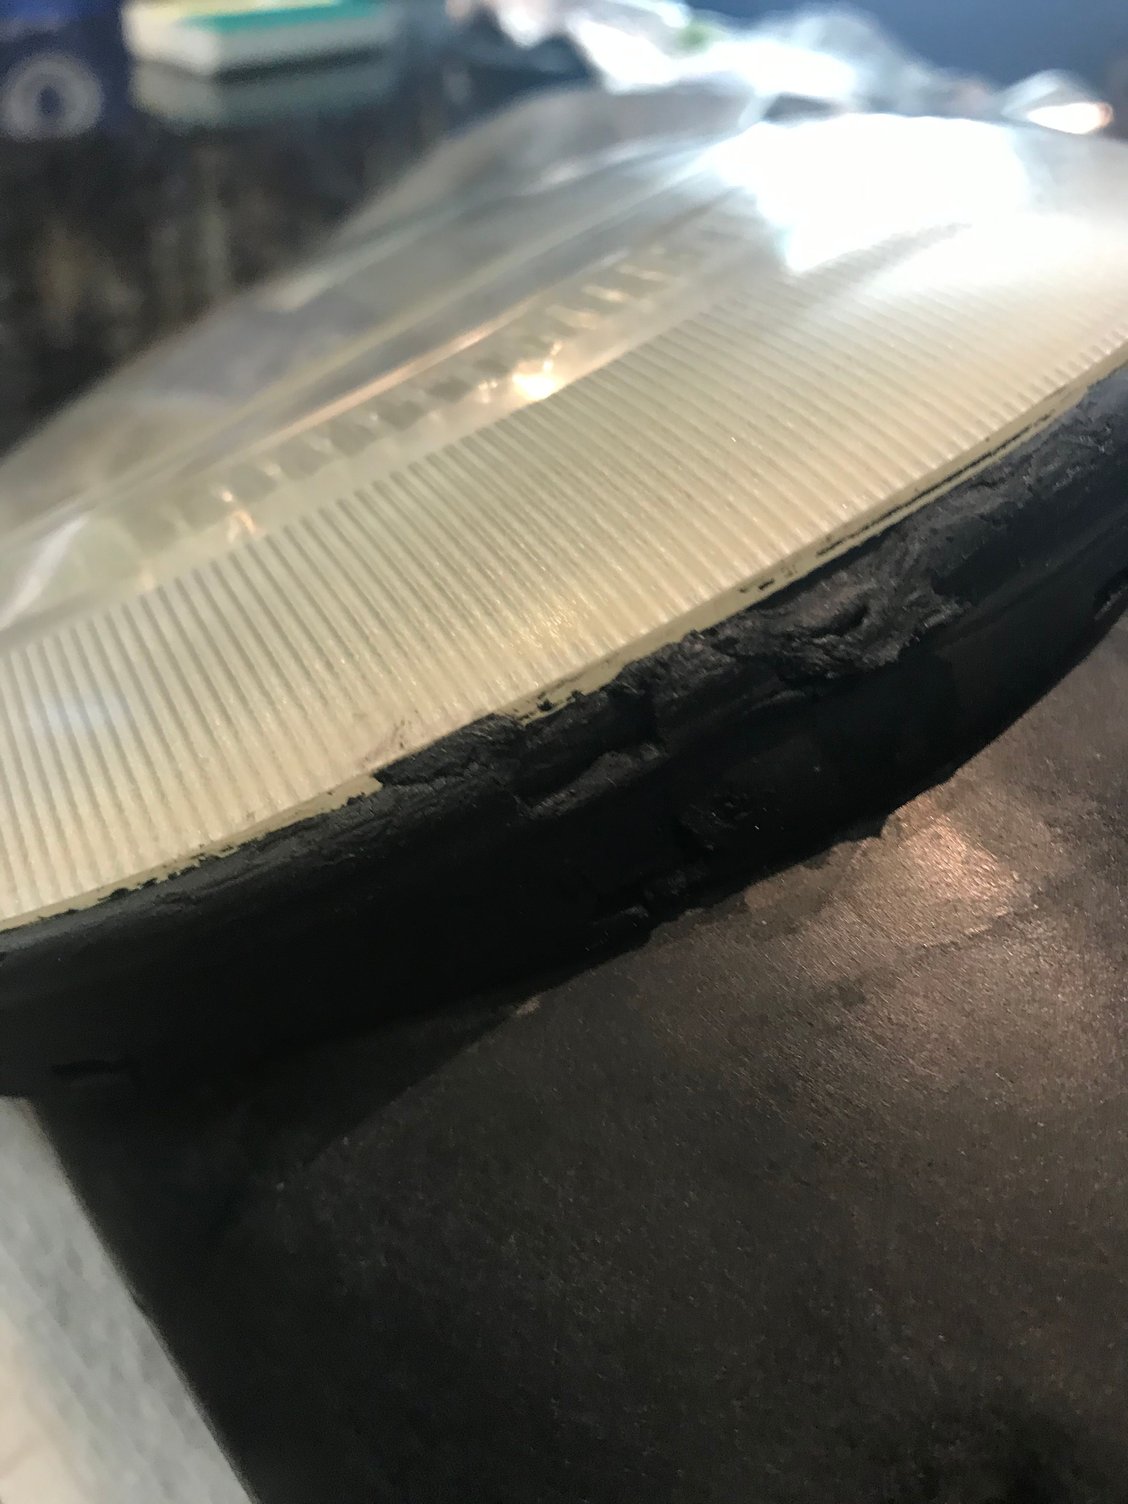
I dug into my first project with my new car after getting it back from the body shop after getting into a fender bender on my first day with it. And of course got some surprises. The passenger headlamp assembly was dead and I found that the male plug had some busted tabs and so no longer was fixed into the mounting plate. Gonna blame that one on the body shop. The ballast was a little corroded but nothing prepared me for the driver side assembly (which still works). The ballast is corroded to **** and the rubber seals are like goo. I�d say there�s a relationship there. So I have some unanticipated work to do, but that�s OK since I bought this car to tinker with. (I�m a completely novice mechanic).
@Cityfisher
The upper cubby I sourced directly from the local dealer for about 40 euros. They had the best price.
The lower cubby I also replaced since my old one was cut up. These are cheap on eBay as much less in demand vs. the upper one.
I think this setup looks decent and more importantly gives much needed space for phone(s), wallet etc., specially on cars without a glovebox like mine. With the Aux cable right there it's the perfect place to drop in the phone.
Thanks! Looks great. I def need a spot for my wallet etc. Cubby be perfect.
Wow! That corrosion is gnarly! The broken light connector is quite common (one of the first things I fixed on my car - mine was the blue one though...). You can source parts here: http://www.autoatlanta.com/porsche-p..._911_parts.php They don't always have the best prices, (and always charge for shipping!) but their diagrams are great and have all the part #'s along with updates (once you've got the part #'s shopping is easy). Good luck with the tinkering - if your car is anything like mine, you'll have plenty to do!
Not sure exactly what compartment you are referring to...maybe the Hemholtz Resonator? The extra short tube that connects to the air filter box?
Oh..forgot to add..is the K&N filter one of those that require oil? Not a good idea as the oil coats the MAF sensor and ruins it. Only use a paper filter.
Wow! That corrosion is gnarly! The broken light connector is quite common (one of the first things I fixed on my car - mine was the blue one though...). You can source parts here: http://www.autoatlanta.com/porsche-p..._911_parts.php They don't always have the best prices, (and always charge for shipping!) but their diagrams are great and have all the part #'s along with updates (once you've got the part #'s shopping is easy). Good luck with the tinkering - if your car is anything like mine, you'll have plenty to do!
Thanks for the tip! Being in Canada I get hosed anyway on shipping, exchange rate, duties, etc. Good info is gold, though.
today I had to use Duct Tape - actually, it was Gorilla Tape.... I am thankful this happened at a gas station that sold such tape!!! But I will say, the OH **** moment when it came off in my hand......
today I had to use Duct Tape - actually, it was Gorilla Tape.... I am thankful this happened at a gas station that sold such tape!!! But I will say, the OH **** moment when it came off in my hand......
Been there, done that, bought the gorilla tape T-Shirt.
I will say the following, there was no discernible difference in drivability for me with the gorilla tape solution and I thought it worked fine, being that the tube is a PIA to replace, I was lazy... When looking into AOS issues at the track I thought it likely that the cracked tube was not air tight and allowing for a vac leak so I bit the bullet and changed the tube. When I got it off I sealed both ends and sure enough - not even close to air tight. So, I would swap it out sooner rather than later even if you don't notice a difference,
I bought a replacement tube and cap at the dealer, figured I'd do both at once. If your going to do it yourself, you can get away with just sliding the belt off the alternator, remove alternator mounting bolts and wiggle it out of the way, you don't need to fully remove it. Then you will be able to access the 2 10MM bolts that hold the tube in - working blind so be patient and turn your fingers into eyes. Buy a magnetic 10MM socket also, really helpful here. Put a little lube on the O-ring (does not come with tube, make sure you get when getting tube) and ease her in.... Then put everything back together and turn your old oil fill cap into a manometer testing cap.
today I had to use Duct Tape - actually, it was Gorilla Tape.... I am thankful this happened at a gas station that sold such tape!!! But I will say, the OH **** moment when it came off in my hand......
That's a good temporary fix but it will start letting air in before too long. A better temporary (or longer run) fix is to use marine grade heat shrink material. Do a search here. Another fix is to find a rubber plumbing coupler that fits and use some hose clamps to secure it. I did the gorilla tape for a month or two and then switched to the coupler. When I did the change, I saw that there was glue on the inside of the tube, meaning that air was leaking in. I had the coupler on for almost two years without issue before replacing the filler tube.
Today was front shock mounts, bump stops, and lower control arms.
Still waiting on the correct sway bar bushings to arrive, then those will go on as well.
Next up will be rear suspension refreshing....
The front bump stops on my car are in a similar state. Is there a way to gauge, before disassembly, if the top mounts need replacement? Sometimes I hear a knock from the front left but only after a long drive. �99 with about 45k miles.
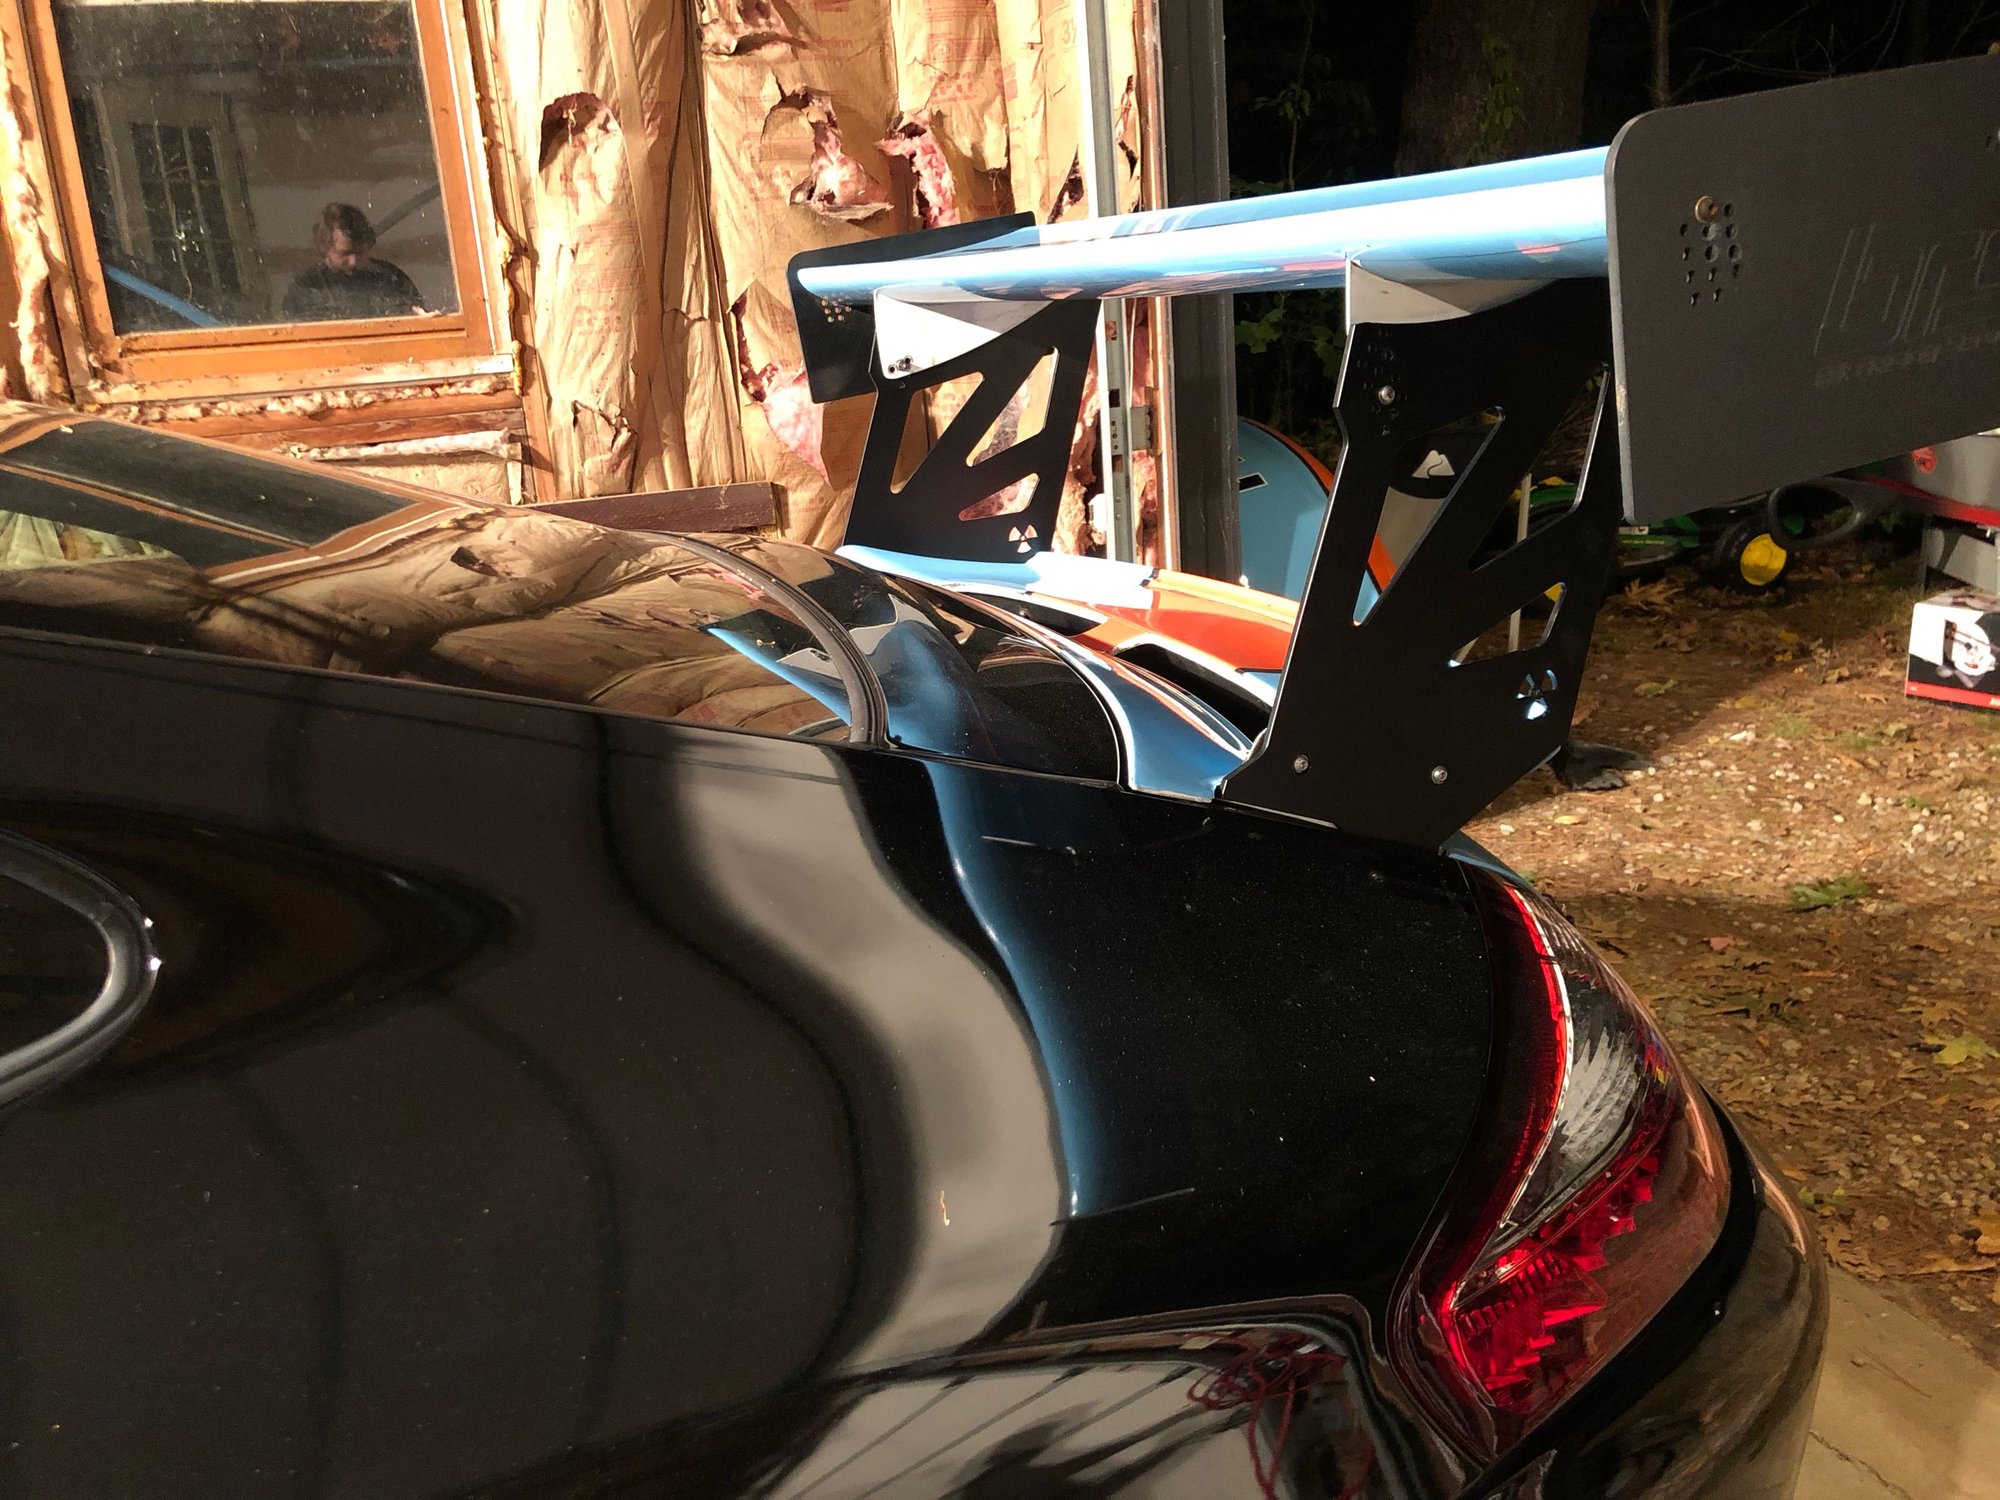
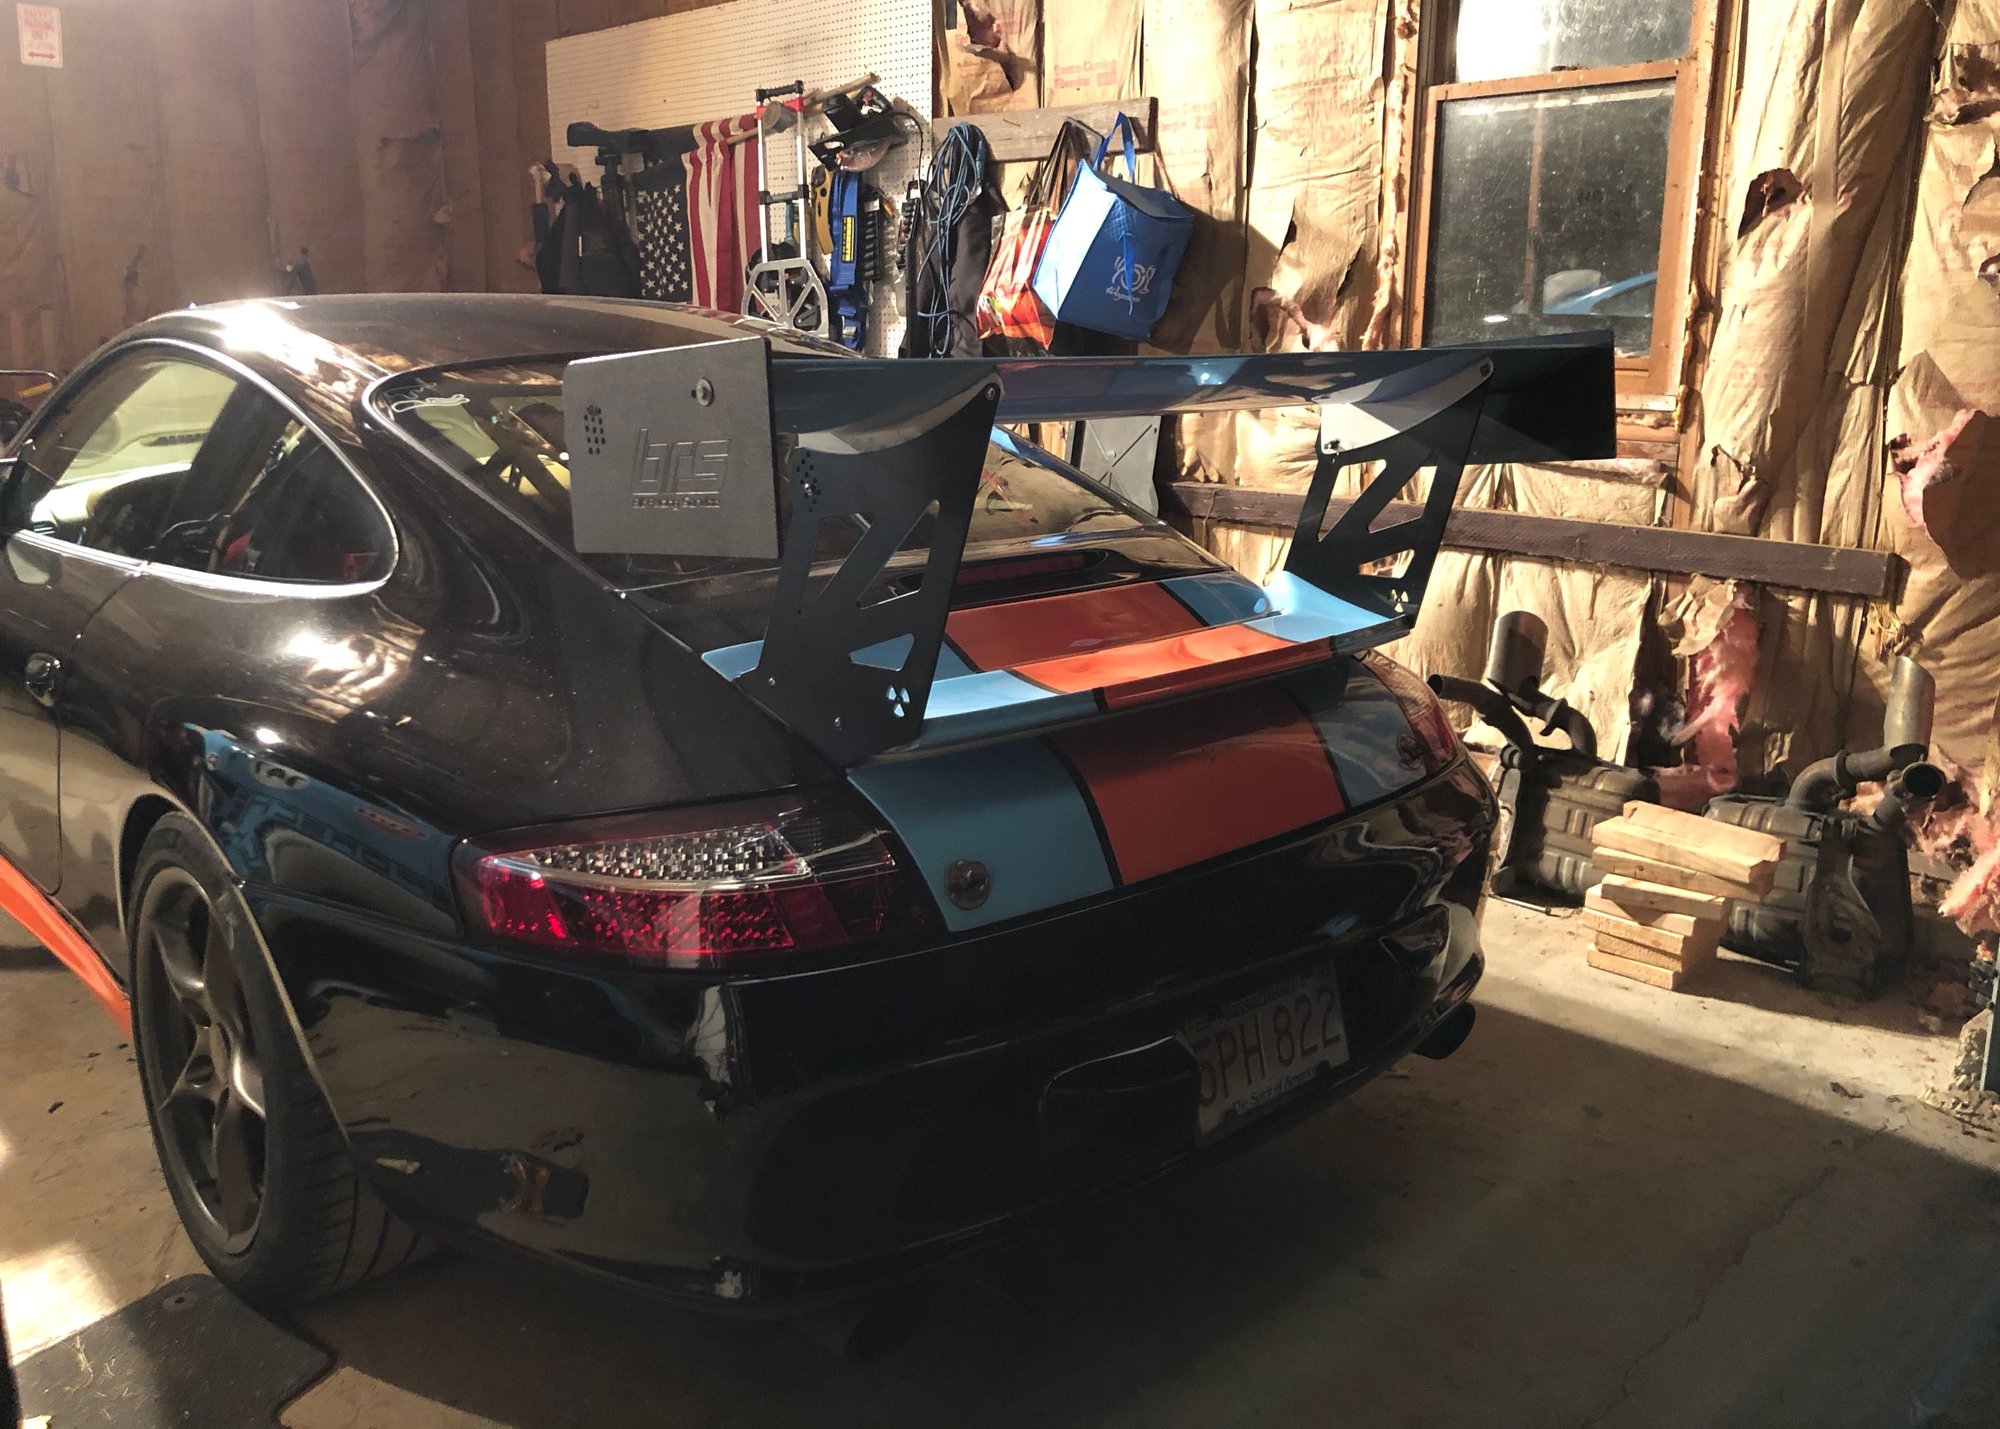
I really like the looks of you car now.
How are the dive planes attached, adhesive?
Thanks Tex !
I am going to use in this order : 2 sided 3M VHB, 3 screws and washers, an aluminum backing plate inside rear bumper, 3 nuts and washers.
Joe T doe not make the dive planes for the 2nd gen 996, he suggested the 986 version for closest fit - its workable but not perfect. The screws would be needed in any case in this situation to suck the part up to the bumper for good seal between the bumper and part.
 09-21-2020, 08:06 AM
 And of course got some surprises. The passenger headlamp assembly was dead and I found that the male plug had some busted tabs and so no longer was fixed into the mounting plate. Gonna blame that one on the body shop. The ballast was a little corroded but nothing prepared me for the driver side assembly (which still works). The ballast is corroded to **** and the rubber seals are like goo. I�d say there�s a relationship there. So I have some unanticipated work to do, but that�s OK since I bought this car to tinker with. (I�m a completely novice mechanic).
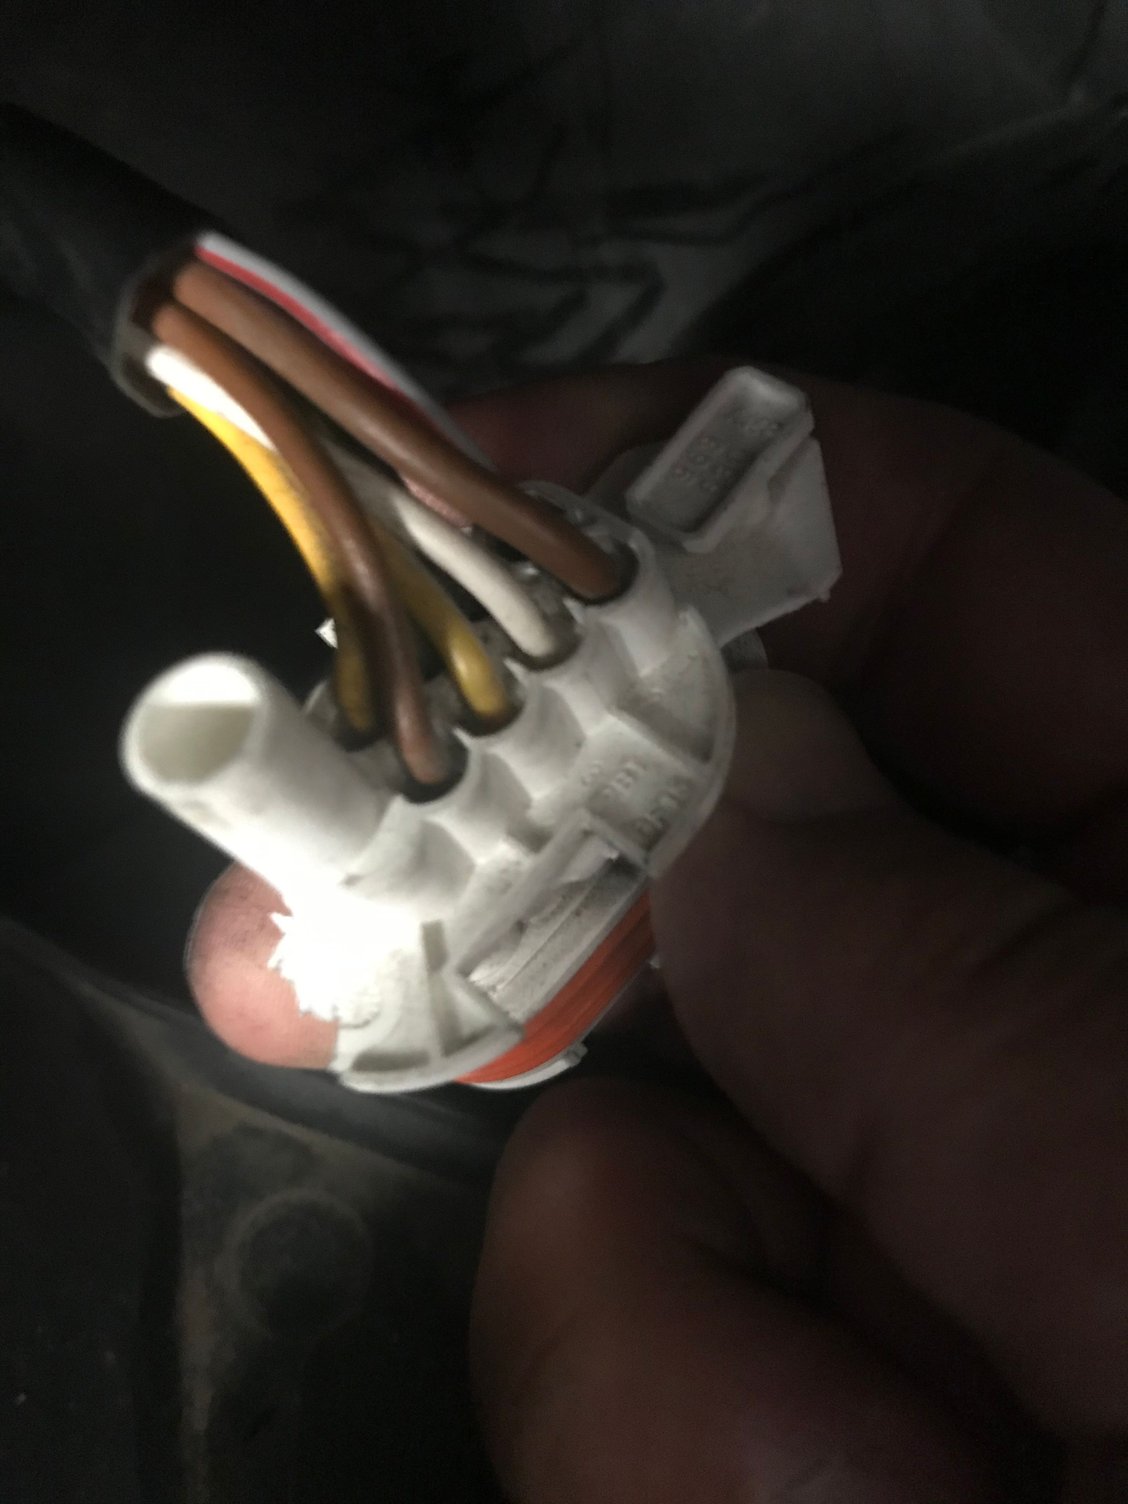


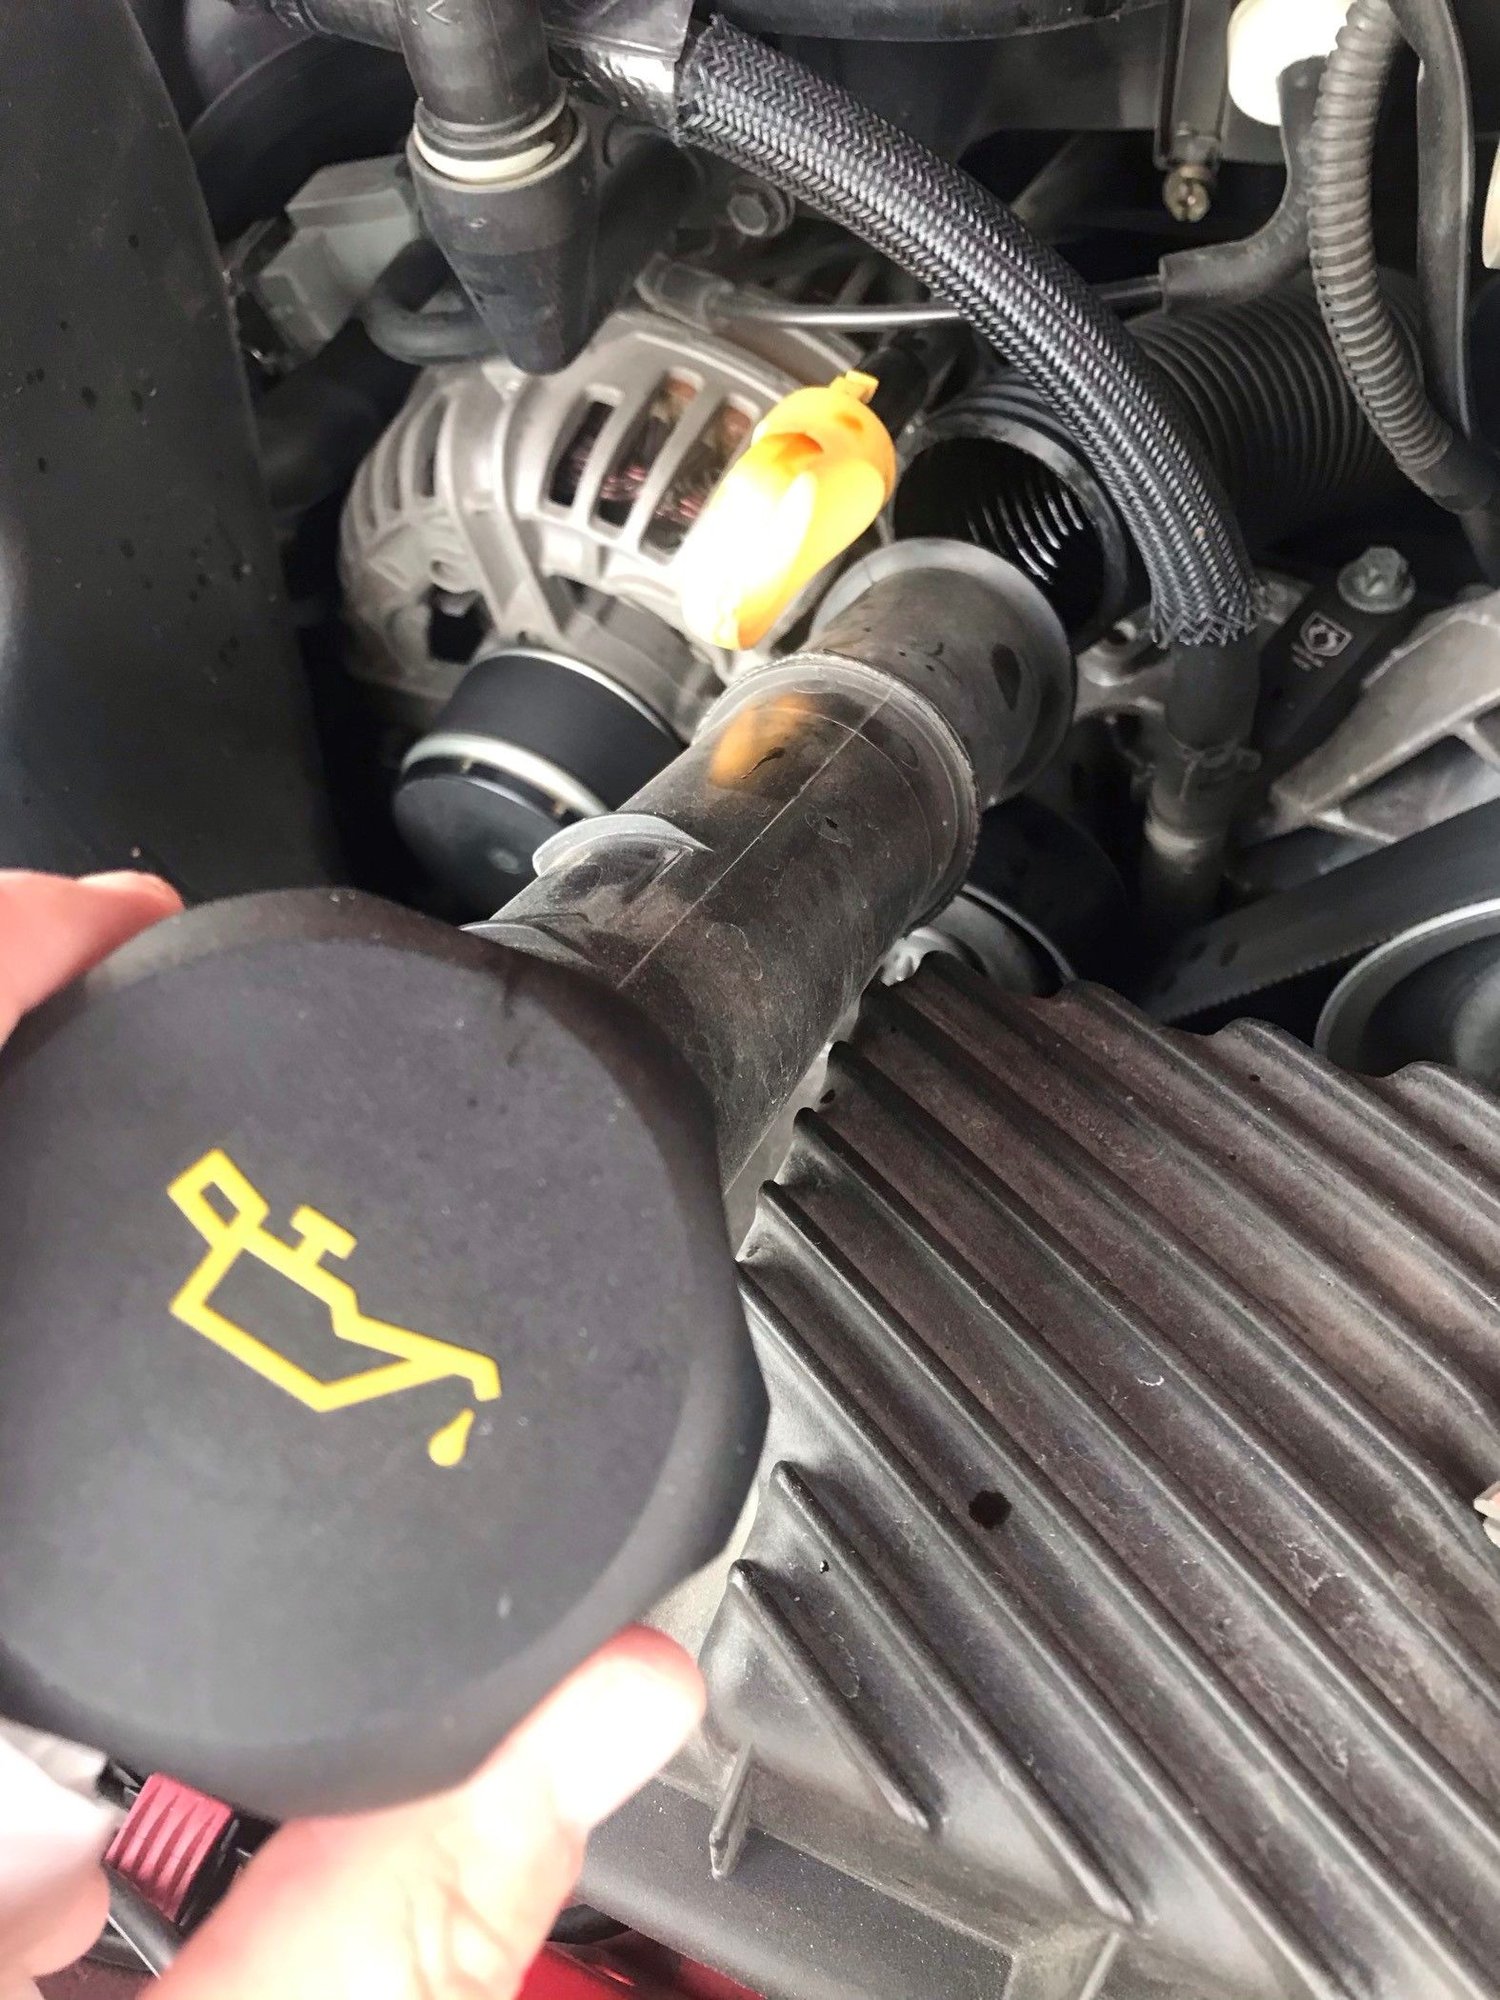


 Then put everything back together and turn your old oil fill cap into a manometer testing cap.