When you click on links to various merchants on this site and make a purchase, this can result in this site earning a commission. Affiliate programs and affiliations include, but are not limited to, the eBay Partner Network.
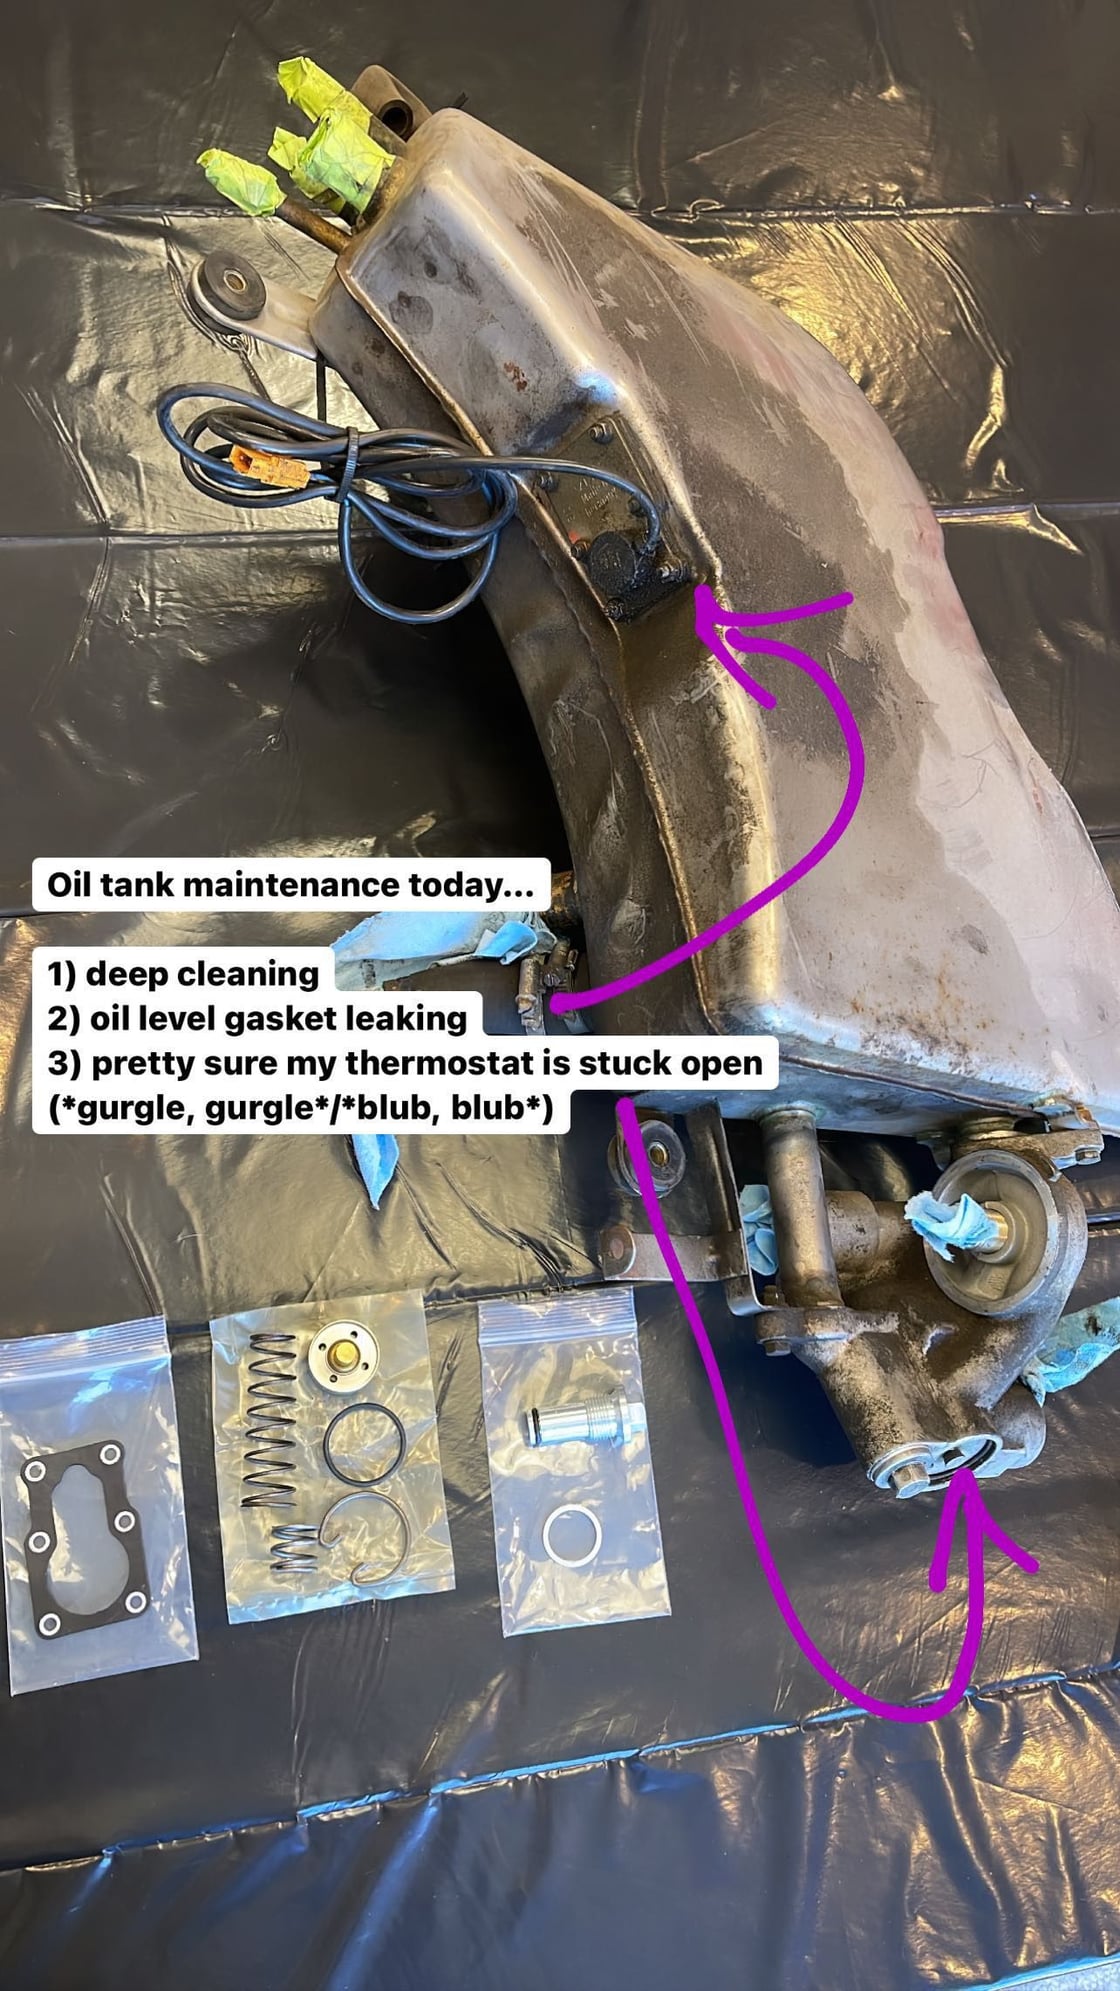
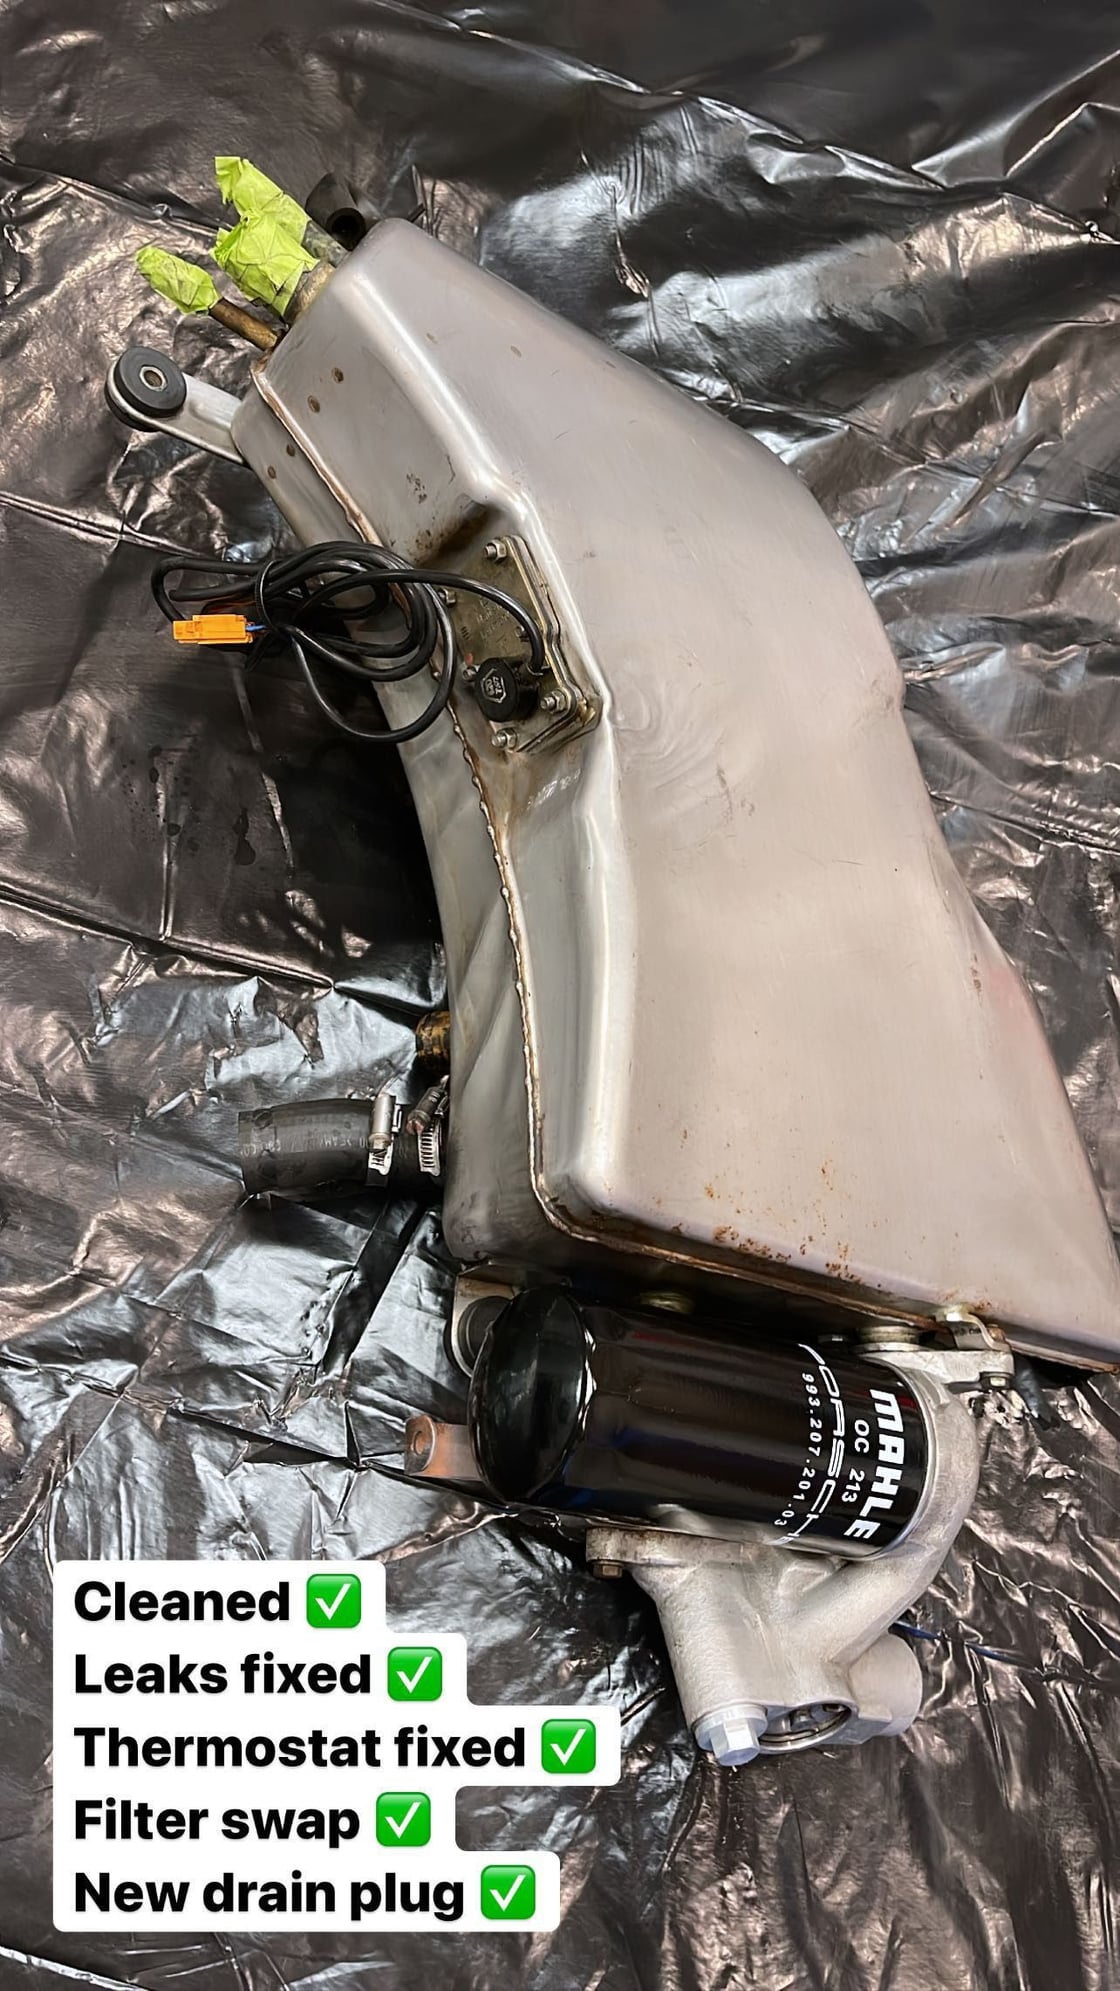
Oil tank got a rehab as well. Gasket on the level gauge was leaking and replaced. Deep cleaning on the outside.
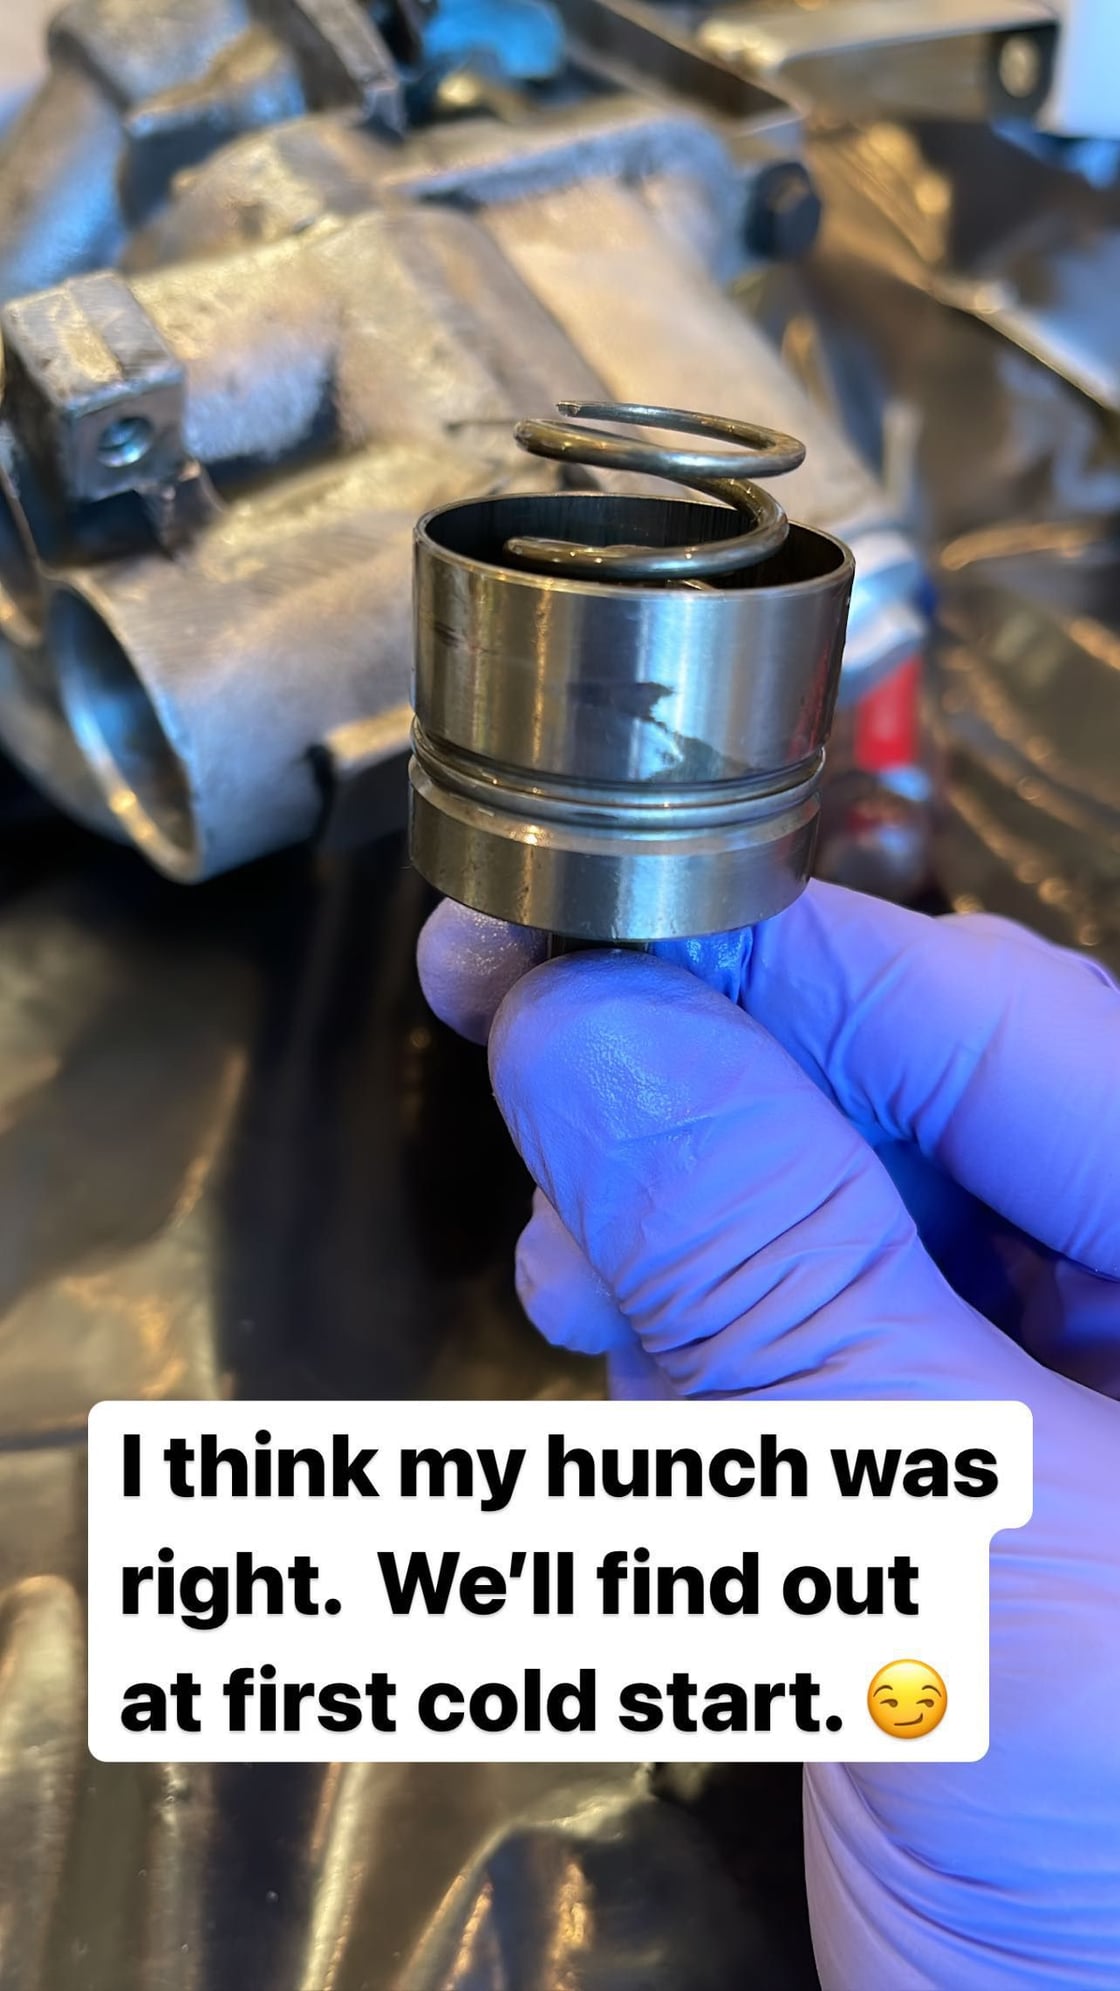
Also my thermostat needed replacing (a strong hunch based on sounds at cold start). Dismantled it and found it was bent. Indeed it must have been stuck open and jammed in there ****-eyed. We'll see...
New drain plug to boot.
Last edited by boomboomthump; 04-05-2022 at 05:41 PM.
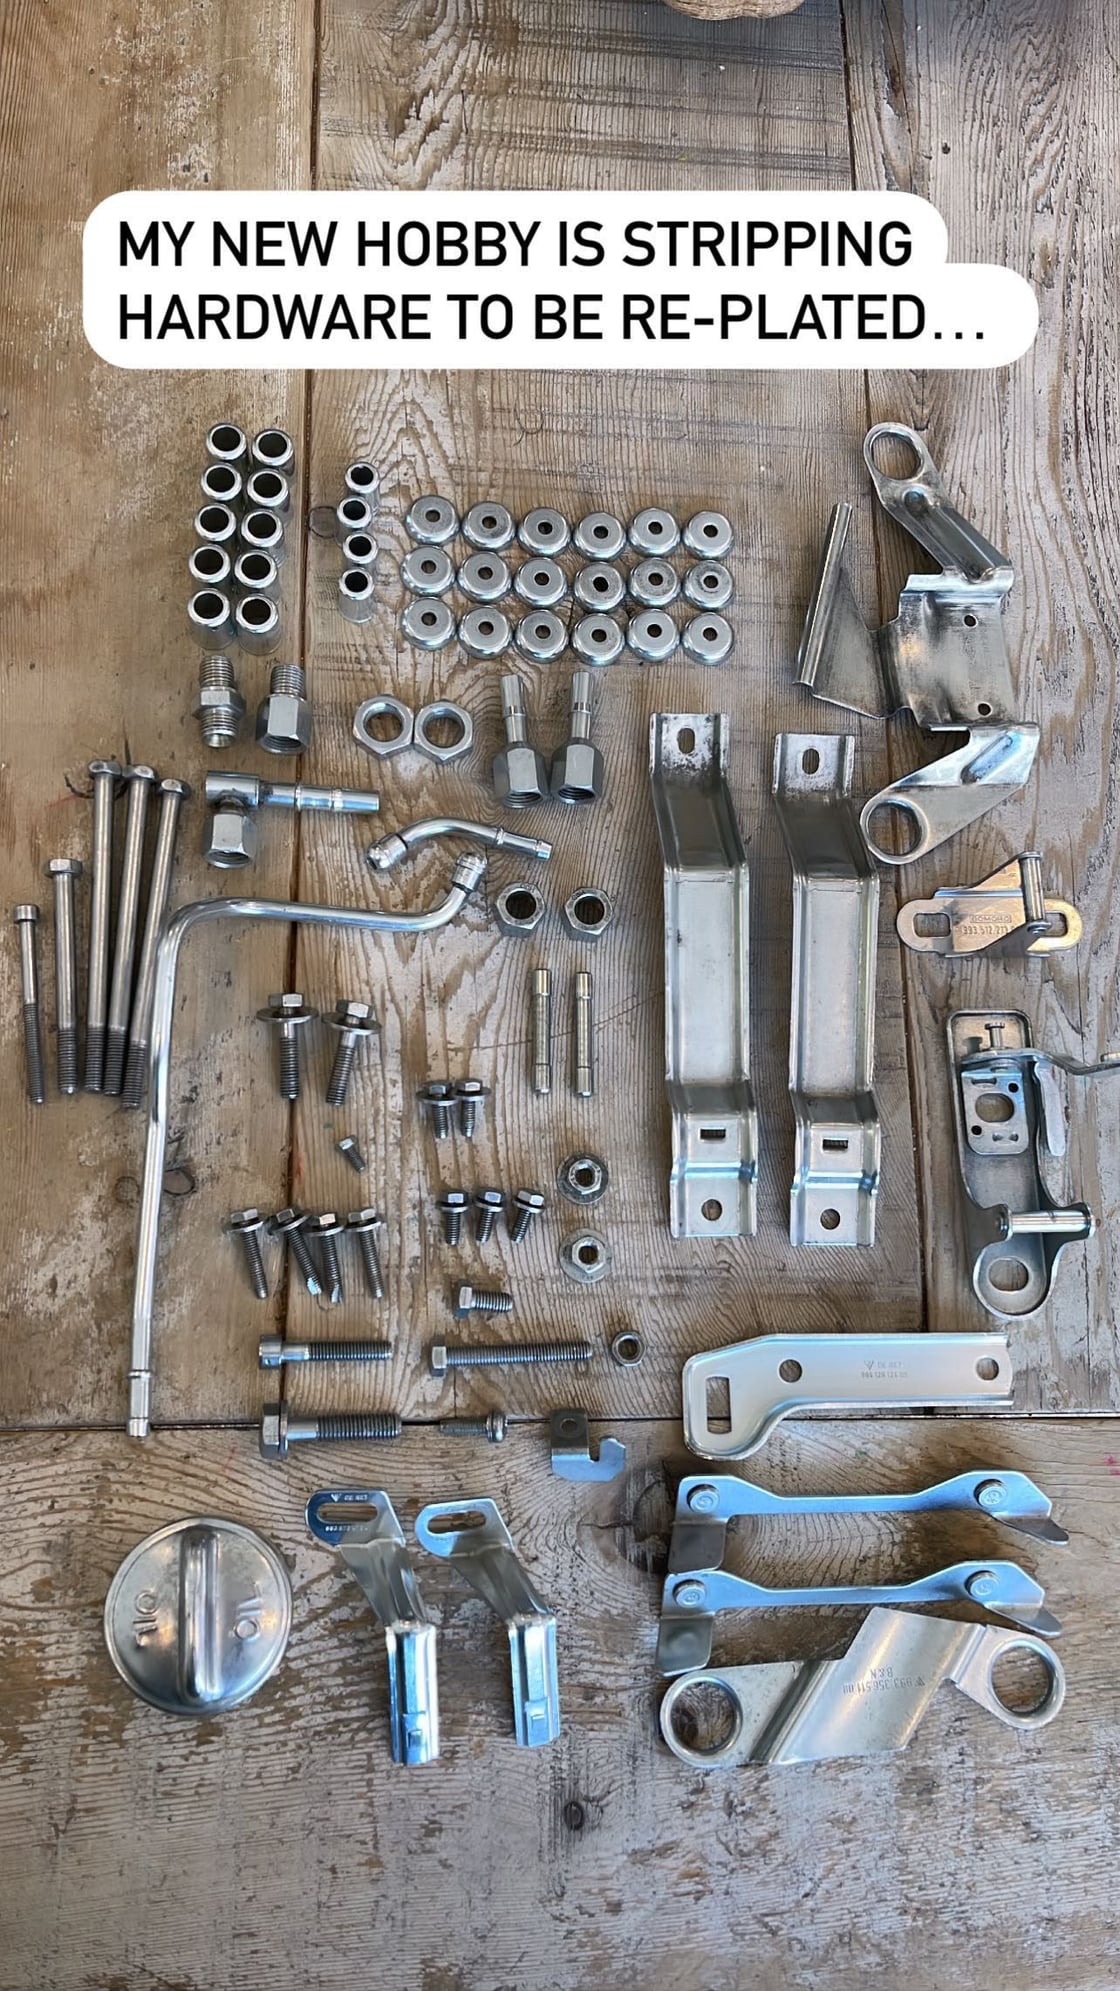
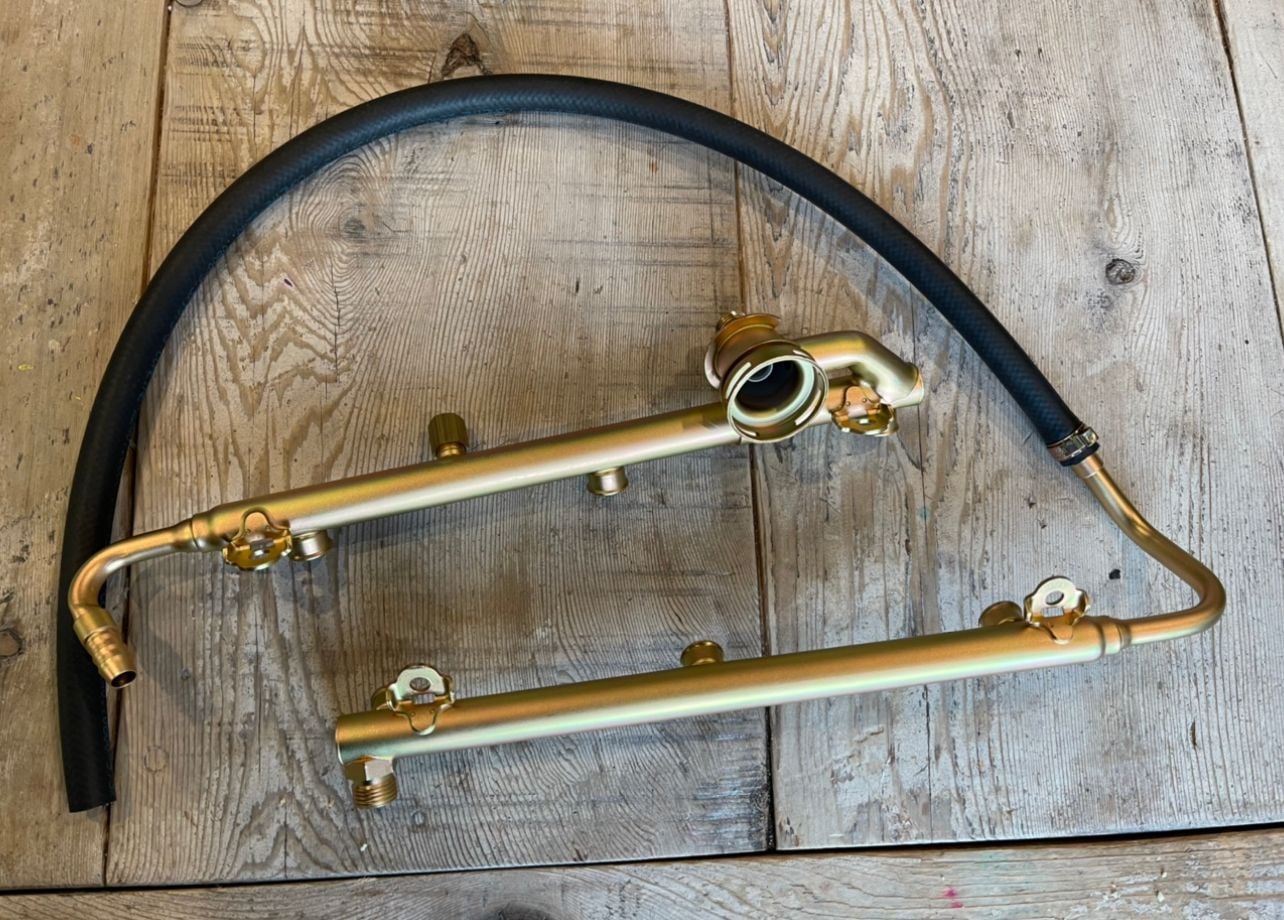
Stripped a bunch of hardware, brackets and other items to be re-plated including my fuel rails and all fuel line bits so I can re-crimp new lines.
Highly recommend anyone seeking their parts re-plated to strip/clean and polish all hardware so the plater is ready to go. Polished parts will come out a lot more shiny in the end. If the plater is blasting or acid bathing the parts, they will have a more matte/dull finish (as can be seen on the fuel rails).
Process I used was this (on all parts except fuel rails):
Naval jelly on all parts for 5 minutes, then rinse in cold water
Use thick rubber gloves (this is acid)
This will remove some rust and also wipe off any old zinc plating as you towel dry them
Run parts for 24 hrs in vibratory tumbler (such as Harbor freight 18lb tumbler, the smaller one isn't strong enough)
Use the green pyramid media
Add a mixture of water and your favorite degreaser (Simple Green HD is what I used) so that the level is just up to the top of the media
This will remove remaining rust and leave all the parts clean and practically new looking (but not shiny)
Any extreme/severe rust/pitting cannot be fully removed but this should be very minimal (I had a few "spots" here and there on a couple parts or bolts. The zinc plating will cover this to an extent and encapsulate it.)
Run parts for 24 hrs in crushed walnut media with a few generous squirts of metal polish cream not paste (I used Nu Finish)
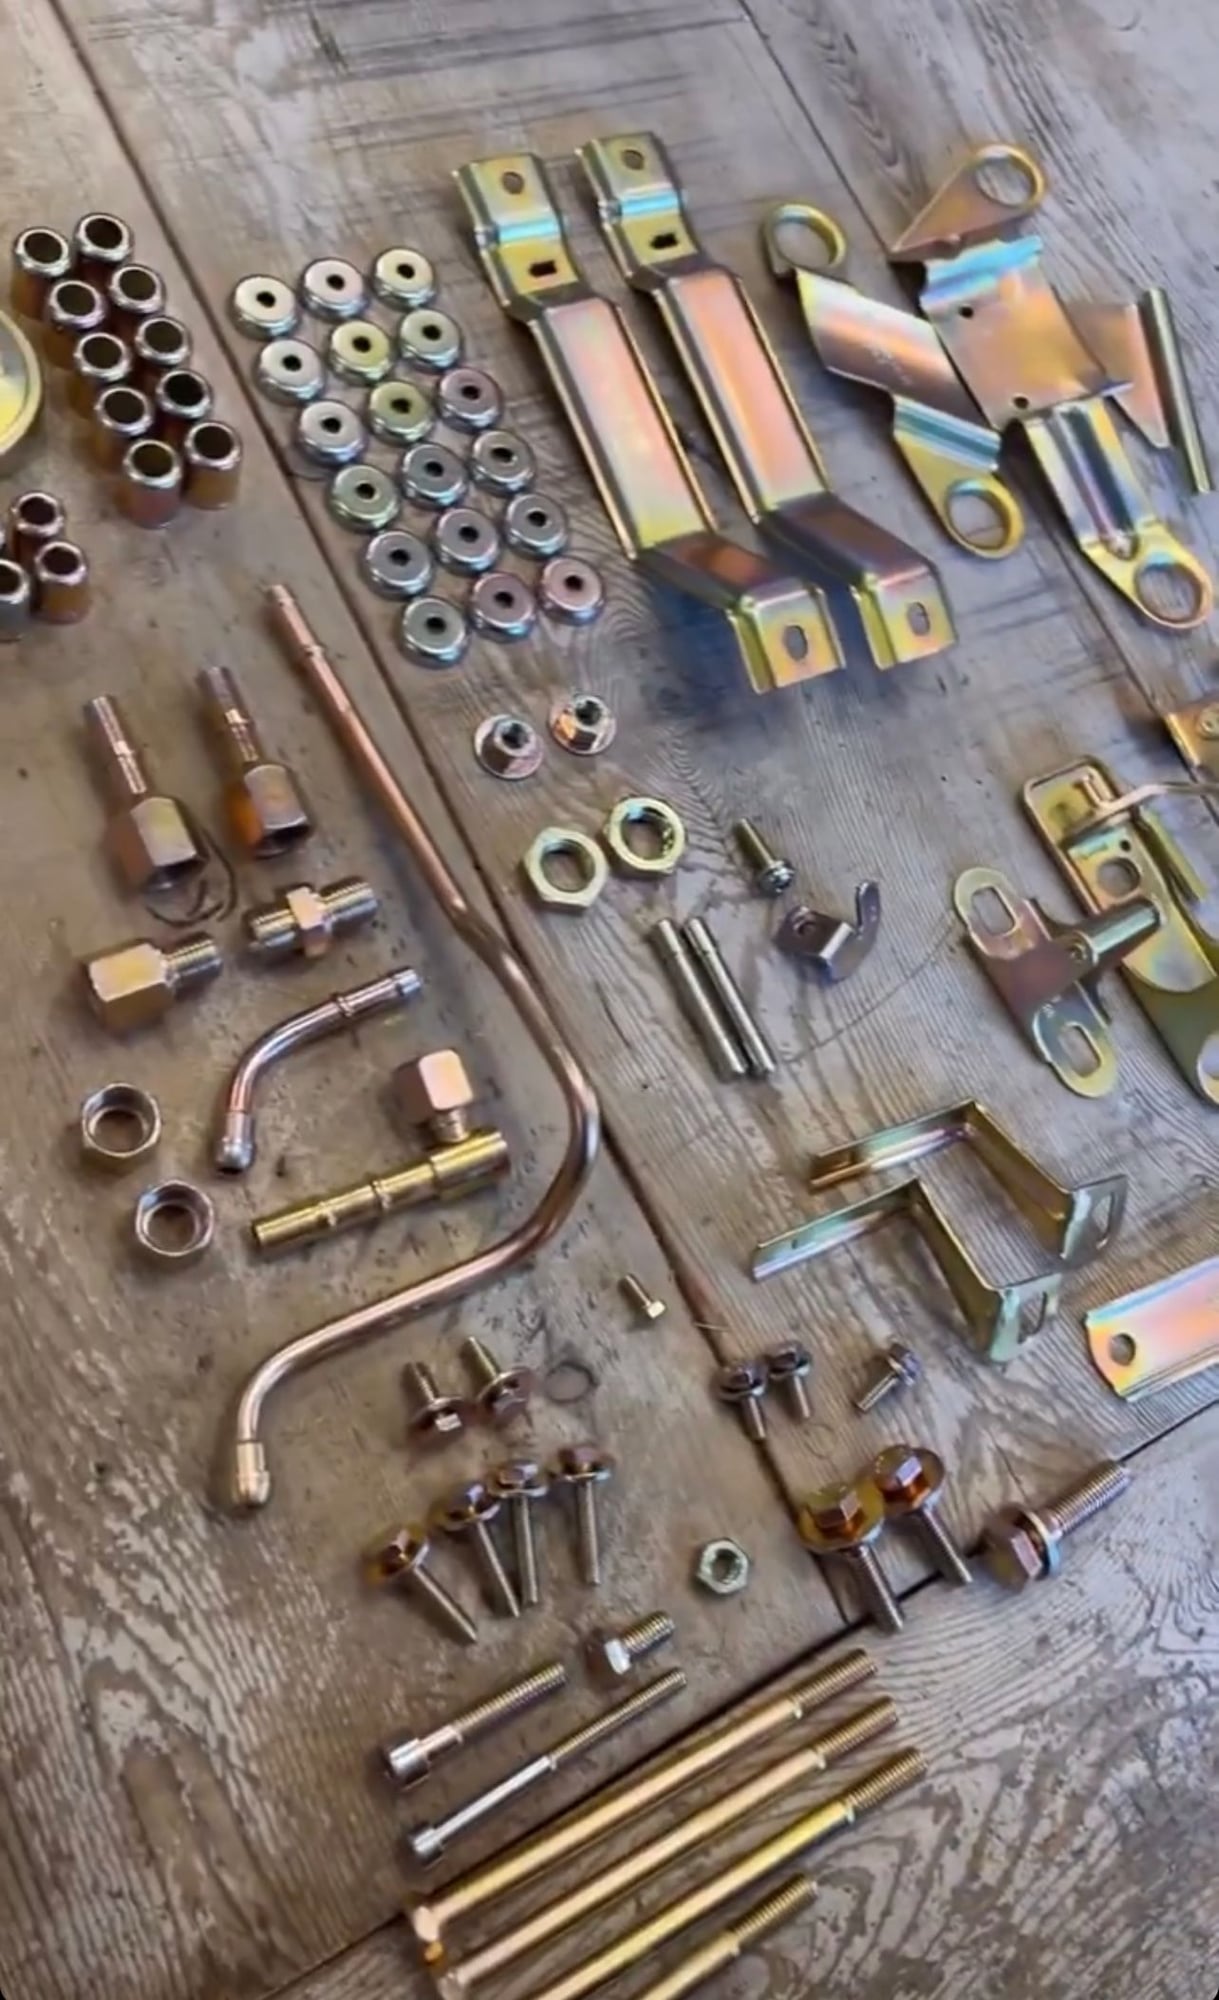
After that the parts will be clean, smooth and shiny, ready for plating as seen below. I couldnt do this for the fuel rails due to size and also didn't even know these tips ahead of time. In hindsight, I would have tried stripping them and then buffing a bit on a bench top buffer before plating.
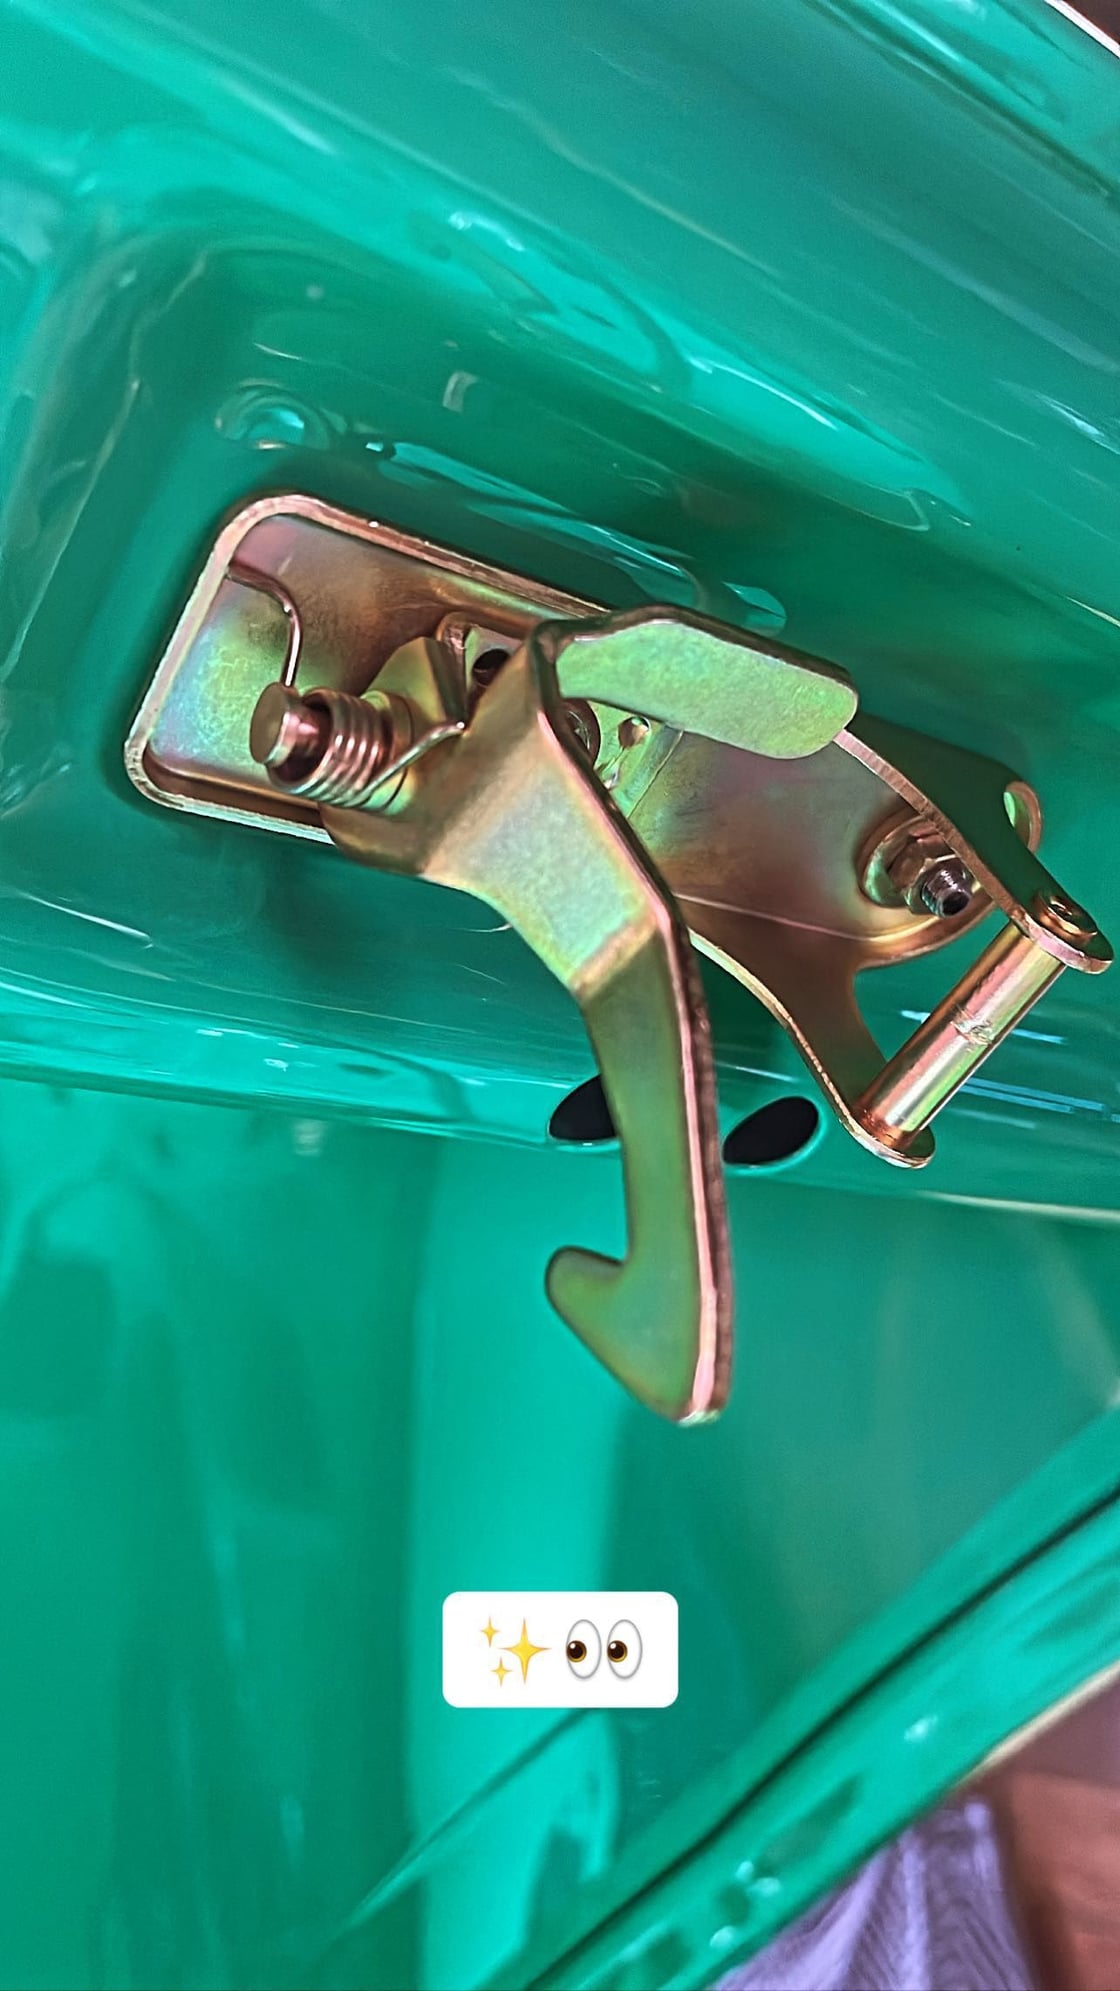
BTW, the "after" photo is a screen capture from a video, so it's a bit fuzzy. The parts came out very shiny and just like factory fresh looking hardware, etc. I didn't take a still photo, so this is the best I could do. You can see in the following photo of the hood latch how nice the finish came out (result of polishing the parts before plating) as compared to the matte looking finish on the fuel rails.
Last edited by boomboomthump; 04-06-2022 at 09:18 AM.
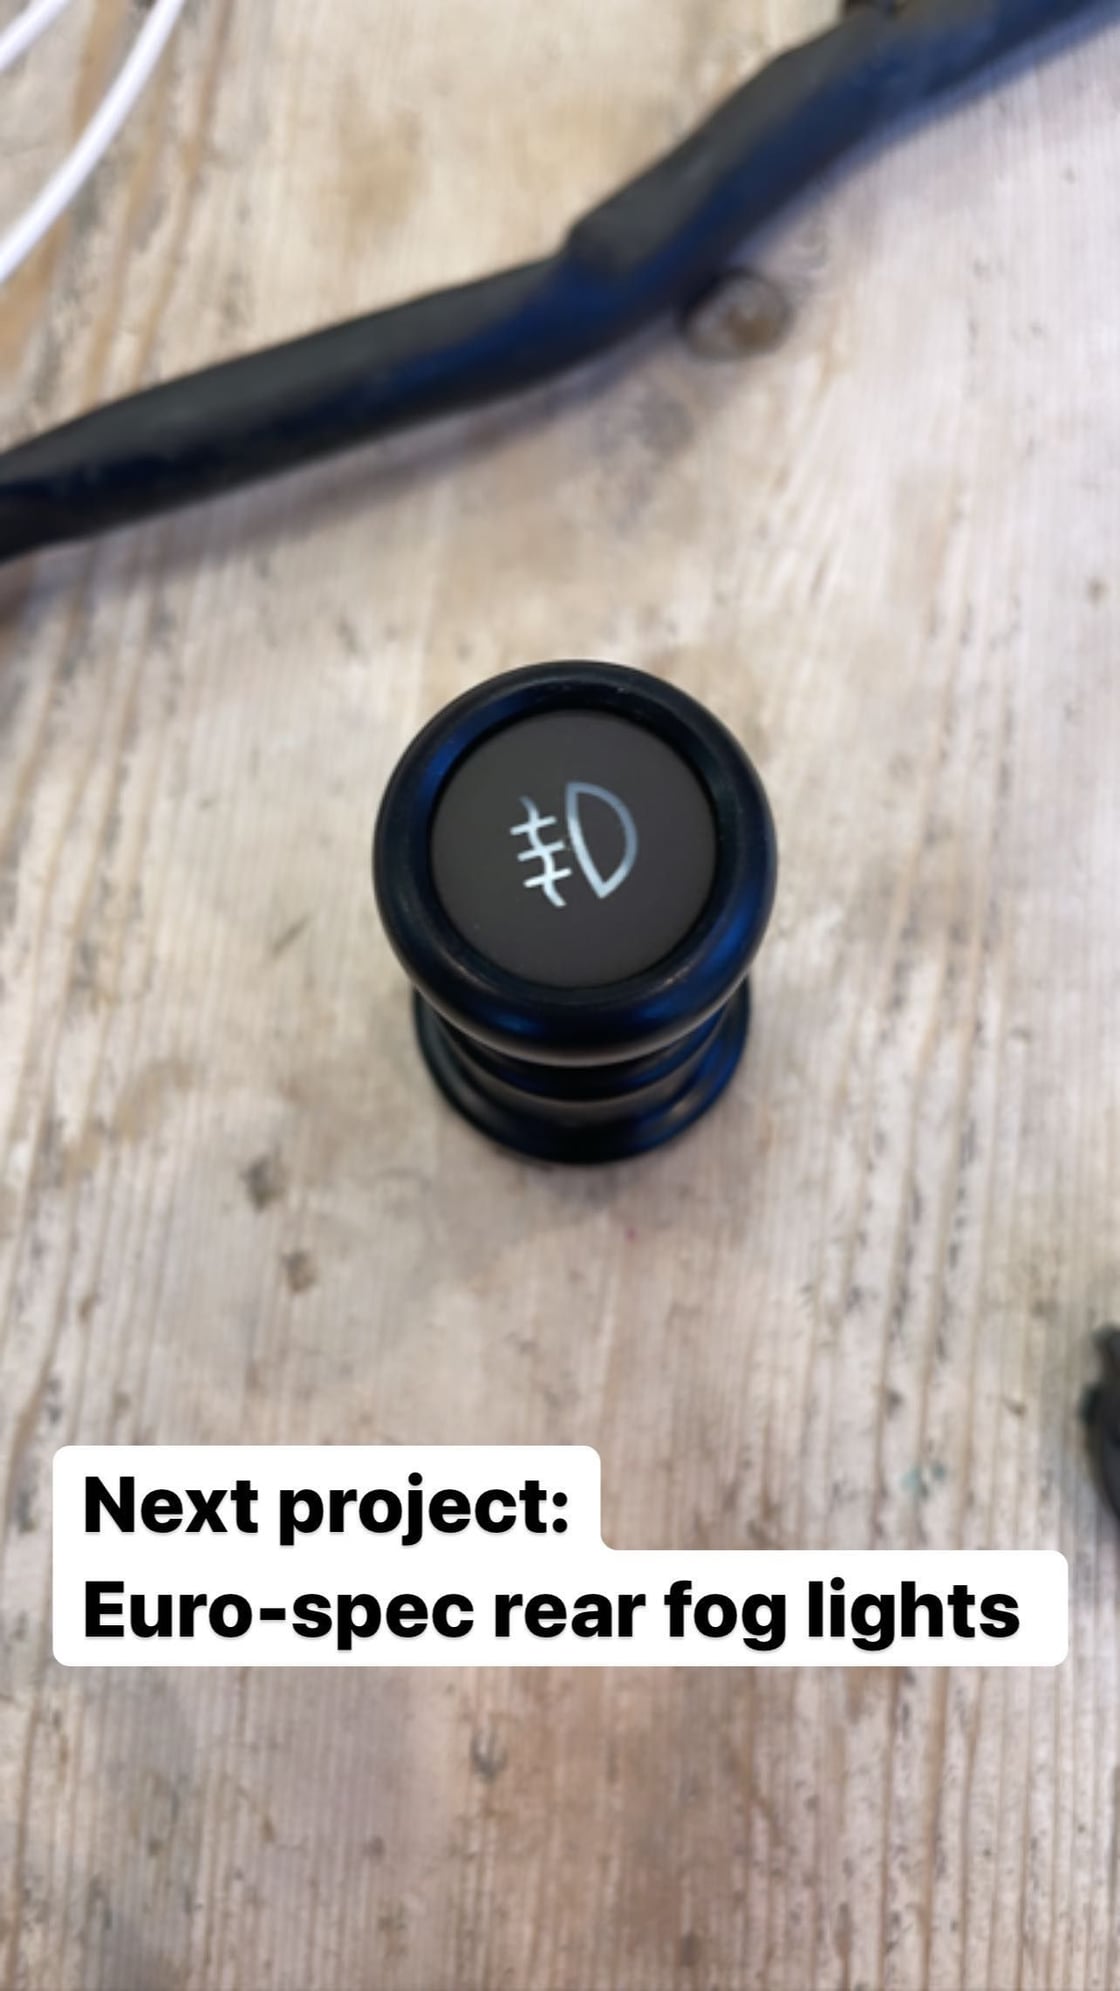
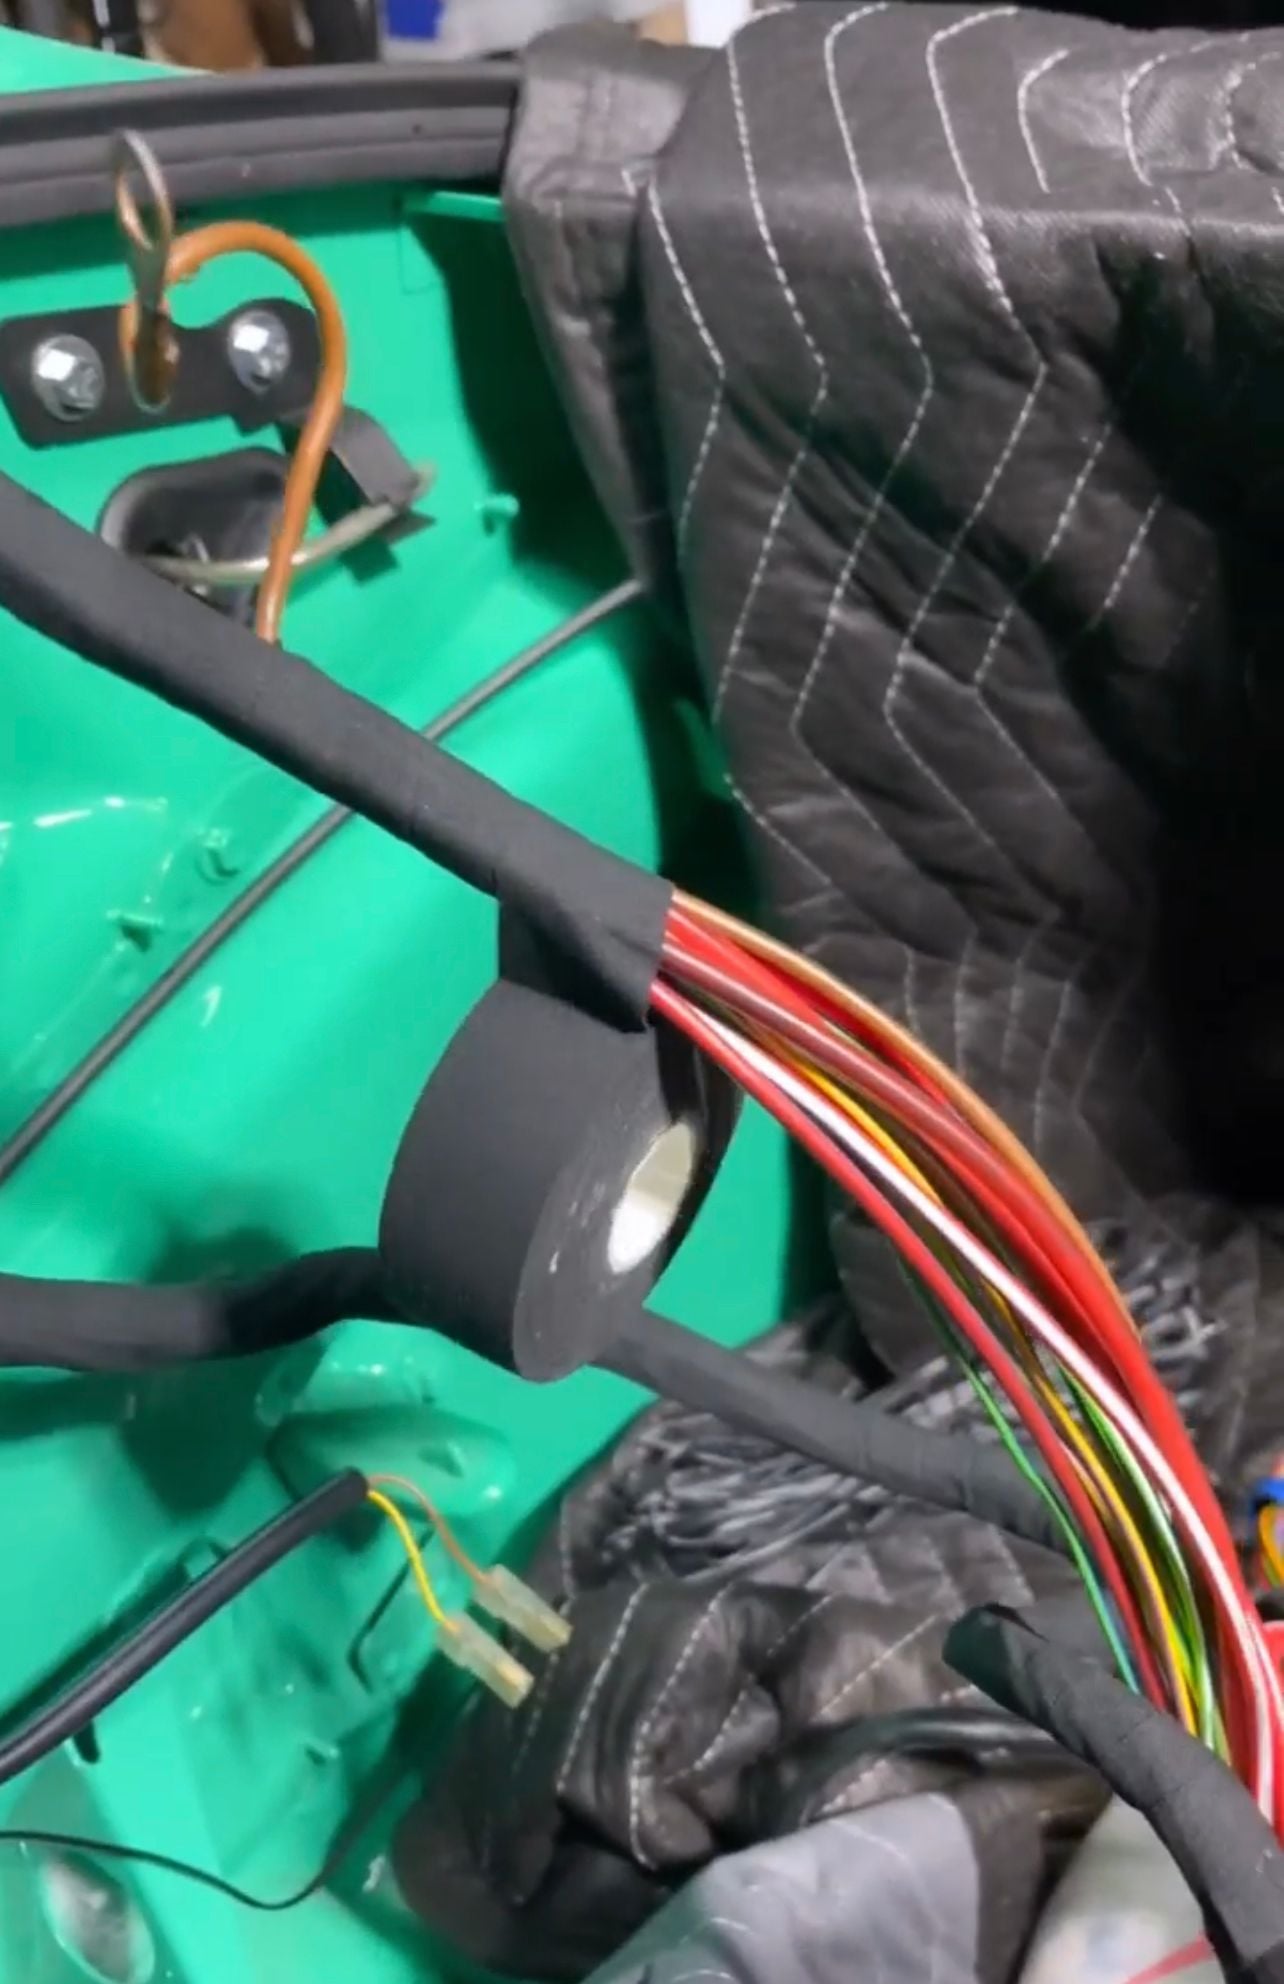
Purely because I'm not a fan of the "blank" on the dashboard between the foglight switch and cig lighter, I decided to add euro-spec rear fog lights.
There's some old tutorials on this floating around out there where they tell you to get the switch parts and tell you how to wire. One thing that is missing in all those guides is that instead of just soldering wires to the back of the pins on the switch, you can actually buy the connector and all the female pins and make a factory looking connection.
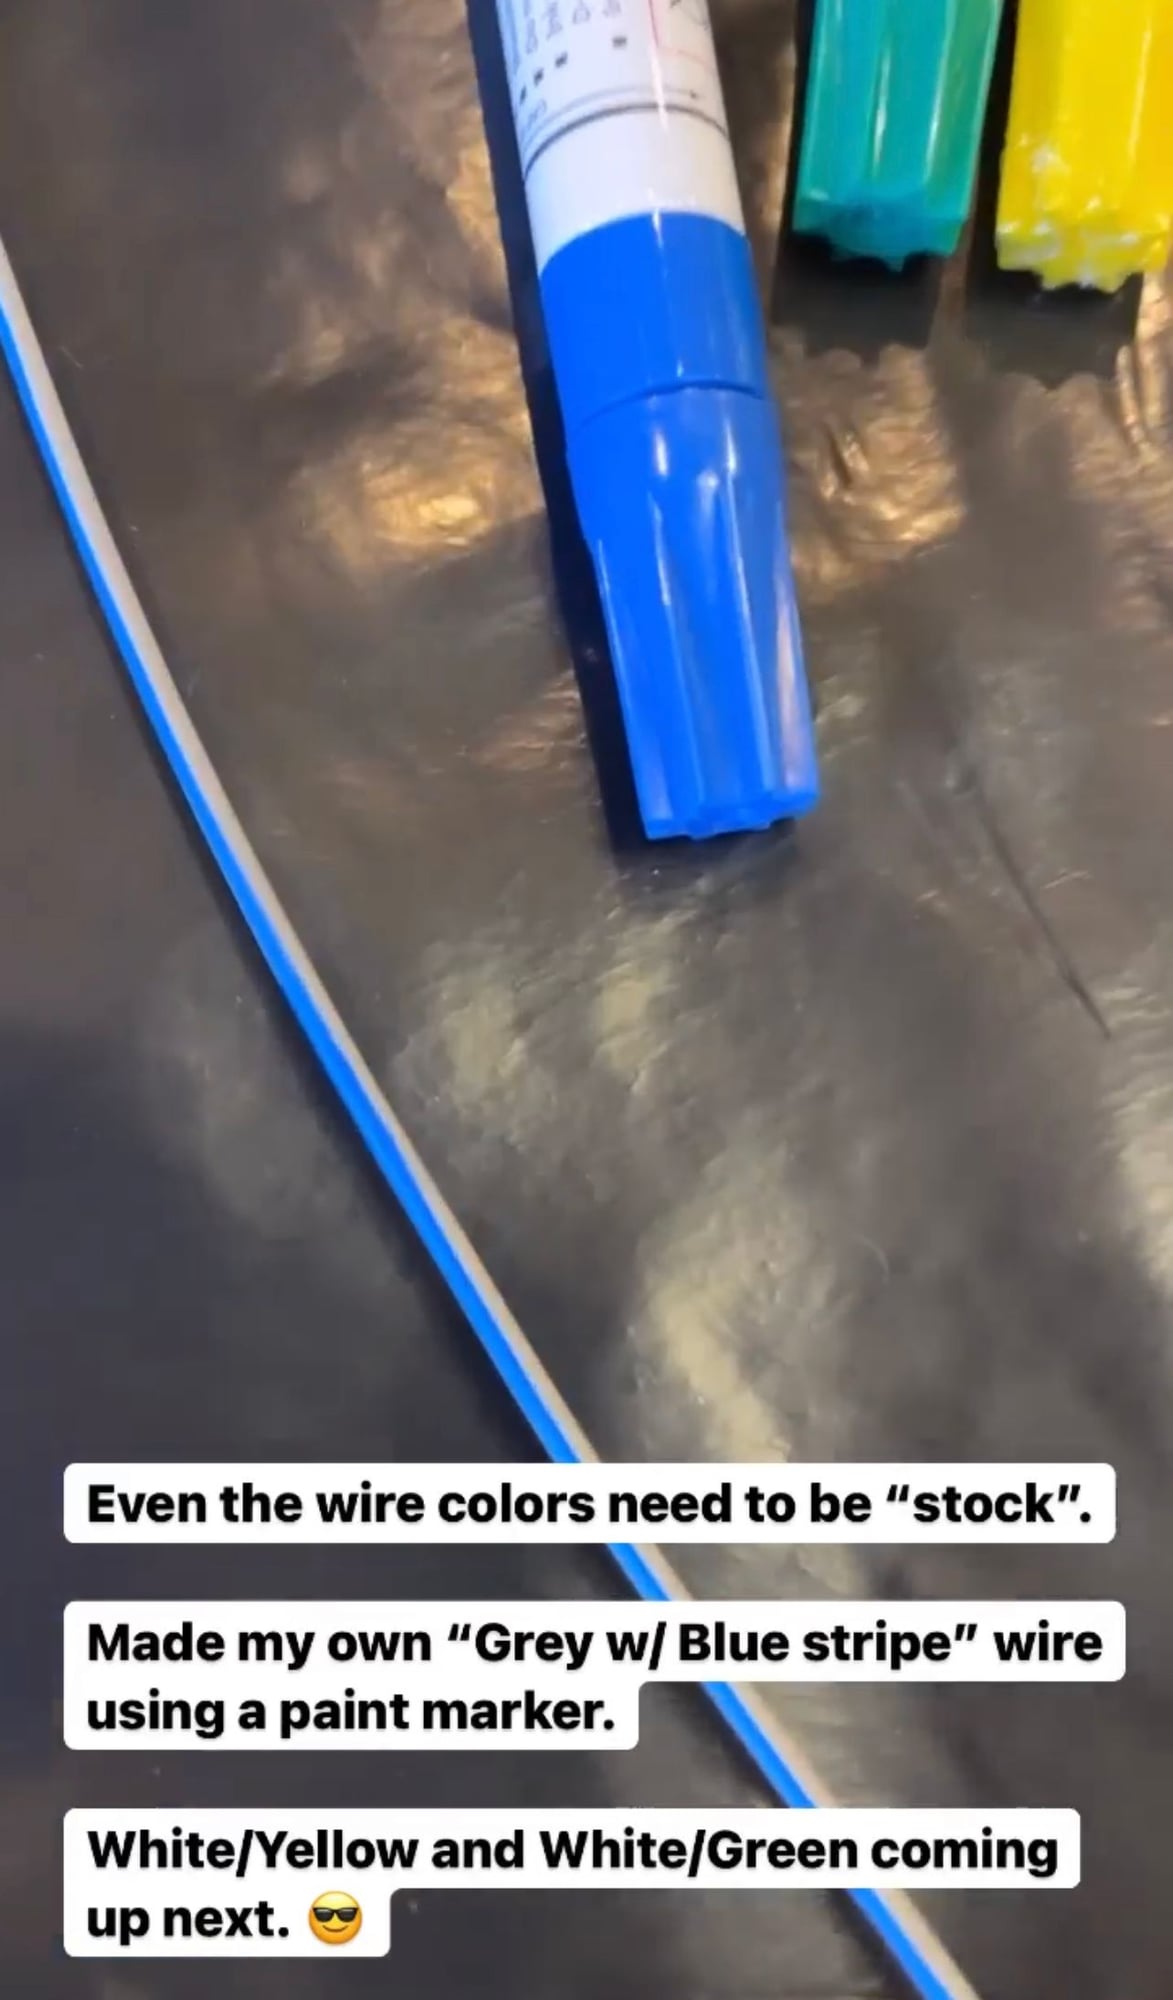
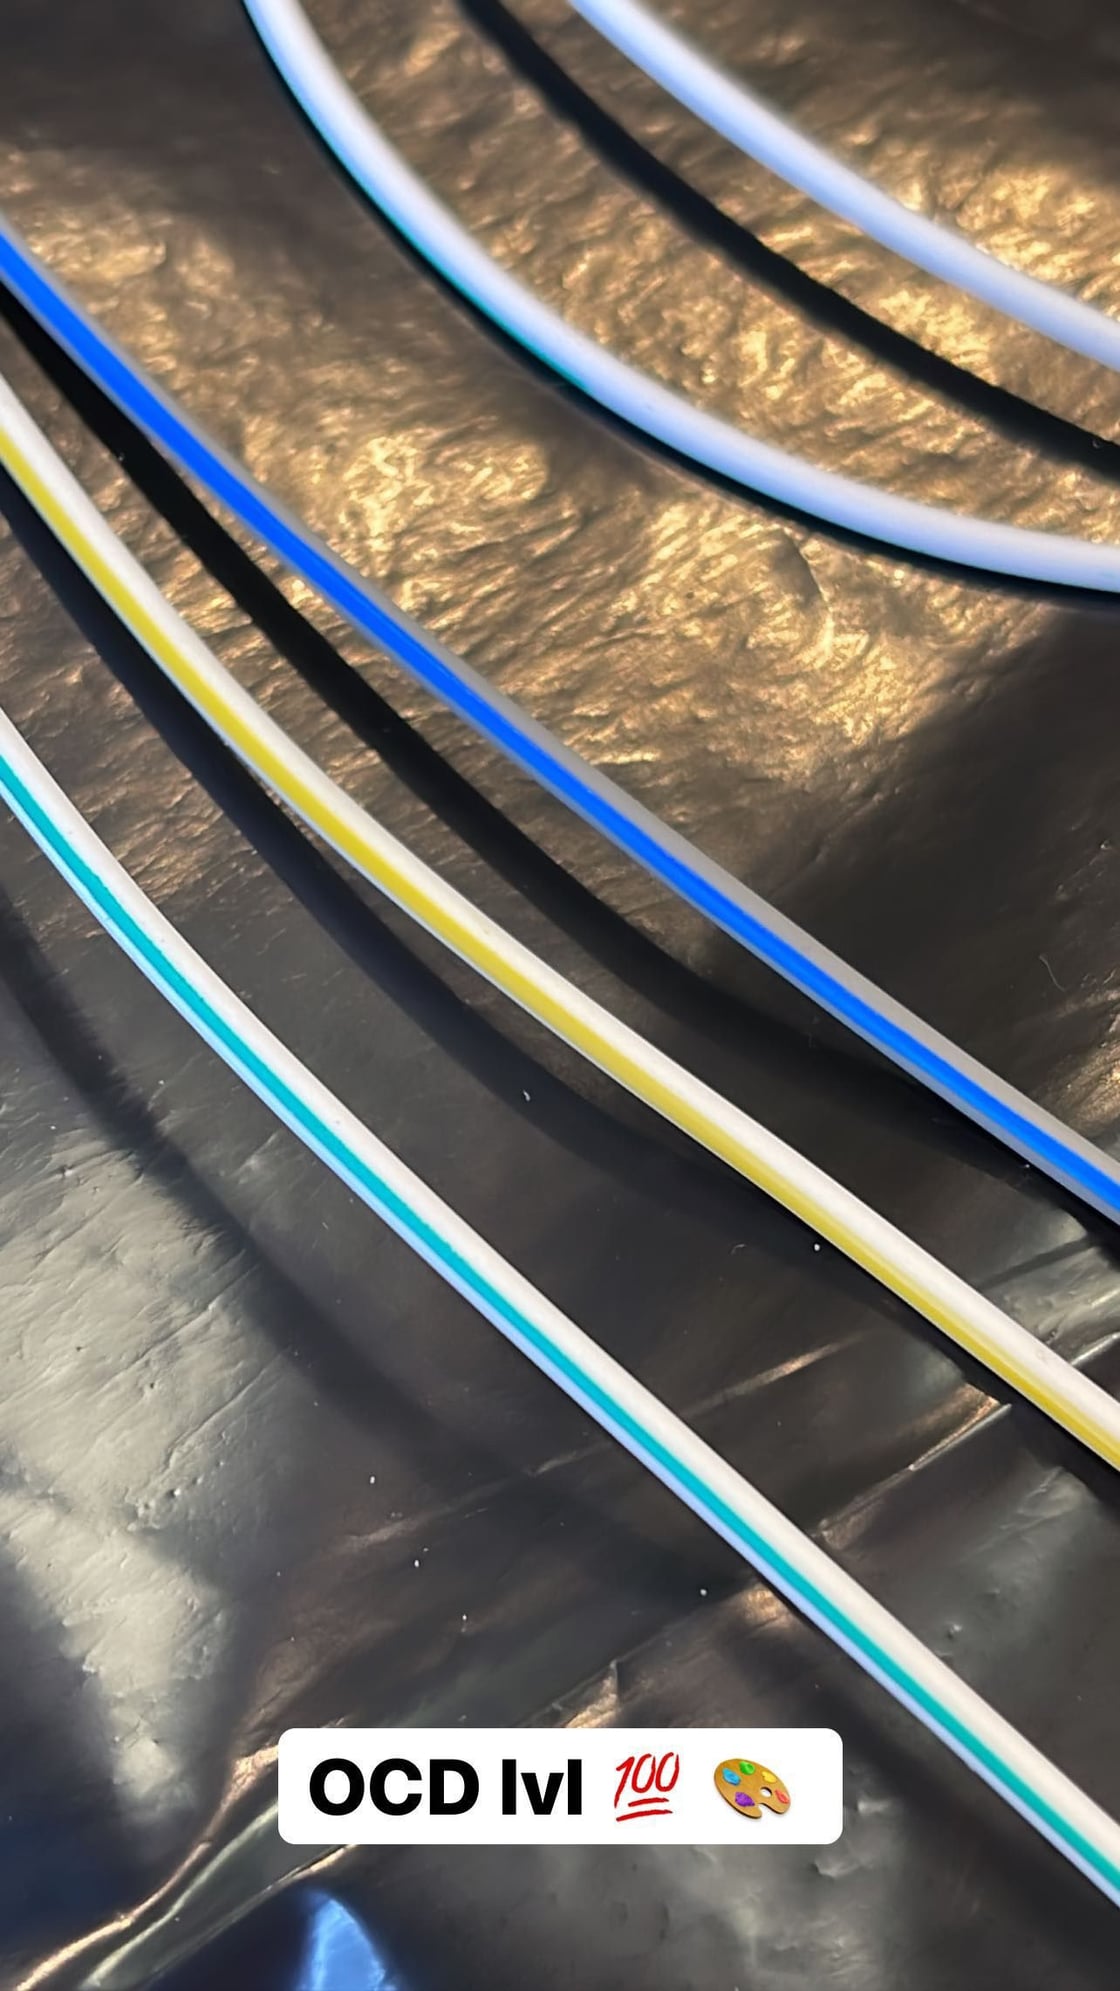
Since my OCD is next level, I decided to go this route, run the wiring through all the factory harnesses and connectors all the way back to the lights. Even though no one will ever see it or care, I even used all the factory wiring colors as shown on the wiring diagram. I made my own custom striped wiring colors using oil based paint markers. Simply turn the marker horizontal and use the side (not the tip) to run a perfectly straight line of paint onto a solid colored wire.
Bonus tip: for really long wire runs, you can convince your 6 yr old daughter to hold one end of the wire while you run a colored paint stripe down it as you hold part of the wire and walk away. The challenge here is having her not let go during or for a few minutes after as you let it flash dry real quick.
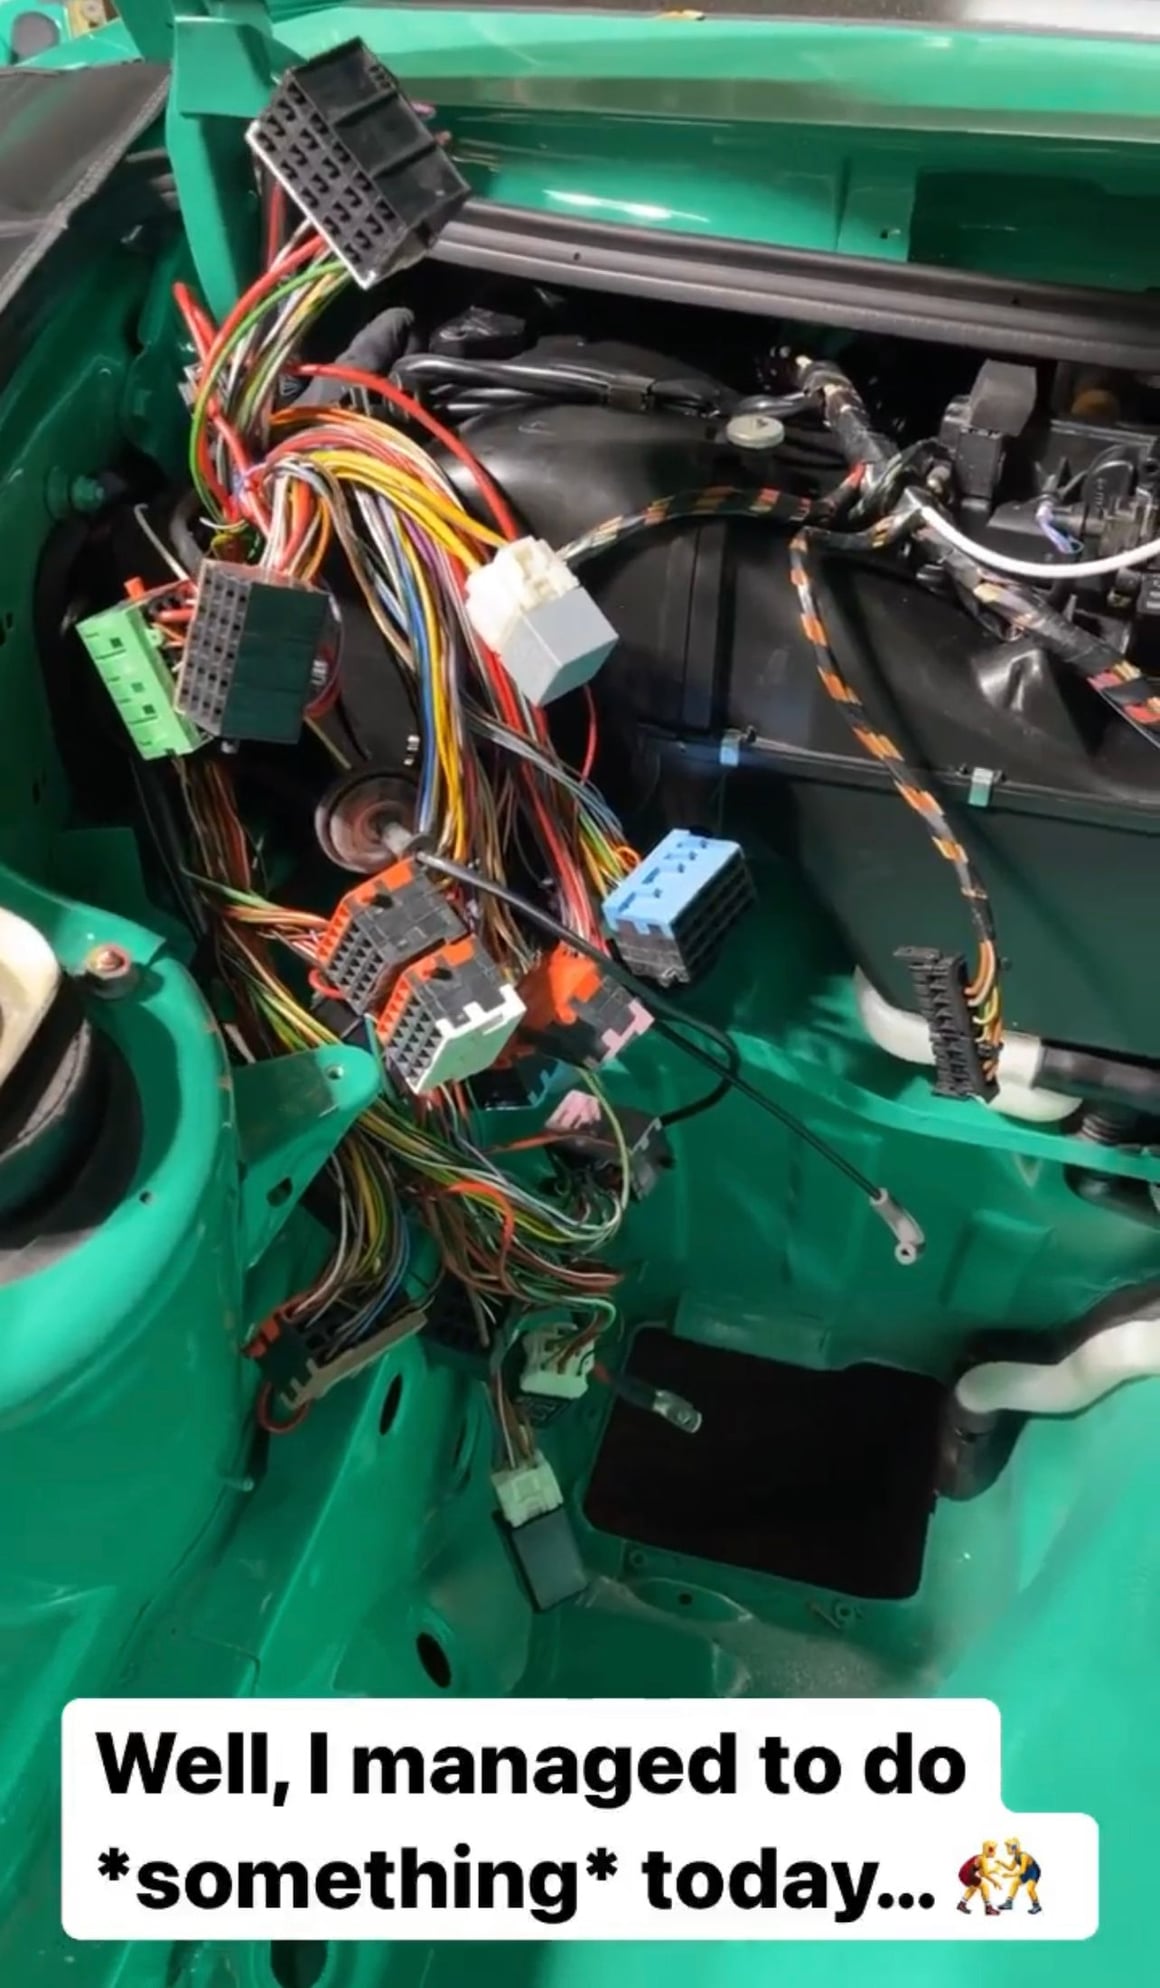
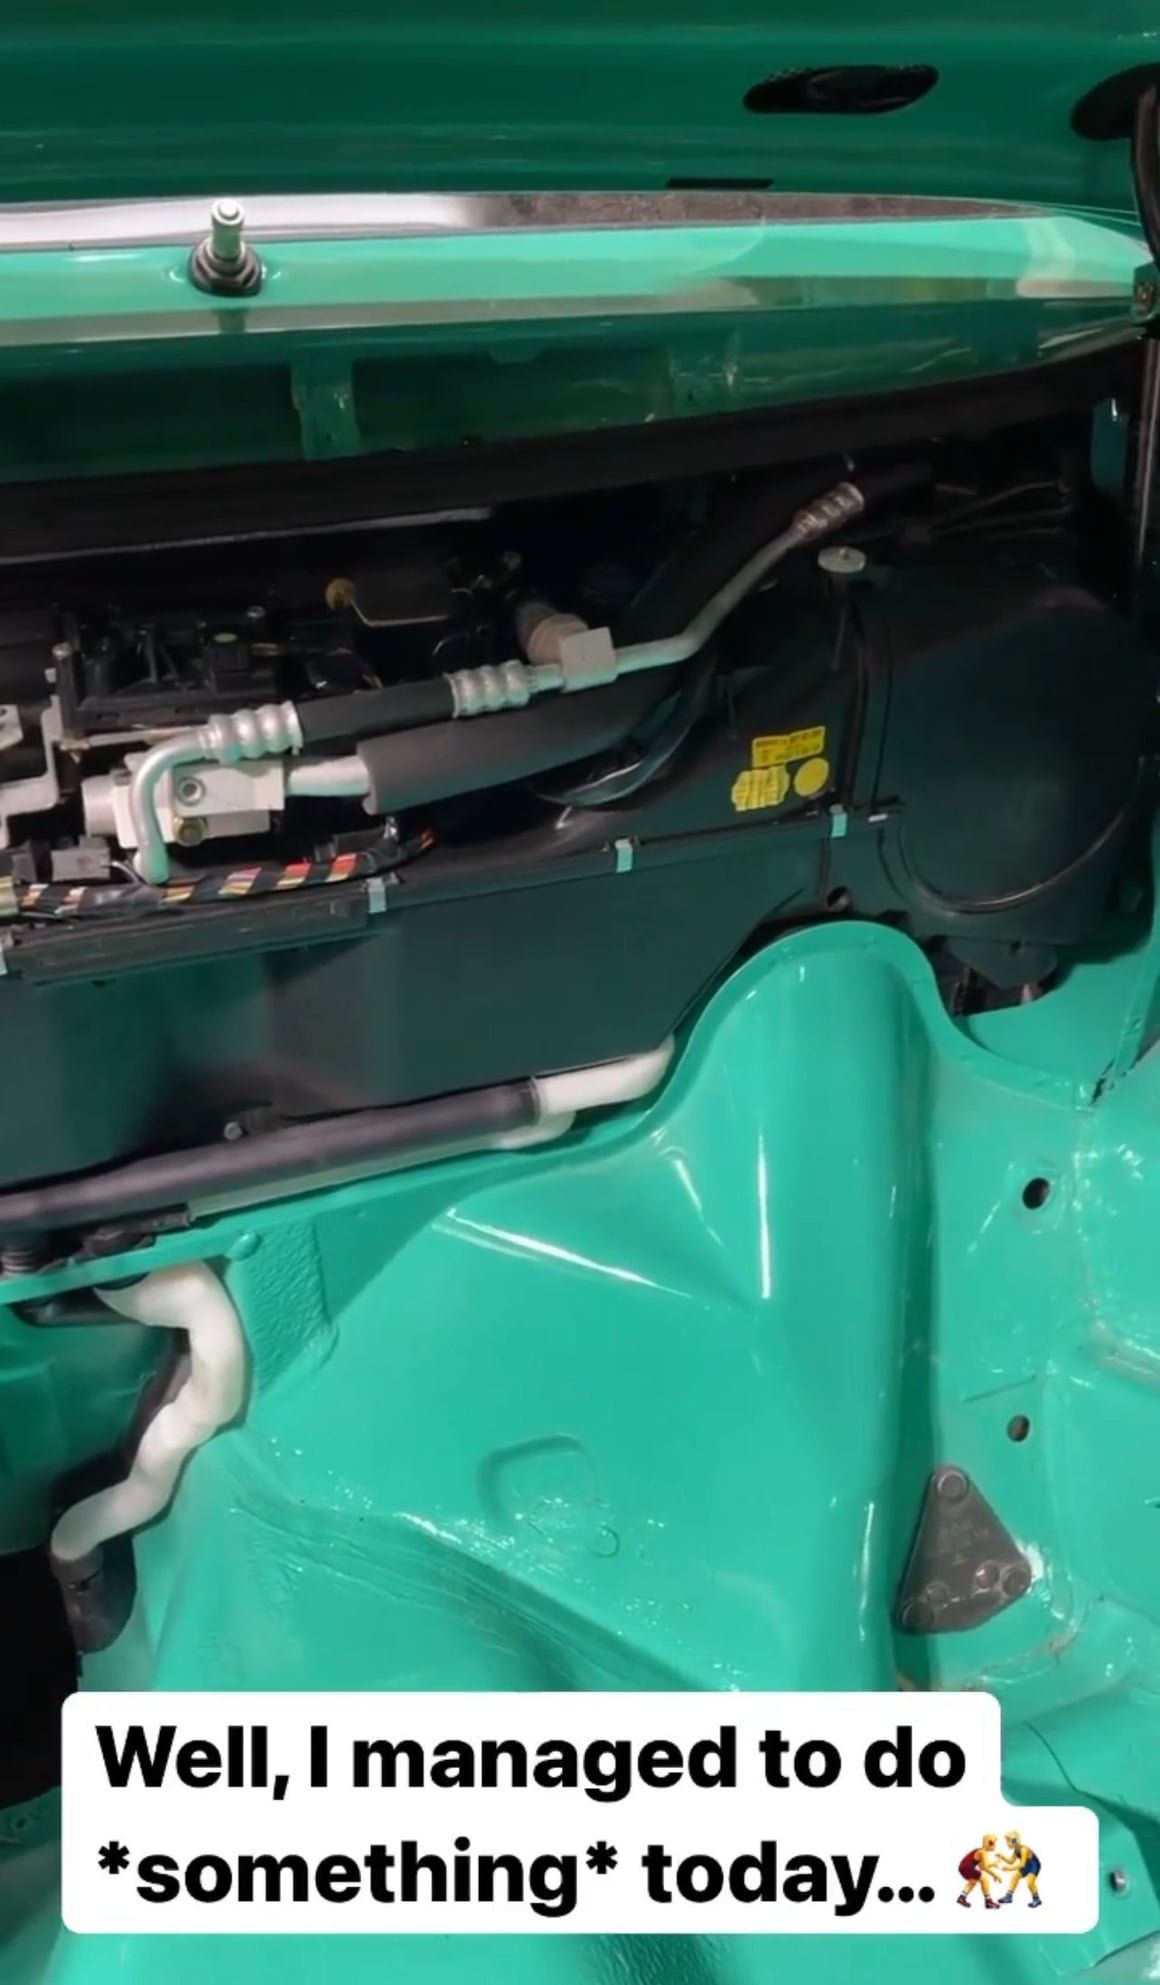
Wrestling match to get the wiring all back into the frunk and then get the HVAC suitcase back in place.
Also re-wrapped all the wiring so it was nice looking. I'm not planning to run carpet as I like the RS look and want it looking tidy in there.
Got the fuel tank installed on Sunday (milestone!) and new brake fluid reservoir and hooked all the lines back up to the reservoir for the clutch/brakes. Next step is the ABD/ABS pump, along with the firewall and fuse panel and then the frunk area is pretty much squared away.
And that pretty much brings us through today. I've got a ton of suspension overhaul items on the way. Here's two other random pics that brought me joy...
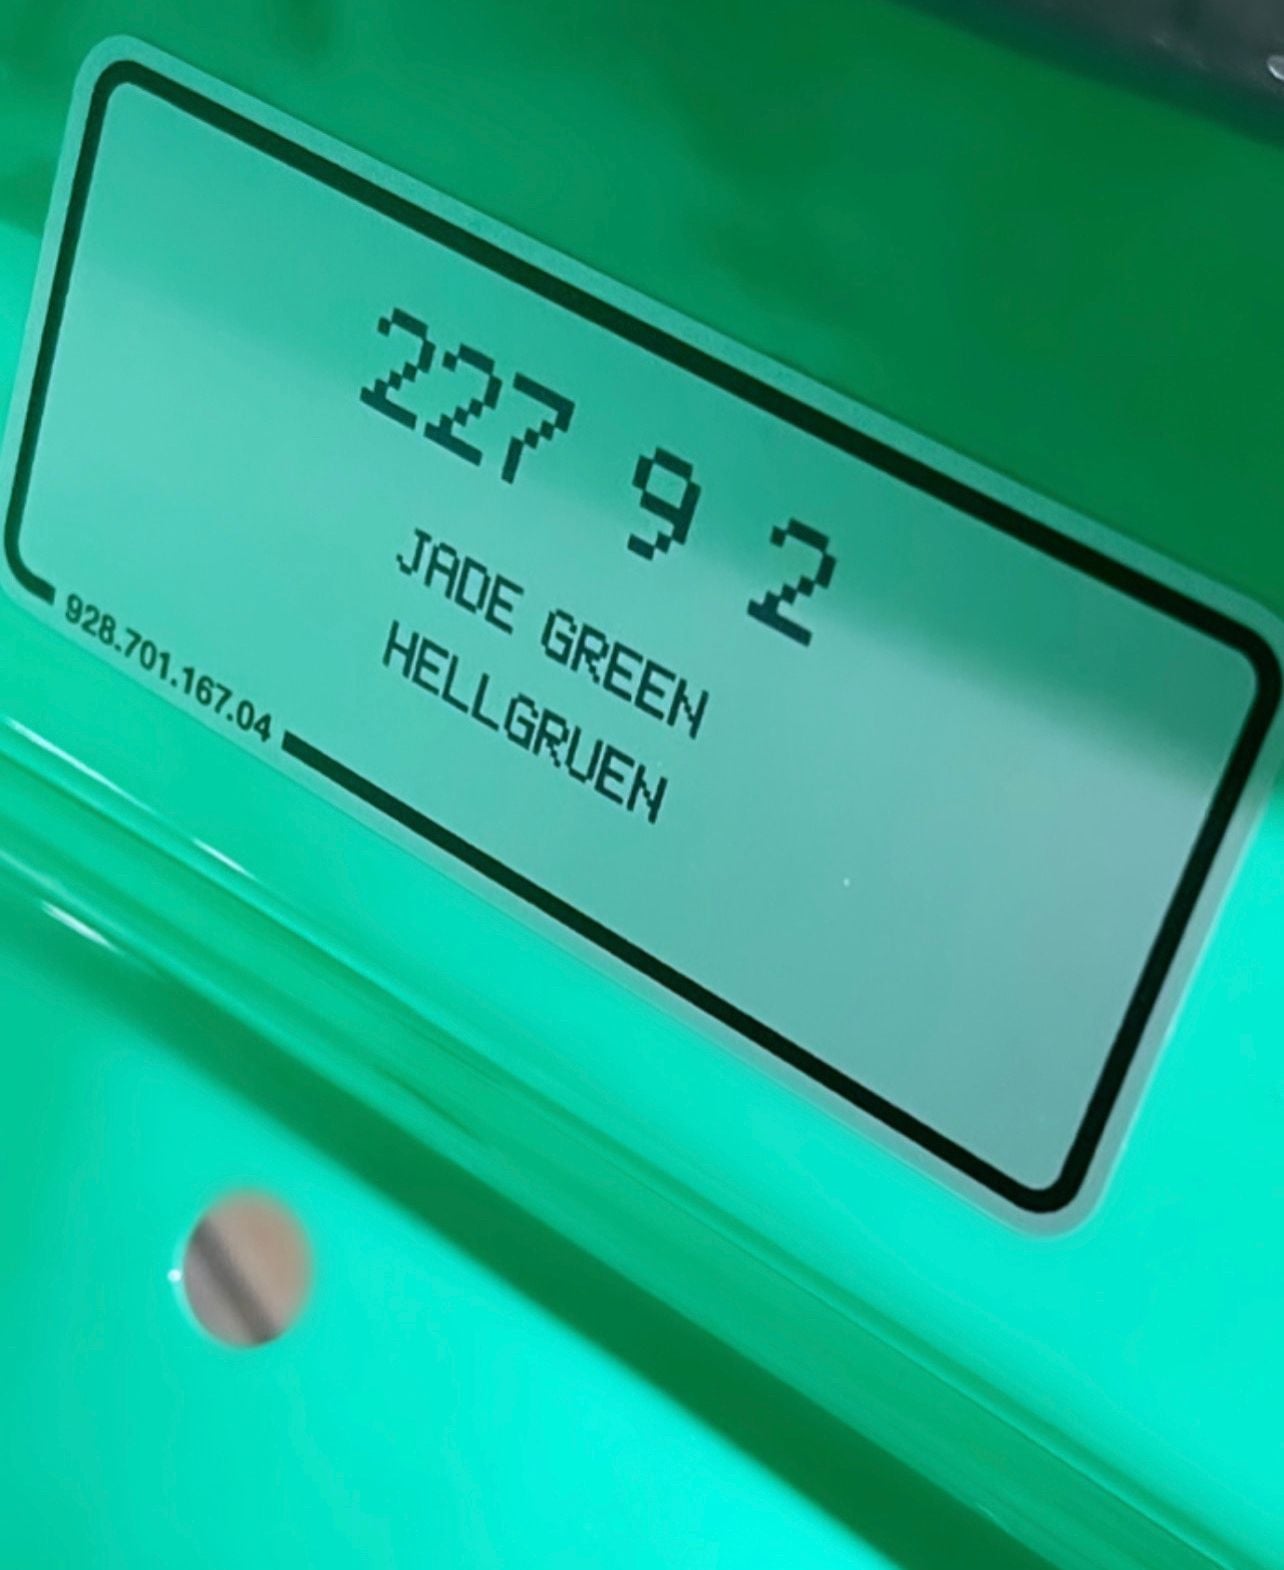
First, putting the paint code sticker on. No, hellgr�n is not spelled incorrectly on the sticker. When typed in fonts where enunciation cannot be depicted, words are transliterated into phonetic spelling. So � becomes UE.
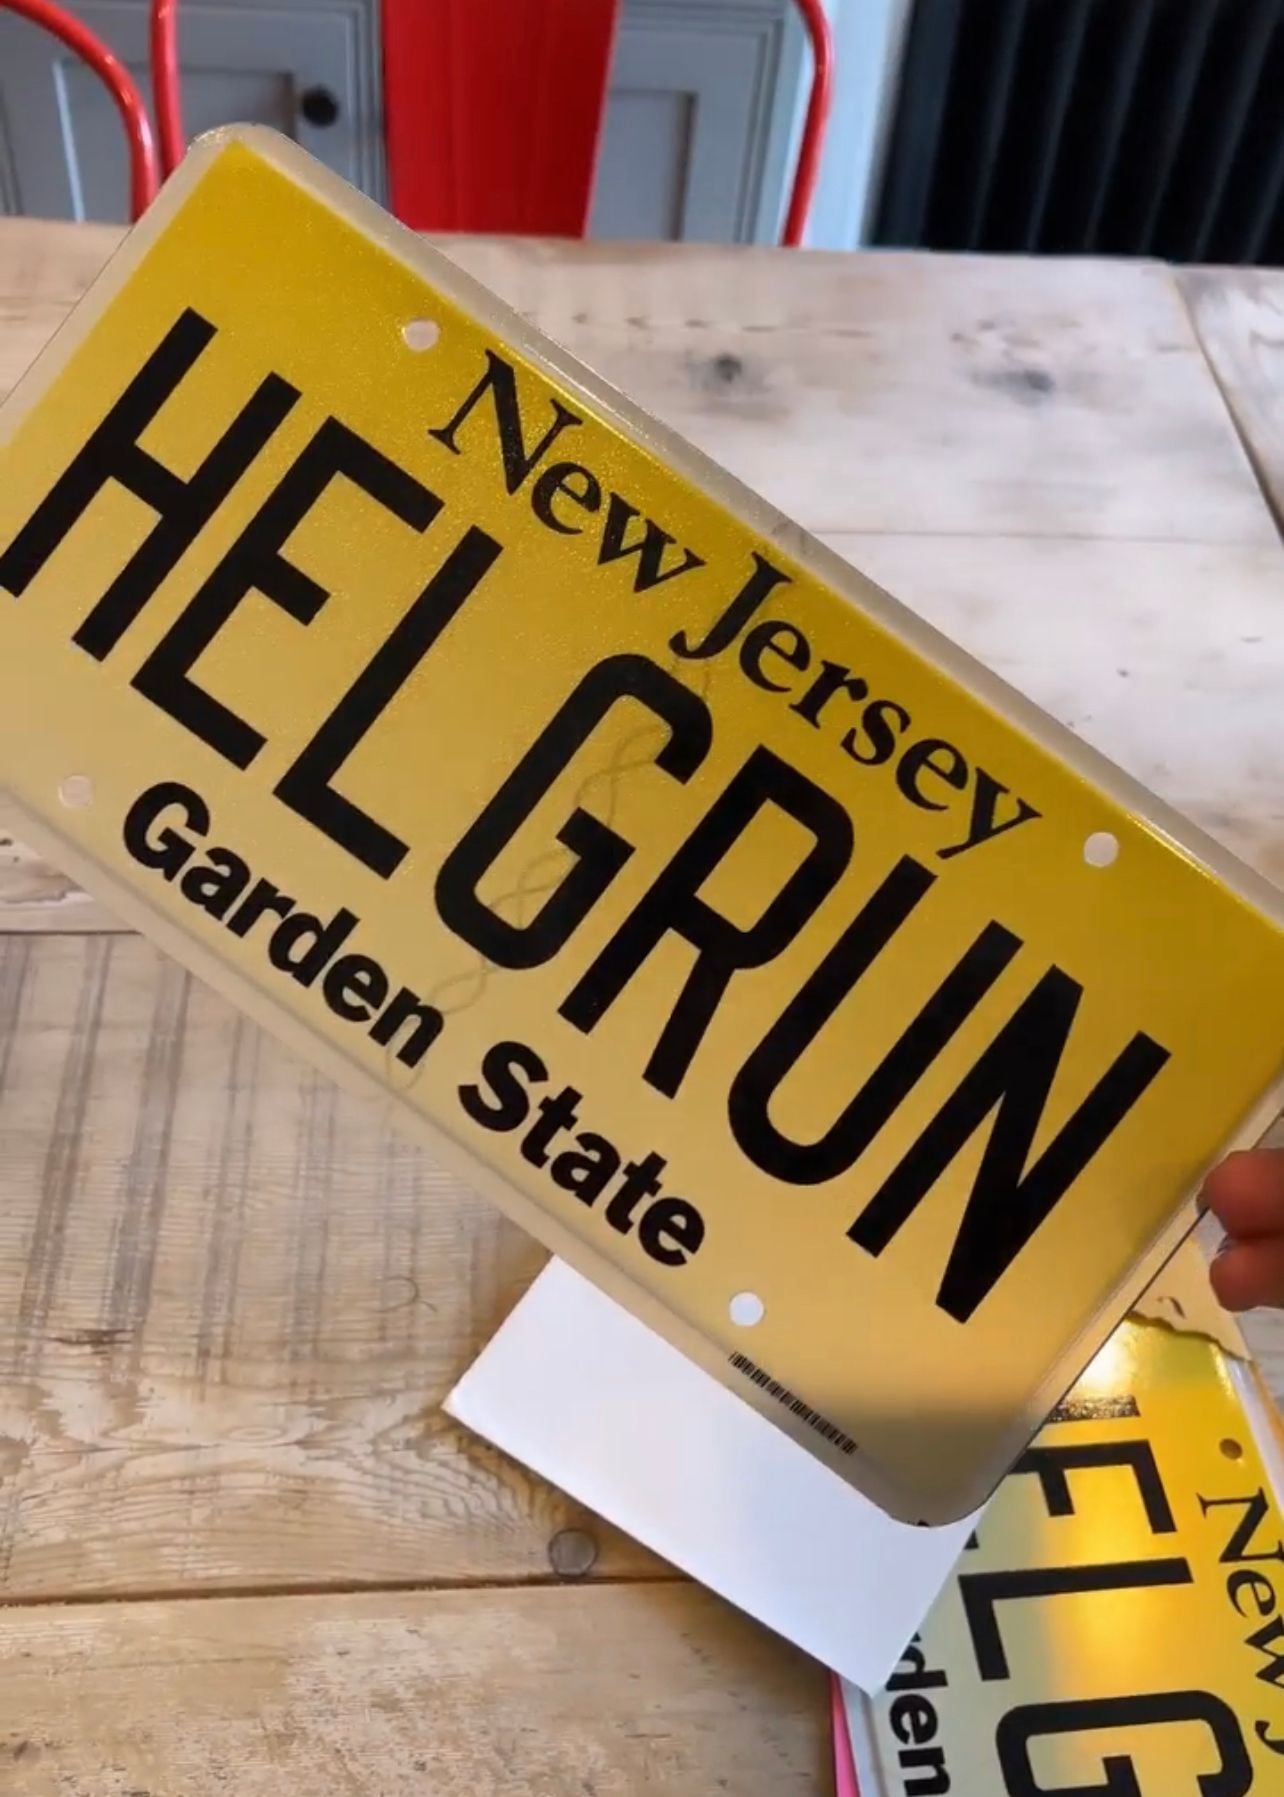
Second, vanity plate because why not try in vain to let people know it isn't "mint green"?
Last edited by boomboomthump; 04-06-2022 at 09:06 AM.
Cohline 2240 - 9.3MM ID. The only exception is from the fuel filter to the feed side of the fuel rails, which I'm using the same stuff except 7.3MM ID. For whatever reason Porsche made that line smaller ID than everything else (7MM vs 9MM). The Cohline 2240 is rubber with braided reinforcement suitable for high pressure applications and rated for up to 100% ethanol content.
I'm crimping the appropriate size Cohline collars onto the stock fittings. I had the stock fittings and new Cohline collars plated to match all the hardware (you can see them above in the upper/middle left side of my re-plated hardware). On the piece between the fuel rails, I'm using an Oetiker 154 high pressure crimp clamp to ensure it doesn't budge off the rails. The stock stuff is a thin polyamide hose which is snaked through an outer protective rubber hose. The barb ends on the fuel rails are designed for rigid hose, hence the clamp. You can see one end is already crimped above. I don't want to attach the other end until I mount it and cut the hose to the exact length I want.
Additional specs:
Working Pressure: 145 psi or 10 bar
Bursting Pressure: 725 psi or 50 bar
Temperature Range: -40F to 257F
Approved for gasoline, diesel fuel, bio diesel, water, and air. Features an internally reinforced braiding to withstand pressure. ETHANOL Proof- 100%. Abrasion Resistant Outer Rubber Layer German OEM
Additional Standards: BMW GS 93010, DBL 6256.70, GME 08 007, SAE J30R9, VW TL 524 24, DIN 73379 Type 3E
Last edited by boomboomthump; 04-06-2022 at 09:03 AM.
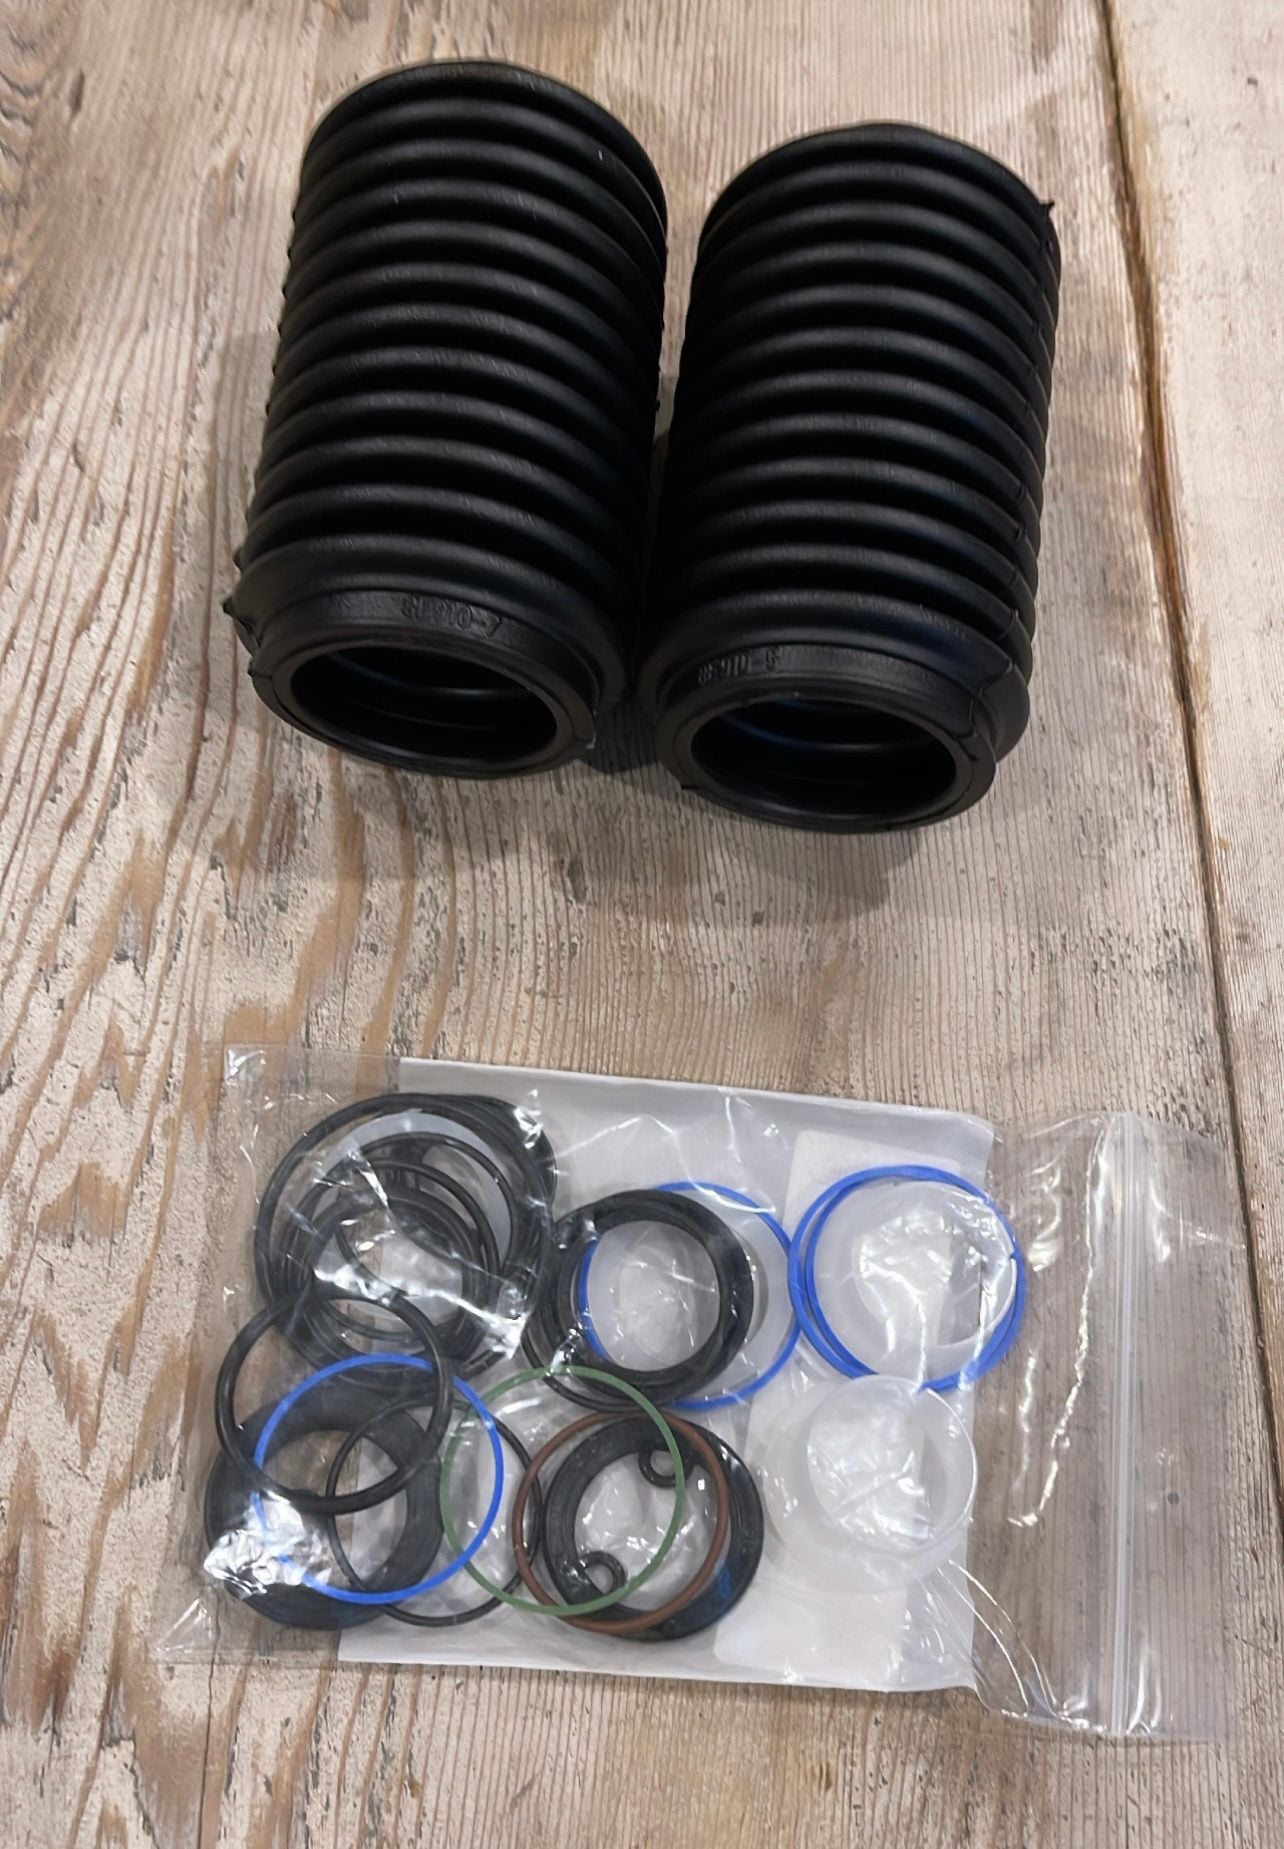
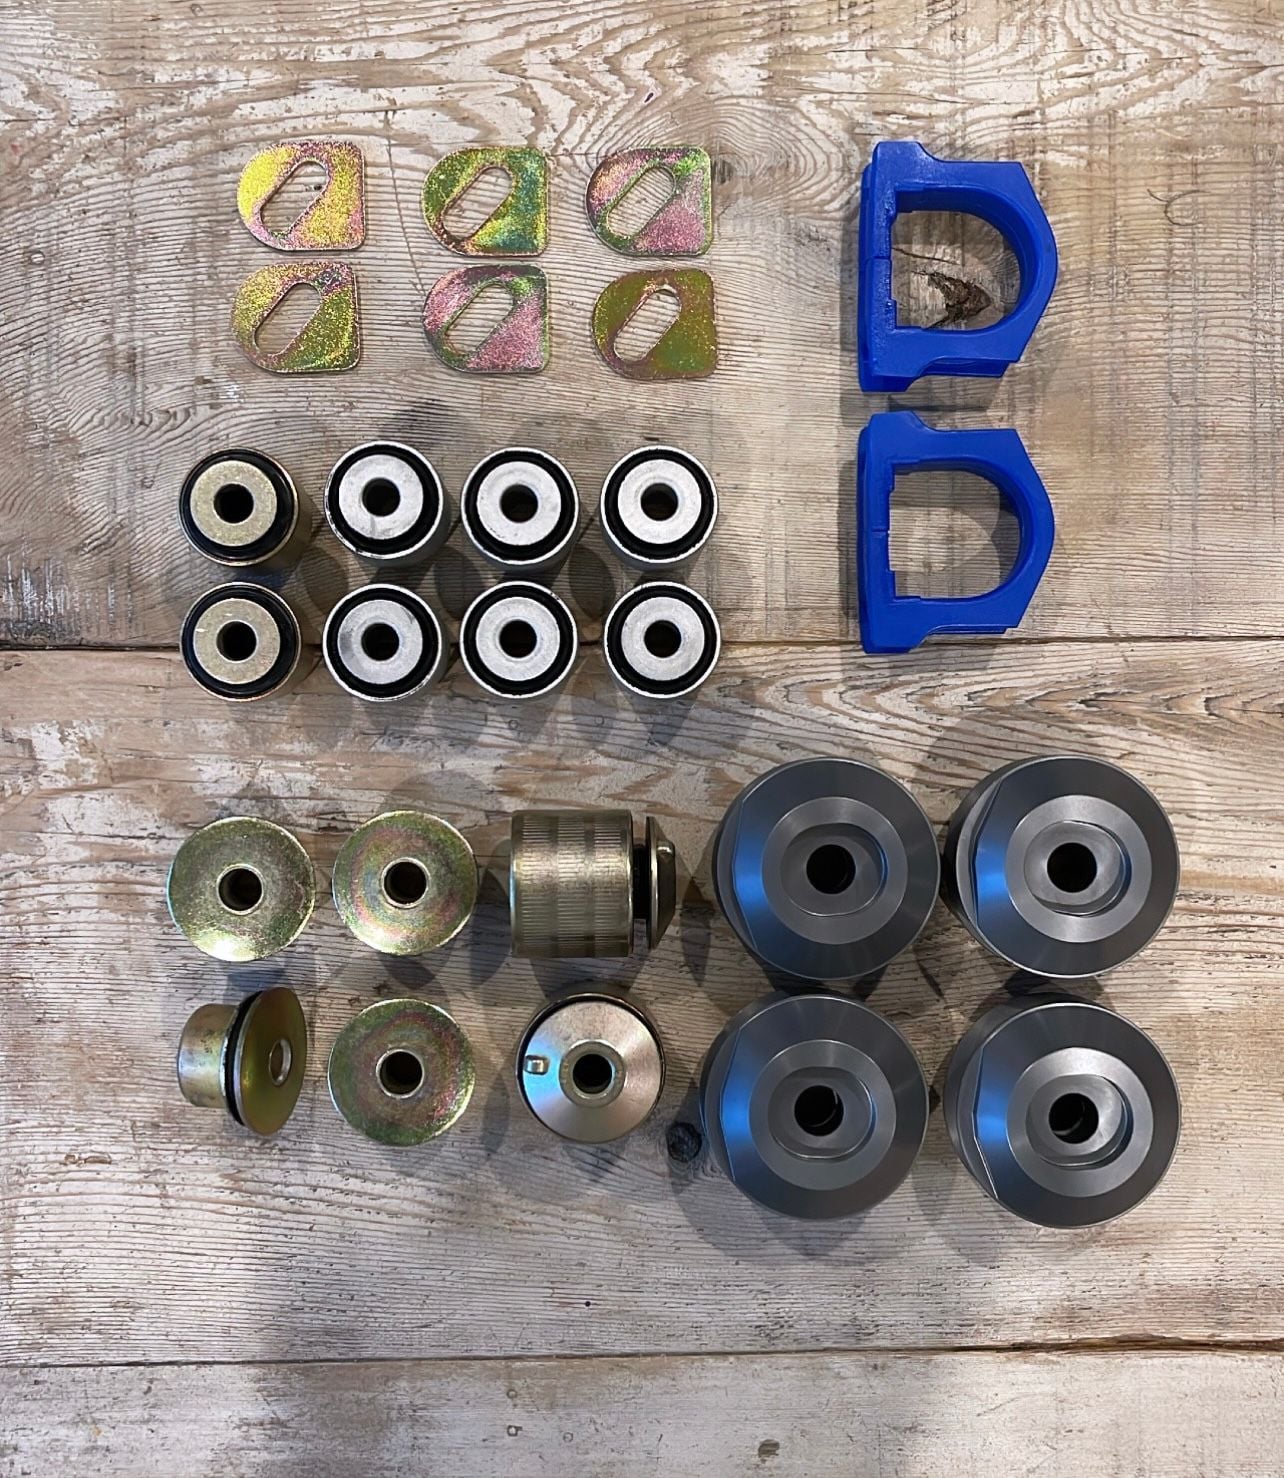
More goods in the mail. Steering rack reseal kit, new tie rod boots, poly steering rack bushings, "Sport" bushings for all control arms front/rear, solid subframe mounts and lockout plates for the eccentric adjusters.
Not shown but the Rennline rear monoball upper mounts also showed up a few days ago. A few minor quality control issues. One mount was missing the safety wire which is used to hold the seal to the mount (easy enough to solve). The second issue (on the mount that did have safety wire on the seal) the seal actually had a tear in it. Sent an email to Rennline and got a reply right away. Very apologetic and new seal is on the way.

 04-05-2022, 05:36 PM