When you click on links to various merchants on this site and make a purchase, this can result in this site earning a commission. Affiliate programs and affiliations include, but are not limited to, the eBay Partner Network.
Left side A/C Console: it might become useful in case I would decide to also install the second oil cooler as it was on the 993 CUP - I am not sure it will ever happen, since I am not planning to make anything else than Time Attack Sessions, but who knows!
Together with the fuel tank lid, which is the only other exterior panel together with the rear lid that is going to be reused.
Actually these 2 steel panels will be, together the whole chassis, the only surviving parts of the original car: I couldn't ever expect the chassis to be so "healthy", i.e. not bent and therefore robust. Now it is much more than in origin, since it is all welded in the same specs as were the 993 RSR racecars, with dome and front reinforcements, luckily still available from Porsche.
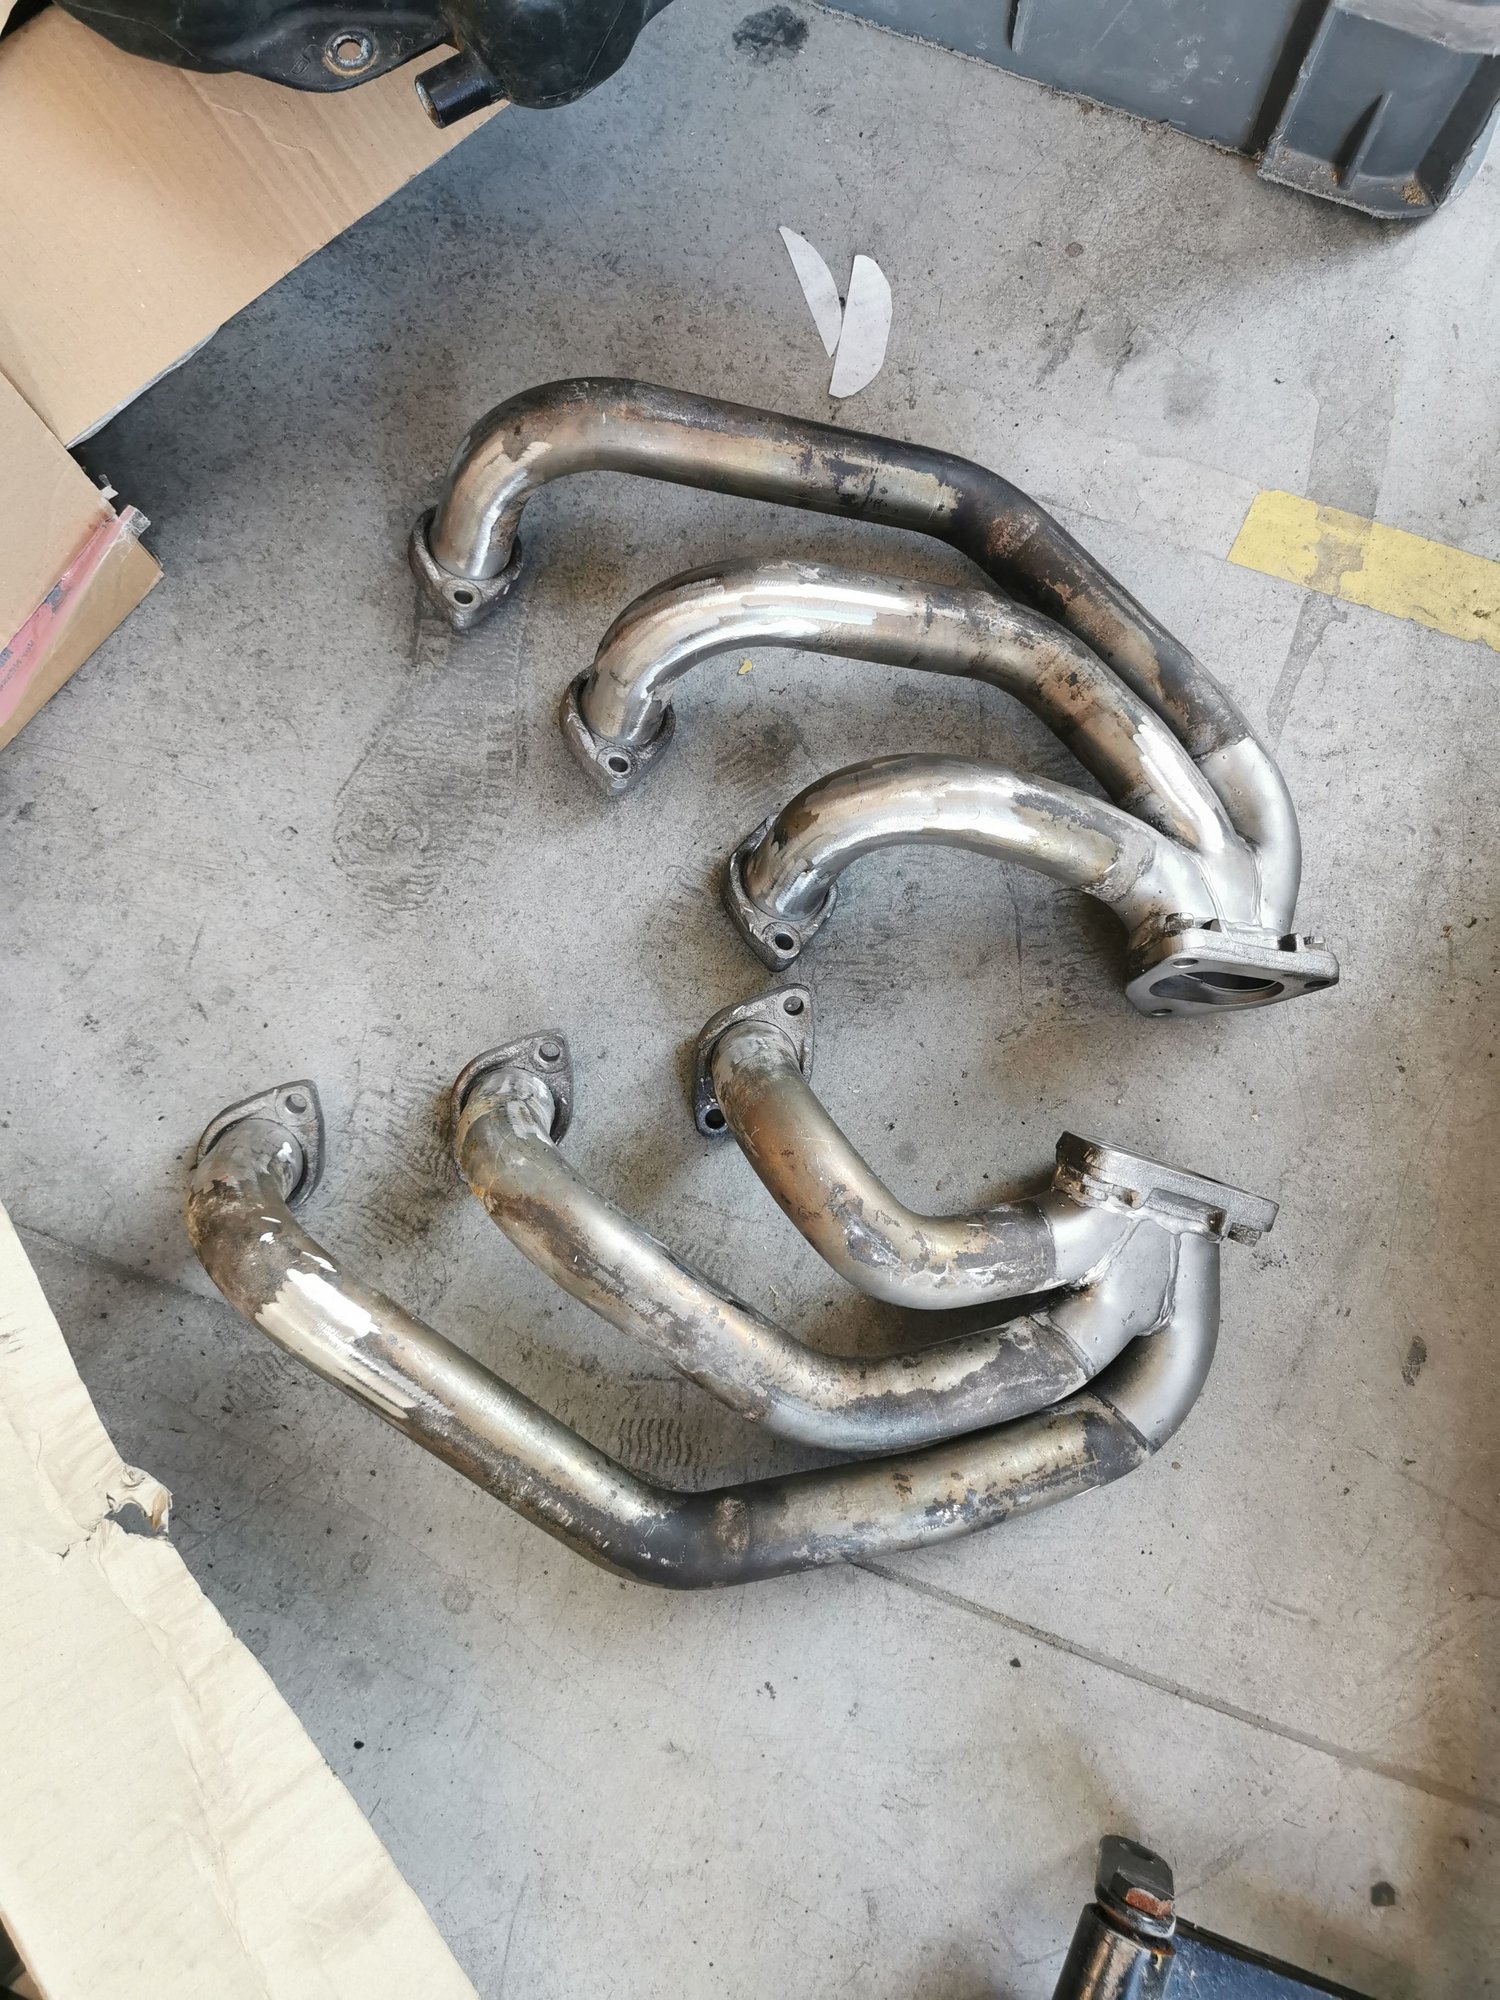
Here there are the original exhaust primaries, stripped from the heat exchangers: I need to understand now if it is better to polish them (if they are inox, maybe this is the case) or get them microsphere blasted and then somehow, if it is possible, get them ceramic coated, for better flow.
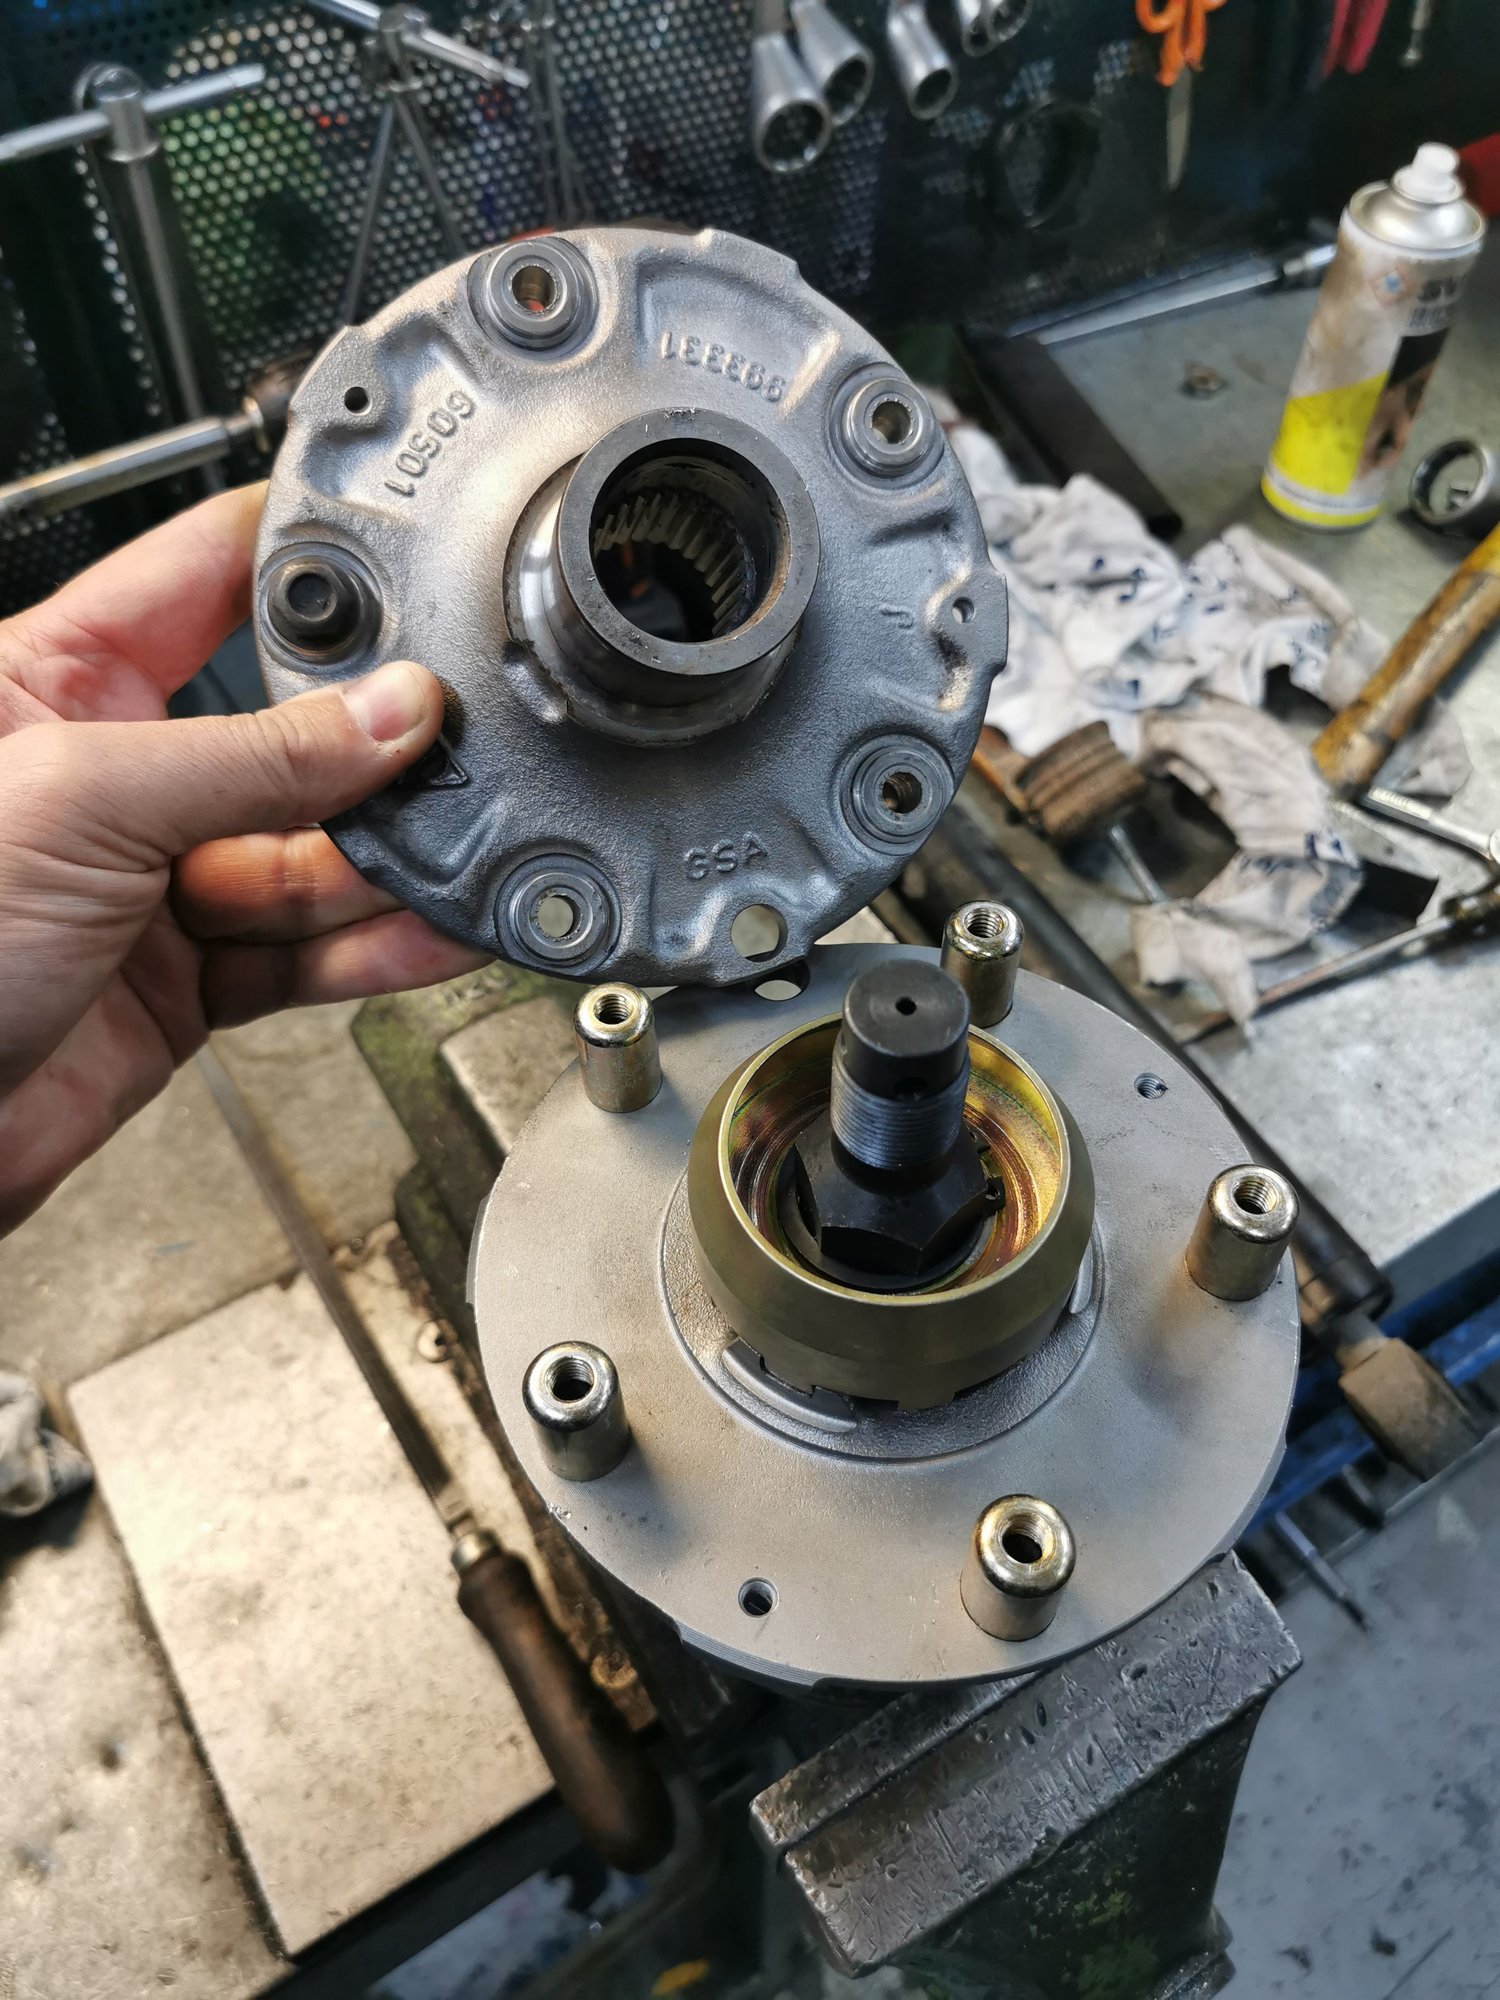
Now I am dealing with the rear wheel hubs to be modified to install the center locking system I've got new from Eurowise, Charlotte, United States.
I am also looking for the front wheel hubs that I am still missing - Part # 993 341 065 01 (or equivalent, but for carrera RWD, not 4WD) - and possibly also the shake-proof washers (m. y. 95 -) part # 993 341 155 01 - in used but perfectly working conditions, they need to be reworked in any case.
Alternatively, if you know of someone who can provide the original front 993 CUP wheel hubs (just front, or both front and rear, at a decent price) it would be even better (less modifying work to do) Part # 964 341 705 70 for the front axle and Part # 993 331 605 02 for the rear axle.
The BBS Motorsport E29 Wheels are on their way to be machined, and probably they will be ready for Christmas time: I can't wait to unpack them!
They will be both center lock and 5 lugs ready.
Last edited by nothingbutgt3; 11-09-2021 at 06:14 AM.
I have followed this thread from the beginning and congratulate you on the progress. I have not posted before, but want to let you know that you have inspired a 20-year old from Alaska to rescue this 1995 993 Carrera Cabriolet:......
This 993 was parked outside in 2005 in Seward, Alaska, which is located next to the ocean. Limoncella was probably better preserved under water than this car parked outside in a seaside town!
Cheers!
Blue TTop - You have to start a new thread on this project and keep us up to date. Courageous undertaking!
we couldn't just tighten the bolts leaving all that lack kf space in the bolt seats... too easy...
We decided to cut the original threaded columns, 8mm diameter drill them (the bolts side) and machine the exterior part of the columns in order to become a mating/coupling flange for the pins kf the center locking system.
The final result is stunning, so solid, as if it was born that way!
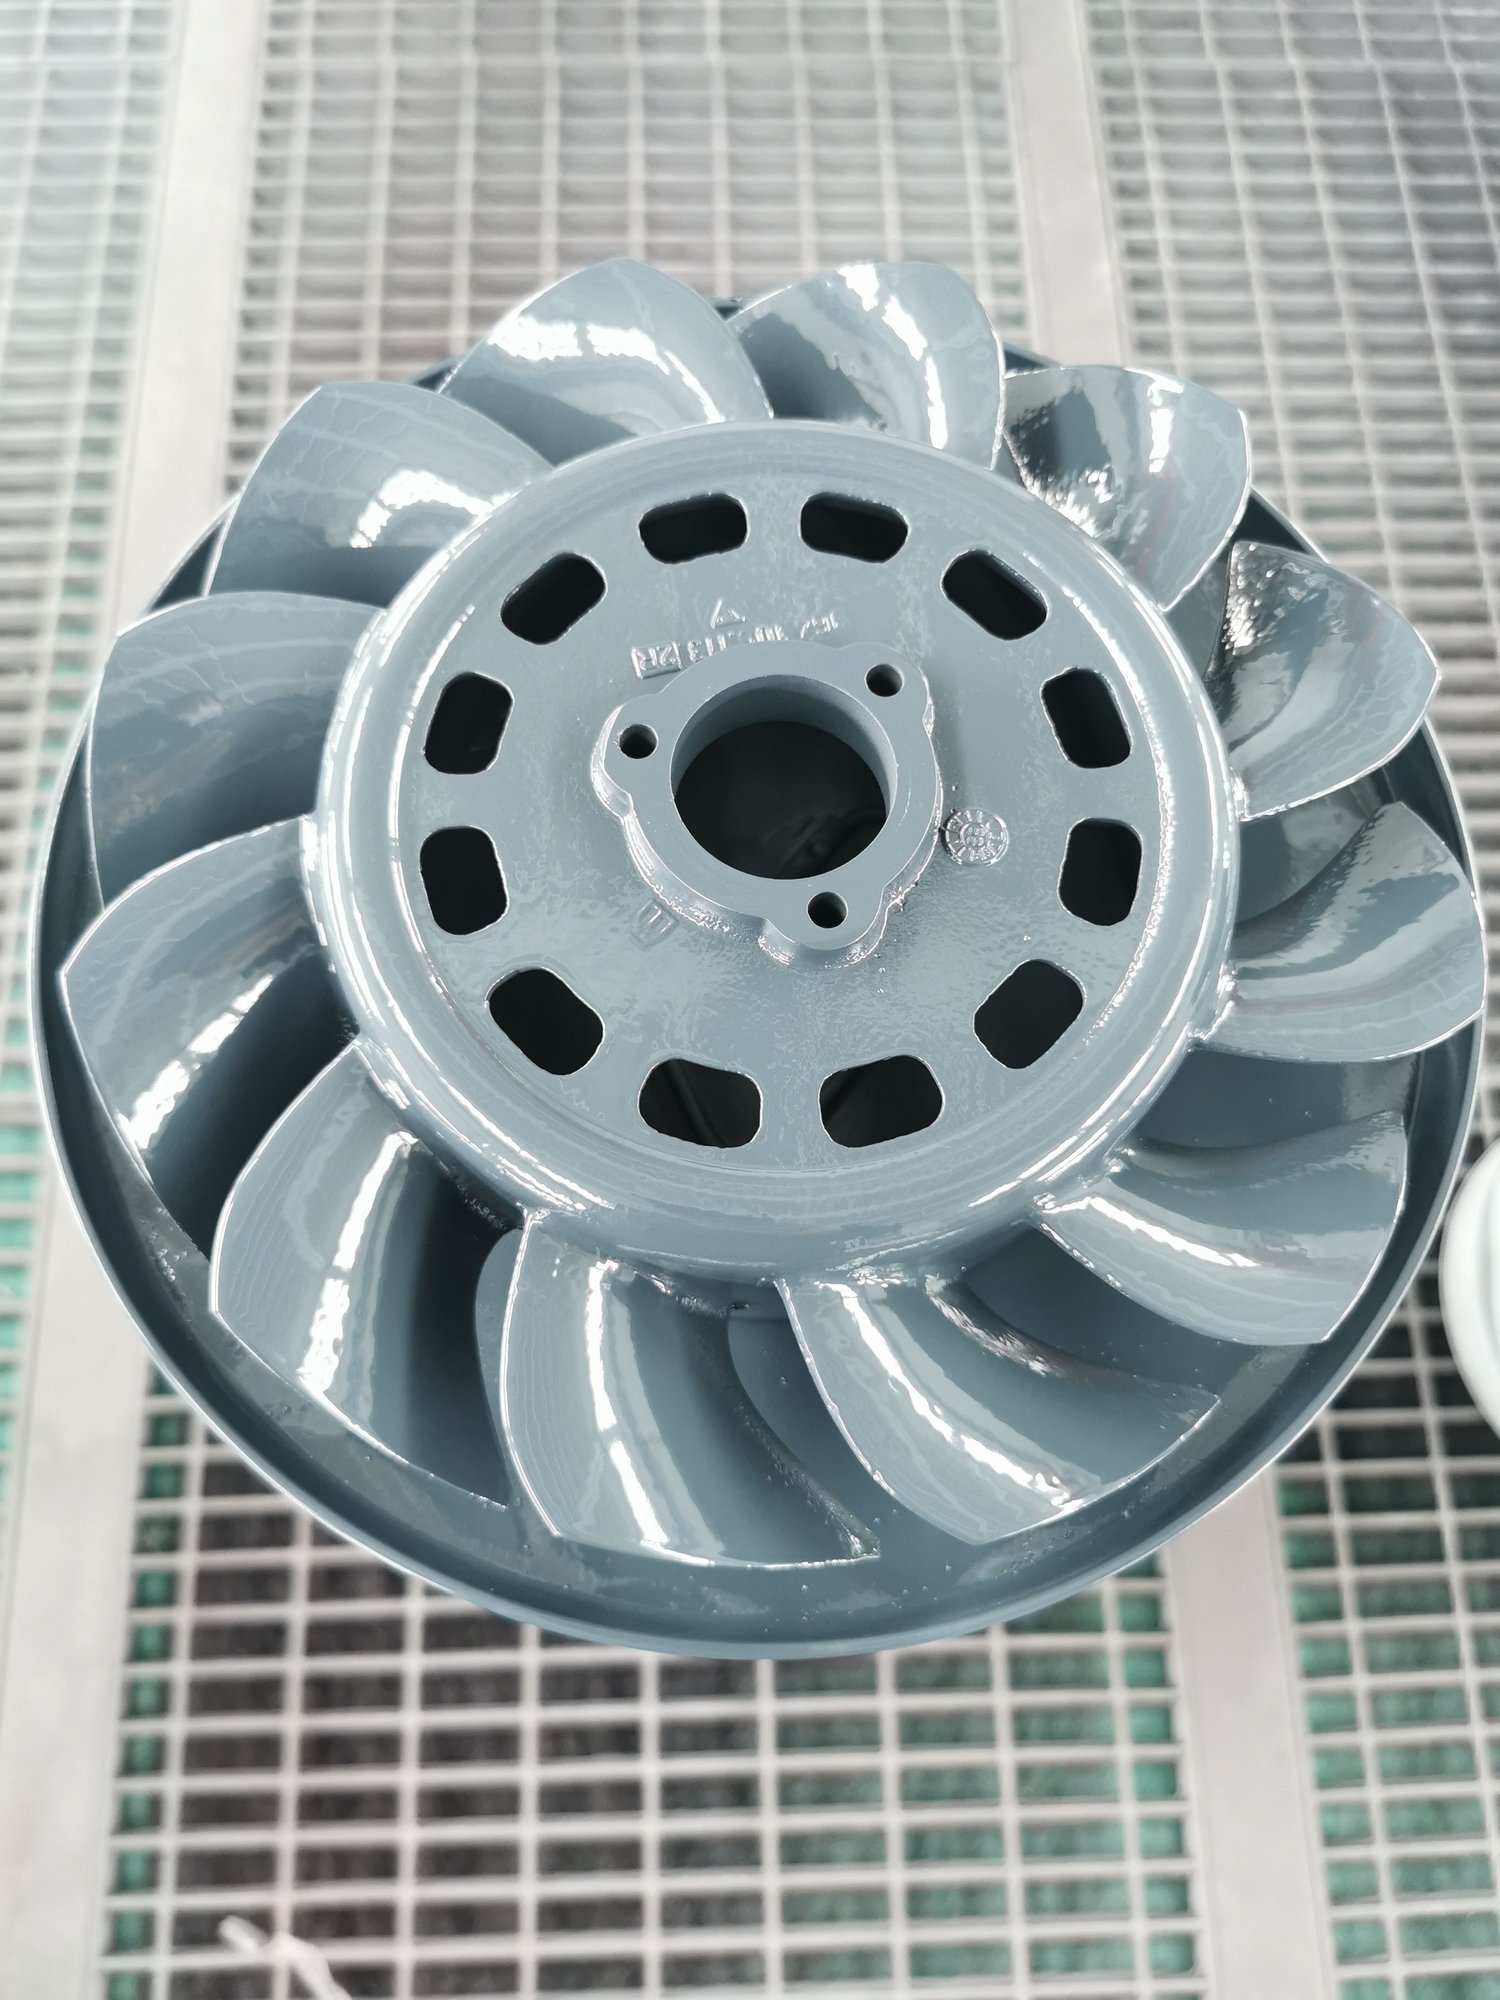
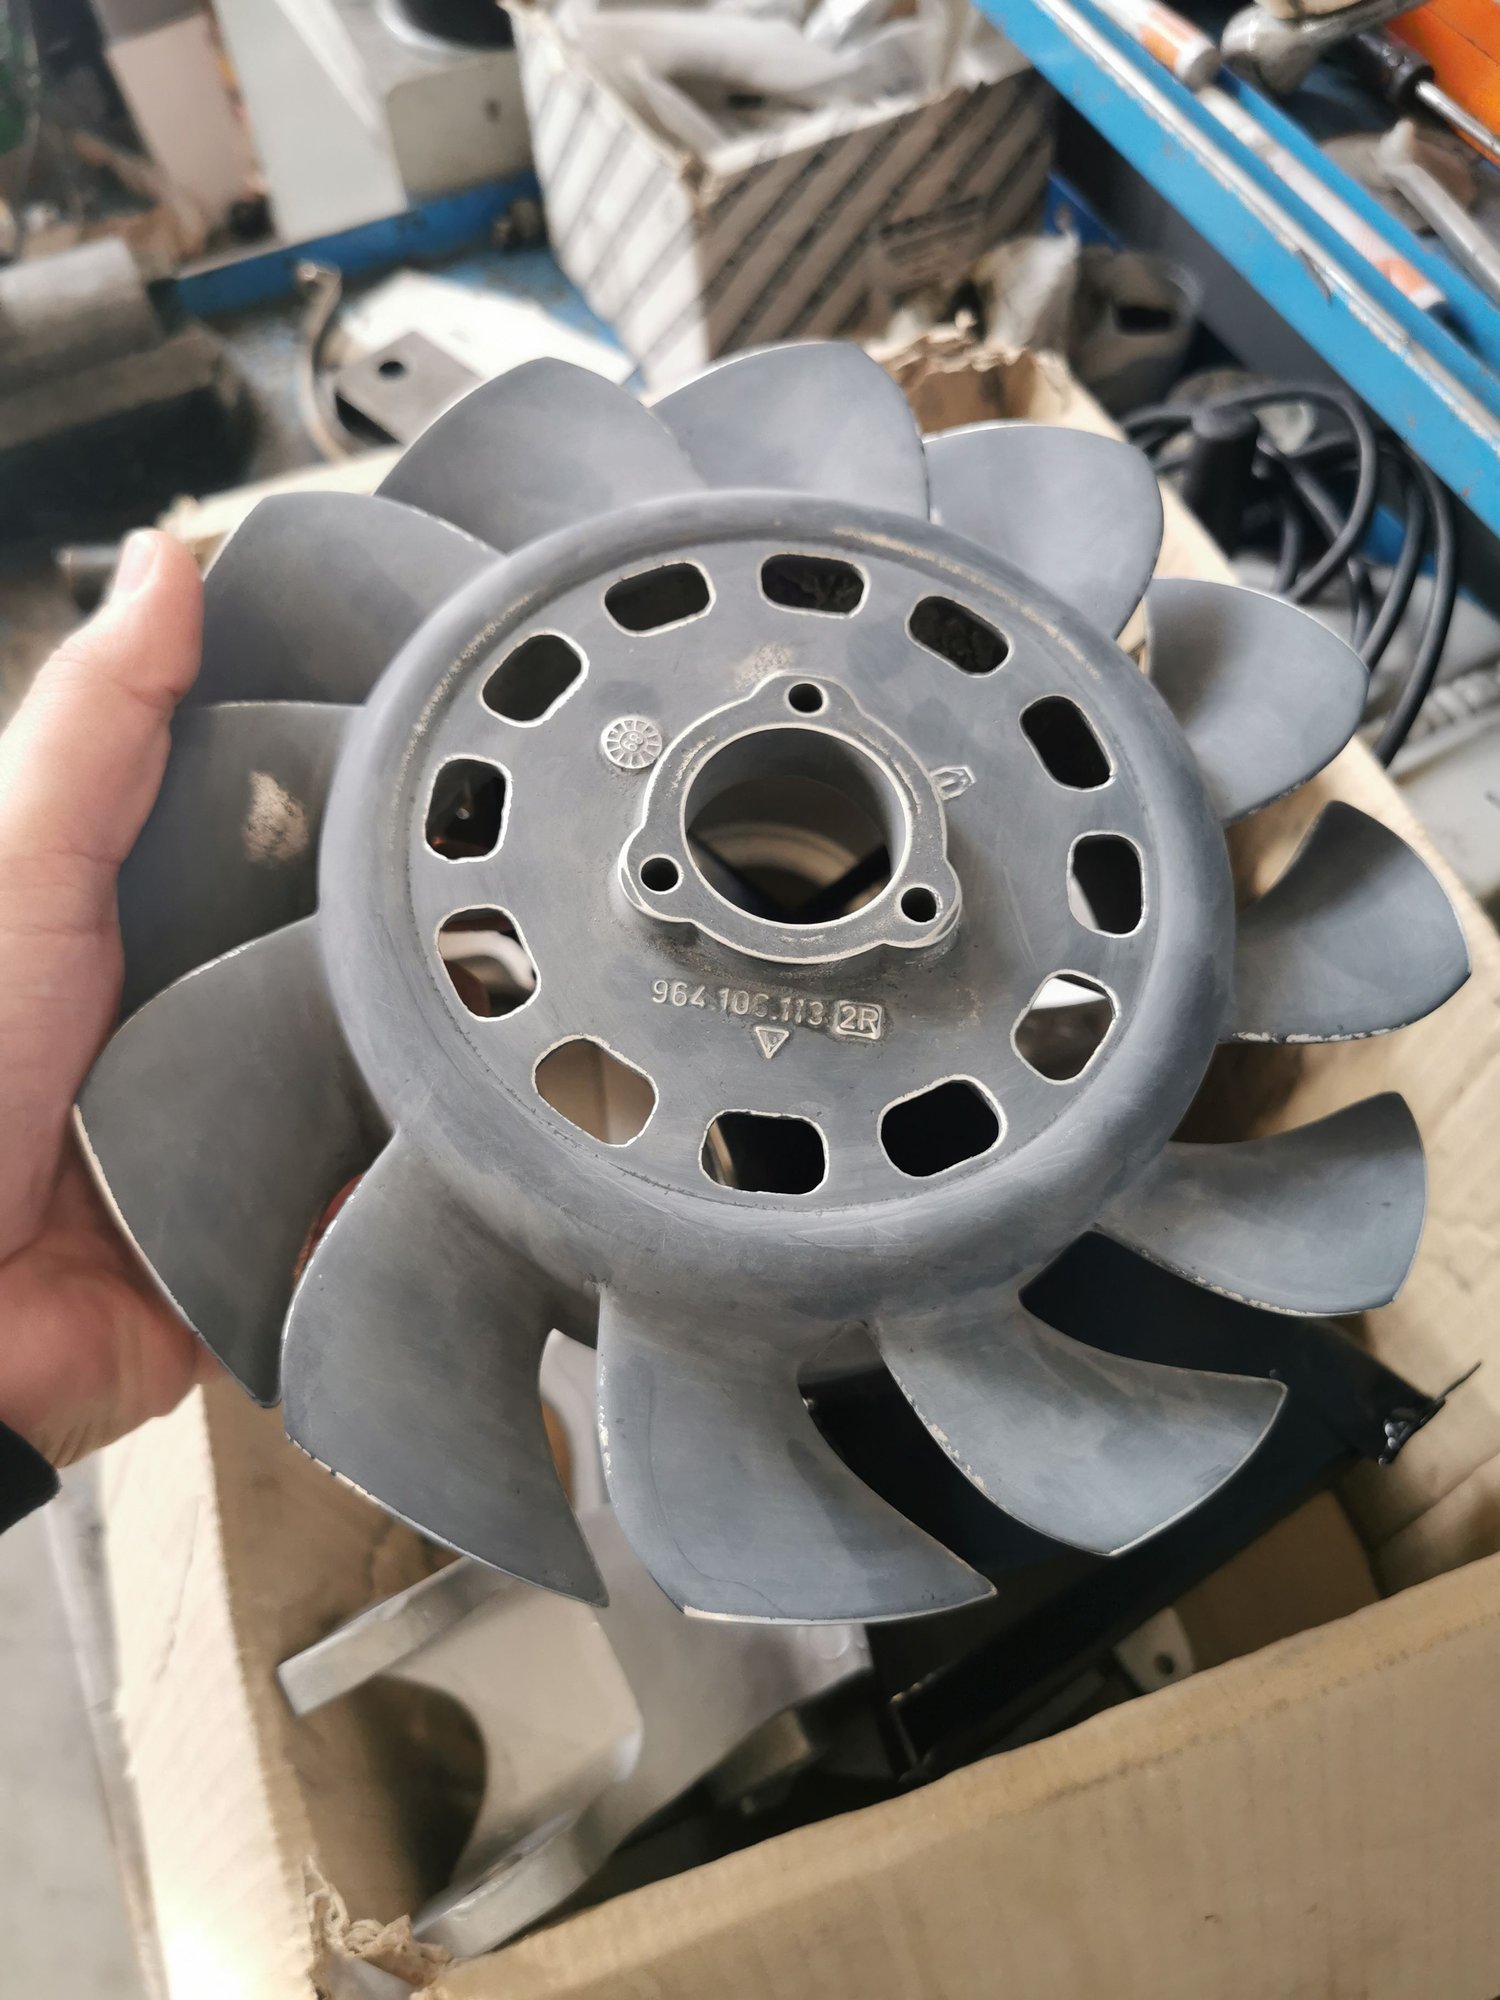
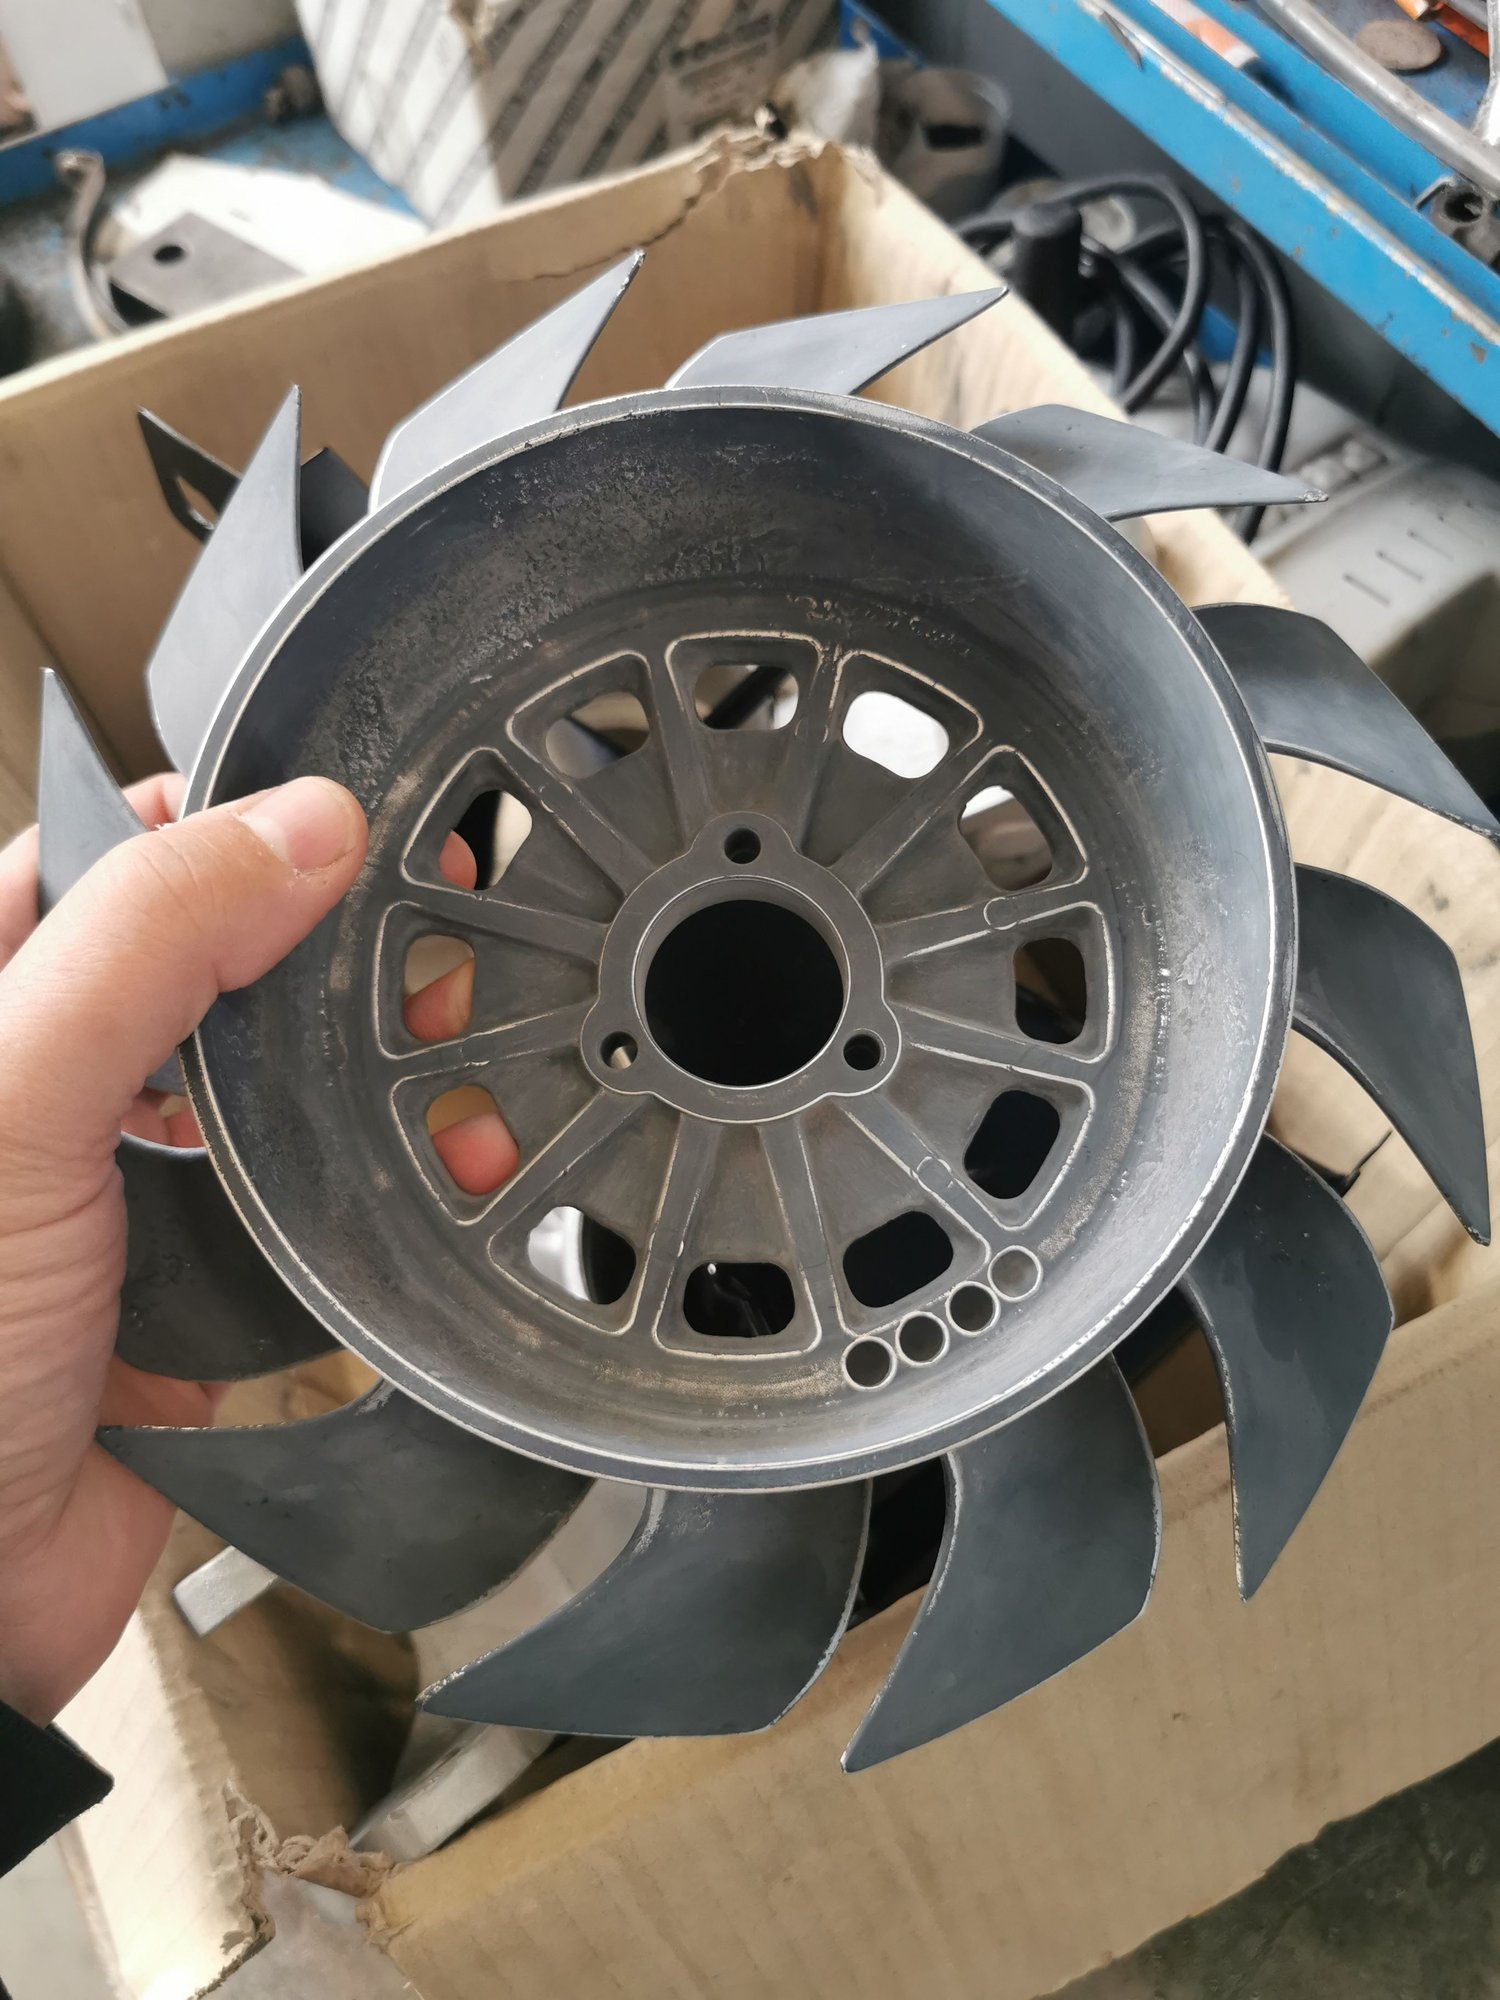
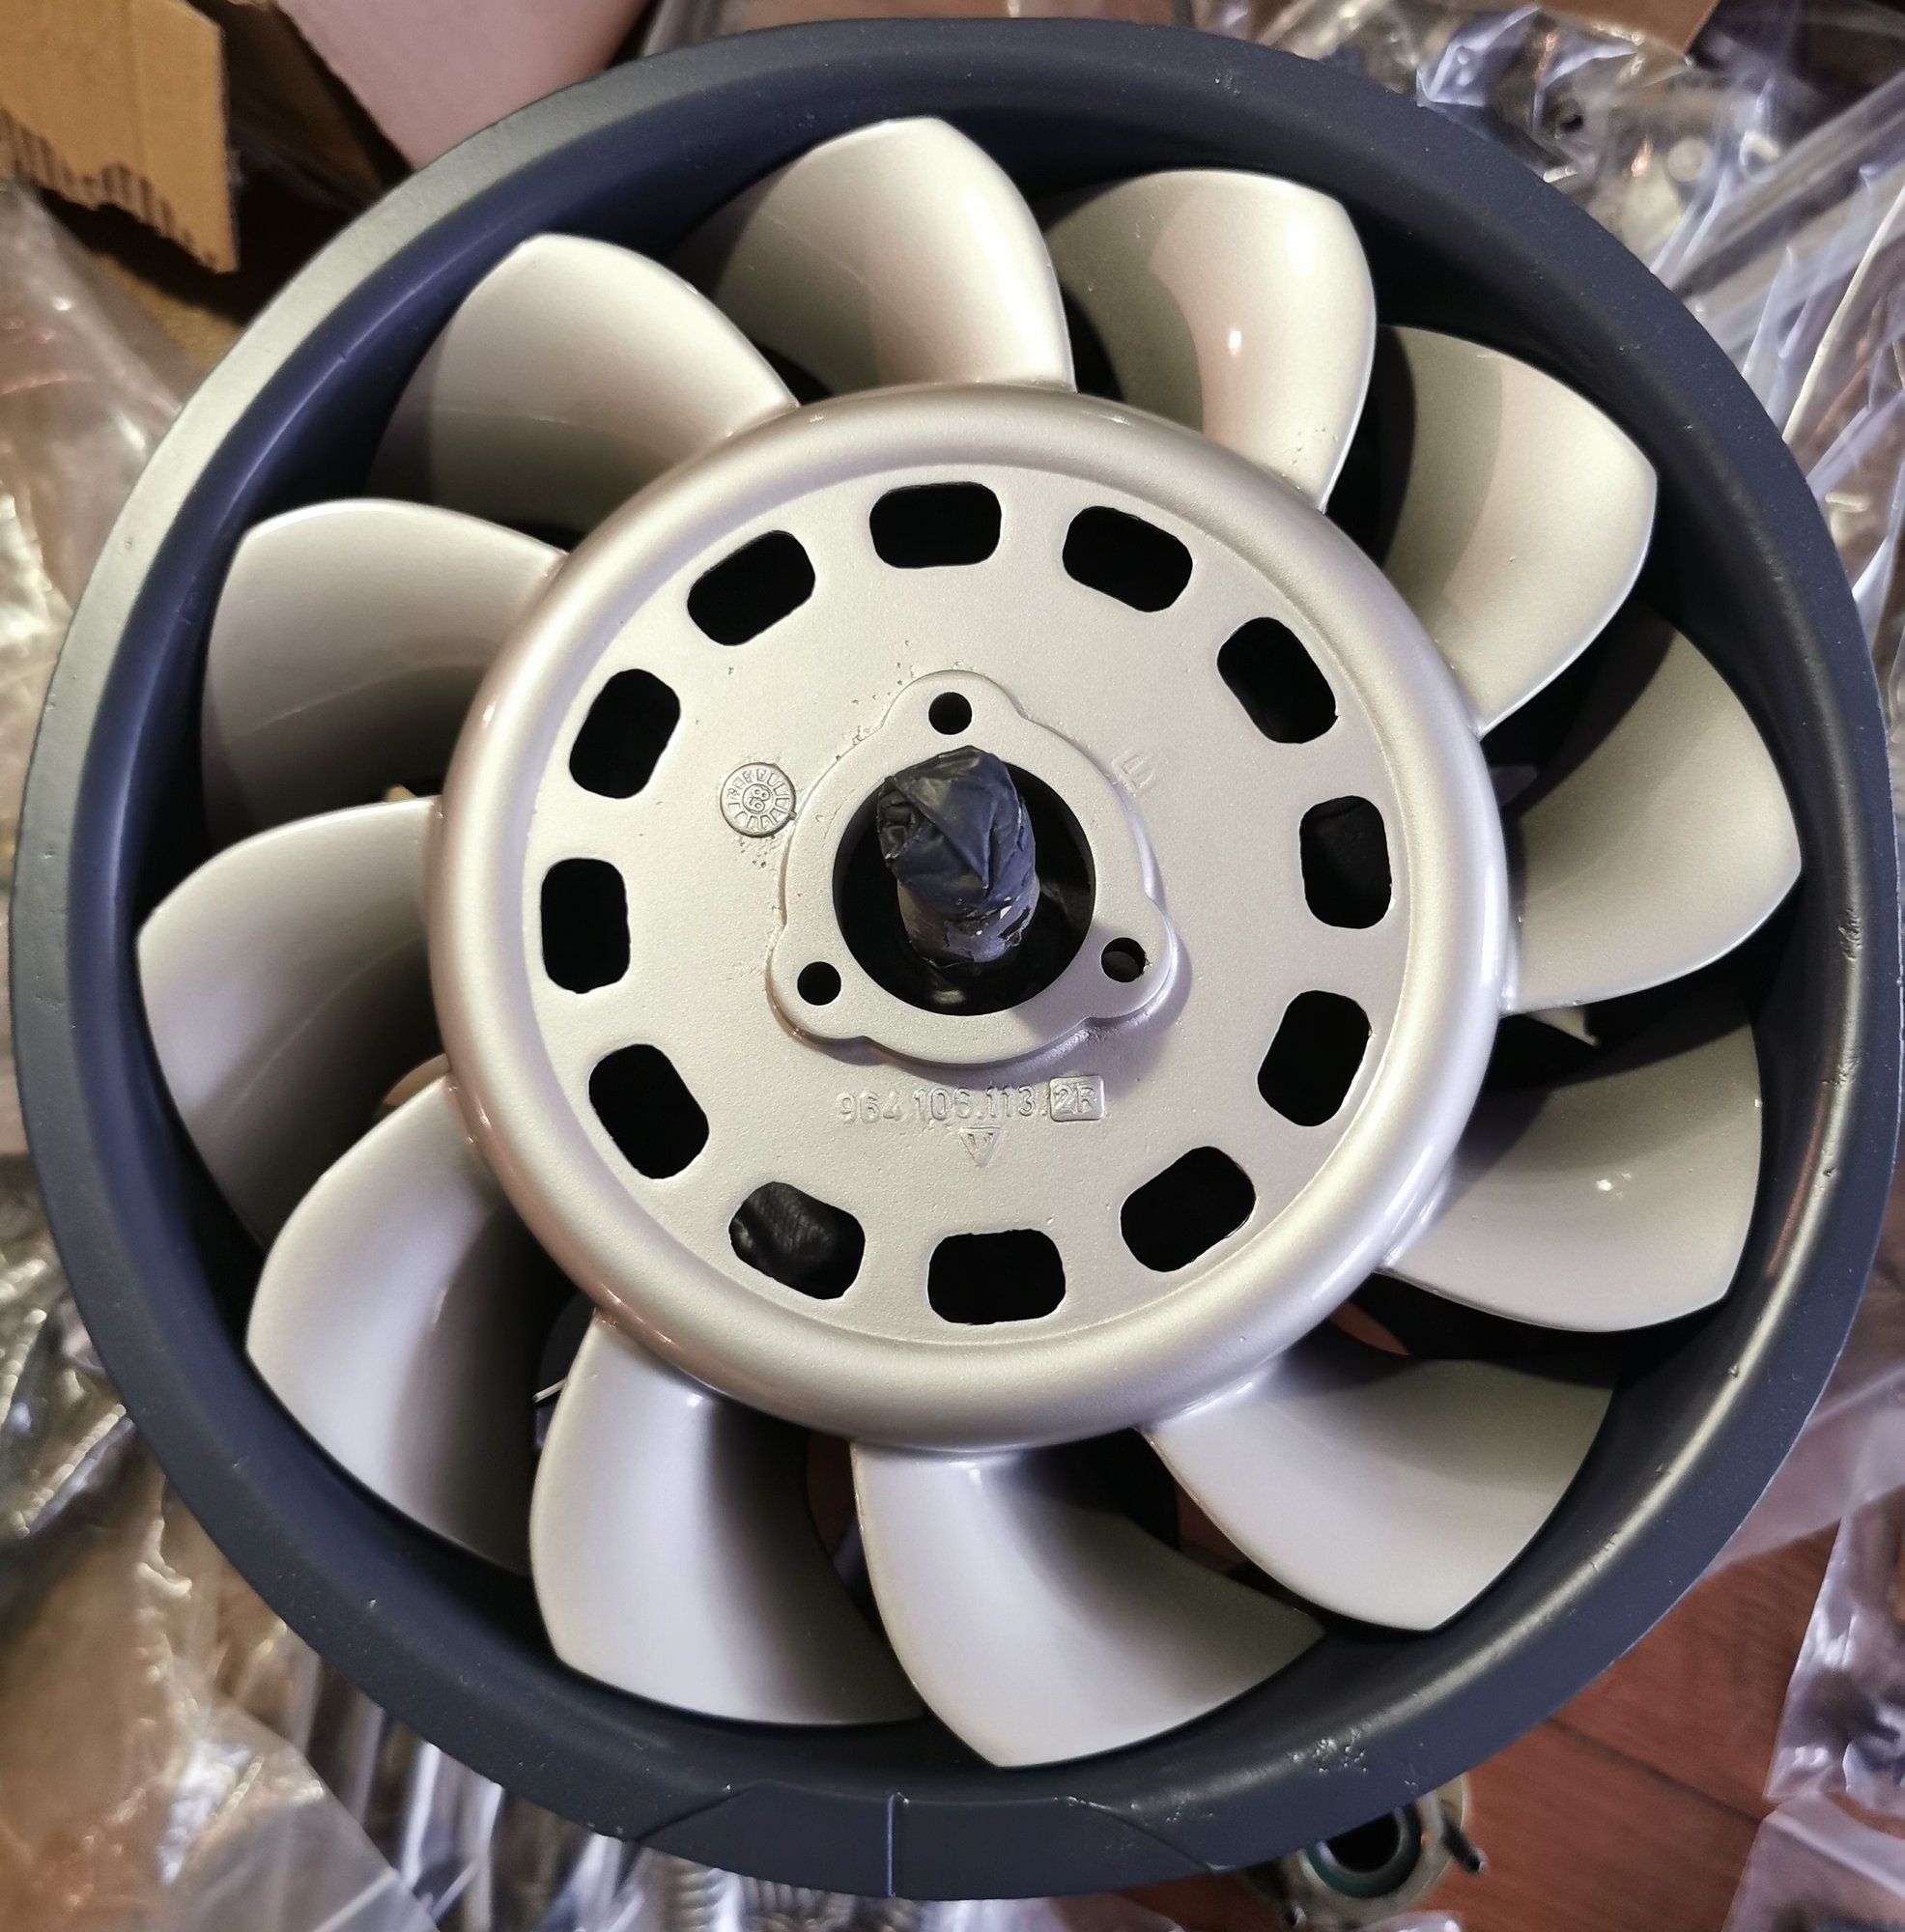
Yesterday they finally took in charge the engine fan & its housing, first applying a primer, to make the magnesium surface smooth / finish it and eventually reapply, so as to eliminate small imperfections, before giving the final color
Am I the only one here to think this view is so much cool?
I really can't wait, but there will be some skotch briting to do to get to the final result we have in mind
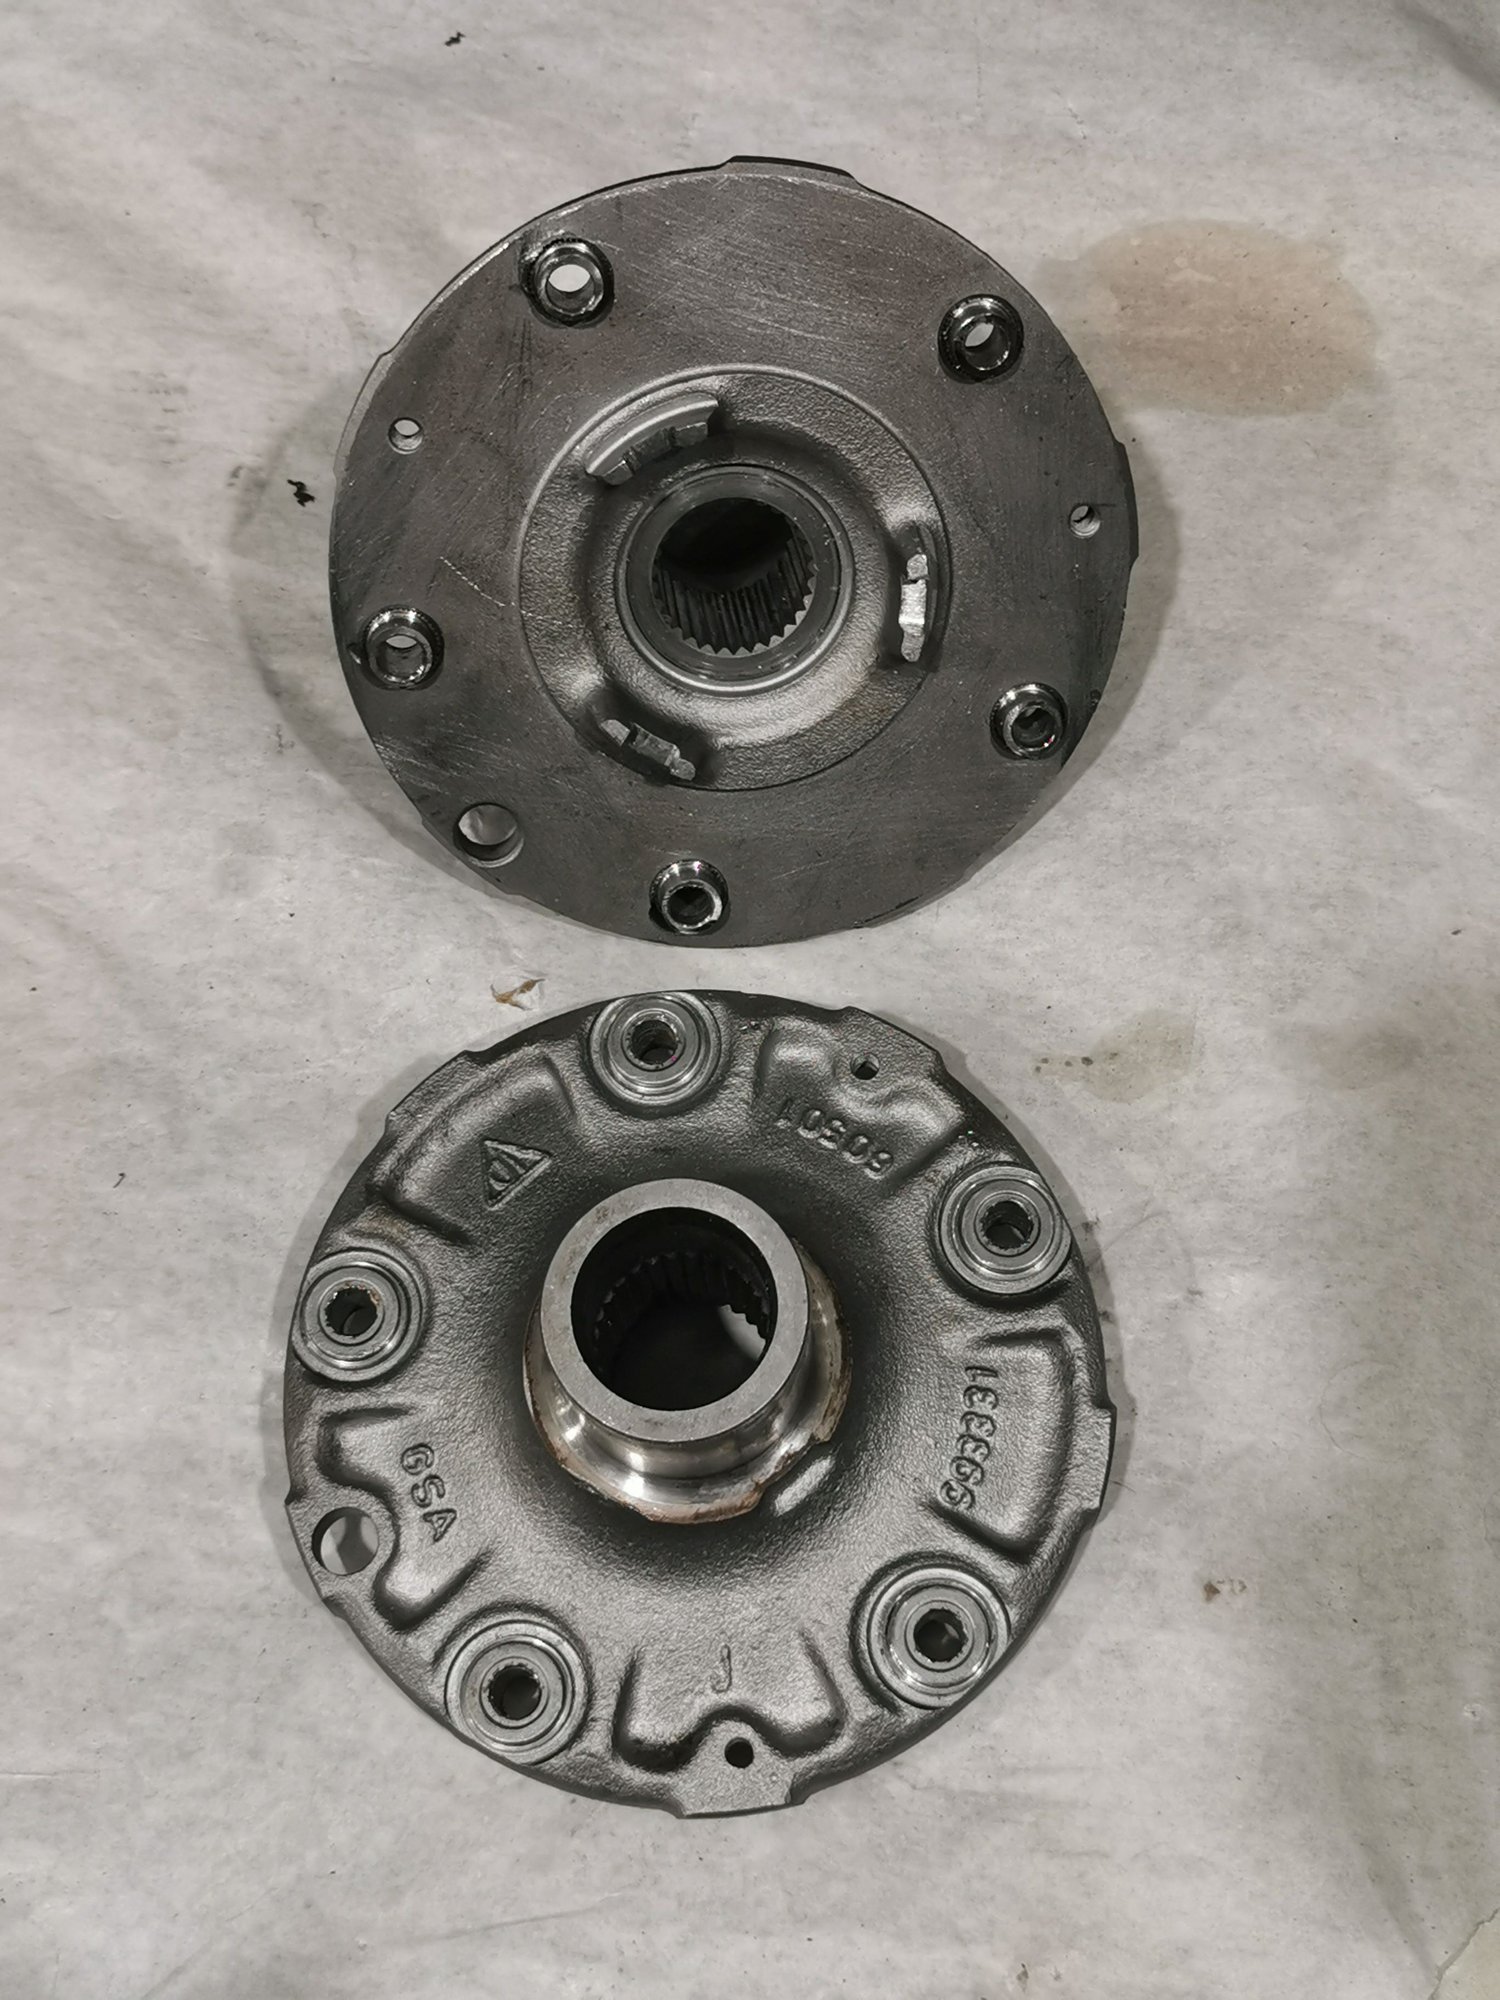
rear center locking wheel hubs ready to be sent to zync plating
Good news is I will be able to reuse its original keys (and there are all the 3 of them) , its original oginal steering lock mechanism, only element I will have to change being the Niemann Electrical ignition insert.
these are the small but important details that mean a lot to me.
Paolo contact DemonSpeed Motorsports they have the front and rear stubs and hubs for Centerlock , also the centering washers for
Speedline and safety clips / stub nuts as well .
I only last week ordered a set of center nuts and safety clips but had ordered from them last year as well , project is moving fast looks great
regards Bert
Hi Bert,
thank you for answering, I have already bought all the hardware for the center lock conversion from Eurowise, I am missing the front wheel hubs: I wrote Demon speed motorsport, but they have only one wheel hub and I am quite confident I can source a set used for at least a third of the price (there are customs, shipping costs and VAT as well to be added to their list price), to be reworked with ease, since the car is already on her wheels, with all her standard/original equipment.
But yes, the budget is very important, since I don't want to disappoint anyone: I value lot more people who are working on the car. instead of those ones whonhave rusty parts on the shelf and try to treat us like chicken.
I don't exclude eventually to buy them new, since it is really more and more becoming annoying coming across the second-hand market sellers. Then they will have to find another one interested in their wheel hubs! Good luck!
I don't find the used parts for an acceptable price, center locking system will have to wait.
I don't have to do it (the conversion), these seller of Porsche used scary rusted parts think to have juwels in their hands, evidently, if only they were transformers I could understand, but more probably even in that case, I wouldn't, since it is not a transformer what I am looking for.
Last edited by nothingbutgt3; 11-15-2021 at 08:57 AM.
the heat exchangers have been removed from the original manifolds and now I wonder: what material are they made of, Stainless steel maybe?
Does it make sense to sand blast and then polish them? What treatment would you recommend?
The engine fan was from a 964 Engine (89 the production year), it was prime coated, I personally smoothed and thinned the layer with scotch brite 400 and it is now ready for a very thin layer of wet-on-wet primer and then for painting process with its final color, which should be Zermatt Silver slightly modified in the metallized components
It is very important the layers of paint to be as thin as possible
The separate oil tank, despite being in perfect condition and made of stainless steel, was all sandblasted with glass microspheres, prime coated and finally painted with matt black paint, for greater longevity.
I can't wait to reinstall the primary oil filter console which has also been sanded, cleaned both inside and out and checked in the coupling surfaces: this is an element of fundamental importance, because it acts as an intermediate connection of all the 'cooling system.
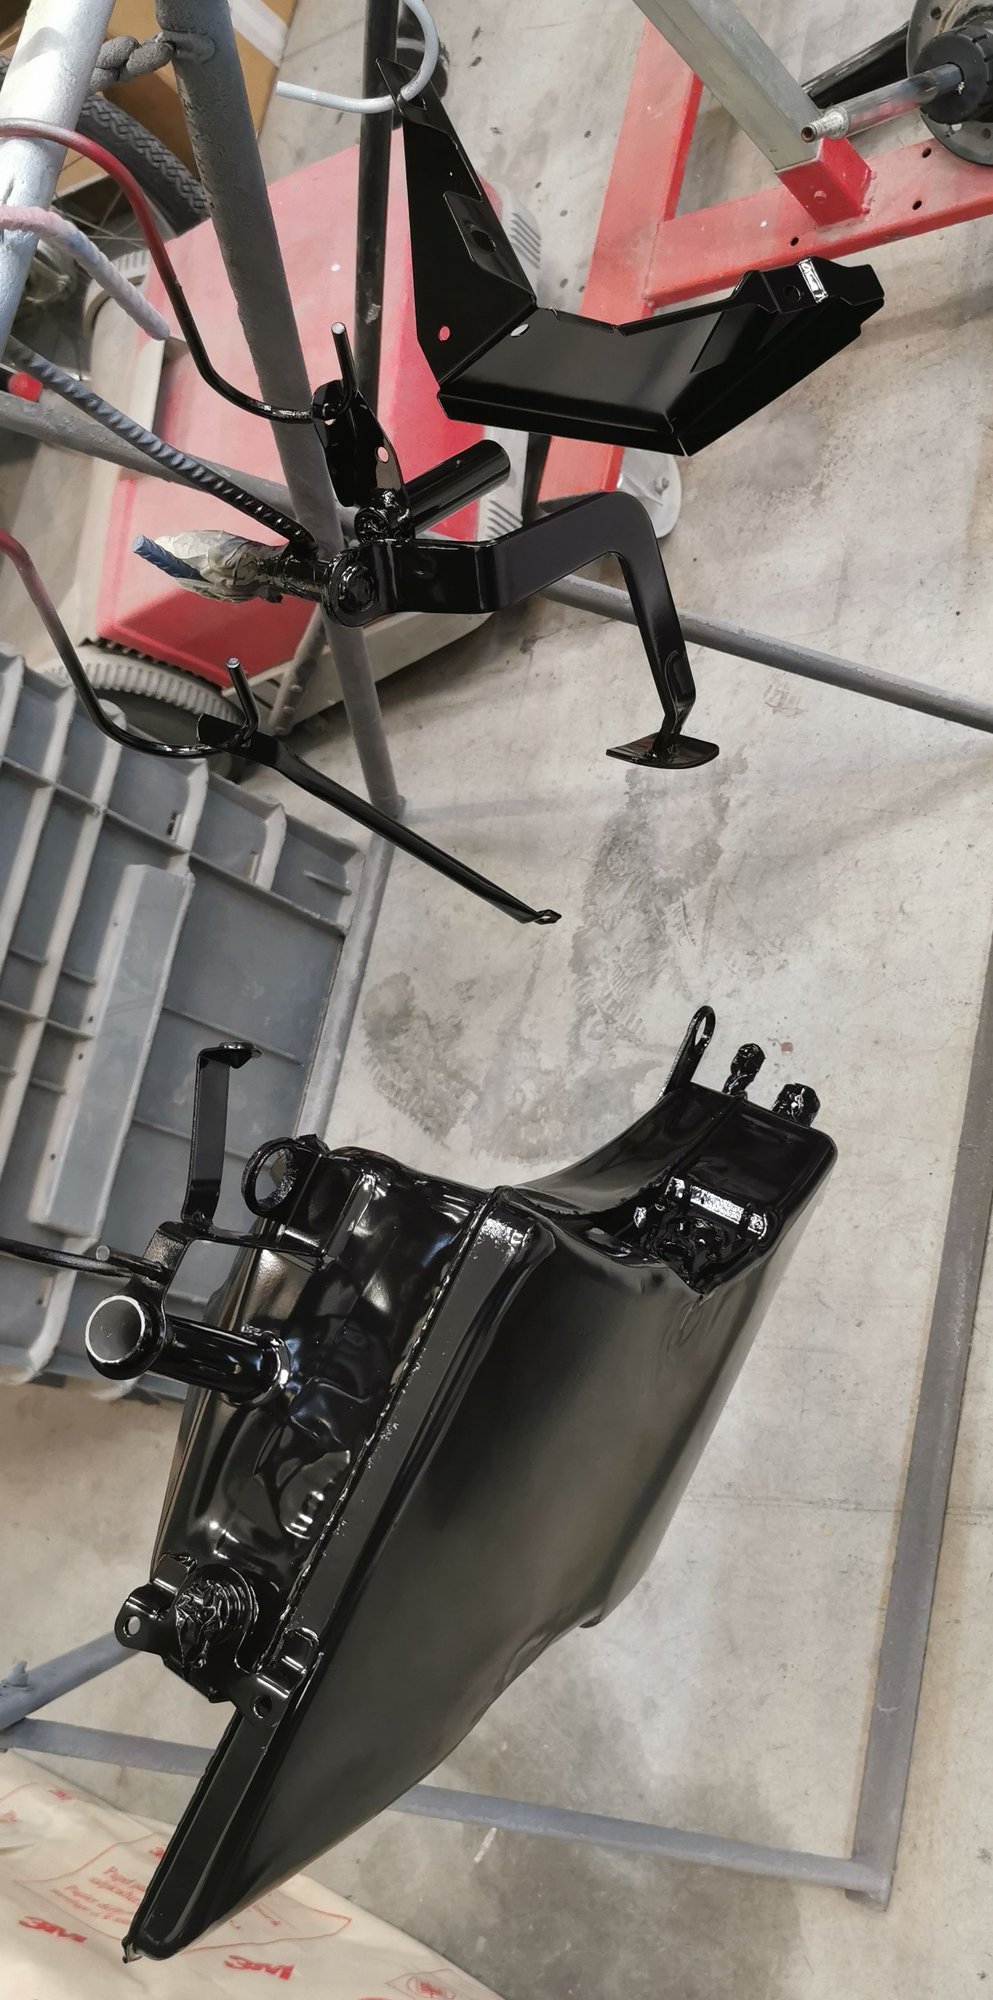
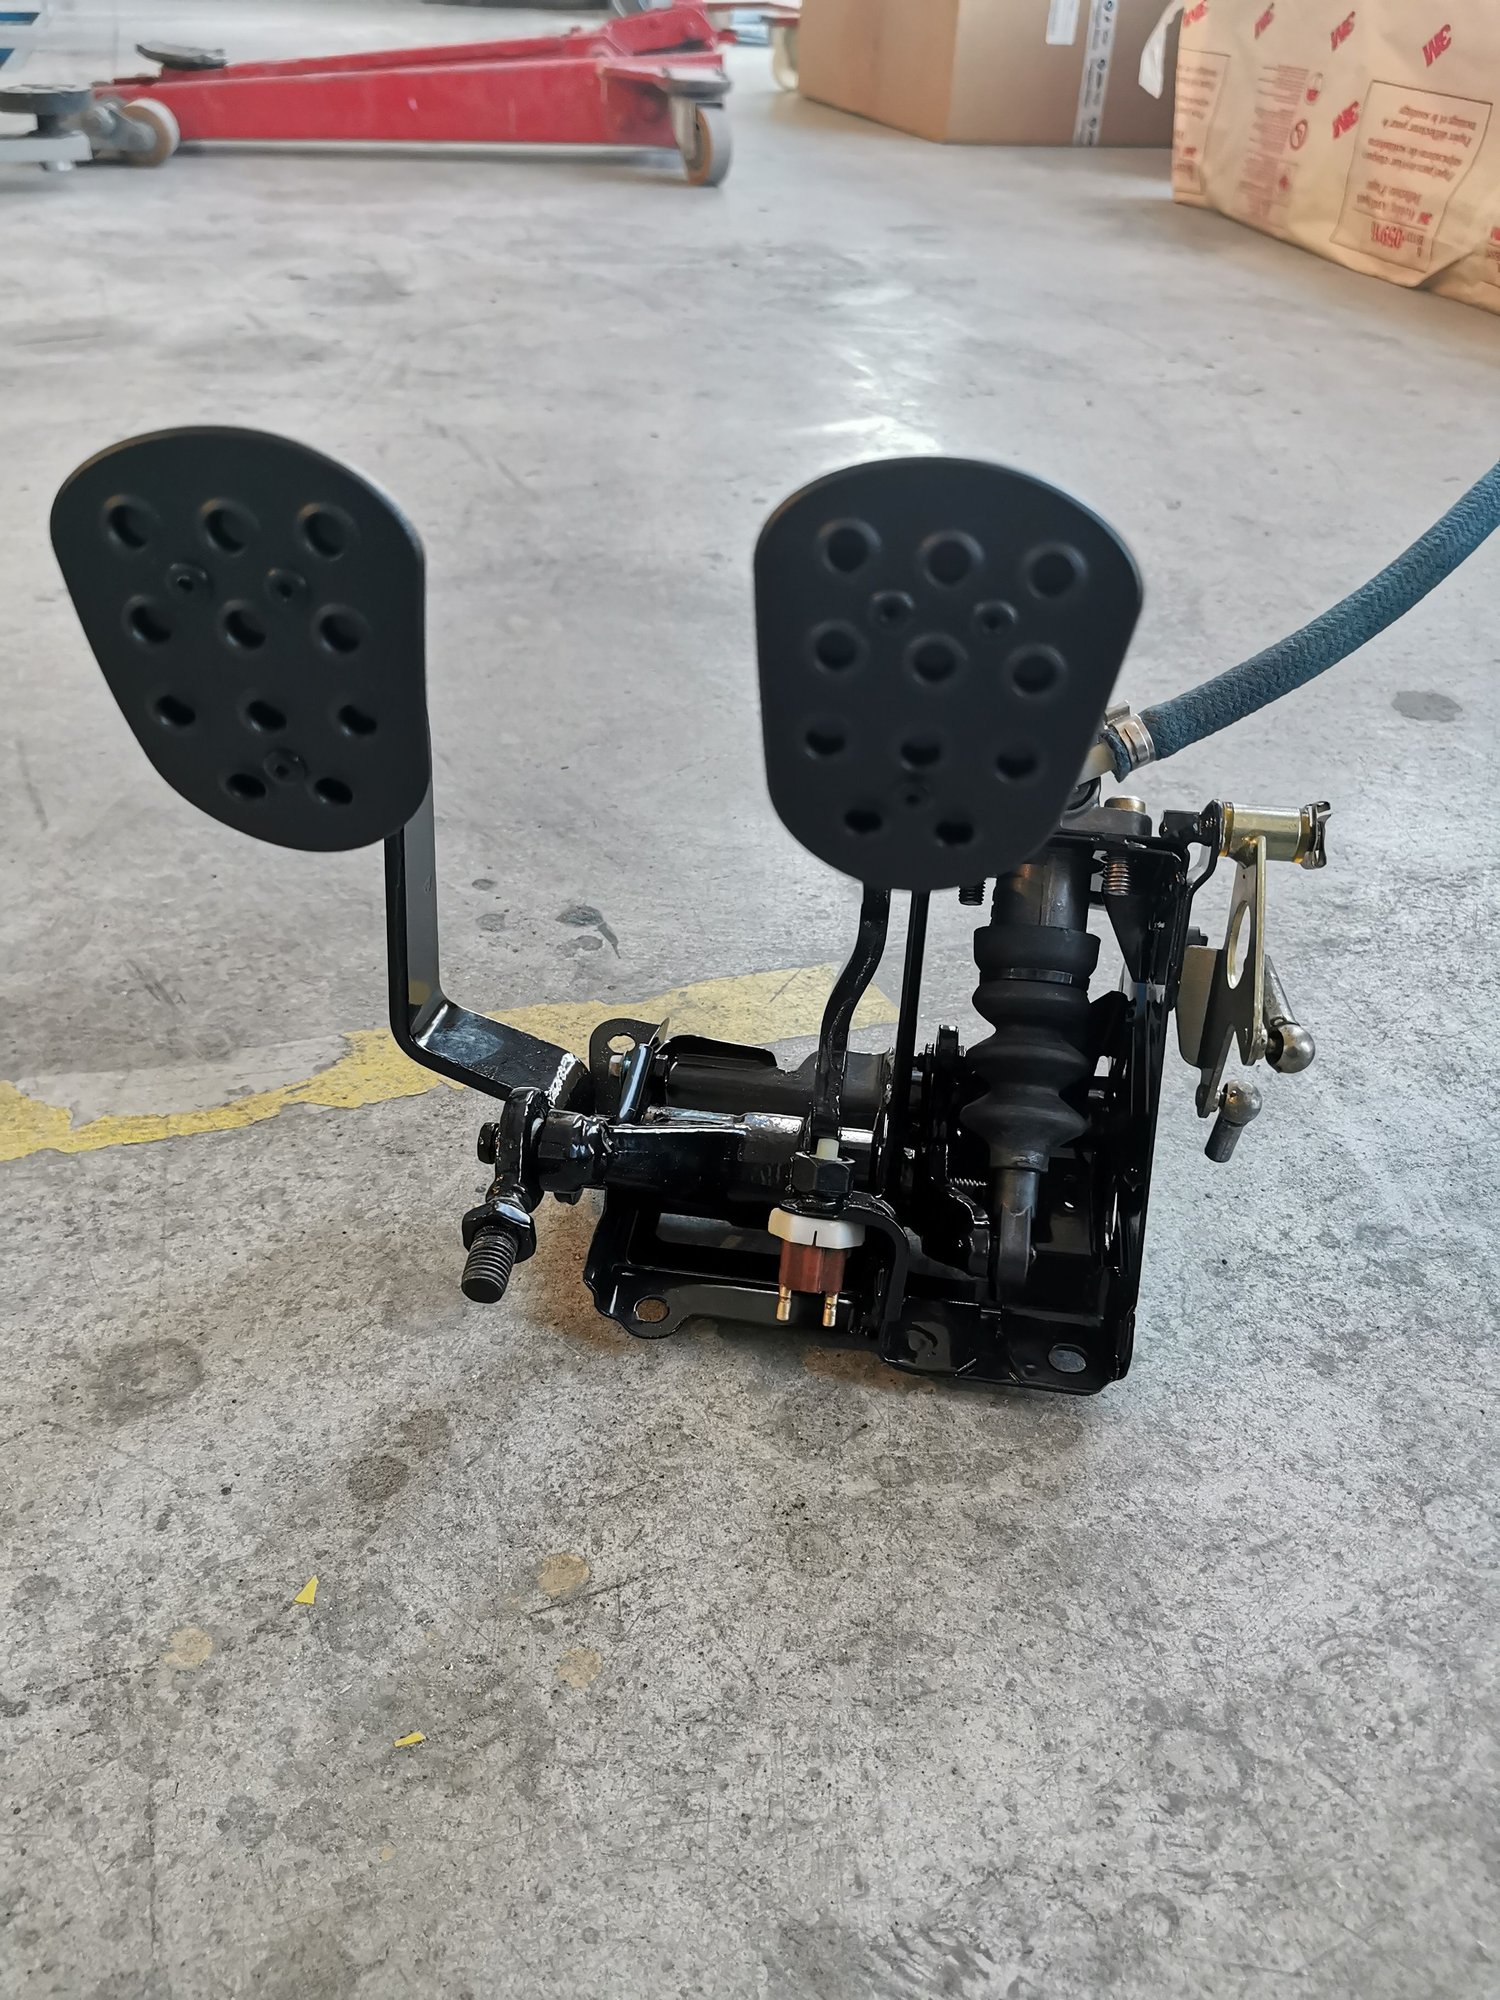
The pedal pieces you see hanging are the ones that were on the sunken car: the pedal board will be totally rebuilt using its original parts.
While the A / C console was bought used, sandblasted and totally refurbished (maybe it would have costed me less to buy it new).
Last edited by nothingbutgt3; 11-19-2021 at 12:22 PM.
For What It's Worth...
A couple of precautions, make absolutely sure that the inside of the oil tank is clean and rinsed out. No glass beads inside hiding that could spell disaster later. I had this issue with a 1948 Harley Davidson engine. Second, the fan blade tips and the shroud clearance is Very Small. There could be paint interference that should be checked before spinning/running these parts together.
Best Wishes with your Grand Project!!!!
George B.
Thank you George,
I had the oil tank sand blasted with all the holes closed, then I sent it to be washed inside a microwaves bath, but you are right, checking it at least other couple times, using pressure air flow and then again washing by myself is very very important.
Even if they are already clean, the mechanic who is going to reassemble the engine parts will be responsible for eventual demages depending from dirt, so I will recommend him, but he already knows this, to check, clean them again in the microwave bath and check them again.
The engine fan is ready to be painted: as you can see the outer part of the blades is almost with no primer coating, before painting them there will be applied a very very thin layer of primer coating "wet on wet" just to paint right on it with a very thin layer of paint.
Not only is important to avoid interference, but also to avoid overweight.
I am looking forward to see the final fan painted in its original color and will keep you posted!
Last edited by nothingbutgt3; 11-20-2021 at 01:49 PM.
I haven't been on this forum in a long, long time. I read your entire thread from the beginning. What an amazing journey. Thank you for taking the extra time to document every step along the way - it's cathartic (cartatico). I'm just beginning the search for a 993. I once had an '84 Carrera and made the mistake of selling it long ago. When I sold it the 993's were still new. I hope to get lucky and find one for myself.
I haven't been on this forum in a long, long time. I read your entire thread from the beginning. What an amazing journey. Thank you for taking the extra time to document every step along the way - it's cathartic (cartatico). I'm just beginning the search for a 993. I once had an '84 Carrera and made the mistake of selling it long ago. When I sold it the 993's were still new. I hope to get lucky and find one for myself.
Best,
Robert
Thank you very much for your kind words Robert
Right now at the coachbuilder shop we are dealing with the color of the engine fan: we have the original engine fan of the silver 993 as a reference, though it is well maintained, it still wears the aging process after 25 years.
We decided to give a try to Zermatt Silver, which in the Glasurit 90 series is composed with the following proportions
In regard to the portion of M99/01 we have decided toreplace it by the same quantity of M99/00, in order to reduce the metallic grain: the rest will be done by the semi-gloss finish to be applied as last layer.
This is the paint ready to be applied, now let's see if the final result will be 100% satisfying as desired.
Last edited by nothingbutgt3; 11-23-2021 at 07:51 PM.
Thank you Will!
Here is the pedal set fully restored, I can't describe all thr emotions flowing through my body, while seeing the recovered (and complex) pedal set, thinking how it was when I personally removed it unbolting the rusted nuts.

 11-09-2021, 06:02 AM


