When you click on links to various merchants on this site and make a purchase, this can result in this site earning a commission. Affiliate programs and affiliations include, but are not limited to, the eBay Partner Network.
I've had my 2015 C2S for a couple of years now. Reading these forums have caused me to lust after a 911R or a gt3 touring, but I can't justify the massive extra cost. 400 HP is plenty for a weekend fun car; however, the standard interior of my car has left me wanting. So, I decided to look into some upgrades. I'll use this thread to document my changes.
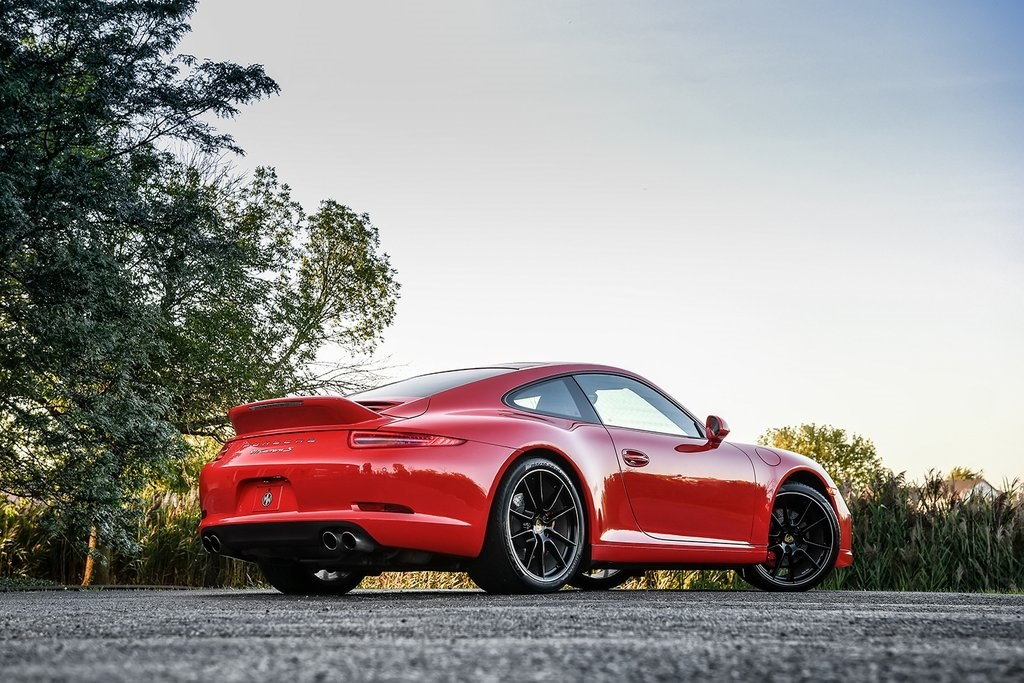
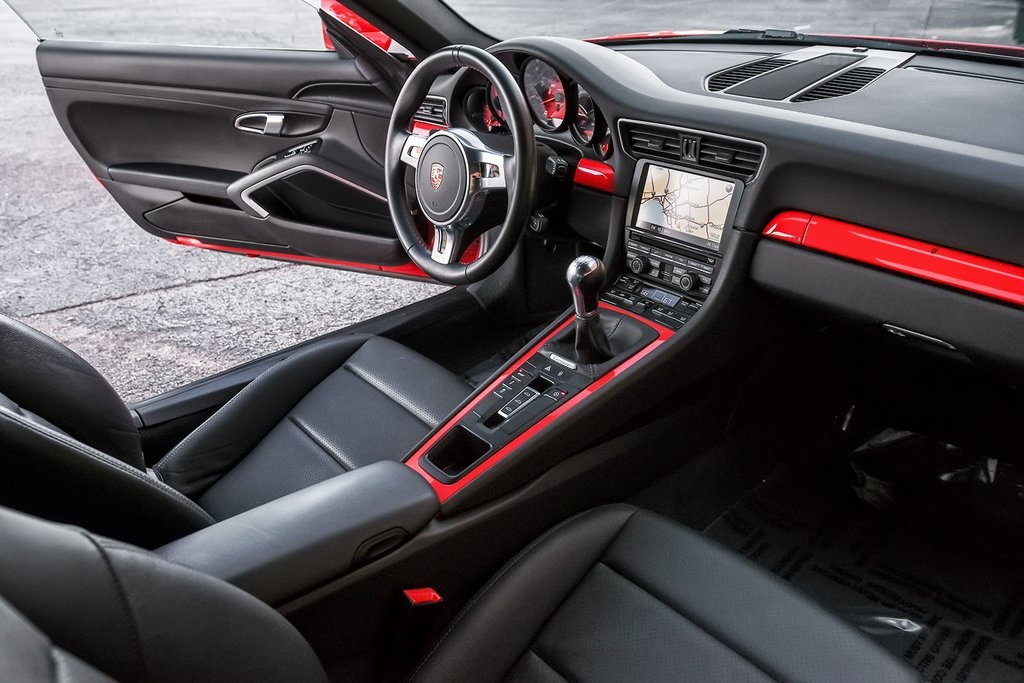
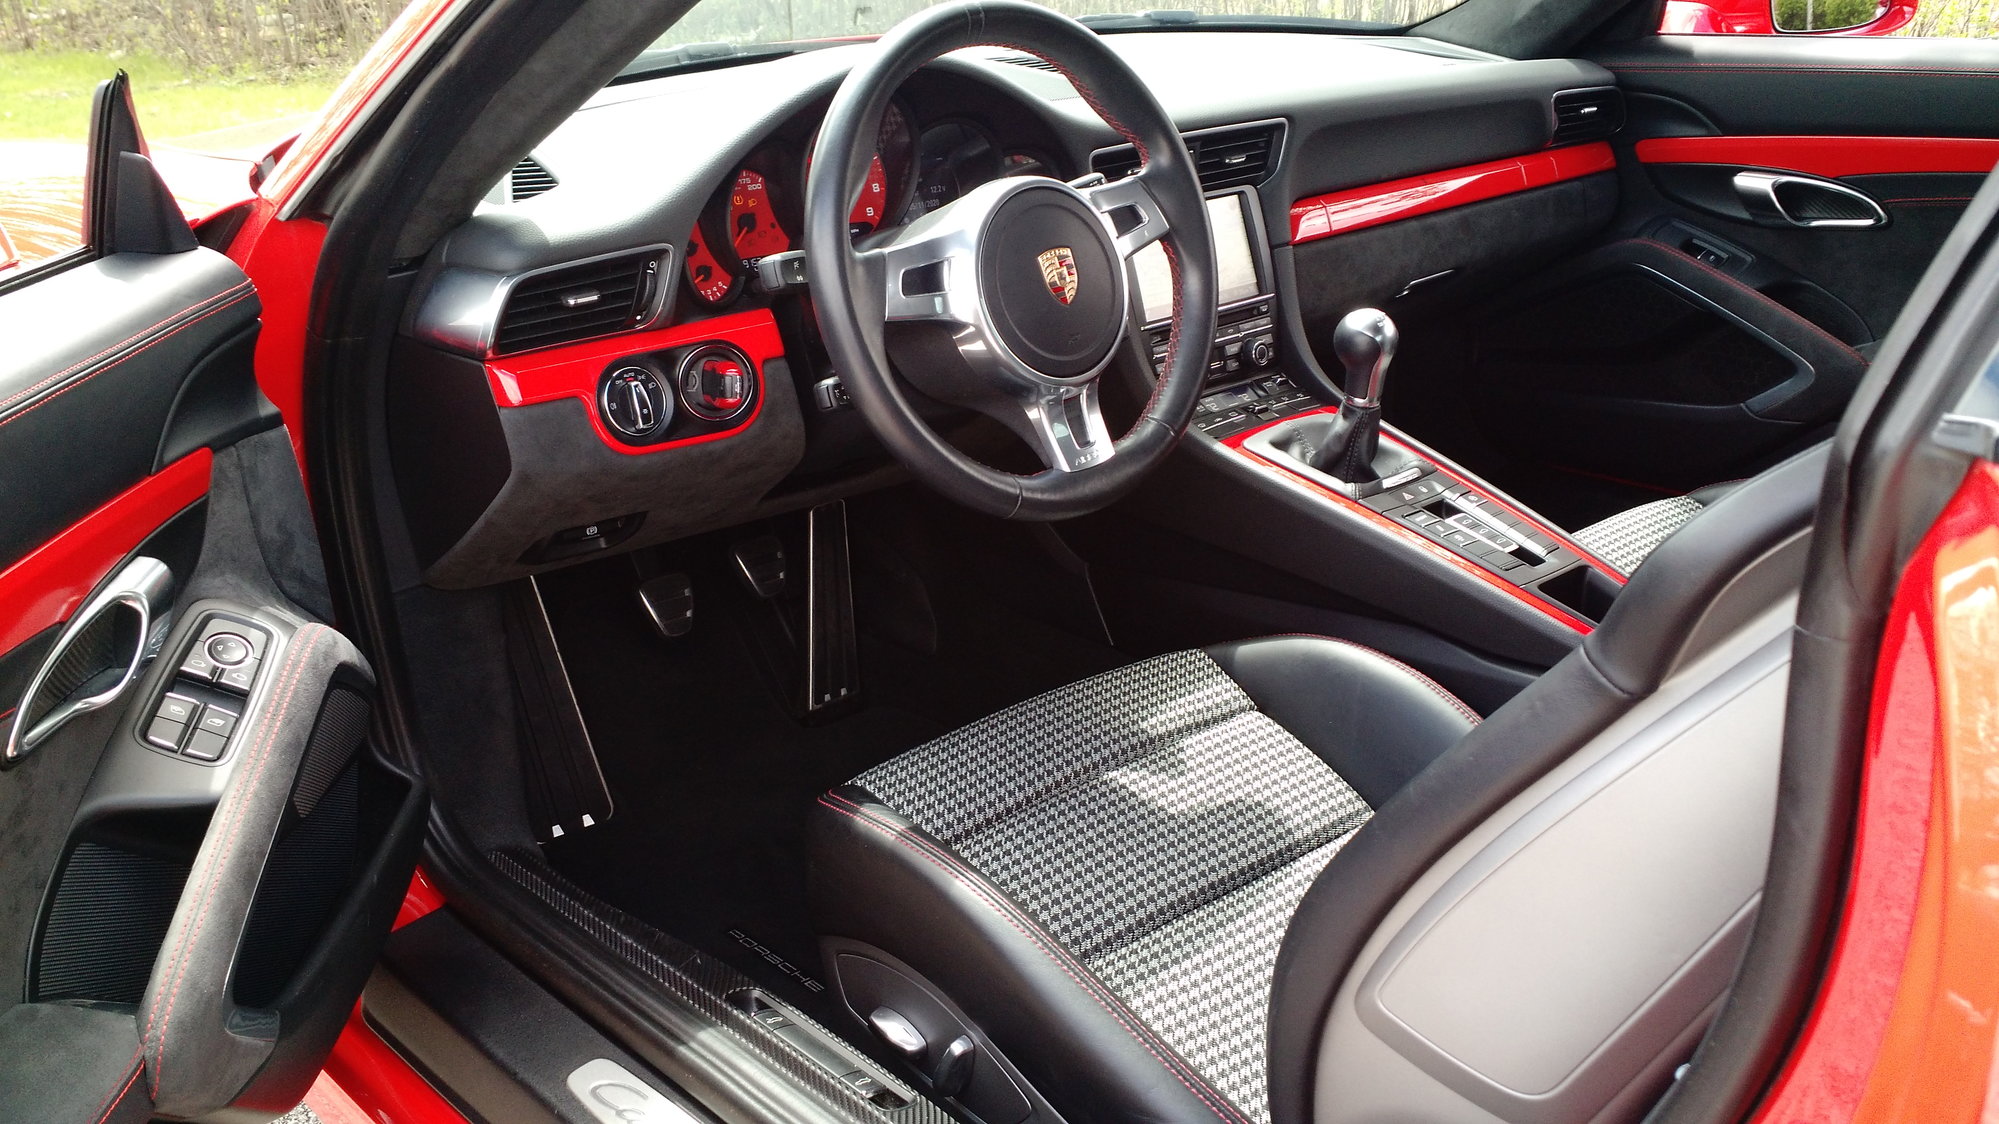
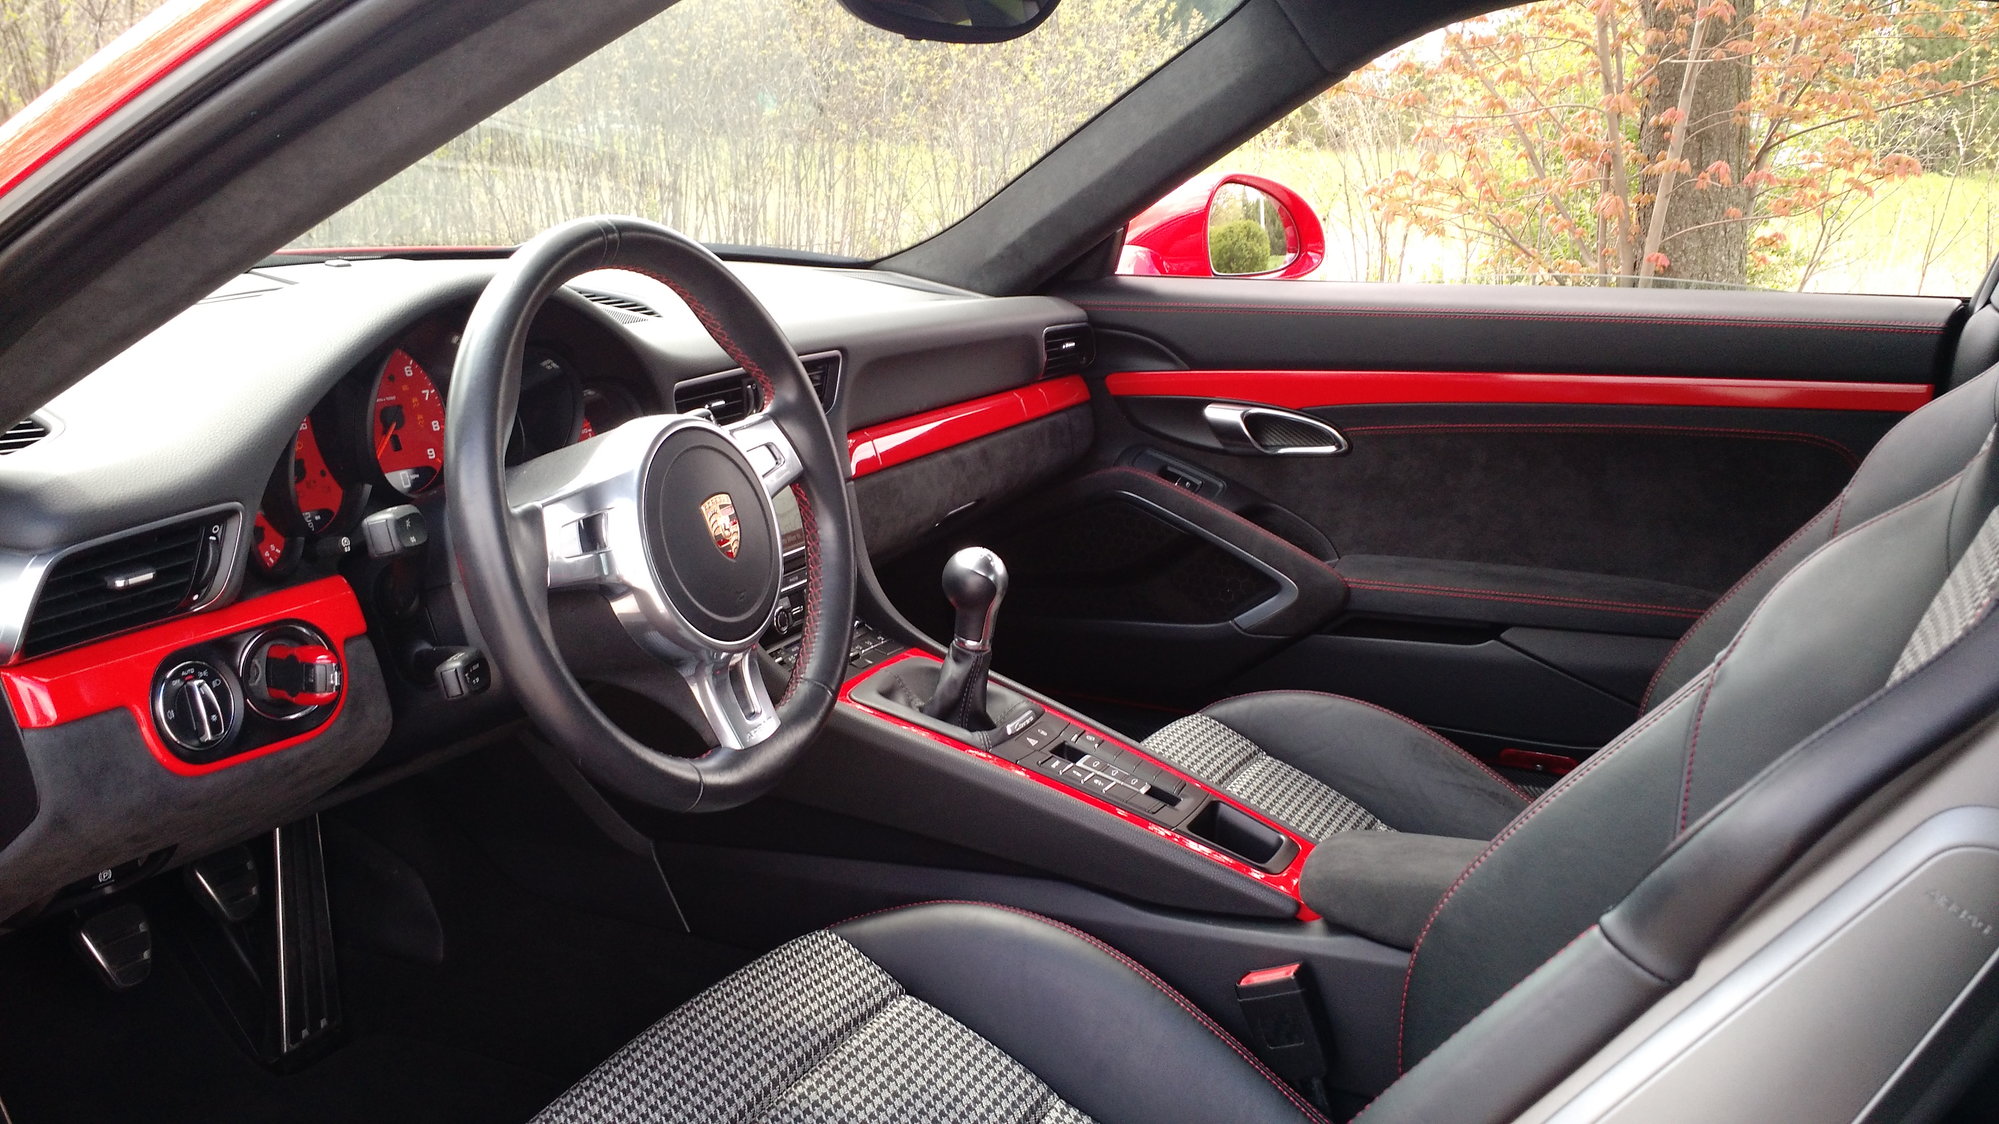
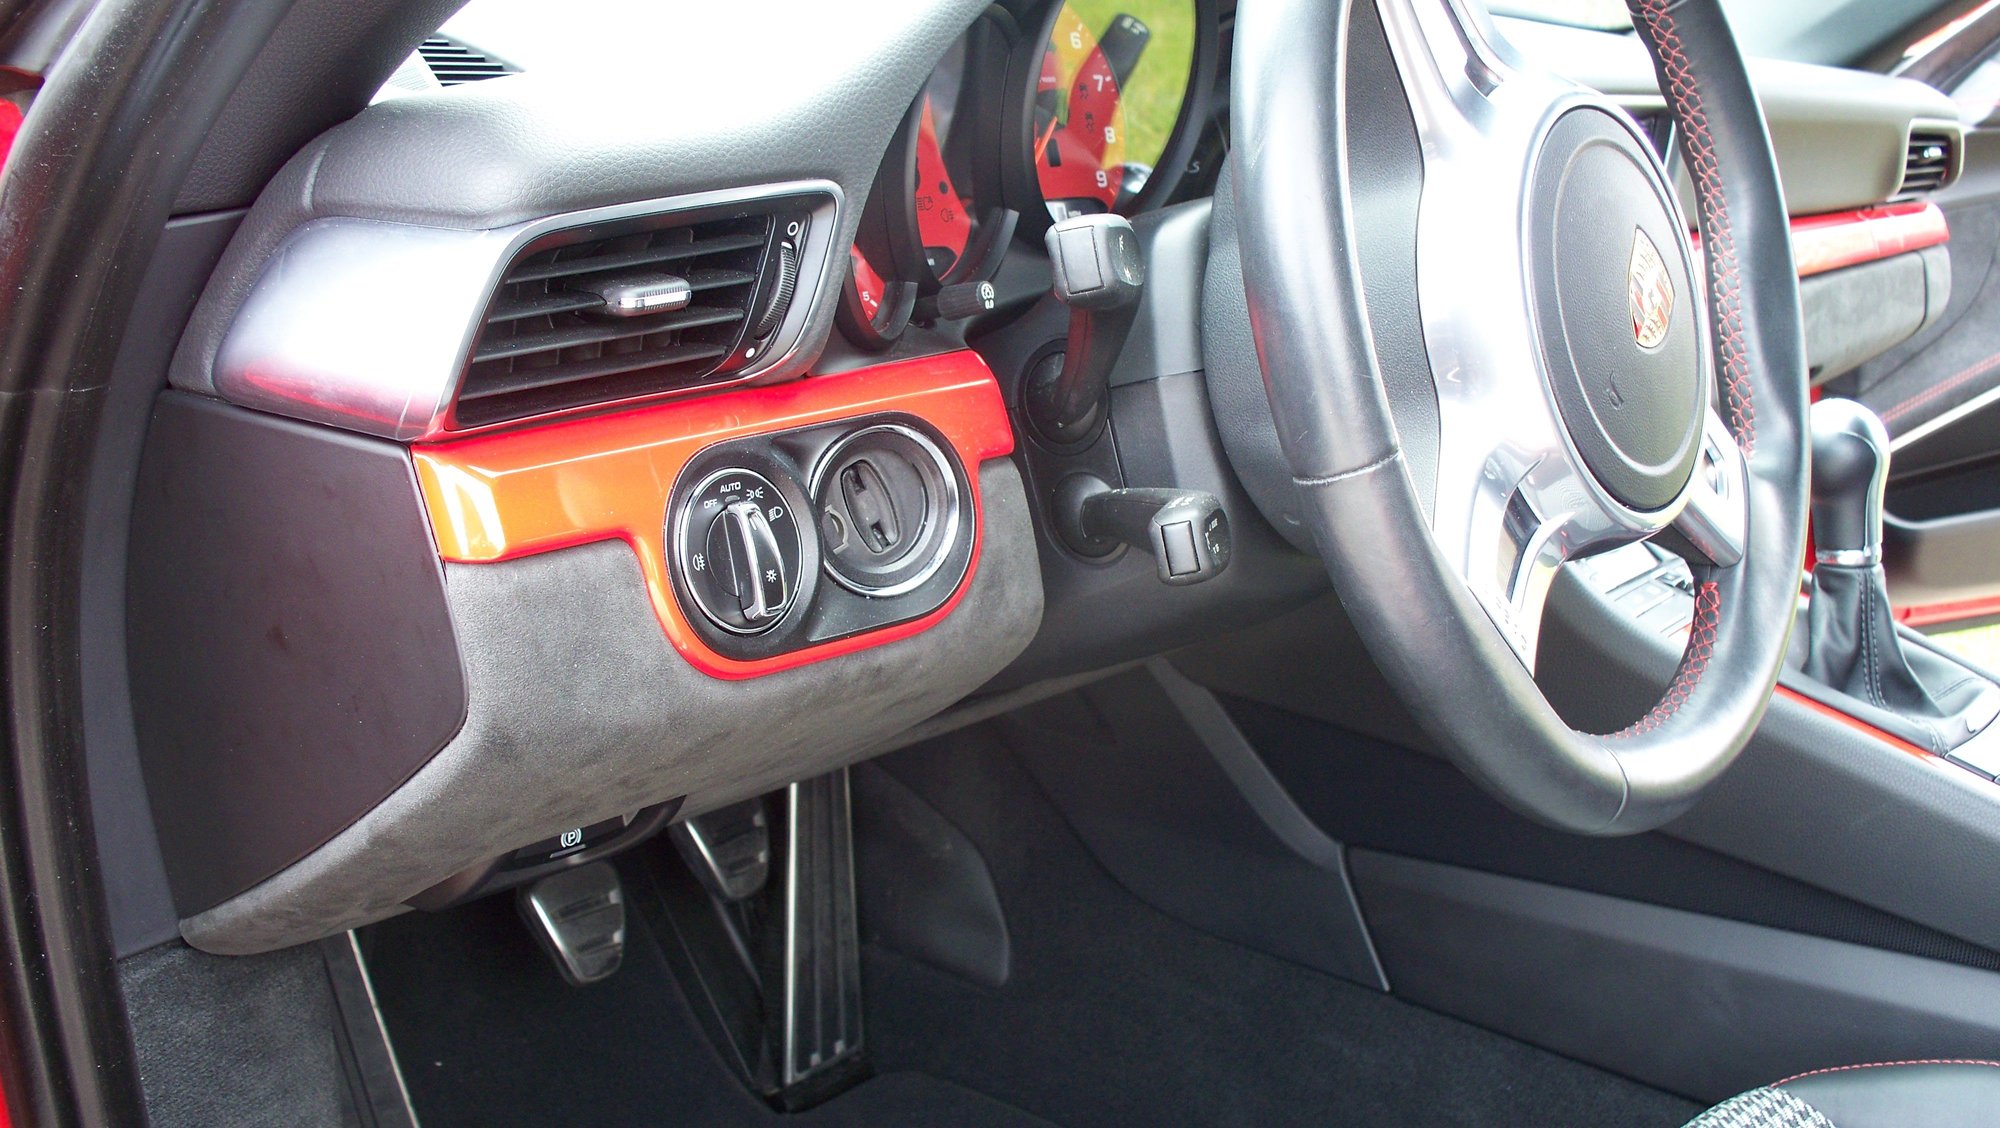
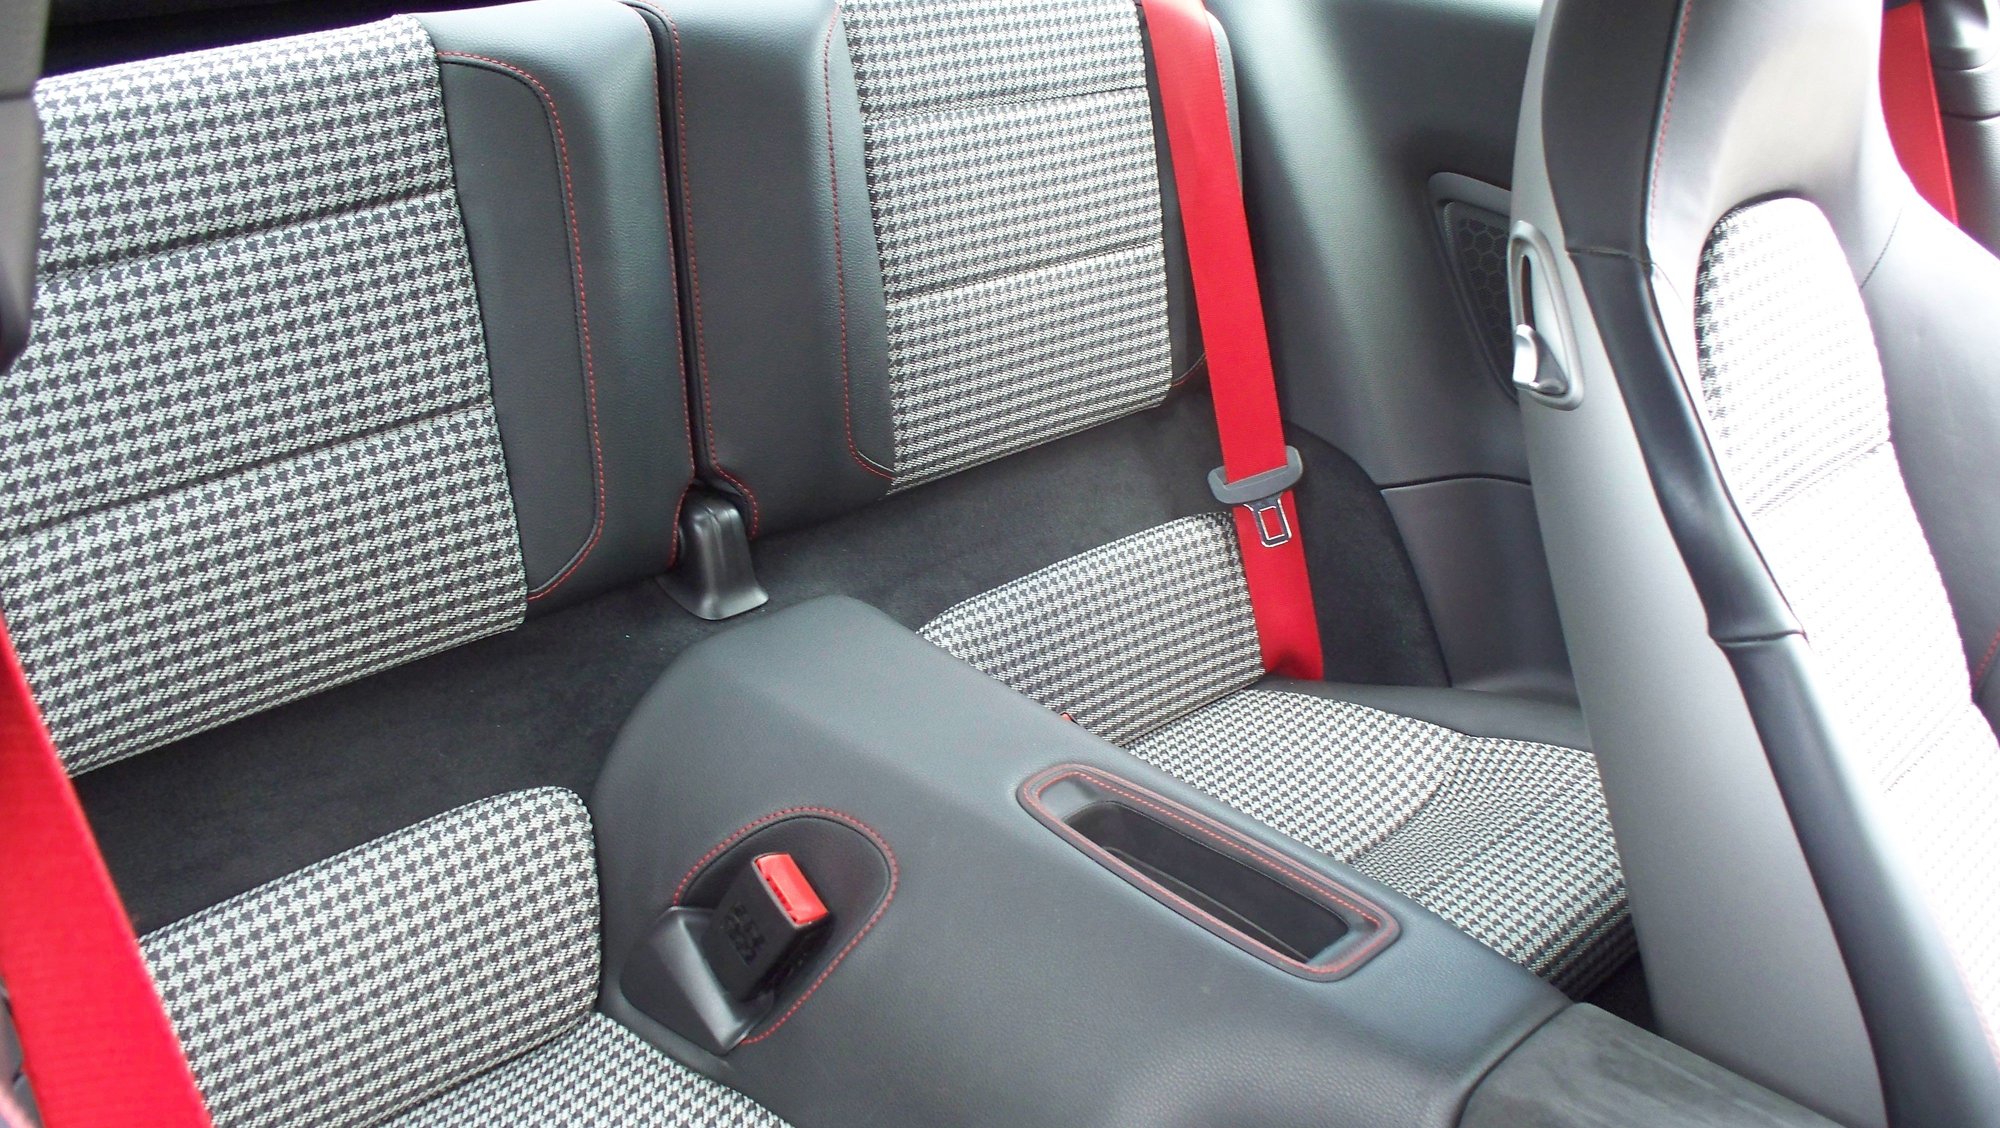
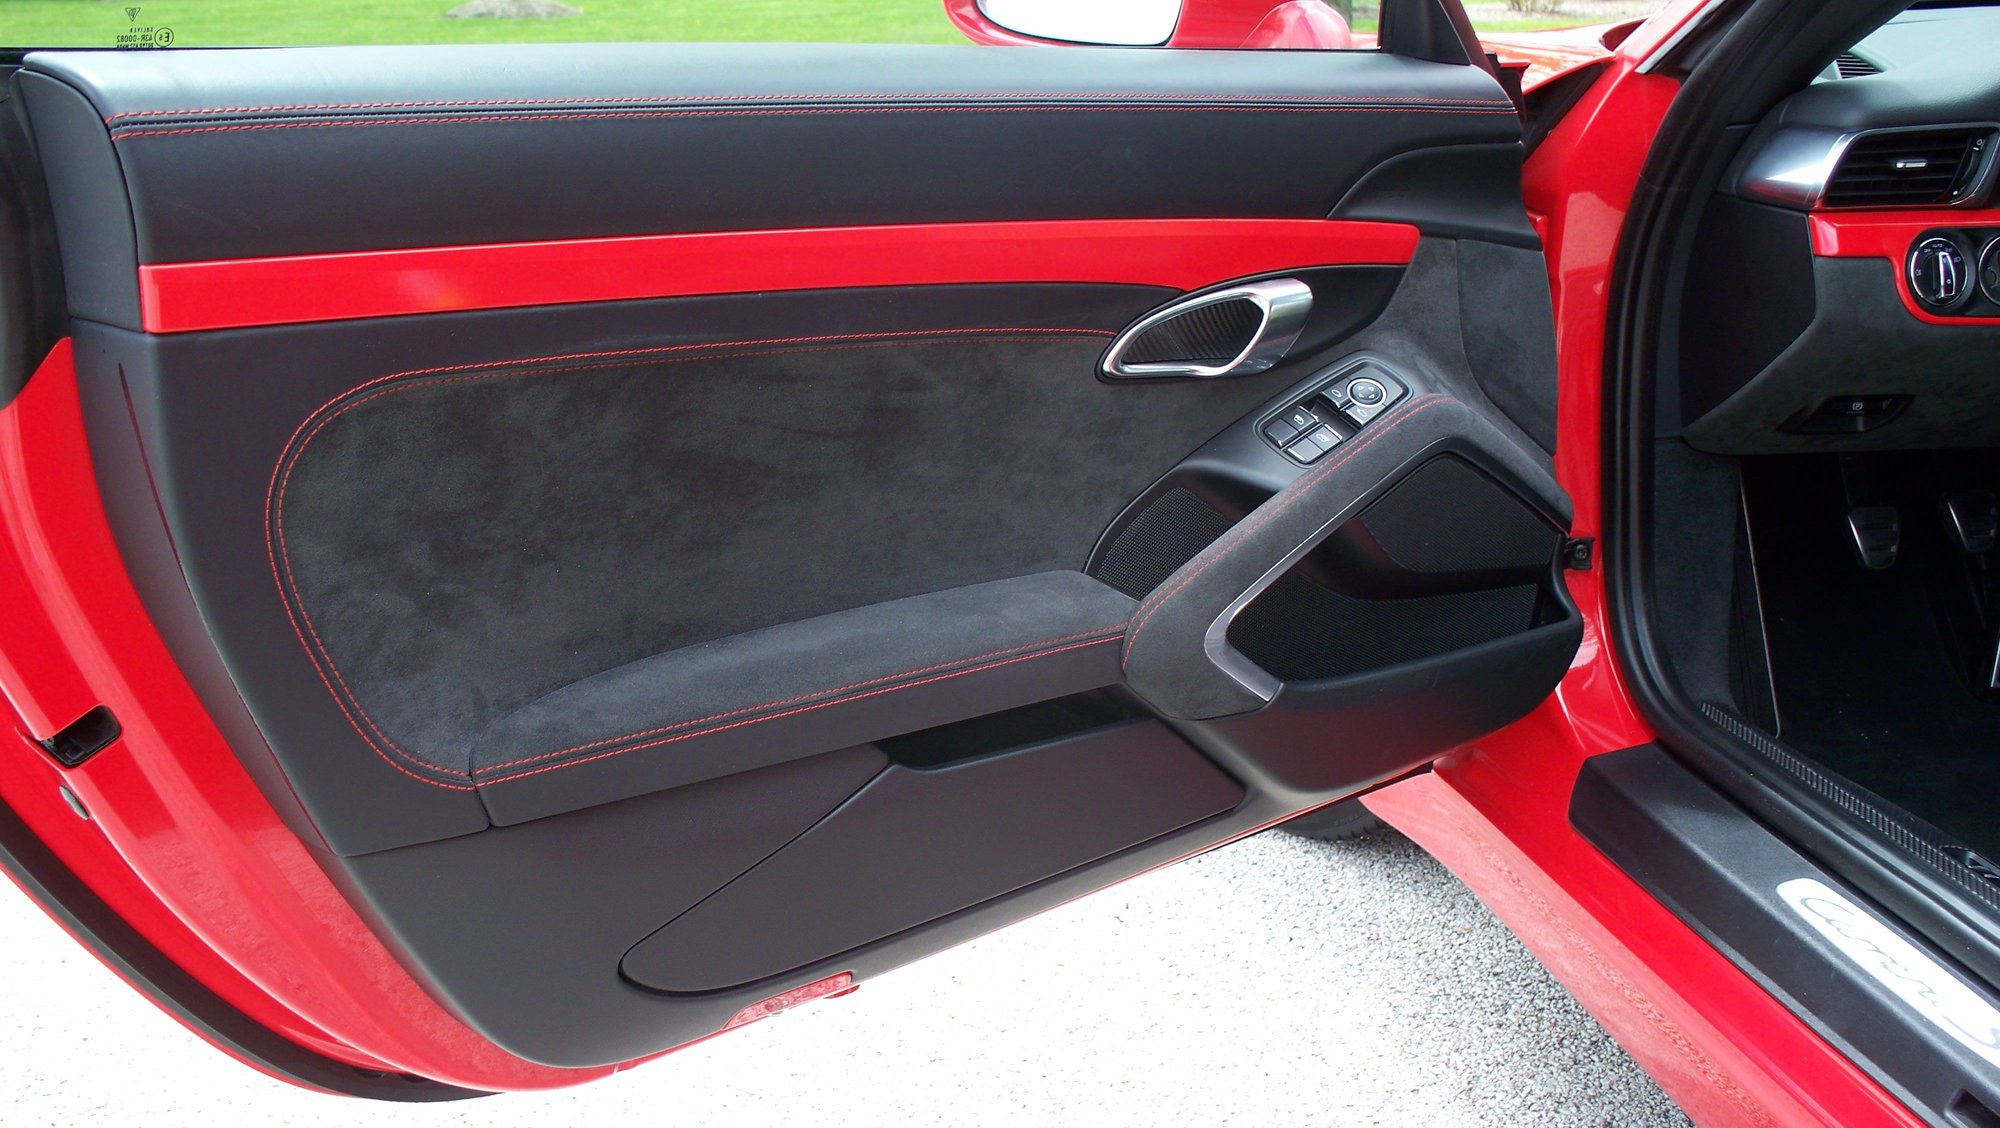
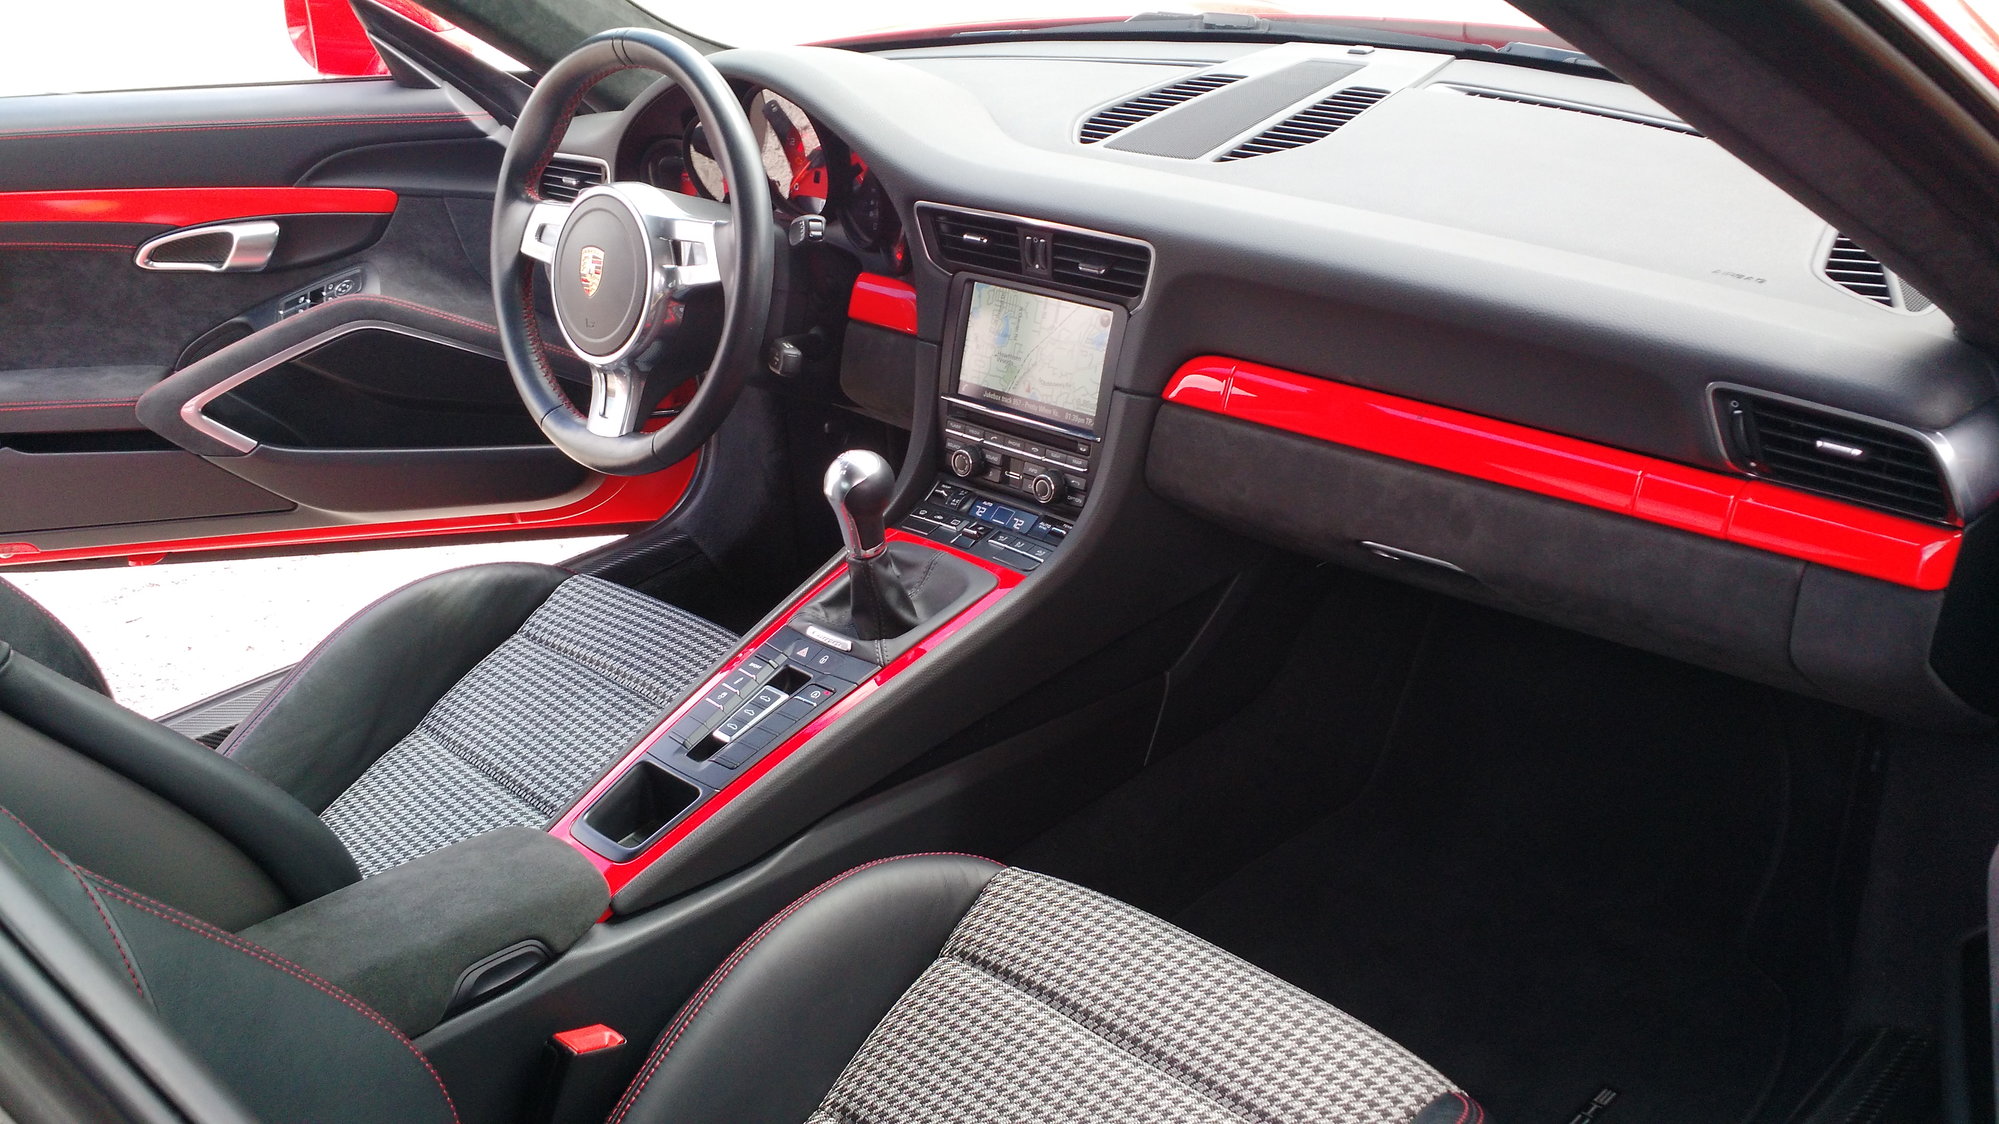
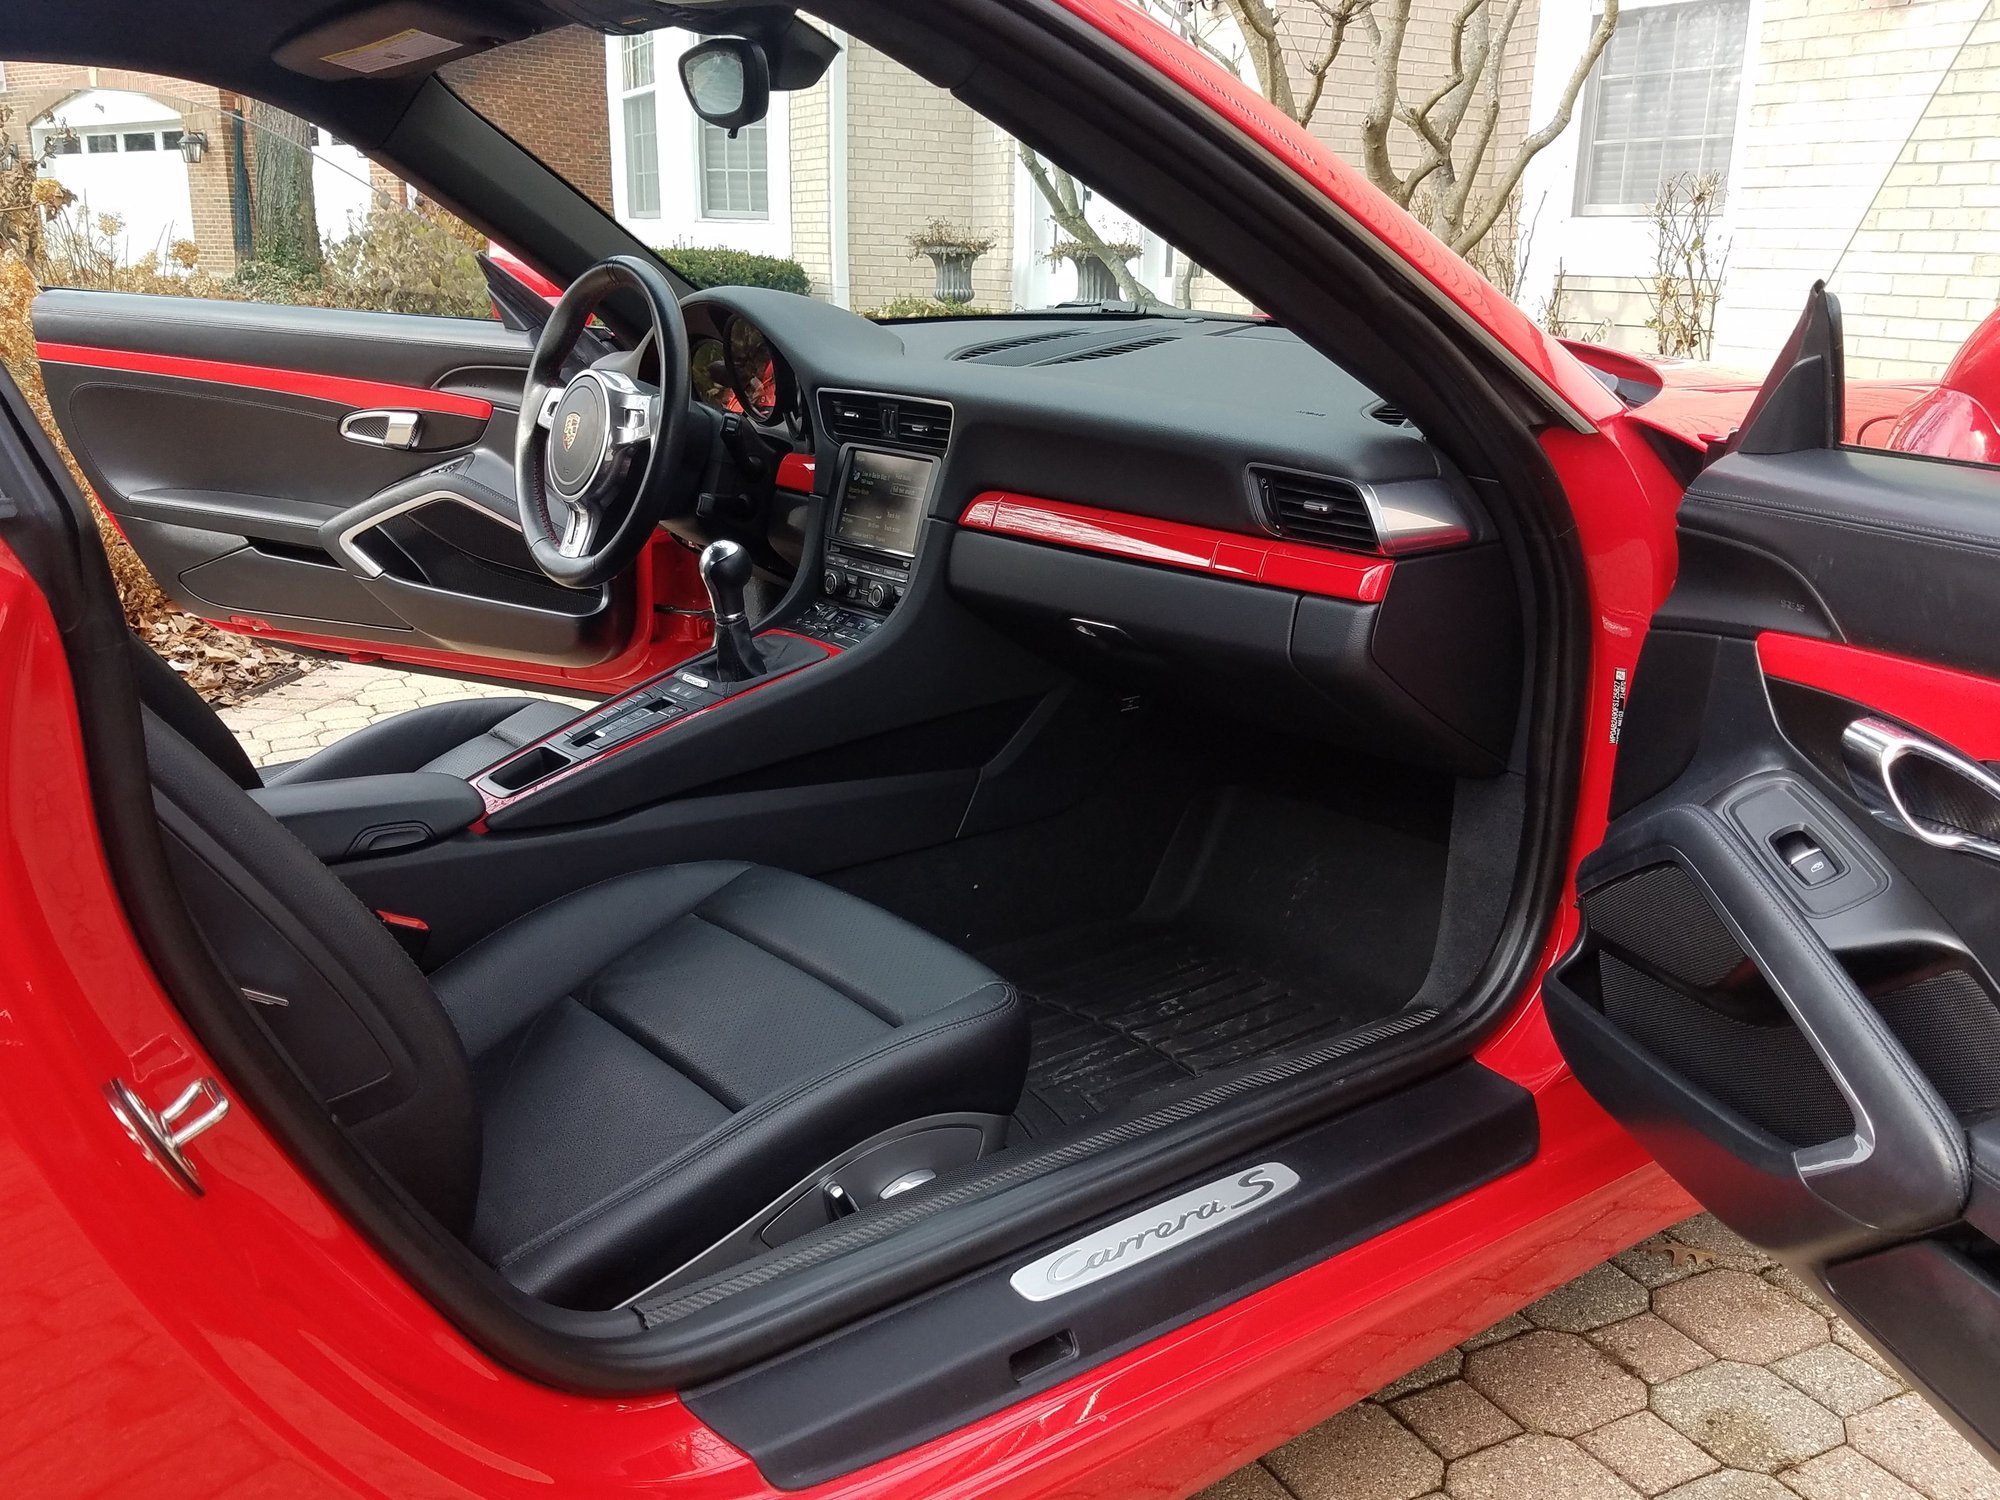
Starting point. Std 4 way seats, std black interior, optional red belts, red gauges, red trim. 7 sp manual trans. 2015 C2S sport design package, guards red Red trim on console and dash
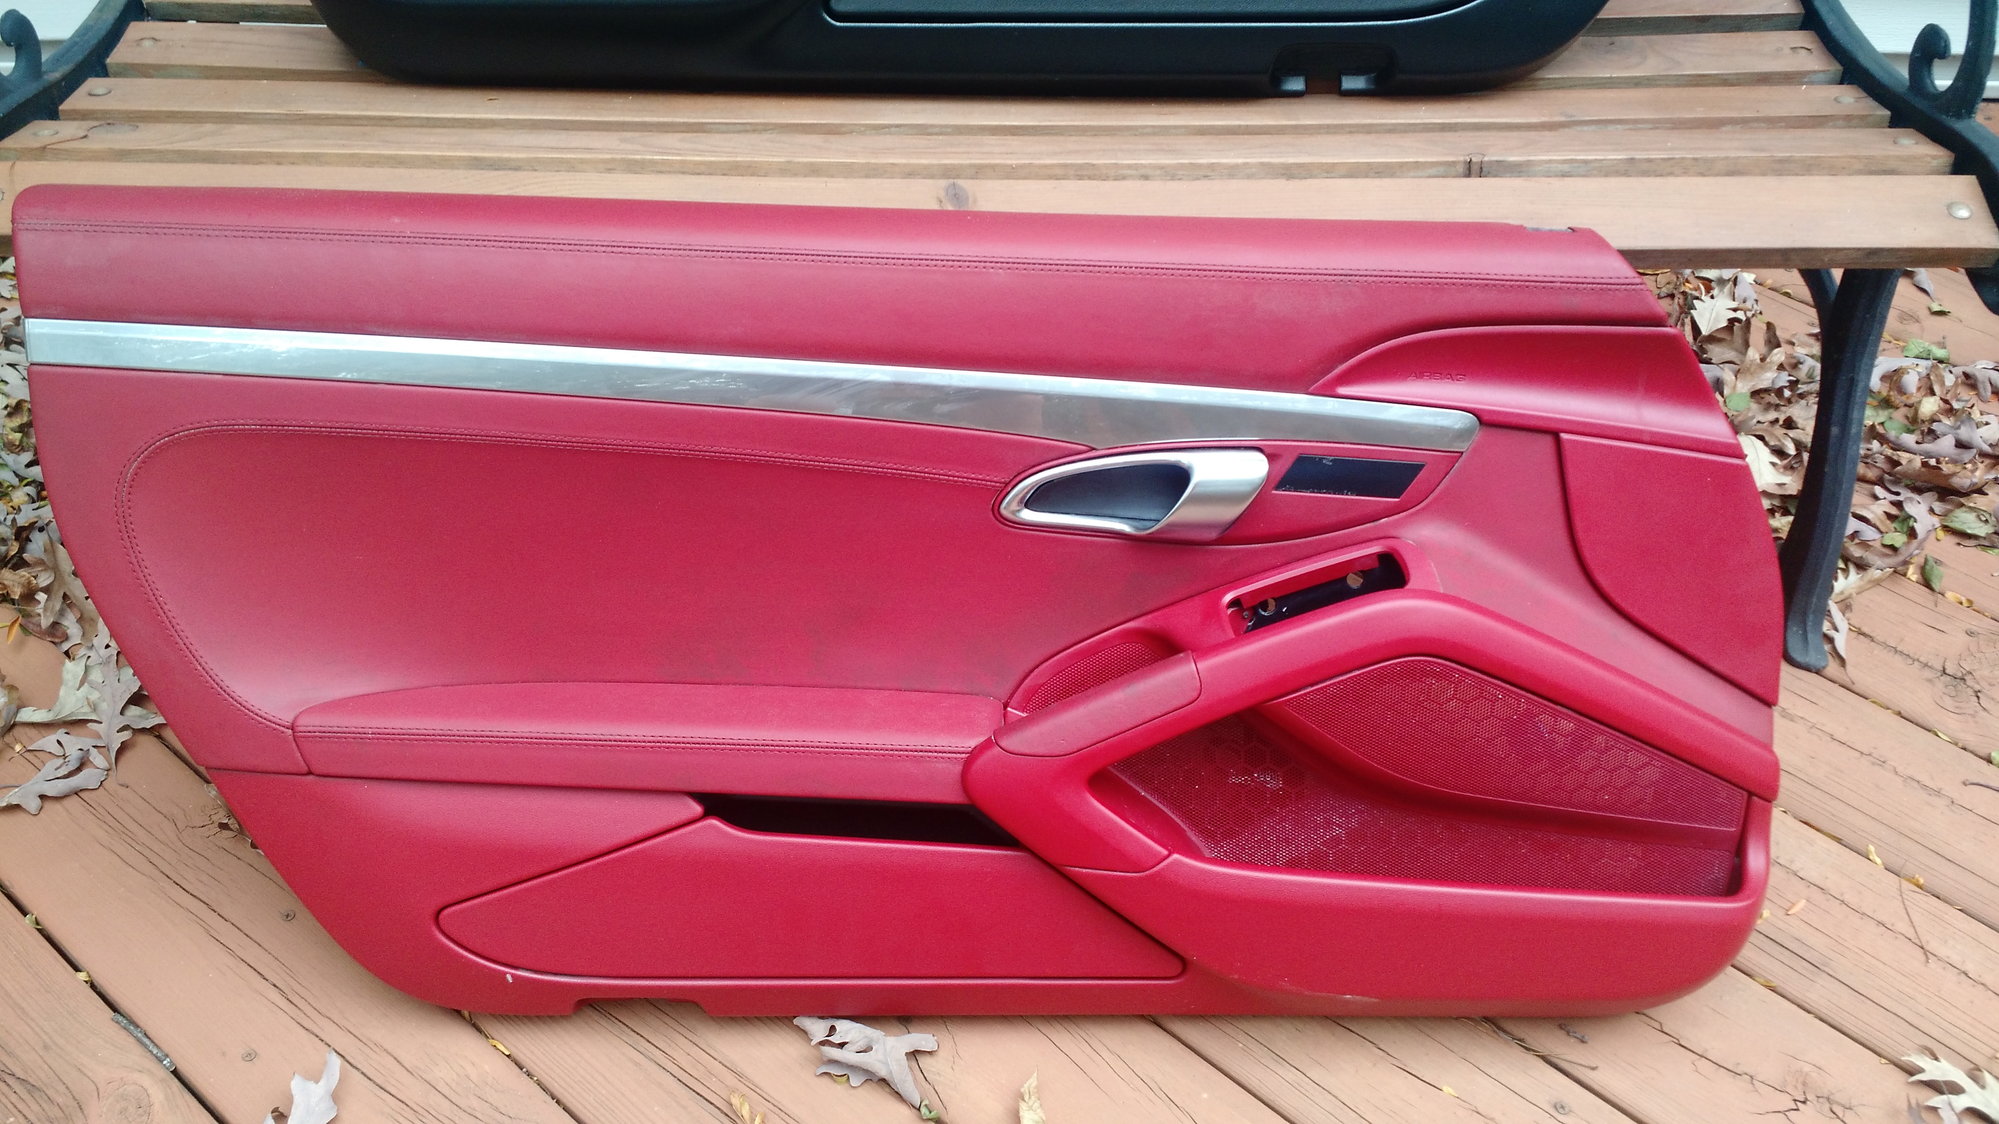
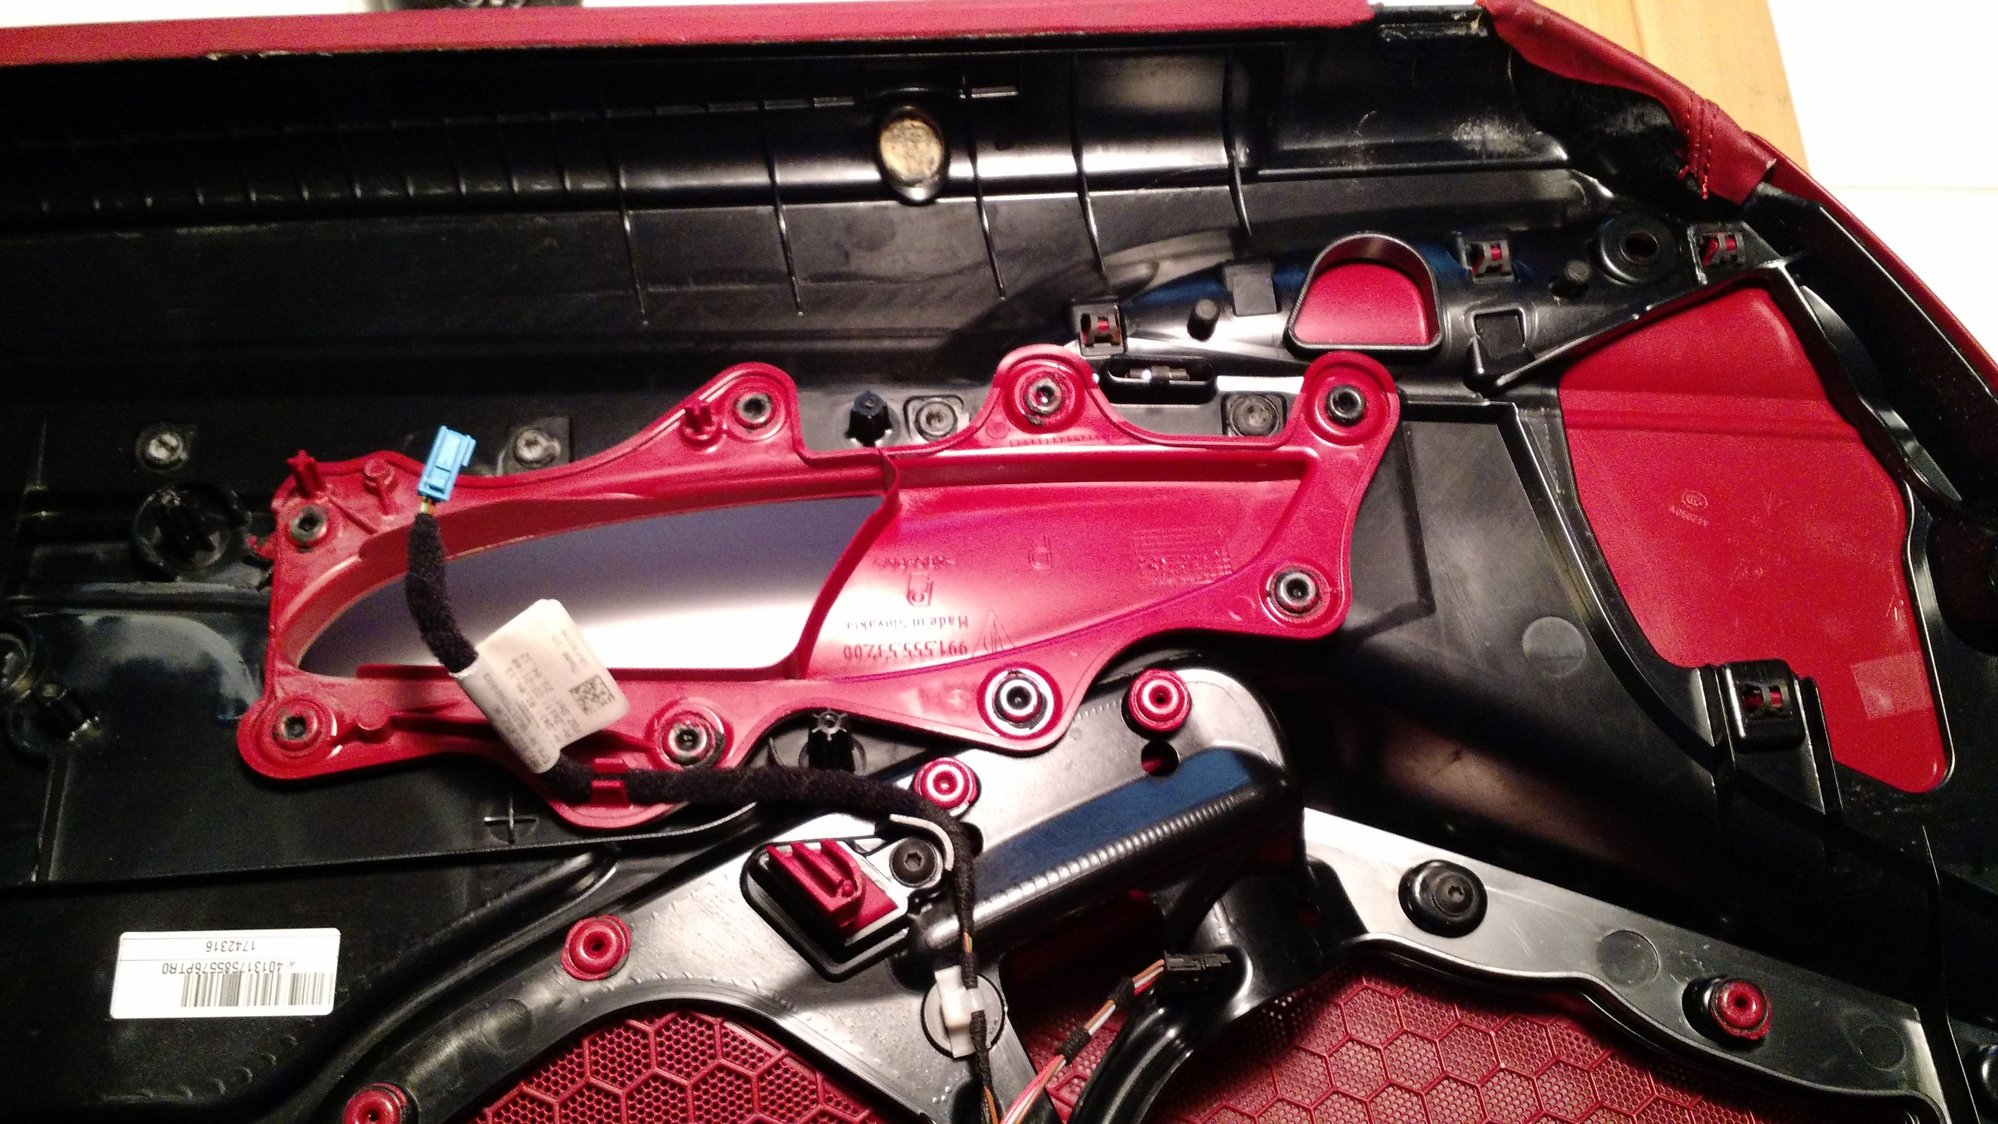
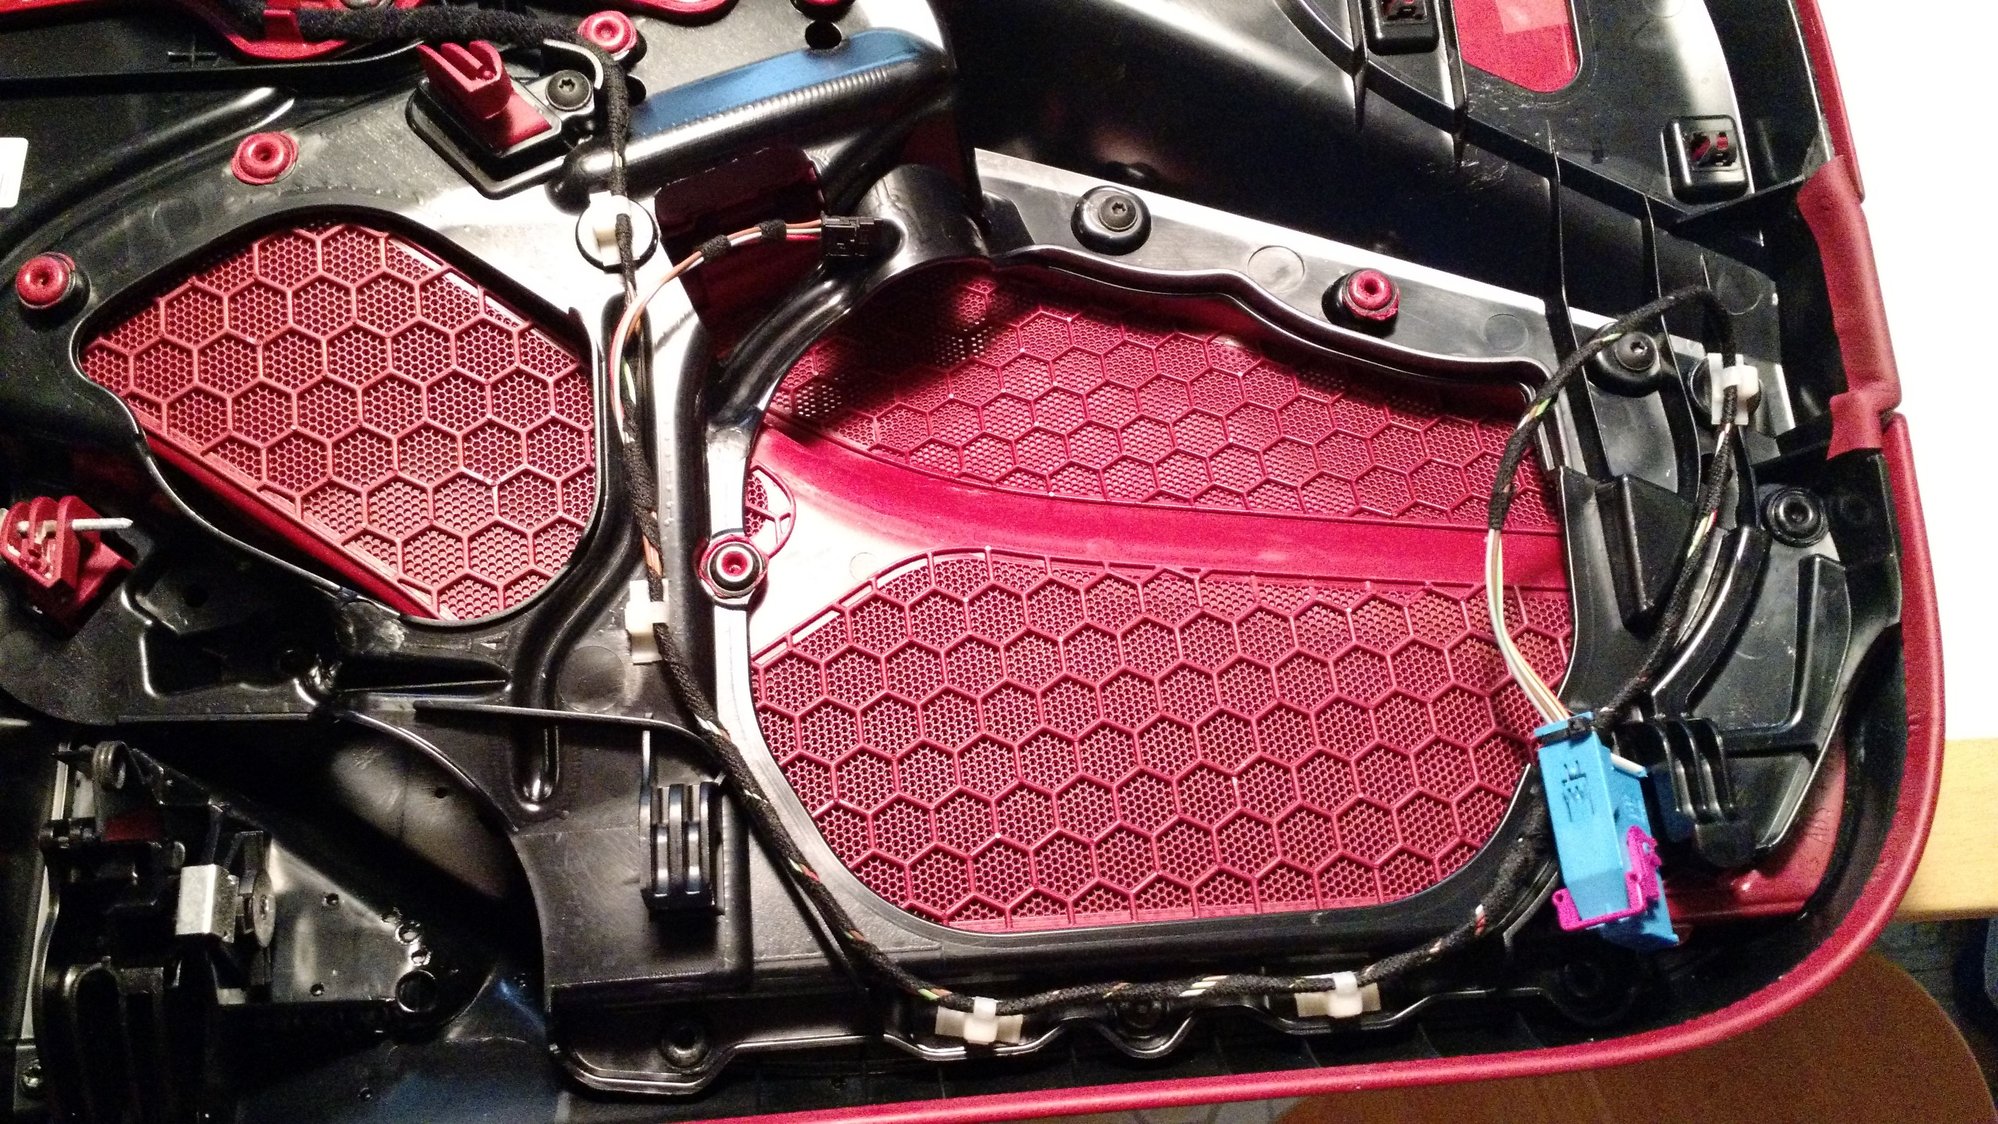
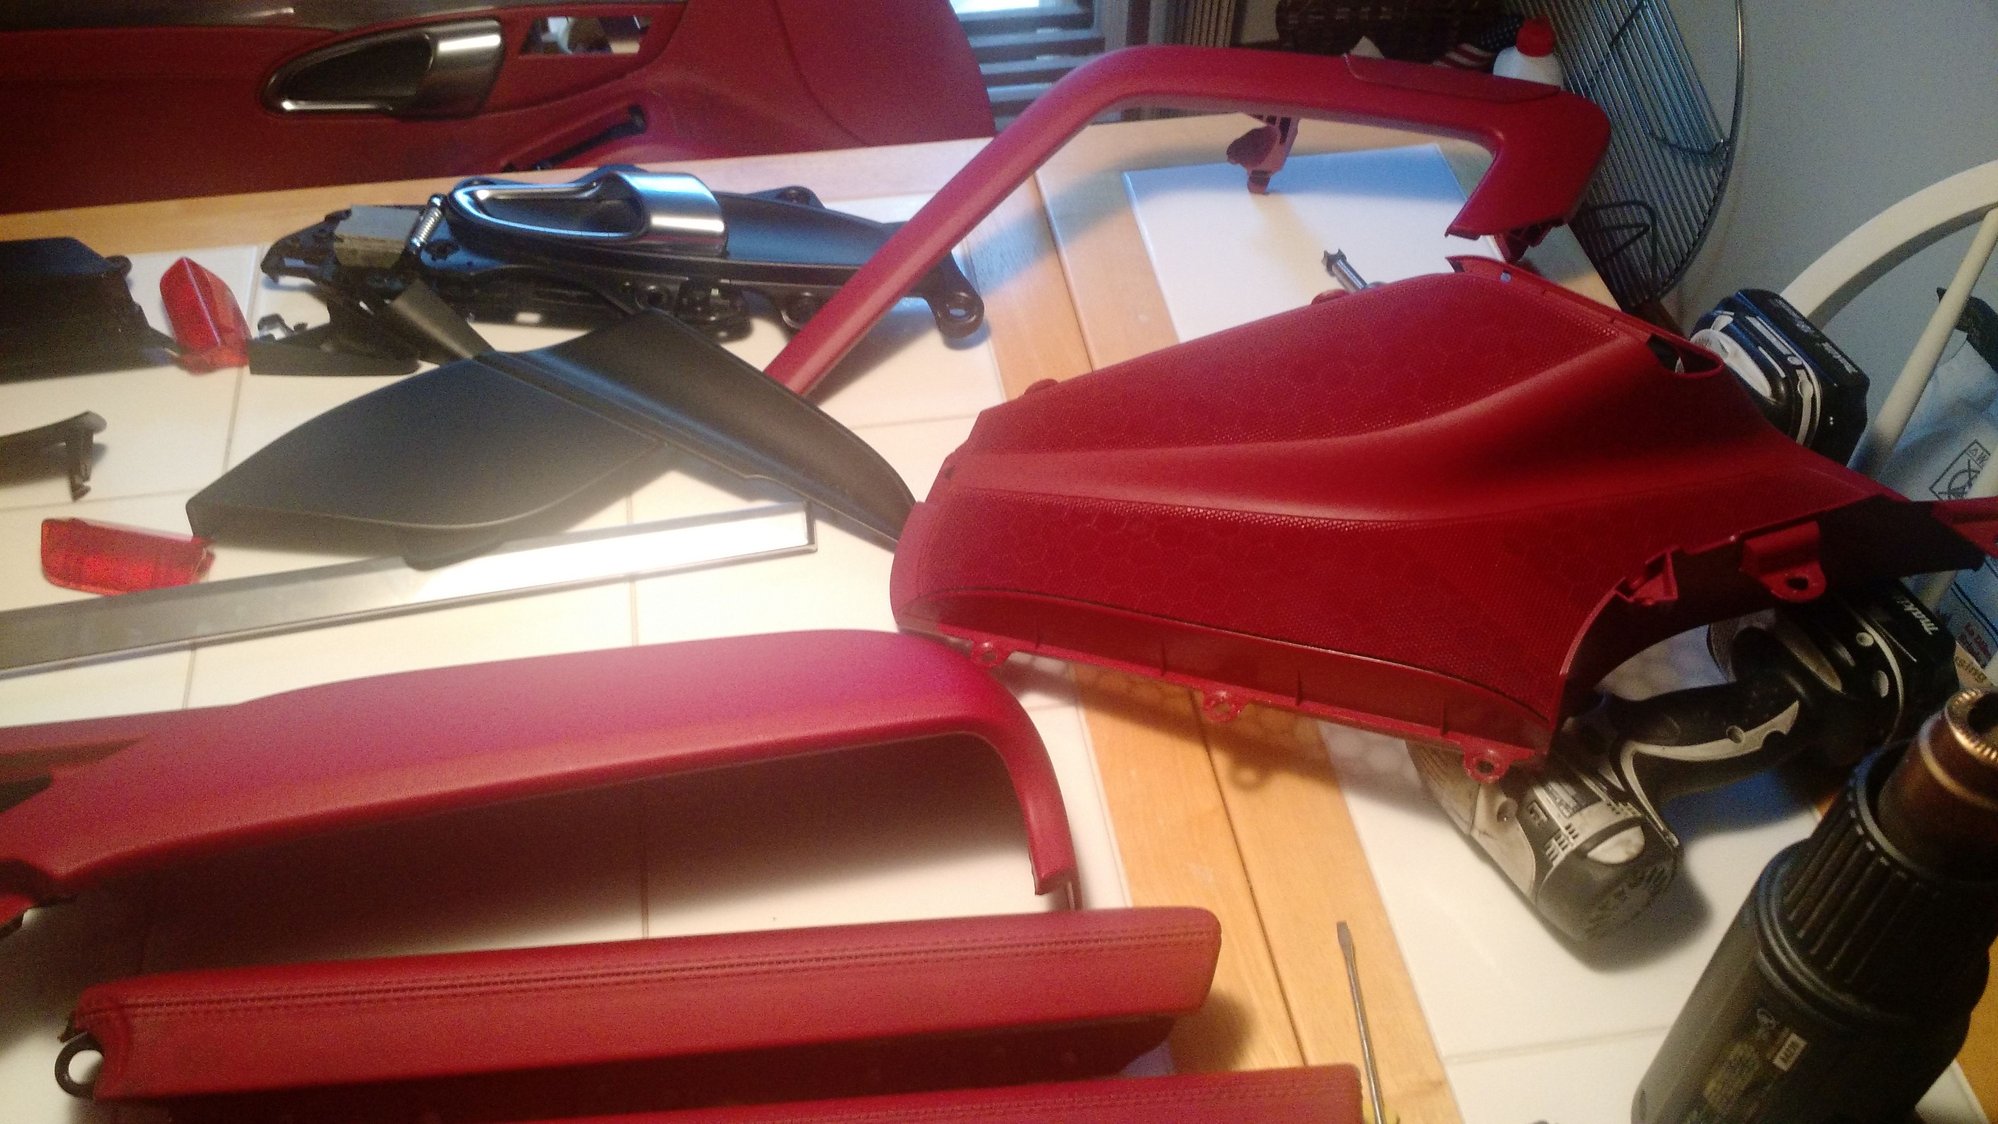
Phase 1: Update door trim to extend the dash trim. This is more difficult than you think as the std doors don't have trim that is removable. It is molded into the rest of the vinyl door panel. I started looking at options. I could have bought carbon fiber overlays that I could paint but I didn't think it would look "factory". I looked at eBay for a long time trying to find low cost door panels. Most are very expensive $2000. Lots of warped vinyl std panels are available. I finally found a set of 981 leather door panels but they were red. So I bought them. The only difference between 981 and 991 door panels are the door pull and wiring to the puddle light on the 991. I'll just swap over my 991 stuff. Red leather door panels from Cayman or boxster
Now I need to remove the door trim and redye..
I used threads by Plenum to find a Video to remove 991 / 981 door panels. Thanks for posting this as it helped me start my project.
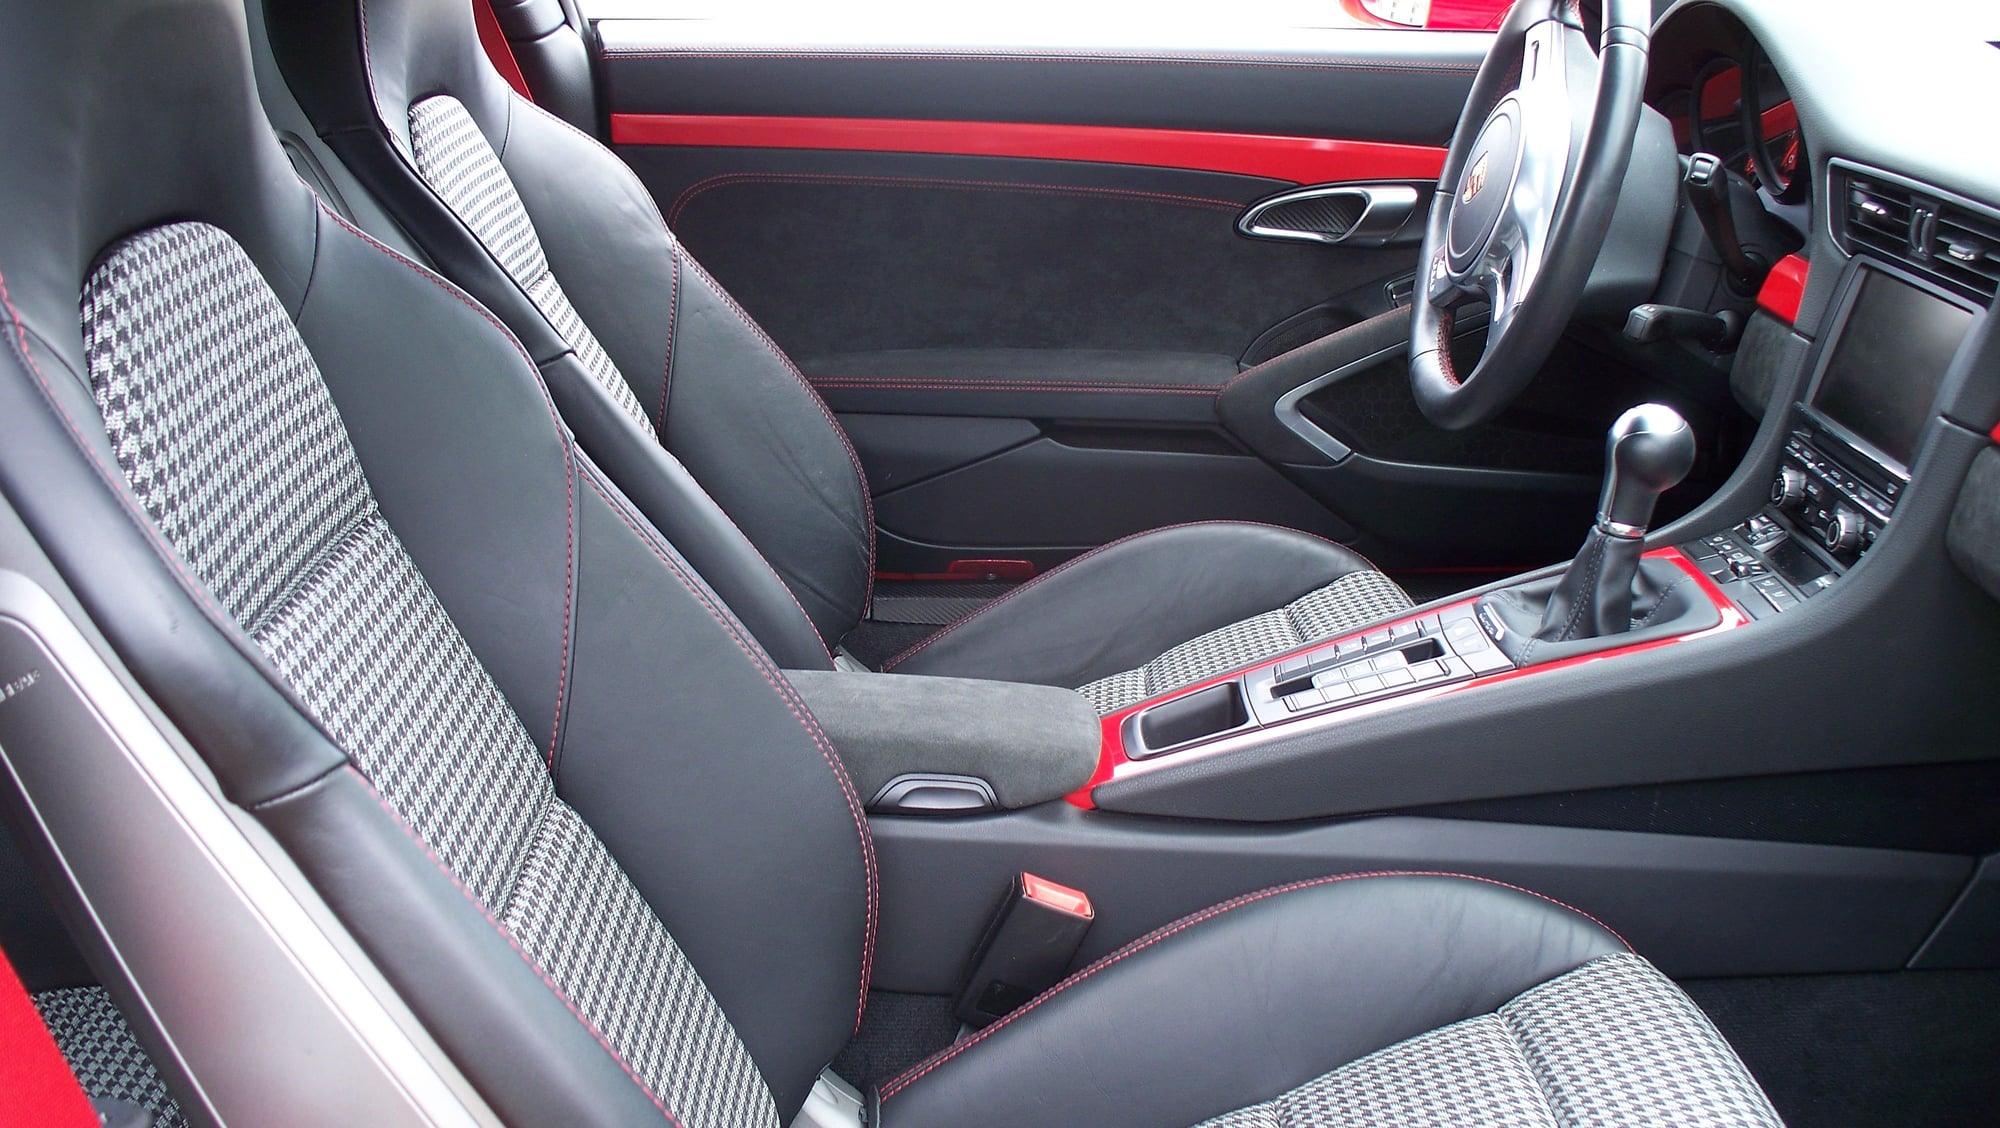
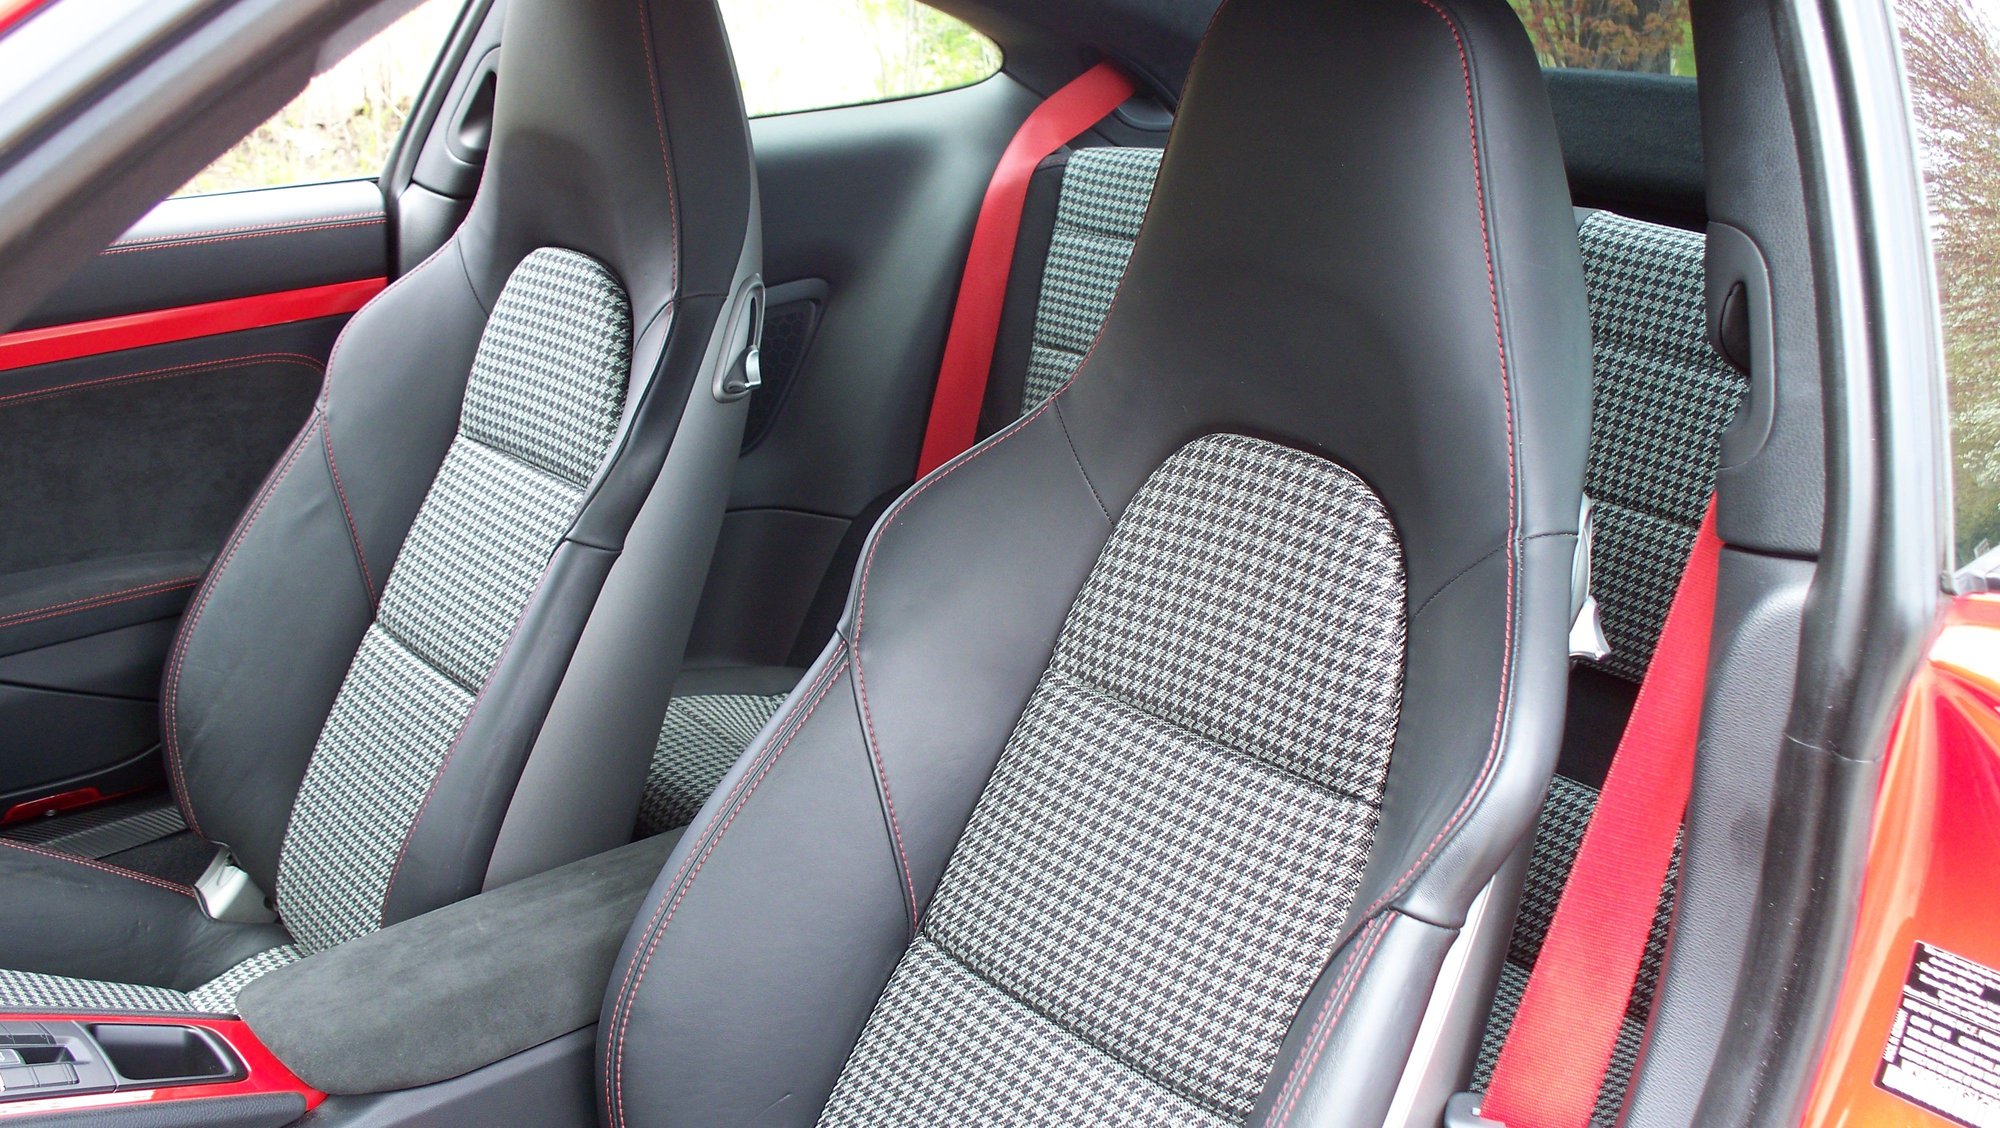
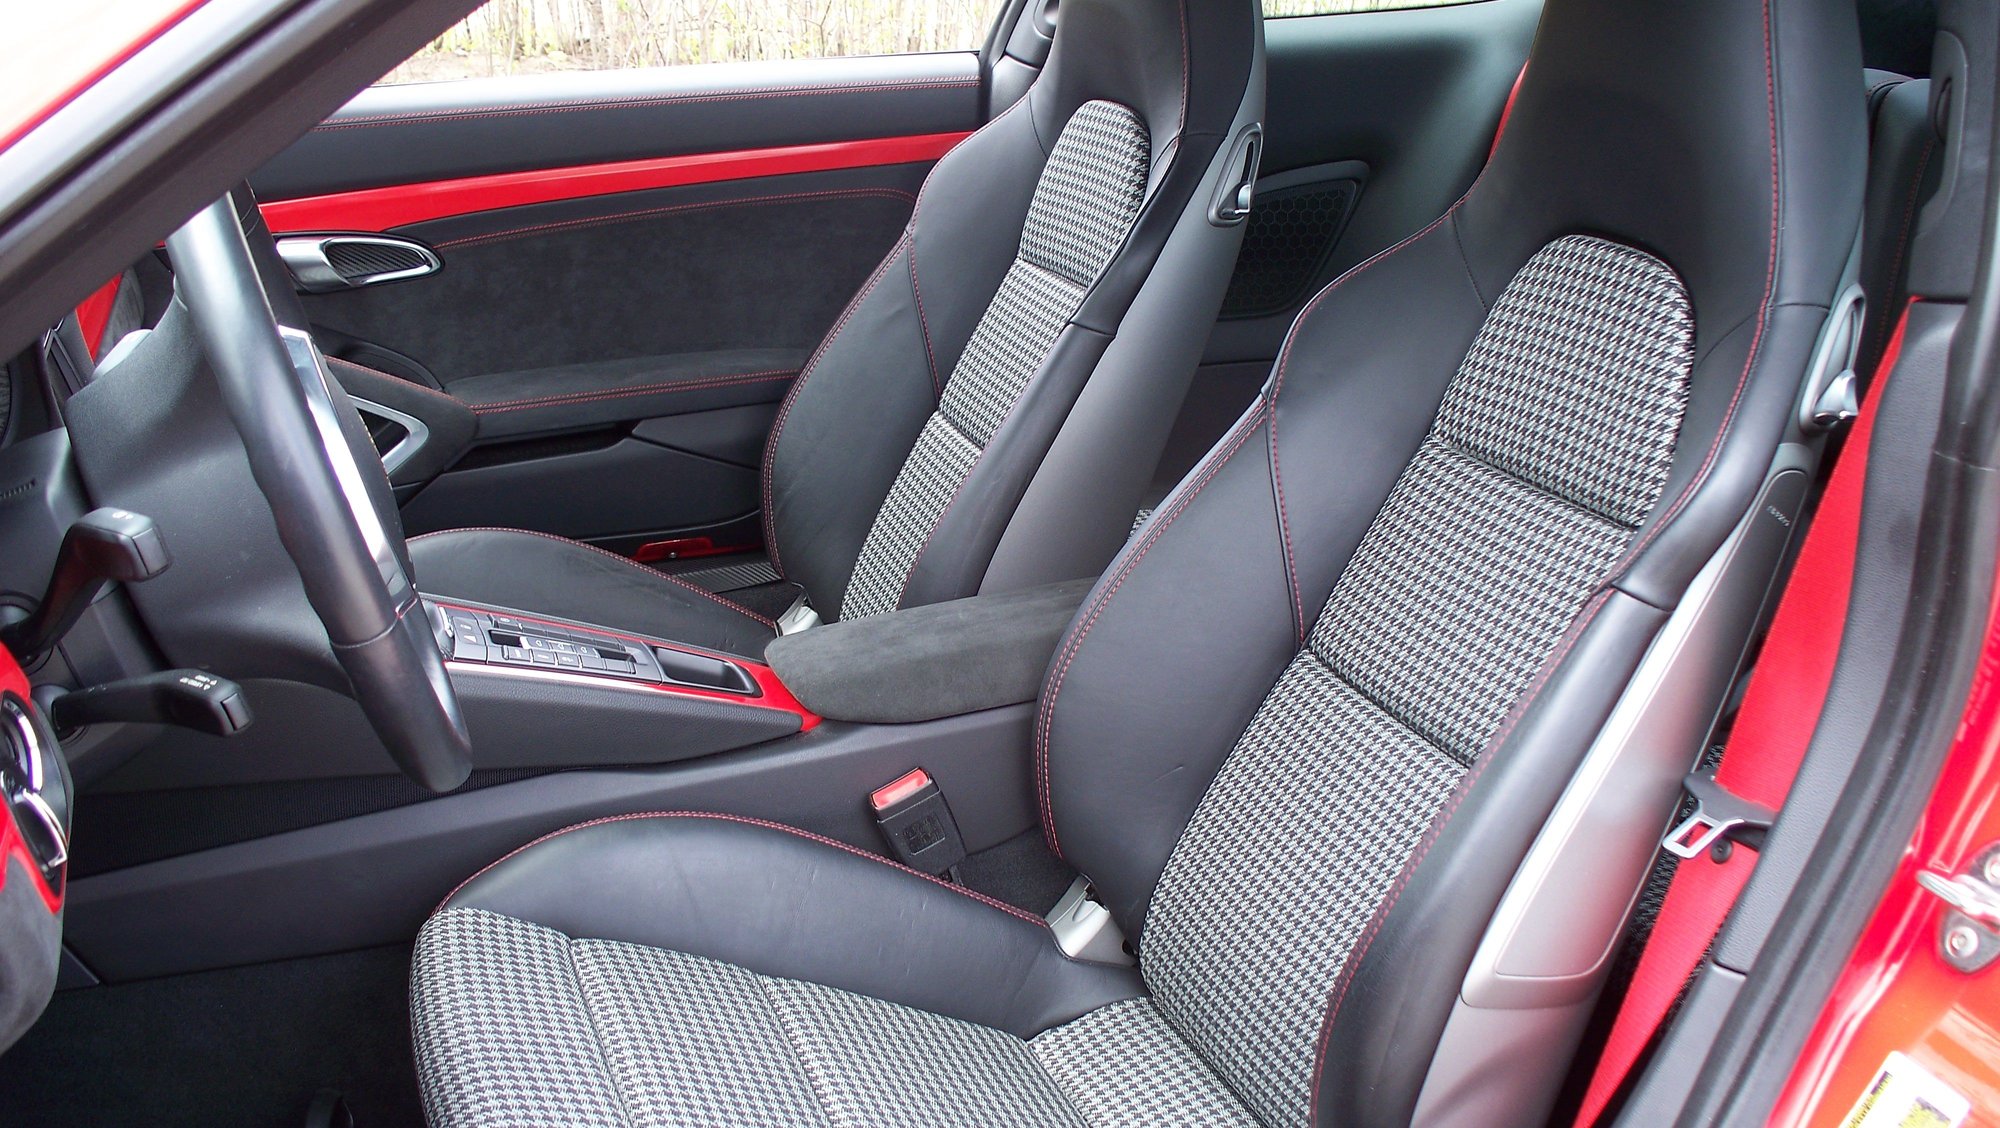
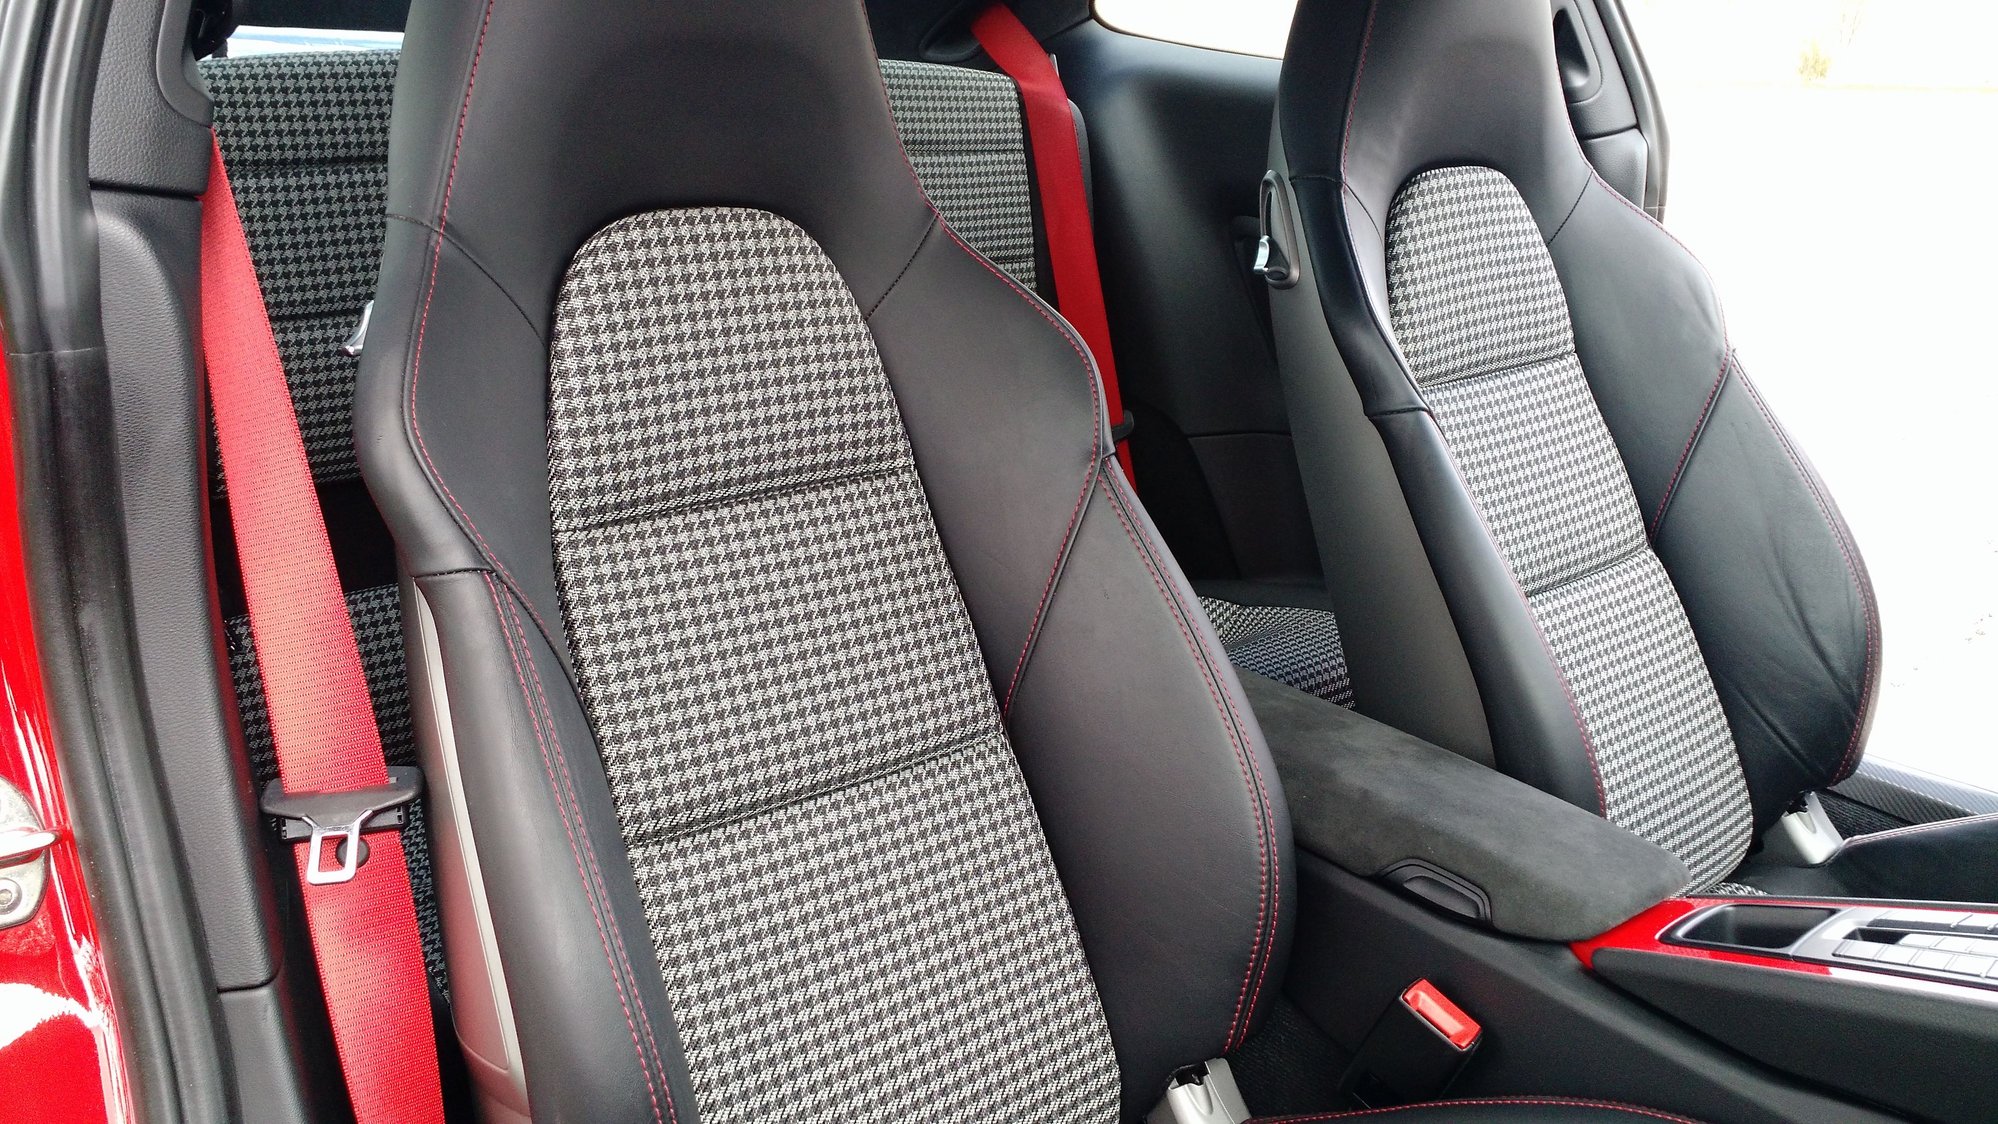
Last step is to reinstall the front seats. I swapped the occupancy sensor to the passenger pepita sport plus seat and dropped it in.
Took some pictures with a better camera.
Updated with alcantara A pillar shots
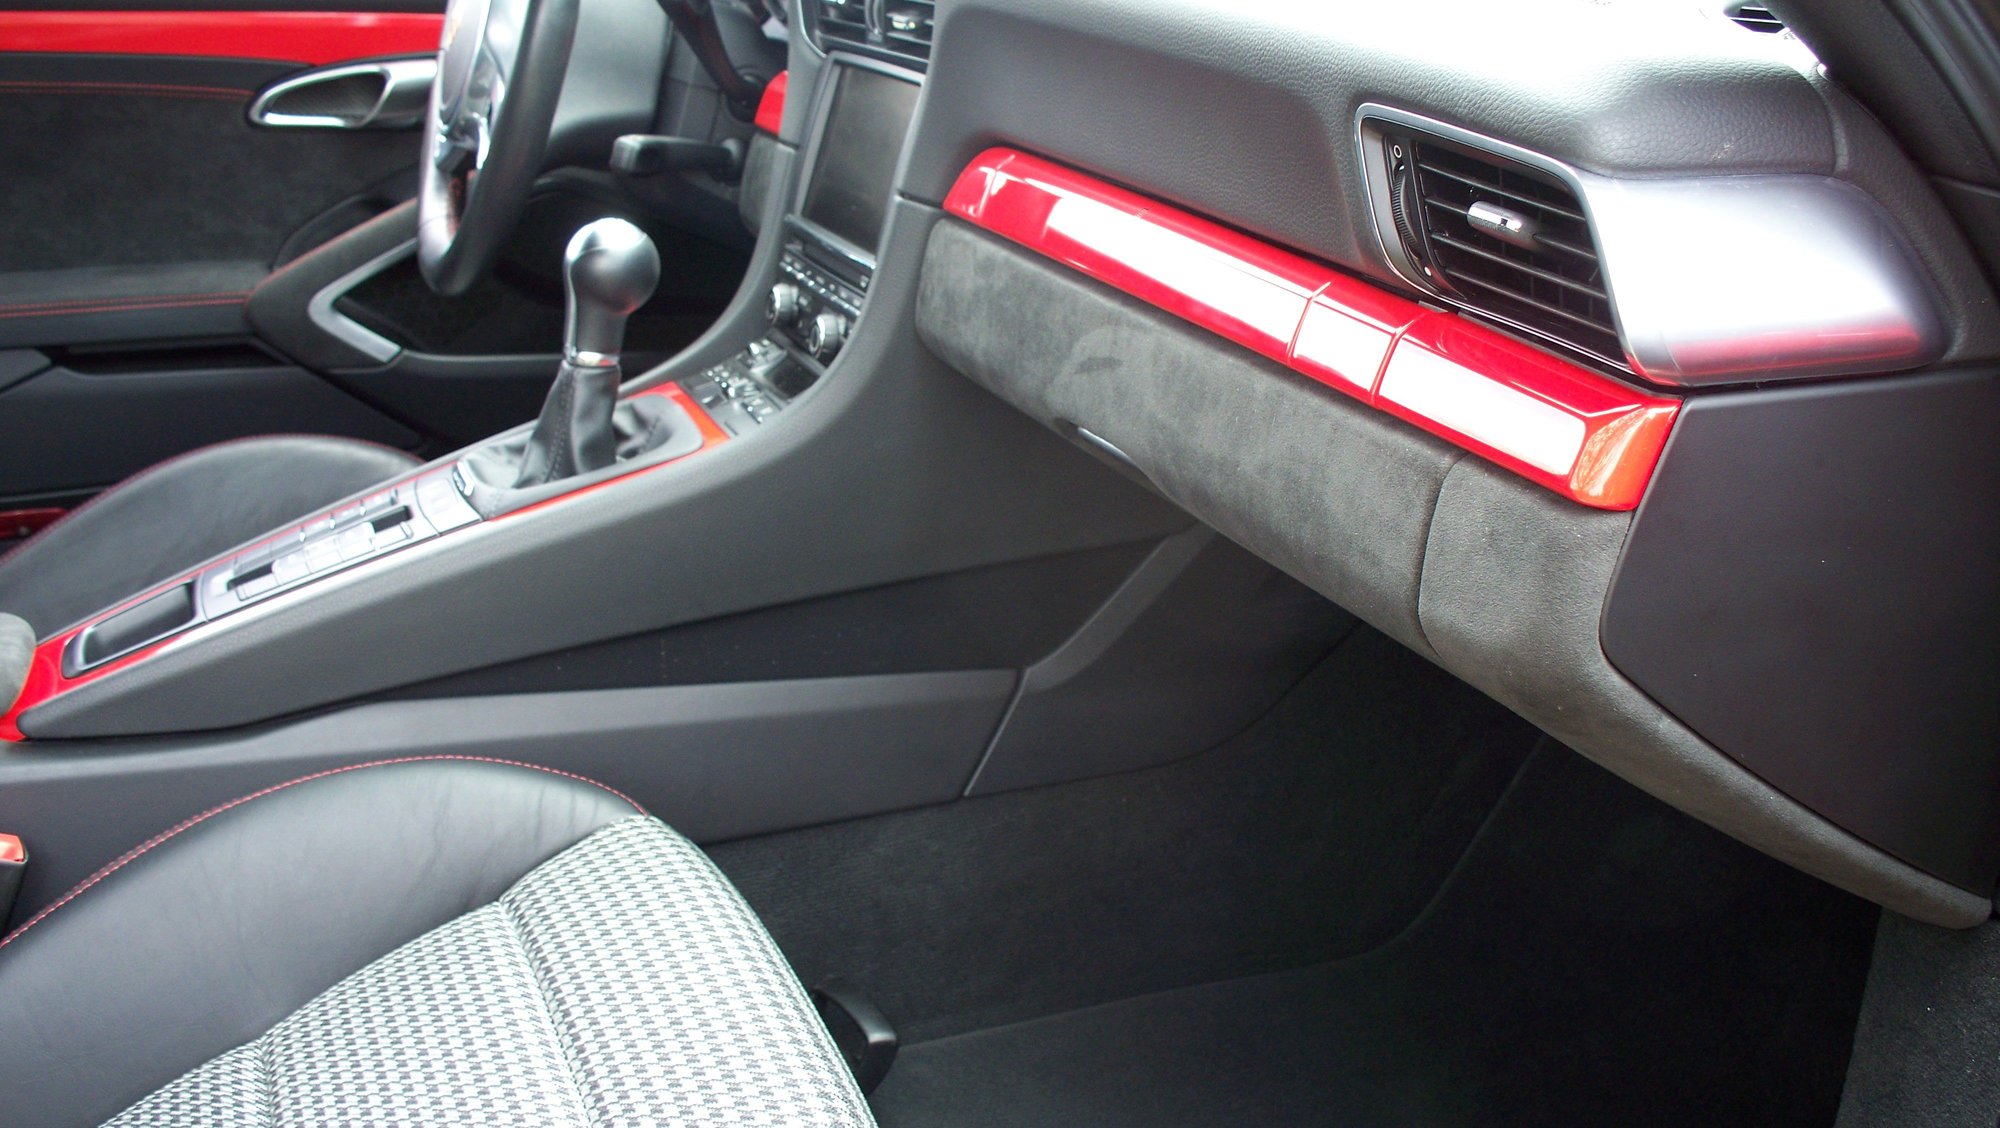
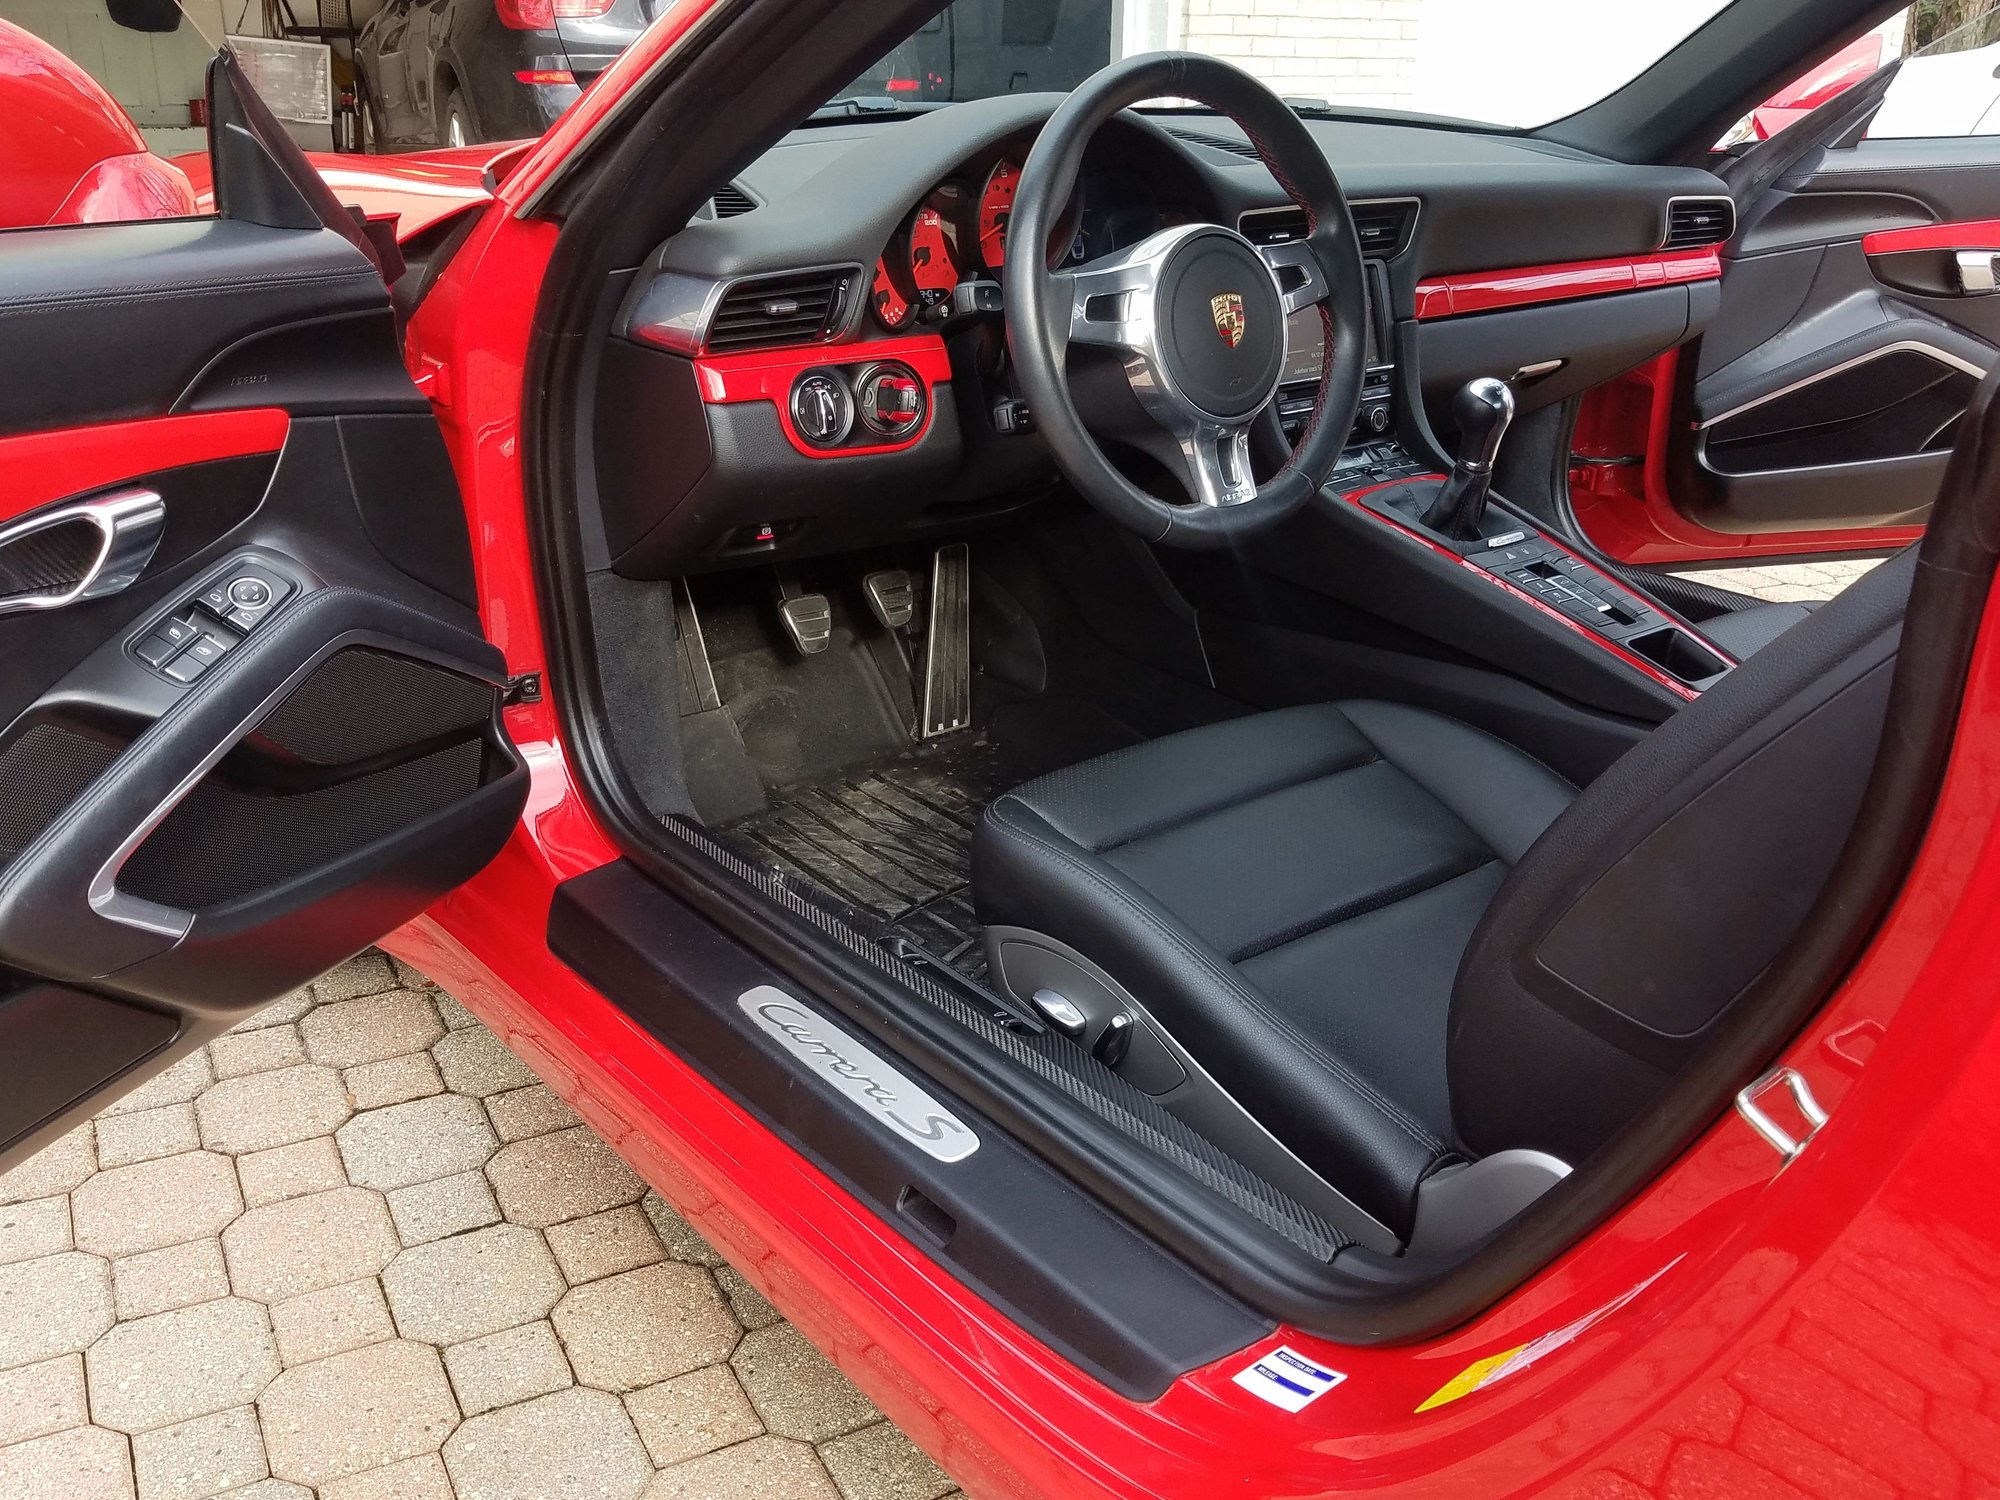
I'm really happy with the result! I feel like this is the interior the car should have had at the start.
I tried to create blend of what Porsche did with the 50th anniversary edition, 911R and GT3 Touring.
Thanks to everyone who followed along. I hope you found it somewhat useful.
Also see this thread on door panels
Thanks MJG911 for posting your thread. I used a forstner bit to drill plastic rivets, it gives nice flat surface for screws and washer.
Tools to disassemble doors:
1/2" forstner bit
Various interior pry tools
Heat gun
T20 torx bit
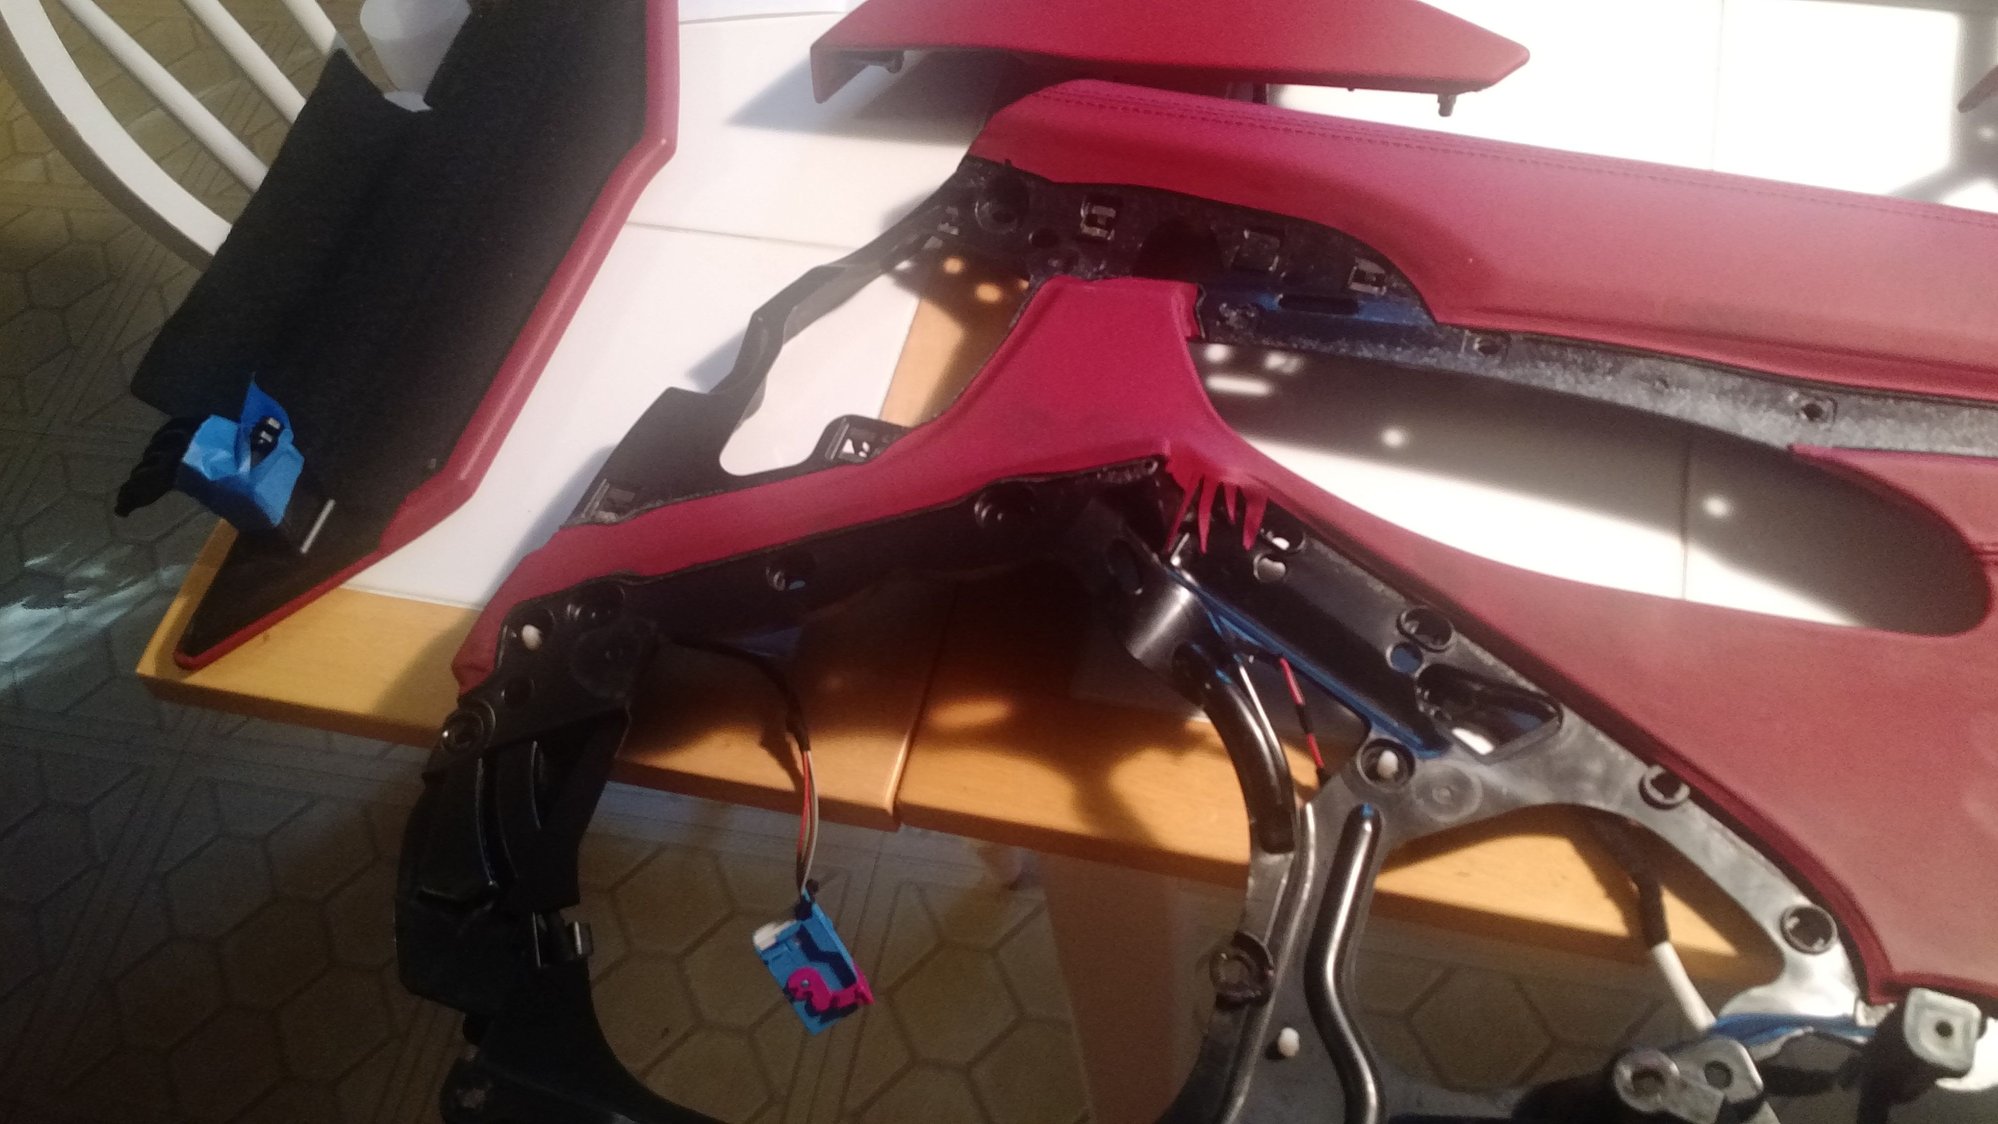
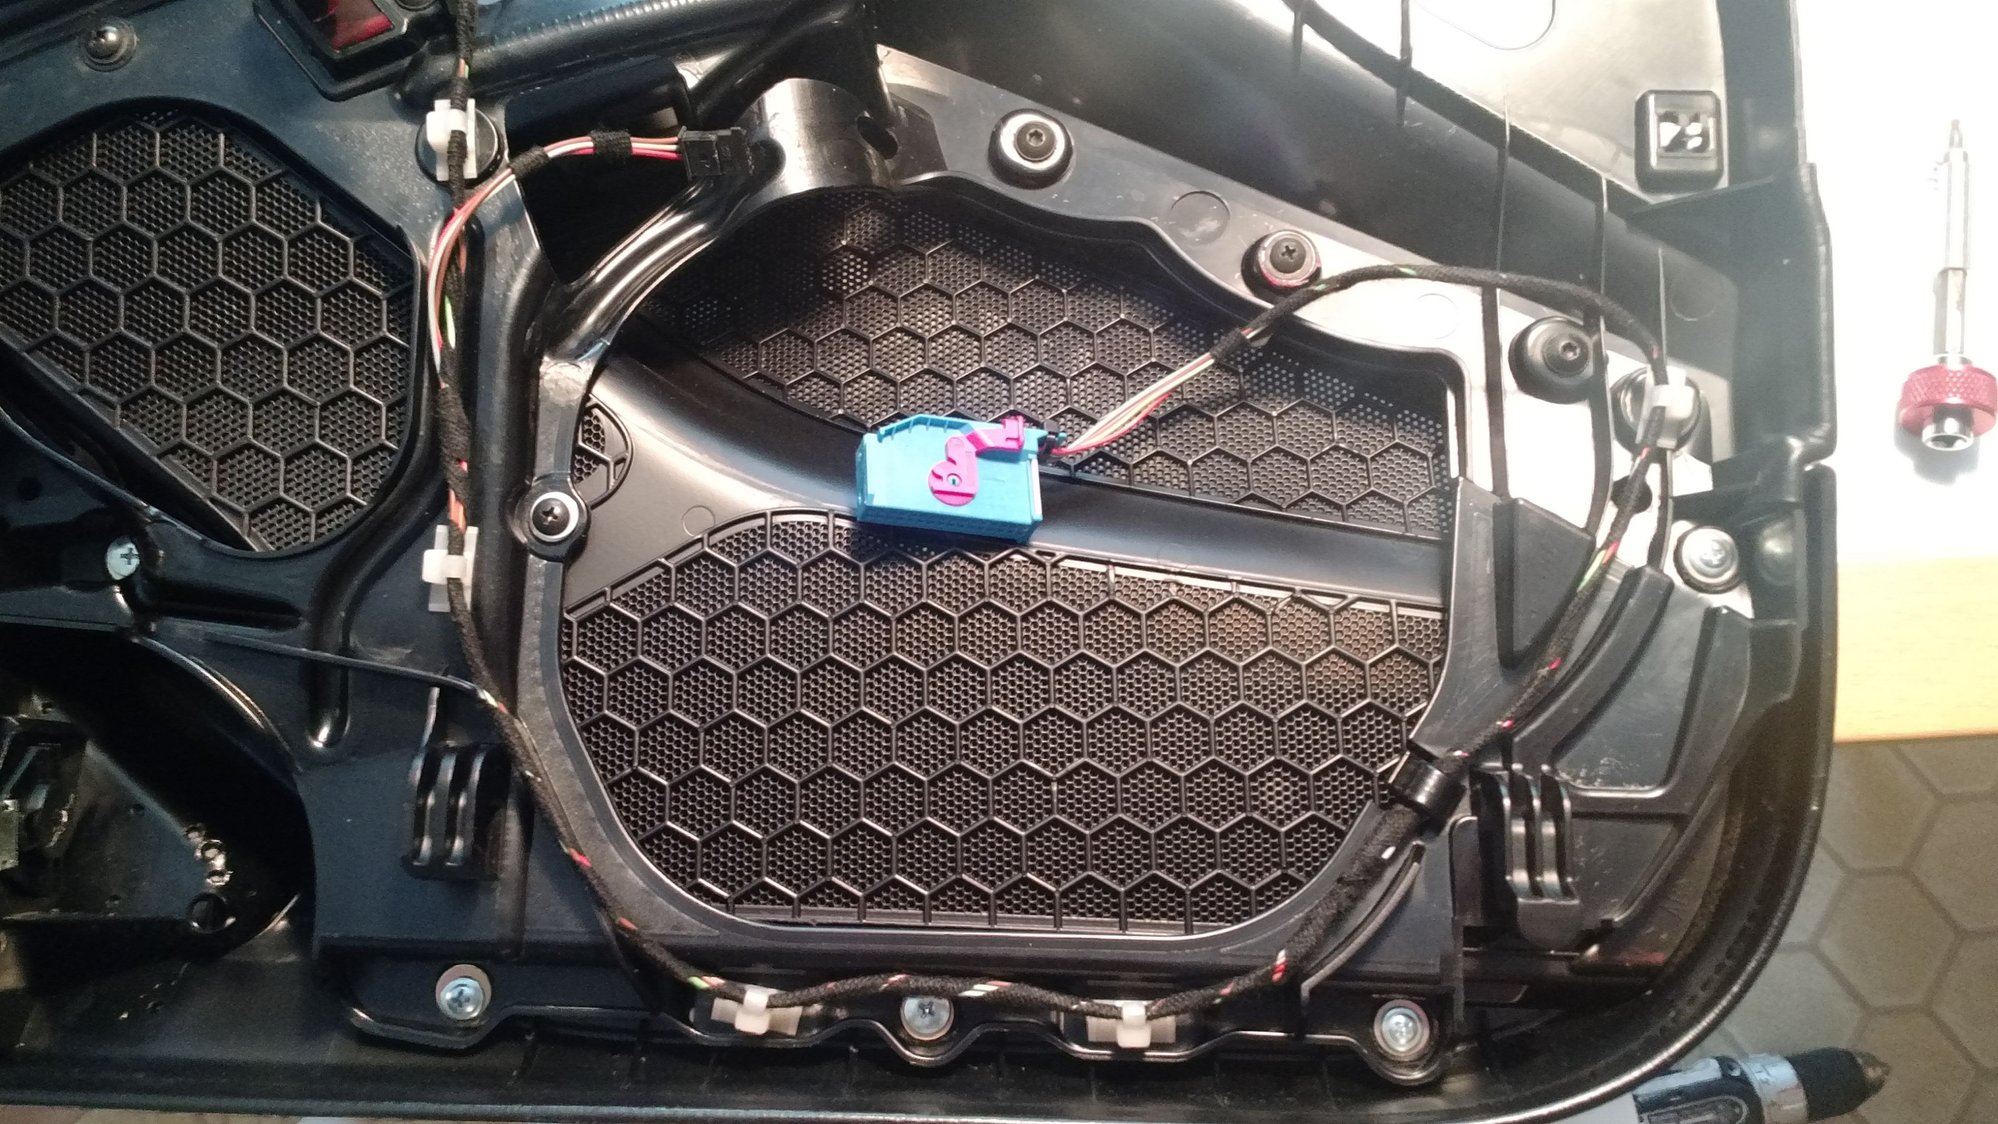
Remove the door handle, plastic airbag trim, etc.
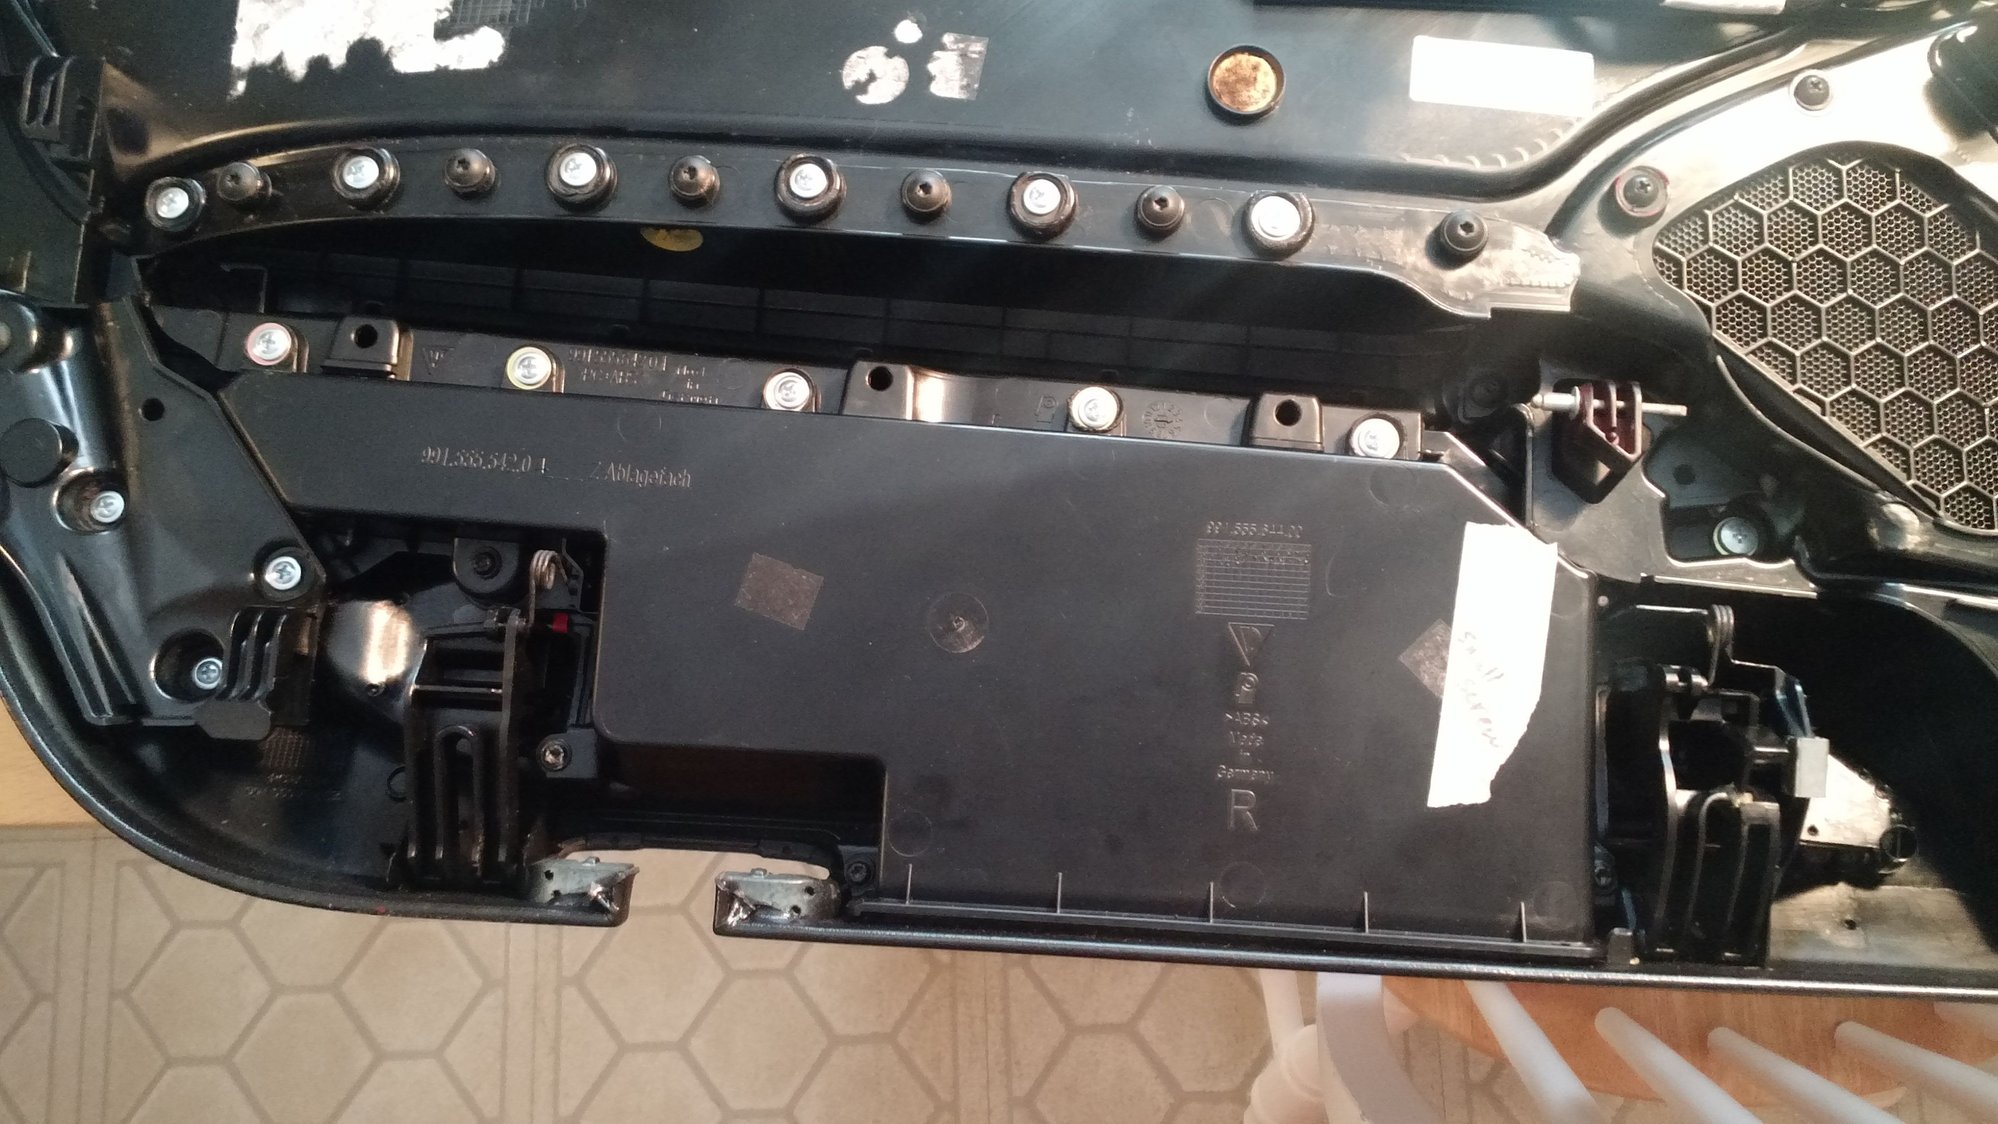
Drill plastic rivets with forstner bit and use heat gun and pry tools to take the door apart. Hours later.....
One part of my plan is to save the original parts so I can put the car back to stock when/if I sell it.
You may notice the donor drivers door panel had seat memory. My car doesn't, so I had to buy a small piece of abs plastic and abs cement to fill and bodywork the hole shut.
I used SEM trim black to paint the plastics. I love this product, goes on great and dries with a nice sheen. I used adhesion promoter on the plastic before painting anything.
I had some left over leatherique Porsche black dye from my 993 that I didn't use so I figured that would work for this project. It doesn't! 991 panels are more grey than black.
In this thread, drcollie mentioned he used DecoArt satin acrylic paint on his leather projects. So I went to hobby lobby and bought some black, gray, white. I mixed up a bunch of different "blacks" until I came up with decent match and air brushed the door panels. With multiple coats.
Initial leatherique black is way too dark compared to std panels.
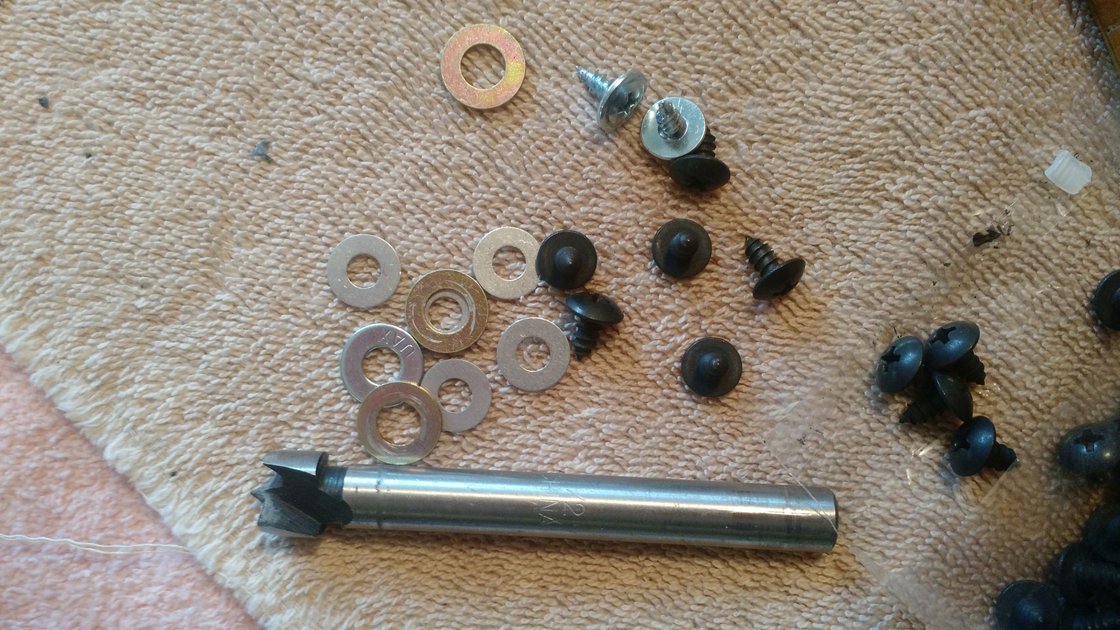
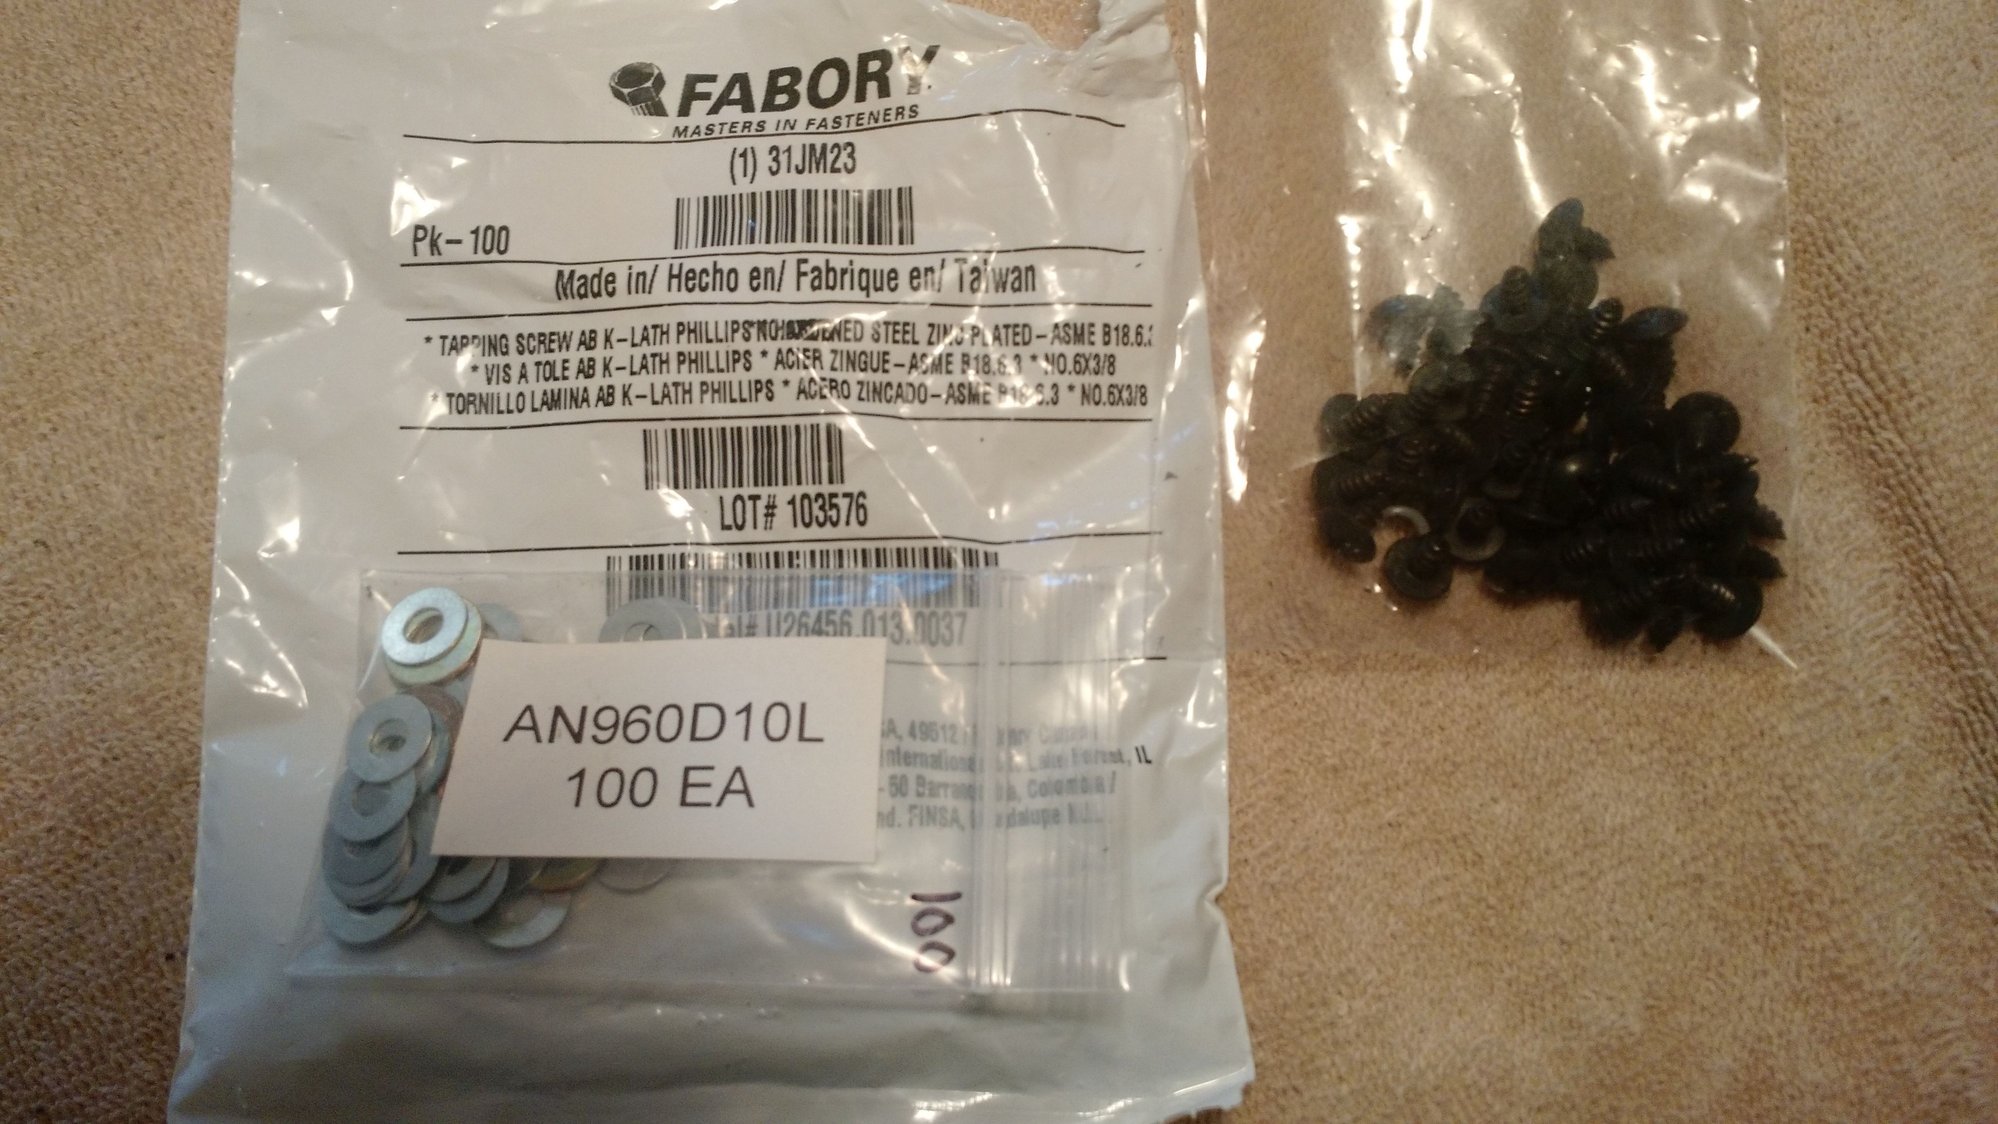
I used various washers and screws to reassemble the doors being VERY careful to pre-drill (9/64) so screws don't crack plastic.
Black screw m4 x 8mm self tapping truss head screws. eBay $7 for 100. Stacking washers controls depth of screw so you don't run thru trim.
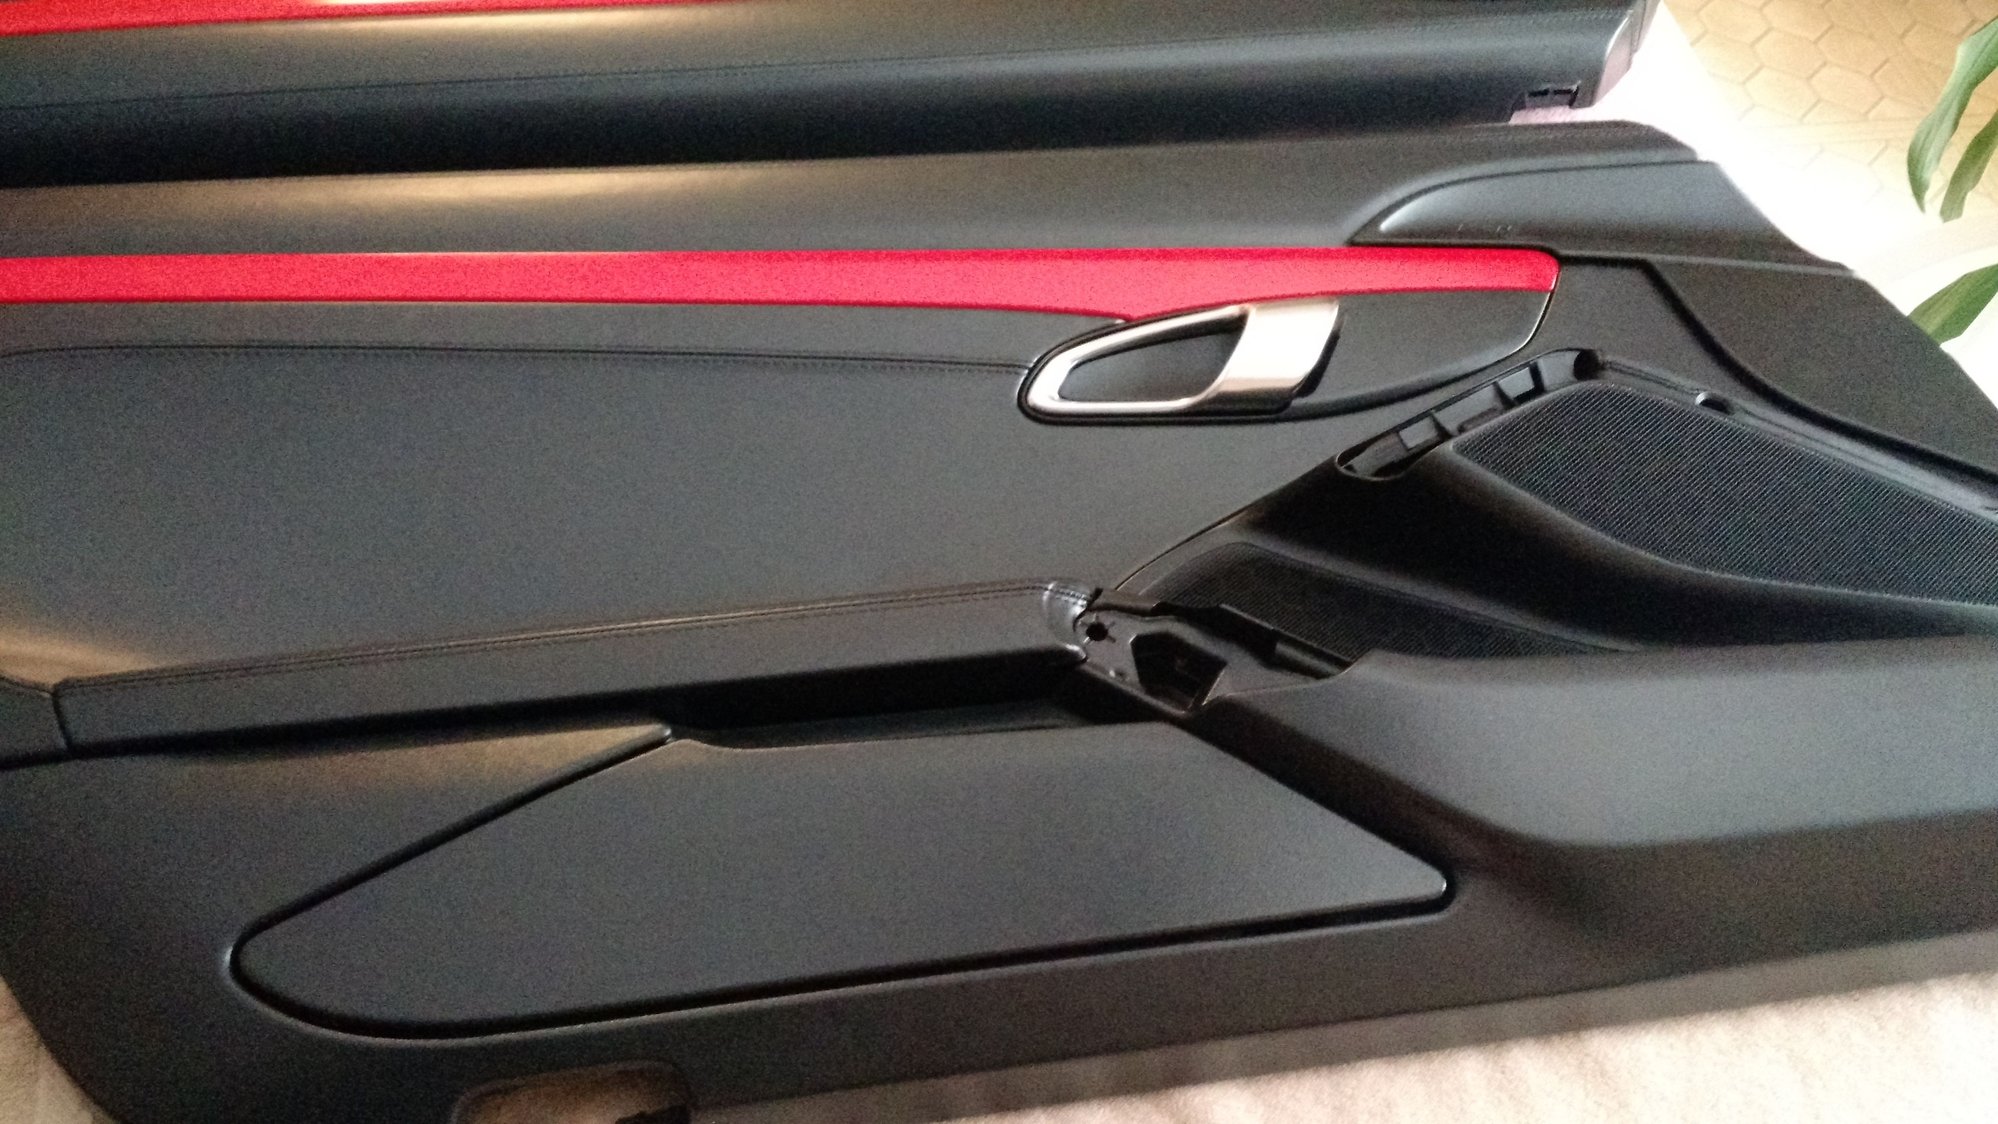
Now that door panels are dyed, I have to reinstall the door trim. I wrapped the silver parts in oracal gloss red 031 vinyl (closest I could find to guards red) to see how they would look. I'll remove wrap to paint and clear coat if I want to make permanent.
Some screw/washer detail
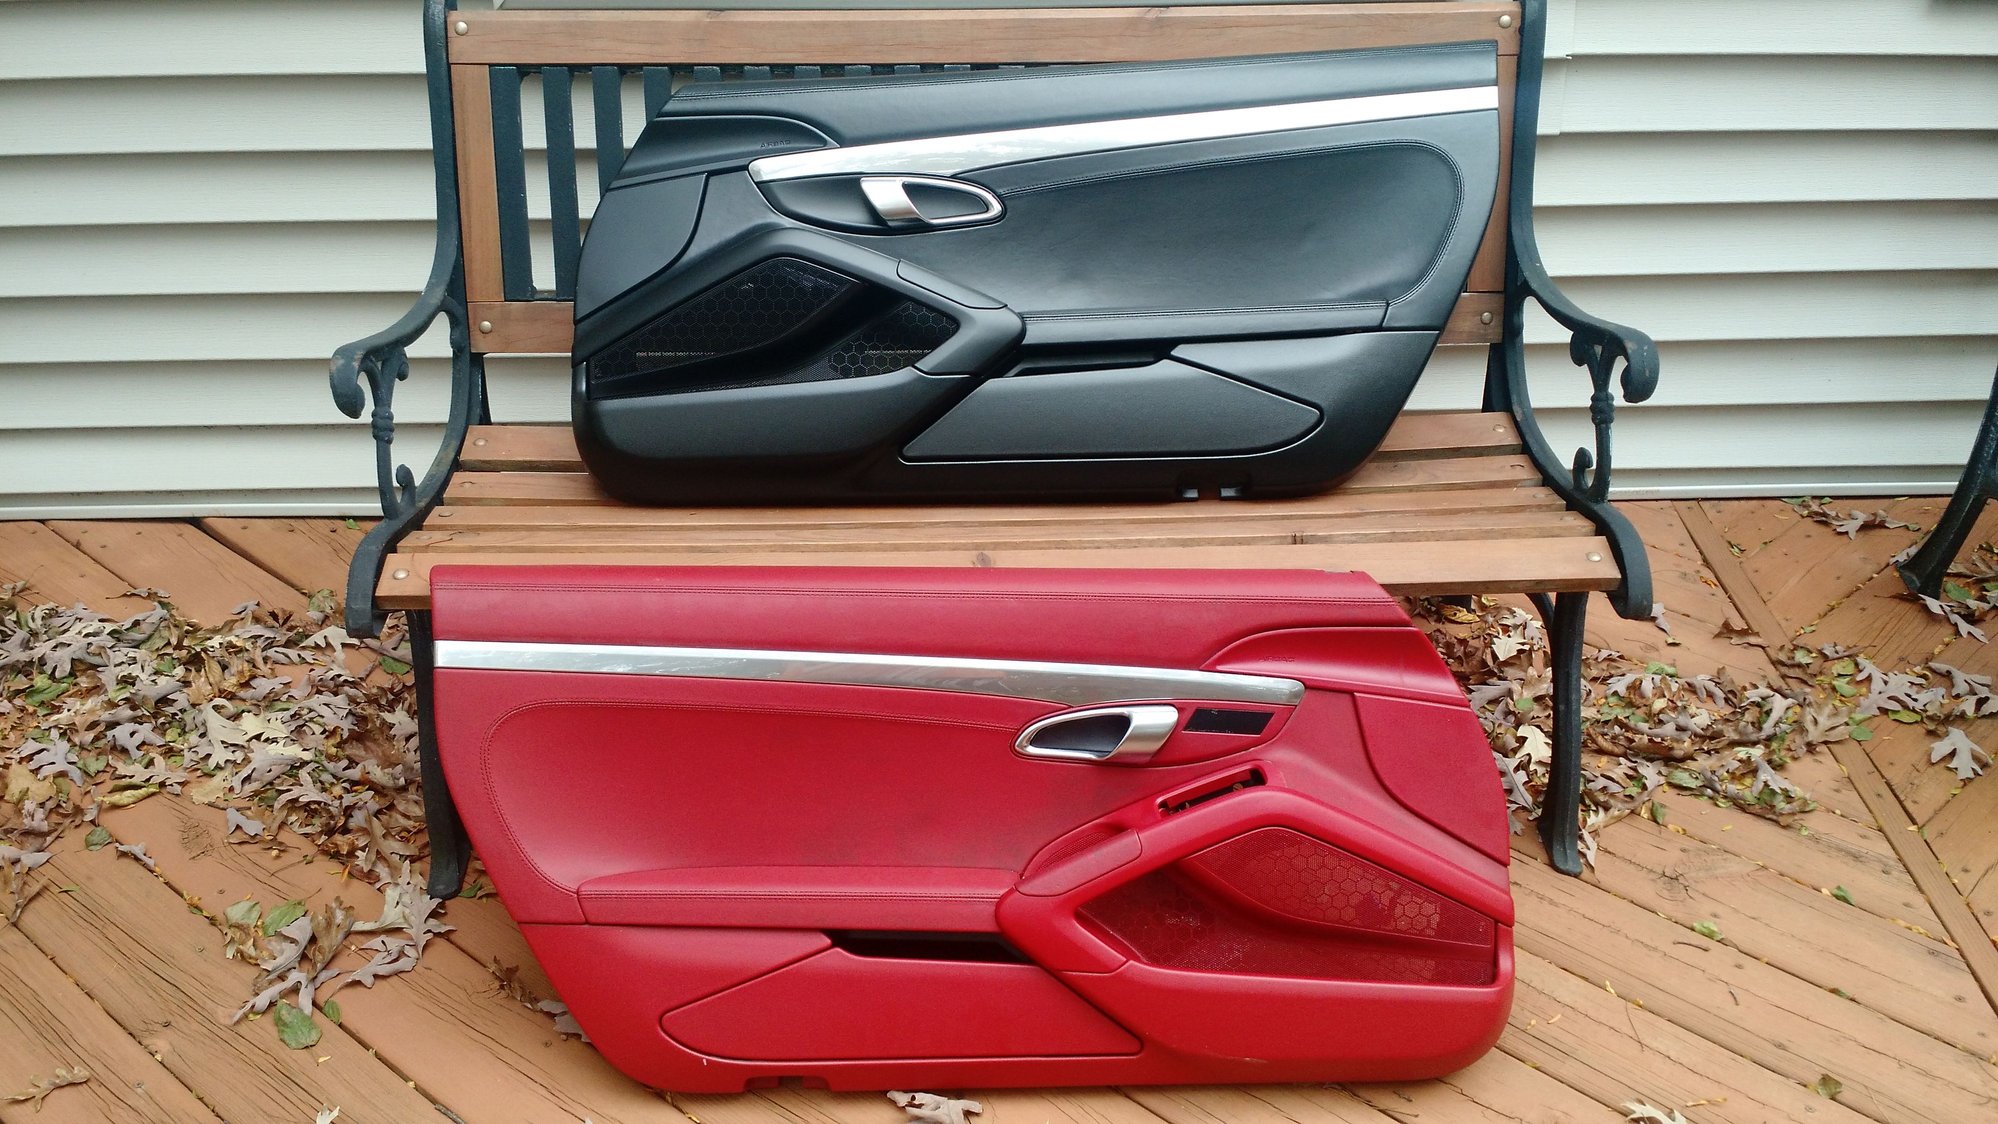
Installed!
Turned out better than I expected! Color is still a little dark in some light, but inside the car it's pretty good.
Thanks, for the replies. Yeah, it was more work than I realized. I should have waited longer to find black donor panels, then swapping the door trim would have been pretty straight forward. Probably should have just painted some stick on carbon fiber trim as the project snowballed from here.
Could you have transferred the silver belt line trim to the standard non leather door panels ? or are the door panels too different in construction to be able to do that?
You did an AMAZING job!
Stunning Porsche 356A Super GT Speedster Auction Fails to Meet Reserve
Slideshow: One of the rarest Porsche 356 Speedsters ever built has resurfaced, offering a glimpse into a little-known chapter of the model's competition history.
Theon Goes Full Carbon Fiber With Stunning New Build
Slideshow: Built around a carbon-bodied 964 and a naturally aspirated 4.0-liter flat-six, this bespoke commission highlights how far the restomod formula has evolved.
Tuner Is Converting Porsche 911s Into Shooting Brakes
Slideshow: A Polish Porsche specialist is moving ahead with one of the most unusual 911 conversions in recent memory: a shooting brake version of the 991-generation sports car.
This Coachbuilt Creation Is A Modern Take on the Legendary Porsche 917
Slideshow: A Porsche Carrera GT has been transformed into a one-off coachbuilt machine that blends analog supercar engineering with styling inspired by the legendary 917 race cars.