When you click on links to various merchants on this site and make a purchase, this can result in this site earning a commission. Affiliate programs and affiliations include, but are not limited to, the eBay Partner Network.
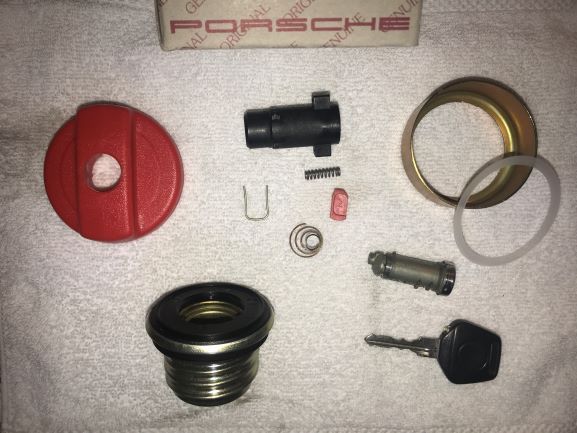
So either my gas cap got lost or it was stolen (too lazy to lock?). I purchased a new unloaded cap (no lock cylinder) and also a used one (just for cylinder).
Got everything apart and cleaned easily:
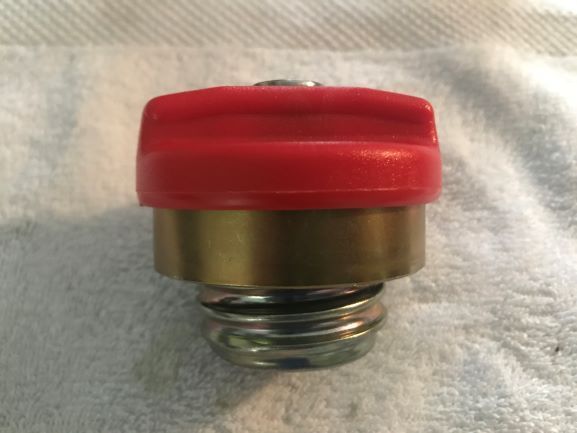
After filing the cylinder tumblers for my key and greasing, I got (snapped) everything back together:
Apologies if this was covered before - but I just wanted to mention that it was easy and worth the effort vs. buying new keyed-unit.
Just another COVID-19 at-home activity...
-Robert
Robert, how do you disassemble the cap? Have been wanting to do that to replate the yellow zinc dichromate parts.
I finally moved my afm further down the intake tract to achieve a rock steady idle after installation of the 928 Motosports supercharger kit and put it all back together. Replaced all the self tapper speed nuts to m5 threaded and dollied it up along the way
put the exhaust back in it after removal to weld bung in for air/fuel meter install
big weekend but so worth it
i will road test thru the week
peter
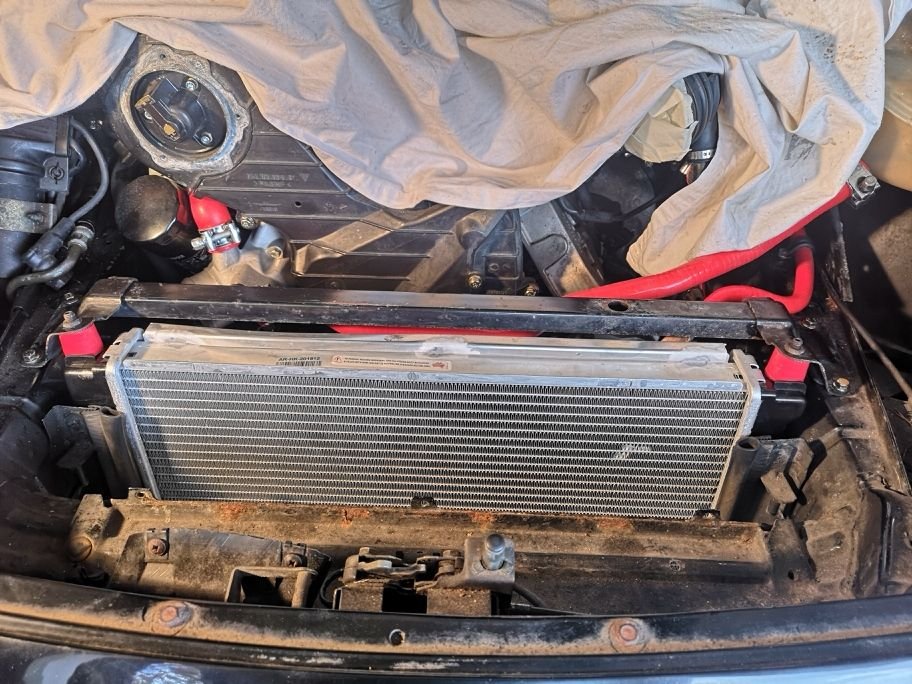
Came to fit my radiator today and realised I did not have new top radiator mounts, one of the old ones was splitting and the other was missing. Not so easily available here and would delay the project so I got creative. I’ve got various sizes of silicone pipe sitting around, I found that 18mm bore fitted nicely over the steel cores of the old mounts. I fitted two sleeves as shown. I then used two short lengths of smaller od tubing that fitted inside the larger tube to make the rubber buffers more solid, pushing them up to the stop formed by the old metal mount core. Think these might work in the long term, if not it’s easy to change them, I will monitor.
Porsche 968 upper radiator mounts replaced with silicone pipe
you might check your lower buffers also if the uppers are worn. set the adjusters just like the drag on a feeler gauge then just a tad more.
Thanks, the lowers were pretty reasonable. They are old though so I�ll probably change them out in time. Think with the improvisation it may be harder to fine control the pressure as you suggest, I guess new upper buffers would be the ideal
yeah, the radiator really needs to be isolated from vibration and given room for expansion.
in a previous life, I killed a solid brass radiator in land rover classic with the vibration from a sawzall cutting a seized fog light mounting bolt. I have avoided using power tools on old things since.
yeah, the radiator really needs to be isolated from vibration and given room for expansion.
in a previous life, I killed a solid brass radiator in land rover classic with the vibration from a sawzall cutting a seized fog light mounting bolt. I have avoided using power tools on old things since.
That must have been unexpected and frustrating. Lower mounts are pretty soft really I guess they provide much of the expansion room, so I�m less worried for that reason, I note the uppers don�t have much compressibility anyway. I�m happy to try this for now, though finally spotted a source in France for these rubbers at a sensible price so likely to order when I next purchase a bunch of stuff.
Installed new rear shocks. Very easy to do. Both of the ones replaced were easily movable by hand! Right side was really, really bad!! I installed Bilsteins purchased from Rock Auto. Least expensive I could find for the Bilsteins. Everywhere else was much more expensive.
Reinstalled my passenger door card and new speakers.
My AC compressor clutch crapped the bed. Getting that fixed as we speak, along with new belts for my baseline. Cams, cam chain, cam chain pads all look great - was happy about that!!
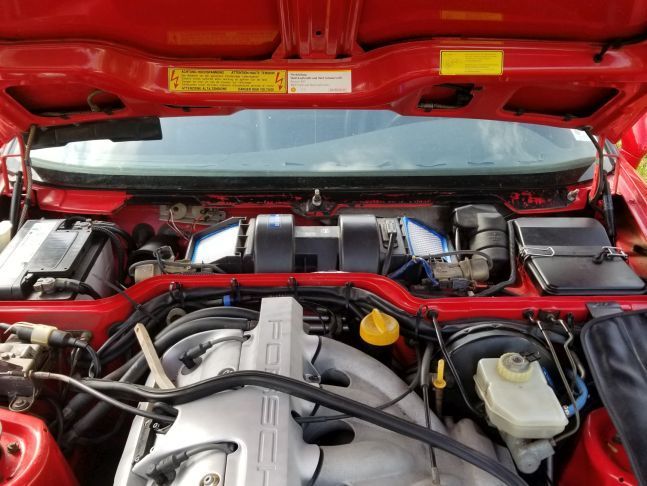
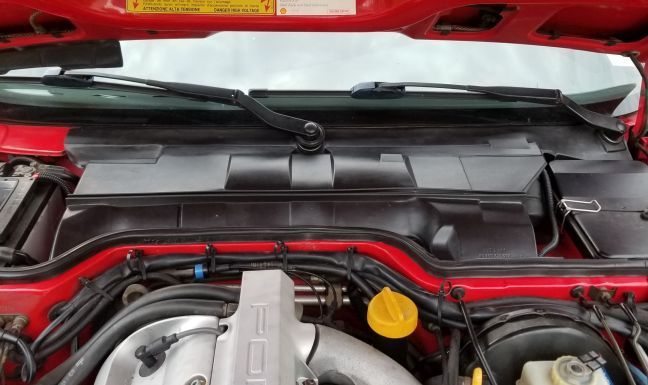
Cleaned under the rain tray and replaced it. I can't say I'm very impressed with the manufacture of this particular component. It fits well under the rubber seal but they trim the top edge too far, requiring it to stretch more than I'd like in order to keep the edge well under the windshield. These rain trays are quality along the lines of the armrest hinge. Overpriced junk. I use to do a lot of fiberglass body work in my younger days. If it breaks, I won't buy another. I'll use it as a form to lay up a copy made of Buckram or polyester cloth bound with fiberglass resin instead. Carbon fiber would be a good option as well I believe. You can buy a CF kit for much less than this stupid plastic tray costs.
Cleaned under the rain tray and replaced it. I can't say I'm very impressed with the manufacture of this particular component. It fits well under the rubber seal but they trim the top edge too far, requiring it to stretch more than I'd like in order to keep the edge well under the windshield. These rain trays are quality along the lines of the armrest. Overpriced junk but what can you do, right? I use to a lot of fiberglass body work in my younger days. If it breaks, I won't buy another. I'll use it as a form to lay up fiberglass instead.
Yea, the thing is one notch above trash bag plastic. I ordered mine from some big Porsche parts place and it was all scratched up when I got it. They wouldn't return my calls or emails about the issue.
"Yea, the thing is one notch above trash bag plastic. I ordered mine from some big Porsche parts place and it was all scratched up when I got it. They wouldn't return my calls or emails about the issue."
"Yea, the thing is one notch above trash bag plastic. I ordered mine from some big Porsche parts place and it was all scratched up when I got it. They wouldn't return my calls or emails about the issue."
Yep, there's gotta be a better way...
If you do make a mold, let me know, it would be interesting to get a better solution. Right now, I have to solve replacing fuel return line to sender from hard line. Which means driving the car whenever I get a chance to burn gas out of the tank.
Cleaned under the rain tray and replaced it. I can't say I'm very impressed with the manufacture of this particular component. It fits well under the rubber seal but they trim the top edge too far, requiring it to stretch more than I'd like in order to keep the edge well under the windshield. These rain trays are quality along the lines of the armrest hinge. Overpriced junk. I use to do a lot of fiberglass body work in my younger days. If it breaks, I won't buy another. I'll use it as a form to lay up a copy made of Buckram or polyester cloth bound with fiberglass resin instead. Carbon fiber would be a good option as well I believe. You can buy a CF kit for much less than this stupid plastic tray costs.
I think you�d have a market if you started making those 😀
 05-08-2020, 11:48 PM