When you click on links to various merchants on this site and make a purchase, this can result in this site earning a commission. Affiliate programs and affiliations include, but are not limited to, the eBay Partner Network.
Are those three bulbs the Cluster illuminating bulbs..? All but the far right one are gone [making sticking to the Speed Limit trickier at night..!] and need replacing..
Is removing the Cluster a tricky job..? Steering Wheel off presumably..?
I was worried about damaging the dash piece that surrounds the cluster so I removed the steering wheel. Not hard to do. If you have an airbag in the steering wheel and you do decide to remove the steering wheel, do remember to disconnect the batter a few hours before doing the job . Disconnecting ahead of time avoid getting a Airbag warning light when you reconnect.
I was worried about damaging the dash piece that surrounds the cluster so I removed the steering wheel. Not hard to do. If you have an airbag in the steering wheel and you do decide to remove the steering wheel, do remember to disconnect the batter a few hours before doing the job . Disconnecting ahead of time avoid getting a Airbag warning light when you reconnect.
The trim around the cluster came off very easily from my car, little is easy on this ageing example normally! Damage never felt probable there , unlike while stripping the cluster itself later which does require care
Yep, this is what my parking brake shoes looked like when I changed them last night. It must have happened a long time ago before I bought it considering there was no trace of that missing lining remaining. I changed the rotors and pads as well as flushing the fluid also.
Are those three bulbs the Cluster illuminating bulbs..? All but the far right one are gone [making sticking to the Speed Limit trickier at night..!] and need replacing..
Is removing the Cluster a tricky job..? Steering Wheel off presumably..?
I have done a full restoration of the cluster, including splitting the clear plastic off the front to refinish the surround where it had gone kind of brown. Also disassembled light tunnels so that night lighting would be as good or better than new. Can provide lots of pics of process - let me know if you want me to create a post, or I could send to you via email.
I have done a full restoration of the cluster, including splitting the clear plastic off the front to refinish the surround where it had gone kind of brown. Also disassembled light tunnels so that night lighting would be as good or better than new. Can provide lots of pics of process - let me know if you want me to create a post, or I could send to you via email.
Jeff
Having recently been into the instrument cluster to replace bulbs I would like to see the see the photos of your process, especially on refurbishing the illumination conduits and to clear up the trim behind the clear plastic screen.
thanks in advance.
I have done a full restoration of the cluster, including splitting the clear plastic off the front to refinish the surround where it had gone kind of brown. Also disassembled light tunnels so that night lighting would be as good or better than new. Can provide lots of pics of process - let me know if you want me to create a post, or I could send to you via email.
Jeff
I’ve got my speedometer gear parts here in the uk now and am about to fit those, for European owners wishing to avoid import dues I have to say that www.partworks.de were knowledgeable and fast to supply, navigating me through their listings towards what was actually listed as an Audi part (no connection other than happy customer) . Cluster lighting refurb is next, sadly not really the time to wait for the great LED units being offered here.
Im interested to hear what you think should be done with the light tunnels. Mine have intact silvering in place though it’s 25 years old. I’ve read about people removing it with solvent and replacing with foil, but wonder if that’s worth doing if it looks ok. I guess the OEM silver paint was less reflective than the surface could have been though,
I have done a full restoration of the cluster, including splitting the clear plastic off the front to refinish the surround where it had gone kind of brown. Also disassembled light tunnels so that night lighting would be as good or better than new. Can provide lots of pics of process - let me know if you want me to create a post, or I could send to you via email.
Jeff
Create a post if you get a chance. It'll be good for the Community.
Having recently been into the instrument cluster to replace bulbs I would like to see the see the photos of your process, especially on refurbishing the illumination conduits and to clear up the trim behind the clear plastic screen.
thanks in advance.
I did it several years ago for a late dash 944 which is pretty much the same. the clarks garage walk through is pretty accurate. Make sure you follow the airbag procedure if you have one. http://www.clarks-garage.com/shop-manual/elect-07.htm
Thanks. Those are great photos.
Since I replaced my illumination bulbs with LEDs and also replaced a couple of the warning bulbs successfully, I now notice a new small problem. It seems as if my coolant temperature gauge has turned or twisted a bit. The needle of this gauge now points about a 1/3rd of an inch below the lowest index mark before I start the engine. When the proper engine temperature is reached after a few miles the needle only reaches that lowest mark. Before I opened the instrumentation cluster, the needle started off pointing to the lowest index mark and reached at least the half way index mark when the engine reached its running temperature. Is it possible that I inadvertently twisted the mechanism that turns the needle while I had the cluster open? And if so can I go back in and twist it back to its original position? Advise from anybody who have had this problem will be much appreciated. If I don�t hear anything back on this I will start a new thread about this problem.
Thanks in advance.
Alwyn
If you have a picture, that would be helpful. In general, the answer should be yes, you can. It should be like the speedo gear needle. Here is text from odometergears.com on how to remove the speedo needle, I would think the same logic applies: DO NOT PRY UP ON THE NEEDLE TO REMOVE! This is the trickiest part of the job. The needle is pressed onto a shaft that is extremely thin. It feels like a pretty tough metal, but you need to be careful here. Do not pull straight up. Do not put any torque on the shaft. Grip the speedometer needle at the center and rotate counter-clockwise, you may have to gently lift the needle above the needle stop, until it hits an internal stop. Gently continue to rotate the needle while also gently applying a small amount of upwards tension at the same time. The friction is all that is holding the needle to the shaft. Keep turning and applying a small amount of upwards tension until the needle comes off. Do not force
Like many others before me, I performed the "stripped odometer gear" replacement today. Replacement gears were ordered from www.odometergears.com awhile back. I was able to get the cluster out of the dash without removing the steering wheel, but it was a very tight fit - helped to have a second set of hands from a helper to apply pressure to open up the dash another mm or two during extraction and replacement. Worst part was removal and reapplication of the 3 ribbon cable attachments behind the cluster.
After completing the job, I think I might win the award for "most obliterated gear". The smaller gear was intact, but the larger one that interfaces directly with the gear that turns the odometer was destroyed.
Obliterated odometer gear
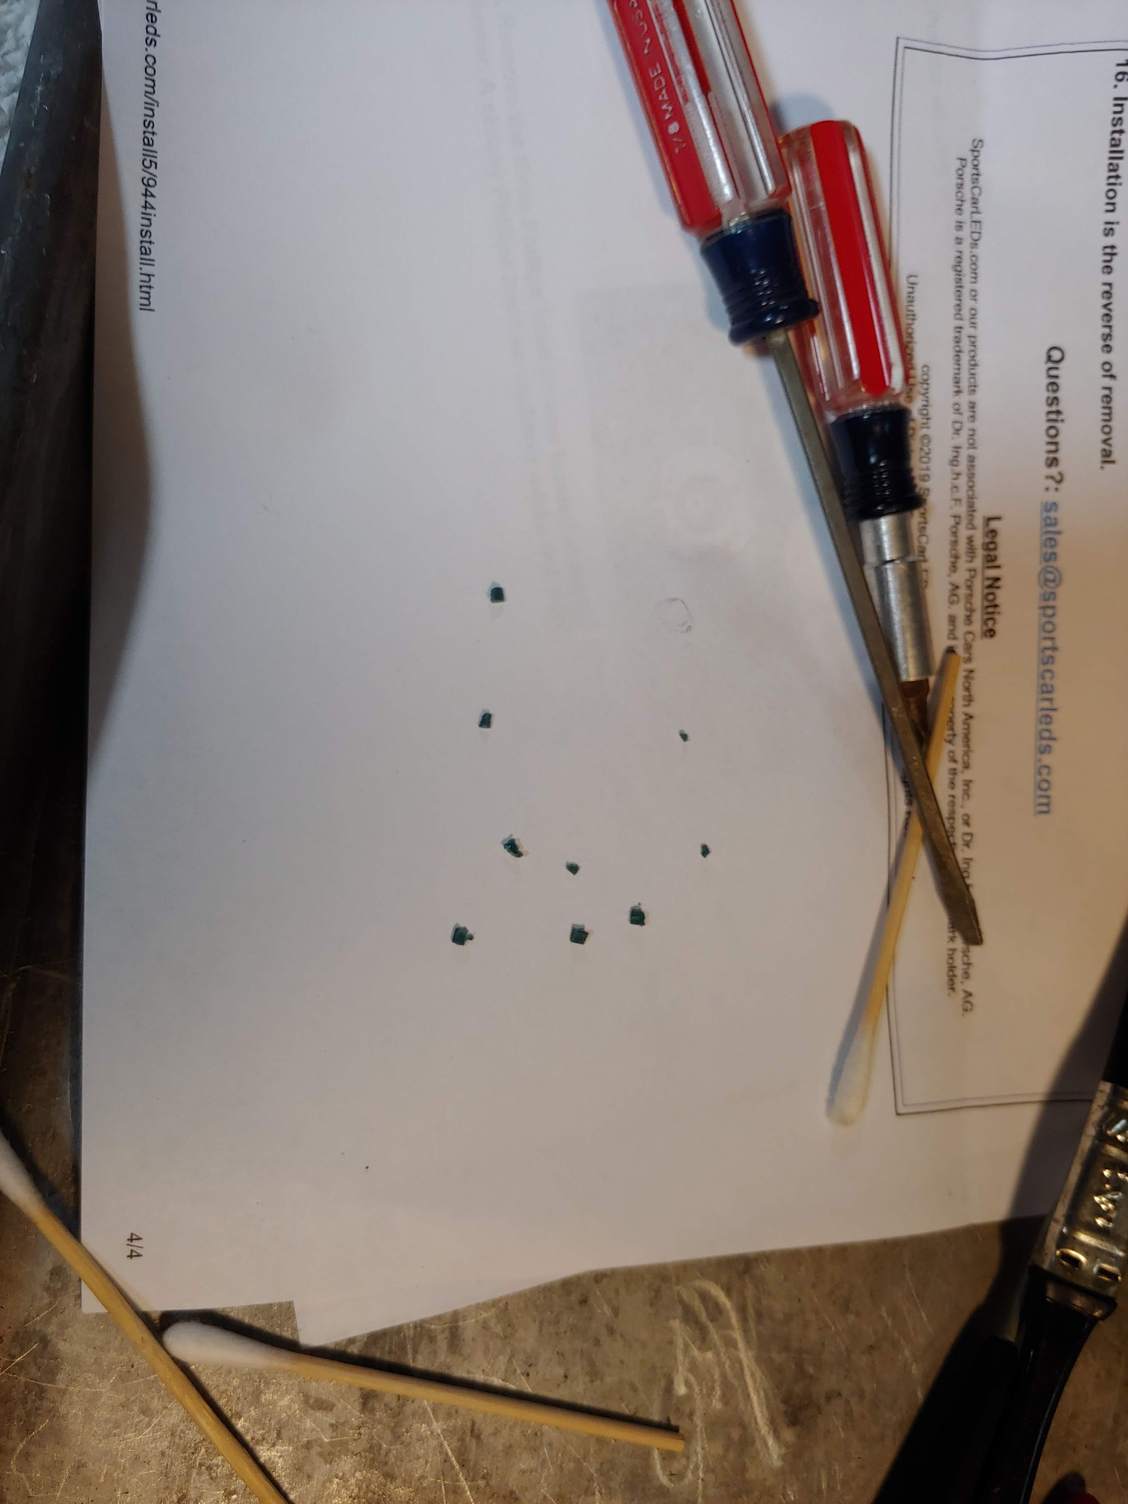
The fragments of the destroyed gear were sprinkled in the primary odometer gear and elsewhere in the housing :
Gear fragments
I wound up spending quite a bit of time cleaning out the fragments - here's a partial collection of what was removed from the remaining gears and cluster :
Gear Fragments
After cleaning the entire cluster out and adding the new replacement gear, I was able to get everything reassembled, and am happy to report I'm now "officially" logging miles again!
Like many others before me, I performed the "stripped odometer gear" replacement today. Replacement gears were ordered from www.odometergears.com awhile back. I was able to get the cluster out of the dash without removing the steering wheel, but it was a very tight fit - helped to have a second set of hands from a helper to apply pressure to open up the dash another mm or two during extraction and replacement. Worst part was removal and reapplication of the 3 ribbon cable attachments behind the cluster.
After completing the job, I think I might win the award for "most obliterated gear". The smaller gear was intact, but the larger one that interfaces directly with the gear that turns the odometer was destroyed.
After cleaning the entire cluster out and adding the new replacement gear, I was able to get everything reassembled, and am happy to report I'm now "officially" logging miles again!
Wow totally trashed! I reassembled my own speedo with new gear last night. Although time was a bit limited I hit an issue after reassembly in that it seemed pretty hard to plug the speedo back into the white housing of the cluster. There�s 4 electrical contact pins on the back of it, though only 3 of them look as if they want to line up, and getting the connectors engaged seems tricky. I stopped at that point to avoid rushing things. Wonder if there�s any trick for getting the assembled speedo back in the housing,
Glad the odometer wheels are made out of colored plastic. If they were clear plastic you would never be able to find all the little bits.
Thanks for posting your experiences...
Wow totally trashed! I reassembled my own speedo with new gear last night. Although time was a bit limited I hit an issue after reassembly in that it seemed pretty hard to plug the speedo back into the white housing of the cluster. There�s 4 electrical contact pins on the back of it, though only 3 of them look as if they want to line up, and getting the connectors engaged seems tricky. I stopped at that point to avoid rushing things. Wonder if there�s any trick for getting the assembled speedo back in the housing,
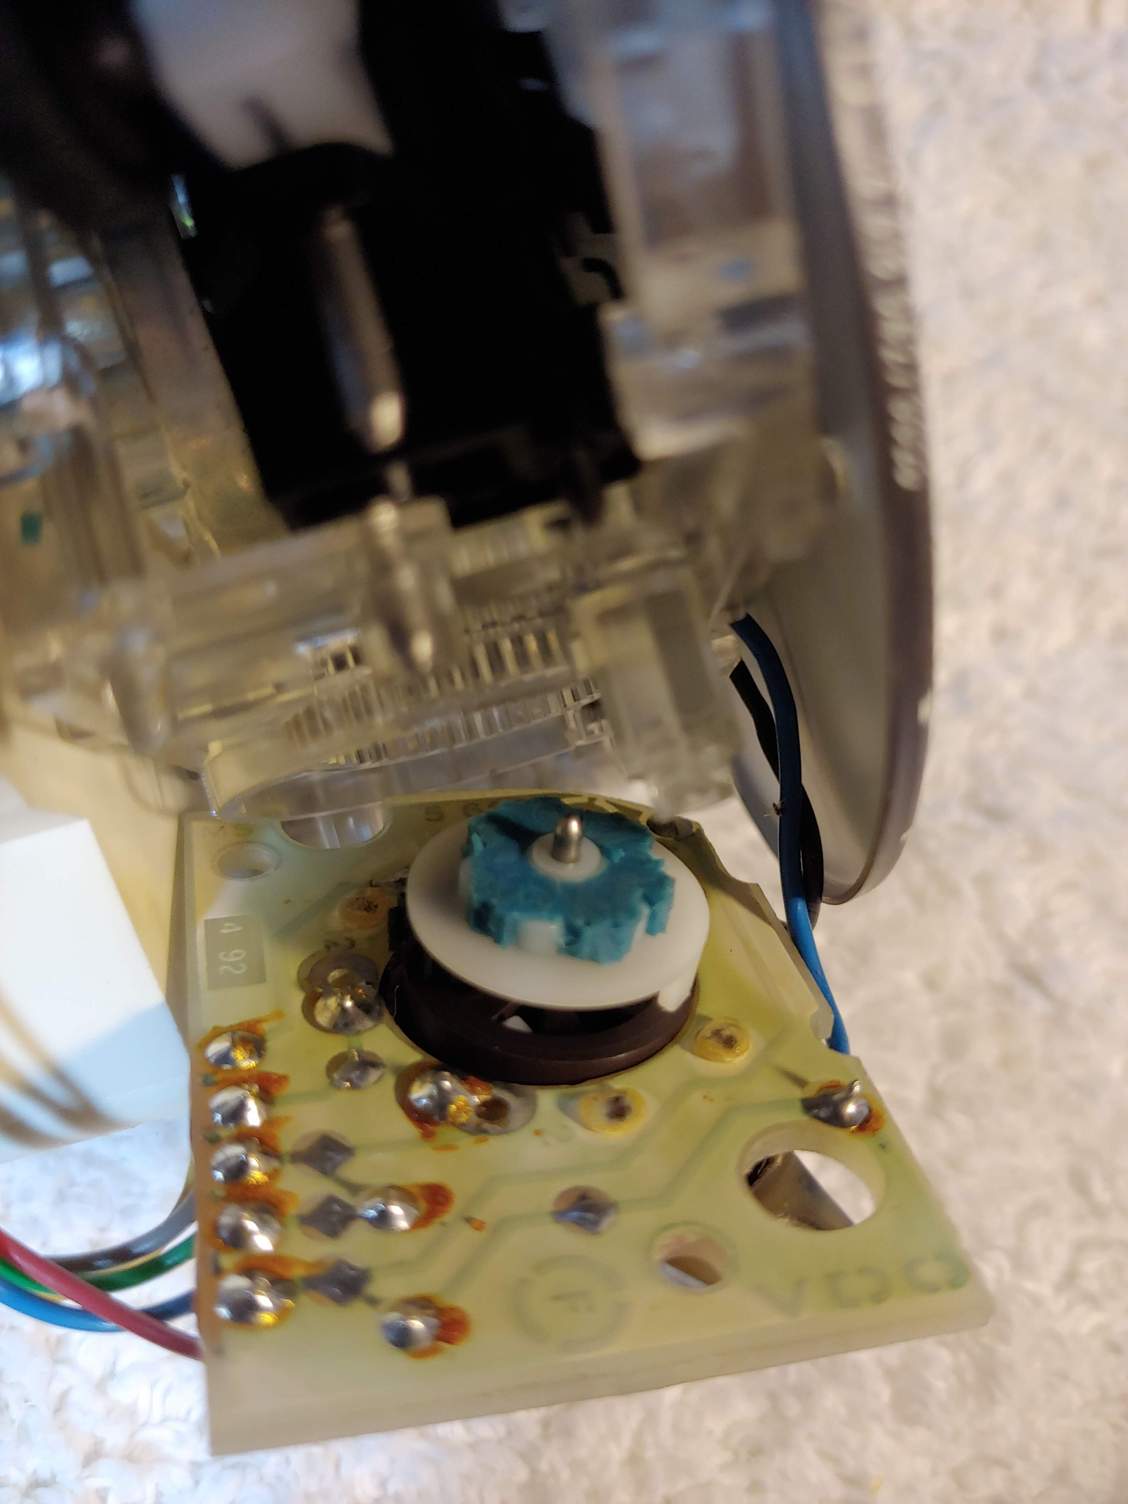
If you mean just the speedo unit itself going back into the cluster, I had no problems there. Here's a view of mine from the side, outside the cluster :
Speedo assembly, removed from instrument cluster
My only disassembly of the speedo unit past this point was removing the two phillips head screws visible on top of this pic - I could then lift off the circuit board (wires still attached) that then exposed the old gear. Did my work on gear and cleaning (in my original post above), then reattached this small circuit board and replaced speedo assembly back into the cluster.
Assembly back into the instrument cluster then only required getting the black peg on bottom of this pic (sending unit for speed?) into the appropriate hole on the cluster, lining up the screw holes and replacing the 4 screws to secure speedo assembly into cluster. I didn't notice (or pay attention to) any electrical contacts that may of been there, but it worked fine when reassembled.
Did you have a different method to get into the gears within the speedo assembly (maybe making reassembly more difficult)?
 02-24-2020, 03:29 PM