
So It Begins
 04-24-2015, 09:00 AM
#391
Drifting
Thanks Paul
I read somewhere, possibly on here, that they changed the design at some point. Mine still drones a tad at 3k, thankfully it's not unbearable. Might not be fun on a long drive though as 3k is 110km/h in 5th.
On the plus side it sound the business when you're on it without being too obnoxious.
Cheers,
Jeremy
 04-26-2015, 12:41 PM
#392
Rennlist Member
Thread Starter
Join Date: Nov 2010
Location: North Yorkshire, England
Posts: 855
Likes: 0
Received 16 Likes
on
14 Posts
Hi Jeremy,
That's exactly the reason I changed, I was having to slow down then speed up again as I couldn't bear cruising with the noise 
Cheers,
Paul
I read somewhere, possibly on here, that they changed the design at some point. Mine still drones a tad at 3k, thankfully it's not unbearable. Might not be fun on a long drive though as 3k is 110km/h in 5th.
Cheers,
Paul
Last edited by Paul284pt; 04-26-2015 at 12:41 PM. Reason: spelling
04-28-2015, 07:29 AM
#393
Rennlist Member
Thread Starter
Join Date: Nov 2010
Location: North Yorkshire, England
Posts: 855
Likes: 0
Received 16 Likes
on
14 Posts
Hi Chaps,
I hope you're not sick of seeing the upholstery updates but I may as post them posterity.
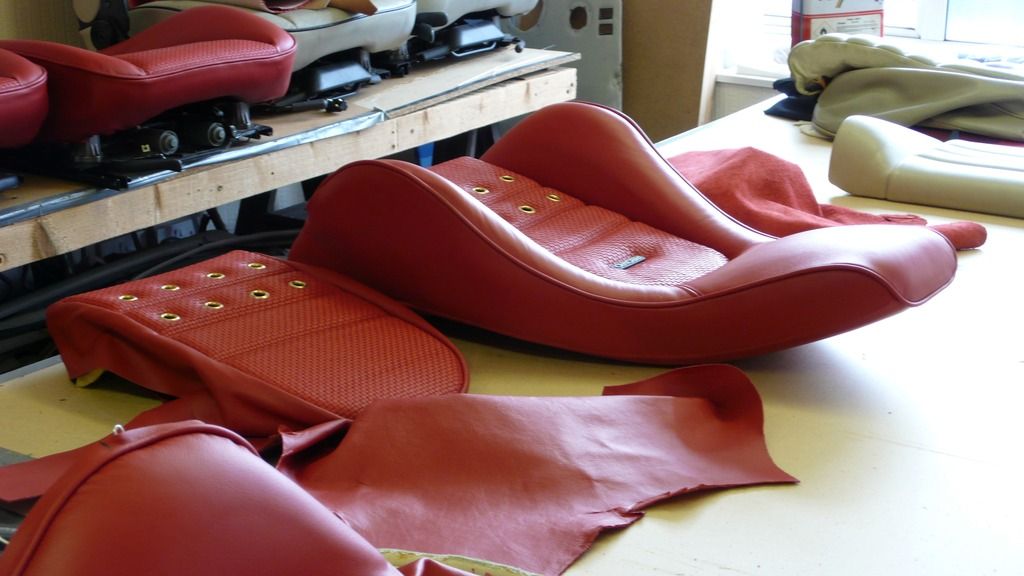
Seat backs:
A shot of the seat bases completed, for good measure.
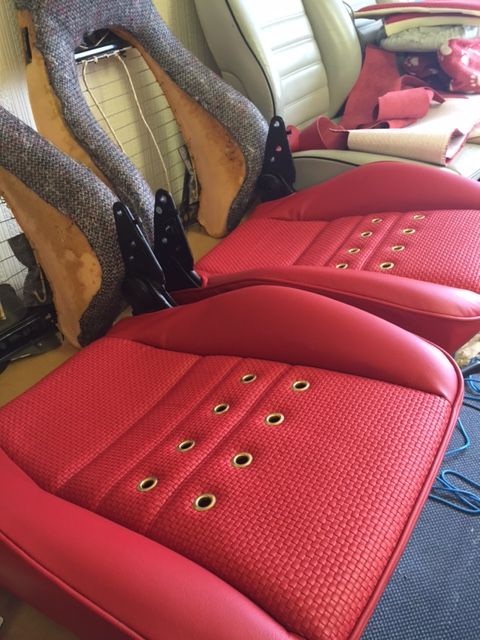
Cheers,
Paul
I hope you're not sick of seeing the upholstery updates but I may as post them posterity.
Seat backs:


A shot of the seat bases completed, for good measure.

Cheers,
Paul
04-28-2015, 10:59 AM
#394
Rennlist Member

Keep the pics coming! Thanks for sharing the process, such skilled craftsmanship on display.
Love the brass.
Just think, those seat bottoms used to look like this.
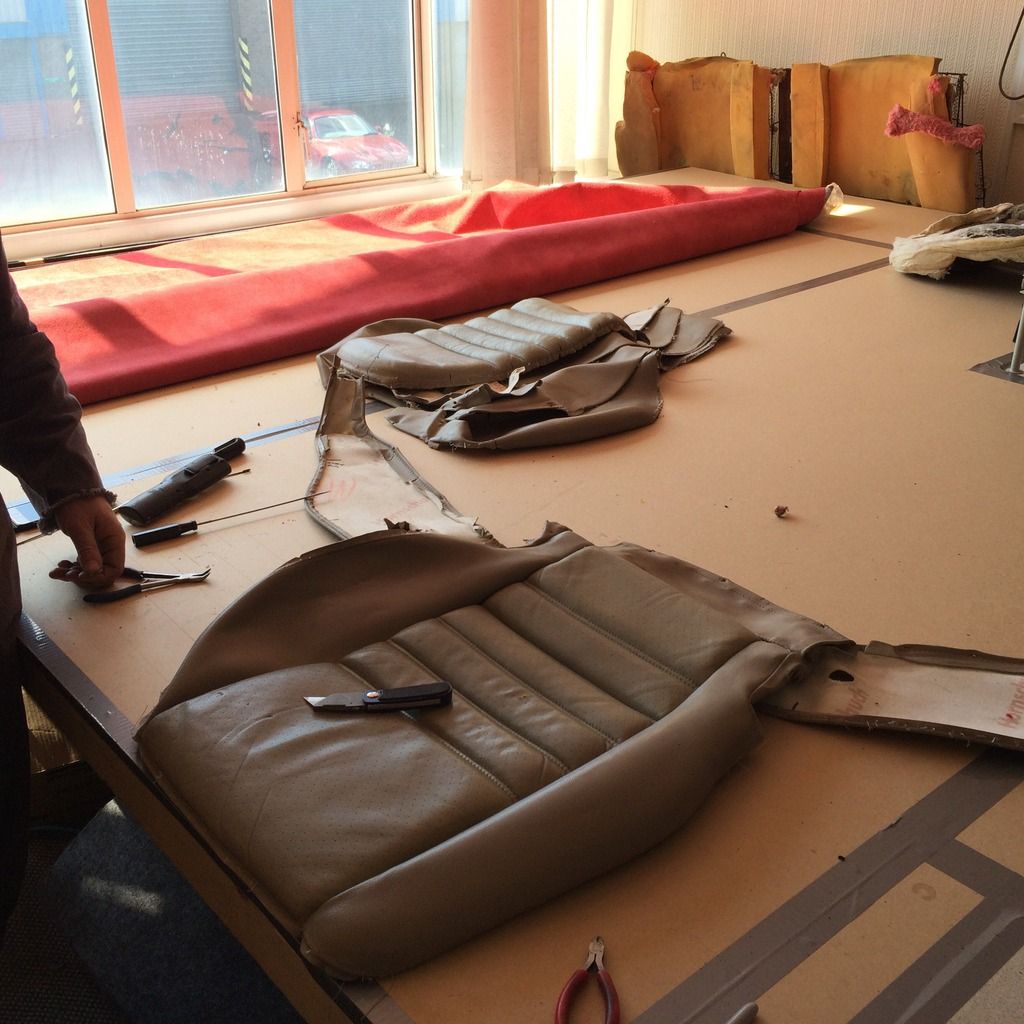
Love the brass.
Just think, those seat bottoms used to look like this.
04-28-2015, 01:33 PM
#395
Rennlist Member
Thread Starter
Join Date: Nov 2010
Location: North Yorkshire, England
Posts: 855
Likes: 0
Received 16 Likes
on
14 Posts
Hi Jetta,
Thanks mate!
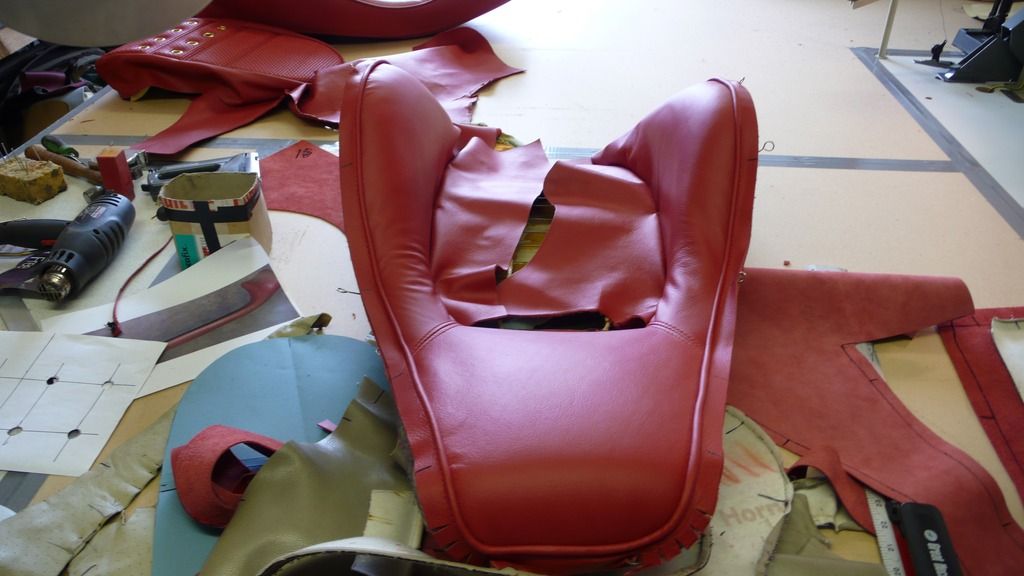
I should have added in the previous post for anyone who may be interested in the method of covering the bolsters without getting folds or creases etc:
The leather is heated with a gun, stretched and pulled over, then pinned into place. The method repeated several times until the leather takes on the shape and desired finish is achieved. It very much depends on the thickness and quality of the leather as to how long it takes, it's a slow job!
Cheers,
Paul
Thanks mate!
I should have added in the previous post for anyone who may be interested in the method of covering the bolsters without getting folds or creases etc:
The leather is heated with a gun, stretched and pulled over, then pinned into place. The method repeated several times until the leather takes on the shape and desired finish is achieved. It very much depends on the thickness and quality of the leather as to how long it takes, it's a slow job!
Cheers,
Paul
05-01-2015, 06:06 PM
#396
Rennlist Member
Thread Starter
Join Date: Nov 2010
Location: North Yorkshire, England
Posts: 855
Likes: 0
Received 16 Likes
on
14 Posts
Hi Guys,
I've been thinking, and we know what thinking does, the devil finds work for idle hands and all that. I've had nothing better to do while the trim is being done.
So here it is, ta dah! A dash trim badge (when I first put that in the spell checker came up with 'trimmed badger'") ), anyway, Edward has designed this and I"m having it made in sterling silver.
), anyway, Edward has designed this and I"m having it made in sterling silver.
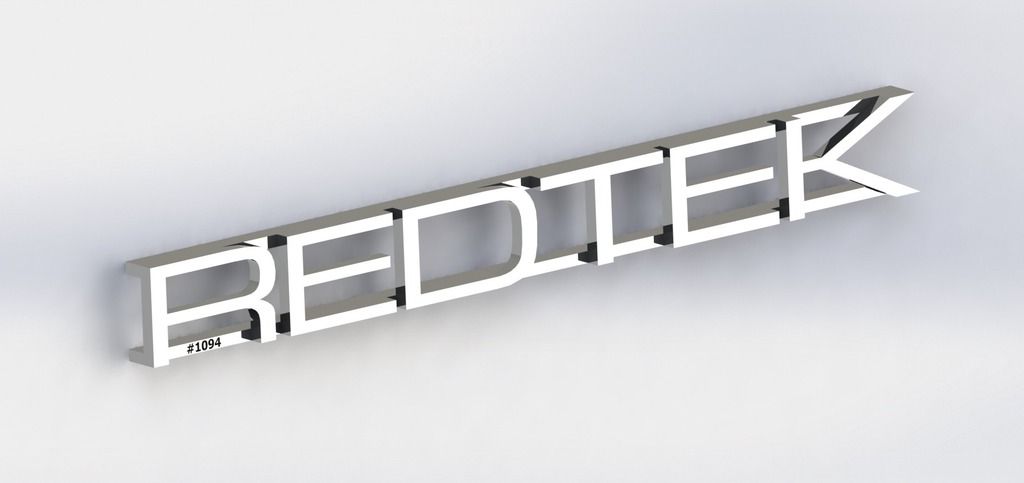

I only did the thinking.
Cheers,
Paul
I've been thinking, and we know what thinking does, the devil finds work for idle hands and all that. I've had nothing better to do while the trim is being done.
So here it is, ta dah! A dash trim badge (when I first put that in the spell checker came up with 'trimmed badger'
), anyway, Edward has designed this and I"m having it made in sterling silver. 

I only did the thinking.
Cheers,
Paul
05-02-2015, 09:25 AM
#397
Rennlist Member
Thread Starter
Join Date: Nov 2010
Location: North Yorkshire, England
Posts: 855
Likes: 0
Received 16 Likes
on
14 Posts
Hi All,
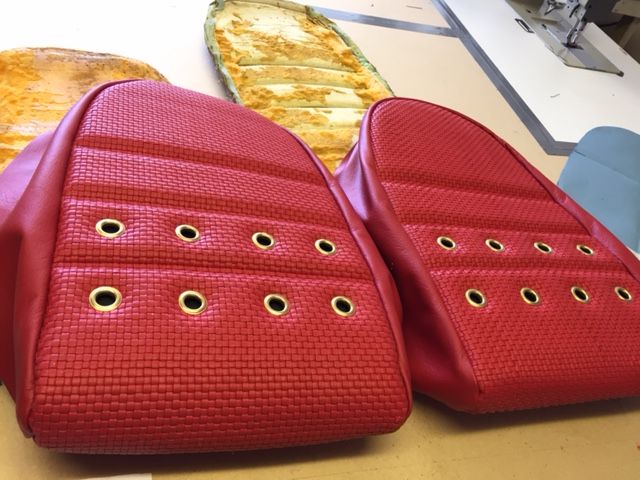
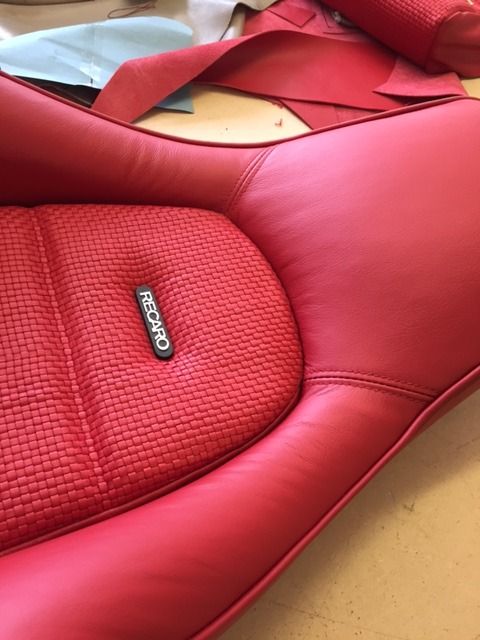
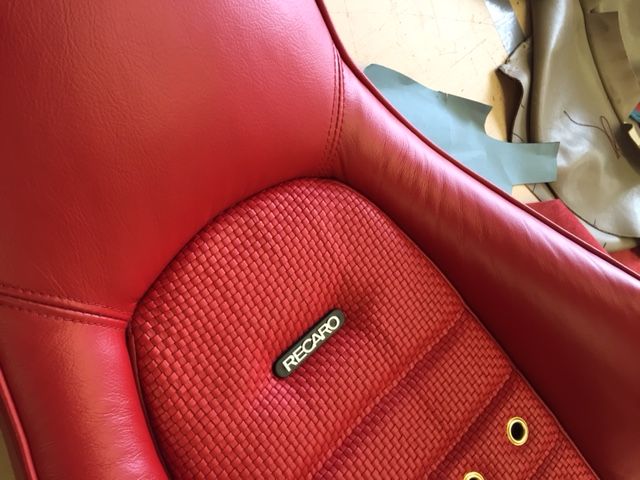
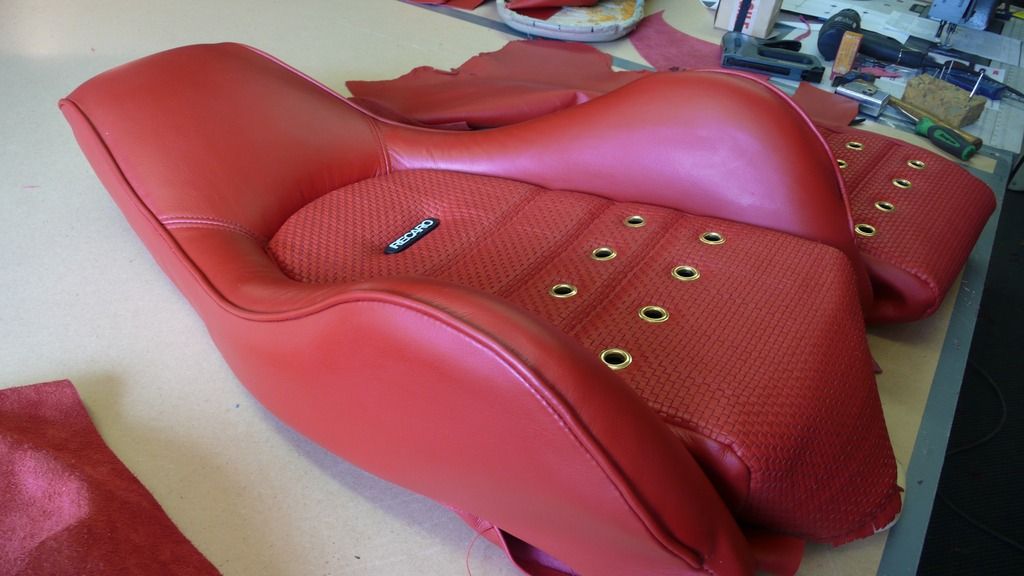
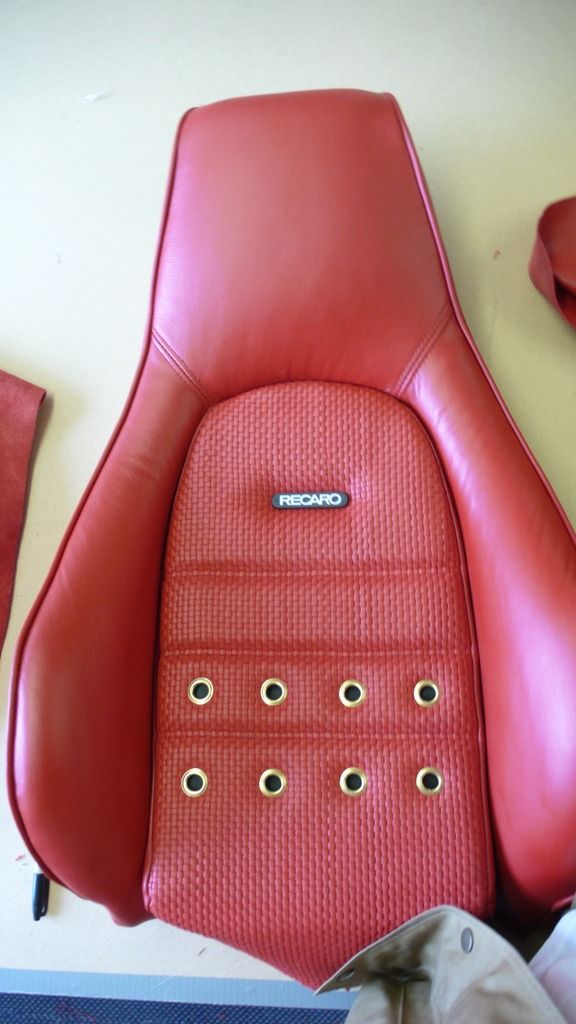
Here are the seat backs completed with the Recaro badges fitted a la Singer style. The seats are of course the standard period correct Porsche Recaro Sports seats but only stylised like the Singers to give them a classic look.
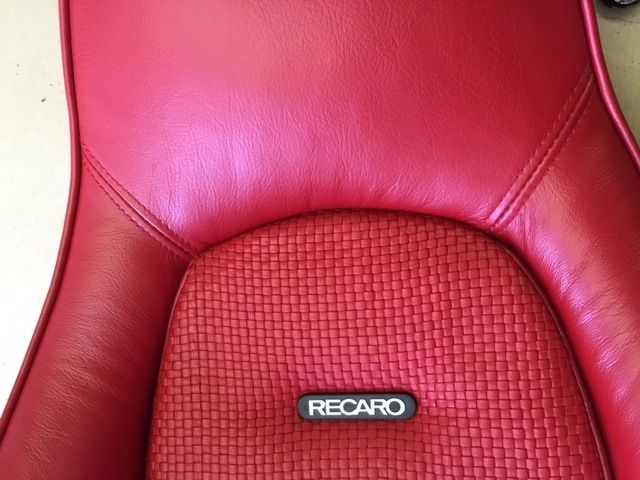
Cheers,
Paul
Here are the seat backs completed with the Recaro badges fitted a la Singer style. The seats are of course the standard period correct Porsche Recaro Sports seats but only stylised like the Singers to give them a classic look.


Cheers,
Paul
05-04-2015, 06:04 AM
#401
Rennlist Member
Thread Starter
Join Date: Nov 2010
Location: North Yorkshire, England
Posts: 855
Likes: 0
Received 16 Likes
on
14 Posts
Hi Poli84,
Thank you
I'm pleased they are turning out the way I imagined them so it will be great to see them all finished.
Thanks again,
Paul
Thank you
I'm pleased they are turning out the way I imagined them so it will be great to see them all finished.
Thanks again,
Paul
 05-05-2015, 04:02 PM
#403
Rennlist Member
Thread Starter
Join Date: Nov 2010
Location: North Yorkshire, England
Posts: 855
Likes: 0
Received 16 Likes
on
14 Posts
Hello again,
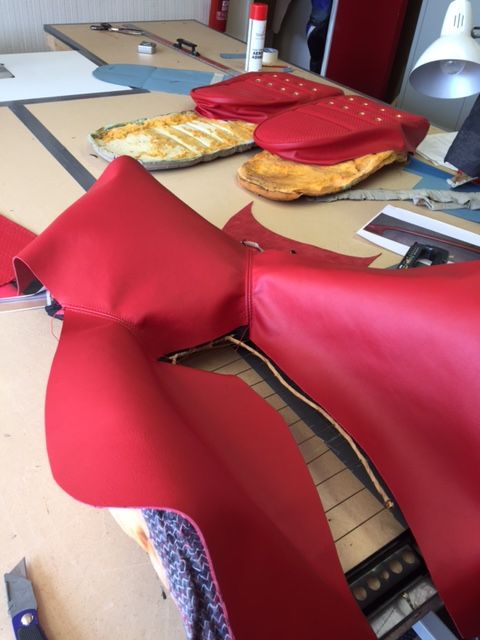
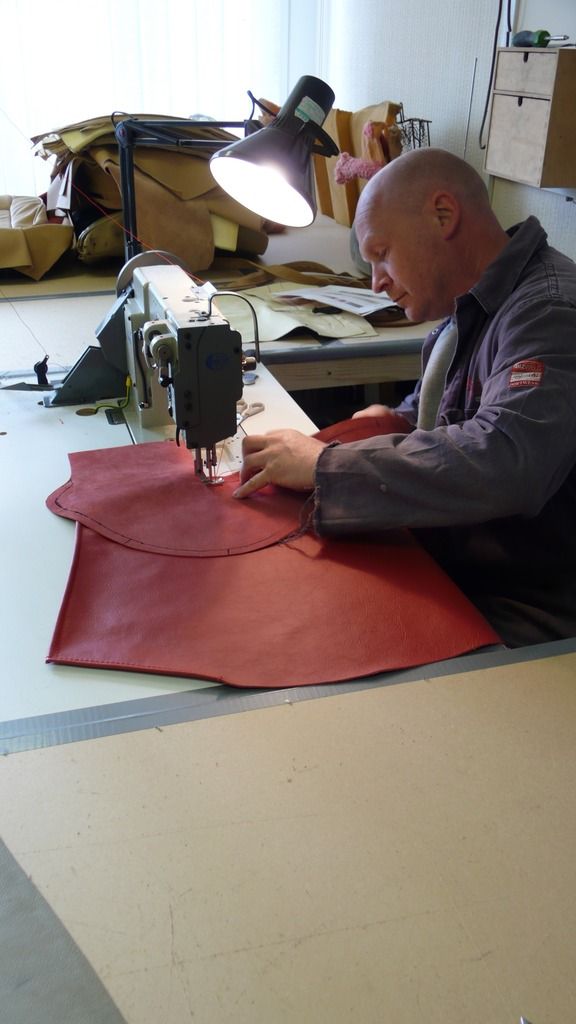
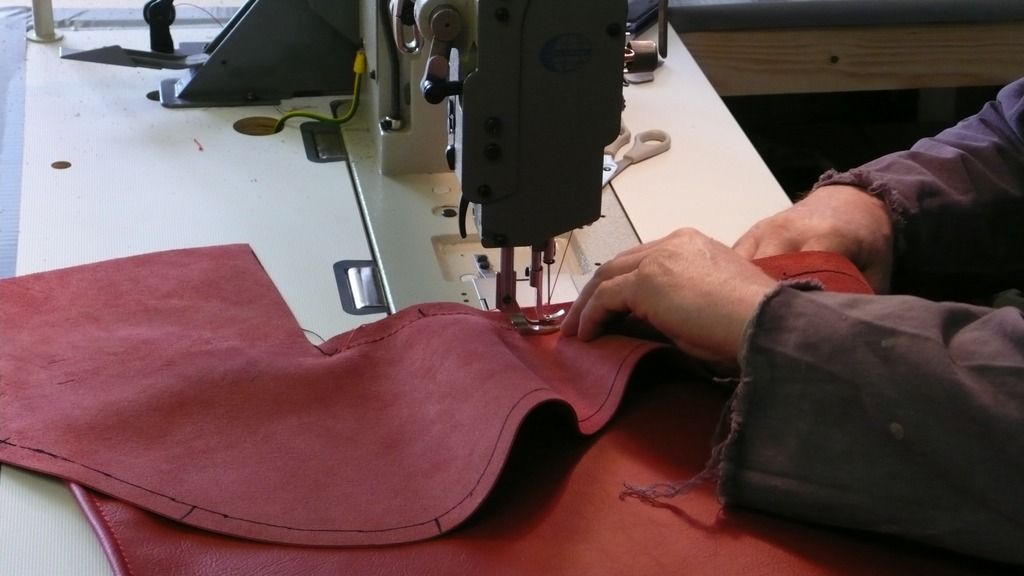
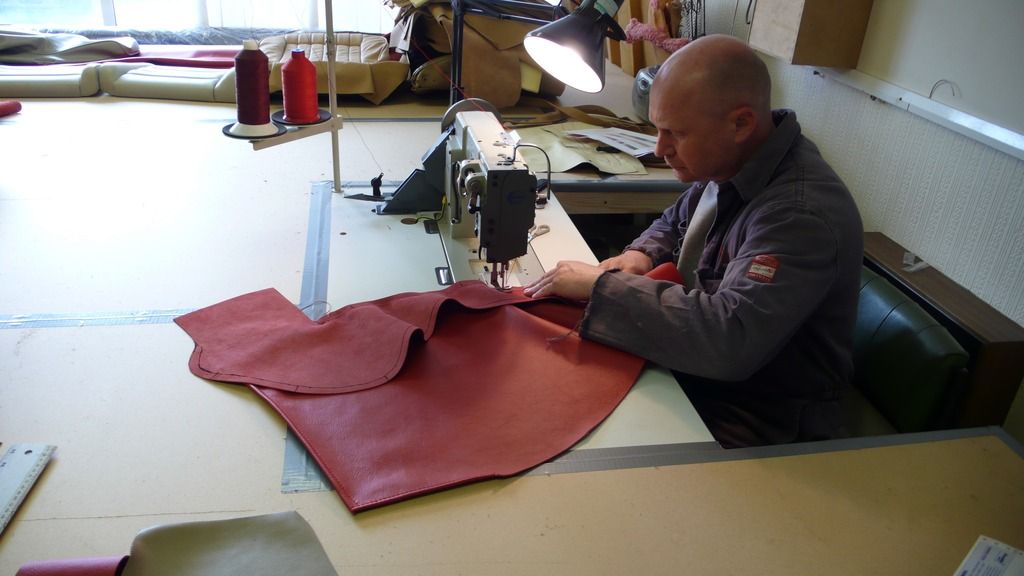
Some photos of the process of making up the seats:
The master John at work at his new machine, it may look like an ordinary sewing machine but it really is the bees knees.
Also, I wish I had one tenth of his talent! And he's an absolute top bloke! It makes you sick
As he sews he keeps checking his lines to make sure he's not running off pattern by even one millimetre.
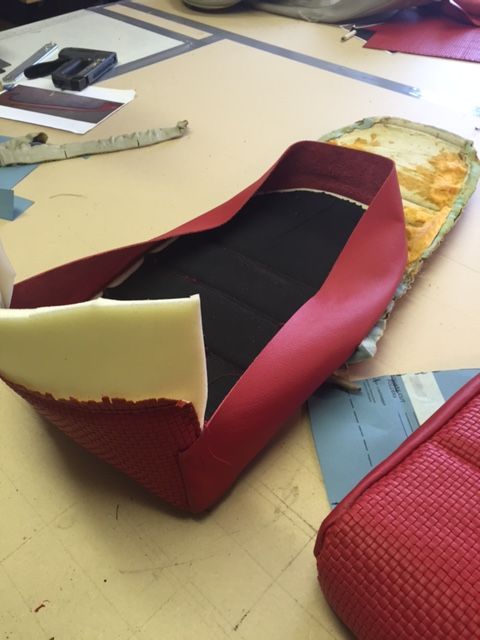
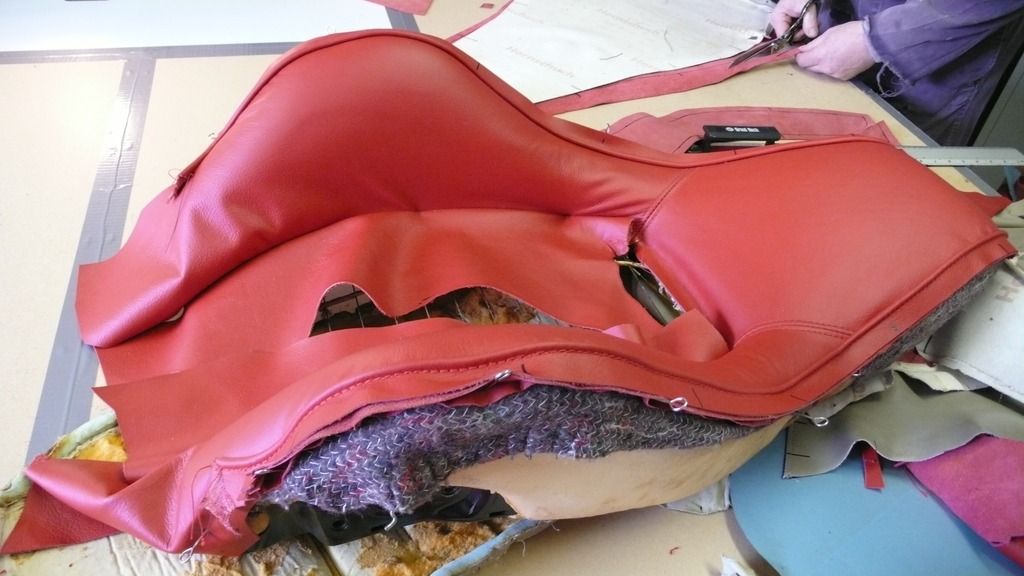
As I was explaining earlier when the pattern is cut and sewn the hide is stretched over the seat bolster and heated, then pinned as you can see here. The hide left to cool and the process repeated as many times necessary.
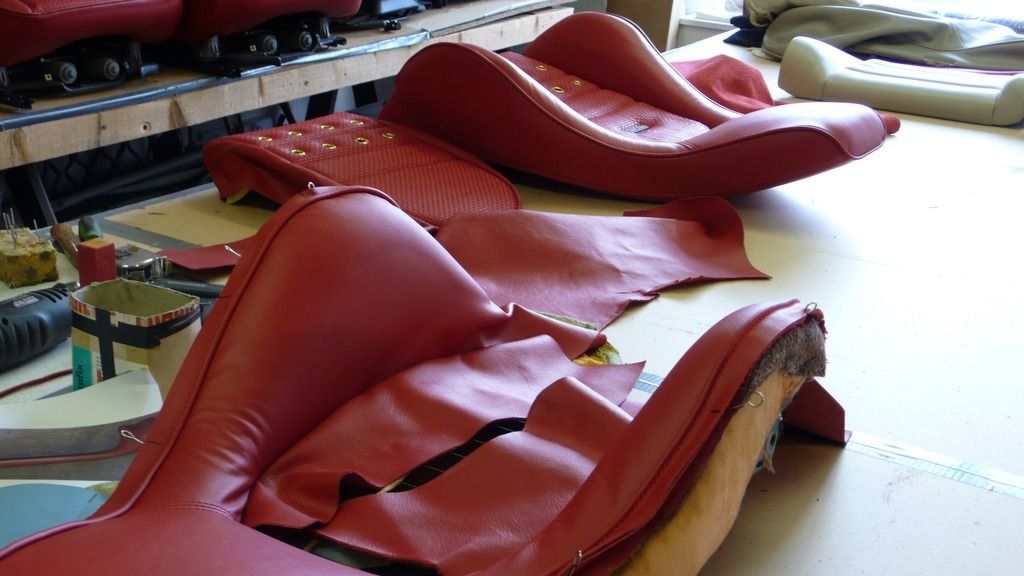
And finally the finished article assembled with the cushions. My old seats in the background from which we will take the bases and electrics.
If you would like to see more of John's work check out his Instagram page @johncollins47
More later in the week,
Paul
Some photos of the process of making up the seats:
The master John at work at his new machine, it may look like an ordinary sewing machine but it really is the bees knees.
Also, I wish I had one tenth of his talent! And he's an absolute top bloke! It makes you sick
As he sews he keeps checking his lines to make sure he's not running off pattern by even one millimetre.


As I was explaining earlier when the pattern is cut and sewn the hide is stretched over the seat bolster and heated, then pinned as you can see here. The hide left to cool and the process repeated as many times necessary.


And finally the finished article assembled with the cushions. My old seats in the background from which we will take the bases and electrics.


If you would like to see more of John's work check out his Instagram page @johncollins47
More later in the week,
Paul
05-07-2015, 12:28 AM
#404
you 64 cats are killing' me! absolutely love it! can't wait to see them installed.
05-09-2015, 10:16 AM
#405
Rennlist Member
Thread Starter
Join Date: Nov 2010
Location: North Yorkshire, England
Posts: 855
Likes: 0
Received 16 Likes
on
14 Posts
Outstanding Paul.
Thank you

you 64 cats are killing' me! absolutely love it! can't wait to see them installed.

Update:
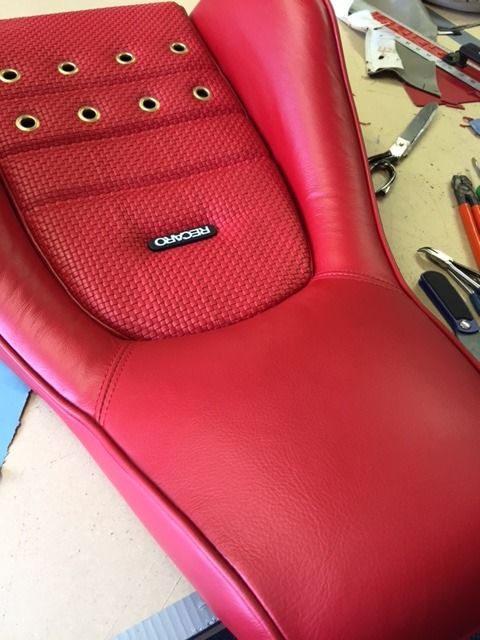
Underneath the brass ferrules we have positioned black leather to finish the appearance from above as seen below.

The seats being re-assembled. If you look closely at the base of the seat you can see the steel grips which hold the leather seat covers and stop them riding forward.

Fully assembled on my original seat runners etc., with the leather cut for the repositioned electric switches and tilt levers.

I'm showing a shot of the seats from when I purchased them not only to show the difference but also the cream plastic hinge covers. I was unsure about what to do with these to match the new trim. We could have painted them to match but the better alternative would be to also cover them with leather, as you can see.


As you can imagine the seats have been the most difficult parts of the re-trim and the rest should come together more quickly but it's definitely been worth waiting for.

Bye for now,
Paul