
Aussie 964C2 Maintenance Diary (pic heavy!)
 10-22-2012, 08:36 PM
#346
Burning Brakes
Thread Starter

My wheels are already coated in Nanolex, which I think is a similar product. I didn't think of doing the same with the calipers, though, that's a good tip.
 10-23-2012, 09:54 AM
#347
Burning Brakes

Join Date: Aug 2012
Location: Raleigh, NC
Posts: 841
Likes: 0
Received 0 Likes
on
0 Posts
Thank you for putting this thread together. I am going to use a lot of what you did as a road map. You explanation along with the pictures is very good and appreciated.
Thanks,
Steve
Thanks,
Steve
10-25-2012, 10:45 AM
#348
Burning Brakes
Thread Starter
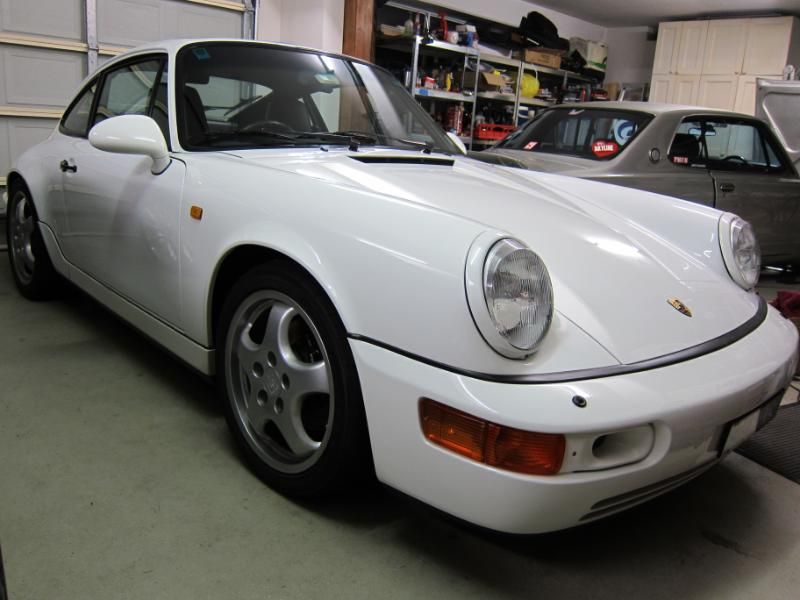
As the concours looms (its this Sunday), we have to increase our efforts. 
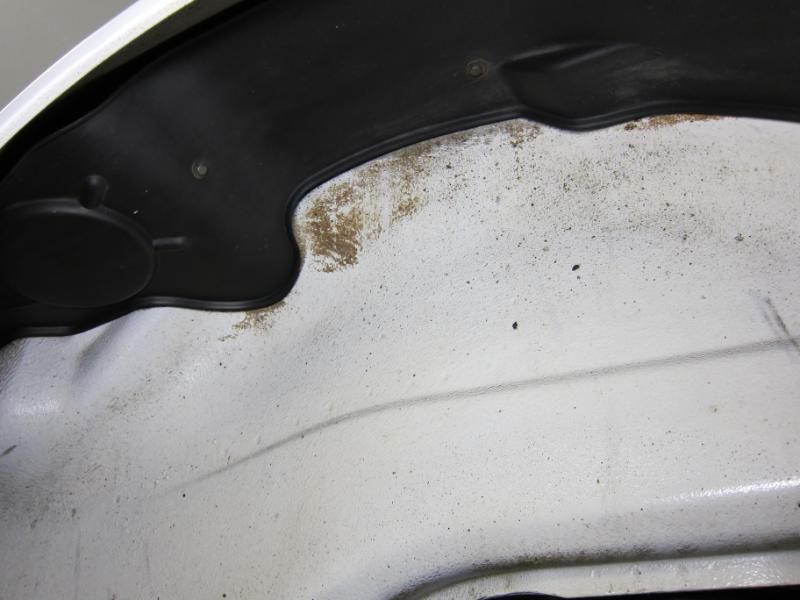
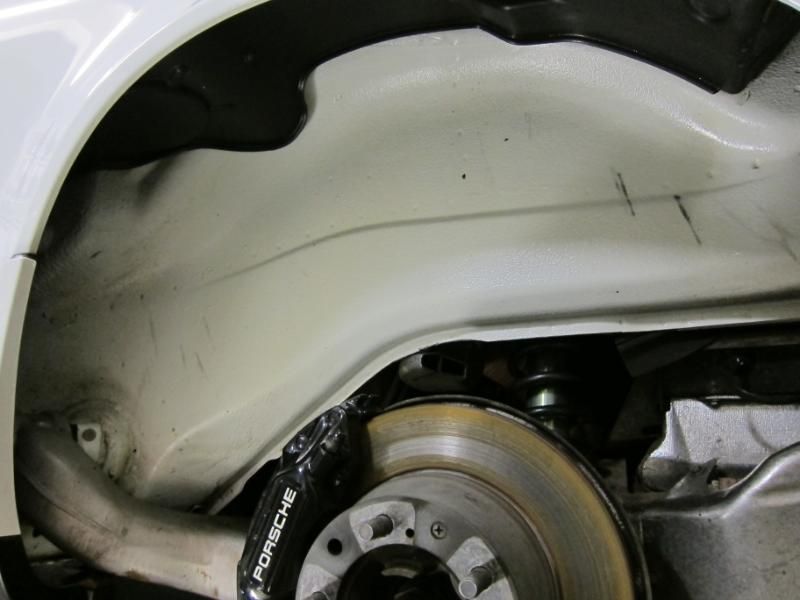
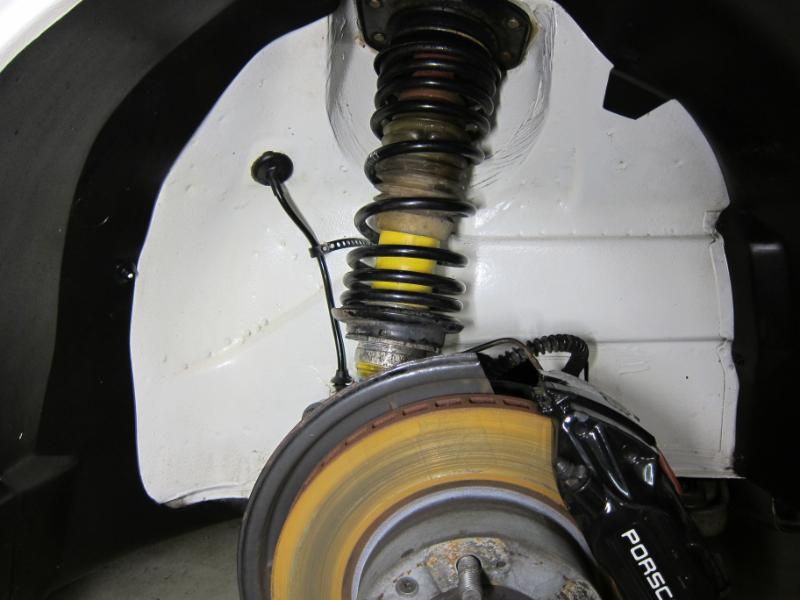
But first...as Vandit suggested, I bought some WD40 and decided to give it a try in removing the ugly splotches of cosmoline wax in the wheel wells.
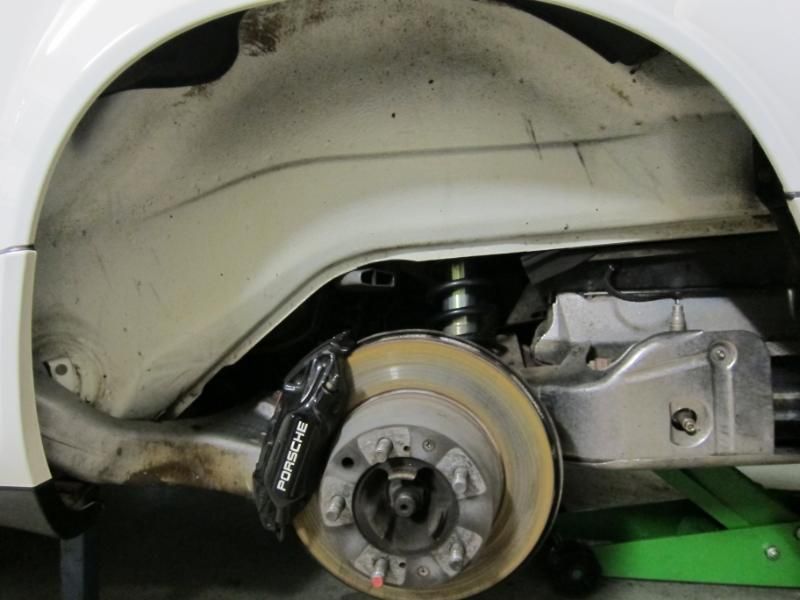
As you can see, there's a few spots where it's quite noticeable.
But after a squirt of WD40, the cosmoline starts to melt pretty much straight away.
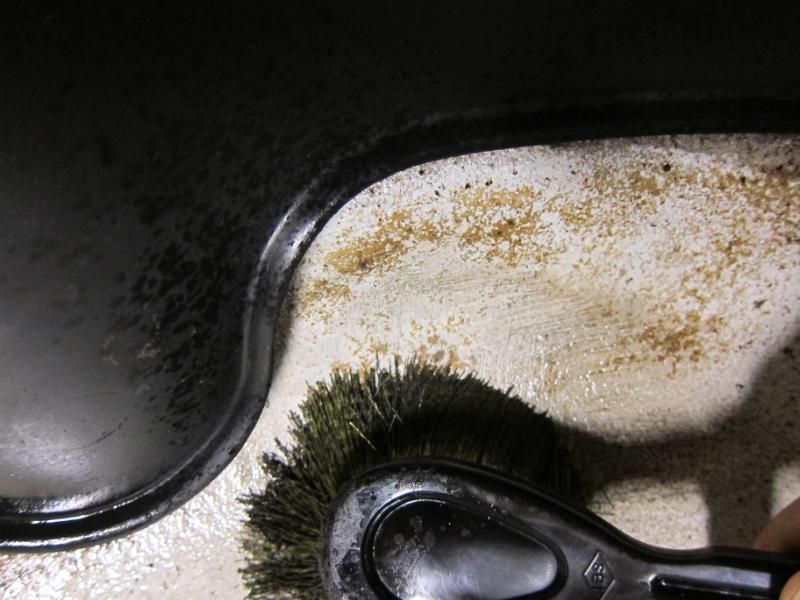
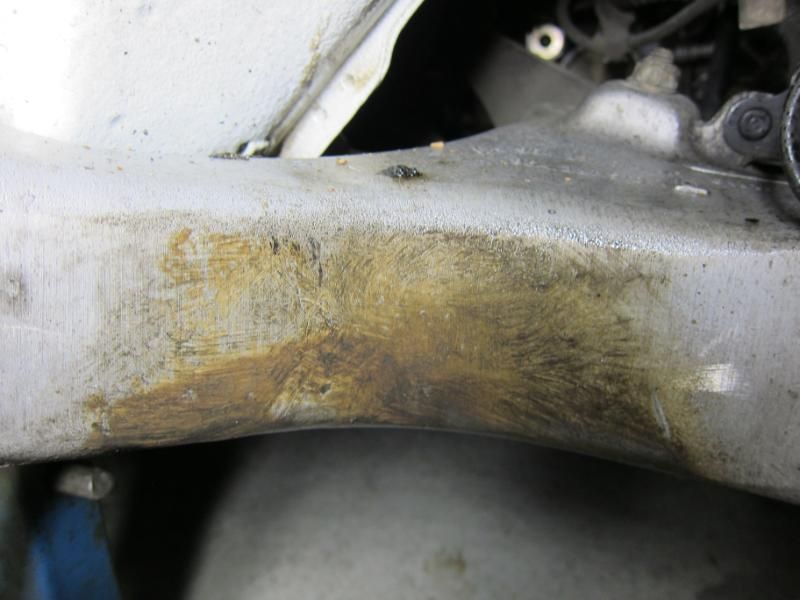
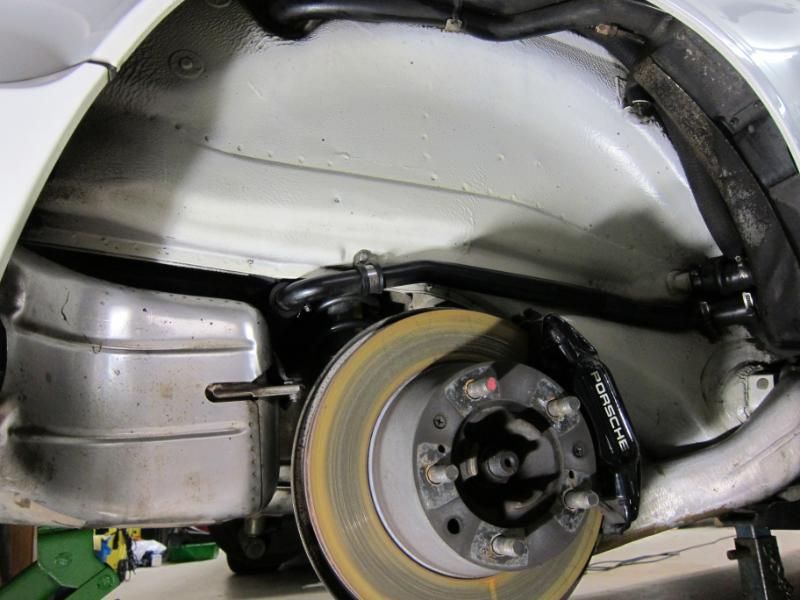
Both rear suspension arms had a very thick puddle of the stuff, which took a lot of scrubbing to remove...
But eventually it all came off.
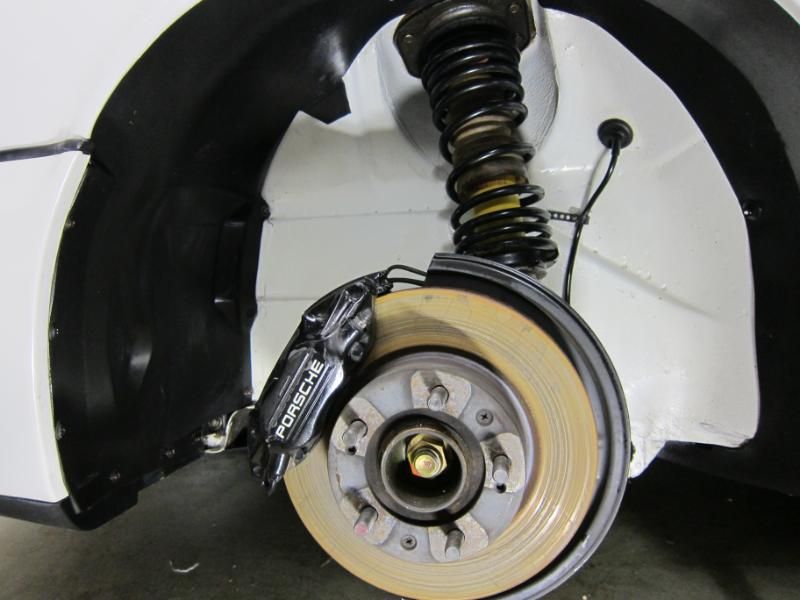
Then I gave it a spritz of Meguiars Quick Detailer and then wiped off the remaining WD40, and I was pretty shocked at how clean it suddenly looked without the cosmoline
The other side...
And the front.
Thanks Vandit, it was a great tip
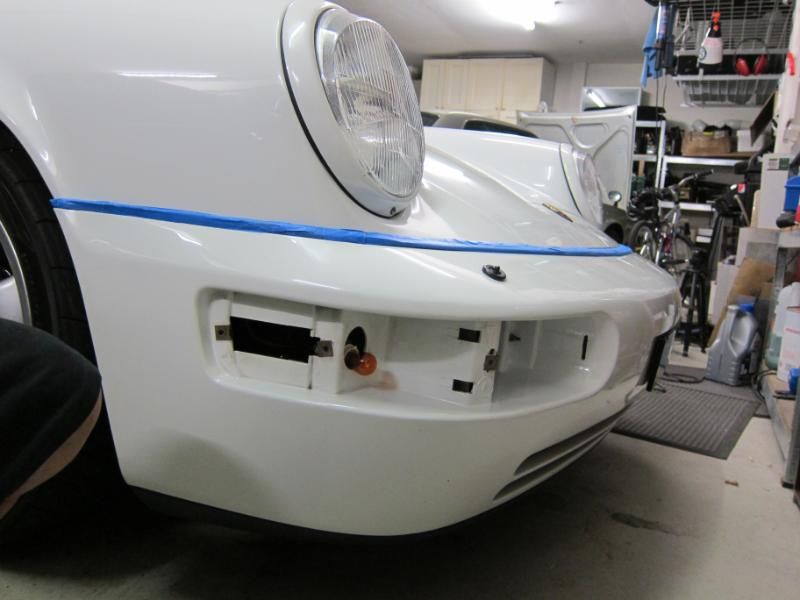
And now we turn to the paintwork. I like to mask off the rubber smile, as well as the tail lights, to save me from having to clean the white polish residue off later. The front indicators are easy enough to remove though, and allows you to really get into the cracks to clean it properly.
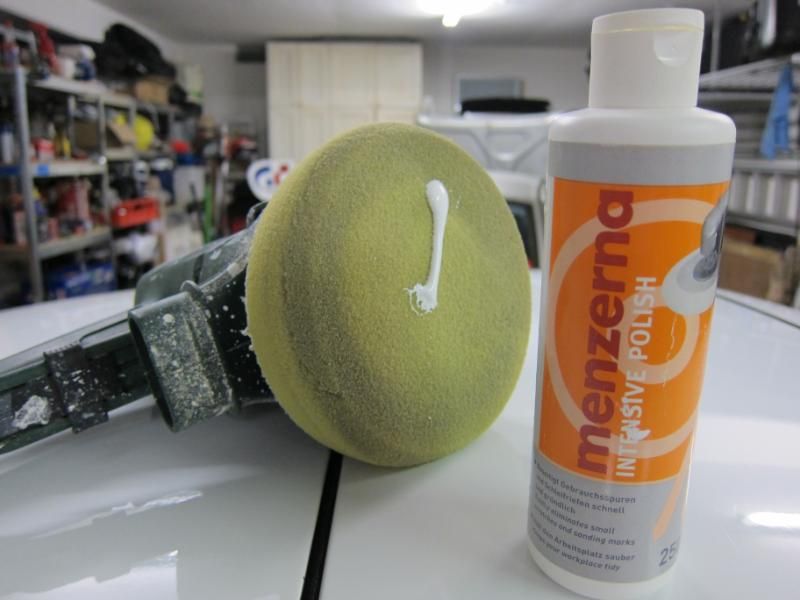
First I start with a good claying, then I polish with Menzerna Intensive Polish. It's a mild cut, and good for removing swirl marks.
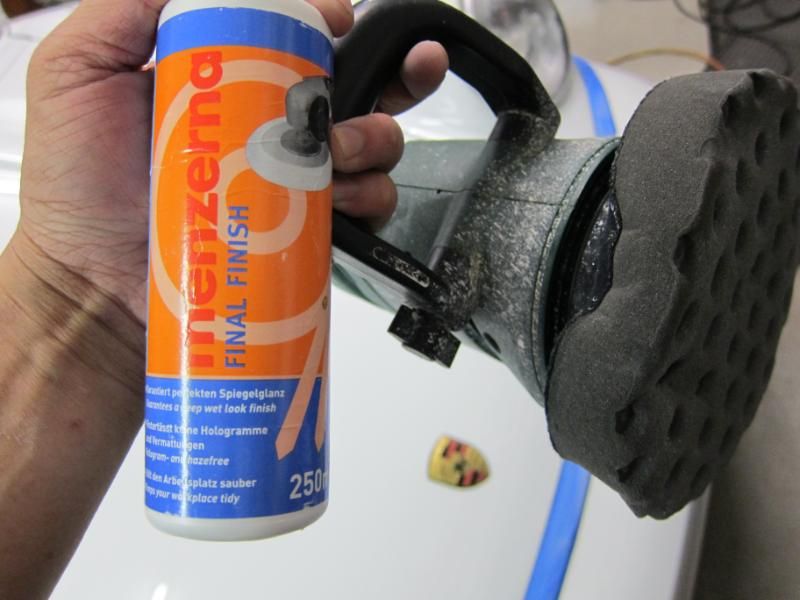
Then next is the Final Finish, which is a very mild polish.
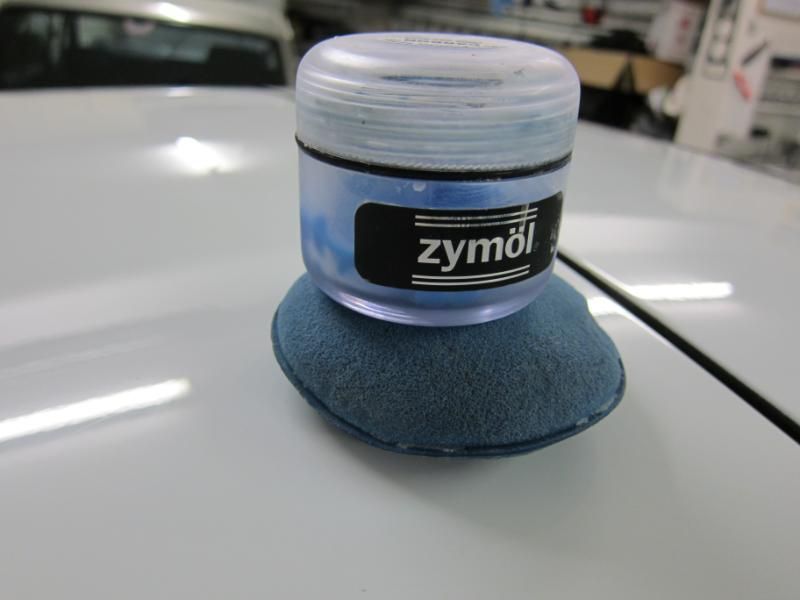
And finally to seal the polish, I use a Zymol Carbon, which I apply by hand. I prefer to do this last step without the machine buffer, since you can really get into the nooks and crannies better this way.
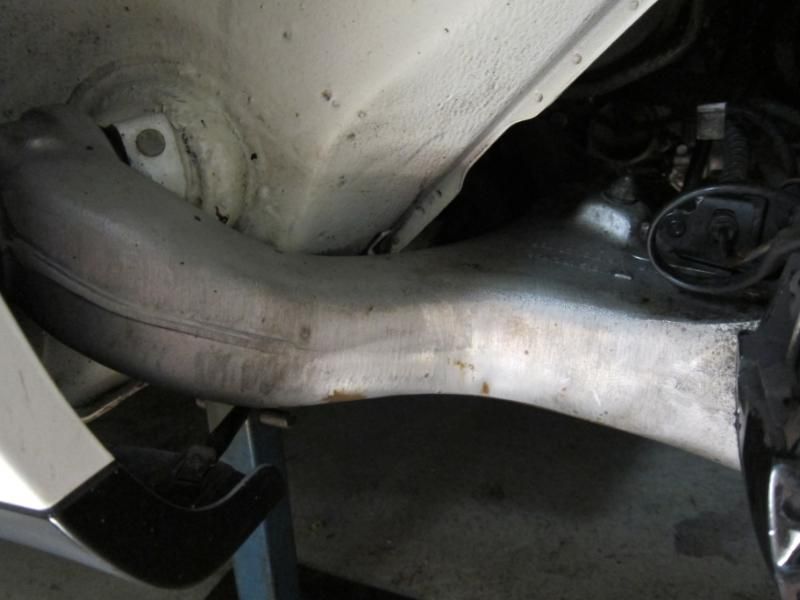
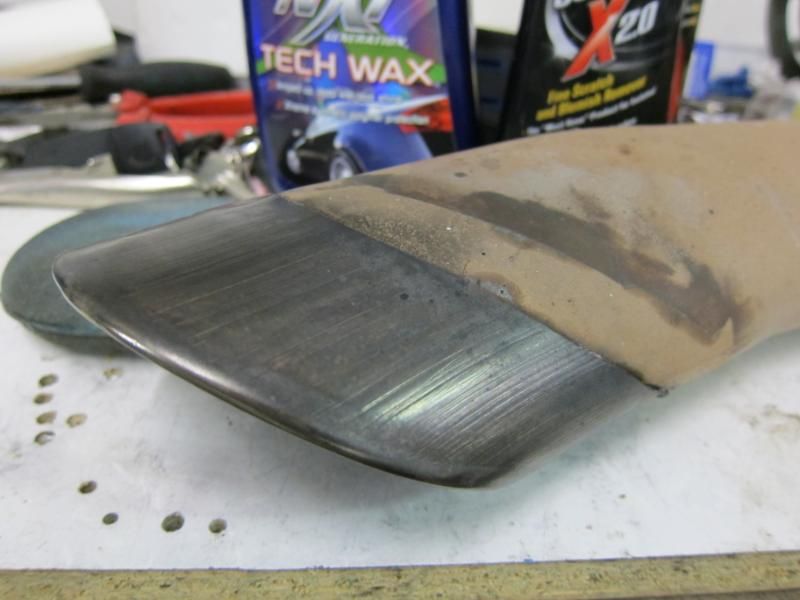
Then the tailpipe gets some love.
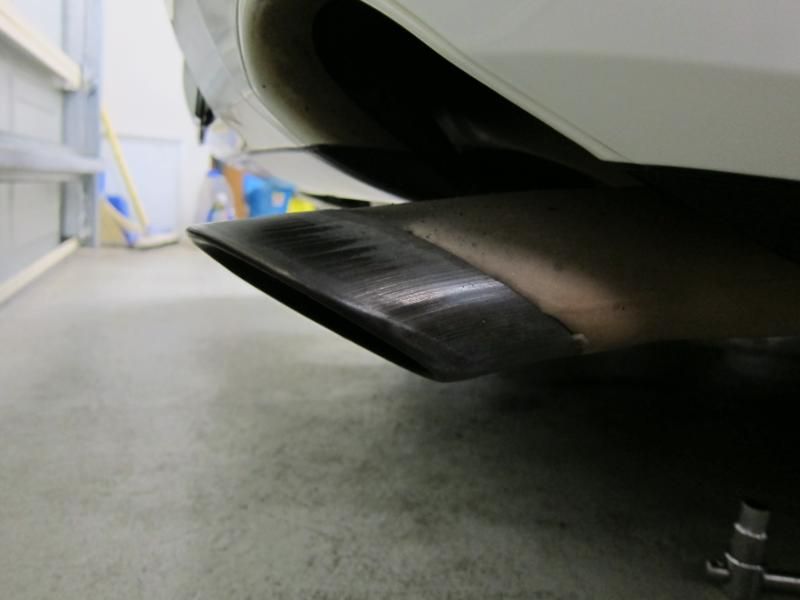
I hit it with some abrasive polish compound, then polish it up with Meguiars NXT...aaaaaand it looks more or less the same
But with a few more days to go, I'd say we're in good shape.
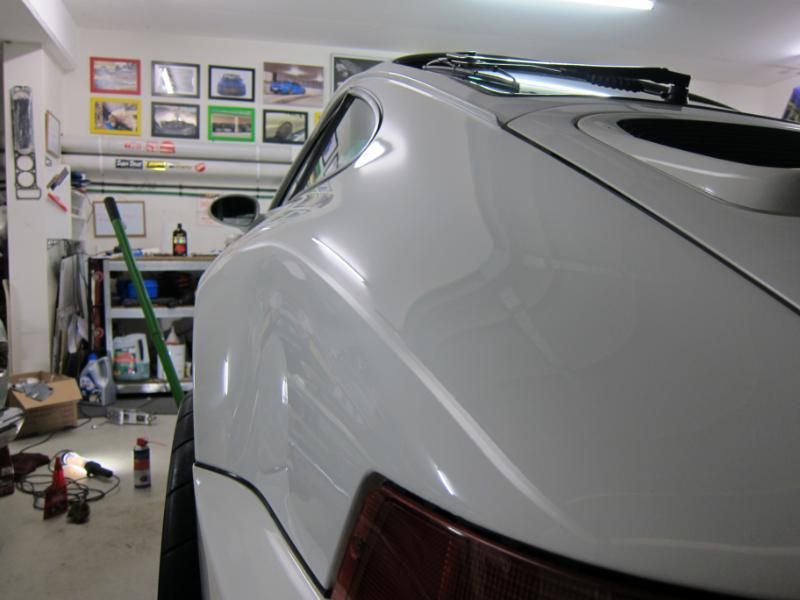
I've still got to do the interior, and then go over the car one last time to take care of all the little things (even things like door strikers and check straps are items in the judging sheet) and to see if there's anything I missed, but I reckon this is about as pretty as she's gonna get
But first...as Vandit suggested, I bought some WD40 and decided to give it a try in removing the ugly splotches of cosmoline wax in the wheel wells.
As you can see, there's a few spots where it's quite noticeable.
But after a squirt of WD40, the cosmoline starts to melt pretty much straight away.
Both rear suspension arms had a very thick puddle of the stuff, which took a lot of scrubbing to remove...
But eventually it all came off.
Then I gave it a spritz of Meguiars Quick Detailer and then wiped off the remaining WD40, and I was pretty shocked at how clean it suddenly looked without the cosmoline
The other side...
And the front.
Thanks Vandit, it was a great tip
And now we turn to the paintwork. I like to mask off the rubber smile, as well as the tail lights, to save me from having to clean the white polish residue off later. The front indicators are easy enough to remove though, and allows you to really get into the cracks to clean it properly.
First I start with a good claying, then I polish with Menzerna Intensive Polish. It's a mild cut, and good for removing swirl marks.
Then next is the Final Finish, which is a very mild polish.
And finally to seal the polish, I use a Zymol Carbon, which I apply by hand. I prefer to do this last step without the machine buffer, since you can really get into the nooks and crannies better this way.
Then the tailpipe gets some love.
I hit it with some abrasive polish compound, then polish it up with Meguiars NXT...aaaaaand it looks more or less the same
But with a few more days to go, I'd say we're in good shape.
I've still got to do the interior, and then go over the car one last time to take care of all the little things (even things like door strikers and check straps are items in the judging sheet) and to see if there's anything I missed, but I reckon this is about as pretty as she's gonna get
10-25-2012, 10:54 AM
#350
Burning Brakes
Thread Starter
10-26-2012, 10:37 AM
#353
Rennlist Member

Baba,
Good luck on Sunday.
Make sure you take the LONG way home from the concours...with a trophy in the back seat!
Good luck on Sunday.
Make sure you take the LONG way home from the concours...with a trophy in the back seat!
10-29-2012, 11:41 PM
#354
Burning Brakes
Thread Starter
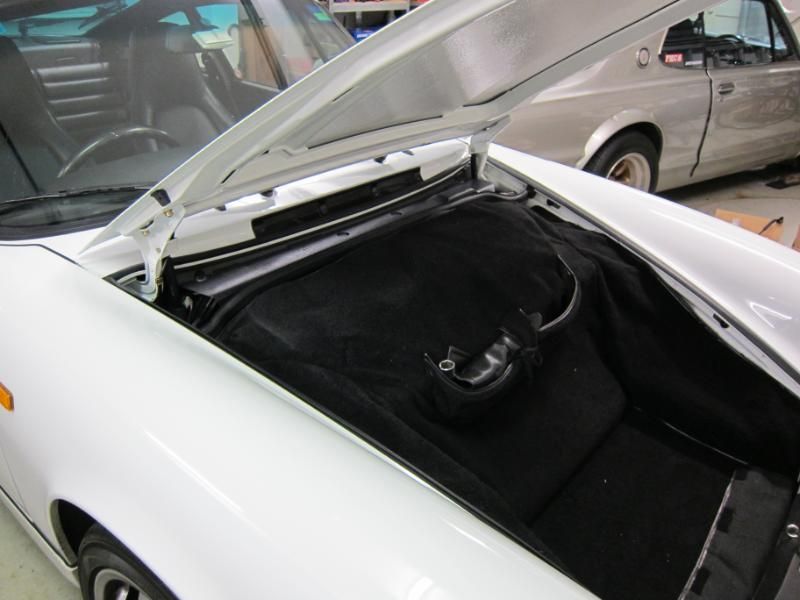
Well, there's always next year!The very first mod I did on the 964 (in fact I think I did it the first day I got it!) was to drill the airbox. And I thought it would be a good idea to do it as stealthily as possible, while retaining the stock intake horn.
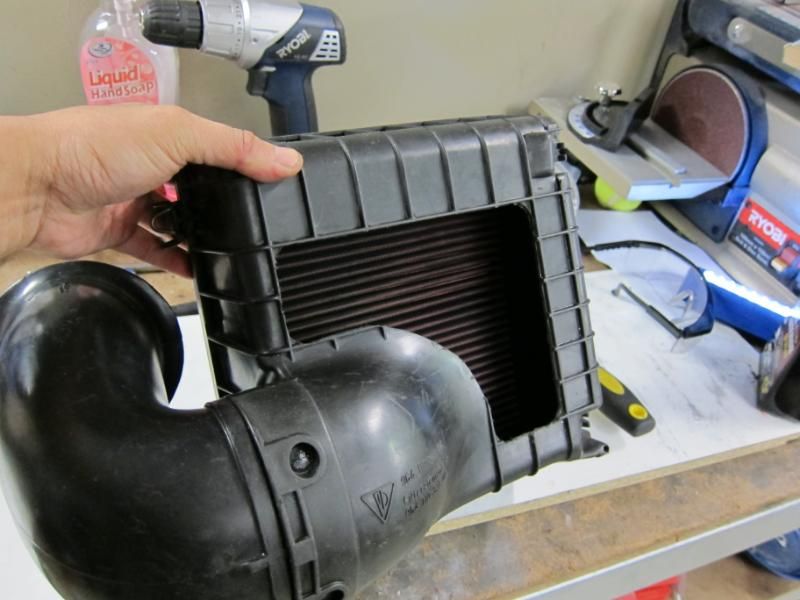
But while it did liberate the expected amount of induction snarl (good), the intake horn always seemed to be bulky and in the way when I wanted to remove the airbox lid (bad). So this morning, I pulled out the jigsaw and opened up the lid some more, but not as much as the Cup cars.
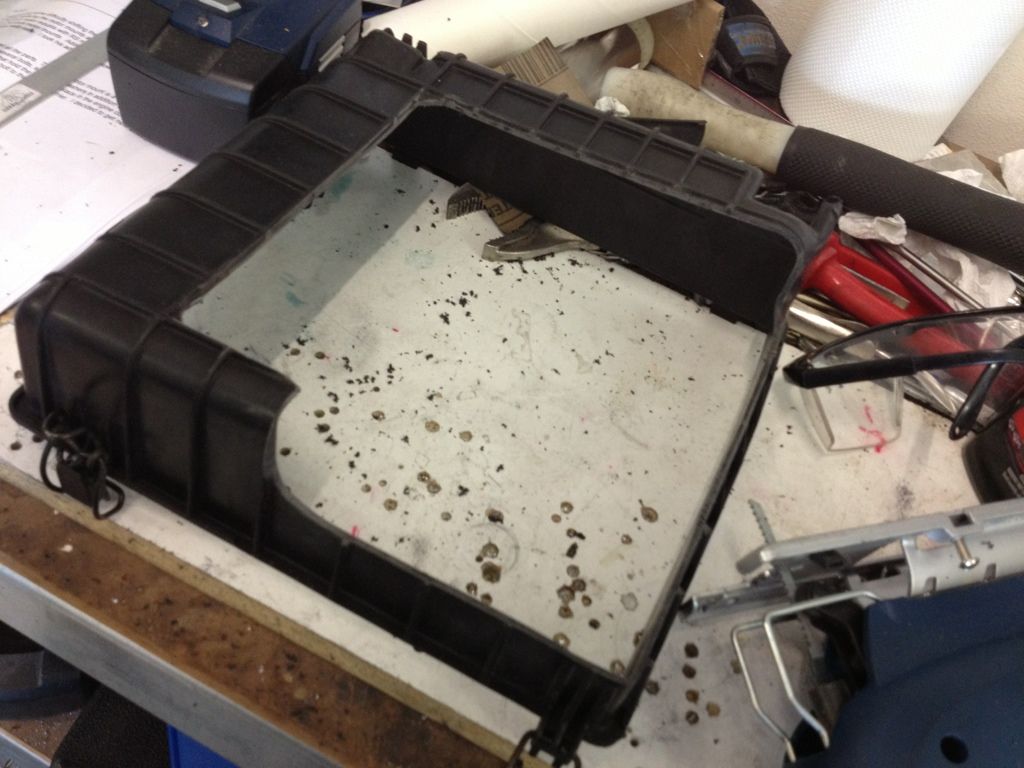
The top of the lid is largely intact, so should shield the filter element from water when washing the car, etc and that pesky horn is gone! Much more access in the engine bay now.
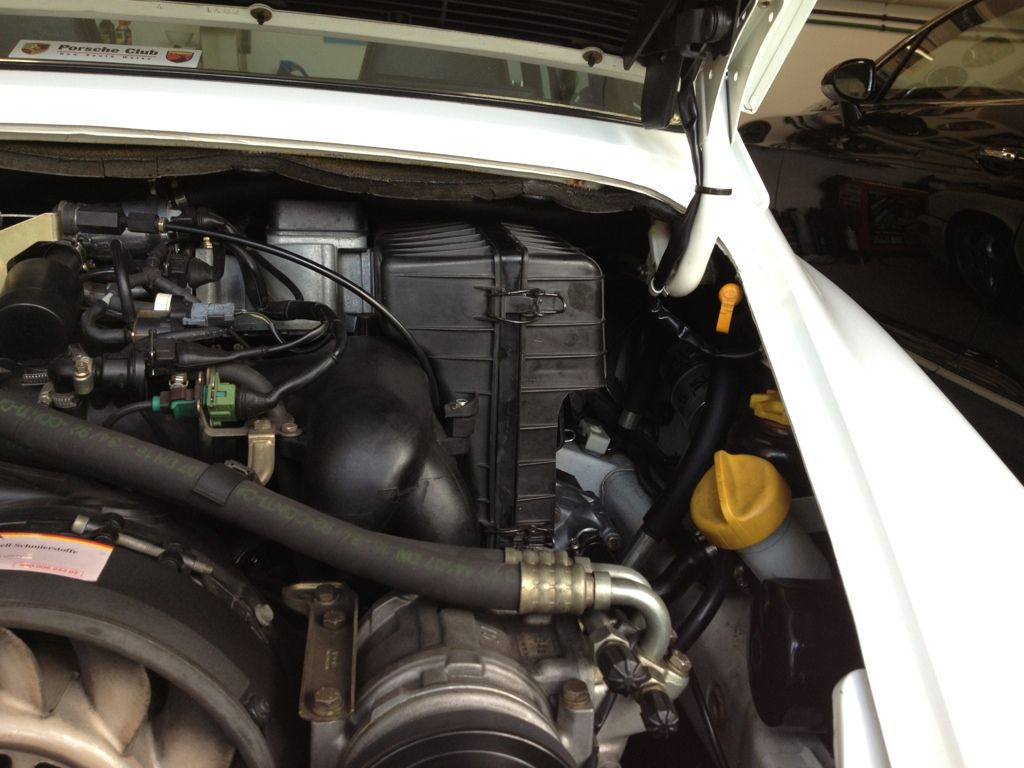
I also owe a debt of gratitude to Marc Shaw for putting up that DIY post on installing new hood shocks, I'll put up the pics a little later
10-30-2012, 12:03 AM
#356
Burning Brakes
Thread Starter
Yes...it's one of those jobs where you're scratching your head for 45mins as to how to do it, then you decide to stop trying to be a hero, do a search on Rennlist and 15mins later it's all done
10-30-2012, 12:06 AM
#357
Racer
Join Date: Jan 2007
Location: Sydney, Australia
Posts: 369
Likes: 0
Received 0 Likes
on
0 Posts
BTW, where did you get hood shocks? Pelican or locally?
10-30-2012, 12:07 AM
#358
Burning Brakes
Thread Starter
Type911.co.uk
There's a few different types including heavy-duty options, I went for the oem ones: http://www.type911shop.co.uk/shop/ar...6aid%3D1608%26
For reasons which will become clear in the fullness of time, I do have a spare new one
There's a few different types including heavy-duty options, I went for the oem ones: http://www.type911shop.co.uk/shop/ar...6aid%3D1608%26
For reasons which will become clear in the fullness of time, I do have a spare new one
11-02-2012, 10:35 AM
#359
Burning Brakes
Thread Starter
As promised, here's the write-up of the hood shock replacement.
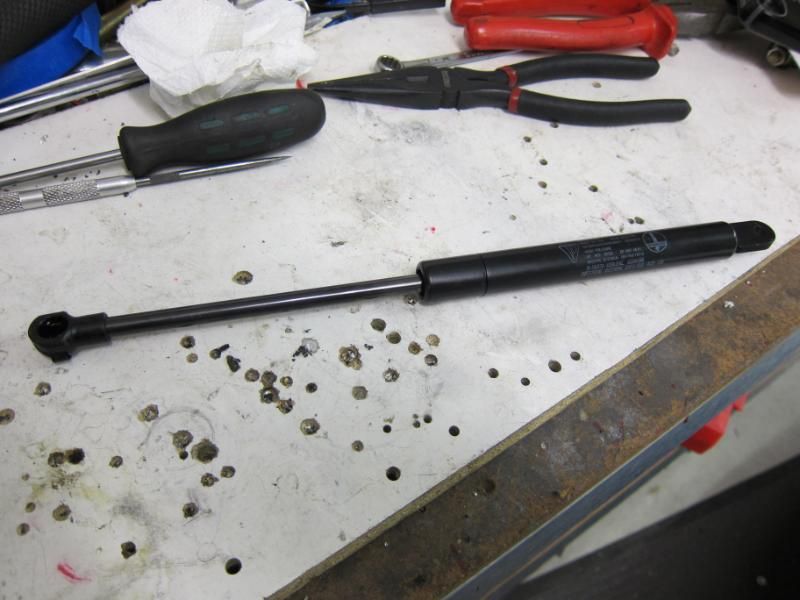
Firstly, I owe a debt to Marc Shaw, who wrote up this brilliant DIY a few years ago: https://rennlist.com/forums/964-foru...utes-each.html
I spent about 45mins looking at the old hood shocks, poking and prodding with various tools and not getting anywhere...then after consulting Ye Olde Rennlist, 20mins later it's all done!
First thing I noted, was the position of the shocks...right up against the hinges, where they are at the wrong end of the leverage equation and so those little shocks have quite a heavy load to carry. The old shocks actually still seem to be quite strong, but they're just not strong enough to work from that position anymore.
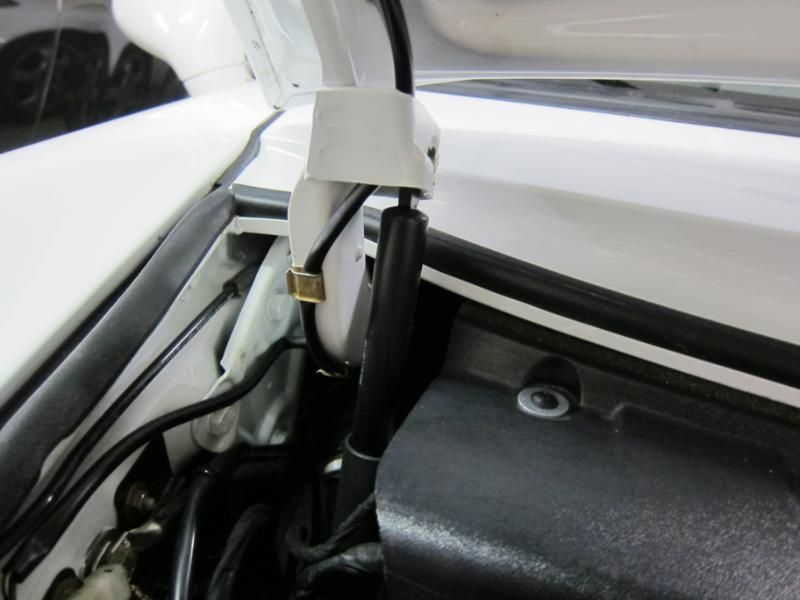
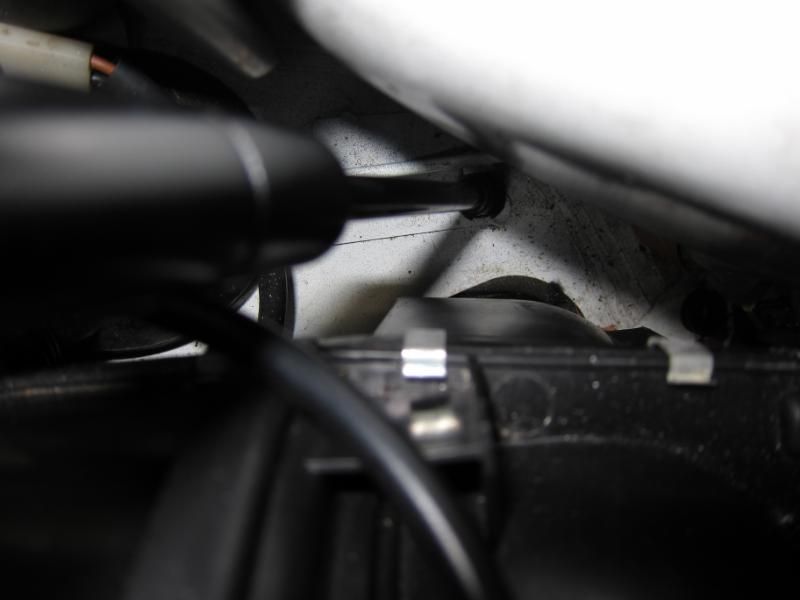
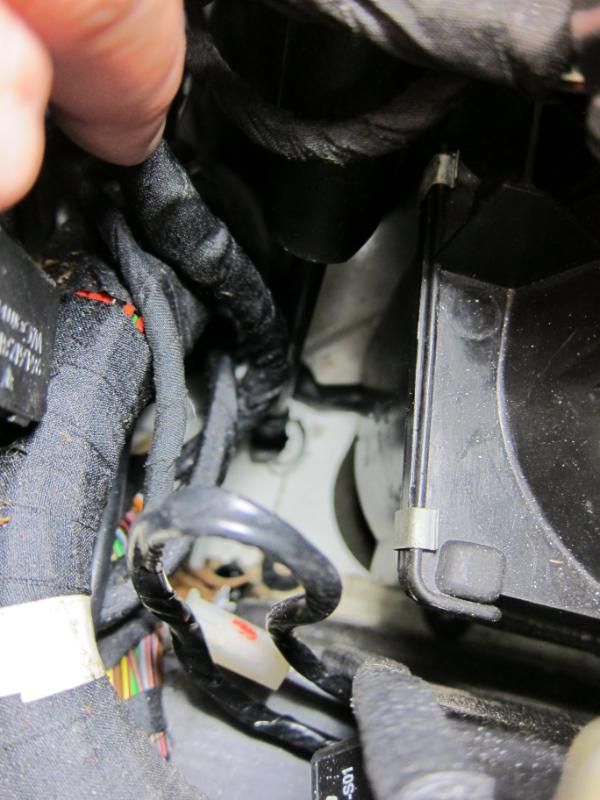
At the top, the shocks are held in with a pin and a spring clip, but the other end extends waaaaay deep into the cowl, where they clip into a ball that's hardmounted to the body. Getting this lower end off, is the challenge.
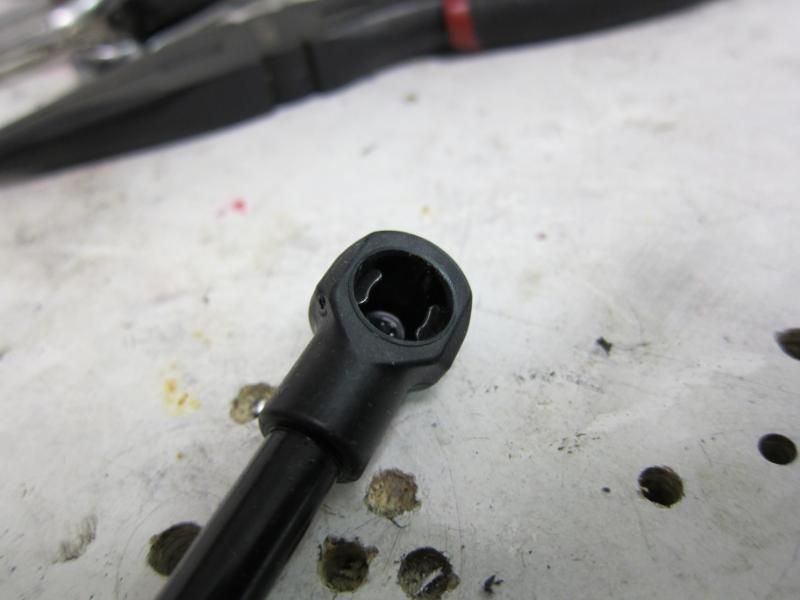
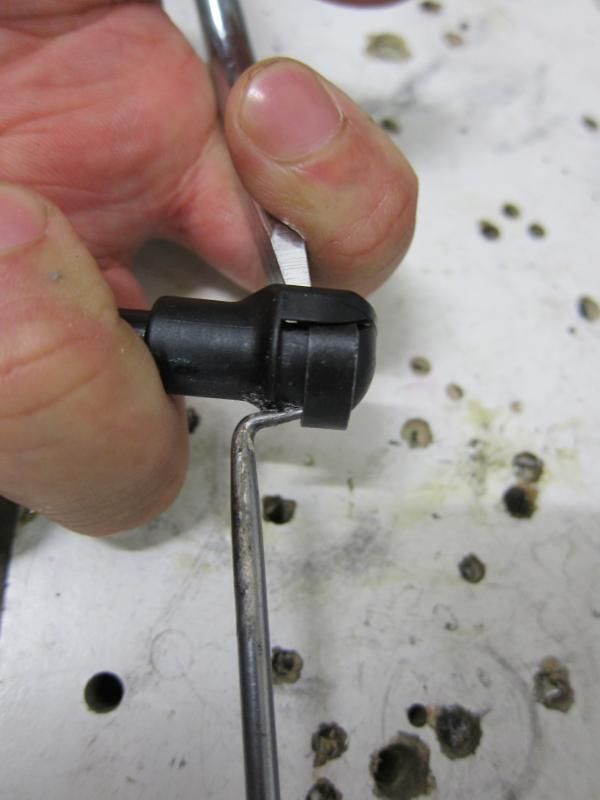
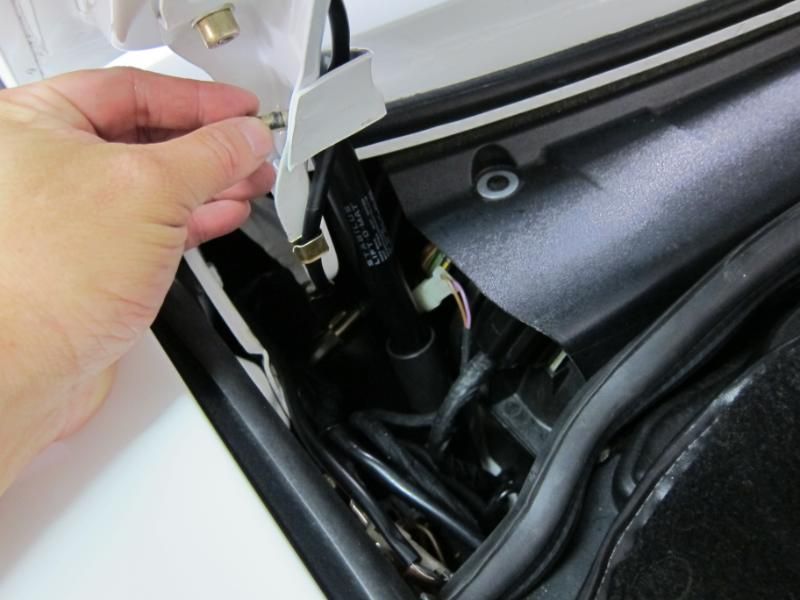
First things first, you prepare the new shocks for installation. At the lower end, you can see the cup, with these metal jaws that spring into position and hold fast against the ball on the body.
I use my trusty picktool for the next step, although a slender and long flathead screwdrive would also do the trick.
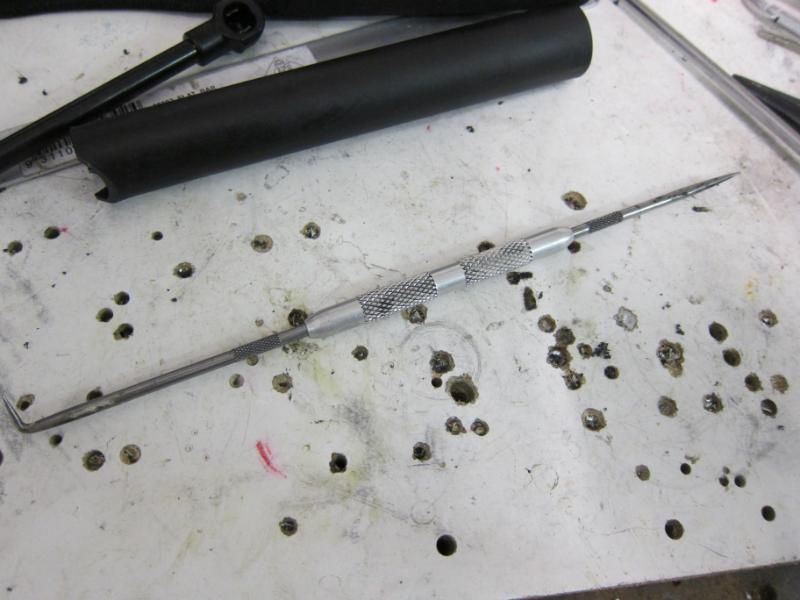
I use a screwdriver to prise apart the metal jaws inside the cup, then use my picktool to lever the springclip back and down. With the jaws forced apart, it should slide back along that groove without forcing. Don't actually remove the clip, just leave it sitting in this position.
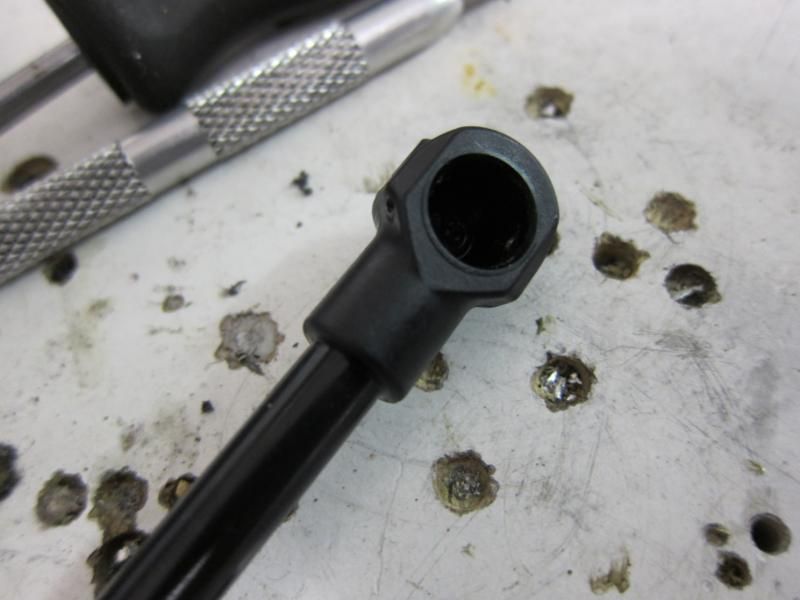
...which leaves the metal jaws retracted. Now, we go and remove the old shocks.
These little clips tend to go PING and disappear somewhere on the other side of your garage, so I give it a little squirt of WD40 first to help ease it out.
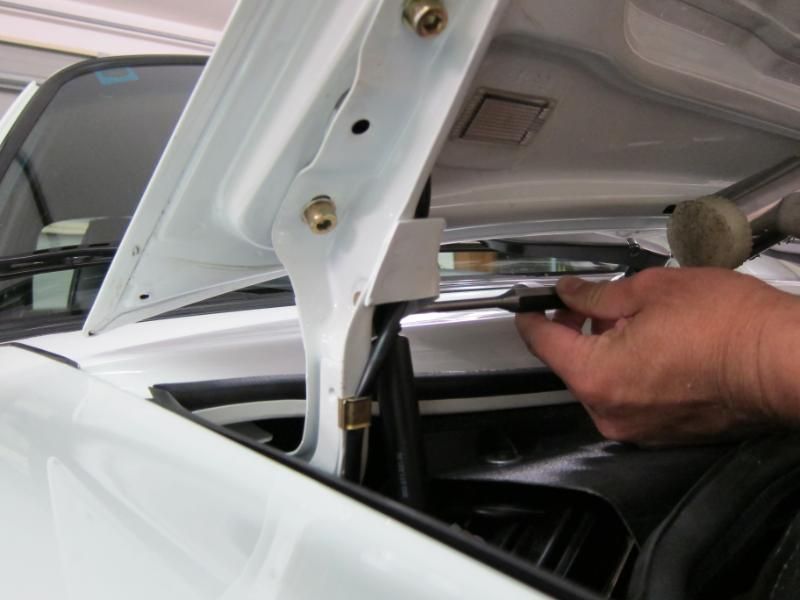
The pin is then nudged out with a punch and some gentle persuasion.
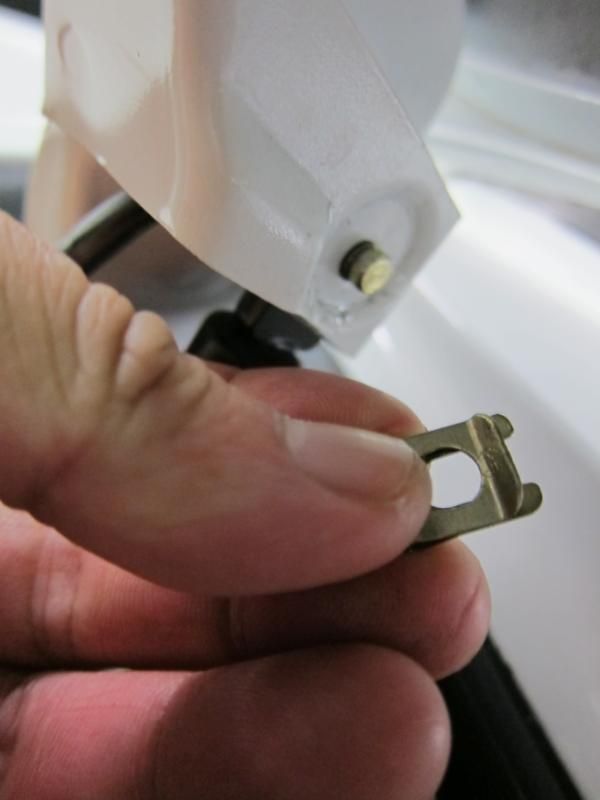
Now for the fiddly part. You have to use the picktool, to prise open the springclip/jaws on the old shocks. I start with the picktool to prise up the clip a little, then use a screwdriver to prise it out some more. It's a little blurry, but you might be able to see the clip, pretty much about to fly off the cup. But at this point the metal jaws are retracted, and you can wiggle it free of that ball and lift out the old shock.
Then the new shocks go in...first refitting the top pin. Don't forget to refit the plastic sleeve on the right hand side, which just slides up and down on the shock.
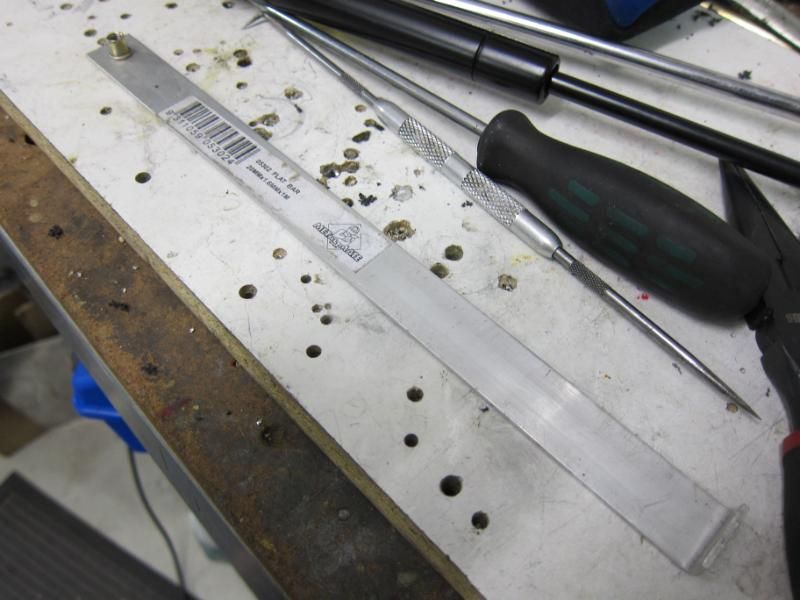
Then I made this tool out of some scrap metal. The important part is the end on the right, which has a little bit bend up at 90 degrees like a hook.
With the lower end seated on the ball, you just hook the tool around the metal clip, pull it upwards and it'll snap into position with a nice, loud click.
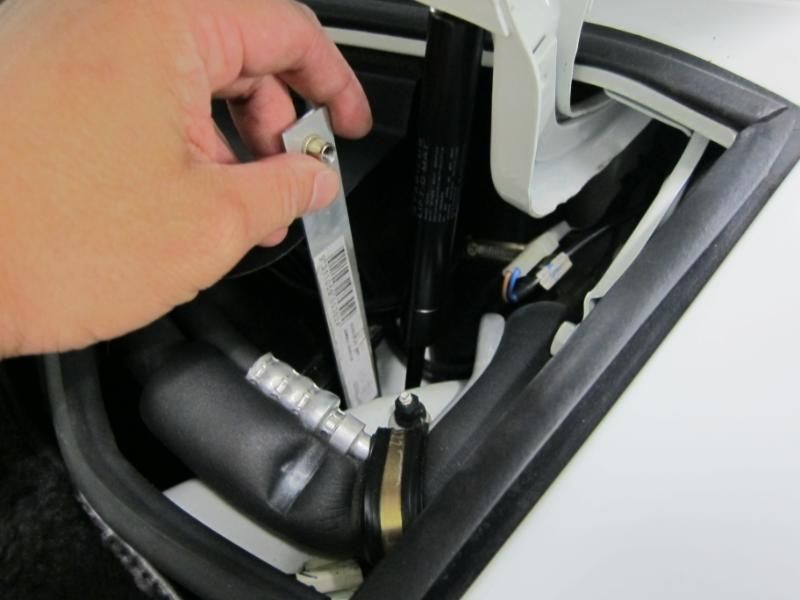
Then we're done! And no more hood latch-shaped dents in the back of your head!
BTW the shocks were ordered from Type911.co.uk and were sold as the oem items. They're made by Stabilus in Germany, like the original ones (although their logo is a little different nowadays).
Firstly, I owe a debt to Marc Shaw, who wrote up this brilliant DIY a few years ago: https://rennlist.com/forums/964-foru...utes-each.html
I spent about 45mins looking at the old hood shocks, poking and prodding with various tools and not getting anywhere...then after consulting Ye Olde Rennlist, 20mins later it's all done!
First thing I noted, was the position of the shocks...right up against the hinges, where they are at the wrong end of the leverage equation and so those little shocks have quite a heavy load to carry. The old shocks actually still seem to be quite strong, but they're just not strong enough to work from that position anymore.
At the top, the shocks are held in with a pin and a spring clip, but the other end extends waaaaay deep into the cowl, where they clip into a ball that's hardmounted to the body. Getting this lower end off, is the challenge.
First things first, you prepare the new shocks for installation. At the lower end, you can see the cup, with these metal jaws that spring into position and hold fast against the ball on the body.
I use my trusty picktool for the next step, although a slender and long flathead screwdrive would also do the trick.
I use a screwdriver to prise apart the metal jaws inside the cup, then use my picktool to lever the springclip back and down. With the jaws forced apart, it should slide back along that groove without forcing. Don't actually remove the clip, just leave it sitting in this position.
...which leaves the metal jaws retracted. Now, we go and remove the old shocks.
These little clips tend to go PING and disappear somewhere on the other side of your garage, so I give it a little squirt of WD40 first to help ease it out.
The pin is then nudged out with a punch and some gentle persuasion.
Now for the fiddly part. You have to use the picktool, to prise open the springclip/jaws on the old shocks. I start with the picktool to prise up the clip a little, then use a screwdriver to prise it out some more. It's a little blurry, but you might be able to see the clip, pretty much about to fly off the cup. But at this point the metal jaws are retracted, and you can wiggle it free of that ball and lift out the old shock.
Then the new shocks go in...first refitting the top pin. Don't forget to refit the plastic sleeve on the right hand side, which just slides up and down on the shock.
Then I made this tool out of some scrap metal. The important part is the end on the right, which has a little bit bend up at 90 degrees like a hook.
With the lower end seated on the ball, you just hook the tool around the metal clip, pull it upwards and it'll snap into position with a nice, loud click.
Then we're done! And no more hood latch-shaped dents in the back of your head!
BTW the shocks were ordered from Type911.co.uk and were sold as the oem items. They're made by Stabilus in Germany, like the original ones (although their logo is a little different nowadays).