Project "Amazon" Restoration-Lightweight C4- 2Pack paint soon;-)


 11-27-2010, 09:53 PM
#185
Three Wheelin'
Thread Starter

 11-28-2010, 03:33 AM
#186
Racer
Join Date: Apr 2006
Location: the land of taxes (uk)
Posts: 409
Likes: 0
Received 0 Likes
on
0 Posts
looking good kid,
She'll be awesome in the end, remember I have the seam welding information in that book here for you area's length etc as metal is metal and weld is weld.
Gaz,
She'll be awesome in the end, remember I have the seam welding information in that book here for you area's length etc as metal is metal and weld is weld.
Gaz,
11-28-2010, 07:35 AM
#187
Nordschleife Master
") 11-28-2010, 12:58 PM
11-28-2010, 12:58 PM
#188
Three Wheelin'
Thread Starter
11-28-2010, 05:59 PM
#189
Drifting
From Pelican.............
Part Superseded to 96450308700GRV (Click number for more info)
OEM-96450308700GRV
Genuine Porsche Part: ROOF PANEL
- This is a special-order, non-returnable, Porsche part
(availability and shipping charges may vary). [More Info]
$2142.25
Part Superseded to 96450308700GRV (Click number for more info)
OEM-96450308700GRV
Genuine Porsche Part: ROOF PANEL
- This is a special-order, non-returnable, Porsche part
(availability and shipping charges may vary). [More Info]
$2142.25
11-28-2010, 10:34 PM
#190
Three Wheelin'
Thread Starter
 Want me post you one from the Uk
 11-29-2010, 01:22 AM
#191
Drifting
11-29-2010, 09:49 PM
#192
Three Wheelin'
Thread Starter
11-29-2010, 10:17 PM
#193
Three Wheelin'
Thread Starter
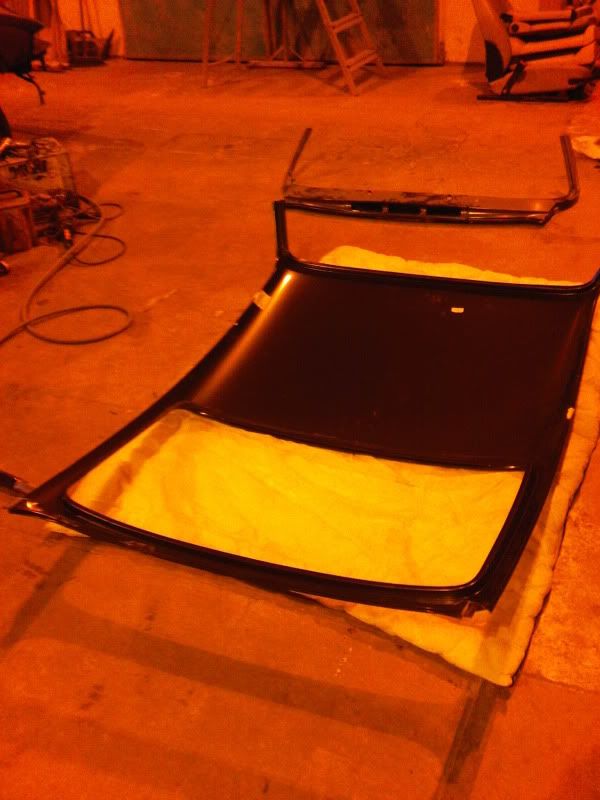
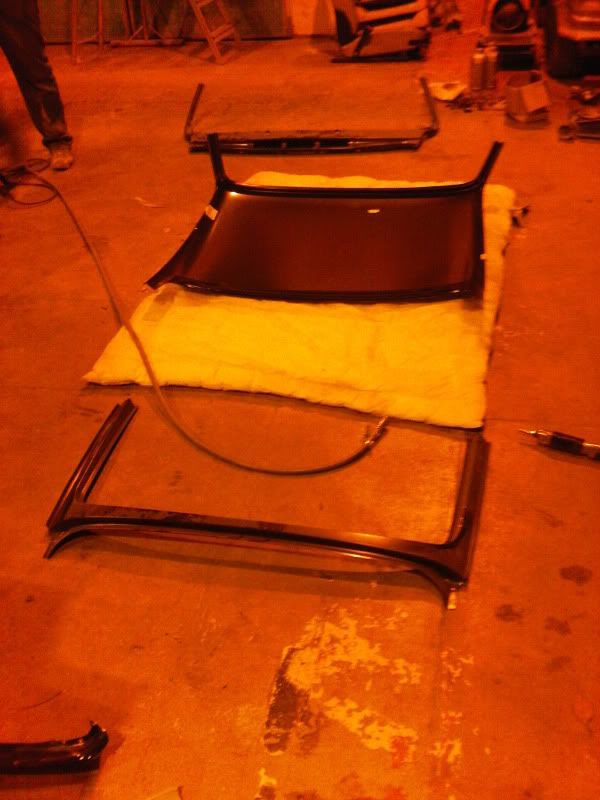
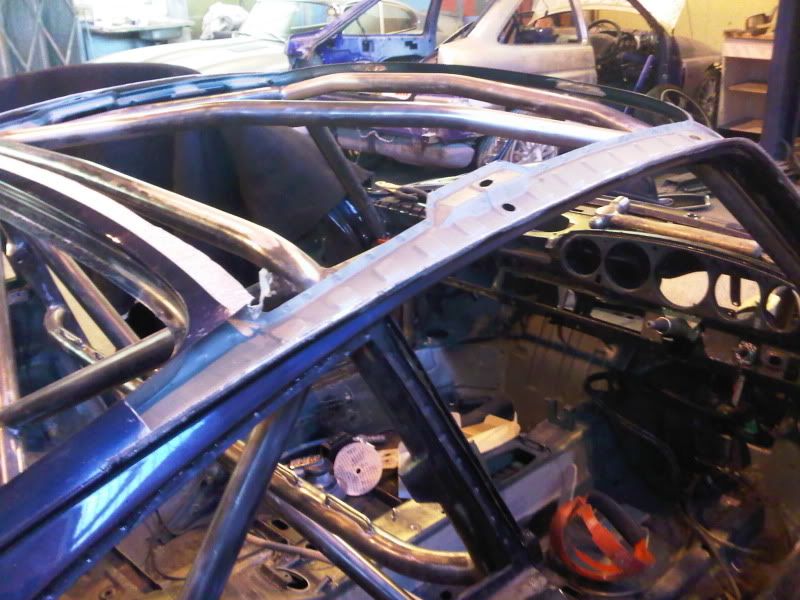
The update so far this week, Neil starts to shine with his skills in getting the roof on the car.
As you know from 2 weeks ago, Neil had cut out the main middle part of the roof with the underneath skin for the sunroof. The rollcage was then fitted and welded by JJ next door.
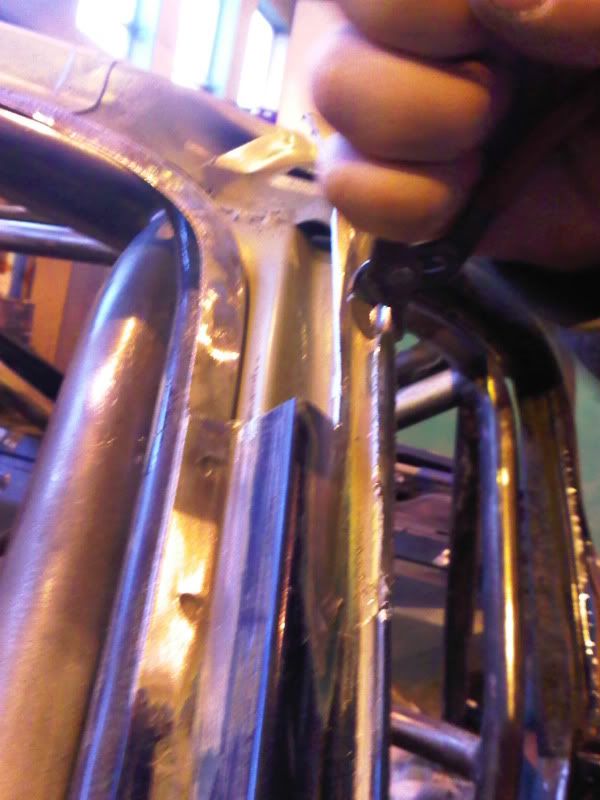
The next part of Neils job is to 'unpick' all of the roof skin, which these pictures will demonstrate. Neil says its nothing difficult as most doorskins on new cars are done this way.
As you can see, he has already unpicked one side of the roof, but beforehand the front part of the roof was drilled out. As the top and bottom skin at the front and back of the roof is spot welded (rear part will be shown later).
So what I learnt, the roof was spot welded front and back, and the sides were lightly bonded, unfolded and 1 spot weld on either side of the roof.
One side done, but a simple run down on the other side will be shown.
If you look closely, the top skin and lower skin held with spot welds, that are drill out to release the top skin.
As you know from 2 weeks ago, Neil had cut out the main middle part of the roof with the underneath skin for the sunroof. The rollcage was then fitted and welded by JJ next door.
The next part of Neils job is to 'unpick' all of the roof skin, which these pictures will demonstrate. Neil says its nothing difficult as most doorskins on new cars are done this way.
As you can see, he has already unpicked one side of the roof, but beforehand the front part of the roof was drilled out. As the top and bottom skin at the front and back of the roof is spot welded (rear part will be shown later).
So what I learnt, the roof was spot welded front and back, and the sides were lightly bonded, unfolded and 1 spot weld on either side of the roof.
One side done, but a simple run down on the other side will be shown.
If you look closely, the top skin and lower skin held with spot welds, that are drill out to release the top skin.
Last edited by Nski; 11-29-2010 at 10:59 PM.
11-29-2010, 10:33 PM
#194
Three Wheelin'
Thread Starter
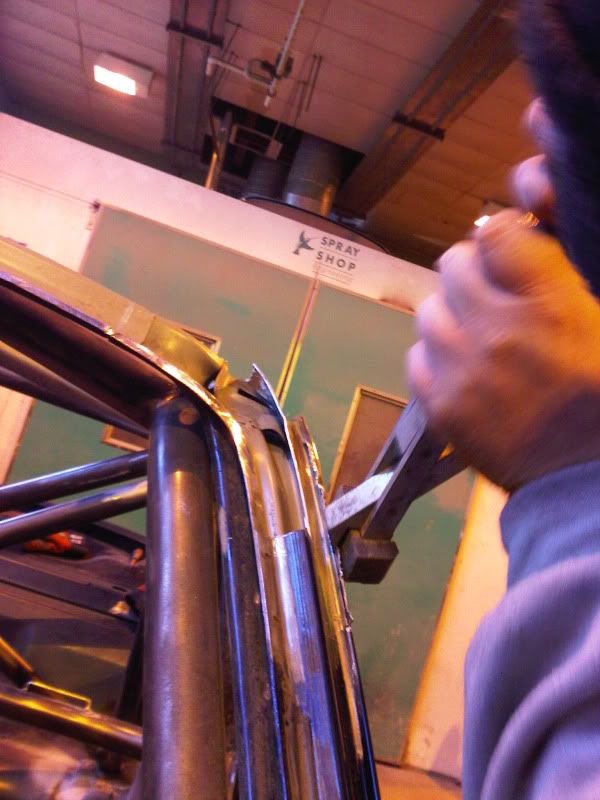
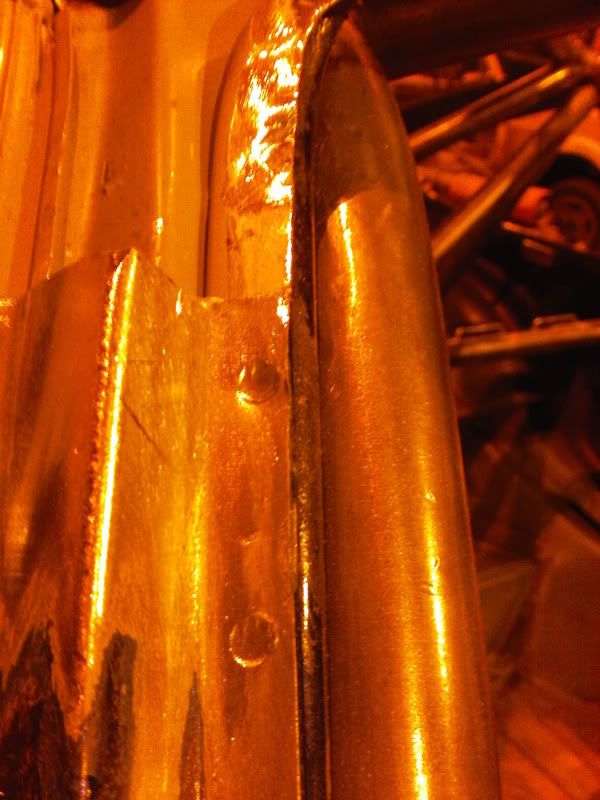
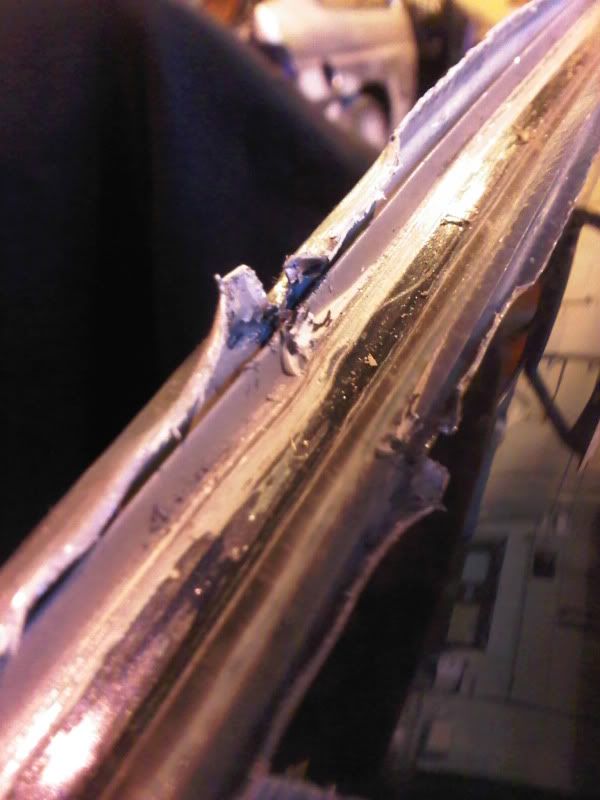
As I said earlier, the double skin is bonded, 1 spot welded on either end and the gutter rail skin folded onto the roofskin shown>>>>>>
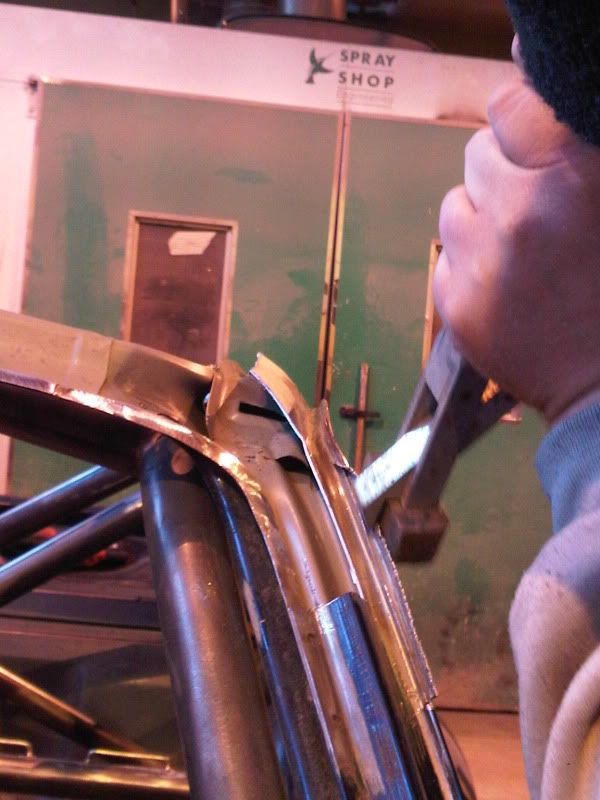
One spot weld as you can see from the cut-break in the metal and the silver blob just underneath the cut. As you can see on the top right corner of the picture, the gutter rail skin is unfolded. Can you see the separation of the top skin?
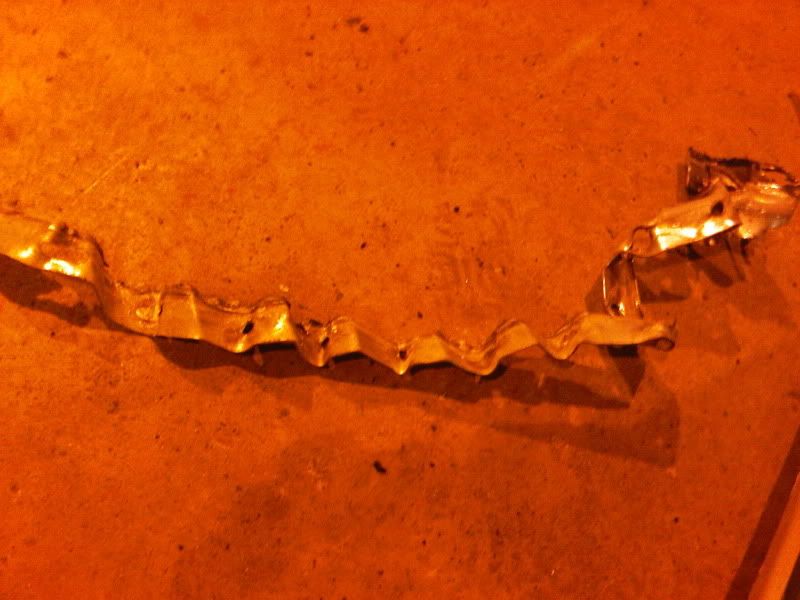
The roof skin is removed! When the gutter rail skin is unfolded and straightened this is what it looks like, plus you can see the top half, darker line of bonded sealer and what was a blob of spot weld unpicked with a cut-break in the metal shown from the previous picture is all straightened and good.
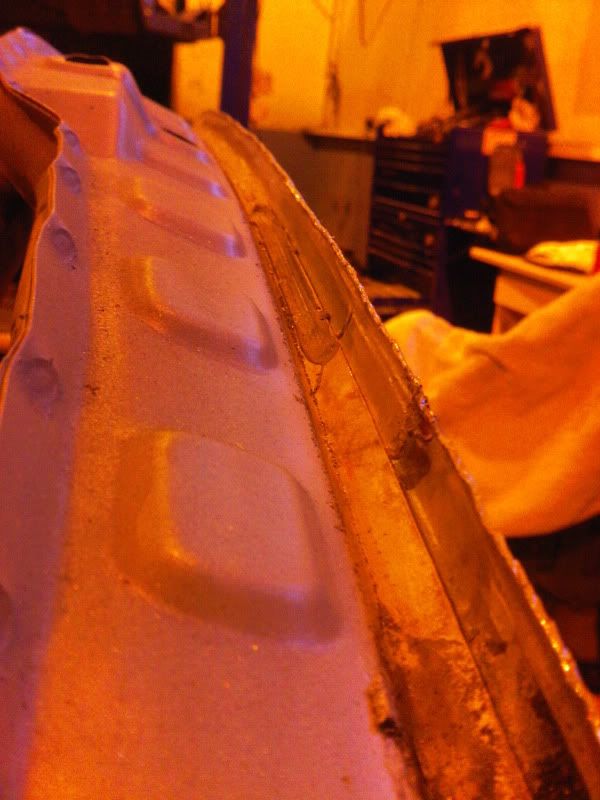
One spot weld as you can see from the cut-break in the metal and the silver blob just underneath the cut. As you can see on the top right corner of the picture, the gutter rail skin is unfolded. Can you see the separation of the top skin?
The roof skin is removed! When the gutter rail skin is unfolded and straightened this is what it looks like, plus you can see the top half, darker line of bonded sealer and what was a blob of spot weld unpicked with a cut-break in the metal shown from the previous picture is all straightened and good.