
Pending projects and a few q?
 01-12-2014, 10:15 AM
#346
Professor of Pending Projects
Rennlist Member
Rennlist Member
Thread Starter
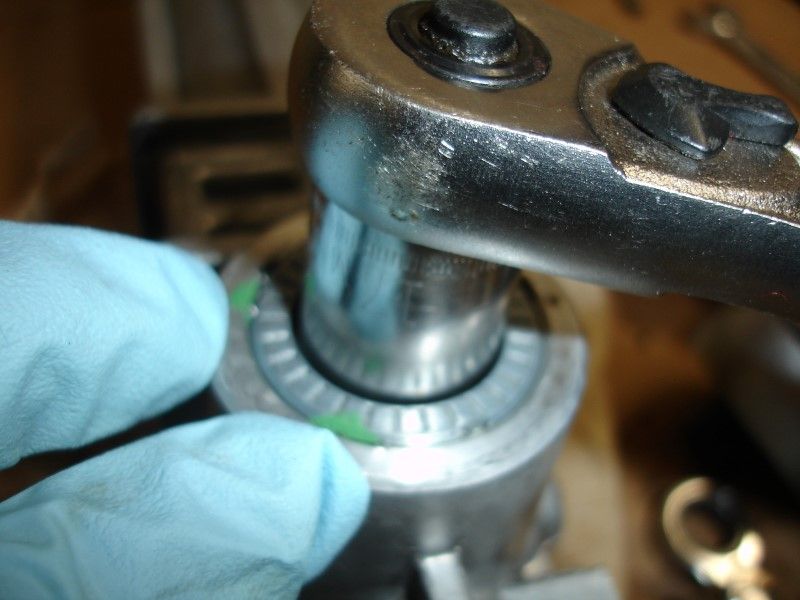
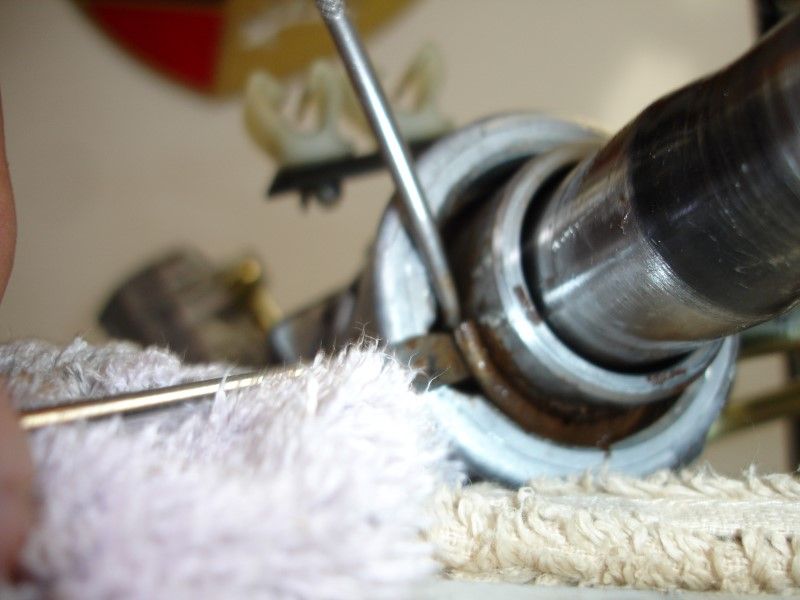
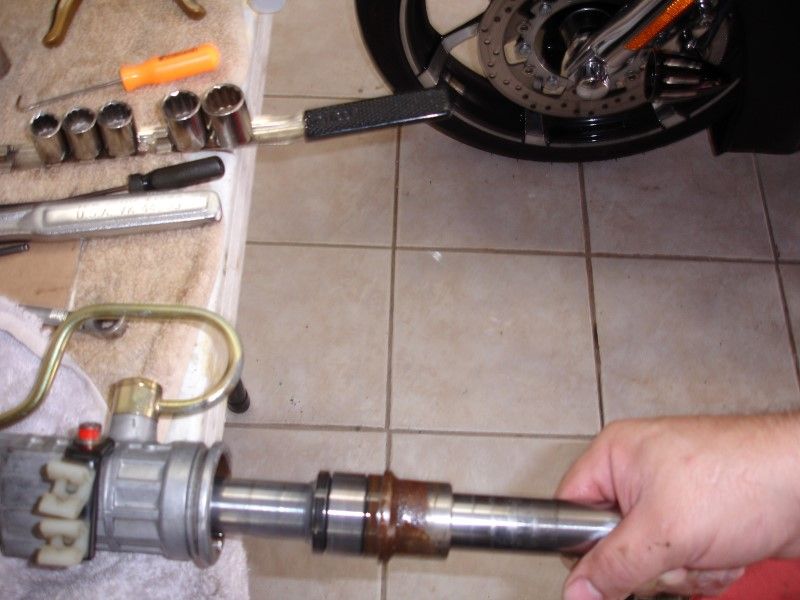
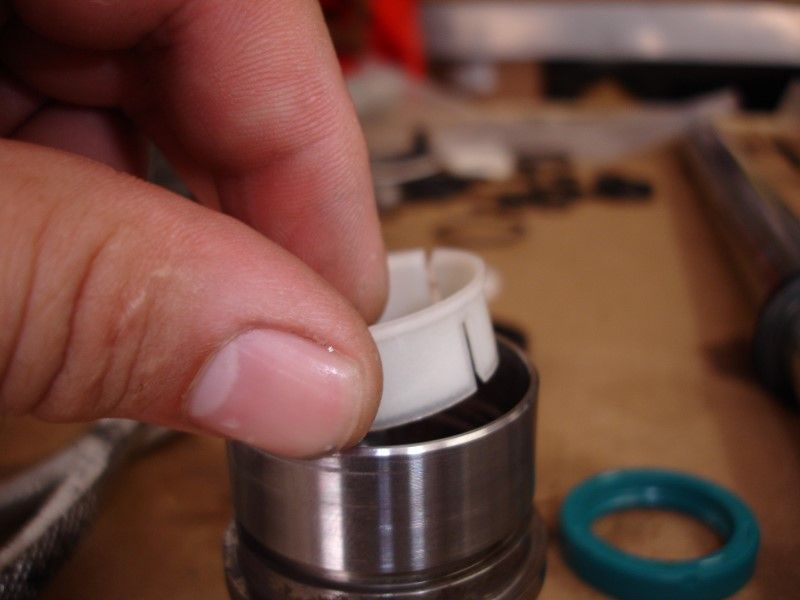
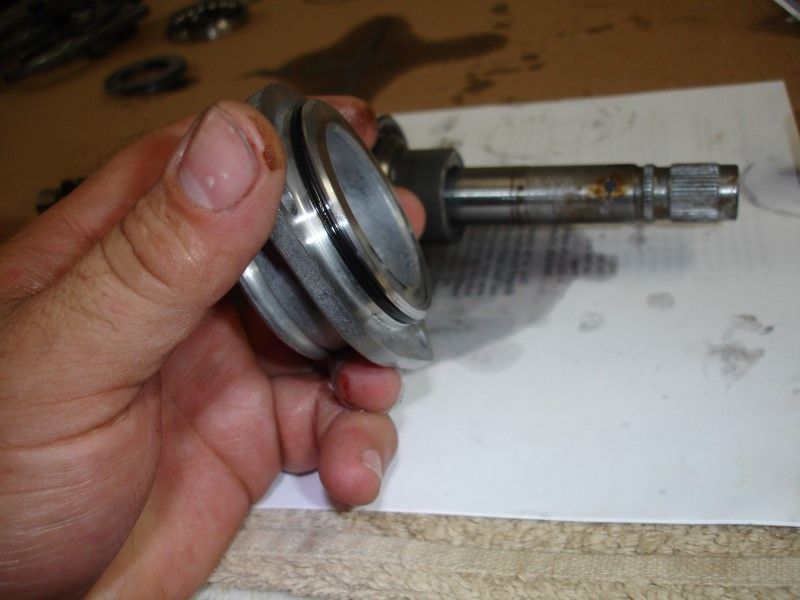
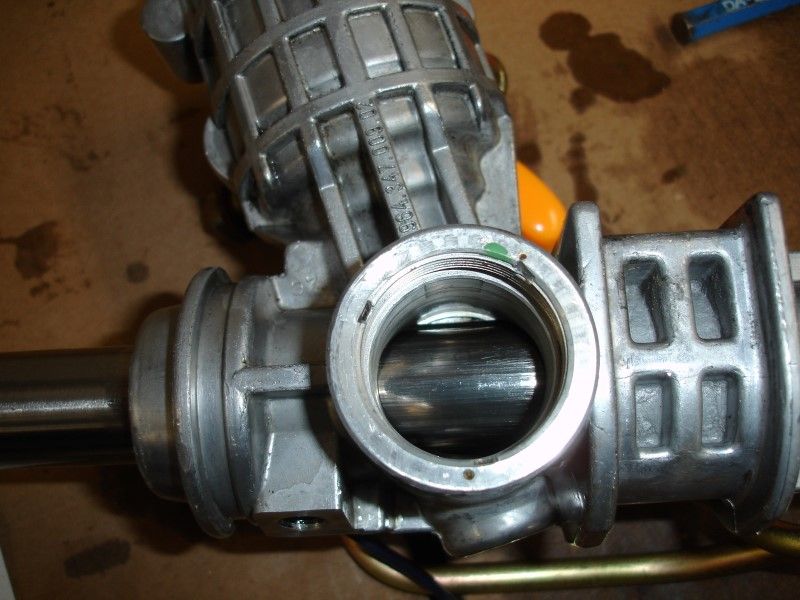
Continue... remember to go by the instructions posted in the link above... these are just so you can see what the 964 rack looks like...
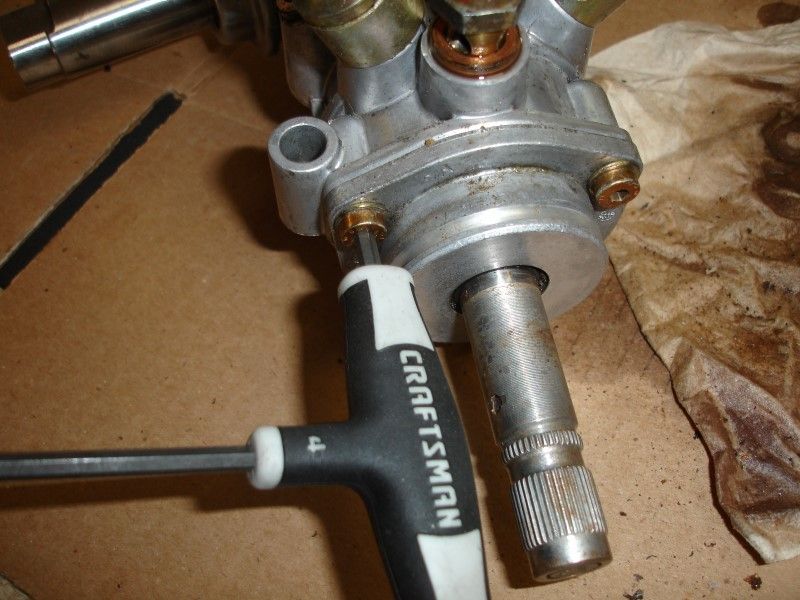
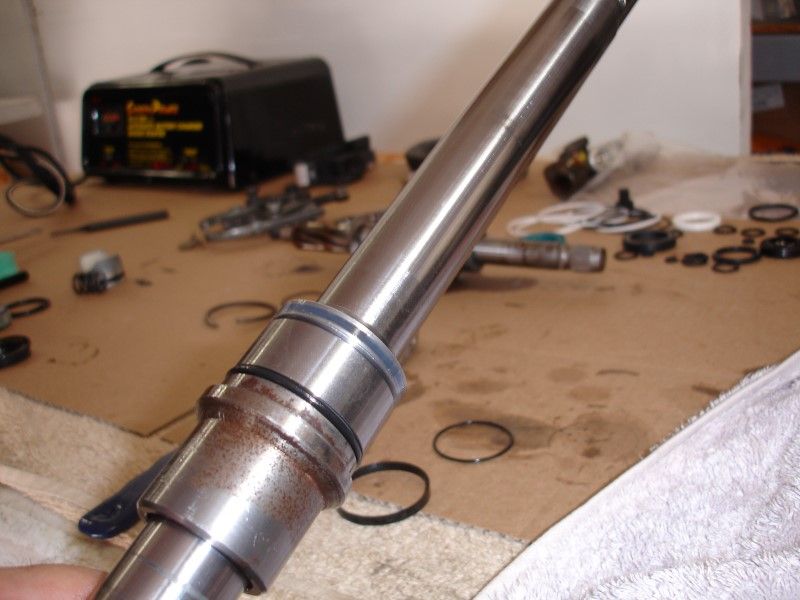
This one, the part inside not the cover, was one of the ones that were dificult to take out. Seems that the rubber o-ring made it stick to the sides...
Here is the little #$%^#$%!@# finally out:
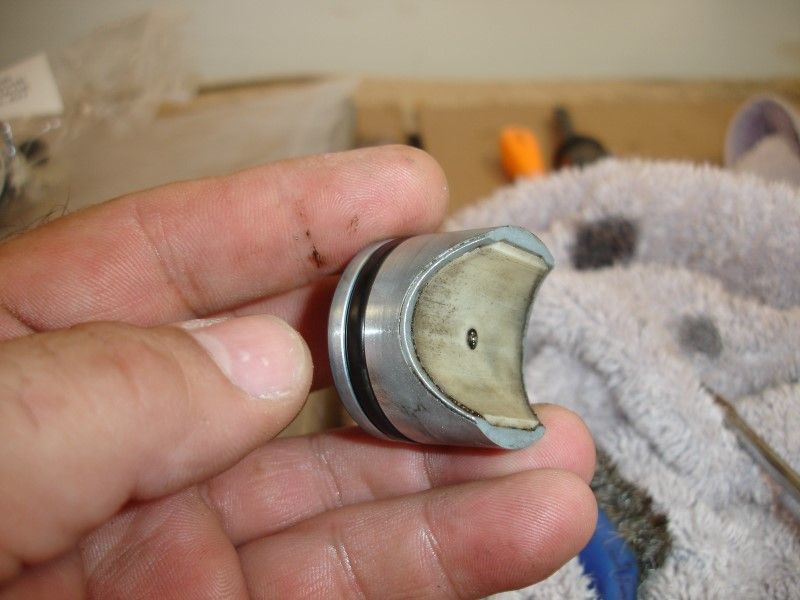
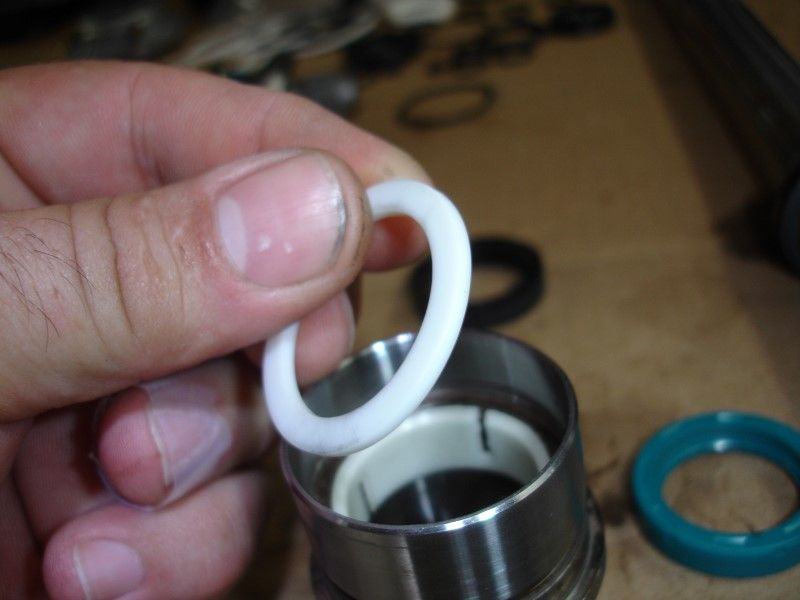
Some of the scars... but nothing to worry about as that only holds the spring in place
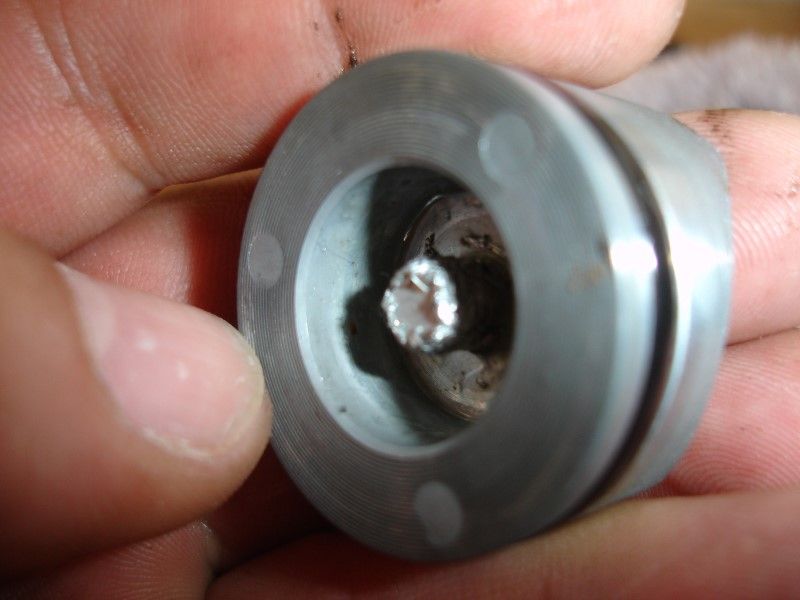
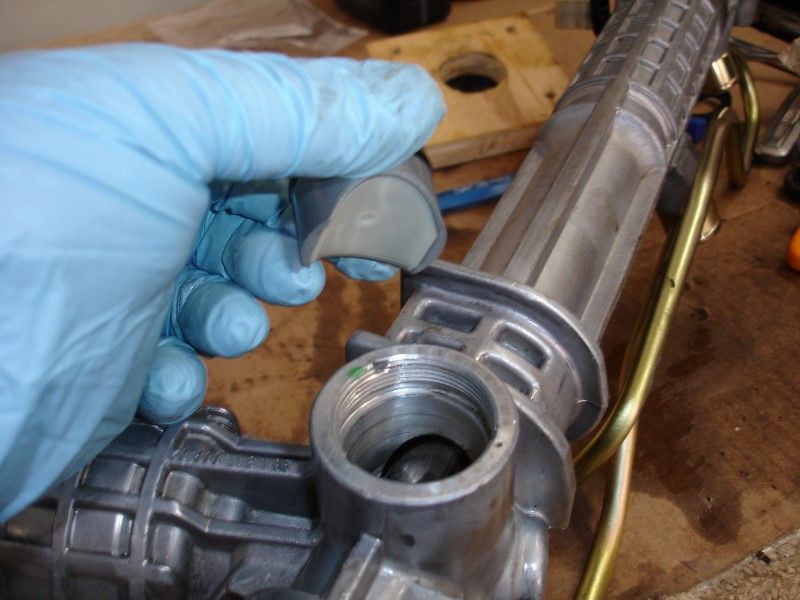
I went ahead and installed the new plastic bushing
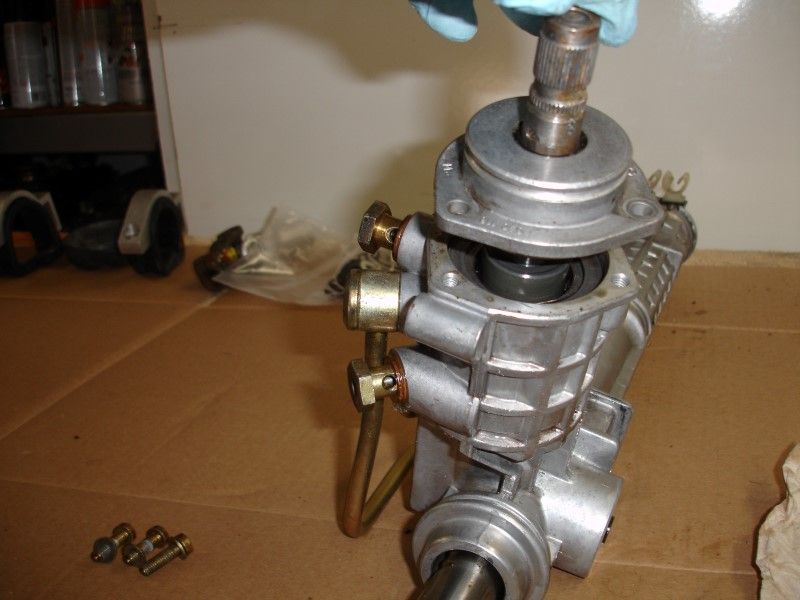
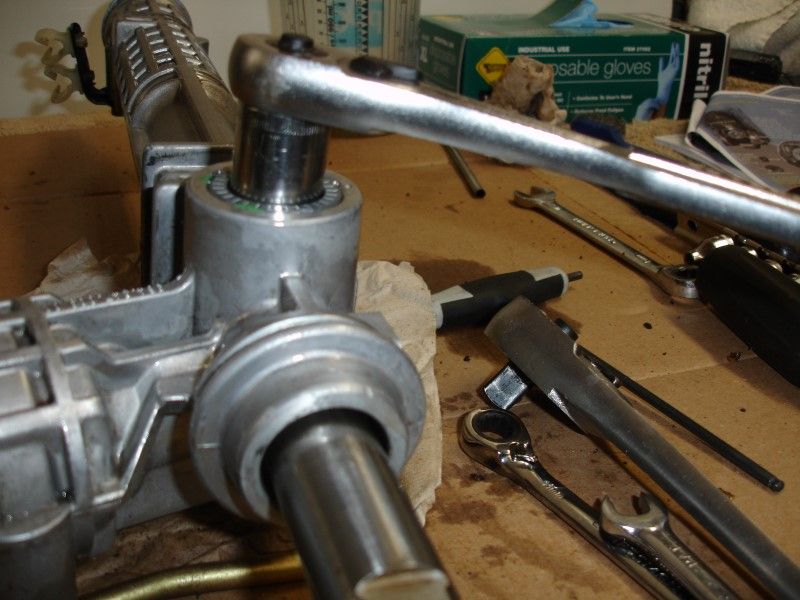
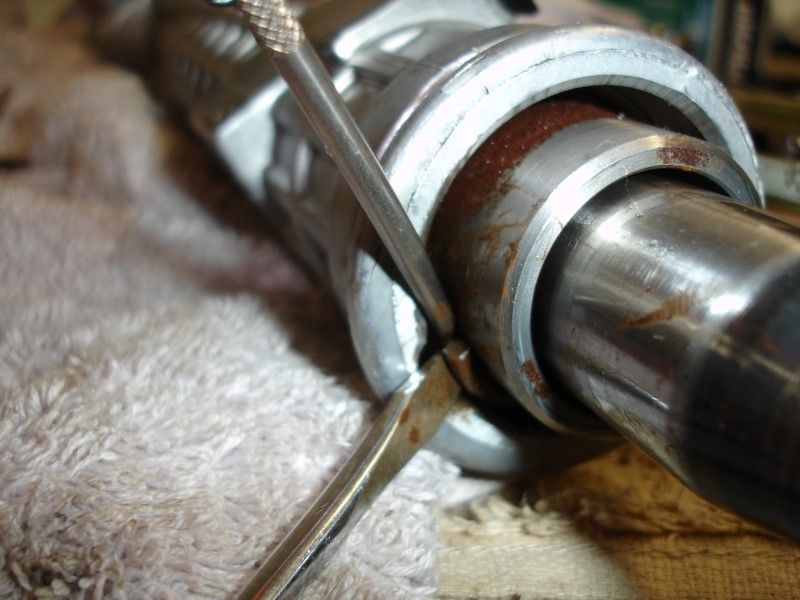
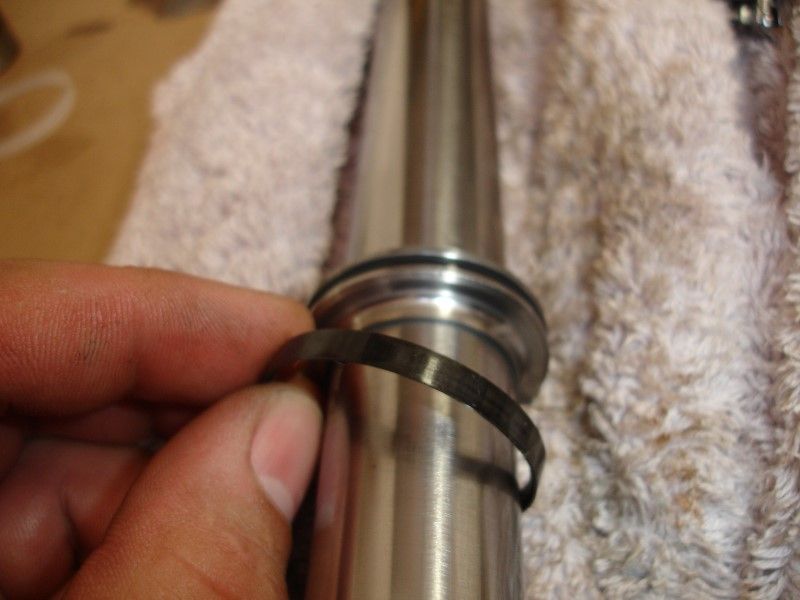
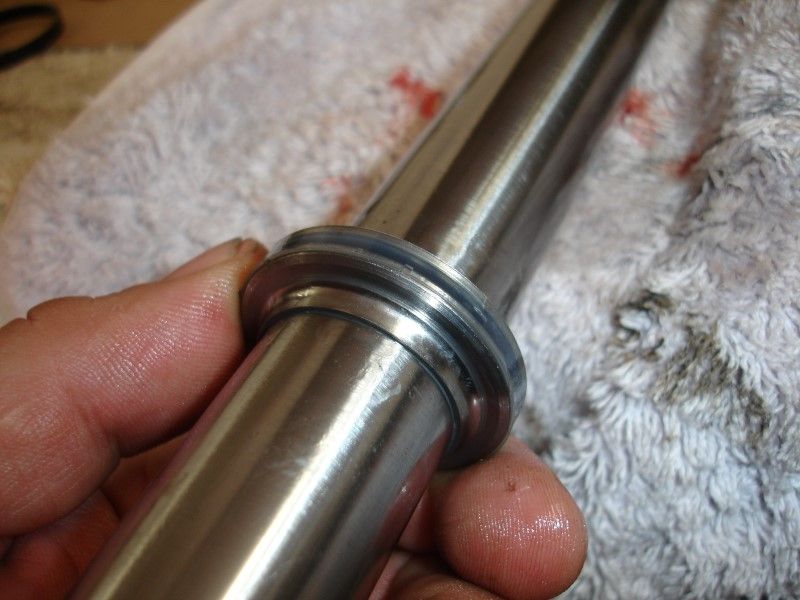
The second part that was not easy to remove is the ring on the end of the rack... sob!@ You will need an extra set of hands for that one.
This one, the part inside not the cover, was one of the ones that were dificult to take out. Seems that the rubber o-ring made it stick to the sides...
Here is the little #$%^#$%!@# finally out:
Some of the scars... but nothing to worry about as that only holds the spring in place
I went ahead and installed the new plastic bushing
The second part that was not easy to remove is the ring on the end of the rack... sob!@ You will need an extra set of hands for that one.

 01-12-2014, 10:26 AM
#348
Professor of Pending Projects
Rennlist Member
Rennlist Member
Thread Starter
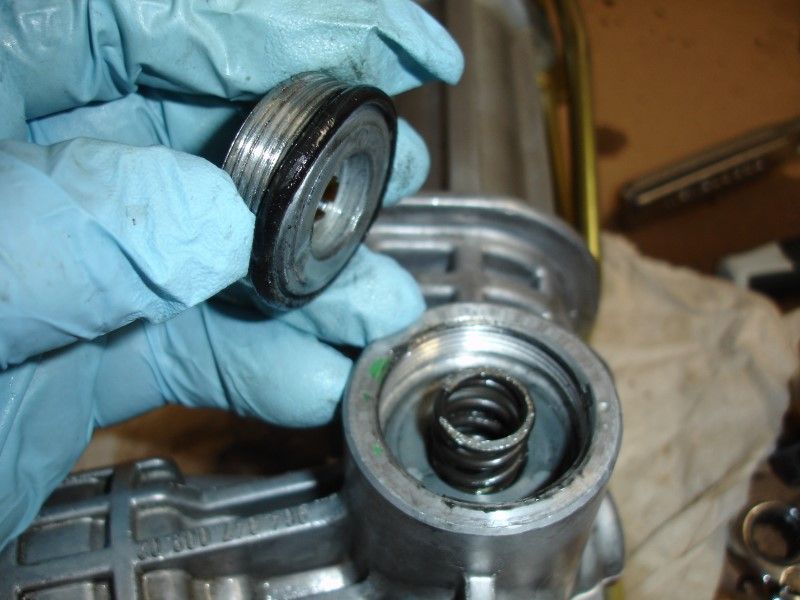
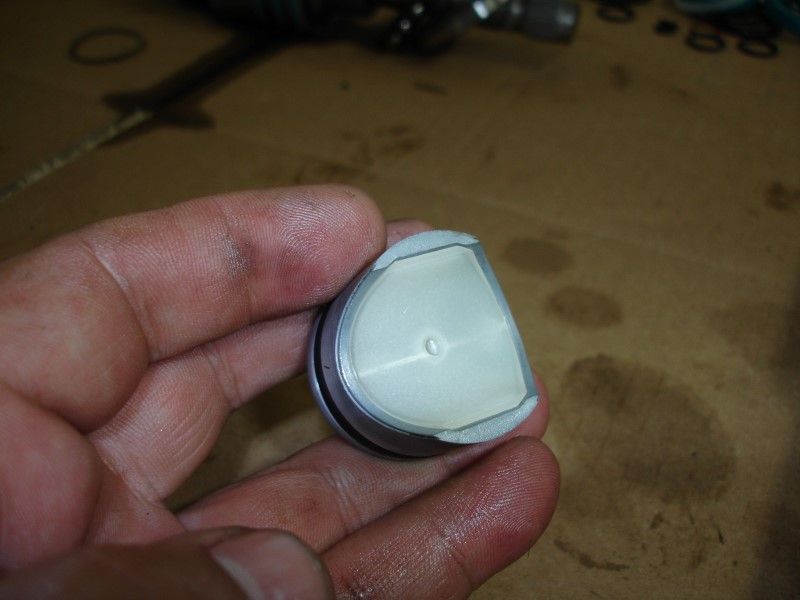
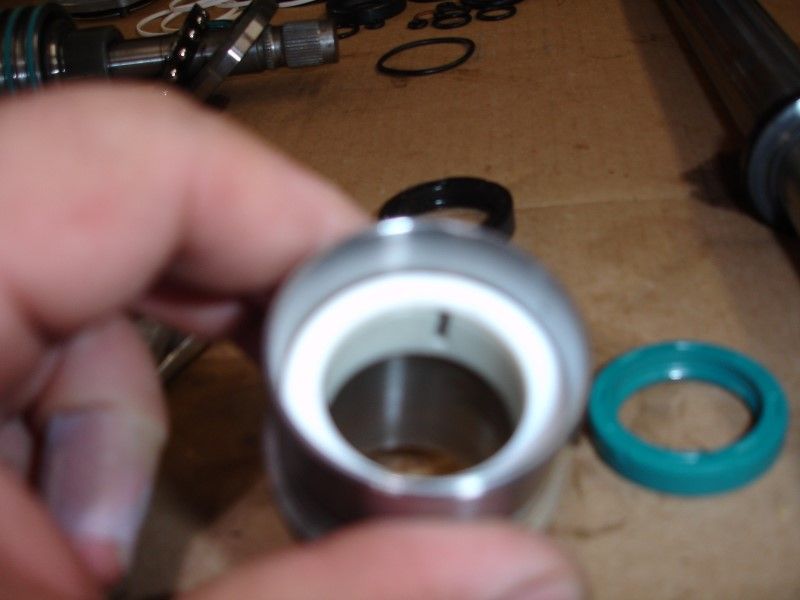
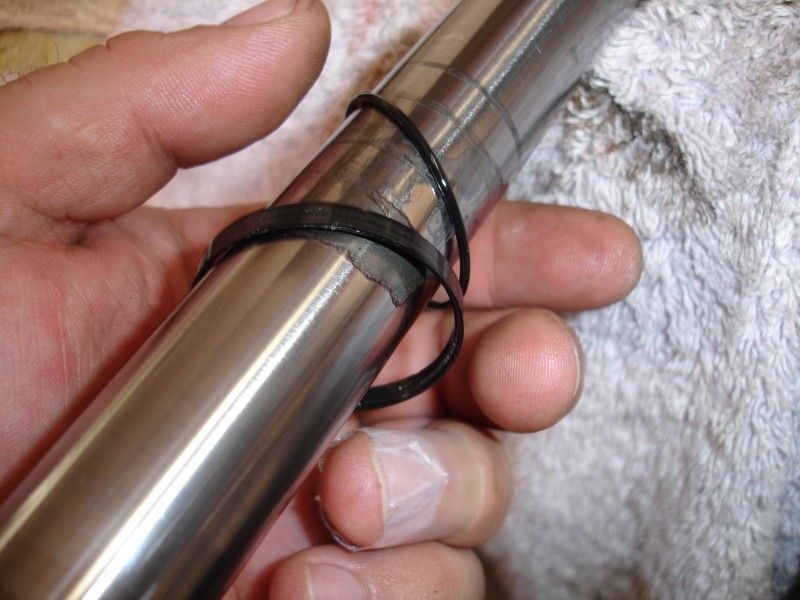
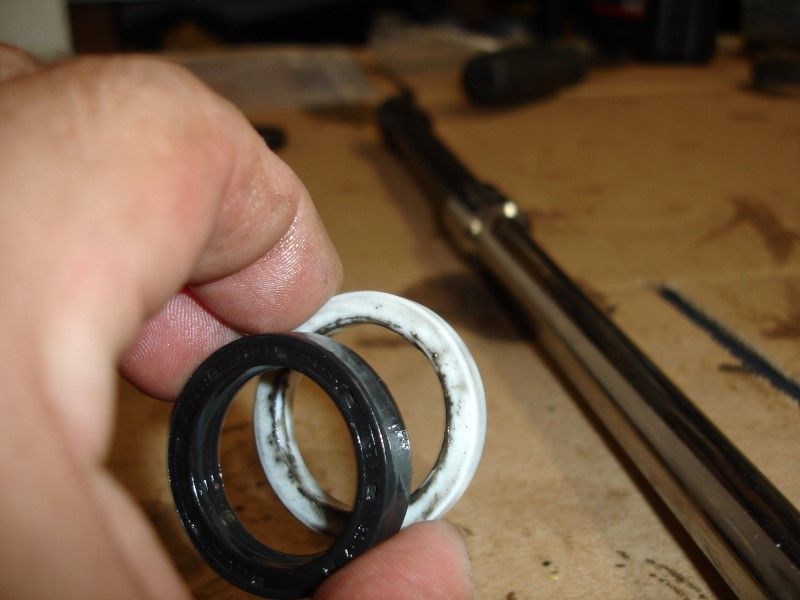
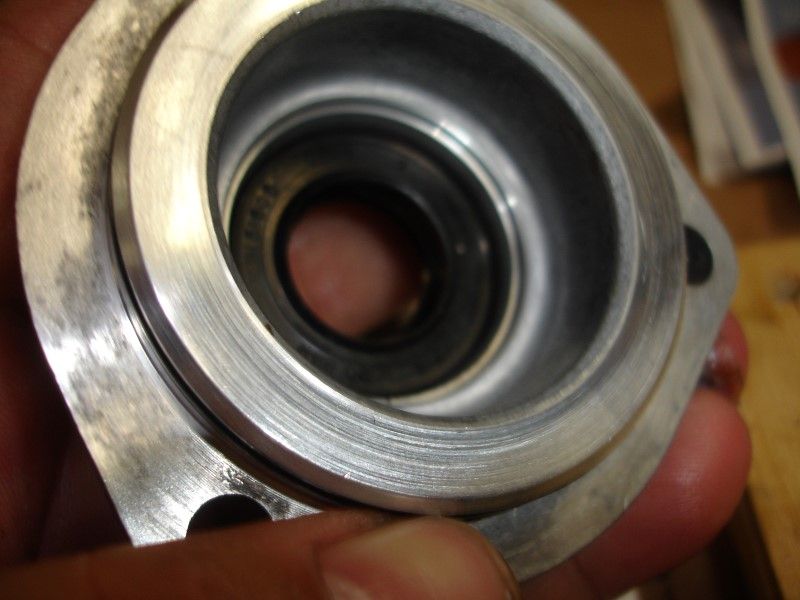
And here my friends is the old seal and the new one that I installed facing the wrong way... which I found out after re-installing the rack an seeing it leak again... live and learn baby, live and learn!
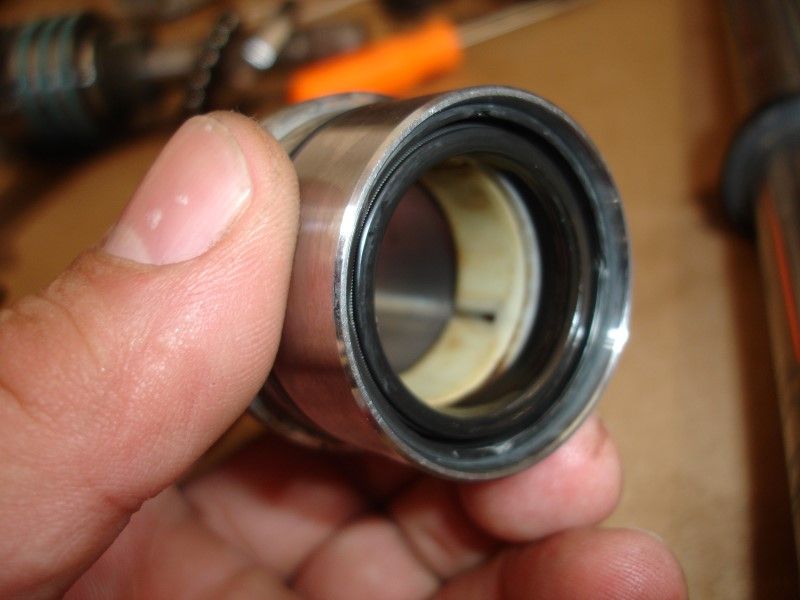
You push it out from the other side with a 13/16 socket... all in the instructions...
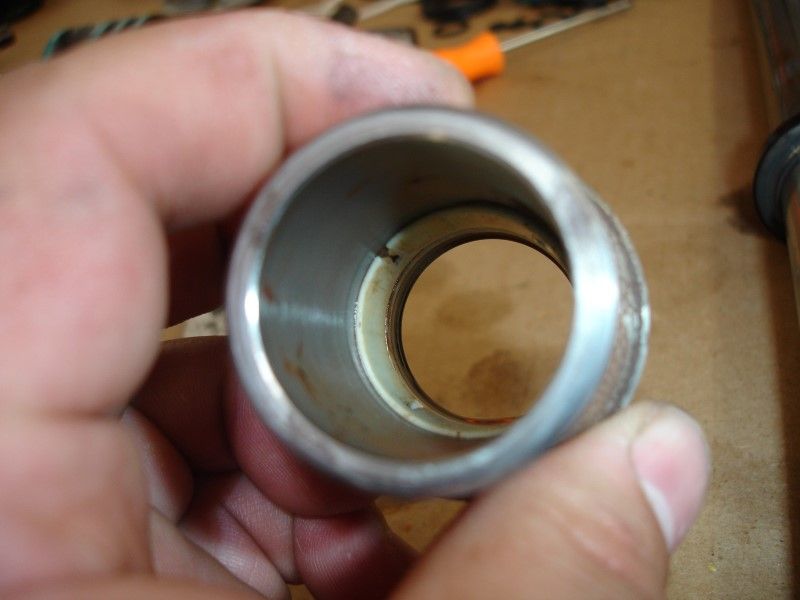
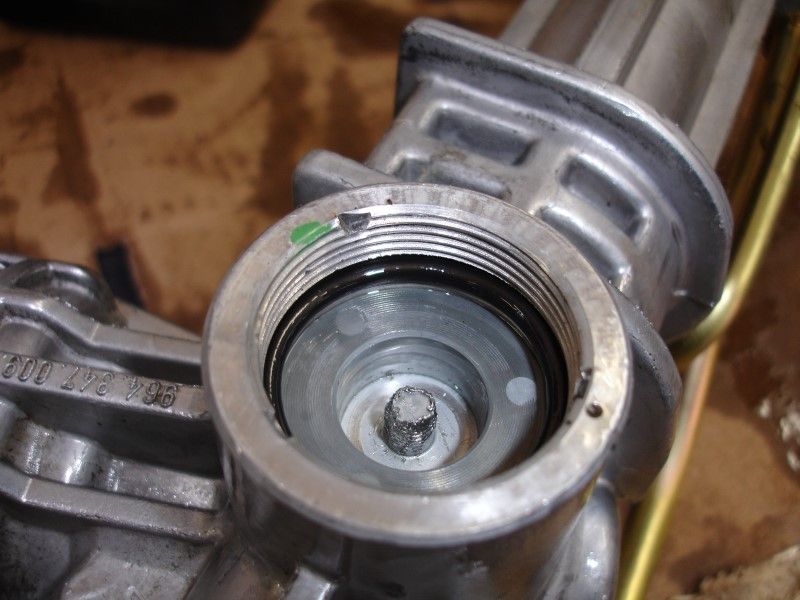
For reference to see how much in was the old seal when seated correctly
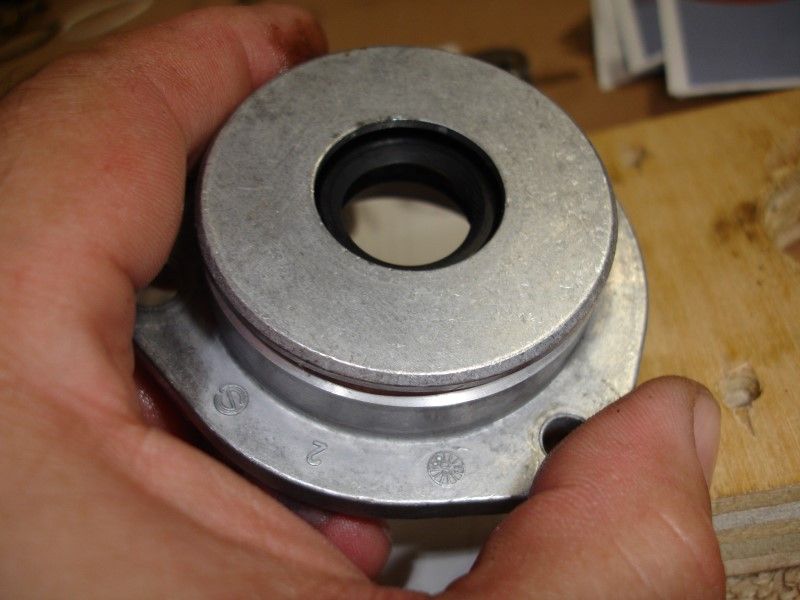
Installing the new parts... bushing plastic washer, and seal.... can you see my mistake??

There there... see it?? No? Go back to the old seal photo...
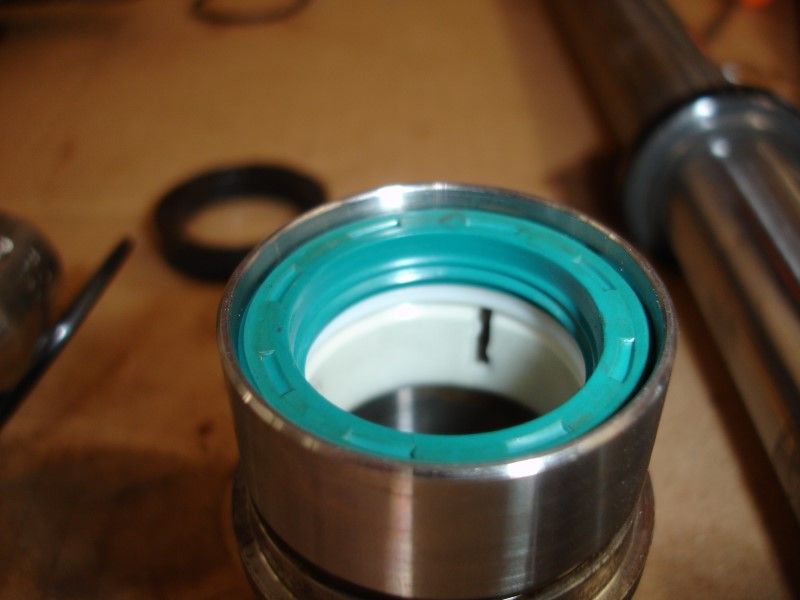
Moving on... no sense in crying over spilled Pentosin...
You push it out from the other side with a 13/16 socket... all in the instructions...
For reference to see how much in was the old seal when seated correctly
Installing the new parts... bushing plastic washer, and seal.... can you see my mistake??
There there... see it?? No? Go back to the old seal photo...
Moving on... no sense in crying over spilled Pentosin...
01-12-2014, 10:35 AM
#349
Professor of Pending Projects
Rennlist Member
Rennlist Member
Thread Starter
Moving on...
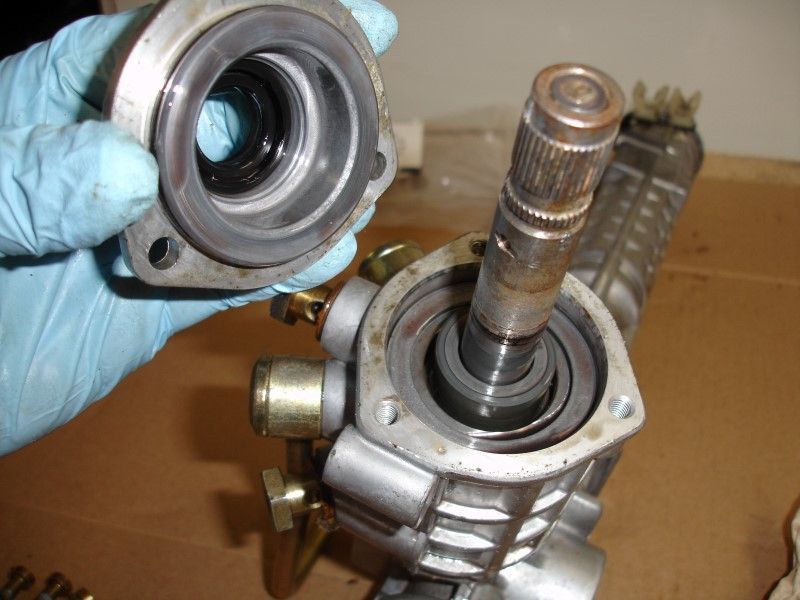
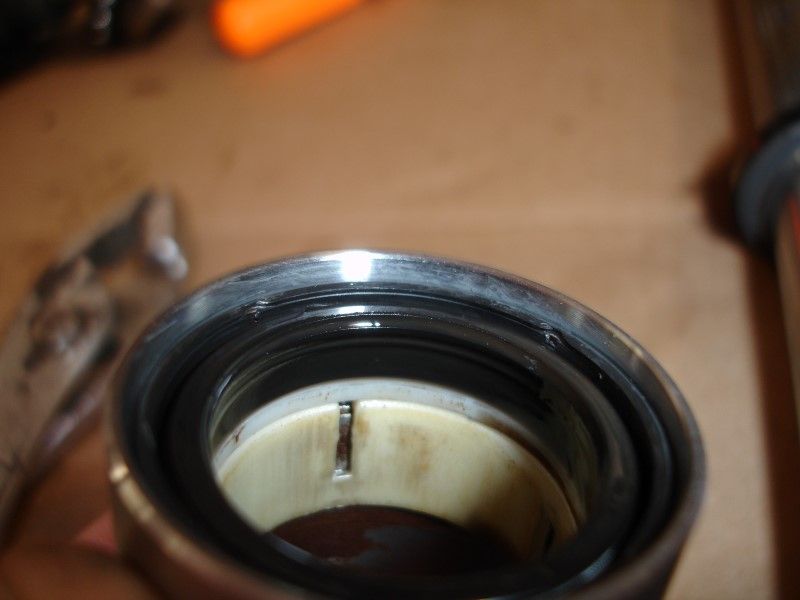
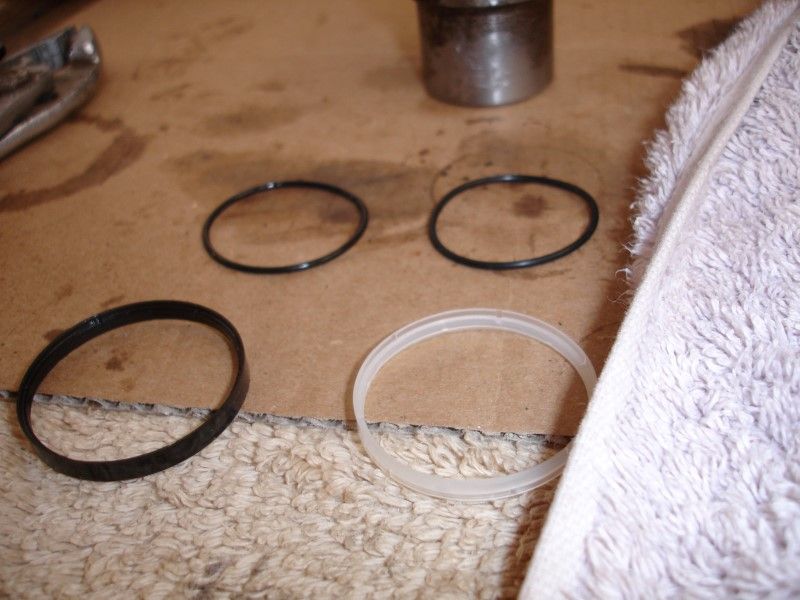
Old versus new
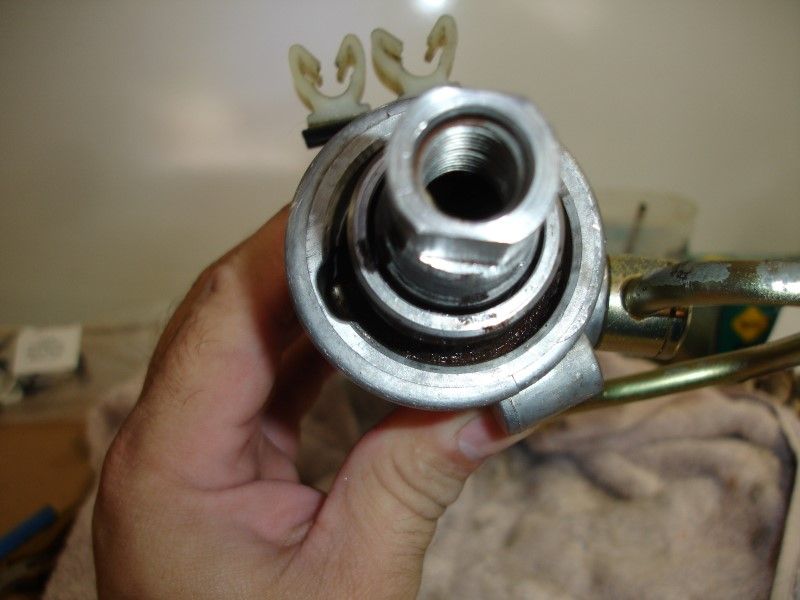
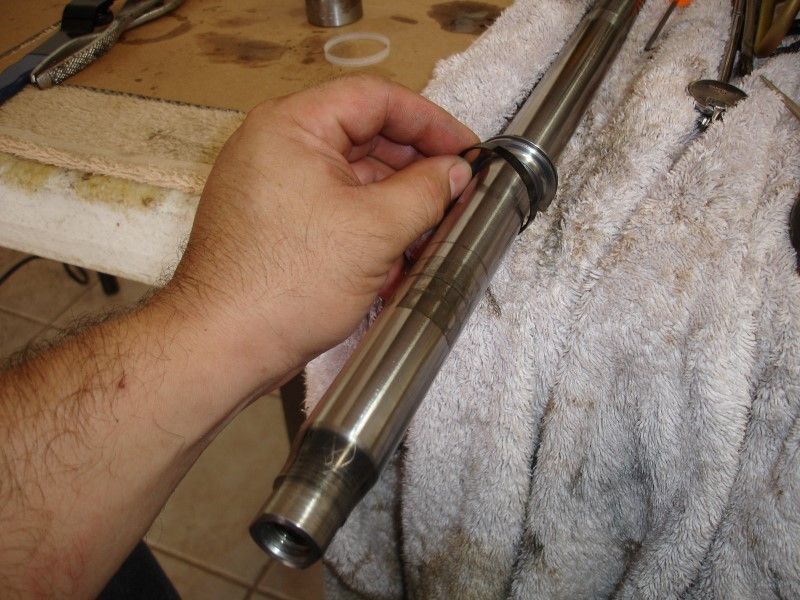
This one is inside the rack and this is the one you have to use an extension with another socket to push it out.
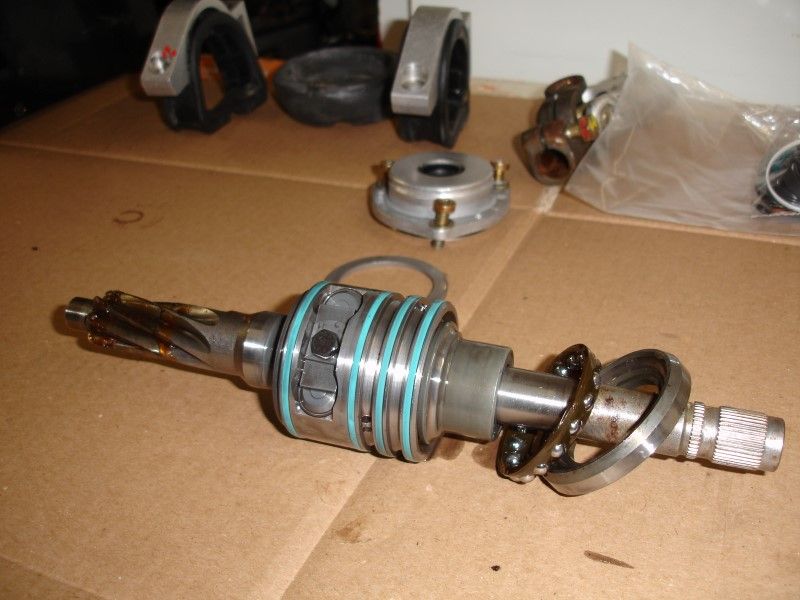
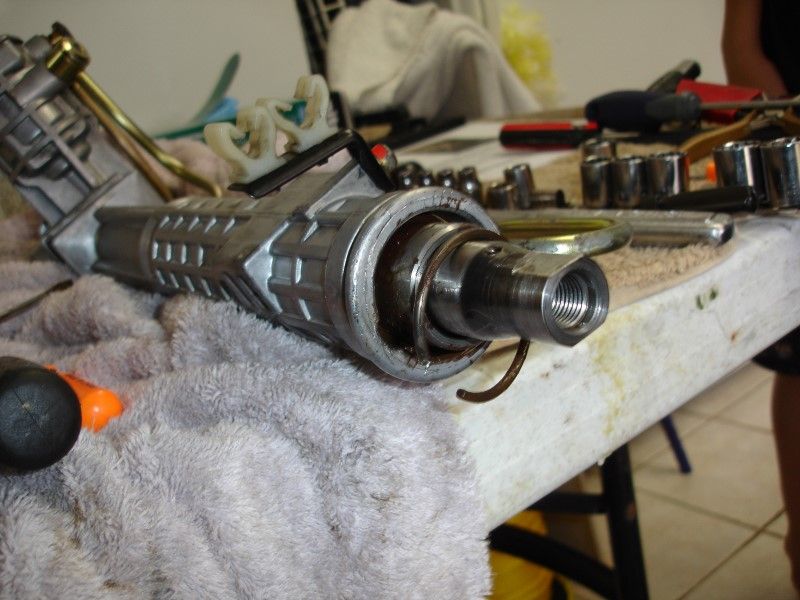
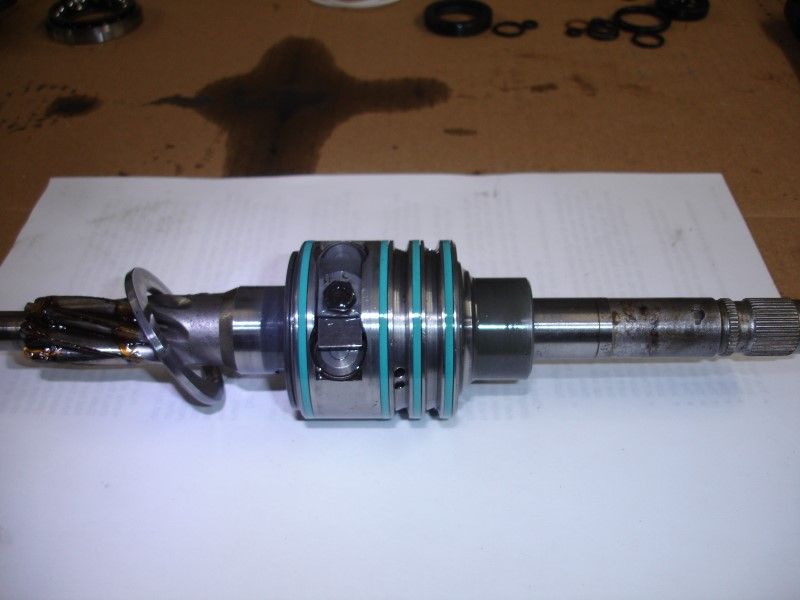
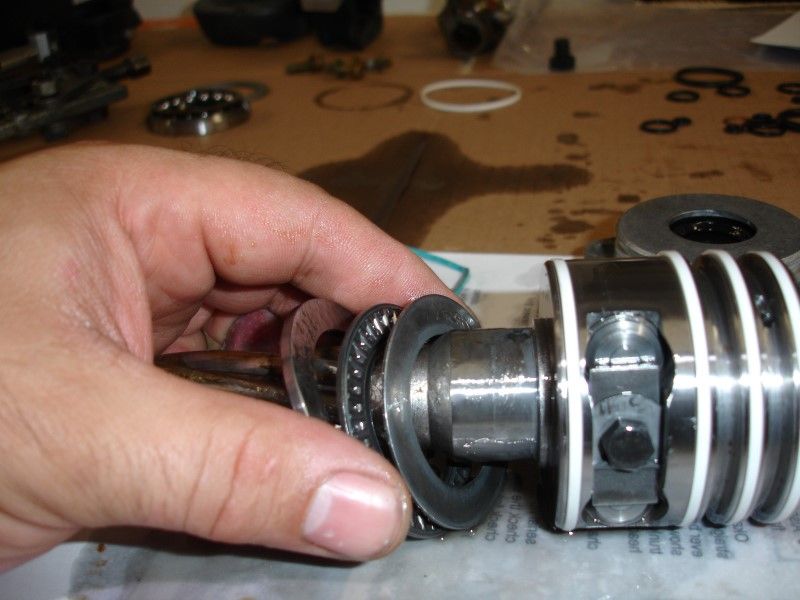
Now on to the steering shaft. Under each of the blue plastic bushings there is an o-ring... replace all...

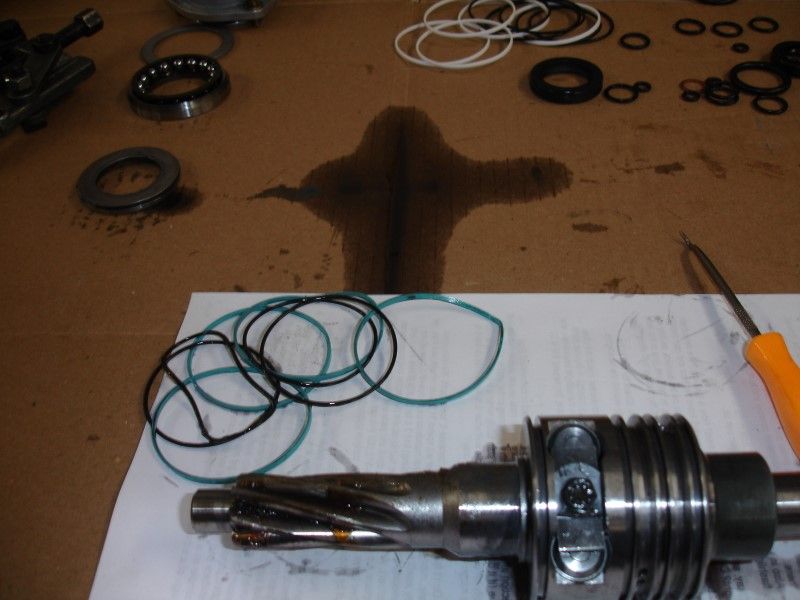
New ones in place...
This one was easy... remember the o-ring...
Make sure that last race is pointing to the correct direction or the shaft will not seat completely in the housing... you have been warned...
Old versus new
This one is inside the rack and this is the one you have to use an extension with another socket to push it out.
Now on to the steering shaft. Under each of the blue plastic bushings there is an o-ring... replace all...
New ones in place...
This one was easy... remember the o-ring...
Make sure that last race is pointing to the correct direction or the shaft will not seat completely in the housing... you have been warned...
01-12-2014, 10:41 AM
#350
Professor of Pending Projects
Rennlist Member
Rennlist Member
Thread Starter
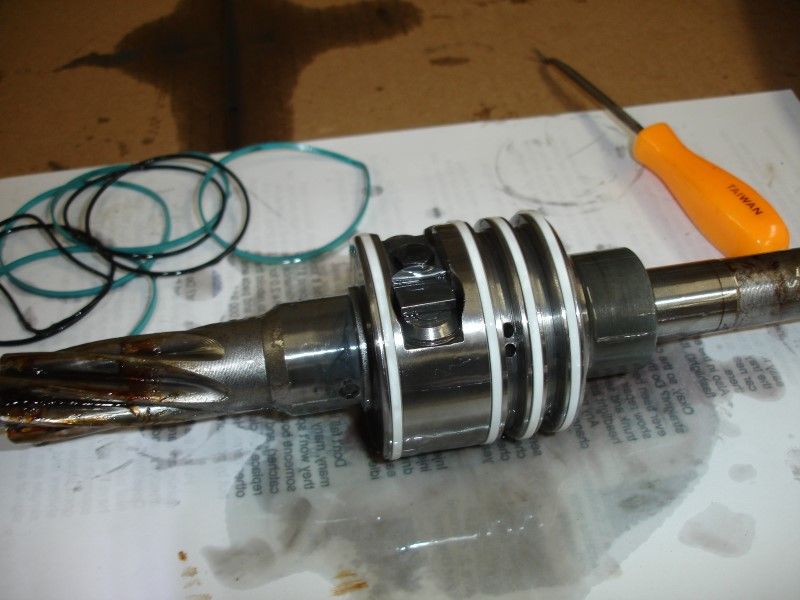
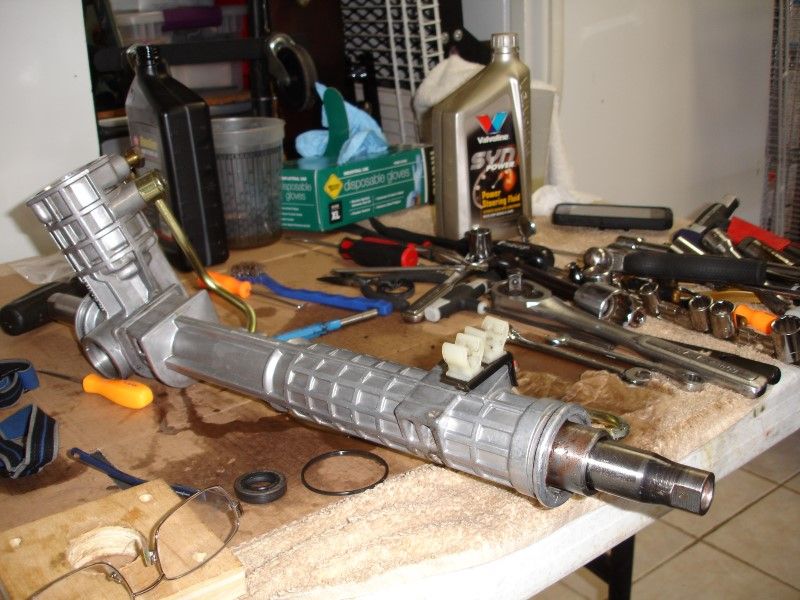
Let's keep going...
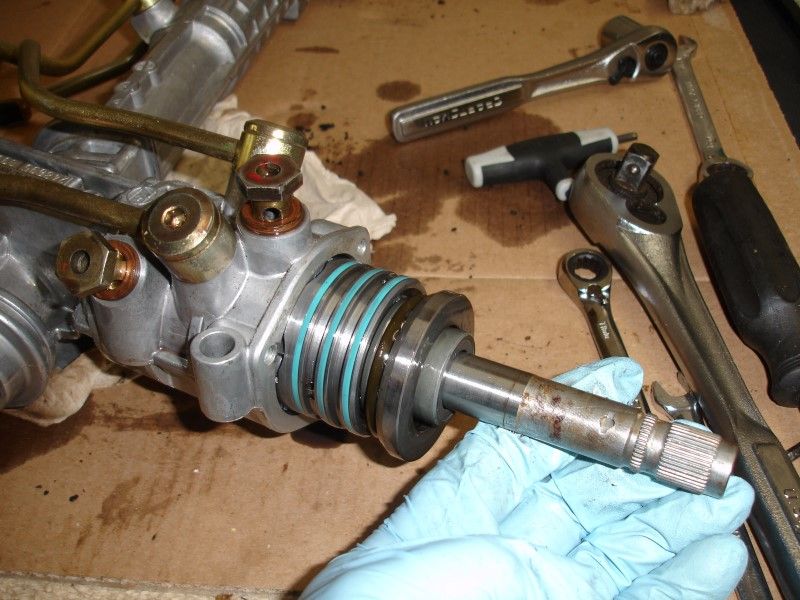
Apply some grease on the gear... and slide back in... careful on the direction as you want the smooth side to go against the plastic bushing you just replaced...
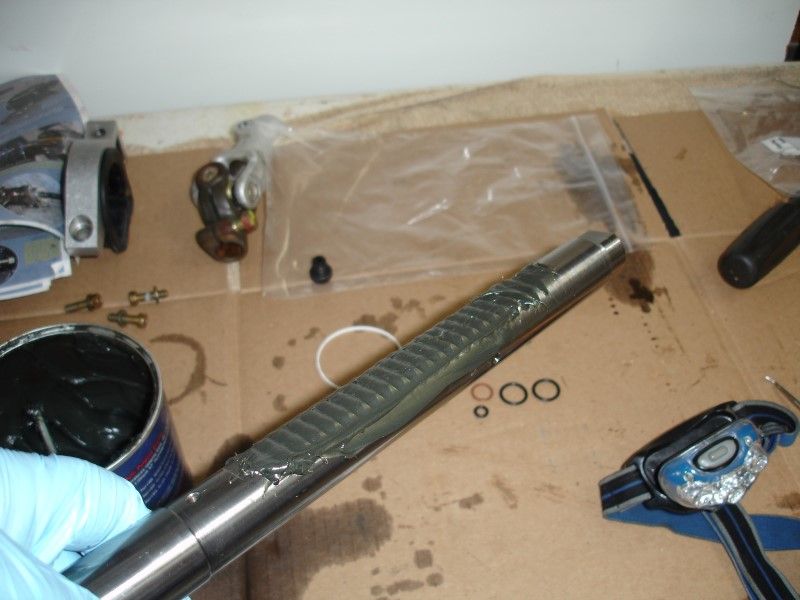
Here, you see? You have to see smooth surface before you drop in the bushing. And do not turn the shaft once the bushing is in or you will damage it.
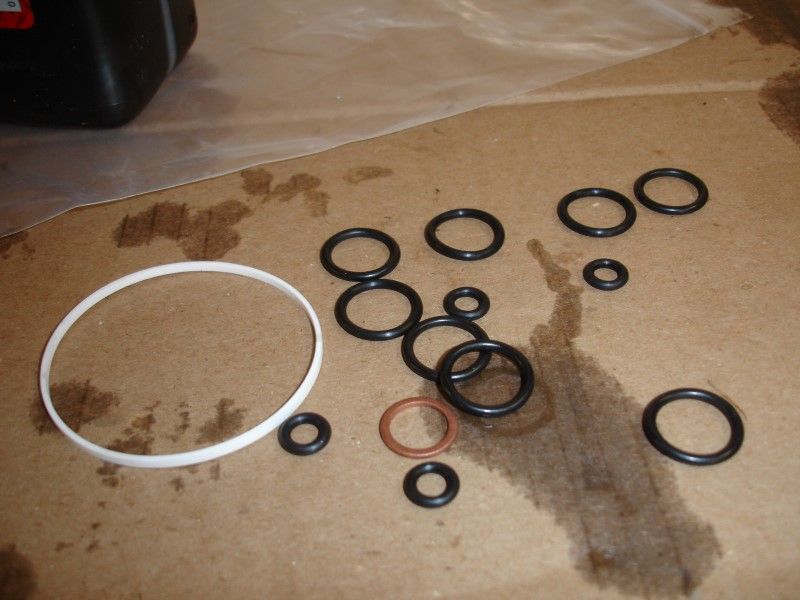
These were left over from the kit...
I will get more photos next time do this and fill in the blanks if you have any questions...
Hope that you learn from my mistakes
Apply some grease on the gear... and slide back in... careful on the direction as you want the smooth side to go against the plastic bushing you just replaced...
Here, you see? You have to see smooth surface before you drop in the bushing. And do not turn the shaft once the bushing is in or you will damage it.
These were left over from the kit...
I will get more photos next time do this and fill in the blanks if you have any questions...
Hope that you learn from my mistakes
01-19-2016, 08:28 PM
#352
Professor of Pending Projects
Rennlist Member
Rennlist Member
Thread Starter
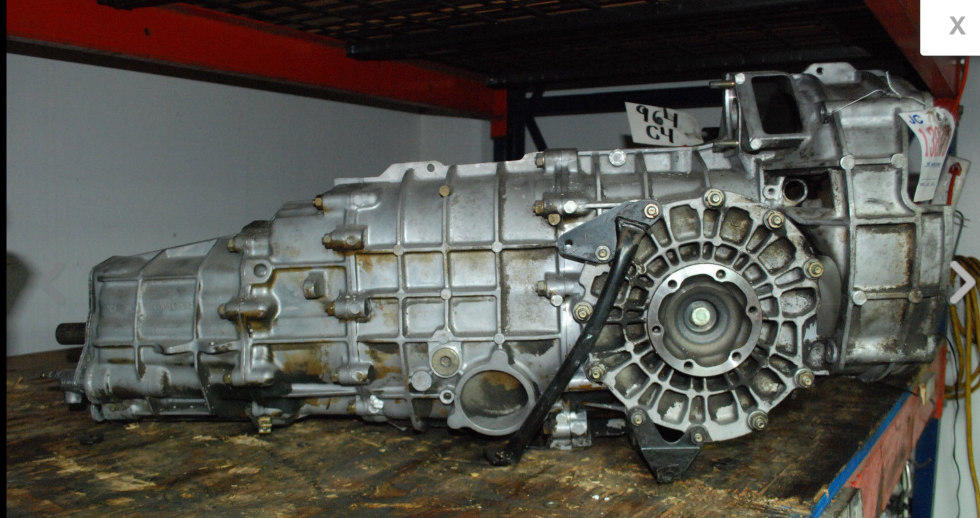
Well....closed my eyes, pulled out the credit card and ordered a transmission... I hope to have my baby back on the road soon.

A few links that I am keeping for reference...
https://rennlist.com/forums/964-foru...refresh-2.html
IMPULSE SENDER - PORSCHE (911-606-217-02)
A few links that I am keeping for reference...
https://rennlist.com/forums/964-foru...refresh-2.html
IMPULSE SENDER - PORSCHE (911-606-217-02)
Last edited by Wachuko; 01-20-2016 at 12:48 PM.
 01-19-2016, 11:32 PM
#354
Professor of Pending Projects
Rennlist Member
Rennlist Member
Thread Starter
Car has been sitting for 5 years...how time just goes by so fast..
https://rennlist.com/forums/964-foru...e-bushing.html
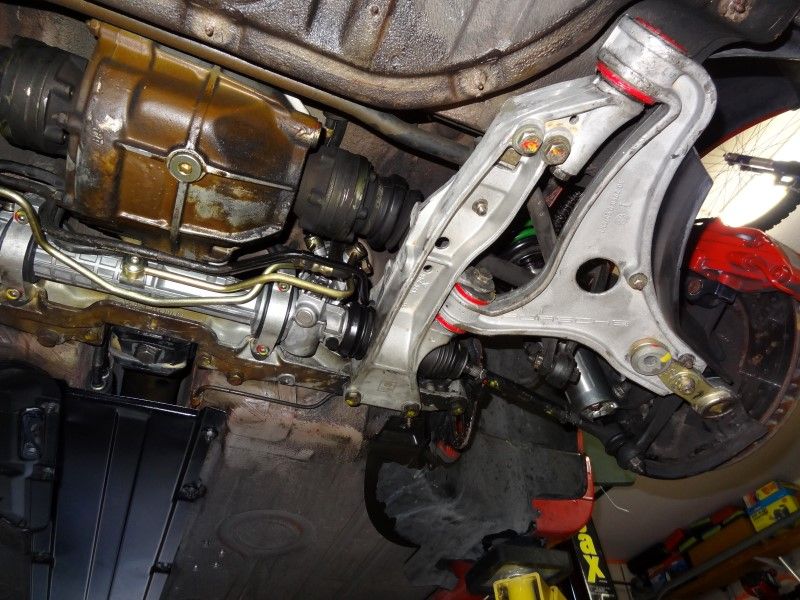
Something is wrong with it. Can't shift into 1-3-5, will not go into reverse...with force it goes into 2 and 4... It is not the shift linkage, not the clutch... Something inside the transmission got stuck (fork or something).
https://rennlist.com/forums/964-foru...e-bushing.html
Something is wrong with it. Can't shift into 1-3-5, will not go into reverse...with force it goes into 2 and 4... It is not the shift linkage, not the clutch... Something inside the transmission got stuck (fork or something).
01-20-2016, 01:26 PM
#355
Professor of Pending Projects
Rennlist Member
Rennlist Member
Thread Starter
Just a post for reference...since I will be starting to work on it again to get it back on the road, might as well list all the tasks that I need to do on the car. List is not in order of importance nor execution  :
:
1. Remove/replace transmission
2. Replace clutch fork for updated part (I was not aware that the fork was updated when I did the last clutch job. Since the transmission is coming out it is the best time to update this part and get that smooth pedal feel again.
Fork Part Number 950-116-086-06 has now been replaced by 997-116-086-90
Guide tube (need to inspect condition, just placing part number here in case I do needed) 950-116-813-06
Fork bushings 950-116-715-01 (2)
Fork shaft 950-116-710-04
Operating shaft gasket 999-113-418-40 (2)
Operating shaft bush - needle bearing 999-201-339-01 (L)
Operating shaft bush - needle bearing 999-201-365-01 (R)
Operating shaft cover 950-116-725-00
3. I had remove the automatic spoiler for a fixed one and had done a temporary fix for the wiring that was left. I basically just wrapped it with electrical tape at the time. Need to finish this correctly.
4. Car was sitting all this time... was starting fine a few months back... now it will not start. Cranks, cranks, no start...
https://rennlist.com/forums/964-foru...ed-sensor.html
Impulse Sender original Part No. 911-606-217-03 now superseded by:
999-652-916-40 (QUANTITY OF 1)
996-606-105-00 (QUANTITY OF 1)
999-652-871-22 (QUANTITY OF 3)
999-704-161-40 (QUANTITY OF 3)
5. Differential Lock seems to be leaking
https://rennlist.com/forums/964-foru...-begins-8.html
http://9mshop.co.uk/epages/5c9a3e21-...jectID=2063946
6. I have the big brake kit in front. If I turn towards full lock, the car just stops. I need to sort this out, not sure if it is the wheels or the brakes, but something is wrong
7. Carpet Set: Carpet is looking rather tired and old...I have a new set ready to go in.
8. Car needs a full respray... I made the mistake of leaving the expensive car outside and the FIAT Spider inside
9. Complete service (plugs, filters, etc.)
I will add more to the list as I find additional stuff...
:1. Remove/replace transmission
2. Replace clutch fork for updated part (I was not aware that the fork was updated when I did the last clutch job. Since the transmission is coming out it is the best time to update this part and get that smooth pedal feel again.
Fork Part Number 950-116-086-06 has now been replaced by 997-116-086-90
Guide tube (need to inspect condition, just placing part number here in case I do needed) 950-116-813-06
Fork bushings 950-116-715-01 (2)
Fork shaft 950-116-710-04
Operating shaft gasket 999-113-418-40 (2)
Operating shaft bush - needle bearing 999-201-339-01 (L)
Operating shaft bush - needle bearing 999-201-365-01 (R)
Operating shaft cover 950-116-725-00
3. I had remove the automatic spoiler for a fixed one and had done a temporary fix for the wiring that was left. I basically just wrapped it with electrical tape at the time. Need to finish this correctly.
4. Car was sitting all this time... was starting fine a few months back... now it will not start. Cranks, cranks, no start...
https://rennlist.com/forums/964-foru...ed-sensor.html
Impulse Sender original Part No. 911-606-217-03 now superseded by:
999-652-916-40 (QUANTITY OF 1)
996-606-105-00 (QUANTITY OF 1)
999-652-871-22 (QUANTITY OF 3)
999-704-161-40 (QUANTITY OF 3)
5. Differential Lock seems to be leaking
https://rennlist.com/forums/964-foru...-begins-8.html
http://9mshop.co.uk/epages/5c9a3e21-...jectID=2063946
6. I have the big brake kit in front. If I turn towards full lock, the car just stops. I need to sort this out, not sure if it is the wheels or the brakes, but something is wrong
7. Carpet Set: Carpet is looking rather tired and old...I have a new set ready to go in.
8. Car needs a full respray... I made the mistake of leaving the expensive car outside and the FIAT Spider inside
9. Complete service (plugs, filters, etc.)
I will add more to the list as I find additional stuff...
Last edited by Wachuko; 01-21-2016 at 04:10 PM.
 01-20-2016, 02:51 PM
#357
Professor of Pending Projects
Rennlist Member
Rennlist Member
Thread Starter
01-20-2016, 09:05 PM
#358
Agent Orange
Rennlist Member
Rennlist Member
Jaime, it's great to see you wrenching along on your cars after all these years! Hopefully the gearbox gets sorted soon! I'm getting mine rebuilt and finding parts for a G50 is not very easy these days...
01-21-2016, 08:43 AM
#360
Burgled
Rennlist Member
Rennlist Member
Like to see your cars one of these days. Now I noticed a water leak in the left rear of the TT so need to put it up on the lift. Hope its just a lose hose clamp. Its very slow.